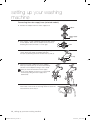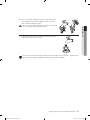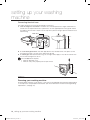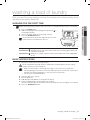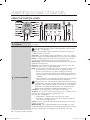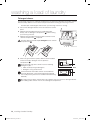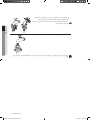
1
WD8704EJ(A/F/G/H/S/V/W/Z) WD8702EJ(A/F/G/H/S/V/W/Z) WD8700EJ(A/F/G/H/S/V/W/Z) WD8704RJ(A/F/G/H/S/V/W/Z) WD8702RJ(A/F/G/H/S/V/W/Z) WD8700RJ(A/F/G/H/S/V/W/Z) WD8704CJ(A/F/G/H/S/V/W/Z) WD8702CJ(A/F/G/H/S/V/W/Z) WD8700CJ(A/F/G/H/S/V/W/Z) WD8704DJ(A/F/G/H/S/V/W/Z) WD8702DJ(A/F/G/H/S/V/W/Z) WD8700DJ(A/F/G/H/S/V/W/Z) Washing Machine user manual imagine the possibilities Thank you for purchasing this Samsung product. To receive more complete service, please register your product at www.samsung.com/register WD8704CJ-02732A-02_EN.indd 1 2010-04-20 ¿ÀÈÄ 2:56:01 features of your new samsung washing machine Your new washing machine will change the way you feel about doing laundry. From its super-size capacity to its energy efficiency, the Samsung washing machine has all the features to turn a mundane chore into a pleasure. • Silver Wash - Silver Wash Health System(selected model only) The winning combination! Samsung’s silver technology combines the sanitizing effect of silver with state-of-the-art science for the ultimate in clean. Two plates of pure silver are converted into silver ions through electrolysis. Even in cold, bleach-less water, the silver particles remove of odor causing bacteria for a “super clean” wash. So washing in cold water is energy efficient and better for your clothes. The Silver plates carry a warranty of ten years for 2 times run a week and can easily be replaced by a Service Technician if needed. • Washing to drying with one button Enjoy convenient non stop washing and drying managing. 4 different special drying programs can be selected to perform the whole wash cycle including the drying cycle using one button. • Cupboard(standard program), Low temp drying, Iron,Time Drying (30min ~ 270mins) Those drying programs also can be operated independently of washing programs. • Child Lock The Child Lock function ensures that curious little hands are kept out of your washing machine. This safety feature stops your children from playing with the operation of the washing machine, and alerts you when it is activated. • Wool Certified The machine has been tested and passed the required Woolmark Company specification for machine washable wool products. Fabrics should be washed according to the instructions on the garment label as specified by Woolmark and Samsung. • Delay End Delay a cycle for up to 19 hours in one-hour increments and increase the convenience of using your washing machine especially when you have to go out. • Quick Wash No time to lose! Less than 30 minutes wash will give you time to run out before it’s too late. Our 29 minute Quick Wash program can be the solution to your busy life. Now you can wash your favourite clothes in only 29 minutes! • Delicates & Hand Wash Program Special care can be determined by the appropriate temperature, the gentle wash action and the appropriate amount of water. • Ceramic Heater for Durability & Energy Saving (selected models) Our truly innovative Ceramic Heater is twice as durable as regular heaters. That saves you money on repairs. Plus, it eliminates the scale of hard water and save energy. 2_ features WD8704CJ-02732A-02_EN.indd 2 2010-04-20 ¿ÀÈÄ 2:56:01 • Air Wash The Air Wash system deodorizes unpleasant smells and sterilizes the laundry that cannot be eliminated through a conventional washing system, a benefit of its unique air-washing mechanism. • Air-washable : Woolen coats, cotton/down jumpers, sweaters, suits, pillows, cushions, needlework dolls • Not applicable : leather, silk, velvet, electric blankets, other stained laundry • Digital Graphic Display The Digital Graphic Display control panel is clear and easy to use for minimum fuss and hassle. And while it is easy to operate, the Digital Graphic Display enables you to make quick and accurate adjustments to your wash for excellent washing results. • Wide door Extra wide door aperture for convenient viewing! Easily add and remove laundry, especially for large sized laundry items such as bedding, towels etc. • Direct Drive Motor As the drum does not utilize belts or gears, vibrations are reduced significantly. This feature ensures that your washer machine is quieter and more durable. This manual contains important information on the installation, use, and care of your new Samsung washing machine. Refer to it for descriptions of the control panel, instructions on how to use the washing machine, and tips for making the most of its state-of-the-art features and functions. The “Troubleshooting and information codes” section on page 29 tells you what to do if something goes wrong with your new washing machine. features _3 WD8704CJ-02732A-02_EN.indd 3 2010-04-20 ¿ÀÈÄ 2:56:01 safety information Throughout this manual, you’ll see Warning and Caution notes. These warnings, cautions, and the important safety instructions that follow do not cover all possible conditions and situations that may occur. It’s your responsibility to use common sense, caution, and care when installing, maintaining, and operating your washing machine. Samsung is not liable for damages resulting from improper use. IMPORTANT SAFETY SYMBOLS AND PRECAUTIONS What the icons and signs in this user manual mean: WARNING Hazards or unsafe practices that may result in severe personal injury or death. CAUTION Hazards or unsafe practices that may result in minor personal injury or property damage. CAUTION To reduce the risk of fire, explosion, electric shock, or personal injury when using your washing machine, follow these basic safety precautions: Do NOT attempt. Do NOT disassemble. Do NOT touch. Follow directions explicitly. Unplug the power plug from the wall socket. Make sure the machine is grounded to prevent electric shock. Call the service center for help. Notice These warning signs are here to prevent injury to you and others. Please follow them explicitly. After reading this section, keep it in a safe place for future reference. Read all instructions before using the appliance. As with any equipment using electricity and moving parts, potential hazards exist. To safely operate this appliance, become familiar with its operation and exercise care when using it. Install and store your washing machine inside, away from exposure to weather. Install and level your washing machine on a floor that can support its weight. Your washing machine must be properly grounded. Never plug it into an ungrounded outlet. 4_ safety information WD8704CJ-02732A-02_EN.indd 4 2010-04-20 ¿ÀÈÄ 2:56:03 To reduce the risk of fire or explosion: CAUTION • Do not wash items that have been washed, soaked, or treated with gasoline, dry cleaning solvents, or other flammable or explosive substances. They give off vapors that could ignite or explode. Rinse by hand any material that has been exposed to cleaning solvent or other flammable liquids or solids before putting in your washing machine. Be sure that all traces of such liquids, solids, and fumes have been removed. Dangerous substances include acetone, denatured alcohol, gasoline, kerosene, certain liquid household cleaners and spot removers, turpentine, waxes, and wax removers. • Do not put gasoline, dry cleaning solvents, or other flammable or explosive substances into the washing machine. • Under certain conditions, hydrogen gas may be produced in a hot water system–such as your hot water heater -- that has not been used for two weeks or more. HYDROGEN GAS IS EXPLOSIVE. If your hot water system has not been used for two weeks or more, turn on all hot water taps in your home, and let the water flow for several minutes before using your washing machine. This will release any hydrogen gas build–up. Since hydrogen gas is flammable, do not smoke or light an open flame during this time. Ventilate immediately without touching the power plug if there is a gas leak. Unplug the power cord before servicing your washing machine. Before each wash, empty the pockets of your laundry. Small, irregularly shaped hard objects, such as coins, knives, pins, and paperclips could damage your washing machine. Do not wash clothing with large buckles, buttons, or other heavy metal metal. Do not open the door of the washing machine if you can still see water. Check that the water has drained before opening the door. Do not repair, replace, or service any part of your washing machine yourself unless you fully understand the recommended user–repair instructions and have the skills to carry them out. Work done by an unauthorized person may void your warranty. Connect the washing machine to the water mains using the new set of hoses. Do not reuse the old set of hoses. Water inlet hoses deteriorate over time. Check the hoses periodically for bulges, kinks, cuts, wear, and leaks, and replace them as needed and at least every five years. All packaging and shipping bolts must be removed before the appliance is used. Serious damage may occur if they are not removed. See page 12 “Removing the shipping bolts”. Before washing clothes for the first time, you must run a complete cycle without clothes. See “Washing for the first time”. safety information _5 WD8704CJ-02732A-02_EN.indd 5 2010-04-20 ¿ÀÈÄ 2:56:03 safety information The appliance is designed for home use only. WARNING Make sure that water and electrical connections are made by qualified technicians, observing the user manual (see “Installing your washing machine”) and local safety regulations. Before cleaning or carrying out maintenance, unplug the appliance from the electrical outlet. Always unplug the appliance and turn off the water after use. Make sure that the pockets of all clothing to be washed are empty. Hard, sharp objects, such as coins, safety pins, nails, screws, or stones can cause extensive damage to the appliance. Never allow pets and children to play on or in the appliance. It may cause injury or suffocate them. The glass door becomes very hot during the washing cycle. Never touch on the glass door while it is in use. Do not attempt to repair the appliance yourself. Repairs made by inexperienced or unqualified persons may cause injury and/or make more serious repairs to the appliance necessary. If the plug (power supply cord) is damaged, it must be replaced by the manufacturer or its service agent or a similarly qualified person in order to avoid a hazard. This appliance should only be serviced by our authorized service center, and only rated spare parts should be used. WARNING WARNING Do not let children (or pets) play on or in your washing machine. The washing machine door does not open easily from the inside, and children may be seriously injured if trapped inside. This appliance is not intended for use by persons (including children) with reduced physical, sensory or mental capabilities, or lack of experience and knowledge, unless they have been given supervision or instruction concerning use of the appliance by a person responsible for their safety. Children should be supervised to ensure that they do not play with the appliance To use this appliance safely, the user should become familiar with the instructions for operation of the appliance and always take extra care when using it. This appliance should be positioned to be accessible to the power plug, the water supply tabs and the drain pipes. WARNING Packing materials can be dangerous to children; keep all packing material (plastic bags, polystyrene, etc.) well out of the reach of children. Do not use processed water containing oil, cream or lotion, which is usually found in skincare shops or massage clinics. • Otherwise this will cause the packing to be deformed, which causes a malfunction or water leak. 6_ safety information WD8704CJ-02732A-02_EN.indd 6 2010-04-20 ¿ÀÈÄ 2:56:03 A stainless washing tub does not usually rust. However if some metal such as a hair pin is left in the tub for an extended time, the tub could rust. • Do not leave water or bleach containing chlorine in the tub for an extended period of time. • Do not regularly use or leave water containing iron in the tub for an extended period of time. If rust starts appearing on the surface of the tub, apply a cleansing agent (neutral) to the surface and use a sponge or soft cloth to clean it. (Under no circumstances use a metal brush) The dryer is not to be used if chemicals have been used for cleaning. For washing machines with ventilation openings in the base, ensure that the opening is not obstructed by carpet or any other obstacles. Use the new hose-sets and old hose-sets should not be reused. safety information _7 WD8704CJ-02732A-02_EN.indd 7 2010-04-20 ¿ÀÈÄ 2:56:03 contents SETTING UP YOUR WASHING MACHINE 9 10 10 10 11 11 11 11 11 Checking the parts Meeting installation requirements Electrical supply and grounding Water Supply Drain Flooring Surrounding temperature Alcove or closet installation Installing your washing machine WASHING A LOAD OF LAUNDRY 17 17 18 20 20 20 20 21 22 23 23 24 25 25 26 Washing for the first time Basic instructions Using the control panel Child lock Sound off Delay end Drain Only Fuction Air Wash Using dry course Washing clothes using the cycle selector Washing clothes manually Laundry guidelines Detergent and additives information Which detergent to use Detergent drawer CLEANING AND MAINTAINING YOUR WASHING MACHINE 27 29 29 29 29 Draining the washing machine in an emergency Cleaning the exterior Cleaning the detergent drawer and drawer recess Cleaning the debris filter Cleaning the water hose mesh filter Repairing a frozen washing machine Storing your washing machine TROUBLESHOOTING AND INFORMATION CODES 30 31 Check these points if your washing machine... Information codes CYCLE CHART 32 Cycle chart APPENDIX 33 33 33 34 Fabric care chart Protecting the environment Declaration of conformity Specifications 9 17 27 30 32 33 27 28 8_ contents WD8704CJ-02732A-02_EN.indd 8 2010-04-20 ¿ÀÈÄ 2:56:03 setting up your washing machine CHECKING THE PARTS Carefully unpack your washing machine, and make sure you’ve received all of the parts shown below. If your washing machine was damaged during shipping, or if you do not have all of the parts, contact Samsung Customer Service or your Samsung dealer. Release lever 01 SETTING UP Be sure to have your installer follow these instructions closely so that your new washing machine works properly and so that you’re not at risk of injury when doing laundry. Work top Detergent drawer Control panel Plug Door Drain hose Debris filter Adjustable feet Tub Emergency drain tube Filter Cover Spanner * Bolt hole covers Water supply hose Hose guide * Bolt hole covers : The number of bolt hole covers depends on the model (3~5 covers). setting up your new washing machine _9 WD8704CJ-02732A-02_EN.indd 9 2010-04-20 ¿ÀÈÄ 2:56:04 setting up your washing machine MEETING INSTALLATION REQUIREMENTS Electrical supply and grounding To prevent unnecessary risk of fire, electrical shock, or personal injury, all wiring and grounding must be done in accordance with the National Electrical Code ANSI/FNPA, No. 70 Latest Revision and local codes and ordinances. It is the personal responsibility of the appliance owner to provide adequate electrical service for this appliance. WARNING Never use an extension cord. Use only the power cord that comes with your washing machine. When preparing for installation, ensure that your power supply offers: • 220V~240V 50Hz 15 AMP fuse or circuit breaker • Individual branch circuit serving only your washing machine Your washing machine must be grounded. If your washing machine malfunctions or breaks down, grounding will reduce the risk of electric shock by providing a path of least resistance for the electric current. Your washing machine comes with a power cord having a three-prong grounding plug for use in a properly installed and grounded outlet. Never connect the ground wire to plastic plumbing lines, gas lines, or hot water pipes. Improperly connecting the equipment-grounding conductor can result electrical shock. Check with a qualified electrician or serviceman if you are unsure if the washing machine is properly grounded. Do not modify the plug provided with the washing machine. If it does not fit the outlet, have a proper outlet installed by a qualified electrician. Water Supply Your washing machine will fill properly when your water pressure is 50 kPa ~ 800 kPa. Water pressure less than 50 kPa may cause water valve failure, not allowing the water valve to shut off completely. Or, it may take the washing machine longer to fill than what the controls allow, resulting in your washing machine turning off. (A fill-time limit, designed to prevent overflows/ flooding if an internal hose becomes loose, is built into the controls.) The water taps must be within 4 feet (122cm) of the back of your washing machine for the provided inlet hoses provided to reach your washing machine. Most plumbing supply stores sell inlet hoses of various lengths up to 10 feet (305cm) long. You can reduce the risk of leaks and water damage by: • Making water taps easily accessible. • Turning off taps when the washing machine is not in use. • Periodically checking for leaks at water inlet hose fittings. WARNING Before using your washing machine for the first time, check all connections at the water valve and taps for leaks. 10_ setting up your new washing machine WD8704CJ-02732A-02_EN.indd 10 2010-04-20 ¿ÀÈÄ 2:56:04 Drain Samsung recommends a standpipe height of 18 in (46 cm). The drain hose must be routed through the drain hose clip to the standpipe. The standpipe must be large enough to accept the outside diameter of the drain hose. The drain hose is attached at the factory. For best performance, your washing machine must be installed on a solidly constructed floor. Wood floors may need to be reinforced to minimize vibration and/or unbalanced loads. Carpeting and soft tile surfaces are contributing factors to vibrations and the tendency for your washing machine to move slightly during the spin cycle. Never install your washing machine on a platform or poorly supported structure. 01 SETTING UP Flooring Surrounding temperature Do not install your washing machine in areas where water may freeze, since your washing machine always retains some water in its water valve, pump, and hose areas. Frozen water in the lines can cause damage to belts, the pump, and other components. Alcove or closet installation To operate safely and properly, your new washing machine requires minimum clearances of: Sides – 25 mm Rear – 51 mm Top – 25 mm Front – 465 mm If both the washing machine and a dryer are installed together, the front of the alcove or closet must have at least 465 mm unobstructed air opening. Your washing machine alone does not require a specific air opening. INSTALLING YOUR WASHING MACHINE STEP 1 Selecting a location Before you install the washing machine, make sure the location: • • • • • • Has a hard, level surface without carpeting or flooring that may obstruct ventilation Is away from direct sunlight Has adequate ventilation Will not be freezing (below 32 ˚F or 0 ˚C) Is away from heat sources such as oil or gas Has enough space so that the washing machine doesn’t stand on its power cord setting up your new washing machine _11 WD8704CJ-02732A-02_EN.indd 11 2010-04-20 ¿ÀÈÄ 2:56:04 setting up your washing machine STEP 2 Removing the shipping bolts Before installing the washing machine, you must remove all shipping bolts from the back of the unit. 1. Loosen all the bolts with the supplied wrench. 2. Hold the bolt with the spanner and pull it through the wide section of the hole. Repeat for each bolt. 3. Fill the holes with the supplied plastic covers. 4. Store the shipping bolts away safely in case you have to move the washing machine in the future. WARNING Packaging materials can be dangerous to children; keep all packaging material (plastic bags, polystyrene, etc.) well out of the reach of children. 12_ setting up your new washing machine WD8704CJ-02732A-02_EN.indd 12 2010-04-20 ¿ÀÈÄ 2:56:05 STEP 3 Adjusting the levelling feet When installing your washing machine, ensure that the power plug, the water supply and the drain are easily accessible. 01 SETTING UP 1. Slide the washing machine into position. 2. Level your washing machine by turning the leveling feet in and out as necessary by hand. 3. When your washing machine is level, tighten the nuts using the wrench supplied with your washing machine. STEP 4 Connecting the water and drain Connecting the water supply hose 1. Take the L-shaped arm fitting for the cold water supply hose and connect it to the cold water supply intake on the back of the machine. Tighten by hand. The water supply hose must be connected to the washing machine at one end and to the water tap at the other. Do not stretch the water supply hose. If the hose is too short, replace the hose with a longer, high pressure hose. 2. Connect the other end of the cold water supply hose to your sink’s cold water tap and tighten it by hand. If necessary, you can reposition the water supply hose at the washing machine end by loosening the fitting, rotating the hose, and retightening the fitting. For selected models with an additional hot water intake: 1. Take the red L-shaped arm fitting for the hot water supply hose and connect it to the hot water supply intake on the back of the machine. Tighten by hand. 2. Connect the other end of the hot water supply hose to your sink’s hot water tap and tighten it by hand. 3. Use a Y-piece if you only want to use cold water. setting up your new washing machine _13 WD8704CJ-02732A-02_EN.indd 13 2010-04-20 ¿ÀÈÄ 2:56:06 setting up your washing machine Connecting the water supply hose (selected models) 1. Remove the adaptor from the water supply hose. Adaptor Water supply hose 2. First, using a ‘+’ type screwdriver, loosen the four screws on the adaptor. Next, take the adaptor and turn part (2) following the arrow until there is a 5 mm gap. 1 5 mm 2 3. Connect the adaptor to the water tap by tightening the screws firmly while lifting the adaptor upwards. Turn part (2) following the arrow and connect (1) and (2). Water tap 1 2 4. Connect the water supply hose to the adaptor. When you release part (3), the hose automatically connects to the adaptor making a ‘click’ sound. After you have connected the water supply hose to the adaptor, ensure that it is connected correctly by pulling the water supply hose downwards. 3 5. Connect the other end of the water supply hose to the inlet water valve at the rear of the washing machine. Screw the hose clockwise all the way in. 14_ setting up your new washing machine WD8704CJ-02732A-02_EN.indd 14 2010-04-20 ¿ÀÈÄ 2:56:07 6. Turn on the water supply and ensure that no water leaks from the water valve, tap or adaptor. If there is a water leaks, repeat the previous steps. • ✗ ✗ 01 SETTING UP WARNING Do not use your washing machine if there is a water leak. This may cause electric shock or injury. If the water tap has a screw type tap, connect the water supply hose to the tap as shown. Use the most conventional type of tap for the water supply. In case the tap is square or too big, remove the spacing ring before inserting the tap into the adaptor. setting up your new washing machine _15 WD8704CJ-02732A-02_EN.indd 15 2010-04-20 ¿ÀÈÄ 2:56:07 setting up your washing machine Connecting the drain hose The end of the drain hose can be positioned in three ways: 1. Over the edge of a wash basin: The drain hose must be placed at a height of between 60 and 90 cm. To keep the drain hose spout bent, use the supplied plastic hose guide. Secure the guide to the wall with a hook or to the tap with a piece of string to prevent the drain hose from moving. 60 ~ 90 cm Drain hose Hose guide 2. ln a sink drain pipe branch: The drain pipe branch must be above the sink siphon so that the end of the hose is at least 60 cm above the ground. 3. ln a drain pipe: We recommend using a 65 cm high vertical pipe; it must be no shorter than 60 cm and no longer than 90 cm. 60 ~ 90 cm The standpipe drain requires; • minimum diameter 5 cm. • minimum carry-away capacity 60 liter per minute. STEP 5 Powering your washing machine Plug the power cord into a wall sockets, a 230 volt 50 Hz approved electrical outlet protected by a 15-amp fuse or comparable circuit breaker. (For more information on electrical and grounding requirements, see page 10.) 16_ setting up your new washing machine WD8704CJ-02732A-02_EN.indd 16 2010-04-20 ¿ÀÈÄ 2:56:08 washing a load of laundry With your new Samsung washing machine, the hardest part of doing laundry will be deciding which load to wash first. WASHING FOR THE FIRST TIME 1. Press the Power button. 2. Add a little detergent to the detergent compartment the detergent drawer. 3. Turn on the water supply to the washing machine. 4. Press the Start/Pause button. in This will remove any water that might be left over in the machine from the manufacturer’s test run. Compartment Compartment Compartment : Detergent for prewash, or starch. : Detergent for the main wash, water softener, pre-soaking agent, bleach and stain removal product. : Additives, e.g. fabric softener or former (fill no higher than lower edge (MAX) of “A”) 02 WASHING A LOAD OF LAUNDRY Before washing laundry for the first time, you must run a complete empty cycle (i.e. no laundry). BASIC INSTRUCTIONS 1. Load your laundry into the washing machine. WARNING Do not overload the washing machine. To determine the load capacity for each type of laundry, refer to the chart on page 24. • Make sure that laundry is not caught in the door, as this may cause a water leak. • Washing detergent may remain in the front rubber part of the washer after a wash cycle. Remove any remaining detergent, as they may cause a water leak. • Do not wash water-proofed items. 2. 3. 4. 5. Close the door until it latches. Turn the power on. Add detergent and additives to the dispenser drawer. Select the appropriate cycle and options for the load. The Wash Indicator light will illuminate and the estimated cycle time will appear in the display. 6. Press the Start/Pause button. washing a load of laundry _17 WD8704CJ-02732A-02_EN.indd 17 2010-04-20 ¿ÀÈÄ 2:56:10 washing a load of laundry USING THE CONTROL PANEL 1 1 2 2 3 4 1 5 6 7 8 9 10 11 12 DIGITAL GRAPHIC DISPLAY Displays the remaining wash cycle time, all cycle information, and error messages. CYCLE SELECTOR Select the tumble pattern and spin speed for the cycle. For detailed information, refer to “Washing clothes using the cycle selector”. (see page 22) Cotton - For averagely or lightly soiled cottons, bed linen, table linen, underwear, towels, shirts, etc. Synthetics - For averagely or lightly soiled blouses, shirts, etc., made of polyester (diolen, trevira), polyamide (perlon, nylon) or other similar blends. Denim - A higher water level in the main wash and extra rinse ensure that no washing powder remains that may mark your clothing. Sports Wear - Use for water-proofed or proofed garments to keep their good looks and fresh feel. Delicates - For sheer fabrics, brassieres, lingerie, dresses, shirts and blouses. For best results, use liquid detergent. Wool - Only for machine-washable wool. A load should be less than 2.0 kg. • The wool course washes the laundry using gentle cradling actions. During the wash, the gentle cradling and soaking actions are continued to protect the wool fibers from shrinkage / distortion and for a super gentle clean. This stop operation is not a problem. • Neutral detergent is recommended for wool course, for improved washing results and for improved care of the wool fibers. The wool wash cycle of this machine has been approved by Woolmark for the washing of machine-washable Woolmark products provided that the products are washed according to the instructions on the garment label and those issued by the manufacturer of this washing machine, M0509 (Certificate Number issued by IWS NOM INEE Co., Ltd.) Handwash - A very light wash cycle as gentle as a hand wash. Air Wash - This course is useful for removing bad odors. Turning the Cycle Selector cycles through the following operating modes. (Deodorization Sanitization) • Deodorization - Reduces bad smells from the laundry • Sanitization - Deodorize and sterilize the laundry by stronger air wash action with higher temp. Drying - Select to dry laundry automatically by detecting the amount and weight of the laundry. Water Saving - This is a specially designed course that enables you to wash laundry effectively with the minimum amount of water. Water Saving, 40˚C, Intensive Wash/Dry, 1400rpm spin is recommended for a normally soiled cotton load. 18_ washing a load of laundry WD8704CJ-02732A-02_EN.indd 18 2010-04-20 ¿ÀÈÄ 2:56:10 Quick 29’ - For lightly soiled garments that you require quickly. Spin - Performs an additional spin cycle to remove more water. Rinse + Spin - Use for a load that needs rinsing only or to add rinseadded fabric softener to a load. Drain Only - Turn the Cycle Selector to the Spin position, press the Spin button, and then press the Start/Pause button to drain the water. PREWASH SELECTION BUTTON Press this button to select pre-wash. Pre-wash is only available with: Cotton, Synthetics, Denim, Sports Wear, Water Saving . 4 DELAY END SELECTION BUTTON Press this button repeatedly to cycle through the available Delay End options (from 3 hours to 19 hours in one hour increments). The hour displayed indicates the time when the wash cycle will be finished. 5 TEMPERATURE SELECTION BUTTON Press this button repeatedly to cycle through the available water temperature options: (Cold Water , 30 ˚C, 40 ˚C , 60 ˚C and 95 ˚C). 6 RINSE SELECTION BUTTON Press this button to add additional rinse cycles. The maximum number of rinse cycles is five. Press the button repeatedly to cycle through the available speeds for the spin cycle. 7 SPIN SELECTION BUTTON WD8704 , , 400, 800, 1200, 1400 rpm WD8702 , , 400, 800, 1000, 1200 rpm WD8700 , , 400, 600, 800, 1000 rpm 02 WASHING A LOAD OF LAUNDRY 3 “No spin ” - The laundry remains in the drum and no spin cycle is performed after the final drain. “Rinse Hold ” -The laundry remains soaking in the final rinse water. Before the laundry can be unloaded, either a Drain or Spin cycle must be performed. 8 Drying BUTTON Pressing the button cycles through the following options. Cup Board → Low Temp → Iron → Time Dry (30min. → 1:00min. → 1:30min. → 2:00min. → 2:30min. → 3:00min. → 3:30min. → 4:00min. → 4:30min.) → Cup Board “Cup Board ” - Use this cycle to dry loads such as cotton, underwear, and linen. “Low Temp ” - This cycle protect heat-sensitive items at a low drying temperature. “Iron ” - Finishes the dry cycle in a moist state appropriate for Ironing. “Time Dry ” -Dry the laundry for the specified period of time. • You must avoid washing laundry that may not be dried as it may be deformed even at low temperatures. • The Cup Board, Low Temp, Iron and Time Dry options detect the weight of the laundry in order to display an accurate drying time and dry them more completely. • The drying conditions may differ depending on the type and the amount of laundry. 9 INTENSIVE WASH SELECTION BUTTON Press this button when the laundry is heavily soiled and needs to be washed intensively. The cycle time is increased for each cycle. 10 SILVER WASH SELECTION BUTTON Silver Wash water is supplied during the wash cycle as well as during the last rinse cycle, removing bacteria as well as giving protection from bacterial growth for up to one month. 11 START/PAUSE SELECTION BUTTON Press to pause and restart a cycle. 12 POWER BUTTON Press it once to turn your washing machine on, press it again to turn your washing machine off. If the washing machine is left on for more than 10 minutes without any buttons being touched, the power automatically turns off. washing a load of laundry _19 WD8704CJ-02732A-02_EN.indd 19 2010-04-20 ¿ÀÈÄ 2:56:12 washing a load of laundry Child lock The Child Lock function allows you to lock the buttons so that the wash cycle you’ve chosen can’t be changed. Activating/Deactivating If you want to activate or deactivate the Child Lock function, press the Temp. and Rinse buttons at the same time for 3 seconds. “Child Lock ” will be lit when this feature is activated. When the Child Lock function is activated, only the Power button works. The Child Lock function remains on even after the power is turned on and off or after the disconnecting and reconnecting the power cord. 3 SEC. Sound off The Sound Off function can be selected during all courses. When this function is selected, sound is turned off for all courses. Even if the power is turned on and off repeatedly, the setting is retained. Activating/Deactivating If you want to activate or deactivate the Sound Off function, press the Spin and Drying buttons at the same time for 3 seconds. The “Sound Off ” will be lit when this feature is activated. 3 SEC. Delay end You can set the washing machine to finish your wash automatically at a later time, choosing a delay of between 3 to 19 hours (in 1 hour increments). The hour displayed indicates the time at which the wash will be finished. 1. Manually or automatically set your washing machine according to the type of laundry you are washing. 2. Press the Delay End button repeatedly until the delay time is set. 3. Press the Start/Pause button. The “Delay End ” indicator will be lit, and the clock will begin counting down until it reaches the set time. 4. To cancel a Delay End function, press the Power button and then turn the washing machine on again. Drain Only Fuction When you want just drain water from washing machine, follow directions below. 1. Press the Power button 2. Turn the Cycle Selector to the Spin positio. 3. Press the Spin button 1 times until rpm sign is off. 4. Then “1” shows up on time display in center. 5. Press the Start/Pause button. 20_ washing a load of laundry WD8704CJ-02732A-02_EN.indd 20 2010-04-20 ¿ÀÈÄ 2:56:14 Air Wash MODE CYCLE TIME Deodorization 29 min Sanitization 59 min When one of these options has been selected, no other button can be selected and you can only select the delay end time from between 3:00 – 19:00. 4. Close the door and press the Start/Pause button. • • When there is water in the tub, Air Wash cannot be selected. Drain the water and select Air Wash. • Press the Start/Pause or Power button to remove the laundry. • Fragrance or dryer sheets can be used with Air Wash programs to add fragrance to your refreshed laundry (one sheet per one or two items). 02 WASHING A LOAD OF LAUNDRY Air Wash can refresh laundry without using water owing to its powerful airing system. Clothing that can be refreshed includes woolen coats, cotton or jumpers, sweaters and suits. (Two items or less (less than 1 kg) 1. Open the door, place the laundry into the washing machine and close the door. 2. Press the Power button. 3. Select Air Wash by turning the Cycle Selector. • Each time the button is pressed, the operating mode cycles through the following sequence: Deodorization, Sanitization ... Avoid Air Wash the following clothes: • Sensitive clothes made of leather, mink, fur, silk, etc. • Underwear trimmed with lace, ‘glued’ doll cushions, and dress suits may have their decorations loosened. • Clothes trimmed with buttons can cause them to break. • Starchy clothes can become deformed. • Hard bedding such as a wooden pillows (neck-rest) - Pillows or blankets filled with plastic or starch rather than cotton - Electric blankets • Furry blankets • Bulky blankets • Latex pillow washing a load of laundry _21 WD8704CJ-02732A-02_EN.indd 21 2010-04-20 ¿ÀÈÄ 2:56:15 washing a load of laundry USING DRY COURSE Refer to the label of drying capacity and be sure to put in the clothes to the lower level than the marked line for the dried clothe of 5.0kg. 1. Open the door, put in the clothes and close the door again. 2. Press the Power button and then press the Drying button. : The standard course will be selected automatically. Drying is availably selected only at the courses such as cotton, synthetics, denim and sports wear. 3. Select Drying button as follows. Drying Programs • Every press of this button will select drying type repeatedly in the following order: Cup Board → Low Temp → Iron → Time Dry (30min. →1:00min. → 1:30min. → 2:00min. → 2:30min. → 3:00min. → 3:30min. → 4:00min. → 4:30min.) → Cup Board Drying Type Auto Drying Cupboard( Low Temp.( Iron( Time Drying( ) ) ) Information Max Load Time (Max Load) Standard: Dries the laundry. 3.5kg 160min. 2.0kg 160min. For leaving items partially damp so that it can be easily ironed 2.0kg 30min. You can select the appropriate drying time depending on the texture, quantity, and moisture. 5.0kg 270min. ) Dries the laundry at a low temperature to protect the texture of the laundry. • It automatically displays Drying Time by sensing the weight of clothes before drying for increasing the drying effect. • For laundry weighing less than 3.5kg, use the Auto Dry. For laundry that weighs more, please use the Time Dry. • If both the spin and drying cycles are selected, the spin speed is automatically selected to enhance the drying efficiency. • When using the drying cycle, check if the water supply valve is opened. 4. Put suitable amount of detergent and fiber softener in the detergent tray and close it again. 5. Press Start/Pause button. : It automatically performs an optimal function from washing to drying. • The selected course can’t be altered after the start of drying. • If you select Drying function, the intensity of SPIN will be set up as High in default for increasing the drying effect. • If cold water is not supplied, drying will not be performed. • If you do not take out clothes from the tub after the end of drying, a function of wrinkle protection will be performed for about 30 minutes with the display of [End]. In order to take out the clothes: press firstly Start/Pause or Power button and take them out. • In case you wish to dry after hand washing, select both Spin and Dry at the same time. 22_ washing a load of laundry WD8704CJ-02732A-02_EN.indd 22 2010-04-20 ¿ÀÈÄ 2:56:15 Washing clothes using the cycle selector Pre-wash is only available when selecting the Cotton, Synthetics, Denim, Sports Wear, and Water Saving cycles. It is only necessary if your clothing is heavily soiled. 7. Use the Cycle Selector to select the appropriate cycle according to the type of material: Cotton, Synthetics, Denim, Sports Wear, Delicates, Wool, Hand Wash, Water Saving , Quick 29’. The relevant indicators will illuminate on the control panel. 8. At this time, you can control the wash temperature, the amount of rinses, the spinning speed, and the delay time by pressing the appropriate option button. 9. Press the Start/Pause button and the wash will begin. The process indicator will light up and the remaining time for the cycle will appear in the display. 02 WASHING A LOAD OF LAUNDRY Your new washing machine makes washing clothes easy, using Samsung’s “Fuzzy Control” automatic control system. When you select a wash program, the machine will set the correct temperature, washing time, and washing speed. 1. Turn on your sink’s water tap. 2. Press the Power button. 3. Open the door. 4. Load the articles one at a time loosely into the drum, without overfilling it. 5. Close the door. 6. Add detergent, softener, and pre-wash detergent (if necessary) into the appropriate compartments. Pause Option Within 5 minutes of starting a wash, it is possible to add/remove laundry items. 1. Press the Start/Pause button to unlock the door. The door cannot be opened when the water is too HOT or the water level is too HIGH. 2. After closing the door, press the Start/Pause button to restart the wash. When the cycle is finished: After the total cycle has finished, the power will turn off automatically. 1. Open the door. 2. Remove laundry. Washing clothes manually You can wash clothes manually without using the Cycle Selector. 1. Turn the water supply on. 2. Press the Power button on the washing machine. 3. Open the door. 4. Load the articles loosely into the drum one at a time, without overfilling it. 5. Close the door. 6. Add detergent and, if necessary, softener or prewash detergent, into the appropriate compartments. 7. Press the Temp. button to select the temperature. (Cold water, 30 ˚C, 40 ˚C, 60 ˚C, 95 ˚C) 8. Press the Rinse button to select the required number of rinse cycles. The maximum number of rinse cycles is five. The wash duration is increased accordingly. 9. Press the Spin button to select the spin speed. The rinse hold function allows you to remove items that are still wet from the washing machine. ( : No Spin, : Rinse Hold) 10. Press the Delay End button repeatedly to cycle through the available Delay End options (from 3 hour to 19 hours in one hour increments). The hour displayed indicates the time at which the wash will be finished. 11. Press the Start/Pause button and the machine will begin the cycle. washing a load of laundry _23 WD8704CJ-02732A-02_EN.indd 23 2010-04-20 ¿ÀÈÄ 2:56:15 washing a load of laundry LAUNDRY GUIDELINES Follow these simple guidelines for the cleanest laundry and the most efficient wash. Always check the Care label on clothing before washing. Sort and wash your laundry according to the following criteria: • Care Label: Sort laundry into cottons, mixed fibres, synthetics, silks, wools and rayons. • Colour: Divide whites and colours. Wash new colour items separately. • Size: Placing items of different sizes in the same load will improve the wash action. • Sensitivity: Wash delicate items separately, using the Delicate wash cycle for pure, new woollen items, curtains and silk articles. Check the labels on the items you are washing or refer to the fabric care chart in the appendix. Emptying pockets Before each wash, empty all the pockets of your laundry. Small, irregularly shaped hard objects, such as coins, knives, pins, and paperclips could damage your washing machine. Do not wash clothing with large buckles, buttons, or other heavy metal objects. Metal on clothing may damage your clothing as well as the tub. Turn clothing with buttons and embroidered clothes inside out before washing them. If zips of pants and jackets are open while washing, the spin basket may be damaged. Zips should be closed and fixed with a string before washing. Clothing with long strings may become entangled with other clothes damaging them. Be sure to fix the strings before starting the wash. Prewashing cotton Your new washing machine, combined with modern detergents, will give perfect washing results, thus saving energy, time, water and detergent. However, if your cotton is particularly dirty, prewash with a protein-based detergent. Determining the load capacity Do not overload the washing machine or your laundry may not wash properly. Use the chart below to determine the load capacity for the type of laundry you are washing. Fabric Type Load Capacity Model WD8704/ WD8702/ WD8700 Cotton - average/lightly soiled - heavily soiled 8.0 kg Synthetics 3.0 kg Denim 3.0 kg Sports Wear 2.5 kg Delicates 2.5 kg Wool 2.0 kg • When the laundry is unbalanced (“UE” lights up on the display), redistribute the load. If the laundry is unbalanced, the spin efficiency may be degraded. • When washing Bedding or Duvets, the wash time may be lengthened or the spin efficiency may be degraded. 24_ washing a load of laundry WD8704CJ-02732A-02_EN.indd 24 2010-04-20 ¿ÀÈÄ 2:56:16 Make sure to insert brassieres (water washable) into a laundry net (to be purchased additionally). CAUTION Do not wash the laundry net by itself without other laundry. This may cause abnormal vibrations that could move the washing machine and cause an accident resulting in injury. DETERGENT AND ADDITIVES INFORMATION Which detergent to use The type of detergent you should use is based on the type of fabric (cotton, synthetic, delicate items, wool), colour, wash temperature, and degree of soiling. Always use “low suds” laundry detergent, which is designed for automatic washing machines. Follow the detergent manufacturer’s recommendations based on the weight of the laundry, the degree of soiling, and the hardness of the water in your area. If you do not know how hard your water is, enquire at your local water authority. 02 WASHING A LOAD OF LAUNDRY • The metal parts of the brassieres may break through the material and damage the laundry. Therefore make sure to place them inside a fine laundry net. • Small, light clothing such as socks, gloves, stockings and handkerchiefs may become caught around the door. Place them inside a fine laundry net. Do not use detergent that has hardended or solidified as the detergent may remain in the rinse cycle. It may cause your washing machine to not rinse properly or result in the overflow becoming blocked. Please note the following when using the Wool course. • Use a neutral liquid detergent for wool only. • When using a powder detergent, it may remain on the laundry and cause damage to the material (wool). washing a load of laundry _25 WD8704CJ-02732A-02_EN.indd 25 2010-04-20 ¿ÀÈÄ 2:56:16 washing a load of laundry Detergent drawer Your washing machine has separate compartments for dispensing detergent and fabric softener. Add all laundry additives to the correct compartment before starting your washing machine. Do NOT open the detergent drawer when your washing machine is running. 1. Pull out the detergent drawer on the left side of the control panel. 2. Add the recommended amount of laundry detergent directly into the detergent compartment before starting your washing machine. 3. Add the recommended amount of fabric softener into the softener compartment if required. CAUTION Do NOT add any powder/liquid detergent to the softener compartment ( ). 4. When using the Prewash option, add the recommended amount of laundry detergent into the prewash compartment . When washing large items do NOT use the following detergetnt types. • Tablet and capsule type detergents • Detergents using a ball and net MAX Concentrated or thick fabric softener and conditioner must be diluted with a little water before being poured into the dispenser (prevents the overflow from becoming blocked). Be careful that the fabric softener does not overflow, when you close the detergent drawer after adding fabric softener into the rinse detergent compartment. 26_ washing a load of laundry WD8704CJ-02732A-02_EN.indd 26 2010-04-20 ¿ÀÈÄ 2:56:17 cleaning and maintaining your washing machine Keeping your washing machine clean improves its performance, wards off unnecessary repairs, and lengthens its life. 1. Unplug the washing machine from the power supply. 2. Open the filter cover using a coin or a key. Filter cover 03 CLEANING AND MAINTAINING DRAINING THE WASHING MACHINE IN AN EMERGENCY 3. Unscrew the emergency drain cap by turning it to the left. Emergency drain cap 4. Hold the cap on the end of the emergency drain tube and slowly pull it out about 15 cm. 5. Allow all the water to flow into a bowl. 6. Reinsert the drain tube and screw the cap back on. 7. Replace the filter-cover. Emergency drain tube CLEANING THE EXTERIOR 1. Wipe the washing machine surfaces, including the control panel, with a soft cloth using a nonabrasive household detergent. 2. Use a soft cloth to dry the surfaces. 3. Do not pour water onto the washing machine. cleaning and maintaining your washing machine _27 WD8704CJ-02732A-02_EN.indd 27 2010-04-20 ¿ÀÈÄ 2:56:17 cleaning and maintaining your washing machine CLEANING THE DETERGENT DRAWER AND DRAWER RECESS 1. Press the release lever on the inside of the detergent drawer and pull the drawer out. 2. Remove the liquid detergent divider from the detergent drawer Release lever Liquid detergent divider 3. Wash all parts under running water. 4. Clean the drawer recess with an old toothbrush. 5. Replace the liquid detergent divider by pushing it firmly into the drawer. 6. Push the drawer back into place. 7. To remove any remaining detergent, perform a rinse cycle without any laundry in the drum. 28_ cleaning and maintaining your washing machine WD8704CJ-02732A-02_EN.indd 28 2010-04-20 ¿ÀÈÄ 2:56:18 CLEANING THE DEBRIS FILTER We recommend cleaning the debris filter 5 or 6 times a year, or when the error message of “5E” is displayed. (Refer to “Draining the washing machine in an emergency” in the previous page.) 1. Open the filter cover by using a key or coin. 2. Unscrew the emergency drain cap by turning it to the left and drain off all the water. 3. Unscrew the debris filter cap. 4. Wash any dirt or other material from the debris filter. Make sure the drain pump propeller behind the debris filter is not blocked. 5. Replace the debris filter cap. 6. Replace the filter cover. 03 CLEANING AND MAINTAINING Debris filter cap CLEANING THE WATER HOSE MESH FILTER You should clean the water hose mesh filter at least once a year, or when the error message of “4E” is displayed: 1. Turn off the water supply to the washing machine. 2. Unscrew the hose from the back of the washing machine. To prevent water from gushing out due to the air pressure in the hose, cover the hose with a cloth. 3. Gently pull out the mesh filter from the end of the hose using a pair of pliers and rinse it under water until clean. Also clean inside and outside the threaded connector. 4. Push the filter back into place. 5. Screw the hose back onto the washing machine. 6. Make sure the connections are watertight and turn on the tap. REPAIRING A FROZEN WASHING MACHINE If the temperature drops below freezing and your washing machine is frozen: 1. 2. 3. 4. 5. Unplug the washing machine. Pour warm water over the tap to loosen the water supply hose. Remove the water supply hose and soak it in warm water. Pour warm water into the washing machine drum and let it sit for 10 minutes. Reconnect the water supply hose to the water tap and check if the water supply and drain are operating normal. STORING YOUR WASHING MACHINE If you need to store your washing machine for an extended time, it’s better to drain and disconnect it. Washing machines can be damaged if water is left in the hoses and internal components before storage. 1. Select the Quick 29’ cycle and add bleach to the bleach compartment. Run your washing machine through the cycle without a load. 2. Turn the water taps off and disconnect the inlet hoses. 3. Unplug your washing machine from the electrical outlet, and leave your washing machine door open to allow air to circulate inside the tumbler. If your washing machine has been stored in below-freezing temperatures, allow time for any leftover water in your washing machine to thaw out before using it. cleaning and maintaining your washing machine _29 WD8704CJ-02732A-02_EN.indd 29 2010-04-20 ¿ÀÈÄ 2:56:19 troubleshooting and information codes CHECK THESE POINTS IF YOUR WASHING MACHINE... PROBLEM SOLUTION Will not start • • • • Make sure your washing machine is plugged in. Make sure the door is firmly closed. Make sure the water source tap(s) are turned on. Make sure to press the Start/Pause button. Has no water or not enough water • • • • Turn the water tap on fully. Make sure the water source hose is not frozen. Straighten the water intake hoses. Clean the filter on the water intake hose. Has detergent remains in the detergent drawer after the wash cycle is complete • Make sure your washing machine is running with sufficient water pressure. Make sure the detergent is added to the center of the detergent drawer. Vibrates or is too noisy • • • • • Make sure your washing machine is on a level surface. If the surface is not level, adjust the washing machine feet to level the appliance. Make sure that the shipping bolts are removed. Make sure your washing machine is not touching any other object. Make sure the laundry load is balanced. The washing machine does not drain and/or spin • • Straighten the drain hose. Eliminate kinked hoses. Make sure the debris filter is not clogged. Door is locked shut or will not open. • The door will not open until 3 minutes after the machine stops or the power turns off. If the problem persists, contact your local Samsung Customer Service. 30_ troubleshooting and information codes WD8704CJ-02732A-02_EN.indd 30 2010-04-20 ¿ÀÈÄ 2:56:19 INFORMATION CODES CODE SYMBOL SOLUTION dE • Close the door. 4E • • Make sure the source water tap is turned on. Check the water pressure. 5E • • Clean the debris filter. Make sure the drainage hose is installed correctly. • The laundry load is unbalanced. Redistribute the load. If only one item of clothing needs washing, such as a bathrobe or pair of jeans, the final spin result might be unsatisfactory and an “UE” error message will be shown in the display window. • Call the after-sales service. • It appears when the internal temperature of the drum is high. The fan will automatically function, so just wait until “Hot” indication disappeared. UE cE/3E Hot 04 TROUBLESHOOTING When your washing machine malfunctions, you may see an information code on the display. If that happens, check this table and try the suggested solution before calling Customer Service. For any codes not listed above, or if the suggested solution doesn’t fix the problem, call your Samsung Service Centre or local Samsung dealer. troubleshooting and information codes _31 WD8704CJ-02732A-02_EN.indd 31 2010-04-20 ¿ÀÈÄ 2:56:19 cycle chart CYCLE CHART ( user option) Max load(kg) DETERGENT PROGRAM WD8704/ WD8702/ WD8700 Pre-wash wash Softener Silver wash Max Temp (˚C) Cotton 8.0 yes 95 Synthetics 3.0 yes 60 Denim 3.0 yes 60 Sports Wear 2.5 yes 60 Delicates 2.5 - yes - - 40 Wool 2.0 - yes - - 40 Handwash 2.0 - yes - 40 Deodorization 1.0 - - - - - Sanitization 1.0 - - - - - Drying 5.0 - - - - - Water Saving 3.0 yes 60 Quick 29’ 3.0 - yes - 60 Spin Speed(MAX) rpm PROGRAM Delay end Cycle time (min) 1000 120 1200 1000 90 800 800 78 1200 1200 1000 72 800 800 800 50 WD8704 WD8702 WD8700 Cotton 1400 1200 Synthetics 1200 Denim 800 Sports Wear Delicates Wool 800 800 800 38 Handwash 400 400 400 31 Deodorization - - - 29 Sanitization - - - 59 Drying - - - 160 Water Saving 1200 1200 1000 70 Quick 29’ 1400 1200 1000 29 1. A cycle with a prewash takes approx. 15 minutes longer. 2. The cycle duration data has been measured under the conditions specified in Standard IEC 60456 / EN 60456. 3. Course time in individual homes may differ from the values given in the table due to variations in the pressure and temperature of the water supply, the load and the type of laundry. 4. When the Intensive Wash function is selected, the cycle time is increased for each cycle. 32_ cycle chart WD8704CJ-02732A-02_EN.indd 32 2010-04-20 ¿ÀÈÄ 2:56:19 appendix FABRIC CARE CHART Resistant material Can be ironed at 100 ˚C max Delicate fabric Do not iron Item may be washed at 95 ˚C Can be dry cleaned using any solvent Item may be washed at 60 ˚C Dry clean with perchloride, lighter fuel, pure alcohol or R113 only Item may be washed at 40 ˚C Dry clean with aviation fuel, pure alcohol or R113 only Item may be washed at 30 ˚C Do not dry clean Item may be hand washed Dry flat Dry clean only Can be hung to dry Can be bleached in cold water Dry on clothes hanger Do not bleach Tumble dry, normal heat Can be ironed at 200 ˚C max Tumble dry, reduced heat Can be ironed at 150 ˚C max Do not tumble dry 06 APPENDIX The following symbols provide garment care directions. The care labels include four symbols in this order: washing, bleaching, drying and ironing, and dry cleaning when necessary. The use of symbols ensures consistency among garment manufacturers of domestic and imported items. Follow the care label directions to maximize garment life and reduce laundering problems. PROTECTING THE ENVIRONMENT • • • • This appliance is manufactured from recyclable materials. If you decide to dispose of this appliance, please observe local waste disposal regulations. Cut off the power cord so that the appliance cannot be connected to a power source. Remove the door so that animals and small children cannot get trapped inside the appliance. Do not exceed the detergent quantities recommended in the detergent manu-facturers’ instructions. Use stain removal products and bleaches before the wash cycle only when strictly necessary. Save water and electricity by only washing full loads (the exact amount depends upon the program used). DECLARATION OF CONFORMITY This appliance complies with European safety standards, EC directive 93/68 and EN Standard 60335. appendix _33 WD8704CJ-02732A-02_EN.indd 33 2010-04-20 ¿ÀÈÄ 2:56:24 appendix SPECIFICATIONS TYPE FRONT LOADING WASHING MACHINE WD8704CJ/WD8704DJ/WD8704EJ/WD8704RJ WD8702CJ/WD8702DJ/WD8702EJ/WD8702RJ WD8700CJ/WD8700DJ/WD8700EJ/WD8700RJ DIMENSIONS W598mm X D600mm X H844mm 50 kPa ~ 800 kPa WATER PRESSURE WATER VOLUME 56 ℓ NET WEIGHT WD8704CJ/ WD8704DJ/ WD8704EJ/ WD8704RJ WD8702CJ/ WD8702DJ/ WD8702EJ/ WD8702RJ WD8700CJ/ WD8700DJ/ WD8700EJ/ WD8700RJ 70 kg 69 kg 68 kg WASH AND SPIN CAPACITY 8.0 kg [DRY LAUNDRY] DRY CAPACITY 5 kg MODEL 220 V 150 W 240 V 150 W WASH AND HEATING 220 V 2000 W 240 V 2400 W DRYING 230V 1600W WASHING POWER CONSUMPTION SPIN PACKAGE WEIGHT SPIN REVOLUTIONS WD8704CJ/WD8704DJ/WD8704EJ/WD8704RJ WD8702CJ/WD8702DJ/WD8702EJ/WD8702RJ WD8700CJ/WD8700DJ/WD8700EJ/WD8700RJ MODEL WD8704CJ/ WD8704DJ/ WD8704EJ/ WD8704RJ WD8702CJ/ WD8702DJ/ WD8702EJ/ WD8702RJ WD8700CJ/ WD8700DJ/ WD8700EJ/ WD8700RJ 230V 350 W 250 W 200 W PUMPING 34 W MODEL WD8704CJ/WD8704DJ/WD8704EJ/WD8704RJ WD8702CJ/WD8702DJ/WD8702EJ/WD8702RJ WD8700CJ/WD8700DJ/WD8700EJ/WD8700RJ PAPER 2.5 kg PLASTIC 2.5 kg MODEL WD8704CJ/ WD8704DJ/ WD8704EJ/ WD8704RJ WD8702CJ/ WD8702DJ/ WD8702EJ/ WD8702RJ WD8700CJ/ WD8700DJ/ WD8700EJ/ WD8700RJ rpm 1400 1200 1000 The appearance and specifications of the product are subject to change without prior notice for purposes of product enhancement. 34_ appendix WD8704CJ-02732A-02_EN.indd 34 2010-04-20 ¿ÀÈÄ 2:56:24 memo WD8704CJ-02732A-02_EN.indd 35 2010-04-20 ¿ÀÈÄ 2:56:24 QUESTIONS OR COMMENTS? Country CALL OR VISIT US ONLINE AT U.A.E 800-SAMSUNG (726-7864) www.samsung.com Code No. DC68-02732A-02_EN WD8704CJ-02732A-02_EN.indd 36 2010-04-20 ¿ÀÈÄ 2:56:24 WD8704EJ(A/F/G/H/S/V/W/Z) WD8702EJ(A/F/G/H/S/V/W/Z) WD8704EJ(A/F/G/H/S/V/W/Z) WD8704RJ(A/F/G/H/S/V/W/Z) WD8702RJ(A/F/G/H/S/V/W/Z) WD8700RJ(A/F/G/H/S/V/W/Z) WD8704CJ(A/F/G/H/S/V/W/Z) WD8702CJ(A/F/G/H/S/V/W/Z) WD8700CJ(A/F/G/H/S/V/W/Z) WD8704DJ(A/F/G/H/S/V/W/Z) WD8702DJ(A/F/G/H/S/V/W/Z) WD8700DJ(A/F/G/H/S/V/W/Z) الغسالة دليل املستخدم إمكانيات هائلة .Samsung نشكرك على شراء هذا املنتج من الرجاء تسجيل املنتج على موقع,ًللحصول على خدمة أكثر تكامال www.samsung.com/register WD8704CJ-02732A-02_AR.indd 1 4/30/2010 3:07:00 PM ميزات الغسالة اجلديدة من samsung تتميز الغسالة اجلديدة بأنها مزودة بإمكانية تغيير الطريقة التي ترغب في إجراء الغسيل بها .تتميز غسالة Samsungبوجود كافة امليزات التي حُتول املهام غير املرغوبة إلى شيء ممتع ،بدءا ً من سعتها ذات احلجم الفائق وحتى استهالكها االقتصادي للطاقة. • غسيل بالفضة -نظام الغسيل بالفضة الصحي (طرازات مختارة فقط) تركيبة رائدة! تعمل تقنية الغسيل الفضي من Samsungعلى جتميع آثار التعقيم الناجمة عن الغسيل الفضي باستخدام العلوم املتقدمة للحصول على أقصى درجات الغسيل النظيف .حيث يتم حتويل طبقني من الفضة النقية إلى أيونات فضية عن طريق التحليل بالكهرباء .وتقوم اجلزيئات الفضية بإزالة الرائحة املسببة للبكتريا التى حتدث أثناء عملية الغسيل “فائق النظافة” حتى وإن كانت في ماء بارد أو ماء بال مادة تبييض اللون.لذا فإن عملية الغسيل في ماء بارد تعمل على توفير طاقة كافية ومفيدة للغسيل. تتمتع طبقتا الفضة بضمان عشر سنوات مبعدل مرتني تشغيل أسبوع ًيا كما ميكن استبدالهما بسهولة بواسطة فني الصيانة، إذا لزم األمر. •الغسيل إلى التنشيف بواسطة زر واحد متتع بغسيل مريح بدون توقف وكذا إدارة التجفيف .فضالً عن إمكانية اختيارك 4برامج جتفيف خاصة إلجراء دورة الغسيل الكلية مبا في ذلك دورة التجفيف باستخدام زر واحد. كما ميكن تشغيل برامج التجفيف هذه مبعزل عن برامج الغسيل ومنها • “خزانة” (البرنامج القياسي)“ ،جتفيف بدرجة حرارة منخفضة”“ ،الكي”“ ،وقت التجفيف” ( 270 ~ 30دقيقة). •التأمني ضد عبث األطفال تضمن وظيفة تأمني ضد عبث األطفال إبقاء األطفال بعيدا ً عن الغسالة. وتعمل ميزة األمان هذه على منع األطفال من اللعب بالغسالة باإلضافة إلى تنبيهك عند تشغيلها. •اعتماد غسيل الصوف لقد مت اختبار الغسالة وقد تطابقت مع املواصفات التي حددتها شركة Woolmarkاخلاصة بغسل املنتجات الصوفية في الغسالة. يجب غسل املالبس وفقا ً للتعليمات املدونة على امللصق املوجود على املالبس كما حددتها شركتي Woolmarkو.Samsung • تأجيل التوقف تأجيل الدورة حتى 19ساعة بإمكانية زيادة ساعة وزيادة إمكانية استخدام الغسالة السيما عندما ترغب في الذهاب للخارج. • غسيل سريع ال مجال لضياع الوقت! نظرا ً ألن عملية الغسيل تستغرق أقل من 30دقيقة مما تيسر عليك مزاولة مهامك قبل فوات األوان. لذا يمُ ثل برنامج غسيل سريع حالً لزخم حياتك في 29دقيقة .ميكنك اآلن غسل مالبسك املفضلة في 29دقيقة فقط! • برنامج األنسجة الرقيقة و غسيل يدوي ميكنك أن تخظى بعناية غسيل خاصة ملالبسك عن طريق حتديد درجة حرارة مالئمة ودورة غسيل بسيطة وكمية ماء مناسبة. • سخان خزفي للمتانة وتوفير الكهرباء (طرازات محددة) يتميز السخان اخلزفي املبتكر بأنه ذو قوة مضاعفة عن السخانات العادية. مما يوفر تكاليف الصيانة واإلصالحات .فضالً عن أنه يخفف من حدة املاء الساخن على املالبس ويوفر الكهرباء. _ ازيملا 4/30/2010 3:07:00 PM WD8704CJ-02732A-02_AR.indd 2 • غسيل بالهواء يقوم نظام “الغسيل بالهواء” بإزالة الروائح الكريهة وتعقيم الغسيل من الروائح الكريهة التي يصعب التخلص منها والناجمة عن نظام الغسيل التقليدي ،لذا فهي تعتبر إحدى فوائد تقنية التنظيف بالهواء الفريدة. • املالبس التي ميكن تنظيفها بالهواء :املعاطف الصوفية والسترات القطنية/الداخلية والسترات الثقيلة والبدل واملساند والوسائد واملالبس املطرزة • املالبس التي ال ميكن تنظيفها بالهواء :املالبس اجللدية واحلريرية والناعمة والبطاطني الكهربائية واملالبس األخرى املتسخة • لوحة العرض الرسومية الرقمية تتميز لوحة حتكم العرض الرسومية الرقمية بأنها واضحة وسهلة االستخدام مما يقلل احتمالية حدوث مشاكل أو متاعب. وباإلضافة إلى سهولة تشغيلها ،تتيح لك لوحة العرض الرسومية الرقمية إجراء تعديالت بسرعة ودقة للحصول على نتائج رائعة للغسيل. • باب واسع فتحة عريضة ج ًدا للباب إلتاحة مشاهدة عملية الغسيل بشكل مناسب! كما أنه يسمح بإضافة قطع املالبس وإزالتها بسهولة، وخصوصا القطع كبيرة احلجم مثل املفروشات واملناشف إلخ. ً • محرك كهربائي مباشر نظرًا ألن حاوية الغسيل ال تستخدم األحزمة أو التروس ،لذا فإن االهتزازات تعتبر قليلة بشكل ملحوظ .وكنتيجة لذلك ،فإن هذه امليزة تضمن تشغيل الغسالة بشكل أكثر هدو ًء وأكثر حتمالً. يحتوى هذا الدليل على معلومات هامة حول عملية التركيب واالستخدام وصيانة غسالة Samsungاجلديدة .وميكنك الرجوع إليه للتعرف على شكل لوحة التحكم ،والتعليمات اخلاصة بكيفية استخدام الغسالة ،والتلميحات املتعلقة بالوصول إلى أقصى استفادة من أحدث امليزات واإلمكانات املتوفرة بها .يرشدك قسم “استكشاف املشاكل وحلها ورموز املعلومات” الواردة في صفحة 29إلى ما يتوجب عليك فعله في حالة حدوث عطل بالغسالة اجلديدة. ازيملا _ 4/30/2010 3:07:00 PM WD8704CJ-02732A-02_AR.indd 3 معلومات السالمة وتنبيهية .ال تشير التحذيرات والتنبيهات وإرشادات ستجد بني ثنايا هذا الدليل ،مالحظات حتذيرية السالمة الهامة التالية إلى كافة الظروف واملواقف احملتمل التعرض لها .لذا تقع على عاتقك مسئولية التعامل بحذر وانتباه وعناية عند تركيب الغسالة وصيانتها وتشغيلها .ال تقع على شركة Samsungأي مسؤولية جتاه األضرار الناجمة عن سوء االستخدام. الرموز واالحتياطات الهامة للسالمة تشير الرموز والعالمات املوجودة في دليل املستخدم هذا إلى ما يلي: حتذير تنبيه تنبيه املمارسات اخلطيرة أو غير اآلمنة التي قد تؤدي إلى إصابات جسدية بالغة أو الوفاة. املمارسات اخلطيرة أو غير اآلمنة التي قد تؤدي إلى إصابات طفيفة لألفراد أو تلف الغسالة. لتقليل خطر حدوث حريق أو انفجار أو التعرض لصدمة كهربائية أو إصابة جسدية عند استخدام الغسالة ،اتبع احتياطات السالمة األساسية التالية: ممنوع. ممنوع الفك. ممنوع اللمس. اتبع اإلرشادات كما هي. قم بفصل موصل الطاقة من مقبس احلائط. تأكد من توصيل الغسالة مبأخذ أرضي ملنع حدوث صدمة كهربائية. اتصل مبركز اخلدمة للمساعدة. مالحظة تهدف عالمات التحذير هذه إلى منع حدوث إصابات لك ولآلخرين. لذا الرجاء اتباعها بعناية. بعد االطالع على هذه الدليل ،قم بحفظه في مكان آمن لالستناد إليه كمرجع في املستقبل. اقرأ كافة التعليمات أوال ً قبل استخدام اجلهاز. نظرًا الحتمال التعرض للمخاطر كما هو احلال مع كافة األجهزة الكهربائية وأجزائها املتحركة .ولتشغيل هذا اجلهاز بأمان ،يجب عليك التعرف على طريقة تشغيله وتوخي احلذر عند استخدامه. قم بتركيب الغسالة ووضعها في مكان مغلق ،بحيث ال تتعرض لعوامل الطقس. قم بتركيب الغسالة وجعلها مستوية على أرضية تتحمل وزنها. يجب توصيل الغسالة مبأخذ أرضي بشكل صحيح .وال تقم بتوصيلها بأحد املآخذ غير األرضية. _ مالسلا تامولعم 4/30/2010 3:07:08 PM WD8704CJ-02732A-02_AR.indd 4 لتقليل مخاطر حدوث حريق أو انفجار: تنبيه • ال تقم بغسل املالبس التي مت غسلها أو نقعها أو التعامل معها باستخدام اجلازولني أو مذيبات التنظيف اجلاف أو املواد األخرى القابلة لالشتعال أو االنفجار .ألنها حُتدث أبخرة ميكن أن تشتعل أو تنفجر .قم بشطف أية مالبس تعرضت ملذيبات تنظيف أو أية سوائل أو مواد صلبة أخرى قابلة لالشتعال يدويا ً قبل وضعها في الغسالة .تأكد من التخلص من كافة آثار تلك املواد السائلة والصلبة واألبخرة .تتضمن املواد اخلطرة األسيتون ،واملواد الكحولية ،واجلازولني ،والكيروسني ،وبعض املنظفات املنزلية السائلة ،ومزيالت البقع ،والزيوت التربنتينة ،والشمع ،ومزيالت الشمع. • ال تضع اجلازولني ،أو مذيبات التنظيف اجلاف ،أو أية مواد أخرى قابلة لالشتعال أو االنفجار في الغسالة. • قد يتكون غاز الهيدروجني في نظام املاء الساخن في ظروف معينة -كما هو احلال بالنسبة لسخان املاء الساخن اخلاص بك -الذي لم يُستخدم ملدة أسبوعني أو أكثر .غاز الهيدروجني قابل لالنفجار .وفي حالة عدم استخدام نظام املاء الساخن ملدة أسبوعني أو أكثر ،قم بفتح كافة صنابير املاء الساخن املوجودة في املنزل ،ودع املاء يتدفق لبضعة دقائق قبل استخدام الغسالة .مما يعمل ذلك على التخلص من غاز الهيدروجني املتكون داخل الصنابير .وال تقم بالتدخني أو إشعال أي مصدر لهب مفتوح في ذلك الوقت ،نظرا ً ألن غاز الهيدروجني قابل لالشتعال. قم بالتهوية على الفور دون ملس القابس في حالة تسرب الغاز. قم بفصل سلك الطاقة قبل الشروع في صيانة تشغيل الغسالة. قم بتفريغ جيوب املالبس قبل كل غسلة .حيث ميكن أن تتسبب األشياء الصغيرة والصلبة ذات األشكال غير املنتظمة مثل العمالت املعدنية والشفرات والدبابيس وماسكات الورق في تلف الغسالة .ال تقم بغسل املالبس املزودة بإبزميات أو أزرار كبيرة احلجم أو األشياء املعدنية األخرى ثقيلة الوزن. ال تفتح باب الغسالة في حالة وجود املاء داخل الغسالة .تأكد من أنه قد مت تصريف املاء قبل فتح الباب. ال تقم بإصالح أي جزء من الغسالة أو استبداله أو صيانته بنفسك إال في حالة استيعابك الكامل إلرشادات اإلصالح املُوصى بها بالنسبة للمستخدم وتوفر املهارات الالزمة لتنفيذها .قد تؤدي عملية اإلصالح من ِقبل شخص غير معتمد إلى إلغاء الضمان. قم بتوصيل الغسالة مبصادر املياه الرئيسية باستخدام مجموعة خراطيم جديدة .ال تعيد استخدام مجموعة اخلراطيم القدمية. تتأثر خراطيم صنبور املاء مبرور الوقت .لذا يجب فحص اخلراطيم بشكل دوري ملعرفة االنتفاخات أو االلتواءات أو مناطق القطع أو التآكالت أو التسريبات ،واستبدالها حسبما تقتضي احلاجة ،كل خمس سنوات على األقل. يجب إزالة جميع مسامير التعبئة والشحن قبل تشغيل اجلهاز .حيث قد حتدث أضرارًا خطيرة في حالة عدم إزالتها .راجع اجلزء “إزالة مسامير الشحن” في صفحة .12 قبل غسل املالبس للمرة األولى ،يجب تشغيل الغسالة دورة كاملة دون مالبس. راجع “الغسيل للمرة األولى”. مالسلا تامولعم _ 4/30/2010 3:07:08 PM WD8704CJ-02732A-02_AR.indd 5 معلومات السالمة مت تصميم اجلهاز لالستخدام املنزلي فقط. حتذير تأكد من قيام فنيني مؤهلني بإجراء توصيالت املاء والكهرباء ،مع مراعاة التعليمات املوضحة في دليل املستخدم (راجع “تركيب الغسالة”) وقوانني السالمة احمللية. قم بفصل قابس اجلهاز من منفذ التيار الكهربائي قبل تنظيفه أو صيانته. افصل قابس اجلهاز دو ًما من منفذ التيار الكهربي وأغلق صنبور املاء بعد االنتهاء من استخدامها. تأكد من تفريغ جيوب املالبس التي سيتم غسلها. قد تتسبب األشياء الصلبة واحلادة مثل العمالت املعدنية أو الدبابيس أو املسامير أو البراغي أو األحجار في إحداث أضرار بالغة باجلهاز. ال تدع احليوانات األليفة واألطفال يلعبون فوق الغسالة أو بداخلها .فقد يلحق ذلك بهم ضررا ً أو يؤدي إلى اختناقهم. يصبح الباب الزجاجي ساخنًا ج ًدا أثناء دورة الغسيل .لذا ،ال تقم بلمس الباب الزجاجي أثناء االستخدام. ال حتاول إصالح اجلهاز بنفسك .فقد تؤدي عمليات اإلصالح من ِقبل أفراد غير فنيني أو غير مؤهلني إلى حدوث إصابات و/أو إحداث املزيد من اخللل باجلهاز. في حالة تلف قابس اجلهاز (سلك التيار الكهربائي) ،يجب تغييره من ِقبل الشركة املصنّعة أو وكيل الصيانة اخلاص بها أو أي فني مؤهل لتفادي التعرض ألي خطر. يجب صيانة هذا اجلهاز من ِقبل مركز اخلدمة املعتمد التابع لنا ،ويجب تبديل قطع الغيار بقطع غيار أصلية فقط. حتذير ال تدع األطفال (أو احليوانات األليفة) يلعبون فوق الغسالة أو بداخلها .ال ميكن فتح باب الغسالة بسهولة من الداخل ،وقد يصاب األطفال بإصابات بالغة في حالة احتباسهم بداخلها. حتذير لم يتم تصنيع هذا اجلهاز حتى يُستخدم من ِقبل أشخاص لديهم مشكالت جسمانية وعقلية وشعورية (مبا فيهم األطفال) أو نقص في املعرفة أو اخلبرة ،إال حتت إشراف أو تعليمات بخصوص استخدامه من ِقبل الشخص املسؤول عن سالمتهم. يجب مراقبة األطفال لضمان عدم عبثهم بالغسالة. يجب أن يكون املستخدم على دراية بالتعليمات اخلاصة بتشغيل الغسالة وأن يتوخي بالغ احلذر واحليطة عند استخدامها بصفه دائمة حتى يتسنى له استخدامها بشكل آمن. يجب وضع اجلهاز بالقرب من مأخذ التيار الكهربائي ،وصنابير توريد املاء وخراطيم تصريف املاء بحيث يسهل الوصول إليها. حتذير قد تشكل مواد التعبئة خطورة على األطفال؛ لذا احتفظ بكافة مواد التعبئة (األكياس البالستيكية واملواد املصنوعة من مادة البوليستيرين...الخ) بعيدا ً عن متناول األطفال. يُحظر استخدام املاء املعالج الذي يحتوي على زيوت أو كرميات أو مستحضرات ،والذي يكون في الغالب موجودًا في املستحضرات اجللدية أو عيادات التدليك. • وإال سيؤدي هذا إلى إتالف التغليف وهو ما يؤدي بدوره إلى حدوث خلل أو تسرب املاء. _ مالسلا تامولعم 4/30/2010 3:07:09 PM WD8704CJ-02732A-02_AR.indd 6 وبالنسبة ألنبوب الغسيل الداخلي فهو مصنوع بحيث يكون مضادا ً للصدأ .ولكن في حالة ترسب بعض املعادن الصغيرة مثل دبابيس الشعر في ذلك األنبوب لفترة زمنية طويلة ،فقد يتعرض األنبوب للصدأ نتيجة لذلك. • يُحظر أيضا ً ترك املاء الذي يحتوي على الكلور أو أي مواد كيميائية في األنبوب لفترة زمنية طويلة. • يُحظر استخدام املاء الذي يحتوي على املعادن بصورة منتظمة أو تركه في األنبوب لفترة زمنية طويلة .وفي حالة ظهور الصدأ على سطح األنبوب ،يُفضل تنظيف سطح األنبوب باستخدام سائل تنظيف (عادي) واستخدام قطعة قماش ناعمة أو قطعة إسفنج في تنظيفه( .يُحظر بأي حال من األحوال استخدام فرشاة معدنية في التنظيف) يجب عدم استخدام اجملفف في حالة استخدام مواد كيميائية للتنظيف. بالنسبة للغساالت التي حتتوي على فتحات تهوية بقاعدتها ،يجب جتنب سد السجاد أو أية عوائق أخرى لهذه الفتحات. استخدام مجموعة خراطيم جديدة وال تعيد استخدام اخلراطيم القدمية. مالسلا تامولعم _ 4/30/2010 3:07:09 PM WD8704CJ-02732A-02_AR.indd 7 احملتويات إعداد الغسالة 9فحص األجزاء 10استيفاء متطلبات التركيب 10مصدر الطاقة الكهربائية والتوصيل األرضي 10توريد املاء 11تصريف 11سطح األرضية 11درجة احلرارة احمليطة 11تركيب القنطرة أو اخلزانة 11تركيب الغسالة غسيل املالبس 17الغسيل للمرة األولى 17إرشادات أساسية 18استخدام لوحة التحكم 20التأمني ضد عبث األطفال 20إيقاف تشغيل الصوت 20تأجيل التوقف 20وظيفة التصريف فقط 21غسيل بالهواء 22استخدام دورة التجفيف 23غسيل املالبس باستخدام قرص حتديد الدورة 23غسيل املالبس يدويا ً 24دليل غسيل املالبس 25معلومات حول مسحوق الغسيل واملواد اإلضافية 25ما هو مسحوق الغسيل الذي ميكنك استخدامه 25درج مسحوق الغسيل 9 17 تنظيف الغسالة وصيانتها 26 استكشاف املشاكل وحلها ورموز املعلومات 29 جدول الدورة 31 امللحق 32 26تصريف املاء من الغسالة عند الطوارئ 26تنظيف األسطح اخلارجية 27تنظيف درج مسحوق الغسيل واجلزء الداخلي منه 27تنظيف مصفاة اخمللفات 28تنظيف املصفاة الشبكية املتصلة بخرطوم املاء 28إصالح جهاز غسالة متجمد 28تخزين الغسالة 29حتقق مما يلي إذا كانت الغسالة... 30رموز املعلومات 31جدول الدورة 32جدول العناية باألقمشة 32حماية البيئة 32إعالن التوافق 33املواصفات _ يوتحملا 4/30/2010 3:07:09 PM WD8704CJ-02732A-02_AR.indd 8 إعداد الغسالة تأكد من اتباع متخصص التركيبات لهذه اإلرشادات بدقة كي تعمل الغسالة بشكل صحيح ولتفادي حدوث إصابات أثناء الغسيل. أخرج الغسالة بحرص من الصندوق وتأكد من وجود كافة األجزاء املوضحة أدناه .في حالة تلف الغسالة أثناء عملية الشحن ،أو عدم استالمك لكافة األجزاء ،قم باالتصال بخدمة عمالء Samsungأو املوزع املعتمد لدى .Samsung 01إعداد الغسالة فحص األجزاء زراع اإلرخاء سطح الغسالة درج مسحوق الغسيل لوحة التحكم القابس باب الغسالة خرطوم التصريف مصفاة اخمللفات أقدام قابلة للتعديل حوض الغسيل أنبوب التصريف عند الطوارئ غطاء املصفاة الصواميل * أغطية فتحات املسامير خرطوم توريد املاء حامل اخلرطوم * أغطية فتحات املسامير :يعتمد عدد أغطية فتحات املسامير على حسب الطراز (من 3إلى 5أغطية). ةلاسغلا دادعإ _ 4/30/2010 3:07:13 PM WD8704CJ-02732A-02_AR.indd 9 إعداد الغسالة استيفاء متطلبات التركيب مصدر الطاقة الكهربائية والتوصيل األرضي لتفادي خطر حدوث حريق أو التعرض لصدمة كهربائية أو إصابة جسدية ،يجب أن تتم عملية توصيل األسالك والتوصيل األرضي وفقًا ألحدث نسخة من الالئحة الوطنية للكهرباء ،ANSI/FNPAرقم 70والقوانني والضوابط احمللية .يقع على عاتق مالك هذا اجلهاز مسؤولية توفير الصيانة الكهربائية الكافية. حتذير ممنوع استخدام كبالت إضافية. استخدم سلك التيار الكهربائي املرفق مع الغسالة فقط. عند اإلعداد لعملية التركيب ،تأكد أن سلك التيار الكهربائي يوفر: • قاطع دائرة كهربائية أو صمام كهربائي بقدره 220فولت ~ 240فولت و 50هرتز و 15أمبير • دائرة كهربائية فرعية لتشغيل الغسالة فقط يجب توصيل الغسالة مبأخذ أرضي بشكل صحيح .وفي حالة حدوث خلل أو تعطل في األداء ،يعمل التوصيل األرضي على تقليل خطورة التعرض لصدمة كهربائية وذلك بتوفير مسار أقل مقاومة للتيار الكهربائي. يتم تزويد الغسالة بسلك تيار كهربائي به ثالثة قوابس شوكية أرضية الستخدامها بشكل صحيح في املقبس األرضي املُركب بشكل صحيح. ال تقم بتوصيل السلك األرضي بخطوط مواسير السباكة البالستيكية ،أو خطوط الغاز ،أو مواسير املاء الساخن. فقد يؤدي التوصيل غير الصحيح للموصل األرضي اخلاص بالغسالة إلى حدوث صدمة كهربائية. استشر فني كهربائي مؤهل أو فني صيانة إذا لم تكن متأكدا ً من صحة التوصيل األرضي للغسالة .يحظر استخدام قابس آخر غير املرفق مع الغسالة .وفي حالة عدم مالءمته مع مأخذ التيار ،استعن بفني كهربائي مؤهل لتركيب مأخذ مناسب. توريد املاء يتم ملء الغسالة بشكل سليم عندما يكون ضغط املاء 800~ 50كيلوباسكال .قد يتسبب ضغط املاء األقل من 50كيلوباسكال في تلف صمام املاء مما يؤدي إلى عدم السماح بإغالقه كلي ًة .أو قد تستغرق الغسالة وقتًا أطول مما تسمح به عناصر التحكم مللئها ،مما ينتج عنه إيقاف تشغيل الغسالة( .مت تضمني نظام حتديد وقت ملء الغسالة في عناصر التحكم والذي مت تصميمه للحد من عمليات تدفق/فيضان املاء في حالة ارتخاء اخلرطوم الداخلي). يجب أن تكون صنابير املاء على بُعد 4أقدام ( 122سم) من اجلانب اخللفي للغسالة لتسهيل وصول خراطيم صنابير املاء املرفقة إلى الغسالة. تقوم معظم متاجر توريد املواسير ببيع خراطيم صنابير املاء مبختلف أطوالها التي تصل إلى 10أقدام ( 305سم). ميكنك تقليل مخاطر تسرب املاء أو تلوثه عن طريق: • تيسير وصول اخلراطيم إلى صنابير املاء. • إغالق الصنابير في حالة عدم تشغيل الغسالة. • قم بفحص دوري للتأكد من أن مثبتات اخلرطوم تسرب املاء. حتذير قم بفحص كافة التوصيالت املوجودة في صمام وصنابير املاء للتحقق ما إذا كانت هناك أية تسريبات قبل استخدام الغسالة للمرة األولى. _10ةلاسغلا دادعإ 4/30/2010 3:07:13 PM WD8704CJ-02732A-02_AR.indd 10 تصريف توصي Samsungباستخدام ماسورة رأسية يصل ارتفاعها إلى 18بوصة ( 46سم) .يجب توجيه خرطوم التصريف باستخدام مشبك خرطوم التصريف إلى اجتاه املاسورة الرأسية .يجب أن تكون املاسورة الرأسية كبيرة بدرجة كافية إلدخال القطر اخلارجي خلرطوم التصريف .يقوم املصنع بإرفاق خرطوم التصريف. يجب تثبيت الغسالة على سطح ثابت وصلب للحصول على أفضل أداء .قد حتتاج األسطح اخلشبية إلى تقويتها لتقليل االهتزاز و/أو األحمال غير املتزنة .يكون السجاد وأسطح البالط الناعمة مبثابة عوامل مساهمة في عمليات االهتزاز واحتمالية حترك الغسالة بشكل طفيف أثناء دورة التنشيف. ال تقم بتركيب الغسالة على أرضية أو بنية ضعيفة. 01إعداد الغسالة سطح األرضية درجة احلرارة احمليطة ال تقم بتركيب الغسالة في مناطق قد يتجمد فيها املاء ،حيث أن الغسالة حتتفظ دو ًما ببعض املاء في صمام املاء واملضخة وأجزاء من اخلرطوم .ميكن أن يتسبب املاء املتجمد املوجود في املواسير في إحلاق ضرر باألحزمة واملضخة واملكونات األخرى. تركيب القنطرة أو اخلزانة لتشغيل الغسالة بشكل آمن وسليم ،يجب توفير احلد األدنى من املساحات بالنسبة إلى ما يلي: اجلوانب 25 -مم اجلانب اخللفي 51 -مم اجلانب األمامي 465 -مم اجلانب العلوي 25 -مم في حالة تركيب الغسالة واجملفف معاً ،يجب أن يكون باجلانب العلوي للقنطرة أو اخلزانة فتحة هواء خالية قدرها 465مم على األقل. ال تتطلب الغسالة وحدها فتحة هواء بعينها. تركيب الغسالة اخلطوة رقم 1 اختيار مكان الغسالة قبل تركيب الغسالة ،تأكد من توفر ما يلي في املكان الذي قمت باختياره: • • • • • • سطح صلب ومستوي دون وجود سجاد أو بالط قد يعوق عملية التهوية مكان بعيد عن أشعة الشمس املباشرة تتوفر به تهوية كافية ال يصل إلى مرحلة التجمد (أقل من 32درجة فهرنهايت أو 0درجة مئوية) يكون بعي ًدا عن مصادر احلرارة مثل البترول أو الغاز تتوفر به مساحة كافية حتى ال يتم وضع الغسالة على سلك الطاقة ةلاسغلا دادعإ _11 4/30/2010 3:07:13 PM WD8704CJ-02732A-02_AR.indd 11 إعداد الغسالة اخلطوة رقم 2 إزالة مسامير الشحن قبل تثبيت الغسالة ،يجب إزالة جميع مسامير الشحن من اجلزء اخللفي للوحدة. .1قم بفك جميع املسامير بواسطة مفتاح الربط املرفق مع اجلهاز. .2امسك الصواميل بواسطة مفتاح الربط واسحبها من خالل اجلزء العريض للفتحة. كرر ذلك إلزالة كل مسمار. .3قم بتغطية جميع الفتحات باستخدام األغطية البالستيكية املرفقة مع اجلهاز. .4قم بحفظ صواميل الشحن في مكان بعيد آمن حيث قد حتتاج إلى نقل الغسالة إلى مكان آخر في املستقبل. حتذير قد تشكل مواد التعبئة خطورة على األطفال؛ لذلك احتفظ بكافة مواد التعبئة (األكياس البالستيكية واملواد املصنوعة من مادة البوليستيرين...الخ) بعيدا ً عن متناول األطفال. _12ةلاسغلا دادعإ 4/30/2010 3:07:15 PM WD8704CJ-02732A-02_AR.indd 12 اخلطوة رقم 3 ضبط استواء أرجل الغسالة عند تركيب الغسالة ،تأكد من توصيل سلك الطاقة وخرطوم توريد املاء وخرطوم التصريف بسهولة. 01إعداد الغسالة .1ضع الغسالة في املكان احملدد. .2اجعل الغسالة مستوية عن طريق لف األقدام املساوية إلى الداخل واخلارج يدويًا كما هو مطلوب. .3عند استواء الغسالة ،أحكم ربط الصماويل باستخدام مفتاح الربط املرفق مع الغسالة. اخلطوة رقم 4 توصيل املاء واخلرطوم توصيل خرطوم تزويد املاء .1استخدم مثبت الذراع الذي على شكل حرف Lاخلاص بخرطوم توريد املاء البارد ووصله إلى مدخل توريد املاء البارد املوجود في اجلانب اخللفي من الغسالة .وأحكم ربطه يدويًا. يجب توصيل أحد طرفي خرطوم توريد املاء بالغسالة وتوصيل الطرف اآلخر للخرطوم بصنبور املاء .ال جتذب خرطوم توريد املاء. إذا كان اخلرطوم قصيرا ً للغاية ،استبدله بخرطوم أطول يتحمل الضغط العالي. .2صل الطرف اآلخر خلرطوم توريد املاء البارد بصنبور املاء البارد وأحكم تثبيته يدويًا .ميكنك ،إذا لزم األمر ،إعادة توصيل خرطوم املاء بالغسالة من خالل إرخاء مثبت اخلرطوم ولفه وإعادة ربطه بإحكام. بالنسبة للطرازات احملددة املزودة مبدخل إضافي لتوريد املاء الساخن: .1استخدم مثبت الذراع الذي على شكل Lاألحمر اخلاص بخرطوم توريد املاء الساخن ووصله إلى مدخل توريد املاء الساخن املوجود في اجلانب اخللفي من الغسالة .وأحكم ربطه يدويًا. .2صل الطرف اآلخر خلرطوم توريد املاء الساخن بصنبور املاء الساخن وأحكم تثبيته يدويًا. .3استخدم قطعة على شكل حرف Yإذا أردت استخدام املاء البارد فقط. ةلاسغلا دادعإ _13 4/30/2010 3:07:18 PM WD8704CJ-02732A-02_AR.indd 13 إعداد الغسالة توصيل خرطوم توريد املاء (طرازات معينة) .1قم بإزالة احملول من خرطوم تزويد املاء. احملول خرطوم توريد املاء .2أوالً ،باستخدام مفك براغي من نوع “ ،”+قم بخلخلة املسامير األربعة املوجودة باحملول .ثم أخرج احملول واجعل اجلزء ( )2باجتاه السهم حتى تتواجد مسافة مقدارها 5مم بينهما. 5مم 1 2 .3قم بتوصيل احملول بصنبور املاء عن طريق ربط املسامير بإحكام مع ترك احملول يتدلى إلى أسفل. اجعل اجلزء ( )2باجتاه السهم ووصل ( )1و (.)2 صنبور املاء 2 1 .4صل خرطوم تزويد املاء باحملول .عند إرخاء اجلزء ( ،)3يتصل اخلرطوم باحملول تلقائيا ً محدثا ً صوت. بعد توصيل خرطوم توريد املاء باحملول ،تأكد من توصيله بشكل صحيح عن طريق سحب خرطوم توريد املاء ألسفل. 3 .5قم بتوصيل الطرف اآلخر من خرطوم توريد املاء بصمام دخول املاء املوجود باجلانب اخللفي من الغسالة .لف خرطوم توريد املاء في اجتاه عقارب الساعة. _14ةلاسغلا دادعإ 4/30/2010 3:07:23 PM WD8704CJ-02732A-02_AR.indd 14 .6قم بتشغيل مصدر توريد املاء وتأكد من عدم وجود تسريبات من صمام املاء أو الصنبور أو احملول .قم بتكرار اخلطوات السابقة ،في حالة تسريب املاء. حتذير ✗ إذا كان صنبور املاء من نوع برغي ،صل خرطوم توريد املاء إلى الصنبور كما هو مبني. 01إعداد الغسالة • ال تستخدم الغسالة في حالة تسريب املاء .فقد يتسبب ذلك في حدوث صعقة كهربائية أو إصابة جسدية. ✗ استخدم صنبور من النوع العادي لتوريد املاء .إذا كان الصنبور مربعا ً أو كبيرا ً جداً ،أزل احللقة الفاصلة قبل إدخال الصنبور في احملول. ةلاسغلا دادعإ _15 4/30/2010 3:07:24 PM WD8704CJ-02732A-02_AR.indd 15 إعداد الغسالة توصيل خرطوم التصريف ميكنك وضع نهاية خرطوم التصريف بثالث طرق: .1فوق حافة حوض الغسيل :يجب وضع خرطوم التصريف على ارتفاع يتراوح بني 60و 90سم .لإلبقاء على انثناء خرطوم التصريف، استخدم ماسك اخلرطوم البالستيكي املرفق .ثبت املاسك على اجلدار بواسطة خطاف أو ثبته في الصنبور بواسطة سلك أو حبل ملنع سقوط خرطوم التصريف على األرض. خرطوم التصريف 90 ~ 60سم حامل اخلرطوم .2في فرع أنبوب تصريف احلوض :يجب أن يكون فرع أنبوب التصريف فوق سباكة احلوض بحيث يكون طرف اخلرطوم على ارتفاع 60سم على األقل عن األرض. .3في أنبوب تصريف :توصي Samsungباستخدام أنبوب عمودي على ارتفاع 65سم؛ على أال يقل طوله عن 60سم وال يزيد عن 90سم. يتطلب خرطوم تصريف املاسورة الرأسية; • بحد أدنى لقطر الدائرة 5سم. • احلد األدنى لسعة اجلرف 60متر في الدقيقة. 90 ~ 60سم اخلطوة رقم 5 تشغيل الغسالة قم بتوصيل سلك التيار الكهربائي بحيث يكون منفذ تيار كهربائي معتمد وبقدرة 230فولت 50هرتز محمي بصمام كهربائي 15أمبير أو قاطع دائرة كهربائية مماثل له( .ملزيد من املعلومات حول متطلبات التوصيل الكهربائي والتوصيل األرضي ،راجع صفحة رقم ).10 _16ةلاسغلا دادعإ 4/30/2010 3:07:28 PM WD8704CJ-02732A-02_AR.indd 16 غسيل املالبس مع الغسالة اجلديدة من ،Samsungيقوم اجلزء األكثر صالبة بتحديد الكمية التي يجب غسلها أوالً. الغسيل للمرة األولى .1 .2 .3 .4 اضغط على زر ( Powerطاقة). أضف كمية قليلة من مسحوق الغسيل في اجلزء اخملصص له الغسيل. قم بتزويد الغسالة باملاء. اضغط على الزر ( Start/Pauseتشغيل/إيقاف مؤقت). 02غسيل املالبس قبل غسل املالبس للمرة األولى ،يجب تشغيل اجلهاز دورة كاملة (أي بدون مالبس). في درج مسحوق يؤدي ذلك إلى إزالة املاء املتبقي في الغسالة نتيجة التشغيل االختباري الذي قامت به الشركة املصنعة للجهاز. حجيرة حجيرة حجيرة :مسحوق للغسيل األولي أو النشا. :مسحوق الغسيل لدورة الغسل الرئيسية ومواد تنقيه املاء ومواد ما قبل النقع ومادة التبييض ومواد إزالة البقع. :املواد اإلضافية ،مثل مكون أو منعم األقمشة (ال تتجاوز احلافة السلفية (احلد األقصى) لـ “)”A إرشادات أساسية .1قم بوضع املالبس في الغسالة. حتذير .2 .3 .4 .5 .6 ال تتجاوز الوزن احملدد للغسالة .لتحديد سعة الوزن لنوع املالبس التي ترغب في غسلها ،راجع اجلدول املوجود في صفحة رقم .24 • تأكد أن املالبس غير عالقة بالباب ،حيث قد يؤدي ذلك إلى تسرب املاء. • قد يتبقي مسحوق الغسيل في اجلزء املطاطي األمامي للغسالة بعد دورة الغسيل .قم بإزالة أي مسحوق متبقي ،ألن ذلك قد يسبب تسرب املاء. • ال تقم بغسل العناصر العازلة للماء. أغلق الباب حتى يثبت. قم بتشغيل الغسالة. قم بإضافة املسحوق واملواد اإلضافية إلى درج التوزيع. حدد الدورة واخليارات املناسبة لكمية املالبس التي مت إضافتها. سيضيء مؤشر الغسيل وسيظهر وقت الدورة احملدد على الشاشة. اضغط على الزر ( Start/Pauseتشغيل/إيقاف مؤقت). الملا ليسغ _17 4/30/2010 3:07:31 PM WD8704CJ-02732A-02_AR.indd 17 غسيل املالبس استخدام لوحة التحكم ١٢ ١١ ١٠ ٩ ٨ 1 لوحة العرض الرسومية الرقمية 2 قرص حتديد الدورة ٧ ٦ ٥ ١ ٤ ٣ ٢ ١ تعرض الوقت املتبقي لدورة الغسيل وكافة املعلومات اخلاصة بالدورة ورسائل اخلطأ. اختيار نوع التدوير وسرعة التنشيف للدورة. ملزيد من املعلومات ،راجع “غسيل املالبس باستخدام قرص حتديد الدورة”( .راجع صفحة )23 ( Cottonقطن) -أو املالبس القطنية وأغطية السرير واملفارش الكتانية ،واملالبس الداخلية واملناشف والقمصان متوسطة أو خفيفة االتساخ...الخ ( Syntheticsاصطناعي) -البلوزات والقمصان متوسطة أو خفيفة االتساخ وغيرها من املالبس املصنوعة من البوليستر (الديولني والتريفيرا) ومادة البوليامايد (البيرلون والنيلون) أو األنسجة الصناعية األخرى املشابهة. ( Denimاجلينز) -يضمن وجود مستوى ماء أعلى في دورة الغسيل األساسية والشطف اإلضافي عدم وجود أي بقايا من مسحوق الغسيل في مالبسك. ( Sports Wearمالبس رياضية) -املالبس املقاومة للماء أو ذات الطبقة العازلة للمحافظة على نظافة وجمال مظهرها. ( Delicatesأنسجة رقيقة) -األقمشة اخلفيفة وحماالت الصدر واملالبس النسائية والفساتني والقمصان والبلوزات .للحصول على أفضل النتائج ،استخدم مسحو ًقا سائالً. ( Woolصوف) -تستخدم هذه الدورة لغسل املالبس الصوفية التي يسمح بوضعها في الغسالة فقط .يجب أن تقل احلمولة عن 2.0كجم. • تعمل دورة ( Woolالصوف) على غسيل املالبس باستخدام حركات اهتزازية خفيفة .أثناء عملية الغسيل ،تستمر عمليتا االهتزاز اخلفيف والنقع حلماية األلياف الصوفية من االنكماش /التلف وللحصول على نظافة فائقة بسهولة .ال تعد عملية التوقف هذه مشكلة. • يُنصح باستخدام مسحوق تنظيف عادي لدورة ( Woolالصوف) ،للحصول على نتائج غسيل رائعة ولعناية فائقة باأللياف الصوفية. مت اعتماد دورة غسيل املالبس الصوفية في هذه الغسالة من ِقبل Woolmarkلغسيل منتجات Woolmarkالتي ميكن وضعها في الغسالة شريطة أن يتم غسيل املنتجات وفقا ً للتعليمات الواردة في امللصق املوجود على املالبس والتعليمات الصادرة من الشركة املصنّعة لهذه الغسالة ( .M0509رقم الشهادة الصادرة عن شركة IWS NOM INEEاحملدودة) ( Handwashغسيل يدوي) -دورة غسيل بسيطة كما لو كنت تغسل املالبس باليدين. ( Air Washالغسيل بالهواء) -تُعد هذه الدورة مالئمة إلزالة الروائح الكريهة .قم بلف قرص اختيار الدورة للتبديل بني أوضاع التشغيل التالية. (( Deodorizationإزالة الروائح الكريهة) ← ( Sanitizationالتعقيم)) • ( Deodorizationإزالة الروائح الكريهة) -تعمل على إزالة الروائح الكريهة من الغسيل • ( Sanitizationالتعقيم) -يقوم بإزالة الروائح الكريهة وتعقيم الغسيل عن طريق إجراء الغسيل بالهواء درجة حرارة عالية. ( Dryingجتفيف) -حدد خيار جتفيف الغسيل تلقائ ًيا عن طريق التعرف على كمية الغسيل ووزنه. _18الملا ليسغ 4/30/2010 3:07:33 PM WD8704CJ-02732A-02_AR.indd 18 3 زر حتديد ( PREWASHغسيل أولي) اضغط على هذا الزر لتحديد غسيل أولي .وتتوفرخاصية الغسيل األولي مع الدورات التالية فقط: ( Cottonقطن) و ( Syntheticsاصطناعي) و ( Sports Wearمالبس رياضية) و ( Water Savingتوفير املاء). 4 زر حتديد ( DELAY ENDتأجيل التوقف) اضغط على هذا الزر بشكل متكرر للتبديل بني خيارات خاصية تأجيل التوقف املتوفرة (من 3ساعات إلى 19ساعة بواقع زيادة ساعة واحدة). تشير الساعة املعروضة إلى وقت انتهاء دورة الغسيل. 5 زر حتديد ( TEMPERATUREدرجة احلرارة) اضغط على هذا الزر بشكل متكرر للتبديل بني خيارات درجة حرارة املاء املتوفرة: (ماء بارد ˚30مئوية و ˚40مئوية و ˚60مئوية و ˚95مئوية). 6 زر حتديد ( RINSEالشطف) اضغط على هذا الزر إلضافة دورات شطف إضافية .احلد األقصى لعدد دورات الشطف هو خمسة. 7 زر حتديد ( SPINتنشيف) 8 زر حتديد ( DRYINGجتفيف) 9 زر حتديد INTENSIVE WASH (غسيل مكثف) اضغط على هذا الزر مع املالبس املتسخة بشدة والتي حتتاج إلى الغسيل بكثافة .يتم زيادة مدة الدورة لكل الدورات. 10 زر حتديد SILVER WASH (غسيل بالفضة) يتم توفير ماء الغسيل بالفضة أثناء دورة الغسيل وكذلك أثناء دورة الشطف األخيرة مما يعمل على إزالة البكتريا وتوفير احلماية ضد منو البكتريا ملدة تصل إلى شهر واحد. 11 زر حتديد START/PAUSE (تشغيل/إيقاف مؤقت) اضغط إليقاف الدورة مؤقتا ً وإعادة تشغيلها. 12 الزر ( POWERطاقة) اضغط على هذا الزر مرة واحدة لتشغيل الغسالة ،واضغط عليه مرة أخرى إليقاف تشغيلها .في حالة ضغط زر تشغيل الغسالة وتركها ملدة تزيد عن 10دقائق دون ضغط أي زر ،يتم إيقاف تشغيلها تلقائ ًيا. 02غسيل املالبس خصيصا لتمكينك من غسل املالبس بفاعلية ( Water Savingتوفير املاء) -لقد مت تصميم هذه الدورة ً بأقل كمية من املاء .يوصى باختيار دورة ( Water Savingتوفير املاء) ،مع درجة حرارة 40درجة مئوية وغسيل/جتفيف مكثف وجتفيف بسرعة 1400لفة في الدقيقة حلمولة املالبس القطنية متوسطة االتساخ. ’Quick 29(’ 29سريع) -للمالبس خفيفة االتساخ التي حتتاجها بسرعة. ( Spinتنشيف) -إجراء دورة جتفيف إضافية إلزالة املزيد من املاء. ( Rinse + Spinشطف +تنشيف) -للمالبس التي حتتاج إلى الشطف فقط أو إلضافة منعم األقمشة الذي يتم إضافته أثناء الشطف فقط. للتصريف فقط -قم بلف قرص اختيار الدورة إلى وضع تنشيف ،اضغط على زر ( Spinتنشيف) ثم اضغط على زر ( Start/Pauseتشغيل/إيقاف مؤقت) لتصريف املياه. اضغط على هذا الزر بشكل متكرر للتبديل بني سرعات دورة التجفيف املتوفرة. WD8704 , 1400 ,1200 ,800 ,400 ,لفة في الدقيقة WD8702 , 400 ,و 800و 1200و 1400لفة في الدقيقة WD8700 , 400 ,و 600و 800و 1000لفة في الدقيقة “بدون تنشيف ” -تبقى املالبس في احلاوية دون تشغيل دورة التجفيف بعد تصريف املاء النهائي. ” -يبقى الغسيل منقو ًعا في املاء أثناء عملية الشطف األخيرة .يجب تشغيل “إيقاف الشطف دورة تصريف أو تنشيف قبل أن تتمكن من إخراج املالبس. بالضغط على هذا الزر ،ميكنك التبديل بني اخليارات التالية. ( 30دقيقة← . ← مدة التجفيف ← كي ← درجة حرارة منخفضة خزانة 1دقيقة 1:30 ← .دقيقة ← .دقيقتان 2:30 ← .دقيقة 3 ← .دقائق 3:30 ← .دقيقة 4 ← .دقائق← . 4:30دقيقة ← ).خزانة “( Cup Boardخزانة) ” -استخدم هذه الدورة لتجفيف املالبس مثل املالبس القطنية والداخلية واملالبس املصنوعة من الكتان. “( Low Tempدرجة حرارة منخفضة) ” -تقوم هذه الدورة بحماية املالبس احلساسة للحرارة حتت درجة جتفيف منخفضة. “( Ironكي) ” -يعمل هذا اخليار على إنهاء دورة التجفيف في حالة رطبة بقدرٍ يتالءم مع الكي. “( Time Dryمدة التجفيف) ” -يعمل هذا اخليار على جتفيف الغسيل في الفترة الزمنية احملددة. • يجب جتنب غسيل املالبس التي قد ال ميكن جتفيفها حيث أنها قد تتعرض للتشوه حتى في درجات احلرارة املنخفضة. • مت اعتماد وظائف خزانة و درجة حرارة منخفضة و الكي تتعرف خيارات التجفيف على وزن الغسيل حتى يتم عرض وقت دقيق لعملية التجفيف وإجرائها بشكل كامل. • قد تختلف ظروف التجفيف باختالف نوع الغسيل وحجمه. الملا ليسغ _19 4/30/2010 3:07:39 PM WD8704CJ-02732A-02_AR.indd 19 غسيل املالبس للتأمني ضد عبث لألطفال ﱢ متكنك وظيفة قفل لﻸطفال من قفل األزرار حتى ال يكون هناك إمكانية لتغيير دورة الغسيل التي قمت باختيارها. للتشغيل/عدم للتشغيل إذا كنت ترغب في تشغيل وظيفة “تأمني ضد األطفال” أو عدم تشغيلها ،اضغط على الزرين ( Temp.درجة لحلرلرة) و ( Rinseشطف) في وقت واحد ملدة 3ثوان .ستضيء عالمة “( Child Lockللتأمني ضد عبث لألطفال) ” عند تشغيل هذه امليزة. ميكن استخدام زر ( Powerطاقة) فقط عند تشغيل وظيفة التأمني ضد عبث األطفال .يستمر تشغيل وظيفة التأمني ضد عبث األطفال حتى بعد تشغيل الغسالة وإيقاف تشغيلها أو بعد فصل توصيل سلك التيار الكهربائي وإعادة توصيله. ﺛولن إيقاف تشغيل للصوا ميكن تديد وظيفة إيقاف تشغيل الصوت مع كافة الدورات .عند تديد هذه الوظيفة ،يتم إيقاف تشغيل الصوت لكافة الدورات .حتى في حالة تشغيل الطاقة أو إيقاف تشغيلها بشكل متكرر ،ال يتغير اإلعداد الذي مت اختياره. للتشغيل/عدم للتشغيل إذا تريد تشغيل وظيفة إيقاف تشغيل الصوت ،اضغط على ( Spinتنشيف) و ( Dryingجتفيف) في نفس الوقت ملدة 3ثوان .ستتم إضاءة عالمة “( Sound Offإيقاف تشغيل للصوا) ” عندما يتم تشغيل هذه الوظيفة. ﺛولن تأجيل للتوقف ميكنك ضبط الغسالة إلنهاء عملية الغسيل تلقائيا ً في وقت الحق ،قم باختيار تأجيل الوقت بني 3و 19ساعة (بواقع زيادة ساعة واحدة) .تشير الساعة املعروضة إلى الوقت الذي يتم االنتهاء فيه من عملية الغسيل. .1ميكنك ضبط الغسالة تلقائيا ً أو يدويا ً حسب نوع املالبس التي تريد غسلها. .اضغط على الزر ( Delay Endتأجيل للتوقف) بشكل متكرر حتى تصل إلى وقت التأجيل املطلوب. .اضغط على الزر ( Start/Pauseتشغيل/إيقاف مؤقت) .سيضيء مؤشر “( Delay Endتأجيل للتوقف) ” وتبدأ الساعة بالعد التنازلي حتى تصل إلى الوقت احملدد. .إللغاء وظيفة تأجيل التوقف ،اضغط على الزر( Powerطاقة) ثم قم بتشغيل الغسالة من جديد. وﻇيفة للتصريف فقط عندما ترغب في تصريف املياه من الغسالة ،اتبع التعليمات الواردة أدناه. .1 . . . . اضغط على زر ( Powerطاقة). قم بلف قرص اختيار الدورة إلى وضع تنشيف. اضغط على زر ( Spinتنشيف) مرة واحدة حتى يتم تتوقف إشارة عدد اللفات في الدقيقة. ثم “ ”1تظهر في الوقت احملدد في املركز. اضغط على الزر ( Start/Pauseتشغيل/إيقاف مؤقت). _0غسيل لزلبس 4/30/2010 3:07:45 PM WD8704CJ-02732A-02_AR.indd 20 غسيل بالهواء الوضع مدة الدورة ( Deodorizationإزالة الروائح الكريهة) 29دقيقة. ( Sanitizationالتعقيم) 59دقيقة. 02غسيل املالبس تتيح وظيفة “غسيل بالهواء” غسل املالبس دون استخدام ماء بفضل نظام التهوية القوي .تتضمن املالبس التي ميكن تنظيفها كال من املعاطف الصوفية واملالبس القطنية والبلوزات واجلواكت والسترات( .قطعتان أو أقل (أقل من 1كجم)) .1افتح الباب ،ضع الغسيل في الغسالة ثم أغلق الباب. .2اضغط على زر ( Powerطاقة). .3اختر ( Air Washغسيل بالهواء) عن طريق لف قرص اختيار الدورة. • في كل مرة تقوم فيها بالضغط على الزر ،يتبدل وضع التشغيل بالتسلسل التالي: ( Deodorizationإزالة الروائح الكريهة) و ( Sanitizationالتعقيم)..... • عند اختيار أحد هذه اخليارات ،ال ميكن اختيار زر أخر حيث ميكنك فقط حتديد تأجيل التوقف حيث يستغرق ما بني 3:00إلى .19:00 .4أغلق الباب واضغط على الزر ( Start/Pauseتشغيل/إيقاف مؤقت). • ال ميكن اختيار ( Air Washغسيل بالهواء) عند وجود ماء في احلوض .قم بتصريف املاء واختر ( Air Washغسيل بالهواء). • اضغط على الزر ( Start/Pauseتشغيل/إيقاف مؤقت) أو ( Powerطاقة) إلخراج الغسيل. • ميكن استخدام عطر أو أوراق مجففة مع برنامج “التنظيف بالبخار” إلضافة رائحة إلى الغسيل الذي مت تنظيفه (ورقة واحدة لكل قطعة غسيل أو قطعتان). جتنب إجراء التنظيف بالبخار مع املالبس التالية: • • • • • • • • املالبس احلساسة املصنوعة من اجللد أو املنك أو الفرو أو احلرير ،الخ املالبس الداخلية ذات األطرف املعقودة ووسائد الدمى التي حتتوي على “غراء” والسترات التي ميكن أن تفقد زينتها. املالبس التي حتتوي أطرافها على أزرار لتجنب كسرها. املالبس التي حتتوي على نشا لتجنب تشوهها. املفروشات الثقيلة مثل الوسائد اخلشبية (املزودة مبكان إلراحة الرقبة) الوسائد أو البطاطني اململوءة بالبالستيك أو القش بدال ً من القطن البطاطني الكهربائيةالبطاطني املصنوعة من الفرو البطاطني كبيرة احلجم الوسائد الليثية الملا ليسغ _21 4/30/2010 3:07:45 PM WD8704CJ-02732A-02_AR.indd 21 غسيل املالبس استخدام دورة التجفيف راجع امللصق اخلاص بسعة التجفيف وتأكد من وضع املالبس في املستوى الذي يقل عن اخلط احملدد اخملصص للمالبس التي مت جتفيفها التي تبلغ حمولتها 5.0كجم. .1افتح باب الغسالة ،وضع املالبس ثم أغلق الباب مرة أخرى. .2اضغط على الزر ( Powerطاقة) ثم اضغط على الزر ( Dryingجتفيف). :سيتم حتديد الدورة القياسية تلقائ ًيا ميكن حتديد خيار التجفيف فقط في دورات مثل ( cottonقطن) أو ( syntheticsاصطناعي) أو ( denimجينز) أو ( sports wearمالبس رياضية). .3قم بتحديد الزر ( Dryingجتفيف) كما يلي. برامج التجفيف • في كل مرة يتم فيها الضغط على هذا الزر ،سيتم حتديد نوع التجفيف بشكل متكرر بالترتيب التالي: ( 30دقيقة ← .دقيقة واحدة← . ← مدة التجفيف ← كي ← درجة حرارة منخفضة خزانة 1:30دقيقة ← .دقيقتان 2:30 ← .دقيقة 3 ← .دقائق 3:30 ← .دقيقة 4 ← .دقائق 4:30 ← .دقيقة ← ).خزانة 3.5كجم 160دقيقة. 2.0كجم 160دقيقة. يتم ترك املالبس رطبة جزئ ًيا حتى يتسنى كيها بسهولة. 2.0كجم 30دقيقة. ميكنك حتديد مدة التجفيف املالئمة على أساس نوع القماش والكمية ونسبة الرطوبة. 5.0كجم 270دقيقة نوع التجفيف معلومات ) قياسي :جتفيف املالبس. خزانة ( التجفيف اآللي احلمل األقصى مدة (احلمل األقصى) درجة حرارة منخفضة ( الكي ( مدة التجفيف ( ) ) جتفيف املالبس حتت درجة حرارة ) منخفضة وذلك حلماية نوع قماش املالبس. • يتم عرض “مدة التجفيف” تلقائ ًيا عن طريق استشعار وزن املالبس قبل التنشيف لزيادة تأثر التنشيف. • بالنسبة للغسيل األقل من 3.5كجم ،استخدم خاصية التجفيف اآللي .بالنسبة للغسيل الذي يزن أكثر من 3.5كجم، الرجاء استخدم خاصية وقت التجفيف. • إذا مت حتديد كالً من التنشيف ودورات التجفيف ،فإنه يتم حتديد سرعة اجملفف تلقائ ًيا لتعزيز كفاءة التجفيف. • عند استخدامك دورة التجفيف ،تأكد من أن صمام توريد املاء مفتوح. .4ضع مقدارا ً مالئما ً من املسحوق وملني املالبس في درج املسحوق ثم أغلقه مرة أخرى. .5اضغط على الزر ( Start/Pauseتشغيل/إيقاف مؤقت). :يتم إجراء وظيفة مثلى تلقائ ًيا بد ًءا من الغسيل وحتى التنشيف. • ال ميكن تبديل الدورة احملددة بعد بدء التنشيف. • إذا قمت بتحديد وظيفة “التجفيف” ،سيتم ضبط كثافة “التنشيف” على “عالي” في الوضع االفتراضي لزيادة تأثير التجفيف. • في حالة عدم توريد ماء بارد ،ال يتم إجراء التجفيف. • إذا لم تقم بإخراج املالبس من احلوض بعد انتهاء التجفيف ،سيتم إجراء وظيفة “احلماية من الكرمشة” ملدة 30دقيقة تقري ًبا مع عرض [إنهاء] .إلخراج املالبس :اضغط أوال ً على الزر ( Start/Pauseتشغيل/إيقاف مؤقت) أو ( Powerطاقة) وأخرج املالبس. • إذا كنت تريد إجراء التجفيف بعد الغسيل باليد ،حدد كل من ( Spinتنشيف) و ( Dryingجتفيف) في نفس الوقت. _22الملا ليسغ 4/30/2010 3:07:46 PM WD8704CJ-02732A-02_AR.indd 22 غسيل املالبس باستخدام قرص حتديد الدورة تتاح خاصية ( Pre-washغسيل أولي) عند حتديد الدورات( Cotton :قطن) و ( Syntheticsاصطناعي) و ( Baby Careمالبس أطفال) و ( Water Savingتوفير املاء) .ويعد الغسيل األولي ضروريا ً فقط في حالة االتساخ الشديد للمالبس. .7استخدم قرص حتديد الدورة لتحديد الدورة املناسبة وفقا ً لنوع املادة : ( Cottonقطن) و ( Syntheticsاصطناعي) و ( Sports Wearمالبس رياضية) و ( Delicatesأنسجة رقيقة) و ( Woolصوف) و ( Hand Washغسيل يدوي) و ( Water Savingتوفير املاء) و ’Quick 29(’ 29سريع) .ستضاء املؤشرات املرتبطة على لوحة التحكم. .8في هذا الوقت ،ميكنك التحكم في درجة حرارة عملية الغسيل وحجم الشطف وسرعة التنشيف ووقت التأجيل بالضغط على زر اخليار املناسب. .9اضغط على الزر ( Start/Pauseتشغيل/إيقاف مؤقت) وعندها تبدأ الغسالة في العمل .يضيء مؤشر العملية ويظهر الوقت املتبقي للدورة على الشاشة. 02غسيل املالبس تتيح الغسالة اجلديدة غسيل املالبس بسهولة ،باستخدام نظام “التحكم الذكي” األوتوماتيكي من .Samsungعند اختيار أحد برامج الغسيل ،تقوم الغسالة بضبط درجة احلرارة ووقت الغسل وسرعات الغسيل املناسبة. .1افتح صنبور املاء. .2اضغط على زر ( Powerطاقة). .3افتح الباب. .4ضع املالبس قطعة بقطعة في احلاوية دون جتاوز سعتها. .5أغلق الباب. .6أضف مسحوق الغسيل ومنعم القماش ومسحوق الغسيل األولي (إذا لزم األمر) في احلجيرات اخلاصة به. خيار اإليقاف املؤقت من املمكن إضافة/إزالة قطع املالبس في غضون 5دقائق من بدء الغسيل. .1اضغط على الزر ( Start/Pauseتشغيل/إيقاف مؤقت) إللغاء قفل الباب. ال ميكن فتح الباب عندما تكون درجة حرارة املاء عالية جدا ً أو مستوى املاء عالي جداً. .2اضغط على الزر ( Start/Pauseتشغيل/إيقاف مؤقت) إلعادة تشغيل الغسالة. عند انتهاء الدورة: بعد انتهاء دورة الغسيل بالكامل ،يتم إيقاف الغسالة تلقائ ًيا. .1افتح الباب. .2أخرج املالبس. غسيل املالبس يدوياً ميكنك غسيل املالبس يدويا ً دون استخدام قرص حتديد الدورة. .1قم بتشغيل مصدر توريد املاء. .2اضغط على زر ( Powerطاقة) املوجود في الغسالة. .3افتح الباب. .4ضع املالبس قطعة بقطعة في احلاوية دون جتاوز سعتها. .5أغلق الباب. .6أضف مسحوق الغسيل ،وإذا لزم األمر ،أضف منعم األقمشة أو مسحوق الغسيل األولي في احلجيرات املناسبة. .7اضغط على الزر ( Temp.درجة احلرارة) لتحديد درجة احلرارة املطلوبة( .ماء بارد و ˚30مئوية و ˚40مئوية و ˚60مئوية و ˚95مئوية) .8اضغط على الزر ( Rinseشطف) لتحديد العدد املطلوب لدورات الشطف. احلد األقصى لعدد دورات الشطف هو خمسة. يتم زيادة مدة الغسيل وفقا ً لعدد الدورات. .9اضغط على الزر ( Spinتنشيف) لتحديد سرعة التجفيف. تسمح لك وظيفة إيقاف الشطف بإخراج املالبس التي ال تزال مبتلة من الغسالة. :إيقاف الشطف ) ( :بدون تنشيف, .10اضغط على الزر ( Delay Endتأجيل التوقف) بشكل متكرر للتنقل بني خيارات تأجيل التوقف املتوفرة بني ( 3إلى 19ساعة بإمكانية زيادة ساعة واحدة) .تشير الساعة املعروضة إلى الوقت الذي يتم االنتهاء فيه من عملية الغسيل. .11اضغط على الزر ( Start/Pauseتشغيل/إيقاف مؤقت) وعندها يبدأ تشغيل الدورة. الملا ليسغ _23 4/30/2010 3:07:46 PM WD8704CJ-02732A-02_AR.indd 23 غسيل املالبس دليل غسيل املالبس اتبع هذه التعليمات البسيطة للحصول على مالبس أكثر نظافة وأكثر فاعلية. قم بفحص بطاقة العناية املوجودة على املالبس دوما ً قبل الغسيل. افرز املالبس واغسلها وفقاً للمعايير التالية: • بطاقة العناية :افرز املالبس إلى أقطان وألياف متنوعة وأقمشة صناعية ومالبس حريرية وأصواف وحرير صناعي. • اللون :فم بفصل املالبس البيضاء عن املالبس امللونة .اغسل املالبس اجلديدة امللونة كل على حدة. • احلجم :يعمل وضع املالبس مبختلف أحجامها في مرة واحدة على حتسني عملية الغسيل. • رقة امللمس :اغسل املالبس الرقيقة كل على حدة ،باستخدام الدورة ( Delicateأنسجة رقيقة) للحصول على مالبس صوفية وستائر ومالبس حريرية نقية تبدو جديدة .افحص العالمات املوجودة باملالبس التي تريد غسلها أو راجع جدول العناية باألقمشة في امللحق. إفراغ اجليوب قم بإفراغ كافة جيوب املالبس قبل كل عملية غسيل .حيث ميكن أن تتسبب األشياء الصغيرة والصلبة ذات األشكال غير املنتظمة مثل العمالت املعدنية والشفرات والدبابيس وماسكات الورق في تلف الغسالة .ال تقم بغسل املالبس املزودة بإبزميات أو أزرار كبيرة احلجم أو األشياء املعدنية األخرى ثقيلة الوزن. قد تتسبب املعادن املستخدمة في املالبس في تلفها وتلف احلوض .اقلب املالبس املزينة باألزرار واملطرزة على ظهرها قبل غسلها .إذا تركت إبزميات السراويل واجلواكت مفتوحة أثناء الغسيل ،فإن هذا قد يتسبب في تلف سلة التنشيف .يجب غلق اإلبزميات وتثبيتها بخيط قبل الغسيل. قد تتشابك املالبس ذات اخليوط الطويلة مع مالبس أخرى وقد يؤدي ذلك إلى تلف هذه املالبس .احرص على تثبيت اخليوط قبل بدء الغسيل. الغسيل األولي للمالبس القطنية تقدم لك الغسالة اجلديدة باستخدام مساحيق الغسيل احلديثة ،أفضل نتائج لعمليات الغسيل ،ومن ثم فهي تساعدك على توفير الطاقة الكهربائية والوقت واملاء واملسحوق .لكن إذا كانت املالبس القطنية شديدة االتساخ ،استخدم الغسيل األولي مع مسحوق الغسيل الذي يحتوي على البروتني. حتديد سعة وزن املالبس ال تتجاوز الوزن احملدد للغسالة حيث يؤدي ذلك إلى احلصول على نتائج غير مرضية .استخدم اجلدول التالي لتحديد سعة الوزن لنوع املالبس التي تقوم بغسلها. نوع القماش سعة الوزن الطراز WD8704/ WD8702/ WD8700 ( Cottonقطن) متوسط/خفيف االتساخ -شديدة االتساخ 8.0كجم ( Syntheticsاصطناعي) 3.0كجم ( Denimجينز) 3.0كجم ( Sports Wearمالبس رياضية) 2.5كجم ( Delicatesأنسجة رقيقة) 2.5كجم ( Woolصوف) 2.0كجم • في حالة عدم توازن املالبس (يضيء “ ”UEعلى الشاشة) ,وفي هذه احلالة ،أعد توزيع املالبس. حيث يؤدي عدم توازن املالبس إلى تقليل فعالية دورة التنشيف. • عند غسيل املفارش أو األحلفة ،قد تطول مدة الغسيل أو تقل فعالية عملية التجفيف. _24الملا ليسغ 4/30/2010 3:07:46 PM WD8704CJ-02732A-02_AR.indd 24 تأكد من إدخال حماالت الصدر (التي ميكن غسلها في املاء) في شبكة غسيل (يتم شراؤها بشكل منفصل). • قد تنكسر األجزاء املعدنية املوجودة في حماالت الصدر مما قد يؤدي إلى تلف الغسيل .لذا يجب عليك أن تتأكد من وضعهم داخل شبكة غسيل جيدة. • قد تتعلق املالبس الصغيرة واخلفيفة بالباب مثل اجلوارب والقفازات واملنسوجات واملناديل. لذا قم بوضعهم داخل شبكة غسيل جيدة. 02غسيل املالبس تنبيه ال تقم بغسل شبكة الغسيل وحدها دون وجود مالبس بها .فقد يؤدي ذلك إلى حدوث اهتزازات غير طبيعية للغسالة مما قد يؤدي إلى حتريكها من مكانها ووقوع حوادث ينتج عنها إصابات. معلومات حول مسحوق الغسيل واملواد اإلضافية ما هو مسحوق الغسيل الذي ميكنك استخدامه يعتمد نوع مسحوق الغسيل الذي تستخدمه على نوع القماش (القطن أو األلياف الصناعية أو األنسجة الرقيقة أو الصوف) ،واأللوان ودرجة حرارة املاء ودرجة االتساخ .استخدم دوما ً مسحوق الغسيل ذا “الرغوة القليلة” املص َّمم خصيصا ً للغساالت األوتوماتيكية. اتبع توصيات الشركة املصنعة ملسحوق الغسيل وفقًا لوزن املالبس ودرجة االتساخ ودرجة نقاء املاء في منطقتك .وإذا لم تكن تعرف ما إذا كان املاء نق ًيا أم ال في منطقتك ،اتصل بالهيئة املسؤولة عن املاء. ال تستخدم منظف صلب أو خشن ألنه قد يتبقي في دورة الشطف .ألن ذلك قد يتسبب في أداء الغسالة لدورة الشطف بشكل غير صحيح.أو يتسبب في إعاقة تدفق املاء. الرجاء مالحظة التعليمات عند استخدام دورة “الصوف”. • استخدم مسحو ًقا سائالً جيدا ً لغسيل الصوف فقط. • فعند استخدامك مسحو ًقا بودرة ،فقد يترك أثرًا على الغسيل ويتسبب في تلف الصوف. درج مسحوق الغسيل حتتوى الغسالة على حجيرات منفصلة لتوزيع املسحوق ومنعم األقمشة .قم بإضافة كافة املواد اإلضافية اخلاصة بتنظيف املالبس إلى احلجيرة املناسبة قبل بدء تشغيل الغسالة. ال تقم بفتح درج املسحوق أثناء تشغيل الغسالة. .1اسحب درج مسحوق الغسيل املوجود على اجلانب األيسر من لوحة التحكم. .2قم بإضافة كمية من مسحوق الغسيل املوصى به مباشرة في حجيرة املسحوق قبل تشغيل الغسالة. .3قم بإضافة الكمية املوصى بها من منعم األقمشة في احلجيرة اخلاصة به لزم األمر. تنبيه املنعم ال تقم بإضافة أي منظف مسحوق/سائل إلى حجيرة ّ إذا . .4عند استخدام خيار الغسيل األولي ،قم بإضافة الكمية املوصى بها من مسحوق الغسيل في حجيرة الغسيل األولي . ال تستخدم أنواع املساحيق التالية عند غسيل املالبس كبيرة احلجم. • مساحيق الغسيل التي تكون على شكل ألواح أو أقراص • املساحيق التي تكون على شكل كرة أو شبكة أقصى حد يجب إذابة منعم األقمشة املركز أو السميك بقليل من املاء قبل صبه في درج التوزيع (ملنع إعاقة تدفق املاء). منعم منعم األقمشة عند غلق درج املنظف بعد إضافة ّ جتنب عدم تدفق ّ األقمشة بداخل حجيرة مسحوق الشطف. الملا ليسغ _25 4/30/2010 3:07:50 PM WD8704CJ-02732A-02_AR.indd 25 تنظيف الغسالة وصيانتها يعمل حفظ الغسالة نظيفة على حتسني أدائها ،وجتنب اإلصالحات غير الضرورية ،وزيادة عمر الغسالة. تصريف املاء من الغسالة عند الطوارئ .1افصل الغسالة من مصدر الطاقة. .2افتح غطاء املصفاة باستخدام عملة معدنية أو مفتاح. غطاء املصفاة ُ .3فك غطاء التصريف عند الطوارئ عن طريق لفه لليسار. غطاء التصريف عند الطوارئ .4 .5 .6 .7 أمسك الغطاء من نهاية أنبوب التصريف عند الطوارئ واجذبه ببطء مسافة حوالي 15سم. اسمح بتدفق املاء بأكمله في وعاء. أعد إدخال أنبوب التصريف وثبت الغطاء مرة أخرى. أعد غطاء املصفاة إلى مكانه. أنبوب التصريف عند الطوارئ تنظيف األسطح اخلارجية .1امسح األسطح اخلارجية جلهاز الغسالة ،مبا في ذلك لوحة التحكم بقطعة من القماش الناعم ومسحوق تنظيف منزلي غير خادش. .2استخدم قطعة من القماش الناعم لتجفيف األسطح اخلارجية. .3ال تصب املاء على الغسالة. _26اهتنايصو ةلاسغلا فيظنت 4/30/2010 3:07:51 PM WD8704CJ-02732A-02_AR.indd 26 تنظيف درج مسحوق الغسيل واجلزء الداخلي منه الفاصل اخلاص بسائل مسحوق الغسيل 03التنظيف والصيانة .1اضغط ذراع اإلرخاء املوجودة في داخل درج مسحوق الغسيل واسحبه إلى اخلارج. .2قم بإزالة الفاصل اخلاص بسائل مسحوق الغسيل من درج مسحوق الغسيل زراع اإلرخاء .3اغسل كافة األجزاء باملاء اجلاري. .4 .5 .6 .7 نظف اجلزء الداخلي للدرج باستخدام فرشاة أسنان قدمية. ضع الفاصل اخلاص بسائل مسحوق الغسيل في مكانه عن طريق دفعه بقوة في الدرج. أعد الدرج إلى مكانه. قم بتشغيل دورة الشطف دون وجود أي غسيل في احلاوية إلزالة أي مسحوق متبقي. تنظيف مصفاة اخمللفات توصي Samsungبتنظيف مصفاة اخمللفات 5أو 6مرات في العام ،أو عند عرض رسالة اخلطأ “( ”5Eراجع “تصريف املاء من الغسالة عند الطوارئ” في الصفحة السابقة). .1افتح غطاء املصفاة باستخدام مفتاح أو قطعة معدنية. .2أرخ غطاء التصريف عند الطوارئ بلفه إلى اليسار لصرف املاء من الغسالة. .3أرخ غطاء مصفاة اخمللفات. غطاء مصفاة اخمللفات .4قم بغسل أية أوساخ أو أي مواد أخرى عالقة في مصفاة اخمللفات .تأكد أن مروحة مضخة التصريف املوجودة خلف مصفاة اخمللفات غير مسدودة. .5ضع غطاء مصفاة اخمللفات في مكانه. .6استبدل غطاء املصفاة اهتنايصو ةلاسغلا فيظنت _27 4/30/2010 3:07:55 PM WD8704CJ-02732A-02_AR.indd 27 تنظيف الغسالة وصيانتها تنظيف املصفاة الشبكية املتصلة بخرطوم املاء يجب عليك تنظيف املصفاة الشبكية املتصلة بخرطوم املاء مرة كل عام على األقل ،أو عند ظهور رسالة خطأ “:”4E .1قم بإيقاف تشغيل مصدر توريد املاء إلى الغسالة. .2افصل اخلرطوم عن اجلانب اخللفي من الغسالة .قم بتغطية اخلرطوم بقطعة من القماش ،ملنع تدفق املاء بسبب الضغط العالي في اخلرطوم. .3باستخدام الزردية ،اسحب املصفاة الشبكية إلى اخلارج من طرف اخلرطوم بلطف واشطفها باملاء حتى تصبح نظيفة .نظف كذلك اجلزأين الداخلي واخلارجي للوصلة امللفوفة. .4أعد املصفاة إلى مكانها. .5ثبت اخلرطوم في الغسالة مرة أخرى. .6تأكد أن الوصالت محكمة ضد املاء وقم بتشغيل الصنبور. إصالح جهاز غسالة متجمد إذا انخفضت درجة احلرارة إلى أقل من درجة التجمد وجتمدت الغسالة: .1افصل الغسالة من مصدر التيار الكهربائي. .2صب املاء الدافئ على صنبور املاء إلرخاء خرطوم توريد املاء. .3قم بإزالة خرطوم توريد املاء وانقعه في املاء الدافئ. .4صب املاء الدافئ في حاوية الغسالة واتركه ملدة 10دقائق. .5أعد توصيل خرطوم توريد املاء إلى صنبور املاء وتأكد من أن توريد املاء والتصريف يتم كما ينبغي. تخزين الغسالة إذا كنت بحاجة إلى تخزين الغسالة ملدة طويلة ،فمن املستحسن تصريف املاء منها وفصلها .حيث ميكن أن تتلف الغسالة في حالة ترك ماء في اخلراطيم واملكونات الداخلية قبل التخزين. .1اختر الدورة ’Quick 29(’ 29سريع) ثم قم بإضافة مادة تبييض في احلجيرة اخلاصة مبادة التبييض .قم بتشغيل الغسالة من خالل الدورة دون وجود مالبس بها. .2قم بإيقاف صنابير املاء وافصل خراطيم صنابير املاء. مفتوحا للسماح بدخول الهواء داخل احلاوية. .3قم بفصل الغسالة عن منفذ التيار الكهربائي ،واترك باب الغسالة ً في حالة قيامك بتخزين الغسالة في درجات حرارة حتت التجمد ،اجعل هناك فرصة خلروج املاء املتبقي في الغسالة قبل استخدامها مرة أخرى. _28اهتنايصو ةلاسغلا فيظنت 4/30/2010 3:07:55 PM WD8704CJ-02732A-02_AR.indd 28 استكشاف املشاكل وحلها ورموز املعلومات 04استكشاف املشاكل وحلها حتقق مما يلي إذا كانت الغسالة... املشكلة احلل ال تعمل • • • • تأكد من توصيل قابس الغسالة مبصدر التيار الكهربائي. تأكد من إغالق الباب بإحكام. تأكد من فتح مصدر صنابير املاء. تأكد من الضغط على الزر ( Start/Pauseتشغيل/إيقاف مؤقت). كاف عدم وجود ماء أو عدم وجود ماء ٍ • • • • افتح الصنبور متاماً. تأكد من أن خرطوم توريد املاء غير متجمد. فك ثنيات خراطيم توريد املاء. نظف املصفاة املوجودة على اخلرطوم اخلاص مبدخل املاء. هل يوجد مسحوق غسيل في الدرج بعد اكتمال دورة الغسيل • • تأكد من تشغيل الغسالة بضغط ماء كاف. تأكد من إضافة مسحوق الغسيل في منتصف درج املسحوق. تهتز الغسالة أو حتدث صوتاً مرتفعاً • تأكد من تركيب الغسالة على أرض مستوية .إذا كانت األرض غير مستوية ،اضبط قدم الغسالة حتى تستوي على األرضية. تأكد من إزالة مسامير الشحن. تأكد من عدم مالمسة الغسالة ألي شيء آخر. تأكد من توزيع وزن املالبس املوجودة في الغسالة. ال يتم تصريف املاء من الغسالة و/أو ال تقم بعملية التنشيف • • فك الثنيات املوجودة في خرطوم التصريف .قلل من استخدام اخلراطيم امللتوية. تأكد أن املصفاة الشبكية املتصلة بخرطوم املاء غير مسدودة. الباب مغلق وال ميكن فتحه • ال ميكن فتح الباب حتى متر 3دقائق على توقف اجلهاز عن العمل أو فصل التيار الكهربي. • • • في حالة استمرار املشكلة ،اتصل مبركز خدمة عمالء Samsungاحمللي مولعملا زومرو اهلحو لكاشملا فاشكتسا _29 4/30/2010 3:07:55 PM WD8704CJ-02732A-02_AR.indd 29 استكشاف املشاكل وحلها ورموز املعلومات رموز املعلومات عندما تتعرض الغسالة للعطل ،قد يظهر أحد رموز املعلومات على الشاشة .في حالة حدوث ذلك ،الرجاء التحقق من هذا اجلدول وجتربة احللول املقترحة قبل االتصال بخدمة العمالء. احلل رمز الكود dE • أغلق الباب. 4E • • تأكد أن صنبور توريد املاء مفتوح. تأكد من ضغط املاء. 5E • • نظف مصفاة اخمللفات. تأكد من تركيب خرطوم تصريف املاء بطريقة صحيحة. • وزن املالبس غير موزّع .قم بإعادة توزيع املالبس .في حالة غسل قطعة واحدة من املالبس ،مثل رداء حمام أو جينز ،قد ال تكون نتيجة التنشيف النهائي مرضية ،وتظهر رسالة خطأ “ ”UEفي إطار العرض. cE / 3E • اتصل بخدمة ما بعد البيع. Hot • سوف تظهر عندما تكون درجة احلرارة الداخلية في احلاوية مرتفعة. ستعمل املروحة تلقائ ًيا ،لذا يُرجى االنتظار حتى تختفي عالمة “.”Hot UE بالنسبة للرموز التي لم تذكر أعاله ،أو في حالة عدم مساهمة احلل املقترح في حل املشكلة ،اتصل مبركز خدمة Samsungأو املوزع احمللي املعتمد التابع لـ .Samsung _30مولعملا زومرو اهلحو لكاشملا فاشكتسا 4/30/2010 3:07:55 PM WD8704CJ-02732A-02_AR.indd 30 جدول الدورة جدول الدورة ( خيارات املستخدم) أقصى وزن (كجم) غسيل بالفضة 95 البرنامج WD8704/ WD8702/ WD8700 غسيل أولي غسيل منعم األقمشة ( Cottonقطن) 8.0 نعم ( Syntheticsاصطناعي) 3.0 نعم 60 ( Denimجينز) 3.0 نعم 60 ( Sports Wearمالبس رياضية) 2.5 نعم 60 ( Delicatesأنسجة رقيقة) 2.5 - نعم - - 40 ( Woolصوف) 2.0 - نعم - - 40 ( Handwashغسيل يدوي) 2.0 - نعم - 40 ( Deodorizationإزالة الروائح الكريهة) 1.0 - - - - - ( Sanitizationالتعقيم) 1.0 - - - - - ( Dryingجتفيف) 5.0 - - - - - ( Water Savingتوفير املاء) 3.0 نعم 60 ’Quick 29(’ 29سريع) 3.0 - نعم - 60 سرعة التنشيف (القصوى) (دورة/دقيقة) البرنامج .1 .2 .3 .4 تأجيل التوقف مدة الدورة (دقيقة) 120 WD8704 WD8702 WD8700 ( Cottonقطن) 1400 1200 1000 ( Syntheticsاصطناعي) 1200 1200 1000 90 ( Denimجينز) 800 800 800 78 ( Sports Wearمالبس رياضية) 1200 1200 1000 72 ( Delicatesأنسجة رقيقة) 800 800 800 50 ( Woolصوف) 800 800 800 38 31 ( Handwashغسيل يدوي) 400 400 400 ( Deodorizationإزالة الروائح الكريهة) - - - 29 ( Sanitizationالتعقيم) - - - 59 ( Dryingجتفيف) - - - 160 ( Water Savingتوفير املاء) 1200 1200 1000 70 ’Quick 29(’ 29سريع) 1400 1200 1000 29 05جدول الدورات مسحوق الغسيل أقصى درجة حرارة ˚( مئوية) تستغرق دورة الغسيل األولي مدة أطول بحوالي 15دقيقة. مت قياس بيانات مدد الدورات وفقا ً للشروط املنصوص عليها في مقياس .IEC 60456/EN 60456 قد يختلف وقت الدورة في كل منزل عن القيم املبينة في اجلدول بسبب االختالف في ضغط املاء ودرجة احلرارة اخلاصة بتوريد املاء وكمية املالبس ونوعها. عند حتديد وظيفة ( Intensive Washغسيل مكثف) ،يتم زيادة مدة الدورة لكل الدورات. ةرودلا لودج _31 4/30/2010 3:07:56 PM WD8704CJ-02732A-02_AR.indd 31 امللحق جدول العناية باألقمشة توضح الرموز التالية تعليمات العناية باملالبس .تتضمن بطاقات العناية أربعة رموز على النحو التالي :غسيل ،تبييض ،جتفيف ،وكي ،وتنظيف جاف إذا لزم األمر. يضمن استخدام هذه الرموز التناسق بني الشركات املصنعة للمالبس احمللية واملستوردة .اتبع تعليمات بطاقة العناية لزيادة عمر املالبس وتقليل مشاكل الغسيل. مواد مقاومة ميكن الكي عند ˚ 100م بحد أقصى أنسجة رقيقة يحظر الكي ميكن الغسيل عند ˚95درجة مئوية ميكن استخدام التنظيف اجلاف باستخدام أي مواد مذيبة ميكن الغسيل عند 60درجة مئوية التنظيف اجلاف بالبروكلوريد أو الوقود اخملفف أو الكحول النقي أو R113فقط ميكن الغسيل عند 40درجة مئوية التنظيف اجلاف بوقود الطائرات أو الكحول النقي أو R113 فقط ميكن الغسيل عند 30درجة مئوية يحظر استخدام التنظيف اجلاف تغسل باليد جتفف وهي مفرودة تنظيف جاف فقط ميكن تعليقها لتجف ميكن استخدام مادة تبييض مع املاء البارد جتفيف املالبس وهي معلقة على حمالة يحظر استخدام مادة تبييض جتفيف بالتدوير ،حرارة عادية ميكن الكي عند ˚ 200م بحد أقصى جتفيف بالتدوير ،حرارة خفيفة ميكن الكي عند ˚ 150م بحد أقصى يحظر جتفيفها بالتدوير حماية البيئة • • • • هذا اجلهاز مصنوع من مواد قابلة إلعادة التدوير .إذا قررت التخلص من هذا اجلهاز ،يرجى مراعاة القوانني احمللية اخلاصة بالتخلص من النفايات .اقطع سلك التيار بحيث ال ميكن توصيل اجلهاز مبصدر طاقة .قم بإزالة الباب ملنع تعرض احليوانات أو األطفال الصغار لالحتباس داخل اجلهاز. ال تضع مسحوق غسيل أكثر من الكمية املبينة في إرشادات الشركة املصنعة ملسحوق الغسيل. استخدم مواد إزالة البقع ومواد التبييض قبل دورة الغسيل عند احلاجة فقط. وفر املاء والكهرباء من خالل إجراء الغسيل بأوزان كاملة (تختلف الكمية وفقا ً للبرنامج املستخدم). إعالن التوافق يتوافق هذا اجلهاز مع مقاييس السالمة األوروبية و EC directive 93/68و .EN Standard 60335 _32حلملا 4/30/2010 3:08:12 PM WD8704CJ-02732A-02_AR.indd 32 املواصفات غسالة التحميل األمامي النوع األبعاد 06امللحق WD8704CJ/WD8704DJ/WD8704EJ/WD8704RJ WD8702CJ/WD8702DJ/WD8702EJ/WD8704RJ WD8702CJ/WD8702DJ/WD8702EJ/WD8700RJ العرض 598مم × العمق 600مم × االرتفاع 844مم ضغط املاء 50كيلوباسكال ~ 800كيلوباسكال كمية املاء 56لتر الوزن الصافي WD8704CJ/ WD8704DJ/ WD8704EJ/ WD8704RJ WD8702CJ/ WD8702DJ/ WD8702EJ/ WD8702RJ WD8700CJ/ WD8700DJ/ WD8700EJ/ WD8700RJ 70كجم 69كجم 68كجم سعة الغسيل والتنشيف 8.0كجم [مالبس جافة] سعة التجفيف 5كجم WD8704CJ/WD8704DJ/WD8704EJ/WD8704RJ WD8702CJ/WD8702DJ/WD8702EJ/WD8702RJ WD8700CJ/WD8700DJ/WD8700EJ/WD8700RJ الطراز الغسيل الغسيل والتسخني استهالك الطاقة التجفيف دورات التنشيف 240فولت 150وات 220فولت 2000وات 240فولت 2400وات 230فولت 1600وات الطراز WD8704CJ/ WD8704DJ/ WD8704EJ/ WD8704RJ WD8702CJ/ WD8702DJ/ WD8702EJ/ WD8702RJ WD8700CJ/ WD8700DJ/ WD8700EJ/ WD8700RJ 230فولت 350وات 250وات 200وات التنشيف العبوة الوزن 220فولت 150وات الضخ 34وات الطراز WD8704CJ/WD8704DJ/WD8704EJ/WD8704RJ WD8702CJ/WD8702DJ/WD8702EJ/WD8702RJ WD8700CJ/WD8700DJ/WD8700EJ/WD8700RJ غالف ورقي 2.5كجم غالف بالستيكي 2.5كجم الطراز WD8704CJ/ WD8704DJ/ WD8704EJ/ WD8704RJ WD8702CJ/ WD8702DJ/ WD8702EJ/ WD8702RJ WD8700CJ/ WD8700DJ/ WD8700EJ/ WD8700RJ دورة في الدقيقة 1400 1200 1000 قد يتعرض شكل املنتج ومواصفاته للتغيير دون إخطار مسبق ألغراض حتسني املنتج. حلملا _33 4/30/2010 3:08:12 PM WD8704CJ-02732A-02_AR.indd 33 امللحق _ حلملا34 WD8704CJ-02732A-02_AR.indd 34 4/30/2010 3:08:12 PM مذكرة WD8704CJ-02732A-02_AR.indd 35 4/30/2010 3:08:13 PM هل لديك أسئلة أو تعليقات؟ البلد اتصل بـ أو قم بزيارة موقعنا على اإلنترنت على U.A.E )800-SAMSUNG (726-7864 www.samsung.com كود رقمDC68-02732A-02_AR . 4/30/2010 3:08:13 PM WD8704CJ-02732A-02_AR.indd 36