1
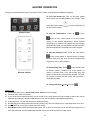
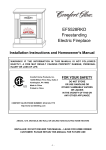
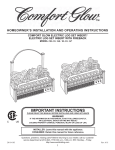
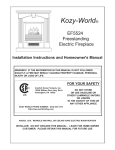
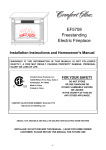
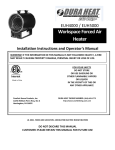
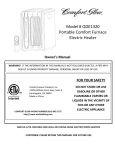
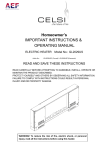
Model#:QEH1500, QEH1501
H
Power
L
H
℃
L
℉
Ti me
Temp
Quartz Infrared
Electric Heater
℃
℉
Temp
Installation Instructions and Homeowner's Manual
WARNING! IF THE INFORMATION IN THIS MANUAL IS NOT FOLLOWED EXACTLY, A FIRE
MAY RESULT CAUSING PROPERTY DAMAGE, PERSONAL INJURY OR LOSS OF LIFE.
Comfort Home Products, Inc.
12256 William Penn Hwy, Suite A
Huntingdon, PA 16652
Made in China
Printed in China
FOR YOUR SAFETY
DO NOT STORE
OR USE GASOLINE OR
OTHER FLAMMABLE VAPORS
OR LIQUIDS
IN THE VICINITY OF THIS OR
ANY OTHER APPLIANCE
COMFORT GLOW PHONE NUMBER: (814) 643-1775
http://www.worldmkting.com
ANSI/UL 1278. MOVABLE AND WALL-OR CEILING HUNG ELECTRIC ROOM HEATERS
INSTALLER: DO NOT DISCARD THIS MANUAL - LEAVE FOR HOME OWNER
CUSTOMER: PLEASE RETAIN THIS MANUAL FOR FUTURE USE
-1 -
TABLE OF CONTENTS
PLEASE READ THE INSTALLATION & OPERATIONS INSTRUCTIONS
BEFORE USING THIS APPLIANCE
IMPORTANT: Read all instructions and warnings carefully before starting installation.
Failure to follow these instructions may result in a possible electric shock, fire hazard
and will void the warranty.
Table of Contents, Specifications
2
Important Safety Instructions
3
Zone Heat Saves
4
Heater Operation
5
Filter Maintenance
6
Trouble Shooting
6
Replacement Parts List
7
SPECIFICATIONS
Electrical:
Voltage: 120V, 60HZ
Power Consumption: 750W, 1500W (+5%, - 10% tolerance)
Features:
Remote Control
Room Temperature Display
High & Low Heat Settings
Washable Air Filter
Overheat Protection
Dimensions:
Product Dimensions: H 17.6” x W 13.2” x D18.7”
Box Dimensions: H 20.9” x W 16.5” x D 22.8”
Product Weight: 31.5 lbs.
Shipping Weight: 35.3 lbs.
-2 -
IMPORTANT SAFETY INSTRUCTIONS
PLEASE RETAIN THIS USER’S GUIDE FOR FUTURE REFERENCE
When using electrical appliances, basic precautions should always be followed to reduce the risk of
fire, electric shock, and injury to person, including following:
soft surfaces, like a bed, where openings may
become blocked.
1. Read all instructions before using this appliance.
2. This heater is hot when in use. To avoid burns, do
not let bare skin touch hot surfaces. The grill directly in
front of the heater outlet becomes hot during heater
operation. Keep combustible materials, such as
furniture, pillows, bedding, papers, clothes, and
curtains at least 3 feet from the front of the heater and
keep them away from the sides and rear.
13. CAUTION: This heater has hot and arcing or
sparking parts inside. Do not use it in areas where
gasoline, paint, or flammable liquids are used or
stored. This heater should not be used as a drying
rack for clothing.
14. Do not modify this heater. Use it only as
described in this manual. Any other use, not
recommended by the manufacturer, may cause fire,
electric shock or injury to persons.
3. CAUTION: Extreme caution is necessary
when any heater is used by or near children or
invalids and whenever the heater is left
operating and unattended.
15. Avoid the use of an extension cord because it
may overheat and cause a fire hazard. However if
you have to use an extension cord, the cord shall
be 14 AWG minimum size and rated not less than
1875 watts. Always use the shortest extension cord
that is safe.
4. Always unplug heater when not in use.
5. Do not operate any heater with a damaged
cord or plug or after the heater malfunctions,
has been dropped or damaged in any manner.
Return heater to an authorized service facility
for examination, electrical or mechanical
adjustment, or repair.
16. Always use a certified electrician should new
circuits or outlets been required.
17. Always use ground fault protection where
required by electrical code.
6. Do not use outdoors.
7. This heater is not intended for use in bathrooms,
laundry areas or similar indoor locations. Never
locate the heater where it may fall into a bathtub or
other water container.
18. Always disconnect power before performing any
cleaning, maintenance or relocation of the heater.
8. Do not run cord under carpeting. Do not cover
cord with throw rugs, runners or similar coverings.
Arrange cord away from traffic areas and where it
will not be tripped over.
SAVE THESE INSTRUCTIONS!
9. To disconnect heater, turn controls to off, then
remove plug from outlet.
Grounding
10. Always connect to properly grounded, fused,
and polarized outlets.
This heater is for use on 120 volts. The cord has a
plug with three blades for proper grounding. DO
NOT attempt to modify the plug in any way or use
adaptors to defeat the purpose of the grounding
feature. Plug ONLY into a receptacle that accepts
three-blade plug.
11. Do not insert or allow foreign objects to enter
any ventilation or exhaust opening as this may
cause an electric shock or fire, or damage to the
heater.
12. To prevent a possible fire, do not block air
intakes or exhaust in any manner. Do not use on
-3 -
ZONE HEATING SAVES!
The concept of Zone Heating is simple. Use High Efficiency heaters to heat the rooms you use most, during
the times you use these areas and turn back the thermostat to your central heating system. To achieve the
maximum benefit it is important to understand your heater and where best to locate it.
Our COMFORT GLOW Infrared Heater provides clean and economical heat by utilizing a two stage heating
process. The heating process of our Infrared Heater draws filtered air into ‘the box” where it is initially
warmed by a resistance heating element. The blower then channels the warm air past the infrared heat
elements boosting the temperature even further. The warm air passes the copper reflector as it exits the
heater further enhancing the heat. When properly located, the fan will project the accumulated warmth
throughout the room.
Please follow these suggestions:
1. Close doors to areas you do not wish to heat.
2. Locate a three prong outlet along an interior wall if possible. Position the heater so that the warm air can
blow unobstructed across the room towards the exterior walls.
3. Check your windows and doors for the infiltration of cold air and insulate as needed to avoid heat loss.
Rapid heat loss will minimize the effectiveness of your Infrared heater as it would any conventional type
heater.
4. Keep the area around the heater free of obstructions to insure maximum airflow. Keep electrical cords,
drapery, furniture, and other combustibles 3 feet (0.9 M) away from the front of the heater and away from
the sides.
5. Avoid locating your heater in high traffic areas or in direct sunlight.
6. Avoid locating your heater near your central heating thermostat.
-4-
HEATER OPERATION
Plug your Infrared Heater power cord into a 120V, 15amp or 20amp three-bladed receptacle.
To Turn the Heater On: Turn on the main power
on/off switch on the rear panel of the heater. Then
press the Power button
on the control panel or
on the remote control.
Control Panel
To Set the Temperature: Press up
or down
button on the control panel or on the remote
control to the desired temperature. When desired
temperature is reached, the heater will stop heating
automatically. When the temperature drops below the
desired temperature, the heater will come on again.
To Set the Heating Level: Press the heat button
on the control panel or remote control to switch
between high and low heat and the corresponding
High (H) or low (L) LED will be lit.
To Set Running Time: Press
on the control panel
or remote control, numbers 0 to 8 will appear on
screen. 0 means there is no set running time and
heater will be running continuously. Number 1-8 mean
the number of hours that the heater will run before it
automatically stops.
Remote Control
To change between ℃ and ℉: Press
Helpful Tips:
1) If heater will not turn on, check main power switch on rear of heater.
2) Check air filter, clean as needed
3) If your room has minimal heat loss, and is closed off to cooler areas you may be able to reduce the cost of
operation by setting the heater to low after the room has reached a comfortable temperature.
4) If remote is lost, you can still operate the heater manually.
5) Do not drag your heater across the room by pulling it buy the cord. Stow cord on cord wrap when not in use.
6) Use the timer to turn off your heater and save energy.
7) Cool Down feature: When the thermostat cycles “off” or when you turn the unit off, the fan will continue to run
for a few moments to finish distributing the heat and to cool down the interior of the heater.
-5-
FILTER MAINTENANCE
Your heater is equipped with a washable filter. For proper operation this filter must be kept clean. If the
heater is used without the filter dirt and dust can accumulate inside and may cause the unit to smell while in
operation or other problems. Use without a filter will void your warranty.
1) WARNING! Make sure the power is turned off before performing any maintenance. Turn off heater, by
using the main power switch on the rear of the unit and unplug the heater.
2) Remove the filter from the rear of the heater.
3) Vacuuming will generally clean the filter in most cases.
4) If dirt remains, rinse filter with warm tap water through the rear side of the filter (opposite of air intake
direction) until clear of dust and debris.
5) If the filter is extremely dirty or clogged with grease, you can soak the filter in a mild solution of dish soap
and water, and repeat sensing process.
6) Shake filter to remove excess water and lay on clean cloth or paper towels to dry. Do not use heat source
to dry filter.
7) Replace filter in heater ONLY after it is completely dry.
WARNING! Do not use this product if any part has been under water.
TROUBLE SHOOTING
PROBLEM
1. Heater does not blow warm air
2. No Power to heater
CORRECTIVE ACTION
a. The room temperature is higher than the thermostat setting.
b. Check to be sure unit is on HIGH setting.
a. Check circuit breaker, Reset as needed or plug into a different outlet.
b. Make sure main switch on rear of unit is switched to on position.
c. Over heat safety control activated. Remove blockage from filter and around heater.
Unplug heater for 10 to 20 minutes. Unit should then operate normally.
-6-
REPLACEMENT PARTS LIST
Exposed Drawing of Parts – Model# QEH1500 / QEH1501
ITEM
DESCRIPTION
OEM
01
Filter
ND-48/01
02
Power cord and plug
ND-48/02
03, 04, 19
Heater/Blower Assembly
05
Main power switch
ND-48/05
06
Metal cabinet
ND-48/06
07
Temperature sensor
ND-48/07
08
Wooden Box
ND-48/08
09
Circuit board
ND-48/09
10
Overheat switch
ND-48/10
11
Upper heat reflector
ND-48/11
12
Front grill
ND-48/12
13, 14
Control Assembly with button switches
15
Remote Sender
ND-48/15
16
Quartz Tube
ND-48/16
17
Lower heat reflector “U”
ND-48/17
18
Heat chamber
ND-48/18
20
Casters
ND-48/20
-7-
ND-48/03,04,19
ND-48/13,14