1
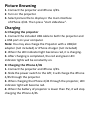
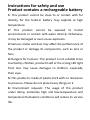
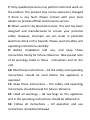
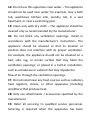
USER MANUAL Handheld Projector for iPhone4/4S 【Projector Nano Go 1】 【Projector Nano Go 2】 READ THIS USER MANUAL COMPLETELY BEFORE USAGE Congratulations with your purchase ! This product is made for iPhone 4/4S. It can project videos, pictures online video and PDF up to 60” screen size. The projector can display video just about anywhere! For best video quality, we suggest you find a light colored wall (preferably white) and place the projector with its lens facing the location. (For PDF, the Projout app is required and downloadable free of charge from Appstore) It has a focus adjustment wheel. It can be charged with the supplied USB cable when connecting to a computer or when connecting to an optional AC/DC-USB 5V power adapter. This projector can also charge your iPhone4/4S using its built-in big capacity rechargeable battery. Projector Overview 1. Optical Lens 2. 30-pin Connector 3. Cooling Holes 4. Speaker (only for Nano Go 1) 5. Fine-tuning Focus Wheel (only for Nano Go 1) 6. Volume Up (for Nano Go 1) Motor Focus (for Nano Go 2) 7. Volume Down (for Nano Go 1) Motor Focus (for Nano Go 2) 8: DC 5V / 2A power input micro USB 9: Status LED for modes: power, charge, projector 10: Slide button for power, charge, projector LED Indicator Light When the projector is charging, or when the projector charges your iPhone the red light will be on. When charging is completed, green light and red light will be on. When the projector is in operational mode, the blue light will flash. When the battery is low (less than 10%), the blue light will flash fast. The machine will power off automatically in one minute. Turn on/Turn off the Projector Slide the power switch rightward for 3 seconds to turn on the projector. Slide the power switch rightward for another 3 seconds to turn off the projector. Focus Adjustment Nano Go 1: You can manually adjust the focus to achieve better video effect. (manual focus) Nano Go 2: You can adjust the focus electronically to achieve better video effect. (motor focus) Volume Adjustment Nano Go 1: You can adjust audio volume through pressing the volume buttons on the left side. Nano Go 2: You can adjust the audio volume through pressing the volume buttons of the iPhone4/4S Video Display 1. Connect the projector and iPhone 4/4S. 2. Turn on the projector. 3. Select video files to display in the main interface of iPhone 4/4S. Then press "Play". 4. When displaying the video file, adjust volume through the buttons of "+"/"-"on Nano Go 1 or use the volume buttons of iPhone 4/4S for Nano Go 2. 5. In order to project the complete display of the video, it is recommended to select PAL for TV out on your iPhone 4/4S. Note: If the following interface appears, please turn on the projector again and re-display the video. This accessory is not supported by iPhone Dismiss Note: In order to ensure the complete display of the video recorded by iPhone 4/4S device, it is recommended to place the iPhone 4/4S device horizontally when recording video. Note: The projector can display video just about anywhere! For best video quality, we suggest you find a light colored wall (preferably white) and place the projector with its lens facing the location. Picture Browsing 1. Connect the projector and iPhone 4/4S. 2. Turn on the projector. 3. Select picture file to display in the main interface of iPhone 4/4S. Then press "start slideshow". Charging A: Charging the projector 1. Connect the included USB cable to both the projector and a USB port on your computer. Note: You may also charge the Projector with a USB/AC adapter (not included) or iPhone charger (not included) 2. When the LED indicator light becomes red, it is charging. 3. After charging is completed, the red and green LED indicator lights will be constantly on. B: Charging the iPhone 4/4S 1. Connect the projector and iPhone 4/4S. 2. Slide the power switch to the left; it will charge the iPhone 4/4S through the projector. 3. When charging the iPhone 4/4S through the projector, LED indicator light will become red. 4. When the battery of projector is lower than 5%, it will stop charging the iPhone 4/4S. C: Charging the whole set (projector and iPhone4/4S) 1. Connect the projector and iPhone 4/4S. 2. Connect the included USB cable to both the projector and a USB port on your computer. Note: You may also charge the Projector with a USB/AC adapter (not included) or iPhone charger (not included) 3. Charging 3.1 When the projector is turned off, the external power will charge the projector first, and the red LED indicator will remain on; when the charging completes, the green and red LED indicator lights will remain on, then the external power will charge the iPhone 4/4S. 3.2 When the projector is in operation, the external power will charge the projector first, when the charging completes, the external power will automatically switch to charge the iPhone 4/4S, the red LED indicator remain on and the blue LED indicator will flash. 3.3 When the projector is charging the iPhone 4/4S, the external power will charge the whole set (projector and iPhone 4/4S), the red LED indicator will remain on. Instructions for safety and use Product contains a rechargeable battery 1: This product cannot be close to or contact with for directly, for the build-in battery may explode at high temperature. 2: This product cannot be exposed to humid environments or contact with water directly. Otherwise, it may be damaged or even cause explosion. 3: Serious smoke and dust may affect the performance of the product or damage its components, such as lens or fans. 4: Dangers for humans: This product is not suitable to be touched by children, product itself or the strong LED light from lens may cause damages to children, especially their eyes. 5: This product is made of plastic shell with no resistance to pressure. Please do not place heavy things on it. 6: Environment requests: The usage of this product under damp, extremely high and low-temperature and temperature fluctuation conditions will reduce its service life. 7: Only qualified persons may perform technical work on the product. The product may not be opened or changed if there is any fault. Please contact with your local dealers to provide official maintenance service. 8: When used in the directed manner, this unit has been designed and manufactured to ensure your personal safety. However, improper use can result in potential electrical shock or fire hazards. Please read all safety and operating instructions carefully 9: Before installation and use, and keep these instructions handy for future reference. Take special note of all warnings listed in these instructions and on the unit. 10: Read these instructions – All the safety and operating instructions should be read before the appliance is operated. 11: Keep these instructions – The safety and operating instructions should be kept for future reference. 12: Heed all warnings – All warnings on the appliance and in the operating instructions should be adhered to. 13: Follow all instructions – All operation and use instructions should be followed. 14: Do not use this apparatus near water – The appliance should not be used near water; for example, near a bath tub, washbowl, kitchen sink, laundry tub, in a wet basement, or near a swimming pool. 15: Clean only with dry cloth – The appliance should be cleaned only as recommended by the manufacturer. 16: Do not block any ventilation openings. Install in accordance with the manufacturer’s instructions. The appliance should be situated so that its location or position does not interfere with its proper ventilation. For example, the appliance should not be situated on a bed, sofa, rug, or similar surface that may block the ventilation openings; or placed in a built-in installation, such as a bookcase or cabinet that may impede the flow of air through the ventilation openings. 17: Do not install near any heat sources such as radiators, heat registers, stoves, or other apparatus (including amplifiers) that produce heat. 18: Only use attachments / accessories specified by the manufacturer. 19: Refer all servicing to qualified service personnel. Servicing is required when the apparatus has been damaged in any way, such as power-supply cord or plug is damaged, liquid has been spilled or objects have fallen into the apparatus, the apparatus has been exposed to rain or moisture, does not operate normally, or has been dropped. 20: This appliance shall not be exposed to dripping or splashing water and that no object filled with liquids such as vases shall be placed on the apparatus. 21: Power Sources – The appliance should be connected to a power supply only of the type described in the operating instructions or as marked on the appliance. Do not overload wall outlet. 22: Danger of explosion if battery is incorrectly replaced. Replace only with the same or equivalent type. There is a high energy rechargeable battery inside the projector, do not throw it into fire to avoid danger of explosion. 23: Do not charge the internal rechargeable battery longer than specified to prevent danger of fire. Overcharging rechargeable batteries may shorten their life span. 24: Do not attempt to dismantle, open or repair this product yourself. If a fault occurs, seek advice from your local qualified service technician or contact the distributor. Important notes Avoid installing the unit in locations described below: 1: Places exposed to direct sunlight or close to heat Radiating appliances such as electric heaters. 2: Places subject to constant vibration. 3: Dusty, Humid or moist places NOTE: This product is not magnetically shielded and may cause color distortion on the screen of some TVs or video monitors. To avoid this you may need to move the unit further away from the TV or monitor if unnatural color shifts or image distortion occurs Specifications of Projector Nano Go 1 / Nano Go 2 Compatible with iPhone 4/4S Texas Instruments DLP Technology Superbright LED lamp: 15 Lumen (Nano Go 1) Superbright LED lamp: 25 Lumen (Nano Go 2) LED Lamp: 20,000 hours lifetime Up to 60” screen size 640 x 360 16:9 resolution Contrast ratio 1000:1 100% offset Long focus lens / manual focus (Nano Go 1) Short focus lens / motor engine focus (Nano Go 2) Internal speaker with digital control (Nano Go 1) Rechargeable 2100mAh battery (Nano Go 1) Rechargeable 1700mAh battery (Nano Go 2) Up to 2,5 hours projection time Powerbank for iPhone4/4S (5V / 1A) Micro USB power input (5V / 2A) Nano Go 1: dimension 63.5W x 22H x 126.6D(mm) Weight: 100gram Nano Go 2: dimension 63.5W x 20H x 126.5D(mm) Weight: 96gram iPhone not included. iPhone is a trademark of Apple Inc., registered in the U.S. and other countries. Made for iPhone4 and iPhone 4S. “Made for iPhone” means that an electronic accessory has been designed to connect specifically to iPhone , and has been certified by the developer to meet Apple performance standards. Apple is not responsible for the operation of this device or its compliance with safety and regulatory standards. Please note that the use of this accessory with iPhone, may affect wireless performance. DLP and the DLP ® logo are trademarks of Texas Instruments. 【RISK GROUP 2】 CAUTION: POSSIBLE HAZARDOUS OPTICAL RADIATION EMITTED FROM THIS PRODUCT. DO NOT STARE AT OPERATING LAMP. MAYBE HARMFUL TO THE EYES.