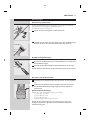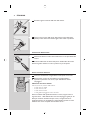
1
FlexCare
900 series
Rechargeable
sonic toothbrush
2
1
A
B
N
C
D
E
F
K
G
H
L
I
J
M
HX6985, HX6983, HX6982, HX6942, HX6933, HX6932, HX6902,
ENGLISH 4
DEUTSCH 15
ITALIANO 40
FRANÇAIS 27
NEDERLANDS 51
4
ENGLISH
Important
Read this user manual carefully before you use the appliance and save it for
future reference.
Danger
- Keep the charger and/or sanitiser away from water. Do not place or
store it over or near water contained in a bathtub, washbasin, sink
etc. Do not immerse the charger and/or sanitiser in water or any
other liquid. After cleaning, make sure the charger and/or sanitiser is
completely dry before you connect it to the mains.
Warning
- Check if the voltage indicated on the bottom of the charger and/or
sanitiser corresponds to the local mains voltage before you connect
the appliance.
- The mains cord cannot be replaced. If the mains cord is damaged,
discard the charger and/or sanitiser.
- Always have the charger and/or sanitiser replaced with one of the
original type in order to avoid a hazard.
- Do not use the charger and/or sanitiser outdoors or near heated
surfaces.
- If the appliance is damaged in any way (brush head, toothbrush handle,
charger and/or sanitiser), stop using it. This appliance contains no
serviceable parts. If the appliance is damaged, contact the Customer
Care Centre in your country (see chapter ‘Guarantee & service’).
- This appliance is not intended for use by persons (including children)
with reduced physical, sensory or mental capabilities, or lack of
experience and knowledge, unless they have been given supervision or
instruction concerning use of the appliance by a person responsible for
their safety.
- Children should be supervised to ensure that they do not play with the
appliance.
- Discontinue use of the sanitiser if the UV light bulb remains on when
the door is open. UV light can be harmful to the human eye and skin.
Keep the sanitiser out of the reach of children at all times.
Caution
- Do not clean the brush head, the handle, the charger, the charger cover
and/or the sanitiser in the dishwasher.
- If you have had oral or gum surgery in the previous 2 months, consult
your dentist before you use the toothbrush.
- Consult your dentist if excessive bleeding occurs after using this
toothbrush or if bleeding continues to occur after 1 week of use.
- The Sonicare toothbrush complies with the safety standards for
electromagnetic devices. If you have a pacemaker or other implanted
device, contact your physician or the device manufacturer of the
implanted device prior to use.
- If you have medical concerns, consult your doctor before you use the
Sonicare.
- This appliance has only been designed for cleaning teeth, gums and
tongue. Do not use it for any other purpose. Stop using the appliance
and contact your doctor if you experience any discomfort or pain.
- The Sonicare toothbrush is a personal care device and is not intended
for use on multiple patients in a dental practice or institution.
ENGLISH
-
-
5
Stop using a brush head with crushed or bent bristles. Replace the
brush head every 3 months or sooner if signs of wear appear.
Do not use other brush heads than the ones recommended by the
manufacturer.
If your toothpaste contains peroxide, baking soda or bicarbonate
(common in whitening toothpastes), thoroughly clean the brush head
with soap and water after each use. This prevents possible cracking of
the plastic.
The UV light bulb is hot during and immediately after the sanitising
cycle. Do not touch the UV light bulb when it is hot.
Do not operate the sanitiser without the protective screen in place to
avoid contact with a hot bulb.
Electromagnetic fields (EMF)
This Philips appliance complies with all standards regarding electromagnetic
fields (EMF). If handled properly and according to the instructions in this
user manual, the appliance is safe to use based on scientific evidence
available today.
The Sonicare (Fig. 1)
A
B
C
D
E
F
G
H
I
J
K
L
M
N
-
Hygienic travel cap
Brush head
Interchangeable colour code ring
Handle with soft grip
Power on/off button
Personalised Brushing button
Brushing modes
Brushing routines
Deluxe recharge gauge
Deluxe charger (specific types only)
Charger cover with brush head holder (specific types only)
Travel charger
Charger base with cord wrap
UV sanitiser with integrated charger and cord wrap (specific types
only)
Not shown: UV light bulb
Not shown: Sanitiser drip tray
Not shown: Protective screen for UV light bulb
Getting started
Changing the colour code ring
Sonicare brush heads come with interchangeable colour code rings to
identify your brush head.
To change the colour code ring:
ENGLISH
1 Pull the colour code ring from the bottom of the brush head.
2 Slip one edge of the new ring over the bottom of the brush head.
Then press down on the other side to snap the ring in place.
Attaching the brush head
1 Align the brush head so the bristles face the front of the handle.
2 Firmly press the brush head down on the metal shaft until it stops.
Note:There is a small gap between the colour code ring and the handle.
clea
n
se
ns
itiv
e
6
Charging your Sonicare
1 Plug the charger or sanitiser into a wall socket.
2 Place the handle on the charger or sanitiser.
, The flashing light on the battery gauge indicates that the toothbrush
is charging.
Deluxe recharge gauge:
Indicates the amount of charge left in the battery
- 3 green LEDs: 75-100%
- 2 green LEDs: 50-74%
- 1 green LED: 25-49%
- 1 flashing yellow LED: less than 25%
Note: If the battery charge of your Sonicare is low, you hear 3 beeps and 1
LED on the recharge gauge flashes yellow for 30 seconds.
Note:To keep the battery fully charged, we recommend that you keep your
Sonicare on the charger or sanitiser when not in use. It takes at least 24 hours
to charge the battery fully.
ENGLISH
7
Using the Sonicare
Brushing instructions
1 Wet the bristles and apply a small amount of toothpaste.
2 Place the toothbrush bristles against the teeth at a slight angle
towards the gumline.
3 Press the power on/off button to switch on the Sonicare.
4 Apply light pressure to maximise the Sonicare’s effectiveness and let
the Sonicare toothbrush do the brushing for you.
5 Gently move the brush head slowly across the teeth in a small back
and forth motion so the longer bristles reach between your teeth.
Continue this motion throughout your brushing cycle.
1
3
2
4
Note:To make sure you brush evenly throughout the mouth, divide your mouth
into 4 sections using the Quadpacer (see chapter ‘Features’).
6 Begin brushing in section 1 (outside of upper teeth) and brush for 30
seconds before moving to section 2 (inside of upper teeth). Continue
brushing in section 3 (outside of lower teeth) and brush for 30
seconds before moving to section 4 (inside of lower teeth).
7 After you have completed the brushing cycle, you can
spend additional time brushing the chewing surfaces of your teeth
and areas where staining occurs.You may also brush your tongue,
with the toothbrush switched on or off, as you prefer.
Your Sonicare is safe to use on:
- Braces (brush heads wear out sooner when used on braces)
- Dental restorations (fillings, crowns, veneers)
Personalising your brushing experience
The Sonicare automatically starts in the default Clean mode. To personalise
your brushing:
1 Before you switch on the Sonicare, press the Personalised Brushing
button to toggle between modes and routines.
, The green LED indicates the selected mode or routine.
Note:When the toothbrush is switched on, you can switch between modes but
not between routines. Routines have to be selected before you switch on the
appliance.
Brushing modes
Clean mode
Standard mode for superior teeth cleaning.
Sensitive mode
Gentle, yet thorough cleaning for sensitive gums and teeth.
Massage mode
Gentle gum stimulation.
8
ENGLISH
Brushing routines
Go Care routine
1-minute brushing cycle in the Clean mode, for a quick clean. You hear the
Quadpacer signal at 15-second intervals.
Max Care routine
3-minute brushing cycle that combines the Clean and Massage modes in
one routine for a thorough mouth clean. There are 30 seconds of Clean
mode and 15 seconds of Massage mode for each of the 4 sections of your
mouth. You hear the Quadpacer signal at 45 second intervals.
Note: When the Sonicare is used in clinical studies, the default
2-minute Clean mode must be selected.The handle has to
be fully charged. Deactivate the Easy-start feature. For areas
where excess staining occurs, an additional 30 seconds of
brushing time can be spent to help remove stains.
Features
Easy-start
-
This Sonicare model comes with the Easy-start feature activated.
The Easy-start feature gently increases power over the first 14
brushings to ease into the Sonicare experience.
Note: Each of the first 14 brushings must last at least 1 minute to properly
move through the Easy-start ramp-up cycle.
Deactivating or activating the Easy-start feature
1 Attach your brush head to the handle.
2 Place the handle on the plugged-in charger or sanitiser.
- To deactivate Easy-start:
Press and hold the on/off button for 5 seconds. You hear 1 beep to indicate
that the Easy-start feature has been deactivated.
- To activate Easy-start:
Press and hold the on/off button for 5 seconds. You hear 2 beeps to
indicate that the Easy-start feature has been activated.
Note: Using the Easy-start feature beyond the initial ramp-up period is not
recommended and reduces the Sonicare’s effectiveness in removing plaque.
Smartimer
The Smartimer indicates that your brushing cycle is complete by
automatically switching off the toothbrush at the end of the brushing cycle.
Dental professionals recommend brushing no less than 2 minutes twice a
day.
ENGLISH
9
Quadpacer
1
3
2
4
The Quadpacer is an interval timer that has a short beep and pause to
remind you to brush the 4 sections of your mouth. Depending on the
brushing mode or brushing routine you have selected, the Quadpacer
beeps at different intervals during the brushing cycle. See the ‘Brushing
instructions’ and ‘Personalising your brushing experience’ sections.
The Quadpacer on this model has been activated. To deactivate or
reactivate the Quadpacer:
1 Place the handle with a brush head attached on the plugged-in
charger or sanitiser
2 To deactivate the Quadpacer: press and hold the Personalised
Brushing button for 5 seconds.You hear 1 beep to indicate that the
Quadpacer has been deactivated.
, To reactivate the Quadpacer: press and hold the Personalised
Brushing button for 5 seconds until you hear 2 beeps. This indicates
that the Quadpacer is active again.
Note:The Quadpacer cannot be deactivated on the pre-programmed Go Care
and Max Care brushing routines.
Cord wrap on deluxe charger (specific types only)
If your model includes the deluxe charger cover and base, the travel
charger is pre-installed inside the cover. If you want to shorten the mains
cord, you can store excess cord in the cord-wrap feature built into the
charger base.
1 To separate the charger cover from the charger base, press the two
grey snap bars on the charger base and pull the white charger cover
upwards.
2 Wrap excess cord around the grey charger base as shown in the
picture. Be sure to wrap the cord on the inside of the two snap
levers.
3 When you have stored the excess cord, guide the cord through the
small groove in the rear of the grey charger base.
4 Reattach the charger cover by pressing it down over the charger
base until it snaps into place.
Tip: For extra convenience during travel, you can remove the travel charger and
use it without the charger cover and charger base.
10
ENGLISH
Cord wrap on sanitiser (specific types only)
-
If your model includes the sanitiser, you can store excess cord with the
cord-wrap feature built into the bottom of the sanitiser.
Sanitising (specific types only)
-
With the sanitiser, you can clean your brush head after every use.
Discontinue use of the sanitiser if the UV light bulb remains on when the
door is open or if the Philips logo is broken or missing from the sanitiser.
UV light can be harmful to the human eye and skin. Keep the sanitiser
out of the reach of children at all times.
Unplug the sanitiser and call Customer Service if the sanitiser gives off
smoke or a burning smell while it is operating.
1 After brushing, rinse the brush head and shake off excess water.
Do not place the travel cap on the brush head during sanitisation.
2 To open the sanitiser door, press the door release button.
-
3 Place the brush head on one of the 2 pegs in the sanitiser.
Make sure the bristles of the brush head directly face the light bulb.
Note: Only clean Sonicare ProResults brush heads in the sanitiser.
4 Make sure the sanitiser is plugged into wall socket.
5 Close the door and press the green power on/off button once to
select the UV clean cycle.
Note:You can only switch on the sanitiser when the door is properly closed.
Note: If you open the door during the sanitising cycle, the sanitiser stops.
Note:The sanitiser cycle runs for 10 minutes and then automatically switches
off.
, The sanitiser is in operation when the blue light glows through the
Philips logo and the UV clean LED flashes slowly.
, When the sanitising cycle is complete, the UV clean LED lights up
green continuously and the sanitiser automatically switches off.
ENGLISH
11
Cleaning
Do not clean brush heads, the handle, the travel charger, the charger
cover and the UV sanitiser in the dishwasher.
Toothbrush handle
1 Remove the brush head and rinse the metal shaft with warm water.
Do not push on the rubber seal round the metal shaft with sharp
objects, as this may cause damage.
2 Use a damp cloth to wipe the entire surface of the handle.
Brush head
1 Rinse the brush head and bristles after each use.
2 Remove the brush head from the handle and rinse the brush head
connection at least once a week with warm water.
Travel charger and deluxe charger (specific types only)
1 Unplug the charger.
2 Specific types only: Disassemble the deluxe charger and take out the
travel charger.
3 Use a damp cloth to wipe the surface of the charger.
Sanitiser (specific types only)
Do not clean the sanitiser when the UV light bulb is hot.
For optimal effectiveness, it is recommended to clean the sanitiser weekly.
1 Unplug the sanitiser.
2 Slightly lift the drip tray and pull it out. Rinse the drip tray and wipe it
clean with a damp cloth.
3 Clean all reflector surfaces with a damp cloth.
12
ENGLISH
4 Remove the protective screen in front of the UV light bulb.
To remove the screen, gently lift it up (1) and pull it out (2).
5 Remove the UV light bulb.
To remove the light bulb, grasp it and pull it out of the metal clasp.
6 Clean the protective screen and the UV light bulb with a damp cloth.
7 Reinsert the UV light bulb.
To reinsert the light bulb, align the bottom of the light bulb with the metal
clasp and push the bulb into the clasp.
8 Reinsert the protective screen.
To reinsert the screen, align the pegs on the screen with the slots on the
reflective surface near the UV light bulb. Then insert the pegs into the slots
and slide down the screen to secure it in the sanitiser.
Storage
-
-
If you are not going to use the appliance for a long time, remove the
mains plug from the wall socket. Then clean the appliance and store it
in a cool and dry place away from direct sunlight. You can use the cord
wrap to store the mains cord neatly.
You can store brush heads on the pegs at the back of the deluxe
charger (specific types only).
Replacement
Brush head
-
Replace Sonicare brush heads every 3 months to achieve optimal
results.
Use only Sonicare ProResults replacement brush heads.
UV light bulb
-
You can order replacement UV light bulbs from the Customer Care
Centre in your country or an authorised Philips service centre.
Disposal
-
-
Do not throw away the appliance with the normal household waste
at the end of its life, but hand it in at an official collection point for
recycling. By doing this, you help to preserve the environment.
The lamp of the sanitiser contains mercury, which is a substance that
can be harmful to the environment. When you discard the lamp, do not
throw it away with the normal household waste but hand it in at an
official collection point.
The built-in rechargeable battery contains substances that may pollute
the environment. Always remove the battery before you discard and
hand in the appliance at an official collection point. Dispose of the
battery at an official collection point for batteries. If you have trouble
removing the battery, you can also take the appliance to a Philips
service centre. The staff of this centre will remove the battery for you
and will dispose of it in an environmentally safe way.
ENGLISH
13
Removing the rechargeable battery
Please note that this process is not reversible.
1 To deplete the rechargeable battery of any charge, remove the
handle from the charger or sanitiser, switch on the Sonicare and let it
run until it stops.
Repeat this step until you can no longer switch on the Sonicare.
2 Insert a flat-head (standard) screwdriver into the slot located at the
bottom of the handle. Turn the screwdriver anticlockwise to release
the bottom cap.
3 Hold the handle upside down and push down on the shaft to release
the internal components of the handle.
4 Insert the screwdriver under the circuit board, next to the battery
connections, and twist to break the connections. Remove the circuit
board and pry the battery from the plastic carrier.
Do not connect the appliance to the mains again after you have removed
the battery.
Guarantee & service
If you need information or if you have a problem, please visit the Philips
website at www.philips.com or contact the Philips Customer Care Centre
in your country (you find its phone number in the worldwide guarantee
leaflet). If there is no Customer Care Centre in your country, go to your
local Philips dealer or contact the Service Department of Philips Domestic
Appliances and Personal Care BV.
Guarantee restrictions
The terms of the international guarantee do not cover the following:
- Brush heads
- Damage caused by misuse, abuse, neglect or alterations
- Normal wear and tear, including chips, scratches, abrasions,
discolouration or fading
- UV light bulb
Frequently asked questions
This chapter lists the questions most frequently asked about the appliance.
If you cannot find the answer to your question, contact the Customer Care
Centre in your country.
14
ENGLISH
Question
Answer
Why doesn’t the Sonicare
toothbrush work?
You may need to recharge the Sonicare. Charge the Sonicare for at
least 24 hours.
The socket may not be live. The electricity supply to sockets in mirror
cabinets over washbasins or shaver sockets in bathrooms may be cut
off when the light is switched off.
You may need to reattach or replace the brush head.
Why do I feel a tickling sensation You may experience a slight tickling/tingling sensation when you use
when I use the Sonicare?
Sonicare for the first time. As you become accustomed to brushing
with the Sonicare, this sensation diminishes.
The brush head chatters against
my teeth. What can I do about
this?
To avoid this, keep the brush head properly oriented, with the bristles
placed on the gumline at a slight angle.
Why does the toothbrush seem
less powerful?
You may need to charge the Sonicare.
The Easy-start feature may be on. Deactivate the Easy-start feature
(See chapter ‘Features’).
You may need to replace the brush head.
Why doesn’t the Personalised
Brushing button work during
brushing?
You may have selected a brushing routine. If this is the case, the
Personalised Brushing button is not active (See chapter ‘Using the
Sonicare’).
Why doesn’t the sanitiser
light go on?
The socket may not be live. The electricity supply to sockets in mirror
cabinets over washbasins or shaver sockets in bathrooms may be cut
off when the light is switched off.
You may need to shut the sanitiser door.
You may need to replace the UV light bulb (see chapter
‘Replacement’).
Why does the toothbrush seem
to lose power during brushing?
You may be in the Max Care brushing routine. If this is the case,
the routine alternates between the Clean and Massage modes
throughout the 3-minute brushing cycle. The Clean and Massage
modes have a different sound and brush movement.
Do I need a special charger if I
travel with my Sonicare?
Travel tip: the travel charger, the deluxe charger and the sanitiser can
be used at common worldwide voltages between 100-240V AC, at
either 50 or 60Hz. All you need is a simple plug adapter.
DEUTSCH
15
Wichtig
Lesen Sie diese Bedienungsanleitung vor dem Gebrauch des Geräts
aufmerksam durch und bewahren Sie sie für eine spätere Verwendung auf.
Gefahr
- Halten Sie Ladegerät und/oder den UV Cleaner von Wasser fern.
Stellen Sie sie nicht über oder nahe einer mit Wasser gefüllten
Badewanne bzw. einem Waschbecken ab. Tauchen Sie Ladegerät
und/oder den UV Cleaner nicht in Wasser oder andere Flüssigkeiten.
Schließen Sie das Ladegerät und/oder den UV Cleaner nach dem
Reinigen erst wieder an das Stromnetz an, wenn es vollkommen
trocken ist.
Warnhinweis
- Prüfen Sie vor Inbetriebnahme, ob die Spannungsangaben auf der
Unterseite des Ladegeräts bzw. UV Cleaners mit der örtlichen
Netzspannung übereinstimmen.
- Das Netzkabel kann nicht ausgetauscht werden. Wenn das Netzkabel
beschädigt ist, entsorgen Sie das Ladegerät und/oder den UV Cleaner.
- Tauschen Sie das Ladegerät bzw. den UV Cleaner immer durch ein
Original-Ersatzgerät aus, um Gefährdungen zu vermeiden.
- Verwenden Sie das Ladegerät und/oder den UV Cleaner nie im Freien
oder in der Nähe von heißen Oberflächen.
- Benutzen Sie das Gerät nicht, wenn es beschädigt ist (Bürstenkopf,
Handstück, Ladegerät und/oder UV Cleaner). Die Geräteteile lassen
sich nicht vom Benutzer warten/reparieren. Ist das Gerät defekt,
wenden Sie sich bitte an das Philips Service-Center in Ihrem Land
(siehe “Garantie und Kundendienst”).
- Dieses Gerät ist für Benutzer (einschl. Kinder) mit eingeschränkten
physischen, sensorischen oder psychischen Fähigkeiten bzw. ohne
jegliche Erfahrung oder Vorwissen nur dann geeignet, wenn eine
angemessene Aufsicht oder ausführliche Anleitung zur Benutzung des
Geräts durch eine verantwortliche Person sichergestellt ist.
- Achten Sie darauf, dass Kinder nicht mit dem Gerät spielen.
- Benutzen Sie den UV Cleaner nicht, wenn die UV-Lampe bei offener
Klappe noch leuchtet. UV-Licht kann schädlich für das menschliche
Auge und die Haut sein. Halten Sie den UV Cleaner immer von
Kindern fern.
Achtung
- Reinigen Sie den Bürstenkopf, das Handstück, das Reise-Ladegerät,
die Hülle für das Ladegerät und/oder das UV Cleaner nicht in der
Spülmaschine.
- Wenn in den vergangenen 2 Monaten ein chirurgischer Eingriff an Ihren
Zähnen oder am Zahnfleisch vorgenommen wurde, sollten Sie vor
Benutzung der Zahnbürste Ihren Zahnarzt konsultieren.
- Konsultieren Sie Ihren Zahnarzt, wenn nach Benutzung dieses Geräts
übermäßiges Zahnfleischbluten auftritt oder Zahnfleischbluten länger
als eine Woche anhält.
- Die Sonicare-Zahnbürste entspricht den Sicherheitsstandards
für elektromagnetische Geräte. Wenn Sie als Träger eines
Herzschrittmachers oder eines anderen Implantats Fragen zur
Verwendung des Geräts haben, setzen Sie sich bitte mit Ihrem Arzt
oder dem Hersteller des Schrittmachers oder Implantats in Verbindung.
16
DEUTSCH
-
-
-
Sollten Sie Bedenken wegen Ihrer Gesundheit haben, konsultieren Sie
vor Benutzung der Sonicare Ihren Arzt.
Dieses Gerät ist ausschließlich zum Reinigen von Zähnen, Zahnfleisch
und Zunge vorgesehen und sollte nicht für andere Zwecke benutzt
werden. Sollten Sie bei Gebrauch des Geräts Unbehagen oder
Schmerzen verspüren, benutzen Sie es nicht weiter und konsultieren
Sie Ihren Arzt.
Die Sonicare-Zahnbürste ist ein Gerät zur individuellen Mundpflege
und nicht für die Verwendung von mehreren Patienten in einer
Zahnarztpraxis oder Zahnklinik geeignet.
Benutzen Sie keinen Bürstenkopf mit abgeknickten oder zerdrückten
Borsten. Tauschen Sie den Bürstenkopf spätestens nach 3 Monaten aus
oder sobald Abnutzungserscheinungen zu erkennen sind.
Benutzen Sie nur die vom Hersteller für diese Zahnbürste
empfohlenen Bürstenköpfe.
Bei Verwendung peroxid-, natron- oder bikarbonathaltiger Zahnpasta
(üblich in Weißmacher-Zahnpasta) sollten Sie den Bürstenkopf nach
jedem Gebrauch gründlich mit einem milden Reinigungsmittel und
Wasser reinigen. Dadurch werden Risse im Kunststoff verhindert.
Während und direkt nach dem Reinigungsvorgang ist die UV-Lampe
heiß. Berühren Sie die heiße UV-Lampe nicht.
Verwenden Sie den UV Cleaner nicht ohne den aufgesetzten
Schutzschirm, um einen Kontakt mit der heißen Lampe zu vermeiden.
Elektromagnetische Felder (EMF; Electro Magnetic Fields)
Dieses Philips Gerät erfüllt sämtliche Normen bezüglich
elektromagnetischer Felder (EMF). Nach aktuellen wissenschaftlichen
Erkenntnissen ist das Gerät sicher im Gebrauch, sofern es ordnungsgemäß
und entsprechend den Anweisungen in dieser Bedienungsanleitung
gehandhabt wird.
Sonicare (Abb. 1)
A
B
C
D
E
F
G
H
I
J
K
Hygienische Schutzkappe
Bürstenkopf
Auswechselbarer Farbring
Handstück mit weicher Grifffläche
Ein-/Ausschalter
Taste für individuelles Putzen
Putzmodi
Putzeinstellungen
Deluxe-Ladestandsanzeige
Deluxe -Ladegerät (nur bestimmte Typen)
Abdeckung für Ladegerät mit Bürstenkopfhalter (nur bestimmte
Gerätetypen)
L Reiseladegerät
M Ladestation mit Kabelaufwicklung
N UV Cleaner mit integriertem Ladegerät und Kabelaufwicklung (nur
bestimmte Gerätetypen)
- Nicht abgebildet: UV-Lampe
- Nicht abgebildet: Abtropfschale des UV Cleaners
- Nicht abgebildet: Schutzschirm für UV-Lampe
DEUTSCH
17
Vorbereitungen
Den Farbring auswechseln
Sonicare-Bürstenköpfe haben auswechselbare Farbringe, mit denen Sie
Ihren Bürstenkopf eindeutig kennzeichnen können.
So wechseln Sie den Farbring aus:
1 Ziehen Sie den Farbring unten am Bürstenkopf ab.
2 Schieben Sie eine Seite des neuen Rings unten über den Bürstenkopf.
Drücken Sie dann die andere Seite fest, bis der Ring einrastet.
Den Bürstenkopf befestigen
1 Richten Sie den Bürstenkopf so aus, dass die Borsten zur Vorderseite
des Handstücks zeigen.
2 Drücken Sie den Bürstenkopf auf den Metallschaft, bis er fest sitzt.
clea
n
se
ns
itiv
e
Hinweis: Zwischen dem Farbring und dem Handstück bleibt eine kleine Lücke.
Die Sonicare-Zahnbürste laden
1 Schließen Sie das Ladegerät oder den UV Cleaner an eine Steckdose
an.
2 Stellen Sie das Handstück auf das Ladegerät oder den UV Cleaner.
, Die blinkende Batterieladeanzeige zeigt an, dass die Zahnbürste
geladen wird.
Deluxe-Ladestandsanzeige:
Gibt an, über wie viel Energie der Akku noch verfügt
- 3 grüne LEDs: 75-100 %
- 2 grüne LEDs: 50-74 %
- 1 grüne LED: 25-49 %
- 1 blinkende gelbe LED: weniger als 25 %
Hinweis: Ist der Ladestand Ihrer Sonicare niedrig, ertönen nach dem 2minütigen Putzzyklus drei Signaltöne und die Ladestandsanzeige blinkt
30 Sekunden lang gelb.
18
DEUTSCH
Hinweis: Es empfiehlt sich, die Sonicare bei Nichtgebrauch im Ladegerät oder
UV Cleaner aufzubewahren, damit der Akku geladen bleibt. Ein vollständiges
Aufladen des Akkus dauert mindestens 24 Stunden.
Die Sonicare-Zahnbürste benutzen
Putzanleitung
1 Befeuchten Sie die Borsten und tragen Sie etwas Zahnpasta auf.
2 Setzen Sie die Borsten der Zahnbürste in einem leichten Winkel zum
Zahnfleischsaum auf die Zähne.
3 Drücken Sie zum Einschalten der Sonicare den Ein-/Ausschalter.
4 Für eine optimale Zahnpflege putzen Sie die Zähne nur mit leichtem
Druck und überlassen der Zahnbürste die eigentliche Arbeit.
1
3
2
4
5 Führen Sie den Bürstenkopf langsam in kleinen Vorwärts- und
Rückwärtsbewegungen so über die Zähne, dass die längeren Borsten
in die Zahnzwischenräume gelangen.Verfahren Sie auf diese Weise bis
zum Ende des Putzvorgangs.
Hinweis: Damit alle Zähne gleichmäßig geputzt werden, teilen Sie Ihren Mund
mit der Quadpacer-Funktion in vier Abschnitte auf (siehe “Produktmerkmale”).
6 Beginnen Sie mit Abschnitt 1 (Außenseite Oberkiefer), und putzen
Sie 30 Sekunden lang. Fahren Sie danach mit Abschnitt 2 (Innenseite
Oberkiefer), Abschnitt 3 (Außenseite Unterkiefer) und Abschnitt 4
(Innenseite Unterkiefer) für jeweils 30 Sekunden fort.
7 Nach Ablauf des Putzzyklus können Sie zusätzlich die Kauflächen der
Zähne und Bereiche mit Verfärbungen putzen. Sie können auch die
Zunge ganz nach Belieben mit ein- oder ausgeschalteter Zahnbürste
putzen.
Ihre Sonicare ist sicher für den Gebrauch bei:
- Zahnspangen (die Bürstenköpfe nutzen sich beim Putzen von
Zahnspangen schneller ab)
- Zahnersatz (Füllungen, Kronen, Veneers)
Den Putzvorgang individuell gestalten
Die Sonicare beginnt automatisch im standardmäßig eingestellten CleanModus. So gestalten Sie den Putzvorgang individuell:
1 Drücken Sie vor dem Einschalten der Sonicare die Taste für
individuelles Putzen, um zwischen den Modi und Einstellungen zu
wechseln.
, Die grüne LED-Anzeige gibt den ausgewählten Modus bzw. die
gewählte Einstellung an.
Hinweis: Bei eingeschalteter Zahnbürste können Sie zwischen den Modi
wechseln, aber nicht zwischen den Einstellungen. Diese müssen vor Einschalten
des Geräts gewählt werden.
DEUTSCH
19
Putzmodi
Clean-Modus
Standardmodus für überragende Zahnreinigung.
Sensitive-Modus
Sanfte und doch gründliche Reinigung für empfindliches Zahnfleisch und
Zähne.
Massage-Modus
Sanft anregende Zahnfleischmassage.
Putzeinstellungen
Go Care-Einstellung
1-minütiger Putzzyklus im Clean-Modus - für eine schnelle Reinigung. Das
Quadpacer-Signal ertönt alle 15 Sekunden.
Max Care-Einstellung
3-minütiger Putzzyklus, der Clean- und Massage-Modus für eine besonders
gründliche Mundreinigung kombiniert. Für jeden der vier Abschnitte stehen
30 Sekunden im Clean-Modus und 15 Sekunden im Massage-Modus zur
Verfügung. Das Quadpacer-Signal ertönt alle 45 Sekunden.
Hinweis: Wird die Sonicare in klinischen Studien eingesetzt,
muss der standardmäßig eingestellte 2-minütige Clean-Modus
ausgewählt werden. Das Handstück muss vollständig geladen
sein. Deaktivieren Sie die Easy-Start-Funktion. Bereiche mit
starken Verfärbungen können zusätzlich 30 Sekunden geputzt
werden, um die Verfärbungen zu entfernen.
Produktmerkmale
Easy-Start
-
Bei diesem Sonicare-Modell ist die Easy-Start-Funktion aktiviert.
Mit der Easy-Start-Funktion wird die Intensität über die ersten
14 Anwendungen langsam erhöht, damit Sie sich leichter an das Putzen
mit der Sonicare gewöhnen.
Hinweis: Jeder der ersten 14 Putzzyklen muss mindestens eine Minute dauern,
damit der jeweilige Zyklus von der Easy-Start-Funktion berücksichtigt wird.
Die Easy-Start-Funktion deaktivieren bzw. aktivieren
1 Setzen Sie den Bürstenkopf auf das Handstück.
2 Stellen Sie das Handstück in das an das Stromnetz angeschlossene
Ladegerät oder UV Cleaner.
- So deaktivieren Sie Easy-Start:
Halten Sie den Ein-/Ausschalter 5 Sekunden gedrückt. Sie hören einen
Signalton, sobald die Easy-Start-Funktion deaktiviert wurde.
- So aktivieren Sie Easy-Start:
Halten Sie den Ein-/Ausschalter 5 Sekunden gedrückt. Sie hören zwei
Signaltöne, sobald die Easy-Start-Funktion aktiviert wurde.
Hinweis: Die Funktion Easy-start sollte nur in der ersten Gewöhnungsphase
genutzt werden, da sie die Effizienz der Plaque-Entfernung mit der Sonicare
20
DEUTSCH
reduziert.
Smartimer
Der Smartimer zeigt an, dass der Putzzyklus beendet ist, indem die
Zahnbürste nach beendetem Putzzyklus automatisch ausgeschaltet wird.
Zahnärzte empfehlen, die Zähne zweimal täglich mindestens 2 Minuten
lang zu putzen.
Quadpacer
1
3
2
4
Der Quadpacer ist ein Intervalltimer mit einem kurzen akustischen
Signal und einer Pause, damit die vier Abschnitte des Mundes
gleichmäßig geputzt werden. Je nach gewähltem Putzmodus oder
gewählter Putzeinstellung ertönt das Signal nach unterschiedlichen
Intervallen des Putzzyklus. Siehe dazu die Abschnitte “Putzanleitung”
und “Den Putzvorgang individuell gestalten”.
Die Quadpacer-Funktion wurde bei diesem Modell aktiviert. So
deaktivieren bzw. reaktivieren Sie die Quadpacer-Funktion:
1 Stellen Sie das Handstück mit einem aufgesetzten Bürstenkopf in das
ans Stromnetz angeschlossene Ladegerät oder UV Cleaner.
2 Zum Deaktivieren des Quadpacer: Halten Sie die Taste für
individuelles Putzen 5 Sekunden gedrückt. Sie hören einen Signalton,
sobald der Quadpacer deaktiviert wurde.
, Zum Reaktivieren des Quadpacer: Halten Sie die Taste für
individuelles Putzen 5 Sekunden gedrückt, bis Sie zwei Signaltöne
hören. Dies bedeutet, dass die Quadpacer-Funktion wieder
eingeschaltet ist.
Hinweis: Bei den vorprogrammierten Go Care- und Max Care-Einstellungen
kann die Quadpacer-Funktion nicht deaktiviert werden.
Kabelaufwicklung des Deluxe-Ladegeräts (nur bestimmte
Gerätetypen)
Umfasst Ihr Modell eine Abdeckung und Basis des Deluxe-Ladegeräts,
ist das Reiseladegerät in der Abdeckung vorinstalliert. Ist Ihnen das Kabel
zu lang, können Sie das überschüssige Kabel in der Kabelaufwicklung der
Ladestation verstauen.
1 Um die Abdeckung von der Basis des Ladegeräts zu trennen, drücken
Sie auf die beiden grauen Entriegelungsleisten an der Basis und
ziehen die weiße Abdeckung des Ladegeräts nach oben.
DEUTSCH
21
2 Überschüssiges Kabel können Sie, wie in der Abbildung gezeigt, um
die graue Basis der Ladestation wickeln. Achten Sie darauf, dass sich
das Kabel auf der Innenseite der beiden Klemmen befindet.
3 Wenn Sie das überschüssige Kabel aufgewickelt haben, führen Sie das
Kabel durch die kleine Rille auf der Rückseite der grauen Basis des
Ladegeräts.
4 Setzen Sie die Abdeckung des Ladegeräts mit leichtem Druck auf die
Basis, bis sie einrastet.
Tipp: Besonders praktisch auf Reisen ist das Reiseladegerät, das Sie
herausnehmen und ohne Abdeckung und Basis benutzen können.
Kabelaufwicklung beim UV Cleaner (nur bei bestimmten
Typen)
-
Umfasst Ihr Modell einen UV Cleaner, können Sie überschüssiges Kabel
in der Kabelaufwicklung auf der Unterseite des UV Cleaners verstauen.
Keimfrei Reinigen (nur bestimmte Gerätetypen)
-
Mit dem UV Cleaner können Sie den Bürstenkopf nach jedem
Gebrauch reinigen.
Benutzen Sie den UV Cleaner nicht, wenn bei geöffneter Klappe die UVLampe noch leuchtet oder das Philips-Logo am UV Cleaner zerbrochen
ist bzw. ganz fehlt. UV-Licht kann schädlich für das menschliche Auge und
die Haut sein. Halten Sie den UV Cleaner immer von Kindern fern.
Ziehen Sie den Netzstecker des UV Cleaners und rufen Sie Ihr ServiceCenter an, wenn der UV Cleaner bei Betrieb raucht oder Brandgeruch
verströmt.
1 Spülen Sie den Bürstenkopf nach Gebrauch aus und schütteln Sie
überschüssiges Wasser ab.
Während der Reinigung darf sich die Schutzkappe nicht auf dem
Bürstenkopf befinden.
22
DEUTSCH
2 Drücken Sie zum Öffnen der Klappe am UV Cleaner die
Entriegelungstaste.
3 Setzen Sie den Bürstenkopf auf einen der beiden Stifte im UV
Cleaner.
- Vergewissern Sie sich, dass die Borsten des Bürstenkopfes direkt auf die
Lampe gerichtet sind.
Hinweis: Reinigen Sie ausschließlich Sonicare ProResults-Bürstenköpfe im UV
Cleaner.
4 Überprüfen Sie, dass der UV Cleaner an die Steckdose angeschlossen
ist.
5 Schließen Sie die Klappe und drücken Sie den grünen Ein-/
Ausschalter zur Auswahl des UV-Reinigungsvorgangs einmal.
Hinweis: Der UV Cleaner lässt sich nur bei geschlossener Klappe einschalten.
Hinweis:Wird die Klappe während der Reinigung geöffnet, hält der UV Cleaner
den Vorgang an.
Hinweis: Der Reinigungszyklus dauert 10 Minuten, danach schaltet sich das
Gerät automatisch aus.
, Der UV Cleaner ist in Betrieb, wenn das blaue Licht durch das
Philips-Logo scheint und die LED-Anzeige für die UV-Reinigung
langsam blinkt.
, Nach beendetem Reinigungszyklus leuchtet die LED-Anzeige für die
UV-Reinigung ununterbrochen grün und der UV Cleaner schaltet
sich automatisch aus.
Reinigung
Reinigen Sie die Bürstenköpfe, das Handstück, das Reise-Ladegerät, die
Hülle für das Ladegerät und das UV Cleaner nicht in der Spülmaschine.
Handstück der Zahnbürste
1 Nehmen Sie den Bürstenkopf ab und spülen Sie den Metallschaft mit
warmem Wasser ab.
Drücken Sie nicht mit scharfkantigen Gegenständen auf die
Gummidichtung um den Metallschaft, da dies zu Beschädigungen führen
kann.
2 Wischen Sie die Oberfläche des Handstücks mit einem feuchten Tuch
ab.
DEUTSCH
23
Bürstenkopf
1 Spülen Sie Bürstenkopf und Borsten nach jedem Gebrauch unter
fließendem Wasser ab.
2 Nehmen Sie einmal pro Woche den Bürstenkopf vom Handstück und
spülen Sie die Verbindung zwischen Bürstenkopf und Handstück mit
warmem Wasser ab.
Reise-Ladegerät und Deluxe-Ladegerät (nur bei bestimmten
Typen)
1 Ziehen Sie den Netzstecker des Ladegeräts.
2 Nur bei bestimmten Typen: Nehmen Sie das Deluxe-Ladegerät ab,
und nehmen Sie das Reise-Ladegerät heraus.
3 Wischen Sie die Oberfläche des Ladegeräts mit einem feuchten Tuch
ab.
UV Cleaner (nur bestimmte Gerätetypen)
Reinigen Sie den UV Cleaner nicht, wenn die UV-Lampe noch heiß ist.
Für eine optimale Wirksamkeit sollte der UV Cleaner einmal pro Woche
gereinigt werden.
1 Ziehen Sie den Netzstecker des UV Cleaners.
2 Heben Sie die Abtropfschale leicht an und ziehen Sie sie heraus.
Spülen Sie die Abtropfschale ab und wischen Sie sie mit einem
feuchten Tuch nach.
3 Reinigen Sie alle Reflektoroberflächen mit einem feuchten Tuch.
4 Nehmen Sie den Schutzschirm vor der UV-Lampe heraus.
Heben Sie ihn dazu leicht an (1) und ziehen Sie ihn heraus (2).
5 Nehmen Sie die UV-Lampe heraus.
Halten Sie die Lampe fest und ziehen Sie sie aus der Metallklammer.
6 Reinigen Sie den Schutzschirm und die UV-Lampe mit einem
feuchten Tuch.
7 Setzen Sie die UV-Lampe wieder ein.
Richten Sie dazu die Unterseite der Lampe mit der Metallklammer aus und
drücken Sie die Lampe in die Klammer.
8 Setzen Sie den Schutzschirm wieder ein.
Setzen Sie dazu die Stifte des Schirms auf die Schlitze der reflektierenden
Oberfläche bei der UV-Lampe. Führen Sie die Stifte in die Schlitze ein und
schieben Sie den Schutzschirm nach unten, bis er sicher im UV Cleaner
befestigt ist.
24
DEUTSCH
Aufbewahrung
-
-
Wenn Sie das Gerät längere Zeit nicht benutzen, sollten Sie den
Netzstecker ziehen, das Gerät reinigen und an einem kühlen, trockenen
Ort ohne direkte Sonneneinstrahlung aufbewahren. Das Kabel kann in
der Kabelaufwicklung aufbewahrt werden.
Sie können die Bürstenköpfe auf der Rückseite des Deluxe-Ladegeräts
aufhängen (nur bei bestimmten Typen).
Ersatz
Bürstenkopf
-
Um optimale Ergebnisse zu erzielen, tauschen Sie SonicareBürstenköpfe spätestens nach 3 Monaten aus.
Benutzen Sie ausschließlich Sonicare ProResults-Ersatzbürstenköpfe.
UV-Lampe
-
Ersatz-UV-Lampen können beim Service-Center in Ihrem Land oder
einem autorisierten Philips-Händler bestellt werden.
Entsorgung
-
-
Werfen Sie das Gerät am Ende der Lebensdauer nicht in den
normalen Hausmüll. Bringen Sie es zum Recycling zu einer offiziellen
Sammelstelle. Auf diese Weise helfen Sie, die Umwelt zu schonen.
Die in dem UV Cleaner installierte Lampe enthält Quecksilber, eine
Substanz, die die Umwelt gefährden kann. Werfen Sie die Lampe
deshalb nicht in den Hausmüll, sondern geben Sie sie bei einer
offiziellen Sammelstelle ab.
Der integrierte Akku enthält Substanzen, die die Umwelt gefährden
können. Entfernen Sie den Akku, bevor Sie das Gerät an einer offiziellen
Recyclingstelle abgeben. Geben Sie den gebrauchten Akku bei einer
Batteriesammelstelle ab. Falls Sie beim Entfernen des Akkus Probleme
haben, können Sie das Gerät auch an ein Philips Service-Center geben.
Dort wird der Akku umweltgerecht entsorgt.
Den Akku entfernen
Bitte beachten Sie, dass dieser Vorgang nicht rückgängig gemacht werden
kann.
1 Um den Akku komplett zu entladen, nehmen Sie das Handstück aus
dem Ladegerät oder UV Cleaner, schalten die Sonicare ein und lassen
sie laufen, bis sie zum Stillstand kommt.
Wiederholen Sie diesen Vorgang, bis Sie die Sonicare nicht mehr
einschalten können.
DEUTSCH
25
2 Stecken Sie einen (Standard)-Schraubendreher in den Schlitz an der
Unterseite des Handstücks. Drehen Sie den Schraubendreher gegen
den Uhrzeigersinn, um die Bodenabdeckung zu lösen.
3 Halten Sie das Handstück kopfüber und drücken Sie den Schaft nach
unten, um die internen Komponenten des Handstücks zu lösen.
4 Stecken Sie den Schraubendreher neben den Akkuverbindungen
unter die Platine und drehen Sie ihn, bis die Verbindungen
zerbrechen. Nehmen Sie die Platine heraus und lösen Sie den Akku
aus der Plastikhalterung.
Verbinden Sie das Gerät nicht mehr mit dem Stromnetz, nachdem Sie
den Akku entnommen haben.
Garantie und Kundendienst
Benötigen Sie weitere Informationen oder treten Probleme auf, wenden
Sie sich bitte an Ihren Philips-Händler, oder setzen Sie sich mit einem
Philips Service-Center in Ihrem Land in Verbindung (Telefonnummer siehe
Garantieschrift). Besuchen Sie auch die Philips Website www.philips.com.
Sie können auch direkt die Service-Abteilung von Philips Domestic
Appliances and Personal Care BV kontaktieren.
Garantieeinschränkungen
Die folgenden Geräteteile/Schäden unterliegen nicht den Bedingungen der
internationalen Garantie:
- Bürstenköpfe
- Schäden durch Missbrauch, falsche Benutzung, Fahrlässigkeit oder
Produktveränderungen.
- Normale Abnutzungserscheinungen wie abgeschlagene Stellen, Kratzer,
Abschürfungen, Verfärbungen oder Verblassen.
- UV-Lampe
Häufig gestellte Fragen
Dieses Kapitel enthält die am häufigsten zu diesem Gerät gestellten Fragen.
Sollten Sie hier keine Antwort auf Ihre Frage finden, wenden Sie sich bitte
an das Philips Service-Center in Ihrem Land.
26
DEUTSCH
Frage
Antwort
Warum funktioniert die
Sonicare-Zahnbürste nicht?
Unter Umständen muss die Sonicare aufgeladen werden. Laden Sie
die Sonicare mindestens 24 Stunden lang auf.
Möglicherweise führt die Steckdose keinen Strom. Steckdosen in
Badezimmerschränken über Waschbecken sowie Rasierer-Steckdosen
werden häufig zusammen mit der Raumbeleuchtung ausgeschaltet.
Unter Umständen müssen Sie den Bürstenkopf neu anbringen oder
austauschen.
Warum spüre ich beim
Verwenden der Sonicare ein
Kribbeln?
Bei erstmaliger Benutzung der Sonicare spüren Sie u. U. ein leichtes
Kitzeln oder Kribbeln. Dieses Gefühl lässt mit zunehmender
Gewöhnung an die Sonicare nach.
Der Bürstenkopf schlägt gegen
meine Zähne. Wie kann ich das
vermeiden?
Richten Sie den Bürstenkopf so aus, dass die Borsten in einem leichten
Winkel auf dem Zahnfleischsaum aufliegen.
Woran liegt es, dass die
Putzleistung geringer zu sein
scheint?
Möglicherweise müssen Sie die Sonicare aufladen.
Eventuell ist die Easy-Start-Funktion aktiviert. Deaktivieren Sie die
Easy-Start-Funktion (siehe Abschnitt “Produktmerkmale”).
Der Bürstenkopf muss möglicherweise ausgetauscht werden.
Warum funktioniert die Taste
für individuelles Putzen beim
Putzen nicht?
Wahrscheinlich haben Sie eine Putzeinstellung ausgewählt. Dann ist
die Taste für individuelles Putzen nicht aktiv (siehe “Die SonicareZahnbürste benutzen”).
Warum leuchtet die Anzeige
am UV Cleaner nicht auf?
Möglicherweise führt die Steckdose keinen Strom. Steckdosen in
Badezimmerschränken über Waschbecken sowie Rasierer-Steckdosen
werden häufig zusammen mit der Raumbeleuchtung ausgeschaltet.
Möglicherweise ist die Klappe des UV Cleaners nicht richtig
geschlossen.
Vielleicht muss die UV-Lampe ausgetauscht werden (siehe “Ersatz”).
Warum scheint die Leistung
der Zahnbürste während des
Putzens geringer zu werden?
Möglicherweise haben Sie die Max Care-Einstellung gewählt. Dabei
wechselt das Programm im 3-minütigen Putzzyklus zwischen
dem Clean- und dem Massage-Modus hin und her. Die beiden
Modi haben ein unterschiedliches Geräusch und unterschiedliche
Bürstenbewegungen.
Benötige ich ein spezielles
Reisetipp: Das Reise-Ladegerät, das Deluxe-Ladegerät und der UV
Ladegerät, wenn ich meine
Cleaner können weltweit mit allen üblichen Netzspannungen zwischen
Sonicare mit auf Reisen nehme? 100 und 240 V AC (50 oder 60 Hz) betrieben werden. Sie benötigen
lediglich einen passenden Netzteiladapter.
FRANÇAIS
27
Important
Lisez attentivement ce mode d’emploi avant d’utiliser l’appareil et
conservez-le pour un usage ultérieur.
Danger
- Évitez tout contact du chargeur et/ou de l’assainisseur avec l’eau. Ne les
placez pas et ne les rangez pas sur ou près d’une baignoire, d’un lavabo
ou d’un évier. Ne les plongez pas dans l’eau ni dans tout autre liquide.
Après le nettoyage, assurez-vous que le chargeur et/ou l’assainisseur
sont parfaitement secs avant de les brancher sur le secteur.
Avertissement
- Avant de brancher l’appareil, vérifiez que la tension indiquée sur le
socle du chargeur et/ou de l’assainisseur correspond à la tension
secteur locale.
- Il est impossible de remplacer le cordon d’alimentation. En cas de
dommages, le chargeur et/ou l’assainisseur devra/devront être mis au
rebut.
- Remplacez systématiquement le chargeur et/ou l’assainisseur par un
chargeur/assainisseur de même type pour éviter tout accident.
- N’utilisez pas le chargeur et/ou l’assainisseur à l’extérieur ou près de
surfaces chauffantes.
- Si l’appareil (tête de brosse, manche de la brosse, chargeur et/ou
assainisseur) est endommagé, cessez de l’utiliser. L’appareil ne
contient aucune pièce réparable. S’il est endommagé, contactez le
Service Consommateurs de votre pays (voir le chapitre « Garantie et
service »).
- Cet appareil n’est pas destiné à être utilisé par des personnes
(notamment des enfants) dont les capacités physiques, sensorielles
ou intellectuelles sont réduites, ou par des personnes manquant
d’expérience ou de connaissances, à moins que celles-ci ne soient sous
surveillance ou qu’elles aient reçu des instructions quant à l’utilisation
de l’appareil par une personne responsable de leur sécurité.
- Veillez à ce que les enfants ne puissent pas jouer avec l’appareil.
- Cessez d’utiliser l’assainisseur si la lampe UV reste allumée alors que le
portillon est ouvert. Les UV peuvent être dangereux pour les yeux et
la peau. Tenez toujours l’assainisseur hors de portée des enfants.
Attention
- Ne mettez pas la tête de brosse, le manche, le chargeur de voyage, le
couvercle du chargeur ou l’assainisseur au lave-vaisselle.
- Si vous avez reçu des soins bucco-dentaires, notamment au niveau des
gencives, au cours des deux derniers mois, consultez votre dentiste
avant d’utiliser cette brosse à dents.
- Consultez votre dentiste si vos gencives saignent de manière excessive
après utilisation de cette brosse à dents ou si le saignement persiste
après une semaine d’utilisation.
- La brosse à dents Sonicare est conforme aux normes de sécurité
relatives aux appareils électromagnétiques. Si vous avez des questions
concernant l’utilisation de la brosse à dents Sonicare avec un
stimulateur cardiaque ou tout autre dispositif implanté, contactez votre
médecin traitant ou le fabricant de ce dispositif avant utilisation.
- Si vous avez des problèmes de santé, consultez votre médecin avant
d’utiliser la brosse à dents Sonicare.
28
FRANÇAIS
-
-
-
Cet appareil a été conçu exclusivement pour le brossage des dents,
des gencives et de la langue. Ne l’utilisez jamais à d’autres fins. Si son
utilisation devait s’avérer inconfortable ou douloureuse, cessez d’utiliser
l’appareil et consultez votre médecin.
La brosse à dents Sonicare est un appareil de soins personnel et n’est
pas destinée à être utilisée sur plusieurs patients dans les cabinets ou
établissements dentaires.
Cessez d’utiliser une tête de brosse dont les poils sont écrasés ou
tordus. Remplacez la tête de brosse tous les 3 mois ou plus tôt si vous
constatez des signes d’usure.
N’utilisez pas d’autres têtes de brosse que celles recommandées par le
fabricant.
Si votre dentifrice contient du peroxyde, du bicarbonate de soude ou
du bicarbonate (couramment utilisés dans les dentifrices blanchissants),
nettoyez bien la tête de brosse avec de l’eau et du savon après chaque
utilisation afin de prévenir toute fissure éventuelle du plastique.
Ne touchez pas la lampe UV pendant et juste après le cycle
d’assainissement, lorsqu’elle est chaude.
N’utilisez pas l’assainisseur sans l’écran de protection pour éviter tout
contact avec la lampe, car elle peut être chaude.
Champs électromagnétiques (CEM)
Cet appareil Philips est conforme à toutes les normes relatives aux champs
électromagnétiques (CEM). Il répond aux règles de sécurité établies
sur la base des connaissances scientifiques actuelles s’il est manipulé
correctement et conformément aux instructions de ce mode d’emploi.
Sonicare (fig. 1)
A
B
C
D
E
F
G
H
I
J
K
Capuchon de protection hygiénique
Tête de brosse
Anneau de couleur interchangeable
Manche ergonomique
Bouton marche/arrêt
Bouton de brossage personnalisé
Modes de brossage
Routines de brossage
Indicateur de charge Deluxe
Chargeur Deluxe (certains modèles uniquement)
Couvercle du chargeur avec support pour tête de brosse (certains
modèles uniquement)
L Chargeur de voyage
M Socle du chargeur avec range-cordon
N Assainisseur UV avec chargeur intégré et range-cordon (certains
modèles uniquement)
- Non illustré : lampe UV
- Non illustré : plateau égouttoir de l’assainisseur
- Non illustré : écran de protection pour lampe UV
FRANÇAIS
29
Pour démarrer
Changement de l’anneau de couleur
Les têtes de brosse Sonicare sont fournies avec des anneaux de couleur
interchangeables, qui vous permettent de les identifier.
Pour changer l’anneau de couleur :
1 Retirez l’anneau de couleur situé à la base de la tête de brosse.
2 Faites glisser un bord du nouvel anneau, puis exercez une pression
sur l’autre côté pour le mettre en place.
Fixation de la tête de brosse
1 Orientez la tête de brosse de sorte que les poils soient alignés avec
l’avant du manche.
2 Insérez le manche métallique au maximum dans la tête de brosse.
clea
n
se
ns
itiv
e
Remarque : Le léger espace existant entre l’anneau de couleur et le manche
est normal.
Charge de la brosse à dents Sonicare
1 Branchez le chargeur ou l’assainisseur sur une prise secteur.
2 Placez le manche sur le chargeur ou l’assainisseur.
, Le voyant clignotant de l’indicateur de charge de la batterie indique
que la brosse à dents est en charge.
Indicateur de charge Deluxe :
Indique le niveau de charge de la batterie
- 3 témoins verts : 75-100 %
- 2 témoins verts : 50-74 %
- 1 témoin vert : 25-49 %
- 1 témoin jaune clignotant : moins de 25 %
Remarque : Lorsque le niveau de charge de la batterie est faible, la brosse à
dents Sonicare émet 3 signaux sonores et 1 témoin jaune de l’indicateur de
charge clignote pendant 30 secondes.
30
FRANÇAIS
Remarque : Pour que la batterie reste chargée en permanence, nous vous
recommandons de laisser la brosse Sonicare sur le chargeur ou l’assainisseur
lorsque vous ne l’utilisez pas. Il faut environ 24 heures pour charger
entièrement la batterie.
Utilisation de la brosse à dents Sonicare
Instructions de brossage
1 Humidifiez les poils de la tête de brosse, puis appliquez une petite
quantité de dentifrice.
2 Mettez les poils de la tête de brosse sur vos dents, en les inclinant
légèrement vers la gencive.
3 Allumez la brosse à dents Sonicare en appuyant sur le bouton
marche/arrêt.
4 Exercez une légère pression pour optimiser l’efficacité de la brosse à
dents Sonicare et laissez l’appareil brosser vos dents.
5 Déplacez lentement la tête de brosse le long de vos dents avec un
léger mouvement de va-et-vient, de sorte que les poils les plus longs
atteignent les espaces interdentaires. Continuez ainsi jusqu’à la fin du
cycle de brossage.
1
3
2
4
Remarque : Pour assurer un brossage uniforme, divisez votre
bouche en 4 sections à l’aide de la fonction Quadpacer (voir le
chapitre « Caractéristiques »).
6 Brossez chaque section pendant 30 secondes : commencez par la
section 1 (dents de la mâchoire supérieure, à l’extérieur), suivie de la
section 2 (dents de la mâchoire supérieure, à l’intérieur), puis de la
section 3 (dents de la mâchoire inférieure, à l’extérieur) et enfin de
la section 4 (dents de la mâchoire inférieure, à l’intérieur).
7 Une fois le cycle de brossage terminé, vous pouvez consacrer du
temps supplémentaire au brossage de la surface de mastication des
dents et insister sur les zones propices aux taches.Vous pouvez
également brosser votre langue avec la brosse à dents en marche ou
arrêtée.
La brosse à dents Sonicare est compatible avec :
- - les appareils orthodontiques (les têtes de brosse s’usent toutefois
plus rapidement) ;
- - les restaurations dentaires (plombages, couronnes, facettes) ;
Personnalisation du brossage
La brosse à dents Sonicare est paramétrée pour démarrer
automatiquement en mode Clean. Pour personnaliser le brossage :
1 Avant d’allumer la brosse Sonicare, appuyez sur le bouton de
brossage personnalisé pour faire défiler les modes et les routines.
, Le témoin vert indique le mode ou la routine sélectionnée.
Remarque : Lorsque la brosse à dents est allumée, vous pouvez changer
de mode mais pas de routine. Les routines doivent être sélectionnées avant
l’allumage de l’appareil.
FRANÇAIS
31
Modes de brossage
Mode Clean
Mode standard pour le nettoyage des dents de la mâchoire supérieure.
Mode Sensitive
Nettoyage en douceur, mais en profondeur, des gencives et des dents
sensibles.
Mode Massage
Stimulation en douceur des gencives.
Routines de brossage
Routine Go care
Cycle de brossage de 1 minute en mode Clean pour un nettoyage rapide.
La fonction Quadpacer émet un signal sonore toutes les 15 secondes.
Routine Max care
Cycle de brossage de 3 minutes combinant les modes Clean et Massage
pour une bouche parfaitement propre : 30 secondes en mode Clean
suivies de 15 secondes en mode Massage pour chacune des 4 sections de
votre bouche. La fonction Quadpacer émet un signal sonore toutes les
45 secondes.
Remarque : Dans le cadre d’études cliniques, il est conseillé de
sélectionner le mode Clean de 2 minutes. Le manche doit être
entièrement chargé. Désactivez la fonction Easy-start. Insistez
30 secondes de plus sur les zones les plus tachées.
Caractéristiques
Fonction Easy-start
-
La fonction Easy-start est activée sur ce modèle Sonicare.
Cette fonction, qui augmente progressivement la puissance lors des
14 premiers brossages, vous permet de vous habituer en douceur au
système Sonicare.
Remarque : Au cours des 14 premières utilisations, chaque cycle de brossage
doit durer au moins 1 minute pour que la fonction Easy-start se déroule
correctement.
Désactivation ou activation de la fonction Easy-start
1 Fixez la tête de brosse au manche.
2 Placez le manche sur le chargeur ou l’assainisseur préalablement
branché.
- Pour désactiver la fonction Easy-start :
Appuyez sur le bouton marche/arrêt et maintenez-le enfoncé pendant
5 secondes. Un signal sonore vous indique que la fonction Easy-start est
désactivée.
- Pour activer la fonction Easy-start :
Appuyez sur le bouton marche/arrêt et maintenez-le enfoncé pendant
5 secondes. Deux signaux sonores vous indiquent que la fonction Easystart est activée.
32
FRANÇAIS
Remarque : Il est recommandé de ne pas dépasser la période initiale
d’utilisation de la fonction Easy-start, sous peine de réduire l’efficacité de la
brosse à dents Sonicare dans l’élimination de la plaque dentaire.
Fonction Smartimer
La fonction Smartimer indique que le cycle de brossage est terminé en
éteignant automatiquement la brosse à dents à la fin du cycle.
Les dentistes recommandent de se brosser les dents 2 fois par jour
pendant au moins 2 minutes.
Fonction Quadpacer
1
3
2
4
La fonction Quadpacer est un minuteur à intervalles qui émet un
bref signal sonore et suspend le cycle pour vous rappeler de brosser
les 4 sections de votre bouche. Les signaux sont émis à différents
intervalles au cours du cycle de brossage en fonction du mode ou
de la routine choisie. Voir les sections « Instructions de brossage » et
« Personnalisation du brossage ».
La fonction Quadpacer est activée sur ce modèle. Pour la désactiver ou la
réactiver :
1 Placez le manche, auquel vous aurez fixé une tête de brosse, sur le
chargeur ou l’assainisseur préalablement branché.
2 Pour désactiver la fonction Quadpacer : appuyez sur le bouton de
brossage personnalisé et maintenez-le enfoncé pendant 5 secondes.
Un signal sonore vous indique que la fonction Quadpacer est
désactivée.
, Pour réactiver la fonction Quadpacer : appuyez sur le bouton de
brossage personnalisé et maintenez-le enfoncé pendant 5 secondes.
Deux signaux sonores vous indiquent que la fonction Quadpacer est
réactivée.
Remarque : La fonction Quadpacer ne peut pas être désactivée avec les
routines de brossage préprogrammées Go Care et Max Care.
Range-cordon sur chargeur Deluxe (certains modèles
uniquement)
Si votre modèle inclut le couvercle et le socle du chargeur Deluxe, le
chargeur de voyage est intégré au couvercle. Pour raccourcir le cordon
d’alimentation, enroulez-le autour du range-cordon situé dans le socle du
chargeur.
1 Pour séparer le couvercle du socle, appuyez sur les deux barres
grises situées sur le socle et tirez le couvercle blanc vers le haut.
FRANÇAIS
33
2 Ajustez la longueur du cordon en l’enroulant autour du socle gris,
comme indiqué sur l’image. Assurez-vous d’enrouler le cordon à
l’intérieur des deux leviers de fermeture.
3 Insérez ensuite le cordon dans la petite fente située à l’arrière du
socle gris.
4 Refermez le couvercle en exerçant une pression jusqu’à entendre un
bruit sec.
Conseil : Pour plus de confort lors de vos déplacements, vous pouvez retirer le
chargeur de voyage et l’utiliser sans le couvercle ni le socle.
Range-cordon sur assainisseur (certains modèles uniquement)
-
Si votre modèle inclut l’assainisseur, vous pouvez ajuster la longueur du
cordon en l’enroulant autour du range-cordon intégré dans le socle de
l’assainisseur.
Assainisseur (certains modèles uniquement)
-
L’assainisseur permet de nettoyer la tête de brosse après chaque
utilisation.
Cessez d’utiliser l’assainisseur si la lampe UV reste allumée alors que le
portillon est ouvert ou que le logo Philips est cassé ou manquant. Les
UV peuvent être dangereux pour les yeux et la peau. Tenez toujours
l’assainisseur hors de portée des enfants.
Si de la fumée ou une odeur de brûlé s’échappe de l’assainisseur
en fonctionnement, débranchez l’appareil et contactez le
Service Consommateurs.
1 Après chaque utilisation, rincez la tête de brosse et secouez-la pour
en retirer l’eau.
Ne mettez pas le capuchon de protection sur la tête de brosse lors de
l’assainissement.
34
FRANÇAIS
2 Pour ouvrir le portillon de l’assainisseur, appuyez sur le bouton de
déverrouillage du portillon.
-
3 Placez la tête de brosse sur l’un des 2 supports de l’assainisseur.
Assurez-vous de placer les poils de la tête de brosse directement face
à la lampe.
Remarque : Les têtes de brosse Sonicare ProResults ne doivent être nettoyées
que dans l’assainisseur.
4 Assurez-vous que l’assainisseur est branché sur la prise secteur.
5 Fermez le portillon et appuyez une fois sur le bouton vert marche/
arrêt pour sélectionner le cycle de nettoyage UV.
Remarque :Vous ne pouvez allumer l’assainisseur qu’une fois le portillon
correctement fermé.
Remarque : L’assainisseur s’éteint lorsque le portillon est ouvert pendant le
cycle d’assainissement.
Remarque : Le cycle de l’assainisseur dure 10 minutes, après quoi l’appareil
s’éteint automatiquement.
, Lorsque l’assainisseur est en marche, le voyant bleu au niveau
du logo Philips est allumé et le témoin de nettoyage UV clignote
lentement.
, Une fois le cycle terminé, le témoin de nettoyage UV cesse de
clignoter et devient vert ; l’assainisseur s’éteint automatiquement.
Nettoyage
Ne mettez pas les têtes de brosse, le manche, le chargeur de voyage, le
couvercle du chargeur ou l’assainisseur UV au lave-vaisselle.
Manche de la brosse à dents
1 Retirez la tête de brosse et rincez le manche métallique à l’eau
chaude.
N’appuyez pas sur le système de fermeture en caoutchouc autour du
manche métallique avec des objets pointus, sous peine de l’endommager.
2 Essuyez la surface du manche à l’aide d’un chiffon humide.
FRANÇAIS
35
Tête de brosse
1 Rincez la tête de brosse et les poils après chaque utilisation.
2 Retirez la tête de brosse du manche et rincez le raccord de la tête
de brosse au moins une fois par semaine à l’eau chaude.
Chargeur de voyage et chargeur Deluxe (certains modèles
uniquement)
1 Débranchez le chargeur.
2 Certains modèles uniquement : possibilité de démonter le chargeur
Deluxe et de retirer le chargeur de voyage.
3 Essuyez la surface du chargeur à l’aide d’un chiffon humide.
Assainisseur (certains modèles uniquement)
Ne nettoyez pas l’assainisseur lorsque la lampe UV est chaude.
Pour une efficacité optimale, il est recommandé de nettoyer l’assainisseur
une fois par semaine.
1 Débranchez l’assainisseur.
2 Soulevez légèrement le plateau égouttoir et retirez-le. Rincez le
plateau et nettoyez-le à l’aide d’un chiffon humide.
3 Nettoyez toutes les surfaces du réflecteur à l’aide d’un chiffon
humide.
4 Retirez l’écran de protection placé devant la lampe UV.
Pour retirer l’écran, soulevez-le doucement (1), puis sortez-le de l’appareil
(2).
5 Retirez la lampe UV.
Pour retirer la lampe, saisissez-la et sortez-la de sa fixation métallique.
6 Nettoyez l’écran de protection et la lampe UV à l’aide d’un chiffon
humide.
7 Réinsérez la lampe UV.
Pour réinsérer la lampe, alignez le bas de l’ampoule avec la fixation
métallique et enfoncez l’ampoule dans la fixation.
8 Réinsérez l’écran de protection.
Pour réinsérer l’écran, alignez les fiches de l’écran avec les fentes de la
surface du réflecteur situées près de la lampe UV. Insérez ensuite les
fiches dans les fentes et faites glisser l’écran vers le bas pour le fixer dans
l’assainisseur.
36
FRANÇAIS
Rangement
-
-
Si vous ne comptez pas utiliser l’appareil pendant une période
prolongée, débranchez le cordon d’alimentation de la prise secteur,
nettoyez l’appareil et rangez-le dans un endroit frais et sec, à l’abri de la
lumière. Utilisez le range-cordon pour ranger correctement le cordon
d’alimentation.
Vous pouvez ranger les têtes de brosse sur les supports situés à
l’arrière du chargeur Deluxe (certains modèles uniquement).
Remplacement
Tête de brosse
-
Pour obtenir des résultats optimaux, remplacez les têtes de
brosse Sonicare au moins tous les 3 mois.
Utilisez exclusivement des têtes de rechange Sonicare ProResults.
Lampe UV
-
Vous pouvez commander des lampes UV de rechange
auprès du Service Consommateurs de votre pays ou d’un
Centre Service Agréé Philips.
Mise au rebut
-
-
-
Lorsqu’il ne fonctionnera plus, ne jetez pas l’appareil avec les ordures
ménagères, mais déposez-le à un endroit assigné à cet effet, où
il pourra être recyclé. Vous contribuerez ainsi à la protection de
l’environnement.
La lampe de l’assainisseur contient du mercure, une substance qui peut
nuire à l’environnement. Lorsque vous mettez la lampe au rebut, ne
la jetez pas avec les ordures ménagères, mais déposez-la à un endroit
assigné à cet effet.
La batterie rechargeable intégrée contient des substances qui peuvent
nuire à l’environnement. Veillez à toujours retirer la batterie avant de
mettre l’appareil au rebut ou de le déposer à un endroit assigné à cet
effet. Déposez la batterie usagée à un endroit assigné à cet effet. Si
vous n’arrivez pas à retirer la batterie, vous pouvez apporter l’appareil
dans un Centre Service Agréé Philips qui prendra toute l’opération en
charge pour préserver l’environnement.
Retrait de la batterie rechargeable
Ce processus est irréversible.
1 Pour décharger la batterie rechargeable, retirez le manche du
chargeur ou de l’assainisseur, allumez la brosse à dents Sonicare et
laissez-la fonctionner jusqu’à ce qu’elle s’éteigne.
Répétez cette opération jusqu’à ce que la brosse à dents ne s’allume plus.
FRANÇAIS
37
2 Insérez un tournevis plat (standard) dans la fente située en bas du
manche. Tournez dans le sens inverse des aiguilles d’une montre pour
desserrer le couvercle inférieur.
3 Tenez le manche à l’envers et tirez sur l’axe pour retirer les
composants internes du manche.
4 Insérez le tournevis sous le circuit imprimé, à proximité des
connexions de la batterie, et tournez pour rompre ces connexions.
Retirez le circuit imprimé et séparez la batterie du boîtier en
plastique.
Ne branchez pas l’appareil sur le secteur après avoir retiré la batterie.
Garantie et service
Si vous souhaitez obtenir des informations supplémentaires ou si vous
rencontrez un problème, visitez le site Web de Philips à l’adresse
www.philips.com ou contactez le Service Consommateurs Philips de
votre pays (vous trouverez le numéro de téléphone correspondant
sur le dépliant de garantie internationale). S’il n’existe pas de
Service Consommateurs Philips dans votre pays, renseignez-vous auprès
de votre revendeur Philips local ou contactez le « Service Department of
Philips Domestic Appliances and Personal Care BV ».
Limitation de garantie
La garantie internationale ne couvre pas les éléments suivants :
- les têtes de brosse ;
- les dommages causés par une mauvaise utilisation, une négligence ou
des altérations ;
- les marques d’usure dues à un usage normal, comme les rayures,
abrasions et décolorations.
- Lampe UV
38
FRANÇAIS
Foire aux questions
Ce chapitre reprend les questions les plus fréquemment posées au sujet de
l’appareil. Si vous ne trouvez pas la réponse à votre question ici, contactez
le Service Consommateurs Philips de votre pays.
Question
Réponse
Pourquoi la brosse à dents
Sonicare ne fonctionne-t-elle
pas ?
Votre brosse à dents Sonicare a peut-être besoin d’être rechargée.
Dans ce cas, rechargez-la pendant au moins 24 heures.
La prise de courant n’est peut-être pas alimentée. Dans une salle de
bain, notez que l’alimentation électrique des prises, notamment celles
situées dans les armoires de toilette au-dessus des lavabos ou celles
destinées aux rasoirs, peut être coupée lorsque la lumière est éteinte.
Vous devez peut-être refixer ou remplacer la tête de brosse.
J’ai une sensation de
chatouillement lorsque j’utilise
la brosse à dents Sonicare.
Pourquoi ?
Vous pouvez éprouver une légère sensation de chatouillement lors
du premier brossage avec la brosse à dents Sonicare. Cette sensation
s’atténue après quelques utilisations.
La tête de brosse « cliquète »
sur mes dents. Que puis-je
faire ?
Ceci peut être évité en orientant correctement la tête de brosse et
en inclinant légèrement les poils vers la gencive.
La puissance du brossage
semble diminuer. Pourquoi ?
Il faut peut-être charger la brosse à dents Sonicare.
La fonction Easy-start a peut-être été activée. Désactivez-la (voir le
chapitre « Caractéristiques »).
Vous devez peut-être remplacer la tête de brosse.
Pourquoi le bouton de
brossage personnalisé ne
fonctionne-t-il pas lors du
brossage ?
Vous avez peut-être sélectionné une routine de brossage. Le cas
échéant, le bouton de brossage personnalisé est désactivé (voir le
chapitre « Utilisation de la brosse à dents Sonicare »).
Pourquoi le voyant de
l’assainisseur ne s’allume-t-il
pas ?
La prise de courant n’est peut-être pas alimentée. Dans une salle de
bain, notez que l’alimentation électrique des prises, notamment celles
situées dans les armoires de toilette au-dessus des lavabos ou celles
destinées aux rasoirs, peut être coupée lorsque la lumière est éteinte.
Il faut peut-être fermer le portillon de l’assainisseur.
Il faut peut-être remplacer la lampe UV (voir le
chapitre « Remplacement »).
Pourquoi la brosse à dents
semble-t-elle perdre de la
puissance lors du brossage ?
Vous avez peut-être sélectionné la routine de brossage Max Care. Le
cas échéant, la routine alterne les modes Clean et Massage au cours
d’un cycle de brossage de 3 minutes. Chacun des modes est associé à
un son et à un mouvement de brosse différents.
FRANÇAIS
39
Question
Réponse
Ai-je besoin d’un chargeur
spécial si je voyage avec ma
brosse à dents Sonicare ?
Conseil pour les déplacements : le chargeur de voyage, le
chargeur Deluxe et l’assainisseur sont conçus pour une tension
secteur comprise entre 100 et 240 V AC, à 50 ou 60 Hz. Il vous suffit
de vous munir d’un simple adaptateur de courant.
40
ITALIANO
Importante
Prima di utilizzare l’apparecchio, leggete attentamente il presente manuale e
conservatelo per eventuali riferimenti futuri.
Pericolo
- Tenete il caricabatterie e/o l’igienizzatore lontani dall’acqua. Non
appoggiateli né riponeteli vicino a vasche, lavandini, lavabi ecc. Non
immergete il caricabatterie e/o l’igienizzatore in acqua o in altre
sostanze liquide. Dopo la pulizia, assicuratevi che il caricabatterie e/o
l’igienizzatore siano completamente asciutti prima di collegarli alla presa
di corrente.
Avvertenza
- Prima di collegare l’apparecchio, controllate che la tensione indicata
sulla parte inferiore del caricabatterie e/o dell’igienizzatore corrisponda
a quella locale.
- Il cavo di alimentazione non può essere sostituito. Nel caso fosse
danneggiato, gettate il caricabatterie e/o l’igienizzatore.
- Sostituite il caricabatterie e/o l’igienizzatore esclusivamente con un
adattatore e/o un igienizzatore originale al fine di evitare situazioni
pericolose.
- Non utilizzate il caricabatterie e/o l’igienizzatore in esterno o in
prossimità di superfici calde.
- In caso di danneggiamenti (testina, manico, caricabatterie e/o
igienizzatore), non utilizzate in nessun caso l’apparecchio. Questo
apparecchio contiene componenti esclusi dalla garanzia. In caso di
danneggiamenti dell’apparecchio, contattate il Centro Assistenza Clienti
del vostro paese (vedere il capitolo “Garanzia e assistenza”).
- L’apparecchio non è destinato a persone (inclusi bambini) con capacità
mentali, fisiche o sensoriali ridotte, fatti salvi i casi in cui tali persone
abbiano ricevuto assistenza o formazione per l’uso dell’apparecchio da
una persona responsabile della loro sicurezza.
- Adottate le dovute precauzioni per evitare che i bambini giochino con
l’apparecchio.
- Non utilizzate l’igienizzatore se la lampadina a raggi UV rimane accesa
nonostante lo sportello sia aperto. I raggi UV potrebbero essere nocivi
per gli occhi e la pelle. Tenete l’igienizzatore lontano dalla portata dei
bambini.
Attenzione
- Non pulite la testina, il manico, il caricabatterie, il coperchio del
caricabatterie e/o l’igienizzatore nella lavastoviglie.
- Se nel corso degli ultimi 2 mesi vi siete sottoposti a interventi su denti
o gengive, chiedete il parere del vostro dentista prima di utilizzare lo
spazzolino.
- Rivolgetevi al vostro dentista nel caso di eccessivo sanguinamento
dopo l’uso dell’apparecchio o qualora tale sanguinamento continui per
più di una settimana.
- Lo spazzolino Sonicare è conforme alle norme di sicurezza in materia
di dispositivi elettromagnetici. In caso di portatori di pacemaker o di
altro dispositivo impiantato, consultate il vostro medico o il produttore
del dispositivo prima dell’uso.
- In caso di problemi orali, consultate il medico prima di utilizzare
Sonicare.
ITALIANO
-
-
41
Questo apparecchio è destinato esclusivamente alla pulizia di denti e
gengive. Non utilizzatelo per scopi diversi da quelli previsti. Qualora
avvertiate dolore durante l’utilizzo, contattate il vostro medico.
Lo spazzolino Sonicare è un apparecchio assolutamente personale e
non deve essere utilizzato da più persone o presso studi dentistici.
Non utilizzate l’apparecchio in presenza di setole rovinate o piegate.
Sostituite la testina al massimo ogni 3 mesi o prima in presenza di segni
di usura.
Utilizzate esclusivamente le testine consigliate dal produttore.
Se il dentifricio utilizzato contiene perossido, bicarbonato di sodio
o bicarbonato (impiegati di solito per i dentifrici sbiancanti), pulite
accuratamente la testina con acqua e sapone dopo ogni uso, onde
evitare di danneggiare la parte in plastica.
La lampadina a raggi UV diventa incandescente durante e subito
dopo il ciclo di igienizzazione. Non toccate la lampadina a raggi UV se
incandescente.
Non mettete l’igienizzatore in funzione senza lo schermo protettivo
per evitare il contatto con una lampadina.
Campi elettromagnetici (EMF)
Questo apparecchio Philips è conforme a tutti gli standard relativi ai campi
elettromagnetici (EMF). Se utilizzato in modo appropriato seguendo le
istruzioni contenute nel presente manuale utente, l’apparecchio consente
un utilizzo sicuro come confermato dai risultati scientifici attualmente
disponibili.
Spazzolino Sonicare (fig. 1)
A
B
C
D
E
F
G
H
I
J
K
L
M
N
-
Cappuccio igienico da viaggio
Testina
Ghiera colorata intercambiabile
Impugnatura morbida
Pulsante on/off
Pulsante di pulizia personalizzata
Modalità di utilizzo
Programmi di pulizia
Indicatore di ricarica deluxe
Caricabatterie deluxe (solo alcuni modelli)
Coperchio caricabatterie con supporto testina (solo alcuni modelli)
Caricabatterie da viaggio
Base caricabatterie con avvolgicavo
Igienizzatore UV con caricabatterie integrato e avvolgicavo (solo alcuni
modelli)
Non illustrato: lampadina a raggi UV
Non illustrato: vassoio antigoccia igienizzatore
Non illustrato: schermo protettivo per lampadina a raggi UV
Messa in funzione
Sostituzione della ghiera colorata
Le testine Sonicare vengono fornite insieme a ghiere colorate
intercambiabili ideali per personalizzare la testina.
Per sostituire la ghiera colorata:
ITALIANO
1 Estraete la ghiera colorata dalla base della testina.
2 Fate scorrere un lato della nuova ghiera lungo la base della testa,
quindi premete l’altro lato finché la ghiera non scatta in posizione.
Inserimento della testina
1 Allineate la testina in modo che le setole siano in corrispondenza del
manico.
2 Premete saldamente la testina sulla parte metallica fino all’arresto.
Nota tra la ghiera colorata e il manico è presente un piccolo spazio.
clea
n
se
ns
itiv
e
42
Come ricaricare Sonicare
1 Inserite il caricabatterie o l’igienizzatore nella presa di corrente.
2 Posizionate il manico sul caricabatterie o sull’igienizzatore.
, Quando lo spazzolino è in carica, la spia della batteria inizia a
lampeggiare.
Indicatore di ricarica deluxe:
Indica l’autonomia residua della batteria
- 3 LED verdi: 75-100%
- 2 LED verdi: 50-74%
- 1 LED verde: 25-49%
- 1 LED giallo lampeggiante: meno del 25%
Nota se la batteria dello spazzolino Sonicare è scarica, vengono emessi 3
segnali acustici e 1 LED dell’indicatore di ricarica lampeggia in giallo per 30.
Nota per mantenere la batteria sempre carica, si consiglia di tenere lo
spazzolino Sonicare sul caricabatterie o sull’igienizzatore quando non viene
utilizzato. Una ricarica completa richiede almeno 24 ore.
ITALIANO
43
Modalità d’uso dello spazzolino Sonicare
Istruzioni d’uso
1 Bagnate le setole e applicate una piccola quantità di dentifricio.
2 Appoggiate le setole contro i denti con una leggera angolazione
rispetto alla gengiva.
3 Premete il pulsante on/off per accendere lo spazzolino Sonicare.
4 Per ottimizzare l’efficacia, esercitate solo una leggera pressione e
lasciate che lo spazzolino Sonicare lavori per voi.
5 Muovete delicatamente lo spazzolino avanti e indietro, in modo che
le setole più lunghe raggiungano lo spazio interdentale. Procedete in
questo modo per tutto il ciclo.
1
3
2
4
Nota per assicurare una corretta pulizia di tutti i denti, dividete la bocca in 4
sezioni utilizzando Quadpacer (vedere capitolo “Caratteristiche”).
6 Iniziate a pulire la sezione 1 (parte superiore esterna) per 30
secondi prima di passare alla sezione successiva (parte superiore
interna). Procedete quindi con la sezione 3 (parte inferiore esterna)
e continuate per 30 secondi prima di passare alla sezione 4 (parte
inferiore interna).
7 Al termine del ciclo di pulizia, potete dedicare alcuni secondi alla
superficie orizzontale dei denti e alle zone macchiate. Potete inoltre
spazzolare la lingua con lo spazzolino acceso o spento, a seconda
delle vostre preferenze.
Sonicare può essere utilizzato su:
- Apparecchi dentali (le testine si consumano più rapidamente)
- Impianti odontoiatrici (otturazioni, corone, coperture)
Personalizzazione dell’uso dello spazzolino
Lo spazzolino Sonicare viene avviato automaticamente nella modalità di
pulizia predefinita.
1 Prima di accendere Sonicare, premete il pulsante di pulizia
personalizzata per selezionare le modalità e i programmi desiderati.
, Il LED verde indica la modalità o il programma selezionato.
Nota quando lo spazzolino è acceso, potete selezionare un’altra modalità
ma non un altro programma. I programmi devono essere selezionati prima di
accendere l’apparecchio.
Modalità di utilizzo
Modalità pulizia
Modalità standard per una pulizia accurata.
Modalità denti sensibili
Pulizia delicata ma efficace per denti e gengive sensibili.
Modalità massaggio
Stimolazione delicata delle gengive.
44
ITALIANO
Programmi di pulizia
Programma Go Care
Ciclo di pulizia da 1 minuto in modalità pulizia per un’azione rapida. Ad
intervalli di 15 secondi viene emesso il segnale Quadpacer.
Programma Max Care
Ciclo di pulizia da 3 minuti che combina modalità pulizia e messaggio in
un unico programma per una pulizia accurata. Per ciascuna delle 4 sezioni
della bocca, sono previsti 30 secondi in modalità pulizia e 15 in modalità
massaggio. Ad intervalli di 45 secondi viene emesso il segnale Quadpacer.
Nota quando Sonicare viene impiegato per studi clinici, è
necessario selezionare la modalità pulizia predefinita da
2 minuti. Il manico deve essere completamente carico.
Disattivate la funzione Easy-start. In caso di macchie
persistenti, continuate per altri 30 secondi.
Caratteristiche
Easy-start
-
Questo modello Sonicare è dotato della funzione Easy-start attivata.
La funzione Easy-start aumenta la potenza per i primi 14 cicli di pulizia
per facilitare l’utilizzo di Sonicare.
Nota durante i primi 14 cicli di utilizzo, spazzolate i denti per almeno 1
minuto per attivare correttamente il ciclo Easy-start.
Disattivazione/attivazione della funzione Easy-start
1 Inserite la testina sul manico.
2 Posizionate il manico sul caricabatterie o sull’igienizzatore collegato
alla presa di corrente.
- Per disattivare la funzione Easy-Start:
Tenete premuto il pulsante on/off per 5 secondi. Verrà quindi emesso un
segnale acustico per indicare la disattivazione della funzione Easy-start.
- Per attivare la funzione Easy-Start:
Tenete premuto il pulsante on/off per 5 secondi. Verranno quindi emessi 2
segnali acustici per indicare l’attivazione della funzione Easy-start.
Nota si sconsiglia di utilizzare la funzione Easy-start dopo il periodo iniziale in
quanto potrebbe ridurre l’efficacia dello spazzolino Sonicare nella rimozione
della placca.
Smartimer
La funzione Smartimer spegne automaticamente lo spazzolino per indicare
che il ciclo di pulizia è completo.
I dentisti consigliano di utilizzare lo spazzolino almeno 2 volte al giorno per
2 minuti.
ITALIANO
45
Quadpacer
1
3
2
4
La funzione Quadpacer è un timer a intervalli che emette un breve
segnale acustico e interrompe il funzionamento per indicare di pulire
le 4 sezioni della bocca. A seconda della modalità o del programma di
pulizia selezionato, la funzione Quadpacer emette un segnale acustico a
intervalli differenti durante il ciclo di pulizia (vedere le sezioni “Istruzioni
d’uso” e “Personalizzazione dell’uso dello spazzolino”).
La funzione Quadpacer per questo modello è stata attivata. Per attivare/
disattivare Quadpacer:
1 Posizionate il manico con la testina collegata nel caricabatterie e/o
igienizzatore collegato alla presa di corrente.
2 Per disattivare Quadpacer: tenete premuto il pulsante di pulizia
personalizzata per 5 secondi.Verrà quindi emesso un segnale acustico
per indicare la disattivazione di Quadpacer.
, Per riattivare Quadpacer: tenete premuto il pulsante di pulizia
personalizzata per 5 secondi finché non vengono emessi 2 segnali
acustici per indicare la riattivazione di Quadpacer.
Nota Quadpacer non può essere disattivato se si selezionano i programmi di
pulizia Go Care e Max Care.
Avvolgicavo per il caricabatterie deluxe (solo alcuni modelli)
Se il modello acquistato è dotato di coperchio e base del caricabatterie
deluxe, il caricabatterie da viaggio è preinstallato all’interno del coperchio.
Se desiderate accorciare il cavo di alimentazione, potete riporre il cavo in
eccesso nell’avvolgicavo integrato nella base.
1 Per separare il coperchio dalla base del caricabatterie, premete
le due barre a scatto grigie poste sulla base del caricabatterie e
spingete il coperchio bianco verso l’alto.
2 Avvolgete il cavo in eccesso intorno alla base grigia come illustrato
nell’immagine. Assicuratevi che il cavo sia avvolto all’interno delle due
leve a scatto.
3 Dopo aver riposto il cavo in eccesso, fate scorrere il cavo di
alimentazione lungo la piccola scanalatura sul retro della base grigia.
4 Ricollegate il coperchio del caricabatterie esercitando pressione sulla
base finché non scatta in posizione.
Consiglio per la massima praticità durante gli spostamenti, potete rimuovere il
caricabatterie da viaggio e utilizzarlo senza il coperchio e la base.
46
ITALIANO
Avvolgicavo dell’igienizzatore (solo alcuni modelli)
-
Se il modello acquistato comprende l’igienizzatore, potete riporre il
cavo in eccesso utilizzando la funzione avvolgicavo integrata nella base
dell’igienizzatore.
Igienizzazione (solo alcuni modelli)
-
Grazie all’igienizzatore, potete pulire la testina dopo ogni utilizzo.
non utilizzate l’igienizzatore se la lampadina a raggi UV rimane accesa
nonostante lo sportello sia aperto o se il logo Philips è rotto o è privo
dell’igienizzatore. I raggi UV potrebbero essere nocivi per gli occhi e la
pelle. Tenete l’igienizzatore lontano dalla portata dei bambini.
scollegate l’igienizzatore e rivolgetevi a centro assistenza clienti
se l’igienizzatore emette fumo o odore di bruciato durante il
funzionamento.
1 Dopo un ciclo di pulizia, sciacquate la testina ed eliminate l’acqua in
eccesso.
Non posizionate il cappuccio da viaggio sulla testina durante
l’igienizzazione.
2 Per aprire lo sportello dell’igienizzatore, premete il pulsante di
sgancio dello sportello.
-
3 Posizionate le testine su una dei 2 ganci dell’igienizzatore.
Assicuratevi che le setole della testina siano in corrispondenza della
lampadina.
Nota l’igienizzatore può essere utilizzato solo con testine Sonicare ProResults.
4 Verificate che l’igienizzatore sia collegato alla presa di corrente.
5 Chiudete lo sportello e premete una volta il pulsante on/off verde
per selezionare il ciclo di pulizia UV.
Nota potete accendere l’igienizzatore solo quando lo sportello è ben chiuso.
Nota se aprite lo sportello durante il funzionamento, l’igienizzatore si arresta.
Nota il ciclo di igienizzazione dura 10 minuti, trascorsi i quali l’igienizzatore si
spegne automaticamente.
, L’igienizzatore è in funzione quando la spia blu si accende sul logo
Philips e il LED UV lampeggia lentamente.
, Al termine del ciclo di igienizzazione, il LED UV si accende in luce
continua verde e l’igienizzatore si spegne automaticamente.
ITALIANO
47
Pulizia
Non pulite le testine, il manico, il caricabatterie da viaggio, il coperchio
del caricabatterie e l’igienizzatore UV nella lavastoviglie.
Manico dello spazzolino
1 Rimuovete la testina e sciacquate le parte metallica con acqua calda.
non utilizzate oggetti appuntiti sulla guarnizione in gomma intorno alla
parte metallica onde evitare danneggiamenti.
2 Passate un panno morbido sull’intera superficie del manico.
Testina
1 Risciacquate la testina e le setole dopo l’uso.
2 Rimuovete la testina dal manico e sciacquate in acqua calda l’attacco
della testina almeno una volta a settimana.
Caricabatterie da viaggio e caricabatterie deluxe (solo alcuni
modelli)
1 Scollegate il caricabatterie dalla presa di corrente.
2 Solo alcuni modelli: smontate il caricabatterie deluxe e rimuovete il
caricabatterie da viaggio.
3 Passate un panno morbido sull’intera superficie del caricabatterie.
Igienizzatore (solo alcuni modelli)
Non pulite l’igienizzatore quando la lampadina UV è incandescente.
Per la massima efficacia, si consiglia di pulire l’igienizzatore ogni settimana.
1 Scollegate l’igienizzatore dalla presa di corrente.
2 Sollevate leggermente il vassoio antigoccia ed estraetelo. Sciacquatelo
e asciugatelo con un panno morbido.
3 Pulite tutte le superfici del riflettore con un panno morbido.
48
ITALIANO
4 Rimuovete lo schermo protettivo posto dinanzi alla lampadina UV.
Per rimuovere lo schermo, sollevatelo leggermente (1) ed estraetelo (2).
5 Rimuovete la lampadina UV.
Per rimuovere la lampadina, afferratela e estraetela dal gancio metallico.
6 Pulite lo schermo protettivo e la lampadina UV con un panno
morbido.
7 Reinserite la lampadina UV.
Per reinserire la lampadina, allineate la base della lampadina con il gancio
metallico, quindi esercitare pressione per inserirla nel gancio.
8 Reinserite lo schermo protettivo.
Per reinserire lo schermo, allineate i ganci dello schermo con le fessure
poste sulla superficie riflettente accanto alla lampadina UV. A questo punto,
reinserite i ganci nelle fessure e fateli scorrere lungo lo schermo per fissarlo
nell’igienizzatore.
Come riporre l’apparecchio
-
-
Se pensate di non utilizzare l’apparecchio per un lungo periodo,
rimuovete il cavo di alimentazione dalla presa di corrente. Pulite
l’apparecchio e riponetelo in un luogo fresco e asciutto lontano
dai raggi diretti del sole. Potete utilizzare l’avvolgicavo per riporre
facilmente il cavo.
Potete riporre le testine sui ganci sul retro del caricabatterie deluxe
(solo alcuni modelli).
Sostituzione
Testina
-
Per ottenere risultati ottimali, sostituite la testina del Sonicare ogni 3
mesi.
Utilizzate solo testine Sonicare ProResults originali.
Lampadina a raggi UV
-
Potete ordinare le lampadine a raggi UV di ricambio presso il Centro
Assistenza Clienti del vostro paese o presso un centro autorizzato
Philips.
Smaltimento
-
-
Per contribuire alla tutela dell’ambiente, non gettate l’apparecchio tra i
rifiuti domestici quando non viene più utilizzato, ma consegnatelo a un
centro di raccolta ufficiale.
La lampada dell’apparecchio contiene mercurio, ossia una sostanza
potenzialmente nociva per l’ambiente. Al momento dello smaltimento
della lampada, non gettatela tra i rifiuti domestici ma consegnatela a un
centro di raccolta ufficiale.
La batteria ricaricabile integrata contiene sostanze potenzialmente
nocive per l’ambiente. Rimuovete sempre la batteria prima di smaltire
l’apparecchio e consegnarlo a un centro di raccolta ufficiale. Smaltite la
batteria in un apposito centro di raccolta. In caso di difficoltà durante
ITALIANO
49
la rimozione della batteria, consegnate l’apparecchio a un centro di
assistenza Philips, che si occuperà della rimozione della batteria e dello
smaltimento dell’apparecchio.
Rimozione della batteria ricaricabile
ricordate che questo processo non è reversibile.
1 Per scaricare completamente la batteria ricaricabile, rimuovete il
manico dal caricabatterie o dall’igienizzatore, spegnete lo spazzolino
Sonicare e lasciatelo in funzione fino all’arresto.
Ripetete questo passaggio finché lo spazzolino Sonicare non si accende più.
2 Inserite un cacciavite a testa piatta (standard) nella scanalatura
sulla base del manico. Ruotate il cacciavite in senso antiorario per
rilasciare il cappuccio inferiore.
3 Tenete il manico al contrario e premete la parte metallica per
rilasciare i componenti interni.
4 Inserite il cacciavite solo il circuito stampato, accanto ai collegamenti
della batteria, e ruotate il cacciavite per rompere i collegamenti.
Rimuovete il circuito stampato ed estraete la batteria dal supporto in
plastica.
Non ricollegate l’apparecchio alla presa di corrente dopo aver rimosso
la batteria.
Garanzia e assistenza
Per ulteriori informazioni o eventuali problemi, visitate il sito Web Philips
all’indirizzo www.philips.com oppure contattate il Centro Assistenza
Clienti Philips locale (il numero di telefono è riportato nell’opuscolo della
garanzia). Qualora non fosse disponibile un Centro Assistenza Clienti locale,
rivolgetevi al rivenditore autorizzato Philips oppure contattate il Reparto
assistenza Philips Domestic Appliances & Personal Care BV.
Limitazioni della garanzia
I seguenti componenti sono esclusi dalla garanzia internazionale:
- Testine
- I danni dovuti a un uso improprio, abuso, trascuratezza o alterazioni.
- La normale usura, incluso scheggiature, graffi, abrasioni, scoloritura o
alterazione dei colori.
- Lampadina a raggi UV
50
ITALIANO
Domande frequenti
Nella presente sezione sono riportate le domande più frequenti relative
all’apparecchio. Se non riuscite a trovare una risposta esaustiva alla vostra
domanda, rivolgetevi al Centro Assistenza Clienti del vostro paese.
Domanda
Risposta
Perché lo spazzolino Sonicare
non funziona?
Potrebbe essere necessario ricaricare lo spazzolino Sonicare.
Ricaricatelo per almeno 24 ore.
La presa potrebbe non funzionare. Spesso l’erogazione di corrente
alle prese dei bagni, vicino ai lavandini, viene interrotta quando si
spegne la luce.
Provate a inserire nuovamente o a sostituire la testina.
Perché quando uso lo
Le prime volte che utilizzate lo spazzolino Sonicare potreste avvertire
spazzolino Sonicare avverto una una leggera sensazione di fastidio/solletico. Man mano che vi abituate
sensazione di solletico?
al nuovo spazzolino, questa sensazione tenderà a diminuire.
La testina sbatte contro i
denti. Come posso risolvere il
problema?
Per evitare questo problema, tenete la testina nella corretta
inclinazione con le setole posizionate sul bordo gengivale.
Perché lo spazzolino mi sembra
meno potente del solito?
Potrebbe essere necessario ricaricare lo spazzolino Sonicare.
Potrebbe essere attiva la funzione Easy-start. Disattivarla (vedere
capitolo “Caratteristiche”).
Potrebbe essere necessario sostituire la testina.
Perché il pulsante di pulizia
personalizzata non funziona?
È possibile che abbiate selezionato un programma di pulizia. In tal
caso, il pulsante di pulizia personalizzato non è attivo (vedere il
capitolo “Modalità d’uso dello spazzolino Sonicare”).
Perché la spia
dell’igienizzatore non si
accende?
La presa potrebbe non funzionare. Spesso l’erogazione di corrente
alle prese dei bagni, vicino ai lavandini, viene interrotta quando si
spegne la luce.
Potrebbe essere necessario chiudere lo sportello dell’igienizzatore.
È possibile che la lampadina a raggi UV debba essere sostituita
(vedere il capitolo “Sostituzione”).
Perché la potenza dello
spazzolino sembra diminuire
durante l’uso?
È possibile che abbiate selezionato il programma di pulizia Max Care.
In tal caso, il programma alterna tra le modalità pulizia e messaggio
durante il ciclo di 3 minuti. Queste modalità hanno diversi suoni e
movimenti.
Devo utilizzare un caricabatterie
speciale per lo spazzolino
Sonicare durante gli
spostamenti?
Consiglio durante i viaggi: il caricabatterie da viaggio, il caricabatterie
deluxe e l’igienizzatore possono essere utilizzati ovunque sia
disponibile una tensione compresa tra 100-240 V AC, a 50 o 60 Hz. È
sufficiente utilizzare un adattatore.
NEDERLANDS
51
Belangrijk
Lees deze gebruiksaanwijzing zorgvuldig door voordat u het apparaat gaat
gebruiken. Bewaar de gebruiksaanwijzing om deze indien nodig te kunnen
raadplegen.
Gevaar
- Houd de oplader en/of de UV-reiniger uit de buurt van water. Plaats
of bewaar deze niet in de buurt van of boven een bad, wasbak,
gootsteen enz. Dompel de oplader en/of de UV-reiniger nooit in water
of een andere vloeistof. Zorg ervoor dat de oplader en/of de UVreiniger na het schoonmaken helemaal droog is voordat u deze op het
stopcontact aansluit.
Waarschuwing
- Controleer of het voltage aangegeven op de onderkant van de oplader
en/of de UV-reiniger overeenkomt met de plaatselijke netspanning
voordat u het apparaat aansluit.
- Het netsnoer kan niet worden vervangen. Dank de oplader en/of de
UV-reiniger af als het netsnoer beschadigd is.
- Zorg er voor dat u de oplader en/of UV-reiniger vervangt door een
oplader en/of UV-reiniger van het oorspronkelijke type om gevaar te
voorkomen.
- Gebruik de oplader niet buitenshuis of in de buurt van hete
oppervlakken.
- Gebruik het apparaat niet langer als het op enige wijze beschadigd
is (opzetborstel, handvat van de tandenborstel, oplader en/of UVreiniger). Dit apparaat bevat geen repareerbare onderdelen. Als het
apparaat beschadigd is, neem dan contact op met het Customer Care
Centre in uw land (zie hoofdstuk ‘Garantie & service’).
- Dit apparaat is niet bedoeld voor gebruik door personen (waaronder
kinderen) met verminderde lichamelijke, zintuiglijke of geestelijke
vermogens, of die gebrek aan ervaring of kennis hebben, tenzij iemand
die verantwoordelijk is voor hun veiligheid toezicht op hen houdt of
hen heeft uitgelegd hoe het apparaat dient te worden gebruikt.
- Houd toezicht op kinderen om te voorkomen dat ze met het apparaat
gaan spelen.
- Gebruik de UV-reiniger niet meer als de UV-lamp blijft branden als het
deurtje open staat. UV-licht kan schade aan ogen en huid veroorzaken.
Houd de UV-reiniger altijd buiten het bereik van kinderen.
Let op
- Maak de opzetborstel, het handvat, de oplader, de opladerkap en/of de
UV-reiniger niet schoon in de vaatwasmachine.
- Raadpleeg uw tandarts voordat u de tandenborstel gebruikt als u in de
afgelopen 2 maanden een chirurgische behandeling aan uw mond of
uw tandvlees hebt ondergaan.
- Neem contact op met uw tandarts als er na het gebruik van deze
tandenborstel ernstige tandvleesbloeding optreedt of als het tandvlees
nog steeds gaat bloeden nadat u het apparaat 1 week hebt gebruikt.
- De Sonicare-tandenborstel voldoet aan de veiligheidseisen voor
elektromagnetische apparaten. Als u een pacemaker of ander
geïmplanteerd apparaat hebt, neem dan contact op met uw arts of de
fabrikant van het geïmplanteerde apparaat voor u de tandenborstel
gaat gebruiken.
52
NEDERLANDS
-
-
-
Raadpleeg uw arts voordat u de Sonicare gebruikt als u medische
klachten hebt.
Dit apparaat is alleen bedoeld voor het reinigen van tanden, tandvlees
en de tong. Gebruik het niet voor andere doeleinden. Gebruik het
apparaat niet langer en neem contact op met uw arts als u pijn of
ongemak ondervindt tijdens gebruik van het apparaat.
De Sonicare-tandenborstel is bedoeld voor thuisgebruik en is niet
bedoeld om door meerdere personen te worden gebruikt in een
tandartsenpraktijk of een instelling.
Gebruik de opzetborstel niet langer als de borstelharen verbogen of
geknakt zijn. Vervang de opzetborstel om de 3 maanden of eerder
indien er tekenen van slijtage optreden.
Gebruik dit apparaat uitsluitend met de door de fabrikant aanbevolen
opzetborstels.
Als uw tandpasta peroxide dan wel zuiveringszout of
natriumbicarbonaat bevat (veelvoorkomend in witmakende
tandpasta’s) moet u de opzetborstel na ieder gebruik grondig
schoonmaken met zeep en water. Hiermee voorkomt u dat er barsten
in het plastic ontstaan.
Tijdens de UV-reinigingscyclus en direct erna is de UV-lamp heet. Raak
de UV-lamp niet aan als deze heet is.
Gebruik de UV-reiniger niet zonder het afdekscherm. Zo voorkomt u
contact met een hete lamp.
Elektromagnetische velden (EMV)
Dit Philips-apparaat voldoet aan alle richtlijnen met betrekking tot
elektromagnetische velden (EMV). Mits het apparaat op de juiste wijze
en volgens de instructies in deze gebruiksaanwijzing wordt gebruikt, is het
veilig te gebruiken volgens het nu beschikbare wetenschappelijke bewijs.
De Sonicare (fig. 1)
A
B
C
D
E
F
G
H
I
J
K
L
M
N
-
Hygiënisch beschermkapje
Opzetborstel
Verwisselbare ring met kleurcode
Handvat met zacht greepgedeelte
Aan/uitknop
Poetsvoorkeurknop
Poetsmodi
Poetsprogramma’s
Luxe oplaadmeter
Luxe oplader (alleen bepaalde typen)
Opladerkap met opzetborstelhouders (alleen bepaalde typen)
Reisoplader
Opladervoet met snoerwikkelaar
UV-reiniger met ingebouwde oplader en snoerwikkelaar (alleen
bepaalde typen)
Niet afgebeeld: UV-lamp
Niet afgebeeld: lekbakje voor UV-reiniger
Niet afgebeeld: afdekscherm voor UV-lamp
NEDERLANDS
53
Het apparaat in gebruik nemen
De ring met kleurcode vervangen
Sonicare-opzetborstels worden geleverd met verwisselbare ringen met
kleurcodes waarmee u uw eigen opzetborstel herkenbaar kunt maken.
Een ring met kleurcode vervangen:
1 Verwijder de ring met kleurcode van de onderkant van de
opzetborstel.
2 Schuif de nieuwe ring aan één kant op de onderkant van de
opzetborstel. Druk de ring vervolgens ook aan de andere kant vast.
De opzetborstel bevestigen
1 Plaats de opzetborstel zo op het handvat dat de borstelharen naar
de voorzijde van het handvat wijzen.
2 Druk de opzetborstel op de metalen aandrijfas tot deze niet verder
kan.
clea
n
se
ns
itiv
e
Opmerking: Er zit een kleine opening tussen de ring met kleurcode en het
handvat.
De Sonicare opladen
1 Steek de stekker van de oplader of de UV-reiniger in een
stopcontact.
2 Plaats het handvat op de oplader of de UV-reiniger.
, Het knipperende lampje van de accu-indicator geeft aan dat de
tandenborstel wordt opgeladen.
Luxe oplaadmeter:
Geeft de resterende capaciteit van de accu weer
- 3 groene lampjes: 75-100%
- 2 groene lampjes: 50-74%
- 1 groen lampje: 25-49%
- 1 knipperend geel lampje: minder dan 25%
Opmerking: Als de accu van uw Sonicare bijna leeg is, hoort u 3 piepjes en
knippert er 1 geel lampje gedurende 30 seconden op de oplaadmeter.
54
NEDERLANDS
Opmerking: Om de accu altijd volledig opgeladen te houden, adviseren wij u
de Sonicare altijd op de oplader of de UV-reiniger te plaatsen als u deze niet
gebruikt. Het duurt minimaal 24 uur om de accu volledig op te laden.
De Sonicare gebruiken
Poetsinstructies
1 Maak de borstelharen nat en doe er een kleine hoeveelheid
tandpasta op.
2 Plaats de borstelharen van de tandenborstel onder een lichte hoek
richting tandvleesrand tegen de tanden.
3 Druk op de aan/uitknop om de Sonicare in te schakelen.
4 Druk de Sonicare lichtjes op het poetsoppervlak voor een maximaal
resultaat. Laat de Sonicare het werk doen.
5 Beweeg de opzetborstel voorzichtig kleine stukjes heen en weer
over de tanden zodat de langere haren tussen de tanden komen. Ga
de volledige poetsbeurt zo door.
1
3
2
4
Opmerking: Om ervoor te zorgen dat u overal even goed poetst, moet u uw
mond in 4 kwadranten verdelen en de Quadpacer gebruiken (zie hoofdstuk
‘Functies’).
6 Begin te poetsen in kwadrant 1 (de buitenkant van de boventanden)
en ga daar 30 seconden mee door voordat u verdergaat met
kwadrant 2 (de binnenkant van de boventanden). Poets vervolgens
kwadrant 3 (de buitenkant van de ondertanden) gedurende 30
seconden voordat u verdergaat met kwadrant 4 (de binnenkant van
de ondertanden).
7 Nadat u de poetsbeurt hebt voltooid, kunt u nog wat extra tijd
besteden aan het poetsen van de kauwvlakken van uw kiezen en
plaatsen waar vlekken voorkomen. U kunt ook uw tong poetsen met
de tandenborstel in- of uitgeschakeld, afhankelijk van uw voorkeur.
De Sonicare is veilig te gebruiken op:
- Beugels (opzetborstels slijten sneller als deze voor een gebit met een
beugel worden gebruikt)
- Tandheelkundige restauraties (vullingen, kronen, facings)
Uw eigen poetsvoorkeur instellen
De Sonicare begint automatisch te poetsen in de standaard Clean-modus.
U kunt uw poetsvoorkeur als volgt instellen:
1 Druk voordat u de Sonicare inschakelt op de poetsvoorkeurknop
waarmee u kunt schakelen tussen de modi en programma’s.
, Het groene lampje geeft aan welke modus of welk programma is
geselecteerd.
Opmerking: Als de tandenborstel is ingeschakeld, kunt u wel tussen modi, maar
niet tussen programma’s schakelen. Het programma moet u selecteren voordat
u het apparaat inschakelt.
NEDERLANDS
55
Poetsmodi
Clean-modus
Standaardmodus voor het optimaal reinigen van het gebit.
Sensitive-modus
Modus voor het voorzichtig maar grondig reinigen van gevoelig tandvlees
en gevoelige tanden.
Massage-modus
Modus voor zachte stimulatie van het tandvlees.
Poetsprogramma’s
Go Care-programma
Een poetsbeurt van 1 minuut in de Clean-modus voor een snelle
gebitsreiniging. Om de 15 seconden hoort u het Quadpacer-signaal.
Max Care-programma
Een poetsbeurt van 3 minuten waarbij de Clean-modus en de Massagemodus worden gecombineerd voor een grondige reiniging. In elk van de 4
kwadranten van uw mond werkt de Sonicare 30 seconden in Clean-modus
en 15 seconden in Massage-modus. Om de 45 seconden hoort u het
Quadpacer-signaal.
Opmerking: Wanneer de Sonicare wordt gebruikt voor klinisch
onderzoek, moet de standaard Clean-modus van 2 minuten
worden gekozen. Het handvat moet volledig zijn opgeladen. De
Easy-start-functie moet zijn uitgeschakeld. Op plekken waar
de tanden veel vlekken vertonen, kunt u 30 seconden extra
poetsen om deze te verwijderen.
Functies
Easy-start
-
Bij dit Sonicare-model is de Easy-start-functie standaard ingeschakeld.
Tijdens de eerste 14 poetsbeurten voert de Easy-start-functie de
poetskracht geleidelijk op om u te laten wennen aan het poetsen met
de Sonicare.
Opmerking: De eerste 14 poetsbeurten moeten allemaal minimaal 1 minuut
duren om de Easy-start-cyclus goed te doorlopen.
Easy-start uitschakelen of inschakelen
1 Bevestig de opzetborstel op het handvat.
2 Plaats het handvat op de op netspanning aangesloten oplader of UVreiniger.
- Easy-start uitschakelen:
Houd de aan/uitknop 5 seconden ingedrukt. U hoort 1 piepje dat aangeeft
dat de Easy-start-functie is uitgeschakeld.
- Easy-start inschakelen:
Houd de aan/uitknop 5 seconden ingedrukt. U hoort 2 piepjes die
aangeven dat de Easy-start-functie weer is ingeschakeld.
Opmerking: Gebruik van de Easy-start-functie na de eerste gewenningsperiode
56
NEDERLANDS
wordt afgeraden, omdat de Sonicare hierdoor minder effectief plak zal
verwijderen.
Smartimer
De Smartimer geeft aan dat de poetsbeurt is voltooid door de
tandenborstel aan het eind van de poetsbeurt automatisch uit te schakelen.
Tandartsen adviseren minimaal twee keer per dag 2 minuten te poetsen.
Quadpacer
1
3
2
4
De Quadpacer is een timer die een kort piepje laat horen en voor een
korte onderbreking van de poetsbeurt zorgt om u eraan te herinneren
elk van de 4 kwadranten in uw mond te poetsen. Afhankelijk van
de gekozen poetsmodus of het gekozen poetsprogramma, laat de
Quadpacer tijdens de poetsbeurt na een bepaald aantal seconden
een piepje horen. Zie ‘Poetsinstructies’ en ‘Uw eigen poetsvoorkeur
instellen’.
Op dit model is de Quadpacer ingeschakeld. Om de Quadpacer uit of in te
schakelen:
1 Plaats het handvat met daarop een opzetborstel in de op netspanning
aangesloten oplader of UV-reiniger
2 De Quadpacer uitschakelen: Houd de poetsvoorkeurknop 5
seconden ingedrukt. U hoort 1 piepje dat aangeeft dat de Quadpacer
is uitgeschakeld.
, De Quadpacer inschakelen: Houd de poetsvoorkeurknop 5 seconden
ingedrukt, totdat u 2 piepjes hoort. Dit geeft aan dat de Quadpacer
weer is ingeschakeld.
Opmerking: U kunt de Quadpacer niet uitschakelen in de
voorgeprogrammeerde Go Care- en Max Care-poetsprogramma’s.
Snoerwikkelaar van luxe oplader (alleen bepaalde typen)
Als uw tandenborstel is voorzien van een luxe oplader met kap en voet,
dan bevindt de reisoplader zich onder de kap. Als u het netsnoer wilt
inkorten, dan kunt u het overtollige snoer opbergen op de ingebouwde
snoerwikkelaar in de opladervoet.
1 Om de kap van de opladervoet te verwijderen, drukt u op de twee
grijze kliksluitingen op de opladervoet en trekt u de witte kap van de
oplader omhoog.
2 Wikkel het overtollige netsnoer om de grijze opladervoet, zoals
op het plaatje is aangegeven. Zorg dat u het snoer binnen de twee
kliksluitingen wikkelt.
NEDERLANDS
57
3 Nadat u het overtollige snoer hebt opgeborgen, leidt u het netsnoer
door de kleine inkeping aan de achterkant van de grijze opladervoet.
4 Plaats de kap weer op de opladervoet door hem erop te drukken tot
hij vastklikt.
Tip Voor extra gemak op reis kunt u de reisoplader uitnemen en deze zonder
opladerkap en opladervoet gebruiken.
Snoerwikkelaar van UV-reiniger (alleen bepaalde typen)
-
Als uw Sonicare is uitgerust met een UV-reiniger, dan kunt u het
overtollige netsnoer om de snoerwikkelaar in het onderste deel van de
UV-reiniger wikkelen.
UV-reinigen (alleen bepaalde typen)
-
U kunt de UV-reiniger gebruiken om na elke poetsbeurt de
opzetborstel schoon te maken.
Gebruik de UV-reiniger niet als de UV-lamp blijft branden als het deurtje
open staat of als het Philips-logo op de UV-reiniger is beschadigd of
ontbreekt. UV-licht kan schade aan ogen en huid veroorzaken. Houd de
UV-reiniger altijd buiten het bereik van kinderen.
Haal de stekker van de UV-reiniger uit het stopcontact en neem contact
op met de klantenservice als er rook uit de UV-reiniger komt of als de
UV-reiniger een brandlucht verspreidt als deze in werking is.
1 Spoel de opzetborstel na het poetsen schoon en schud het
overtollige water eraf.
Plaats tijdens het UV-reinigen nooit het beschermkapje op de
opzetborstel.
2 Druk op de ontgrendelknop om het deurtje van de UV-reiniger te
openen.
58
NEDERLANDS
-
3 Plaats de opzetborstel op een van de 2 pinnen in de UV-reiniger.
Controleer of de borstelharen van de opzetborstel naar de lamp
wijzen.
Opmerking: Gebruik de UV-reiniger alleen voor het schoonmaken van Sonicare
ProResults-opzetborstels.
4 Zorg ervoor dat de UV-reiniger is aangesloten op netspanning.
5 Sluit het deurtje en druk één keer op de groene aan/uitknop om de
UV-reinigingscyclus te selecteren.
Opmerking: U kunt de UV-reiniger alleen inschakelen als het deurtje volledig is
gesloten.
Opmerking: Als u het deurtje tijdens de UV-reinigingscyclus opent, dan stopt de
UV-reiniger.
Opmerking: De UV-reinigingscyclus duurt 10 minuten, waarna de UV-reiniger
automatisch uitschakelt.
, De UV-reiniger is in werking als het blauwe licht door het Philipslogo naar buiten schijnt en het UV-reinigingslampje langzaam
knippert.
, Wanneer de UV-reinigingscyclus is voltooid, brandt het groene UVreinigingslampje continu en schakelt de UV-reiniger automatisch uit.
Schoonmaken
Maak de opzetborstels, het handvat, de reisoplader, de opladerkap en de
UV-reiniger niet schoon in de vaatwasmachine.
Handvat van tandenborstel
1 Verwijder de opzetborstel en spoel de metalen aandrijfas af met
warm water.
Gebruik geen scherpe voorwerpen om op de rubberen afdichting rond
de metalen aandrijfas te duwen, omdat dit schade kan veroorzaken.
2 Maak het gehele oppervlak van het handvat schoon met een vochtige
doek.
Opzetborstel
1 Spoel de borstel en de borstelharen na iedere poetsbeurt onder de
kraan af.
2 Verwijder minimaal één keer per week de opzetborstel van het
handvat en spoel het aansluitpunt van de borstel met warm water
schoon.
NEDERLANDS
59
Reisoplader en luxe oplader (alleen bepaalde typen)
1 Haal de stekker van de oplader uit het stopcontact.
2 Alleen bepaalde typen: demonteer de luxe oplader en neem de
reisoplader uit.
3 Maak het oppervlak van de oplader schoon met een vochtige doek.
UV-reiniger (alleen bepaalde typen)
Maak de UV-reiniger nooit schoon wanneer de UV-lamp heet is.
Voor een optimale werking van de UV-reiniger raden wij u aan deze
wekelijks schoon te maken.
1 Haal de stekker van de UV-reiniger uit het stopcontact.
2 Til het lekbakje iets op en trek het naar buiten. Spoel het lekbakje af
en veeg het schoon met een vochtige doek.
3 Maak alle reflectorvlakken schoon met een vochtige doek.
4 Verwijder het afdekscherm dat zich voor de UV-lamp bevindt.
Verwijder het afdekscherm door het voorzichtig omhoog te tillen (1) en
naar buiten te trekken (2).
5 Verwijder de UV-lamp.
Verwijder de lamp door deze vast te pakken en uit de metalen klem te
trekken.
6 Maak het afdekscherm en de UV-lamp schoon met een vochtige
doek.
7 Plaats de UV-lamp terug.
Plaats de lamp terug door de onderkant op gelijke hoogte te houden met
de metalen klem en de lamp in de klem te drukken.
8 Plaats het afdekscherm terug.
Om het afdekscherm terug te plaatsen, houdt u de pinnen van het scherm
op gelijke hoogte met de openingen in het reflectievlak naast de UV-lamp.
Steek de pinnen vervolgens in de openingen en schuif het scherm omlaag
totdat het goed vastzit in de UV-reiniger.
Opbergen
-
-
Gaat u het apparaat langere tijd niet gebruiken, haal dan de stekker
uit het stopcontact. Maak het apparaat vervolgens schoon en bewaar
het op een koele en droge plaats buiten direct zonlicht. U kunt de
snoerwikkelaar gebruiken om het netsnoer netjes op te bergen.
U kunt opzetborstels opbergen door ze op de pinnen op de
achterkant van de luxe oplader te plaatsen (alleen bepaalde typen).
Vervangen
Opzetborstel
-
Vervang de Sonicare-opzetborstels om de 3 maanden voor optimale
resultaten.
60
NEDERLANDS
-
Gebruik hiervoor alleen Sonicare ProResults-opzetborstels.
UV-lamp
-
Nieuwe UV-lampen kunt u bestellen bij het Customer Care Centre in
uw land of bij een geautoriseerd Philips-servicecentrum.
Het apparaat afdanken
-
-
-
Gooi het apparaat aan het einde van zijn levensduur niet weg met
het normale huisvuil, maar lever het in op een door de overheid
aangewezen inzamelpunt om het te laten recyclen. Op die manier
levert u een bijdrage aan een schonere leefomgeving.
De lamp van de UV-reiniger bevat kwik, een stof die schadelijk kan zijn
voor het milieu. Als u de lamp afdankt, gooi de lamp dan niet weg met
het normale huisvuil, maar lever deze apart in bij een door de overheid
aangewezen inzamelpunt.
De ingebouwde accu bevat stoffen die schadelijk kunnen zijn voor
het milieu. Verwijder altijd de accu voordat u het apparaat afdankt en
inlevert op een door de overheid aangewezen inzamelpunt. Lever de
accu in op een officieel inzamelpunt voor batterijen. Als u problemen
ondervindt bij het verwijderen van de accu, kunt u met het apparaat
ook naar een Philips-servicecentrum gaan. Medewerkers van dit
centrum verwijderen dan de accu voor u en zorgen ervoor dat deze
op milieuvriendelijke wijze wordt verwerkt.
De accu verwijderen
U kunt de accu niet opnieuw in het apparaat plaatsen nadat u deze hebt
verwijderd.
1 Om de accu volledig te ontladen, neemt u het handvat van de
oplader of UV-reiniger af, schakelt u de Sonicare in en laat u deze
werken tot deze vanzelf stopt.
Herhaal deze stap totdat u de Sonicare niet meer kunt inschakelen.
2 Steek een gewone platkopschroevendraaier in de sleuf in de
onderkant van het handvat. Draai de schroevendraaier linksom om
het afdekplaatje aan de onderkant te verwijderen.
3 Houd het handvat ondersteboven en duw het omlaag op de
aandrijfas zodat de onderdelen in het handvat naar buiten komen.
NEDERLANDS
61
4 Steek de schroevendraaier onder de printplaat naast de
accuaansluitingen en beweeg de schroevendraaier heen en weer om
de aansluitingen af te breken.Verwijder de printplaat en wrik de accu
los uit de plastic houder.
Sluit het apparaat niet meer aan op netspanning nadat u de accu hebt
verwijderd.
Garantie & service
Als u informatie nodig hebt of als u een probleem hebt, bezoek dan de
Philips-website www.philips.com, of neem contact op met het Philips
Customer Care Centre in uw land (u vindt het telefoonnummer in het
‘worldwide guarantee’-vouwblad). Als er geen Customer Care Centre in
uw land is, ga dan naar uw Philips-dealer of neem dan contact op met de
afdeling Service van Philips Domestic Appliances and Personal Care BV.
Garantiebeperkingen
De volgende zaken vallen niet onder de voorwaarden van de internationale
garantie:
- Opzetborstels
- Schade als gevolg van verkeerd gebruik, misbruik, verwaarlozing of
wijzigingen
- Gewone slijtage, inclusief kerfjes, krasjes, schuurplekken, verkleuring of
verbleking
- UV-lamp
Veelgestelde vragen
In dit hoofdstuk vindt u de meestgestelde vragen over het apparaat. Als u
het antwoord op uw vraag niet kunt vinden, neem dan contact op met het
Customer Care Centre in uw land.
Vraag
Antwoord
Waarom werkt de Sonicaretandenborstel niet?
Mogelijk moet de Sonicare worden opgeladen. Laad de Sonicare
minimaal 24 uur op.
Mogelijk staat er geen stroom op het stopcontact. Het is mogelijk dat
de stroomtoevoer naar stopcontacten in spiegelkastjes boven wastafels
of naar stopcontacten voor scheerapparaten in badkamers wordt
afgesloten wanneer het licht in de badkamer wordt uitgedaan.
Mogelijk moet de opzetborstel opnieuw op het apparaat worden
bevestigd of worden vervangen.
Waarom kietelt het wanneer ik De eerste paar keer dat u de Sonicare gebruikt, kunt u een licht
de Sonicare gebruik?
kietelend of prikkelend gevoel ervaren. Dit gevoel verdwijnt wanneer u
aan de Sonicare gewend bent geraakt.
De borstel klappert tegen mijn
tanden. Wat moet ik doen?
U kunt dit voorkomen door de borstel volgens de instructies
vast te houden, d.w.z. met de borstelharen enigszins schuin op de
tandvleesrand.
62
NEDERLANDS
Vraag
Antwoord
Waarom lijkt de tandborstel
minder krachtig te poetsen?
Mogelijk moet de Sonicare worden opgeladen.
Mogelijk is de Easy-start-functie ingeschakeld. Schakel de Easy-startfunctie uit (zie hoofdstuk ‘Functies’).
Mogelijk moet de opzetborstel worden vervangen.
Waarom werkt de
poetsvoorkeurknop niet
tijdens het poetsen?
Mogelijk hebt u een poetsprogramma geselecteerd. Is dit het geval,
dan is de poetsvoorkeurknop niet actief (zie hoofdstuk ‘De Sonicare
gebruiken’).
Waarom gaat de UV-lamp van
de UV-reiniger niet aan?
Mogelijk staat er geen stroom op het stopcontact. Het is mogelijk dat
de stroomtoevoer naar stopcontacten in spiegelkastjes boven wastafels
of naar stopcontacten voor scheerapparaten in badkamers wordt
afgesloten wanneer het licht in de badkamer wordt uitgedaan.
Het deurtje van de UV-reiniger is mogelijk niet goed gesloten.
Mogelijk moet de UV-lamp worden vervangen (zie hoofdstuk
‘Vervangen’).
Het lijkt alsof de tandenborstel
tijdens het poetsen minder
krachtig wordt. Hoe kan dat?
U hebt mogelijk het Max Care-poetsprogramma gekozen. In dat geval
schakelt het programma tijdens een 3 minuten durende poetsbeurt
afwisselend de Clean-modus en de Massage-modus in. De geluiden
en borstelbewegingen in de Clean-modus en de Massage-modus zijn
verschillend.
Heb ik een speciale oplader
nodig als ik mijn Sonicare wil
meenemen op reis?
Reistip: de reisoplader, de luxe oplader en de UV-reiniger kunnen
wereldwijd worden gebruikt bij voltages tussen 100V AC en 240V AC
en bij 50 of 60Hz. Alles wat u verder nodig hebt, is een eenvoudige
stekkeradapter.
63
www.philips.com/support
© 2008 Koninklijke Philips Electronics N.V. (KPENV). All rights reserved.
PHILIPS and the Philips shield are registered trademarks of KPENV.
Quadpacer, Sonicare and the Sonicare logo are trademarks of Philips Oral
Healthcare, Inc. and/or KPENV
Printed in the U.S.A.
Printed on 100% recycled paper
Protected by U.S. and international patents.
Other patents pending.
4235.020.2277.3