Download On Networks PL200
Transcript
Easy, Reliable & Secure
Installation Guide
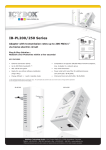
Po w e rl i n e 200
H o me N etwor k Adap ter (P L 2 0 0 )
Trademarks
Brand and product names are trademarks or registered
trademarks of their respective holders. Information is subject to
change without notice.
Statement of Conditions
In the interest of improving internal design, operational function,
and/or reliability, On Networks reserves the right to make changes
to the products described in this document without notice. On
Networks does not assume any liability that may occur due to the
use or application of the product(s) or circuit layout(s) described
herein.
This symbol is placed in accordance with the European
Union Directive 2002/96 on the Waste Electrical and
Electronic Equipment (the WEEE Directive). If disposed
of within the European Union, this product should be
treated and recycled in accordance with the laws of
your jurisdiction implementing the WEEE Directive.
2
LED descriptions
Item
Description
Power LED
• Solid green. The electrical
power is on.
• Solid amber. The adapter is in
power saving mode.
• Blinking green. The adapter is
in the process of setting up
security.
• Off. There is no electrical power.
• Solid green. The Ethernet port is
linked.
• Off. There is no Ethernet
connection.
• Solid green. The adapter is
connected to a Powerline
network.
• Off. The adapter has not found
any other compatible Powerline
devices using the same
encryption key.
Ethernet LED
Performance
Indicator
3
Button descriptions
Reset button
Security button
Ethernet port
Item
Description
Factory Reset
Press the Reset button for 1 second,
then release it to return the Powerline adapter to its factory default settings.
After you plug in your new AV
adapter, press the Security button
for 2 seconds, then press the security
button on one of the other AV adapters in your existing network for 2 seconds. Both buttons must be pressed
within 2 minutes.
Security
Button
4
Install your Powerline adapter
For each Powerline adapter you are adding to
your existing Powerline network, do the
following:
1.
Plug each Powerline adapter into a power
outlet.
2. Set up security on your Powerline adapter to
add it to your existing Powerline network.
Press the Security button for 2 seconds,
then press the Security button on one of the
other Powerline adapters in your existing
network for 2 seconds. Both buttons must be
pressed within two minutes.
Note: Do not press the Security button on the
Powerline adapter until installation is complete
and the adapters are communicating with each
other (indicated by the blinking Powerline LED).
Pressing this button too soon can temporarily
disable Powerline communication. If this should
occur, use the Factory Reset button to return the
Powerline adapter to its factory default settings.
5
3.
Connect devices to your Powerline adapter.
To the Ethernet port on the bottom of the
Powerline adapter, you can connect a
device, such as a router or a computer.
Safety Information
•
•
•
AC input: 100-240V~, 60m A (Max).
Operating temperature: 0C~40C.
The socket-outlet shall be installed near the
equipment and shall be easily accessible.
6
Technical Support
Thank you for selecting On Networks products.
After installing your device, locate the serial
number on the label of your product, and use it to
register your product at
http://www.on-networks.com/register.
Registration is required before you can use the
telephone support service. Registration through
http://www.on-networks.com/register is strongly
recommended.
Go to http://www.on-networks.com/support/
products/pl200 for product updates and web
support.
For additional information about setting up,
configuring, and using your USB wireless
adapter, see the User Manual.
For complete DoC, visit
http://www.on-networks.com/doc/pl200.
For GNU General Public License (GPL) related
information, visit
http://www.on-networks.com/gpl.
April 2012


