Transcript
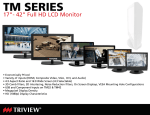
Wall Mount Kit TWM-DA1520
dds TRIVI EW Installation Instruction
* Because wall vertical surface vary from job to job, it is mandatory that you consult with the
appropriate local engineer and architect to ensure that the mounting component are properly
mounted on the wall to handle the applied loads.
* Installation on flat, solid wall is mandatory. Wooden, concrete, and metal wall are
recommended; drywall or any other hollow wall must be avoided. Use #14 or 1/4" wood screws
E
Features:
*
*
E * * +
Parts in the assembly:
(1)
(2)
(3)
(4)
for wooden wall and the thread covered in the wood no less than 1 %"; use 7" concrete anchors for
concrete wall and the anchor's length covered in concrete no less than 1 1/4"; use 7" machine
screws for metal wall and the thread covered in metal wall no less than 3/4". Screws for installing
on the concrete or metal wall will be prepared by installers.
+ Maximum weight of monitor is 18 Ib.
* Do not use over force on the screws for installation of monitor.
wall, 3 1/2" to 13 1/2" (90mm - 340mm).
Support monitor size from 15" to 20", maximum
load 18 Ib.
Fit for VESA standard 75mm and 100mm.
Wide tilt and swivel angle.
Light weight, easy installation.
Compatible Tatung CCVE monitors are: To
Monitor
Arrow upward
For LCD monitor wall mount.
Provide the monitor various distance away from Fig. 1 >
TM17 TLM-1506T TLTM-19AD 5005L13
TM19 TLM-1706T TLM-1851W 9005L
TM19W TLM-1906T TLM-1901W W9005S
TM22W THR15X 7005L W2205S
Double Arm + Dual-pivot component (x1).
Wall plate (x1). 3)
VESA plate. (x1).
Screws, M4, 0.7 pitch x 12mm, Pan-head,
Phillips, (x4)
(5) Wood screws, #14, 1 1/2" length, / washer
(2 pairs). В 78m
Tools needed: Screw driver.
INSTRUCTIONS: Fig. 2 © 5°
(1) Install Wall plate (2) onto the wall: a 9
Find out wooden stud, use wood screws / washers 90° 90°
provided to secure the wall plate onto the wall. See Fig. 1. о” o
For other type of wall, consult with the local architacts
for proper installation. - — 100 mm
(2) Install LCD monitor:
Use screw (4), (M4, 4 pieces provided in the package) VESA Plate
to secure LCD monitor with the VESA plate (3). Do not use FRONT VIEW
over force on the screws. Da
(3) There are two hole-pattern on the VESA plate, 75 mm
and 100 mm, apply proper one to fit the mounting hole-pattern
on the back of the monitor. see Fig. 2.
(4) The monitor can be tilted on any direction or angle, TATUNG COMPANY OF AMERICA, INC
including Azimuth Rotation, gently turning the monitor until get 2850 EL PRESIDIO ST, LONG BEACH, CA 90810
desirable view angle.
TEL: 1-800-827-2850 FAX: 310.631.4758
3/2012