Transcript
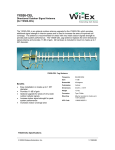
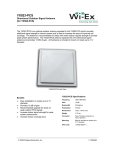
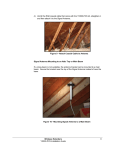
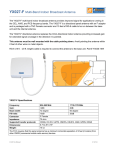
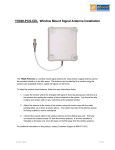
YX050-PCS-CEL Antenna Installation Instructions
The directions below will assist you in the installation of the YX050-PCS-CEL ceiling mount
omni-directional indoor antenna. The antenna provides enhanced performance for the zBoost
cell phone signal booster and is compatible with YX500 Series and YX600 ProPack Series.
Mounting the
Base Unit and
Directional
Antenna
The YX050-PCS-CEL antenna provides enhanced signal strength in all
directions (omni-directional) from the antenna. The antenna should be located
near the center of the area where improved signal strength is desired. The
antenna may be connected directly to the Base Unit or located near the Base
unit using the supplied 10’ RG-8x extension coax.
Note:
Unplug the Base Unit until all cables are connected. Plug-in the Base
Unit and verify that the Power light stays green and no red indicators
light; otherwise, you may have to move the antenna to another location
in the room. See the Troubleshooting section of the zBoost YX500 or
YX 600 Series Installation Guide or www.Wi-Ex.com for more
information.
Ceiling Mounting the Base Unit Antenna
Once you have determined the desired location for the antenna, mount the antenna using the
included hardware:
1) Drill a ¾” diameter (19 mm) hole in the ceiling
where the antenna is to be mounted.
2) Route the RF cable and threaded mount of the
antenna through the hole from the room side
as shown in Figure 1.
3) Attach the plastic nut over the threaded
section extending through the ceiling and hand
tighten the nut. Excessive force can damage
the threaded mount of the antenna.
4) Connect the RF cable on the antenna either
directly to the Base Unit or the 10’ extension
coax to the Base Unit.
Figure 1. Mounting diagram