1
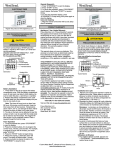
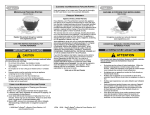
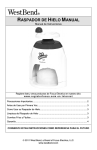
ELECTRONIC TRIPLE TIMER/CLOCK Instruction Manual 40053 Register this product at www.registerfocus.com SAVE THIS INSTRUCTION MANUAL FOR FUTURE REFERENCE. OPERATING PRECAUTIONS To prevent personal injury, NEVER place the battery in mouth for ANY reason, as it small and can be swallowed. DISCARD USED BATTERY IMMEDIATELY. KEEP BATTERY AWAY FROM CHILDREN. For household use ONLY. Battery Installation 1. Press down on the clip to expose the battery compartment cover. Slide the battery compartment cover off and insert one triple A (AAA) battery. Be sure to match the plus (+) and minus (-) symbols. 2. Replace the battery compartment cover, peel the static label from the electronic display and your timer is now ready to use. Note: The timer will count up to or down from 99 hours, 59 minutes, and 59 seconds. Keep the timer away from all heat sources. Temperatures above 120° F, 50° C, can damage the timer. Never immerse the timer in water or any other liquid. 3. The clip on the back can be attached to any thin surface or belt or can be used with the metal stand bar to stand on any flat surface. The magnet will also secure it to any magnetic surface. Place a lanyard through the hole to hang. Setting the Clock 1. Press and hold the “CLOCK” button for 5 seconds. The display will flash. 2. Press the “HOUR,” “MINUTE,” and “SECOND” buttons to advance to the correct time. Holding the buttons down will cause the numbers to advance rapidly. 3. Press the “CLOCK” button once more to activate the clock. Timer Operation 1. To set the desired time, press “TIME 1,” “TIME 2,” or “TIME 3” for the desired timer channel. The selected timer channel symbol; T1, T2, or T3, will display. 2. Press “CLEAR” to zero the display. 3. Press and hold the “HOUR,” “MINUTE,” and “SECOND” buttons to advance to the correct time. 4. Press the “START/STOP/MEMORY” button to begin timing. 5. When time expires, a distinctive alarm will sound. The timer will continue to count up. The alarm will silence after 1 minute. 6. Press any button to silence the alarm, then “START/STOP/MEMORY” to stop the timer. 7. Press “CLEAR” to zero the display. Recall Previous Time When the countdown time has expired, press “START/STOP/MEMORY” once to pause the timer, twice to recall previous time, and again to start the countdown timer. Operate Stopwatch 1. Press “TIME1,” “TIME2,” or “TIME3” button for the desired timer channel. The selected timer channel symbol; T1, T2, or T3 will display. 2. Press “START/STOP/MEMORY” to time. 3. To pause the stopwatch, press “START/STOP/MEMORY” once to pause, then press again to resume timing. 4. To clear the stopwatch display, press “START/STOP/MEMORY” to stop timing, then press “CLEAR.” Care and Cleaning 1. Wipe the exterior of the timer with a soft, damp cloth if necessary. PRODUCT WARRANTY Appliance 1 Year Limited Warranty Focus Electrics, LLC (“Focus Electrics”) warrants this appliance from failures in the material and workmanship for one (1) year from the date of original purchase with proof of purchase, provided the appliance is operated and maintained in conformity with the provided Instruction Manual. Any failed part of the appliance will be repaired or replaced without charge at Focus Electrics’ discretion. This warranty applies to indoor household use only. This warranty does not cover any batteries. This warranty is null and void, as determined solely by Focus Electrics if the appliance is damaged through accident, misuse, abuse, negligence, scratching, or if the appliance is altered in any way. THIS WARRANTY IS IN LIEU OF ALL IMPLIED WARRANTIES, INCLUDING WARRANTIES OF MERCHANTABILITY, FITNESS FOR A PARTICULAR PURPOSE, PERFORMANCE, OR OTHERWISE, WHICH ARE HEREBY EXCLUDED. IN NO EVENT SHALL FOCUS ELECTRICS BE LIABLE FOR ANY DAMAGES, WHETHER DIRECT, INDIRECT, INCIDENTAL, FORSEEABLE, CONSEQUENTIAL, OR SPECIAL ARISING OUT OF OR IN CONNECTION WITH THIS APPLIANCE. If you think the appliance has failed or requires service within its warranty period, please contact the Focus Electrics Customer Service Department at (866) 290-1851, or e-mail us at [email protected]. A receipt proving the original purchase date will be required for all warranty claims, hand written receipts are not accepted. You may also be required to return the appliance for inspection and evaluation. Return shipping costs are not refundable. Focus Electrics is not responsible for items lost in transit. Valid ONLY in the USA and Canada. Visit our Web site at www.focuselectrics.com Focus Electrics, LLC Attn: Customer Service P.O. Box 2780 West Bend, WI. 53095 ® 2010 West Bend , a Brand of Focus Electrics, LLC. www.focuselectrics.com MINUTEUR TRIPLE ÉLECTRONIQUE/HORLOGE Mode d’emploi 40053 Enregistrez ce produit sur notre site Internet : www.registerfocus.com CONSERVEZ CE MODE D’EMPLOI POUR UNE CONSULTATION ULTÉRIEURE. PRÉCAUTIONS DE SÉCURITÉ IMPORTANTES Afin d’éviter toute blessure, le placez JAMAIS la pile dans la bouche QUEL QU’EN SOIT le motif car elle est petite et elle risquerait d’être ingérée. JETEZ TOUTE PILE USAGEE IMMEDIATEMENT. CONSERVEZ VOTRE PILE HORS DE PORTEE DES ENFANTS. Pour une utilisation domestique UNIQUEMENT. Installation de la Pile 1. Appuyez sur la pince pour exposer le cache du logement de la pile. Faites glisser le cache de la pile pour le retirer et insérez une pile triple A (AAA). Assurez-vous de faire correspondre les symboles plus (+) et moins (-). 2. Remettez en place le cache de la pile, détachez l’étiquette statique de l’affichage électronique et votre minuteur est maintenant prêt à l’emploi. Remarque: Le minuteur va chronométrer ou décompter à partir de 99 heures, 59 minutes et 59 secondes. Veuillez conserver le minuteur à l’écart de toutes les sources de chaleur. Des températures supérieures à 120° F, 50° C, peuvent détériorer le minuteur. Ne plongez jamais le minuteur dans de l’eau ou dans tout autre liquide. 3. La pince à l’arrière peut être fixée sur toute surface fine ou sur toute ceinture ou elle peut être utilisée avec la barre de support métallique pour tenir debout sur toute surface plane. L’aimant permettra également de le fixer contre toute surface magnétique. Placez un cordon dans le trou pour pouvoir le suspendre autour du cou. Régler l’horloge 1. Maintenez la touche « CLOCK » (horloge) enfoncée pendant 5 secondes. L’écran clignote. 2. Appuyez sur les touches « HOUR » (heure), « MINUTE » (minute) et « SECOND » (seconde) pour avancer jusqu’à l’heure correcte. Maintenir les boutons enfoncés fera défiler l’heure plus rapidement. 3. Appuyez sur la touche « CLOCK » (horloge) une fois de plus pour activer l’horloge. Utilisation du minuteur 1. Pour régler le temps souhaité, appuyez sur « TIME 1 » (temps 1), « TIME 2 » (temps 2) ou « TIME 3 » (temps 3) pour obtenir le canal de minuterie souhaité. Le symbole du canal de minuterie sélectionné T1, T2, ou T3, s’affiche. 2. Appuyez sur « CLEAR » (effacer) pour remettre l’écran à zéro. 3. Maintenez les touches « HOUR » (heure), « MINUTE » (minute) et « SECOND » (seconde) enfoncées pour avancer jusqu’à l’heure correcte. 4. Appuyez sur la touche « START/STOP/MEMORY » (marche/arrêt/mémoire) pour commencer à minuter. 5. Une fois le temps expiré, une alarme distinctive est émise. Le minuteur continue son décompte. L’alarme s’arrête au bout de 1 minute. 6. Appuyez sur n’importe quel bouton pour arrêter l’alarme, puis sur « START/STOP/MEMORY » (Marche/arrêt/mémoire) pour arrêter le minuteur. 7. Appuyez sur « CLEAR » (effacer) pour remettre l’écran à zéro. Rappeler le Temps Précédent Une fois que le temps de décompte a expiré, appuyez une fois sur “START/STOP/MEMORY” (marche/arrêt/mémoire) pour mettre le minuteur en pause, deux fois pour rappeler le temps précédent, et une nouvelle fois pour lancer le décompte de la minuterie. Utilisation du Chronomètre 1. Appuyez sur la touche « TIME1 » (temps 1), « TIME2 » (temps 2) ou « TIME3 » (temps 3) pour le canal de temps choisi. Le symbole du canal minuterie choisi; T1, T2, ou T3, s’affiche. 2. Appuyez sur « START/STOP/MEMORY » (marche/arrêt/mémoire) pour commencer à chronométrer. 3. Pour mettre le chronomètre en pause, appuyez sur « START/STOP/MEMORY » (marche/arrêt/mémoire) une fois, ensuite appuyez à nouveau pour reprendre le chronométrage. 4. Pour effacer l’écran du chronomètre, appuyez sur « START/STOP/MEMORY » (marche/arrêt/mémoire) pour arrêter le chronométrage, puis appuyez sur « CLEAR » (effacer). Entretien et nettoyage 1. Essuyez l’extérieur du minuteur à l’aide d’un chiffon doux humide si nécessaire. GARANTIE DU PRODUIT Garantie limitée d’1 an de l’appareil Focus Electrics, LLC garantit cet appareil contre tout défaut de pièce et de main d’oeuvre pendant un (1) an à compter d el date d’achat d’origine avec un justificatif d’achat à condition que l’appareil soit utilisé et entretenu conformément avec le Mode d’emploi de Focus Electrics. Toute pièce défectueuse de l’appareil sera réparée ou remplacée sans frais à la discrétion de Focus Electrics. Cette garantie s’applique en cas d’utilisation domestique en intérieur uniquement. Cette garantie est nulle et non avenue, tel que déterminé uniquement par Focus Electrics si l’appareil est détérioré à la suite d’un accident, d’une mauvaise utilisation, d’une utilisation abusive, d’une négligence, d’une rayure ou si l’appareil est modifié de toute manière. LA PRÉSENTE GARANTIE ANNULE ET REMPLACE TOUTE GARANTIE INDUITE, NOTAMMENT LES GARANTIES DE COMMERCIALISATION, D’ADAPTATION À UN USAGE PARTICULIER, DE PERFORMANCE, OU AUTRE QUI SONT ICI EXCLUES. EN AUCUN CAS FOCUS ELECTRICS. NE POURRA ÊTRE TENUE POUR RESPONSABLE DE TOUT DOMMAGE, QUE CELUI-CI SOIT DIRECT, INDIRECT, INDUIT, PRÉVISIBLE, SECONDAIRE OU PARTICULIER, RÉSULTANT DE L’UTILISATION DE OU EN RELATION AVEC CET APPAREIL. Si vous pensez que cet appareil est défectueux ou nécessite des réparations pendant la durée de sa garantie, veuillez contacter le Service clientèle de Focus Electrics au (866) 290-1851 ou nous envoyer un e-mail à [email protected]. Une facture justifiant la date d’achat d’origine sera nécessaire pour toute demande dans le cadre de la garantie, les factures manuscrites ne sont pas acceptées. Il possible que l’on vous demande de renvoyer l’appareil pour inspection et évaluation. Les frais de transport de retour ne sont pas remboursables. Focus Electrics n’est pas responsable pour les retours perdus pendant le transport. Valide uniquement aux USA et au Canada Commandez en ligne à www.focuselectrics.com Focus Electrics, LLC Attn: Customer Service P.O. Box 2780 West Bend, WI. 53095 L5566D 06/10 TEMPORIZADOR TRIPLE ELECTRÓNICO/RELOJ Manual de Instrucciones 40053 Registre éste producto en nuestro sitio: www.registerfocus.com CONSERVE ESTE MANUAL DE INSTRUCCIONES PARA FUTURAS CONSULTAS MEDIDAS PREVENTIVAS IMPORTANTES Para prevenir lesiones personales, JAMÁS coloque la batería en la boca por NINGUNA razón, puesto que es pequeña y puede ser tragada. DESECHE LA BATERÍA USADA INMEDIATAMENTE. MANTENGA LA BATERÍA ALEJADA DE LOS NIÑOS. SOLAMENTE para uso doméstico. Instalación de la Batería 1. Presione la presilla hacia abajo para exponer la tapa del compartimiento de la batería. Deslice la tapa del compartimiento de la batería hacia afuera e inserte una batería triple A (AAA). Asegúrese de que los símbolos más (+) y menos (-) coincidan. 2. Vuelva a colocar la tapa del compartimiento de la batería en su lugar, despegue la etiqueta estática de la pantalla electrónica y el temporizador estará entonces listo para usarse. Nota: El temporizador contará en forma ascendente o descendente desde 99 horas, 59 minutos y 59 segundos. Mantenga el temporizador alejado de toda fuente de calor. Temperaturas por encima de 120° F, 50° C, pueden dañar el temporizador. Nunca sumerja el temporizador en agua o ningún otro líquido. 3. La presilla en el reverso puede fijarse a cualquier superficie delgada o correa o puede ser utilizada con la base de barra de metal para pararlo sobre cualquier superficie plana. El imán también lo fijará a cualquier superficie magnética. Coloque una cuerda a través del orificio para guindarlo. Ajuste del Reloj 1. Presione y mantenga presionado el botón “CLOCK” (reloj) durante 5 segundos. La pantalla centelleará. 2. Presione los botones “HOUR” (hora), “MINUTE” (minuto) y “SECOND” (segundo) para avanzar a la hora correcta. El mantener los botones presionados causará que los números se adelanten rápidamente. 3. Presione el botón “CLOCK” (reloj) una vez más para activar el reloj. Operación del Temporizador 1. Para ajustar la hora deseada, presione “TIME 1” (tiempo 1), “TIME 2” (tiempo 2) o “TIME 3” (tiempo 3) para el canal del temporizador deseado. Se mostrará el símbolo del canal del temporizador seleccionado: T1, T2 o T3. 2. Presione “CLEAR” (borrar) para colocar la pantalla a cero. 3. Presione y mantenga presionados los botones “HOUR” (hora), “MINUTE” (minuto) y “SECOND” (segundo) para avanzar a la hora correcta. 4. Presione el botón “START/STOP/MEMORY” (iniciar/parar/memoria) para comenzar a cronometrar. 5. Cuando expire el tiempo, sonará una alarma distintiva. El temporizador continuará contando en forma ascendente. La alarma se silenciará después de 1 minuto. 6. Presione cualquier botón para silenciar la alarma, y luego “START/STOP/MEMORY” West Bend , a Brand of Focus Electrics, LLC. ® (iniciar/parar/memoria) para parar el temporizador. 7. Presione “CLEAR” (borrar) para colocar la pantalla a cero. Recuperación del Tiempo Anterior Cuando el tiempo en cuenta descendente ha expirado, presione “START/STOP/MEMORY” (iniciar/parar/memoria) una vez para hacer una pausa, dos veces para recuperar el tiempo anterior y de nuevo para comenzar el temporizador en cuenta descendente. Operación del Cronómetro 1. Presione el botón “TIME 1” (tiempo 1), “TIME 2” (tiempo 2) o “TIME 3” (tiempo 3) para el canal del temporizador deseado. Se mostrará el símbolo del canal del temporizador seleccionado: T1, T2 o T3. 2. Presione “START/STOP/MEMORY” (iniciar/parar/memoria) para cronometrar. 3. Para hacer una pausa, presione “START/STOP/MEMORY” (iniciar/parar/memoria) una vez, luego presiónelo de nuevo para continuar cronometrando. 4. Para borrar la pantalla del cronómetro, presione “START/STOP/MEMORY” (iniciar/parar/memoria) para parar de cronometrar, y luego presione “CLEAR” (borrar). Cuidado y Limpieza 1. Limpie la parte exterior del temporizador con un paño suave y húmedo si fuese necesario. GARANTÍA DEL PRODUCTO Garantía limitada de 1 año del artefacto electrodoméstico Focus Electrics, LLC (“Focus Electrics”) garantiza que este aparato no presentará fallas de material ni fabricación durante un (1) año a partir de la fecha original de compra con prueba de dicha compra, siempre y cuando el aparato sea operado y mantenido tal como se indica en el manual de instrucciones provisto. Toda pieza del aparato que presente fallas será reparada o reemplazada sin costo alguno a criterio de Focus Electrics. Esta garantía rige solamente para el uso domestico dentro de la casa. Esta garantía es nula y sin valor, según lo determine exclusivamente Focus Electrics si el artefacto electrodoméstico es dañado a causa de accidente, mal uso, abuso, negligencia, rayaduras, o si el artefacto electrodoméstico es cambiado de algún modo. ESTA GARANTÍA REEMPLAZA A TODAS LAS DEMÁS GARANTÍAS IMPLÍCITAS, INCLUYENDO AQUÉLLAS DE COMERCIABILIDAD, IDONEIDAD PARA UN FIN O USO EN PARTICULAR, DESEMPEÑO, U OTROS TIPOS, LAS CUALES QUEDAN EXCLUIDAS MEDIANTE EL PRESENTE DOCUMENTO. FOCUS ELECTRICS RECHAZA TODA RESPONSABILIDAD POR DAÑOS, YA SEAN DIRECTOS, INDIRECTOS, INCIDENTALES, PREVISIBLES, CONSECUENTES O ESPECIALES QUE SURJAN DE ESTE APARATO ELECTRODOMÉSTICO O GUARDEN RELACIÓN CON EL MISMO. Si piensa que el artefacto electrodoméstico se ha dañado o requiere de servicio dentro de su período de garantía, por favor póngase en contacto con el Departamento de Atención al Cliente de Focus Electrics por el (866) 290-1851 o contáctenos por correo electrónico a la [email protected]. Para todas las reclamaciones de garantía, se requerirá un recibo que demuestra la fecha de compra original, los recibos escritos a mano no son aceptados. También puede requerirse que usted devuelva el aparato para su inspección y evaluación. Los gastos de devolución no son reembolsables.Focus Electrics no se hace responsable de las devoluciones perdidas en tránsito. Válido sólo en EE.UU. y Canadá Visite por favor nuestro sitio www.focuselectrics.com Focus Electrics, LLC Attn: Customer Service P.O. Box 2780 West Bend, WI. 53095 Printed in China