1
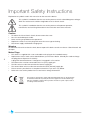
Audiant 80i Integrated Amplifier
Owners Manual
Important Safety Instructions
Explanation of symbols used in this manual or on the rear of the device:
This symbol is intended to alert the user to the presence of uninsulated dangerous voltages
within the enclosure of sufficient magnitude to cause electric shock.
This symbol is intended to alert the user to the presence of important operation,
maintenance and servicing information in the instruction and service manuals.
Caution
•
•
•
•
•
To reduce the risk of electric shock, do not remove the cover.
No user serviceable parts inside.
Refer servicing to qualified service personnel.
Replace the mains fuse in the plug with one of the same type and rating.
Disconnect supply cord before changing fuse.
Warning
To reduce the risk of fire or electric shock, do not expose this device to rain or moisture. Shock hazard - do
not open.
Mains Plugs
•
•
1
•
•
•
•
•
This device is supplied with a non-rewireable mains plug for the intended country.
Replacement mains leads can be obtained from your Perreaux dealer. Should you need to change
the plug please dispose of it carefully.
A plug with bared conductors is dangerous if engaged in a live socket.
The Brown wire must be connected to the Live (Line) supply pin.
The Blue wire must be connected to the Neutral supply pin.
The Green/Yellow wire must be connected to the Earth (Ground) supply pin.
Please contact your dealer or a competent electrician if you are in any doubt.
Refer to the rear of the product for fuse and mains voltage information.
This product is designed to comply with international directives on the Restriction
of Hazardous Substances (RoHS) in electronic equipment. The wheelie bin logo
indicates compliance and that these products must be recycled or processed as
according to these directives.
General Safety Instructions
All safety and operation instructions should be read carefully before the 80i is operated. Keep the Owners
Manual in a safe place for future reference.
•
•
•
•
•
•
•
•
•
•
•
•
•
•
•
•
•
•
•
•
Read these instructions.
Keep these instructions.
Heed all warnings.
Follow all instructions.
Do not use the device near water, for example near a bathtub, kitchen sink, in a wet basement, near a
swimming pool, etc.
Clean only with a dry cloth.
Mounting to a wall or ceiling should be via a heavy-duty bracket or shelf designed for audio equipment
use.
The device should be situated away from heat sources such as radiators, stoves, or other appliances
that produce excessive amounts of heat.
DO NOT place the device directly onto carpeted surfaces.
Avoid exposing the device to extremely high or low temperatures.
The device should be connected to a mains power supply only of the type described in the operating
instructions, and/or as marked on the rear of the unit.
DO NOT defeat the safety earth of the grounding type mains plug, severe injury or death may result. If
the provided plug does not fit into your outlet, contact your dealer or consult an electrician.
The power cord should be routed so that it is not likely to be walked on or pinched by items placed on
or against it.
Unplug the device during lightning storms or when unused for long periods of time.
DO NOT let objects or liquids fall into the device, expose the device to dripping or splashing or place a
vessel containing liquid on top of the device.
Keep this device out of reach of children.
DO NOT operate the device with the cover removed.
DO NOT bypass any fuse, replace only with the value and type specified.
DO NOT attempt to repair the device. In the event of a problem, please contact your Perreaux dealer.
DO NOT operate this product in an explosive atmosphere.
2
Table of Contents
INTRODUCTION.......................................................................................................................................3
INSTALLATION..........................................................................................................................................4
CONNECTING...........................................................................................................................................5
Rear Panel...............................................................................................................................................5
OPERATION..............................................................................................................................................7
Front Panel..............................................................................................................................................7
Remote Control.......................................................................................................................................8
PROTECTION SYSTEM............................................................................................................................9
CARE AND MAINTENANCE.....................................................................................................................9
TROUBLESHOOTING.............................................................................................................................10
TECHNICAL SPECIFICATIONS..............................................................................................................11
PHYSICAL DIMENSIONS.......................................................................................................................13
CONTACT DETAILS................................................................................................................................14
Introduction
3
The Audiant 80i integrated amplifier
Congratulations on your Audiant 80i integrated amplifier purchase. To realize the full potential of your unit you need
to appreciate all aspects of its operation.
Before installing the 80i into your system, read the entire manual carefully. Endeavour to understand every detail
by familiarising yourself with the controls and features as you read. You will find it easier to install using the relevant
sections of this manual as a reference.
We have attempted to explain every feature and operation facet clearly and concisely. Your Perreaux dealer will be
happy to assist if you encounter any unforeseen problems.
Read this manual, install your unit correctly and realise the sonic significance of your investment in Perreaux.
Perreaux products are designed to provide the utmost in sonic realism and electronic reliability, with a functional
yet elegant appearance that reflects the care and craftsmanship applied during all stages of construction.
We maintain the human-link throughout; from design and construction, through to the ultimate test – your music,
your system, your ears.
Because we too listen to our products, we know that with your Audiant integrated amplifier you will discover many
more of the musical secrets we strive to reveal.
From all of us at Perreaux, thank you for choosing the Audiant 80i integrated amplifier.
Copyright and Acknowledgments
Audiant 80i Manual Version 1.0
Copyright © 2010 Perreaux Industries Ltd.
Perreaux Industries Ltd., Gladstone Road, Mosgiel, Dunedin 9024, New Zealand.
All rights reserved. No part of this publication may be reproduced, stored in a retrieval system, or transmitted, in any form or by any means, electronic, mechanical,
photocopying, recording, or otherwise, without the prior written permission of the publisher. The content of this manual is furnished for information use only, is subject
to change without notice, and should not be construed as a commitment by Perreaux Industries Ltd.
Perreaux Industries Ltd. assumes no responsibility or liability for any errors or inaccuracies that may appear in this manual.
All trademarks and registered trademarks are the property of their respective owners. Perreaux, the Perreaux logo and Audiant are trademarks of Perreaux Industries
Ltd. All rights reserved. Printed in New Zealand.
Installation
Unpacking
The Audiant 80i is supplied with the following accessories:
• Remote control
• 2 x AAA batteries
• Mains lead
• USB cable
• This manual
We recommend you retain the packaging for reuse in case you need to transport the unit at a later date.
Placement
Your Audiant 80i integrated amplifier should generally be placed close to your primary source component,
keeping interconnect cabling short.
Position all other components of your system close enough to your 80i to avoid having to stretch or extend
any of the interconnect cables.
Ventilation Requirements
Your Audiant 80i requires dissipating considerable power in the form of heat. It should be placed in a
position that does not restrict the airflow around it.
Allow at least 80mm (3 inches) above and to each side of the unit and mount the Audiant 80i on a flat
surface for air circulation to allow heat to dissipate.
Do not place directly onto a carpeted surface as it will reduce air circulation and the heat will not dissipate
as intended.
It the device is used in a cabinet, air must be able to flow through. An enclosed cabinet will severely restrict
heat dissipation.
Ensure that nothing is placed above or below the amplifier that might block or restrict the vents.
If the Audiant 80i has inadequate ventilation and/or is played very enthusiastically for a period of time, its
temperature may rise above the designated operating level and the over-temperature protection will trip
(see Protection System section).
Other Devices
Ideally, your Audiant 80i integrated amplifier should not be located directly above or adjacent to other heatproducing products such as radiators, other power amplifiers, etc. If multiple amplifiers are being used and
space is restricted, placing them side by side is preferable to stacking.
Do not place another device directly on top of the Audiant 80i, it will restrict heat dissipation and prevent
the heatsink from operating as designed.
It is advisable to position your Audiant 80i away from (and if possible, connected to a power socket on a
different circuit from) powerful electrical or electronic products such as TV sets, computers, cookers, fridges
etc. This will prevent the possibility of the strong electrical and electromagnetic emissions or interference
given off by such devices adversely affecting the performance of your amplifier.
4
Connecting - Rear panel
15
14
13 12 11
10
9
8
7
6
5
4
3
2
1
Important:
Before making any connections, switch off the mains power to all components in your system.
1
Power On/Off
The Power switch turns power to the unit on and off.
2
Mains Power Socket
The Mains Power Socket is used with the removable mains power cord to supply your Audiant 80i
integrated amplifier with power.
5
Before connecting the 80i to the mains power, please check the voltage label on the rear panel to
ensure that your amplifier conforms to the power supply in your area. Never attempt to connect the
unit to an incorrect voltage – severe damage may result.
Note: The unit must always be earthed when connected to mains power. Use the earthed, moulded
mains lead supplied. Never use an unearthed mains plug, socket or adaptor with this unit. The mains
lead supplied may be fitted with a fused plug, depending on local regulations. If this is the case,
always replace this fuse with another of the same type and rating.
3
Mains Fuse
The mains fuse is user serviceable, and should always be replaced with the same type and rating (see
Technical Specifications, page 11).
Ensure your Audiant 80i is disconnected from the mains power before attempting to change the fuse.
Note: Fuses do not usually blow without a reason. Any doubts about fuse failure should be conveyed
directly to your Perreaux dealer.
4
Speaker Outputs
These speaker terminals are for connecting a speaker system. Connect the wires from your left
channel loudspeaker to the LEFT + & - terminals, and the wires from the right channel loudspeaker to the
RIGHT + & - terminals. In each case, the red terminal is the positive output and the black terminal is the
negative output.
Care should be taken to ensure no stray strands of wire short the speaker outputs together. Please
ensure that the loudspeaker terminals have been tightened to provide a good electrical connection. It
is possible for the sound quality to be affected if the screw terminals are loose.
5
Phono Earth Terminal
The phono earth terminal connects to the earth lead from the tonearm cable of a record player, if
required.
6
Phono Input
These sockets are for connecting to an analogue record player. The phono input is only compatible
with moving-magnet (MM) cartridges.
If you wish to use an external phono amplifier, the internal phono stage can be bypassed and used as
a line level input. Ask your Perreaux dealer for assistance with bypassing the internal phono stage.
7
Aux, Disc Inputs
These inputs are suitable for any ‘line level’ source equipment such as CD players, DAB or FM/AM tuners
etc.
Note: These inputs are for analogue audio signals only. They should not be connected to the digital
output of a CD player or any other digital device.
8
HT Loop Switch
This switch is used to select the operation of the HT Loop Input.
‘HT’ is selected by default from the factory and bypasses the volume control allowing the Audiant 80i
to be integrated into a home theatre system.
Setting to ‘Line’ allows the HT Loop Input to be used as a line level input for analogue sources such as
an iPod or tape deck.
Caution: When connecting a line level signal, make sure the HT Loop Switch is set to ‘Line’, otherwise
serious damage may occur to the amplifier and/or your speakers.
9
HT Loop Input
The Home Theatre Loop is used to integrate the Audiant 80i into a home theatre system that has
preamp outputs on the surround processor or receiver. Please ensure the volume level of the
connected processor is suitably attenuated before selecting this input.
It can also be used as a line level input depending on the setting of the HT Loop Switch.
10 Line Out
These sockets provide a line level audio signal, suitable for recording from the selected source input.
The input should not be changed whilst recording.
11 Pre Out
These sockets provide a preamp level audio signal for connection to an external power amplifier or
active subwoofer.
12 Coax Input
The Coax Input is for connecting coaxial digital sources, such as CD players, music streamers etc.
13 Opt1, Opt2 Inputs
These inputs are for connecting optical digital sources, such as TVs, Sky and Freeview set-top boxes etc.
14 USB Input
The USB Input is for connecting directly to your computer.
When connecting to your computer via USB, the Audiant remote control will allow basic control of your
music application, such as iTunes, Windows Media Player etc. (see Remote Control, page 8).
15 RS232 Port
The RS232 port allows external serial control of the Audiant 80i for custom install use. A full command set is
available on the Perreaux website. This port can also be used by Perreaux service personnel for software updates.
6
Operation - Front Panel
1
1
2
3
2
4
Standby Button
The Standby Button switches the unit between Standby mode (indicated by dim standby LED) and On
(indicated by bright standby LED). Standby is a low-power mode where the power consumption is less
than 1 Watt. The unit should be left in Standby mode when not in use.
2
Source Buttons
The Source Buttons allow you to select the source component that you wish to listen to. The signal
selected is also fed to the Line Out sockets so that it may be recorded. The input should not be
changed whilst recording.
7
3
Volume Control
The Volume Control increases/decreases the level of the sound from the outputs of the amplifier. This
control affects the level of the loudspeaker output and the preamp output. It does not affect the Line
Out connections.
Note: When HT Input (Home Theatre Loop) is selected, and the HT Loop Switch is set to ‘HT’, the
volume control will have no effect on the volume level of the amplifier.
4
Infrared Sensor
The Infrared (IR) Sensor receives commands from the supplied Audiant remote control. Clear
unobstructed line of sight between the remote control and the sensor is required.
Operation - Remote Control
1 Standby
The Standby key switches
the amplifier between On
and Standby mode.
2 Source Up & Down
The Source keys scroll
through the source inputs.
3 Volume Up & Down
The Volume keys adjust
the volume level of the
amplifier. When the HT input
(HT Loop) is selected the
Volume keys will have no
effect.
6 Skip Forward
When connected to a
computer using the USB
input, the Skip Forward key
allows you to skip forward
by one track in the music
application running on the
computer. The USB input
must be selected for this to
function.
4 Skip Backward
When connected to a
computer using the USB
input, the Skip Backward
key allows you to skip
backward by one track
in the music application
running on the computer.
The USB input must
be selected for this to
function.
7 Stop
When connected to a
computer using the USB
input, the Stop key allows
you to stop the music
application running on the
computer. The USB input
must be selected for this to
function.
5 Play/Pause
When connected to a
computer using the USB
input, the Play/Pause
key allows you to play
and pause the music
application running on the
computer. The USB input
must be selected for this
to function.
8 Display
9 Mute
The Mute key causes the
volume level of the amplifier
and the preamp outputs to
be muted. The mute mode
is indicated by the selected
input LED flashing gradually.
Press again, or increase the
volume, to cancel mute.
10Direct Source Keys
The Direct Source Keys
provide direct selection of
source inputs.
The Display key adjusts the
display options, scrolling
through FULL, MEDIUM
and LOW brightness and
display OFF, although the
Standby LED will remain on
at a reduced brightness. If
the display is set to OFF, the
display will turn on when the
source input is changed then
automatically turn off.
8
Protection System
Your Audiant 80i integrated amplifier protection systems to ensure reliability and long life of the unit and
the speakers it is connected to. The protection system comprises of five main protection methods. In all
instances the protection state will be indicated by all source input LEDs flashing. Power to the amplifier will
need to be cycled, by the standby button or power switch, to reset the protection state.
DC Offset Detection
The DC offset detection system offers loudspeaker protection if the output of the amplifier goes to a high
DC voltage.
Over-Temperature Detection
The over-temperature detection system constantly monitors the heat generated by the output MOSFETs.
If the monitored temperature reaches 80°C (176°F) the output to the speakers will be disconnected to stop
the temperature from rising further.
An over-temperature condition is normally caused by a combination of high listening levels, low impedance
or low sensitivity speakers.
Fuse Fail Detection
The fuse fail detection system monitors the internal DC rail fuses. If any of the fuses should blow the output
to the speakers will be disconnected to protect the speakers and amplifier from damage.
Fuses normally blow for a reason. Any doubts about fuse failure should be conveyed directly to your
Perreaux dealer.
AC Fail Detection
9
The AC fail detection system monitors the AC voltage on the main power transformer. If for any reason
the AC mains voltage is lost, e.g. power failure or tripped circuit breaker, the speakers are immediately
disconnected from the amplifier before the amplifier loses power.
Over-Current Detection
The over-current detection system ensures the output devices are constantly operating within their safe
operating limits and provides a fast response to temporary overload conditions. When an over-current condition
is detected the output to the speakers is disconnected to isolate the amplifier from potential damage.
An over-current condition can occur due to a short across the speaker terminals, a speaker driver/crossover
fault or excessive current demand due to low impedance speakers.
Care and Maintenance
The 80i has been designed to provide many years of trouble free enjoyment. It is important to keep the
exterior of the unit clean.
Notes: Always switch the unit off and remove the power cord from the rear of the amplifier before
attempting to clean your Audiant 80i integrated amplifier in the manner described below.
Never apply liquid directly to the amplifier.
Never use abrasives.
Never rub in a circular motion.
Front Panel and Cover
The front panel and cover feature a durable, high-quality anodised finish. To remove finger marks and dirt,
simply rub the surface with a soft cloth.
If the dirt is not removed, use a small quantity of isopropyl alcohol on a clean cloth and rework the effected area.
Troubleshooting
There is no power
Ensure the AC power cord is connected securely.
Ensure the mains plug is fully inserted into the wall socket and is switched on.
Check the mains fuse of the amplifier.
Check fuse in the mains plug or adaptor.
There is no sound
Check that the source component is properly connected.
Check that the source component playing.
Check that the speakers are properly connected.
Make sure the amplifier is not muted.
There is no sound on one channel
Check speaker connections.
Check interconnects.
There is a loud buzz or hum
Ensure no interconnects are loose or defective.
Ensure that your tape deck/turntable is not too close to the amplifier.
Unable to make or play tape recordings
Check Line Out has been connected correctly.
There is weak bass or diffused stereo imaging
Ensure the speakers are wired in the correct polarity, the +ve terminal of the loudspeaker should connect to
the +ve speaker output terminal of the amplifier, and likewise, -ve to -ve.
All source LEDs are flashing
The protection system of the amplifier has engaged (see Protection System section).
The remote handset will not function
Check the batteries have not expired.
Check the batteries are inserted in the correct orientation.
Ensure that nothing is blocking the remote sensor.
10
Technical Specifications
All specifications are accurate at the time of printing. Perreaux Industries Ltd. reserves the right to adjust
specifications without notice.
All specifications measured at 230V after a 10 minute warm up period using an Audio Precision ATS-2
Audio Analyser. Measurements taken at 65kHz bandwidth, unless specified otherwise. Digital to analogue
converter measurements taken using 24-bit/96kHz input signal.
Amplifier
Rated Power Output (per channel, <0.05% THD+N):
Total Harmonic Distortion (THD+N)
Typically:
20Hz to 20kHz:
Frequency Response:
Signal to Noise Ratio (A-weighted):
Damping Factor:
Gain:
80Wrms into 8Ω
130Wrms into 4Ω
0.002% @ 1kHz, 80W into 8Ω
<0.05%, 80W into 8Ω
<0.05%, 1W into 8Ω
±0.1dB, 20Hz to 20kHz
105dB, ref. 80W into 8Ω
400 @ 1kHz, ref. 8Ω
28dB
Preamplifier
11
Analogue Inputs:
Home Theatre Input:
Analogue Input Impedance:
Digital Inputs:
Digital Input Impedance:
Transformer Coupled Digital Input:
Analogue Outputs:
Analogue Output Source Impedance
Pre Out:
Line Out:
Volume Control Range
Signal to Noise Ratio (A-weighted):
3 Line Level
1 Phono
Yes (selectable)
47kΩ
1 Coax (RCA)
2 Optical (Toslink)
1 USB (Type B)
75Ω (Coax)
Yes (Coax)
1 Pre Out
1 Line Out
540Ω
270Ω
-90.0dB to +6.0dB
113dB, ref. 2Vrms
Digital to Analogue Converter (DAC)
Input Sample Rate (maximum):
Input Word Length (maximum):
Digital to Analogue Conversion:
Output Voltage:
Total Harmonic Distortion (THD+N)
Typically:
20Hz to 20kHz:
Frequency Response:
Signal to Noise Ratio (A-weighted):
Phono Stage
Gain:
Input Impedance:
Input Capacitance:
Total Harmonic Distortion (THD+N)
Typically:
20Hz to 20kHz:
General
Power Consumption
Standby:
Idle:
Maximum ( 30W into 4Ω):
Mains Fuse Rating:
100VAC – 120VAC
220VAC – 240VAC
Dimensions
Width:
Depth:
Height:
Weight:
96kHz (Coax, Optical)
48kHz (USB)
24-bit (Coax, Optical)
16-bit (USB)
24-bit/96kHz (upsampled)
1.95Vrms @ 0dBFS
0.002% @ 1kHz, -20dBFS
<0.004%, -20dBFS
±0.2dB, 20Hz to 20kHz
120dB, ref. 0dBFS
40dB
47kΩ
100pF
0.06% @ 1kHz, 1Vrms
<0.15%, 1Vrms
12
1W
50W
640W
6A (slow blow)
4A (slow blow)
431mm (17.0”)
309mm (12.2”)
67mm (2.6”)
11.5kg (25.3lb)
Dimensions
67mm (2.6”)
431mm (17.0”)
13
309mm
(12.2”)
Installation Notes
Please record the serial number of your Audiant 80i integrated amplifier for future reference.
Serial Number: __________________________
_____________________________________________________________________________________________________
_____________________________________________________________________________________________________
_____________________________________________________________________________________________________
_____________________________________________________________________________________________________
_____________________________________________________________________________________________________
_____________________________________________________________________________________________________
_____________________________________________________________________________________________________
_____________________________________________________________________________________________________
_____________________________________________________________________________________________________
_____________________________________________________________________________________________________
14
Contact Details
Perreaux Industries Ltd.
PO Box 305
Mosgiel
Dunedin 9053
New Zealand
T: +64 3 489 2975
F: +64 3 489 2976
E: [email protected]
W: www.perreaux.com
Perreaux Industries Ltd.
PO Box 305
Mosgiel
Dunedin 9053
New Zealand
T: +64 3 489 2975
F: +64 3 489 2976
E: [email protected]
W: www.perreaux.com