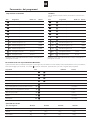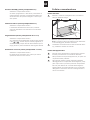
1
Bedienungsanleitung für professionelle Ablufttrockner Mode d’emploi pour les séchoirs à sortie d'air à usage professionnel Istruzioni per l’uso di asciugatrici professionali con scarico diretto dell'aria Instructions for the use of professional exhaust air dryers Sicherheitshinweise beachten! Respecter les consignes de sécurité! Seguire le indicazioni di sicurezza! Follow the safety instructions! Gerät erst nach dem Lesen dieser Anleitung in Betrieb nehmen! Ne mettre en marche l’appareil qu’une fois après avoir lu ce mode d‘emploi! Mettere in funzione l’apparecchio solo dopo aver letto queste istruzioni! Only use appliance after first reading these instructions! Spirit proLine 38A TRI 9250 / 9375/9550 / 9750 Instruktions-Nr. N° d’instruction No. dell’istruzione Instruction No. 240 647.AF WT09 TRI Produkte-Nr.9655.1 N° de produit 9656.1 No. di prodotto 9657.1 Product No. 9658.1 EG-Konformitätserklärung für Maschinen Déclaration CE de conformité de machines (Maschinenrichtlinie 2006/42/EG, Anhang II A) (Directive Machine 2006/42/CE, Annexe II.A) Hersteller: Adresse: Fabricant: Adresse: Schulthess Maschinen AG Landstrasse 37 CH-8633 Wolfhausen Déclare ci-après que les séchoirs industriels: Erklärt hiermit, dass die Wäschetrockner der nachstehenden Typen: Typen: Prod.-Nr. Spirit ProLine Spirit ProLine Spirit ProLine Spirit ProLine Elektrische TRI 9250 TRI 9375 TRI 9550 TRI 9750 Anschlüsse 9655.1 9656.1 9657.1 Schulthess Maschinen AG Landstrasse 37 CH-8633 Wolfhausen 9658.1 3x400V Type: Spirit ProLine Spirit ProLine Spirit ProLine Spirit ProLine Raccordement TRI 9250 TRI 9375 TRI 9550 TRI 9750 électrique N° prod. 9655.1 9656.1 9657.1 9658.1 3x400V konform sind mit den einschlägigen Bestimmungen der sont conformes aux dispositions à ce sujet de la Maschinenrichtlinie 2006/42/EG Directive Machines 2006/42/CE konform sind mit den einschlägigen Bestimmungen folgender weiterer EU-Richtlinien sont conformes aux dispositions des Directives Européennes suivantes Elektromagnetische Verträglichkeit 2004/108/EG Compatibilité électromagnétique 2004/108/CE Wolfhausen, Dezember 2009 Wolfhausen, Décembre 2009 Schulthess Maschinen AG Ch. Daneffel H.-P. Caderas Leitung Forschung und Entwicklung Product Manager Schulthess Maschinen AG Ch. Daneffel H.-P. Caderas Directeur Recherche & DéveloppementProduct Manager Dichiarazione di conformità CE per macchine EC Declaration of conformity for machinery (Direttiva macchine 2006/42/CE, Appendice II A) (Machinery Directive 2006/42/EC, Annex II., sub. A) Il produttore: Indirizzo: Manufacturer: Address: Schulthess Maschinen AG Landstrasse 37 CH-8633 Wolfhausen Hereby declares that the industrial dryers: Dichiara con il presente documento che le asciugatrici: Tipi: N° prod. Spirit ProLine Spirit ProLine Spirit ProLine Spirit ProLine Allagamenti TRI 9250 TRI 9375 TRI 9550 TRI 9750 elettrici 9655.1 9656.1 9657.1 Schulthess Maschinen AG Landstrasse 37 CH-8633 Wolfhausen 9658.1 3x400V Type: Prod. No. Spirit ProLine Spirit ProLine Spirit ProLine Spirit ProLine Electrical TRI 9250 TRI 9375 TRI 9550 TRI 9750 Connection 9655.1 9656.1 9657.1 9658.1 sono conformi alle relative disposizioni della are in conformity with the relevant provisions of the Direttiva macchine 2006/42/CE Machinery Directive 2006/42/EC sono conformi alle relative disposizioni delle seguenti ulteriori Direttive dell’UE are in conformity with the provisions of the following other EC-Directives Compatibilità elettromagnetica 2004/108/CE Electromagnetic compatibility 2004/108/EC Wolfhausen, Dicembre 2009 Schulthess Maschinen AG Ch. Daneffel Direttore Ricerca & Sviluppo H.-P. Caderas Product Manager Wolfhausen, December 2009 3x400V Schulthess Maschinen AG Ch. Daneffel Manager Research & Development H.-P. Caderas Product Manager Liebe Kundin, lieber Kunde Wir freuen uns, dass Sie sich für einen Schulthess- Wäschetrockner entschieden haben. Bitte lesen Sie diese Bedienungsanleitung sorgfältig durch, um alle Möglichkeiten und Vorteile Ihres neuen Wäschetrockners nutzen zu können. Ihr neuer Wäschetrockner entstand in mehrjähriger Entwicklungsarbeit. Höchste Qualitätsansprüche sowohl in der Entwicklung als auch in der Fertigung garantieren ihm eine lange Lebensdauer. Beachten Sie insbesondere das Kapitel «Sicherheits hinweise» sowie das beiliegende Garantie- und Kunden dienstheft. Seine Konzeption erfüllt alle heutigen und zukünftigen Anforderungen moderner Wäschepflege. Sie ermöglicht Ihnen eine vielfältige und individuelle Programmwahl. Wir wünschen Ihnen viel Freude an Ihrem neuen Schulthess-Gerät. Sparsamster Energieverbrauch und kurze Trocknungs zeiten sichern Ihnen beim Betrieb Ihres Wäschetrockners höchste Wirtschaftlichkeit. Ihre Schulthess Maschinen AG Chère cliente, cher client Nous sommes fort heureux que vous vous soyez décidé pour un séchoir Schulthess. Votre nouvelle acquisition est le fruit de plusieurs a nnées d’efforts de développement. Des normes de qualité extrêmement rigoureuses en matière de mise au point comme de fabrication lui garantiront une longue durée de vie. Sa conception répond à toutes les exigences actuelles et futures de l’entretien moderne du linge. Elle permet un choix varié et personnalisé entre ses programmes. Sa sobriété en matière de consommation d’énergie et la brièveté de ses temps de séchage vous garantiront un fonctionnement particulièrement économique. Nous vous prions de lire avec soin le présent mode d’emploi, afin que vous puissiez profiter de tous les avantages et possibilités de votre nouveau séchoir. Observez notamment le chapitre «Conseils de sécurité» et le livret de garantie et d’assistance ci-joint. Nous vous souhaitons beaucoup de plaisir avec votre nouvelle machine Schulthess. Cordialement Schulthess Maschinen SA Cara cliente, caro cliente Siamo lieti che abbiate scelto un’asciugabiancheria Schulthess. La vostra nuova asciugatrice e nata dopo molti anni di ricerche. Le alte esigenze di qualità richieste e durante la fase di fabbricazione vi garantiscono un apparecchio di lunga durata. La sua concezione soddisfa tutte le richieste odierne e future per un moderno trattamento della biancheria. Vi consente di selezionare i programmi in modo vario e personalizzato. Il forte risparmio di energia e tempi di asciugatura più brevi vi garantiscono la massima economicità durante il funzionamento della vostra asciugatrice. Vi preghiamo di leggere attentamente queste istruzioni per l’uso, per poter sfruttare tutte le possibilità ed i vantaggi che vi offre la vostra nuova asciugatrice. Osservare particolarmente il capitolo «Istruzioni per la sicurezza» come anche il libretto del Servizio Assistenza ed il certificato di garanzia allegati. Vi auguriamo di poter utilizzare con gioia la vostra nuova macchina Schulthess. Vostra Schulthess Maschinen SA Dear Customer We are pleased that you have chosen a Schulthess dryer. Your new dryer is the result of many years of development work. The highest quality requirements, both in development and manufacture, guarantee a long lifetime. Its design meets all the current and future demands of modern laundry care. It offers you a varied and indi vidual choice of programmes. Sparing use of energy and short drying times help to nsure that you can use your dryer as economically as possible. Please read these instructions carefully to enable you to use all the possibilities and advantages of your new dryer. Please note in particular the chapter «Safety information» and the enclosed guarantee and customer services booklet. We hope you will be very happy with your new Schulthess machine. Yours Schulthess Maschinen AG 4 D EUTSCH Inhaltsverzeichnis Verwendete Symbole6 Entsorgungshinweise XX Verpackung des Neugerätes XX Entsorgung des Altgerätes 6 6 Sicherheitshinweise XX Allgemeine Sicherheitshinweise XX Vor der Inbetriebnahme beachten XX Beim Trocknen beachten XX Bei einem Transport beachten 6 6 7 7 So trocknen Sie richtig und umweltfreundlich XX Wäsche sortieren 7 XX Beladung7 XX Tipps zum Trocknen 7/8 XX Diese Textilien nicht im Gerät trocknen 8 Inbetriebnahme XX Vorbereitung8 XX Einfülltür öffnen 8 XX Einfülltür schliessen 8 Gerätebeschreibung XX Bedienungs- und Anzeigefeld XX Programmtasten 9 9 Programmübersicht10 Programm wählen XX Restfeuchtegesteuertes Programm wählen11 XX Mangelfeucht-Programm wählen 11 XX Zeit-Programm wählen 11 XX Wet-Clean-Programm wählen 11 Zusatzfunktionen XX Pflegeleicht 11 XX Zeitwahl11 XX Schontrocknen11 XX Startzeitvorwahl11 XX Schnellgang11 Programm starten XX Programm vor dem Programmstart ändern12 XX Wäsche einfüllen 12 XX Programm starten 12 XX Programmablauf / Programmstand 12 XX Wäsche nachlegen 12 XX Programm abbrechen 12 XX Programmende12 XX Wäsche entnehmen 12 XX Gerät ausschalten 12 Grundeinstellungen ZZ Trocknungsgrad13 ZZ Knitterschutz13 ZZ Abkühlen13 ZZ Uhrzeit13 ZZ Sprache 13 XX Erweiterte Grundeinstellungen ZZ Kindersicherung13 ZZ Tastenspeicher 13 ZZ LCD Helligkeit 13 ZZ LCD Kontrast 13 ZZ Summer-Lautstärke13 ZZ Standby-Funktion14 ZZ Optische Schnittstelle 14 ZZ Defaultsprache14 ZZ Startzeitvorwahl14 Reinigung und Pflege XX Filter reinigen XX Gerät reinigen 14 14 Störungen XX Störungsmeldungen15 XX Störungen beheben 15/16 Geräuschpegel18 Kundendienst XX Produkte- und Geräte-Nr. 16 Garantie16 Technische Daten17 Notizen18 Sommaire français XX Voir page 19 Sommario italiano XX Vedere pagina 33 Contents english XX See page 47 6 Verwendete Symbole Sicherheitshinweise signalisiert Sicherheitshinweise und Warnungen verweist auf Arbeitsschritte, die der Reihe nach aus geführt werden müssen kennzeichnet Aufzählungen sowie allgemeine nützliche Hinweise Entsorgungshinweise Allgemeine Sicherheitshinweise: Verpackung des Neugerätes Verpackungsmaterial ordnungsgemäss entsorgen. Verpackungsmaterial ist kein Spielzeug. Durch die Aufbereitung und Wiederverwendung werden Rohstoffe eingespart und Abfallvolumen verringert. Die Verpackung kann dem Fachhändler oder Lieferanten zurückgegeben werden. Alle verwendeten Verpackungsmaterialien sind umweltverträglich und wiederverwendbar. Der Karton besteht aus 80% bis 100% Altpapier. Holzteile sind nicht chemisch behandelt. Die Folien sind aus Polyethylen (PE), die Umbänderung aus Polypropylen (PP). Diese Materialien sind reine KohlenwasserstoffVerbindungen und recycelbar. Entsorgung des Altgerätes Ausgediente Geräte sind unbrauchbar zu machen: Nachdem der Netzstecker gezogen bzw. der Anschluss vom Elektriker demontiert worden ist, Netzkabel durch trennen und entfernen. Türschloss zerstören oder ent fernen, damit spielende Kinder sich nicht einsperren und in Lebensgefahr geraten. Komponenten des Altgerätes dürfen nicht weiter verwendet werden. Das Altgerät enthält wertvolle Werkstoffe, die einer Wiederverwertung zugeführt werden sollten. Stellen Sie sicher, dass Ihr altes Gerät ordnungsgemäss entsorgt wird. Bewahren Sie Ihr Altgerät nicht auf und geben Sie es keinesfalls in den normalen Abfall. Anschriften von Sammelstellen oder Rücknahmeorten für die Entsorgung von Altgeräten erfahren Sie bei Ihrer Gemeindeverwaltung. Bitte helfen Sie auf diese Weise bei einer umweltverträg lichen Entsorgung bzw. Wiederverwertung mit. Dieses Gerät entspricht den einschlägigen Sicherheits bestimmungen für Elektrogeräte. Es ist nicht für die Benutzung durch Personen (einschliesslich Kindern) mit verringerten physischen, sensorischen oder mentalen Fähigkeiten bzw. mit mangelnden Erfahrungen und Kenntnissen geeignet. Bitte beachten Sie die Sicherheits hinweise in dieser Bedienungsanleitung und der dazugehörenden Aufstellanleitung. Nicht auf das Gerät steigen. Setzen, lehnen oder stützen Sie sich nicht auf die Einfüll tür. (Kippgefahr!) Keinesfalls das Gerät mit Wasser abspritzen oder mit einem Dampfreiniger reinigen. Wird das Gerät für längere Zeit nicht gebraucht, ist es vom Strom zu trennen. Netzstecker nur mit trockenen Händen anfassen. Nur am Stecker, nie am Kabel ziehen. Reparaturen dürfen nur von geschultem Fachpersonal durchgeführt und defekte Bauteile nur gegen OriginalErsatzteile vom Gerätehersteller ausgetauscht werden. Durch unsachgemässe Reparaturen oder Fremdersatzteile können erhebliche Sachschäden und Gefahren für den Benutzer entstehen. Modifikationen am Gerät sind nur in Absprache mit dem Hersteller zulässig. Sobald eine Funktionsstörung auftritt, muss das Gerät vom Stromnetz getrennt werden. Der Trockner ist nur dann elektrisch vom Netz getrennt, wenn der Netzstecker gezogen, oder der Hauptschalter ausgeschaltet, oder die Sicherung demontiert ist Waschmittel und Wäschepflegezusätze so aufbewahren, dass sie für Kinder unzugänglich sind. Vor der Inbetriebnahme beachten: Lesen Sie die beiliegenden Druckschriften sorgfältig durch, bevor Sie Ihre Waschmaschine in Betrieb nehmen. Sie enthalten wichtige Informationen zu Installation, zum Gebrauch und zur Sicherheit des Gerätes. Druckschriften für Mitbenützer oder Nachbesitzer sorgfältig aufbewahren. Der Trockner darf nur von unserem Kundendienst oder einem autorisierten Fachhändler aufgestellt und in Betrieb genommen werden. Ein Gerät mit sichtbaren Schäden nicht anschliessen. Den Anschluss der Abluftleitung nicht an einen Kamin anschliessen, an den ein Gas-, Kohleofen bzw. Herd oder eine Gas-Raumheizung angeschlossen ist. Durch Rücksaugung besteht Vergiftungsgefahr! Benutzen Sie den Trockner nur, wenn alle abnehmbaren Aussenverkleidungen montiert sind. Flusen, die in Luftleitungen gelangen, können unter Um ständen einen Brand verursachen. Betreiben Sie den Trockner nur mit eingebautem und tadellosem Flusen filter. Sollten Sie eine Beschädigung feststellen, ist der Flusenfilter unbedingt sofort zu ersetzen. 7 So trocknen Sie richtig und umweltfreundlich Beim Trocknen beachten: Vor dem Einfüllen der Wäsche darauf achten, dass sich keine Fremdkörper oder eventuell eingesperrte Tiere in der Trommel befinden. Nur saubere Wäschestücke im Trockner trocknen. Der Trockner darf nicht benutzt werden, wenn Chemika lien für die Reinigung benutzt worden sind. Wäschestücke, die mit Speiseöl, Aceton, Alkohol, Benzin, Petroleum, Kerosin, Fleckenentferner, Terpentin, Wachs oder Wachs entferner verschmutzt sind, sollten vor dem Trocknen im Trockner in warmem Wasser mit einer zusätzlichen Menge Waschmittel gewaschen werden. Trocknen mit normaler Temperatur. Trocknen mit niedriger Temperatur. Gegenstände wie Schaumgummi (Latex-Schaumgummi), Duschhauben, wasserdichte Textilien, gummierte Artikel sowie Kleidungsstücke oder Kopfkissen mit Schaumgummi flocken sollten nicht im Trockner getrocknet werden. Nicht maschinell Trocknen. Weichspüler oder ähnliche Produkte sollten gemäss ihrer Anweisungen verwendet werden. Ein Trocknungsgang sollte immer mit vollständig erfolgtem Abkühlschritt enden, damit die Wäschestücke bei einer Temperatur bleiben, welche sie nicht beschädigt. Sollte der Trocknungsgang vorzeitig ohne Abkühlen beendet werden, müssen alle Wäschestücke rasch entnommen und so ausgebreitet werden, dass die Wärme abgegeben werden kann. Dabei ist zu beachten, dass die Wäschestücke aufgrund ihrer Temperatur und Feuchte bei Hautkontakt Verbrennungen verursachen können. Es ist daher für entsprechenden Handschutz zu sorgen. Haustiere vom Gerät fernhalten. Das Gerät nur im Haushalt zum Trocknen von Textilien benutzen. Das Gerät nur zum Trocknen von Textilien benutzen. Das Türglas wird beim Trocknen heiss. Berühren Sie niemals das Türglas während dem Trocknen! Beim Trocknen muss für eine gute Raumbelüftung gesorgt werden (Fenster oder Tür öffnen). Nach Programmende nicht in die drehende Trommel greifen. Lagern oder verwenden Sie in der Nähe des Trockners kein Benzin, Petroleum oder sonstige leicht entzündbare Stoffe (Brand- oder Explosionsgefahr!) Im Notfall drücken Sie sofort den roten «Not-Aus»Knopf! (siehe Kapitel «Inbetriebnahme / «Not-Aus»-Schalter») Bei einem Transport beachten: Vorsicht beim Transport des Gerätes! (Verletzungsgefahr!) Das Gerät nicht an vorstehenden Bauteilen anheben! Wäsche sortieren Beachten Sie die Trocknungs-Symbole in den Textilien. Nur Textilien, die mit Wasser gewaschen wurden, im Gerät trocknen. Um ein gleichmässiges Trocknungsergebnis zu erzielen, die Wäsche nach Gewebeart und gewünschtem Trocknungsziel sortieren. Beladung zz Am sparsamsten und umweltfreundlichsten trocknen Sie, wenn Sie die maximale Wäschemenge einfüllen. (Siehe Kapitel «Programmtabelle») zz Die maximalen Beladungsmengen nicht überschreiten, da Überfüllen das Trocknungsergebnis beeinträchtigt und die Wäsche stark knittert. zz Die Wäsche vor dem Trocknen durch Schleudern im Waschautomat oder in einer Wäscheschleuder gründlich entwässern. Je höher die Schleuderdrehzahl, umso kürzer ist die Trocknungszeit und geringer der Stromverbrauch. zz Auch pflegeleichte Wäsche schleudern. Tipps zum Trocknen zz Schliessen Sie Reissverschlüsse, Haken und Ösen. Knöpfen Sie Duvet- und Kissenbezüge zu. Lose Gürtel, Schürzenbänder usw. zusammenbinden. zz Pflegeleichte Wäsche möglichst in leicht feuchtem Z ustand (Trocknungsziel «Leichttrocken» wählen) aus dem Gerät nehmen und an der Luft kurz nachtrocknen lassen. Bei Übertrocknen besteht Knittergefahr. zz Legen Sie die Wäsche gut aufgelockert in die Trommel, grosse und kleine Stücke gemischt. zz Wäschestücke, die nach dem Trocknen eines Wäsche postens mit stark unterschiedlichen Gewebearten noch zu feucht sind, können im Programm «Zeittrocknen» nachgetrocknet werden. zz Gewirkte Textilien, z.B. Trikotwäsche, können beim Trocknen etwas einlaufen. Für diese Textilien kein Pro gramm «Extratrocken» verwenden. zz Wenn ein einzelnes Wäschestück getrocknet werden muss, so wird es gleichmässiger getrocknet, wenn Sie zusätzliche Wäschestücke als Ballast beigeben, z. B. zwei Frotteetücher. zz Reine Leinengewebe neigen im Trockner zum «Auf rauhen». Beachten Sie deshab die Herstellerangaben. Stärkewäsche kann im Trockner getrocknet werden. 8 Inbetriebnahme zz Zu bügelnde Wäschestücke müssen nicht unmittelbar nach dem Trocknen gebügelt werden. Es ist vorteilhaft, sie für einige Zeit zusammengelegt oder zusammen gerollt liegen zu lassen, damit sich die Restfeuchte in der Wäsche gleichmässig verteilen kann. zz Die richtige Feuchte für das Bügeln oder Mangeln erreichen Sie durch entsprechende Programmwahl. Das Gerät entsprechend der Aufstellanleitung installieren. Bevor das Gerät das erste Mal in Betrieb genommen wird, die Trommel mit einem feuchten Tuch auswischen. Vorbereitung Diese Textilien nicht im Gerät trocknen Überprüfen Sie, ob: zz Tropfnasse Wäsche: Energieverschwendung! (Nochmals schleudern) XXder Flusenfilter eingesetzt ist. (siehe Kapitel «Programm starten») zz Wäsche, die mit entzündlichen Lösungsmitteln behandelt wurde, z.B. mit Fleckenentferner oder Waschbenzin, nicht im Gerät trocknen (Explosionsgefahr!). XXder Netzstecker eingesteckt oder der Wandschalter eingeschaltet ist. Das Gerät ist betriebsbereit, sobald sämtliche Kontroll lampen blinken oder im Schlafmodus erloschen sind. zz Textilien, die Schaumgummi enthalten oder die mit Haarfestiger, Nagellackentferner oder ähnlichen Mitteln behaftet sind, nicht im Gerät trocknen (Brandgefahr!). Falls eine Kontrolllampe dauernd leuchtet, mit Schnellgangtaste bis zur Anzeige «Bitte Programm wählen» tippen. Einfülltür öffnen XXÖffnen Sie die Einfülltür und füllen Sie die Wäsche ein. Einfülltür schliessen XXSchliessen Sie die Einfülltür, indem Sie diese zudrücken, bis der Verschluss hörbar einschnappt. Achten Sie darauf, dass beim Schliessen der Einfülltür keine Wäschestücke eingeklemmt werden. Bei nicht geschlossener Tür verhindert ein Sicherheits schalter die Inbetriebnahme des Gerätes. 9 Gerätebeschreibung Bedienungs- und Anzeigefeld Anzeigen Programme 1 2 3 4 5 6 13 Display-Anzeige Wet-Clean-Programme Zeittrocknen Mangelfeucht 1 (1 - 5) Mangelfeucht 2 (1 - 5) Schranktrocken Extratrocken Schnittstellen 4 SCS-Schulthess Control System 1 (PC-Schnittstelle für Kundendienst) Zusatzfunktionen 2 7 8 9 10 11 12 Zeitwahl Knitterschutz Startzeitvorwahl Pflegeleicht Schontrocknen Programmstart Schnellgang Bedienungs- und Anzeigefeld Not-Aus-Taste Einfüllöffnung Flusenfilter 10 Programmübersicht Koch- und Buntwäsche Pflegeleichtwäsche Für pflegeleichte Textilien aus Synthetic- oder Mischgewebe, sowie Baumwolle mit Bügelfreiausrüstung. Tasten Programm Restfeuchte Tasten Dauer Programm Restfeuchte Dauer 1x Mangelfeucht 1 «1» 13min 1x + Mangelfeucht 1 «1» 2 min 2x Mangelfeucht 1 «2» 16min 2x + Mangelfeucht 1 «2» 4 min 3x Mangelfeucht 1 «3» 18min 3x + Mangelfeucht 1 «3» 5 min 4x Mangelfeucht 1 «4» 20min 4x + Mangelfeucht 1 «4» 7 min 5x Mangelfeucht 1 «5» 21min 5x + Mangelfeucht 1 «5» 8 min 1x Mangelfeucht 2 «1» 22min 1x + Mangelfeucht 2 «1» 9 min 2x Mangelfeucht 2 «2» 23min 2x + Mangelfeucht 2 «2» 10 min 3x Mangelfeucht 2 «3» 25min 3x + Mangelfeucht 2 «3» 11 min 4x Mangelfeucht 2 «4» 26min 4x + Mangelfeucht 2 «4» 12 min 5x Mangelfeucht 2 «5» 27min 5x + Mangelfeucht 2 «5» 13 min 1x Schranktrocken +2/-2 % 1x + Schranktrocken +2/0% 1x Extratrocken +2/-4 % 1x + Extratrocken 0/-2 % Mit gedrückter Taste «Schontrocknen» verlängert sich die Trocknungszeit um ca. 20 %. Mit gedrückter Taste «Schontrocknen» verlängert sich die Trocknungszeit um ca. 20%. Wet-Clean-Wäsche Für empfindliche Textilien, die nach dem Wet-Clean-Verfahren gewaschen wurden, bietet das Gerät die Möglichkeit, diese auch entsprechend schonend zu trocknen bzw. anzutrocknen. Über Taste sind durch ein- oder mehrmaliges Antippen folgende zehn Programme wählbar: Programm Tasten Anzeige Dauer Zeittrocknen kalt 1x + beliebig oft kalt 1min - 2h30 min möglich Zeittrocknen 40°C 2x + beliebig oft 40°C 1min - 2h30 min möglich Zeittrocknen 60°C 3x + beliebig oft 60°C 2min - 2h30 min möglich Zeittrocknen 70°C 4x + beliebig oft 70°C 3min - 2h30 min möglich Nichtwaschbare Garderobe 5x ca. 47min Waschbare Oberbekleidung 6x ca. 24min Angora, Seide (antrocknen) 7x 11min Hochzeitskleider, Vorhänge 8x 13min Oberbetten 9x 1h23min 10x ca. 31min Imprägnierware Beladungsmengen Trockner-Typ TRI 9250 TRI 9375 TRI 9550 TRI 9750 Koch- und Buntwäsche 10kg 15kg 22kg 30kg Pflegeleichtwäsche 5kg 7,5kg 11kg 15kg Feinwäsche 3kg 5kg 7kg 10kg 11 Programm wählen Restfeuchtegesteuertes Programm wählen Das elektronische Abtastsystem kontrolliert laufend die aktuelle Feuchte Ihrer Wäsche und beendet das Pro gramm automatisch beim Erreichen des eingestellten Trocknungsziels. Zusatzfunktionen Durch die Wahl einer oder mehrerer Zusatzfunktionen können Sie dieses Trocknungsprogramm gezielt auf die jeweiligen Besonderheiten Ihrer Wäsche abstimmen. Diese Zusatzfunktionen bleiben nur für dieses eine Trockenprogramm aktiv. XXSie haben zudem die Möglichkeit, Ihren Wäschetrockner durch Veränderung der Grundeinstellungen Ihren Bedürf nissen anzupassen (siehe Kapitel «Grundeinstellungen»). Änderungen an der Grundeinstellung bleiben aktiv, bis Sie sie wieder ändern. XXProgrammtaste antippen, dem gewünschten Trock nungsgrad entsprechend. zz Die Kontrolllampe des gewählten Programmes leuchtet. XXFür pflegeleichte Textilien Zusatzfunktion «Pflegeleicht» wählen. Mangelfeucht-Programm wählen Pflegeleicht Für pflegeleichte Textilien aus Synthetic- oder Mischge webe, sowie Baumwolle mit Bügelfrei-Ausrüstung. Zeitwahl Falls Sie in den Spezialprogrammen ein zeitgesteuertes Trockenprogramm angewählt haben, können sie mit der Taste «Zeitwahl» die Programmdauer festlegen. Die einzustellende Trocknungszeit richtet sich nach der Wäscheart, der Wäschemenge und -feuchtigkeit. Das Gerät bietet bei den Tasten «Mangelfeucht 1» und «Mangelfeucht 2» die Möglichkeit, durch mehrmaliges Drücken den Feuchtigkeitsgrad zu verändern. Es sind jeweils 5 Stufen möglich. In der Anzeige erscheint die gewählte Stufe, wobei mit steigender Zahl die Wäsche trockener wird. Zeit-Programm wählen XXProgrammtaste antippen. zz Die Kontrolllampe «Zeitprogramm» blinkt und die minimale Trocknungszeit wird angezeigt. XXTrocknungszeit durch wiederholtes Antippen der Taste «Zeitwahl» wählen. Schontrocknen Bei empfindlichen Textilien kann die Taste «Schontrocknen» gedrückt werden. Die Temperatur wird reduziert. Startzeitvorwahl Zeitprogramm zum Trocknen von einzelnen Wäsche stücken oder zum Nachtrocknen von bereits vorgetrock neten Textilien mit geringem Feuchtigkeitsgehalt. Die einzustellende Trocknungszeit richtet sich nach der Wäscheart, der Wäschemenge und der Wäschefeuch tigkeit. XXProgrammtaste antippen. zz Die Kontrolllampe Zeitprogramm leuchtet und die minimale Trocknungszeit wird angezeigt. XXDie Trocknungszeit kann durch wiederholtes Antippen der Taste bis max. 150 Minuten gewählt werden Wet-Clean-Programm wählen Durch ein- oder mehrmaliges Antippen der Taste «Start zeitvorwahl» kann die Programmstartzeit um bis zu 23,5 Stunden verzögert werden. Dies ermöglicht z.B. das Ausnützen des Niedertarifs für Nachtstrom. Beginn und damit auch Ende eines Programms können an individuelle Lebensgewohnheiten angepasst werden. In der Displayanzeige wird die Startzeit und die zu er wartende Zeit für das Programmende angezeigt. Nach dem Betätigen der Starttaste beginnt die Vorwahl zeit. Beim Erreichen der Startzeit startet das gewählte Pro gramm automatisch. Die aktuelle Programmdauer wird angezeigt. zz Bei einem Stromunterbruch bleibt die aktuelle Zeit espeichert. Die Dauer des Stromunterbruchs wird nicht g berücksichtigt. Mit diesen Programmen können Textilien getrocknet werden, welche vorher im Wet-Clean-Verfahren gewaschen wurden. XXTaste wiederholt antippen, bis das gewünschte Programm auf dem Display erscheint (siehe Programm übersicht) Schnellgang Das Programm kann durch Betätigen der Schnellgang taste verkürzt oder abgebrochen werden. 12 Programm starten Wäsche nachlegen ist jederzeit möglich. Programm wählen Siehe Kapitel «Programm wählen» Zusatzfunktionen wählen Siehe Kapitel «Zusatzfunktionen» Programm vor dem Programmstart ändern XXGewünschte Programmtaste erneut antippen. zz Alle Kontrolllampen der wählbaren Zusatzfunktionen blinken wieder und alle Einstellungen sind gelöscht. XXEventuell Zusatzfunktionen wählen. Wäsche einfüllen Nur Textilien, die mit Wasser gewaschen wurden, im Gerät trocknen. XXLegen Sie die Wäsche gut aufgelockert in die Trommel, grosse und kleine Stücke gemischt. XXÖffnen Sie die Tür zz Die Trommel bleibt stehen. XXLegen Sie die Wäsche ein. XXSchliessen Sie die Tür. XXDrücken Sie die Starttaste. Bei aktiver Kindersicherung: XXgleichzeitig Start- und Schnellgangtaste gedrückt halten. zz Der Trocknungsvorgang wird fortgesetzt Programm abbrechen u Programm durch mehrmaliges Antippen der Schnell gangtaste abbrechen, bis «Programmende» auf dem Display erscheint. Bei aktiver Kindersicherung: XX Starttaste gedrückt halten. XX Gleichzeitig S chnellgangtaste antippen. Programmende Programm starten Das Programmende wird durch den Anzeigewert 00:00h, die Displayanzeige «Programmende» sowie eine blinkende Kontrolllampe angezeigt. zz Signal ertönt (nur bei eingeschalteter Summerfunktion). XXStarttaste antippen. zz Die Kontrolllampe leuchtet und das Programm läuft automatisch ab. Bei aktiver Kindersicherung: XXStarttaste gedrückt halten und Schnellgangtaste betätigen. Programmablauf / Programmstand zz Trommel dreht sich nach Programmende in kurzen Abständen weiter, damit die Wäsche nicht knittert (nur bei eingeschaltetem Knitterschutz, 30 oder 60 Minuten lang). Spätestens jetzt sollte die Wäsche entnommen werden. Wäsche entnehmen XXÖffnen Sie die Tür XXEntnehmen Sie die Wäsche. XXReinigen Sie den Filter. Gerät ausschalten XXSchliessen Sie die Tür. XXSchalten Sie den Wandschalter aus. XXBei den feuchtegesteuerten Programmen wird die Wäschefeuchtigkeit durch ein elektronisches Abtastsystem ständig kontrolliert. zz Die verbleibende Programmdauer wird angezeigt. Diese Restzeit wird während dem Trocknen mehrmals neu berechnet, das effektive Programmende variiert deshalb um wenige Minuten. XXBei Zeitprogrammen wird die Restzeit bis zum Programmende angezeigt. zz Falls kein Wandschalter vorhanden ist, erlischt das Anzeigefeld nach 4 Min. automatisch, und der Trockner wechselt in den Standby-Modus. (Nur bei eingeschalteter Standby-Funktion) 13 Grundeinstellungen Das Gerät hat eine Grundeinstellung ab Werk. Es kann bei der Inbetriebnahme oder später mit den nachstehenden Funktionen auf individuelle Bedürfnisse angepasst werden. Die Grundeinstellungen können nur verändert werden, wenn kein Trocknungsprogramm läuft. Zum Ändern einer Grundeinstellung muss immer zuerst die Programmtaste in gedrückter Stellung gehalten und dann die Schnellgangtaste betätigt werden. Die entsprechenden Funktionen werden in der Display-Anzeige a ngezeigt. Bei g ehaltener Programmtaste und m ehrmaligem Antippen der Schnellgangtaste ändert die Anzeige. Erweiterte Grundeinstellungen + + XXDurch gleichzeitiges Antippen dieser drei Tasten erfolgt die Anzeige der erweiterten Grundeinstellungen. XXWiederholtes Antippen der öglichen Einstellungen an. m XXDas Antippen der der Einstellungen. -Taste zeigt die -Taste ermöglicht das Verändern XXDurch Antippen der -Taste wird die Anzeige der Einstellungen abgebrochen. Kindersicherung (ab Werk AUS) Beispiel: «Erweiterte Grundeinstellungen» wählen! Funktion ausgeschaltet Die Kindersicherung soll ein zufälliges Starten, Verändern oder Löschen eines Programmes durch Kleinkinder verhindern. Programmstart bei eingeschalteter Kindersicherung: Funktion eingeschaltet + Trocknungsgrad (ab Werk NORMAL) + Halten Sie die Starttaste gedrückt und betätigen Sie die Schnellgangtaste. Tastenspeicher (ab Werk AUS) Ist der Trocknungsgrad «HÖHER» gewählt, wird die Wäsche in den feuchtegesteuerten Programmen «Schranktrocken» und «Extratrocken» etwas trockener. Knitterschutz (ab Werk 30MIN) + Bei eingeschalteter Funktion beginnt am Programmende die Knitterschutzphase von max. 60 Minuten. «Erweiterte Grundeinstellungen» wählen! Ist die Tastenspeicher-Funktion aktiviert, dann werden bei den beiden Mangelfeucht- sowie den Wet-CleanProgrammen die zuletzt benutzten Programme abgespeichert. Bei erneuter Anwahl eines dieser Programme, ist das zuletzt benutzte Programm dann automatisch angewählt LCD-Helligkeit (ab Werk 150) «Erweiterte Grundeinstellungen» wählen! Abkühlen (ab Werk AUS) Mit der -Taste kann die Helligkeit der Schrift auf dem Display verändert werden. + Bei eingeschalteter Funktion wird in einigen Programmen die Abkühlphase verlängert. Uhrzeit (ab Werk ist die Uhr nicht eingestellt) «Erweiterte Grundeinstellungen» wählen! Mit der -Taste kann der Kontrast auf dem Display verändert werden. Summer-Lautstärke (ab Werk LAUTSTÄRKE 2) + Mit der Taste können die Stunden und mit der Taste die Minuten eingestellt werden. Sprache (ab Werk DEUTSCH) + LCD-Kontrast (ab Werk 32) ÷ Diese Einstellung gilt temporär für das gewählte Programm und wechselt einige Minuten nach Programmende zur Defaultsprache zurück. «Erweiterte Grundeinstellungen» wählen! Bei eingeschaltetem Summer ertönt am Programmende in regelmässigen Abständen ein Signal. Die Lautstärke ist in 3 Stufen einstellbar: Aus Lautstärke 1 Lautstärke 2 Lautstärke 3 14 Reinigung und Pflege Standby-Funktion (ab Werk EIN) «Erweiterte Grundeinstellungen» wählen! Bei eingeschalteter Standby-Funktion schaltet die Steuerung wenn kein Trocknungsprogramm läuft in den Energiespar-Zustand. Alle Anzeigen sind dunkel. Filter reinigen Betreiben Sie den Trockner nur mit eingebautem und tadellosem Flusenfilter. Optische Schnittstelle (ab Werk AUS) «Erweiterte Grundeinstellungen» wählen! Wenn die optische Schnittstelle (SCS) eingeschaltet ist, kann der Kundendienst über einen PC mit der Maschine kommunizieren. Defaultsprache (ab Werk DEUTSCH) «Erweiterte Grundeinstellungen» wählen! Wird mit den Tasten und temporär eine andere Sprache gewählt, wechselt die Einstellung 4 Minuten nach Programmende, im Standby-Modus oder nach längerem Stillstand zur Defaultsprache zurück. XXDer Flusenfilter ist täglich zu reinigen. XX Der Flusenfilter darf nicht entfernt werden und es ist darauf zu achten, dass er nicht beschädigt wird. Beschädigte Flusenfilter sind zu ersetzen! Startzeitvorwahl (ab Werk 24 STUNDEN) Flusen, die in Luftleitungen gelangen, können unter Umständen Brand verursachen. «Erweiterte Grundeinstellungen» wählen! Der maximal einstellbare Bereich der Startzeitverzögerung kann von 24 Stunden auf 100 Stunden umgestellt werden. Gerät reinigen Vor Reinigungs-, Pflege- und Wartungsarbeiten ist darauf zu achten, dass die Stromzufuhr ausgeschaltet ist. Keinesfalls das Gerät mit Wasser abspritzen oder mit einem Dampfreiniger reinigen. Keine Lösungsmittel verwenden! Diese Mittel können Geräteteile beschädigen, entwickeln giftige Dämpfe und sind explosionsgefährlich! Gehäuse und Bedienteile nur mit Seifenlauge oder mit einem handelsüblichen, lösungsmittelfreien, nicht scheuernden Reinigungsmittel reinigen. 15 Störungen Störungen beheben Reparaturen, Änderungen oder Eingriffe an Elektrogerä ten dürfen nur von geschultem Fachpersonal durchgeführt werden. Durch unsachgemässe Reparaturen können erhebliche Sachschäden und Gefahren für den Benutzer entstehen. Bei Reparaturen dürfen nur Originalersatzteile eingesetzt werden. Störungsmeldungen Bei den nachstehenden Störungsanzeigen kann das Programm nach Beheben der Störungen durch Betätigen der Starttaste wieder gestartet werden. «Kindersicherung aktiv» XXHalten Sie die Starttaste gedrückt und betätigen Sie die Schnellgangtaste. «Bitte Tür schliessen» XXTür zudrücken, bis Verschluss richtig einschnappt. «Sockelblende / Flusensieb» Diese Meldung erscheint nur während eines Trocken programmes XXSockelblende schliessen. «NOT-AUS-TASTE GEDRÜCKT» zz Die Not-Aus-Taste darf nur bei Gefahr betätigt werden und bewirkt eine sofortige Stillsetzung des Trockners. zz Der Schalter bleibt im betätigten Zustand verriegelt. zz Bitte die Not-Aus-Taste im normalen Betrieb nicht zum Stoppen des Trockners benutzen. zz Die betätigte Not-Aus-Taste kann nach Beheben der Störung oder Beseitigung der Gefahr durch Rechts drehen des roten Pilzknopfes entriegelt werden. XXZur Wiederinbetriebnahme des Trockners, Taste entriegeln und Starttaste drücken. «NETZSPERRUNG» zz Bei elektrisch beheizten Maschinen kann durch externe Energie-Management-Systeme das Gerät zu Zeiten von Leistungsspitzen stillgesetzt werden. zz Die Netzsperrung bewirkt ein Abschalten der Heizung und der Trockner geht in die Abkühl- und anschliessend in die Knitterschutzphase über. zz In diesem Zustand sind alle Bedienungstasten ausser der Schnellgang-Taste gesperrt, und die Restzeitanzeige ist gestoppt. Die Kontrollampe der Starttaste leuchtet. zz Ist die Netzsperre beendet, wird das Trockenprogramm automatisch fortgesetzt und die Anzeige wieder aktiviert. Das Zuschalten der Heizung erfolgt um 15 Sekunden verzögert. Falls das Gerät eine Funktionsstörung F – – anzeigt: XXBrechen Sie das Programm mit der Schnellgangtaste ab und wählen Sie ein neues Programm. Bei wiederholter Fehleranzeige: XXStromzufuhr für ca. 1 Minute unterbrechen und wieder einschalten. (Netzstecker ziehen oder Wandschalter ausschalten) zz Das Gerät ist wieder betriebsbereit, wenn die Kontroll lampen der Programme blinken. XXWählen Sie ein neues Programm. Bei nochmaliger Fehleranzeige: XXFehlermeldung notieren. XXNetzstecker ziehen oder Wandschalter ausschalten. XXKundendienst benachrichtigen. Kleine Störungen selbst beheben Das Gerät geht nach Betätigen einer Programmtaste nicht in Betrieb: XXÜberprüfen Sie, ob der Wandschalter eingeschaltet und der Netzstecker eingesteckt ist. XXÜberprüfen Sie, ob alle Sicherungen intakt sind oder der Sicherungsautomat ausgelöst hat. Das Display ist dunkel: XXDas Gerät ist im Standby-Modus. Kein Fehler; zum Betreiben des Gerätes eine Taste drücken. XXNetzausfall: Falls vor dem Netzausfall ein Programm gestartet war, wird es nach dem Netzausfall automatisch weitergeführt. Das Gerät läuft nicht an: XXStarttaste nicht gedrückt. XXStartzeitvorwahl eingestellt. Kein Fehler; Start erst nach Ablauf der vorgewählten Startzeit. Das Gerät lässt sich nicht einschalten, das Dis play bleibt nach Betätigen einer Taste dunkel: XXÜberprüfen Sie, ob der Wandschalter eingeschaltet und der Netzstecker eingesteckt ist. XXÜberprüfen Sie, ob alle Sicherungen intakt sind oder der Sicherungsautomat ausgelöst hat. XXNetzsperrung, in der Regel um die Mittagszeit. Betreiben Sie das Geräte nach Ende der Netzsperrungszeit. Das Trocknungsziel wurde nicht erreicht: XXWarme Wäsche fühlt sich feuchter an, als sie tatsächlich ist! Lassen sie die Wäsche ausserhalb des Trockner fertig abkühlen. Falls sie dann immer noch zu feucht ist: XXFilter reinigen. (siehe Kapitel «Programm starten») XXTrocknungsgrad erhöhen. Einzelstück erreicht das Trocknungsziel nicht: XXMuss ein einzelnes Wäschestück getrocknet werden, wird es gleichmässiger getrocknet, wenn sie zusätzliche Wäschestücke als Ballast beigeben, z.B. zwei Frottée tücher. Die Trocknungszeit dauert zu lange: XXFilter reinigen. (siehe Kapitel «Programm starten») XXStromausfall (Sperrzeiten von EW beachten). Die Wäsche wird bei der maximal möglichen Einstellung nicht trocken: XXTrommel überladen. (siehe Kapitel «Programmübersicht») XXWäsche nicht ausreichend geschleudert. XXRaumbelüftung nicht ausreichend (Tür oder Fenster öffnen). XXFilter durch Flusen oder Kalkbelag verstopft (siehe Kapitel «Programm starten/Filter reinigen»). XXKontrollieren ob bauseitige Abluftleitung verstopft ist. XXÜberprüfen ob zulässige Rohrleitungslängen und -quer schnitte gemäss Aufstellungsanweisung entsprechen. 16 Feuchtigkeit im Raum steigt stark an: XXRaum nicht genügend belüftet. Für ausreichende Belüftung sorgen. Geräuschpegel Durch bauseitige Schallisolation der Abluftleitungen oder Einsatz von speziell gedämpften Rohrleitungen (z.B. aus Kunststoff), kann der Geräuschpegelwert reduziert werden Kundendienst Bevor Sie den Kundendienst rufen, prüfen Sie, ob Sie die Störung selbst beheben können (siehe Kapitel «Störungen»). In Beratungsfällen entstehen Ihnen auch während der Garantiezeit Kosten bei Einsatz eines Service-Technikers. Wenn Sie eine Störung nicht selbst beheben können, Netzstecker ziehen oder Wandschalter ausschalten, Wasserhahn schliessen und den Kundendienst rufen. Wählen Sie die zentrale Kundendienst-Nummer (siehe Umschlag-Rückseite). Sie werden automatisch mit der zuständigen Kundendienst-Niederlassung in Ihrer Region verbunden. Geben Sie bitte dem Kundendienst die Produkte- und Gerätenummer an. Sie finden diese Angaben auf dem Typenschild auf der Innenseite der Tür. Notieren Sie hier die Nummer Ihres Gerätes. Produkte-Nr. Geräte-Nr. Garantie Garantiezeit 1 Jahr. 17 Technische Daten TRI 9250 TRI 9375 TRI 9550 TRI 9750 Fassungsvermögen Trockenwäsche 10 kg 15 kg 22 kg 30 kg Programmdauer «Schranktrocken» ca. 35 min ca. 35 min ca. 35 min ca. 35 min Trommelvolumen 231 dm3 347 dm3 508 dm3 690 dm3 Trommeldurchmesser 776 mm 776 mm 1075 mm 1076 mm Trommeltiefe 490 mm 735 mm 560 mm 760 mm 45 U /min 45 U /min 40 U /min 40 U/min 0,17 L /min 0,24 L /min 0,35 L /min 0,48 L/min 14,4 kW 19,2 kW 28,8 kW 38,4 kW 3 4 6 8 180 W 180 W 370 W 370W 400 V 3~ NE 400 V 3~ NE 400 V 3~ NE 400 V 3~NE 25 AT 32 AT 50 AT 63 AT max. 900 m3 /h max. 1100 m3 /h max. 1200 m3 /h max. 1500 m3 / h max. 70°C max. 70°C max. 70°C max. 70°C Leitungswiderstand bauseitig max. 200 Pa max. 200 Pa max. 300 Pa max. 300 Pa Heiztemperatur max. 200°C max. 200°C max. 200°C max. 200°C 200 mm 200 mm 200 mm 200 mm radial radial radial radial 30 dm2 30 dm2 48 dm2 48 dm2 Reversierend ja ja ja ja Feuchtigkeitssteuerung ja ja ja ja 2 RS 2 RS 2 RS 2RS Durchmesser Einfüllöffnung 530 mm 530 mm 530 mm 530 mm Einfüllhöhe 578 mm 578 mm 759 mm 759 mm ja ja ja ja 523 mm 523 mm 705 mm 705 mm Aussenmass Höhe 1460 mm 1460 mm 1795 mm 1795 mm Aussenmass Breite 842 mm 842 mm 1150 mm 1150 mm Aussenmass Tiefe 820 mm 1065 mm 888 mm 1088 mm 200 kg 220 kg 360 kg 400 kg Trommeldrehzahl Trockenleistung bei Restfeuchte 50% zu «Schranktrocken» nach EN 61121 Anschluss Elektroheizung Anzahl Heizelemente Antrieb Anschlussspannung Absicherung Abluftleistung Ablufttemperatur Abluft-Anschluss Durchmesser Luftführung Flusenfilterfläche Lagerung hinten Türöffnung 180° Tür-Unterkante ab Boden Maschinengewicht netto 18 Notizen / Notes / Note F RANÇAIS Sommaire Symboles utilisés20 Conseils pour la mise au rebut XX Emballage de votre nouvelle machine XX Elimination de l’ancien appareil 20 20 Consignes de sécurité XX Consignes de sécurité générales XX À observer avant la mise en service XX À observer lors du séchage XX À observer lors du transport 20 20 21 21 Séchage correct et respectueux de l’environnement XX Tri du linge 21 XX Charge21 XX Conseils pour le séchage 21/22 XX Ne pas sécher à la machine les textiles suivants22 Nettoyage et entretien XX Nettoyage du filtre XX Nettoyage de l’appareil Pannes XX Messages de panne XX Conseils en cas de panne 28 28 29 29/30 Niveau sonore 30 Service après-vente XX N° du produit et de la machine 30 Garantie 30 Données techniques 31 Notes 32 Mise en service XX Préparation22 XX Ouverture de la porte 22 XX Fermeture de la porte 22 Description de la machine XX Commandes et affichage XX Touches de programmes 23 23 Aperçu des programmes24 Sélection du programme XX Sélection du programme 25 «Contrôle d’humidité résiduelle» XX Sélection du programme «Prêt à calandrer»25 XX Sélection du programme programmé 25 XX Sélection du programme Wet-Clean 25 Fonctions additionnelles XX Entretien facile XX Sélection de durée XX Séchage doux XX Démarrage différé XX Marche rapide 25 25 25 25 25 Démarrage du programme XX Modification du programme XX Chargement du linge XX Démarrage du programme XX Déroulement/Etat du programme XX Rajout de linge XX Interruption du programme XX Fin du programme XX Enlèvement du linge XX Mise hors tension de l’appareil 26 26 26 26 26 26 26 26 26 Réglages de base ZZ Degré de séchage 27 ZZ Anti-froissement27 ZZ Refroidissement27 ZZ Heure 27 ZZ Langue 27 XX Réglages de base étendus ZZ Sécurité enfants 27 ZZ Mémoire touches 27 ZZ Luminosité LCD 27 ZZ Contraste LCD 27 ZZ Volume signal sonore 27 ZZ Fonction standby 28 ZZ Interface optique 28 ZZ Langue de défaut 28 ZZ Démarrage différé 28 Inhaltsverzeichnis deutsch XX Siehe Seite 5 Sommario italiano XX Vedere pagina 33 Contents english XX See page 47 20 Symboles utilisés Consignes de sécurité et avertissements caractérise des étapes de travail à effectuer l’un après l’autre énumérations, informations générales utiles Conseils pour la mise au rebut Emballage de votre nouvel appareil Consignes de sécurité Consignes de sécurité générales: Ne grimpez pas sur l’appareil. Ne vous asseyez pas et ne vous appuyez pas sur la porte (danger de basculement!). N’aspergez en aucun cas l’appareil avec de l’eau ou ne le nettoyez pas au karcher. Si l’appareil n’est pas utilisé pour une période prolongée, il faut le mettre hors tension. Ne touchez la fiche secteur qu'avec des mains sèches. Ne retirez que la fiche, jamais le câble. Les réparations ne doivent être effectuées que par un personnel spécialisé formé et les pièces défectueuses ne doivent être remplacées que par des pièces de rechange originales du fabricant des appareils. Débarrassez-vous de l’emballage comme il se doit. Les matériaux de l’emballage ne sont pas des jouets. Le recyclage de l’emballage permet d’épargner des atières premières et de réduire les volumes de déchets. m L’emballage pourra être restitué au commerçant spécialisé ou au fournisseur. Tous les matériaux d’emballage utilisés sont écologiques et recyclables. Le carton est constitué de 80 à 100% de vieux papiers. Les pièces en bois n’ont pas été traitées chimiquement. Les feuilles sont en polyéthylène (PE); les banderoles, en polypropylène (PP). Ces matériaux, recyclables, sont exclusivement des composés d’hydrocarbures. Elimination de l’ancien appareil Les appareils mis au rebut doivent être rendus inutilisables. Après avoir tiré la fiche réseau, ou fait défaire le bran chement par l’électricien, sectionnez et enlevez le câble de réseau. Détruisez la serrure pour éviter que, en jouant, des enfants s’y enferment et mettent leur vie en danger. Les composants de l’ancien appareil ne doivent plus être utilisés ultérieurement. Votre ancien appareil contient des matières précieuses, qu’il convient d’envoyer au recyclage. Assurez que votre ancien appareil est éliminé correctement. Ne conservez pas votre ancien appareil et ne le jetez pas aux ordures ménagères. Vous trouverez davantage d’informations sur le recyclage de ce produit en vous adressant à votre commune, au service d’enlèvement des ordures ou au magasin dans lequel vous avez acheté le produit. Cela vous permettra d’attribuer à une élimination ou un recyclage respectueux de l'environnement. Cet appareil est conforme aux normes de sécurité des appareils électriques. Il n’est pas destiné à être utilisé par des personnes (y compris les enfants) dont les capacités physiques, sensorielles ou mentales sont réduites ou qui manquent d’expérience et de connaissance. Veuillez respecter les consignes de sécurité du présent mode d'emploi et de la notice d'installation correspondante. Mal effectuées, elles peuvent entraîner de notables dégâts matériels et de graves dangers pour l’utilisateur. Il n’est autorisé de modifier l’appareil qu’avec l’accord du fabricant. Dès que survient un dysfonctionnement, l’appareil doit être débranché du réseau d’alimentation électrique. Le sèche-linge d’est débranché du réseau électrique que lorsque la prise de courant est retirée ou que l’interrupteur général est hors circuit ou que le fusible de sécurité est démonté. Conservez les lessives et les activateurs de lavage pour le linge hors de la portée des enfants. À observer avant la mise en service! Lisez attentivement les notices jointes avant de mettre en service votre séchoir. Elles contiennent des informations importantes pour l’installation, l’utilisation et la s écurité de l’appareil. Conservez soigneusement les notices, à l’intention des autres utilisateurs actuels et futurs. Le séchoir ne peut être installé et mis en service que par notre service après-vente ou un revendeur agréé. Ne branchez pas un appareil visiblement endommagé. Ne reliez pas le raccord de la conduite d’évacuation d’air à une cheminée à laquelle est relié un poêle ou une cuisinière à gaz ou à charbon ou un appareil de chauffage à gaz pour locaux. Le reflux entraîne des risques d’intoxication! N’utilisez le sèche-linge qu’une fois que toutes les garnitures extérieures ont été installées. Les peluches qui pénètrent dans les conduites d’air peuvent le cas échéant provoquer des incendies. Ne faites fonctionner le sèche-linge qu’avec des filtres à peluches mis en place et en parfait état. Si vous deviez constater une détérioration, il convient impérativement de remplacer immédiatement le filtre à peluches. 21 Séchage correct et respectueux de l’environnement À observer lors du séchage: Avant de charger le linge, assurez-vous qu’aucun corps étranger n’est présent dans le tambour, ou même que des animaux y sont enfermés. Ne séchez que des vêtements propres dans le sèchelinge. Le sèche-linge ne doit pas être utilisé si des produits chimiques ont été utilisés pour le nettoyage. Les vêtements qui ont des taches d’huile alimentaire, d’acétone, d’alcool, d’essence, de pétrole, de kérosène, de détachant, d’essence de térébenthine, de cire ou de produits destinés à éliminer la cire, devraient être nettoyés à l'eau chaude avec une quantité supplémentaire de lessive avant d’être séchés dans le sèche-linge. Des objets comme le caoutchouc mousse (caoutchouc mousse latex), les bonnets de bain, les textiles impermé ables, articles caoutchoutés tels que les vêtements ou les coussins contenant des billes de caoutchouc mousse ne doivent pas être séchés au sèche-linge. Les adoucissants ou les produits similaires doivent être utilisés conformément à leurs instructions. Un cycle de séchage doit toujours se terminer par la réalisation d’une étape complète de refroidissement afin que les vêtements restent à une température qui ne les endommage pas. Si le cycle de séchage devait se terminer prématurément sans étape de refroidissement, tous les vêtements doivent être alors retirés rapidement et être étalés de telle sorte que la chaleur puisse s’évacuer. Dans ce cas, il faut tenir compte du fait que les vêtements peuvent entraîner des brûlures lors d’un contact avec la peau en raison de leur température et humidité. C’est pourquoi il est nécessaire de prévoir des protègemains appropriés. Éloignez les animaux domestiques de l’appareil. N’utilisez l’appareil qu’en milieu domestique, pour sécher des textiles. La vitre de la porte devient chaude au moment du séchage. Ne touchez jamais le verre du hublot en cours de processus de séchage! Lors du séchage, il faut assurer une bonne aération de la pièce (ouvrez les fenêtres ou la porte). A la fin du programme, ne mettez pas la main dans le tambour lorsqu’il tourne.. Ne stockez pas d’essence, de pétrole ou un quelconque autre matériau facilement inflammable à proximité du sèche-linge (danger d’incendie ou d’explosion). En cas d’urgence, appuyez immédiatement sur la touche rouge d’arrêt d’urgence! (Voir chapitre «Mise en service/«Bouton d’arrêt d’urgence») À observer lors du transport: Attention lors du transport de l’appareil! (risque de blessure!) Ne soulevez pas l’appareil avec les parties avant! Tri du linge Tenez compte des symboles d’entretien figurant sur les textiles. Séchage à température normale. Séchage à basse température. Ne pas sécher à la machine. Ne séchez que des textiles lavés à l’eau dans l’appareil. Afin d’obtenir un résultat de séchage uniforme, triez le linge selon le type de tissu et l’objectif de séchage désiré. Charge zz Vous sécherez avec le maximum d’économie, et en réservant au mieux l’environnement, si vous chargez la p machine avec le plus possible de linge. (Voir chapitre «Tableau des programmes») zz Ne dépassez pas les quantités maximales, car la s urcharge nuit au résultat du séchage et le linge sera complètement froissé. zz Avant le séchage, débarrassez complètement le linge de son eau par essorage dans une machine à laver automatique ou une essoreuse. Plus la vitesse d’essorage sera élevée, plus le temps de séchage sera bref, et moins vous consommerez d’électricité. zz Essorez également le linge d’entretien facile. Conseils pour le séchage zz Fermez fermetures-éclair, crochets et oeillets. Bouton nez les housses de duvet et coussins. Nouez les rubans de tablier et les ceintures qui sont détachées, etc. zz Pour les tissus d’entretien facile, sortez-les de l’appareil, si possible, à l’état légèrement humide (objectif de séchage: «Légèrement sec» ), et complétez par un bref séchage à l’air. Un séchage excessif entraîne des risques de froissage. zz Placez le linge de façon bien aérée dans le tambour, petites et grandes pièces mélangées. zz Les pièces de linge encore trop humides après le s échage d’un lot à base de types de tissu très différents peuvent subir un complément de séchage en programme «Séchage chronométré». zz Les textiles tricotés peuvent rétrécir un peu au s échage. Ne pas utiliser le programme «Extra sec» pour ces matériaux. zz Si une pièce de linge individuelle doit être séchée, elle est séchée régulièrement lorsque vous ajoutez des pièces de linge supplémentaires comme ballast, p. ex. deux serviettes éponge. zz Les tissus pur lin ont tendance à «pelucher». Veuillez donc prêter attention aux indications fournies par le fabricant. Le linge empesé peut être séché dans le sèchelinge. 22 zz Le linge à repasser ne doit pas l’être immédiatement après le séchage. Il convient de le laisser reposer, roulé ou plié, pendant un certain temps afin que l’humidité résiduelle puisse s’y répartir uniformément. Mise en service zz Vous obtiendrez la bonne humidité pour le repassage ou pour le calandrage par le biais d’un choix de programme approprié. Ne pas sécher à la machine les textiles s uivants: Installez la machine conformément aux instructions de montage. Avant de mettre la machine en service pour la première fois, essuyer le tambour au moyen d’un linge humide. Préparation Vérifiez: zz Linge dégoulinant: gaspillage d’énergie! (Essorer encore une fois) XXsi le filtre à peluches est en place (Voir chapitre «Démarrage du programme»). zz Ne séchez pas le linge ayant été traité au moyen de s olvants inflammables, p.ex. détacheur ou essence de lavage, dans l’appareil (risque d'explosion!). XXsi la fiche réseau est branchée, ou si l’interrupteur mural est allumé. zz Ne séchez pas les textiles contenant du caoutchouc mousse ou présentant des traces de laque, de dissolvant ou de produits similaires, dans l'appareil (risque d'incendie!). L’appareil est prêt à l’emploi dès que tous les témoins de contrôle sont allumés ou éteints en mode repos. Si un témoin reste allumé en permanence, pressez plusieurs fois sur la touche de marche rapide jusqu’au message «Selectionner programme». Ouverture de la porte XXOuvrez la porte et chargez le linge. Fermeture de la porte XXFermez la porte, en la poussant en position jusqu’à ce que la fermeture émette un déclic audible. Veillez à ce qu’aucune pièce de linge ne reste coincée lors de la fermeture de la porte. Si la porte n’est pas fermée, un interrupteur de sécurité empêche la mise en service de l’appareil. 23 Description de la machine Commandes et affichage Affichages Programmes 1 2 3 4 5 6 13 Afficheur Programmes Wet-Clean Séchage programmé Prêt à calandrer 1 (1 - 5) Prêt à calandrer 2 (1 - 5) Prêt à ranger Extra sec Interfaces 4 SCS-Schulthess Control System 1 (interface PC pour le S.A.V.) Fonctions additionnelles 2 7 8 9 10 11 12 Sélection de durée Anti-froissement Démarrage différé Linge d'entretien facile Séchage doux Démarrage différé Marche rapide Commandes et affichage Bouton d’arrêt d’urgence Porte de chargement Filtre à peluches 24 Aperçu des programmes Linge blanc et couleurs Linge d'entretien facile Pour les textiles d’entretien facile en tissu synthétique ou fibres mélangées, ainsi que pour le coton à apprêt éliminant le repassage. Touches Programme Humid. réd Durée Touches Programme Humid. réd Durée 1x Prêt à calandrer 1 «1» 13min 1x + Prêt à calandrer 1 «1» 2 min 2x Prêt à calandrer 1 «2» 16min 2x + Prêt à calandrer 1 «2» 4 min 3x Prêt à calandrer 1 «3» 18min 3x + Prêt à calandrer 1 «3» 5 min 4x Prêt à calandrer 1 «4» 20min 4x + Prêt à calandrer 1 «4» 7 min 5x Prêt à calandrer 1 «5» 21min 5x + Prêt à calandrer 1 «5» 8 min 1x Prêt à calandrer 2 «1» 22min 1x + Prêt à calandrer 2 «1» 9 min 2x Prêt à calandrer 2 «2» 23min 2x + Prêt à calandrer 2 «2» 10 min 3x Prêt à calandrer 2 «3» 25min 3x + Prêt à calandrer 2 «3» 11 min 4x Prêt à calandrer 2 «4» 26min 4x + Prêt à calandrer 2 «4» 12 min 5x Prêt à calandrer 2 «5» 27min 5x + Prêt à calandrer 2 «5» 13 min 1x Prêt à ranger +2/-2 % 1x + Prêt à ranger +2/0% 1x Extra sec +2/-4 % 1x + Extra sec 0/-2 % Touche «Séchage doux» enfoncée, le temps de séchage augmente d’env. 20%. Touche «Séchage doux» enfoncée, le temps de séchage augmente d’env. 20%. Linge lavé selon le procédé dit du Wet-Clean Pour des articles textiles délicats, qui ont été lavés selon le procédé dit du Wet-Clean, cet appareil offre la possibilité de les sécher, voire de leur faire subir un pré-séchage, en les ménageant de manière appropriée. Les dix programmes suivants peuvent être sélectionnés par l’enfoncement répété de la touche : Programme Touches Affichage Durée Séchage programmé froid 1x + à choix froid 1min - 2h30 min possible Séchage programmé 40°C 2x + à choix 40°C 1min - 2h30 min possible Séchage programmé 60°C 3x + à choix 60°C 2min - 2h30 min possible Séchage programmé 70°C 4x + à choix 70°C 3min - 2h30 min possible Linge non lavable 5x env. 47min Survêtement lavable 6x env. 24min Angora, soie (séchage initial) 7x 11min Robes de mariée, rideaux 8x 13min Couettes 9x 1h23min Articles textiles imprégnés env. 31min 10x Quantité des chargements Type de sèche-linge TRI 9250 TRI 9375 TRI 9550 TRI 9750 Linge blanc et couleurs 10 kg 15kg 22kg 30kg Linge d'entretien facile 5kg 7,5kg 11kg 15kg Linge délicat 3kg 5kg 7kg 10kg 25 Sélection du programme Sélection d'un programme avec contrôle d’humidité résiduelle Le système électronique de palpation, avec ses capteurs sensibles, évalue en continu le degré d’humidité momentané de votre linge, et met automatiquement fin au programme dès qu’est atteint l’objectif de séchage imposé. XXPressez la touche de programme conformément au degré de séchage désiré. zz Le témoin du programme choisi s’allume. XXPour les tissus synthétiques, choisir la fonction addi tionnelle «Entretien facile» . Sélection du programme «Prêt à calandrer» Grâce à ses touches «Prêt à calandrer 1 et 2», cet appareil permet de modifier le degré d’humidité par pressions successives. Il existe cinq niveaux différents. L’écran de visualisation fait apparaître le degré sélectionné, les taux d’humidité résiduelle diminuant au fur et à mesure que le nombre correspondant aux degrés augmente. Fonctions additionnelles Le choix d’une ou plusieurs fonctions additionnelles vous permettra d’ajuster ce programme de séchage d’après les particularités spécifiques de votre linge. Ces fonctions additionnelles restent actives pour ce programme de séchage uniquement. XXVous avez en outre la possibilité d’adapter votre séchoir à vos besoins en modifiant ses réglages de base (Voir chapitre «Réglages de base »). Les modifications apportées au réglage de base restent actives jusqu'à ce que vous les modifiiez une nouvelle fois. Entretien facile Pour les textiles d’entretien facile en tissu synthétique ou fibres mélangées, ainsi que pour le coton à apprêt éliminant le repassage. Sélection de durée Si vous avez sélectionné un programme de séchage temporisé parmi les programmes spéciaux, vous pouvez définir la durée du programme en appuyant sur la touche «Sélection du temps». La durée de séchage sera choisie d’après le type et la quantité de linge ainsi qu’en fonction de l’humidité de celui-ci. XXPressez la touche «Sélection de durée». zz Le témoin du programme chronométré clignote, et la durée minimale de séchage s’affiche. XXImposez la durée du séchage en pressant la touche de façon répétée. Sélection du séchage programmé Séchage doux Avec les textiles délicats, vous pouvez appuyer sur la touche «Séchage doux» pour réduire la température de séchage. Programme programmé pour le séchage de pièces de linge individuelles, ou comme complément de séchage pour textiles déjà séchés et à faible contenu d’humidité. La durée de séchage sera choisie d’après le type et la quantité de linge ainsi qu’en fonction de l’humidité de celui-ci. XXPressez la touche de programme. zz Le témoin du programme chronométré s’allume, et la durée minimale de séchage s’affiche. XXImposez la durée du séchage en pressant la touche de façon répétée, jusqu’à un maximum de 150 min. Sélection du programme Wet-Clean Démarrage différé En pressant une ou plusieurs fois la touche de démarrage différé, on peut retarder jusqu’à 23,5 heures le démarrage du programme Ceci permet par ex. de profiter du tarif réduit de nuit pour l’électricité. On peut adapter le début et donc a ussi la fin d’un programme à ses habitudes individuelles de vie. L’écran indique l’heure de démarrage et l’heure prévue de la fin du programme. Après avoir appuyé sur la touche de démarrage, le compte à rebours commence. Une fois l’heure de démarrage atteinte, le programme sélectionné démarre automatiquement et l’affichage indique la durée du programme. zz En cas de coupure de courant, le temps choisi demeure en mémoire. La durée de la coupure n’est pas prise en considération. Ces programmes permettent de sécher des textiles qui ont auparavant été lavés au moyen d’un processus WetClean. XXAppuyer à nouveau sur la touche jusqu’à ce que le programme souhaité apparaisse à l’écran. Marche rapide On peut abréger ou interrompre le programme en pressant la touche de marche rapide. 26 Démarrage du programme Rajouts de linge Possibles à tout moment. Sélection du programme Voir chapitre «Sélection du programme» Sélection des fonctions additionnelles Voir chapitre «Fonctions additionnelles» Modification du programme avant son démarrage XXPressez à nouveau la touche du programme désiré. zz Tous les témoins des fonctions additionnelles choisissables se remettent à clignoter, et tous les réglages sont effacés. XXChoisissez éventuellement les fonctions additionnelles. Chargement du linge Ne séchez dans l’appareil que des textiles ayant été lavés à l’eau. XXPlacez le linge de façon bien aérée dans le tambour, petites et grandes pièces mélangées. XXOuvrez la porte. zz Le tambour s’arrête. XXRajoutez le linge. XXRefermez la porte. XXPressez la touche de démarrage. Si la sécurité enfants est activée: XXAppuyer simultanément sur la touche «Start» et sur la touche «Marche rapide». XXLe séchage reprend. Interruption du programme u Pour interrompre le programme, pressez à plusieurs reprises la touche de marche rapide, jusqu’à ce que le témoin «Fin de programme» clignote. Si la sécurité enfants est activée: XXTenez pressée la touche de démarrage. XXAppuyez en même temps sur la touche «Marche rapide». Fin du programme Démarrage du programme XXPressez la touche de démarrage. La fin du programme est indiquée par la valeur 00:00h, le message «Fin du programme» à l'écran et le clignotement du voyant. zz Un signal résonne (seulement si le signal sonore a été enclenché). Si la sécurité enfants est activée: zz A la fin du programme, le tambour continue à tourner à des intervalles courts pour éviter un froissement du linge (uniquement en cas d’antifroissement activé, pendant 30 ou 60 minutes). XXTout en tenant pressée la touche de marche rapide, agissez sur la touche de démarrage. C’est au plus tard à ce moment qu’il conviendra d’enlever le linge. zz Le témoin s’allume, et le programme se déroule automatiquement. Déroulement du programme / Etat du programme Enlèvement du linge XXOuvrez la porte. XXEnlevez le linge. XXNettoyez le filtre. Mise hors service de l’appareil XXRefermez la porte XXEteignez l’interrupteur mural. XXDans les programmes pilotés par le taux d'humidité, l’humidité du linge est constamment contrôlée par un système électronique de palpation. zz La durée restante du programme est affichée. Ce temps restant est recalculé plusieurs fois au cours du cycle de séchage, la fin effective du programme varie donc de quelques minutes. XXDans les programmes chronométrés, le temps restant demeure affiché jusqu’à la fin du programme. zz S’il n'y a pas d'interrupteur mural, le panneau d'affichage s'éteint automatiquement après 4 minutes, et le sèche-linge passe en mode standby (uniquement en cas de fonctin standby activée). 27 Réglages de base Le réglage de base de l'appareil a été effectué en usine, mais on peut l'adapter selon ses exigences individuelles, lors de la mise en service ou ultérieurement, au moyen des fonctions suivantes. Les réglages de base ne peuvent être modifiés que si aucun programme de séchage n'est en cours. Pour modifier un réglage de base, il faut tout d'abord maintenir la touche de programme enfoncée, puis appuyer sur la touche de marche rapide. Les fonctions correspondantes s'affichent alors sur l'afficheur numérique. En appuyant de manière répétée sur la touche de marche rapide , la touche de programme demeurant enfoncée, l'affichage change. Réglages de base étendus + + XXPour accéder aux autres réglages de base, appuyer simultanément sur ces trois touches. XXUne pression répétée sur la touche réglages possibles. montre les XXPour modifier les réglages, appuyer sur la touche . XXPour mettre fin à l'affichage des réglages, appuyer sur la touche . Sécurité enfants (en usine OFF) Sélectionner «Réglages de base étendus»! Exemple: Fonction désactivée Fonction activée Degré de séchage (en usine NORMALE) La sécurité enfants vous protège contre tout démarrage, modification ou annulation fortuit(e)s du programme par les enfants. Démarrage d'un programme lorsque la sécurité enfants est activée: + Maintenir la touche «Start» enfoncée et appuyez sur la touche «Marche rapide». + Mémoire touches (en usine OFF) Si vous sélectionnez le degré de séchage «PLUS FORT», le linge sèche un peu plus avec les programmes pilotés par le taux d'humidité (Prêt à ranger et Extra sec). Anti-froissement (en usine 30MIN) Sélectionner «Réglages de base étendus»! Fonction d'enregistrement des touches activée, la machine mémorise les derniers programmes utilisés en mode «Prêt à calandrer» et «Wet-Clean». Si vous sélectionnez à nouveau l'un de ces programmes, le dernier programme utilisé s'active alors automatiquement. + Lorsque la fonction est activée, la phase de défroissage de 60 minutes commence à la fin du programme. Refroidissement (en usine OFF) + Sélectionner «Réglages de base étendus»! La touche permet de régler la luminosité ou la olice de l'affichage. p Contraste LCD (en usine 32) En cas de fonction activée, la phase de refroidissement est prolongée dans quelques programmes. Heure (non effectué en usine) Sélectionner «Réglages de base étendus»! La touche permet de régler le contraste de l'affichage. Volume signal sonore (en usine VOLUME 2) Sélectionner «Réglages de base étendus»! + La touche permet de régler les heures et la touche les minutes. Langue (en usine DEUTSCH) + Luminosité LCD (en usine 150) ÷ Vous permet de modifier la langue de base, qui restera conservée même après une mise hors tension ou le mode standby. Signal sonore activé, la fin du programme est indiquée par un signal acoustique retentissant à intervalles réguliers. Le volume de ce signal peut être réglé sur 3 niveaux à l'aide de la touche. Off Volume 1 Volume 2 Volume 3 28 Nettoyage et entretien Fonction Standby (en usine ON) Sélectionner «Réglages de base étendus»! Fonction standby activée, la commande met la machine en mode économie d'énergie si aucun programme de séchage n'est en cours. Tous les affichages sont alors éteints. Nettoyage du filtre N'utilisez le sèche-linge qu'avec un filtre à peluches propre. Interface optique (en usine OFF) Sélectionner «Réglages de base étendus»! Interface optique (SCS) activée, le S.A.V. peut communiquer avec la machine via un PC. Langue de défaut (en usine DEUTSCH) Sélectionner «Réglages de base étendus»! Si une autre langue est sélectionnée provisoirement à l’aide des touches et , le réglage revient à la langue par défaut 4 minutes après la fin du programme, dans le mode standby ou après un arrêt prolongé. XXNettoyez le filtre tous les jours. XXNe retirez pas le filtre à peluches et veillez à ne pas l'endommager. Veuillez remplacer tout filtre à peluches endommagé! Démarrage différé (en usine 24 HEURES) Les peluches s'introduisant dans les conduites d'aération peuvent provoquer des incendies. Sélectionner «Réglages de base étendus»! La plage de réglage maximale du retard de démarrage peut être paramétrée de 24 heures à 100 heures. Nettoyage de l’appareil Avant toute opération d’entretien, maintenance ou nettoyage, assurez-vous que l’alimentation électrique a été coupée. N’aspergez en aucun cas l’appareil avec de l’eau ou ne le nettoyez pas au karcher. N’utilisez pas de solvants! Ces produits peuvent endommager des pièces de l’appareil, dégagent des vapeurs toxiques et engendrent un danger d’explosion! Ne nettoyez le corps de l’appareil et les éléments de commande qu’au moyen d’eau savonneuse ou d’un nettoyant commercial non abrasif et exempt de solvants. 29 Pannes Si le message de panne se répète encore: XXNotez le message de panne. XXFermez le robinet de l’eau et retirez la fiche réseau ou fermez l’interrupteur mural. XXInformez le service après-vente. Messages de panne En présence des messages de panne suivants, on peut remettre le programme en marche en pressant la touche de démarrage, après élimination des pannes. «SEcuritE enfants active» XX Appuyer simultanément sur la touche de démarrage et sur la touche «Marche rapide». «VEUILLEZ fermer la porte» XXPoussez sur la porte jusqu’à ce que la fermeture s’encliquette correctement. «PANNEAU BAS / FILTRE» Ce message n'apparaît qu'au cours d'un programme de séchage. XXFermer la plinthe de socle. «TOUCHE ARRET URG. ACT.» zz La touche d’arrêt d’urgence ne doit être utilisé qu’en cas de danger, elle arrête automatiquement le sèchelinge. zz La touche reste verrouillé en position «actif». zz N’utilisez pas le bouton d’arrêt d’urgence pour arrêter le sèche-linge en fonctionnement normal. zz Le bouton d’arrêt d’urgence activé peut être déverrouillé une fois que le problème est résolu ou qu’il n’y a plus de risque, en tournant vers la droite le gros bouton rouge. XXPour remettre en marche le sèche-linge, déverrouillez le bouton d’arrêt d’urgence et appuyer sur la touche de démarrage. «BLOCAGE RESEAU» zz Il est possible que des appareils chauffés électiquement soient arrêtes par des systèmes extérieurs de gestion de l’énergie au moment des pointes de puissance. zz La coupure du réseau provoque une mise hors fonction du chauffage, le sèche-linge passant alors à la phase d’abaissement de température, puis à la phase de prévention des froissures. zz Dans cet état, toutes les touches de service, en dehors de la touche «Marche rapide», sont bloquées et l’affichage du temps restant à courir est mis hors fonction. Le voyant de contrôle de la touche de démarrage s’allume. zz Dès la fin du blocage par rapport au réseau, le programme de séchage reprend automatiquement et l'affichage est à nouveau activé. La mise en fonction complémentaire du chauffage s’opère avec un retard de 15 secondes. Si l’appareil affiche une panne de fonctionnement F– –: XXInterrompez le programme au moyen de la touche «Marche rapide» et choisissez un nouveau programme. En cas de message répété de panne: XXCoupez l’alimentation électrique pendant 1 minute environ, puis rétablissez-la. (Retirez la fiche réseau ou fermez l’interrupteur mural) zz L’appareil est de nouveau prêt à fonctionner dès que les témoins des programmes clignotent. XXChoisissez un nouveau programme. Conseils en cas de panne Les réparations, modifications et interventions sur des appareils électriques ne doivent être effectuées que par du personnel spécialisé dûment formé. Des réparations mal faites peuvent entraîner de considérables dommages matériels et des risques élevés pour l’utilisateur. On utilisera seulement des pièces originales lors des réparations. Réparer soi-même les petites pannes L’appareil ne se met pas en marche après avoir pressé une touche de programme: XXVérifiez si l’interrupteur mural est allumé, et si la fiche réseau est branchée. XXVérifiez si tous les fusibles sont intacts et si le disjoncteur automatique ne s’est pas déclenché. L’écran est sombre: XXL’appareil est en mode standby. Aucune erreur, pour faire fonctionner l’appareil, appuyez sur une touche. XXPanne de secteur: Si un programme a été démarré avant la panne de secteur, il continuera automatiquement après la panne de secteur. L’appareil ne démarre pas: XXTouche de démarrage non actionnée. XXDémarrage différé inséré. Le démarrage n’aura lieu qu’après le retard imposé. Il est impossible de mettre en marche l'appareil, l'écran reste sombre après l'actionnement d'une touche: XXVérifiez si l’interrupteur mural est allumé, et si la fiche réseau est branchée. XXVérifiez si tous les fusibles sont intacts et si le disjonc teur automatique ne s’est pas déclenché. XXBlocage réseau, en règle générale vers midi. Faites fonctionner l’appareil à la fin de la période de blocage réseau. Le séchage attendu n'est pas atteint: XXLe linge chaud a l’air plus humide que ce qu’il est vraiment! Laissez refroidir le linge en dehors du sèchelinge. S'il est toujours trop humide: XXNettoyer le filtre (Voir chapitre «Démarrage du programme»). XXAugmenter le degré de séchage (Voir chapitre «Réglages de base»). La pièce de linge individuelle n’atteint pas le but de séchage: XXLorsqu’une pièce de séchage individuelle doit être séchée, elle est séchée uniformément lorsque vous ajoutez des pièces de linge supplémentaires comme ballast, par exemple deux serviettes éponge. 30 Le séchage dure trop longtemps: XXNettoyer le filtre (Voir chapitre «Démarrage du programme»). XXCoupure de courant (heures de coupure des compagnies électriques). Le linge n’est pas sec même à la puissance maximale de séchage possible: XXTambour surchargé (Voir chapitre «Aperçu des programmes»). XXLinge insuffisamment essoré. XXAération de la pièce insuffisante (ouvrir porte et fenêtre). XXFiltre bouché par des peluches ou des dépôts calcaires (Voir chapitre «Démarrage du programme / Nettoyage du filtre»). XXVérifiez si le conduit d’aération n’est pas bouché. XXVérifiez que les longueurs et diamètres des tuyaux soient conformes aux instructions de montage. L’humidité monte fortement dans le local: XXLocal pas assez aéré. Assurez une ventilation suffisante. Service après-vente Avant d’appeler le service après-vente, vérifiez si vous ne pouvez pas remédier vous-même à la panne (voir chapitre «Pannes»). Si vous faites appel à un technicien d’assistance, des coûts vous seront facturés pour ses conseils même pendant la période de garantie. Si vous ne pouvez réparer vous-même la panne, retirez la fiche réseau ou fermez l’interrupteur mural, fermez le robinet de l’eau et appelez le service après-vente. Composez le numéro central de celui-ci (voir verso de la couverture). Vous serez automatiquement mis en rapport avec le point d’assistance compétent pour votre région. Indiquez au service après-vente le message d’erreur F — ainsi que le numéro du produit et celui de l’appareil. Vous trouverez ces données sur la plaque signalétique visible dans le cadre de la porte quand elle est ouverte. Notez ici le numéro de votre appareil: Numéro de produit Niveau sonore La valeur du niveau sonore peut être abaissée par une insonorisation des conduites d’évacuation d’air du bâtiment ou par l’utilisation de tuyaux spécialement amortis (p. ex.en matière synthétique). Numéro de l’appareil Garantie Garantie 1 année. 31 Données techniques TRI 9250 TRI 9375 TRI 9550 TRI 9750 10 kg 15 kg 22 kg 30 kg env. 35 min env. 35 min env. 35 min env. 35 min Capacité du tambour 231 dm3 347 dm3 508 dm3 690 dm3 Diamètre du tambour 776 mm 776 mm 1075 mm 1076 mm Profondeur du tambour 490 mm 735 mm 560 mm 760 mm Vitesse de rotation du tambour 45 rot/min 45 rot/min 40 rot/min 40 rot/min Performance de séchage avec humidité résiduelle de 50% à «Prèt à ranger» suivant EN 61121 0,17 L /min 0,24 L /min 0,35 L /min 0,48 L/min 14,4 kW 19,2 kW 28,8 kW 38,4 kW 3 4 6 8 180 W 180 W 370 W 370W 400 V 3~ NE 400 V 3~ NE 400 V 3~ NE 400 V 3~NE 25 AT 32 AT 50 AT 63 AT max. 900 m3 /h max. 1100 m3 /h max. 1200 m3 /h max. 1500 m3 / h max. 70°C max. 70°C max. 70°C max. 70°C Résistance de conduite d’évacuation montée dans l’immeuble max. 200 Pa max. 200 Pa max. 300 Pa max. 300 Pa Température de chauffage max. 200°C max. 200°C max. 200°C max. 200°C 200 mm 200 mm 200 mm 200 mm radialement radialement radialement radialement 30 dm2 30 dm2 48 dm2 48 dm2 Marche réversible oui oui oui oui Commande en fonction de l’humidité oui oui oui oui 2 RS 2 RS 2 RS 2RS Diamètre du hublot de chargement 530 mm 530 mm 530 mm 530 mm Hauteur de chargement 578 mm 578 mm 759 mm 759 mm oui oui oui oui 523 mm 523 mm 705 mm 705 mm Dimensions extérieures, hauteur 1460 mm 1460 mm 1795 mm 1795 mm Dimensions extérieures, largeur 842 mm 842 mm 1150 mm 1150 mm Dimensions extérieures, profondeur 820 mm 1065 mm 888 mm 1088 mm 200 kg 220 kg 360 kg 400 kg Capacité pour du linge sec Durée du programme de séchage «Prèt à ranger» Raccordement au chauffage électrique Nombre d’éléments de chauffe Moteur Tension de raccordement Protection par fusible Puissance d’évacuation d’air Température de l’air d’évacuation Raccordement pour l’air d’évacuation (diamètre) Canalisation de l’air Surface du filtre à peluches Paliers à l’arrière Ouverture du hublot 180° degrés Hauteur de lârète inférieure du hublot à partir Poids net de l’appareil 32 Notizen / Notes / Note I TALIANO Indice Simboli impiegati34 Consigli per il riciclo XX Imballaggio della nuova asciugatrice XX Smaltimento del vecchio apparecchio Istruzioni per la sicurezza XX Istruzioni generali per la sicurezza XX Cosa fare prima della messa in funzione XX Durante l’asciugatura fare attenzione a quanto segue XX Durante il trasporto fare attenzione a quanto segue 34 34 34 34 35 35 Per asciugare correttamente rispettando l’ambiente XX Selezione dei capi 35 XX Caricamento35 XX Consigli per l’asciugazione 35/36 XX Non utilizzare l’asciugatrice per i seguenti tessuti36 XX Impostazione estese ZZ Sicurezza bambini ZZ Memoria tasti ZZ Luminosità LCD ZZ Contrasto LCD ZZ Volume segnale acustico ZZ Funzione standby ZZ Interfaccia ottica ZZ Lingua default ZZ Selezionare ora avvio 41 41 42 42 42 42 Pulizia e manutenzione XX Pulizia del filtro XX Pulizia dell'apparecchio 42 42 Anomalie di funzionamento XX Segnalazioni di guasto XX Guida in caso di guasti 43 43/44 Intensità di rumore44 Messa in funzione XX Preparazione36 XX Apertura del sportello 36 XX Chiusura del sportello 36 Servizio assistenza XX Numero di prodotto e di macchina Descrizione dell'asciugatrice XX Pannello di comando e visualizzazione XX Tasti dei programmi Dati tecnici 37 37 41 41 44 Garanzia44 45 Note46 Panoramica dei programmi38 Selezione del programma XX Selezione del programma ad umidità residua39 XX Selezione del programma «Stiratura 39 per mangano XX Selezione del programma a tempo 39 XX Selezione del programma Wet-Clean 39 Funzioni supplementari XX Sintetici XX Imposta durata XX Asciugatura delicata XX Selezionare ora avvio XX Ciclo veloce 39 39 39 39 39 Avvio del programma XX Cambiare programma prima dell’avvio 40 XX Inserimento della biancheria 40 XX Avvio del programma 40 XX Durata e fase di svolgimento del programma40 XX Aggiunta di biancheria 40 XX Interruzione del programma 40 XX Fine programma 40 XX Togliere la biancheria 40 XX Spegnere l'asciugatrice 40 Impostazione di base ZZ Grado di asciugatura ZZ Antipiega ZZ Raffreddamento ZZ Ora ZZ Lingua 41 41 41 41 41 Inhaltsverzeichnis deutsch XX Siehe Seite 3 Sommaire français XX Voir page 19 Contents english XX See page 51 34 Simboli impiegati Istruzioni per la sicurezza ed avvertimenti Istruzioni per la sicurezza indica fasi di lavoro da eseguire secondo la successione indicata conteggi, informazioni generali utili Questo apparecchio soddisfa le norme per la sicurezza relative agli apparecchi elettrici. Non si intende finalizzato all’uso da parte di persone (inclusi i bambini) con ridotte capacità fisiche, sensoriali o mentali, o con c arenza di esperienza e conoscenza. Osservare le istruzioni di sicu rezza riportate nel presente manuale e le successive istruzioni per il posizionamento. Istruzioni generali per la sicurezza: Consigli per il riciclo Non salire sulla macchina. Non sedersi, né sorreggersi, né appoggiarsi sul sportello. (Pericolo di ribaltamento!) Non spruzzare mai acqua sull’apparecchio, né pulire con un pulitore ad alta pressione Se l’apparecchio non viene usato per lungo tempo, deve essere staccato dall'alimentazione di corrente. Toccare la presa di corrente solo con mani perfettamente asciutte. Staccare la spina, tirando esclusivamente alla presa di corrente e mai il cavo stesso. Le riparazioni devono essere condotte esclusivamente da personale esperto e le parti danneggiate devono essere sostituite esclusivamente da pezzi di ricambio originali del fabbricante dei apparecchi. Le riparazioni non idonee possono provocare gravi danni materiali e causare pericoli per l’utente. Modifiche all’apparecchio sono possibili solo previo consenso del produttore. Appena si presenta un’anomalia nel funzionamento, l’apparecchio deve essere staccato dalla rete d’alimenta zione della corrente. L’asciugatrice è staccata dalla rete elettrica solo quando è stata tolta la spina dalla presa a muro o è stato spento l’interruttore principale oppure è stato smontato il fusibile Conservare i detersivi e gli altri additivi per il lavaggio fuori dalla portata dei bambini. Imballaggio dell’asciugatrice nuova Smaltire il materiale d’imballaggio secondo le norme. Il materiale d’imballaggio non è un giocattolo. Attraverso il suo trattamento e recupero si risparmiano materie prime e si riduce il volume dei rifiuti. L’imballaggio può essere restituito al rivenditore o al fornitore. Tutti i materiali d’imballaggio utilizzati sono compatibili con l’ambiente e riciclabili. Il cartone è costituito dall’80% al 100% da carta riciclata. Le parti in legno non sono state trattate chimicamente. I fogli sono in polietilene (PE), i nastri di fasciatura in polipropilene (PP) e le imbottiture, prive di CFC, sono in polistirolo espanso (PS). Questi materiali sono composti puri di idrocarburi e sono riciclabili. Smaltimento del vecchio apparecchio Rendere inutilizzabili gli apparecchi fuori uso. Dopo aver sfilato la spina, o dopo che l’elettricista ha smontato il cavo d’allacciamento, tagliare e togliere il cavo di connessione. Distruggere o togliere la serratura dello sportello, per evitare che i bambini giocando rimangano imprigionati e possano rischiare la vita. I componenti del vecchio apparecchio non possono più essere utilizzati. Il vostro vecchio apparecchio contiene materiali preziosi, che devono essere inviati ad un centro di recupero. Assicurarsi che il proprio apparecchio in disuso venga smaltito in modo appropriato. Non conservarlo, né gettarlo con i rifiuti normali. Per ulteriori informazioni sul riciclaggio di questo prodotto si rivolga al suo comune, all’azienda addetta alla raccolta dei rifiuti o al negozio presso il quale ha acquistato il prodotto. Vi preghiamo di collaborare allo smaltimento o al riciclaggio ecologici dell’apparecchio. Cosa fare prima della messa in funzione: Leggere attentamente le istruzioni allegate, prima di mettere in funzione la vostra asciugatrice. Ci sono importanti informazioni relative all’installazione, all’uso ed alla sicurezza dell’apparecchio. Conservare con cura tutta la documentazione per altre persone che utilizzano l’asciugatrice o per eventuali proprietari futuri. L'asciugatrice deve essere installata e messa in funzione solo dal nostro servizio assistenza o da personale specializzato autorizzato. Non collegare un apparecchio che presenti danni evidenti. Non collegare l’allacciamento del tubo di scarico ad un camino al quale siano collegati una stufa a gas o a carbone, la cucina o un riscaldamento a gas. Il ritorno dei fumi comporta un pericolo d’avvelenamento! Utilizzare l’apparecchio solo quando sono stati rimontati tutti i pannelli di copertura esterni smontabili. I filamenti di tessuto che finiscono nelle condutture dell’aria possono eventualmente causare in incendio. Mettere in funzione l’asciugatrice solo con il filtro per i filamenti montato e senza che presenti difetti. Nel caso si constatassero dei danni, il filtro per i filamenti deve essere immediatamente sostituito. 35 Per asciugare correttamente rispettando l’ambiente Durante l’asciugatura fare attenzione a quanto segue: Prima di inserire la biancheria accertarsi che nel cestello non si trovino corpi estranei, né animali domestici che eventualmente si sono nascosti. Asciugare nell’asciugatrice solo capi puliti. L’asciugatrice non deve essere utilizzata se per il lavaggio sono stati usati prodotti chimici. Biancheria venuta a contatto con olio da tavola, acetone, alcol, benzina, petrolio, cherosene, smacchiatori, trementina, cera o olio togli-cera, prima dell'asciugatura nell'asciugatrice devono venire lavati in acqua tiepida con una dose aggiuntiva di detersivo. Oggetti come la gomma piuma (gomma piuma in lattice), cuffie da doccia, tessuti impermeabili, articoli in gomma come capi d’abbigliamento o cuscini contenenti fiocchi di gomma piuma non devono venire asciugati nell'asciugatrice. Ammorbidenti o prodotti simili possono essere utilizzati seguendo le rispettive istruzioni per l’uso. Un processo di asciugatura dovrebbe sempre concludersi con la fase di raffreddamento completamente riuscita, cosicché la biancheria rimanga ad una temperatura tale da non essere danneggiata. Se l’asciugatura viene interrotta prima e senza che sia stato eseguito il processo di raffreddamento, la biancheria va estratta rapidamente e stesa in modo da permettere al calore di disperdersi. In questo caso è necessario considerare che i capi, in base alla loro temperatura e umidità, in caso di contatto con la pelle potrebbero causare delle ustioni. Si consiglia quindi di indossare dei guanti adatti. Tenere gli animali domestici lontani dall’apparecchio. L’apparecchio è concepito esclusivamente per l’asciuga zione domestica di tessuti. L’oblò dello sportello si surriscalda durante la fase d’asciugatura. Non toccare mai l’oblò durante la fase d’asciugatura! Durante il processo d’asciugatura si deve provvedere ad una buona aerazione dell’ambiente (aprire la finestra o la porta). Al termine del programma, non introdurre la mano nel cestello ancora rotante. Non depositare, né utilizzare in prossimità dell’asciugatrice benzina, petrolio o sostanze particolari facilmente infiammibili (pericolo di incendio e di esplosione). In caso di emergenza premere immediatamente il pulsante rosso per l'arresto d’emergenza! (Vedi capitolo «Messa in funzione/Tasto d’emergenza) Durante il trasporto fare attenzione a quanto segue: Attenzione durante il trasporto dell’asciugatrice: pericolo di ferirsi! Non sollevare l’apparecchio facendo presa sulle parti sporgenti! Selezione dei capi Controllare i simboli di asciugatura sulle etichette dei tessuti. Asciugazione a temperatura normale. Asciugazione a bassa temperatura. Non asciugare con l’asciugatrice. Asciugare nell’asciugatrice solo capi che sono stati lavati con acqua. Per ottenere un’asciugazione uniforme, suddividere la biancheria per tipo di tessuto e per grado d’asciugazione desiderato. Caricamento zz Il sistema d’asciugazione più economico e meno ocivo per l’ambiente è quello di caricare la quantità n massima di biancheria consentita (Vedi capitolo «Tabella dei programmi»). zz Non superare la quantità massima di carico consentita, poiché il sovraccarico pregiudica i risultati dell’asciugazione e sgualcisce molto la biancheria. zz Centrifugare i capi in lavatrice o in una centrifuga p rima di asciugarli, per eliminare completamente l’acqua. Maggiore è la velocità di centrifugazione, minori saranno i tempi di asciugatura e, di conseguenza, i consumi d’energia elettrica. zz Centrifugare anche i capi delicati. Consigli per l’asciugazione zz Chiudere le cerniere lampo, i ganci e gli occhielli. Per favore chiudere i bottoni degli copripiumini e federe. Allacciare le cinture aperte, legare insieme i nastri dei grembiuli, ecc. zz Se possibile, togliere i capi delicati dall’asciugatrice ancora leggermente umidi (selezionare il grado di asciu gatura leggero). In caso d’eccessiva asciugatura c’è il rischio che si sgualciscano. zz Mettere i capi ben distesi nel cestello, mischiando capi grandi e piccoli. zz I capi che risultassero ancora umidi al termine del ciclo d’asciugazione (carico misto cotonati) possono essere asciugati con il programma «Asciugatura a tempo». zz I tessuti lavorati, ad. es. i capi in maglia, potrebbero restringersi con l’asciugazione. Per questo tipo di tessuti non utilizzare il programma «Asciugatura forte» . zz Se si desidera asciugare solamente un capo, allora uesto si può asciugare in modo uniforme, solo se si q integrano altri capi per equilibrare il peso, quali panni di spugna zz Tessuti in puro lino potrebbero «irruvidirsi», quindi seguire le indicazioni per l’asciugatura riportate sulle etichette. La biancheria inamidata può essere asciugata nell’asciugatrice. 36 zz I capi da stirare non devono essere necessariamente stirati subito dopo l’asciugatura. È consigliabile sovrapporli o avvogerli per un po’ di tempo, affinché l’umidità residua si distibuisca unifomemente nella biancheria. Messa in funzione zz Per ottenere il giusto grado d’umidità per la stiratura con il mangano o a ferro, selezionare il relativo programma. Installare l’asciugatrice seguendo le relative istruzioni. Prima di mettere in funzione l’asciugatrice per la prima volta, pulire il cestello con un panno umido. Preparazione Non utilizzare l’asciugatrice per i seguenti tessuti: Controllare che: zz La biancheria è troppo bagnata: spreco di energia! (Centrifugare di nuovo il bucato) XXSia inserito il filtro per i pelucchi (vedi capitolo «Selezione del programma/Pulizia del filtro»). zz I capi trattati con solventi infiammabili, es. smacchianti o benzina solvente, non devono essere asciugati nella macchina (rischio di esplosione!) e neppure i capi che contengono gommapiuma o schiuma per capelli, solvente per smalto o sostanze simili (rischio di incendio!). XXLa spina sia inserita o l’interruttore a parete acceso. L’asciugatrice è pronta ad entrare in funzione, se tutte le spie di controllo lampeggiano oppure sono spente. Nel caso che una spia rimanga continuamente accesa, premere il tasto «Ciclo veloce», finché viene indicato «Selezionare un programma».. Apertura del sportello XXAprire lo sportello e introdurre la biancheria. Chiusura del sportello XXPer chiudere il sportello, premerlo finché non si sente scattare chiaramente la serratura. Accertarsi che nel chiudere il sportello non vi rimangano impigliati dei capi. Se lo sportello non è stato chiuso, un dispositivo di sicu rezza impedisce la messa in funzione dell’apparecchio. 37 Descrizione dell'asciugatrice Pannello di comando e indicatori Indicatori Programmi 1 2 3 4 5 6 Programmi Wet-Clean Asciugatura a tempo Umidita mangano 1 (1 - 5) Umidita mangano 2 (1 - 5) Asciugatura normale Asciugatura forte 13 Display digitale Interfacce 4 SCS-Schulthess Control System 1 (interfaccia PC per assistenza clienti) Funzioni supplementari 2 7 8 9 10 11 12 Imposta durata Antipiega Selezionare ora avvio Sintetici Asciugatura delicata Avvio del programma Ciclo veloce Pannello di comando Tasto di emergenza ed visualizzazione Apertura di riempimento Filtro per filamenti 38 Panoramica dei programmi Capi colorati e resistenti Sintetici Per capi delicati in tessuto sintetico, tessuti misti o cotone da non stirare. Tasti Programmi Umid. res. Durata Tasti Programme Umid. res. Durata 1x Umidità mangano 1 «1» 13min 1x + Umidità mangano 1 «1» 2 min 2x Umidità mangano 1 «2» 16min 2x + Umidità mangano 1 «2» 4 min 3x Umidità mangano 1 «3» 18min 3x + Umidità mangano 1 «3» 5 min 4x Umidità mangano 1 «4» 20min 4x + Umidità mangano 1 «4» 7 min 5x Umidità mangano 1 «5» 21min 5x + Umidità mangano 1 «5» 8 min 1x Umidità mangano 2 «1» 22min 1x + Umidità mangano 2 «1» 9 min 2x Umidità mangano 2 «2» 23min 2x + Umidità mangano 2 «2» 10 min 3x Umidità mangano 2 «3» 25min 3x + Umidità mangano 2 «3» 11 min 4x Umidità mangano 2 «4» 26min 4x + Umidità mangano 2 «4» 12 min 5x Umidità mangano2 «5» 27min 5x + Umidità mangano2 «5» 13 min 1x Asciugatura normale +2/-2 % 1x + Asciugatura normale +2/0% 1x Asciugatura forte +2/-4 % 1x + Asciugatura forte 0/-2 % Premendo il tasto «Asciugatura delicata» il tempo d’asciugatura si prolunga di ca. il 20%. Premendo il tasto «Asciugatura delicata» il tempo d’asciugatura si prolunga di ca. il 20%. Per tessuti lavati con il procedimento Wet-Clean Questa macchina offre la possibilità d’asciugare o preasciugare in modo delicato i tessuti sensibili, lavati precedentemente con il procedimento Wet-Clean (lavaggio per via umida). Con il tasto si possono selezionare, premendo una o più volte, i seguenti dieci programmi: Programmi Tasti Indicatori Durata Asciugatura a tempo freddo 1x + a scelta freddo 1min fino ad 2 h 30 min Asciugatura a tempo 40°C 2x + a scelta 40°C 1min fino ad 2 h 30 min Asciugatura a tempo 60°C 3x + a scelta 60°C 2min fino ad 2 h 30 min Asciugatura a tempo 70°C 4x + a scelta 70°C 3min fino ad 2 h 30 min Capi di abbigliamento non lavabili ad acqua 5x ca. 47min Capi di abbigliamento pesante lavabili ad acqua 6x ca. 24min Angora, Seta (non completamente asciutta) 7x 11min Abiti da sposa, tende 8x 13min Piumini 9x 1h23min 10x ca. 31min Impregnare Quantità dei carichi Tipo di asciugatrice TRI 9250 TRI 9375 TRI 9550 TRI 9750 Capi resistenti e colorati 10 kg 15kg 22kg 30kg Sintetici 5kg 7,5kg 11kg 15kg Capi delicati 3kg 5kg 7kg 10kg 39 Selezione del programma Selezione del programma ad umidità residua Il sistema di rilevamento elettronico, dotato di sensori precisi, controlla costantemente il grado di umidità dei vostri capi e termina il programma automaticamente al momento in cui è stato raggiunto il grado d’asciugazione impostato. XXPremere il tasto del programma corrispondente al grado di asciugatura desiderato. zz Si accende la spia luminosa del programma selezionato. XXPer i tessuti delicati selezionare la funzione supplementare «Sintetici» . Selezione del programma ad umidità mangano Selezionando i programmi «Umidità mangano 1 e 2» c'è la possibilità di cambiare il grado d’umidità residua, premendo più volte i tasti. Sono possibili 5 diversi livelli. Sul display compare il livello selezionato in quanto i valori dell’umidità residua diminuiscono con l’aumentare della cifra. Funzioni supplementari Selezionando una o più funzioni supplementari potete impostare questo programma di asciugazione in base alle caratteristiche specifiche della vostra biancheria. Tali funzioni supplementari rimangono attive esclusivamente per questo programma di asciugatura. XXAvete inoltre la possibilità di standardizzare la vostra asciugatrice alle vostre necessità personali, cambiando le impostazioni di base (vedi capitolo «Impostazioni di base»). I cambiamenti effettuati sulla programmazione di base rimangono attivi fino a quando non verranno nuovamente cambiati. Sintetici Per capi delicati in tessuto sintetico, tessuti misti o c otone da non stirare. Imposta durata Se tra i programmi speciali avete selezionato un programma di asciugatura temporizzato, potete stabilire la durata del programma con il pulsante «Imposta durata». Il tempo d’asciugazione da impostare dipende dal tipo di biancheria, dalla quantità di biancheria e dal contenuto di umidità. XXPremere il tasto del programma. zz La spia luminosa «Imposta durata» lampeggia ed il tempo d’asciugatura minimo viene indicato. XXSelezionare il tempo d’asciugazione premendo più volte il tasto. Selezione del programma a tempo Asciugatura delicata In caso di tessuti delicati si può premere il tasto «Asciu gatura delicata», in modo da ridurre la temperatura. Per asciugare singoli capi di biancheria o per finire d’asciugare tessuti già preasciugati con un basso contenuto di umidità. Il tempo d’asciugatura da impostare dipende dal tipo di biancheria, dalla quantità di biancheria e dal contenuto di umidità. zz Premere il tasto del programma.i accende la spia luminosa «Programma a tempo» e viene indicato il tempo d’asciugatura minimo. XXSelezionare il tempo d’asciugatura, fino ad un massimo di 150 min, premendo più volte il tasto. Selezione del programma Wet-Clean Con questi programmi si possono asciugare i tessuti lavati in precedenza con il procedimento Wet-Clean. XXDigitare più volte sul tasto , finché sul display compare il programma desiderato. Selezionare ora di avvio Premendo una o più volte il tasto «Selezionare ora di avvio» si può impostare l’ora d’avvio in modo che l’asciugabiancheria entri in funzione entro le 23,5 ore successive. Questo consente, ad esempio, di sfruttare la tariffa ridotta per la corrente erogata durante la notte. L’inizio e la fine di un programma possono quindi essere adeguati alle proprie abitudini di vita. Nel display viene visualizzato il tempo di avvio ed il tempo residuo per finire il programma. L’ora preselezionata inizia a decorrere dopo l’attivazione del tasto di avvio. Una volta raggiunta l’ora di avvio, il programma si attiva automaticamente e viene visualizzata la sua durata effettiva. zz In caso d’interruzione di corrente rimane memorizzato il tempo attuale. Non viene tenuta in considerazione la durata dell’interruzione di corrente. Ciclo veloce Il programma può essere ridotto o interrotto, premendo il tasto «Ciclo veloce». 40 Avvio del programma Aggiunta di biancheria effettuabile in ogni momento. Selezione del programma Vedi capitolo «Selezione del programma» Selezione di funzioni supplementari Vedi capitolo «funzioni supplementari» XXAprire lo sportello. zz Il tamburo si ferma. XXIntrodurre la biancheria. XXChiudere lo sportello. XXPremere il tasto «Avvio». Se è inserito il dispositivo di sicurezza per i bambini: Cambiare programma prima dell’avvio del programma XXPremere nuovamente il tasto del programma desiderato. zz Lampeggiano nuovamente tutte le spie di controllo delle funzioni supplementari che possono essere selezionate e tutte le impostazioni vengono cancellate. XXEv. selezionare le funzioni supplementari. Inserimento della biancheria Utilizzare l’asciugatrice solo per i capi che sono stati lavati ad acqua. XXInserire nel cestello i capi ben aperti, mischiando i capi grandi e piccoli. XXMantenere premuti entrambi i tasti «Avvio» e «Ciclo veloce». zz Il processo di asciugatura riprende. Interruzione del programma u Interrompere il programma premendo più volte il tasto «Ciclo veloce», finché sul display compare «Fine del programma». Se è inserito il dispositivo di sicurezza per i bambini: XXTener premuto il tasto «Avvio». XXContemporaneamente premere il tasto «Ciclo veloce». Fine programma Avvio del programma XXPremere il tasto «Avvio». La fine del programma viene visualizzata dal valore 00:00h, il display indica «Fine programma» e la spia lampeggia. zz Viene emesso un segnale acustico (solamente nel caso in cui è inserita l’apposita funzione di segnalazione.) zz La spia luminosa si accende ed il programma parte automaticamente. zz Alla fine del programma, il cestello continua a muoversi a intervalli brevi, per evitare che il bucato non si pieghi (solo con funzione antipieghe attivata, 30 o 60 minuti). Se è inserito il dispositivo di sicurezza per i bambini: Dopodiché la biancheria dovrebbe essere rimossa. XXTenere premuto il tasto «Ciclo veloce» ed azionare il tasto «Avvio» Svolgimento del programma / Fase del programma Togliere la biancheria XXAprire lo sportello. XXTogliere la biancheria. XXPulire il filtro. Spegnere l’asciugatrice XXChiudere lo sportello XXSpegnere l’interruttore a parete. XXNei programmi in base all'umidità residua il sistema di rilevamento elettronico controlla costantemente il grado d’umidità della biancheria. zz Viene visualizzata la durata residua del programma. Questo tempo residuo viene ricalcolato più volte durante l'asciugatura, pertanto l'effettiva fine del programma varia di alcuni minuti. XXNei programmi a tempo viene indicato il tempo che rimane prima della fine del programma. zz Se non è presente un interruttore a parete, il campo di visualizzazione scompare automaticamente dopo 4 minuti e l’asciugatrice passa alla modalità di standby (solo con funzione standby attivata). 41 Impostazioni di base Impostazione estese Sebbene i parametri base dell'asciugatrice siano già stati predisposti in fabbrica, prima dell'avviamento o in qual siasi momento successivo le funzioni di seguito elencate vi permettono di adattarli alle vostre esigenze personali. Le impostazioni di base possono essere cambiate solamente se nessun programma di asciugatura è in esecuzione. Per cambiare un'impostazione di base si deve sempre mantenere premuto il tasto di programma e poi attivare il tasto «Ciclo veloce». Le relative funzioni vengono visualizzate sul display. Tenendo premuto il tasto di programma e premendo più volte il tasto «Ciclo veloce» la visualizzazione cambia. + + XXLa pressione contemporanea su questi tre tasti attiva la visualizzazione delle impostazioni estese. XXLa pressione ripetuta sul tasto stazioni disponibili. XXLa pressione sul tasto varie impostazioni. visualizza le impo- permette di modificare le XXCon la pressione sul tasto delle impostazioni. termina la visualizzazione Sicurezza bambini (valore preimpostato OFF) Esempio: Selezionare «Impostazioni estese»! Il dispositivo di sicurezza per i bambini serve ad evitare che i bambini facciano partire casualmente il programma, oppure lo cambino o lo cancellino. Avvio di un programma quando è inserito il dispositivo di sicurezza per i bambini: : + Funzione disinserita Funzione inserita Grado di asciugatura (valore preimpostato NORMALE) Tenere premuto il tasto «Avvio» e azionare il tasto «Ciclo veloce». + Se è inserito «PIU ALTO», il grado d'asciugatura dei programmi elettronici (Asciugatura normale e forte) viene leggermente aumentato e la biancheria risulta un po' più asciutta. Antipiega (valore preimpostato 30MIN) Memoria tasti (valore preimpostato OFF) Selezionare «Impostazioni estese»! Se è attivata la funzione memoria, in entrambi i p rogrammi «Stiratura per mangano» e «Wet-Clean» vengono memorizzati i programmi utilizzati per ultimi. Selezionando nuovamente uno di questi programmi, viene rilevato automaticamente il programma utilizzato per ultimo. + Attivando questa funzione, alla fine del programma inizia una fase di protezione antipiega della durata di 60 min. Luminosità LCD (valore preimpostato 150) Selezionare «Impostazioni estese»! Questo tasto consente di modificare la luminosità o il tipo di carattere visualizzato. Raffreddamento (valore preimpostato OFF) + Contrasto LCD (valore preimpostato 32) In caso di funzione attivata, in alcuni programmi la fase di raffreddamento si prolunga. Selezionare «Impostazioni estese»! Questo tasto consente di modificare il livello di contrasto del display. Ora (non preimpostata in fabbrica) Volume segnale acustico (valore preimpostato VOLUME 2) + Il tasto consente di regolare le ore e il tasto regolare i minuti. di Lingua (valore preimpostato: DEUTSCH) + ÷ La lingua di base viene modificata e mantenuta anche dopo lo spegnimento e la modalità di standby. Selezionare «Impostazioni estese»! Con cicalino attivato, al termine del programma viene emesso un segnale acustico ad intervalli regolari. Questo tasto consente di regolarne il volume su 3 livelli: Off Volume 1 Volume 2 Volume 3 42 Pulizia e manutenzione Funzione standby (valore preimpostato ON) Selezionare «Impostazioni estese»! Se nessun programma è in esecuzione, l'attivazione di questa funzione commuta il funzionamento della macchina nello stato di risparmio energetico. Tutte le spie sono spente. Pulizia del filtro Mettere in funzione l'asciugatrice solo se è inserito il filtro per filamenti integro. Interfaccia ottica (valore preimpostato OFF) Selezionare «Impostazioni estese»! L'attivazione dell'interfaccia ottica (SCS) consente al Servizio Assistenza di comunicare con la macchina tramite PC. Lingua default (valore preimpostato DEUTSCH) Selezionare «Impostazioni estese»! Se si seleziona temporaneamente un’altra lingua tramite i tasti e , 4 minuti dopo la fine del programma, in modalità standby o dopo mancato funzionamento per un lungo periodo si passa nuovamente alla lingua di default. Selezionare ora avvio (valore preimpostato: 24 ORE) Selezionare «Impostazioni estese»! La selezione per posticipare l’ora di avvio può essere spostata da 24 ore a max. 100 ore. XXPulire quotidianamente il filtro per filamenti. XXNon rimuovere il filtro per filamenti e fare attenzione a non danneggiarlo, altrimenti sostituirlo! Se filamenti di tessuto finiscono nelle condutture dell'aria, potrebbero causare un incendio. Pulizia dell’apparecchio Prima di pulire l’apparecchio o eseguire lavori di manu tenzione, accertarsi che la corrente sia disinserita. Non spruzzare mai acqua sull’apparecchio, né pulire con un pulitore ad alta pressione Non utilizzare solventi! Queste sostanze potrebbero danneggiare alcuni componenti dell’asciugatrice; svilup pano vapori tossici e possono provocare un’esplosione! Pulire la parte esterna ed i comandi dell’asciugatrice semplicemente con acqua saponata o con un normale detergente in commercio che non contenga solventi o che non sia abrasivo. 43 Anomalie di funzionamento Se viene ancora indicata la segnalazione di guasto: XXAnnotarsi il tipo di segnalazione di guasto. XXSfilare la spina o spegnere l’interruttore a parete. Segnalazioni di guasto Nel caso vengano segnalate le seguenti anomalie, il programma può essere fatto ripartire, premendo il tasto «Avvio», dopo aver eliminato l’anomalia. «sicurezza bambini attiva» XXMantenere premuto il tasto «Avvio» e azionare il tasto «Ciclo veloce» (Vedi capitolo «Impostazione di base»). «chiudere sportello» XXPremero lo sportello finché la chiusura non si inserisce correttamente. «PANELLO BASE / FILTRO» Questa segnalazione compare solo durante un programma di asciugatura. XXChiudere la mascherina nello zoccolo.. «STOP EMERGENZA PREMUTO» zz l Il tasto d’emergenza deve essere azionato solamente in caso di pericolo e provoca un arresto immediato dell’asciugabiancheria. zz L’interruttore rimane bloccato in posizione d’azione. zz Si prega di non utilizzare l’interruttore d’emergenza per arrestare l’asciuga biancheria durante il normale funzionamento. zz Dopo aver riparato il guasto o eliminato il pericolo si può sbloccare l’interruttore d’emergenza azionato, ruotando verso destra il pulsante a fungo rosso. XXPer mettere nuovamente in funzione l’asciuga biancheria sbloccare l’interruttore d’emergenza e premere il tasto di avvio. «BLOCCO DI RETE» zz Nelle macchine con riscaldamento elettrico l’apparecchio può essere fermato da sistemi esterni per la gestione della corrente, perché temporaneamente è stata raggiunta una punta di potenza. zz Il blocco di rete causa una disattivazione del riscaldamento e l’asciugatrice passa alla fase di raffreddamento ed in seguito e quella d’antisgualcitura. zz In questo stato tutti i tasti di comando, ad eccezione del tasto «Ciclo veloce», sono bloccati ed il display che indica il tempo residuo si ferma. La spia del tasto d’avvio si accende. zz Se il blocco di rete termina, il programma d'asciugatura prosegue automaticamente ed il display è nuovamente attivo. Il riscaldamento viene attivato 15 secondi più tardi. Se l’apparecchio segnala un messaggio di guasto F– – : XXInterrompere il programma con il tasto «Ciclo veloce» e selezionare un nuovo programma. Se la segnalazione di guasto viene ripetuta: XXInterrompere per circa 1 minuto l’alimentazione di corrente e poi reinserirla. (Sfilare la spina o spegnere l’interruttore a parete). zz L’apparecchio è nuovamente pronto ad entrare in funzione, se le spie luminose dei programmi lampeggiano. XXSelezionare un nuovo programma. XXAvvisare il Servizio Assistenza. Guida in caso di guasti Riparazioni, modifiche o interventi su apparecchi elettrici devono essere eseguiti esclusivamente da personale specializzato. Le riparazioni non idonee possono provocare gravi danni materiali e causare pericoli per l’utente. Per le riparazioni devono essere utilizzati solamente ricambi originali. Come eliminare da soli piccole anomalie La macchina non entra in funzione dopo aver remuto un tasto del programma: XXControllare che l’interruttore a parete sia acceso e la spina sia inserita. XXControllare che tutti i fusibili siano intatti oppure che sia scattato il salvavita. Il display è oscurato: XXL’apparecchio è in modalità di standby. Non si tratta di un errore, basta premere un tasto per riattivare l’apparecchio. XXControllare che tutti i fusibili siano intatti oppure che sia scattato il salvavita. L’apparecchio non entra in funzione: XXNon è stato premuto il tasto «Avvio». XXÈ impostata un’ora d’avvio. Parte solamente dopo che è trascorso il tempo d’avvio selezionato. L’apparecchio non si accende, il display rimane oscurato, anche dopo aver premuto un tasto: XXControllare che l’interruttore a parete sia acceso e la spina sia inserita. XXControllare che tutti i fusibili siano intatti oppure che sia scattato il salvavita. XXBlocco di rete, di regola avviene intorno a m ezzogiorno. Riattivare l’apparecchio una volta trascorso il periodo del blocco di rete. Il grado di asciugatura non è stato raggiunto: Il bucato ancora caldo si percepisce più umido di quello che in realtà è! Lasciare raffreddare il bucato fuori dall’asciugatrice. Se continua ad essere troppo umido: XXPulire il filtro (vedi capitolo «Avvio del programma»). XXAumentare il grado d'asciugatura (Vedi capitolo «Impostazione di base»). Il singolo capo non raggiunge l’asciugatura desiderata: XXSe si desidera asciugare solamente un capo, allora questo si può asciugare in modo uniforme, solo se si integrano altri capi per equilibrare il peso, quali ad esempio panni di spugna. Il tempo di asciugatura è troppo lungo: XXPulire il filtro (Vedi capitolo «Avvio del programma»). XXMancanza di corrente (Controllare i blocchi da parte della Società Elettrica). 44 La biancheria non si asciuga nonostante sia stato impostato il massimo grado di asciugatura: XXIl cestello è sovraccarico (Vedi capitolo «Panoramica dei programmi»). XXLa biancheria non è stata centrifugata a sufficienza. XXL’aerazione dell’ambiente non è sufficiente (Aprire la porta o la finestra). XXIl filtro è otturato da filamenti di tessuto o di sedimento di calcio (Vedi c apitolo «Avvio del programma / Pulizia del filtro»). XXControllare che il tubo di scarico nelle condutture dell’abitazione non sia otturato. XXControllare che le lunghezze e le sezioni delle tubazioni consentite corrispondano alle istruzioni per l’installazione. L’illuminazione del cestello non funziona: XXLa lampadina è guasta. Per motivi di sicurezza la lampadina deve essere sostituita soltanto dal Servizio Assistenza o da un tecnico. Consistente aumento d’umidità nell’ambiente: XXL’ambiente non è aerato sufficientemente. Provvedere ad una sufficiente aerazione dell’ambiente. Il sportello è bloccato: XXSe dovesse essere mancata la corrente prima dell’apertura dello sportello (ad esempio per mancanza di moneta), allora può essere aperto manualmente premendo all’altezza del bloccaggio dello sportello. Servizio assistenza Prima di rivolgervi al Servizio Assistenza, verificate se potete eliminare da soli l’anomalia. (Vedi capitolo «Anomalie di funzionamento»). In caso di consulenza, anche durante il periodo di garanzia, vi saranno addebitati i costi per l’intervento di un tecnico. Nel caso non siate in grado di eliminare da soli il guasto, sfilare la spina o spegnere l’interruttore a parete e rivol gersi al Servizio Assistenza. Comporre il numero della sede centrale del Servizio Assistenza (vedi retro della busta). Sarete collegati automaticamente con la filiale del Servizio Assistenza competente per la vostra zona. Vi preghiamo di indicare al Servizio Assistenza il numero di prodotto ed il numero dell’apparecchio. Troverete questi dati sulla targa di identificazione situata all’interno dello sportello. Segnare qui i numeri del vostro asciuga biancheria. No. di prodotto No. di apparecchio Il bucato resta avvolto: XXUtilizzare lo speciale programma «Biancheria letto» o «Biancheria bagno». Garanzia Garanzia 1 anno. Intensità di rumore Il valore dell’intensità di rumore può essere ridotto mediante l’isolamento acustico - in fase di costruzione - delle condutture per l’aria di scarico, o mediante l’impiego di tubazioni specificamente isolate (ad es. in plastica). 45 Dati tecnici TRI 9250 TRI 9375 TRI 9550 TRI 9750 10 kg 15 kg 22 kg 30 kg ca. 35 min ca. 35 min ca. 35 min ca. 35 min Volume del tamburo 231 dm3 347 dm3 508 dm3 690 dm3 Diametro del tamburo 776 mm 776 mm 1075 mm 1076 mm Profondità del tamburo 490 mm 735 mm 560 mm 760 mm Velocità di rotazione del tamburo 45 giri /min 45 giri /min 40 giri /min 40 giri/min Potenza di asciugatura con umidità residua del 50% per asciugatura normale in conformità a EN 61121 0,17 L /min 0,24 L /min 0,35 L /min 0,48 L/min 14,4 kW 19,2 kW 28,8 kW 38,4 kW 3 4 6 8 180 W 180 W 370 W 370W 400 V 3~ NE 400 V 3~ NE 400 V 3~ NE 400 V 3~NE 25 AT 32 AT 50 AT 63 AT mass. 900 m3 /h mass. 1100 m3 /h mass. 1200 m3 /h mass. 1500 m3 / h mass. 70°C mass. 70°C mass. 70°C mass. 70°C Resistenza conduttura di scarico a muro mass. 200 Pa mass. 200 Pa mass. 300 Pa mass. 300 Pa Temperatura riscaldamento mass. 200°C mass. 200°C mass. 200°C mass. 200°C 200 mm 200 mm 200 mm 200 mm Conduzione aria radiale radiale radiale radiale Superficie filtro per filamenti 30 dm2 30 dm2 48 dm2 48 dm2 Reversibile si si si si Comando in base ad umidità residua si si si si 2 RS 2 RS 2 RS 2RS Diametro apertura di carico 530 mm 530 mm 530 mm 530 mm Altezza di carico 578 mm 578 mm 759 mm 759 mm si si si si 523 mm 523 mm 705 mm 705 mm 1460 mm 1460 mm 1795 mm 1795 mm Dimensione esterna in larghezza 842 mm 842 mm 1150 mm 1150 mm Dimensione esterna in profondità 820 mm 1065 mm 888 mm 1088 mm 200 kg 220 kg 360 kg 400 kg Capacità con biancheria asciutta Durata del programma «Asciugatura normale» Allacciamento riscaldamento elettrico Numero degli elementi riscaldanti Motore Tensione di allacciamento Fusibili Potenza aria di scarico Temperatura aria di scarico Allacciamento aria di scarico (diametro) Supporto posteriore Apertura dello sportello 180 ° Spigolo inferiore dello sportello del pavimento Dimensione esterna in altezza Peso macchina netto 46 Notizen / Notes / Note E NGLISH Contents Used symbols 48 Waste disposal advice XX Packaging from your new machine XX Disposal of your old machine 48 48 Safety information XX General safety information XX Observe before start-up XX Observe when drying XX When transporting your machine 48 48 48 48/49 How to dry correctly and environmentally friendly XX Sorting the laundry 49 XX Load49 XX Tips for drying 49/50 XX Do not dry the following fabrics in the machine50 Start up XX Preparation50 XX Opening the door 50 XX Closing the door 50 Machine description XX Control and display area XX Programme buttons 51 51 Cleaning and Care XX Cleaning the filter XX Cleaning the machine Problems XX Error messages XX Troubleshooting Noise level 56 56 57 58/59 58 Customer services XX Product and serial numbers 58 Guarantee58 Technical Data 59 Inhaltsverzeichnis deutsch XX Siehe Seite 5 Programme survey52 Selecting programme XX Selecting residual moisture controlled programme XX Selecting mangle moist programme XX Selecting time programme XX Selecting Wet-Clean programme 53 53 53 53 Additional functions XX Easy care XX Time selection XX Gentle drying XX Start time preselection XX Fast forward 54 54 54 54 54 Starting programme XX Changing the programme before the start54 XX Add laundry 54 XX Start the programme 54 XX Programme progress/Programme status 54 XX Adding more laundry 54 XX Interrupting the programme 54 XX Programme end 54 XX Removing the laundry 54 XX Switch off the machine 54 Basic settings ZZ Drying level ZZ Crease protection ZZ Cool down ZZ Time ZZ Language XX Extended basic settings ZZ Child lock ZZ Button memory ZZ LCD Brightness ZZ LCD Contrast ZZ Alarm volume ZZ Standby function ZZ Optical interface ZZ Default language ZZ Start time preselection 55 55 55 55 55 55 55 55 55 55 56 56 56 56 Sommaire français XX Voir page 19 Sommario italiano XX Vedere pagina 33 48 Used symbols Safety Information Safety information and warnings indicates work steps which must be executed one after the other enumerations, general useful hints Waste Disposal Advice General safety information: Do not stand on the machine. Do not sit, lean or support yourself on the loading door. (danger of tipping!) Under no circumstances spray the machine with water or clean it with a steam cleaner. If the machine is not needed for a longer period of time, disconnect it from the power supply. Touch the power plug with dry hands only. Only pull the plug, do not pull the cable. Repair work may only be executed by qualified and trained personnel and defective components may only be replaced with original spare parts by the original equipment manufacturer. Packaging from your new machine Dispose of all packaging materials properly. Packaging materials are not toys. Processing and reuse saves raw materials and reduces waste volumes. The packaging can be returned to the retailer or supplier. All packaging materials used are environmentally friendly and reusable. All card is made of 80-100% recycled paper. Wood is not chemically treated. Films are made of polyethylene (PE), banding is made of polypropylene (PP). These materials are pure hydrocarbon compounds and are recyclable. Disposal of your old machine Worn out machines should be made unusable: After unplugging the machine or after an electrician has removed the connection, cut through and remove the mains cable. Destroy or remove the door lock so that playing children cannot become locked in and put their lives at risk. Components from your old machine must not be reused. The old machine contains valuable materials which should be sent for recycling. Please ensure that your old machine is disposed of properly. Please do not keep your old machine and under no circumstances dispose of it in your normal waste. Additional information on the recycling of this product can be obtained from your commune, your waste disposal contractor or the shop in which you bought the product. In this way you can help to ensure environmentally friendly disposal and/or recycling methods. This machine meets the stringent safety regulations for electronic devices. It is not intended for use by persons (including children) with reduced physical, sensory or mental capabilities, or lack of experience and knowledge. Please observe the safety instructions in these operating instructions and the appurtenant mounting instructions. Inexpert repairs can cause considerable damage and risk to the user. Modifications to the appliance are only admissible after consultation with the manufacturer. If a malfuntion occurs, the appliance must be disconnected from the mains immediately. The tumble dryer is only electrically isolated from the mains if the mains plug is withdrawn or the main switch set to off or the fuse removed. Detergents and laundry care agents must be kept out of children’s reach. Observe before start-up: Read the enclosed documents carefully before using your washing machine. They contain important information on the installation, use and safety of the machine. Keep the documents safe for other users or subsequent owners. The tumble dryer may only be set up and put into operation by customer service or an approved specialist dealer. Do not plug in a machine with visible damage. Do not connect the exhaust air evacuation, duct to a chimney to which a gas or coal-burning stove or gas room heating is connected. Danger of poisoning due to gases being sucked back! Only use the tumble dryer when all removable external panels are fitted. Fluff, which finds its way into the air pipes, may cause a fire under certain circumstances. Only operate the tumble dryer with a perfectly functioning fluff filter fitted. Replace the fluff filter immediately if any sign of damage is seen. 49 How to dry correctly and environmentally friendly Observe when drying: Before adding laundry, ensure that there are no foreign bodies or even trapped pets in the drum. Dry clean laundry in the dryer only. The tumbler dryer is not to be used if chemicals have been used for cleaning. ltems that have been soiled with substances such as cooking oil, acetone, alcohol, petrol, kerosene, spot removers, turpentine, waxes and wax removers should be washed in hot water with an extra amount of detergent before being dried in the tumble dryer. ltems such as foam rubber (latex foam), shower caps, waterproof textiles, rubber backed articles and clothes or pillows fitted with foam rubber pads should not be dried in the tumble dryer. Fabric softeners, or similar products, should be used as specified by the fabric softener instructions. A drying procedure should always end with fully completed cooling-off, so that the laundry remains at a temperature that does not damage them. If the drying procedure is ended prematurely without cooling-off, all of the laundry must be removed quickly and spread out so that the heat can be given off. Here one should be aware that the laundry can cause burns upon contact with skin due to its temperature and moisture. Appropriate hand protection is therefore to be worn. Keep pets away from the machine. Only use the machine in the home for drying textiles. The door glass becomes very hot when the dryer is in use. Never touch the door glass during the drying. Ensure good room ventilation when drying (open a window or door). Do not reach into the rotating drum after the end of the programme.. Do not store or use petrol, paraffin or any other easily inflammable materials in the immediate vicinity of the tumble dryer. (Fire and explosion hazard!) In the event of an emergency, press the red emergency stop button immediately! (see chapter «Start-up/«Emergency stop switch») When transporting your machine: Take care when transporting the machine! (risk of injury!) Do not lift the machine by the fittings on the front! Sorting the laundry Pay attention to the drying symbols on your fabrics. Dry at normal temperature. Dry at low temperature Do not tumble dry. Dry textiles only which have been washed in water. To achieve even drying results, sort the laundry by fabric type and desired level of dryness. Load zz Your dryer will be most environmentally friendly and economical if you fill the machine with the maximum laundry load. (See chapter «Programme table») zz Do not exceed the maximum load, because overfilling affects the drying result and severely creases the laundry. zz Remove as much water as possible from the laundry before drying by spinning in a washing machine or spin dryer. The higher the spin speed, the shorter the drying time and lower the energy consumption. zz You should also spin easy care laundry. Tips for drying zz Do up all zips, hooks and eyes. Button up duvet c overs and pillowcases. Tie together loose belts, apron strings etc. zz Remove easy care laundry from the dryer in a slightly damp state if possible (Select target dryness «Light Drying») and allow to finish drying in the air. Over drying causes creases. zz Shake the laundry slightly and place it loosely into the drum, mix big and small textiles. zz Laundry which is still too damp after drying a load of widely varying fabrics can be dried further using the programme «Time drying». zz Knitted fabrics, e.g. jersey underwear, can shrink slightly during drying. Do not use the «Extra Dry» programme for these fabrics. zz If one single piece is to be dried in the dryer, it will be dried more evenly by adding additional pieces as ballast, e.g. two terry towels. zz Pure linen fabrics tend to roughen up in the dryer. The manufacturer’s instructions should therefore be observed. Starched laundry can be dried in the tumble dryer. zz Laundry for ironing does not have to be ironed im mediately after drying. It is beneficial to leave it folded or rolled for a qhile to enable the residual moisture in the laundry to distribute itself evenly. zz The correct moisture level for hand ironing or machine ironing is achieved by appropriate programme selection 50 Start-up Do not dry the following fabrics in the machine: zz Dripping wet laundry: waste of energy! (Spin laundry again) zz Do not dry laundry in the machine which was treated with inflammable solvents, e.g. with stain remover or spirit vinegar (explosion hazard!). zz Do not dry textiles in the dryer which contain any foam rubber or have been in contact / covered with setting lotion, nail polish remover or similar agents (fire hazard!). Install the machine according to the installation instructions. Before using the machine for the first time, wipe the inside of the drum with a damp cloth. Preparation Check whether: XXThe fluff filter is in place. (See chapter «Selecting programmes /Cleaning the filters») XXThe machine is plugged in or switched on at the wall. The machine is ready for use if all the control lights are flashing or have gone out in sleep mode. XXIf one of the control lights stays on, press the «Fast forward» button until the message «Please select programme» is displayed. Open the door XXOpen the door and add the laundry. Close the door XXClose the door by pushing it until the lock audibly engages. Ensure when closing the door that no laundry gets shut in it. If the door is not closed, the safety switch will prevent the machine from operating. 51 Machine description Control and display area Displays Programmes 1 2 3 4 5 6 13 Display Wet-Clean programmes Timed drying Mangle moist 1 (1 - 5) Mangle moist 2 (1 - 5) Cabinet dry Extra dry Interfaces 4 SCS-Schulthess Control System 1 (PC interface for customer services) Additional functions 2 7 8 9 10 11 12 Time selection Crease protection Start time preselection Easy care Gentle drying Programme start Fast forward Control and display area Emergency stop button Loading opening Fluff filter 52 Programme survey Boil and coloured wash Easy care wash Textiles from synthetik or cotton mixtures as well as cotton with handle free equipment. Buttons Programme Resid. moist Time Buttons Programme Resid. moist Time 1x Mangle moist 1 «1» 13min 1x + Mangle moist 1 «1» 2 min 2x Mangle moist 1 «2» 16min 2x + Mangle moist 1 «2» 4 min 3x Mangle moist 1 «3» 18min 3x + Mangle moist 1 «3» 5 min 4x Mangle moist 1 «4» 20min 4x + Mangle moist 1 «4» 7 min 5x Mangle moist 1 «5» 21min 5x + Mangle moist 1 «5» 8 min 1x Mangle moist 2 «1» 22min 1x + Mangle moist 2 «1» 9 min 2x Mangle moist 2 «2» 23min 2x + Mangle moist 2 «2» 10 min 3x Mangle moist 2 «3» 25min 3x + Mangle moist 2 «3» 11 min 4x Mangle moist 2 «4» 26min 4x + Mangle moist 2 «4» 12 min 5x Mangle moist 2 «5» 27min 5x + Mangle moist 2 «5» 13 min 1x Cabinet dry +2/-2 % 1x + Cabinet dry +2/0% 1x Extra dry +2/-4 % 1x + Extra dry 0/-2 % With the «Gentle drying» button pressed, the drying time is extended by around 20 %. With the «Gentle drying» button pressed, the drying time is extended by around 20%. Wet-Clean Wash For sensitive textiles which have been washed using the Wet-Clean process, this appliance offers the facility of an equally gentle drying or partial drying programme to match. The following 10 programmes can be selected by pressing button once or several times: Programme Buttons Display Time Timed drying cold 1x + to choice cold 1min - 2h30 min possible Timed drying 40°C 2x + to choice 40°C 1min - 2h30 min possible Timed drying 60°C 3x + to choice 60°C 2min - 2h30 min possible Timed drying 70°C 4x + to choice 70°C 3min - 2h30 min possible Non-washable coats and jackets 5x ca. 47min Washable outerwear 6x ca. 24min Angora, Silk (only part-dryed) 7x 11min Wedding dresses, curtains 8x 13min Duvets 9x 1h23min 10x ca. 31min Impregnated items Quantity of the loadings Type of dryer TRI 9250 TRI 9375 TRI 9550 TRI 9750 Boil and coloured wash 10kg 15kg 22kg 30kg Easy care wash 5kg 7,5kg 11kg 15kg Delicates 3kg 5kg 7kg 10kg 53 Selecting programmes Additional Functions Selecting residual moisture controlled programme Alongside the various standard programmes, your dryer also offers you the opportunity to design your own programmes. Select first a standard or special programme. By selecting one or more additional functions, you can tailor this drying programme to the specifics of your laundry. These additional functions are only active for this one drying programme. The electronic sampling system continually checks the current level of dryness of your laundry and automatically stops the programme when it reaches the specified level of dryness. XXYou have the opportunity to tailor your dryer to your needs by changing the basic settings (see chapter «Basic settings»). Adjustments to basic settings remain active until you change them again. XXPress the programme button corresponding to the desired drying level. zz The control light for the selected programme lights up. XXFor easy care fabrics, select the additional «Easy care» function. Selecting mangle moist programme Easy care For easy care fabrics made of synthetic or mixed fibres, and cotton with a non-iron finish. Time selection If you have chosen a time-controlled drying programme from the special programmes you can set the length of the programme with the «Time selection» button. The drying time required depends on the type and amount of laundry and how damp it is. The appliance offers the facility to change the moisture level by repeated pressing of the «Iron dry 1 and 2» buttons. 5 levels are possible for each. The display shows the level selected, whereby the residual moisture declines as the number increases. Selecting time programme XXPress the programme button. zz The time programme control light flashes and the inimum drying time is displayed. m XXSelect the drying time by repeatedly pressing the button. Gentle drying With sensible textiles, the button «Gentle drying» can be pushed. The temperature is reduced. Start time preselection Timed programme for drying of individual items of laundry or additional drying of previously dried textiles with a low moisure content. Set the drying time according to the type of laundry, the quantity of laundry and the moisture level. XXLightly press the programme button. zz The time programme pilot lamp illuminates and the minimum drying time is displayed. XXSelect the drying time up to a maximum of 150 min. by repeated pressing of the button. Selecting Wet-Clean programme By pressing the Start time preselect button one or more times, the programme start time can be delayed by up to 23,5 hours. This makes it possible to take advantage of cheaper night-time electricity, for example. The start time and consequently also the end time of a programme can be tailored to your individual lifestyle. The display shows the start time and anticipated pro gramme time end. The preselected time starts when the start button is pressed. When the start time is reached, the selected programme starts automatically. The current programme duration will be displayed. zz In the event of a power cut, the current time is stored. The duration of the power cut is not taken into account. These programmes serve to dry textiles which have been washed with the Wet-Clean procedure first. XXPress the button repeatedly until the desired programme will appear on the display. Fast forward The programme can be shortened or interrupted by pressing the fast forward button. 54 Starting the programme Adding more laundry This is possible at any time. Selecting programmes See chapter «Selecting programmes» Selecting additional functions See chapter «Additional functions» Changing a programme before the start XXPress the desired programme button again. zz All control lights for the available additional functions flash again and all settings are deleted. XXSelect any additional functions. Add laundry Only dry fabrics which have been washed with water in the dryer. XXPlace the laundry loosely in the drum, mixing large and small items XXOpen the door. zz Wait for the drum to stop. XXAdd your laundry. XXClose the door again. XXPress the start button. If the child lock is activated: XXHold down the start and fast forward buttons at the same time. zz The drying process is continued. Interrupting the programme u Interrupt the programme by pressing the fast forward button repeatedly, until «programme end» appears on the display. If the child lock is activated: XXHold the start button down. XXSimultaneously tip the fast forward button. Programme end Start programme XXPress the start button. zz The control light is illuminated and the programme starts automatically. If the child lock is activated: XXHold the start button down and press the fast forward button. Programme progress / Programme status The programme end is indicated by the display value 00:00h, the display of «Programme End» as well as a flashing control light. zz An audible signal. (only if the alarm volume is switched on) zz The drum continues to rotate periodically after the programme has ended to prevent the laundry from creasing (only if crease protection has been switched on, for 30 or 60 minutes). The washing should be taken out now at the latest. Remove the laundry XXOpen the door. XXRemove the laundry. XXClean the filter. Switch off the machine XXClose the door. XXSwitch the machine off at the wall. XXWith the moisture controlled programmes the dampness of the laundry is continually monitored by an electronic sampling system. zz The programme time remaining is displayed. This remaining time is recalculated several times during drying, so the effective programme end will therefore vary by a few minutes. XXFor time programmes, the time remaining to the end of the programme is displayed. zz If there is not wall switch, the display field will automatically go out after 4 min. and the dryer will switch to standby mode (only if the standby function is switched on). 55 Basic Settings Extended basic settings The machine has basic settings from the factory. It can be adapted to the user's individual needs either when first used or later using the following functions. The basic settings can only be changed if no dry programme is running. To change a basic setting, it is first necessary to hold the programme button pressed and then press the fast forward button. The corresponding function is shown on the digital display. The display changes when the fast forward button i s pressed repeatedly with the programme button held down. Example: + + By pressing these three buttons at the same time, the display shows the extended basic settings. XXRepeatedly pressing the settings. -button shows the possible XXPressing the changed. -button allows the settings to be XXPressing the settings. -button ends the display of the Child lock (ex factory OFF) Function switched off Function switched on Select «Extended basic settings»! The child lock is to prevent accidental starting, changing or deletion of a programme by small children. Start a programme with the child lock switched on: + Hold the start button down and press the fast forward button. Drying level (ex factory NORMAL) + When this function is switched on, the level of dryness for the moisture controlled programmes (Cabinet and Extra Dry) is slightly increased and the laundry will be slightly drier. Crease protection (ex factory 30MIN) Button memory (ex factory OFF) Select «Extended basic settings»! If the button memory function is activated, the last programmes used will be saved for both the «Mangle Moist» and «Wet Clean» programmes. When one of these programmes is selected again, the last programme used is automatically selcted. + LCD Brightness (ex factory 150) When this function is switched on, the crease protection phase begins at the end of the programme. Select «Extended basic settings»! The button can be used to alter the brightness or text on the display. Cool down (ex factory OFF) LCD Contrast (ex factory 32) + Select «Extended basic settings»! With this function switched on, the cooling-down phase is extended in some programmes Time (the time is not set ex factory) Alarm volume (ex factory VOLUME 2) Select «Extended basic settings»! + The hours can be set using the minutes using the button. button and the Language (ex factory DEUTSCH) + The button can be used to alter the contrast on the display. ÷ The basic language is changed and is retained even after switching the machine off or putting it in sleep mode. With the Alarm setting switched on, a signal sounds at regular intervals at the end of the programme. The level can be adjusted in 3 levels. Off Level 1 Level 2 Level 3 56 Cleaning and Care Standby function (ex factory ON) Select «Extended basic settings»! When the standby function is switched on, the controls switch off when no drying programme is running in energy saving mode. All displays are dark. Cleaning the fluff filter Only operate the tumble dryer with a perfectly functioning fluff filter fitted. Optical interface (ex factory OFF) Select «Extended basic settings»! If the optical interface (SCS) is switched on, customer services can communicate with the machine by PC. Default language (ex factory DEUTSCH) Select «Extended basic settings»! If another language is temporarily selected via the buttons and , 4 minutes after programme end, in standby mode or after a long standstill, the setting reverts back to the default language. Start time preselection (ex factory 24 HOURS) XXThe fluff filter should be cleaned every day. XXThe fluff filter must not be removed and care should be taken to ensure it is not damaged. Damaged fluff filters must be replaced! Select «Extended basic settings»! The maximum adjustable range of the start time delay can be reset from 24 hours to 100 hours. Fluff which finds its way into the air pipes may cause a fire under certain circumstances. Cleaning the machine Ensure that the power supply is switched off before any cleaning, care or maintenance work. Under no circumstances spray the machine with water or clean it with a steam cleaner. Do not use solvents! These substances can damage parts of the machine, produce poisonous vapour and carry the risk of explosion! Casings and control areas should only be cleaned with soap or a commercially available, solvent-free, non-abra sive cleaning product. 57 Problems Error messages If the following error messages are displayed, the programme can be restarted by pressing the start button once the error has been rectified. «Child lock ACTIVE» XXHold the start button down and press the fast forward button (see chapter «Basic settings»). «PLEASE CLOSE DOOR» XXPush door closed until lock engages. «BASE PANEL / FILTER» This message only appears during a drying programme. XXClose the plinth flap. «EMERGENCY-STOP PRESSED» zz The emergency stop button is only to be used in the event of danger and causes the dryer to stop immediately. zz When actuated, the switch remains locked. zz Please do not use the emergency stop button to stop the dryer during normal operation. zz Once the fault has been rectified or the danger removed, the actuated emergency stop button can be released by turning the red mushroom-head button clockwise. XXTo restart the tumble dryer, unlock the emergency button and press the start button. «MAINS SUPPLY BLOCKED» zz In the case of electrically-heated machines, the appliance may be shut down by external energy management systems at times of peak power loads. zz The mains blocking causes the heating to shut down and the dryer goes over to the cool-down cycle and then into the anti-crease cycle. zz In this condition all operating buttons are blocked ex cept for the Fast forward button, and the time remaining display is stopped. The control light for the start button lights up. zz When the mains blocking is ended, the drying pro gramme is resumed automatically and the display reactivated. If the machine displays an F - - error message: XXInterrupt the programme using the fast forward button and select a new programme. If error messages appear repeatedly: XXSwitch off the power for around 1 minute and switch it back on again. (Pull out the plug or switch off at the wall). zz The machine is ready for use again when the programme control lights flash. XXSelect a new programme. If an error message appears again: XXMake a note of the error message. XX Unplug the machine or switch it off at the wall. XX Notify customer services. Troubleshooting Repairs, alterations or intervention on electronic equipment should only be carried out by qualified specialists. Inexpert repairs can cause considerable damage and risk to the user. Only original spare parts should be used for repairs. Rectifying minor faults yourself The machine does not start after pressing a programme button: XXCheck whether the mains power is switched on at the wall and the plug is in. XXCheck whether all the fuses are intact or the safety switch has tripped. The display is dark: XXThe machine is in standby mode. No error. To operate the machine press any button. XXPower failure: If a programme had been started before the power failure, it will automatically be continued after the power failure. The machine does not start: XXThe start button has not been pressed. XXStart time preselect has been set. Only starts at the preselected start time. The machine cannot be switched on, display remains dark even after pressing a button: XXCheck whether the mains power is switched on at the wall and the plug is in. XXCheck whether all the fuses are intact or the safety switch has tripped. XXMains blockage, generally at noon. Operate the machine after the mains blockage has ended. The drying target was not achieved: When warm, laundry feels more moist than it actually is! Remove the laundry from the dryer and let it cool. When still moist: XXClean filter (see chapter «Starting the programme»). XXIncrease degree of drying (see chapter «Basic settings»). The individual laundry piece does not reach the set drying target: XXIf one single piece is to be dried in the dryer, it will be dried more evenly by adding additional pieces as ballast, e.g. two terry towels. The drying takes too long: XXClean filter (see chapter «Starting the programme»). XXPower failure (note lock times of EW). The laundry is not dry after the maximum possible settings: XXDrum is overloaded (see chapter «Programme survey»). XXLaundry not sufficiently spun. XXInsufficient room ventilation (open a window or door). XXThe filter is blocked with fluff or scale deposits (see chapter «Starting the programme/Cleaning the filter»). XXIncrease degree of drying (see chapter «Basic settings») XXClean moisture sensor (see chapter «Cleaning and Maintenance»). Dampness in the room increases significantly: XXThe room does not have sufficient ventilation. Ensure adequate ventilation. 58 Noise level The value of level of noise can be reduced by fitting sound insulation to the exhaust air duct or the use of specially soundproofed pipework (made of plastic for example. Customer Services Before you call customer services, check whether you can rectify the problem yourself (see chapter «Problems»). If advice is required, costs may be incurred if a service technician is required, even during the guarantee period. If you cannot rectify a problem yourself, unplug the machine or switch it off at the wall and call customer services. Dial the central customer services number (see back cover). You will be automatically connected to the customer services branch for your region. Give customer services product and serial numbers. You will find this information on the type label on the inside of the door. Note the numbers for your machine here. Product No. Serial No. Guarantee Guarantee 1 year. 59 Technical Data TRI 9250 TRI 9375 TRI 9550 TRI 9750 10 kg 15 kg 22 kg 30 kg ca. 35 min ca. 35 min ca. 35 min ca. 35 min Drum volume 231 dm3 347 dm3 508 dm3 690 dm3 Drum diameter 776 mm 776 mm 1075 mm 1076 mm Drum depth 490 mm 735 mm 560 mm 760 mm Drum speed 45 RPM 45 RPM 40 RPM 40 RPM 0,17 L /min 0,24 L /min 0,35 L /min 0,48 L/min 14,4 kW 19,2 kW 28,8 kW 38,4 kW 3 4 6 8 180 W 180 W 370 W 370W 400 V 3~ NE 400 V 3~ NE 400 V 3~ NE 400 V 3~NE 25 AT 32 AT 50 AT 63 AT max. 900 m3 /h max. 1100 m3 /h max. 1200 m3 /h max. 1500 m3 / h max. 70°C max. 70°C max. 70°C max. 70°C Maximum line resistance (external) max. 200 Pa max. 200 Pa max. 300 Pa max. 300 Pa Heater temperature max. 200°C max. 200°C max. 200°C max. 200°C 200 mm 200 mm 200 mm 200 mm radial radial radial radial 30 dm2 30 dm2 48 dm2 48 dm2 Reversing yes yes yes yes Moisture control yes yes yes yes Rear bearing arrangement 2 RS 2 RS 2 RS 2RS Loading opening diameter 530 mm 530 mm 530 mm 530 mm Loading height 578 mm 578 mm 759 mm 759 mm yes yes yes yes 523 mm 523 mm 705 mm 705 mm External height 1460 mm 1460 mm 1795 mm 1795 mm External width 842 mm 842 mm 1150 mm 1150 mm External depth 820 mm 1065 mm 888 mm 1088 mm 200 kg 220 kg 360 kg 400 kg Capacity (dry laundry) Programme duration «Cabinet dry» Drying performance from 50% residual moisture to «Cabinet dry» according to EN61121 Connected load, electrical heating Number of heating elements Drive motor Mains voltage Fuses Exhaust air volume Exhaust air temperature Exhaust connection diameter Air duct Fluff filter area Door opening 180° Height of door lower edge from the ground Machine weight, net Kundendienst Zentrale Kundendienst-Nummern für die Schweiz Tel. 0844 888 222 Fax 0844 888 223 Tel. 0844 888 222 Fax 0844 888 223 Service après-vente Numéros centralisés du service après-vente pour la Suisse Servizio assistenza Numeri della sede centrale del Servizio Assistenza per la Svizzera Customer Service Central Customer Service numbers for Switzerland Tel. 0844 888 222 Fax 0844 888 223 Tel. 0844 888 222 Fax 0844 888 223 Schulthess Maschinen AG/SA Postfach / PO Box CH - 8633 Wolfhausen Tel. 055 · 253 51 11 Fax 055 · 253 54 70 www.schulthess.ch Schulthess Maschinen GmbH Hetzendorferstrasse 191 A - 1130 Wien Tel. 01 · 803 98 00 - 20 Fax 01 · 803 98 00 - 30 01.12 d / f / i /e Printed in Switzerland Subject to change without notice