1
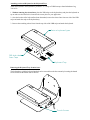
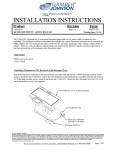
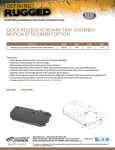
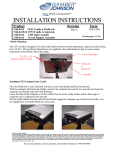
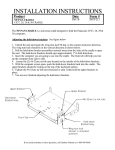
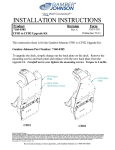
INSTALLATION INSTRUCTIONS
Product
Revision
Form
INST-493
Rev. A
CFH Keyboard Tray
7160-0180
Printing Spec: PS-001
The CFH1 Keyboard Tray (7160-0180) is a keyboard mount that can be used to hold just about any size
keyboard. The keyboard tray has a hole pattern that matches the current Panasonic keyboard that is used with the
PDRC display. There are strips of VHB foam tape located in the hardware bag for customers that choose to use
the keyboard tray with keyboards other than Panasonic.
Attaching a Panasonic or TG3 Keyboard to the Keyboard Tray:
Attach the Panasonic keyboard to the keyboard tray assembly with the (8) M3 x 8MM flat head machine screws
found in hardware bag 7120-0513.
Attach the TG3 keyboard to the keyboard tray assembly with the (4) 8-32unc x 3/8 flat head machine screws
found in hardware bag 7120-0513.
Panasonic or TG3 keyboard
Keyboard Tray
Mounting Hardware
Product Mounting Disclaimer
Gamber-Johnson is not liable under any theory of contract or tort law for any loss, damage, personal injury, special, incidental or consequential damages for personal injury or other damage
of any nature arising directly or indirectly as a result of the improper installation or use of its products in vehicle or any other application. In order to safely install and use Gamber-Johnson
products full consideration of vehicle occupants, vehicle systems (i.e., the location of fuel lines, brakes lines, electrical, drive train or other systems), air-bags and other safety equipment is
required. Gamber-Johnson specifically disclaims any responsibility for the improper use or installation of its products not consistent with the original vehicle manufactures specifications
and recommendations, Gamber-Johnson product instruction sheets, or workmanship standards as endorsed through the Gamber-Johnson Certified Installer Program.
If you need assistance or have questions, call Gamber-Johnson at 1-800-456-6868
Attaching a universal Keyboard to the Keyboard Tray:
Attach the keyboard to the keyboard tray with the 1" x 2" strips of VHB foam tape found in hardware bag
7120-0513.
1. Without removing the release liners place the VHB strips on the keyboard tray and place the keyboard on
top to make sure the Dual lock is located in the correct place for your application.
2. Once the location of the keyboard has been determined, remove the release liner from one side of the VHB
strips and attach the strips to the keyboard tray.
3. Remove the remaining release liners from the top sides of the VHB strips and attach the keyboard.
Various keyboard types
VHB dual sided
foam Tape
Keyboard Tray
Removing the Keyboard Tray from the base:
The keyboard tray with the keyboard attached can be removed from the base mount by loosening the thumb
screws located on the bottom side of the base.
Thumb Screws
Attaching the keyboard mount to the CFH1 Vehicle Dock:
1. Attach the keyboard mount to the back side of the CFH1 Vehicle Dock (between the
Vehicle Dock and Vesa Adapter) with the M4 x 0.7 x 20mm screws that were supplied in
hardware bag 7120-0513.
CFH1 Vehicle Dock
Vesa Adapter
M4 x 0.7 x 20mm
mounting screws
Keyboard Tray Assembly