1
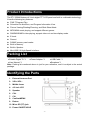
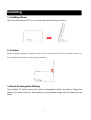
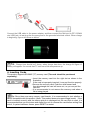
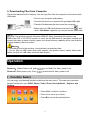
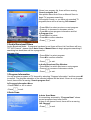
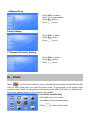
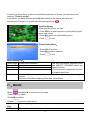
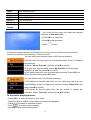
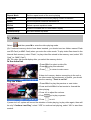
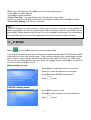
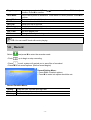
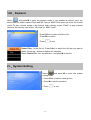
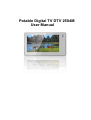
Potable Digital TV DTV 2504M
User Manual
Important safety instruction
1.
2.
3.
4.
5.
Read these instructions.
Keep these instructions.
Heed all warnings.
Follow all instructions.
Do not use this apparatus near water.
Caution: “To reduce the risk of fire or electric shock, do not expose this apparatus to
rain or moisture.”
6. Clean only with dry cloth.
7. Do not install near any heat sources such as radiators, heat registers, stoves, or other
apparatus (including amplifiers) that produce heat.
8. Protect the power cord from being walked on or pinched particularly at plugs, convenience
receptacles, and the point where they exit from the apparatus.
9. Only use attachments/accessories specified by the manufacturer.
10. Unplug this apparatus during lightning storms or when unused for long periods of time.
11. Refer all servicing to qualified service personnel. Servicing is required when the apparatus
has been damaged in any way, such as power-supply cord or plug is damaged, liquid has
been spilled or objects have fallen into the apparatus, the apparatus has been exposed to
rain or moisture, does not operate normally, or has been dropped.
Precautions:
1. This product is fragile, so you need to place it to a place relatively flat. It cannot suffer the
collision due to falling.
2. This product should be protected against damp, and it will be damaged when damp or
liquid gets inside.
3. The screen (LCD panel) of this product is made of glass, which can easily be damaged by
abnormal external force or sharp object.
4. Never press the LCD, lest it may be damaged.
5. This product is hot-swappable. However, it is suggested to power off this product before
plugging/unplugging your memory card, to protect the memory card or other devices.
6. We strongly recommend you to use the power adapter delivered with this product to ensure
the display effect.
7. To clean the screen, cut off the power supply first and use lightly wet soft cloth to wipe it.
Never apply alcohol, gasoline or other chemical agents.
8. To ensure normal operations of this product and avoid any accident, do not use or store
this product under the following conditions:
The environment with too low/high temperature;
The place with heavy dampness or long-term direct sunshine;
The bad conditions such as strong shock.
9. During the operation, this product may heat lightly, which is normal.
10. When the product is not used for long time, please pull the adapter cable out of the frame.
11. According to the manufacturer, for the colored LCD, 0.01% of pixel-sum flaw rate is
allowable. Your understanding is appreciated.
Statement:
Both product and user's manual are subject to further improvement or supplement without
further notice.
This product complies with ROHS environmental protection requirements.
If at any time in the future you should need to dispose of this product please note that:
Waste electrical products should not be disposed with household waste.
Please recycle where facilities exist. Check with your Local Authority or retailer for recycling
advice. (Waste Electrical and Electronic Equipment Directive).
Table of Contents
Product Introductions ................................................................................................. 5
Packing List.................................................................................................................. 5
Identifying the Parts..................................................................................................... 5
Button Introduce .......................................................................................................... 6
Installing ....................................................................................................................... 7
1. Installing Stand................................................................................................................ 7
2. Antenna ............................................................................................................................ 7
3. About Rechargeable Battery .......................................................................................... 7
4. Inserting Cards ................................................................................................................ 8
5. Downloading Files from Computer................................................................................ 9
Operation ...................................................................................................................... 9
I
. Function Select .......................................................................................................... 9
II
. DVB-T........................................................................................................................ 10
III . Photo......................................................................................................................... 12
IV
. MUSIC ....................................................................................................................... 13
V
. Video......................................................................................................................... 16
VI
. E-BOOK .................................................................................................................... 17
VII . Record ...................................................................................................................... 18
VIII . Explorer .................................................................................................................... 18
IX
. System Setting ......................................................................................................................19
Trouble Shooting ....................................................................................................... 20
Technical Specifications ........................................................................................... 20
Product Introductions
The DTV 2504M features 4.3-inch digital TFT-LCD panel and built-in multimedia technology.
It has the following key features:
DVB-T Program Play.
Schedule List AutoSave, and Program Information View.
Picture Viewing/Rotating/Zooming, and Slide Show Mode.
MP3/WMA music playing, and support different genres.
RM/RMVB/WMV video playing, support video out and two display mode.
E-book.
Record.
D/MMC memory card reader.
Built-in Memory.
Built-in Speaker.
Mini-USB 2.0 High-Speed Interface.
Packing List
●Potable Digital TV *1
●Power Adapter *1
●USB Cable *1
●User Manual *1
●Earphone*1
Note: Packing list mentioned above is just for your reference, and it is subject to the actual
package.
Identifying the Parts
1. External Antenna Port
2. VOL+/VOL3. Middle frame
4. 4.3-inch LCD
5. Speaker
6. CH+
7. CH8. Confirm/MENU
9. Return
10. Micro SD (TF) jack
11. Power ON/OFF/HOLD
-5-
12. MIC(support record function)
13. USB Port
14. Earphone
15. Reset
16. Build-in Antenna
17. Rear panel
18. Stand
Button Introduce
VOL+/-
POWER ON/
OFF/HOLD
Return
M
Confirm/MENU
CH+
Channel Down
1、Photo View: Switch left/right ;
2、Increase/ decrease the volume;
3、Photo Zoom In: Hold pressing the button to view photos left/right
4、Main menu mode: Move up/ Move down
1、Push up and hold on for 2sec,power on; When power is on: Push
up and hold on for 4sec, power is off.
2、 Music/Video Mode: Push up to play/pause music or video.
3、 Push to HOLD direction to forbid action of all buttons.
1、Exit current menu or return to previous menu.
1、Confirm current selection
2、Enter into setting menu.
1、TV Mode: Select next channel;
2、Photo View: select next file
Photo Zoom In: Hold pressing this button to move up;
3、Music/Video Mode: Switch to next file, and Hold pressing this
button for 2sec to fast forward the play back.
CH-
Channel Up
1、TV Mode: Select previous channel;
2、Photo View: select previous file
Photo Zoom In: Hold pressing this button to move up;
3、Music/Video Mode: Switch to previous file, and Hold pressing this
button for 2sec to fast rewind the play back.
Reset
Reset Button
When unit out of work, press this button to reset.
-6-
Installing
1. Installing Stand
Open the stand and put the TV unit on the desk just like the figure shows:
2. Antenna
Before playing broadcast programs, pull out the antenna first until the axletree comes out;
then adjust the antenna to have a good reception.
3. About Rechargeable Battery
Your portable TV device comes with a built-in rechargeable Lithium-Ion battery. Charge the
battery fully before initial use. When battery is weak, please charge with AC adapter just as
below:
-7-
Connect the USB cable to the power adapter, and then connect the Mini port to DTV 2504M
mini USB jack, at last plug the two prong end to the grounded electrical socket. When charge
is beginning, figures will show as below.
TIP:Charge time should be 5 hours, when charge has done; the charge full figure of
battery will appear. It’s normal that TV unit has a little temperature up.
4. Inserting Cards
This product supports SD/MMC (TF) memory card (The card should be purchased
separately).
• Insert the memory card into the right slot as shown in the
illustration.
If the card is improperly inserted, it may not function properly.
• Remove the memory card: Push the card forward and
then disentangle the card will come out, so you can pull the
card out.
• It is recommended to not remove the memory card when a
file is being played.
Tip: Since there are many memory card brands, it is recommended to test whether a
card is compatible with this product. (Note: This product does not support illegal cards) If the
card is inserted correctly and the startup picture is displayed but the card fails to read, it is
recommended that you shut down and restart the unit or reformat the card before writing files
onto it, if system had been frozen, press RESET to restart.
-8-
5. Downloading Files from Computer
The device features built-in memory. You can copy files from the computer to the device with
USB cable.
• Turn on your computer and product;
• Connect the device to computer with provided USB cable.
• Transfer files between the device and the computer.
• Before pull out USB cable please click to the icon
, and
when “safe delete” appears, you can pull out the USB cable
Tip: This product supports Windows 2000/XP. When formatting the memory card,
ensure that FAT or FAT32 file system is used. As the difference in calculation method and
system files take up some memory space, the actual memory capacity will be less than the
nominal capacity, which is normal.
Warning:
1. Formatting need to be cautious, note that back up important data.
2. Do not pull out USB cable when data transfer, and please ensure "safely delete disk",
before you pull out USB cable, avoid the date broken!
Operation
Power on:When Power is off, push
Power off: When power is on, Push
up and hold it for 2sec, power is on.
up and hold for 4sec, power is off.
I . Function Select
You can enjoy your desired function mode from the main menu. The main menu provides
several functions for you: DVB-T, Music, Video, Photo, Record,eBook, , Explorer and
Settings.
• Press CH+/- to select a function;
• Press +/- to move up or down;
• Press M to access the selected item.
-9-
Function list:
DVB-T
DVB-T Menu: search and play video and audio broadcasting.
Music
Music Menu: play music files of internal memory or memory card
Video
Video Menu: play video files of internal memory or memory card
Photo
Photo View: play photo files of internal memory or memory card
Record
Record Menu: record sound, and play
e-Book
E-book Menu: play word files of internal memory or memory card
Explorer
All Files Browse: You can administer all files or delete any.
Settings
Set the parameter of unit system
II.DVB-T
Pull out the antenna, Select “
digital TV mode.
” from the main menu,and press M to enter the DVB-T
Function List:
• Press CH+/- to select.
• Press M to confirm selection.
• Press
to return to main menu.
1.Video Broadcast
Video Broadcast Mode:If TV programs has been
found, there will be a list:
• Press CH+/- to select.
• Press M to play selection.
• Press
- 10 -
to return to main menu.
If there’s no program list, there will be a warring
“Search program first”.
Now please select Auto Scan or Manual Scan to
begin TV programs searching.
If the signal is weak, or you have not searched TV
programs,there will be a warring “NO channel”.
• Press CH+/- to select previous or next program.
• Press +/- to increase or decrease volume.
• Press M to show program information and list.
In Program List:
• Press CH+/- to select.
• Press M to confirm selection.
• Press
to exit.
2.Audio Broadcast/Others
Audeo Broadcast Mode:If programs has been found, there will be a list;if not,there will be a
TIP:”NO Channel”, please select Auto Scan or Manual Scan to begin programs searching.If
searching has done,there will be a program list:
Program List:
• Press CH+/- to select program.
• Press M to confirm selection.
• Press
to exit.
In Audio Broadcast Play Window:
• Press CH+/- to switch previous or next program
• Press +/- to increase or decrease volume.
• Press
to exit.
3.Program Information
You can preview programs of TV channel by selecting “Program Information” and then press M
to confirm. The program schedule of the selected channel will be listed. If there is not program
found ,there will be a warring “Search program first”.
In Program Information Menu:
• Press CH+/- or +/- to select
• Press
to exit.
4.Auto Scan
In Auto Scan Menu:
It is searching automaticly. “Program Num” shows
current programs have been found.
If there is no channel found, there will be a warring
“NO Channel”.
• Press
- 11 -
to exit.
5.Manual Scan
Press CH+/- to select;
Press +/- to switch pages;
Press M to confirm;
Press
to exit.
6.Area Setting
Press CH+/- to select;
Press M to confirm;
Press
to exit.
7.Timezone Diversity Setting
Press CH+/- to select;
Press M to confirm;
Press
to exit.
III.Photo
Select
, if you inserted a memory card, you should see two folders named Flash and SD
Card (or MMC Card) when you enter the photo mode. To play photos in the internal flash
memory, select “Flash”; to play photos in the memory card, select “SD Card” (or “MMC Card”).
The device displays photos in 4*3 thumbnail view window.
In the Photo View Window:
• Press CH+/- and +/- to select.
• Press M to view the selected photo.
• Press
- 12 -
to return to main menu.
If there is no photo file or no picture meets the requirement of format, you should see the
warning: "There is no file!"
If the picture you have selected (press M) has broken or the picture not meets the
requirement of format, you should view the warning picture
.
View The Photo:
When view the photo, you can:
• Press CH+/- to select previous or next photo (signal
photo view mode).
• Press M to enter into photo setting menu.
• Press
to exit.
Photo Setting Menu:
• Press CH+/- to select.
• Press M to confirm selection.
• Press
to exit.
Photo Setting List:
Rotate Right Rotate photo clockwise
Rotate Left
Rotate photo.
Zoom In
Zoom in the photo
Zoom Out
Zoom out the photo
Browse
Tips: only the photo's resolution more
than 480×272, JPEG/BMP photo can
support function.
Gif format cannot support the function
of Rotation and Zoom
Set View Mode as turn on means automatic slide show; turn off means signal
browse.
Automatic Slide Show Spacing Time:5sec,10sec,20sec.
IV.MUSIC
Select
, and press M to enter the music mode.
• Press CH+/- to select.
• Press M to confirm.
• Press
Resume
Play
All Music
to return to main menu.
Resume playing from the point where the music stop last time
Show all music files in the internal memory
- 13 -
Artist
Album
Genre
My Favorite
Record
Dir List
Media-Lib
Update
Play tracks by artist
Play tracks by album
Play tracks by genre selected
Show My Favorite tracks
Play record files.
Enter the folder navigation mode
Update the music library of the internal memory
• You could see the music list under the selected
category. In the music list:
• Press CH+/- to select file.
• Press M to play selection.
• Press
to exit.
If there isn’t memory device connecting to the unit or no music meets the requirement of
format, you should see the warning: "There is no file!"
You can collect your favorite tracks to My Favorite directory.
(1)In the music list, select one of your favorite tracks. Press - to display
the submenu.
(2)Select “Add to Favorite” and then press M to confirm.
(3)To play your favorite tracks, select “My Favorite” from the music
category list, and then press M to confirm.
(4)You should see all of your favorite tracks are listed. Press CH+/- to
select a track and then press M to play.
You can delete music in My Favorite directory.
(1)To delete one favorite track from the list, select the track that your
want to delete, press - to display the submenu, select “Delete File” and
then press M to confirm.
(2)To delete all favorite tracks from the list, press+ to display the
submenu, select “Clear Up” and then press M to confirm.
In the music playing screen:
• Press CH+/- to select previous or next music.
Press and hold on CH+/- to fast rewind or forward the playback .
• Press +/- to increase or decrease volume.
• Push
up to play music or pause.
• Press M to open music setting menu.
- 14 -
• Press and hold M to repeat: Once and then release, confirm the starting point A, once again,
confirm the ending point B; the last once, exit the setting.
• Press
to exit.
1
Equalizer mode Microsoft EQ、Rock、Pop、Classic.etc.
2
Current Bit rate and Sample rate.
3
Item of current music.
4
Playing time bar.
5
Time Bar of file played.
6
Play/Pause.
7
Fast rewind playback.
8
Forward the playback.
9
Single Music Repeat Mode: Set the repeat point of single music.
10
Repeat Mode: Set the repeat mode of the music playing.
11
Play Setting: Set the play mode of the music playing as Order or Random.
12
File Length.
13
Volume Display.
14
Display: Enable or disable the ID3 information display.
15
Current Music Format
Music Setting Menu:
When playing music: press M to open music setting
menu.
• Press CH+/- to select.
• Press M to enter into submenu.
• Press
- 15 -
to exit.
Repeat Mode
Set the repeat mode of the music playing
Play Mode
Set the play mode of the music playing :Order or Random
MSEQ
Set the equalizer mode as Microsoft EQ
EQ Sel
Select a preset equalizer mode
Display
Enable or disable the ID3 information display
UserEQ Setup
Set user-defined equalizer
V.Video
Select
and then press M to enter the video playing mode.
(1). If external memory device have been inserted, you should see two folders named Flash
and SD Card (or MMC Card) when you enter the video mode. To play video files stored in the
internal flash memory, select “Flash”; to play video files stored in the memory card, select “SD
Card” (or “MMC Card”).
(2). The video list should display after you select the memory device.
In the video list:
• Press CH+/- to select a video file.
• Press M to play files selected.
• Press
to return to main menu.
If there isn’t memory device connecting to the unit or
no video meets the requirement of format, you should
see the warning: "There is no file!"
Play the Video:
• Press CH+/- to play the previous or next video.
• Press and hold CH+/- to fast rewind or forward the
video playing.
• Press +/- to adjust the volume.
• Push
up to play or pause.
• Press
to exit.
If power isn’t off, system will record the situation of video playing, to play video again, there will
be a tip” Continue Last Play”, select “YES” to continue last playing, select “NO “to start from
scratch.
- 16 -
When in the video playing, Press M to enter into video setting menu:
• Press CH+/- to select options
• Press M to confirm selection.
• Select Time Play:You can directly select the set time to play video.
Press +/- to switch unit of hour and minute, press CH+/- to adjust time. Press M to confirm.
• Screen Size Setting: Full Screen or Normal.
TIP: Because encoding format of video may be various, and there will be problem of
coding compatibility, we can not ensure that all video files which measure up standard can be
played glibly. Please transform the format if it is not in suitable format range. It is normal that a
few video files can not carry out the especial functions such as: fast rewind or forward.
VI.E-BOOK
Select
and press M to enter the e-book reading mode.
If you inserted a memory card, you should see two folders named Flash and SD Card (or MMC
Card) when you enter the e-book mode. To play e-books stored in the internal flash memory,
select “Flash”; to play e-books stored in the memory card, select “SD Card” (or “MMC Card”).
The e-book list should display after you select the storage device. Press CH+/- to select an
e-book and then press M to read it.
When reading, you can:
• Press CH+/- to read the previous or next line
• Press +/- to read the previous or next page.
• Press M to open E-BOOK setting menu.
• Press
to exit.
E-BOOK setting menu:
• Press CH+/- to select a tool.
• Press M to open submenu or confirm selection.
• Press
- 17 -
to exit.
Page Jump
Save Mark
Load Mark
Del Mark
Set Font
Set Color
Browse Mode
Flip Time
Mode
Jump to page selected. Press
to move cursor. Press CH+/- to adjust
number, Press M to confirm.
Save current photo as bookmark. Press CH+/- to select position. Press M to
confirm.
Pick-up bookmark which has been saved.
Delete bookmark which has been saved.
Setup font size of the text.
Setup font color of the text.
Include Auto-mode and Manuel-mode
Set auto-paged time.
Change color of your back ground
TIP: You can read E-book with music playing.
VII.Record
Select
and press M to enter the recorder mode.
• Push
up to begin or stop recording.
• Press
to exit; system will remind you to save files of recorded.
• Press M to set record options. (Before record begins)
Record Setting Menu:
• Press CH+/- to select options.
• Press M to enter into option should be set.
Record Function Menu:
Quality
Volume
Desktop
There are two: low rate and high rate.
Set the volume of record.
Set the desktop of record.
- 18 -
VIII.Explorer
Select
and press M to enter the explorer mode. If you inserted a memory card, you
should see two folders named Flash and SD Card (or MMC Card) when you enter the e-book
mode. To play e-books stored in the internal flash memory, select “Flash”; to play e-books
stored in the memory card, select “SD Card”(or “MMC Card”).
• Press CH+/- to select a folder or file.
• Press M to confirm.
• Press
to exit.
Delete Files:In the file list, Press CH+/- to select the file that you want to
delete. Press the - button to display the submenu.
Select “Delete File” from the submenu, and press M to confirm.
IX.System Setting
Select
and press M to enter the system
setting mode.
• Press CH+/- to select a setting item.
• Press M to confirm selection.
• Press
- 19 -
to exit.
Desktop
Light Time
5sec/10sec/15sec/20sec/30sec/Always On
Brightness
One/Two/Three/Four/Five
Light Mode
All Dark or Penumbra
Display status
Hide or Display
Upgrade
Restorable
Desk1,Desk2,Desk3,Desk4,Desk5,Desk6,Desk7,Desk6
Time Setting
Set time and date of system
Language
Set the language which displayed on OSD.
Set the language of Code Page.
System Information
Show the software version and the other system information.
Display Setting
System Setting
Trouble Shooting
Description
Possible reason
Can not power on.
Battery has no power and didn’t connect
power adaptor well.
Can not find files in
card.
The card has been reversed, or cannot
suit the product.
Picture or video
doesn’t full the
screen.
The resolution of the file is not suitable.
Change the file’s
resolution.
Can’t play the video.
The resolution of the file is not suitable.
Change the file’s
resolution.
Can’t play the music
file correctly.
Can not input
document when the
memory is not used
completely.
The file is damaged or the format code is
wrong.
Change the file.
There is some remnants documents
garbage in memory.
Connect to compute
to clean up the disk,
or format the memory.
- 20 -
Settlement
Check the connection
of the power cable
and charge battery.
Insert the card
correctly, or format
the card.
Technical Specifications
LCD Panel
DVB-T
Picture
Playback
E-BOOK
format
LCD Model
Size
4.3-inch Digital TFT LCD
Active area
95.04(W) ×53.856(H) mm
Resolution
frequency
range
modulate
parameter
LDPC coding
receive
sensitive
degree
Format
480RGB x 272
Parameter
*.AVI
1/2 and 3/4
More than -80dbm in closed loop testing condition
JPEG
BMP
Only support Baseline format
less than 8 mega pixels
The most Resolution
3264*2448
video code
Xvid, Divx3/4/5, MS MPEG-4 v3
Not support GMC,QPEL
&Interlacement)
*.RM/*.RMVB
Real Video Codec 8/9/10
(not support G2)
*.WMV
WMV 7/8/9
(Don’t support high profile, VC-1)
*.FLV
Sorenson H.263
(Don’t support O2 VP6)
*.DAT/*.MPG
MPEG-I
file postfix
Audio
Playback
16QAM, 64QAM, QPSK
GIF
The most
Resolution
999 x 999
TXT encoded by ANSI, the size should less than 1MB.
file postfix
Video
Playback
470MHz-798MHz
audio code
*.MP3
MPEG1/2/2.5,Audio Layer 3
*.WMA
Version 7/8/9 ( Don’t support
WMA Pro and WMA lossless)
*.WAV
MS-ADPCM,IMA-ADPCM,PCM
*.APE
*.FLAC
*.OGG
*.AAC
Ver. 3.95/3.97/3.98/ 3.99 等级为
normal or fast
FLAC
Q-1- Q10
ADIF ,ATDS Header AAC-LC and
AAC-HE
- 21 -
video parameter
audio style
Most
720x480
MP3, AC3,
Resolution≤25fps,
MS-ADPCM
≤1.2Mbps
Most
720x480
Real Audio
Resolution≤25fps,
≤1Mbps
Most
640x480
Resolution, ≤25fps, WMA
≤1Mbps
Most
640x480
Resolution, ≤25fps, MP3
≤800Kbps
Most
640x480
Mpeg layer2
Resolution,
≤25fps,≤1Mbps
parameter
Bit rate 96~320Kbps, CBR and VBR;
Sampel rate 8-48KHz
Bit rate 80Kbps~192kbps;
Sampel rate 8-48KHz
4bit MS-ADPCM,IMA-ADPCM;
Sampel rate 8-48KHz
Sampel rate 8-48KHz
Sampel rate 8-48KHz
Sampel rate 8-48KHz
Sampel rate 8-48KHz
Power input
Power
Consumption
Adapter
DC5V 1A
≦5W.
Input
AC100-240V +/- 10%, 50/60 Hz,
Max.0.35A
output
DC5V, 1A
Description
Chargeable polymer-lithium-ion cell,
3.7V, 1200mAh
Charge time should be 5 hours
Work time
2 hours when play ISDB-T video.
Play music without backlight, can
continue use about 15 hours.
Test evolvement is:
Temperature: 25°C, volum: 16
Earphone output.
In the station of continue playing,
Audio MP3 bit rate is 128Kbps, file
of video Real Video 9 Coding-RMVB
coding is 451Kbps
Electric
Specification
Battery
Audio output
Memory
Support
Interface
Product size
Weight
Environment
requirement
Earphone
output
Build-in
speaker
32Ω stereo sound
8Ω±15%at1kHz /0.8W x1
Memory
NAND Flash, Capacity please references the packing.
Memory card
Supports TF (Micro SD) card Up to 16GB.
USB
USB 2.0 interface (connect with PC)USB1.1 is compatible.
124(Length) × 74(Wight) × 13.5(Thick) mm
About 140g.
Work
temperature/
humidity
Reserve
temperature/
humidity
Temperature:0°C~40°C
-20°C~60°C
Humidity:<75%.
Humidity: <75%
- 22 -