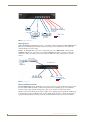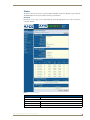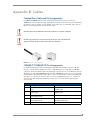
1
Operation/Reference Guide NXA-ENET8POE Gigabit Ethernet Switch Network/Communication Init ial Re le ase : 3/2 3 /20 1 1 AMX Limited Warranty and Disclaimer This Limited Warranty and Disclaimer extends only to products purchased directly from AMX or an AMX Authorized Partner which include AMX Dealers, Distributors, VIP’s or other AMX authorized entity. AMX warrants its products to be free of defects in material and workmanship under normal use for three (3) years from the date of purchase, with the following exceptions: • Electroluminescent and LCD Control Panels are warranted for three (3) years, except for the display and touch overlay components are warranted for a period of one (1) year. • Disk drive mechanisms, pan/tilt heads, power supplies, and MX Series products are warranted for a period of one (1) year. • AMX lighting products are guaranteed to switch on and off any load that is properly connected to our lighting products, as long as the AMX lighting products are under warranty. AMX also guarantees the control of dimmable loads that are properly connected to our lighting products. The dimming performance or quality there of is not guaranteed, impart due to the random combinations of dimmers, lamps and ballasts or transformers. • AMX software is warranted for a period of ninety (90) days. • Batteries and incandescent lamps are not covered under the warranty. • AMX AutoPatch Epica, Modula, Modula Series4, Modula CatPro Series and 8Y-3000 product models will be free of defects in materials and manufacture at the time of sale and will remain in good working order for a period of three (3) years following the date of the original sales invoice from AMX. The three-year warranty period will be extended to the life of the product (Limited Lifetime Warranty) if the warranty card is filled out by the dealer and/or end user and returned to AMX so that AMX receives it within thirty (30) days of the installation of equipment but no later than six (6) months from original AMX sales invoice date. The life of the product extends until five (5) years after AMX ceases manufacturing the product model. The Limited Lifetime Warranty applies to products in their original installation only. If a product is moved to a different installation, the Limited Lifetime Warranty will no longer apply, and the product warranty will instead be the three (3) year Limited Warranty. All products returned to AMX require a Return Material Authorization (RMA) number. The RMA number is obtained from the AMX RMA Department. The RMA number must be clearly marked on the outside of each box. The RMA is valid for a 30-day period. After the 30-day period the RMA will be cancelled. Any shipments received not consistent with the RMA, or after the RMA is cancelled, will be refused. AMX is not responsible for products returned without a valid RMA number. AMX is not liable for any damages caused by its products or for the failure of its products to perform. This includes any lost profits, lost savings, incidental damages, or consequential damages. AMX is not liable for any claim made by a third party or by an AMX Authorized Partner for a third party. This Limited Warranty does not apply to (a) any AMX product that has been modified, altered or repaired by an unauthorized agent or improperly transported, stored, installed, used, or maintained; (b) damage caused by acts of nature, including flood, erosion, or earthquake; (c) damage caused by a sustained low or high voltage situation or by a low or high voltage disturbance, including brownouts, sags, spikes, or power outages; or (d) damage caused by war, vandalism, theft, depletion, or obsolescence. This limitation of liability applies whether damages are sought, or a claim is made, under this warranty or as a tort claim (including negligence and strict product liability), a contract claim, or any other claim. This limitation of liability cannot be waived or amended by any person. This limitation of liability will be effective even if AMX or an authorized representative of AMX has been advised of the possibility of any such damages. This limitation of liability, however, will not apply to claims for personal injury. Some states do not allow a limitation of how long an implied warranty last. Some states do not allow the limitation or exclusion of incidental or consequential damages for consumer products. In such states, the limitation or exclusion of the Limited Warranty may not apply. This Limited Warranty gives the owner specific legal rights. The owner may also have other rights that vary from state to state. The owner is advised to consult applicable state laws for full determination of rights. EXCEPT AS EXPRESSLY SET FORTH IN THIS WARRANTY, AMX MAKES NO OTHER WARRANTIES, EXPRESSED OR IMPLIED, INCLUDING ANY IMPLIED WARRANTIES OF MERCHANTABILITY OR FITNESS FOR A PARTICULAR PURPOSE. AMX EXPRESSLY DISCLAIMS ALL WARRANTIES NOT STATED IN THIS LIMITED WARRANTY. ANY IMPLIED WARRANTIES THAT MAY BE IMPOSED BY LAW ARE LIMITED TO THE TERMS OF THIS LIMITED WARRANTY. EXCEPT AS OTHERWISE LIMITED BY APPLICABLE LAW, AMX RESERVES THE RIGHT TO MODIFY OR DISCONTINUE DESIGNS, SPECIFICATIONS, WARRANTIES, PRICES, AND POLICIES WITHOUT NOTICE. AMX Software License and Warranty Agreement • LICENSE GRANT. AMX grants to Licensee the non-exclusive right to use the AMX Software in the manner described in this License. The AMX Software is licensed, not sold. This license does not grant Licensee the right to create derivative works of the AMX Software. The AMX Software consists of generally available programming and development software, product documentation, sample applications, tools and utilities, and miscellaneous technical information. Please refer to the README.TXT file on the compact disc or download for further information regarding the components of the AMX Software. The AMX Software is subject to restrictions on distribution described in this License Agreement. AMX Dealer, Distributor, VIP or other AMX authorized entity shall not, and shall not permit any other person to, disclose, display, loan, publish, transfer (whether by sale, assignment, exchange, gift, operation of law or otherwise), license, sublicense, copy, or otherwise disseminate the AMX Software. Licensee may not reverse engineer, decompile, or disassemble the AMX Software. • ACKNOWLEDGEMENT. You hereby acknowledge that you are an authorized AMX dealer, distributor, VIP or other AMX authorized entity in good standing and have the right to enter into and be bound by the terms of this Agreement. • INTELLECTUAL PROPERTY. The AMX Software is owned by AMX and is protected by United States copyright laws, patent laws, international treaty provisions, and/or state of Texas trade secret laws. Licensee may make copies of the AMX Software solely for backup or archival purposes. Licensee may not copy the written materials accompanying the AMX Software. • TERMINATION. AMX RESERVES THE RIGHT, IN ITS SOLE DISCRETION, TO TERMINATE THIS LICENSE FOR ANY REASON UPON WRITTEN NOTICE TO LICENSEE. In the event that AMX terminates this License, the Licensee shall return or destroy all originals and copies of the AMX Software to AMX and certify in writing that all originals and copies have been returned or destroyed. • PRE-RELEASE CODE. Portions of the AMX Software may, from time to time, as identified in the AMX Software, include PRERELEASE CODE and such code may not be at the level of performance, compatibility and functionality of the GA code. The PRE-RELEASE CODE may not operate correctly and may be substantially modified prior to final release or certain features may not be generally released. AMX is not obligated to make or support any PRE-RELEASE CODE. ALL PRE-RELEASE CODE IS PROVIDED “AS IS” WITH NO WARRANTIES. • LIMITED WARRANTY. AMX warrants that the AMX Software (other than pre-release code) will perform substantially in accordance with the accompanying written materials for a period of ninety (90) days from the date of receipt. AMX DISCLAIMS ALL OTHER WARRANTIES, EITHER EXPRESS OR IMPLIED, INCLUDING, BUT NOT LIMITED TO IMPLIED WARRANTIES OF MERCHANTABILITY AND FITNESS FOR A PARTICULAR PURPOSE, WITH REGARD TO THE AMX SOFTWARE. THIS LIMITED WARRANTY GIVES LICENSEE SPECIFIC LEGAL RIGHTS. Any supplements or updates to the AMX SOFTWARE, including without limitation, any (if any) service packs or hot fixes provided to Licensee after the expiration of the ninety (90) day Limited Warranty period are not covered by any warranty or condition, express, implied or statutory. • LICENSEE REMEDIES. AMX's entire liability and Licensee's exclusive remedy shall be repair or replacement of the AMX Software that does not meet AMX's Limited Warranty and which is returned to AMX in accordance with AMX's current return policy. This Limited Warranty is void if failure of the AMX Software has resulted from accident, abuse, or misapplication. Any replacement AMX Software will be warranted for the remainder of the original warranty period or thirty (30) days, whichever is longer. Outside the United States, these remedies may not available. NO LIABILITY FOR CONSEQUENTIAL DAMAGES. IN NO EVENT SHALL AMX BE LIABLE FOR ANY DAMAGES WHATSOEVER (INCLUDING, WITHOUT LIMITATION, DAMAGES FOR LOSS OF BUSINESS PROFITS, BUSINESS INTERRUPTION, LOSS OF BUSINESS INFORMATION, OR ANY OTHER PECUNIARY LOSS) ARISING OUT OF THE USE OF OR INABILITY TO USE THIS AMX SOFTWARE, EVEN IF AMX HAS BEEN ADVISED OF THE POSSIBILITY OF SUCH DAMAGES. BECAUSE SOME STATES/COUNTRIES DO NOT ALLOW THE EXCLUSION OR LIMITATION OF LIABILITY FOR CONSEQUENTIAL OR INCIDENTAL DAMAGES, THE ABOVE LIMITATION MAY NOT APPLY TO LICENSEE. • U.S. GOVERNMENT RESTRICTED RIGHTS. The AMX Software is provided with RESTRICTED RIGHTS. Use, duplication, or disclosure by the Government is subject to restrictions as set forth in subparagraph ©(1)(ii) of The Rights in Technical Data and Computer Software clause at DFARS 252.227-7013 or subparagraphs ©(1) and (2) of the Commercial Computer Software Restricted Rights at 48 CFR 52.227-19, as applicable. • SOFTWARE AND OTHER MATERIALS FROM AMX.COM MAY BE SUBJECT TO EXPORT CONTROL. The United States Export Control laws prohibit the export of certain technical data and software to certain territories. No software from this Site may be downloaded or exported (i) into (or to a national or resident of) Cuba, Iraq, Libya, North Korea, Iran, Syria, or any other country to which the United States has embargoed goods; or (ii) anyone on the United States Treasury Department's list of Specially Designated Nationals or the U.S. Commerce Department's Table of Deny Orders. AMX does not authorize the downloading or exporting of any software or technical data from this site to any jurisdiction prohibited by the United States Export Laws. This Agreement replaces and supersedes all previous AMX Software License Agreements and is governed by the laws of the State of Texas, and all disputes will be resolved in the courts in Collin County, Texas, USA. For any questions concerning this Agreement, or to contact AMX for any reason, please write: AMX License and Warranty Department, 3000 Research Drive, Richardson, TX 75082. Table of Contents Table of Contents NXA-ENET8POE Gigabit PoE Ethernet Switch ...................................................1 Overview .................................................................................................................. 1 Common Application ................................................................................................ 1 Features .......................................................................................................................... 1 NXA-ENET8POE Architecture................................................................................... 3 Power-over-Ethernet Capability................................................................................ 3 10/100/1000BASE-T Ports ........................................................................................ 4 SFP Slot .................................................................................................................... 4 Port and Power Status LEDs ..................................................................................... 4 Power Supply Socket ................................................................................................ 4 Network Planning ...............................................................................................5 Introduction To Switching......................................................................................... 5 Application Examples ............................................................................................... 5 Supplying PoE ................................................................................................................. 5 Collapsed Backbone........................................................................................................ 5 Meeting Room ................................................................................................................ 6 Making VLAN Connections.............................................................................................. 6 Application Notes ..................................................................................................... 7 Installing the NXA-ENET8POE .................................................................................. 8 Selecting a Site ............................................................................................................... 8 Ethernet Cabling ............................................................................................................. 8 Installing an Optional SFP Transceiver ............................................................................ 8 Connecting to a Power Source........................................................................................ 9 Making Network Connections ................................................................................ 10 Connecting Network Devices........................................................................................ 10 Twisted-Pair Devices ..................................................................................................... 10 Power-over-Ethernet Connections ................................................................................ 10 Cabling Guidelines ........................................................................................................ 10 Connecting to PCs, Servers, Hubs and Switches ........................................................... 10 Network Wiring Connections ........................................................................................ 10 Fiber Optic SFP Devices................................................................................................ 11 Connectivity Rules .................................................................................................. 12 1000BASE-T Cable Requirements ................................................................................. 12 1000 Mbps Gigabit Ethernet Collision Domain ............................................................. 12 100 Mbps Fast Ethernet Collision Domain .................................................................... 12 10 Mbps Ethernet Collision Domain.............................................................................. 12 Cable Labeling and Connection Records ................................................................ 13 NXA-ENET8POE Gigabit PoE Ethernet Switch v Table of Contents Browser-Based Configuration Pages ................................................................15 Initial Configuration ................................................................................................ 15 Configuration Page Interface .................................................................................. 16 Status...................................................................................................................... 17 Overview ....................................................................................................................... 17 Statistics ........................................................................................................................ 20 System .................................................................................................................... 21 Name............................................................................................................................. 21 LAN Settings ................................................................................................................. 22 Password ....................................................................................................................... 23 Secure MAC .................................................................................................................. 24 Tools.............................................................................................................................. 25 Ports ....................................................................................................................... 26 Settings ......................................................................................................................... 26 Storm Control................................................................................................................ 27 Port Mirroring ............................................................................................................... 28 Cable Diagnostics.......................................................................................................... 29 Trunks ..................................................................................................................... 30 Membership .................................................................................................................. 30 Settings ......................................................................................................................... 31 LACP Setup ................................................................................................................... 32 LACP Status................................................................................................................... 33 VLANs ..................................................................................................................... 34 Introduction to VLANs................................................................................................... 34 VLAN Membership ........................................................................................................ 35 VLAN Port Config.......................................................................................................... 36 802.1X .................................................................................................................... 38 Settings ......................................................................................................................... 38 Statistics ........................................................................................................................ 40 IGMP Snooping....................................................................................................... 41 Settings ......................................................................................................................... 41 Status ............................................................................................................................ 42 LLDP ....................................................................................................................... 43 Settings ......................................................................................................................... 43 Neighbor ....................................................................................................................... 44 RSTP........................................................................................................................ 45 Settings ......................................................................................................................... 45 STA Introduction ........................................................................................................... 46 Status ............................................................................................................................ 47 QOS ........................................................................................................................ 48 Settings ......................................................................................................................... 48 vi NXA-ENET8POE Gigabit PoE Ethernet Switch Table of Contents Port-based..................................................................................................................... 49 802.1p........................................................................................................................... 49 DSCP ............................................................................................................................. 49 SNMP...................................................................................................................... 50 Settings ......................................................................................................................... 50 POE......................................................................................................................... 51 Settings ......................................................................................................................... 51 Logout .................................................................................................................... 52 Appendix A: Troubleshooting ..........................................................................53 Diagnosing NXA-ENET8POE Indicators .................................................................. 53 Use With the MVP-9000i......................................................................................... 53 SFP Slot .................................................................................................................. 53 Power and Cooling Problems ................................................................................. 53 Installation .............................................................................................................. 53 In-Band Access ........................................................................................................ 53 Forgot or Lost Password......................................................................................... 53 Changing a PC’s IP Address.................................................................................... 54 Resetting the NXA-ENET8POE to Factory Defaults................................................ 54 Appendix B: Cables ..........................................................................................55 Twisted-Pair Cable and Pin Assignments ................................................................ 55 10BASE-T/100BASE-TX Pin Assignments................................................................ 55 Straight-Through Wiring ......................................................................................... 56 Crossover Wiring .................................................................................................... 56 1000BASE-T Pin Assignments ................................................................................. 57 Cable Testing for Existing Category 5 Cable .......................................................... 57 Adjusting Existing Category 5 Cabling to Run 1000BASE-T.......................................... 57 Fiber Standards ...................................................................................................... 57 NXA-ENET8POE Gigabit PoE Ethernet Switch vii Table of Contents viii NXA-ENET8POE Gigabit PoE Ethernet Switch NXA-ENET8POE Gigabit PoE Ethernet Switch NXA-ENET8POE Gigabit PoE Ethernet Switch Overview The NXA-ENET8POE Gigabit Ethernet Switch features 8 x 1000 Base-T ports and is designed for homes and businesses that require a managed network for efficient handling of voice, video, and data applications. The NXA-ENET8POE transmits both power and data through a single cable to eight remotely located Power-over-Ethernet (PoE) enabled devices such as AMX Touch Panels, Wireless Access Points, VoIP Phones and IP Surveillance cameras. The settings may be adjusted to improve throughput, data prioritization and security with the user-friendly Browser-Based Configuration Pages. Common Application The NXA-ENET8POE is a cost-effective solution that brings continuous availability, network security, and an easy management interface for customers who are looking to migrate from unmanaged to managed networks. It is perfect for homes and businesses. PoE capabilities enable one Ethernet cable to deliver both data and power devices such as AMX Touch Panels, WAPs and VoIP phones. Features Gigabit Ethernet Switch - Gigabit switching capacity significantly improves the performance of a network's backbone delivering the throughput needed to support a broad range of advanced network applications and reduce file transfer times. Multiple 10/100/1000 Base-T Ports - supports three different transfer rates on the same port and auto-selects the best speed and duplex supported by both connected devices for maximum data throughput. Provides Power over Ethernet - can deliver maximum power up to 15.4W for 4 ports or 7.5W simultaneously for 8 ports over twisted pair cable up to 100 meters. Simplified Set-Up - The embedded web interface is user-friendly and enables users to quickly and simply configure the NXA-ENET8POE. Comprehensive Quality of Service - Four queues per port enable differentiated management of up to four traffic types - traffic is prioritized providing optimal performance for real-time applications such as voice and video. Enhanced Security Features - IEEE 802.1X port-based access control ensures all users are authorized before being granted network access, plus user authentication can be managed using a RADIUS server. Power Management Capabilities - the NXA-ENET8POE can auto-detect powered devices and power consumption, cutting power to ports with devices that have been powered off and prioritization of ports to ensure power to important devices is retained if the power demand exceeds the maximum power supply. Supports IGMP Snooping - The NXA-ENET8POE supports multicast video for solutions such as AMX Vision². Send Signals Extreme Distances - The NXA-ENET8POE can send data over fiber for distances to 70 kilometers depending on the cable type using the shared RJ-45/SFP combo port. Fanless Design - Fewer moving parts reduces potential failures and runs more quietly. The NXA-ENET8POE is not for use with MVP-9000i docking stations, including the MVP-TDS-9 and MVP-WDS-9. For more information on MVP-9000i docking stations, please visit www.amx.com. NXA-ENET8POE Gigabit PoE Ethernet Switch 1 NXA-ENET8POE Gigabit PoE Ethernet Switch SFP transceiver slot PoE LEDs Power LED PoE Ports (front) Link/ACT LEDs Status LED (rear) 120-240 VAC input FIG. 1 NXA-ENET8POE Gigabit PoE Ethernet Switch NXA-ENET8POE Specifications Dimensions (HWD): 1.7" x 13" x 8" (4.4 cm x 33 cm x 20.3 cm) Weight: 4 lbs. (1.8 kg) Power Requirements: Power consumption: • 165W maximum (full PoE load) Voltage: • 100-240V • 50-60Hz • 1.5 A Current: • 0.75 A @ 110 VAC • 1.5 A @ 220 VAC Power Over Ethernet Input Voltage: • 48 V DC Maximum output power 70 W: • 15.4 W for any four ports simultaneously Maximum output current per port: • 350 mA DC • Port 1 can provide 25 W • Port 1 can reach: 565 mA DC • Output Voltage: 44 - 57 V DC Maximum output current per port: • 350 mA DC Front Panel Components: Power LED: Green LED indicates unit is powered. PoE LEDs: Amber LEDs indicate device connected to port and receiving power. LINK/ACT LEDs: • Amber LEDs indicate device connected to port. • Blinking amber LEDs indicate data transmission between switch and connected device. Ports: SFP transceiver slot: Status LED: Eight 10/100/1000BaseT RJ-45 ports. RJ45 port allowing SPF transceiver communication. Green LED indicates SFP connection. Rear Panel Components: Power input: 2 1 120-240 VAC 3-prong power supply socket. NXA-ENET8POE Gigabit PoE Ethernet Switch NXA-ENET8POE Gigabit PoE Ethernet Switch NXA-ENET8POE Specifications (Cont.) Operating Environment: • Operating temperature: 32° F to 113° F (0° C to 45° C) • Non-operating temperature: -40° F to 158° F (-40° C to 70° C) • Max. relative humidity: 90% (Non-condensing) Certifications: • FCC part 15 Class A • CE • UL Listed (US and Canada) • RoHS • CISPR Class A • VCCI (Pending) • C-TICK (Pending) Other AMX Equipment: • NXA-WAP1000 Smart Wireless Access Point, US Operation (FG2255-51) • NXA-WAP1000 Smart Wireless Access Point, Operation Outside US (FG2255-53) • NXA-WAPZD1000 Wireless LAN Zone Director, US Operation (FG2255-52) • NXA-WAPZD1000 Wireless LAN Zone Director, Includes EU Power Adapter for use in Europe (except UK), Chile, Egypt, Indonesia, Pakistan, Saudi Arabia (except Dharan), Vietnam (FG2255-54K) • NXA-WAPZD1000 Wireless LAN Zone Director, Includes AU Power Adapter for use in Australia and New Zealand (FG2255-55K) • NXA-WAPZD1000 Wireless LAN Zone Director, Includes China AU style CCC certified Power Adapter for use in China (FG2255-56K) • NXA-WAPZD1000 Wireless LAN Zone Director, Includes India Power Adapter (FG2255-57K) • NXA-WAPZD1000 Wireless LAN Zone Director, Includes Korea Power Adapter (FG2255-58K) • NXA-WAPZD1000 Wireless LAN Zone Director, Includes UK Power Adapter for use in the United Kingdom, Hong Kong, Malaysia, Singapore, and United Arab Emirates (UAE) (FG2255-59K) • NXA-WAPZD1000 Wireless LAN Zone Director, Includes US Power Adapter with 110 and 220 power input for use in Brazil, Philippines, Saudi Arabia (Dharan), Taiwan, Thailand, Uruguay (FG2255-60K) NXA-ENET8POE Architecture The NXA-ENET8POE employs a wire-speed, non-blocking switching fabric. This permits simultaneous wirespeed transport of multiple packets at low latency on all ports. The device also features full-duplex capability on all ports, which effectively doubles the bandwidth of each connection. The NXA-ENET8POE uses store-and-forward switching to ensure maximum data integrity. With store-andforward switching, the entire packet must be received into a buffer and checked for validity before being forwarded. This prevents errors from being propagated throughout the network. Power-over-Ethernet Capability The NXA-ENET8POE’s eight 10/100/1000 Mbps ports support the IEEE 802.3af Power-over-Ethernet (PoE) standard that enables DC power to be supplied to attached devices using wires in the connecting Ethernet cable. Any 802.3af compliant device attached to a port can directly draw power from the switch over the Ethernet cable without requiring its own separate power source. This capability gives network administrators centralized power control for devices such as IP phones and wireless access points, which translates into greater network availability. For each attached 802.3af-compliant device, the switch automatically senses the load and dynamically supplies the required power. Independent overload and short-circuit protection for each port allows the switch to automatically shut down a port’s power when limits are exceeded. Port 1 on the switch can provide up to 25 W of power to an attached device at the standard 48 DC voltage. Ports 2-8 can provide up to 15.4 W of power. NXA-ENET8POE Gigabit PoE Ethernet Switch 3 NXA-ENET8POE Gigabit PoE Ethernet Switch 10/100/1000BASE-T Ports The switch contains eight RJ-45 ports that operate at 10 Mbps or 100 Mbps, half or full duplex, or at 1000 Mbps, full duplex. Because all ports on the switch support automatic MDI/MDI-X operation, you can use straight-through cables for all network connections to PCs or servers, or to other switches or hubs. Each of these ports support auto-negotiation, so the optimum transmission mode (half or full duplex), and data rate (10, 100, or 1000 Mbps) can be selected automatically. If a device connected to one of these ports does not support auto-negotiation, the communication mode of that port can be configured manually. SFP Slot The Small Form Factor Pluggable (SFP) transceiver slot is shared with RJ-45 Port 8. If an SFP transceiver (purchased separately) is installed in the slot and has a valid link on its port, the associated RJ-45 port is disabled and cannot be used. Port and Power Status LEDs The NXA-ENET8POE includes a display panel (FIG. 1) for key system and port indications that simplify installation and network troubleshooting. Power Supply Socket The power socket is located on the rear panel of the NXA-ENET8POE (FIG. 1). The standard power socket is for the AC power cord. 4 NXA-ENET8POE Gigabit PoE Ethernet Switch Network Planning Network Planning Introduction To Switching A network switch allows simultaneous transmission of multiple packets via non-crossbar switching. This means that it can partition a network more efficiently than bridges or routers. The switch has, therefore, been recognized as one of the most important building blocks for today’s networking technology. When performance bottlenecks are caused by congestion at the network access point (such as the network card for a high-volume file server), the device experiencing congestion (server, power user or hub) can be attached directly to a switched port. By using full-duplex mode, the bandwidth of the dedicated segment can be doubled to maximize throughput. When networks are based on repeater (hub) technology, the distance between end stations is limited by a maximum hop count. However, a switch turns the hop count back to zero. Subdividing the network into smaller and more manageable segments, and linking them to the larger network by means of a switch, removes this limitation. A switch can be easily configured in any Ethernet, Fast Ethernet, or Gigabit Ethernet network to significantly boost bandwidth while using conventional cabling and network cards. Application Examples The switch is not only designed to segment your network, but also to provide a wide range of options in setting up network connections. Some typical applications are described below. Supplying PoE The NXA-ENET8POE is an excellent choice for supplying power to connected PoE devices such as web cameras, IP telephones or access points. You can easily connect a PoE device to a switch port and allow power to be supplied over the connecting cable. Each of the eight ports on the NXA-ENET8POE can provide power to a connected device. In the example below (FIG. 2), the device is supplying power to three PoE devices. It is also providing dedicated 100 Mbps full-duplex data connections to the devices. In addition, other non-PoE devices can be connected to the device. Power-over-Ethernet Devices Web Camera IP Telephone Access Point FIG. 2 PoE Connections Collapsed Backbone The NXA-ENET8POE is an excellent choice for mixed Ethernet, Fast Ethernet, and Gigabit Ethernet installations where significant growth is expected in the near future. In a basic stand-alone configuration, it can provide direct full-duplex connections for up to eight workstations or servers. You can easily build on this basic configuration, adding direct full-duplex connections to workstations or servers. When the time comes for further expansion, just connect to another hub or switch using one of the Gigabit Ethernet ports built into the front panel, or a Gigabit Ethernet port on a plug-in SFP transceiver. In FIG. 3, the NXA-ENET8POE is operating as a collapsed backbone for a small LAN. It is providing dedicated 10 Mbps full-duplex connections to workstations, 100 Mbps full-duplex connections to power users, and 1 Gbps full-duplex connections to servers. In addition, connected IP phones and wireless access points are receiving PoE power from the device. NXA-ENET8POE Gigabit PoE Ethernet Switch 5 Network Planning Power-over-Ethernet Devices 10/100 Mbps Full Duplex Servers 1000 Mbps Full Duplex Network Segment 100 Mbps Full Duplex Standard LAN PoE Workstations 100 Mbps Full Duplex FIG. 3 Collapsed Backbone Meeting Room With eight 1000 Mbps parallel bridging ports (i.e., eight distinct collision domains), the NXA-ENET8POE can function as an efficient bridged node that is ideal for a meeting room environment. Zero noise makes the switch unobtrusive for such a setting. In FIG. 4, the ES4308-PoE is connected to a central wiring closet via a 1000BASE-SX connection. The 1000BASE-T RJ-45 ports on the switch are providing 10/100 Mbps full-duplex connections for PCs and notebooks, as well as providing power and connectivity for PoE devices, such as IP telephones and web cameras. Wiring Closet NXA-ENET8POE Server Farm 10/100 Mbps Segments Web IP Computer Camera Telephone Standard LAN PoE FIG. 4 Meeting Room Making VLAN Connections The NXA-ENET8POE supports VLANs that can be used to organize any group of network nodes into separate broadcast domains (FIG. 5). VLANs confine broadcast traffic to the originating group, and can eliminate broadcast storms in large networks. This provides a more secure and cleaner network environment. VLANs can be based on untagged port groups, or traffic can be explicitly tagged to identify the VLAN group to which it belongs. Untagged VLANs can be used for small networks attached to a single switch. However, tagged VLANs should be used for larger networks, and all the VLANs assigned to the inter-switch links. 6 NXA-ENET8POE Gigabit PoE Ethernet Switch Network Planning R&D VLAN 1 Tagged Ports Tagged Port Untagged Ports Finance Testing VLAN 2 VLAN unaware switch Marketing VLAN aware switch R&D Finance VLAN 3 VLAN 4 Testing VLAN 1 VLAN 3 VLAN 2 FIG. 5 Making VLAN Connections When connecting to a switch that does not support IEEE 802.1Q VLAN tags, use untagged ports. Application Notes 1. Full-duplex operation only applies to point-to-point access (such as when a switch is attached to a workstation, server or another switch). When the switch is connected to a hub, both devices must operate in half-duplex mode. 2. For network applications that require routing between dissimilar network types, you can attach the switch directly to a multi-protocol router. 3. As a general rule, the length of fiber optic cable for a single switched link should not exceed: 1000BASE-SX: 550 m (1805 ft) for multimode fiber 1000BASE-LX: 5 km (3.1 miles) for single-mode fiber 1000BASE-LH: 70 km (43 miles) for single-mode fiber However, power budget constraints must also be considered when calculating the maximum cable length for your specific environment. NXA-ENET8POE Gigabit PoE Ethernet Switch 7 Network Planning Installing the NXA-ENET8POE Selecting a Site The NXA-ENET8POE can be mounted in a standard 19-inch equipment rack or on a flat surface. Be sure to follow the guidelines below when choosing a location. The site should: Be at the center of all the devices you want to link and near a power outlet. Be able to maintain its temperature within 0 to 45 °C (32 to 113 °F) and its humidity within 10% to 90%, non-condensing Provide adequate space (approximately five centimeters or two inches) on all sides for proper air flow Be accessible for installing, cabling and maintaining the devices Allow the status LEDs to be clearly visible Make sure twisted-pair cable is always routed away from power lines, fluorescent lighting fixtures and other sources of electrical interference, such as radios and transmitters. Make sure that the unit is connected to a separate grounded power outlet that provides 100 to 240 VAC, 50 to 60 Hz, is within 2 m (6.6 feet) of each device and is powered from an independent circuit breaker. As with any equipment, using a filter or surge suppressor is recommended. Ethernet Cabling To ensure proper operation when installing the NXA-ENET8POE into a network, make sure that the current cables are suitable for 10BASE-T, 100BASE-TX or 1000BASE-T operation. Check the following criteria against the current installation of your network: Cable type: Unshielded twisted pair (UTP) or shielded twisted pair (STP) cables with RJ-45 connectors; Category 3 or better for 10BASE-T, Category 5 or better for 100BASE-TX, and Category 5, 5e or 6 for 1000BASE-T. Protection from radio frequency interference emissions Electrical surge suppression Separation of electrical wires (switch related or other) and electromagnetic fields from data based network wiring Safe connections with no damaged cables, connectors or shields Installing an Optional SFP Transceiver The NXA-ENET8POE supports the following optional transceivers: 1000BASE-SX 1000BASE-LX 1000BASE-LH To install an SFP transceiver, do the following: 1. Consider network and cabling requirements to select an appropriate transceiver type. 2. Insert the transceiver with the optical connector facing outward and the slot connector facing down. Note that SFP transceivers are keyed so they can only be installed in one orientation. 3. Slide the transceiver into the slot until it clicks into place. SFP transceivers are hot-swappable. The NXA-ENET8POE does not need to be powered off before installing or removing a transceiver. However, always first disconnect the network cable before removing a transceiver. If an SFP transceiver is installed in the slot and has a valid link on its port, the associated RJ-45 port is disabled and cannot be used. 8 NXA-ENET8POE Gigabit PoE Ethernet Switch Network Planning Connecting to a Power Source To connect a device to a power source: 1. Insert the power cable plug directly into the socket located at the back of the device (FIG. 1). 2. Plug the other end of the cable into a grounded, three-pin, AC power source. For international use, you may need to change the AC line cord. You must use a line cord set that has been approved for the socket type in your country. 3. Check the front-panel LEDs as the device is powered on to be sure the Power LED is on. If not, check that the power cable is correctly plugged in. NXA-ENET8POE Gigabit PoE Ethernet Switch 9 Network Planning Making Network Connections Connecting Network Devices The NXA-ENET8POE is designed to interconnect multiple segments (or collision domains). It can be connected to network cards in PCs and servers, as well as to hubs, switches or routers. It may also be connected to devices using optional SFP transceivers. If 802.3af-compliant PoE devices are connected to the switch’s 10/100 Mbps ports, the NXA-ENET8POE automatically supplies the required power. Twisted-Pair Devices Each device requires an unshielded twisted-pair (UTP) cable with RJ-45 connectors at both ends. Use Category 5, 5e or 6 cable for 1000BASE-T connections, Category 5 or better for 100BASE-TX connections, and Category 3 or better for 10BASE-T connections. Power-over-Ethernet Connections The NXA-ENET8POE automatically detects an 802.3af-compliant device by its authenticated PoE signature and senses its required load before turning on DC power to the port. This detection mechanism prevents damage to other network equipment that is not 802.3af complaint. Power-over-Ethernet connections work with all existing Category 3, 4, 5, 5e or 6 network cabling, including patch cables and patch-panels, outlets, and other connecting hardware, without requiring modification. The NXA-ENET8POE delivers power to a device using wire pairs in the connecting Ethernet cable. The switch can provide up to 15.4 W of power continuously on each 10/100 Mbps port. However, taking into account some power loss over the cable run, the amount of power that can be delivered to a terminal device is 12.95 W. If a device draws more than 15.4 W, from a port, an overload condition occurs and the port turns off the power. The NXA-ENET8POE controls the power and data on a port independently. Power can be requested from a device that already has a data link to the switch. Also, the switch can supply power to a device even if the port’s data connection has been disabled. The power on a port is continuously monitored by the switch and it will be turned off as soon as a device connection is removed. Cabling Guidelines The RJ-45 ports on the switch support automatic MDI/MDI-X pinout configuration, so you can use standard straight-through twisted-pair cables to connect to any other network device (PCs, servers, switches, routers, or hubs). Do not plug a phone jack connector into an RJ-45 port. This will damage the switch. Use only twisted-pair cables with RJ-45 connectors that conform to FCC standards. Connecting to PCs, Servers, Hubs and Switches To connect the NXA-ENET8POE to individual PCs, servers, hubs, and switches: 1. Attach one end of a twisted-pair cable segment to the device’s RJ-45 connector. 2. If the device is a PC card and the switch is in the wiring closet, attach the other end of the cable segment to a modular wall outlet that is connected to the wiring closet. Otherwise, attach the other end to an available port on the NXA-ENET8POE. Make sure each twisted pair cable does not exceed 100 meters (328 ft) in length. 3. As each connection is made, the Link LED (on the switch) corresponding to each port turns on to indicate that the connection is valid. Network Wiring Connections The punch-down block is an integral part of many newer equipment racks. It is actually part of the patch panel. Instructions for making connections in the wiring closet with this type of equipment follows: 1. Attach one end of a patch cable to an available port on the switch, and the other end to the patch panel. 10 NXA-ENET8POE Gigabit PoE Ethernet Switch Network Planning 2. If not already in place, attach one end of a cable segment to the back of the patch panel where the punchdown block is located, and the other end to a modular wall outlet. 3. Label the cables to simplify future troubleshooting. Fiber Optic SFP Devices An optional Gigabit SFP transceiver (1000BASE-SX, 1000BASE-LX or 1000BASE-LH) can be used for a backbone connection between switches, or for connecting to a high-speed server. Each single-mode fiber port requires 9/125 micron single-mode fiber optic cable with an LC connector at both ends. Each multimode fiber optic port requires 50/125 or 62.5/125 micron multimode fiber optic cabling with an LC connector at both ends. The NXA-ENET8POE use lasers to transmit signals over fiber optic cable. The lasers are compliant with the requirements of a Class 1 Laser Product and are inherently eye-safe in normal operation. However, you should never look directly at a transmit port when it is powered on. When selecting a fiber SFP device, considering safety, please make sure that it can function at a temperature that is not less than the recommended maximum operational temperature of the product. You must also use an approved Laser Class 1 SFP transceiver. 1. Remove and keep the LC port’s rubber cover. When not connected to a fiber cable, the rubber cover should be replaced to protect the optics. 2. Check that the fiber terminators are clean. You can clean the cable plugs by wiping them gently with a clean tissue or cotton ball moistened with alcohol. Dirty fiber terminators on fiber cables will impair the quality of the light transmitted through the cable and lead to degraded performance on the port. 3. Connect one end of the cable to the LC port on the switch and the other end to the LC port on the other device (FIG. 6). Since LC connectors are keyed, the cable can be attached in only one orientation. FIG. 6 Making Connections to SFP Transceivers 4. As a connection is made, check the Link LED on the switch corresponding to the port to be sure that the connection is valid. The 1000BASE-SX, 1000BASE-LX and 1000BASE-LH fiber optic ports operate at 1 Gbps full duplex. The maximum length for fiber optic cable operating at Gigabit speed will depend on the fiber type. If an SFP transceiver is installed in the slot and has a valid link on its port, the associated RJ-45 port is disabled and cannot be used. NXA-ENET8POE Gigabit PoE Ethernet Switch 11 Network Planning Connectivity Rules When adding hubs (repeaters) to your network, please follow the connectivity rules listed in the manuals for these products. However, note that because switches break up the path for connected devices into separate collision domains, you should not include the switch or connected cabling in your calculations for cascade length involving other devices. 1000BASE-T Cable Requirements All Category 5 UTP cables that are used for 100BASE-TX connections should also work for 1000BASE-T, providing that all four wire pairs are connected. However, it is recommended that for all critical connections, or any new cable installations, Category 5e (enhanced Category 5) or Category 6 cable should be used. The Category 5e specification includes test parameters that are only recommendations for Category 5. Therefore, the first step in preparing existing Category 5 cabling for running 1000BASE-T is a simple test of the cable installation to be sure that it complies with the IEEE 802.3-2005 standards. 1000 Mbps Gigabit Ethernet Collision Domain Maximum 1000BASE-T Gigabit Ethernet Cable Length Cable Type Maximum Cable Length Connector Category 5, 5e, 6 100-ohm UTP or STP 100 m (328 ft) RJ-45 Maximum 1000BASE-SX Fiber Optic Cable Length Fiber Diameter Fiber Bandwidth Cable Length Range Connector 62.5/125 micron multimode fiber (MMF) 160 MHz/km 2-220 m (7-722 ft) LC 200 MHz/km 2-275 m (7-902 ft) LC 400 MHz/km 2-500 m (7-1641 ft) LC 500 MHz/km 2-550 m (7-1805 ft) LC 50/125 micron multimode fiber (MMF) Maximum 1000BASE-LX Fiber Optic Cable Length Fiber Diameter Fiber Bandwidth Cable Length Range Connector 9/125 micron single-mode fiber N/A 2 m - 5 km (7 ft - 3.2 miles) LC Maximum 1000BASE-LH Fiber Optic Cable Length Fiber Diameter Fiber Bandwidth Cable Length Range Connector 9/125 micron single-mode fiber N/A 2 m - 70 km (7 ft - 43 miles) LC 100 Mbps Fast Ethernet Collision Domain Maximum Fast Ethernet Cable Length Type Cable Type Maximum Cable Length Connector 100BASE-TX Category 5 or better 100-ohm UTP or STP 100 m (328 ft) RJ-45 10 Mbps Ethernet Collision Domain Maximum Ethernet Cable Length 12 Type Cable Type Maximum Cable Length Connector 10BASE-T Categories 3, 4, 5 or better 100-ohm UTP 100 m (328 ft) RJ-45 NXA-ENET8POE Gigabit PoE Ethernet Switch Network Planning Cable Labeling and Connection Records When planning a network installation, it is essential to label the opposing ends of cables and to record where each cable is connected. Doing so will enable you to easily locate inter-connected devices, isolate faults and change your topology without need for unnecessary time consumption. To best manage the physical implementations of your network, follow these guidelines: Clearly label the opposing ends of each cable. Using your building’s floor plans, draw a map of the location of all network-connected equipment. For each piece of equipment, identify the devices to which it is connected. Note the length of each cable and the maximum cable length supported by the switch ports. For ease of understanding, use a location-based key when assigning prefixes to your cable labeling. Use sequential numbers for cables that originate from the same equipment. Differentiate between racks by naming accordingly. Label each separate piece of equipment. Display a copy of your equipment map, including keys to all abbreviations at each equipment rack. NXA-ENET8POE Gigabit PoE Ethernet Switch 13 Network Planning 14 NXA-ENET8POE Gigabit PoE Ethernet Switch Browser-Based Configuration Pages Browser-Based Configuration Pages Initial Configuration To make use of the management features of your NXA-ENET8POE, you must first configure it with an IP address that is compatible with the network in which it is being installed. This should be done before you permanently install the switch in the network. To configure it with an IP address other than the default: 1. Place the NXA-ENET8POE close to the PC that you intend to use for configuration. It helps if you can see the front panel of the switch while working on your PC. 2. Connect the Ethernet port of your PC to any port on the front panel of the device. Connect power to the device and verify that you have a link by checking the front-panel LEDs (FIG. 1). 3. Check that your PC has an IP address on the same subnet as the device. The default IP address of the device is 192.168.2.10 and the subnet mask is 255.255.255.0, so the PC and device are on the same subnet if they both have addresses that start 192.168.2.x. If the PC and device are not on the same subnet, you must manually set the PC’s IP address to 192.168.2.x (where “x” is any number from 1 to 255, except 10). 4. Open your web browser and enter the address http://192.168.2.10. If your PC is properly configured, you will see the login page of the device (FIG. 7). If you do not see the login page, repeat step 3. 5. Enter the default password “1988” and click on the Login button. 6. From the menu, click on SYSTEM, then click on LAN Settings. On the LAN Settings page, enter the new IP address, Subnet Mask and Gateway IP Address for the switch, then click on the APPLY button. No other configuration changes are required at this stage, but it is recommended that you change the administrator’s password before logging out. To change the password, select SYSTEM > Password, and then fill in all the fields on the Password Settings page before clicking on the APPLY button. FIG. 7 Login page If user input is not detected within five minutes, the current session is terminated. NXA-ENET8POE Gigabit PoE Ethernet Switch 15 Browser-Based Configuration Pages Configuration Page Interface The NXA-ENET8POE provides an embedded HTTP web agent. Using a web browser, you can configure the device and view statistics to monitor network activity. The web agent can be accessed by any computer on the network using a standard web browser (Internet Explorer 5.5 or above, or Mozilla Firefox 1.0 or above). Prior to accessing the switch from a web browser, be sure you have first performed the following tasks: 1. Configure the switch with a valid IP address, subnet mask, and default gateway. (Defaults: IP address 192.168.2.10; Subnet mask 255.255.255.0; Gateway 0.0.0.0) 2. Set a new password using the web interface. (Default: “admin”). For more information, please refer to the Initial Configuration section on page 15 . If you cannot remember the switch's IP address, you can restore the original settings by following the procedure described in the Password section on page 23. After entering the new password at the Login page, the Home page is displayed (FIG. 8). The home page displays the menu on the left side of the screen and the workspace on the right side. The Menu links are used to navigate to other pages, and the workspace displays configuration parameters and statistics. Menu Front Panel Indicators Workspace FIG. 8 Home Page layout Home Page 16 Menu: Click any of the links in the Menu to open a submenu. Click on any submenu link to open the appropriate page. Front Panel Indicators: This display shows which of the eight ports on the NXA-ENET8POE are being used at this time. The port will turn green when the corresponding front-panel port is in connection with another device. To show the port number, hover your cursor over the intended port. Workspace: This section displays the appropriate page from the Menu submenus. NXA-ENET8POE Gigabit PoE Ethernet Switch Browser-Based Configuration Pages Status The Status section provides a basic system description, including system name, IP address, port, trunk, and VLAN information. It also shows statistics for both port and interface. Overview From the Overview section, you can easily identify the system by displaying the device name, location and contact information. FIG. 9 Status - Overview page Status - Overview page Refresh: Click this button to refresh the displayed information. System Information System Name: The name assigned to the NXA-ENET8POE. System Location: The current location of the NXA-ENET8POE. System Contact: The contact information for the device administrator. NXA-ENET8POE Gigabit PoE Ethernet Switch 17 Browser-Based Configuration Pages Status - Overview page (Cont.) Number of Ports: The number of built-in ports in the device. Hardware Version: Hardware version of the main board. Software Version: The current software version on the device. Serial Number: The serial number of the device. Address Information: Management VLAN: ID of a configured VLAN through which you can manage the device. By default, all ports on the device are members of VLAN 1. However, the management station can be attached to a port belonging to any VLAN, as long as that VLAN has been assigned an IP address. IP Address: Address of the VLAN to which the management station is attached. (Note that the management station must always be on VLAN 1. Valid IP addresses consist of four decimal numbers, 0 to 255, separated by periods. Subnet Mask: This mask identifies the host address bits used for routing to specific subnets. (Default: 255.255.255.0) Gateway IP Address: IP address of the gateway router between the switch and management stations that exist on other network segments. (Default: 0.0.0.0) MAC Address: The physical layer address of the device. Port Information: Port: This field indicates the port number. Type: This field indicates the port type. Link Status: This field indicates if the link is Up or Down. Speed/Duplex Status: Shows the current speed and duplex mode. • 10hdx: 10 Mbps half duplex. • 10fdx: 10 Mbps full duplex. • 100hdx: 100 Mbps half duplex. • 100fdx: 100 Mbps full duplex. • 1000fdx: 1000 Mbps full duplex. Flow Control Status: This field indicates whether flow control is enabled or disabled (IEEE 802.3x, or Back-Pressure). Auto-negotiation: This field shows if auto-negotiation is enabled or disabled. Frame Type: Either “Tagged” or “All.” “Tagged” means that the port will only receive VLANtagged frames. When set to “All,” the port will also receive untagged frames. PVID: The VLAN ID assigned to untagged frames received on the interface. Outgoing frames are tagged unless the frame’s VLAN ID is the same as the PVID. When the PVID is set to “None,” all outgoing frames are tagged. (Default: 1) Trunk/LACP Information: Trunk/LACP: The trunk label. “T1” through “T4” are used as trunk labels. Type: All trunks and ports on this device are 10/100/1000Mbps. Trunk/LACP Status: Indicates the speed and duplex setting of the trunk. • 10hdx: 10 Mbps half duplex. • 10fdx: 10 Mbps full duplex. • 100hdx: 100 Mbps half duplex. • 100fdx: 100 Mbps full duplex. • 1000fdx: 1000 Mbps full duplex. Ports: The ports that are members of the trunk. VLAN Information: 18 VLAN ID: A number in the range 1 - 4094 which identifies the VLAN. VLAN Members: A list of the ports that are members of the VLAN. By default, all ports are members of VLAN 1. NXA-ENET8POE Gigabit PoE Ethernet Switch Browser-Based Configuration Pages Status - Overview page (Cont.) Help: Links directly to web help. Refresh: Refreshes the workspace. NXA-ENET8POE Gigabit PoE Ethernet Switch 19 Browser-Based Configuration Pages Statistics You can display statistics on network traffic from the ports. These statistics can be used to identify potential problems with the NXA-ENET8POE (such as a faulty port or unusually heavy loading). All values displayed have been accumulated since the last system reboot, but can be reset to zero by clicking the Clear button. The current statistics are not displayed until you click the Refresh button. FIG. 10 Status - Statistics page Status - Statistics page Port Statistics: 20 Port Number: The current port. Port Speed/Duplex: The current speed and duplex status. Received Octets: The total number of octets received on the interface, including framing characters. Received Packets: The number of subnetwork-unicast packets delivered to a higher-layer protocol. Received Broadcast/ Multicast Packets: The number of packets, delivered by this sub-layer to a higher (sub-)layer, which were addressed to a multicast address at this sub-layer. Received Errors: The number of inbound packets that contained errors preventing them from being deliverable to a higher-layer protocol. Transmitted Octets: The total number of octets transmitted out of the interface, including framing characters. Transmitted Packets: The total number of packets that higher-level protocols requested be transmitted to a subnetwork-unicast address, including those that were discarded or not sent. Transmitted Broadcast/ Multicast Packets: The total number of packets that higher-level protocols requested be transmitted, and which were addressed to a multicast address at this sub-layer, including those that were discarded or not sent. Transmitted Errors: The number of outbound packets that could not be transmitted because of errors. Help: Links directly to web help. Pause: Freezes incoming statistics at that point. Press Continue to proceed with statistics collection. Clear: Discards all values. NXA-ENET8POE Gigabit PoE Ethernet Switch Browser-Based Configuration Pages System From the System section, you can get the name of the NXA-ENET8POE, set the LAN IP address, subnet mask, and gateway IP address, and change the password. Name You can easily identify the system by displaying the device name. FIG. 11 System - Name page System - Name page System Name: A name assigned to the switch system. System Location: The current location of the NXA-ENET8POE. System Contact: Contact information for the device administrator. Help: Links directly to web help. Apply: Sets specified values to the system. Cancel: Discards all changes and restores current values. NXA-ENET8POE Gigabit PoE Ethernet Switch 21 Browser-Based Configuration Pages LAN Settings This section describes how to configure an initial IP interface for management access over the network. The IP address for this device is 192.168.2.10 by default. To manually configure an address, you need to change the switch’s default settings (IP address 192.168.2.10 and netmask 255.255.255.0) to values that are compatible with your network. You may also need to a establish a default gateway between the switch and management stations that exist on another network segment (if routing is not enabled on this switch). FIG. 12 System - LAN Settings page System - LAN Settings page Change IP Address: 22 DHCP Enabled: Check the box to enable DHCP (default: enabled). LAN IP Address: Address of the VLAN interface that is allowed management access. Valid IP addresses consist of four numbers, 0 to 255, separated by periods. (Default: 192.168.2.10) Subnet Mask: This mask identifies the host address bits used for routing to specific subnets. (Default: 255.255.255.0) Gateway IP Address: IP address of the gateway router between this device and management stations that exist on other network segments. (Default: 0.0.0.0) Management VLAN: ID of a configured VLAN (1-4093, no leading zeroes) through which you can manage the device. By default, all ports on the device are members of VLAN 1. However, the management station can be attached to a port belonging to any VLAN, as long as that VLAN has been assigned an IP address. Help: Links directly to web help. Apply: Sets specified values to the system. Cancel: Discards all changes and restores current values. NXA-ENET8POE Gigabit PoE Ethernet Switch Browser-Based Configuration Pages Password The administrator has write access for all parameters governing the onboard agent. You should therefore assign a new administrator password as soon as possible, and store it in a safe place. FIG. 13 System - Password page System - Password page Current Password: Specifies the user password. (Range: 1-16 characters plain text, case sensitive) Help: Links directly to web help. Apply: Sets specified values to the system. Cancel: Discards all changes and restores current values. NXA-ENET8POE Gigabit PoE Ethernet Switch 23 Browser-Based Configuration Pages Secure MAC The Secure MAC page is used to enter and save static MAC addresses. These MAC addresses are used to allow different devices to access the same Ethernet connection via the NXA-ENET8POE. FIG. 14 System - Secure MAC page System - Secure MAC page Secure MAC Configuration: Secure MAC Enabled: Click this box to allow the NXA-ENET8POE to access secure MAC addresses. Uplink Ports: Click the appropriate boxes to allow uplink from particular ports on the device. Add Static MAC Address: MAC Address: Enter the MAC address of the device to be added. VLAN ID: Enter the VLAN number to be allowed access. Static MAC Address Entries: 24 Selected: The selected entry. Item No.: The item’s number in the entry list Static MAC Address: The MAC address for the entered device. VLAN ID: The number for the device’s VLAN. Destination Mask (Port): The port or ports being used for the static MAC address. Help: Links directly to web help. Modify: Allows editing of the MAC address entry. Delete: Deletes the MAC address entry. NXA-ENET8POE Gigabit PoE Ethernet Switch Browser-Based Configuration Pages Tools On the Tools page, you can restore the NXA-ENET8POE to default settings, upgrade the firmware of the device, or restart the device. FIG. 15 System - Tools page System - Tools page Restore to Factory Defaults: Forces the switch to restore the original factory settings. To reset the switch, select Reset to Factory Defaults from the drop-down list and click APPLY. The LAN IP Address, Subnet Mask and Gateway IP Address will be reset to their factory defaults. Upgrade Firmware: Upgrades the switch system firmware. Select Upgrade Firmware from the drop-down list and then click on the Browse button to select the firmware file. Click the APPLY button to upgrade the selected device firmware file. Upload/Download Configuration: To upload or download the configuration file, select Upload/Download Configuration from the drop-down list, then click Upload or Download, and then click on the Browse button to select the file. Restart Switch: To restart the NXA-ENET8POE, select from the drop-down list, and then click APPLY. The reset will be complete when the Browser-Based Configuration Pages displays the login page. Help: Links directly to web help. Apply: Sets specified values to the system. NXA-ENET8POE Gigabit PoE Ethernet Switch 25 Browser-Based Configuration Pages Ports From the Ports section, you can configure the speed and duplex mode of individual ports, set the broadcast storm control parameters, set up the port mirroring features of the switch to enable traffic monitoring, and diagnose cable faults. Settings You can use the Port Configuration page to manually set the speed, duplex mode, and flow control. FIG. 16 Ports - Settings page Ports - Settings page 26 Enable Jumbo Frames: Click this box to enable larger frames in the Browser-Based Configuration Pages than usual. Power Saving Mode: Select Enable or Disable from the dropdown list. Port: The individual front port on the NXA-ENET8POE. Speed/Duplex: Allows you to manually set the port speed and duplex mode. Flow Control: Allows flow control to be enabled or disabled. When the box is checked, flow control is enabled. Trunk: Indicates if a port is a member of a trunk. Help: Links directly to web help. Apply: Sets specified values to the system. Cancel: Discards all changes and restores current values. NXA-ENET8POE Gigabit PoE Ethernet Switch Browser-Based Configuration Pages Storm Control Broadcast storms may occur when a device on your network is malfunctioning, or if application programs are not well designed or properly configured. If there is too much broadcast traffic on your network, performance can be severely degraded or everything can come to complete halt. You can protect your network from broadcast storms by setting a threshold for broadcast traffic for each port. Any broadcast packets exceeding the specified threshold will then be dropped. FIG. 17 Ports - Storm Control page Ports - Storm Control page Type: List the type of traffic which can be rate limited, including ICMP, learn frames, broadcast, multicast and flooded unicast frames. Enable Rate Limits: Click the check box to enable rate limits for the specific frame type. Limit (number of frames per second): The Rate field is set by a single drop-down list. The same threshold is applied to every port on the switch. When the threshold is exceeded, packets are dropped, irrespective of the flow-control settings. Help: Links directly to web help. Apply: Sets specified values to the system. Cancel: Discards all changes and restores current values. NXA-ENET8POE Gigabit PoE Ethernet Switch 27 Browser-Based Configuration Pages Port Mirroring You can mirror traffic from any source port to a target port for real-time analysis. You can then attach a logic analyzer or RMON probe to the target port and study the traffic crossing the source port in a completely unobtrusive manner. FIG. 18 Ports - Port Mirroring page Ports - Port Mirroring page Port to Mirror to: The port that will “duplicate” or “mirror” the traffic on the source port. Only incoming packets can be mirrored. Packets will be dropped when the available egress bandwidth is less than ingress bandwidth. Ports to Mirror: Port: Select the ports that you want to mirror from this section of the page. Mirroring Enabled: A port will be mirrored when the “Mirroring Enabled” check-box is checked. Help: Links directly to web help. Apply: Sets specified values to the system. Cancel: Discards all changes and restores current values. If the total ingress bandwidth exceeds the mirror port’s egress bandwidth, packets will eventually be dropped on ingress to the switch, which means they will not reach the mirror port or their intended destination port. Input rate-limiting in conjunction with port flow-control should be used to ensure that the total ingress bandwidth never exceeds the egress bandwidth. 28 NXA-ENET8POE Gigabit PoE Ethernet Switch Browser-Based Configuration Pages Cable Diagnostics You can perform cable diagnostics for all ports or selected ports to diagnose any cable faults (short, open etc.) and feedback a distance to the fault. FIG. 19 Ports - Cable Diagnostics page Ports - Cable Diagnostics page Cable Diagnostics: Cable diagnostics is performed on a per-port basis. Select the port number from the drop-down list and click APPLY to start the diagnostics scan. Cable Status: Pair: Shows the pair of ports being used. Length (m): Shows the length of the cable in meters. Status: Shows the operating conditions and isolates a variety of common faults that can occur on Category 5 twisted pair cabling. Help: NXA-ENET8POE Gigabit PoE Ethernet Switch Links directly to web help. 29 Browser-Based Configuration Pages Trunks From the Trunks section, you can select ports to group into static trunks, configure trunk connection settings, configure Link Aggregation Control Protocol (LACP) on the NXA-ENET8POE, and show the LACP groups status. Membership This page allows you to create a maximum of four trunks of up to eight ports per trunk. The Membership Table has one row for each port and six columns. Each row contains five radio buttons which are used to indicate to which trunk (if any) the port belongs. FIG. 20 Trunks - Membership page Trunks - Membership page 30 Port: The front panel port number. Not a Trunk Member: If the radio button in this column is selected, the port is not a member of any trunks. This is the default state. Trunk T1-T4: These columns correspond to the four trunks that are supported by the switch. To assign a port to a trunk, click on the radio button in the corresponding column, then click APPLY. Help: Links directly to web help. Apply: Sets specified values to the system. Cancel: Discards all changes and restores current values. NXA-ENET8POE Gigabit PoE Ethernet Switch Browser-Based Configuration Pages Settings FIG. 21 Trunk - Settings page Trunks - Settings page Trunk: Indicates trunk identification. Speed/Duplex: Allows you to manually set the port speed and duplex mode for all ports in the trunk. Flow Control: Allows flow control to be enabled or disabled. When the box is checked, flow control is enabled. Ports: Indicates which ports belong to the trunk. Help: Links directly to web help. Apply: Sets specified values to the system. Cancel: Discards all changes and restores current values. NXA-ENET8POE Gigabit PoE Ethernet Switch 31 Browser-Based Configuration Pages LACP Setup The NXA-ENET8POE supports both static trunking and dynamic Link Aggregation Control Protocol (LACP). LACP configured ports can automatically negotiate a trunked link with LACP-configured ports on another device. You can configure any number of ports on the switch as LACP, as long as they are not already configured as part of a static trunk. If ports on another device are also configured as LACP, the switch and the other device will negotiate a trunk link between them. FIG. 22 Trunks - LACP Setup page Trunks - LACP Setup page 32 Port: The port number. Enabled: Enables LACP on the associated port when selected. Key Value: Ports in an aggregated link group must have the same LACP port Key. For a port to be allowed to join an aggregated group, the port Key must be set to the same value. When set to zero, the port Key is automatically set by the NXA-ENET8POE. Help: Links directly to web help. Apply: Sets specified values to the system. Cancel: Discards all changes and restores current values. NXA-ENET8POE Gigabit PoE Ethernet Switch Browser-Based Configuration Pages LACP Status This page displays the LACP status of the NXA-ENET8POE. FIG. 23 Trunks - LACP Status Trunks - LACP Status page Aggregation Information: Shows aggregation information for each LACP group. Aggregation Group: The ID number of the LACP group. Partner MAC Address: The MAC address of the link partner. Local Ports Aggregated: Port member list of the local LACP group. Seconds Since Last Change: Time in seconds for the LACP group since the last setup. LACP Port Status: Shows LACP port status. Port: The port number. Port Active: Shows if the port is a member of an active LACP group. Partner Port Number: A list of port numbers assigned to the link by the LACP partner. Operational Port Key: The current operational value of the Key for the LACP group. Help: Links directly to web help. Refresh: Refreshes the displayed data. NXA-ENET8POE Gigabit PoE Ethernet Switch 33 Browser-Based Configuration Pages VLANs This page allows you to create and delete VLANs (Virtual LANs) and to change the VLAN membership and behavior of individual ports. VLANs are powerful, but can be difficult to set up properly. Each row of the table corresponds to one port or trunk; trunked ports cannot be configured individually. Introduction to VLANs VLANs are logical partitions of the physical LAN. You can use VLANs to increase network performance or improve internal network security. If the network has adequate performance and security for your current needs, it is recommended that you leave the VLAN settings in the default configuration. The default configuration is as follows: All ports are members of VLAN 1 The switch management interface is on VLAN 1 All ports have a Port VLAN ID (PVID) of 1 All ports can send and receive both VLAN-tagged and untagged packets (that is, they are hybrid ports) In the default configuration, any port is able to send traffic to any other port and a PC connected to any port will be able to access the management interface. Broadcast traffic, for example, will be flooded to all ports on the NXA-ENET8POE. The NXA-ENET8POE supports up to 64 VLANs. A Virtual LAN is a collection of network nodes that share the same collision domain regardless of their physical location or connection point in the network. The device supports tagged VLANs based on the IEEE 802.1Q standard. Ports can be manually assigned to a specific set of VLANs. This allows the NXA-ENET8POE to restrict traffic to the VLAN groups to which a user has been assigned. By segmenting your network into VLANs, you can: Eliminate broadcast storms which severely degrade performance in a flat network. Simplify network management for node changes/moves by remotely configuring VLAN membership for any port, rather than having to manually change the network connection. Provide data security by restricting all traffic to the originating VLAN. 34 NXA-ENET8POE Gigabit PoE Ethernet Switch Browser-Based Configuration Pages VLAN Membership Use this page to create or remove VLAN groups. To propagate information about VLAN groups used on this switch to external network devices, you must specify a VLAN ID for each of these groups. FIG. 24 VLANS - VLAN Membership page VLANs - VLAN Membership page Add VLAN: VLAN ID: ID of configured VLAN (1-4094, no leading zeroes). VLAN List: Lists all the current VLAN groups created for this system. Up to 64 VLAN groups can be defined. VLAN 1 is the default untagged VLAN. Help: Links directly to web help. Modify: Allows modification of the VLAN in the list. Delete: Deletes the VLAN. NXA-ENET8POE Gigabit PoE Ethernet Switch 35 Browser-Based Configuration Pages VLAN Port Config There are three different parameters that can be configured for each port on the NXA-ENET8POE; VLAN ID (VLAN membership), PVID and Packet Type. Note that the ports within a trunk cannot be configured individually; configure the trunk instead (trunks are labelled T1 to T4). FIG. 25 VLANs- VLAN Port Config page VLANs - VLAN Port Config page 36 Port/Trunk: The port number of the port or the ID of a trunk. This cannot be changed. VLAN aware Enabled: VLAN aware ports will strip the VLAN tag from received frames and insert the tag in transmitted frames (except PVID). VLAN unaware ports will not strip the tag from received frames or insert the tag in transmitted frames. Ingress Filtering Enabled: When enabled, allows filtering of incoming packets. Packet Type: Sets the interface to accept all frame types, or only tagged frames. If the Packet Type is set to “All,” the port can accept incoming tagged and untagged packets. Untagged packets will be associated with the VLAN identified by the PVID. Tagged packets will be dropped unless the port is a member of the VLAN identified by the VLAN tag in the packet. If the Packet Type is set to “Tagged Only,” the port will drop untagged packets and will only receive tagged packets. Tagged packets will be dropped unless the port is a member of the VLAN identified by the VLAN tag in the packet. (Default: All) PVID: The port VLAN ID (PVID) assigned to untagged frames received on the interface. From the drop-down menu, choose the VLAN ID that will be assigned to untagged frames received on the port. You cannot remove a port from VLAN 1 unless its PVID has been changed to something other than 1. You can only choose “None” for the VLAN ID when the packet type is set to “Tagged Only.” Outgoing packets are tagged unless the packet’s VLAN ID is the same as the PVID. When the PVID is set to “None,” all outgoing packets are tagged. (Default: 1) Help: Links directly to web help. NXA-ENET8POE Gigabit PoE Ethernet Switch Browser-Based Configuration Pages VLANs - VLAN Port Config page (Cont.) Apply: Sets specified values to the system. Cancel: Discards all changes and restores current values. If you select “Tagged Only” mode for a port, it is recommended to set the PVID to “None” as the standard configuration. NXA-ENET8POE Gigabit PoE Ethernet Switch 37 Browser-Based Configuration Pages 802.1X Network switches can provide open and easy access to network resources by simply attaching a client PC. Although this automatic configuration and access is a desirable feature, it also allows unauthorized personnel to easily intrude and possibly gain access to sensitive network data. With IEEE 802.1X (802.1X), access to all switch ports in a network can be centrally controlled from a server, which means that authorized users can use the same credentials for authentication from any point within the network. Settings The IEEE 802.1X standard defines a port-based access control procedure that prevents unauthorized access to a network by requiring users to first submit credentials for authentication. FIG. 26 802.1X - Settings page 802.1X - Settings page System Setting: Mode: Indicates if 802.1X protocol is globally enabled or disabled on the switch. RADIUS IP: Sets the RADIUS server IP address. RADIUS UDP Port: Sets the UDP port to the use for the external RADIUS server. RADIUS Secret: Sets the text string used for encryption between the switch and the RADIUS server. Reauthentication Enabled: Sets the client to be re-authenticated after the interval specified by the Re-authentication Period. Re-authentication can be used to detect if a new device is plugged into a switch port. Reauthentication Period: Sets the time period after which a connected client must be re-authenticated. EAP timeout: The time the switch shall wait for the supplicant response before re-transmitting a packet. Port Setting: Port: 38 The port number. NXA-ENET8POE Gigabit PoE Ethernet Switch Browser-Based Configuration Pages 802.1X - Settings page (Cont.) Admin State: Sets the authentication mode to one of the following options: • Auto - Requires a 802.1X-aware client to be authorized by the authentication server. Clients that are not 802.1X-aware will be denied access. • Force-Authorized - Forces the port to grant access to all clients, either 802.1X-aware or otherwise. • Force-Unauthorized - Forces the port to deny access to all clients, either 802.1X-aware or otherwise. Port State: The state of the port. Reset: Two options are available: • Re-Authenticate - Schedules a reauthentication to whenever the quiet-period of the port runs out. • Force-Reinitialize - Bypasses the quiet-period of the port and enables immediate reauthentication regardless of the status for the quiet-period. Help: Links directly to web help. Apply: Sets specified values to the system. Cancel: Discards all changes and restores current values. The reason for the “quiet-period”: If a re-authentication fails, the IEEE 802.1X standard enforces a so-called “quiet-period” in which the authenticator (switch) shall be quiet and not re-try another authentication – also packets from the supplicant are discarded. In this way, “brute-force” attacks are prevented. NXA-ENET8POE Gigabit PoE Ethernet Switch 39 Browser-Based Configuration Pages Statistics FIG. 27 802.1X - Statistics page 802.1X - Statistics page 40 Port Statistics: Statistics can be viewed on a per-port basis. Select the port that you want to view here. Authenticator counters: General statistics for authenticator. Backend Authenticator counters: General statistics for RADIUS server. 802.1X MIB counters: MIB module defined for 802.1X. Other statistics: This section collects the Last Supplicant identity statistics. Help: Links directly to web help. NXA-ENET8POE Gigabit PoE Ethernet Switch Browser-Based Configuration Pages IGMP Snooping This page enables customers to setup the configuration of IGMP Snooping. IGMP Snooping monitors IGMP service requests passing between multicast clients and servers, and dynamically configures the ports which need to receive the mulitcast traffic. For IGMPV3, basic support for reports only, and Source Multicast is not supported. Settings FIG. 28 IGMP Snooping - Settings page IGMP Snooping - Settings page IGMP Snooping Enabled: When enabled, the switch will monitor network traffic to determine which hosts want to receive multicast traffic. Router Ports: Set if ports are connecting to the IGMP administrative routers. Unregistered IPMC Flooding enabled: Set forwarding mode for unregistered (not-joined) IP multicast traffic. The traffic will flood when enabled, and forward to router-ports only when disabled. VLAN ID: The VLAN ID. It can not be changed IGMP Snooping Enabled: When enabled, the port will monitor network traffic to determine which hosts want to receive the multicast traffic. IGMP Querying Enabled: When enabled, the port can serve as the Querier, which is responsible for asking hosts if they want to receive multicast traffic. Help: Links directly to web help. Apply: Sets specified values to the system. Refresh: Refreshes current values. If the network has adequate performance and security for your current needs, it is recommended that you leave the VLAN settings in the default configuration. The default configuration is as follows: All ports are members of VLAN 1 The switch management interface is on VLAN 1 (this cannot be changed) All ports have a Port VLAN ID (PVID) of 1 All ports can send and receive both VLAN-tagged and untagged packets (i.e. they are “hybrid” ports) NXA-ENET8POE Gigabit PoE Ethernet Switch 41 Browser-Based Configuration Pages Status This page shows IGMP Snooping instances and port states. FIG. 29 IGMP Snooping - Status page IGMP Snooping - Status page 42 VLAN ID: VLAN ID number. Querier: Show whether Querying is enabled. Queries transmitted: Show the number of transmitted Query packets. Queries received: Show the number of received Query packets. v1 Reports: Show the number of received v1 Report packets. v2 Reports: Show the number of received v2 Report packets. v3 Reports: Show the number of received v3 Report packets. v2 Leaves: Show the number of v2 leave packets received. Help: Links directly to web help. Refresh: Refreshes the statistics on the page. NXA-ENET8POE Gigabit PoE Ethernet Switch Browser-Based Configuration Pages LLDP This page allows you to configure the Link Layer Discovery Protocol (LLDP) configuration. LLDP allows devices on the network to share information about themselves for the reasons of simplified troubleshooting, enhanced network management, and maintaining an accurate network topology. LLDP-capable devices periodically transmit information in messages called Type Length Value (TLV) fields to neighbor devices. Settings FIG. 30 LLDP - Settings page LLDP - Settings page Port: The port number State: You can choose to disable or enable LLDP for each port. Enabling LLDP will allow the port to receive and transmit TLVs. Help: Links directly to web help. Apply: Sets specified values to the system. Cancel: Discards all changes and restores current values. NXA-ENET8POE Gigabit PoE Ethernet Switch 43 Browser-Based Configuration Pages Neighbor This page displays the LLDP Neighbor Table. This table provides information on neighboring devices. FIG. 31 LLDP - Neighbor page LLDP - Neighbor page 44 Local Port: The local port of the neighboring device. Chassis ID: The chassis information where the neighboring device is located. Remote Port ID: The remote port ID on the neighboring device. System Name: The neighboring devices full name. Port Description: The port description and information of the neighboring device. System Capabilities: The system capabilities information of the neighboring device. Management Address: Displays the management address of the neighboring device. Help: Links directly to web help. Refresh: Refreshes the statistics on the page. NXA-ENET8POE Gigabit PoE Ethernet Switch Browser-Based Configuration Pages RSTP RSTP is a protocol that prevents loops in the network and dynamically reconfigures which physical links in the NXA-ENET8POE should forward frames. Settings This page enables you to setup the configuration of RSTP. FIG. 32 RSTP - Settings page RSTP - Settings page RSTP System Configuration: System Priority: This parameter configures the spanning tree priority globally for this switch. The device with the highest priority becomes the STA root device. However, if all devices have the same priority, the device with the lowest MAC address will then become the root device. Number between 0 - 61440 in increments of 4096. Therefore, there are 16 distinct values. Hello Time: Interval (in seconds) at which the root device transmits a configuration message (BPDU frame). Number between 1 - 10 (default is 2). Max Age: The maximum time (in seconds) a device can wait without receiving a configuration message before attempting to reconfigure. That also means the maximum life time for a BPDU frame. Number between 6 - 40 (default is 20). Forward Delay: The maximum time (in seconds) the root device will wait before changing states (i.e., discarding to learning to forwarding). Number between 4 - 30 (default is 15). Force Version: Set and show the RSTP protocol to use. • Normal - use RSTP • Compatible - compatible with STP. RSTP Port Configuration: NXA-ENET8POE Gigabit PoE Ethernet Switch 45 Browser-Based Configuration Pages RSTP - Settings page (Cont.) Port: The port ID. It can not be changed. Aggregations means any configured trunk group. Enabled: Click on the box to enable/disable the RSTP protocol for the port. Edge: Expect the port to be an edge port (linking to an end station) or a link to another STP device. Path Cost (0...200000000, 0 means autogenerated path cost) This parameter is used by the STP to determine the best path between devices. Therefore, lower values should be assigned to ports attached to faster media, and higher values assigned to ports with slower media. Set the RSTP pathcost on the port. Number between 0 - 200000000. 0 means autogenerated pathcost. Help: Links directly to web help. Apply: Sets specified values to the system. Refresh: Refreshes the page with the current RSTP configuration. STA Introduction The Spanning Tree Algorithm (STA) can be used to detect and disable network loops, and to provide backup links between switches, bridges or routers. This allows the switch to interact with other bridging devices (that is, an STA-compliant switch, bridge or router) in your network to ensure that only one route exists between any two stations on the network, and provide backup links which automatically take over when a primary link goes down. The spanning tree algorithms supported by this switch include these versions: STP - Spanning Tree Protocol (IEEE 802.1D) RSTP - Rapid Spanning Tree Protocol (IEEE 802.1w) 46 NXA-ENET8POE Gigabit PoE Ethernet Switch Browser-Based Configuration Pages Status This page shows RSTP bridge and port states. FIG. 33 RSTP - Status page RSTP - Status page RSTP Bridge Overview: Hello Time: Interval (in seconds) at which the root device transmits a configuration message (BPDU frame). Number between 1 - 10 (default is 2). Max Age: The maximum time (in seconds) a device can wait without receiving a configuration message before attempting to reconfigure. That also means the maximum life time for a BPDU frame. Number between 6 - 40 (default is 20). Forward Delay: The maximum time (in seconds) the root device will wait before changing states (i.e., discarding to learning to forwarding). Number between 4 - 30 (default is 15). Topology: Shows the NXA-ENET8POE’s current state Root ID: The root port ID for the NXA-ENET8POE. RSTP Port Status: Port/Trunk: Port/Trunk ID number. VLAN ID: VLAN IDs of the port. Path Cost: Show the path cost on this port. Edge Port: Select Yes if the port is an edge port which connects to an end station. P2p Port: Select Yes if the port link is connected to another STP device. Protocol: Show the running protocol, RSTP or STP. Port State: Show the current port state: blocking, forwarding, learning, etc. Help: Links directly to web help. Refresh: Refreshes the page with the current status. NXA-ENET8POE Gigabit PoE Ethernet Switch 47 Browser-Based Configuration Pages QOS QoS (Quality of Service) is a mechanism which is used to prioritize certain traffic as it is moves through the switch. Traffic can be classified as High, Medium, Normal or Low priority. This switch features both strict priority-based and weighted round-robin (WRR) forwarding, with guaranteed bandwidth allocation for the different QOS classes. Settings FIG. 34 QOS - Settings page QOS - Settings page QoS Configuration: Queue Mode: Select one of the two options: • Strict priority - Higher priority frames take precedence over lower priority frames during forwarding. In case of congestion, the lowest priority traffic is dropped before higher priority frames. Head-of-queue blocking maybe encountered by using this mode. • WRR - In this mode, all priorities can be guaranteed a share of the bandwidth when the system is overloaded. The bandwidth sharing percentage can be adjusted by specifying the four QOS class with different ratio in WRR Weight, which appears after WRR is enabled in Queue Mode. QoS Mode: Port-Based: The port-based qos can prioritize each specified port. When QoS Mode is set to Port-based, the Port Priority Configuration table appears, which allows a priority to be set for each port. 802.1p: The 802.1p field is held within the VLAN-tag of a packet. The field is three bits long so can hold eight values; 0 - 7 inclusive. When QoS Mode is set to 802.1p, the 802.1p Configuration table appears which allows a priority to be set for each of the eight values. Note: Because end-stations, like PCs, are not usually VLAN aware, they do not create VLAN-tagged frames. As a result, this method of prioritization is not ideal when many PCs are connected to the NXA-ENET8POE. DSCP: 48 The Differentiated Services Code Point (DSCP) is a six bit field that is contained within an IP (TCP or UDP) header. Six bits allows the DSCP field to take any value in the range 0 - 63 inclusive. When QoS Mode is set to DSCP, the DSCP Configuration table appears which allows a priority to be set for each of the DSCP values. NXA-ENET8POE Gigabit PoE Ethernet Switch Browser-Based Configuration Pages QOS - Settings page (Cont.) Prioritize Traffic: Use the Prioritize Traffic drop-down list to quickly set the values in each table. • All Low Priority to set all values to low priority, • All Normal Priority to set all values to normal priority. • All Medium Priority to set all values to medium priority. • All High Priority to set all values to high priority. • Use Custom if you want to set each value individually. Help: Links directly to web help. Apply: Sets specified values to the system. Cancel: Discards all changes and restores current values. Port-based The port-based QoS can prioritize each specified port. When QoS Mode is set to Port-based, the Port Priority Configuration table appears which allows a priority to be set for each port. You can use the Prioritize Traffic drop-down list to set the values in the Port Priority Configuration table. Select All Low Priority to set all values to low priority, All Normal Priority to set all values to normal priority, All Medium Priority to set all values to medium priority, or select All High Priority to set all values to high priority. Use Custom if you want to set each value individually. 802.1p The 802.1p field is held within the VLAN-tag of a packet. The field is three bits long so can hold eight values; 0 - 7 inclusive. When QoS Mode is set to 802.1p, the 802.1p Configuration table appears which allows a priority to be set for each of the eight values. You can use the Prioritize Traffic drop-down list to quickly set the values in the 802.1p Configuration table. Select All Low Priority to set all values to low priority, All Normal Priority to set all values to normal priority, All Medium Priority to set all values to medium priority, or select All High Priority to set all values to high priority. Use Custom if you want to set each value individually. Because end-stations, like PCs, are not usually VLAN aware, they do not create VLAN-tagged frames. As a result, this method of prioritization is not ideal when many PCs are connected to the NXA-ENET8POE. DSCP The Differentiated Services Code Point (DSCP) is a six bit field that is contained within an IP (TCP or UDP) header. Six bits allows the DSCP field to take any value in the range 0 - 63 inclusive. When QoS Mode is set to DSCP, the DSCP Configuration table appears which allows a priority to be set for each of the DSCP values. You can use the Prioritize Traffic drop-down list to quickly set the values in the DSCP Configuration table. Select All Low Priority to set all values to low priority, All Normal Priority to set all values to normal priority, All Medium Priority to set all values to medium priority, or select All High Priority to set all values to high priority. Use Custom if you want to set each value individually. NXA-ENET8POE Gigabit PoE Ethernet Switch 49 Browser-Based Configuration Pages SNMP Simple Network Management Protocol (SNMP) is a communication protocol designed specifically for managing devices on a network. Equipment commonly managed with SNMP includes switches, routers and host computers. SNMP is typically used to configure these devices for proper operation in a network environment, as well as to monitor them to evaluate performance or detect potential problems. The switch includes an onboard SNMP agent that continuously monitors the status of its hardware, as well as the traffic passing through its ports. A network management station can access this information using network management software. Access rights to the onboard agent are controlled by community strings. To communicate with the switch, the management station must first submit a valid community string for authentication. Settings FIG. 35 SNMP - Settings page SNMP - Settings page 50 SNMP Enabled: Activate or deactivate SNMP. SNMP Trap Destination: IP address of the trap manager. Traps indicating status changes are issued by the switch to specified trap managers. You must specify trap managers so that key events are reported by this switch to your management station. SNMP trap destination specifies the IP address of the trap manager. SNMP Read Community: A community string that acts like a password and permits access to the SNMP protocol. The read community string specifies read-only access. Authorized management stations are only able to retrieve MIB objects. SNMP Write Community: Specifies read-write access. Authorized management stations are able to both retrieve and modify MIB objects. SNMP Trap Community: Community string sent with the notification operation. Help: Links directly to web help. Apply: Sets specified values to the system. Cancel: Discards all changes and restores current values. NXA-ENET8POE Gigabit PoE Ethernet Switch Browser-Based Configuration Pages POE The NXA-ENET8POE can provide DC power to a wide range of connected devices, eliminating the need for an additional power source and cutting down on the amount of cables attached to each device. Once configured to supply power, an automatic detection process is initialized by the switch that is authenticated by a PoE signature from the connected device. Detection and authentication prevent damage to non-802.3af compliant devices. The switch’s power management enables individual port power to be controlled within the switch power budget. Port power can be automatically turned on and off for connected devices, and a per-port power priority can be set so that the switch never exceeds its power budget. When a device is connected to a switch port, its power requirements are detected by the switch before power is supplied. If the power required by a device exceeds the power budget of the port or the whole switch, power is not supplied. Ports can be set to one of four power priority levels, critical, high, medium, or low. To control the power supply within the switch’s budget, ports set at critical or high priority have power enabled in preference to those ports set at low priority. For example, when a device is connected to a port set to critical priority, the switch supplies the required power, if necessary, by dropping power to ports set for a lower priority. If power is dropped to some low-priority ports and later the power demands on the switch fall back within its budget, the dropped power is automatically restored. If PoE port priority is not configured, power is automatically allocated to the port according its port number, that is, lower numbered ports are assigned a higher priority for power delivery. Settings Displays the Power over Ethernet parameters for the NXA-ENET8POE. FIG. 36 POE - Settings page POE - Settings page Port 1 Power Mode: Port 1 may be configured to supply as much as 25 watts of power when set to High mode. In normal mode it can supply a maximum of 15.4 watts. (Default: Normal) Power Reservation: Displays the percentage of power budget (70W) being drawn by attached devices. Port: The port number. PoE Enabled: The administrative status of PoE power on the port. Delivering Power: The current operating status of PoE power on the port. Current: The current power consumption on the port. Priority: The port’s configured power priority setting. (Range: Low, Medium, High, Critical; Default: Low) Help: Links directly to web help. NXA-ENET8POE Gigabit PoE Ethernet Switch 51 Browser-Based Configuration Pages POE - Settings page (Cont.) Apply: Sets specified values to the system. Refresh: Refreshes the statistics on the page. Logout FIG. 37 Logout page To log out of the Browser-Based Configuration Pages, open the Logout page. A prompt appears asking “Do you wish to log out?” (FIG. 37) Click OK to log out and return to the Login page. 52 NXA-ENET8POE Gigabit PoE Ethernet Switch Appendix A: Troubleshooting Appendix A: Troubleshooting Diagnosing NXA-ENET8POE Indicators Troubleshooting Chart Symptom Action Power LED is Off • Check connections between the switch, the power cord, and the wall outlet. Link LED is Off • Verify that the switch and attached device are powered on. • Be sure the cable is plugged into both the switch and corresponding device. • If the switch is installed in a rack, check the connections to the punch-down block and patch panel. • Verify that the proper cable type is used and its length does not exceed specified limits. • Check the adapter on the attached device and cable connections for possible defects. Replace the defective adapter or cable if necessary. Use With the MVP-9000i The NXA-ENET8POE is not for use with MVP-9000i docking stations, including the MVP-TDS-9 and MVPWDS-9. For more information on MVP-9000i docking stations, please visit www.amx.com. SFP Slot The Small Form Factor Pluggable (SFP) transceiver slot is shared with RJ-45 Port 8. If an SFP transceiver (purchased separately) is installed in the slot and has a valid link on its port, the associated RJ-45 port is disabled and cannot be used. Power and Cooling Problems If the power indicator does not turn on when the power cord is plugged in, you may have a problem with the power outlet, power cord, or internal power supply. However, if the device powers off after running for a while, check for loose power connections, power losses or surges at the power outlet. If you still cannot isolate the problem, then the internal power supply may be defective. Installation Verify that all system components have been properly installed. If one or more components appear to be malfunctioning (such as the power cord or network cabling), test them in an alternate environment where you are sure that all the other components are functioning properly. In-Band Access You can access the NXA-ENET8POE Browser-Based Configuration Pages (please refer to the Browser-Based Configuration Pages section on page 15) from anywhere within the attached network using a Web browser, or other network management software tools. However, you must first configure the NXA-ENET8POE with a valid IP address, subnet mask, and default gateway. If you have trouble establishing a link to the BrowserBased Configuration Pages, check to see if you have a valid network connection, and then verify that you entered the correct IP address. Also, be sure the port through which you are connecting to the device has not been disabled. If it has not been disabled, then check the network cabling that runs between your remote location and the device. Forgot or Lost Password If you have forgotten the administration password to the NXA-ENET8POE, you can return it to its factory default state by following these steps: 1. Remove the power cord from the back of the switch. 2. Remove all cables from the front-panel ports. 3. Connect port 1 to port 2 on the front panel, using a standard network cable. NXA-ENET8POE Gigabit PoE Ethernet Switch 53 Appendix A: Troubleshooting 4. Reconnect the power cord to the rear of the switch. 5. Wait at least 40 seconds before disconnecting port 1 from port 2. After completing this procedure, the password will be “1988” and the network address will be returned to the default; 192.168.2.10. Changing a PC’s IP Address To change the IP address of a Windows XP PC: 1. Click Start, Control Panel, and then Network Connections. 2. For the IP address you want to change, right-click the network connection icon and then click Properties. 3. In the list of components used by this connection on General tab, select Internet Protocol (TCP/IP), and then click the Properties button. 4. In the Internet Protocol (TCP/IP) Properties dialog box, click to select Use the following IP address. Then type your intended IP address, Subnet mask, and Default gateway in the provided text boxes. 5. Click OK to save the changes. To change the IP address of a Windows 2000 PC: 1. Click Start, Settings, and then Network and Dial-up Connections. 2. For the IP address you want to change, right-click the network connection icon, and then click Properties. 3. In the list of components used by this connection on General tab, select Internet Protocol (TCP/IP), and then click the Properties button. Resetting the NXA-ENET8POE to Factory Defaults If you have forgotten the administration password for the Browser-Based Configuration Pages, you can return the switch to its factory default state by following these steps: 1. Remove the power cord from the back of the device. 2. Remove all cables from the front-panel ports. 3. Connect port 1 to port 2 on the front panel, using a standard network cable. 4. Reconnect the power cord to the rear of the switch. 5. The PoE LEDs (FIG. 1) will flash on and off at least two times, followed by the ƒn Link/ACT LEDs. Do not disconnect the cable or the power cord until only the first two Link/ACT LEDs are a steady green and the others are off. 6. Disconnect the power cord and THEN disconnect the network cable. 7. Reconnect the power cord. The NXA-ENET8POE is now reset to its factory defaults. After completing this procedure, the password will be admin and the network IP address will be returned to the default of 192.168.2.10. 54 NXA-ENET8POE Gigabit PoE Ethernet Switch Appendix B: Cables Appendix B: Cables Twisted-Pair Cable and Pin Assignments For 10BASE-T/100BASE-TX connections, a twisted-pair cable must have two pairs of wires. For 1000BASE-T connections the twisted-pair cable must have four pairs of wires. Each wire pair is identified by two different colors. For example, one wire might be green and the other, green with white stripes. Also, an RJ-45 connector must be attached to both ends of the cable. Each wire pair must be attached to the RJ-45 connectors in a specific orientation. DO NOT plug a phone jack connector into any RJ-45 port. Use only twisted-pair cables with RJ-45 connectors that conform with FCC standards. 8 1 8 1 FIG. 38 RJ-45 Connector Pin Numbers 10BASE-T/100BASE-TX Pin Assignments Use unshielded twisted-pair (UTP) or shielded twisted-pair (STP) cable for RJ-45 connections: 100-ohm Category 3 or better cable for 10 Mbps connections, or 100-ohm Category 5 or better cable for 100 Mbps connections. Also be sure that the length of any twisted-pair connection does not exceed 100 meters (328 feet). The RJ-45 ports on the NXA-ENET8POE support automatic MDI/MDI-X operation, so you can use straightthrough cables for all network connections to PCs or servers, or to other switches or hubs. In straight-through cable, pins 1, 2, 3, and 6, at one end of the cable, are connected straight through to pins 1, 2, 3, and 6 at the other end of the cable. When using any RJ-45 port on the device, you can use either straight-through or crossover cable. 10/100BASE-TX MDI-X and MDI Port Pinouts Pin MDI Signal Name MDI-X Signal Name 1 Receive Data plus (RD+) and GND (Positive Vport) Transmit Data plus (TD+) and -48V feeding power (Negative Vport) 2 Receive Data minus (RD-) and GND (Positive Vport) Transmit Data minus (TD-) and -48V feeding power (Negative Vport) 3 Transmit Data plus (TD+) and -48V feeding power (Negative Vport) Receive Data plus (RD+) and GND (Positive Vport) 6 Transmit Data minus (TD-) and -48V feeding power (Negative Vport) Receive Data minus (RD-) Not used Not used 4, 5, 7, 8 NXA-ENET8POE Gigabit PoE Ethernet Switch and GND (Positive Vport) 55 Appendix B: Cables Straight-Through Wiring If the twisted-pair cable is to join two ports and only one of the ports has an internal crossover (MDI-X), the two pairs of wires must be straight-through. (When auto-negotiation is enabled for any RJ-45 port on the NXA-ENET8POE, you can use either straight-through or crossover cable to connect to any device type.) You must connect all four wire pairs as shown in Straight-Through Wiring section on page 56 to support Gigabit Ethernet connections. End A End B FIG. 39 Straight-Through Wiring Crossover Wiring If the twisted-pair cable is to join two ports and either both ports are labeled with an “X” (indicating MDI-X) or neither port is labeled with an “X” (which indicates MDI), a crossover must be implemented in the wiring. (When auto-negotiation is enabled for any RJ-45 port on the switch, you can use either straight-through or crossover cable to connect to any device type.) You must connect all four wire pairs as shown in FIG. 40 to support Gigabit Ethernet connections. End A End B FIG. 40 Crossover wiring 56 NXA-ENET8POE Gigabit PoE Ethernet Switch Appendix B: Cables 1000BASE-T Pin Assignments All 1000BASE-T ports support automatic MDI/MDI-X operation, so you can use straight-through cables for all network connections to PCs or servers, or to other switches or hubs. The table below shows the 1000BASE-T MDI and MDI-X port pinouts. These ports require that all four pairs of wires be connected. Note that for 1000BASE-T operation, all four pairs of wires are used for both transmit and receive. Use 100-ohm Category 5, 5e or 6 unshielded twisted-pair (UTP) or shielded twisted-pair (STP) cable for 1000BASE-T connections. Also be sure that the length of any twisted-pair connection does not exceed 100 meters (328 feet). 1000BASE-T MDI-X and MDI Port Pinouts Pin MDI-X Signal Name MDI Signal Name 1 Bi-directional Data Two Plus (BI_D2+) Bi-directional Data One Plus (BI_D1+) 2 Bi-directional Data Two Minus (BI_D2-) Bi-directional Data One Minus (BI_D1-) 3 Bi-directional Data One Plus (BI_D1+) Bi-directional Data Two Plus (BI_D2+) 4 Bi-directional Data Four Plus (BI_D4+) Bi-directional Data Three Plus (BI_D3+) 5 Bi-directional Data Four Minus (BI_D4-) Bi-directional Data Three Minus (BI_D3-) 6 Bi-directional Data One Minus (BI_D1-) Bi-directional Data Two Minus (BI_D2-) 7 Bi-directional Data Three Plus (BI_D3+) Bi-directional Data Four Plus (BI_D4+) 8 Bi-directional Data Three Minus (BI_D3-) Bi-directional Data Four Minus (BI_D4-) Cable Testing for Existing Category 5 Cable Installed Category 5 cabling must pass tests for Attenuation, Near-End Crosstalk (NEXT), and Far-End Crosstalk (FEXT). This cable testing information is specified in the ANSI/TIA/EIA-TSB-67 standard. Additionally, cables must also pass test parameters for Return Loss and Equal-Level Far-End Crosstalk (ELFEXT). These tests are specified in the ANSI/TIA/EIA-TSB-95 Bulletin, “The Additional Transmission Performance Guidelines for 100 Ohm 4-Pair Category 5 Cabling.” Note that when testing your cable installation, be sure to include all patch cables between switches and end devices. Adjusting Existing Category 5 Cabling to Run 1000BASE-T If your existing Category 5 installation does not meet one of the test parameters for 1000BASE-T, three measures can be applied to try and correct the problem: 1. Replace any Category 5 patch cables with high-performance Category 5e or Category 6 cables. 2. Reduce the number of connectors used in the link. 3. Reconnect some of the connectors in the link. Fiber Standards The current TIA (Telecommunications Industry Association) 568-A specification on optical fiber cabling consists of one recognized cable type for horizontal subsystems and two cable types for backbone subsystems. Horizontal 62.5/125 micron multimode (two fibers per outlet). Backbone 62.5/125 micron multimode or single mode. TIA 568-B will allow the use of 50/125 micron multimode optical fiber in both the horizontal and backbone in addition to the types listed above. All optical fiber components and installation practices must meet applicable building and safety codes. NXA-ENET8POE Gigabit PoE Ethernet Switch 57 Appendix B: Cables 58 NXA-ENET8POE Gigabit PoE Ethernet Switch Appendix B: Cables NXA-ENET8POE Gigabit PoE Ethernet Switch 59 In the ever-changing AV industry, continual education is key to success. AMX University is dedicated to ensuring that you have the opportunity to gather the information and experience you need to deliver strong AMX solutions. Plus, AMX courses also help you earn CEDIA, NSCA, InfoComm, and AMX continuing education units (CEUs). 3/11 ©2011AMX. Visit AMX University online for 24/7/365 access to: - Schedules and registration for any AMX University course - Travel and hotel information - Your individual certification requirements and progress All rights reserved. AMX and the AMX logo are registered trademarks of AMX. AMX reserves the right to alter specifications without notice at any time. Increase Your Revenue through education + knowledge 3000 RESEARCH DRIVE, RICHARDSON, TX 75082 USA • 800.222.0193 • 469.624.8000 • 469-624-7153 fax • 800.932.6993 technical support • www.amx.com