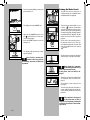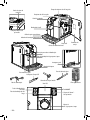
1
BRA Via Torretta, 240 I-40041 Gaggio Montano, Bologna Tel: + 39 0534 771111 06 Fax: + 39 0534 31025 www.saeco.com 02 Saeco International Group S.p.A. BRA 06 Rev.00 del 15-10-09 02 The manufacturer reserves the right to change the features of the product without prior notice. O fabricante reserva-se o direito de efectuar qualquer alteração sem aviso prévio. © Saeco International Group S.p.A. 02 06 OPERATING INSTRUCTIONS Type Sup 037DR 06 BRA INSTRUÇÕES DE UTILIZAÇÃO 02 READ THESE OPERATING INSTRUCTIONS CAREFULLY BEFORE USING THE MACHINE. LEIA ATENTAMENTE ESTAS INSTRUÇÕES DE UTILIZAÇÃO ANTES DE UTILIZAR A MAQUINA. Português English BRA GENERAL INFORMATION The coffee machine is suitable for preparing espresso coffee using either coffee beans or ground coffee and is equipped with a device to dispense steam and hot water. Keep these operating instructions in a safe place and make them available to anyone who may use the coffee machine. For further information or in case of problems that are not included or not completely explained in these instructions, please contact an authorized service center. Warning. No liability is held for damage caused by: Incorrect use not in accordance with the intended purposes; Repairs not carried out by authorized service centers; Tampering with the power cord; Tampering with any parts of the machine; Storage or use of the machine at a temperature outside the operating temperature range (+15°C / +45°C); • The use of non-original spare parts and accessories. In these cases, the warranty shall be deemed null and void. • • • • • SAFETY REGULATIONS Never allow water to come into contact with any of the electrical parts of the machine: Danger of short circuit! Steam and hot water may cause scalding! Do not direct the steam/hot water wand towards body parts. Carefully handle the steam/hot water wand by its grip: Danger of scalding! Intended Use Do not make any technical changes or use the machine for unauthorized purposes since this would create serious hazards! The equipments is not to be used by persons with reduced physical, mental or sensory abilities or with scarce experience and/or expertise, unless they are supervised by a person responsible for their safety, or they are instructed by this person on how to properly use the machine. Power Supply - Power Cord Only connect the coffee machine to a suitable socket. The voltage must correspond to that indicated on the machine label located on the inside of service door. Never use the coffee machine if the power cord is defective or damaged. If damaged, the power cord must be replaced by the manufacturer or an authorized service center. Do not pass the power cord around corners, over sharp edges or over hot objects and keep it away from oil. Do not use the power cord to carry or pull the coffee machine. Do not pull out the plug by the power cord or touch it with wet hands. Do not let the power cord hang freely from tables or shelves. For the Safety of Others Make sure that the coffee machine is use for operator instructed by person on how to properly use equipments. Danger of Burns Never direct the steam/hot water wand towards yourself or others: Danger of scalding! Always use the handles or knobs provided. •2• For best use, it is recommended to: • Choose a safe, level surface, where there will be no danger of overturning it or being injured. • Choose a location that is sufficiently well-lit, clean and near an easily reachable socket. • Provide for a minimum distance from the sides of the machine as shown in the illustration. • During machine turning on/off, it is recommended to place an empty glass under the dispensing head. Do not keep the machine at a temperature below 0°C (32°F). Frost may damage the machine. Do not use the coffee machine outdoors. In order to prevent its housing from melting or being damaged, do not place the machine on very hot surfaces and close to open flames. Storing the Machine - Cleaning Before cleaning the machine, turn it off by pressing the ON/OFF button, and then switch the power button to “0”. Remove the plug from the socket. Wait for the machine to cool down. Never immerse the machine in water! It is strictly forbidden to tamper with the internal parts of the machine. Water left in the tank for several days should not be consumed. Wash the tank and fill it with fresh drinking water. If the machine will not be used for a long time, dispense water from the steam wand, and carefully clean the Pannarello (if supplied), then turn it off and unplug it. Store it in a dry place, out of the reach of children. Keep it protected from dust and dirt. Servicing / Maintenance In case of failure, problems or a suspected fault resulting from the falling of the machine, immediately remove the plug from the socket. Never attempt to operate a faulty machine. Servicing and repairs may only be carried out by authorized service centers. All liability for damages resulting from work not carried out by professionals is declined. Fire Safety Precautions In case of fire, use carbon dioxide (CO2) extinguishers. Do not use water or dry powder extinguishers. •3• English Machine Location - Suitable Location for Operation and Maintenance Coffee bean hopper lid Grinder adjustment knob Coffee bean hopper Control panel Dispensing head Pre-ground bypass doser Drip tray Full drip tray indicator Service door Brew group Dregdrawer Wand protective gripper Steam/hot water wand Power switch Drip tray Water hardness test Water tank Brew group lubricant Pre-ground coffee scoop Power cord Strong coffee brew button Long coffee brew button LCD Display Intenza water filter ON/OFF button “Aroma” - Pre-ground coffee selector button. Coffee/hot water/steam dial. •4• For your own and for other people’s safety, carefully follow the instructions provided in the “Safety Regulations” section. • Remove the water tank and install the Intenza water filter as recommended on page 27. • Fill the tank with fresh drinking water. Do not exceed the “max” level indicated on the water tank. Once filled, place the tank back into the machine. Machine Packaging The original packaging has been designed and constructed to protect the machine during transport. We recommend keeping the packaging material for possible future transport. Preliminary Operations • Remove the coffee bean hopper lid and the drip tray with grill from the packaging. • Remove the coffee machine from the packaging and position it in a place that meets the requirements described in the safety regulations. • Place the drip tray with grill into its appropriate seat on the machine. Make sure it is fully inserted and clicks into place. • Place the coffee bean hopper lid on the bean hopper. Note: Insert the plug in the machine and in the wall socket only when indicated and check that the power button is switched to “0”. Important Note: Carefully read the explanations of all the warnings displayed on the LCD control panel (section “LCD Display Warnings”). Never remove the drip tray when the machine is turned on. Wait a couple of minutes after turning on/off, since the machine will be carrying out a rinse/selfcleaning cycle (see section “Rinse/ Self-cleaning Cycle”). Fill the tank only with fresh, non-sparkling water. Hot water or any other liquid may damage the tank and/or the machine. Do not turn on the machine when the tank is empty. Make sure there is enough water in the tank. • Remove the coffee bean hopper lid. Note: The hopper may be provided with different safety features according to the regulations of the country of use of the machine. • Slowly pour the coffee beans into the hopper. Only coffee beans may be put into the coffee bean hopper. Ground coffee, instant coffee or any other object may damage the machine. • Replace the coffee bean hopper lid. • Insert the plug into the socket on the back of the machine. • Insert the plug of the other end of the cable into a wall socket with suitable power voltage. •5• English INSTALLATION • Turn the machine ON by pressing the power switch to “I”. Priming the Water Circuit • The display shows the ON/OFF icon. • Turn the selector dial clockwise to set it to the “ ” position. The machine starts the automatic priming of the circuit by letting out a preset quantity of water through the steam/hot water wand (Pannarello, if supplied). The bar under the icon shows the operation progress. At the end of the priming process, the display shows an icon (see figure) indicating that the selection dial must be brought back to the central “ ” position. • To prime the water circuit, place a container under the steam/hot water wand(Pannarello, if supplied). Black • Make sure the ON/OFF button is set to the “ ” position; if this is not the case, set it to that position. • Press the ON/OFF button to turn the machine on. Red • The display indicates that the circuit must be primed. Red Note: Before starting the machine after long periods of inactivity, the water circuit must be primed. • The display then shows the machine warm-up icon, as shown in the figure. Orange Orange Green When warm-up is complete, the machine performs a rinse cycle of the internal circuits. In this phase, this icon will be displayed: • When the operations described above are complete, this icon will be displayed: The machine is then ready to brew beverages. • To brew coffee, dispense hot water or steam, and for a proper use of the machine, carefully follow the instructions provided. If the machine is being used for the first time or after a long period of inactivity, follow the operations described in the following section. •6• These simple operations will make it possible to always brew excellent coffee. Green 1 Place a large container under the dispensing spout. 2 Before starting the procedure, check that the following icon is displayed. English The following icon will be displayed. Using the machine for the first time or after a long period of inactivity. Red 9 Dispense water until the no water signal is displayed, then turn the selector switch counter-clockwise to set it to the “ ” position. 10 At the end, fill the water tank again. Then the products can be brewed as described in the following sections. Green 3 Select the pre-ground coffee function by pressing the “ “ button one or more times. Do not add the pre-ground coffee to the compartment. Rinse/Self-Cleaning Cycle The icon will appear on the display. This cycle will rinse coffee circuits with fresh water. The cycle is carried out: • At machine start (with cold boiler) • After priming the water circuit (with cold boiler) • During the stand-by mode (if a coffee product has been brewed) • If the machine is turned off by pressing the ON/OFF button (if a coffee product has been brewed). Green 4 Press the button to brew a long coffee. 5 Wait until brewing is completed and empty the water tank. 6 Repeat the operations from step 1 to step 5 for 3 times; then continue with step 7. 7 Place a container under the steam wand (Pannarello, if supplied). A small amount of water will be dispensed to rinse and heat all the machine components; in this phase this icon is displayed: Orange 8 Turn the selector switch clockwise to set it to the “ ” position. Wait for the cycle to finish automatically. You can stop dispensing as well, by pressing either coffee button and/or the ON/OFF button. •7• Water hardness measurement Intenza Water Filter The water hardness measurement is very important in order to correctly manage the “Intenza” filter and the frequency with which the machine must be descaled. To improve the quality of the used water, it is recommended that you install the water filter. Immerse the water hardness test strip provided with the machine in water for 1 second. Note: The test strip is only valid for one measurement. Check how many squares change colour and refer to the table. The letters correspond to the references that are located in the base of the Intenza filter. The filter must be adjusted based on this measurement. A 1 Intenza Aroma System B Set the Intenza Aroma System as specified on the box. A = Soft water B = Hard water (standard) C = Very hard water C 2 3 4 Machine water hardness setting The numbers correspond to the settings that are found for the water hardness adjustment that is shown in the programming section. More precisely: 1 = (very soft water) 2= (soft water) 3= (hard water) 4= (very hard water) Once this value is known, set the water hardness value as specified in the programming section. •8• Remove the small white filter from the tank and store it in a dry place sheltered from dust. Remove the water filter from its packaging, immerse it vertically (with the openings positioned upwards) in cold water and gently press its sides so as to let the air bubbles out. Insert the filter in the empty tank. The reference mark and the groove must match. Push firmly until it is completely inserted. Fill the tank with fresh drinking water and re-insert it into the machine. Dispense the water in the tank by using the hot water function (see section “Hot Water Dispensing”). Fill the water tank again. Press the ON/OFF button to change the machine status to stand-by mode. Black Press the “ “ button until the following page is displayed. Orange Press the “ “ button to select “ON” and press the “ “button to confirm. Orange Orange In this way, the machine has been programmed to inform the user of the need to replace the filter. Note: When an “Intenza” filter must be replaced with a new one, the function must be reset. Replace the filter as previously shown. After that, enter the programming menu until the indicated window is displayed and select the “RESET” option; then press the “ “ button. The machine is now programmed to manage a new filter. ADJUSTMENTS The machine that you have bought allows for certain adjustments that will permit you to use it to its full potential. Saeco Adapting System Coffee is a natural product and its characteristics may change according to its origin, blend and roast. The Saeco coffee machine is equipped with a self-adjusting system that allows the use of all types of coffee beans available on the market (not including flavored or carmelized). • The machine automatically adjusts itself in order to optimize the extraction of the coffee, ensuring perfect compression of the beans to obtain a creamy espresso coffee that is able to release all the aromas, regardless of the type of coffee used. • The optimization process is a learning process that requires the brewing of a certain number of coffees to allow the machine to adjust the compactness of the ground coffee. • Attention should be given to special blends, which require grinder adjustments in order to optimize the extraction of the coffee (see section "Coffee Grinder Adjustment"). Coffee Grinder Adjustment Orange Note: If the filter is already installed and you want to remove it, without replacing it, select the “OFF” option and then press the “ “ button. To exit, press the ON/OFF button until the stand-by page is displayed. Black Note: If there is no Intenza water filter, insert the small white filter previously removed into the water tank. Warning! The grinder adjustment knob, inside the coffee bean hopper, must be turned only when the grinder is working. Do not pour ground and/or instant coffee into the coffee bean hopper. Do not insert any material other than coffee beans into the hopper. The grinder contains moving parts that may be dangerous. Therefore, do not insert fingers and/ or other objects. Only grind setting by means of the knob is permitted. Turn off the machine and unplug it from the socket before carrying out any type of operation inside the coffee •9• English When the icon appears, press the “ “ button to access the machine programming menu. bean hopper. Do not pour coffee beans when the coffee grinder is working. The machine allows slight adjustments to the coffee grinder to adapt it to the kind of coffee used. Green “ is proAt this point the button “ grammed; each time it is pressed and released, the machine will brew the same amount of coffee that was just programmed. To make any adjustment, press and turn the knob inside the coffee bean hopper. Press and turn the knob by one notch at a time and brew 2-3 cups of coffee; this is the only way to notice differences in grind. The reference marks inside the coffee bean hopper indicate the grind setting. There are 5 different grind settings to choose from with the following references: • The machine begins the dispensing phase. The “ ” icon will be displayed to show which button is being programmed. • Press the button with the “ ” icon again when the desired amount of coffee in the cup is reached. Stand-By The machine is designed for energy saving. The machine automatically turns off after 60 minutes of inactivity. Black Large Dot - Coarse Grind Small Dot - Fine Grind Note: During the switching off phase, the machine performs a rinse cycle, if a coffee product has been brewed. To turn the machine on again, simply press the ON/OFF button (if the power switch is set to “I”). In this case the machine will go through the rinse cycle only if the boiler is cold. Adjusting the Coffee Quantity The machine allows you to adjust the amount of brewed coffee according to your tastes and/or the size of your cups. COFFEE BREWING Note: Should the machine not brew coffee, make sure that the water tank contains water. Each time you press and release button “ “ or “ “, the machine brews a pre-programmed amount of coffee. This amount may be reprogrammed to your taste. Each button may be individually programmed for a specific brew setting. As an example, the following procedure describes the programming of the button “ “, which is normally associated with espresso coffee. • Place a cup under the dispensing head. • Press and hold the “ “ button, until the relevant icon is displayed. At this point, the machine is programming it. Green • 10 • Before brewing coffee, check the messages on the display. Check that the water tank and coffee been hopper are full. Green Leave the dial on the coffee position “ ” during the dispensing phase. Before brewing the coffee, adjust the height of the brewing head according to your needs, and select the aroma or the pre-ground coffee. Most cups on the market can be used with this coffee machine. The height of the dispensing head may be adjusted to better fit the dimensions of the cups that you wish to use. Manually move the dispensing head up or down to adjust its height by placing your fingers as shown in the figure. The recommended positions are: For use with small cups; Green After selecting “Strong Aroma”, the function for brewing coffee with pre-ground coffee is displayed. This selection is displayed by the icon on the side. Refer to the relevant section to use this function. Using Coffee Beans For use with big cups. • Two cups/mugs can be placed under the dispensing head for brewing two coffees at the same time. Green Aroma Adjustment Aroma adjusts the quantity of coffee to be ground, or sets the use of pre-ground coffee. Four choices are possible by pressing and releasing the “ “ button (mild, medium or strong aroma, and ground coffee). Selection can be made when the beans appear on the display. Each time the “ “ button is pressed and released, the aroma changes by one degree: Green • To brew coffee, press and release one of the following buttons: the “ “ button to select the desired aroma. the “ ” button for an espresso coffee;. the “ “ button for a long coffee. • The brewing cycle then starts: To dispense 1 cup of coffee, press the button once. This icon will be displayed: To dispense 2 cups of coffee, press the button twice. This icon will be displayed: To brew 2 coffees, the machine automatically grinds and doses the correct amount of coffee. Brewing two coffees requires two grinding cycles and two brewing cycles, which the machine carries out automatically. • After the prebrewing cycle, coffee begins to come out of the dispensing head. • Coffee brewing stops automatically when the pre-programmed level is reached; however, it is possible to interrupt coffee brewing by pressing the button initially pressed. = Mild aroma = Medium aroma Green = Strong aroma • 11 • English Selection must be made prior to brewing the coffee. The system sets the aroma according to the personal taste of the user. Dispensing Head Adjustment The machine is adjusted to brew a true Italian espresso coffee. This feature may slightly lengthen the brewing time, allowing the intense flavor of the coffee to develop fully. Warning: Only add pre-ground coffee to the bypass doser. Other substances and objects may cause severe damages to the machine. Such damages will not be covered by warranty. Press and release: the “ ” button for an espresso coffee; the “ “ button for a long coffee. • The brewing cycle then starts. After the pre-brewing cycle, coffee begins to come out of the dispensing head. After dispensing the product, the machine defaults back to the whole coffee bean configuration. Using Pre-Ground Coffee This function allows using pre-ground and decaffeinated coffee. Pre-ground coffee must be poured into the bypass doser positioned next to the coffee bean hopper. Only use coffee ground for espresso machines and never coffee beans or instant coffee. Green Green • 12 • Repeat the operations described above to brew other Note: • If no pre-ground coffee is poured into the bypass doser, only water will be dispensed; • If the dose is excessive and 2 or more measuring scoops of coffee are used, the machine will not brew the product. In this case, the machine will run an empty cycle and discharge any ground coffee into the dregdrawer. To brew coffee: • Press and release the “ “ button to select the pre-ground coffee function. • Lift the pre-ground bypass doser cover. • Add only 1 scoop of pre-ground coffee to the compartment. Use the measuring scoop supplied with the machine to perform this operation. Then, close the cover. coffees. DISPENSING HOT WATER Warning: Dispensing may be preceded by short spurts of hot water and scalding is possible. The steam/hot water wand may reach high temperatures: Do not touch with bare hands. Use the appropriate handle only. • Before dispensing hot water, check that the following icon is displayed: Green When the machine is ready, proceed as follows: • Place a container under the steam/hot water wand (Pannarello, if supplied). • Turn the selector dial clockwise to the “ ” position. • Place a container under the steam/hot water wand (Pannarello, if supplied). • The following icon will be displayed: • When the machine is ready to brew coffee, turn selector dial counterclockwise to set it onto the “ ” position. Residual water may dispense from the steam/hot water wand (Pannarello, if supplied). Green • Fill the cup with hot water to the desired level; to stop hot water dispensing, turn selector dial counterclockwise back to the “ ” position. The machine returns to the normal operating mode. Orange Occasionally, after turning the selector dial, hot water may not be dispensed and the following icon may be displayed: Simply wait until the end of the warm-up phase, at which point hot water will be dispensed from the wand (Pannarello if supplied). • The following icon is displayed during the preheating time required by the machine: Orange • Steam dispensing will begin when the following icon is displayed; soon after only steam will begin to come out. Green STEAM DISPENSING / CAPPUCCINO BREW ING • Turn the selector dial clockwise and set it back to the “ ” position to stop dispensing steam. Steam may be used to froth milk for a cappuccino, as well as to reheat other beverages. Danger of scalding! Brewing may be preceded by small spurts of hot water. The steam/hot water wand may reach high temperatures. Never touch it with bare hands. Important Note: After using the steam/hot water wand to froth milk, immediately clean the wand (or Pannarello when provided). When the machine is ready, dispense a small amount of hot water in a glass and clean the steam wand (or Pannarello when provided) externally. • Fill 1/3 of the container you wish to use to prepare the cappuccino with cold milk. Use cold milk for better results when preparing a cappuccino. • 13 • English In this way, all parts will be perfectly cleaned and free of any milk residue. • Immerse the steam/hot water wand (Pannarello, if supplied) in the milk to be heated. CLEANING AND MAINTENANCE General cleaning • Empty and clean the dregdrawer daily, with the machine turned on. • Turn the selector dial counter-clockwise to set it to the “ ” position. Froth the milk by gently swirling the cup. • After dispensing steam for the desired time, turn the selector dial clockwise and set it back to the “ ” position to stop dispensing steam. • The same procedure can be used to heat other beverages. After using the steam/hot water wand (Pannarello, if supplied), wash it as described in the “Cleaning and Maintenance” section. After using steam to prepare a beverage, it is possible to brew coffee or to dispense steam straight after. If the selector dial is left on the central position “ ”, the machine, in order to save energy, automatically reaches the temperature needed to dispense coffee. • 14 • • Maintenance and cleaning operations can only be carried out when the machine is cold and disconnected from the power supply. • Do not immerse the machine in water. • Do not wash any of its parts in the dishwasher. • Do not use sharp objects or harsh chemical products (solvents) for cleaning. • Use a soft, dampened cloth to clean the machine. • Do not dry the machine and/or its components using a microwave and/ or standard oven. After frothing milk beverages, dispense hot water from the steam/hot water wand (Pannarello, if supplied) to obtain a thorough cleaning. • Every day, after frothing the milk, remove the external part of the steam/ hot water wand and wash it with fresh drinking water. • Clean the steam wand weekly. In order to do this, you have to: - Remove the external part of the Pannarello (for standard cleaning); - Remove the upper part of the Pannarello from the steam wand; - Wash the upper part of the Pannarello with fresh drinking water; - Wash the steam wand with a wet cloth and remove any milk residue; - Replace the upper part in the steam wand (make sure it is completely inserted). Reassemble the external part of the Pannarello. • Also clean the seat of the tray every week through the openings on the bottom of the machine. • Make sure that the brew group is in rest position. The two references must match. English • It is recommended to clean the water tank daily. - Remove the small white filter in the water tank and wash it under running drinking water. - Reposition the small white filter in its housing by gently pressing and turning it at the same time. - Fill the water tank with fresh drinking water. • Empty and clean the drip tray daily. Perform this operation also when the float is raised. • The lever on the rear part of the brew group must be in contact with the base. Press the “PUSH” button to make sure that the brew group is in the correct position. Lubricate the brew group after approximately 500 brewing cycles. The brew group lubricant may be purchased at authorized service centers. • Lubricate the brew group guides using the supplied lubricant only. Brew Group • The brew group must be cleaned at least once a week. • Turn off the machine by pressing the ON/OFF button and remove the plug from the socket. • Remove the dregdrawer. Open the service door. • To remove the brew group, pull it by the handle and press the «PUSH» button. The brew group must be washed only with lukewarm water, no detergent/ soap is necessary. • Apply the lubricant evenly on both side guides. • Insert the brew group in its seat until it locks into place WITHOUT pressing the “PUSH” button. • Insert the dregdrawer. Close the service door. • Wash the brew group with lukewarm water and carefully clean the upper filter. • Thoroughly wash and dry all the parts of the brew group. • Thoroughly clean the inside of the machine. • 15 • DESCALING • Press button “ ” to confirm the activation of the descaling cycle. Limescale build-up is normal with the use of this appliance. From this point forward, the descaling cycle must be completed before proceeding. The display informs you when descaling is necessary: Orange • Pour the entire content of the Saeco concentrated descaling solution into the water tank, and then fill the tank with fresh drinking water up to the MAX level. Place the tank back in the machine. Only use the Saeco descaling solution. It has been specifically developed to preserve performance and functionality throughout the lifetime of the machine and to ensure, with regular use, a high quality delivered product. • Insert a container below the steam/hot water wand. Warning! Never drink the descaling solution or any products dispensed until the cycle has been carried out to the end. Never use vinegar as a descaling solution. Use a large container for this process. If you do not have a container of this capacity, once it is filled close the knob, empty the container and then place it again under the wand and repeat the procedure. Before descaling, remove the Pannarello attachment from the steam/hot water wand as described in the “Cleaning and Maintenance” section. • After adding the descaling solution in the tank, turn the selector dial clockwise to position “ ” to start the descaling cycle. Red • Turn the machine on by pressing the ON/OFF button. Wait for the machine to finish its rinse cycle and warm up. Warning! Remove the Intenza filter before adding the descaling solution. • Hold the “ “ button for 5 seconds. The display will show the icon on the side. • The machine will start dispensing, at regular intervals, the descaling solution (the bar shows the cycle progress). Red If you press the “ “ button by mistake, use the “ “ button to quit. • 16 • Red Red • When inserting the water tank in the machine, turn the selector switch clockwise to position “ ”. Dispense the entire tank as previously described. At the end, fill the tank again. • When inserting the water tank again, the icon on the side is displayed. Press the “ “ button to exit the descaling cycle. Red Red • The icon indicates that the tank must be rinsed and filled. Rinse the water tank thoroughly and refill it with fresh drinking water. • Empty the container used to collect the liquid dispensed by the machine and place it under the steam wand. • When inserting the tank filled with water in the machine, the icon on the side is displayed; turn the selector dial clockwise to position “ ”. Red • The machine starts the rinse cycle. • The machine now carries out the warm-up and rinse cycle to prepare for product brewing. • Empty the container used to collect the liquid dispensed by the machine. The descaling solution must be disposed of according to the manufacturer’s instructions and/or regulations in force in the country of use. After completing the descaling cycle, wash the brew group as described in the “Brew group” section in the “Cleaning and maintenance” section. Reassemble the external part of the Pannarello. Red Red Red • When the water in the tank is finished dispensing, the icon on the side is displayed to indicate that the selector dial must be brought back to the “ ” position. • The icon indicates that the tank must be rinsed and filled. Rinse the water tank thoroughly and refill it with fresh drinking water. • Empty the container used to collect the liquid dispensed by the machine and place it under the steam wand. • 17 • English Red • When the solution in the tank is finished dispensing, the icon on the side is displayed to indicate that the selector dial must be brought back to the “ ” position. Programming commands PROGRAMMING Changes can be made on each page: The user can change some of the machine operating parameters to suit his/ her needs. Orange Enter the “menu” The programming menu can only be accessed when the machine is in “stand-by” mode. - The “ ” and “ “ buttons allow you to change the value of the function, among those appearing on the page. To change the machine status to stand-by mode, press the ON/OFF button. - The “ “ button allows you to scroll the functions and to store the changes that were made. Black When the machine is in stand-by mode, “button to access propress the “ gramming. Note: Changes can be stored only after the displayed value is changed; when the displayed value is changed the “OK” message appears. The first page that is displayed is shown here. Orange Orange - The “ON/OFF” button allows you to exit the change or programming mode. Exit programming mode To exit the programming mode, press the ON/OFF button until the stand-by page is displayed. Black • 18 • Note: The machine will exit the programming mode if the user does not do anything for 30 seconds. The settings that were changed but not confirmed will not be stored. Programming example COFFEE TEMPERATURE This function allows you to adjust the coffee brewing temperature. In this example, we want to explain how to programme the display contrast. Proceed in a similar manner to change the other functions. Orange TIMER (STAND-BY) This function allows you to adjust the time the machine will go into stand-by mode after the last brewing. Change the machine status to stand-by mode. Black When the machine is in stand-by mode, press the “ “button to access programming. Orange CONTRAST This function allows you to adjust the contrast of the display to better view the messages. The first page is displayed. Orange Orange Orange WATER HARDNESS This function allows you to adjust the water hardness in order to better manage machine maintenance: = very soft water = soft water = hard water = very hard water Press the “ “ button until the “CONTRAST” function is displayed. Orange Press the “ ” button 1 (one) time to increase the contrast. Orange For more details, see the "Water hardness measurement" section. Press the “ “ button to confirm. Orange Orange Press the “ON/OFF” button to exit the programming mode. “INTENZA” WATER FILTER This function allows you to manage the “Intenza” water filter. For more details, see the section related to filter handling. FACTORY SETTINGS This function allows you to reset all factory values. At this point, the function is programmed and will be active the next time the machine is started. Black Orange • 19 • English Functions CONTROL PANEL DISPLAY Ready Signals Warning Signals • The machine is ready for whole bean coffee brewing and hot water dispensing. • The machine is warming up to brew coffee and dispense hot water or steam. Green Orange • The machine is ready for pre-ground coffee brewing. Green • The machine is performing the rinse cycle. Wait until the machine automatically stops brewing the beverage. Orange • The machine is in the steam dispensing phase. Green • The machine must be descaled. Orange • The machine is in the hot water dispensing phase. Green • The brew group is being reset due to machine reset. Orange • The machine is brewing 1 espresso coffee. Green • The coffee bean hopper needs to be refilled with coffee beans to restart the brewing cycle. Orange • The machine is brewing 1 long coffee. • The Intenza filter must be replaced with a new one. Green • The machine is brewing 2 espresso coffees. Orange Green The alarm is deactivated only if it is “RESET” in the programming mode. • The machine is brewing 2 long coffees. Orange Green • The machine is programming the amount of coffee to be brewed. Green • 20 • This message will only be displayed if the function is activated in the programming mode. English Alarm Signals • Start screen for descaling cycle activation. • Return the hot water / steam knob to its proper position. Red Press “OK” to continue or “ESC” to quit. Red • Open the knob to carry out the operation • Close the service door. described. Red Red • Descaling cycle in progress. • Refill the coffee bean hopper. Red Red • Turn the machine off. After 30-seconds, turn it back on. Try 2 or 3 times. Red If the machine does NOT start, contact an authorized service center. • Descaling cycle ended. Press the “ button to quit the descaling cycle. Red • Fill the water tank. • Insert the brew group in the machine. Red Red • Problems with the water circuit. Red • Insert the dregdrawer. Red • Empty the dregdrawer and the drip tray. Red • Fill the water tank. Red • 21 • “ TROUBLESHOOTING Machine Actions Causes The machine does not turn on. The machine is not connected to the power Connect the machine to the power source. source. The cups are cold. Warm the cups with hot water. The hole of the steam wand is clogged. Clean the hole of the steam wand using a pin. Make sure that the machine is turned off and has cooled before performing this operation. Pannarello is dirty (if supplied). Clean the Pannarello. The coffee blend is unsuitable, the coffee is not Change coffee blend or adjust the grind as explained freshly roasted or the grind is too coarse. in the “Coffee Grinder Adjustment” section. The machine circuit is obstructed by limescale Descale the machine. build-up. The coffee is not hot enough. No hot water or steam is dispensed. The coffee has little crema. (see note) The machine takes a long time to warm up or the amount of water dispensed from the wand is too little. The brew group does not come out. Solutions Turn the machine on. Close the service door. The brew group automatically returns to the correct position. Dregdrawer is inserted. Remove the dregdrawer first, then the brew group. The machine grinds the coffee beans but no Water tank is empty. Fill the water tank and prime the circuit (section coffee comes out. “Using the Machine for the First Time”). (See note) Brew group is dirty. Clean the brew group (section “Brew Group”). Circuit is not primed. Prime the circuit (section “Using the Machine for the First Time”). Rare event that occurs when the machine is auto- Brew a few coffees as described in section “Saeco matically adjusting the dose. Adapting System”. The dispensing head is dirty. Clean the dispensing head. The coffee is too weak. (see note) Coffee is brewed slowly. (see note) Coffee leaks out of the dispensing head. The brew group is out of place. Rare event that occurs when the machine is auto- Brew a few coffees as described in section “Saeco matically adjusting the dose. Adapting System”. The coffee grind is too fine. Change coffee blend or adjust the grind as explained in the “Coffee Grinder Adjustment” section. The circuit is not primed. Prime the circuit (section “Using the Machine for the First Time”). The brew group is dirty. Clean the brew group (section “Brew Group”). The dispensing head is clogged. Clean the dispensing head and its holes. Note: These problems can be considered normal if the coffee blend has been changed or if the machine has just been installed. In this case wait until the machine performs a self-adjusting operation as described in section “Saeco Adapting System”. Please contact Saeco Customer Service or an authorized service center for any problems not covered in the above table or when the suggested solutions do not solve the problem. • 22 • TECHNICAL SPECIFICATIONS Nominal Voltage - Power Rating - Power Supply . . . . . . . . . . . . . . . . . . . . . . . . . . . . . . . . . . . . . . . . . . . . . . . . . . . . . . . See label on the inside of the service door Housing material . . . . . . . . . . . . . . . . . . . . . . . . . . . . . . . . . . . . . . . . . . . . . . . . . . . . . . . . . . . . . . . . . . . . . . . . . . . . . . . . . . . . . . . . . . . .Thermoplastic material/Metal Size (w x h x d). . . . . . . . . . . . . . . . . . . . . . . . . . . . . . . . . . . . . . . . . . . . . . . . . . . . . . . . . . . . . . . . . . . . . . . . . . . . . . . . . . . . . . . 10” x 12.5” x 16” (256 x 315 x 415 mm) Weight . . . . . . . . . . . . . . . . . . . . . . . . . . . . . . . . . . . . . . . . . . . . . . . . . . . . . . . . . . . . . . . . . . . . . . . . . . . . . . . . . . . . . . . . . . . . . . . . . . . . . . . . . . . . . . . . . . . 20 lbs. (9 kg) Power Cord Length . . . . . . . . . . . . . . . . . . . . . . . . . . . . . . . . . . . . . . . . . . . . . . . . . . . . . . . . . . . . . . . . . . . . . . . . . . . . . . . . . . . . . . . . . . . . . . . . . . . . . . . . . . . 47” (1.2m) Control Panel . . . . . . . . . . . . . . . . . . . . . . . . . . . . . . . . . . . . . . . . . . . . . . . . . . . . . . . . . . . . . . . . . . . . . . . . . . . . . . . . . . . . . . . . . . . . . . . . . . . . . . . . . . . . . . . . . Front side Pannarello (only available for certain models) . . . . . . . . . . . . . . . . . . . . . . . . . . . . . . . . . . . . . . . . . . . . . . . . . . . . . . . . . . . . . . . . . . . . . . . . . Special for cappuccinos Water tank . . . . . . . . . . . . . . . . . . . . . . . . . . . . . . . . . . . . . . . . . . . . . . . . . . . . . . . . . . . . . . . . . . . . . . . . . . . . . . . . . . . . . . . . . . . . . . . . . . . .1.2 litres – Removable type Coffee Bean Hopper Capacity. . . . . . . . . . . . . . . . . . . . . . . . . . . . . . . . . . . . . . . . . . . . . . . . . . . . . . . . . . . . . . . . . . . . . . . . . . . . . . . . . . . . . . . . . . . . . . . . 9.2 oz. (260 g) Dregdrawer Capacity . . . . . . . . . . . . . . . . . . . . . . . . . . . . . . . . . . . . . . . . . . . . . . . . . . . . . . . . . . . . . . . . . . . . . . . . . . . . . . . . . . . . . . . . . . . . . . . . . . . . . . . . . . . . . . . . . 8 Pump pressure . . . . . . . . . . . . . . . . . . . . . . . . . . . . . . . . . . . . . . . . . . . . . . . . . . . . . . . . . . . . . . . . . . . . . . . . . . . . . . . . . . . . . . . . . . . . . . . . . . . . . . . . . . . . . . . . . . 15 bar Boiler . . . . . . . . . . . . . . . . . . . . . . . . . . . . . . . . . . . . . . . . . . . . . . . . . . . . . . . . . . . . . . . . . . . . . . . . . . . . . . . . . . . . . . . . . . . . . . . . . . . . . . . . . . . . . . . Stainless steel type Safety Mechanisms . . . . . . . . . . . . . . . . . . . . . . . . . . . . . . . . . . . . . . . . . . . . . . . . . . . . . . . . . . . . . . . . . . . . . . . . . . . . . . . . . . . . . . . . . . . . . . . . . . . . . . . . Thermal fuse MACHINE DISPOSAL - The packing materials can be recycled. - Appliance: Unplug the appliance and cut the power cord. - Deliver the appliance and power cord to a service center or public waste disposal facility. This product complies with eu directive 2002/96/ec. on the product or on its packaging indicates that The symbol this product may not be treated as commons waste. Instead it shall be handed over to the applicable collection point for the recycling of electrical and electronic equipment. By ensuring this product is disposed of correctly, you will help prevent potential negative consequences for the environment and human health, which could otherwise be caused by inappropriate waste handling of this product. For more detailed information about recycling of this product, please contact your local city office. • 23 • English The manufacturer reserves the right to make changes to the technical specifications of the product. GERAL A máquina de café é indicada para a preparação de café expresso, utilizando café em grãos; encontra-se equipada com um dispositivo para a distribuição de vapor e água quente. Guarde estas instruções de utilização num local seguro e coloque junto à máquina de café no caso de uma outra pessoa a utilizar. Para obter mais informações ou no caso de ocorrerem problemas, não especificados totalmente ou incompletos nas presentes instruções, contacte os Centros de Assistência Autorizados. Atenção. Não se assume qualquer tipo de responsabilidade por eventuais danos, no caso de: • utilização errada e não conformidade com o funcionamento previsto; • reparações não realizadas nos centros de assistência autorizados; • deterioração do cabo de alimentação; • deterioração de qualquer componente da máquina; • armazenagem ou utilização da máquina em temperaturas diferentes das condições de utilização (entre os 15ºC e os 45ºC) • utilização de peças sobresselentes e acessórios que não sejam originais. Estes casos não estão incluídos na garantia. NORMAS DE SEGURANÇA Nunca coloque em contacto com água as peças que estão ligadas à corrente: perigo de curto-circuito! O vapor e a água quente podem provocar queimaduras! Nunca vire o jacto de vapor ou de água quente em direcção a partes do corpo; toque cuidadosamente no tubo de vapor / água quente, agarrando-o pela pega adequada: perigo de queimaduras! Utilização prevista É proibido efectuar modificações técnicas e qualquer utilização ilícita, devido aos riscos que pode causar! O aparelho não se destina a ser utilizado por pessoas com reduzidas capacidades físicas, mentais ou sensoriais ou com experiência e/ou competências insuficientes, a não ser que estejam sob a supervisão de uma pessoa responsável pela sua segurança ou que sejam ensinados por essa mesma pessoa a utilizar o equipamento. Alimentação de corrente - Cabo de alimentação Ligue a máquina de café apenas a uma tomada de corrente adequada. A tensão deve corresponder à indicada na plaqueta do aparelho, situada no interior da portinhola. Nunca utilize a máquina de café se o cabo de alimentação estiver defeituoso. Se o cabo de alimentação estiver danificado, deve ser substituído pelo produtor ou pelo seu serviço de assistência a clientes. Não passe o cabo de alimentação por ângulos e sob arestas vivas, por cima de objectos muito quentes e proteja-o do óleo. Não ande com a máquina de café nem a puxe pelo cabo. Não tire a ficha puxando pelo cabo, nem toque nela com as mãos molhadas. Evite que o cabo de alimentação caia livremente de mesas ou estantes. Protecção de outras pessoas Certifique-se de que todos os operadores tenham instruções ou manual de operação ao seu dispor. • 24 • Perigo de queimaduras Evite dirigir contra si mesmo e/ou outras pessoas o jacto de vapor e/ou água quente: perigo de queimaduras! Utilize sempre as adequadas pegas ou botões. Para uma correcta gestão aconselha-se: • Escolha uma base de apoio segura, bem nivelada, onde ninguém possa derrubá-la nem ficar ferido. • Escolha um ambiente suficientemente iluminado, higiénico e com uma ficha de corrente facilmente alcançável; • Preveja uma distância mínima das paredes da máquina como indicado na figura; • Durante as fases de ligação e encerramento da máquina, é aconselhável colocar um copo vazio debaixo do distribuidor. Não mantenha a máquina a uma temperatura inferior a 0°C; o gelo poderia danificar a máquina. Não utilize a máquina de café ao ar livre. Não pouse a máquina em superfícies muito quentes e perto de chamas livres, para evitar que a carcaça se funda ou fique danificada. Armazenagem da máquina - Limpeza Antes de limpar a máquina, é indispensável desligar a máquina com a tecla ON/OFF, depois coloque o interruptor geral no “0” e desligue a ficha da tomada de corrente. Além disso, deve esperar que a máquina arrefeça. Nunca mergulhe a máquina em água! É rigorosamente proibido tentar modificar de algum modo o interior da máquina. Não utilize, para fins alimentares, a água restante no reservatório durante alguns dias, lave o reservatório e encha com água fresca potável. Se a máquina não for utilizada durante um período prolongado, distribua água do tubo de vapor e lave com cuidado o pannarello (se existente); de seguida desligue-a e desprenda a ficha da tomada. Guarde-a num local seco e não acessível a crianças. Proteja-a contra o pó e a sujidade. Reparações / Manutenção No caso de avarias, defeitos ou suspeita de defeito após uma queda, desligue imediatamente a ficha da tomada. Nunca coloque em funcionamento uma máquina defeituosa. Só os Centros de Assistência Autorizados podem efectuar intervenções e reparações. No caso de intervenções não realizadas segundo as normas, rejeita-se qualquer tipo de responsabilidade por eventuais danos. Anti-incêndio No caso de incêndio, utilize extintores de dióxido de carbono (CO2). Não utilize água ou extintores de incêndio em pó. • 25 • Português Colocação - Espaço para a utilização e manutenção Tampa do recipiente de café em grãos Botão de ajuste da moagem Recipiente de café em grãos Painel de comando Distribuidor de café Compartimento de café pré-moído Grelha de apoio para chávenas Indicador de bandeja de limpeza cheia Grupo café Gaveta de recolha das borras Portinhola de serviço Protecção para o tubo de distribuição Tubo de distribuição de água quente / vapor Interruptor geral Bandeja de limpeza Teste de dureza da água Reservatório de água Graxa para o Grupo Café Doseador de café pré-moído Cabo de alimentação Filtro Água Intenza Visor LCD Tecla de distribuição de café curto Tecla de distribuição de café longo Tecla ON/OFF Selector de “Aroma” Café pré-moído Selector de café / água quente / vapor. • 26 • Para a sua própria segurança e para a segurança de terceiros, tenha muita atenção às instruções indicadas no capítulo “Normas de segurança”. • Retire o reservatório de água do seu local. • Lave-o e encha-o com água fresca; não ultrapasse o nível (MÁX) indicado no reservatório. Introduza novamente o reservatório no local adequado. Embalagem A embalagem original foi concebida e realizada para proteger a máquina durante o transporte. Recomenda-se conservar a mesma para uma eventual necessidade de transporte no futuro. Operações preliminares • Da embalagem, retire a tampa do recipiente de café e a bandeja de limpeza com a grelha. • Retire da embalagem a máquina de café e coloque-a num local adequado, de acordo com os requisitos necessários e descritos nas normas de segurança. • Insira a bandeja de limpeza com a grelha no local adequado da máquina, certificando-se de que a bandeja esteja completamente inserida. • Insira a tampa sobre o recipiente de café. Obs.: introduza a ficha na tomada de corrente somente quando indicado e verifique se o interruptor geral está na posição “0”. Obs. importante: É importante ler o indicado no Capítulo “Avisos no visor LCD”, onde é explicado pormenorizadamente o significado de todos os avisos que a máquina apresenta ao utilizador, através do visor LCD posicionado no painel de comando. NUNCE retire a bandeja de limpeza com a máquina ligada. Aguarde alguns minutos depois de ligar e/ou desligar a máquina, enquanto esta efectua um ciclo de enxagúe/auto-limpeza (veja o parágrafo “Ciclo de enxagúe/auto-limpeza”). Coloque sempre e só água fresca sem gás no reservatório. A água quente e outros líquidos podem danificar o reservatório e/ou a máquina. Não coloque a máquina em funcionamento sem água: assegure-se que há água suficiente no interior do reservatório. • Tire a tampa do recipiente de café. Obs.: o recipiente pode estar equipado com um sistema de segurança diferente com base nas normas do país de utilização da máquina. • Deite lentamente o café em grãos no recipiente. Coloque no recipiente apenas e sempre café em grãos. Café moído, solúvel, ou outros objectos danificam a máquina. • Coloque novamente a tampa sobre o recipiente de café. • Introduza a ficha na tomada de corrente na parte traseira da máquina. • Introduza a ficha da outra extremidade do cabo numa tomada de corrente de parede de tensão adequada. • 27 • Português INSTALAÇÃO • Coloque o interruptor geral sobre “I” para poder ligar a máquina. Carregamento do circuito • O visor visualiza assim o ícone ON/ OFF. • Vire o selector no sentido dos ponteiros do relógio até ao ponto “ ”. A máquina procede então ao carregamento automático do circuito fazendo com que saia uma quantidade de água predefinida do pannarello, visualizando o enchimento progressivo da barra debaixo do símbolo. No final do processo de carregamento no visor aparece o símbolo indicado na figura que requer que volte a posicionar o botão de selecção na posição central “ ”. • Para carregar o circuito, introduza um recipiente debaixo do tubo de vapor (pannarello, se existente); Preto • Assegure-se que o selector está na posição “ ”; se necessário vire-o até ficar na posição indicada. • Para ligar a máquina é suficiente pressionar a tecla ON/OFF. Vermelho • O visor indica que é necessário proceder ao carregamento do circuito. Obs.: Antes de proceder à primeira utilização da máquina, no caso de um período prolongado de inactividade é necessário carregar o circuito hidráulico. Vermelho • No visor é então visualizado o símbolo de aquecimento da máquina indicado na figura. Laranja Laranja Verde Depois de terminado o aquecimento, a máquina realizará um ciclo de enxagúe dos circuitos internos. Nesta fase no visor é visualizado o símbolo indicado na figura. • Ao terminar as operações acima descritas, no visor aparecerá o símbolo. A máquina está então pronta para distribuir os produtos. • Para distribuir café, água quente ou vapor e utilizar correctamente a máquina, siga atentamente as instruções que se seguem. Se a máquina está sendo utilizada pela primeira vez ou se esteve parada por um longo período de tempo, realize as operações descritas no parágrafo seguinte. • 28 • No visor será visualizado o seguinte símbolo. Primeira utilização ou após um longo período de inutilização. Verde 1 Introduza um recipiente grande debaixo do distribuidor. Vermelho 2 Antes de iniciar o procedimento verifique que o visor visualiza o seguinte símbolo. 9 Distribua água até a sinalização de falta de água, em seguida vire o selector no sentido contrário ao dos ponteiros do relógio até colocá-lo na posição “ ”. 10 No final encha novamente o reservatório de água. Sucessivamente é possível distribuir os produtos conforme descrito nos parágrafos seguintes. Verde 3 Seleccione a função de distribuição do café pré-moído pressionando uma ou mais vezes a tecla “ “. Não adicione o café pré-moído no compartimento. Ciclo de enxagúe/auto-limpeza No visor aparece o símbolo. O ciclo permite enxaguar os circuitos de café internos com água fresca. Verde Este ciclo é efectuado: • ao ligar a máquina (com caldeira fria) • depois de ter carregado o circuito (com caldeira fria) • durante a fase de preparação do Standby (quando tiver sido distribuído um produto de café) • durante a fase de encerramento depois de ter pressionado a tecla ON/ OFF (quando tiver sido distribuído um produto de café). 4 Pressione a tecla para a distribuição do café longo. 5 Aguarde o fim da distribuição e esvazie o recipiente com água. 6 Repita as operações do ponto 1 ao ponto 5 por 3 vezes; depois passe ao ponto 7. 7 Introduza um recipiente debaixo do tubo de vapor (Pannarello, se existente). É distribuída uma pequena quantidade de água que enxagua e aquece todos os componentes; nesta fase aparece o símbolo. Laranja 8 Vire o selector no sentido dos ponteiros do relógio até o ponto “ ”. Espere que este ciclo termine automaticamente; é possível interromper a distribuição pressionando uma das duas teclas de café e/ou a tecla ON/ OFF. • 29 • Português Estas simples operações sempre lhe permitirá distribuir um óptimo café. Medição da dureza da água Filtro água “INTENZA”. A medição da dureza da água é muito importante para a gestão correcta do filtro “Intenza” e para a frequência de descalcificação da máquina. Para melhorar a qualidade da água utilizada, aconselhamos instalar o filtro água. Mergulhe na água, durante 1 segundo, o papel para o teste de dureza da água, fornecido com a máquina. Obs.: O teste só pode ser usado para uma medição. Verifique quantos quadrados mudam de cor e consulte a tabela. As letras correspondem às referências que são postas na base do filtro Intenza; o filtro será ajustado em função desta medição. A Intenza Aroma System B Tire o filtro da embalagem e mergulhe-o na posição vertical (com a abertura para cima) em água fria e pressione delicadamente os lados para que saiam as bolhas de ar. Remova o filtro branco presente no reservatório, guarde-o num lugar seco protegido do pó. Programe o Intenza Aroma System conforme especificado na embalagem. A = Água doce B = Água dura (padrão) C = Água muito dura C Introduza o filtro no reservatório vazio. Pressione até ao ponto de paragem. 1 2 3 4 Programação dureza máquina Os números correspondem às programações encontradas no ajuste da dureza da água que é ilustrada no capítulo da programação. Mais precisamente: 1 = (água muito doce) 2= (água doce) 3= (água dura) 4= (água muito dura) Conhecendo este valor, programe o valor da dureza da água conforme especificado no capítulo da programação. • 30 • Encha o reservatório com água fresca potável e reintroduza-o na máquina. Distribua a água contida no reservatório através da função água quente (veja o parágrafo “Distribuição de água quente”). Encha novamente o reservatório de água. Pressione a tecla ON/OFF para colocar a máquina em Stand-by. Preto Pressione a tecla “ presente página. “ até visualizar a Laranja Pressione a tecla “ “ para seleccionar a opção “ON” e a tecla “ “ para confirmar. Laranja Laranja Laranja Deste modo a máquina já está programada para avisar ao utilizador quando se deverá substituir o filtro. Obs.: quando seja necessário substituir um filtro “Intenza” por um novo, deve-se apagar a função. Substitua o filtro conforme apresentado anteriormente. Depois entre no menu programação até a janela indicada e seleccione a opção “RESET”; então pressione a tecla “ “. Deste modo a máquina é programada para gerir um filtro novo. Obs.: quando o filtro já está instalado e o queira remover, sem substitui-lo, seleccione a opção “OFF” e logo pressione a tecla “ “. Para sair pressione a tecla ON/OFF até visualizar a página de Stand-by. Preto Obs.: quando o filtro de água Intenza não estiver presente, deve introduzir-se no reservatório, o filtro branco removido anteriormente. AJUSTES A máquina que adquiriu permite efectuar alguns ajustes que lhe permitirá utilizá-la da melhor forma. Saeco Adapting System O café é um produto natural e as suas características podem mudar em função da origem, da mistura e da torrefacção. A máquina de café Saeco é equipada com um sistema de ajuste automático que permite utilizar todos os tipos de café em grãos existentes no comércio (não caramelizados). • A máquina regula-se automaticamente para optimizar a extracção do café, assegurando a perfeita compactação da pastilha para obter um café expresso cremoso, capaz de libertar todos os aromas, independentemente do tipo de café utilizado. • O processo de optimização é um processo de aprendizagem que exige a distribuição de um certo número de cafés para permitir que a máquina regule a compactação do pó. • Atenção, pois podem haver certas misturas particulares que necessitam de uma regulação da moagem para optimizar a extracção do café – (veja o par. Ajuste do moinho de café). Ajuste do moinho de café Atenção! O botão de ajuste da moagem, colocado no interior do recipiente de café, deve ser rodado apenas quando o moinho de café estiver em funcionamento. Não introduza café moído e/ou solúvel no recipiente de café em grãos. É proibido introduzir qualquer material, que não seja café em grãos. O moinho de café contém componentes em movimento que podem ser perigosos; é proibido introduzir os dedos e/ou outros objectos. Só é permitido ajustar o grau de moagem mediante o botão. Antes de intervir, por qualquer outro motivo, no interior do recipiente de café, desligue • 31 • Português Quando aparece o ícone pressione a tecla “ “ para ter acesso à programação da máquina. a máquina e desprenda a ficha da tomada de corrente. Não coloque café em grãos quando o moinho de café estiver em funcionamento. Verde A máquina permite efectuar um ligeiro ajuste do grau de moagem do café para o adaptar ao tipo de café utilizado. O ajuste deve ser realizado movendo o interruptor presente no interior do recipiente de café; este deverá ser pressionado e virado. Pressione e vire o interruptor de uma posição de cada vez e distribua 2-3 cafés; só desta maneira será possível notar a variação do grau de moagem. As marcas colocadas no interior do recipiente indicam o grau de moagem programado; podem programar-se 5 graus de moagem diferentes com as seguintes referências: Nesta altura a tecla “ “ está programada; a cada pressão e libertação a máquina deverá distribuir a mesma quantidade acabada de ser programada. Stand-by Preto Para reiniciar a máquina é suficiente pressionar a tecla ON/OFF (se o interruptor geral estiver posicionado em “I”); neste caso a máquina efectua o enxagúe apenas se a caldeira tiver sido arrefecida. Ajuste da altura do café na chávena A máquina permite ajustar a dosagem de café distribuído segundo o seu gosto e/ou de acordo com as dimensões da sua chávena. DISTRIBUIÇÃO DE CAFÉ A cada pressão e libertação da tecla “ “ ou “ “, a máquina distribui uma quantidade programada de café. Esta quantidade pode ser programada novamente a seu desejo. A cada tecla está associada uma distribuição de café; esta ocorre de modo independente. Verde • 32 • • Coloque uma chávena debaixo do distribuidor. • Pressione e mantenha pressionada a tecla “ “ até aparecer o símbolo. Nesta altura a máquina está em programação. A máquina está predisposta para a poupança de energia. Após 60 minutos desde a última utilização, a máquina desliga-se automaticamente. Obs.: durante a fase de encerramento a máquina efectua um ciclo de enxagúe, quando tiver sido distribuído um produto de café. Referência Grande - Moagem Grossa Referência Pequena - Moagem Fina A título de exemplo, descreve-se a programação da tecla “ “ que, normalmente, está associada ao café expresso. • A máquina inicia a fase de distribuição, no visor aparecerá o símbolo “ ” que evidencia a tecla que se está a programar. • Neste momento deve pressionar-se a tecla evidenciada com o símbolo “ ” quando na chávena se atingiu a quantidade de café desejada. Obs.: Caso a máquina não distribua café, verifique que o reservatório de água tenha água. Verde Antes de distribuir o café verifique os sinais presentes no visor, que o reservatório de água e o recipiente do café estejam cheios. Mantenha o selector na posição do café “ ” durante a fase de distribuição. Antes de distribuir o café ajuste a altura do grupo de distribuição a seu gosto e seleccione o aroma ou o café pré-moído. Com a máquina de café é possível utilizar a maior parte de chávenas existentes no comércio. O grupo de distribuição de café pode ser ajustado na altura para se adaptar melhor às dimensões das chávenas que pretende utilizar. Para efectuar o ajuste, levante ou baixe manualmente o grupo de distribuição colocando os dedos conforme apresentado na figura. As posições aconselhadas são: Para a utilização de chávenas pequenas; Verde Para utilizar esta função consulte o parágrafo apropriado. Com café em grãos Para a utilização de chávenas grandes. • Debaixo do grupo de distribuição podem ser colocadas duas chávenas para distribuir simultaneamente dois cafés. Verde Ajuste “Aroma” Verde A máquina está predisposta para permitir ajustar a dosagem de café que deve ser moído. Verde Ao pressionar e libertar a tecla “ “ será possível escolher entre quatro selecções (suave, médio, forte, pré-moído). Verde A selecção é possível quando são visualizados os grãos no visor; a cada pressão e libertação da tecla “ “ é variado o aroma em um grau: = Aroma suave = Aroma médio = Aroma forte Depois de ter seleccionado o “aroma forte” é seleccionada a função que permite distribuir café com o café pré-moído. Esta selecção é apresentada com o símbolo ao lado. Verde • Para distribuir o café é necessário pressionar e libertar: a tecla “ “ para seleccionar o Aroma desejado. a tecla “ ” para obter um café expresso; a tecla “ “ para obter um café longo. • De seguida inicia-se o ciclo de distribuição: Para distribuir 1 café pressione só uma vez a tecla e no visor é visualizado o símbolo. Para distribuir 2 cafés pressione 2 vezes seguidas a tecla e no visor é visualizado o símbolo. Para a distribuição de 2 cafés, a máquina procede automaticamente à moagem e dosagem da quantidade certa de café. A preparação de dois cafés requer dois ciclos de moagem e dois ciclos de distribuição geridos automaticamente pela máquina. • Depois de ter completado o ciclo de pré-infusão, o café começa a sair do grupo de distribuição. • A distribuição do café pára automaticamente quando atingir o nível programado; no entanto, é possível interromper a distribuição do café pressionando a tecla accionada anteriormente. • 33 • Português A selecção deve ser efectuada antes da selecção do café. Desta forma determina-se a intensidade do sabor conforme os gostos pessoais. Ajuste do grupo de distribuição A máquina encontra-se regulada para preparar um verdadeiro expresso à italiana. Esta característica poderia alongar ligeiramente a duração de distribuição, tirando partido do gosto intenso do café. Pressione e liberte: ” para obter um café a tecla “ expresso; “ para obter um café a tecla “ longo. • De seguida iniciará o ciclo de distribuição. Depois de ter completado o ciclo de pré-infusão, o café começa a sair do grupo de distribuição. • A distribuição do café pára automaticamente quando atingir o nível programado; no entanto, é possível interromper a distribuição do café pressionando a tecla accionada anteriormente. No final da distribuição do produto a máquina volta à configuração programada para o café em grãos. Com café pré-moído Esta função permite utilizar café pré-moído e descafeinado. O café pré-moído deve ser vertido no compartimento apropriado posicionado ao lado do recipiente de café em grãos. Verta apenas café para máquinas de café expresso moído e nunca café em grãos ou solúvel. Verde Verde • 34 • Para distribuir outros cafés repita as operações acima descritas. Obs.: • Se o café pré-moído não for vertido no compartimento, ocorrerá apenas a distribuição de água; • Se a dose for excessiva e forem vertidas 2 ou mais medidores de café, a máquina não distribui o produto. Também neste caso a máquina efectua um ciclo a vazio e descarrega o café em pó na gaveta de recolha das borras. Para distribuir o café é necessário: • Pressionar e libertar a tecla “ “ para seleccionar a função pré-moído. • Eleve a tampa do compartimento de café pré-moído. • Verta apenas 1 medidor de café prémoído no compartimento; para esta operação utilize apenas o medidor fornecido com a máquina. De seguida volte a fechar a tampa. Atenção: no compartimento verta apenas café pré-moído. A introdução de outras substâncias e objectos poderá causar danos graves na máquina não cobertos pela garantia. DISTRIBUIÇÃO DE ÁGUA QUENTE Atenção: no início podem verificar-se breves jactos de água quente: perigo de queimaduras. O tubo de distribuição de água quente pode alcançar temperaturas elevadas: evite tocá-lo directamente com as mãos. • Antes de distribuir água quente verifique que o visor visualiza o seguinte símbolo. Verde Com a máquina pronta para distribuir café, proceda do seguinte modo: • Introduza um recipiente debaixo do tubo de vapor (pannarello, se existente); • Vire o selector no sentido dos ponteiros do relógio até ao ponto “ ”. Isto garantirá uma perfeita limpeza de todas as peças dos eventuais resíduos de leite. Português • Introduza um recipiente debaixo do tubo de vapor (pannarello, se existente). • No visor será visualizado o seguinte símbolo. Verde • Com a máquina pronta para distribuir café, rode o selector no sentido contrário aos ponteiros do relógio até ao ponto “ ”; a água restante pode sair do tubo de vapor (pannarello, se existente). • Retire a quantidade desejada de água quente; para parar a distribuição de água quente rode o selector no sentido contrário aos ponteiros do relógio até que esteja na posição “ ”. A máquina volta ao funcionamento normal. Laranja De qualquer forma, depois da rotação do selector poderá não sair água quente e no visor será visualizado o seguinte símbolo. Espere que a fase de aquecimento termine para obter um fluxo de água quente do pannarello. DISTRIBUIÇÃO DE VA POR / CAPPUCCINO O vapor pode ser utilizado para criar espuma no leite, para o cappuccino, mas também para aquecer as bebidas. Perigo de queimaduras! Durante o início da distribuição podem verificar-se breves salpicos de água quente. O tubo de distribuição pode atingir temperaturas elevadas: evite tocá-lo directamente com as mãos. Obs. importante: logo depois de utilizar o vapor para criar espuma no leite, proceda à limpeza do tubo de vapor (ou pannarello onde existente). Com a máquina pronta, distribua uma pequena quantidade de água quente para dentro de um copo e limpe o exterior do tubo de vapor (ou pannarello onde existente). • A máquina necessita de um tempo de pré-aquecimento, nesta fase será visualizado o seguinte símbolo. Laranja • Quando o visor visualiza o seguinte símbolo, inicia a distribuição; em pouco tempo começará a sair apenas vapor. Verde • Rode o selector no sentido dos ponteiros do relógio e coloque-o na posição “ ” para parar a distribuição de vapor. • Encha com leite frio 1/3 do recipiente que deseja utilizar para preparar o cappuccino. Para garantir um melhor resultado na preparação do cappuccino, o leite utilizado deve estar frio. • 35 • • Mergulhe no tubo de vapor (pannarello, se existente) o leite a aquecer. LIMPEZA E MANUTEN ÇÃO Limpeza geral • Todos os dias, com a máquina ligada, esvazie e limpe a gaveta de recolha das borras. • Rode o selector no sentido contrário aos ponteiros do relógio até ao ponto “ ”; vá rodando o recipiente lentamente de baixo para cima para que a formação de espuma seja uniforme. • Depois de ter utilizado o vapor durante o tempo desejado, rode o selector no sentido dos ponteiros do relógio e coloque-o novamente na posição “ ” para parar a distribuição de vapor. • O mesmo sistema pode ser utilizado para o aquecimento de outras bebidas. Depois de ter utilizado o tubo de vapor (pannarello, se existente), lave-o como descrito no capítulo “Limpeza e Manutenção”. Depois de ter utilizado o vapor para preparar a bebida é possível passar logo à distribuição do café ou do vapor. Ao deixar o selector na posição central “ ”, a máquina volta automaticamente para a temperatura de distribuição de café, para evitar inúteis desperdícios de energia. • 36 • • As outras operações de manutenção e limpeza só podem ser realizadas quando a máquina estiver fria e desligada da corrente eléctrica. • Não mergulhe a máquina em água. • Não introduza os componentes removíveis na máquina de lavar loiça. • Não utilize objectos farpados ou produtos químicos agressivos (solventes) para efectuar a limpeza. • Para a limpeza do aparelho utilize um pano macio humedecido em água. • Não seque a máquina e/ou os seus componentes utilizando um microondas e/ ou um forno convencional. No final da preparação das bebidas com leite distribua água quente pelo tubo de vapor (pannarello, se existente), para uma limpeza eficaz. • Diariamente, após aquecer o leite, desmonte a parte externa do pannarello (se existente) e lave com água fresca potável. • Semanalmente será preciso limpar o tubo de vapor. Para realizar esta operação, deve-se: - remover a parte externa do pannarello (para a limpeza regular); - tirar a parte superior do pannarello do tubo de vapor; - lavar a parte superior do pannarello com água fresca potável; - lavar o tubo de vapor com um pano húmido e remover eventuais resíduos de leite; - reposicionar a parte superior no tubo de vapor (certifique-se de que está • Aconselha-se a limpar quotidianamente o reservatório de água: - Retire o filtro branco colocado no interior do reservatório e limpe-o com água fria potável. - Reposicione o filtro branco no seu compartimento, exercendo uma ligeira pressão combinada com uma leve rotação. - Encha o reservatório com água fresca potável. • Diariamente, esvazie e lave a bandeja de limpeza; esta operação também deve ser realizada quando a bóia sobe. • Semanalmente limpe também a sede da bandeja de limpeza através das aberturas no fundo da máquina. Grupo café • O Grupo Café deve ser limpo sempre que encher o recipiente de café em grãos ou, de qualquer forma, pelo menos uma vez por semana. • Desligue a máquina pressionando o interruptor e retire a ficha da tomada de corrente. • Retire a gaveta de recolha das borras. Abra a portinhola de serviço. • Retire o Grupo Café segurando-o com a pega apropriada e pressionando a tecla «PUSH». O Grupo Café só pode ser lavado com água tépida sem detergente. • Lave o Grupo Café com água tépida; lave o filtro superior com cuidado. • Lave e seque cuidadosamente todas as peças do Grupo Café. • Limpe cuidadosamente o compartimento interno da máquina. • Verifique que as duas referências coincidam. • Verifique que a alavanca esteja em contacto com a base do Grupo Café. Pressione a tecla “PUSH” para se certificar de que o Grupo Café esteja na posição ideal. Lubrifique o Grupo Café após cerca de 500 distribuições. A graxa para a lubrificação do Grupo Café é adquirida nos centros de assistência autorizados. • Lubrifique as guias do grupo só com a graxa fornecida. • Distribua a graxa uniformemente nas duas guias laterais. • Introduza de novo o Grupo Café no compartimento adequado até obter o encaixe SEM pressionar a tecla “PUSH”. • Introduza a gaveta de recolha das borras. Feche a portinhola de serviço. • 37 • Português completamente inserida). Monte novamente a parte externa do pannarello. DESCALCIFICAÇÃO • Pressione a tecla “ ” para confirmar a entrada no ciclo de descalcificação. A formação de calcário é uma consequência natural da utilização do aparelho. A partir deste momento é obrigatório completar o ciclo de descalcificação. A necessidade de efectuar a descalcificação é evidenciada pelo visor: Laranja • Deite todo o conteúdo da garrafa de descalcificante concentrado Saeco no reservatório de água do aparelho e encha-o com água fresca potável até alcançar o nível MÁX. Introduza novamente o reservatório na máquina. Utilize unicamente o produto descalcificante Saeco. Foi concebido especificamente para manter da melhor forma o desempenho e o funcionamento da máquina durante toda a sua vida, assim como para evitar, se for utilizado correctamente, qualquer alteração do produto distribuído. • Introduza um recipiente debaixo do tubo de vapor. Atenção! Não beba a solução descalcificante e os produtos distribuídos até a conclusão do ciclo. Nunca utilize, baixo nenhuma circunstância, o vinagre como descalcificante. A capacidade do recipiente deve ser de pelo menos 1 Litro. Caso não disponha de um recipiente assim tão grande feche a torneira, esvazie o recipiente, coloque-o novamente debaixo do tubo e abra novamente a torneira. Antes de realizar a descalcificação retire o pannarello (se existente) do tubo de vapor, como descrito no capítulo “Limpeza e Manutenção”. • Ligue a máquina com a tecla ON/OFF. Espere que a máquina termine o processo de enxagúe e aquecimento. Vermelho • Só depois de ter adicionado a solução descalcificante no interior do reservatório, rode o selector no sentido dos ponteiros do relógio até ao ponto “ ” para iniciar o ciclo de descalcificação. Atenção! Retire o filtro “Intenza” antes de introduzir o descalcificante. • Mantenha pressionado durante 5 segundos a tecla “ “ e no visor aparecerá o símbolo ao lado. Vermelho Se a tecla “ “ for pressionada acidentalmente, deve sair ao pressionar a tecla “ “. • 38 • Vermelho • Neste momento a máquina inicia a distribuição do descalcificante por intervalos (a barra indica o estado de avanço do ciclo). Vermelho Vermelho Vermelho Vermelho • O símbolo indica que deverá enxaguar e encher o reservatório. Enxagúe bem o reservatório e encha-o com água fresca potável. • Esvazie o recipiente utilizado para recuperar o líquido que sai da máquina e coloque-o novamente debaixo do tubo de vapor. • Quando introduz o reservatório cheio de água na máquina aprece o símbolo ao lado; rode o selector no sentido dos ponteiros do relógio até ao ponto “ ”. Vermelho • Inicia o ciclo de enxagúe da máquina. • Quando introduzir o reservatório cheio de água na máquina, vire o selector no sentido dos ponteiros do relógio até o ponto “ ”. Distribua todo o conteúdo do reservatório conforme descrito anteriormente. No final encha novamente o reservatório. • Quando se introduz novamente o reservatório cheio de água na máquina aparece o símbolo ao lado. Pressione a tecla “ “ para sair do ciclo de descalcificação. • A este ponto a máquina efectua o ciclo de aquecimento e de enxagúe para a distribuição dos produtos. • Esvazie o recipiente utilizado para recuperar o líquido que sai da máquina. A solução descalcificante deverá ser eliminada de acordo com o previsto pelo fabricante e/ou pelas normas vigentes no país de utilização. Depois de ter realizado o ciclo de descalcificação proceda com a lavagem do grupo café conforme descrito no parágrafo “Grupo café” do capítulo “Limpeza e manutenção”. Monte novamente a parte externa do pannarello. Vermelho • Quando a água no interior do reservatório terminar aparece o símbolo situado ao lado; isto indica que deve voltar a colocar o selector na posição “ ”. Vermelho Vermelho • O símbolo indica que deverá enxaguar e encher o reservatório. Enxagúe bem o reservatório e encha-o com água fresca potável. • Esvazie o recipiente utilizado para recuperar o líquido que sai da máquina e coloque-o novamente debaixo do tubo de vapor. • 39 • Português • Quando a solução no interior do reservatório terminar aparece o símbolo situado ao lado; isto indica que deve voltar a colocar o selector na posição “ ”. Comandos de programação PROGRAMAÇÃO Em cada página será possível realizar modificações. O utilizador pode modificar alguns parâmetros de funcionamento da máquina segundo suas próprias exigências. Entrar no “menu” Laranja O acesso ao menu de programação somente é possível quando a máquina está em “Stand-by”. - As teclas “ ”e“ “ permitem modificar o valor da função, entre os valores presentes na página. Pressione a tecla ON/OFF para colocar a máquina em Stand-by. Preto - A tecla “ “ permite o avanço entre as funções e a memorização das modificações realizadas. Quando a máquina está em Stand-by pressione a tecla “ “para ter acesso à programação. A primeira página apresentada é a seguinte. Laranja Laranja Obs.: a memorização das modificações é possível somente depois de uma modificação do valor presente; quando esse valor é modificado aparece a tecla OK”. - A tecla “ON/OFF” permite a saída da modificação ou da programação. Sair da programação Para sair da programação pressione a tecla ON/OFF até visualizar a imagem de ecrã de Stand-by. Preto • 40 • Obs.: a máquina sai da programação quando passam 30 segundos sem a intervenção do utilizador. Não serão memorizadas as programações com modificações não confirmadas. Funções Exemplo de programação TEMPERATURA DO CAFÉ Esta função permite ajustar a temperatura de distribuição do café. No exemplo, queremos explicar o procedimento para a programação do contraste do visor. Para modificar as outras funções proceda do mesmo modo. Coloque a máquina em Stand-by. TEMPORIZADOR (STAND-BY) Esta função permite ajustar o tempo de passagem à Stand-by depois da última distribuição. Preto Quando a máquina está em Stand-by pressione a tecla “ “para ter acesso à programação. Laranja CONTRASTE Esta função permite ajustar o contraste do visor para melhor visualizar as mensagens. É visualizada a primeira página. Laranja Laranja Laranja DUREZA DA ÁGUA Esta função permite ajustar a dureza da água para permitir uma melhor gestão da manutenção da máquina: = água muito doce = água doce = água dura = água muito dura Pressione a tecla “ “ até visualizar a função “CONTRASTE”. Laranja Pressione a tecla “ ” 1 (uma) vez para aumentar o contraste. Laranja Para mais detalhes veja o parágrafo "Medição da dureza da água". Pressione a tecla “ “ para confirmar. Laranja Laranja Pressione a tecla “ON/OFF” para sair da programação. FILTRO DE ÁGUA "INTENZA" Esta função permite gerir o filtro de água “Intenza”. Para mais detalhes veja o parágrafo relativo ao tratamento do filtro. PROGRAMAÇÕES DE FÁBRICA Esta função permite reprogramar os valores de fábrica. A este ponto a função está programada e estará activa na próxima ligação da máquina. Preto Laranja • 41 • Português Laranja VISOR DO PAINEL DE COMANDO Sinais de máquina pronta Sinais de aviso • Máquina pronta para a distribuição de café • Máquina em fase de aquecimento para a distribuição de café, água quente e vapor. com café em grãos e de água quente. Verde Laranja • Máquina pronta para a distribuição de café • Máquina em fase de enxagúe. com café pré-moído. Verde Aguarde que a máquina termine a operação. Laranja • Máquina em fase de distribuição de vapor. • A máquina necessita de um ciclo de descalcificação. Verde Laranja • Máquina em fase de distribuição de água • O Grupo Café está na fase de reinício devido quente. Verde ao reset da máquina. Laranja • Máquina em fase de distribuição de 1 • Encha o recipiente com café em grãos e expresso. Verde reinicie o ciclo de distribuição. Laranja • Máquina em fase de distribuição de 1 café longo. • Proceda com a substituição do filtro Intenza por um novo. Verde • Máquina em fase de distribuição de 2 Laranja expressos. Verde O alarme é desactivado somente quando se realiza o “RESET” pela programação. • Máquina em fase de distribuição de 2 cafés longos. Laranja Verde • Máquina em fase de programação da dosagem de café a distribuir. Verde • 42 • Esta mensagem é visualizada somente se a função for activada na programação. Sinais de alarme • Coloque o botão da torneira de água quente cificação. Ao pressionar “ESC” é possível sair. Vermelho Vermelho • Abra a torneira para efectuar o processo • Feche a portinhola de serviço. indicado. Vermelho Vermelho • Ciclo de descalcificação em fase de exe- • Ausência de grãos no interior do recipiente cução. de café. Vermelho Depois de encher o recipiente, é possível reiniciar o ciclo. Vermelho • Ciclo de descalcificação terminado. Pressione “ para sair do ciclo. a tecla “ • Desligue e após 30 segundos ligue novamente a máquina. Experimente 2 ou 3 vezes. Vermelho Se a máquina NÃO iniciar, contacte o centro de assistência. Vermelho • Encha o reservatório de água. • O Grupo Café deve ser inserido na máquina. Vermelho Vermelho • Problemas no circuito hidráulico. Vermelho • Introduza a gaveta de recolha das borras. Vermelho • Esvazie a gaveta de recolha das borras e o reservatório de recuperação de líquidos. Vermelho • Encha o reservatório de água. Vermelho • 43 • Português • Página inicial para entrar no ciclo de descal- / vapor na posição correcta. RESOLUÇÃO DE PROBLEMAS Comportamentos Causas A máquina não se liga. O café não está suficientemente quente Não sai água quente ou vapor. A máquina não está ligada à rede eléctrica. As chávenas estão frias. O furo do tubo de vapor está obstruído. Soluções Ligue a máquina à rede eléctrica. Escalde as chávenas com água quente. Limpe o furo do tubo de vapor com um alfinete. Antes de efectuar esta operação certifique-se de que a máquina esteja desligada e fria. Pannarello sujo (se existente). Limpe o pannarello. O café tem pouco creme. A mistura não é adequada ou o café não é fresco Mude a mistura de café ou ajuste a moagem como no (Ver obs.) de torrefacção, ou está moído demasiado gVer- parágrafo “Ajuste do moinho de café”. melho. A máquina demora demasiado tempo para O circuito da máquina está cheio de calcário. Descalcifique a máquina. aquecer ou a quantidade de água que sai do tubo é limitada. O Grupo Café não pode ser retirado. O Grupo Café não está na posição correcta. Ligue a máquina. Feche a portinhola de serviço. O grupo de distribuição volta automaticamente para a posição inicial. Gaveta de recolha das borras introduzida. Retire a gaveta de recolha das borras antes de retirar o grupo de distribuição. A máquina mói, mas o café não sai. Falta de água. Encha o reservatório de água e recarregue o circuito (Ver obs.) (parágrafo “Primeira utilização”). Grupo Café sujo. Limpe o Grupo Café (parágrafo “Grupo café”). Circuito não está carregado. Recarregue o circuito (parágrafo “Primeira utilização”). Caso extremo que ocorre quando a máquina está a Distribua alguns cafés conforme descrito no parágrafo regular automaticamente a dose. “Saeco Adapting System”. Grupo de distribuição sujo. Limpe o grupo de distribuição. Café demasiado aquoso. Caso extremo que ocorre quando a máquina está a Distribua alguns cafés conforme descrito no parágrafo (Ver obs.) regular automaticamente a dose. “Saeco Adapting System”. Café sai lentamente. Café demasiado fino. Mude a mistura de café ou ajuste a moagem como no (Ver obs.) parágrafo “Ajuste do moinho de café”. Circuito não está carregado. Recarregue o circuito (parágrafo “Primeira utilização”). Grupo Café sujo. Limpe o Grupo Café (parágrafo “Grupo café”). Café sai para o exterior do grupo de distri- Grupo de distribuição obstruído. Limpe o grupo de distribuição e as suas saídas. buição. Obs.: estes problemas podem ser normais se a mistura de café foi modificada ou no caso de se estar a efectuar a primeira instalação; neste caso espere que a máquina proceda a um auto ajuste, como descrito no parágrafo “Saeco Adapting System”. Para as avarias que não estão incluídas na tabela atrás ou no caso das soluções sugeridas não resolverem o problema, contacte um centro de assistência. • 44 • DADOS TÉCNICOS Tensão nominal – Potência nominal - Alimentação . . . . . . . . . . . . . . . . . . . . . . . . . . . . . . . . . . . . . . . . . . Veja a plaqueta posicionada no interior da portinhola Material do corpo . . . . . . . . . . . . . . . . . . . . . . . . . . . . . . . . . . . . . . . . . . . . . . . . . . . . . . . . . . . . . . . . . . . . . . . . . . . . . . . . . . . . . . . . . . . . . . . . . . . Termoplástico/Metal Dimensões (l x a x p) (mm) . . . . . . . . . . . . . . . . . . . . . . . . . . . . . . . . . . . . . . . . . . . . . . . . . . . . . . . . . . . . . . . . . . . . . . . . . . . . . . . . . . . . . . . . . . . . . . . . 256 x 315 x 415 Peso . . . . . . . . . . . . . . . . . . . . . . . . . . . . . . . . . . . . . . . . . . . . . . . . . . . . . . . . . . . . . . . . . . . . . . . . . . . . . . . . . . . . . . . . . . . . . . . . . . . . . . . . . . . . . . . . . . . . . . . . . . . . . 9 kg Comprimento do cabo . . . . . . . . . . . . . . . . . . . . . . . . . . . . . . . . . . . . . . . . . . . . . . . . . . . . . . . . . . . . . . . . . . . . . . . . . . . . . . . . . . . . . . . . . . . . . . . . . . . . . . . . . . . . .1,2 m Painel de comando . . . . . . . . . . . . . . . . . . . . . . . . . . . . . . . . . . . . . . . . . . . . . . . . . . . . . . . . . . . . . . . . . . . . . . . . . . . . . . . . . . . . . . . . . . . . . . . . . . . . . . .Na parte frontal Pannarello (existente apenas em alguns modelos) . . . . . . . . . . . . . . . . . . . . . . . . . . . . . . . . . . . . . . . . . . . . . . . . . . . . . . . . . . . . . . . . . . . Especial para cappuccinos Reservatório de água . . . . . . . . . . . . . . . . . . . . . . . . . . . . . . . . . . . . . . . . . . . . . . . . . . . . . . . . . . . . . . . . . . . . . . . . . . . . . . . . . . . . . . . . . . . . . . . . . . 1,2 litro – Extraível Capacidade do recipiente de café (gr) . . . . . . . . . . . . . . . . . . . . . . . . . . . . . . . . . . . . . . . . . . . . . . . . . . . . . . . . . . . . . . . . . . . . . . . . . . . . . . . . . . . . . . . . . . . . . . . . . 260 Capacidade do recipiente das borras . . . . . . . . . . . . . . . . . . . . . . . . . . . . . . . . . . . . . . . . . . . . . . . . . . . . . . . . . . . . . . . . . . . . . . . . . . . . . . . . . . . . . . . . . . . . . . . . . . . . 8 Pressão da bomba . . . . . . . . . . . . . . . . . . . . . . . . . . . . . . . . . . . . . . . . . . . . . . . . . . . . . . . . . . . . . . . . . . . . . . . . . . . . . . . . . . . . . . . . . . . . . . . . . . . . . . . . . . . . . . . 15 bar Caldeira . . . . . . . . . . . . . . . . . . . . . . . . . . . . . . . . . . . . . . . . . . . . . . . . . . . . . . . . . . . . . . . . . . . . . . . . . . . . . . . . . . . . . . . . . . . . . . . . . . . . . . . . . . . . . . . . . . . . . . . . . .Inox Dispositivos de segurança . . . . . . . . . . . . . . . . . . . . . . . . . . . . . . . . . . . . . . . . . . . . . . . . . . . . . . . . . . . . . . . . . . . . . . . . . . . . . . . . . . . . . . . . . . . . . . . . . . . Termofusível DESMANTELAMENTO Este produto está conforme a directiva EU 2002/96/EC. O simbolo impresso no produto ou na sua embalagem indica que este produto não se pode tratar como lixo comum. Este produto deve ser entregue num ponto de recolha de equipamentos elétricos e eletrônicos para reciclagem. Ao assegurar-se que este produto é eliminado corretamente, estará a ajudar a evitar possiveis consequências negativas para o ambiente e saúde pública que resultariam se este produto não fosse manipulado de forma adequada. Para obter informações mais detalhadas sobre a reciclagem deste produto, por favor contate o gabinete da câmara municipal da sua cidade ou a loja onde comprou o produto. • 45 • Português O fabricante reserva o direito de modificar as características técnicas do produto. • 46 • • 47 • Português