1
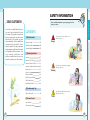
001
www.coway.com
Air Purifier AP-1005AH User's Manual
SAFETY INFORMATION
DEAR CUSTOMERS
Safety Information
CONTENTS
1.Safety Information
If not observed, serious injury or even
death could occur.
Electricity Safety
03
Installation Safety
04
05
Operation Safety
Danger
Operating Instructions
First of all, we would like to thank you
very much for purchasing this Coway
air cleaner. This product is superior to
the ones in the past in function and we
believe that it will provide you with
clean and healthy air. We would like to
recommend you to read this User's
Manual carefully for proper operation
and maintenance and keep this manual
well together with the warranty. This
user's manual could solve your
problem resulted from that you can
easily fix yourself in just a few minutes.
Please read this information to prevent property loss and
ensure your safety.
2.Operating Instructions
Features
Names of Each Part
Operation Part/Indication Part
Preparations
How to Use
Cleaning Method
Filter Cleaning Method
Filter Replacement
Installation Method
Troubleshooting Tips
Names of Internal Filters
07
09
11
12
13
15
18
20
21
24
If not observed, serious injury or property
damage could occur.
Warning
Customer Service
3.Troubleshooting Tips
Before Asking A/S
Notice
4.Customer Service
01
If not observed, slight injury or property
damage could occur.
26
Specifications
28
Warranty Information
29
02
SAFETY INFORMATION
Please read this information to prevent property loss and
ensure your safety.
This product is for AC 220240V only.
Danger
Keep away from heater, candle or
cigarette butts.
It may cause an electric shock
or a failure.
It may cause a fire.
Do not uses in a place like a
restaurant in where a lot of
oil is used or generated.
Do not place anything on the product.
Do not connect or work on power
cable at your disposition. In case
power cable is broken, make sure
not to change the cable at discretion
and contact Service Center.
Operating Instructions
It may cause an electric shock
or a fire.
Warning
Install this product in a dry
place.
Safety Information
Electricity safety
Installation safety
It may cause an electric
shock or a fire.
It may cause an
electric shock.
Do not pull out power cable,
and do not put into and pull
out power plug continuously.
It may cause an
electric shock.
In case water gets in the power
part, take power plug out and wait
until the product dries completely.
It may cause an
electric shock
or a fire.
Notice
It may cause a failure.
It may slow down the
performance.
Troubleshooting Tips
Be sure to take plug out during
repair, maintenance, cleaning
and parts change. Do not
touch the product with a wet
hand.
Do not bend power cable not let
the cable be pressed by something
heavy. And do not pull or twist
power cable.
Keep this product out of the
direct rays of the sun.
Do not install on an inclined plane.
Do not give impact on the product.
It may cause discoloration and
decolorization.
It may cause a breakdown or a failure.
Customer Service
It may cause an
electric shock
or a fire.
Clean anything like dust, water
and etc on the power plug. And
clean power part regularly.
※ do not clean it with volatile matter.
It may cause an electric shock or a fire.
03
04
SAFETY INFORMATION
Operation safety ※ Air can be dry if the product is used for a long time in an airtight place.
Danger
One may not hang or step on the
product.
Keep the product away from wall and
objects, need more apace than 20cm right
and left, 30cm ~ 60cm above.
Objects near wall and ceiling can be
contaminated.
It may cause an injury.
Operating Instructions
Do not put finger or debris in the
air intake or blowhole.
Do not poke the product with
something sharp.
● Be careful during installation for effective use of the product.
Safety Information
Please read this information to prevent property loss and
ensure your safety.
It may cause an injury or a failure.
Keep the product away from lighting
equipment and direct rays of the sun.
The product can not be controlled with
remote controller.
Be careful not to get you body or
anything caught in the upper part of
the product when open front cover.
It may cause a fire of slow down
of the performance.
It may cause an injury.
Troubleshooting Tips
Warning
Do not sprinkle any inflammable
material as like insecticide or air
fresheners near the product.
Install the product away more than 2m from
electronic goods as like TV.
There can be electromagnetic interference.
Change the filter with new filter at
the time of filter change.
Customer Service
Notice
Wash pre-static filter regularly
with water and dry it thoroughly
before use.
Be sure that anything does not block
the product and air-circulation.
Medium filter, HEPA filter, Ag allergy shield filter,
deodorization filter are not recycled by water washing,
so do not wash them nor put them into water.
05
06
FEATURES
Used nano silver and catechin treated HEPA
filter with powerful anti-biotic/anti-mold
capacity to remove floating minute dust and
bacteria in the air, and optimized filter system
to remove pollutant quickly.
� Infant mode
Safety Information
� Outstanding air purity capacity
Run the product with a weak wind to prevent
infant from feeling cold.
� Rhythmical purity system
� Highly improved deodorization capacity
※ hazardous gas remove test
VOCs fields (toluene, benzene, xylene, styrene),
formaldehyde, ammonia, acetaldehyde, acetic acid
(Other CO mentioned above is not removed.)
Applied rhythmical purity system suitable for
indoor Air-Circulation so that indoor pollutant
can be removed quickly.
Operating Instructions
Smell removal function is more improved
using deodorization filter which can remove
not only hazardous gas as like Volatile
Organic Compounds (VOCs), formaldehyde
but also food smell or cigarette smell.
� Silent operation at night
The product is planned to be changed to
silent operation at night to make silent and
comfortable surroundings during sleeping.
� Anion generation
Troubleshooting Tips
Generate healthy anion to make you feel
refreshed even in indoor as if you were in the
woods.
� Wall-mounted type slim design
Applied slim design which goes well with wall.
� Turbo operation which can remove dust and smell in a short time
� Purity level lamp
Function to detect purity level of indoor air
automatically and report to the user on the
petal purity level lamp and it even has interior
appearance.
07
� Customer centered safety planning
When the front cover is opened during running,
all operation will be shut down automatically.
And planned air intake and blowhole safely to
prevent any risk of accidents previously.
Customer Service
Applied turbo operation system to purify
indoor space in a short time when dust and
smell pollution is high.
� Remote controller
Applied remote controller for the convenient
use of the product even in the case the product
is far away or installed in wall-mounted type.
08
NAMES OF EACH PART
Safety Information
Front / Side
Rear
▶
purity level lamp
Handle ▶
Power cord ▶
Operation Part /
Indication Part
Operating Instructions
▶
Unit hanger ▶
Air blower ▶
▶
▶
Air Quality Sensor
Sensor
Troubleshooting Tips
Remote Control
Power ▶
Lamp to display current indoor purity level
▶ Speed
▶ Mode
Lamp ▶
Customer Service
Purity level lamp
High purity :
blue
09
purity :
light blue
Normal :
light green
pollution :
green
Battery (AAA size)
10
NAMES OF INTERNAL FILTERS
▶
▶
▶
Safety Information
▶
OPERATION/INDICATION PART
Pre-static filter
medium filter
HEPA filter
▶
AC deodorization
filter
▶
Anion
Airflow selection in 5 steps is possible in step 1→step 2→
step 3→step 4→turbo using airflow selection button.
(Can be switched to manual operation by pressing airflow
selection switch during mode operation.)
Operating Instructions
Ag allergy shield
filter
Airflow selection switch
Mode selection switch/lamp
Mode can be selected in automatic→infant→rhythmical
mode orders by pressing mode selection button.
Lamp selection switch
Turn purity level lamp on and off.
Sleeping lamp
Troubleshooting Tips
Sleeping lamp is on during sleeping operation.
Power switch
Anion lamp
Anion is generated automatically during operation, and
anion lamp turns on.
▶
Remote controller receiving part
Customer Service
▶
Operation Part /
Indication Part
filter case
Purity level lamp
▶
▶
11
front
Display indoor air purity condition.
purity level lamp
(Petal lamp)
12
PREPARATIONS
Safety Information
- Please remove packing vinyl before installation.
- Make sure to use only in indoor and separate plug from outlet when
the product is not used.
- Check front side of filter.
� To install pre-static filter, place pre-static
filter at the 6 hooks of filter case correctly
with FRONT mark front.
Filter installation
Filter case hook
▶Filter order : pre-static filter→medium filter→HEPA filter→Ag allergy shield filter→AC deodorization filter
Operating Instructions
� Open front cover and take
filter case out.
Pull the lower part of front
cover, and lift it to open.
Pull side handle to take out
filter case from the product.
� Place the lower part of filter case first
�
and push the upper part of the case in.
Install front cover into the
product and close it.
�
� Place filter case on the floor, remove packing for each filter and put
them in the case in reverse according to filter steps.
Remote controller preparations
● Open remote controller pushing
down the rear part and pushing
down the battery cover, and
place AAA size battery setting
positive and negative pole.
Close the cover pushing up the
cover.
�
Ag allergy shield filter
②
During using of remote controller
�
-
Customer Service
AC deodorization filter
①
Troubleshooting Tips
Check filters front side during filter installation.
In case of Ag allergy shield filter, place the filter in its own case with black side
front and put it in the filter case.
If remote controller does not work, check if life-time of battery is over due.
Use the same size of two AAA batteries to change them.
Take the batteries out if the remote controller is not used for a long time.
The life-time of batteries may be differing from the frequency of remote controller.
How to use remote controller
�
Medium filter
13
HEPA filter
- use remote controller facing the receiving part of the product.
- The remote controller can not work if there is any obstacle between the controller
and the product.
- Do not impact remote controller.
- Do not keep the controller in a wet place or direct rays of the sun, and near heat of fire.
14
HOW TO USE
Safety Information
- put power plug into the outlet before operation.
- At the first use of the product, press power switch to operate the product in
automatic mode.
Sleeping operation (Just operated during automatic/infant mode operation)
● When it gets darks during
Manual operation
automatic/infant mode operation,
it runs automatically in low
airflow, Noiseless, low power
consumption.
And it runs in general operation
when it gets brighten again.
● Turn power switch on, select airflow by
pressing airflow selection switch.
step 1→step 2→step 3→step 4→turbo
�
Operating Instructions
※ Sleeping lamp turns on in the light
of ½ light of other lamp.
�
Purity level lamp ON/OFF
● Purity level lamp ON/OFF during general
Mode selection
operation
● Turn power switch on, select mode by
Troubleshooting Tips
You can turn purity level lamp on and off
using lamp selection button.
pressing mode selection switch.
automatic→infant→rhythm
● purity level display lamp ON/OFF during sleeping operation
�
▶ Purity level lamp turns off when
lamp selection button is pressed.
Infant mode
Rhythmical mode
Operate automatically according
to the indoor pollution as just like
automatic operation, airflow
runs at a smaller amount than
automatic operation to prevent
an old and feeble person from
feeling cold by the wind from the
product.
To remove dust efficiently even
the dust at the corner of
indoor, it operates at 4 steps
changing airflows.
Step 1: step 1→step 2→step
3→step 4
Step 2: repetition of step 1
Step 3: step 1→step 3→step
2→step 4
Step 4: repetition of step 1 ~ 3
Press lamp
selection button.
▶ When you turn lamp selection
button again, purity level lamp turns
of in the light of ½ of general
operation light.
※Purity level lamp ON/OFF is possible
during power is shut off.
Purity level
lamp turns off.
Customer Service
15
Automatic mode
Operate efficiently by adjusting
airflow (step 1, step 2, step 3,
and step 4) automatically
according to the indoor
pollution detected by sensor.
It is convenient operation mode
for general users.
�
�
Press lamp
selection button.
Purity level lamp
turns on in the light
of ½ of general
operation light.
16
HOW TO USE
CLEANING METHOD
- Make sure to take power plug out prior to filter cleaning.
Safety Information
Air quality sensor
- Do not use volatile matter or detergent, etc.
- Do not put the product in water or spray water.
The product is initially set in standard sensitivity. You can adjust sensor sensitivity as like the
following methods when humidity is high, when purity level lamp operates more than 2 hours even not
in the case of severe yellow sand and when purity level lamp keeps green more than 1 hour in the
case of high indoor pollution.
� On the condition of operation, press airflow
● Open the air quality sensor cover on the left
side of the unit. Use a wet cotton swab to
clean the lens and wipe up any
remaining moisture.
Operating Instructions
selection / mode selection button more
than 2 seconds at the same time.
Cleaning the air quality sensor (Every 2 Months)
�
� Purity level display lamp on the front side
twinkles in yellowish green color.
Cleaning the air intake and outlet
Troubleshooting Tips
● Clean the air intake and outlet with a soft
brush.
Be careful not to drop the brush into the unit.
� Adjust to desired sensor sensitivity by pressing
airflow selection button. Sensor sensitivity
displayed by twinkling mode display lamp.
Standard
Sensibility
Rhythm
Infant
Automatic
Cleaning the negative ion generator (Every 2 Months)
Customer Service
Insensibility
● Use a dry cotton swab to remove dust on
� If press airflow selection/modes election
button again more than at the same time,
the product starts working normally and
sensor sensitivity input.
the plate.
Be careful not to drop the cotton swab into
the unit.
If there is no button input for 10 seconds,
the value input automatically.
17
18
CLEANING METHOD
● Remove the front cover from the unit and
use a dry cloth or soft brush to dust it off.
Use a wet cloth if necessary but do not use a
polisher.
- Make sure to take power plug out prior to filter cleaning.
- Pre-static filter can be recycled by dust removal or water washing.
- If pre-filter cleaning is not done for a long time, it may cause slow down of
performance of the product.
- Medium filter, HEPA filter, Ag allergy shield filter, deodorization filter can not be
recycled by washing. Washing can damage filters.
Safety Information
Cleaning the front cover
FILTER CLEANING METHOD
Pre-static filter cleaning (Every 2~4 Weeks)
� Lift to separate body pulling the lower
Operating Instructions
part of front cover.
Cleaning the lens on the back of the front cover (Every 2 Months)
● Remove the front cover from the unit and
� Pull pre-static filter handle to take it out.
Troubleshooting Tips
use a dry cloth, soft brush, or cotton swab
to dust off the mood light on the back of
the cover.
Use a wet cloth if necessary but do not use a
polisher.
� Remove dust with vacuum cleaner or
water according to pollution level.
Cleaning the unit
Customer Service
● Use a dry and soft cloth to clean the unit.
Use a wet cloth if necessary but do not use a
polisher.
� Dry well pre-static filter to before installing
in the filter case, and push to the end of
the product. Install front cover in the
product again.
Fix Pre-filter in the filter
case hook correctly to
install in the filter case.
19
�
20
FILTER REPLACEMENT
Make sure to pull power plug out prior to filter change.
Safety Information
Replacing the HEPA filter (Every 12 Months)
Change method
� Open front cover, separate filter case
out of the product and take HEPA filter
out of filter case.
▶ change filters referring to filter preparation section
�
in page 13.
Operating Instructions
▶ Check front side of HEPA filter, Ag allergy shield
filter to change filters.
� separate vinyl packing of new filter
▶ Just use Coway's genuine product filters.
and put HEPA filter in the filter case.
Assemble filter case
in the product and
close, front cover.
Replacing the medium filter (Every 4 Months)
�
case from the product and take
medium filter out of filter case.
Troubleshooting Tips
� Open front cover and separate filter
Replacing the ag allergy shield filter (Every 6 Months)
� Open front cover, separate filter case out
�
of the product and take Ag allergy shield
filter out of Ag allergy
shield filter case.
�
Customer Service
� Remove vinyl packing of the new filter
and put it into medium filter case.
Assemble filter case to the product in
reverse and close
front cover.
� Remove vinyl packing of new filter, put into
�
21
Ag allergy shield filter case so that black
non-woven fabric of Ag
allergy shield comes
to front side. Assemble
�
filter case into the filter
case in reverse and
close front cover.
22
FILTER REPLACEMENT
INSTALLATION METHOD
Make sure to pull power plug out prior to filter cleaning.
Contact A/S center to install the product on the wall.
Installation on the wall method
Fitting method
� Open front cover, separate filter case out
of the product and take AC deodorization
filter out of filter case.
Make sure the product is installed strongly on the screw of wallmounted panel.
� Remove vinyl packing of new filter, Put
wall-mounting parts
Hanger (1 ea)
Troubleshooting Tips
�
screw (6 ea)
Filter Orders
Operating Instructions
Install using wall-mounted panel saving some distance
from wall and ceiling right and left as shown in the picture.
- When the product is used on the wall, it may contaminate
wall or ceiling.
- Be careful not to drop front cover and filter case down
during maintenance or filter change.
- Do not pull power cord.
�
AC deodorization filter into the filter case.
Assemble filter case
into the product in
reverse of separation,
and closefront cover.
Safety Information
Replacing the AC deodorization filter (Every 12 Months)
Pre-static � medium � HEPA � Ag allergy shield � AC deodorization
Cleaning and replacement schedule
anchor (6 ea)
rubber foot (2 ea)
� Determine the place on which the
Filters
Replacement
Cleaning
Pre-Static
Every 2~4 Weeks
Cleaning
Medium
Every 4 Months
Replacement
� Place rubber foot on the 2 ea of round
HEPA
Every 12 Months
Replacement
projection on the lower part of the
back side of the product.
Ag Allergy Shield
Every 6 Months
Replacement
AC Deodorization
Every12 Months
Replacement
�
Customer Service
product is going to be installed.
Make a hole to install
hanger using a nail
and put an anchor in.
Place hanger on it
and fix it on the wall
using screw.
※ based on 24 hours/1 day automatic operation.
23
24
BEFORE ASKING A/S
Installation on the wall method
Please check the followings before request for A/S.
� Separate base by pulling out screw
Please check out the following information before contacting Customer
Service. The unit might not operate properly due to a lack of knowledge
about the unit. If the problem still remains despite referring to this guide, then
please call the customer service center.
on the lower part of the back side.
Symptom
No wind blows
out.
Check
� Is
power plug connected?
Put power plug into AC
220-240V outlet.
� Is
display parts are all off?
Press operation/stop button
and select desired function.
� Check
� Install the product in the hanger.
if it is not a power failure.
Make sure to check after
installation!
Make sure that hanger fits in the
hanger rack on the back side of the
product completely.
No wind change
in automatic/
infant / rhythmical
operation.
in manual operation?
Set the product at the
desired operation mode.
� Is
the room dark?
Wind fixed to the latest
during night silent operation.
( O )
Wind volume is
very weak. It
smells from
ventilator.
Hanger
� Is
dust purity level keeps showing
high?
� Is
dust purity level keeps showing
high?
� Is
filter cleaning and change time
overdue?
the batteries.
� Check
if the batteries are fitted in
correctly (positive, negative)?
( X )
Remote controller
does not work.
� Does
� Is
� Check installation and install filter and front cover on the product.
25
the room light twinkles?
there any electronic goods near
the product?
Page 18
Adjust dust sensor to
insensitivity or standard.
Page 17
Adjust dust sensor to
sensibility or standard.
Page 17
Install correctly. Check
to clean or change the
filters.
Page 20~23
Changer the batteries.
Page 14
Check positive and
negative pole of the
batteries.
Page 14
Customer Service
� Check
Clean dust nearby
sensor lens.
Troubleshooting Tips
there dust on the nearby sensor
lens?
�
Use the product after
power is on.
� Is
� Is
Color of purity
level lamp is
always same.
Remedy
Operating Instructions
�
Safety Information
INSTALLATION METHOD
Change fluorescent light or
move the product.
Keep the product away from
electronic goods more than 2 m.
26
BEFORE ASKING A/S
Symptom
Smells from
blowhole.
Other functional
matter happens
� Is
filter cleaning and change time
overdue?
� Request
& Specifications
Remedy
Check filter cleaning and
change time and filter to clean
or change filters.
Operating Instructions
Purity display
part twinkles.
Check
Safety Information
Warranty Information
Please fill in the blanks
and save this in order
to request service.
for A/S and ask for it.
� Check
the conditions of the problem and take power plug
out to request for A/S and ask for it.
Customer Information
Product Name
Air Purifier
Model
AP-1005AH
Warranty Period
1 year
SER. No.
Day
Month
Year
Warranty Period
Day
Month
Year
Until
Month
Troubleshooting Tips
Purchase Date
Year
Address
TEL.
Customer's Name
MOBILE.
Specifications
Power Supply
Power consumption
Dust Collection Method
Capacity
Maximum Volume of Air
Size
Weight
47W
HEPA Filter Type
Automatic power-off
Customer Service
Safety Method
AC 220-240V/50Hz
10 .5Pyong (a room of an apartment house of 30~35 Pyong )
5.8㎥/min
(W)544X(D)181X(H)510mm
8.8 kg
※ Without prior notice the unit could be changed to improve its performance.
27
28
Safety Information
Product Guarantee
Operating Instructions
1. Parts and components shall be replaced free of charge within the guarantee period if
the defects occur due to manufacturing defects in normal operation.
2. Contact us in case of breakdown.
3. In the following cases, repair work shall be charged even within the guarantee period.
▶Breakdown caused by careless operation or unreasonable repair and renovation.
▶Breakdown caused by nonperformance of the instructions specified in the manual.
4. Even after the expiration of guarantee period, it is possible to apply for charged repair.
5. Present this Letter of Guarantee whenever repair is needed.
6. This Letter of Guarantee is valid only in domestic where you buy this product.
7. Keep this Guarantee carefully as it is not re-issued.
Troubleshooting Tips
Please contact our customer's service center in case you are not satisfied with our A/S service.
● Nationwide A/S Call :
● Customer counseling Center Call:
Fax :
case any other filters or parts which are not genuine
☞ Inproducts
of Coway are used, Coway is not responsible for
any problems related to water quality.
Customer Service
Coway Co., Ltd.
658 Yoogoo-Ri, Yoogoo-Eub, Gongju-Si, Choongnam Province, Korea
29
30