1
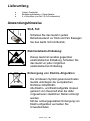
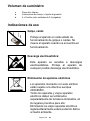
Version 1.0 Bedienungsanleitung Seite 1-5 Manual Page 1-5 Istruzioni per l’uso Pagina 1-5 Notice d’utilisation Page 1-5 Instrucciones de uso Página 1-5 Manual de instruções Página 1-5 Instrukcja obsługi Strona 1-5 инструкция по эксплуатации Стр.1-5 Bedienungsanleitung Interne Festplatte Seite 1 von 5 DE Lieferumfang Intenso Festplatte Bedienungsanleitung + Garantiekarte 4 x Schrauben (nur bei 3,5 Zoll Laufwerken) Anwendungshinweise Stoß, Fall: Schützen Sie das Gerät in jedem Betriebszustand vor Stoß und Fall. Bewegen Sie das Gerät nicht im Betrieb. Elektrostatische Entladung: Dieses Gerät ist sensibel gegenüber elektrostatischer Entladung. Schützen Sie das Gerät vor jeder möglichen elektrostatischen Entladung. Entsorgung von Elektro-Altgeräten Die mit diesem Symbol gekennzeichneten Geräte unterliegen der europäischen Richtlinie 2002/96/EC. Alle Elektro- und Elektroaltgeräte müssen getrennt vom Hausmüll über die dafür vorgesehenen staatlichen Stellen entsorgt werden. Mit der ordnungsgemäßen Entsorgung von Elektro-Altgeräten vermeiden Sie Umweltschäden. Seite 2 von 5 DE Vor der Installation: Bitte beachten Sie die folgenden Sicherheitsinformationen: 1. 2. 3. 4. Entpacken Sie die Festplatte erst unmittelbar vor der Installation aus der Transportverpackung. Zum Vermeiden von elektrostatischen Entladungen sollten Sie sich erden. Fassen Sie hierzu den Metallrahmen des PC oder ein ähnlich ableitendes Material an. Fassen Sie die Festplatten immer an den Seiten an. Vermeiden Sie das Berühren von Komponenten der Platine auf der unteren Seite der Festplatte. Vermeiden Sie Fallenlassen, Schütteln oder zu hartes Aufsetzen der Festplatte. Dies kann zu Schäden am Datenträger führen. Hinweis: Gelegentlich kann es vorkommen, dass S-ATA 1,5Gb/s-Hosts aufgrund von Problemen beim Schnittstellenprotokoll keine S-ATA 3,0 Gb/s Schnittstellenverbindung herstellen können. In diesem Fall wenden Sie sich bitte an den Support des Herstellers der Festplatte. Wichtiger Hinweis: Dieses Produkt ist nicht für eine kommerzielle Nutzung oder für medizinische und spezielle Anwendungen vorgesehen, in denen der Ausfall des Produktes Verletzungen, Todesfälle oder erhebliche Sachschäden verursachen kann. Seite 3 von 5 DE Installation der Festplatte in einem typischen Computersystem: 1. 2. 3. 4. 5. 6. Schalten Sie die Stromversorgung Ihres Computers aus und ziehen Sie das Stromkabel aus der Steckdose. Öffnen Sie das Gehäuse Ihres Computers. Der Öffnungsmechanismus des PC Gehäuses und der Montageplatz für die Festplatte können von PC zu PC unterschiedlich sein. Hilfestellung bietet das Handbuch Ihres PC Herstellers. Stecken Sie die Festplatte in einen freien Laufwerksschacht und befestigen Sie die Festplatte mit den mitgelieferten Schrauben. Verbinden Sie ein Ende des S-ATA Datenkabels mit dem Mainboard und das andere Ende mit der Festplatte. Bitte beachten Sie, dass ein S-ATA Datenkabel nicht im Lieferumfang enthalten ist. Stecken Sie nun ein freies Stromkabel in die entsprechende Buchse an der S-ATA Festplatte. Bitte beachten Sie, dass die Kabel jeweils nur in eine Richtung passen. Überprüfen Sie, ob alle Verbindungskabel richtig gesteckt sind, bevor Sie Ihren Computer erneut einschalten. Starten Sie Ihren Computer wie gewohnt. Hinweis: Stecken Sie bitte niemals einen Stecker gewaltsam in die vorgesehene Buchse an Ihrer Festplatte. Drücken Sie den Stecker gerade herein, bis er richtig sitzt. Einstellungen des Bios: In der Regel wird die S-ATA Festplatte von Ihrem Computer automatisch erkannt werden. Sollte dies nicht der Fall sein, installieren Sie die Festplatte bitte gemäß der Installationsanweisung Ihres Mainboard Herstellers. Partitionierung und Formatierung des Laufwerks: Die neu eingebaute Festplatte muss noch initialisiert und partitioniert werden, bevor Sie die Festplatte verwenden können. Nutzen Sie das Betriebssystem Windows XP, Vista oder Windows 7 wird Ihre Festplatte automatisch erkannt. Seite 4 von 5 DE In der Windows Datenträgerverwaltung können Sie die gewünschte Formatierung und Partitionierung durchführen. Weitere Informationen hierzu entnehmen Sie bitte dem Handbuch zu Ihrem installierten Betriebssystems oder dem Benutzerhandbuch Ihres PC-Systems. Hinweis: Zur Verwendung der Festplatte mit älteren Betriebssystemen kann es vorkommen, dass Sie Treiber für S-ATA Festplatten selbst installieren müssen. Legen sie hierzu die Diskette/CD des Mainboard Herstellers ein oder laden Sie die entsprechenden Treiber von der Website des Herstellers vor Beginn der Installation herunter. Eingeschränkte Garantiebedingungen Die Garantie deckt nur den Ersatz dieses Intenso Produkts ab. Die Garantie gilt nicht für normale Verschleißerscheinungen, die sich aus fehlerhaftem, unsachgemäßen Gebrauch, Nachlässigkeit, Unfall, Inkompatibilität, oder aus mangelhafter Leistung einer bestimmten Computer Hardware oder Computer Software ergeben. Es besteht kein Garantieanspruch bei Nichteinhaltung der Intenso Bedienungsanleitung sowie bei unsachgemäßer Montage, Gebrauch oder bei Defekten durch andere Geräte. Wird das Produkt Erschütterungen, elektrostatische Entladungen, Wärme- oder Feuchtigkeitseinwirkung jenseits der Produktspezifikationen ausgesetzt besteht kein Garantieanspruch. Intenso haftet nicht für Datenverluste oder jegliche auftretende Begleitschäden oder Folgeschäden, für die Verletzung der Garantiebedingungen oder für sonstige Schäden, gleich welche Ursache zugrunde liegt. Warenzeichen: Windows XP / Vista / Windows 7 sind eingetragene Warenzeichen der Microsoft Corporation. Alle Marken und Namen Dritter sind das Eigentum der jeweiligen Anwender. Seite 5 von 5 DE Operating Instructions Internal hard disk Page 1 of 5 EN Scope of Delivery Intenso hard disk Operating instructions + guarantee certificate 4 x screws (only with 3,5“ Inch hard disk) Instructions for use Crush, fall: Protect the device in every operation condition from crush and fall. Do not move the device during operation. Electrostatic discharge: It is an electrostatic discharge sensitive device. Protect the device from every kind of electrostatic discharge. Disposal of WEEE (Waste Electrical and Electronic Equipment) Devices marked with the WEEE logo are subject to the European Community Directive 2002/96/EC. Waste Electrical and Electronic Equipment must be separated from household rubbish and disposed at sites that collect WEEE. By orderly disposing WEEE you will avoid damage caused to the environment. Page 2 of 5 EN Prior to installation: Please observe the following safety information: 1. 2. 3. 4. Remove your hard disk from the transport packaging only directly before installation. To avoid electrostatic discharge you should ground yourself. Please touch the metal frame of the PC or a similar charge eliminating material. Always touch the hard disk on the sides. Do not touch any components of the circuit board on the lower side of the hard disk. Do not drop or shake your hard disk and never put it down too hard. This may damage the data carrier. Note: From time to time the S-ATA 1.5Gb/s-Hosts may not establish any S-ATA 3.0 Gb/s interface connections due to problems with the interface protocol. In this case, please contact the technical support of the manufacturer of the hard disk. Important information: This product is not intended for commercial use, for medical or special applications, where a failure of the product can cause injuries, fatalities or substantial property damage. Page 3 of 5 EN Installation of the hard disk with a typical computer system: 1. 2. 3. 4. 5. 6. Switch off your computer’s power supply and disconnect the power cord from the outlet. Open the housing of your computer. Depending on your PC, the opening method of the PC housing and the installation place of the hard disk may vary. If you need help, please refer to the manual of the manufacturer of your PC. Put the hard disk into a free hard disk duct and attach the hard disk using the screws provided. Connect one end of the S-ATA data cable with the mainboard and the other end with the hard disk. Please note that the product does not come with a S-ATA data cable. Now, please plug a free electric cable into the relevant socket on the S-ATA hard disk. Please note: the cables fit with one end only. Please make sure that all connection cables are properly plugged in before you restart your computer. Now, start your computer as usual. Note: Never put any plugs into any sockets of your hard disk by use of force. Plug in the plug evenly until it fits properly. Bios Settings: Normally, your computer detects the S-ATA hard disk automatically. If not, please install the hard disk according to the installation instructions of the manufacturer of the mainboard. Partitioning and formatting the hard disk: Now, your new hard disk must be initialized and partitioned before you can make use of it. With Windows XP, Vista or Windows 7 your system will detect the hard disk automatically. Using the Windows disk management tool you can format and partition your disk. For more information please refer to manual of the OS installed or the user manual of your PC system. Page 4 of 5 EN Note: If you use your hard disk with older OS, it may happen that you need to install you driver for the S-ATA hard disks yourself. To do so, please insert the disk / CD of the manufacturer of the mainboard or download the relevant driver from the manufacturer’s website prior to the installation. Limited guarantee conditions The guarantee only covers the use of this product. The guarantee does not cover normal wear resulting from faulty, improper use, negligence, accidents, incompatibility or poor functionality of certain computer hardware or computer software. Claim under guarantee does not exist in the case of noncompliance with the user manual as well as in case of improper assembly, use or defects of other devices. Claim under guarantee does not exist in the case that the device is exposed to shock, electro-static discharge, heat or humidity beyond the product specifications. The producer is not liable for data loss or any other occurring indirect damages or secondary damages, for the violation of the guarantee conditions or any other damages, no matter what the reason is. Trademark: Windows XP / Vista / Windows 7 are registered trademarks of the Microsoft Corporation. All trademarks and names of third parties are property of the respective user. Page 5 of 5 EN Istruzioni d’uso Disco Fisso interno Pagina 1 di 5 IT Volume di consegna Disco fisso Intenso Istruzioni per l'uso + certificato di garanzia 4 x viti (solo unità da 3,5 pollici) Avvisi di applicazione Urto, caduta: Protegga l’apparecchiatura da urti e cadute in ogni stato di funzionamento. Non muova l’apparecchio durante il funzionamento. Scarica elettrostatica: Quest’apparecchiatura è sensibile alla scarica elettrostatica. Protegga l’apparecchiatura da ogni possibile scarica elettrostatica. Smaltimento di apparecchiature elettroniche usate Le apparecchiature caratterizzate con questo simbolo sottostanno alla direttiva CEE/2002/96. Tutte le apparecchiature elettroniche ed elettriche usate devono essere smaltite separatamente dai rifiuti domestici pressi i punti di smaltimento previsti dallo stato. Smaltendo correttamente le apparecchiature elettroniche usate evita danni all’ambiente. Pagina 2 di 5 IT Prima dell’installazione: Si prega di osservare le seguenti indicazioni relative alla sicurezza: 1. 2. 3. 4. Estraete il disco rigido dalla confezione solo prima di effettuare l’installazione. Per evitare scariche elettrostatiche dovreste disporre di un collegamento a terra. Tenete toccato perciò il bordo metallico del PC o un materiale dissipativo simile. Afferrate il disco rigido sempre ai lati. Evitate il contatto con le componenti della scheda elettronica sulla parte inferiore del disco rigido. Evitare di far cadere, scuotere o sottoporre ad impatti il disco rigido. Potrebbero essere causati danni al supporto. Nota: Raramente può capitare che gli S-ATA 1,5Gb/s-Hosts non riescano a stabilire alcuna interfaccia di connessione S-ATA 3,0 Gb/s a causa di problemi con il protocollo d’interfaccia. In questo caso si prega di rivolgersi al servizio d’assistenza del produttore del disco rigido. Avviso importante: Questo prodotto non è previsto per uso commerciale, per applicazioni mediche e specialistiche, in cui il non funzionamento del prodotto potrebbe causare ferite, decessi o notevoli danni materiali. Pagina 3 di 5 IT Installazione del disco rigido in un sistema tipico: 1. 2. 3. 4. 5. 6. 7. Spegnete il vostro computer e staccate il cavo della corrente dalla presa. Aprite il telaio del vostro computer. La modalità di apertura del telaio e il punto di montaggio del disco fisso possono essere differenti a seconda del PC. Il manuale d’istruzioni del vostro PC può fornire assistenza a riguardo. Inserite il disco rigido in un drive bay libero e fissatelo con le viti in dotazione. Collegate un’estremità del cavo dati S-ATA con la scheda madre e l’altra estremità con il disco rigido. Notare che il cavo dati SATA non è fornito in dotazione. Inserite ora un cavo di corrente libero nella rispettiva presa del disco rigido S-ATA. Notare che i cavi si inseriscono correttamente in una direzione univoca. Verificate che tutti i cavi di connessione siano correttamente inseriti prima di riaccendere il vostro computer. Avviate il vostro computer come al solito. Nota: Non inserite mai violentemente una spina nella presa del vostro disco rigido. Spingete la spina in linea retta fino a che sia inserita correttamente. Configurazione del Bios: Di norma il disco rigido S-ATA viene riconosciuto automaticamente dal computer. Se ciò non dovesse avvenire, installate il disco rigido seguendo le istruzioni d’installazione della vostra scheda madre rilasciate dal produttore. Partizione e formattazione dell’unità: Il disco rigido appena installato dev’essere ancora inizializzato suddiviso prima di poter essere utilizzato. Con i sistemi operativi Windows XP, Vista o Windows 7, il disco rigido verrà automaticamente riconosciuto. Pagina 4 di 5 IT Nella gestione dei dischi Windows potete eseguire la formattazione e la partizione a vostro piacimento. Potete trovare ulteriori informazioni a riguardo nel manuale del vostro sistema operativo installato o nella guida utenti del vostro PC. Nota: Se utilizzate il disco rigido con sistemi operativi precedenti, può capitare che dobbiate installare in aggiunta i driver per i dischi rigidi S-ATA. Inserite quindi il dischetto/CD della vostra scheda madre o scaricate il driver corrispondente dal sito internet del produttore prima dell’inizio dell’installazione. Condizioni di garanzia limitate La garanzia copre solo la sostituzione di questo prodotto. La garanzia non si applica in caso di segni abituali di usura causati da uso erroneo e scorretto, negligenza, incidenti, incompatibilità o prestazione insufficiente di un determinato hardware o software del computer. Non vi sono diritti di garanzia nel caso in cui non ci si attenga alle istruzioni d’uso o in caso di montaggio e uso scorretto o di difetti causati da altre apparecchiature. Se il prodotto viene esposto a urti, scariche elettrostatiche, penetrazioni di calore o umidità al di là delle specifiche del prodotto, non vi sono diritti di garanzia. Il produttore non si assume alcuna responsabilità per qualsiasi danno secondario o successivo, per la violazione delle condizioni di garanzia o per altri danni, indipendentemente dalla loro causa. Marche: Windows XP / Vista / Windows 7 sono marchi registrati presso Microsoft Corporation. Tutti i marchi e i nomi di terzi sono proprietà dei relativi utilizzatori. Pagina 5 di 5 IT Instructions d’utilisation Disque Dur Interne Page 1 sur 5 FR Contenu Disque dur interne Instructions pour l'utilisation + certificat de garantie 4 x vis (seuls disques 3,5 pouces) Consignes d‘utilisations Ecrasement, chute : L’appareil ne doit subir ni écrasement ni chute pendant son fonctionnement. Evitez de déplacer l’appareil pendant son fonctionnement. Décharge Electrostatique : Cet appareil est sensible aux décharges électrostatiques. N’exposez jamais cet appareil à des décharges électrostatiques. Mise en rebut de vieux appareils électro Les appareils marqués avec ce symbole sont soumis à la directive européenne 2002/96/EC. Tous les vieux appareils électro doivent être mis en rebut séparément du déchet domestique dans les poubelles prévues par l’État. Avec la mise en rebut correcte de vieux appareils électro, vous évitez la pollution de l’environnement. Page 2 sur 5 FR Avant l’installation : Veuillez tenir compte des informations de sécurité suivantes : 1. 2. 3. 4. Sortez le disque dur de son emballage de transport juste avant l'installation et non avant. Reliez-vous à la terre pour éviter des décharges électrostatiques. Pour cela, touchez le cadre en métal du PC ou un matériau dissipateur similaire. Ne touchez les disques durs que sur les côtés. Evitez de toucher les composants de la platine sur le côté inférieur du disque dur. Ne pas faire tomber, secouer ou cogner le disque dur. Cela pourrait provoquer des dommages sur le support de données. Indication : Occasionnellement, il peut arriver que des hosts S-ATA 1,5Gb/s ne puissent pas établir de connexion d'interface S-ATA 3,0 Gb/s en raison de problèmes avec le protocole d'interface. Dans ce cas, veuillez vous adresser au service assistance du fabricant du disque dur. Informations Importantes : Ce produit n’a pas été conçu à des fins commerciales, ni pour des applications médicales ou particulières, conditions dans lesquelles une défaillance du produit pourrait entraîner des blessures, le décès ou des dommages substantiels aux biens. Page 3 sur 5 FR Installation du disque dur dans un système informatique typique : 1. 2. 3. 4. 5. 6. Coupez l’alimentation en courant de votre ordinateur et retirez le câble électrique de la prise. Ouvrez le boitier de votre ordinateur. Le mécanisme d'ouverture du boitier de PC et l’emplacement de montage du disque dur peuvent être différents d'un PC à l'autre. Le manuel du fabricant de votre PC peut vous être utile. Insérez le disque dur dans une baie de lecteur libre et fixez le disque dur à l'aide des vis fournies. Reliez l’extrémité du câble de données S-ATA avec le mainboard et l’autre extrémité avec le disque dur. Veuillez tenir compte du fait que la livraison n'inclut pas de câble de données S-ATA. Insérez alors un câble électrique libre dans la prise correspondante sur le disque dur S-ATA. Veuillez tenir compte du fait que les câbles ne vont respectivement que dans un sens. Vérifiez que tous les câbles de connexion sont correctement branchés avant de mettre à nouveau votre ordinateur en marche. Démarrez votre ordinateur comme d’habitude. Indication : Ne jamais forcer pour insérer une fiche dans la prise prévue sur le disque dur. Enfoncez la fiche à l’intérieur, jusqu’à ce qu’elle soit correctement placée. Réglages du Bio : En règle générale, les disques durs S-ATA sont automatiquement reconnus par votre ordinateur. Si ce n’est pas le cas, installez le disque dur selon les indications d’installation du fabricant de votre mainboard. Partitionnement et formatage du lecteur : Le disque dur récemment monté doit encore être initialisé et des partitions doivent être créées, avant que le disque dur puisse être utilisé. Si vous utilisez le système d’exploitation Windows XP, Vista ou Windows 7, votre disque dur est automatiquement reconnu. Page 4 sur 5 FR Dans la gestion de support de données de Windows, vous pouvez exécuter le formatage et le partitionnement souhaités. Pour plus d’informations, veuillez consulter le manuel du système d'exploitation installé ou le manuel d'utilisateur de votre système informatique. Indication : Pour utiliser le disque dur avec des systèmes d’exploitation plus anciens, il peut arriver que vous deviez installer vous-même le pilote pour disques durs S-ATA. Pour cela, insérez la disquette/CD du fabricant du mainboard ou téléchargez le pilote correspondant à partir du site internet du fabricant avant le début de l'installation. Limites des Conditions de Garantie La garantie ne couvre que l’utilisation de ce produit. La garantie ne couvre pas l’usure normale résultant d’un usage impropre ou défaillant, d’une négligence, d’accidents, d’incompatibilité ou du mauvais fonctionnement de certains appareils ou logiciels informatiques. Les réclamations sous garantie ne sont pas prises en compte dans le cas de non respect du manuel d’utilisation ainsi que dans le cas d’assemblage incorrect, d’utilisation ou de défaillances d’autres appareils. Les réclamations sous garantie ne sont pas prises en compte dans le cas ou l’appareil a été exposé à des chocs, des décharges électrostatiques, la chaleur ou un taux d’humidité dépassant les spécifications du produit. Le fabricant ne peut être tenu responsable en cas de perte de données ou d’autres avaries directes ou secondaires, de violation des conditions de garantie ou tout autre dommage, quelque puisse en être la cause. Marques déposées: Windows XP / Vista / Windows 7 sont des marques déposées de Microsoft Corporation. Toutes les marques déposées et marques tierces parties sont la propriété de leur utilisateur respectif. Page 5 sur 5 FR Manual de instrucciones Disco duro interno Página 1 de 5 ES Volumen de suministro Disco duro Intenso Instrucciones de manejo + tarjeta de garantía 4 x Tornillos (sólo unidades de 3,5 pulgadas) Indicaciones de uso Golpe, caída: Proteja al aparato en cada estado de funcionamiento de golpes o caídas. No mueva el aparato cuando se encuentra en funcionamiento. Descarga electroestática: Este aparato es sensible a descargas electroestáticas. Proteja al aparato de cualquier posible descarga electroestática. Eliminación de aparatos eléctricos Los aparatos marcados con este símbolo están sujetos a la directiva europea 2002/96/EC. Todos los aparatos y viejos aparatos eléctricos deben ser eliminados separadamente de la basura doméstica, en los lugares previstos para ello. Eliminando los viejos aparatos eléctricos reglamentariamente estará evitando daños al medio ambiente. Página 2 de 5 ES Antes de la instalación: Tenga en cuenta las siguientes informaciones de seguridad: 1. 2. 3. 4. Primero, antes de la instalación, desempaquete el disco duro de su embalaje de transporte. Para evitar descargas electroestáticas, debe conectarlo a tierra. Para ello, toque el marco metálico del PC o un material de desviación parecido. Coja el disco duro siempre por los lados. Evite tocar los componentes de platino de la parte inferior del disco duro. El disco duro no debe caerse, sacudirse o manejarse con demasiada fuerza. Ya que podría provocar daños en el soporte de datos. Nota: En ocasiones, puede ser que el S-ATA 1,5Gb/s-Hosts por problemas en el protocolo en la interfaz no pueda crear ninguna conexión con la interfaz S-ATA 3,0 Gb/s. En este caso, póngase en contacto con la asistencia técnica del fabricante del disco duro. Advertencia importante: Este producto no es para uso comercial, está concebido para un uso especial y médico, en los que los fallos del producto, pueden causar lesiones, la muerte o considerables daños colaterales. Página 3 de 5 ES Instalación del disco duro en un sistema informático estándar: 1. 2. 3. 4. 5. 6. Desconecte el suministro eléctrico de su ordenador y desenchufe el cable eléctrico. Abra la carcasa del ordenador. Los mecanismos de apertura de la carcasa del PC y el lugar de montaje del disco duro pueden cambiar según el tipo de PC. Puede encontrar ayuda en el manual del fabricante del PC. Coloque el disco duro en una ranura libre de la unidad de disco y fije el disco duro con los tornillos suministrados. Conecte un extremo del cable de datos S-ATA a la placa base y el otro extremo al disco duro. Tenga en cuenta que el cable de datos S-ATA no está incluido en el envío. Enchufe ahora un cable eléctrico libre en la clavija correspondiente del disco duro S-ATA. Fíjese en que los cables vayan sólo en una dirección. Compruebe que todos los cables de conexión estén correctamente conectados, antes de volver a encender su ordenador. Encienda su ordenador como lo hace habitualmente. Nota: Nunca conecte con una fuerza excesiva el enchufe a la clavija prevista para ello en su disco duro. Introduzca el enchufe de forma recta hasta que esté correctamente asentado. Ajustes de la Bios: Generalmente, el disco duro S-ATA será reconocido por su ordenador automáticamente. Si esto no ocurriese, instale el disco duro según las instrucciones de instalación del fabricante de la placa base. Partición y formateado del disco duro El nuevo disco duro instalado debe todavía ser iniciado y particionado, antes de poder utilizarlo. Su disco duro será reconocido automáticamente, si utiliza los sistemas operativos Windows XP, Vista o Windows 7. Página 4 de 5 ES Para la administración del soporte de datos de Windows, podemos realizar la partición y el formateado deseados. Podrá obtener más información en el manual del sistema operativo que tiene instalado o en el manual del usuario del sistema del PC. Nota: Para la utilización de su disco duro en un sistema operativo más antiguo, deberá instalar usted mismo los drivers para el disco duro S-ATA. Introduzca el disquete/ CD del fabricante de la placa base y descargue el driver correspondiente de la página web del fabricante antes de empezar con la instalación. Condiciones limitadas de garantía La garantía sólo cubre la sustitución de este producto. La garantía no cubre muestras normales de desgaste producidas por un uso erróneo o inadecuado, por negligencia, accidente, incompatibilidad, o por el funcionamiento defectuoso de un hardware o software informático. No existe derecho a garantía si no se siguen las instrucciones de uso, así como en caso de montaje o uso inadecuado, o por daños producidos por otros aparatos defectuosos. No existe derecho a garantía, si el producto ha recibido sacudidas, descargas eléctricas, o si ha sido expuesto a fuentes de calor o de humedad no conformes a las especificaciones de estas instrucciones de uso. El fabricante no se responsabiliza por la pérdida de datos o daño colaterales o como consecuencia de estos, ni de la violación de las condiciones de garantía, ni de otros daños, independientemente de la Marca registrada: Windows XP / Vista / Windows 7 son marcas registradas de Microsoft Corporation. Todas las marcas y nombres de terceros son propiedad del usuario correspondiente. Página 5 de 5 ES Manual de instruções Disco rígido interno Página 1 de 5 PT Âmbito de fornecimento Disco rígido Intenso Manual de instruções + cartão de garantia 4 x parafusos (apenas drives de 3,5 polegadas) Indicações de uso Colisões, quedas: Proteja o aparelho contra colisões ou quedas em qualquer situação de funcionamento. Não mova o aparelho durante o uso. Descarga Eletroestática: Este aparelho é sensível a descargas eletroestáticas. Proteja o aparelho de quaisquer descargas eletroestáticas. Eliminação de aparelhos domésticos Os aparelhos que vêm marcados com este símbolo estão sujeitos às normas européias 2002/96/EC. Todos os aparelhos elétricos e eletrodomésticos devem ser separados do lixo caseiro e depositados em lugares próprios, determinados pelo estado. Com a eliminação correta de aparelhos eletrodomésticos podem ser evitados danos no meio ambiente. Página 2 de 5 PT Antes da instalação: Por favor siga as seguintes informações de segurança: 1. 2. 3. 4. Remova a embalagem de transporte do disco rígido apenas imediatamente antes da instalação. Para evitar descargas electrostáticas deve ligar-se à terra. Para esse efeito toque na moldura metálica do computador ou em material parecido que faça ligação à terra. Agarre os discos rígidos sempre pelos lados. Evite tocar em componentes da placa no lado inferior do disco rígido. Não agite nem deixe cair o disco rígido e não utilize demasiada força ao pousá-lo, pois isso pode provocar danos no suporte de dados. Nota: Pode eventualmente surgir que o S-ATA 1,5Gb/s-Hosts não consiga establecer uma ligação à porta S-ATA 3,0 Gb/s devido a problemas no protocolo das portas.Contacte nestes casos o apoio a clientes do produtor do disco rígido. Aviso importante: Este produto não foi produzido para a utilização comercial, para uso medicinal e especializado, nos quais a interrupção do funcionamento do produto venha a causar ferimentos, falecimentos ou danos materiais consideráveis. Página 3 de 5 PT Instalação do disco rígido num sistema típico de computadores: 1. 2. 3. 4. 5. 6. Desligue o computador da electricidade e retire a ficha da tomada. Abra a caixa do seu computador. O mecanismo de abertura da caixa do computador e o local de montagem para o disco rígido podem variar de computador para computador. Para ajudas consulte o manual de instruções do produtor do computador. Insira o disco rígido numa unidade livre e encaixe o disco rígido com os parafusos fornecidos. Conecte uma extremidade do cabo de dados S-ATA com a placa- mãe e a outra extremidade com o disco rígido. Por favor note que neste volume de entrega não se inclui um cabo de dados S-ATA. Insira um cabo eléctrico livre na respectiva tomada no disco rígido S-ATA. Por favor note que os cabos apenas encaixam numa direcção. Antes de ligar novamente o computador, verifique se todos os cabos de de conexão estão correctamente posicionados. Inicie o computador como de costume. Nota: Nunca utilize força ao inserir a ficha na tomada do seu disco rígido. Insira a ficha a direito até encontrar a posição correcta. Configuração do Bios: O disco rígido S-ATA do seu computador é detectado automaticamente pelo seu computador. Caso contrário siga as instruções de instalação do produtor da sua placa-mãe para efectuar a instalação do seu disco rígido. Partição e formatação da unidade: Antes da utilização do disco rígido então montado é necessário iniciar e dividi-lo. Caso utilize o sistema operativo Windows XP, Vista ou Windows 7 o seu disco rígido é detecado automaticamente. Página 4 de 5 PT Na gestão dos suportes de dados de Windows pode efectuar a formatação e partição pretendida. Consulte o manual do sistema operativo instalado ou o manual de instruções do seu sistema do computador para mais informações. Nota: Ao utilizar o disco rígido com sistemas operativos mais antigos poderá ter que instalar manualmente os drivers para os discos rígidos. Antes de iniciar a instalação insira nesse caso a disquete/CD do produtor da placa-mãe ou carregue o driver respectivo da página web do produtor. Condições limitadas de garantia A garantia cobre somente a substituição deste produto. A garantia não cobre marcas de desgaste normais, originadas por uso incorreto ou fora das orientações indicadas, falta de cuidado, acidente, incompatibilidade ou por desempenho insuficiente de certos Hardwares ou Softwares. A garantia não é válida se as instruções do Manual de Uso não forem seguidas corretamente, bem como em caso de montagem ou uso fora das orientações indicadas, ou defeitos provocados por outros aparelhos. Se o produto for submetido a abalos, descargas eletroestáticas, influência de calor ou umidade além das indicadas nas especificações do produto, não constitui direito à garantia. A produtor não se responsabiliza por perda de dados ou quaisquer outros danos colaterais ou consequentes, por violações dos termos da garantia ou por outros danos, seja qual for a causa. Marcas registadas: Windows XP / Vista / Windows7 são marcas registadas da Microsoft Corporation. Todas as marcas e nomes de terceiros são propriedade dos respectivos utilizadores. Página 5 de 5 PT Instrukcja obsługi Wewnętrzny dysk twardy Strona 1 z 5 PL Dostarczone elementy Dysk twardy Intenso Instrukcja obsługi + karta gwarancyjna 4 x Śruby (tylko 3,5-calowy dysk) Warunki używania Uderzenie, upadek: Należy chronić urządzenie przed uderzeniem i upadkiem w każdych warunkach. Nie należy poruszać urządzeniem w czasie jego pracy. Wyładowania elektrostatyczne: Urządzenie to jest wrażliwe na wyładowania elektrostatyczne. Należy je chronić przed możliwymi wyładowaniami elektrostatycznymi. Utylizacja zużytego sprzętu elektronicznego Oznaczone powyższym symbolem urządzenia podlegają Dyrektywie europejskiej nr 2002/96/EC. Wszystkie zużyte urządzenia elektryczne i elektroniczne muszą być utylizowane osobno od pozostałych odpadków domowych, za pośrednictwem specjalnie przeznaczonych do tego celu placówek państwowych. Utylizując zużyty sprzęt elektroniczny w odpowiedni sposób zapobiegają Państwo zagrożeniu dla środowiska naturalnego. Strona 2 z 5 PL Przed instalacją: Proszę zwrócić uwagę na następujące wskazówki bezpieczeństwa: 1. 2. 3. 4. Dysk twardy rozpakować z opakowania transportowego dopiero bezpośrednio przed instalacją. W celu uniknięcia wyładowań elektrostatycznych należy się uziemić. W tym celu należy dotknąć metalowej ramy komputera lub podobnego materiału uziemiającego. Dysk twardy należy zawsze dotykać po bokach. Należy unikać dotykania elementów obwodu drukowanego znajdującego się na spodniej części dysku. Należy unikać upadku, wstrząsów lub uderzenia o inne przedmioty dysku twardego. Może to prowadzić do uszkodzenia nośnika danych. Wskazówka: Czasami może się zdarzyć, że kontrolery S-ATA 1,5Gb/s ze względu na problemy z protokołem nie mogą utworzyć połączenia S-ATA 3,0 Gb/s. W takim przypadku prosimy zwrócić się do wsparcia technicznego producenta dysku twardego. Ważna wskazówka: Ten produkt nie jest przeznaczony do użytkowania komercyjnego, medycznego lub zastosowań specjalnych, w przypadku których jego awaria może spowodować zranienia, śmierć lub znaczne straty materialne. Instalacja dysku w typowym komputerze: 1. 2. Wyłączyć zasilanie sieciowe komputera i wyjąć wtyczkę zasilania z kontaktu. Otworzyć obudowę komputera. Sposób otwierania obudowy komputera i miejsce montażu dysku twardego jest zależne od Strona 3 z 5 PL 3. 4. 5. 6. typu obudowy. Pomoc w tym zakresie można znaleźć w instrukcji obsługi komputera. Włożyć dysk twardy w wolne miejsce montażowe i umocować go za pomocą dołączonych śrub. Podłączyć jeden koniec przewodu S-ATA do odpowiedniego gniazda na płycie głównej, a drugi do dysku twardego. Proszę pamiętać, że przewód S-ATA nie jest objęty dostawą. Wolny przewód zasilania podłączyć do odpowiedniego gniazda dysku twardego S-ATA. Proszę zwrócić uwagę, że wtyczki można podłączyć jedynie w jednej pozycji. Przed ponownym włączenie komputera należy sprawdzić, czy wszystkie przewody są podłączone prawidłowo. Uruchomić komputer w normalny sposób. Wskazówka: Nigdy nie próbować wkładać wtyczki do gniazda dysku twardego z użyciem siły. Wtyczkę wkładać na wprost i docisnąć, aby była pewnie zamontowana. Ustawienia BIOS: Z reguły dyski twarde S-ATA są przez komputer rozpoznawane automatycznie. Jeśli to nie następuję, należy przeprowadzić instalację dysku zgodnie z instrukcją obsługi płyty głównej. Zakładanie partycji i formatowanie dysków: Zamontowany dysk twardy musi być jeszcze zainicjonowany i należy przeprowadzić podział partycji, zanim będzie można korzystać z dysku. W systemach operacyjnych Windows XP, Vista i Windows 7 dyski twarde są rozpoznawane automatycznie. Tworzyć partycje i formatować dysk można w aplikacji Zarządzanie dyskami systemu Windows. Dalsze informacje można znaleźć w podręczniku systemu operacyjnego lub instrukcji obsługi komputera. Strona 4 z 5 PL Wskazówka: W przypadku korzystania z dysku twardego pod kontrolą staszego systemu operacyjnego konieczna może być samodzielna instalacja sterowników dla dysków S-ATA. W tym celu przed rozpoczęciem montażu należy skorzystać z nośnikach danych dostarczonego przez producenta płyty głównej lub pobrać sterownik ze strony internetowej producenta. Warunki ograniczonej gwarancji Gwarancja obejmuje wyłącznie wymianę tego produktu. Gwarancja nie obejmuje normalnych objawów eksploatacji wynikających z błędnego, niewłaściwego użytkowania, zaniedbania, wypadku, niekompatybilności lub z niewystarczającej wydajności odpowiedniego sprzętu lub oprogramowania komputerowego. Brak jest roszczeń z tytułu gwarancji w przypadku nie dostosowania się do instrukcji obsługi, niewłaściwego montażu, użytkowania lub uszkodzenia spowodowanego innym urządzeniem. Brak jest roszczeń z tytułu gwarancji, jeśli urządzenie zostało narażone na wstrząsy, wyładowania elektrostatyczne, temperaturę lub wilgotność inną niż określona w specyfikacji produktu. Producent nie odpowiada za utratę danych i jakiekolwiek szkody z tym związane i z tego wynikające, złamanie warunków gwarancji, lub za jakiekolwiek szkody bez względu na ich przyczynę. Znaki towarowe: Windows XP / Vista / Windows7 są zastrzeżonymi znakami handlowymi korporacji Microsoft. Wszystkie marki i nazwy należące do podmiotów trzecich są wyłączną własnością ich użytkowników. Strona 5 z 5 PL Руководство по эксплуатации Внутренний жѐсткий диск Стр. 1 из 5 RU Комплект поставки Intenso жесткий диск Инструкция по эксплуатации + гарантийная карта 4 x винта (только 3,5-дюймовых накопителей) Указания пользователя Удар, падение: Защищайте прибор в любом рабочем состоянии от удара и падения. Не передвигайте прибор в рабочем состоянии. Электростатический разряд: Данный прибор очень чувствителен к электрическому разряду. Защищайте прибор от всяких электрических разрядов. Утилизация старых электроприборов Обозначенные данным символом приборы должны соответствовать европейской директиве 2002/96/EC. Все электроприборы и старые электроприборы должны утилизироваться отдельно от домашнего мусора через предусмотренные для этого государством пункты. Надлежащая утилизация электроприборов и старых электроприборов служит предотвращению нанесения вреда окружающей среде. Стр. 2 из 5 RU Перед установкой: Просьба ознакомиться безопасности: 1. 2. 3. 4. со следующими рекомендациями по Доставать из упаковки жесткий диск следует только непосредственно перед установкой. Для предотвращения поражения электростатическим зарядом следует заземлиться. Чтобы удалить возможный заряд, следует дотронуться до металлического корпуса ПК либо другой его токопроводящей части. Всегда беритесь только за боковые грани жесткого диска. Не дотрагивайтесь до компонентов на печатной плате с нижней стороны корпуса жесткого диска. Запрещается бросать либо трясти жесткий диск, а также слишком сильно надавливать на него. Это может привести к повреждению носителя данных. Примечание: Иногда, из-за наличия проблем в интерфейсе протокола, хост S-ATA на 1,5 Гбит/с не может установить прямое соединение с интерфейсом S-ATA на 3,0 Гбит/с. В этом случае следует связаться со службой технической поддержки производителя жесткого диска. Важно: Dies Данный продукт не предназначен для коммерческого использования, медицинского или особого употребления, при котором выход продукта из строя может привести к телесным повреждениям или значительным материальным ущербам. Стр. 3 из 5 RU Стандартная процедура установки жесткого диска для типичной компьютерной системы: 1. Отключить подачу питания на компьютер и отсоединить сетевой шнур из розетки. 2. Открыть корпус компьютера. В зависимости от модели, процедура открытия корпуса и место установки жесткого диска могут быть различными. При необходимости, следует обратиться к руководству производителя ПК. 3. Установить жесткий диск в соответствующий паз и закрепить поставляемыми в комплекте винтами. 4. Подключить один конец кабеля S-ATA к материнской плате, а другой – к жесткому диску. Следует иметь в виду, что кабель S-ATA не входит в комплект поставки жесткого диска. Затем следует подключить кабель питания к соответствующему разъему жесткого диска. Внимание: кабель подходит только одним концом. 5. Перед включением компьютера необходимо убедиться, что все кабели надежно подключены. 6. После этого, как обычно, следует произвести запуск компьютера. Примечание: Никогда не прилагайте чрезмерные усилия при подключении кабелей к гнездам. Подключать разъем необходимо плавно и равномерно, до полной посадки. Настройки в БИОС: Обычно компьютер автоматически определяет новый жесткий диск с интерфейсом S-ATA. Однако если этого не произошло, установку следует производить в соответствии с инструкциями производителя материнской платы. Создание разделов и форматирование жесткого диска: Перед началом использования жесткого диска его необходимо инициализировать и разбить на разделы. При использовании Стр. 4 из 5 RU Windows XP, Vista или Windows 7, ОС автоматически определит жесткий диск. Для форматирования и создания разделов можно использовать стандартную утилиту управления дисками Windows. Для получения дополнительной информации следует обратиться к руководству используемой ОС либо руководству по эксплуатации ПК. Примечание: Если на компьютере используется устаревшая ОС, может понадобиться самостоятельная установка драйверов для жестких дисков с интерфейсом S-ATA. Драйвер предварительно устанавливается с компакт-диска производителя материнской платы, либо посредством его загрузки с интернет-сайта производителя. Ограниченные условия гарантии Гарантия включает только возмещение продукта. Гарантия не распространяется на обычные признаки износа, которые являются следствием неправильного и неумелого использования, небрежности, аварии, несовместимости или неудовлетворительной работы определѐнного компьютерного оборудования или программного обеспечения. Гарантия не распространяется на случаи несоблюдения условий эксплуатации, а также неумелого монтажа, использования или при повреждениях другими предметами. Если продукт был повергнут влиянию сотрясений, электростатических разрядов, тепла или влажности, которые не входят в описание продукта, требование на гарантию теряется. Производитель не отвечает за потерю данных или возникшие сопутствующие или косвенные убытки, за нарушение гарантийных условий или другие убытки, независимо от того, какова их причина. Торговая марка: Windows XP / Vista / Windows 7 являются зарегистрированными торговыми марками корпорации Microsoft. Все марки и названия третьей стороны являются собственностью соответствующего пользователя. Стр. 5 из 5 RU GARANTIE KARTE Sehr geehrte Intenso-Kundin, sehr geehrter Intenso-Kunde, vielen Dank, Sie haben sich für ein hochwertiges Intenso Produkt entschieden. Alle Intenso Produkte unterliegen ständigen Qualitätsprüfungen und selbstverständlich gilt die gesetzliche Gewährleistungszeit ab Kaufdatum. Bitte bewahren Sie deshalb den Kassenbon als Kaufnachweis auf. Garantiebedingungen Die Garantieleistung gilt nur für Material- und Produktionsfehler. Die Intenso GmbH haftet nicht für den Verlust von Daten auf eingesandten Geräten. Die unentgeltliche Garantieleistung bezieht sich auf die Reparatur oder den Austausch mangelhafter Teile. Bitte haben Sie Verständnis, dass wir keine Garantieleistungen erbringen können bei z.B.: missbräuchlicher oder unsachgemäßer Behandlung, Installation oder Anwendung Beschädigungen, Kratzer oder Abnutzung Veränderungen, Eingriffen oder Reparaturen durch Dritte Schäden durch höhere Gewalt oder Transport Ihre Intenso GmbH REKLAMATIONSABLAUF Im Fall einer Reklamation gehen Sie bitte wie folgt vor: 1. Es werden nur Rücksendungen mit vollständigem Zubehör und Kassenbon akzeptiert. 2. Weiterhin ist eine RMA-Nummer für Rücksendungen zwingende Voraussetzung. Diese RMA-Nummer können Sie per Email oder über die Service-Hotline anfordern. 3. Bitte verpacken Sie das Produkt inklusive des gesamten Zubehörs und Kassenbon transportsicher. Das Paket muss ausreichend frankiert sein. 4. Bitte bringen Sie die RMA-Nummer deutlich sichtbar außen auf dem Paket an. Bitte an folgende Service-Adresse schicken: INTENSO GMBH Service Center (Ihre RMA-Nr.) Kopernikusstraße 12-14 D-49377 Vechta Service Hotline: +49 (0) 900 –1 50 40 30 (0,39 € / min. aus dem deutschen Festnetz. Mobilfunkpreise können abweichen.) Email: [email protected] Internet: www.intenso.de GUARANTEE CERTIFICATE Dear Intenso-Customer, Thank you very much for purchasing this Intenso high-quality product. All Intenso products are subject to continuous quality inspections. The statutory warranty period will certainly start with the date of purchase. Thus, please store the receipt as proof of purchase. Warranty Conditions Warranty claims only apply to material and manufacturing errors. Intenso GmbH is not liable for the loss of any data that are on devices sent to us. Free warranty only applies to repairs or replacements of defective parts. Please understand that we cannot render any guarantee services for e.g.: Improper or inappropriate treatment, installation or use Damages, scratches or wear Modifications, interventions or repairs by third parties Damages due to Acts of God or transport Intenso GmbH PROCESSING OF COMPLAINTS In the case of complaints, please proceed as follows: 1. We only accept returns containing the complete accessory and receipt. 2. Additionally, an RMA number for returns is mandatory. You can request this RMA number via e-mail or service hotline. 3. Please pack the product including the entire accessory and the receipt and secure them for transport. Please affix an appropriate stamp. 4. Please apply the RMA number clearly visible on the outside of the package. Please send your package to the following service address: INTENSO GMBH Service Center (Your RMA-No.) Kopernikusstraße 12-14 D-49377 Vechta Germany Service Hotline: +49 (0) 900 –1 50 40 30 (0,39 € / min. with calls from the German telephone network. Different rates apply to calls from mobile phones.) E-mail: [email protected] Internet: www.intenso.de