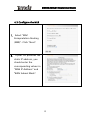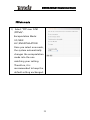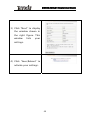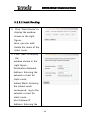
1
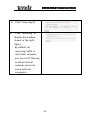
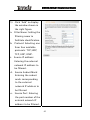
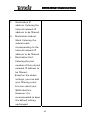
Copyright Statement is the registered trademark of Shenzhen Tenda Technology Co., Ltd. Other trademark or trade name mentioned herein are the trademark or registered trademark of the company. Copyright of the whole product as integration, including its accessories and software, belongs to Shenzhen Tenda Technology Co., Ltd. Without the permission of Shenzhen Tenda Technology Co., Ltd, individual or party is not allowed to copy, plagiarize, imitate or translate it into other languages. All the photos and product specifications mentioned in this manual are for references only, as the upgrading of software and hardware, there will be changes. And if there are changes, Tenda is not responsible for informing in advance. If you want to know more about our products information, please visit our website at www.tenda.cn D840R ADSL2+ Router User Guide CONTENTS Chapter 1 Overview ....................................................1 1.1 Product Introduction .................................................... 1 1.2 Product Features ........................................................... 1 1.3 Supporting Protocol ..................................................... 1 1.4 Data Encapsulation ....................................................... 3 Chapter 2 Hardware Installation..................................4 2.1 ADSL Router Connection.................................... 4 2.2 USB Installation.................................................. 4 Chapter 3 Before Web Management Configuration ......5 3.1 Network Configuration of Your Computer.......... 5 3.2 Verifying the Connection ................................... 8 3.3 Logging in to the Router.................................... 9 Chapter 4 Quick Installation Guide............................10 4.1 Configure the PPPoE ........................................ 11 D840R ADSL2+ Router User Guide 4.2 Configure the PPPoA ........................................ 13 4.3 Configure the MER ........................................... 15 4.4 Configure the IPoA........................................... 18 Chapter 5 Configuration Description.........................20 5.1Device Information ........................................... 20 5.2Advanced Settings ............................................ 23 5.2.1 WAN..........................................................23 5.2.2 LAN ...........................................................49 5.2.3 NAT ..........................................................51 5.2.4 Security .....................................................57 5.2.5 Routing .....................................................65 5.2.6 DNS ..........................................................67 5.2.7 DSL ...........................................................72 5.3 DHCP ............................................................... 73 5.4 System Tool..................................................... 73 5.4.1 Settings ....................................................74 5.4.2 System Log ...............................................76 5.4.3 Internet Time ............................................78 5.4.4 Access Control ..........................................79 D840R ADSL2+ Router User Guide 5.4.5 Software Update .................................................. 82 5.4.6 Save/Reboot ......................................................... 82 Chapter 6 Appendix .................................................83 Appendix 1: Troubleshooting .................................... 83 Appendix 2: FAQ ............................................................ 85 D840R ADSL2+ Router User Guide Chapter 1 Overview 1.1 Product Introduction D840R ADSL2+ Router complies with ADSL, ADSL2 and ADSL2+ standards. Supporting up to 24Mbps downstream rate and 1Mbps upstream rate, it supports multiple network protocols and provides NAT Router, Bridge and switch functions. Built-in 4-port switch can add more end users without purchasing hub or switch. In addition, the intelligent software, Setup Wizard, can assist you to access the Internet fast and easily. Powerful and exquisite, it is the best choice for SOHO and small enterprise users to share the Internet. 1.2 Product Features Provides up to 24Mbps downstream rate and 1Mbps upstream rate Supports DHCP, NAT, IGMP, ICMP, ARP Four 10/100M Auto-Negotiation RJ-45 Ethernet ports for network adapter, Hub and switch 1 D840R ADSL2+ Router User Guide connectivity One RJ-11 port and Voice Splitter included One USB port support for connecting PC’s USB port Provides Web-based management and firmware upgrade Complies with ADSL, ADSL2 and ADSL2+ standards Provides NAT Router, Bridge and switch functions Compatible with all mainstream DSLAM (CO) Provides PPPOE, PPPOA, CLIP protocols Supports firewall and hacker attack prevention Supports Internet Multi Media Provides static and dynamic routes Up to 6.5km transmission distance Setup Wizard support for fast configurations 1.3 Supporting Protocol Supports full-rate ADSL2+ standard ANSI T1. 413 Issue 2 ITU-T G. 992. 1 (G. dmt) ITU-T G. 992. 2 (G. Lite) 2 and easy D840R ADSL2+ Router User Guide ITU-T G. 992. 3 ITU-T G. 992. 5 1.4 Data Encapsulation Supports RFC 1483 Bridge、RFC 1483 Router Supports Classical IP over ATM (RFC 1577) Supports PPP over ATM(RFC 2364) Supports PPP over Ethernet (RFC 2516) 3 D840R ADSL2+ Router User Guide Chapter 2 Hardware Installation 2.1 ADSL Router Connection 1. Connect one end of the telephone line to the LINE port of the D810R and the other end to the MODEM port of the voice splitter. 2. Connect the power adapter to the PWR port of the D810R. 3. Use an Ethernet cable to connect the LAN port with the NIC of your computer. 2.2 USB Installation To connect the device to the USB interface of the computer, please follow the steps below: 1. Connect to the USB port of the D810R through a USB cable. 2. Connect the other end of the cable to the computer’s USB port. 3. Set up the USB driver provided by the CD-ROM. 4 D840R ADSL2+ Router User Guide Chapter 3 Before Web Management Configuration 3.1 Network Configuration of Your Computer 1.On the desktop of your computer, right-click “My Network Places”, and then select “Properties” in the shortcut menu. 2. In the window that appears, right-click “Local Area Connection”, and then select "Properties”. 5 D840R ADSL2+ Router User Guide 3.In the pop-up dialog box, check “Internet Protocol (TCP/IP)” and then click “Properties”. 4. In the window that appears, select “Obtain an IP address automatically (O)” or “Use the following IP address (S)”. 1) When “Obtain an IP address automatically (O)” is selected, the window is as shown in the right figure. 6 D840R ADSL2+ Router User Guide 2) “Use the following IP address”: IP address: 192.168.1.XXX (XXX ranges 2 ~ 254) Subnet mask: 255.255.255.0 Default gateway: 192.168.1.1 DNS server: Enter the local DNS server address (for this address, you can consult your ISP) or the router’s default gateway as the DNS server. At the end of the setting, click “OK” to submit the settings. And then click “OK” in the “Local Area Connection Properties” window. 7 D840R ADSL2+ Router User Guide 3.2 Verifying the Connection 1. Select “Start→Programs →Accessories→Comma nd Prompt”. According to the format shown in the right figure, enter “Ping 192.168.1.1” and press Enter. If the system gives the result shown in the right figure, the connection between your computer and the router is OK. 8 D840R ADSL2+ Router User Guide 3.3 Logging in to the Router 1. Open the web browser, and enter “http://192.168.1.1” in the address field, and then press Enter. 2.In the pop-up login window, enter the user name (“admin”) and password (“admin”), and click “OK” (both user name and password are “admin” by default). 3.If the user name and password entered are correct, the browser displays the administrator window shown right. 9 D840R ADSL2+ Router User Guide Chapter 4 Quick Installation Guide In the Wizard page, Select the required your “Country” and “Area” from the drop-down lists. If you can not find your country and city in these lists, you can consult your ISP and manually enter the VPI and VCI values of your area. After that, click “Next”. 10 D840R ADSL2+ Router User Guide 4.1 Configure the PPPoE 1. Select “PPP over Ethernet (PPPoE)”. Click “Next”. 2. Enter the PPP user name and password provided by the ISP. If the ISP also provides the PPPoE service name, you can enter the corresponding value; otherwise, keep this field null. Use the default values for other options. For their more settings, refer to the detailed description in the Advanced Settings. 11 D840R ADSL2+ Router User Guide 3. Click “Next” and check to enable the WAN service (enabled by default). 4. Click “Next” to display the window shown the summary of your settings. 5.Click “Save/Reboot” to activate your settings. The system automatically establishes connection in a few minutes. 12 D840R ADSL2+ Router User Guide 4.2 Configure the PPPoA 1 . Select “PPP over ATM (PPPoA)”. Click “Next”. 2. Enter the PPP user name and password provided by the ISP. If the ISP also provides the PPPoA service name, you can enter the corresponding value; otherwise, keep this field null. Use the default values for other options. For their more settings, refer to the detailed description in the Advanced Settings. 13 D840R ADSL2+ Router User Guide 3. Click “Next” and check to enable the WAN service (enabled by default). 4. Click “Next” to display the window shown the summary of your settings. 5. Click “Save/Reboot” to activate your settings. The system automatically establishes connection in a few minutes. 14 D840R ADSL2+ Router User Guide 4.3 Configure the MER 1. Select “MAC Encapsulation Routing (MER)”. Click “Next”. 2. If your ISP provides the static IP address, you should enter the corresponding values in “WAN IP Address” and “WAN Subnet Mask”. 15 D840R ADSL2+ Router User Guide 3. If your ISP provides the dynamic IP address, you should select “Obtain an IP address automatically”. 4. Click “Next”. In the case of multiple computers share the Internet access service, it is recommend- ed to enable NAT and firewall. 16 D840R ADSL2+ Router User Guide 5. Click “Next” to display the window shown the summary of your settings. 6. Click “Save/Reboot” to activate your settings. The system automatically establishes connection in a few minutes. 17 D840R ADSL2+ Router User Guide 4.4 Configure the IPoA 1. Select “IP over ATM (IPoA)”. Click “Next”. 2. Enter the fixed IP address and subnet mask in corresponding fields. 3. Click “Next”. It is recommended to enable the NAT and firewall. 18 D840R ADSL2+ Router User Guide 4. Click “Next” to display the window shown the summary of your settings. 5. Click “Save/Reboot” to activate your settings. The system automatically establishes connection in a few minutes. 19 D840R ADSL2+ Router User Guide Chapter 5 Configuration Description 5.1Device Information 1) Click “Running Status” and “Summary” to display the “Device Info” and “DSL Info” window. 2) The device information covers: a. Board ID b. Software version c. Boot version d. LAN MAC address e. WAN MAC address f. Running time g. System time 20 D840R ADSL2+ Router User Guide 3) The DSL information covers: a. Upstream link rate b. Downstream link rate c. LAN IP address d. Default gateway: In the pure bridge mode, there is no gateway; in other modes such as PPPoE and PPPoA, the gateway address is the IP address of the upstream device. e. Primary DNS server: In the PPPoA/PPPoE mode, the DNS obtained address from is the upstream device; in the pure bridge mode, it is not required to set the DNS address; in other modes, you can manually enter the DNS address. f. Secondary DNS server 21 D840R ADSL2+ Router User Guide 4) Click “WAN” in left menu to display the window shown in the right figure. From the table, you can know the general information on WAN. 5) Click “Route” to display the window shown in the right figure, displaying the default information. 22 D840R ADSL2+ Router User Guide 5.2 Advanced Settings 5.2.1 WAN Click “WAN”. If the WAN information has been set, you can edit or modify it in this window. Caution: After modifying/ adding new information, you need to reboot the device to activate the setting. 1) VPI (Virtual Path Identifier): Virtual path between two points in the ATM network. Its value ranges 0 ~ 255. 2) VCI (Virtual Channel Identifier): Virtual channel between two points in the ATM network. Its value ranges 32 ~ 65535 (1 ~ 31 are reserved for the well-known protocols). 23 D840R ADSL2+ Router User Guide 3) Service category: Selecting one from five available service categories. 4) Enable Quality of Service (QoS): check to enable it. 24 D840R ADSL2+ Router User Guide PPPoA mode 1) Select “PPP over ATM (PPPoA)”. Encapsulation Mode: VC/MUX LLC/ENCAPSULATION Once you select one mode, the system automatically changes the encapsulation mode into the one matching your setting. Therefore, it is recommended to keep the default setting unchanged. 25 D840R ADSL2+ Router User Guide 2) Click “Next” to display the window shown in the right figure. a. Authentication Method: AUTO/PAP/CHAP/MSCHAP . Usually, “AUTO” is selected. b. Dial on demand: If you check this option, you need to manually enter the timeout time. If no flow is detected when the timeout time is up, the device will disconnect the network connection automatically. And when a flow is detected, the device automatically makes dial-up connection again. If you disable this option, the device is always in online status until device power-off, connection failure or other failures occur. 26 D840R ADSL2+ Router User Guide C. PPP IP extension: When the integrated gateway is connected with a computer, the IP address obtained through the upstream link is directly allocated to this computer connecting with the device. After the PPP IP extension is enabled, you can enable the advanced DMZ. At this time, you need to enter your DMZ host and subnet mask. d. Use Static IP Address: After this option is checked, the device uses this IP address as the WAN IP address and does not need to obtain it through the upstream link. e. Retry PPP password on authentication error f. Enable PPP debugging mode. 27 D840R ADSL2+ Router User Guide 3) Click “Next” to display the window shown in the right figure. a. Enable IGMP Multicast: IGMP agent. For example, to enable the IPTV in the PPPoE mode, you need to check this option. b. Enabled WAN Service: Checked by default. It is recommended to keep this default setting, unless you do not need to activate your WAN. 28 D840R ADSL2+ Router User Guide 4) Click “Next” to display the window shown in the right figure. This window shows the general information set. 5) Click “Save/Reboot” to activate your settings. 29 D840R ADSL2+ Router User Guide PPPoE mode 1) Select “PPP over Ethernet (PPPoE)”. Encapsulation Mode: VC/MUX LLC/SNAP-BRIDGING Once you select one mode, the system automatically changes the encapsulation mode into the one matching your setting. Therefore, it is recommended to keep the default setting unchanged. 30 D840R ADSL2+ Router User Guide 2) Click “Next” to display the window shown in the right figure. a. Authentication Method: AUTO/PAP/CHAP/MSC HAP. Usually, “AUTO” is selected. b. Dial on demand: If you check this option, you need to manually enter the timeout time. If no flow is detected when the timeout time is up, the device will disconnect the network connection automatically. And when a flow is detected, the device automatically makes dial-up connection again. If you disable this 31 D840R ADSL2+ Router User Guide option, the device is always in online status until device power-off, connection failure or other failures occur. c. PPP IP extension: When the device is connected with a computer, the IP address obtained through the upstream link is directly allocated to this computer connecting with the device. After the PPP IP extension is enabled, you can enable the advanced DMZ. At this time, you need to enter your DMZ host and subnet mask. d. Use Static IP Address: After this option is checked, the device 32 D840R ADSL2+ Router User Guide uses this IP address as the WAB IP address and does not need to obtain it through the upstream link. e. Retry PPP password on authentication error f. Enable PPP debugging mode. 33 D840R ADSL2+ Router User Guide 8) Click “Next” to display the window shown in the right figure. a. Enable IGMP Multicast: IGMP agent. For example, to enable the IPTV in the PPPoE mode, you need to check this option. b. Enabled WAN Service: Checked by default. It is recommended to keep this default setting, unless you do not need to activate your WAN. 34 D840R ADSL2+ Router User Guide 8) Click“Next” to display the window shown in the right figure. This window lists your settings. 8) Click “Save/Reboot” to activate your settings. 35 D840R ADSL2+ Router User Guide MER mode 1) Select “MAC Encapsulation Routing(MER)”. Encapsulation Mode: VC/MUX LLC/SNAP-BRIDGING Once you select one mode, the system automatically changes the encapsulation mode into the one matching your setting. Therefore, it is recommended to keep the default setting unchanged. 36 D840R ADSL2+ Router User Guide 2) Click “Next” to display the window shown in the right figure. a. Obtain an IP address automatically: If your device automatically obtains the IP address, the IP address and other parameters will be from your ISP automatically. b. Use the following IP address: To manually specify an address, you need to check this option and enter your static IP address and subnet mask. c. Obtain default gateway automatically: If this option is checked, the device automatically obtains 37 D840R ADSL2+ Router User Guide the default gateway address from the upstream device. 3) Use the following default gateway: To manually enter a gateway, check this option. a. Use IP Address: After checking “Use the following default gateway”, you can enter a value here. b. Use WAN Interface: For the broadband access device, you need to enter the IP address of the downstream link interface. 4) Obtain DNS server address automatically: If this option is checked, the device 38 D840R ADSL2+ Router User Guide automatically obtains the DNS address. 5) Use the following DNS server address: To manually enter a DNS address, check this option. a. Primary DNS server b. Secondary DNS server 6) Click “Next”. a. Enable IGMP Multicast: IGMP agent. For example, to enable the IPTV in the PPPoE mode, you need to check this option. b. Enable WAN Service: Checked by default. It is recommended to keep this default setting, unless you do not need to 39 D840R ADSL2+ Router User Guide activate your WAN. 7) Click “Next” to display the window shown in the right figure. This window lists your settings. 8) Click “Save/Reboot” to activate your settings. 40 D840R ADSL2+ Router User Guide IPoA mode 1) Select “IP over ATM (IPoA)”. Encapsulation Mode: VC/MUX LLC/SNAP-ROUTING Once you select a mode, the system automatically changes the encapsulation mode into the one matching your setting. Therefore, it is recommended to keep the default setting unchanged. 41 D840R ADSL2+ Router User Guide 2) Click “Next” to display the window shown in the right figure. a. WAN IP Address: Enter the IP address provided by your ISP. b. WAN Subnet Mask: Enter the subnet mask provided by your ISP. c. Use the following default gateway: You can check this option. d. Use IP Address: Enter the IP address provided by your ISP. e. Use WAN Interface: For the broadband access device, you need to enter the IP address of the downstream link interface. 3) Use the following DNS server address: 42 D840R ADSL2+ Router User Guide You can check this option. a. Primary DNS server b. Secondary DNS server Caution: In the IPoA mode, DHCP is not supported, so you need to manually enter the WAN IP address, subnet mask, default gateway, DNS server and other settings. 43 D840R ADSL2+ Router User Guide 4) Click “Next”. a. Enable NAT: NAT enables multiple computers in your LAN to use the same WAN IP address for Internet access. It is recommended to check this option. b. Enable Firewall It is recommended to check this option to avoid some attacks. c. Enable IGMP Multicast: IGMP agent. For example, to enable the IPTV in the PPPoE mode, you need to check this option. d. Enable WAN Service: Checked by default. It is recommended to keep this default setting,unless you do not need to activate your 44 D840R ADSL2+ Router User Guide WAN. 45 D840R ADSL2+ Router User Guide e. Click “Next” to display the window shown in the right figure. This window lists your settings. g. Click “Save/Reboot” to activate your settings. 46 D840R ADSL2+ Router User Guide Bridging mode 1) Select “Bridging”. Encapsulation Mode: VC/MUX LLC/SNAP-BRIDGING Once you select a mode, the system automatically changes the encapsulation mode into the one matching your setting. Therefore, it is recommended to keep the default setting unchanged. 2) Enable Bridge Service: To select the bridge mode, you need to check this option. By default, this option is checked. 47 D840R ADSL2+ Router User Guide 3) Click “Next” to display the window shown in the right figure. This window lists your settings. 4) Click “Save/Reboot” to activate your settings. 48 D840R ADSL2+ Router User Guide 5.2.2 LAN 1). IP Address: IP address used by the router to connect to the LAN. This option is set to 192.168.1.1 upon device delivery. You can change it as required. Caution: After changing this IP address, you need to use the new IP address to access the Web management window upon next login to the router. In addition, you must set the default gateway in each computer in your LAN to this IP address, to ensure normal Internet access. 2). Subnet Mask: Setting 49 D840R ADSL2+ Router User Guide your subnet mask. 3). Enable IGMP Snooping: Used in the bridge mode. 4). Standard Mode 5). Blocking Mode 6). Configure the second IP Address and Subnet Mask for LAN interface. Click “Save/Reboot”. 50 D840R ADSL2+ Router User Guide 5.2.3 NAT 5.2.3.1. Virtual Server 1) Click “NAT” → “Virtual Server” to display the window shown in the right figure. Here, you can add or delete your virtual server settings. By default, the external networks cannot access the IP address of your internal network. However, if you need such access by the external networks (for example, you need to set up the server or support some special applications), you should enable this function to allow the access by external networks. 51 D840R ADSL2+ Router User Guide 2) Click “Add” to display the window shown in the right figure. a. Select a Service: Selecting the service to be enabled. b. Custom Server: Manually entering the server name. c. Server IP Address: LAN IP address for the server. Caution: After a service is selected, the system automatically opens the corresponding port. After you manually enter a customized service, you need to manually enter the port to be opened. 52 D840R ADSL2+ Router User Guide d. Click “Save/Apply” to display the service added, as shown in the right figure. 5.2.3.2 Port Triggering 1) Click “Port Triggering” to display the window shown in the right figure. Here, you can add or delete your port triggering service settings. For some special applications, you need to enable some application ports. Through the port triggering, you can enable the automatic opening of the ports required by applications. 53 D840R ADSL2+ Router User Guide 2) Click “Add” to display the window shown in the right figure. a. Select an application: Selecting the name of the service to be enabled. b. Custom application: Manually entering the service name. Caution: After a service is selected, the system automatically sets the corresponding port. After you manually enter a customized service, you need to manually enter the port to be triggered. 3) Click “Save/Apply” to display the service added, as shown in the right figure. 54 D840R ADSL2+ Router User Guide 5.2.3.3 DMZ Host 1. Click “DMZ Host” to display the window shown in the right figure. 2. DMZ Host IP Address: Entering the LAN IP address for the DMZ host. Caution: Opening DMZ means to open all ports. In this case, your computer is totally exposed to the public network. Be cautions to use this function. Click “Save/Apply” to activate the settings. 55 D840R ADSL2+ Router User Guide 5.2.3.4 UPNP 1) Click “UPNP” to display the window shown in the right figure. Enable UPnP: Check to Enable the UPnP (Universal Plug and Play) function. UPnP is a kind of architecture of common network connection between the computer and intelligent devices/instruments. It is especially common in the family application. Based on the Internet standards and technologies (such as TCP/IP, HTTP and XML), UPnP enables automatic connection and cooperation between such devices, thus to make more people can 56 D840R ADSL2+ Router User Guide access the network (especially the family network). Click “Save/Apply” to activate the settings. 5.2.4 Security 5.2.4.1 IP Filtering 1) Click “Security” → “IP Filtering” to display the window shown in the right figure. By default, all outgoing traffic is allowed. However, you can set IP filtering to restrict external network access by some computers in the internal network. 57 D840R ADSL2+ Router User Guide 2) Click “Add” to display the window shown in the right figure. a. Filter Name: Setting the filtering name to facilitate identification. b. Protocol: Selecting one from four available protocols: TCP/UDP; TCP; UDP; ICMP. c. Source IP address: Entering the internal network IP address to be filtered. d. Source Subnet Mask: Entering the subnet mask corresponding to the internal network IP address to be filtered. e. Source Port: Entering the port number of the internal network IP address to be filtered. 58 D840R ADSL2+ Router User Guide f. Destination IP address: Entering the external network IP address to be filtered. g. Destination Subnet Mask: Entering the subnet mask corresponding to the external network IP address to be filtered. h. Destination Port: Entering the port number of the external network IP address to be filtered. Based on the above settings, you can add your filtering rules. You can select your WAN interface. However, it is recommended to keep the default setting unchanged. 59 D840R ADSL2+ Router User Guide 3) 4) Click “Save/Apply”. Click “Incoming” to display the window shown in the right figure. By default, all incoming traffic is restricted. However, you can set IP filtering to allow internal network access by some external computers. 60 D840R ADSL2+ Router User Guide 5) Click “Add” to display the window shown in the right figure. a. Filter Name: Setting the filtering name to facilitate identification. b. Protocol: Selecting one from four available protocols: TCP/UDP; TCP; UDP; ICMP. c. Source IP address: Entering the external network IP address to be filtered. d. Source Subnet Mask: Entering the subnet mask corresponding to the external network IP address to be filtered. e. Source Port: Entering the port number of the external network IP address to be filtered. 61 D840R ADSL2+ Router User Guide f. Destination IP address: Entering the internal network IP address to be filtered. h. Destination Subnet Mask: Entering the subnet mask corresponding to the internal network IP address to be filtered. i. Destination Port: Entering the port number of the internal network IP address to be filtered. Based on the above settings, you can add your filtering rules. You can select your WAN interface. However, it is recommended to keep the default setting unchanged. 62 D840R ADSL2+ Router User Guide 5) Click “Save/Apply”. 5.2.4.2. Parent Control 1) Click “Time of Day Restriction” to display the window shown in the right figure. 2) Click “Add” to display the window shown in the right figure. Here, you can set a specific period to restrict Internet access of a MAC address. 63 D840R ADSL2+ Router User Guide 3) Click “Save/Apply”. 64 D840R ADSL2+ Router User Guide 5.2.5 Routing 5.2.5.1 Default Gateway 1) Click “Routing” → “Default Gateway” to display the window shown in the right figure. Enable Automatic Assigned Default Gateway: You can check/uncheck this option. If you uncheck this option, you need to manually enter the default gateway address and WAN service. It is recommended to keep the default setting unchanged. 2) Click “Save/Apply”. 65 D840R ADSL2+ Router User Guide 5.2.5.2 Static Routing 1) Click “Static Route” to display the window shown in the right figure. Here, you can add/ delete the items of the static route. 1) Click “Add” to display the window shown in the right figure. Destination Network Address: Entering the network or host for static route. Subnet Mask: Entering the subnet mask correspond- ing to the network or host for static route. Use Gateway IP Address: Entering the 66 D840R ADSL2+ Router User Guide gateway address to be passed by the static route. Use Interface: Selecting the interface correspond- ing to your connection mode. Click “Save/Apply”. 5.2.6. DNS 5.2.6.1 DNS Server 1) Click “DNS Server” to display the window shown in the right figure. 2) Enable Automatic Assigned DNS: After checking it, the DNS settings are activated. And the DHCP server of the router allocates the added DNS address to the client 67 D840R ADSL2+ Router User Guide submitting the request. 3) Primary DNS server: Entering the DNS address provided by the ISP. 4) Secondary DNS server: If your ISP provides two DNS addresses, you can enter the other address here. 5.2.6.2 Dynamic DNS 68 D840R ADSL2+ Router User Guide 1) Click “Dynamic DNS” to display the window shown in the right figure. Here, you can add/ delete the dynamic DNS settings. Dynamic DNS can make your applied domain name correspond to your IP address, so that the other users only need to remember your domain name for accessing your server. 69 D840R ADSL2+ Router User Guide 2) Click “Add” to display the window shown in the right figure. D-DNS provider: Selecting a specific provider of dynamic DNS. Hostname: Domain name applied by you. Interface: Selecting one from two available interface modes. Username: Your user name registered on the website of the dynamic DNS provider. Password: Password corresponding to your user name registered on the website of the dynamic DNS provider. 70 D840R ADSL2+ Router User Guide 3) Click “Save/Apply”. 71 D840R ADSL2+ Router User Guide 5.2.7 DSL Click “DSL” to display the window shown in the right figure. Here, you can enable a service as required. By default, the system checks the status of G.dmt, G.lite, T1.413, ADSL2, ADSL2+, AnnexL, Inner pair and Bitswap. The device can automa- tically negotiate with the upstream device. 72 D840R ADSL2+ Router User Guide 5.3 DHCP i. Click “DHCP Server” to display the window shown in the right figure. 1. You can click “Disable DHCP Server” or “Enable DHCP Server”. 2. Start IP Address: Start address of the DHCP server IP pool 3. End IP Address: End address of the DHCP server IP pool 4. Leased Time: Validity period of the IP address obtained. Click “Save”. Click “DHCP Client List” to view the list of the clients with allocated DHCP service. 5.4 System Tool 73 D840R ADSL2+ Router User Guide 5.4.1 Settings 1. Click “Backup” to display the window shown in the right figure. Here, you can back up the current settings of the router. 2.Click “Update” to display the window shown in the right figure. Here, you can restore the router settings from the backup file. 74 D840R ADSL2+ Router User Guide 3. Click “Restore Default” to display the window shown in the right figure. Click “Restore Default Settings” to restore the default settings before device delivery. Caution: After restoring the default settings, you need to reboot the router to activate this modification. 75 D840R ADSL2+ Router User Guide 5.4.2 System Log 1. Click “System Log” to display shown the in window the right figure. 2. Click “View System Log” to display the window shown in the right figure. 76 D840R ADSL2+ Router User Guide 3. Click “Configure System Log” to display the window shown in the right figure. (1) Log: Enable; Disable (2) Log Level: Selecting the required level, Debugging by default. (3) Display Level: Error by default. (4) Mode: Local by default. If you select “Remote” or “Local/Remote”, the system transmits the log UDP packets to your log server. Click “Save/Apply”. 77 D840R ADSL2+ Router User Guide 5.4.3 Internet Time 1. Click “Internet Time” to display the window shown in the right figure. If you enable this function, the system can automatically obtain the time when accessing the Internet. 78 D840R ADSL2+ Router User Guide 5.4.4 Access Control 5.4.4.1 Service (1) Click “Access Control” to display the window shown in the right figure. You can enable or disable FTP/HTTP/ICMP/SNM P /SSH/TELNET/TFTP. (2) Click “Save/Apply” to activate the settings 79 D840R ADSL2+ Router User Guide 5.4.4.2 IP address (1) Click “IP Address” to display the window shown in the right figure. Here, you can add/delete items. Access Control Mode: Enable; Disable. When you enable it, the IP address allowed can access the management page. (2) Click “Add” to display the window shown in the right figure. You can enter an IP address, which is allowed by the system for access- ing the management page. Click “Save/Apply” to activate the settings. 80 D840R ADSL2+ Router User Guide 5.4.4.3 Password (1) Click “Password” to display the window shown in the right figure. Here, you can modify the password for logging in to the Management page. Enter the former login password, and then the new login password. If the former login password is correctly entered, you can click “Save/Apply” to successfully modify the login password. Caution: For the sake of security, we highly recommend you to change the initial user name and password. (2) Click “Save/Apply” to activate the modification. 81 D840R ADSL2+ Router User Guide 5.4.5 Software Update 1. Click “Update Software” to display the window shown in the right figure. Click “Browse” to select your update file, and then click “Update Software”. 5.4.6 Save/Reboot 1. Click “Save/Reboot” to display the window shown in the right figure. Rebooting device can activate the changed settings. However, the ADSL connection is automatically interrupted before the reboot. 82 D840R ADSL2+ Router User Guide Chapter 6 Appendix Appendix 1: Troubleshooting Trouble Case Power Indicator Off Troubleshooting Check if the power adapter is Connected properly. Check if the power adapter is matched. Check if the ADSL cable connection is OK. ADSL Off Make sure the telephone line is OK you’re your phone. LAN Off Check the phone line cabling is right. Check the Ethernet cable is OK. Make sure the PC’s NIC indicator is ON. Make sure the NIC works normally. 83 D840R ADSL2+ Router User Guide Make sure the above troubles are clear. Make sure the dial-up connection is established and set up. Can’t access the Internet Make sure the user name and password are right. If the dial-up is OK, please make sure the IE proxy server is configured properly. Please try opening multiple web pages 84 D840R ADSL2+ Router User Guide Appendix 2: FAQ Q: What are VPI, VCI? A: VPI (Virtual Path Identifier) and VCI (Virtual Channel Identifier) are to identify ATM terminal (ADSL) for DSLAM, usually provided the local ISP. Q: What related parameters are required from your ISP? A: For dial user, Connection protocol, User name, Password, Value of VPI/VCI, Encapsulation mode and so on. Q: The firmware upgrade fails and I can’t enter the Web-based management interface? A: Contact the technical engineer for support or after-sales service engineer. Note: please download the upgrade packets from the Tenda website. Q: Have completed all configurations, but can’t dial through computer? A: 1) Check the indicator of ADSL, it should be working in normally. 2) Check the accuracy of parameter of value of 85 D840R ADSL2+ Router User Guide VPI/VCI, Encapsulation mode and so on. 3) Make sure the dial-up connection is established. 4) You can check whether your ADSL Modem succeeds in connection through PING command. 86