Download Xerox WorkCentre 7665
Transcript
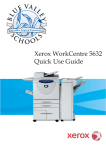
Xerox WorkCentre 7665
Quick Use Guide
Microsoft, MS-DOS, Windows, Windows NT, Microsoft Network, and Windows Server
are either trademarks or registered trademarks of Microsoft Corporation in the United
States and/or other countries.
Novell, NetWare, IntranetWare and NDS are registered trademarks of Novell, Inc. in
the United States and other countries.
Adobe, Acrobat, PostScript, PostScript3, and PostScript Logo are trademarks of
Adobe Systems Incorporated.
Apple, AppleTalk, EtherTalk, LocalTalk, Macintosh, MacOS and TrueType are
trademarks of Apple Computer, Inc., registered in the U.S. and other countries.
HP, HPGL, HPGL/2, and HP-UX are registered trademarks of Hewlett-Packard
Corporation.
All product/brand names are trademarks or registered trademarks of the respective
holders.
The data saved in the hard disk of the machine may be lost if there is any problem in
the hard disk. Xerox is not responsible for any direct and indirect damages arising from
or caused by such data loss.Xerox is not responsible for any breakdown of machines
due to infection of computer virus or computer hacking.
Important(1) This manual is copyrighted with all rights reserved. Under the copyright
laws, this manual may not be copied or modified in whole or part, without the written
consent of the publisher.(2) Parts of this manual are subject to change without prior
notice.(3) We welcome any comments on ambiguities, errors, omissions, or missing
pages.(4) Never attempt any procedure on the machine that is not specifi cally
described in this manual. Unauthorized operation can cause faults or accidents.
Xerox is not liable for any problems resulting from unauthorized operation of the
equipment.
An export of this product is strictly controlled in accordance with Laws concerning
Foreign Exchange and Foreign Trade of Japan and/or the export control regulations of
the United States.
Xerox and Ethernet are registered trademarks.
NOTE: BLUE title is for IT administrator type personnel, GREEN for end users and
RED means machine needs attention. Depending on the configuration of the
machine, some User Interface screens may vary.
Control Panel
WORKCENTRE PRO
Copy
Network
Scanning
E-Mail
Fax
Internet
Fax
1.
Touch Screen
The touch screen allows you to select all the available programing features. It
also displays fault clearance procedures and general machine information.
2.
Job Status
Displays job progress information on the touch screen.
3.
Services button
Displays the job features on the touch screen.
4.
Machine Status
Displays the current status of the machine on the touch screen.
WorkCentre 7655/7665/7675
Quick Use Guide
WorkCentre 7655/7665/7675
Control Panel
5.
Help
Accesses additional online information about a specific task.
6.
Language
Changes text to an alternative language (when available).
7.
Log In/Out
Provides password protected access to the Setup Tools used to adjust the
defaults of the machine.
8.
Clear All
If pressed once, resets the default settings and displays the first screen for the
current pathway. If pressed twice, resets all the features to their machine
default settings.
9.
Interrupt
Temporarily stops the current copy job to allow a priority job to be run.
10. Stop
Temporarily stops the current job. Follow the message to cancel or resume
your job.
11. Start
Starts the job.
12. # (Hash)
Indicates the dialing character or designates a group dial number.
13. Clear
Deletes numeric values or the last digit entered.
14. Dial Pause
Enters a pause in a telephone number when transmitting a fax.
WorkCentre 7655/7665/7675
Quick Use Guide
WorkCentre 7655/7665/7675
WC7655/65/75: Logon
Network Accounting:
To access machine features:
1.
2.
3.
With the All Services screen displayed, select the
required feature (such as Copy, Fax, Scan to File, or Email). The Accounting Login screen will be displayed.
Enter your User ID = Blue Valley ID minus the
leading zeros, then select [Next]. A prompt will be
displayed for your Account ID .
Enter your Account ID,= default Clicks Quick Key
based on copier location. You will only need to enter
your Clicks Quick Key when using a
machine in another building. Select [Enter]
The initial screen for the feature will be
displayed.
*NOTE: You will only need to enter your
ClicksQuickKey when using a machine at a different
building.
.To logout of Network Accounting:
1.
2.
Press the [Log In / Out] button on the Control Panel. An "Are you sure you want to logout?
Session will end and all settings will return to default" message will be displayed.
Select the required logout option on the Touch Screen: Change Accounts, Cancel, and
Logout.
Network Authentication (required for scanning):
To access scanning features:
1.
2.
3.
With the Login screen displayed, enter your network
user ID in the User ID field and then select the [Next]
button on the Touch Screen. The Password screen
will be displayed.
Enter the password in the Password field and then
select the [Enter] button. When the user has been
verified with the Network Authentication server, the
Copy screen will be displayed.
If necessary, select the [All Services] icon and then
select the required feature (such as Copy, Fax, Scan
to File, or E-mail).
To logout of Network Authentication:
1.
2.
Press the [Log In / Out] button on the Control Panel.
Select the [Logout] button on the Touch Screen.
Simple Copying
1. Load the documents
2. Press the Copy icon
WORKCENTRE PRO
Copy
E-Mail
Network
Scanning
Fax
Internet
Fax
3. Select the Features
Copy
All
Services
Basic Copying
Output Color
Auto Detect
Image Quality
Layout Adjustment
Output Color
Output Format
2 Sided Copy
Job Assembly
Copy Output:
Auto Paper
Collated
More...
Hole Punch
Color
Black
More...
WorkCentre 7655/7665/7675
Quick Use Guide
WorkCentre 7655/7665/7675
Simple Copying
4. Enter the Quantity
5. Press Start
6. Identify your job in Job Status mode.
Job Status
Active Jobs
Completed Jobs
Printing
Printing
Printing
Pending
Pending
Processing
Processing
Scanning
WorkCentre 7655/7665/7675
Quick Use Guide
WorkCentre 7655/7665/7675
Simple Faxing - Embedded
1. Load the documents
2. Press the Fax icon
WORKCENTRE PRO
Copy
Network
Scanning
E-Mail
Fax
Internet
Fax
3. Enter the Fax number
All Services
Fax
Fax
Image Quality
Layout
Adjustment
Fax Options
Job Assembly
Fax Number:
Name:
Fax Number:
Add --
Speed Dial
Dialing Chars /
Keypad...
Address
Book...
Cover Page...
Off
2 Sided Scanning
Original Type
Resolution
Standard
1 Sided
Photo & Text
2 Sided
Photo & Text
2 Sided, Rotate Side 2
Text
Fine
Super Fine
WorkCentre 7655/7665/7675
Quick Use Guide
WorkCentre 7655/7665/7675
Simple Faxing - Embedded
4. Change the Settings
All Services
Fax
Fax
Image Quality
Layout
Adjustment
Fax Options
Job Assembly
Fax Number:
Name:
Fax Number:
Add --
Speed Dial
Dialing Chars /
Keypad...
Address
Book...
Cover Page...
Off
Original Type
2 Sided Scanning
Resolution
Standard
1 Sided
Photo & Text
2 Sided
Photo & Text
2 Sided, Rotate Side 2
Text
Fine
Super Fine
5. Press Start
6. Identify your job in Job Status mode.
Job Status
Active Jobs
Completed Jobs
Printing
Printing
Printing
Pending
Pending
Processing
Processing
Scanning
WorkCentre 7655/7665/7675
Quick Use Guide
WorkCentre 7655/7665/7675
Simple Scan to E-mail
1. Load the documents
2. Touch the E-mail icon
WORKCENTRE PRO
Copy
Network
Scanning
E-Mail
Fax
Internet
Fax
3. Enter the Recipient Details
All
Services
E-mail
E-mail
Advanced
Settings
New Recipient
Layout
Adjustment
Name:
E-mail Options
From...
Recipient(s)
Subject...
AddressBook...
Message...
Output Color
2 Sided Scanning
Original Type
1 Sided
Photo & Text
for Sharing and
Color
2 Sided
Photo
for Archival Record
Black
2 Sided, Rotate
Side 2
Text
for OCR
Gray Scale
WorkCentre 7655/7665/7675
Scan Presets
Auto Detect
More...
Quick Use Guide
WorkCentre 7655/7665/7675
Simple Scan to E-mail
4. Change the Settings
All
Services
E-mail
E-mail
Advanced
Settings
New Recipient
Layout
Adjustment
Name:
E-mail Options
From...
Recipient(s)
Subject...
AddressBook...
Message...
Output Color
2 Sided Scanning
Original Type
Scan Presets
Auto Detect
1 Sided
Photo & Text
for Sharing and
Color
2 Sided
Photo
for Archival Record
Black
2 Sided, Rotate
Side 2
Text
for OCR
Gray Scale
More...
5. Press Start
6. Identify your job in Job Status mode.
Job Status
Active Jobs
Completed Jobs
Printing
Printing
Printing
Pending
Pending
Processing
Processing
Scanning
WorkCentre 7655/7665/7675
Quick Use Guide
WorkCentre 7655/7665/7675
Simple Network Scanning
1. Load the documents
2. Press the Network Scanning icon
WORKCENTRE PRO
Copy
E-Mail
Network
Scanning
Fax
Internet
Fax
3. Select the template
All
Services
Network Scanning
Network
Scanning
Advanced
Settings
Layout
Adjustment
Filing
Options
Job
Assembly
Show:
All Templates
Selected Template:
Default
Output Color
2 Sided Scanning
Original Type
1 Sided
Photo & Text
for Sharing and
Printing
Color
2 Sided
Photo
for Archival Record
Black
2 Sided, Rotate
Side 2
Text
for OCR
Gray Scale
WorkCentre 7655/7665/7675
Scan Presets
Auto Detect
More...
Quick Use Guide
WorkCentre 7655/7665/7675
Simple Network Scanning
4. Change the Settings
All
Services
Network Scanning
Network
Scanning
Advanced
Settings
Layout
Adjustment
Filing
Options
Job
Assembly
Show:
All Templates
Selected Template:
Default
Output Color
2 Sided Scanning
Original Type
Scan Presets
Auto Detect
1 Sided
Photo & Text
for Sharing and
Printing
Color
2 Sided
Photo
for Archival Record
Black
2 Sided, Rotate
Side 2
Text
for OCR
Gray Scale
More...
5. Press Start
6. Identify your job in Job Status mode.
Job Status
Active Jobs
Completed Jobs
Printing
Printing
Printing
Pending
Pending
Processing
Processing
Scanning
WorkCentre 7655/7665/7675
Quick Use Guide
WorkCentre 7655/7665/7675
Replacing the Toner Cartridges
1. Replace the toner cartridge while the
machine is on. Open the toner cover, located
just above the machine front door.
CAUTION: Before you begin the procedure,
ensure that the machine has been allowed to
cool down. Failure to do so may result in
burns if certain parts of the machine are
touched.
2. Lay paper on the floor before removing
the cartridge. This will allow any excess
toner to fall on the paper. Hold the handle of
the color indicated in the message, and
gently pull it out.
3. Remove the toner cartridge by
holding the handle on the top of the
cartridge while gently pulling it straight
out. Be careful to not get toner on
clothing.
4. Dispose the toner cartridge as
normal office waste or recycle the
cartridge.
WorkCentre 7655/7665/7675
Quick Use Guide
WorkCentre 7655/7665/7675
Replacing the Toner Cartridges
5. Remove the new toner cartridge from its
packaging.
6. Gently tilt the new cartridge up and
down, and then left and right to redistribute
the toner.
7. Install the toner cartridge by aligning the
arrows on the cartridge evenly with the
printer until you hear a click.
8. Close the Front Door. If the door will not close
completely, make sure the cartridge is in the lock
position and the toner cartridge is installed into the
appropriate toner location.
CAUTION:Never use a vacuum cleaner when you
clean spilled toner. It can cause explosion as the
toner fills the vacuum cleaner and gets sparks.
Use a broom or a cloth moistened with a neutral
detergent.
That completes the procedure for replacing the toner cartridge.
WorkCentre 7655/7665/7675
Quick Use Guide
WorkCentre 7655/7665/7675
WC7655/65/75: Call for Service or Phone Support
1-800-821-2797
Have your serial number ready. If you do not know your serial number, follow the steps
below:
To find the serial number from the Control Panel:
1.
Press the [Machine Status] button on the
Control Panel. The Machine Status screen
will be displayed.
2.
Select the [Machine Information] button on the Touch Screen. The machine serial
number will be displayed.
Select the [Close] button twice to exit.
3.
To find the serial number on the machine:
1.
If necessary, slide Paper Tray 6, the High Capacity Feeder (HCF), to the left until
it stops.
2.
Raise Paper Tray 5 (Bypass Tray) into the vertical position.
3.
Open the bottom Left Cover. The serial number is located on the machine frame.
4.
5.
6.
Close the bottom Left Cover.
Lower Paper Tray 5 (Bypass Tray) to the original position.
If necessary, slide Paper Tray 6 (HCF) to the right until it stops, if necessary.
To request training, please email: [email protected]
Additional Information including Video and Step-by-Step guides
can be found at:
http://www.bluevalleyk12.org/printing/copier


