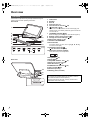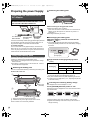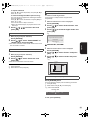
1
VQT2H73~Cover_eng.fm 1 ページ 2010年1月25日 月曜日 午後7時58分 Operating Instructions Portable Blu-ray Disc Player Model No. DMP-B100 Dear customer Thank you for purchasing this product. For optimum performance and safety, please read these instructions carefully. Before connecting, operating or adjusting this product, please read the instructions completely. Please keep this manual for future reference. Region management information BD-Video This unit plays BD-Video marked with labels containing the region code “A” or “B”. Example:For the United Kingdom, Republic of Ireland and Continental Europe Region Code For the United Kingdom, Republic of Ireland and Continental Europe “B” For Asia “A” For Australia and New Zealand “B” DVD-Video This unit plays DVD-Video marked with labels containing the region number or “ALL”. Region Number For the United Kingdom, Republic of Ireland and Continental Europe “2” For Asia “3” For Australia and New Zealand “4” Example:For the United Kingdom, Republic of Ireland and Continental Europe 2 ALL 2 3 5 Model number suffix “EB” denotes UK model. EB EG GN GA until 2010/3/8 VQT2H73 VQT2H73~Safety_eng.fm 2 ページ 2010年1月19日 火曜日 午後5時49分 Caution for AC Mains Lead IMPORTANT SAFETY INSTRUCTIONS (For the United Kingdom and Republic of Ireland) Read these operating instructions carefully before using the unit. Follow the safety instructions on the unit and the applicable safety instructions listed below. Keep these operating instructions handy for future reference. 1) Read these instructions. 2) Keep these instructions. 3) Heed all warnings. 4) Follow all instructions. 5) Do not use this apparatus near water. 6) Clean only with dry cloth. 7) Do not block any ventilation openings. Install in accordance with the manufacturer’s instructions. 8) Do not install near any heat sources such as radiators, heat registers, stoves, or other apparatus (including amplifiers) that produce heat. 9) Protect the AC mains lead from being walked on or pinched particularly at plugs, convenience receptacles, and the point where they exit from the apparatus. 10) Only use attachments/accessories specified by the manufacturer. 11) Use only with the cart, stand, tripod, bracket, or table specified by the manufacturer, or sold with the apparatus. When a cart is used, use caution when moving the cart/apparatus combination to avoid injury from tip-over. 12) Unplug this apparatus during lightning storms or when unused for long periods of time. 13) Refer all servicing to qualified service personnel. Servicing is required when the apparatus has been damaged in any way, such as AC mains lead or plug is damaged, liquid has been spilled or objects have fallen into the apparatus, the apparatus has been exposed to rain or moisture, does not operate normally, or has been dropped. Gettin g started For your safety, please read the following text carefully. This appliance is supplied with a moulded three pin mains plug for your safety and convenience. A 5-ampere fuse is fitted in this plug. Should the fuse need to be replaced please ensure that the replacement fuse has a rating of 5-ampere and that it is approved by ASTA or BSI to BS1362. Check for the ASTA mark Ï or the BSI mark Ì on the body of the fuse. If the plug contains a removable fuse cover you must ensure that it is refitted when the fuse is replaced. If you lose the fuse cover the plug must not be used until a replacement cover is obtained. A replacement fuse cover can be purchased from your local dealer. CAUTION! IF THE FITTED MOULDED PLUG IS UNSUITABLE FOR THE SOCKET OUTLET IN YOUR HOME THEN THE FUSE SHOULD BE REMOVED AND THE PLUG CUT OFF AND DISPOSED OF SAFELY. THERE IS A DANGER OF SEVERE ELECTRICAL SHOCK IF THE CUT OFF PLUG IS INSERTED INTO ANY 13-AMPERE SOCKET. If a new plug is to be fitted please observe the wiring code as stated below. If in any doubt please consult a qualified electrician. IMPORTANT The wires in this mains lead are coloured in accordance with the following code: Blue: Neutral, Brown: Live. As these colours may not correspond with the coloured markings identifying the terminals in your plug, proceed as follows: The wire which is coloured Blue must be connected to the terminal which is marked with the letter N or coloured Black or Blue. The wire which is coloured Brown must be connected to the terminal which is marked with the letter L or coloured Brown or Red. WARNING: DO NOT CONNECT EITHER WIRE TO THE EARTH TERMINAL WHICH IS MARKED WITH THE LETTER E, BY THE EARTH SYMBOL Ó OR COLOURED GREEN OR GREEN/YELLOW. THIS PLUG IS NOT WATERPROOF—KEEP DRY. Before use WARNING: TO REDUCE THE RISK OF FIRE, ELECTRIC SHOCK OR PRODUCT DAMAGE, ≥ DO NOT EXPOSE THIS APPARATUS TO RAIN, MOISTURE, DRIPPING OR SPLASHING AND THAT NO OBJECTS FILLED WITH LIQUIDS, SUCH AS VASES, SHALL BE PLACED ON THE APPARATUS. ≥ USE ONLY THE RECOMMENDED ACCESSORIES. ≥ DO NOT REMOVE THE COVER (OR BACK); THERE ARE NO USER SERVICEABLE PARTS INSIDE. REFER SERVICING TO QUALIFIED SERVICE PERSONNEL. Remove the connector cover. How to replace the fuse CAUTION! The location of the fuse differ according to the type of AC mains plug (figures A and B). Confirm the AC mains plug fitted and follow the instructions below. Illustrations may differ from actual AC mains plug. THIS PRODUCT UTILIZES A LASER. USE OF CONTROLS OR ADJUSTMENTS OR PERFORMANCE OF PROCEDURES OTHER THAN THOSE SPECIFIED HEREIN MAY RESULT IN HAZARDOUS RADIATION EXPOSURE. DO NOT OPEN COVERS AND DO NOT REPAIR YOURSELF. REFER SERVICING TO QUALIFIED PERSONNEL. 1) Open the fuse cover with a screwdriver. Figure A Figure B CAUTION! Fuse cover 2) Replace the fuse and close or attach the fuse cover. Figure A 2 VQT2H73 Figure B Fuse (5 ampere) Fuse (5 ampere) ≥ DO NOT INSTALL OR PLACE THIS UNIT IN A BOOKCASE, BUILT-IN CABINET OR IN ANOTHER CONFINED SPACE. ENSURE THE UNIT IS WELL VENTILATED. TO PREVENT RISK OF ELECTRIC SHOCK OR FIRE HAZARD DUE TO OVERHEATING, ENSURE THAT CURTAINS AND ANY OTHER MATERIALS DO NOT OBSTRUCT THE VENTILATION VENTS. ≥ DO NOT OBSTRUCT THE UNIT’S VENTILATION OPENINGS WITH NEWSPAPERS, TABLECLOTHS, CURTAINS, AND SIMILAR ITEMS. ≥ DO NOT PLACE SOURCES OF NAKED FLAMES, SUCH AS LIGHTED CANDLES, ON THE UNIT. ≥ DISPOSE OF BATTERIES IN AN ENVIRONMENTALLY FRIENDLY MANNER. 3 ページ 2010年1月19日 火曜日 午後5時49分 CAUTION Notice about the rechargeable battery Danger of explosion if battery is incorrectly replaced. Replace only with the same or equivalent type recommended by the manufacturer. Dispose of used batteries according to the manufacturer’s instructions. The battery is designated recyclable. Please follow your local recycling regulations. This product may receive radio interference caused by mobile telephones during use. If such interference is apparent, please increase separation between the product and the mobile telephone. The socket outlet shall be installed near the equipment and easily accessible. The mains plug of the power supply cord shall remain readily operable. To completely disconnect this apparatus from the AC Mains, disconnect the power supply cord plug from AC receptacle. Product Identification Marking is located on the bottom of units. [For[Asia] AC adaptor This AC adaptor operates on AC between 110 V and 240 V. But ≥ Obtain a suitable plug adaptor if the plug does not fit the AC mains socket. Getting started VQT2H73~Safety_eng.fm Warning Keep the Button-Type battery out of the reach of children. Never put Button-Type battery in mouth. If swallowed call your doctor. WARNING DRIVER MUST NOT OPERATE OR VIEW THIS UNIT WHILE OPERATING THE VEHICLE. Doing so will distract the driver and could cause a collision resulting in serious injury or property damage. THIS UNIT IS INTENDED FOR USE IN TROPICAL CLIMATES. [For[the[United[Kingdom,[Republic[of[Ireland,]Continental[Europe, [Australia[and[New[Zealand[ THIS UNIT IS INTENDED FOR USE IN MODERATE CLIMATES. Batteries 1 Battery pack (Lithium ion battery pack) ≥ Use the specified unit to recharge the battery pack. ≥ Do not use the battery pack with equipment other than the specified unit. ≥ Do not use the player outside if it is snowing or raining. (The battery pack is not waterproof.) ≥ Do not get dirt, sand, liquids, or other foreign matter on the terminals. ≥ Do not touch the plug terminals (i and j) with metal objects. ≥ Do not disassemble, remodel, heat or throw into fire. ≥ Do not heat or expose to flame. ≥ Do not leave the battery(ies) in an automobile exposed to direct sunlight for a long period of time with doors and windows closed. 2 Button-type battery (Lithium battery) ≥ Insert with poles aligned. ≥ Do not touch the terminals (i and j) with metal objects. ≥ Do not recharge, disassemble, remodel, heat or throw into fire. ≥ Keep out of reach of children. ≥ Do not heat or expose to flame. ≥ Do not leave the battery(ies) in an automobile exposed to direct sunlight for a long period of time with doors and windows closed. If any electrolyte should come into contact with your hands or clothes, wash it off thoroughly with water. If any electrolyte should come into contact with your eyes, never rub the eyes. Rinse eyes thoroughly with water, and then consult a doctor. 3 Disposing of the batteries Check and follow your local regulations before disposal. Do not rest the unit on your lap for a long time while using it. The unit can become hot and cause burns. To prevent damage Avoid the following: ≥ Spraying flammable insecticides near the unit. ≥ Pressing the LCD. ≥ Touching the lens and other parts of the laser pickup. Do not use the unit in the following places: ≥ Sandy places such as beaches. ≥ On top of cushions, sofas, or hot equipment such as amplifiers. Do not leave in an unventilated automobile or exposed to direct sunlight and high temperatures. Precautions for Listening with the Headphones or Earphones ≥ Do not play your headphones or earphones at a high volume. Hearing experts advise against continuous extended play. ≥ If you experience a ringing in your ears, reduce volume or discontinue use. ≥ Do not use while operating a motorized vehicle. It may create a traffic hazard and is illegal in many areas. ≥ You should use extreme caution or temporarily discontinue use in potentially hazardous situations. ≥ Even if your headphones or earphones are the open-air type designed to let you hear outside sounds, don’t turn up the volume so high that you can’t hear what’s around you. ≥ Excessive sound pressure from earphones and headphones can cause hearing loss. ≥ Listening at full volume for long periods may damage the user’s ears. Be sure to use the supplied or recommended headphones or earphones. Warning Risk of fire, explosion and burns. Do not disassemble. Do not heat the batteries above the following temperatures or incinerate. Button-type battery 100xC Battery pack 60xC 3 VQT2H73 VQT2H73~TOC_eng.fm 4 ページ 2010年1月25日 月曜日 午前10時32分 Table of contents Getting started Caution for AC Mains Lead .....................................2 IMPORTANT SAFETY INSTRUCTIONS ...................2 Accessories ..............................................................4 Firmware updates ....................................................5 Unit and media care .................................................5 Media (Disc and card) information .........................6 Overview ....................................................................... 8 Adjusting the LCD screen angle ........................... 10 Enjoying video in the back seat with the Headrest Mounting Bracket .................... 10 Preparing the power Supply ................................. 12 Turning on/off the unit ........................................... 14 Showing FUNCTION MENU ................................... 14 Adjusting the pictures on the LCD screen .......... 15 Loading the disc or SD card ................................. 15 Playback Basic play (Playing video contents) ..................... 16 Enjoying BONUSVIEW in BD-Video ..................... 19 Playing still pictures .............................................. 20 Playing DivX® videos ............................................. 22 Playing music ......................................................... 24 Using this unit with other equipment ................... 25 Linked operations with the TV (VIERA Link “HDAVI Control™”) .......................... 26 Changing settings with the on-screen menu ...... 28 Settings Changing the unit’s settings ................................. 30 Reference Enjoying High Bit rate Audio and Video .............. 34 About MP3/JPEG/DivX/AVCHD/MPEG2 files ....... 35 Indicators and screen messages ......................... 37 Troubleshooting guide .......................................... 38 Specifications ......................................................... 42 Licenses ...................................................................... 43 Glossary .................................................................. 44 Index .............................................................Back cover 4 VQT2H73 Accessories Please check and identify the supplied accessories. Use numbers indicated in parentheses when asking for replacement parts. (Product numbers correct as of January 2010. These may be subject to change.) ∑ [For[the[United[Kingdom,[Republic[of[Ireland[and[Continental[Europe] 1 Remote control (N2QAJC000019) ∑ [For[Australia,[New[Zealand[and[Asia] 1 Remote control (N2QAJC000020) ∑ 1 Button-type battery for remote control (for replacement > 9) ∑ 1 AC adaptor (RFEA219W) ∑ [For]the]United]Kingdom[and[Republic[of[Ireland] 1 AC mains lead (K2CT3CA00004) ∑ [For[Continental[Europe[ 1 AC mains lead (K2CQ2CA00006) ∑ [For[Australia[and[New[Zealand[ 1 AC mains lead (K2CJ2DA00008) ∑ [For]Asia] 2 AC mains leads AC mains lead with a label is for Thailand. (K2CP2CA00001) AC mains lead without a label is for areas other than Thailand. (K2CQ2CA00006) ≥ For use with this unit only. Do not use it with other equipment. Also, do not use cords for other equipment with this unit. ∑ 1 Car DC Adaptor (RFEC207P-AB) ∑ 1 Headrest Mounting Bracket (RXQ1820) ∑ 1 Rechargeable battery pack (DY-DB30) ≥ DY-DB30 is available as option. [For]the]United]Kingdom[and[Republic[of[Ireland] ∫ Sales and Support Information Customer Care Centre ≥ For customers within the UK: 0844 844 3852 ≥ For customers within the Republic of Ireland: 01 289 8333 ≥ Visit our website for product information www.panasonic.co.uk ≥ E-mail: [email protected] Direct Sales at Panasonic UK ≥ For customers: 0844 844 3856 ≥ Order accessory and consumable items for your product with ease and confidence by phoning our Customer Care Centre Monday–Thursday 9:00 a.m.–5:30 p.m., Friday 9:30 a.m.– 5:30 p.m. (Excluding public holidays) ≥ Or go on line through our Internet Accessory ordering application at www.pas-europe.com. ≥ Most major credit and debit cards accepted. ≥ All enquiries transactions and distribution facilities are provided directly by Panasonic UK Ltd. ≥ It couldn’t be simpler! ≥ Also available through our Internet is direct shopping for a wide range of finished products, take a browse on our website for further details. DMPB100EB-VQT2H73_eng.book 5 ページ 2010年1月15日 金曜日 午後9時19分 Disc and card handling You can download the latest firmware version from the website “http://panasonic.jp/support/global/cs/” (This site is in English only.). After you burn the latest firmware to a CD-R disc, play the disc in the unit and update the firmware. Only when connecting the AC adaptor. Wipe with a damp cloth and then wipe dry. During the firmware update “DO NOT TURN OFF OR UNPLUG THE UNIT OR OPEN THE DISC LID.” ∫ Disc and card handling precautions DO NOT ≥ Handle discs by the edges to avoid inadvertent scratches or fingerprints on the disc. ≥ Do not attach labels or stickers to discs (This may cause disc warping, rendering it unusable). ≥ Do not write on the label side with a ball-point pen or other writing instrument. ≥ Do not use record cleaning sprays, benzine, thinner, static electricity prevention liquids or any other solvent. ≥ Do not use scratch-proof protectors or covers. ≥ Clean any dust, water, or foreign matter from the terminals on the rear side of the card. ≥ Do not use the following discs: jDiscs with exposed adhesive from removed stickers or labels (rented discs etc). jDiscs that are badly warped or cracked. jIrregularly shaped discs, such as heart shapes. Playback ≥ The [Í] and [CHARGE] indicators light while updating the firmware and the indicators turn off when updating the firmware is finished. (> 8) ≥ To check the version of the firmware on this unit, refer to “System Information” (> 33) DO Getting started ∫ Clean discs Maintenance ∫ To clean this unit, wipe with a soft, dry cloth. ≥ Use eyeglass cleaner to remove stubborn dirt from the LCD. ≥ Do not use a microfiber dust cloth on the LCD screen. Follow the caution when wiping the outer casing. ≥ Never use alcohol, paint thinner or benzine to clean this unit. ≥ Wiping the LCD and around the LCD with a hard cloth or rubbing them strongly may scratch the surfaces. Settings Occasionally, Panasonic may release firmware updates for this unit that may add or improve the way a feature operates. These updates are available free of charge. Unit and media care ∫ Maintenance of the lens ≥ Remove dust carefully with an air blower for camera lenses (optional). ≥ Recommended product: Lens cleaner kit (SZZP1038C) (Available from Panasonic dealers.) ≥ You cannot use a CD type lens cleaner. ≥ Be careful not to touch the lens with your fingers. To dispose or transfer this unit The unit may keep the user settings information in the unit. If you discard this unit either by disposal or transfer, then follow the procedure to return all the settings to the factory presets to delete the user settings. (> 38, “To return all settings to the factory preset”) ≥ The operation history may be recorded in the memory of this unit. Reference Firmware updates 5 VQT2H73 DMPB100EB-VQT2H73_eng.book 6 ページ 2010年1月15日 金曜日 午後9時19分 Media (Disc and card) information User recorded media This chart shows the different type of discs recorded with other devices that you can use. Commercially sold discs This chart shows the different type of retail/commercial discs you can use, and also includes the industry-standard logos that should appear on the discs and/or packaging. Type of media and logo BD-Video Features High Definition (HD) movie and music discs ≥ Discs supporting BONUSVIEW (BD-ROM Profile 1 version 1.1/Final Standard Profile) that allows Picture-in-Picture functions to be used. Indicated as This mark means you must finalize the disc with the DVD recorder, etc. before playback. For details about finalizing, refer to the operating instructions for your equipment. Type of media and logo BD-RE BD-R [BD-V] DVD-RAM DVD-Video High quality movie and music discs [DVD-V] CD Compact Discs (CD’s) that contain audio and music ≥ Operation and sound quality of CDs that do not conform to CD-DA specifications (copy control CDs, etc.) cannot be guaranteed. DVD-R/RW [CD] DVD-R DL ∫ BD-RE, BD-R Discs recorded in DR mode using Panasonic Blu-ray Disc recorders may not playback the audio etc., correctly. Formats ≥ Version 3 of the BD-RE Recording Format ≥ JPEG format ≥ Version 2 of the BD-R Recording Format ≥ DivX® format [BD-V] [JPEG] [BD-V] [DivX] ≥ Version 1.1 of the DVD Video Recording Format ≥ JPEG format ≥ AVCHD format [DVD-VR] ≥ DVD-Video Format ≥ Version 1.1 of the DVD Video Recording Format ≥ AVCHD format ≥ DivX format (DVD-RW is not supported) ≥ MP3 format (DVD-RW is not supported) ≥ JPEG format (DVD-RW is not supported) [DVD-V] [DVD-VR] ≥ DVD-Video Format ≥ Version 1.2 of the DVD Video Recording Format ≥ AVCHD format ≥ DivX format ≥ MP3 format ≥ JPEG format [DVD-V] [DVD-VR] rR/rRW/rR DL ≥ rVR (rR/rRW Video Recording) Format ≥ AVCHD format CD-R/RW Indicated as ≥ CD-DA format ≥ MP3 format ≥ JPEG format ≥ DivX format [JPEG] [AVCHD] [AVCHD] [DivX] [MP3] [JPEG] [AVCHD] [DivX] [MP3] [JPEG] [DVD-V] [AVCHD] [CD] [MP3] [JPEG] [DivX] ≥ It may not be possible to play the above discs in some cases due to the type of discs, the condition of the recording, the recording method and how the files were created. ≥ When a disc recorded in the AVCHD format is being played, the video may be paused for a few seconds at portions spliced, due to deletion or editing. 6 VQT2H73 DMPB100EB-VQT2H73_eng.book 7 ページ 2010年1月15日 金曜日 午後9時19分 Type of media* SD Memory Card (from 8 MB to 2 GB) SDHC Memory Card (from 4 GB to 32 GB) SDXC Memory Card (48 GB, 64 GB) Formats Indicated as ≥ JPEG format ≥ AVCHD format ≥ MPEG2 format [JPEG] [AVCHD] [MPEG2] * Includes miniSD Card, microSD Card, microSDHC Card and microSDXC Card The card types mentioned above will be referred to as “SD card” in these operating instructions. ≥ A miniSD Card, microSD Card, microSDHC Card and microSDXC Card must be used with the attached adaptor that comes with the card. ≥ We recommend using a Panasonic SD card. Please confirm the latest information on the following website. http://panasonic.jp/support/global/cs/ (This site is in English only.) ≥ This unit is compatible with SD Memory Cards that meet SD Card Specifications FAT12 and FAT16 formats, as well as SDHC Memory Cards in FAT32 format (Does not support long file name.) and SDXC Memory Cards in exFAT. ≥ If the SD card is used with incompatible computers or devices, recorded contents may be erased due to the card being formatted etc. ≥ When using cards from 4 GB to 32 GB, only SD cards using the SDHC logo can be used. ≥ When using cards 48 GB and 64 GB, only SD cards using the SDXC logo can be used. ≥ Useable memory may be slightly less than the card capacity. ≥ If the SD card is formatted on a PC, you may not be able to use it on this unit. ≥ Keep the Memory Card out of reach of children to prevent swallowing. ≥ When a card recorded in the AVCHD format is being played, the video may momentarily pause, especially where one recording ends and the next one begins. This is normal and does not indicate a problem. ≥ Switch the write-protect switch to the “LOCK” position to protect the content from accidental erasure. Discs that cannot be played in this unit ≥ 2.6 GB and 5.2 GB DVD-RAM ≥ DVD-RAM that cannot be removed from their cartridges ≥ 3.95 GB and 4.7 GB DVD-R for Authoring ≥ DVD-R, DVD-R DL, DVD-RW, +R, +R DL recorded on another unit and not finalized ≥ BD-Video not containing a supported region code ≥ DVD-Video not containing a supported region number ≥ Version 1.0 of DVD-RW ≥ DVD-ROM, CD-ROM, CDV, CD-G, CVD, SACD, Photo CD, MV-Disc and PD ≥ DVD-Audio ≥ Video CD and SVCD ≥ WMA discs ≥ HD DVD ≥ Other discs that are not specifically supported Getting started SD cards This chart shows the different type of cards recorded with other devices that you can use. ADAPTER 7 VQT2H73 DMPB100EB-VQT2H73_eng.book 8 ページ 2010年1月15日 金曜日 午後9時19分 Overview The Unit Instructions for operations are generally described using the remote control in these operating instructions. Front View 1 1 2 3 4 5 6 LCD screen Speaker Disc lid Open the disc lid Turn the unit on and off (> 14) [Í] indicator (> 12) When the unit is connected to the AC mains supply, this indicator lights up in standby mode and goes out when the unit is turned on. 2 3 4 5 6 7 8 9 10 11 12 7 [CHARGE] indicator (> 12) 8 9 10 11 12 Remote control signal sensor (> 9) Change the screen settings (> 15) Adjust the volume (> 16) Show the OPTION menu Selection/OK While recharging the battery pack, this indicator lights up. 13 DISC/SD 14 RETURN 15 16 17 18 ≥ To select: Press up, down, left, or right ([3, 4, 2, 1]) ≥ To enter: Press [OK] 13 Headphone terminal [Ë] (‡ 3.5 mm stereo mini jack) 14 Switch the media to playback It will switch every time it is pressed. DISC Rear View 19 15 16 17 18 19 20 21 22 23 SD Playback (> 16) Stop (> 17) Skip title numbers, etc. (> 17) Return to previous screen DC IN terminal (> 12) HDMI AV OUT terminal (> 25) SD card slot (> 15) Exhaust opening Battery pack (included) 20 21 22 23 8 VQT2H73 About the exhaust opening: Do not block the exhaust opening on the side, or use in a place that will block the exhaust opening. The heat will build up internally, and may cause a fire or deformation of the outer casing. DMPB100EB-VQT2H73_eng.book 9 ページ 2010年1月15日 金曜日 午後9時19分 Remote control ヷヰロ 11 3 4 12 5 13 6 14 7 15 16 8 ヒ ビ ピ 17 フ ブ プ 18 ヘ ベ ペ 19 9 パ 20 Turn the unit on and off (> 14) Switch the drive to playback (> 16) Basic operations for playback (> 16 – 17) Use according to the instructions on the screen [For[Australia,[New[Zealand[and[Asia] It is displayed as "R", "G", "Y", and "B" from the left 5 6 Getting started 10 1 2 1 2 3 4 Show Top menu/Direct Navigator (> 16) Selection/OK, Frame-by-frame ≥ To select: Press up, down, left, or right ([3, 4, 2, 1]) ≥ To enter: Press [OK] ≥ Frame forward / Frame backward: (While paused) press left or right ([2;][;1]) 7 8 9 10 11 12 13 14 15 16 17 18 19 20 21 Show the OPTION menu Select title numbers, etc./Enter numbers (> 18) Cancel the values that were entered Mute the sound Adjust the volume (> 16) Erase the screen Show FUNCTION MENU (> 14) Show Pop-up menu (> 16) Select audio (> 18) Return to previous screen Show on-screen menu (> 28) Show status messages (> 18) Turn the unit off automatically (> 14) Change the screen settings (> 15) Change the setup of this unit (> 30) 21 ∫ Insert the button-type battery (included) ∫ Range of use 1 Pull out the holder. Bottom Within 20 degrees angle either up or down Remote control signal sensor Pull out while pressing here 2 Insert the battery and return the holder. Within 30 degrees angle either left or right _ facing up Lithium battery: CR2025 Remote control transmitter Within 7 m in front The distance and angles are approximate. ≥ Keep the button-type battery out of reach of children to prevent swallowing. 9 VQT2H73 VQT2H73~Body1_mst.fm 10 ページ 2010年1月16日 土曜日 午前11時52分 Adjusting the LCD screen angle A B C D Open the screen. Standard Free Compact When moving the unit: ≥ Close the LCD screen. Don’t hold by the LCD screen. About the LCD screen There may be 0.01 % or less chance of missing or constantly turned on pixels, but this is not a malfunction. Attention Do not place the unit with the LCD display-side down when the screen is open. Doing so may scratch the surface of the LCD and around the LCD. Enjoying video in the back seat with the Headrest Mounting Bracket ≥ Do not leave the unit on a surface that may become hot such as a dashboard. The unit is not heat-resistant so may malfunction. ≥ DRIVER MUST NOT OPERATE OR VIEW THIS UNIT WHILE OPERATING THE VEHICLE. Doing so will distract the driver and could cause a collision resulting in serious injury or property damage. You can enjoy video in the back seat attaching the unit to the back of the front seat. ≥ Please insert a disc or SD card before attaching the unit to the headrest mounting bracket. ≥ Do not attach or detach the unit or the bracket while the car is moving. ≥ Do not attach the unit in the following locations: – anywhere other than the back of the front seat – where it can be viewed or operated by the driver – where it interferes with the driver’s operation of the vehicle – where it interferes with the operation of an airbag ≥ Ensure that the bracket belt is securely fastened and check the lock on the unit. Refer to installation instructions. In the event of an accident, sudden acceleration or braking, the unit could become loose and cause injury or property damage. ≥ Only use the Panasonic bracket supplied to attach the unit to the car seat. 1 Attach the headrest mounting bracket to the front seat. Headrest Mounting Bracket (included) 1 Adjust the headrest so there is an open space of about 3 cm. 2 Attach the bracket to the seat so that the label side of the bracket can be seen from the rear of the seat. 3 Close the buckle. Side view DO DO NOT If this space is larger than 3 cm, the unit could become loose and cause injury in the event of an accident etc. 10 VQT2H73 2 11 ページ 2010年1月22日 金曜日 午前9時38分 Adjust the LCD screen. Rotate the monitor backwards so the screen is facing out. (> 10) 3 Diagram of the attached bracket and unit Use the LCD screen in the open position as shown in the illustration below to prevent abnormal audio or damage resulting from vibrations in the car. The angle of the LCD screen can be adjusted up to about 30o. ≥ The angle of the LCD screen may shift while driving due to vibration, etc. Attach the unit to the bracket. 1 While holding the unit with both hands, line up the unit just below the protruding sections (A) on the bracket. Getting started VQT2H73~Body1_mst.fm 30° ≥ Depending on the type of headrest, you may not be able to attach the bracket. DO 2 Press the unit down about 4 to 5 mm so that the protrusions on the bracket fit into the holes on the bottom of the unit. ≥ When correctly attached, you will hear a locking sound. 23 cm or less DO NOT In the event of an accident etc., the unit could become loose and cause injury. ∫ Detach the unit from the bracket. click! 3 Fasten this unit by tightening the screw at the bottom of the bracket. Release button 1 Loosen the screw at the bottom of the bracket. 2 Press the release buttons (left and right) in towards the centre of the bracket. 3 Lift the unit up to release it. ≥ Do not press the release buttons any time other than when detaching the unit from the bracket. 4 Adjust the belt until it fits tightly around the headrest. ≥ Please check the following points before use. jThe bracket is securely fastened to the unit. jThe unit is not loose and cannot be lifted upwards. 11 VQT2H73 DMPB100EB-VQT2H73_eng.book 12 ページ 2010年1月15日 金曜日 午後9時19分 Preparing the power Supply ∫ Detaching the battery pack Bottom side of this unit Using the unit connected to the AC adaptor 2 Slide. RELEASE [For[the[United[Kingdom[and[Republic[of[Ireland[only] BE SURE TO READ THE CAUTION FOR THE AC MAINS LEAD ON PAGE 2 BEFORE CONNECTION. DETACH ATTACH 1 Press and hold. When not using for long periods of time 1 3 To a household mains socket 2 AC mains lead (included) AC adaptor (included) The unit is in the standby condition (the [Í] indicator lights) when the AC mains lead is connected. The primary circuit is always “live” as long as the AC adaptor is connected to an electrical outlet. To conserve power ≥ Detach the battery pack (> above). (Even when the unit is turned off, there is a small amount of voltage running through the unit, and this may result in a malfunction.) ≥ Recharge the battery for re-use. ∫ Recharging the battery pack Attach the battery pack and connect the AC adaptor (> left). ≥ The [CHARGE] indicator lights while charging the battery, and the [CHARGE] indicator turns off when battery charging is finished. This unit consumes 0.5 W (Approximately 5 W when Quick Start is set to “On”) of power even when turned off. When the unit is not going to be used for a long time, disconnect the AC mains lead from the household mains socket. [CHARGE] indicator (Orange light) Using the battery pack This unit can be used in places without a mains socket, such as outdoors, by attaching the included battery pack. ≥ The battery is not charged at the time of purchase. Charge before initial use. ≥ The battery is designed only for use with this unit. It cannot be used with other equipment. ∫ Approximate recharging and play times (Hours) Play*2 Recharging*1 ∫ Attaching the battery pack Turn the unit off before attaching or detaching the battery pack. 5 Bottom side of this unit *1 *2 LCD brightness level j5 0 i5 3.5 3.25 3 When the unit is off [at 20 oC] At room temperature using headphones [at 20 oC] ≥ Play time indicated above may differ depending on the use. ≥ To change the LCD brightness (> 15, “Adjusting the pictures on the LCD screen”). RELEASE DETACH ∫ Checking the remaining battery charge ATTACH Battery pack (included) Not displayed when the AC adaptor is in use. Press [OPTION] while the power is "On" Remaining charge is displayed for a few seconds at the bottom right of the screen. RELEASE DETACH ATTACH Fully charged 1 Bring in from the left, aligning the grooves. 2 Slide all the way to the right until you hear a "click". Check to make sure it is securely fastened. 12 VQT2H73 Recharge (flashing) Charge the battery pack when the display starts to flash. ≥ Appears automatically when there is only a few minutes of charge remaining. DMPB100EB-VQT2H73_eng.book 13 ページ 2010年1月15日 金曜日 午後9時19分 Before connection, consult your car owner’s manual or your dealer. ≥ Connect to the cigarette lighter socket of a vehicle that has a 12 V battery. It is not compatible with a vehicle that has a 24 V battery. ≥ This is a special negative grounded Car DC Adaptor. Using this Car DC Adaptor with a plus grounded car can cause malfunction and lead to fire. Car DC Adaptor (included) 1 1 2 Getting started Connecting the included Car DC Adaptor 2 Connect the car DC adaptor to the unit. Connect the car DC adaptor to the cigarette lighter socket. Replacing the fuse Replace only with the specified 125 V/250 V, 3.15 A fuse. Use of any other type can cause fire. 125 V/250 V, 3.15 A type 1 Open the socket. 2 Replace the fuse. 3 Close the socket. Cautions ≥ To avoid draining your car battery – Disconnect the Car DC Adaptor from the cigarette lighter after use. The Car DC Adaptor continues to consume some power even if it is not being used, and if a battery pack is attached to this unit, it will start recharging which uses more power. – Do not use the Car DC Adaptor for long periods when the engine is not running. ≥ Leave some slack in the cord. ≥ No responsibility will be taken for damage that occurs due to faulty installation. 13 VQT2H73 DMPB100EB-VQT2H73_eng.book 14 ページ 2010年1月15日 金曜日 午後9時19分 Turning on/off the unit Showing FUNCTION MENU Press [Í] (approx. 0.5 sec.). The unit is turned off when [Í] is pressed again. ≥ The power is shut off if the screen is closed while the power is “On”. ≥ When the “Auto Power Off” is set to “On” (initially set to “On”), the unit will be turned off automatically after 15 minutes (5 minutes when the battery pack is used) when it is in stopped status (> 33). ≥ The startup will take time. The operation related to startup of the unit after turning on this unit can be quickened by setting the initial setup “Quick Start” (> 33) to “On” (initially set to “Off”). (The power consumption will increase) ≥ You may hear operational sounds when the unit is turned on, but this is due to the initialization of the pickup unit, and it is not a malfunction. Some functions of this unit can be operated from the FUNCTION MENU. 1 Press [FUNCTION MENU]. ≥ Functions displayed depend on the media and operating conditions. 2 Press [3, 4] to select the item and press [OK]. e.g., Blu-ray Disc Player DISC Playback Top Menu SD card Easy Setting After opening the LCD screen and pressing [Í] for the 1st time, a screen for the basic settings will appear. Follow the on-screen instructions and make the settings with [3, 4] and [OK]. “On-Screen Language”* (> 32), “Picture Quality Mode” (> 15) and “Quick Start” (> 33) are set. * Only for the United Kingdom, Republic of Ireland, Continental Europe and Asia. ≥ You can perform this setup anytime by selecting “Easy Setting” in the Setup menu. (> 33) ≥ You can also change this setting individually. (> 15, 32, 33) Turn the unit off automatically The unit is turned off automatically after set time has passed. Switch by pressing the [OFF TIMER]. e.g., 30 min. 0 : 30 Off Timer It will switch every time it is pressed. Off 14 VQT2H73 0:30 1:00 2:00 3:00 6:00 12:00 To Others OK RETURN Playback (> 16) Top Menu (> 16) Menu (> 17, 20, 24) Viewing Picture (> 20) Viewing Video (> 16) Listening Music (> 24) Disc (> 16) Switches to the disc drive. ! SD card (> 16) Switches to the SD drive. ! To Others “Playlists”: You can play playlists created on DVD-VR. Press [3, 4, 2, 1] to select the playlist and press [OK]. “Setup” (> 30) “Card Management” (> 19) ! ! ! ! ! ! ! DMPB100EB-VQT2H73_eng.book 15 ページ 2010年1月15日 金曜日 午後9時19分 Adjusting the pictures on the LCD screen 1 Press [LCD MENU]. Loading the disc or SD card Disc Getting started ≥ It is also possible to display with the following procedures. 1 Press [OPTION]. 2 Select “To Others” with [3, 4], and select [OK]. 3 Select “LCD Menu” with [3, 4], and select [OK]. LCD Menu Picture Dynamic Brightness Colour Monitor On OPTION 2 3 RETURN 1 2 Change the setting with [3, 4, 2, 1]. ! ! ! ! Standard: Dynamic: Night: User Standard Picture with high contrast Picture suitable for viewing in dark places jBrightness: s5 to r5 jColour: s5 to r5 Monitor:Displaying images ! On: ! Off: Image display No image Set the disc and close the lid. ≥ Set the disc securely until you hear a "click", with the label side up. (Double-sided disc: place the label side up that you want to play back) Select the item with [3, 4]. Picture:Adjusting image quality Press [OPEN]. ≥ Some discs may start playing when it is loaded with the unit turned on. ≥ About discs with a cartridge jDVD-RAM, DVD-R: Remove the disc from the cartridge and set the disc in the tray. Cartridge discs cannot be used. jPlace the disc back into the cartridge for storage to prevent dirt and scratches after use. ≥ Do not touch the lens as it may make it dirty. Lens (A) ≥ Underlined items are the factory presets. ≥ If you are not using the LCD on this unit, select “Off”. No image mark is displayed on the lower left of the screen when it is set to “Off”. SD card To exit the screen Press [EXIT]. To display images when the “Monitor” is set to “Off ” Press [LCD MENU], [OPTION] or [DISC/SD]. 1 2 Open the cover at the side of the unit. Insert the SD card into the SD card slot. ≥ With the label side up, insert the card straight in the direction shown in the figure, until you hear a sound. 3 Close the cover. To remove the card In step 2 above, press the centre of the card until it “clicks”, and pull the card out straight. 15 VQT2H73 VQT2H73~Body1_mst.fm 16 ページ 2010年1月16日 土曜日 午前11時2分 Basic play (Playing video contents) Playback Instructions for operations are generally described using the remote control in these operating instructions. Insert a disc or SD card (> 15). Play starts. ≥ If play does not start, press [1] (PLAY). ≥ If a media with data in different file formats is inserted, the file selection menu is displayed. Press [3, 4] to select the desired file format and press [OK]. ≥ If the menu is displayed, press [3, 4, 2, 1] to select the item and press [OK]. ≥ If the screen prompting you to use the colour buttons appears, continue to operate with the colour buttons on the remote control. ≥ Signal from PAL discs is output as PAL. Signal from NTSC discs is output as “NTSC” or “PAL60”. You can select “NTSC” or “PAL60” in “NTSC Contents Output” for NTSC discs. (> 31) ≥ The producers of the disc can control how discs are played, so you may not always be able to control play as described in these operating instructions. Read the disc’s instructions carefully. ≥ When playing a set of two or more BD-Video discs, the menu screen may continue to display even if the disc has been ejected. ≥ The start of playback may take time depending on the disc or SD card. ≥ The sound of rotation may be audible during disc playback, but this is not a malfunction. To show Pop-up menu [BD-V] The Pop-up menu is a special feature available with some BDVideo discs. This menu may vary with discs. For the operating method, refer to the instructions for the disc. 1 Press [POP-UP MENU]. 2 Press [3, 4, 2, 1] to select the item and press [OK]. ≥ Pop-up menu also appears by pressing [OPTION] and selecting “Pop-up Menu”. ≥ Press [POP-UP MENU] to exit the screen. Playing HD Video or SD Video [AVCHD] [MPEG2] It is possible to play the HD (High Definition) video recorded on the Panasonic High definition Video Camera on the DVD-RAM/ R/RW/R DL/+R/+RW/+R DL or SD card, and SD (Standard Definition) Video recorded on the Panasonic SD Video Camera on the SD card. 1 Insert a disc or SD card (> 15). ≥ “Title View” or “Video (MPEG-2)” screen is displayed. ≥ If a media containing data in different file formats is inserted, the file selection menu may be displayed. Press [3, 4] to select “Play Video (AVCHD)” or “Play Video (MPEG-2)” and press [OK]. e.g., SD CARD Play Pictures (JPEG) Play Video (AVCHD) Play Video (MPEG-2) Select an action or press [RETURN]. OK To adjust the volume Press [VOL `] or [VOL _]. ≥ When using headphones, turn down the volume before connection. OPTION 2 Press [3, 4, 2, 1] to select the title and press [OK]. ≥ Total title number may not be displayed properly on +R/ +RW. To switch drives Press [DISC/SD] to select “DISC” or “SD”. ≥ If a media is inserted while the unit is stopped, the drive switches automatically depending on the inserted media. e.g., DIRECT NAVIGATOR SD CARD No. 001 002 003 004 005 006 007 008 009 010 Rec time 0:15.47 To show menus [BD-V] [AVCHD] [DVD-VR] [DVD-V] [DivX] Press [DIRECT NAVIGATOR/TOP MENU]. ≥ Total title number may not be displayed properly on +R/+RW. e.g., DVD-RAM Rec Time 0:15 (SP) Date 05.09 05.09 05.09 06.09 06.09 06.09 07.09 07.09 07.09 07.09 Video Picture Day Wed Wed Wed Thu Thu Thu Fri Fri Fri Fri Tuning IN 2 IN 2 VHS VHS IN 2 IN 2 Time 10:00 11:30 11:59 10:00 11:30 11:59 10:00 10:30 11:30 11:59 Name of item Page 01/02 Previous Play OPTION 16 VQT2H73 RETURN Video Picture Video (MPEG-2) Video Date 01.05 01.05 01.05 02.05 02.05 02.05 03.05 03.05 03.05 03.05 Day Wed Wed Wed Thu Thu Thu Fri Fri Fri Fri Time 10:00 11:30 11:59 10:00 11:30 11:59 10:00 10:30 11:30 11:59 Name of item Page 01/02 Play OPTION Previous Next RETURN To return to the menu screen Press [DIRECT NAVIGATOR/TOP MENU]. DIRECT NAVIGATOR Title View DVD-RAM(VR) No. 01 02 03 04 05 06 07 08 09 10 RETURN Next To exit the menu screen Press [EXIT]. DMPB100EB-VQT2H73_eng.book 17 ページ 2010年1月15日 金曜日 午後9時19分 To switch from other menus to AVCHD or MPEG2 menu (If the media contains data in different file formats) 1 Press [FUNCTION MENU]. 2 Press [3, 4] to select “Menu” and press [OK]. 3 Press [3, 4] to select “Play Video (AVCHD)” or “Play Video (MPEG-2)” and press [OK]. ≥ It may pause for a few seconds on the break of images when editing such as partial deletion is performed. ≥ High definition video (transfer rate of 18 Mbps or faster) cannot be played back correctly if it was recorded on a DVD compatible to double speed or slower. Chapter playback [DVD-VR] [AVCHD] 1 2 Insert a disc or SD card (> 15). Press [3, 4] to select the title and press [OPTION]. Other operations during play These functions may not work depending on the media and contents. Stop The stopped position is memorized. Resume play function Press [1] (PLAY) to restart from this position. ≥ The memorized position is cleared in the following instances: j[∫] is pressed several times jThe disc or SD card is removed jThe unit is turned off due to such occurrences as power outage, the removal of the AC adaptor or waste of the battery pack’s remaining power when the unit is turned on ≥ [BD-V]: On BD-Video discs including BD-J (> 44), the resume play function does not work. ≥ [DivX] [MPEG2]: The position is cleared if the unit is turned off. To display the title properties (recording date, etc.) To select the chapter Properties Chapter View Pause ≥ Press [;] again or [1] (PLAY) to restart play. 3 Press [3, 4] to select “Chapter View” and press [OK]. 4 Press [3, 4, 2, 1] to select the chapter and press [OK]. The speed increases up to 5 steps. ≥ Press [1] (PLAY) to revert to normal playback speed. ≥ For some discs, the speed may not change. e.g., [AVCHD] Search DIRECT NAVIGATOR SD CARD Chapter View Video 2009.11.15 002 003 004 005 --- --- --- --- --- --- --- 001 0:00.00 Page 01/01 Play RETURN To return to the previous screen Press [RETURN]. To exit the screen Press [EXIT]. Playback e.g., [AVCHD] Search/Slow-motion While playing, press [6] or [5]. ≥ [DVD-VR] [DVD-V]: Audio is heard during the first step of forward search. ≥ [BD-V] [AVCHD] [DivX] [MPEG2]: Audio is not heard during all steps of search. ≥ [CD] [MP3]: The speed is fixed to a single step. Slow-motion While paused, press [6] or [5]. ≥ [BD-V] [AVCHD]: Forward direction [5] only. ≥ [DVD-VR]: If continued for approx. 5 minutes, slow-motion play pauses automatically. Skip Skip to the title, chapter or track you want to play. ≥ Each press increases the number of skips. ≥ [DivX]: Backward direction [:] only. 17 VQT2H73 DMPB100EB-VQT2H73_eng.book 18 ページ 2010年1月15日 金曜日 午後9時19分 Status messages Direct Play During playback, you can access specific recordings or scenes through direct entry of the numbered buttons. Play starts from the selected title or chapter. [BD-V] [AVCHD] e.g., 5: [0] B [0] B [5] 15: [0] B [1] B [5] [DVD-V] e.g., 5: [0] B [5] 15: [1] B [5] The status messages give you information about what is currently being played. Each time you press [STATUS], the information displayed will change. ≥ It is also possible to display with the following procedures: 1 Press [OPTION]. 2 Select “Status” with [3, 4], and select [OK]. e.g., [BD-V] Frame-by-frame Play status Type of disc ≥ While stopped (the image on the right is displayed on the screen), the title is designated. While playing, the chapter is designated. BD-Video PLAY No display T: Title C: Chapter Items change depending on the disc played. PL: Playlist Elapsed time in the title While paused, press [2] (2;) or [1] (;1). Each press shows the next frame. ≥ Press and hold to change in forward or backward succession. ≥ Press [1] (PLAY) to revert to normal playback speed. ≥ [BD-V] [AVCHD] : Forward direction [1] (;1) only. T1 C1 0:05.14 0:20.52 Current position Total time Depending on the kind of media or the playback status, this display may not appear. Screen Aspect When black bars are shown at the top, bottom, left, and right sides of the screen, you can enlarge the image to fill the screen. 1 Press [OPTION]. 2 Press [3, 4] to select “To Others” and press [OK]. 3 Press [3, 4] to select “Screen Aspect” and press [OK]. 4 Press [2, 1] to select “Side cut” or “Zoom”. ! Normal: Normal output ! Side cut: The black bars on the right and left sides of the 16:9 image disappear and the image is enlarged. Please note that the right and left sides of the image are cut off when the black bar is not displayed. ! Zoom: The black bars on the top and bottom sides of the 4:3 image disappear and the image is enlarged. Please note that the top and bottom sides of the image are cut off when the black bar is not displayed. ≥ Please note that the top, bottom and sides of the image will be cut off in images with no black bars. ≥ Screen aspect will return to “Normal” in the following instances: jThe drive is switched jThe unit is turned on/off ≥ [BD-V] [DVD-V]: “Side cut” does not have any effect. ≥ When “TV Aspect” (> 32) is set to “4:3 Pan & Scan” or “4:3 Letterbox”, the “Zoom” effect is disabled. 18 VQT2H73 Changing audio ≥ It is also possible to display with the following procedures: 1 Press [OPTION]. 2 Select “To Others” with [3, 4], and select [OK]. 3 Select “Audio” with [3, 4], and select [OK]. [BD-V] [DVD-V] e.g., [DVD-V] Soundtrack 1 ENG Digital 3/2.1ch English is selected. You can change the audio channel number each time you press [AUDIO] or [3, 4]. This allows you to change the soundtrack language (> 28, “Soundtrack”), etc. [DVD-VR] [DivX] [MPEG2] e.g., AudioLR>AudioL>Audio R ^---------------------------------} DVD-RAM(VR) PLAY “AudioLR” is selected AudioLR You can change soundtracks each time you press [AUDIO]. DMPB100EB-VQT2H73_eng.book 19 ページ 2010年1月15日 金曜日 午後9時19分 Enjoying BONUSVIEW in BD-Video [BD-V] What is BONUSVIEW? BONUSVIEW allows you to enjoy functions such as picture-inpicture or secondary audio etc., with BD-Video supporting BDROM Profile 1 version 1.1/ Final Standard Profile. ≥ These discs may not be on sale in certain regions. ≥ The usable functions and the operating method may vary with each disc, please refer to the instructions on the disc and/or visit their website. Secondary video Formatting SD cards/Deleting data ≥ If the SD card you use is formatted, all data on the card will be erased. It cannot be recovered. e.g., 1 Insert an SD card (> 15). 2 Press [FUNCTION MENU]. 3 Press [3, 4] to select “To Others” and press [OK]. BD-Video Data Erase 4 Press [3, 4] to select Format SD Card “Card Management” and press [OK]. Format this SD Card. 5 Press [3, 4] to select “BDVideo Data Erase” or “Format SD Card” and press [OK]. 6 Press [2, 1] to select “Yes” and press [OK]. 7 Press [2, 1] to select “Start” and press [OK]. Card Management SD CARD No. of Files 6 Free space 300 MB OK RETURN Primary video To turn on/off secondary video Set “Video” in “Secondary Video” to “On” or “Off” (> 28, Press [DISPLAY] D “Disc” D “Signal Type”) Playback ≥ If you experience any problems, first, try formatting the SD card in this unit. ≥ While using this feature, do not open the cover at the side of the unit, touch or remove the SD card. The secondary video is played. To turn on/off secondary audio Set “Soundtrack” in “Secondary Video” to “On” or “Off” (> 28, Press [DISPLAY] D “Disc” D “Signal Type”) The secondary audio is played. ≥ During search/slow-motion or frame-by-frame, only the primary video is displayed. ≥ When “BD-Video Secondary Audio” in “Digital Audio Output” is set to “Off”, secondary audio will not be played even if you set “Soundtrack” in “Secondary Video” to “On”. Please check that “BD-Video Secondary Audio” is set to “On” (> 31). ≥ The playback method determined by the disc will take priority, so it may not play back in the manner specified with this unit. ≥ When the secondary video is turned off, the secondary audio will not be played. 19 VQT2H73 VQT2H73~Body1_mst.fm 20 ページ 2010年1月22日 金曜日 午前9時40分 Playing still pictures [JPEG] Playback of the BD-RE, DVD-RAM/R/R DL or CD-R/RW with still pictures recorded. This unit can also play still pictures recorded on the SD card. (About structure of folders > 36, “Structure of folders that can play back on this unit”) 1 Insert a disc or SD card (> 15). ∫ BD-RE, DVD-RAM To switch from other menus to JPEG menu (If the media contains data in different file formats) 1 Press [FUNCTION MENU]. 2 Press [3, 4] to select “Menu” and press [OK]. 3 Press [3, 4] to select “Play Pictures (JPEG)” and press [OK]. Useful functions during still picture play “Album View” screen is displayed. ≥ When the “Title View” screen is displayed, press the green button to switch to the “Album View” screen. ≥ If the DVD-RAM containing both JPEG and AVCHD format is inserted, the file selection menu may be displayed. You can display still pictures one by one at a constant interval. ∫ DVD-R/R DL, CD-R/RW, SD card 1 ≥ If the media containing data in different file formats is inserted, the file selection menu may be displayed. Start Slideshow ∫ BD-RE, DVD-RAM Press [3, 4, 2, 1] to select the album and press [OPTION]. Press [3, 4] to select “Play Pictures (JPEG)” and press [OK]. ≥ You can also start slideshow by pressing [1] (PLAY) after selecting the album. e.g., 2 SD CARD While the “Album View” screen is displayed Play Pictures (JPEG) Press [3, 4] to select “Start Slideshow” and press [OK]. Play Video (AVCHD) Play Video (MPEG-2) Select an action or press [RETURN]. OK OPTION RETURN “Picture View” screen is displayed. B Go to step 3 2 Press [3, 4, 2, 1] to select the album and press [OK]. e.g., Video 007 Picture ᧂ Previous Next Video Press [∫]. In step 2 in Start Slideshow (> above) RETURN Press OK to go to Picture View. Press [3, 4, 2, 1] to select the still picture and press [OK]. DIRECT NAVIGATOR DVD-RAM(VR) Picture View Video Picture 2006 9 12 0001 0002 0003 0004 0005 0006 0007 0008 0009 Page 001/001 Play RETURN ≥ Press [2, 1] to display the previous or next still picture. ≥ Press [:, 9] to show other pages. ≥ Playback is not possible for pictures other than JPEGs. ≥ Black bars may be displayed on the top, bottom or sides depending on the picture aspect ratio. To return to the previous screen Press [RETURN]. To exit the screen Press [EXIT]. 20 Press [3, 4] to select “Start Slideshow” and press [OK]. Slideshow Page 02/02 Picture e.g., VQT2H73 Press [OPTION]. 2 Slideshow Setting 2006 9 12 Total 13 OK OPTION While the “Picture View” screen is displayed 008 106_DVD Total 8 3 1 To stop slideshow Album View DIRECT NAVIGATOR DVD-RAM(VR) OPTION ∫ DVD-R/R DL, CD-R/RW, SD card 1 2 Press [3, 4] to select “Slideshow Setting” and press [OK]. To change the display interval Press [3, 4] to select “Display Interval” and press [2, 1] to select the interval (“Long”, “Normal” or “Short”). ≥ When a still picture with a large number of pixels is played, the display interval may become longer. Even if the setting is changed, the display interval may not become shorter. To set display method Press [3, 4] to select “Transition Effect” and press [2, 1] to select “Fade”, “Motion” and “Random”. ! Fade: Pictures are changed by fading out and fading in. ! Motion: Pictures are changed by fading out and fading in, while they are enlarged, reduced, or moved up or down. ! Random: In addition to the “Motion”, pictures are changed by various methods. DMPB100EB-VQT2H73_eng.book 21 ページ 2010年1月15日 金曜日 午後9時19分 To repeat slideshow Press [3, 4] to select “Repeat Play” and press [2, 1] to select “On” or “Off”. To listen to Background Music (SD card only) The music CD can be played back as Background Music during the slideshow. Press [3, 4] to select “Soundtrack” and press [2, 1] to select “On” or “Off”. ≥ You cannot search or skip on the music. ≥ When the slideshow stops, the playback of the music also stops. Press [3, 4, 2, 1] to select “Set” and press [OK]. ∫ BD-RE, DVD-RAM To switch to another higher folder (Only if there is a multiple number of higher folders recognizable) 1 Press [OPTION]. 2 Press [3, 4] to select “Select Folder” and press [OK]. 3 Press [2, 1] to select the higher folder and press [OK]. e.g., Rotate 1 While the “Album View” screen is displayed Select Folder While playing (except for slideshow) Change the Album folder to be accessed. Press [OPTION]. 2 ≥ The rotation information will be stored until the unit is turned off or the media is removed. Zoom out This function is only available for small-sized still pictures. 1 While playing (except for slideshow) Press [OPTION]. 2 \JPEG\DCIM001 Press [3, 4] to select “Rotate RIGHT” or “Rotate LEFT” and press [OK]. Press [3, 4] to select “Zoom out” and press [OK]. Press [OK] to set. OK ∫ DVD-R/R DL, CD-R/RW 1 While the “Picture View” screen is displayed Press [OPTION]. 2 Press [3, 4] to select “Folder” and press [OK]. 3 Press [3, 4] to select a folder and press [OK]. Playback 3 To select the still pictures in another folder e.g. ≥ The zoom-out information will not be stored. Folder selection DIRECT NAVIGATOR CD(JPEG) To cancel “Zoom out” 021216_0026 001 002 003 004 005 006 007 008 009 010 1 Press [OPTION]. 2 Select “Zoom in” and press [OK]. F 2/25 103 104 105 OK RETURN To show the picture properties While playing Press [STATUS] twice. ≥ It is also possible to display with the following procedures: 1 Press [OPTION]. 2 Select “Status” with [3, 4], and select [OK]. e.g., JPEG on DVD-RAM Shooting date Date 11.12.2009 Total 3/9 To exit, press [STATUS]. 21 VQT2H73 DMPB100EB-VQT2H73_eng.book 22 ページ 2010年1月15日 金曜日 午後9時19分 Playing DivX® videos [DivX] 1 ABOUT DIVX VIDEO: DivX® is a digital video format created by DivX, Inc. This is an official DivX Certified device that plays DivX video. Visit www.divx.com for more information and software tools to convert your files into DivX video. You can play BD-R, DVD-R/R DL and CD-R/RW discs which contain DivX video contents that have been recorded on a personal computer. (About structure of folders > 36, “Structure of folders that can play back on this unit”) ≥ Because DivX format can use many different codecs, there is no guarantee that all DivX files will play. (> 35, “About MP3/JPEG/DivX/AVCHD/MPEG2 files”) 1 Playing a title in another folder Insert a disc (> 15). ≥ If the media containing data in different file formats is inserted, the file selection menu may be displayed. Press [3, 4] to select “Play Video (DivX)” and press [OK]. e.g., While the “DIRECT NAVIGATOR” is displayed Press [OPTION]. 2 Press [3, 4] to select “Folder” and press [OK]. 3 Press [3, 4] to select a folder and press [OK]. e.g., DIRECT NAVIGATOR CD (DivX) OK Folder selection 12_02_2004 Image001 Image002 Image003 Image004 Image005 Image006 Image007 Image008 Image009 Image010 F 1/21 RETURN Page 01/01 Selected folder No. / Total folders If the folder has no title, “– –” is displayed as folder number. ≥ You cannot select folders that contain no compatible files. To return to the previous screen CD Press [RETURN]. Play Video (DivX) Play Pictures (JPEG) Play Music (MP3) Select an action or press [RETURN]. ABOUT DIVX VIDEO-ON-DEMAND: OK RETURN OPTION 2 Press [3, 4] to select the title and press [OK]. Play starts on the selected title. e.g., DIRECT NAVIGATOR CD (DivX) 001 This DivX Certified® device must be registered in order to play DivX Video-on-Demand (VOD) content. To generate the registration code, locate the DivX VOD section in the device setup menu. Go to vod.divx.com with this code to complete the registration process and learn more about DivX VOD. Display the unit’s registration code. DivX Name of Title No. Regarding DivX VOD content (> 33, “DivX Registration” in “General”) ABC.divx DivX Registration Play OPTION Folders can be selected from OPTION. Page 01/01 ≥ The picture sizes set for recording may prevent the unit from showing pictures in the proper aspect. You may be able to adjust the aspect through the TV. ≥ Successive play is not possible. ≥ You can use search and skip functions. (> 17) ≥ Press [:, 9] to show other pages. To switch from other menus to DivX menu (If the media contains data in different file formats) 1 Press [FUNCTION MENU]. 2 Press [3, 4] to select “Menu” and press [OK]. 3 Press [3, 4] to select “Play Video (DivX)” and press [OK]. 22 VQT2H73 You must register this unit to play protected DivX videos. RETURN The registration code is necessary to register this unit. Registration Code: XXXXXXXXXX 10 alphanumeric characters Please register at www.divx.com/vod/ ≥ After playing DivX VOD content for first time, the registration code is not displayed. ≥ If you purchase DivX VOD content using a registration code different from this unit’s code, you will not be able to play this content. (“Authorisation Error.” is displayed.) Cancel the unit’s registration. (> 33, “DivX Registration” in “General”) Press [2, 1] to select “Yes” in “DivX Registration”. Use the deregistration code to cancel the registration in www.divx.com. DMPB100EB-VQT2H73_eng.book 23 ページ 2010年1月15日 金曜日 午後9時19分 Regarding DivX VOD content that can only be played a set number of times Some DivX VOD content can only be played a set number of times. When you play this content, the remaining number of plays is displayed. You cannot play this content when the number of remaining plays is zero. (“Rental Expired.” is displayed.) The remaining number of plays decreases each time a programme is played. However, when playing from the point where play was previously stopped, the remaining number of plays does not decrease due to the resume play function. Displaying subtitles text 1 While playing Press [DISPLAY]. 2 Press [3, 4] to select “Disc” and press [1]. 3 Press [3, 4] to select “Subtitle” and press [1]. 4 5 Press [3, 4] to select “On” and press [1]. Playback You can display subtitles text on the DivX video disc on this unit. This function has no relation to the subtitles specified in DivX standard specifications and has no clear standard. The operation might be different or it may not operate properly depending on the way the file was made or the state of this unit (playing, stopped, etc.). Press [3, 4] to select “Text”. ≥ DivX video files that do not display “Text” do not contain subtitles text. Subtitles text cannot be displayed. To exit the screen Press [EXIT]. ≥ If the subtitles text are not displayed correctly, try changing the language settings. (> 31) 23 VQT2H73 DMPB100EB-VQT2H73_eng.book 24 ページ 2010年1月15日 金曜日 午後9時19分 Playing music To switch from other menus to MP3 menu [CD] [MP3] You can play generally available a music CDs or MP3 files recorded onto a DVD-R/R DL and CD-R/RW. (About structure of folders > 36, “Structure of folders that can play back on this unit”) 1 Playing a track in another folder Insert a disc (> 15). “Music list” screen is displayed. ≥ If the media containing data in different file formats is inserted, the file selection menu may be displayed. Press [3, 4] to select “Play Music (MP3)” and press [OK]. e.g., CD Play Video (DivX) Play Pictures (JPEG) Play Music (MP3) Select an action or press [RETURN]. 2 [MP3] 1 While the “Music list” is displayed Press [OPTION]. 2 Press [3, 4] to select “Select Folder” and press [OK]. 3 Press [3, 4] to select a folder and press [OK]. e.g., OK OPTION (If the media contains data in different file formats) 1 Press [FUNCTION MENU]. 2 Press [3, 4] to select “Menu” and press [OK]. 3 Press [3, 4] to select “Play Music (MP3)” and press [OK]. RETURN DIRECT NAVIGATOR CD(MP3) Select Folder Press [3, 4] to select the track and press [OK]. MP3 music 001 My favorite 002 Brazilian pops 003 Chinese pops 004 Czech pops 005 Hungarian pops 006 Liner notes 007 Japanese pops 008 Mexican pops 009 Philippine pops 010 Swedish pops 011 Momoko 012 Standard number 013 Piano solo 014Vocal Play starts on the selected track. ≥ Playback for some discs may start automatically. e.g., [CD] Music list DIRECT NAVIGATOR CD No. 01 02 03 04 05 0.09 4.30 Track1 5 Tracks / Total Play Time 20min54sec Track Name Play Time 4min30sec Track1 3min41sec Track2 4min30sec Track3 Track4 3min11sec 5min 2sec Track5 Play RETURN “ ” indicates the track currently playing. ≥ You can use search and skip functions. (> 17) ≥ The screen switches to Screen Saver mode if there is no operation for 2 minutes after starting playback. (Playback continues.) 24 VQT2H73 F 6/25 OK RETURN Selected folder No. /Total folders If the folder has no track, “– –” is displayed as folder number. ≥ You cannot select folders that contain no compatible tracks. To return to the previous screen Press [RETURN]. DMPB100EB-VQT2H73_eng.book 25 ページ 2010年1月15日 金曜日 午後9時19分 Using this unit with other equipment It is possible to enjoy the high quality video and audio of this unit on the large screen by connecting this unit with the TV using a single cable. ≥ Turn off all equipment before connecting and read the appropriate operating instructions. ≥ Linked operation is possible by connecting to a Panasonic TV (VIERA) or amplifier that is compatible with the VIERA Link (HDMI) function. (> 26) Playback ≥ Non-HDMI-compliant cables cannot be utilized. ≥ Please use High Speed HDMI Cables that have the HDMI logo (as shown on the cover). It is recommended that you use Panasonic’s HDMI cable. When outputting 1080p signal (> 32, “HDMI Video Format”), please use HDMI cables 5.0 meters or less. RP-CDHS15 (1.5 m), RP-CDHS30 (3.0 m), RP-CDHS50 (5.0 m), etc. ≥ This unit incorporates HDMI (x.v.Colour™, High Bit rate Audio) technology. (> 44, 45) Notice ≥ Keep the screen of this unit opened. If the screen of this unit is closed, this unit cannot be operated with the TV remote control in any other condition. ≥ To turn off the display of this unit, select “Off” for the “Monitor” in the “LCD Menu”. (> 15) ≥ When using only the battery pack, operate after turning the unit on. ≥ The quality of video will lower on the screen of this unit when HDMI is connected, but it is not a malfunction. ≥ If you raise the volume on the television while playing this unit, the volume may abruptly become very loud when you switch to a television broadcast. Return the volume to its normal level before changing. Preparation Connect the devices to the unit. AV OUT HDMI cable (not included) Television HDMI IN You can enjoy the high quality surround audio in Dolby Digital Plus, Dolby TrueHD, and DTS-HD by connecting this unit to the HDMI compatible multi-channel amplifier. (> 34) (Only when connected to an amplifier compatible with each audio) 1 Turn on the power of the connected device (TV, etc.), and switch the input. Example: Set the input to “HDMI” or similar (the name of input may be different depending on the connected device). 2 Start playback on this unit. Video and audio are output from the connected device. 25 VQT2H73 DMPB100EB-VQT2H73_eng.book 26 ページ 2010年1月15日 金曜日 午後9時19分 Linked operations with the TV (VIERA Link “HDAVI Control™”) What is VIERA Link “HDAVI Control”? VIERA Link “HDAVI Control” is a convenient function that offers linked operations of this unit, and a Panasonic TV (VIERA) or other device under “HDAVI Control”. You can use this function by connecting the equipment with an HDMI cable. See the operating instructions for connected equipment for operational details. ≥ VIERA Link “HDAVI Control”, based on the control functions provided by HDMI which is an industry standard known as HDMI CEC (Consumer Electronics Control), is a unique function that we have developed and added. As such, its operation with other manufacturers’ equipment that supports HDMI CEC cannot be guaranteed. ≥ This unit supports “HDAVI Control 5” function. “HDAVI Control 5” is the newest standard (current as of December, 2009) for Panasonic’s HDAVI Control compatible equipment. This standard is compatible with Panasonic’s conventional HDAVI equipment. ≥ Please refer to individual manuals for other manufacturers’ equipment supporting VIERA Link function. Setting VIERA Link “HDAVI Control™” Preparation Connect this unit to your TV or other device with an HDMI cable (> 25). 1 Set “VIERA Link” to “On” (> 33). (The default setting is “On”.) 2 Set the “HDAVI Control” operations on the connected equipment (e.g., TV). 3 Turn on all “HDAVI Control” compatible equipment and select this unit’s input channel on the connected TV so that the “HDAVI Control” function works properly. Also when the connection or settings are changed, repeat this procedure. When you want to leave the TV on and set only this unit to standby mode Press [Í] on this unit’s remote control and set to standby mode. 26 VQT2H73 Automatic input switching When the following operations are performed, the television will automatically switch the input channel and display the corresponding action. jWhen play starts on the unit jWhen an action that uses the display screen is performed (e.g., DIRECT NAVIGATOR screen) jWhen the HDMI is connected, with the unit turned on (first time only) [For[the[United[Kingdom,[Republic[of[Ireland[and[Continental[Europe] j[BD-V] [DVD-V] When playback stops, the TV will automatically return to TV tuner mode. Power on link When the television is off and the following operations are performed, the television will automatically turn on and display the corresponding action. jWhen play starts on the unit jWhen an action that uses the display screen is performed (e.g., DIRECT NAVIGATOR screen) Power off link All connected equipment compatible with “HDAVI Control”, including this unit, automatically turns off when you switch the television off. ≥ This unit automatically turns off even during playback or any other operation. ≥ When [1] (PLAY) is pressed on this unit for “Automatic input switching” or “Power on link”, the playback image is not immediately displayed on the screen and it may not be possible to watch the contents from where playback started. In this case, press [:] or [6] to go back to where playback started. Playing music continuously even after the television is set to standby When the unit is connected to a Panasonic TV (VIERA) that supports HDAVI Control 2 or later and other device supports VIERA Link, the unit is turned off if the power to the television is turned off, since “Power off link” (> above) operates. The following operations make it possible to keep the power of the unit ON and to play music continuously. 1 While playing music Press [OPTION]. 2 Press [3, 4] to select “TV Power” and press [OK]. ≥ Sound may be discontinued for several seconds when the power to the television is turned off. ≥ If the operation mentioned above is executed while audio is output from the television, the sound may not be output from the device. It is recommended to set the device beforehand so that audio will be output from the device. When not using “HDAVI Control” Set “VIERA Link” in the Setup menu to “Off”. (> 33) VQT2H73~Body1_mst.fm 27 ページ 2010年1月21日 木曜日 午後6時54分 Easy control only with VIERA remote control If you connect this unit to the TV that supports “HDAVI Control 2” or later with an HDMI cable, you can operate this unit using buttons on the TV remote control. The buttons that you can use for this unit vary depending on the TV. For details, refer to the operating instructions of the TV. Use the remote control supplied with this unit if you cannot operate this unit using buttons on the TV remote control. ≥ The operation of this unit may be interrupted when you press incompatible buttons on the TV remote control. Using the FUNCTION MENU to operate this unit Using the OPTION menu to operate this unit By using the TV remote control, you can play discs using the “Control Panel” and display the Top Menu (for BD-Video and DVD-Video) or Pop-up Menu (for BD-Video), etc. 1 Press [OPTION]. ≥ This can also be displayed by using the VIERA menu screen. ≥ The OPTION menu may not appear while the Top Menu for BD-Video or DVD-Video is displayed. 2 Select an item, then press [OK]. e.g., 1 Press the button for VIERA Link on the remote control. 2 Select the player. ≥ The FUNCTION MENU is displayed. e.g., Control Panel Control Panel is displayed. Follow the indications on the screen. Top Menu [BD-V] [AVCHD] [DVD-V] Top menu is displayed. Menu [DVD-V] Menu is displayed. Pop-up Menu [BD-V] Pop-up menu is displayed. Status (> 18) Rotate RIGHT [JPEG] Rotate the still picture. Blu-ray Disc Player DISC Playback Top Menu SD card To Others Playback By using the TV remote control, you can play media using the FUNCTION MENU. OK RETURN When the AC adaptor is connected while the unit is turned off, the unit will automatically turn on. For details, please refer to the TV user manual. Rotate LEFT [JPEG] Zoom in [JPEG] Enlarge or reduce the still picture. Zoom out [JPEG] To Others jLCD Menu (> 15) jAudio (> 18) jSettings for Playback (> 28) jScreen Aspect (> 18) jSetup (> 30) 27 VQT2H73 VQT2H73~Body1_mst.fm 28 ページ 2010年1月21日 木曜日 午後7時5分 Changing settings with the on-screen menu On-screen menu operations 1 Press [DISPLAY]. ≥ It is also possible to display with the following procedures: 1 Press [OPTION]. 2 Select “To Others” with [3, 4], and select [OK]. 3 Select “Settings for Playback” with [3, 4], and select [OK]. e.g., BD-Video Disc Play Picture Sound Menus Signal Type Subtitle Subtitle Style Items Off - Main 1ENG Angle - Settings ≥ Depending on the condition of the unit (playing, stopped, etc.) and media contents, there may be some items that you cannot select or change. 2 Press [3, 4] to select the menu and press [1]. Soundtrack [AVCHD] [DVD-V] Select the type of audio or language. (> 29, “Language”, “Audio attribute”) [DVD-VR] [MPEG2] The audio attributes appear. (> 29, “Audio attribute”) [DivX] Select the soundtrack number. ≥ Soundtrack numbers are displayed even when there is only one audio type. Subtitle [BD-V] [AVCHD] [DVD-V] Turn the subtitle on/off and select the language. (> 29, “Language”) [DVD-VR] (Only discs that contain subtitle on/off information) Turn the subtitle on/off. [DivX] Turn the subtitle on/off and select “Text” or the subtitle number. ≥ Subtitle number is displayed even if there are not multiple subtitles. Subtitle Style [BD-V] Select the subtitle style. Audio channel [DVD-VR] [DivX] [MPEG2] Select the audio channel number. (> 18, “Changing audio”) 3 Press [3, 4, 2, 1] to select the item and press [1]. 4 Press [3, 4] to select the setting. Angle ≥ Some items can be changed by pressing [OK]. [BD-V] [DVD-V] Select the number of the angle. To exit the on-screen menu Press [DISPLAY] or [EXIT]. What you can change with the on-screen menu Signal Type [BD-V] ! Primary Video Video: The recording method of original video appears. (> 29, “Video attribute”) Soundtrack: Select the type of audio or language. (> 29, “Language”, “Audio attribute”) ! Secondary Video Soundtrack: Select on/off of images. The recording method of original video appears. (> 29, “Video attribute”) Select on/off of audio and the language. (> 29, “Language”, “Audio attribute”) Video [AVCHD] The recording method of original video appears. (> 29, “Video attribute”) 28 VQT2H73 Play Repeat Play (Only when the elapsed time is being displayed on the display.) Select the item which you want to repeat. The items displayed differ depending on the type of media. Disc Video: Some items may be changed only on the disc specific menu. (> 16) ! ! ! ! ! ! All tracks: Chapter: Playlists: Title: One track: Off All tracks Chapter Playlist Title Track Select “Off” to cancel. Random [CD] [MP3] While playing, press [3, 4] to select “On”. Random playback starts from the next track. ! On ! Off DMPB100EB-VQT2H73_eng.book 29 ページ 2010年1月15日 金曜日 午後9時19分 Sound Dialog Enhancer [BD-V] [AVCHD] [DVD-VR] [DVD-V] [DivX] [MPEG2] Select the picture quality mode during play. [BD-V] [AVCHD] [DVD-VR] [DVD-V] [DivX] [MPEG2] (3 channels or more only, including a centre channel) The volume of the centre channel is raised to make dialog easier to hear. ! ! ! ! Normal: Soft: Fine: Cinema: ! User: Default setting Soft picture with smoother video Details are sharper Mellows movies, enhances detail in dark scenes. You can make further adjustments. (> below) 1 Press [1] to select “Picture Adjustment” and press [OK]. 2 Select the item using [3, 4] and adjust it with [2, 1]. Contrast: Increases the contrast between light and dark parts of the picture (j7 to i7). Brightness: Brightens the picture (0 to i15). Sharpness: Adjusts the sharpness of the edges of the horizontal lines (j6 to i6). Colour: Adjusts the shade of the picture’s colour (j7 to i7). Gamma: Adjusts the brightness of dark portions of the screen (0 to i5). 3D NR: Reduces the rough noise in the background to give a greater feeling of depth (0 to i4). When “24p Output” is set to “On”, this function may not operate. (> 32) Integrated NR: Smoothes block noise and reduces the smudging that appears around contrasting sections of the picture (0 to i3). Select the method of conversion for progressive output to suit the type of material being played (> 44, “Film and video”). ! Video: ! Film: ! Off This function is effective for audio from the HDMI AV OUT terminal only when “Dolby D/Dolby D +/Dolby TrueHD” or “DTS/DTS-HD” is set to “PCM”. Language ENG: FRA: DEU: ITA: ESP: NLD: SVE: NOR: DAN: POR: RUS: JPN: CHI: KOR: MAL: VIE: English French German Italian Spanish Dutch Swedish Norwegian Danish Portuguese Russian Japanese Chinese Korean Malay Vietnamese THA: POL: CES: SLK: HUN: FIN: ARA: HIN: PER: IND: MRI: BUL: RUM: GRE: TUR: ¢: Thai Polish Czech Slovak Hungarian Finnish Arabic Hindi Persian Indonesian Maori Bulgarian Romanian Greek Turkish Others Audio attribute Progressive ! Auto: ! On Playback Picture Mode Automatically detects the film and video content, and appropriately converts it. Select when using “Auto” and the content is distorted. Select this if the edges of the film content appear jagged or rough when “Auto” is selected. However, if the video content is distorted as shown in the illustration below, then select “Auto”. LPCM/ Digital/ Digital+/ TrueHD/DTS/DTS 96/DTS-HD HI RES/DTS-HD MSTR/MPEG Signal type ch (channel) Number of channels k (kHz) Sampling frequency b (bit) Number of bits bps (bit per second) Transfer rate of bit Video attribute MPEG-2/MPEG-4 AVC/VC-1 Video recording method 480/576/720/1080 Video Format 24p/50i/60i/50p/60p Video Frame rate YCbCr4:2:2/YCbCr4:4:4/RGB Colour Space bps (bit per second) Transfer rate of bit 24p [DVD-V] Movies and other material recorded on DVD-Video at 24p are output at 24p. ! On ! Off Only when you have selected “On” in “24p Output” (> 32) and play discs recorded at a rate of 60 fields per second. 29 VQT2H73 DMPB100EB-VQT2H73_eng.book 30 ページ 2010年1月15日 金曜日 午後9時19分 Changing the unit’s settings Settings Change the unit’s settings if necessary. The settings remain intact even if you switch the unit to standby. Setup menu operations 1 2 3 4 While stopped Setup Press [SETUP]. Disc Press [3, 4] to select the menu and press [OK]. Sound Picture Display General ! No Limit: All BD-Video can be played. ! Enter limit.: Prohibits play of BD-Video with corresponding ratings recorded on them. ! 0 to 21 year(s): Prohibits play of BD-Video with corresponding ratings recorded on them. Changing settings (When 0 to 254 year(s) is selected) ! Unlock Player ! Change Password ! Change Level ! Temporary Unlock Soundtrack Preference OK Press [3, 4] to select the item and press [OK]. RETURN If there are any other items, repeat these steps. Press [3, 4, 2, 1] to select the option and press [OK]. To return to the previous screen Press [RETURN]. To exit the screen Press [SETUP] or [EXIT]. ≥ Setup menu is also possible to display with the following procedures. 1 While stopped, press [OPTION] 2 Select “To Others” with [3, 4], and select [OK] 3 Select “Setup” with [3, 4], and select [OK] About the password The password of the following items are common. Don’t forget your password. ≥ “DVD-Video Ratings” ≥ “BD-Video Ratings” Summary of settings Underlined items are the factory presets. Disc DVD-Video Ratings Set a ratings level to limit DVD-Video play. Follow the on-screen instructions. Enter a 4-digit password with the numbered buttons when the password screen is shown. ! 8 No Limit: All DVD-Video can be played. ! 1 to 7: Prohibits play of DVD-Video with corresponding ratings recorded on them. ! 0 Lock All: Prohibits play of all DVD-Video. Changing settings (When level 0 to 7 is selected) ! Unlock Player ! Change Password ! Change Level ! Temporary Unlock 30 Set an age limit of BD-Video play. Follow the on-screen instructions. Enter a 4-digit password with the numbered buttons when the password screen is shown. TV Aspect / HDMI Function Settings ≥ There may be differences in operation methods. If this happens, follow the on-screen instructions for the operation. VQT2H73 BD-Video Ratings Choose the language for audio. [BD-V] [DVD-V] ≥ Some discs start in a certain language despite any changes you make here. ≥ When the selected language is not available on the disc, the default language is played. There are discs where you can only switch the language from the menu screen. (> 16) ≥ Enter a code (> 43) with the numbered buttons when you select “Other ¢¢¢¢”. ! German ! French ! English ! Italian ! Spanish ! Dutch* ! Original: The original language of each disc will be selected. ! Other ¢¢¢¢ * Only For the United Kingdom, Republic of Ireland, Continental Europe and Asia. Subtitle Preference Choose the language for subtitle. [BD-V] [DVD-V] ≥ Some discs start in a certain language despite any changes you make here. ≥ When the selected language is not available on the disc, the default language is played. There are discs where you can only switch the language from the menu screen. (> 16) ≥ Enter a code (> 43) with the numbered buttons when you select “Other ¢¢¢¢”. ! Automatic: If the language selected for “Soundtrack Preference” is not available, subtitles of that language will automatically appear if available on that disc. ! English ! German ! French ! Italian ! Spanish ! Dutch* ! Other ¢¢¢¢ * Only For the United Kingdom, Republic of Ireland, Continental Europe and Asia. 31 ページ 2010年1月25日 月曜日 午後5時46分 Menu Preference Choose the language for disc menus. [BD-V] [DVD-V] ≥ Some discs start in a certain language despite any changes you make here. ≥ When the selected language is not available on the disc, the default language is played. There are discs where you can only switch the language from the menu screen. (> 16) ≥ Enter a code (> 43) with the numbered buttons when you select “Other ¢¢¢¢”. ! English ! German ! French ! Italian ! Spanish ! Dutch* ! Other ¢¢¢¢ * Only For the United Kingdom, Republic of Ireland, Continental Europe and Asia. DivX Subtitle Text [DivX] Select a suitable item according to the language used for DivX subtitles text (> 23). ≥ This item is displayed only when pressing [SETUP] after playing back a file. ! Latin1: ! Latin2: ! Cyrillic: English, German, Spanish, etc. Polish, Czech, Hungarian, etc. Russian, etc. Picture Still Mode [BD-V] [AVCHD] [DVD-V] Select the type of picture shown when you pause playback (> 44, “Frames and fields”). ! Automatic: Automatically selects the type of picture shown. ! Field: Select if jittering occurs when “Automatic” is selected. (The picture is coarser.) ! Frame: Select if small text or fine patterns cannot be seen clearly when “Automatic” is selected. (The picture is clearer and finer.) Sound Dynamic Range Compression [BD-V] [AVCHD] [DVD-V] [DivX] You can listen at low volumes but still hear dialog clearly. (Dolby Digital, Dolby Digital Plus and Dolby TrueHD only) ≥ “Auto” is effective only when playing Dolby TrueHD. ! On ! Off ! Auto Digital Audio Output Press [OK] to show the following settings. ≥ For details on digital output (> 34) Dolby D/Dolby D +/Dolby TrueHD DTS/DTS-HD Select whether Dolby Digital, Dolby Digital Plus, Dolby TrueHD, DTS Digital Surround, DTS-HD High Resolution Audio or DTS-HD Master Audio is output in “Bitstream” or “PCM” format. ≥ Not making the proper settings may result in noise. ≥ If the unit is connected with the HDMI AV OUT terminal, the specifications of the connected equipment take precedence over this unit and audio selected in these items may not be output (e.g., when a television is connected, the HDMI audio output of this unit is limited to down-mixed 2ch.) ! Bitstream: Select “Bitstream” when the connected equipment can decode the respective audio format. jConnect equipment supporting HDMI (High Bit rate Audio) and use a High Speed HDMI Cable in order to output high bit rate audio such as Dolby Digital Plus, Dolby TrueHD, DTS-HD High Resolution Audio or DTS-HD Master Audio. ! PCM: Select “PCM” when the connected equipment cannot decode the respective audio format. Refer to the operating instructions for connected devices to verify whether or not they can decode each of the audio formats. MPEG Audio Seamless Play [DVD-VR] Select the play mode between playlist chapter segments and partially deleted titles. ! On: The chapters in playlists are played seamlessly. This does not work while searching or when there are several audio types included on the playlist. Additionally, the positioning of chapter segments may change slightly. ! Off: The points where chapters in playlists change are played accurately, but the picture may freeze for a moment. NTSC Contents Output Select PAL60 or NTSC output when playing NTSC discs. ! NTSC: NTSC discs are played as NTSC. ! PAL60: Select if picture is not displayed correctly when “NTSC” is selected. ! Bitstream: When connected to equipment with a built-in MPEG decoder. ! PCM: When connected to equipment without a built-in MPEG decoder. Settings VQT2H73~Body1_mst.fm BD-Video Secondary Audio [BD-V] Turn on/off the clicking sound on the menu and audio with secondary video in picture-in-picture mode. (> 19) ! On: The primary audio and secondary audio are mixed and output. The sampling frequency is converted to 48 kHz. ! Off: The button click sound on the menu and secondary audio are not output. 31 VQT2H73 VQT2H73~Body1_mst.fm 32 ページ 2010年1月25日 月曜日 午前11時50分 Downmix Switch the downmix system for playing back multi-channel surround sound. ≥ When “Dolby D/Dolby D +/Dolby TrueHD” or “DTS/DTS-HD” is set to “Bitstream”, there are no downmix effects for the outputted audio. ≥ The audio will be output in “Stereo” in the following cases: jAVCHD playback jPlayback of secondary audio (including the button click sound) ! Stereo: When connected to equipment that does not support the virtual surround function. ! Surround encoded: When connected to equipment that supports the virtual surround function (to convert 2-channel to multi channel surround). Display On-Screen Messages Choose whether to show status messages automatically. ! Automatic ! Off Español Nederlands Español Nederlands 简体字 Screen Saver Function ! On: jIf there is no operation for 10 minutes or more, DIRECT NAVIGATOR screen switches to FUNCTION screen automatically. jWhile playing and pausing, etc., this function is not available. jAs for Music (CD-DA, MP3), regardless of the setting, if there is no operation for 2 minutes, DIRECT NAVIGATOR screen switches to the other states automatically. jWhen playing the 4:3 image, the masked-off area on the screen become black. [Only when connecting with an HDMI cable, “TV Aspect” (> right) is set to “16:9” and “HDMI Video Format” (> right) is set to any mode other than“576p/480p”.] ! Off Software Licence Information about the software used by this unit is displayed. 32 ! 4:3 Pan & Scan: Video recorded for a widescreen is played as Pan & Scan (unless prohibited by the producer of the disc). When playing BD-Video, video is output as “4:3 Letterbox”. ! 4:3 Letterbox: Video recorded for a widescreen is played in the letterbox style. To view an image on the unit or connected to a 16:9 widescreen TV: ! 16:9: Video recorded for 4:3 aspect screen is displayed as a 4:3 ratio image in the centre of the screen. ! 16:9 full: Video recorded for 4:3 aspect screen is displayed as a horizontally stretched 16:9 image. Press [OK] to show the following settings. Choose the language for these menus and on-screen messages. * Only For the United Kingdom, Republic of Ireland, Continental Europe and Asia. VQT2H73 “TV Aspect” operates on the screen of the unit or the connected TV. To view an image connected to a 4:3 TV: HDMI Connection On-Screen Language* For United Kingdom and Republic of Ireland: ! Français ! ! English ! Deutsch ! Italiano ! For Continental Europe: ! Français ! ! English ! Deutsch ! Italiano ! ! Svenska For Asia: ! ! English ! 繁體字 TV Aspect / HDMI Function Settings TV Aspect HDMI Video Format* The items supported by the connected devices are indicated on the screen as “¢”. When any item without “¢” is selected, the images may be distorted. * In this unit, a P4HD (> 45) video processor is used to provide video of optimal resolution to the connected TV. ≥ If the image is distorted, set to “576p/480p” or set again correctly. ! Automatic: Automatically selects the output resolution best suited to the connected television (1080p, 1080i, 720p or 576p/ 480p). ! 576p/480p ! 720p ! 1080i ! 1080p jTo enjoy high definition video up-converted to 1080p, you need to connect the unit directly to 1080p compatible HDTV (High Definition Television). If this unit is connected to an HDTV through other equipment, it must also be 1080p compatible. 24p Output [BD-V] [DVD-V] When this unit is connected to a TV supporting 1080/24p output using an HDMI cable, movies and other material recorded at 24p are output at 24p. ≥ When playing DVD-Video, set to “On” and then also set “24p” in “Picture” (> 29) to “On”. ≥ When BD-Video images other than 24p are played, images are output at 60p. ! On: Images in 24p are output in 24p as they are. j[BD-V]:When images other than 24p are played, images are output at 60p. ! Off VQT2H73~Body1_mst.fm 33 ページ 2010年1月21日 木曜日 午前11時59分 HDMI Output Range Effective when connected to a device that only supports RGB output. ! Standard: The video is output as it is. ! Enhanced: When the black and white contrast of a video is low, the signal is enhanced to reproduce clear video. General Auto Power Off Select whether the unit is automatically turned off when about 15 minutes (about 5 minutes when using the battery pack) have elapsed while stopped. ! On ! Off: Select when you do not want to use this function. HDMI Audio Output VIERA Link Set to use “HDAVI Control” function when connected with an HDMI cable to a device that supports “HDAVI Control”. ! On ! Off: Select when you do not want to use “HDAVI Control”. Contents Type Flag Depending on the playback content, the TV will output adjusting to the optimal method when a TV that supports Contents Type Flag is connected. ! Off ! Automatic TV System Change the setting to match the equipment you are connecting with. ≥ If picture output is not smooth, change the setting. ≥ When NTSC contents are played, they are outputted in the signal format specified in the “NTSC Contents Output”, irrespective of the settings here. ! NTSC: Select when connecting to a NTSC television. ! PAL: Select when connecting to a PAL or multi-system television. [For]Asia] The default setting is NTSC. Quick Start Speed of startup from standby mode is increased. ≥ Quick Start only functions when the AC adaptor is connected. ! On: Since internal control unit will be powered, power consumption in standby mode (> 42) will increase in comparison to when “Off”. ! Off Easy Setting You can execute basic settings (“On-Screen Language”* and “Quick Start”). * Only for the United Kingdom, Republic of Ireland, Continental Europe and Asia. ! Yes ! No Default Settings This returns all values in the Setup menu and the on-screen menu, except for “On-Screen Language”*, “DVD-Video Ratings” and “BD-Video Ratings” to the default settings. * Only for the United Kingdom, Republic of Ireland, Continental Europe and Asia. ! Yes ! No DivX Registration [DivX] (> 22) You need this registration code to purchase and play DivX Video-on-Demand (VOD) content. System Information Display firmware version of this unit. Settings Set whether or not to output audio from the HDMI AV OUT terminal. ! On ! Off 33 VQT2H73 VQT2H73~Body1_mst.fm 34 ページ 2010年1月22日 金曜日 午後8時53分 Enjoying High Bit rate Audio and Video R eference About audio output The audio output differs depending on the settings on the unit. (> 31, “Digital Audio Output”) ≥ The number of channels listed is the maximum possible number of output channels. “Dolby D/Dolby D +/Dolby TrueHD”/ “DTS/DTS-HD” “BD-Video Secondary Audio” Dolby Digital/ Dolby Digital EX Dolby Digital Plus/ Dolby TrueHD DTS Digital Surround/ DTS-ES DTS-HD High Resolution Audio/ DTS-HD Master Audio “Bitstream”*1 “On”*3 “PCM”*2 “Off” *2 *3 “Off” Dolby Digital Outputs using original audio 5.1ch PCM DTS Digital Surround 7.1ch LPCM *1 “On” 5.1ch PCM When the connected equipment is not supported with these audio formats, the audio is output as Dolby Digital bitstream, DTS Digital Surround bitstream or down-mixed 2ch PCM (e.g., TV). When the connected equipment is not supported with multi channel surround, the audio is output as down-mixed 2ch PCM. When playing BD-Video without secondary audio or button click sound, the audio is output as the same format as if “BD-Video Secondary Audio” was set to “Off”. Enjoying High Bit rate Audio of BD-Video [BD-V] This unit supports high bit rate audio (Dolby Digital Plus, Dolby TrueHD, DTS-HD High Resolution Audio and DTS-HD Master Audio) adopted in BD-Video. In order to enjoy these audio formats, the following conditions are necessary. (Part shown in the shaded area of table given above) NECESSARY CONNECTIONS ≥ HDMI AV OUT terminal: (> 25) NECESSARY SETTINGS ≥ Set “BD-Video Secondary Audio” to “Off”. (> 31) ≥ Set “HDMI Audio Output” to “On”. (> 33) ≥ HDMI AV OUT terminal: Set “Dolby D/Dolby D +/Dolby TrueHD” or “DTS/DTS-HD” to “Bitstream” or “PCM”. (> 31) ≥ The button click sound on the menu and audio with secondary video in picture-in-picture mode (> 19) is not output. 34 VQT2H73 2010年1月15日 金曜日 午後9時19分 About MP3/JPEG/DivX/ AVCHD/MPEG2 files MP3 File format MP3 Extension Files must have the extension “.mp3” or “.MP3”. Subtitles text file of DivX File format Subtitles text file of DivX File format MicroDVD, SubRip, or TMPlayer Extension Files must have the extension “.SRT”, “.srt”, “.SUB”, “.sub”, “.TXT”, or “.txt” Reference ≥ The DivX video file and subtitles text file are inside the same folder, and the file names are the same except for the file extensions. ≥ Depending on the methods used to create the file or the state of the recording, only parts of the subtitles may be displayed, or the subtitles may not be displayed at all. Compression 32 kbps to 320 kbps rate Sampling rate 44.1 kHz/48 kHz Reference ID3 tags: version 1, 2.2, 2.3, 2.4 (Only titles and the names of artists) JPEG File format JPEG Extension Files must have the extension “.jpg” or “.JPG”. Picture resolution between 34k34 and 8192k8192 pixels (sub sampling is 4:2:2 or 4:2:0) Reference JPEG conforming DCF* is supported. ≥ MOTION JPEG and Progressive JPEG is not supported. * Design rule for Camera File system: unified standard established by Japan Electronics and Information Technology Industries Association (JEITA). ≥ DVD-RAM must conform to UDF 2.0. ≥ BD-RE must conform to UDF 2.5. DivX File format DivX Extension Files must have the extension “.DIVX”, “.divx”, “.AVI” or “.avi”. Picture resolution Up to 1920k1080 pixels Reference ≥ DivX certified to play DivX video up to HD 1080p, including premium content. Video jNumber of stream: Up to 1 jCodec: DIV3, DIV4, DIVX, DX50, DIV6 jFPS (Frame Per Second): Up to 60 fps Audio jNumber of stream: Up to 8 jFormat: MP3, MPEG, Dolby Digital jMulti channel: Dolby Digital is possible. MPEG multi is 2 ch conversion. ≥ GMC (Global Motion Compensation) is not supported. ≥ DVD-R and DVD-R DL must conform to UDF 1.02 without ISO9660 and UDF 1.5 with ISO9660. ≥ BD-R must conform to UDF 2.5. AVCHD File format AVCHD format (V1.0) used on High Definition Video Camera (Panasonic and some other’s) Codec MPEG-4 AVC/H.264 ≥ Discs must conform to UDF 2.5. MPEG2 File format SD-Video format* used on Standard Definition Video Camera (Panasonic and some other’s) Codec MPEG2 * SD-Video Entertainment Video Profile ≥ With certain recording states and folder structures, the play order may differ or playback may not be possible. ≥ CD-R, CD-RW : ISO9660 level 1 or 2 (except for extended formats), Joliet This unit is compatible with multi-session. This unit is not compatible with packet writing. ≥ DVD-R, DVD-R DL (except for AVCHD) : ISO9660 level 1 or 2 (except for extended formats), Joliet, UDF bridge (UDF 1.02/ISO9660) This unit is not compatible with multi-session. This unit is not compatible with packet writing. Reference DMPB100EB-VQT2H73_eng.book 35 ページ 35 VQT2H73 DMPB100EB-VQT2H73_eng.book 36 ページ 2010年1月15日 金曜日 午後9時19分 Structure of folders that can play back on this unit You can play files on this unit by structure of folders as shown below. However depending on the method of writing data (writing software), play may not be in the order you numbered the folders. Structures of still picture (JPEG) folders in DVD-R/DVD-R DL/CD-R/CD-RW Files inside a folder are displayed in the order they were updated or taken. e.g., Root P0000001.jpg P0000002.jpg : Folder which can be displayed with this unit ¢¢¢: Numbers XXX: Letters *1 ¢¢¢: from 001 to 999 *2 ¢¢¢: from 100 to 999 XXXXX: 5 figures *3 ¢¢¢¢: from 0001 to 9999 XXXX: 4 figures Folder A P0000003.jpg P0000004.jpg P0000005.jpg Folder B P0000006.jpg P0000007.jpg P0000008.jpg P0000009.jpg Folder C P0000010.jpg P0000011.jpg P0000012.jpg Structure of MP3 folders in DVD-R/DVD-R DL/CD-R/CD-RW Prefix the file names with 3-digit numbers in the order you want to play them. e.g., Root P0000001.jpg P0000002.jpg 001XXXX.mp3 002XXXX.mp3 001 in BD-RE/DVD-RAM ≥ Folder structure is not displayed. e.g., Root JPEG Folder A *1 DCIM 003XXXX.mp3 004XXXX.mp3 005XXXX.mp3 XXXXX*2 XXXX.JPG*3 Folder B 006XXXX.mp3 007XXXX.mp3 008XXXX.mp3 009XXXX.mp3 DCIM XXXXX*2 XXXX.JPG*3 Folder C 010XXXX.mp3 011XXXX.mp3 012XXXX.mp3 Structure of DivX folders in BD-R/DVD-R/DVD-R DL/CD-R/CD-RW Files inside a folder are displayed in the order they were updated or taken. e.g., in SD card Displays JPEG files in all folders. ≥ Folder structure is not displayed. e.g., Root P0000001.jpg P0000002.jpg DCIM Root P0000001.divx P0000002.divx XXXXX *2 XXXX.JPG*3 Folder A P0000003.divx P0000004.divx P0000005.divx Folder B P0000006.divx P0000007.divx P0000008.divx P0000009.divx Folder C P0000010.divx P0000011.divx P0000012.divx 36 VQT2H73 Folder A P0000003.jpg P0000004.jpg DMPB100EB-VQT2H73_eng.book 37 ページ 2010年1月15日 金曜日 午後9時19分 Indicators and screen messages Indicators The [Í] indicator flashes rapidly. ¾ The unit has malfunctioned. Consult your dealer. U76 ¾ BD-RE, BD-R, BD-Video or DVD Video with copyright protection cannot be played back since the device connected to the HDMI terminal is not compatible with the copyright protection. U77 ¾ Video cannot be output since the copyright protection information on the BD-RE, BD-R, BD-Video or DVD Video being played back is not valid. The [Í] indicator flashes slowly. ¾ “Monitor” on LCD Menu is “Off” (no image). Turn the unit off when no image is being played. F ∑∑ H ∑∑ (∑∑ stands for a number.) The [Í] indicator and the [CHARGE] indicator flash rapidly. ¾ A problem has occurred. (Numbers following the “F” or the “H” will be different depending on the status of the unit) Turn off the unit once, and turn it back on. Alternatively, turn off the unit, disconnect the AC adaptor and the battery pack, and attach them back again. ¾ Update of the firmware did not complete successfully. Perform the update again. (> 5) The [CHARGE] indicator flashes rapidly. ¾ There is a problem with the battery pack. Turn the unit on and check the message on the LCD. (> below) The [CHARGE] indicator flashes slowly. ¾ Battery pack charge is low. The unit will turn off automatically after a few minutes. Screen messages Cannot read. Please check the disc. ¾ Clean the disc. (> 5) ¾ You inserted a disc that has not been finalized. (> 6) ERROR U580 ¾ A problem has occurred with the battery pack. Consult your dealer. Authorisation Error. This unit is not authorised to play this title. ¾ [DivX]: You are trying to play the DivX VOD content that was purchased with a different registration code. You cannot play the content on this unit. (> 22) Cannot play. ¾ You inserted an incompatible disc. (> 6) Cannot play on this unit. ¾ You tried to play a non-compatible image. (> 35) ¾ Re-insert the SD card. No disc is inserted. ¾ The disc may be upside down. Rental Expired. ERROR U581 ¾ The battery pack has been recharging but has failed to recharge for some reason. Recharge again. ¾ [DivX]: The DivX VOD content has zero remaining plays. You cannot play it. (> 22) $ This operation is not available. ¾ You are recharging in a location that is too hot or too cold. Recharge at normal temperature (i5 to i35 oC ). U72 U73 ¾ There was a problem when connecting the HDMI. jConnected device is not compatible with HDMI. jUse a cable with an HDMI logo. jThe HDMI cable is damaged. ¾ Some operations are unsupported by the unit. For example; j[BD-V]: During playback, reverse slow-motion or reverse frame-by-frame is not possible. $ This operation is prohibited by this disc. ¾ Depending on the disc, you may not be able to perform search or skip when film previews and warning screens are being played back. Reference ERROR U582 37 VQT2H73 DMPB100EB-VQT2H73_eng.book 38 ページ 2010年1月15日 金曜日 午後9時19分 Troubleshooting guide Before requesting service, please perform the following steps. Do you have the latest firmware installed? Firmware updates may be released to correct operating irregularities that are discovered with certain movies. (> 5) 4 Make the following checks. If the problem remains unresolved, consult your dealer for instructions. The following do not indicate malfunction. ≥ Sound from the AC adaptor during recharging. ≥ The battery pack warming up when recharging or during use. ≥ The surface and area around the unit becoming warm when used for long periods. Move the unit after waiting for 3 minutes after unplugging the AC adaptor when it needs to be moved or maintained. ≥ Operating noises when the unit is turned on. Safety devices may be operating when the unit does not respond to operations. 1 Press [Í/I] on the unit to turn it off. If the unit is not turned off, hold down for approximately 3 seconds to turn to standby. 2 Press [Í/I] on the unit to turn it on. If operation is still not possible after performing the above operations, consult the dealer where the unit was purchased. To reset this unit To return all settings other than some settings to the factory preset. ¾ Select “Yes” in “Default Settings” in the Setup menu. This returns all values in the Setup menu and the on-screen menu, except for “On-Screen Language”*, “DVD-Video Ratings” and “BD-Video Ratings” to the default settings. (> 33) * Only for the United Kingdom, Republic of Ireland, Continental Europe and Asia. To return all settings to the factory preset ¾ Only when connecting the AC adaptor, reset the unit as follows: 1 Press [Í/I] on the unit to turn off the unit. 2 Press and hold [Í/I] and [ RETURN] on the unit at the same time for more than 5 seconds. 3 The power will turn on and then turn off. 38 VQT2H73 Power No power. ¾ Check connections to the AC adaptor or battery pack. (> 12) ¾ The unit has protection circuitry that is activated if it becomes too hot or too cold. The unit will not work if this occurs. Use the unit between 5 oC and 35 oC. ¾ Hold down [Í/I] for some time. ¾ The unit may not come on immediately after it is turned off. Once the “BYE” display disappears, press [Í/I] and turn the unit on. ¾ The unit can be turned on only when the unit’s screen is open. (> 10) Unit turns off automatically. ¾ The unit turns off after it has been stopped for about 15 minutes (about 5 minutes when the unit is powered by the battery pack) to conserve power (only when “Auto Power Off” in the Setup menu is set to “On”). (> 33) Turn the unit on again. ¾ Press [OFF TIMER] and the unit will be turned off automatically. (> 14) ¾ Safety devices may be operating.Press [Í/I] and turn the unit on. ¾ When using VIERA Link (HDMI), the unit will be automatically turned off if the TV is turned off. If VIERA Link (HDMI) is not being used, set “VIERA Link” settings to “Off”. (> 33) ¾ If the screen is closed when the unit is turned on, the display on the screen will disappear and the unit will be automatically turned off. (> 10) Cannot charge or the [CHARGE] indicator fails to light. ¾ The charging time increases when the temperature is too hot or too cold, and charging may not be possible under some circumstances. ¾ Check connections to the AC adaptor or battery pack. (> 12) Play time dramatically reduced after recharging. ¾ The battery pack has reached the end of its service life (It can be recharged about 300 times). 2010年1月15日 金曜日 午後9時19分 Operation The unit is on but cannot be operated. ¾ The unit can be operated only when the LCD screen is open. (> 10) ¾ Is the incorrect playback media or operation function selected? ¾ The unit may not be operating properly due to lightning, static electricity or some other external factor. Turn the unit off and then back to ON. Alternatively, turn the unit off, disconnect the power source (AC or battery pack), and then reconnect it. ¾ Condensation has formed. Wait 1 to 2 hours for it to evaporate. Play fails to start even when [1] (PLAY) is pressed. Play starts but then stops immediately. ¾ Insert the media correctly with the label facing up. (> 15) ¾ The media is dirty. (> 5) ¾ You tried to play a blank media or unplayable media on this unit. (> 6) ¾ [DivX]: If playing DivX VOD content, refer to the homepage where you purchased it. (> 22) No response when remote control buttons pressed. ¾ The unit can be operated only when the LCD screen is open. (> 10) ¾ Check that the battery is installed correctly. (> 9) ¾ The battery is depleted: Replace it with new one. (> 9) ¾ Point the remote control at the remote control sensor and operate. (> 9) Start up is slow. It takes time before play starts. ¾ Make sure that “Quick Start” is set to “On”. (> 33) ¾ Start up takes time in the following situations. jImmediately after a power failure or the AC adaptor is connected. jWhen the unit is connected with an HDMI cable. Played back image is distorted or does not play back correctly. ([AVCHD]) ¾ High definition video (transfer rate of 18 Mbps or faster) cannot be played back correctly if it was recorded on a DVD compatible to double speed or slower. Cannot set “On” in “24p Output”. ¾ Only when this unit is connected to a TV supporting 24p output via an HDMI cable, you can set to “On”. (> 32) LCD No picture on the LCD. ¾ Check connections. (> 12) ¾ Select “On” in “Monitor”. (> 15) ¾ [DivX]: Images may not be output due to how files were created. (> 35) The LCD is dark. ¾ Select the appropriate picture quality mode. (> 15) LCD pixels turn black or radiate different colours. ¾ The LCD is constructed with precision technology so 99.99 % of the pixels are active, but of the remaining of 0.01 %, there are pixels that may be black or emit light constantly. This phenomenon is not a malfunction. Picture is distorted. ¾ The quality of video will lower on the screen of this unit when HDMI is connected. (> 25) There is a lot of after-image when playing video. ¾ Turn “3D NR” or “Integrated NR” off if it is on. (> 29) A black band is displayed around the edge of the screen. The aspect ratio of the screen is abnormal. ¾ Confirm the “TV Aspect” is set properly. (> 32) Still pictures (JPEG) do not play back normally. ¾ The images that were edited on the PC, such as Progressive JPEG, etc., may not play back. (> 35) Sound No sound from the unit’s speaker. ¾ The speaker is off if headphones are connected. ¾ Turn up the volume. (> 16) Cannot hear the desired audio type. ¾ Press [AUDIO] to select the audio. (> 18) ¾ [DivX]: Audio may not be output depending on how files were created. (> 35) Cannot switch audio. ¾ There are discs for which audio cannot be changed because of how the disc was created. ¾ When connecting an amplifier/receiver using an HDMI cable, you cannot switch the audio if “Dolby D/Dolby D +/Dolby TrueHD” or “DTS/DTS-HD” is set to “Bitstream”. Set “Dolby D/Dolby D +/Dolby TrueHD” or “DTS/DTS-HD” to “PCM”. (> 31) Reference DMPB100EB-VQT2H73_eng.book 39 ページ 39 VQT2H73 DMPB100EB-VQT2H73_eng.book 40 ページ 2010年1月15日 金曜日 午後9時19分 Connection The images from this unit do not appear on the television. Picture is distorted. ¾ Make sure that the television is connected to HDMI AV OUT terminal on this unit. (> 25) ¾ Make sure that the television’s input setting (e.g., VIDEO 1) is correct. ¾ When “24p Output” is set to “On”, HDMI authentication takes place where 24p images switch to other images, and a black screen is displayed. (> 32) ¾ When “24p Output” is set to “On”, jittering may occur while playing DVD-Video other than 24p images. In this case, turn “24p Output” to “Off”. (> 32) ¾ An incorrect resolution is selected in “HDMI Video Format”, when the television is connected to HDMI AV OUT terminal. Set the item again. ¾ Picture may not be seen when more than 4 devices are connected with HDMI cables. Reduce the number of connected devices. ¾ The unit and television are using different video systems. Change the setting to match the equipment you are connecting with. (> 33, “TV System” in the “TV Aspect / HDMI Function Settings”) ¾ The system used on the disc doesn't match your television. jPAL discs cannot be correctly viewed on an NTSC television. jThis unit can convert NTSC signals to PAL60 for viewing on a PAL television. (> 31, “NTSC Contents Output” in the “Picture”) Video is not output in high definition. ¾ Confirm that the “HDMI Video Format” in the Setup menu is set properly. (> 32) Audio is not output in bitstream. ¾ Dolby Digital Plus, Dolby TrueHD, and DTS-HD audio are not output in bitstream. To output the bitstream, select “Default Settings” to restore the factory presets and make proper settings. 40 VQT2H73 The 4:3 aspect ratio picture expands left and right. Screen size is wrong. ¾ Use the television to change the aspect. Refer to your television’s operating instructions. ¾ When using an HDMI cable, change “TV Aspect” type to “4:3 Pan & Scan”. (> 32) No sound from other speakers. ¾ Check all connections and settings. (> 25) Cannot hear the desired audio type. ¾ Audio may not be heard when more than 4 devices are connected with HDMI cables. Reduce the number of connected devices. Cannot switch audio. ¾ When connecting an amplifier/receiver using an HDMI cable, you cannot switch the audio if “Dolby D/Dolby D +/Dolby TrueHD” or “DTS/DTS-HD” is set to “Bitstream”. Set “Dolby D/Dolby D +/Dolby TrueHD” or “DTS/DTS-HD” to “PCM”. (> 31) Card Music on an SD card cannot be played. ¾ Data that can be played from an SD card are AVCHD, MPEG2 and JPEG data. (> 7) The contents of the card cannot be read. ¾ The card is not compatible or the contents on the card may be damaged. (> 7) ¾ Turn off and then turn on the unit again. 2010年1月15日 金曜日 午後9時19分 Other difficulties with playback Audio and video momentarily pause. ¾ This occurs between playlist chapters or scenes ([AVCHD]). ¾ When playing a title recorded on both layers, the unit automatically switches between layers and plays the title in the same way as a normal programme. However, video and audio may momentarily cut out when the unit is switching layers. BD-Video or DVD-Video is not played. ¾ Ensure the disc is for the correct BD-Video region code or DVD-Video region number, and is not defective. (> cover) ¾ You have set a ratings level to limit BD-Video or DVD-Video play. Change this setting. (> 30) ¾ Some BD-Video can only be output with HDMI. Picture-in-picture is not played with BD-Video. ¾ Confirm whether the disc supports picture-in-picture. Alternative soundtrack and subtitles cannot be selected. ¾ The languages are not recorded on the media. ¾ You may not be able to use the on-screen menu to change the soundtrack and subtitles on some discs. Use the disc’s menus to make changes. (> 16) No subtitles. ¾ Subtitles are not recorded on the media. ¾ Turn the subtitles on. Set “Subtitle” on the on-screen menu to “On”. (> 28) Angle cannot be changed. ¾ Angles can only be changed during scenes where different angles are recorded. The resume play function does not work. ¾ The memorized position is cleared in the following instances: j[∫] is pressed several times. jThe disc or SD card is removed. jThe unit is turned off during SD card playback. jThe unit is turned off due to such occurrences as power outage, the removal of the AC adaptor or waste of the battery pack’s remaining power when the unit is turned on. ¾ The resume play function may not work depending on the media. ¾ [BD-V]: On BD-Video discs including BD-J, the resume play function does not work. You have forgotten your ratings password. ¾ While the disc and SD card are removed, press and hold [:] (SKIP) and [OPTION] on the unit at the same time for more than 5 seconds. Turn the unit off. “DVD-Video Ratings” and “BD-Video Ratings” will return to the default settings. The VIERA Link does not work. ¾ Is the LCD screen open? (> 10) The unit cannot be operated with the TV remote control in any other condition. ¾ When using the unit with only the battery pack, operate after turning the unit on. (> 14) When a recorder or player etc. is operated with a remote control, the unit is also simultaneously operated. When the unit's remote control is operated, other Panasonic recorders or players etc. are also simultaneously operated. ¾ Change the remote control codes on the Panasonic recorders or players. Reference DMPB100EB-VQT2H73_eng.book 41 ページ 41 VQT2H73 VQT2H73~Body1_mst.fm 42 ページ 2010年1月22日 金曜日 午前10時11分 Specifications Power supply: SD card: DC 12 V (DC IN terminal)/ DC 7.2 V (Exclusive battery terminal) Power consumption (using included AC adaptor): Play Mode: Approx. 19 W (Unit only Approx. 16 W) Recharge mode (Quick Start “Off”): Approx. 18 W Recharge mode (Quick Start “On”): Approx. 22 W Approx. 0.5 W Standby mode (Quick Start “Off”): Standby mode (Quick Start “On”): Approx. 5 W AC adaptor: Power source: Power consumption: DC output: Car DC Adaptor: DC output: AC 110 to 240 V, 50/60 Hz 36 W 12 V, 2000 mA 12 V, 2 A (Vehicle with 12 V battery only) Battery pack (lithium ion): Voltage: Capacity (Minimum): DY-DB30 (included) 7.2 V 5400 mAh Dimensions (WkDkH) (excluding protrusions and battery): 238 mm (W)k188.3 mm (D)k52.7 mm (H) Mass: Including battery Without battery i5 to i35 oC Operating humidity range: 10 to 80 % RH (no condensation) LCD screen: 8.9q α-Si, TFT wide-screen LCD (1024k600kRGB) HDMI AUDIO/VIDEO output: Number of terminals: Speaker: Output: Headphone output: Output: Number of terminals: 1 system 0.5 W i 0.5 W (8 ≠) ‡ 3.5 mm stereo mini jack 1 system Pickup: Wave length: 405 nm/660 nm/780 nm (BD/DVD/CD) Laser power: CLASS 1M/CLASS 1M/CLASS 1M (BD/DVD/CD) BD-R: DVD-RAM: DVD-R/DVD-R DL: DVD-RW: +R/+RW/+R DL: DVD-Video: CD-Audio: CD-R/CD-RW: 42 VQT2H73 JPEG*8: Pixels: 34 k 34 to 8192 k 8192 Sub Sampling: 4:2:2, 4:2:0 Maximum numbers of folders ≥ CD-R, CD-RW: 99 ≥ BD-RE, DVD-RAM, DVD-R, DVD-R DL, SD card: 300 Maximum numbers of files ≥ CD-R, CD-RW: 999 ≥ BD-RE: 9999 ≥ DVD-RAM, DVD-R, DVD-R DL, SD card: 3000 MP3: Compression rate: Sampling rate: 32 kbps to 320 kbps 44.1 kHz, 48 kHz AVCHD (H.264): File format: AVCHD format V1.0 HDMI: 480p(525p) / 576p(625p) / 1080i(1125i) / 720p(750p) / 1080p(1125p) HDMI (x.v.Colour™, High Bit rate Audio) This unit supports “HDAVI Control 5” function. Approx. 1392 g Approx. 1157 g Operating temperature range: Playable disc: BD-Video BD-ROM: BD-RE: SD Memory Card*6 formatted FAT12, FAT16, FAT32*7, exFAT*9: JPEG, AVCHD format, MPEG-2 Version 2 Version 3 (Single Layer, Dual Layer), JPEG Version 2 (Single Layer, Dual Layer), DivX*4, *5 DVD Video Recording format*10, AVCHD format, JPEG DVD-Video format*1, DVD-Video Recording format*1, *10, AVCHD format*1, DivX *2, *3, *5, JPEG*2, MP3*2 DVD-Video format*1, DVD-Video Recording format*1, *10, AVCHD format*1 Video*1, AVCHD format*1 DVD-Video format CD-DA CD-DA, JPEG*2, MP3*2, DivX*2, *5 Specifications are subject to change without notice. *1 Finalizing is necessary. ISO9660 level 1 or 2 (except for extended formats),Joliet This unit is compatible with multi-session. This unit is not compatible with packet writing. *3 UDF1.02 without ISO9660, UDF1.5 with ISO9660 *4 UDF2.5 *5 DivX certified to play DivX video up to HD 1080p, including premium content. GMC (Global Motion Compensation) is not supported. Maximum number of folders recognizable: 300 folders. (including the root folder) Maximum number of files recognizable: 200 files. *6 includes SDHC, SDXC card includes miniSD Card (need a miniSD Adaptor.) includes microSD/microSDHC/microSDXC Card (need a microSD Adaptor.) *7 Not support long file name *8 Motion JPEG not supported *9 SDXC only [For[the[United[Kingdom,[Republic[of[Ireland,[Australia,[New[Zealand [and[Asia[ *10 CPRM is not supported. *2 ≥ Useable capacity will be less. (SD Card) VQT2H73~Body1_mst.fm 43 ページ 2010年1月25日 月曜日 午前11時53分 Licenses Java and all Java-based trademarks and logos are trademarks or registered trademarks of Sun Microsystems, Inc. in the United States and other countries. Manufactured under license from Dolby Laboratories. Dolby and the double-D symbol are trademarks of Dolby Laboratories. Manufactured under license under U.S. Patent #’s: 5,451,942; 5,956,674; 5,974,380; 5,978,762; 6,487,535 & other U.S. and worldwide patents issued & pending. DTS and the Symbol are registered trademarks, & DTS-HD, DTSHD Advanced Digital Out and the DTS logos are trademarks of DTS, Inc. Product includes software. © DTS, Inc. All Rights Reserved. U.S. Patent Nos. 6,836,549; 6,381,747; 7,050,698; 6,516,132; and 5,583,936. This product incorporates copyright protection technology that is protected by U.S. patents and other intellectual property rights. Use of this copyright protection technology must be authorized by Macrovision, and is intended for home and other limited viewing uses only unless otherwise authorized by Macrovision. Reverse engineering or disassembly is prohibited. HDMI, the HDMI Logo, and High-Definition Multimedia Interface are trademarks or registered trademarks of HDMI Licensing LLC in the United States and other countries. This product is licensed under the AVC patent portfolio license and VC-1 patent portfolio license for the personal and non-commercial use of a consumer to (i) encode video in compliance with the AVC Standard and VC-1 Standard (“AVC/VC-1 Video”) and/or (ii) decode AVC/VC-1 Video that was encoded by a consumer engaged in a personal and non-commercial activity and/or was obtained from a video provider licensed to provide AVC/VC-1 Video. No license is granted or shall be implied for any other use. Additional information may be obtained from MPEG LA, LLC. See http://www.mpegla.com. HDAVI Control™ is a trademark of Panasonic Corporation. x.v.Colour™ is a trademark. “AVCHD” and the “AVCHD” logo are trademarks of Panasonic Corporation and Sony Corporation. “Blu-ray Disc” is a trademark. “BONUSVIEW” is a trademark of Blu-ray Disc Association. This product incorporates the following software: (1) the software developed independently by or for Panasonic Corporation, (2) the software owned by third party and licensed to Panasonic Corporation, (3) the software licensed under the GNU General Public License, Version 2 (GPL v2), (4) the software licensed under the GNU LESSER General Public License, Version 2.1 (LGPL v2.1) and/or, (5) open sourced software other than the software licensed under the GPL v2 and/or LGPL v2.1 For the software categorized as (3) and (4), please refer to the terms and conditions of GPL v2 and LGPL v2.1, as the case may be at http://www.gnu.org/licenses/old-licenses/gpl-2.0.html and http://www.gnu.org/licenses/old-licenses/lgpl-2.1.html. In addition, the software categorized as (3) and (4) are copyrighted by several individuals. Please refer to the copyright notice of those individuals at http://www.am-linux.jp/dl/JPRCBW98 The GPL/LGPL software is distributed in the hope that it will be useful, but WITHOUT ANY WARRANTY, without even the implied warranty of MERCHANTABILITY or FITNESS FOR A PARTICULAR PURPOSE. At least three (3) years from delivery of products, Panasonic will give to any third party who contacts us at the contact information provided below, for a charge no more than our cost of physically performing source code distribution, a complete machine-readable copy of the corresponding source code covered under GPL v2/LGPL v2.1. Contact Information [email protected] Source code is also freely available to you and any other member of the public via our website below. http://www.am-linux.jp/dl/JPRCBW98 SDXC Logo is a trademark of SD-3C, LLC. DivX® is a registered trademark of DivX, Inc., and is used under license. Abkhazian: 6566 Afar: 6565 Afrikaans: 6570 Albanian: 8381 Amharic: 6577 Arabic: 6582 Armenian: 7289 Assamese: 6583 Aymara: 6589 Azerbaijani: 6590 Bashkir: 6665 Basque: 6985 Bengali; Bangla: 6678 Bhutani: 6890 Bihari: 6672 Breton: 6682 Bulgarian: 6671 Burmese: 7789 Byelorussian: 6669 Cambodian: 7577 Catalan: Chinese: Corsican: Croatian: Czech: Danish: Dutch: English: Esperanto: Estonian: Faroese: Fiji: Finnish: French: Frisian: Galician: Georgian: German: Greek: Greenlandic: Guarani: 6765 9072 6779 7282 6783 6865 7876 6978 6979 6984 7079 7074 7073 7082 7089 7176 7565 6869 6976 7576 7178 Gujarati: Hausa: Hebrew: Hindi: Hungarian: Icelandic: Indonesian: Interlingua: Irish: Italian: Japanese: Javanese: Kannada: Kashmiri: Kazakh: Kirghiz: Korean: Kurdish: Laotian: Latin: Latvian, Lettish: 7185 7265 7387 7273 7285 7383 7378 7365 7165 7384 7465 7487 7578 7583 7575 7589 7579 7585 7679 7665 7686 Lingala: Lithuanian: Macedonian: Malagasy: Malay: Malayalam: Maltese: Maori: Marathi: Moldavian: Mongolian: Nauru: Nepali: Norwegian: Oriya: Pashto, Pushto: Persian: Polish: Portuguese: Punjabi: Quechua: 7678 7684 7775 7771 7783 7776 7784 7773 7782 7779 7778 7865 7869 7879 7982 8083 7065 8076 8084 8065 8185 Rhaeto-Romance: 8277 Romanian: 8279 Russian: 8285 Samoan: 8377 Sanskrit: 8365 Scots Gaelic: 7168 Serbian: 8382 Serbo-Croatian: 8372 Shona: 8378 Sindhi: 8368 Singhalese: 8373 Slovak: 8375 Slovenian: 8376 Somali: 8379 Spanish: 6983 Sundanese: 8385 Swahili: 8387 Swedish: 8386 Tagalog: 8476 Tajik: 8471 Tamil: Tatar: Telugu: Thai: Tibetan: Tigrinya: Tonga: Turkish: Turkmen: Twi: Ukrainian: Urdu: Uzbek: Vietnamese: Volapük: Welsh: Wolof: Xhosa: Yiddish: Yoruba: Zulu: 8465 8484 8469 8472 6679 8473 8479 8482 8475 8487 8575 8582 8590 8673 8679 6789 8779 8872 7473 8979 9085 Reference Language code list Enter the code with the numbered buttons. 43 VQT2H73 DMPB100EB-VQT2H73_eng.book 44 ページ 2010年1月15日 金曜日 午後9時19分 Glossary AVCHD AVCHD is a new format (standard) for high definition video cameras that can be used to record and play high-resolution HD images. BD-J Some BD-Video discs contain Java applications, and these applications are called BD-J. You can enjoy various interactive features in addition to playing normal video. Bitstream This is the digital form of multi-channel audio data (e.g., 5.1 channel) before it is decoded into its various channels. BONUSVIEW (Final Standard Profile) This is a BD-Video (BD-ROM Profile 1 version 1.1) that supports the new functions such as Picture-in-picture and Secondary Audio, etc. DivX DivX is a popular media technology created by DivX, Inc. DivX media files contain highly compressed video with high visual quality that maintains a relatively small file size. Dolby Digital This is a method of coding digital signals developed by Dolby Laboratories. Apart from stereo (2-channel) audio, these signals can also be multi-channel audio. Dolby Digital Plus Multi-channel audio and higher audio quality is made possible using Dolby Digital Plus. BD-Video supports up to 7.1 channel output. Dolby TrueHD Dolby TrueHD is a very high quality audio format that reproduces the studio master audio. BD-Video supports up to 7.1 channel output. Down-mixing This is the process of remixing the multi-channel audio found on some discs into fewer channels. DTS (Digital Theater Systems) This surround system is used in many movie theatres. There is good separation between the channels, so realistic sound effects are possible. DTS-HD DTS-HD is a high-quality, sophisticated audio format used in movie theatres. Previous DTS Digital Surround-compatible equipment can play DTS-HD as DTS Digital Surround audio. BD-Video supports up to 7.1 channel output. DTS-HD High Resolution Audio This is a signal format achieved by improving the previous DTS, DTS-ES and DTS 96/24 formats. It is compatible with sampling frequency 96 kHz/48 kHz. BD-Video supports up to 7.1 channel output. DTS-HD Master Audio This is a lossless audio format and compatible with 96 kHz/ 7.1ch or less. In addition, faithful reproduction of the master audio is enabled using lossless audio encoding technology. BD-Video supports up to 7.1 channel output. Dynamic range Dynamic range is the difference between the lowest level of sound that can be heard above the noise of the equipment and the highest level of sound before distortion occurs. Dynamic range compression means reducing the gap between the loudest and softest sounds. This means you can listen at low volumes but still hear dialog clearly. Film and video DVD-Video are recorded using either film or video. This unit can determine which type has been used, then uses the most suitable method of progressive output. Film: Recorded at 25 frames per second (PAL discs) or 24 frames per second (NTSC discs). (NTSC discs recorded at 30 frames per second as well.) Generally appropriate for motion picture films. Video: Recorded at 25 frames/50 fields per second (PAL discs) or 30 frames/60 fields per second (NTSC discs). Generally appropriate for TV drama programmes or animation. Folder This is a place on the disc, SD card where groups of data are stored together. Additional folders can be created within folders, and you can make detailed classifications depending on the folder structure. (> 36) Frames and fields Frames refer to the single images that constitute the video you see on your television. Each frame consists of two fields. Frame r Field Field ≥ A frame still shows two fields, so there may be some blurring, but picture quality is generally better. ≥ A field still shows less picture information so it may be rougher, but there is no blurring. HDMI (High-Definition Multimedia Interface) HDMI is a digital interface for consumer electronic products. Unlike conventional connections, it transmits uncompressed digital video and audio signals on a single cable. 44 VQT2H73 VQT2H73~Body1_mst.fm 45 ページ 2010年1月22日 金曜日 午前9時55分 JPEG (Joint Photographic Experts Group) This is a system used for compressing/decoding colour still pictures. If you select JPEG as the storage system on digital cameras, etc., the data will be compressed to 1/10–1/100 of its original size. The benefit of JPEG is less deterioration in picture quality considering the degree of compression. LPCM (Linear PCM) This is a type of PCM format. These are uncompressed digital signals, similar to those found on CDs. MPEG2 (Moving Picture Experts Group) A standard for efficiently compressing and expanding colour video. MPEG2 is a compression standard used for DVD and satellite based digital broadcasting. MP3 (MPEG Audio Layer 3) An audio compression method that compresses audio to approximately one tenth of its size without any significant loss of audio quality. P4HD (Pixel Precision Progressive Processing for HD) This is a processor which makes use of an exclusive Panasonic algorithm. Various processing is supported, including a high-level conversion of the TV scanning format from interlace to progressive and a high-level conversion of standard resolution (480i or 576i) video signal to a 1080 High Definition video signal. Consequently, this unit is able to provide video of optimal resolution to the connected TV. Pan&Scan/Letterbox In general, DVD-Video are produced with the intention that they be viewed on a widescreen television (16:9 aspect ratio), so images often don’t fit regular (4:3 aspect ratio) televisions. Two styles of picture, “Pan & Scan” and “Letterbox”, deal with this problem. Pan&Scan: The sides are cut off so the picture fills the screen. Letterbox: Black bands appear at the top and bottom of the picture so the picture itself appears in an aspect ratio of 16:9. PCM (Pulse Code Modulation) This is one format for converting analogue audio into digital audio, enabling you to enjoy digital audio with no hassle. Progressive/Interlace The PAL video signal standard has 625 (or 576) interlaced (i) scan lines, whereas progressive scanning, called 625p (or 576p), uses twice the number of scan lines. For the NTSC standard, these are called 525i (or 480i) and 525p (or 480p) respectively. Using progressive output, you can enjoy the high-resolution video recorded on media such as DVD-Video. Your television must be compatible to enjoy progressive video. Panasonic televisions with 625 (576)/50i · 50p, 525 (480)/60i · 60p input terminals are progressive compatible. Sampling frequency Sampling is the process of converting the heights of sound wave (analogue signal) samples taken at set periods into digits (digital encoding). Sampling frequency is the number of samples taken per second, so larger numbers mean more faithful reproduction of the original sound. x.v.Colour™ x.v.Colour™ is a name for devices that are compatible with the xvYCC format, an international standard for expanded colour in motion pictures, and that follow the rules for signal transmission. You can enjoy vivid colours of wider colour ranges for a more realistic picture when connected to a TV that supports the x.v.Colour™ with HDMI cable. 1080i In one high definition image, 1080 (1125) alternating scan lines pass to create an interlaced image. Because 1080i (1125i) more than doubles current television broadcasts of 480i (525i), the detail is much clearer and creates a more realistic and rich image. 1080p In one high definition image, 1080 (1125) scan lines pass at the same time to create a progressive image. Since progressive video does not alternate scan lines like interlace, there is a minimal amount of screen flicker. 24p This is a progressive image recorded at a rate of 24 frames per second. 720p In one high definition image, 720 (750) scan lines pass at the same time to create a progressive image. Since progressive video does not alternate scan lines like interlace, there is a minimal amount of screen flicker. Reference Picture-in-picture This is a function of BD-Video that plays the primary video and secondary video simultaneously. For instance, the function is capable of playing the original movie as the primary video while playing video commentary from the film director on a small screen as a secondary video. 45 VQT2H73 DMPB100EB-VQT2H73_eng.book 46 ページ 2010年1月15日 金曜日 午後9時19分 \Safety\information\for\customers\in\Finland\and\Norway\ SUOMI NORSK VAROITUS! ADVARSEL! LAITTEEN KÄYTTÄMINEN MUULLA KUIN TÄSSÄ KÄYTTÖOHJEESSA MAINITULLA TAVALLA SAATTAA ALTISTAA KÄYTTÄJÄN TURVALLISUUSLUOKAN 1 YLITTÄVÄLLE NÄKYMÄTTÖMÄLLE LASERSÄTEILYLLE. DETTE PRODUKTET ANVENDER EN LASER. BETJENING AV KONTROLLER, JUSTERINGER ELLER ANDRE INNGREP ENN DE SOM ER BESKREVET I DENNE BRUKSANVISNING, KAN FØRE TIL FARLIG BESTRÅLING. DEKSLER MÅ IKKE ÅPNES, OG FORSØK ALDRI Å REPARERE APPARATET PÅ EGENHÅND. ALT SERVICE OG REPARASJONSARBEID MÅ UTFØRES AV KVALIFISERT PERSONELL. VAROITUS: VÄHENNÄ TULIPALON, SÄHKÖISKUN TAI LAITTEISTON VAHINGOITTUMISEN VAARAA ≥ TÄTÄ LAITETTA EI SAA ALTISTAA SATEELLE, KOSTEUDELLE, ROISKEILLE TAI TIPPUVILLE NESTEILLE. LAITTEEN PÄÄLLE EI SAA MYÖSKÄÄN ASETTAA MITÄÄN NESTEELLÄ TÄYTETTYÄ ESINETTÄ, KUTEN MALJAKKOA. ≥ KÄYTÄ VAIN SUOSITELTUJA LISÄVARUSTEITA. ≥ ÄLÄ IRROTA KANTTA (TAI TAUSTAA). SISÄLLÄ EI OLE KÄYTTÄJÄN HUOLLETTAVISSA OLEVIA OSIA. HUOLLON SAA SUORITTAA VAIN AMMATTITAITOINEN HENKILÖKUNTA. VAROITUS! ≥ ÄLÄ ASENNA TAI LAITA TÄTÄ LAITETTA KABINETTITYYPPISEEN KIRJAKAAPPIIN TAI MUUHUN SULJETTUUN TILAAN, JOTTA TUULETUS ONNISTUISI. VARMISTA, ETTÄ VERHO TAI MIKÄÄN MUU MATERIAALI EI HUONONNA TUULETUSTA, JOTTA VÄLTETTÄISIIN YLIKUUMENEMISESTA JOHTUVA SÄHKÖISKU- TAI TULIPALOVAARA. ≥ ÄLÄ PEITÄ LAITTEEN TUULETUSAUKKOJA SANOMALEHDELLÄ, PÖYTÄLIINALLA, VERHOLLA TAI MUULLA VASTAAVALLA ESINEELLÄ. ≥ ÄLÄ ASETA PALAVAA KYNTTILÄÄ TAI MUUTA AVOTULEN LÄHDETTÄ LAITTEEN PÄÄLLE. ≥ HÄVITÄ PARISTOT LUONTOA VAHINGOITTAMATTOMALLA TAVALLA. Pistorasia tulee asentaa laitteen lähelle helppopääsyiseen paikkaan. Verkkojohdon pistokkeen on oltava aina helposti käytettävissä. Tämä laite voidaan kytkeä kokonaan irti verkkovirrasta irrottamalla verkkojohdon pistoke pistorasiasta. TÄMÄ LAITE ON TARKOITETTU KÄYTETTÄVÄKSI LEUDOSSA ILMASTOSSA. ADVARSEL: FØLG NEDENSTÅENDE INSTRUKSER FOR Å REDUSERE RISIKOEN FOR BRANN, ELEKTRISK STØT OG SKADE PÅ PRODUKTET: ≥ DETTE APPARATET MÅ IKKE UTSETTES FOR REGN, FUKTIGHET, DRYPP ELLER SPRUT, OG INGEN VÆSKEFYLTE GJENSTANDER, SOM F.EKS. VASER, MÅ PLASSERES PÅ APPARATET. ≥ BRUK KUN ANBEFALT TILBEHØR. ≥ IKKE FJERN DEKSELET (ELLER BAKSIDEN); APPARATET INNEHOLDER INGEN DELER SOM KAN SKIFTES ELLER REPARERES AV BRUKEREN. OVERLAT TIL KVALIFISERTE SERVICETEKNIKERE Å UTFØRE SERVICE. ADVARSEL! ≥ APPARATET MÅ IKKE PLASSERES I EN BOKHYLLE, ET INNEBYGGET KABINETT ELLER ET ANNET LUKKET STED HVOR VENTILASJONSFORHOLDENE ER UTILSTREKKELIGE. SØRG FOR AT GARDINER ELLER LIGNENDE IKKE FORVERRER VENTILASJONSFORHOLDENE, SÅ RISIKO FOR ELEKTRISK SJOKK ELLER BRANN FORÅRSAKET AV OVERHETING UNNGÅS. ≥ APPARATETS VENTILASJONSÅPNINGER MÅ IKKE DEKKES TIL MED AVISER, BORDDUKER, GARDINER OG LIGNENDE. ≥ PLASSER IKKE ÅPEN ILD, SLIK SOM LEVENDE LYS, OPPÅ APPARATET. ≥ BRUKTE BATTERIER MÅ KASSERES UTEN FARE FOR MILJØET. Strømuttaket må befinne seg i nærheten av utstyret og være lett tilgjengelig. Støpslet på strømkabelen må være klart til bruk. Når dette apparatet skal kobles helt fra strømnettet (AC), må støpslet på strømkabelen trekkes ut av stikkontakten. DETTE APPARATET ER BEREGNET TIL BRUK UNDER MODERATE KLIMAFORHOLD. Bølgelengde: Laserstyrke: 46 VQT2H73 405 nm/660 nm/780 nm (BD/DVD/CD) Ingen farlig stråling sendes ut (med sikkerhets-beskyttelse) DMPB100EB-VQT2H73_eng.book 47 ページ 2010年1月15日 金曜日 午後9時19分 Information for Users on Collection and Disposal of Old Equipment and used Batteries These symbols on the products, packaging, and/or accompanying documents mean that used electrical and electronic products and batteries should not be mixed with general household waste. For proper treatment, recovery and recycling of old products and used batteries, please take them to applicable collection points, in accordance with your national legislation and the Directives 2002/96/EC and 2006/66/EC. By disposing of these products and batteries correctly, you will help to save valuable resources and prevent any potential negative effects on human health and the environment which could otherwise arise from inappropriate waste handling. For more information about collection and recycling of old products and batteries, please contact your local municipality, your waste disposal service or the point of sale where you purchased the items. Penalties may be applicable for incorrect disposal of this waste, in accordance with national legislation. For business users in the European Union If you wish to discard electrical and electronic equipment, please contact your dealer or supplier for further information. [Information on Disposal in other Countries outside the European Union] These symbols are only valid in the European Union. If you wish to discard these items, please contact your local authorities or dealer and ask for the correct method of disposal. Note for the battery symbol (bottom two symbol examples): This symbol might be used in combination with a chemical symbol. In this case it complies with the requirement set by the Directive for the chemical involved. Reference Cd 47 VQT2H73 VQT2H73~BCover_eng.fm 48 ページ 2010年1月22日 金曜日 午後8時50分 Index A AC adaptor . . . . . . . . . . . . . . . . . 12 Angle. . . . . . . . . . . . . . . . . . . . . . 28 Audio Attribute . . . . . . . . . . . . . . . . . . 29 Changing audio . . . . . . . . . . . . 18 Channel . . . . . . . . . . . . . . . . . . 28 Language. . . . . . . . . . . . . . 29, 30 AVCHD . . . . . . . . . . . . . . . . . 35, 44 B BD-J . . . . . . . . . . . . . . . . . . . . . . 44 BD-Video Ratings . . . . . . . . . . . 30 BONUSVIEW (Final Standard Profile) . . . . . . . . . . . . . . . . . 19, 44 C Car DC Adaptor . . . . . . . . . . . . . 13 Chapter . . . . . . . . . . . . . . . . . . . . 17 Cleaning Disc . . . . . . . . . . . . . . . . . . . . . . 5 Lens . . . . . . . . . . . . . . . . . . . . . . 5 Main unit . . . . . . . . . . . . . . . . . . 5 Connection HDMI . . . . . . . . . . . . . . . . . . . . 25 D Default Settings . . . . . . . . . . . . . 33 Dialog Enhancer . . . . . . . . . . . . 29 Direct Navigator. . . . . . . . . . . . . 16 Direct Play . . . . . . . . . . . . . . . . . 18 Disc and card handling . . . . . . . . 5 Discs that cannot be played . . . . 7 DivX . . . . . . . . . . . . . . . . 22, 35, 44 Dolby Digital. . . . . . . . . . 31, 34, 44 Dolby Digital Plus . . . . . 31, 34, 44 Dolby TrueHD. . . . . . . . . 31, 34, 44 DTS . . . . . . . . . . . . . . . . . 31, 34, 44 DTS-HD . . . . . . . . . . . . . . 31, 34, 44 F Finalize . . . . . . . . . . . . . . . . . . . . . 6 Firmware. . . . . . . . . . . . . . . . . . . . 5 Format. . . . . . . . . . . . . . . . . . . . . 19 Frame-by-frame . . . . . . . . . . . . . 18 H HDMI . . . . . . . . . . . . . . . . . . . 25, 44 Headrest Mounting Bracket . . . 10 J JPEG . . . . . . . . . . . . . . . . 20, 35, 45 L Language Audio . . . . . . . . . . . . . . . . . 29, 30 Code list. . . . . . . . . . . . . . . . . . 43 Menu . . . . . . . . . . . . . . . . . . . . 31 On-Screen . . . . . . . . . . . . . . . . 32 Soundtrack. . . . . . . . . . . . . . . . 28 Subtitle . . . . . . . . . . . . . . . . 28, 30 LPCM. . . . . . . . . . . . . . . . . . . . . . 45 M Maintenance . . . . . . . . . . . . . . . . . 5 Menu On-screen . . . . . . . . . . . . . . . . 28 Pop-up . . . . . . . . . . . . . . . . . . . 16 Setup . . . . . . . . . . . . . . . . . . . . 30 MPEG2 . . . . . . . . . . . . . . . . . 35, 45 MP3 . . . . . . . . . . . . . . . . . 24, 35, 45 N Noise reduction (NR) Integrated NR. . . . . . . . . . . . . . 29 3D NR . . . . . . . . . . . . . . . . . . . 29 O Off Timer. . . . . . . . . . . . . . . . . . . 14 On-screen Language . . . . . . . . . . . . . . . . . 32 Menu . . . . . . . . . . . . . . . . . . . . 28 Status messages . . . . . . . . . . . 18 (Bottom of product) (Tuotteen pohjassa) (Produktets underside) P P4HD . . . . . . . . . . . . . . . . . . . . . . 45 Picture-in-picture . . . . . . . . . . . . 19 Playlist . . . . . . . . . . . . . . . . . . . . 14 Pop-up Menu . . . . . . . . . . . . . . . 16 Product Disposal . . . . . . . . . . . . . 5 Progressive . . . . . . . . . . . . . 29, 45 Properties Chapter . . . . . . . . . . . . . . . . . . 17 Still picture . . . . . . . . . . . . . . . . 21 Q Quick Start . . . . . . . . . . . . . . . . . 33 R Ratings level. . . . . . . . . . . . . . . . 30 Remote control . . . . . . . . . . . . . . 9 Repeat play. . . . . . . . . . . . . . . . . 28 Resume play function . . . . . . . . 17 S SD card . . . . . . . . . . . . . . . . . 15, 19 Search . . . . . . . . . . . . . . . . . . . . . 17 Setup menu . . . . . . . . . . . . . . . . 30 Skip . . . . . . . . . . . . . . . . . . . . . . . 17 Slideshow . . . . . . . . . . . . . . . . . . 20 Slow-motion . . . . . . . . . . . . . . . . 17 Soundtrack . . . . . . . . . . . . . . . . . 28 Status Message . . . . . . . . . . . . . 18 Still pictures . . . . . . . . . . . . . . . . 20 Subtitle . . . . . . . . . . . . . . . . . . . . 28 V VIERA Link “HDAVI Control™” . . . . . . . . . . 26 X x.v.Colour™ . . . . . . . . . . . . . . . . 45 24p . . . . . . . . . . . . . . . . . . . . . . . 29, 32 (Bottom of product) EU Panasonic Corporation Web Site: http://panasonic.net EU Pursuant to at the directive 2004/108/EC, article 9(2) Panasonic Testing Centre Panasonic Marketing Europe GmbH Winsbergring 15, 22525 Hamburg, Germany C Panasonic Corporation 2010 p VQT2H73 F0110QK0