1
Network Video Recording Software
RM Series Ver. 1.0
Administrator’s Manual
Make sure you read this “Administrator’s Manual” before using the software.
ENGLISH
This manual explains how to use RM-Lite v1.0 Network Video Recording Software (hereafter referred to as “RM-Lite”).
Please read this manual before using the software. After reading the manual, keep it in a safe place for future reference.
In addition, please read the license agreement before using the software. The license agreement can be found in the
LICENSE folder on the setup CD-ROM.
Request to Customers
1.
2.
3.
4.
5.
Canon owns the copyright of this manual. The unauthorized transfer of all or any part of the contents of this Manual is
forbidden.
The contents of this manual are subject to change without notice.
This document has been prepared with the utmost attention to accuracy. However, if you have any comments, please
contact the Customer Service Center indicated on the back cover.
Irrespective of items (2) and (3) above, Canon cannot bear responsibility for any effects resulting from operation.
When procedures that involve using the Control Panel are described in this manual, the operations are described as
shown in a standard Windows 7 environment.
Disclaimer
Malfunction and failure of this software, or other factors may cause problems, such as recording failure, recorded data
corruption or data loss. Canon shall have no liability whatsoever for any loss or damages incurred by the user as a result of
such problems. Please use this software with this understanding.
Support Information
For various types of information relating to support, including software updates (patch installer), User’s Manuals, operating
environment, etc., please see the Canon Web site.
Copyright Information
Videos, images or sounds recorded with your camera may not be utilized or published, without the consent of the copyright
holders, if any, except in such a way as permitted for personal use under the relevant copyright law.
Trademark notices
• Canon and the Canon logo are registered trademarks of Canon Inc.
• Microsoft, Windows, Windows Server, Windows Vista, Internet Explorer and Visual C++ are registered trademarks or
trademarks of Microsoft Corporation in the United States and other countries.
• Windows is legally recognized as Microsoft Windows Operating System.
• QuickTime is a trademark of Apple Inc.
• Apache is a trademark of the Apache Software Foundation.
• Pentium, Intel Core and Xeon are trademarks of Intel Corporation in the United States or other countries (or both).
• NVIDIA and GeForce are registered trademarks or trademarks of NVIDIA Corporation in the United States and other
countries.
• All other company or product names used in this manual are trademarks or registered trademarks of their respective
holders.
ii
NOTICE ABOUT THE MPEG-4 VISUAL STANDARD
THIS PRODUCT IS LICENSED FROM MPEGLA, LLC. UNDER THE MPEG-4 VISUAL PATENT PORTFOLIO LICENSE FOR
THE PERSONAL AND NON-COMMERCIAL USE OF A CONSUMER TO (i) ENCODING VIDEO IN COMPLIANCE WITH THE
MPEG-4 VISUAL STANDARD (“MPEG-4 VIDEO”) AND/OR (ii) DECODING MPEG-4 VIDEO THAT WAS ENCODED BY A
CONSUMER ENGAGED IN A PERSONAL AND NON-COMMERCIAL ACTIVITY. NO LICENSE IS GRANTED OR SHALL BE
IMPLIED FOR ANY OTHER USE. ADDITIONAL INFORMATION INCLUDING THAT RELATING TO PROMOTIONAL,
INTERNAL AND COMMERCIAL USES AND ADDITIONAL LICENSING MAY BE OBTAINED FROM MPEG LA, LLC. SEE
HTTP://WWW.MPEGLA.COM.
This product is licensed under AT&T patents for the MPEG-4 standard and may be used for encoding MPEG-4 compliant
video and/or decoding MPEG-4 compliant video that was encoded only (1) for a personal and non-commercial purpose or
(2) by a video provider licensed under the AT&T patents to provide MPEG-4 compliant video. No license is granted or
implied for any other use for MPEG-4 standard.
About Third Party Software
This product contains third party software modules.
Each module’s license conditions are also available in the OpenSourceSoftware folder in the LICENSE folder on the
accompanying set-up CD-ROM.
iii
About the Manuals
This product has the following manuals:
• Administrator’s Manual (this guide)
This manual is intended for the system administrator and provides information on how to operate this software product.
• Viewer Operation Guide
This simplified manual is intended for general users and explains how to operate the Viewer.
Please also read the manuals provided with each camera, as required.
About Sample Screens Unique to This Software
In this manual, some screens that are unique to this software are used as examples to illustrate operations. Please note that
they may differ from the actual screens.
The VB-M40 is mainly used as the example camera in this manual. In addition, screens from Windows 7 are used as
samples to describe operations.
How to Display and Read This Manual
This manual assumes that you display and read it on your computer’s screen.
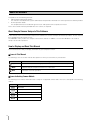
Icons in This Manual
The following icons are used to indicate descriptions on which you should focus your attention.
Icon
Meaning
Important
Cautions and restrictions during operation. Make sure to read these carefully.
Note
Supplementary descriptions and reference information.
Hint
Information useful for operation.
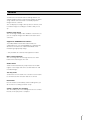
Icons Indicating Camera Models
The following icons indicate information that is unique to a supported camera model. The icons correspond to the following
models:
Icon
Camera Model
VB-M700F
VB-M600D and VB-M600VE
VB-M40
VB-C500VD and VB-C500D
VB-C60
iv
Features
The RM series of network video recording software is a
software product family used to monitor multiple locations
using network cameras and to record and play back
images from the cameras.
You can display live images from up to four cameras, and
record the images according to schedules that you set
up.
Flexible screen layout
You can arrange multiple video windows in the Viewer, so
you can compare images from different locations at the
same time.
Support for JPEG/MPEG-4 and H.264 *
The JPEG, MPEG-4 and H.264 video formats are
supported for live view. Using MPEG-4 or H.264 formats
decreases the load on the network bandwidth, while
maintaining a high quality image.
* Only available for cameras that support the feature.
Direct camera operation
You can change the camera angle and use the zoom
feature while watching the live view.
Shade control
Shade control automatically compensates for the dark
regions in the image and can be used for both live and
recorded images.
Two-way audio
Send and receive live audio. You can also use this feature
to communicate with a location that has a camera.
Record Now
Use this feature to immediately start recording when you
do not have a recording schedule set up.
Saving a segment of a recording
You can extract part of a recording and save it as a video
file that can be played on a computer.
v
Setup Flow
The flow from preparation before introducing the system, to operation management and maintenance is shown below.
Step 1
Prepare for introducing the system
Consider the video storage period and recording conditions, determine
the hard disk capacity required for recording and prepare the
equipment.
See “System Design” in “Chapter 1 Introduction”.
Step 2
Set up your cameras
Step 3
Install
Step 4
Set up the Storage Servers
Step 5
Add cameras
Step 6
Configure the Viewer
Step 7
Set a recording schedule
Step 8
Day-to-day operation
Step 9
Operation management and
maintenance
vi
Set up your cameras for live image display or recording.
See your camera manuals.
Install this software product on your computer.
See “Chapter 2 Setup”.
Set up the Storage Server Group and Storage Servers.
See “Chapter 3 Storage Server Settings”.
Add cameras to the Storage Server Groups.
See “Chapter 3 Storage Server Settings”.
Configure the Viewer to match your environment and use.
See “Chapter 4 Viewer Settings”.
Set the recording conditions for using the cameras.
See “Chapter 5 Setting a Recording Schedule”.
View live images and check events by playing back recorded images.
You can set up your own layouts for the video windows.
See “Chapter 6 Day-to-Day Operations”.
We recommended that you set up a management and maintenance
process, such as taking regular backups of recording files, to reduce
the impact of network failures on system operation.
See “Chapter 7 Operation and Management” and
“Chapter 8 Backup”.
vii
Contents
About the Manuals ......................................................................................................iv
About Sample Screens Unique to This Software ................................................................. iv
How to Display and Read This Manual................................................................................ iv
Features .......................................................................................................................v
Setup Flow ..................................................................................................................vi
Chapter 1
Introduction
Operating Environment ............................................................................................ 1-2
System requirements ......................................................................................................... 1-2
Additional Considerations.................................................................................................. 1-4
Supported Cameras ................................................................................................. 1-4
About Licenses......................................................................................................... 1-4
Notes.................................................................................................................................. 1-5
System Configuration Example ................................................................................ 1-6
Configuration Example 1.................................................................................................... 1-6
Configuration Example 2.................................................................................................... 1-6
System Design ......................................................................................................... 1-7
Determining the Capacity of the Storage Server ............................................................... 1-7
Network Bandwidth Considerations................................................................................... 1-9
Chapter 2
Setup
Installation ................................................................................................................ 2-2
Before Installation .............................................................................................................. 2-2
How to Install the Software................................................................................................. 2-2
Settings After Installation.......................................................................................... 2-4
Windows Firewall Settings ................................................................................................. 2-4
Security Level Setting ........................................................................................................ 2-5
Sound Settings for Using the Audio Feature...................................................................... 2-5
Warning When Viewer Starts.............................................................................................. 2-5
Chapter 3
Storage Server Settings
Flow of Storage Server Settings............................................................................... 3-2
Start the Viewer........................................................................................................ 3-3
Configure a Storage Server Group........................................................................... 3-5
Display the [Storage Server Group Settings] Dialog Box .................................................. 3-5
Change the Storage Server Group Name.......................................................................... 3-5
Configure the Low Disk Space Warning Level .................................................................. 3-5
Configure a Storage Server...................................................................................... 3-6
Display the [Servers] Tab .................................................................................................. 3-6
Change the Destination of the Recording File and the Maximum Disk Usage.................. 3-6
viii
Contents
Add a Camera .......................................................................................................... 3-8
Display the [Cameras] Tab ................................................................................................ 3-8
Add Cameras One at a Time ............................................................................................. 3-8
Search For and Add Cameras ........................................................................................... 3-9
Edit Camera Information ..................................................................................................3-10
Remove a Camera ...........................................................................................................3-11
Add a User ............................................................................................................. 3-12
About User Groups .......................................................................................................... 3-12
Display the [Users] Tab ...................................................................................................3-12
Add a User.......................................................................................................................3-13
Change the User Information...........................................................................................3-13
Remove a User ................................................................................................................ 3-14
Chapter 4
Viewer Settings
Flow for Viewer Settings........................................................................................... 4-2
Configure the Viewer................................................................................................ 4-3
Display the [Viewer Settings] dialog box ........................................................................... 4-3
Configure the Viewer Display and Operation Settings ...................................................... 4-3
Configure Event Notification and Priorities ........................................................................ 4-4
Configure the Camera .............................................................................................. 4-5
Display the [Camera Selector] dialog box......................................................................... 4-5
Select a Camera ................................................................................................................ 4-5
Configure the Video Window ............................................................................................. 4-6
Configure the [Advanced Camera Settings]...................................................................... 4-7
Configure the Video Window Layout ...................................................................... 4-11
Create a Layout................................................................................................................ 4-11
Place a Video Window .....................................................................................................4-11
Save the Layout ...............................................................................................................4-12
Switch Between Layouts ..................................................................................................4-12
Organize Layouts.............................................................................................................4-12
Chapter 5
Setting a Recording Schedule
Flow of Recording Schedule Settings ...................................................................... 5-2
Record on a Regular Basis (Repeating Weekly Schedules) .................................... 5-3
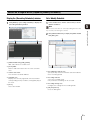
Display the [Recording Schedules] window...................................................................... 5-3
Set a Weekly Schedule ...................................................................................................... 5-3
Specify the Recording Period and Day of the Week ......................................................... 5-4
Configure the Recording Mode ......................................................................................... 5-4
Save the Recording Schedule ........................................................................................... 5-5
Edit a Recording Schedule....................................................................................... 5-6
Editing a Recording Schedule ........................................................................................... 5-6
Delete a Recording Schedule............................................................................................ 5-6
ix
Chapter 6
Day-to-Day Operations
Flow of Operations ................................................................................................... 6-2
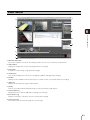
Viewer Features ....................................................................................................... 6-3
View Recorded Images ............................................................................................ 6-4
Record Now ....................................................................................................................... 6-4
Save a Snapshot of the Displayed Image.......................................................................... 6-4
Search for a Recording...................................................................................................... 6-5
Play a Recording................................................................................................................ 6-6
Zoom the Viewing Area In and Out.................................................................................... 6-7
Save Part of a Recording ................................................................................................... 6-7
Operate the Camera................................................................................................. 6-8
Get Control of a Camera .................................................................................................... 6-8
Use the Pan/Tilt/Zoom Feature........................................................................................... 6-8
Change the Camera Angle to a Preset Position ................................................................ 6-9
Change the Camera Angle Using a Panorama Image ....................................................6-10
Play Back Audio...............................................................................................................6-10
Compensate for Dark Regions in the Image....................................................................6-11
Check Events ......................................................................................................... 6-12
View a Live Event .............................................................................................................6-12
Search for Events.............................................................................................................6-12
Chapter 7
Operation and Management
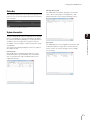
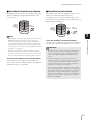
Storage Server Health Check................................................................................... 7-2
Events Indicating Errors or Warning Levels and Corresponding Actions ......................... 7-2
Status Bar........................................................................................................................... 7-3
System Information ............................................................................................................ 7-3
Disk Space Management (Important)....................................................................... 7-4
Chapter 8
Backup
Backing up data........................................................................................................ 8-2
Destinations of the Backup Files........................................................................................ 8-2
Notes on Backup ............................................................................................................... 8-2
How to Restore a Backup......................................................................................... 8-3
Restoring from Backup Data.............................................................................................. 8-3
Chapter 9
Troubleshooting
Actions Required When Recording Errors Occur..................................................... 9-2
Solutions When Viewer Problems Occur ................................................................. 9-2
Viewer and Video windows ................................................................................................ 9-2
Timeline.............................................................................................................................. 9-3
[Extract Video] ................................................................................................................... 9-3
Recording .......................................................................................................................... 9-3
Connection Problems......................................................................................................... 9-4
Error Messages ........................................................................................................ 9-4
Messages Displayed in the Viewer.................................................................................... 9-4
Messages Recorded in the Log Files ................................................................................ 9-7
Event Information ..................................................................................................... 9-9
x
Contents
Appendix
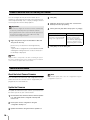
Create a Shortcut Icon for Starting the Viewer....................................................... 10-2
Camera Maintenance ............................................................................................. 10-2
About the Latest Camera Firmware .................................................................................10-2
Update the Firmware .......................................................................................................10-2
How to Check the Version...................................................................................... 10-3
Checking the version of the Viewer .................................................................................10-3
Checking the version of the Storage Server ....................................................................10-3
Functional Limitations for MPEG-4 and H.264 formats .......................................... 10-3
Index....................................................................................................................... 10-4
xi
xii
Chapter
1
Introduction
❏ System requirements (operating environment, supported cameras, license conditions)
❏ System configuration and design guidelines
Operating Environment
System requirements
1 -2
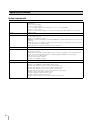
CPU
Intel Pentium G6950 2.80 GHz or higher, or an Intel CPU of equivalent class that meets the following
requirements:
Clock: 2.4 GHz or higher
L2 cache: 512 KB or higher
L3 cache: 3 MB or higher (only required if the L2 cache is less than 3 MB)
Number of cores: 2 or more
Intel Core i5 750 2.67GHz or higher is required when displaying multiple MPEG-4 or H.264 images
Memory
2 GB or greater
Hard disk
Interface: SAS / SATA
Cache:16 MB or greater
Spindle speed: 7200 rpm or faster
200 MB is required for installation (an additional 500 MB is required if .NET Framework 3.5 SP1 is not
installed).
Additional space for recording files and other files (the actual space required depends on the number
of cameras and the recording settings).
Additional space for saving extracted video files, as required.
Network controller
100 BASE-TX or similar, 100 Mbps transfer speed
Display
1280 x 1024 resolution or higher
16-bit colors or greater
NVIDIA GeForce GT 220 or higher graphics card is required, or a graphics card of equivalent class
that meets the following requirements, when displaying multiple MPEG-4 or H.264 images:
Video memory size: 1 GB or greater
Memory interface width: 128 bits
Memory clock: 790 MHz or higher
Others
Audio support is required for audio playback (for details, see P. 6-10).
Operating system
Windows Server 2008 Standard Edition (Service Pack 2) 32-bit or 64-bit version
Windows Server 2008 R2 Standard Edition 64-bit version
Windows Vista Business (Service Pack 2) 32-bit or 64-bit version
Windows Vista Enterprise (Service Pack 2) 32-bit or 64-bit version
Windows Vista Ultimate (Service Pack 2) 32-bit or 64-bit version
Windows Vista Home Premium (Service Pack 2) 32-bit or 64-bit version
Windows 7 Professional 32-bit or 64-bit version
Windows 7 Enterprise 32-bit or 64-bit version
Windows 7 Ultimate 32-bit or 64-bit version
Windows 7 Home Premium (Service Pack 2) 32-bit or 64-bit version
Operating Environment
1
Introduction
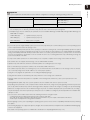
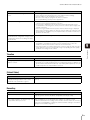
Important
• The system requirments described above are the minimum configuration, assuming the following operating enviroment:
Storage Server
Viewer
Maximum storage/playback data rate
Estimated display frame rate
*1
Maximum events processed
17 Mbps
1280 x 960: 2 fps *2
640 x 480: 10 fps *2
320 x 240: 30 fps *2
10,000 events per day
*1 Assumes a standard resolution ([Image Quality] setting is [3]) and that the receive size and display size are the same. If the receive
size and display size are different, performance may decrease due to an increase in processing load.
*2 If multiple image sizes are combined, the equivalent sizes are four 320 x 240 images for 640 x 480, and eight 320 x 240 images for
1280 x 960. For example:
1280 x 960 (1 fps)
equivalent to 8 fps (1 fps x 8)
640 x 480 (2 fps)
equivalent to 8 fps (2 fps x 4)
320 x 240 (10 fps)
10 fps (same as original)
Total of 26 fps (8 + 8 + 10)
• If you need to operate a high reliability system (such as for 24-hour operation) we recommend that you use a server operating system
on the computer that is used for the Storage Server.
• To record for extended periods (8 hours or more per day) in continuous recording mode, or when high-reliability operation is required
(such as for 24 hour operation, and high frequency disk access) we strongly recommend that you use a high-reliability SAS hard disk.
Using a low-reliability SATA hard disk may result in a disk error in a one to two year period. Therefore, you may need to check the disk
for errors on a regular basis, using features such as scan disk. In such a case, recording performance may suffer during checking, due
to the increased load on the disk.
• To help ensure stable operation, we recommend that you use a separate computer for the Storage Server and for the Viewer.
• This software does not support external storage, such as USB hard disks and NAS.
• Operation may slow down if the amount of stored data (number of recording files) becomes large.
• We recommend that you operate this software in its own dedicated LAN environment.
• The software may not be able to record images if you use an environment where the IP addresses of the Storage Servers or cameras
are occasionally changed. Use fixed IP addresses to ensure proper operation.
• Using IPsec may degrade the performance for recording and displaying images.
• Using anti-virus software or a firewall may affect the performance of the Storage Server and Viewer.
• Running software other than this product or compatible camera management software may cause system operation to become
unstable.
• Running Windows Update may cause system operation to become unstable and cause the system to restart.
• Depending on the performance of the computer and the network environment, changes in the photographing environment (such as the
time of day and the weather) may result in it not being possible to display recorded or live images according to the specified settings.
• When there is a high load on the CPU or hard disk, images may not be recorded or displayed at the specified frame rate, recording
may be interrupted, or the Viewer operation speed may decrease. In addition, recording may be interrupted when the available hard
disk space is low.
• You can use the camera audio feature. Review the following items before using the feature.
– Confirm that the Viewer supports transmission and reception of audio data.
– The audio stream may be interrupted, depending on the performance of your computer and network environment.
– Audio may be interrupted when using anti-virus software.
• Before applying a service pack or updating the operating system, please refer to Canon’s compatibility information before performing
the update.
• The following languages are supported: Japanese, English, French, Italian, German, and Spanish. Note that Windows Multi-language
version is not supported.
• For details on the operating system see “Additional Considerations” in “Operating Environment” (P. 1-4).
1 -3
• Be sure to test the system under your operating environment before starting regular operation.
Note
• The system environment of the Storage Server will depend on your operating environment (number of cameras, recording frame rate
settings, etc.). For details, contact your local supplier.
• The following runtime modules are installed automatically with this software. Please do not uninstall any of these modules.
– Microsoft Visual C++ 2008 Redistributable
• The information in this guide is current as of January 2011. For the latest information on this product, visit the Canon Web site.
Additional Considerations
• Do not specify the Windows folder or the Program Files folder on the system drive as the destination for snapshots or
image files. You cannot save images or image files to those folders.
• You cannot use the shadow backup feature with this software. For example, once you delete the configuration file for this
software, the file cannot be restored with the shadow backup feature.
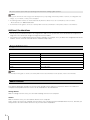
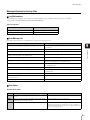
Supported Cameras
Camera
Firmware Version
VB-M700F
Ver. 1.0.0 or later
VB-M600D
Ver. 1.0.0 or later
VB-M600VE
Ver. 1.0.0 or later
VB-M40
Ver. 1.0.0 or later
VB-C500VD/VB-C500D
Ver. 1.1.0 or later
VB-C60
Ver. 1.1.0 or later
Note
The information in this guide is current as of January 2011. For the latest information on this product, visit the Canon Web site.
About Licenses
This software application includes one license for the Storage Server and one license for the Viewer. The number of
computers that a product with one license can be installed on is described below.
Storage Servers
With one Storage Server license, you can install a Storage Server on one computer.
Viewers
With one Viewer license, you can install the Viewer on one computer.
Only 1 Viewer can connect to a Storage Server at a time. You can also purchase individual Viewer licenses, therefore you
must purchase the same number of licenses as you have Viewer installations.
1 -4
About Licenses
1
Introduction
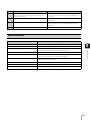
Notes
Compatibility with the Network Video Recorder VK-64/16
Notes on Installation
This software cannot exist with VK-64/16 on the same computer. Do not install this software onto a computer where
VK-64/16 is installed. You can install this software after uninstalling VK-64/16. However, please be aware of the following:
• You cannot use the cameras and recording schedule settings you added with VK-64/16. You must add and configure the
cameras and schedules again.
• You cannot use the recording files and event information associated with VK-64/16.
• You cannot play back recordings made with VK-64/16.
• This software requires a computer with specifications that are higher than those required for VK-64/16. Therefore, the
computer used for VK-64/16 may not meet the operation requirements for this software.
Notes on Protocol Compatibility
This software is not compatible with VK-64/16 protocols, because the protocol used between the Viewer and the Storage
Server has been significantly changed. Therefore, you cannot connect to a VK-64/16 Storage Server from the Viewer in this
software. Similarly, you cannot connect to this software’s Storage Server from the Viewer in VK-64/16.
Notes on Recording Data and Event Data Compatibility
This software uses event data and recording file formats that are different from VK-64/16. VK-64/16 recordings can be
played back using QuickTime Player. However, the recordings for this software are not supported by QuickTime Player.
Note, however, that you can use QuickTime Player to play back a .mov file created using the [Extract Video] feature in this
software.
1 -5
System Configuration Example
This software records images from cameras using an IP network, such as a LAN.
Important
• The load on the Storage Server may increase depending on the number of cameras connected and the recording settings. See
“Determining the Capacity of the Storage Server” (P. 1-7) to consider your configuration.
• Regularly check that the time setting is correct on the computers that are running the Storage Server and the Viewer. Also, before
changing the time setting on the computers, be sure to first stop the Storage Server and Viewer.
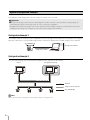
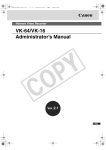
Configuration Example 1
This example shows the simplest system configuration, where the Storage Server and Viewer are installed on one computer.
Up to four cameras are connected and images from the cameras are displayed or recorded using the same computer.
Storage Server/Viewer
Image from camera
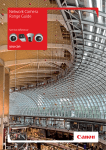
Configuration Example 2
You can install a Storage Server and a Viewer separately in two computers on the network.
Viewer
Storage Server Group
Network
Images from the cameras
Recorded images
Note
RM-Lite operates with one Storage Server Group that contains one Storage Server.
1 -6
1
Introduction
System Design
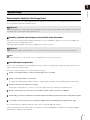
Determining the Capacity of the Storage Server
You must determine the size and configuration of your Storage Server based on the recording and playback data volume
per second and the required hard disk capacity.
Important
The operating performance of this software varies depending on factors such as the usage conditions and the hardware specifications of
the Storage Server. Use the figures below only for reference.
Recording / playback data volume per second and the audio data volume
If the volume of recording or playback data handled by one server is 80 Mbps or greater, to ensure system stability you
should review your recording requirements.
Audio data requires 64 Kbps of disk space, regardless of the type of camera.
Important
Depending on the hard disk and/or RAID card on your server, the disk write performance may be lower than the above estimates.
Hint
See “System Information” (P. 7-3) for details on the recording/playback data volume during operation.
Hard disk capacity requirements
The size of the recording file varies depending on how the camera is configured (the settings for image quality and size)
and the complexity of actual image.
Follow these steps to determine the required hard disk capacity.
1
Decide on the required number of cameras and the image size for recording.
2
Decide on the image quality for each camera.
The higher the image quality setting the higher the image quality, resulting in a correspondingly higher data volume.
3
Decide on the frame rate required for recording.
For general security purposes, you can use 1 to 2 fps. Higher frame rates require more hard disk space.
4
Decide on the number of hours per day to record and the number of days to store the recorded data.
5
After deciding on the above parameters calculate the required hard disk capacity based on the recording file size (in KB).
6
If you will also record audio, be sure to calculate the additional amount of hard disk space required for the audio.
We recommend that you add 10 to 20% more space to the calculated hard disk capacity.
Sample calculations for each video format are shown below, assuming 1000 Kbps = 1 Mbps for the network bandwidth,
and 1024 KB = 1 MB for the disk capacity.
1 -7
•
•
•
•
Image recording from 4 cameras (VB-M40).
Image size is 320 x 240 and image quality is 3 (data size per frame: 15.3 KB).
Recording frame rate is 2 fps.
Data size per second is approximately 30.6 KB (= 15.3 KB x 2 fps).
Although the actual recording file size depends on the objects recorded by each camera, this calculation assumes the
typical sizes given above.
If JPEG images from 4 cameras are recorded at 2 frames per second in continuous recording mode, the required hard disk
space is approximately 10 GB per day (= 30.6 KB x 4 cameras x 60 seconds x 60 minutes x 24 hours = 10,575,360 KB).
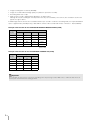
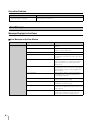
Example of the Data Size for the VB-M700F/VB-M600D/VB-M600VE/VB-M40 (JPEG)
Image Size
Image
Quality
160 × 120
320 × 240
640 × 480
1280 × 960
1
2.0
5.2
16.0
51.6
2
3.0
8.3
25.8
83.3
3
3.7
10.4
32.5
110.0
4
4.7
13.6
43.2
152.6
5
7.4
22.9
78.1
280.9
(Units: KB)
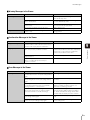
Example of the Data Size for the VB-C500VD/VB-C500D/VB-C60 (JPEG)
Image Size
Image
Quality
160 × 120
320 × 240
640 × 480
1
3.5
9.6
27.5
2
4.0
11.0
31.7
3
4.4
12.5
35.8
4
5.6
16.4
47.8
5
15.8
52.7
171.4
(Units: KB)
Important
The actual data size may increase or decrease depending on the objects being recorded. Make sure to confirm the data size for the
actual system environment before starting operation.
1 -8
System Design
1
Introduction
Storage Server Operation Considerations
We recommended that you dedicate the Storage Server computer exclusively to running this software.
Be sure to avoid the following on the Storage Server computer:
• Running Web server software on the computer
You cannot operate the Storage Server on a computer where Web server software such as Windows standard IIS
(Internet Information Server) or Apache is already installed.
The Storage Server uses HTTP protocol to communicate with cameras. Therefore, the Storage Server may not work
normally if other Web service applications exist on the same computer.
The HTTP port used by this software is 80 and cannot be changed.
• Running database server software (e.g., SQL Server, Oracle) on the computer
Database processing can place a load on the hard disk that may affect recording performance. Conversely, this
software may affect database server performance when it performs tasks that place a load on the hard disk.
• Using the computer as a file server
The hard disk is frequently accessed when the computer is used as a file server, and this may affect recording
performance. In addition, the Storage Server is more likely to run out of disk capacity if the computer is operated as a file
server.
• Running other applications on the computer
The additional processing load from running applications other than this software may affect recording performance.
This software uses the TCP port number 80, 443,10080 and 2380. These ports should not be used by other applications.
Network Bandwidth Considerations
You need to consider the network bandwidth if you want to use a network camera for both recording and live view.
You must calculate the network bandwidth both for the Storage Server and the Viewer.
For example, if you use one Storage Server (QVGA 1 fps) and one Viewer (QVGA 5 fps), calculate the bandwidth as follows:
• Bandwidth for recording
15 (KB/frame) x 1 (frames/sec) x 8 (bits) = 120 Kbps
• Bandwidth for live view (per Viewer)
15 (KB/frame) x 5 (frames/sec) x 8 (bits) = 600 Kbps
Therefore, the required network bandwidth is calculated as follows:
120 Kbps x 1 + 600 Kbps x 1 = 720 Kbps
1 -9
1 -10
Chapter
2
Setup
❏ How to install the software
❏ Settings after installation
Installation
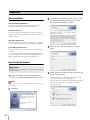
Before Installation
3
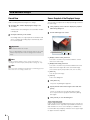
Read the license agreement carefully. Click [I accept
the terms in the license agreement], if you accept
them, and then click [Next] to continue.
4
Enter your user name and organization, and click
[Next].
5
Specify whether to install both the Storage Server and
Viewer, and click [Next].
Use an NTFS Formatted Drive
The drive you install the software on and the drive for
saving recorded images must be NTFS format.
Set Up the Cameras
You must set up any cameras that you will use with this
software before starting operation. For details, refer to the
camera manual.
Stop Other Applications
Stop other applications that are running on the computer,
such as anti-virus software, before installing the software.
Install .NET Framework SP1
.NET Framework 3.5 SP1 or later must be installed on the
computer.
You can download it from the Microsoft Download Center,
or use the installer on the setup CD-ROM (Applications
folder > DotNetFramewrk folder > dotnetfx35.exe).
How to Install the Software
Important
You must log on to the computer as a computer administrator to
install this software.
1
Double-click RMLite_v10.exe in the [Applications]
folder on the setup CD-ROM bundled with the camera.
Note
When the [User Account Control] dialog box appears, click [Yes]
(or [Continue]).
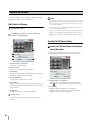
2
2 -2
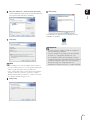
Click [Next].
Select [Complete] to install both applications. If you
selected this option, proceed to step 7.
Select [Custom] to separately install either the Storage
Server or the Viewer. If you selected this option,
proceed to step 6.
Installation
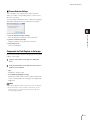
6
Select the application to install, and then click [Next].
9
2
Click [Finish].
Setup
Click the application that you do not want to install and
select [This feature will not be available].
The following icon appears in your desktop when the
installation is complete.
7
Click [Next].
Important
• You must restart the computer to enable the settings that
were made during the installation.
• You must configure the operating system after installation.
For details, see “Settings After Installation” (P. 2-4).
Note
• If you reinstall this software after uninstalling it, the setting
configurations from before uninstallation will not be retained. If
you want to reinstall this software, we recommend that you
back up the settings as a configuration file before
uninstallation. For details on backup, see “Chapter 8 Backup”.
• When installing on a PC that has multiple network interfaces,
select the network interface to use in the [Network adapter] list
and the assigned IP address in the [IP address] list.
• If you clear the [Add storage server programs to the Windows
Firewall exception list.] check box, you need to configure
Windows Firewall after the installation is complete. For details,
see “Windows Firewall Settings” (P. 2-4).
8
Click [Install].
2 -3
Settings After Installation
Configure the following setting after installing this software
according to the operating system you are using:
Click [Allow the connection], and then click [Next].
Windows 7,
Windows Vista
Windows Server
2008, Windows
Server 2008 R2
8
Click [Next].
Windows Firewall
Setting
3
3
9
Security Level
Setting
Enter a name (such as the Storage Server or Storage
Server Group name) in [Name] and click [Finish].
—
3
Warning when
Viewer Starts
3
3
Sound Settings for
Using the Audio
Feature
—
3
(3: Required, —: Not required)
Windows Firewall Settings
The changes to the settings are already complete if you
selected the [Add storage server programs to the
Windows Firewall exception list] check box during
installation. If you did not select the above check box
during installation, perform the following procedure to
change the Windows Firewall settings.
The following settings are not required if you install the
Storage Server and Viewer onto the same computer.
When using Windows 7 or Windows Server
2008 R2
2 -4
7
1
Click [Start] > [Control Panel] to open the [Control
Panel].
2
Click [System and Security] > [Windows Firewall].
3
Click [Advanced Settings] to display the [Windows
Firewall with Advanced Security] window.
4
Click [Inbound Rules] and select [New Rule] from the
[Action] menu to start the [New Inbound Rule Wizard].
5
Click [Port], and then click [Next].
6
Click [TCP] and [Specific local ports], and then enter
80 as the port number. Then click [Next].
10
The added inbound rule should be displayed in the
[Windows Firewall with Advanced Security] window,
with a checkmark icon displayed next to the rule.
When using Windows Vista or Windows Server
2008
1
Click [Start] > [Control Panel] to open the [Control
Panel].
2
Click [System and Security] > [Windows Firewall].
In the Control Panel Classic View, double click
[Windows Firewall].
3
Click [Change settings].
If the [User Account Control] dialog box is displayed,
click [Continue].
4
Click the [Exceptions] tab and click [Add Port].
5
In the [Add a Port] dialog box, enter the name of the
Storage Server and 80 as the port number. Make sure
that [TCP] is selected and click [OK].
6
Confirm that the added Storage Server is now
displayed in the [Windows Firewall] dialog box and that
the check box is selected. Then, click [OK].
Settings After Installation
Sound Settings for Using the Audio Feature
In Internet Explorer, the default security level setting for
Internet or intranet sites in Windows Server 2008 and 2008
R2 is “High”. Therefore, you are not able to configure
settings in the configuration or top page of the camera.
Follow these steps to register the site as a trusted site.
The sound feature is disabled by default in Windows
Server 2008 and 2008 R2. To receive audio with the
camera’s Viewer, follow these steps to enable the sound
feature.
1
Start Internet Explorer and click [Tools] > [Internet
Options] to display the [Internet Options] dialog box.
2
Click the [Security] tab.
3
Click [Trusted Sites] and click [Sites].
4
Clear the [Require server verification (https:) for all
sites in this zone] check box.
5
Enter the IP address of your camera in [Add this
website to the zone] and click [Add].
1
2
Setup
Security Level Setting
Click [Start] > [Control Panel] to open the [Control
Panel].
If the [Control Panel] is set to [Classic View], doubleclick [Sound] and proceed to Step 3.
2
Click [Hardware and Sound] and click [Sound].
3
If the [Audio Service Not Running] dialog box is
displayed, click [Yes].
4
The [Sound] dialog box is displayed. Select the
[Playback] tab and confirm that an appropriate audio
device is installed.
If no audio device is installed, refer to the manual for
your computer on how to install an audio device.
Note
• For details on registration with trusted sites, click [Learn more
about Internet Explorer’s Enhanced Security Configuration] in
the [Internet Options] dialog box and refer to the displayed
summary.
• JavaScript may be disabled in the standard security setting,
even if a content block dialog box is not displayed. This may
limit the operation of the setting page or the camera’s Viewer.
The JavaScript setting is enabled automatically once trusted
site registration is complete.
Warning When Viewer Starts
If [User Account Control] is enabled, the [User Account
Control] screen will be displayed when you start the
Viewer. Click [Yes] (or [Continue]) to start the Viewer.
2 -5
2 -6
Chapter
3
Storage Server Settings
❏ Adding cameras
❏ Configuring the Storage Server Group
❏ Adding users
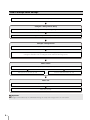
Flow of Storage Server Settings
Start the Viewer (P. 3-3)
Configure a Storage Server Group
Display the [Storage Server Group Settings] dialog box (P. 3-5)
Change the Storage Server Group name (P. 3-5)
Configure a Storage Server
Display the [Servers] tab (P. 3-6)
Specify the storage period for recorded images (P. 3-6)
Change the destination of the recording file and the maximum disk usage (P. 3-6)
Add a camera
Display the [Cameras] tab (P. 3-8)
Add cameras one at a time (P. 3-8)
Search for and add cameras (P. 3-9)
Add a user
Display the [Users] tab (P. 3-12)
Add a user (P. 3-13)
Important
We strongly recommend that only one administrator manage the setup of the Storage Servers on each network.
3 -2
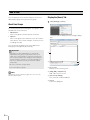
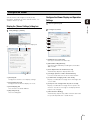
Start the Viewer
Important
Double-click the [RM-Lite Viewer v1.0] icon on your
desktop.
Note
If the [User Account Control] dialog box appears, click [Yes] (or
[Continue]).
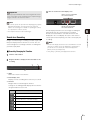
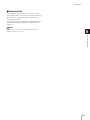
2
Specify the information required to connect to the
Storage Server Group.
➀
➁
➂
➃
➄
• You should change the password for the default user
(administrator) as a security measure. For details on how to
change the password, see “Add a User” (P. 3-12).
Storage Server Settings
You must log on as a computer administrator to configure the
Storage Server from the Viewer.
1
3
Important
• Be sure to remember your password.
• You must start the Viewer while logged on as a user in the
Administrator user group to be able to set up the Storage
Server.
Note
• The first time you connect to the Storage Server Group, you
must enter the host name and port number. However, from the
second time onward, you can simply specify the Storage
Server Group name (P. 3-4).
• If there are no cameras added, a message is displayed asking
if you want to add a camera. Click [Yes] to display the [Add
Camera] dialog box and start adding a camera on the network.
For details, see “Add Cameras One at a Time” (P. 3-8).
• You can configure the Viewer to start without displaying the
startup screen or the [Connect to Storage Server Group] dialog
box. For details, see “Create a Shortcut Icon for Starting the
Viewer” (P. 10-2).
➀ [Host Name]
Enter the host name or the IP address of the Storage
Server Group. If the Viewer and the Storage Server are
installed on the same computer, enter “localhost”.
➁ [Port]
Normally, leave [80] unchanged.
➂ [User Name], [Password]
Enter your user name and password.
The default user name and password are:
User Name: administrator
Password:
NVR
➃ [Remember user name]
Select the check box if you want the software to
remember the user name.
➄ [Use Group Name]
Click to specify a Storage Server Group name for the
connection.
3
Click [Connect].
3 -3
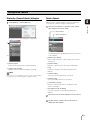
Specify the Storage Server Group for Starting
the Viewer
You can start the Viewer using a Storage Server Group
name instead of the host name of the server.
1
Double-click the [RM-Lite Viewer v1.0] icon on the
desktop.
Note
If the [User Account Control] dialog box appears, click [Yes] (or
[Continue]).
2
Click [Use Group Name].
3
Specify the information required to connect to the
Storage Server.
➀
➁
➂
➀ [User Name] and [Password]
Enter the use name and password.
The default user name and password are:
User Name: administrator
Password:
NVR
➁ [Remember user name]
Select the check box if you want the software to
remember the user name.
➂ [Use Host Name]
Click to specify a Storage Server Group name for the
connection.
4
3 -4
Click [Connect].
Configure a Storage Server Group
You can change the name of the Storage Server Group
and configure the free disk space notifications.
Storage Server Settings
Display the [Storage Server Group Settings]
Dialog Box
3
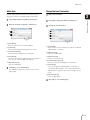
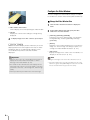
➂ [Events] tab
This cannot be used with RM-Lite.
➃ [OK] and [Cancel]
Close the dialog box.
Change the Storage Server Group Name
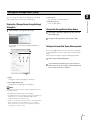
1
Click [Settings] > [Storage Server Group].
The [Storage Server Group Settings] dialog box is
displayed.
➀
➂
➁
1
Click [Edit] to display the [Edit Storage Server Group
Name] dialog box.
2
Change the Storage Server name and click [OK].
Configure the Low Disk Space Warning Level
An event is triggered when the free disk space available
for recording becomes low, relative to the maximum disk
space.
Specify this percentage using the following procedure.
1
Click the [Recording Settings] tab.
2
In [Low Disk Space Warning Level], specify the free
disk space level, as a percentage of the maximum disk
space, which will issue a notification.
➃
➀ [Edit]
Change the name of Storage Server Group.
➁ [Recording Settings] tab
Configure the free disk space notifications.
Note
For RM-Lite, the items in the [Recording Settings] tab have the
following limitations.
• The [Mirroring Settings] feature is not available.
• The [Maximum File Size / Duration] setting is not available. The
maximum file size is fixed at 1,024 MB (1 GB) and the
maximum duration is fixed at 24 hours.
• [Reduce recording frame rate when disk is under high load] is
always enabled. You cannot disable it. You can confirm
whether the frame rate has been automatically reduced by
checking the [Live Events Log].
3 -5
Configure a Storage Server
You can specify the storage period of the recorded
images and the maximum disk usage.
You can specify the storage period for images recorded
on the Storage Server.
• Select the [Ensure video is kept for at least] check box
to specify the minimum storage period. Select the units
(days or weeks) of the storage period and enter the
number of days (1 to 90) or weeks (1 to 12).
• [Ensure video is kept for upto] is always enabled. You
cannot disable it. Select the units (days or weeks) of
the storage period and enter the number of days
(1 to 90) or weeks (1 to 12).
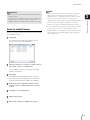
Display the [Servers] Tab
1
Specify the Storage Period for Recorded
Images
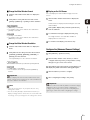
Click [Settings] > [Storage Servers].
The [Servers] tab is displayed in the [Settings] dialog
box.
Important
Depending on the maximum disk usage setting for the Storage
Server (P. 3-6), recordings may not be stored for the full storage
period specified in this setting.
➀
Change the Destination of the Recording File
and the Maximum Disk Usage
➁
Specify a drive for recording or change the maximum disk
usage.
➂
➃
1
Select a Storage Server from the list of Storage
Servers.
2
Click [Edit] to display the [Storage Server Settings]
dialog box.
3
Clear the check boxes next to the drives that are not
used for recording.
4
Specify the maximum disk usage.
➀ List of Storage Servers
Display a list of Storage Servers.
➁ [Add], [Edit], and [Remove]
Edit a Storage Server. [Add] or [Remove] are not
available with RM-Lite.
➂ [Recorded Video Settings]
Specify the minimum and maximum storage period for
recorded images.
➃ [Close]
Close the dialog box.
Click [Do not limit] for each drive to display the
maximum disk usage. Select the [Maximum Disk
Space Used] check box and specify a maximum disk
usage that does not exceed the total disk capacity.
3 -6
Configure a Storage Server
5
Click [OK] to close the dialog box.
3
Important
We recommend that you do not specify the system drive
(typically the C drive) as the destination for the recording file.
Storage Server Settings
3 -7
Add a Camera
You can add a camera to be used for displaying images
or recording to a Storage Server.
Add Cameras One at a Time
Add cameras one at a time to the list of cameras on the
[Cameras] tab.
Note
You can add up to four cameras.
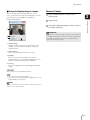
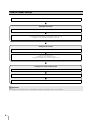
1
Click [Add] to display the [Add Camera] dialog box.
2
Enter the information required to add the camera.
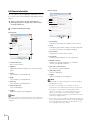
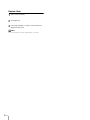
Display the [Cameras] Tab
Display the [Cameras] tab in the [Settings] dialog box to
start adding a camera.
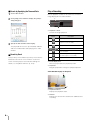
1
➁
➀
➂
➃
➄
Click [Settings] > [Cameras].
➅
➇
➆
➈
➀ [Host Name]
Enter the host name or IP address of the camera.
➀
➁ [Port]
Enter the port number for communicating with the
camera. Typically, leave [80] unchanged.
➂ [User Name]
Enter the user name for the camera.
➁
➂
➀ List of cameras
Displays a list of already added cameras.
➁ [Find]
Search for cameras on the network.
➂ [Add], [Edit], and [Remove]
Add, edit or remove a camera.
➃ [Close]
Closes the dialog box.
➃
➃ [Password]
Enter the password for the user specified in ➂.
➄ [Use SSL Communication]
This cannot be used with RM-Lite.
➅ [Tags]
This cannot be used with RM-Lite.
➆ [Edit]
This cannot be used with RM-Lite.
➇ [Remove]
This cannot be used with RM-Lite.
➈ [OK] and [Cancel]
Close the dialog box.
3
Click [OK] to close the dialog box.
The camera is added in the list of cameras on the
[Cameras] tab.
3 -8
Add a Camera
Important
Note
• You can only search for cameras on the same subnet as the
Storage Server. For details on how to add cameras on a
different subnet, see “Add Cameras One at a Time” (P. 3-8).
• If the host name or IP address of the camera is changed after
registration, you must also change the Storage Server
setting. For details, see “Edit Camera Information” (P. 3-10).
• The names of the cameras (stored on the camera) are
displayed in the list in the [Camera Search Results] dialog box.
3
Storage Server Settings
• Enter the camera’s user name and password in [User Name]
and [Password].
• Cameras that have already been added are also found.
However, a check box is not displayed next to the camera.
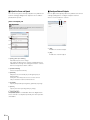
Search For and Add Cameras
You can search for cameras that are on the same network
as the Storage Server.
1
• If you cannot find the camera you are searching for, see “Add
Cameras One at a Time” (P. 3-8) and add the camera.
• Only IPv4 addresses are displayed in the [Host Name] column
of the [Camera Search Results] dialog box. (IPv6 addresses
are not supported.)
Click [Find].
The cameras on the subnet are displayed in the
[Camera Search Results] dialog box.
2
Select the check box of a camera you want to add. To
select all the cameras, click [Select All].
You can add more than one camera by selecting
multiple check boxes.
3
Click [Add].
The [Add Camera] dialog boxes for the cameras
selected in step 2 are displayed in the order of the
[Camera Search Results] list (from top to bottom).
4
Enter the information required to add the camera,
referring to step 2 in “Add Cameras One at a Time”
(P. 3-8).
5
Click [OK] to close the dialog box.
6
Repeat steps 4 and 5.
7
When all the cameras are added, click [Cancel].
3 -9
Edit Camera Information
[Advanced] tab
You can edit the camera registration information, such as
the camera name or the thumbnail image displayed in the
Viewer.
1
Select a camera in the list and click [Edit] in the
[Settings] dialog box to display the [<camera name>
Properties] dialog box.
2
Configure the displayed settings.
➁
➀
➂
➃
➄
➅
[General] tab
➀
➇
➁
➀ [Host Name]
Change the host name or IP address of the camera.
➂
➁ [Port]
Change the port number used for communicating with
the camera. Typically, leave [80] unchanged.
➄
➃
➅
➆
➀ Camera name box
Enter a camera name.
➁ [Update]
Update the thumbnail image in the camera selection
panel.
➂ [Tags]
This cannot be used with RM-Lite.
➃ [Edit]
This cannot be used with RM-Lite.
➂ [User Name]
Change the user name of the camera.
➃ [Password]
Change the password for the user entered in ➂.
➄ [Disable Camera]
Disables the camera temporarily. To enable the
camera, click [Enable Camera].
➅ [Use SSL Communication]
This cannot be used with RM-Lite.
➆ [OK] and [Cancel]
Close the dialog box.
➇ [Apply]
Apply the settings in the dialog box.
Note
➄ [Remove]
This cannot be used with RM-Lite.
• Items ➀ to ➃ can only be changed if the camera is disabled
using [Disable Camera].
➅ [OK] and [Cancel]
Close the dialog box.
• If a camera is not working, you can disable it to prevent
communication error notifications from being sent repeatedly.
➆ [Apply]
Apply the settings in the dialog box.
• If you replace a camera that is not working with another
camera, the host name, etc, is changed to that of the new
camera, so there will be no effect on existing recording
schedules and settings. (The replacement should be the same
model as the original camera.)
Note
The camera name specified in the text box is only used by this
software product. The camera name stored on the camera is not
changed.
3 -10
➆
• If you remove a camera, you will no longer be able to play any
of the recordings made with the removed camera. By disabling
the camera rather than removing it, you will still have access
the recordings made with the camera.
Add a Camera
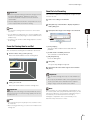
Change the Thumbnail Image of a Camera
You can change the thumbnail image of a camera.
In the [<camera name> Properties] dialog box, click the
[General] tab and click [Update] to display the
[Thumbnail] dialog box.
1
Select a camera in the list of cameras on the
[Cameras] tab.
2
Click [Remove].
3
A message is displayed asking if you want to remove
the camera. Click [Yes].
3
Storage Server Settings
➀
Remove a Camera
Important
➁
➂
➃
If you remove a camera, you will no longer be able to play back
recordings made with the camera. If you need to play back the
recordings, use [Disable Camera] on the [Advanced] tab
instead of removing the camera.
➀ Preview image
Drag the slider to change the zoom position of the
camera. Click in the preview image to change the
camera position.
➁ [Select Preset]
Select a preset image stored on the camera.
➂ [Update]
Use the current preview image as the camera
thumbnail image. The [Thumbnail] dialog box closes
and the camera thumbnail image is updated.
➃ [Cancel]
Close the dialog box without updating the thumbnail
image.
You cannot use the pan/tilt/zoom feature.
• You cannot use the pan/tilt feature.
• You cannot use the zoom when the digital zoom is set
to [Disabled] on the camera.
Note
You must configure the presets first before starting operation. For
details, see the camera manual.
3 -11
Add a User
You can add users to the Viewer and place them in the
administrator group or the general user group.
Display the [Users] Tab
1
Click [Settings] > [Users].
About User Groups
The Viewer provides the following two user groups, each
with different user permissions.
• Administrator
Users in this group can fully operate the Viewer.
The [Users] tab is displayed in the [Settings] dialog
box.
• Operator
Users in this group have limited access to the features
of the Viewer. They cannot configure a camera or set a
recording schedule.
You can specify the group to which the added user
belongs by selecting from [User Group].
Important
• A default user called “administrator” is created in the
Administrator user group. The password for this user is
“NVR”. We recommend that you change the password for
this user after installation. We strongly recommend that, for
normal surveillance operation, you create individual users
with access permissions for only the minimum required
functionality.
➀
➁
• Be sure to remember your password.
• You cannot add user groups.
Note
Administrator for this software program does not refer to the
Windows administrator.
➀ List of users
Displays a list of existing users.
➁ [Add], [Edit], and [Remove]
Add, edit or remove a user.
➂ [User Group Settings]
This cannot be used with RM-Lite.
➃ [Close]
Closes the dialog box.
3 -12
➂
➃
Add a User
Add a User
Change the User Information
Use this tab to add a new Viewer user. Also use it to
specify the kind of user (Administrator or Operator).
1
Select a user in the list.
2
Click [Edit] to display the [Edit User] dialog box.
3
Change the user information.
2
Enter the information required to add the user.
➀
➁
➂
➃
3
Storage Server Settings
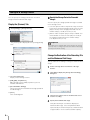
1
Click [Add] to display the [Add User] dialog box.
➀
➁
➂
➃
➄
➄
➀ [User Name]
Enter the name of the user to be added.
➅
➁ [Password]
Enter the password used to log into the Viewer.
➀ [User Name]
All user names can be changed, except for the default
“administrator” user name.
➂ [Confirm Password]
Enter the password again for confirmation.
➁ [Old Password]
Enter the old password.
➃ [User Group]
Select the user group (“Administrator” or “Operator”).
You can also select an added user group.
➂ [New Password]
Enter the new password.
➄ [OK] and [Cancel]
Close the dialog box.
3
Click [OK] to close the dialog box.
The added user appears in the list of users on the
[Users] tab.
➃ [Confirm New Password]
Enter the new password again for confirmation.
➄ [User Group]
Select a user group (“Administrator” or “Operator”).
The default “administrator” user is associated with the
Administrator user group. You cannot change this user
name.
➅ [OK] and [Cancel]
Close the dialog box.
4
Click [OK] to close the dialog box.
3 -13
Remove a User
1
Select a user in the list.
2
Click [Remove].
3
A message asking if you want to remove the user is
displayed. Click [Yes].
Note
You cannot delete the default “administrator” user name.
3 -14
Chapter
4
Viewer Settings
❏ Configuring the Viewer
❏ Configuring a camera
❏ Creating a layout
Flow for Viewer Settings
Start the Viewer (P. 3-3)
Configure the Viewer
Display the [Viewer Settings] dialog box (P. 4-3)
Configure the Viewer display and operation settings (P. 4-3)
Configure event notification and priorities (P. 4-4)
Configure the camera
Display the [Camera Selector] dialog box (P. 4-5)
Select a camera (P. 4-5)
Configure the video window (P. 4-6)
Configure the [Advanced Camera Settings] (P. 4-7)
Configure the video window layout
Create a layout (P. 4-11)
Place a video window (P. 4-11)
Save the layout (P. 4-12)
Important
We strongly recommend that only one administrator configure the Storage Servers on each network.
4 -2
Configure the Viewer
Start the Viewer and configure it for day-to-day
operations. For details on how to start the Viewer, see
“Start the Viewer” (P. 3-3).
1
Click [Settings] > [Viewer].
The [Viewer Settings] dialog box is displayed.
➀
➁
➂
1
Click the [General] tab.
2
Configure each item.
4
Viewer Settings
Display the [Viewer Settings] dialog box
Configure the Viewer Display and Operation
Settings
➀
➁
➂
➃
➄
➅
➆
➀ [Maximum Live Frame Rate]
Specify the maximum live frame rate.
➁ [Manual Recording Duration]
Specify the [Record Now] recording time, from 30 to
300 seconds.
➂ [Auto adjust frame rate under heavy load]
Automatically adjust the display frame rate.
➃
➀ [General] tab
Configure the Viewer screen display settings.
➁ [Event Notification] tab
Configure how the Viewer displays an event.
➂ [Event Display] tab
This cannot be used with RM-Lite.
➃ [OK] and [Cancel]
Close the dialog box.
➃ [Use large captions for video window title bars]
Increase the title bar text size of the video window.
➄ [Confirm when changing to full screen mode]
Display a confirmation message when switching to full
screen mode.
➅ [Prompt to save changes when layouts are closed]
Display a confirmation message when a layout in the
Viewer is closed. The message is not displayed if the
layout is not changed.
➆ [Timeout Before Ending]
Automatically stop two-way audio communication after
the specified period, from 1 to 60 minutes.
4 -3
Configure Event Notification and Priorities
1
Click the [Event Notification] tab.
2
Configure each item.
➀
➁
➂
➃
➀ [Show Events in Live Events Log and Timeline]
Display an event in the [Live Events Log] dialog box
and on the timeline.
[Equal to or higher than]
Specify the priority of events to be displayed.
➁ [Show Video Window on Event]
This cannot be used with RM-Lite.
➂ [Operator Notification]
This cannot be used with RM-Lite.
➃ [Acknowledge Event]
This cannot be used with RM-Lite.
4 -4
Configure the Camera
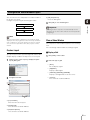
Display the [Camera Selector] dialog box
1
Click [Window] > [Camera Selector].
Select a Camera
4
When you have a large number of cameras registered,
search for the camera using the camera name.
Viewer Settings
1
Click the search button to select the search criteria
type and enter the search criteria.
Search button
Search criteria box
The [Camera Selector] dialog box is displayed.
➀
The following items are displayed when you click the
search button.
➁
• [Name, Tag or Status]
Enter a camera name or camera status in the search
criteria box.
➀ [Search for] box
Search for the camera to be used for display.
• [Camera Name]
Enter the camera name in the search criteria box.
➁ Camera search results
Displays a list of cameras found by searching.
• [Tag]
Cameras cannot be searched using this item in
RM-Lite.
Note
Each time you select [Window] > [Camera Selector], the display
of the [Camera Selector] dialog box is toggled on or off.
• [Camera Status]
Select the camera status to be searched.
• [Camera Type]
Select the model name to be searched.
• [Host Name (camera)]
Enter the camera host name or IP address in the
search criteria box.
• [Storage Server Group Name]
Cameras cannot be searched using this item in
RM-Lite.
2
Specify the search criteria and search for the camera.
3
Double-click the camera in the search results to
display the video window.
4 -5
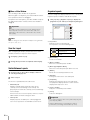
Configure the Video Window
You can configure the video window settings, including
the window size and the video format (JPEG or MPEG-4).
Change the Video Window Size
➀
➁
➀ Video window menu button.
Click to display a menu for operating the video window.
➁ Title bar
Displays the camera name and type of image being
displayed.
4
To display images from other cameras, repeat step 3.
With the on-screen display feature enabled, if you set the
display position to the lower right or lower left, the video
window title bar, the recorded image indicator, or the
event indicator may hide the text that should be
displayed.
Important
• When an error occurs, the corresponding error message is
displayed in the video window. For details, see “Error
Messages in the Video Window” (P. 9-4).
• The number of video windows that can be displayed in the
Viewer depends on factors such as the graphics card, CPU
performance, frame rate, camera image size, and the image
quality.
• Viewer operation may slow down in the CPU load is high.
4 -6
1
Click the video window menu button to display the
menu.
2
Select [Video Display Size] and specify the video
window size from the submenu.
• [160x120] / [320x240] / [640x480]
Change the size of the video window, selecting from
small ([160x120]), medium ([320x240]) and large
([640x480]).
• [Default]
Adjusts the size of video window to the received (live)
image size. For the image size during reception, see
“Change the Video Window Resolution” (P. 4-7).
• [Full Screen]
Display an image on the entire screen. For details, see
“Display on the Full Screen” (P. 4-7).
Note
• Drag the lower right corner of the video window to resize it.
• If the video window size selected in the [Video Receive Size]
submenu is greater than [640 x 480], the load on the CPU will
increase and the Viewer may operate more slowly.
Configure the Camera
Change the Video Window Format
1
Click the video window menu button to display the
menu.
2
Click [Video Format] and select the video format
([JPEG] or [MPEG-4], or [H.264]) from the submenu.
Display on the Full Screen
You can display the video window image on the full
screen.
1
Click the video window menu button to display the
menu.
4
• [MPEG-4] is unavailable.
• The audio is not in synch with the live video when
[H.264] is selected.
• [H.264] is unavailable.
• The audio is not in synch with the live video when
[MPEG-4] is selected.
Change the Video Window Resolution
2
Select [Video Display Size] and select [Full Screen]
from the submenu.
3
A confirmation message is displayed. Click [Yes].
Viewer Settings
A white frame is displayed surrounding the selected
video window.
The image from the selected video window is
displayed on the full screen.
4
To exit full screen display, press the Esc key.
1
Click the video window menu button to display the
menu.
2
Click [Video Receive Size] and select the resolution
([160x120], [320x240], [640x480], [1280x960], or
[Default]) from the submenu.
1
Click [Window] > [Camera Control].
Select [Default] to use the camera’s resolution.
2
Click the video window of the camera you want to
configure and click [Control] on the [Camera Control]
dialog box to get control of the camera.
3
Click [Advanced] on the [Camera Control] dialog box to
display the [Advanced Camera Settings] dialog box.
4
Click the tab that you want to configure.
5
After configuring the settings, click [Close].
Configure the [Advanced Camera Settings]
The resolution cannot be specified for [H.264] format.
• [1280 x 960] is unavailable.
• The resolution cannot be specified for [MPEG-4]
format.
Important
When you display more than one video window for the same
camera, changes to the resolution of one of these windows are
reflected to all of the other windows.
Important
Note
• If you save the layout (P. 4-12), the [Video Receive Size]
setting is also saved.
If camera control is lost while the [Advanced Camera Settings]
dialog box is open, you cannot continue configuring the
settings. Click [Control] on the [Camera Control] dialog box
again to get control and continue configuring the settings.
• The size used for [Default] is determined the first time you
display an image from the camera. The size on the Viewer will
not change, even if you change the size setting on the camera.
4 -7
Adjust the Image
Adjust the image quality using the [Image Adjustment] tab
in the [Advanced Camera Settings] dialog box.
The exposure compensation setting is displayed when
[Auto], [Auto (Shutter Priority)] or [Auto (Flickerless)] is
selected.
[Image Adjustment] tab
Important
The settings may be different for different camera models. For
details, see the camera manual.
[Compensation]: Specify exposure compensation using
seven levels, from -3 to +3 (alternately [Off],
[Low], [Medium], [High]). Select negative
values to darken the image and positive values
to lighten the image.
[Metering Mode]: Specify the metering mode setting:
[Center-weighted], [Average], or [Spot].
➀
➁
➂
➃
➀ [Exposure]
The settings change according to the selected
exposure setting.
Metering mode
Description
[Center-weighted]
Meters the entire image, focusing on
the center of the image.
A correct exposure is obtained for a
subject near the center of the image,
even though the periphery may be
slightly darker or lighter.
Use for subjects that are in the center
of the image.
[Average]
Meters the entire image by averaging.
A uniform exposure is obtained even
when the scene has significant
differences in brightness.
Use for scenes where, for example,
cars are passing through or people
are entering and exiting.
[Spot]
Meters the center of the image.
The correct exposure is obtained for a
subject near the center of the image,
irrespective of the brightness of the
periphery.
Use if the subject is lit by a spotlight or
is backlit, where the exposure should
be adjusted to the center of the
image.
• [Auto]
Automatically control the exposure.
• [Auto (Shutter Priority)]
Specify the shutter speed.
• [Auto (Flickerless)]
Reduce flicker from light sources, such as
fluorescent lighting. The shutter speed is
automatically adjusted according to the lighting
conditions.
[Shutter]: Specify the shutter speed when [Exposure] is
set to [Auto (Shutter Priority)] using 12 levels,
from 1/8 to 1/8000 seconds.
4 -8
Configure the Camera
• [Manual]
Compensate for the exposure manually by using the
following settings.
[Compensation] can be specified using seven levels, from
-3 to +3. To disable exposure compensation, specify [0].
Note
When [Night Mode] is enabled in [Aperture Mode], the screen
image and the recorded image are in black & white.
4
Viewer Settings
[Iris]: Specify the iris setting. Drag the slider to the left
to close down the iris and make the image
darker or to the right to open up the iris and
make the image brighter.
[Shutter]: Specify the shutter speed using 15 levels,
from 1/1 to 1/8000 seconds.
[Gain]: Specify the gain (sensitivity to brightness). Drag
the slider to the left to decrease the gain and
make the image darker or to the right to
increase the gain and make the image brighter.
➁ [Smart Shade Control]
Specify a value to use for the camera’s smart shade
control feature for live image. Select one of seven
levels, from 1 (weakest) to 7 (strongest), or [Off]. If [Off]
is selected, the camera’s smart shade control setting is
used for live image.
➂ [Aperture Mode]
Specify the camera aperture mode.
[Night Mode]
• [Disabled]
Disable the night mode function.
• [Enabled]
Displays live image in night mode.
• [Auto]
The camera automatically switches to night mode.
➃ [White Balance]
Specify the appropriate white balance by selecting one
of the camera’s light source settings displayed in the
list.
If [Manual] is selected, use one of the following two
methods to adjust the white balance.
• [R Gain] and [B Gain]
Specify the white balance parameters by dragging
the sliders. Drag to the right to increase the gain (the
sensitivity to brightness).
• [One Shot WB]
Force white balance adjustment to a light source.
Using a white object (such as piece of white paper)
as a standard, fill the shot with the object and click
this button.
4 -9
Adjust the Focus and Speed
Configure External Outputs
You can use the [Focus and Speed] tab in the [Advanced
Camera Settings] dialog box to adjust the focus and the
pan/tilt/zoom speeds.
Use the [External Outputs] tab on the [Advanced Camera
Settings] dialog box to configure output to external
devices connected to the camera.
➀ ➁
[Focus and Speed] tab
Important
The settings may be different for different camera models. For
details, see to the camera manual.
➀
➁
➂
➃
➄
➀ [Off]
Disable the external output.
➁ [On]
Enable the external output.
➀ [Auto], [Auto (for domes)]
Automatically focus the image.
Use [Auto (for domes)] for cameras equipped with an
indoor dome housing. The setting prevents the camera
from focusing onto the dome surface.
➁ [Fixed at infinity]
Fix the focal point at infinity.
➂ [Manual]
Adjust the focus manually by clicking the [Far] or
[Near] button.
Click [One Shot AF] to focus once on the current
subject and then return to manual focus.
➃ [Pan/Tilt]
Specify the pan/tilt speed ([Slow], [Normal] or [Fast]).
➄ [Zoom]
Specify the zoom speed ([Slow] or [Fast]).
The pan/tilt speed is unavailable. When the digital zoom
on the camera is set to [Not Specified], the zoom speed is
unavailable.
4 -10
Configure the Video Window Layout
You can save the size and position of a video window in
the Viewer as a layout.
Configure a layout using the following procedure:
1. Create a layout
3. Save the layout
3
4
Click [OK] to close the dialog box.
Viewer Settings
2. Place a video window
➃ [OK] and [Cancel]
Close the dialog box.
Important
Following the above steps does not automatically save the
layout. Be sure to enter a name and save the new layout after
configuring it.
Note
When the Viewer starts, it displays the layout that was being
displayed when the program last ended. A new layout with the
name “Untitled1” is opened the first time the Viewer is started.
You can save the layout with a name after you place a video
window.
Create a Layout
You can place a video window anywhere in the viewing
area.
You can arrange video windows according to a grid.
Display a Grid
Specify the layout name, layout background and the video
window display conditions and open it as a new layout.
1
Place a Video Window
Click [Layouts] > [New Layout] to display the [New
Layout] dialog box.
1
Click [Grids] on the toolbar.
2
Select the type of grid.
• [None]
Do not display a grid.
• [Alignment]
Display a dotted grid.
• [160x120] / [320x240] / [640x480]
Display a solid grid with one of three sizes.
2
• [Custom]
This cannot be used with RM-Lite.
Configure each item.
➀
➁
➂
➃
➀ [Layout Name]
Enter the name of the layout.
➁ [Background]
This cannot be used with RM-Lite.
➂ [Playback Options]
This cannot be used with RM-Lite.
4 -11
Move a Video Window
You can drag a video window to any position.
When the grid is set to [None], the video window remains
in the position to which it is dragged.
For options other than [None], the video window snaps to
the grid position that is nearest to where the window is
dragged.
Organize Layouts
You can change the display order of menus, classify and
organize layouts in folders, and edit the layouts.
1
Click [Layouts] > [Organize Layouts] to display the
[Organize Layouts and Layout Sequences] dialog box.
➁
➂
Important
The number of video windows that can be displayed in the
Viewer depends on factors such as the video card, CPU
performance, video frame rate, camera video size, and the
video quality.
➃
➄
➅
➆
➇
➈
➀
Note
You can enlarge the video window in multiples of the grid frame
size (2 x 2, 3 x 3, etc.).
Save the Layout
➀ Layout tree
Displays a list of created layouts.
The layout tree uses the following icons:
Icon
Custom layout
After configuring the display and position of the video
windows, follow these steps to save the layout.
1
Click [File] > [Save Layout].
2
Change the layout name as required, and click [OK].
2
Folder
➁ [New Folder]
Create a new folder.
Switch Between Layouts
1
Description
Click [Layouts] on the toolbar to display a menu for
selecting existing layouts.
Select a layout.
The menu is separated into two sub-menus:
• Shared layouts
Displays shared layouts under the name of the
currently connected Storage Server Group. The
[Layouts] menu shows the currently connected Storage
Server Groups.
All users have access to the layouts, however, only the
administrator can make changes to them.
• User layouts
Displays layouts created by the currently logged in
user. These layouts are not available to other users.
➂ [Move to Folder]
Move the selected layout to a folder.
➃ [Move Up] and [Move Down]
Move the selected layout up or down in the list.
➄ [Delete]
Delete the selected layout from the list.
➅ [Rename]
Change the name of the selected layout.
➆ [Properties]
Displays the properties of the selected layout.
The properties displayed are the same as those
displayed in step 2 on P. 4-11.
➇ [Copy to Folder]
Copy the selected layout to a folder.
➈ [Close]
Close the dialog box.
Important
• You cannot change the name of the [Shared Layouts] and
[User Layouts] folders.
• Only the administrator (or a user with the required
permissions) can manage shared folders (P. 3-12).
4 -12
Configure the Video Window Layout
Note
The settings in the [Organize Layouts and Layout Sequences]
dialog box, such as the order of the layout sequence and the
folder types are also displayed when you click the [Layouts]
menu, or when you click the [Layouts] button on the toolbar.
4
Viewer Settings
4 -13
4 -14
Chapter
5
Setting a Recording
Schedule
❏ How to set a schedule for recording images on particular days of the week or
at the particular times
❏ Settings for different recording modes
Flow of Recording Schedule Settings
Display the [Recording Schedules] window (P. 5-3)
Set a Weekly schedule
Display the [Recording Schedules] window (P. 5-3)
Set a recording schedule (P. 5-3)
Configure the recording conditions
Continuous recording settings (P. 5-4)
Save or edit a recording schedule
Save a recording schedule (P. 5-5)
Edit, delete or copy from a recording schedule (P. 5-6)
Important
Be sure to test recording schedules before using them.
5 -2
Record on a Regular Basis (Repeating Weekly Schedules)
Display the [Recording Schedules] window
1
Click [Window] > [Recording Schedules] to display the
[Recording Schedules] window.
Set a Weekly Schedule
1
In the schedule area, click the camera that you want to
add the schedule to.
5
Hint
2
Setting a Recording Schedule
You can select more than one camera by holding down the Shift
key or Ctrl key and clicking the cameras.
Click [Add Schedule Item] to display the [Edit Schedule
Item] dialog box.
➀
➀
➂
➁
➃
➄
➀ [Add Schedule Item], [Edit], [Delete]
Add, edit or delete a schedule item.
➁ [Zoom] slider
Zoom in and zoom out the time line of the schedule
area.
➁
➂
➃
➂ Camera search box
This cannot be used with RM-Lite.
➀ Recording time settings area
Specify the day of the week and the start and end time
of the recording period.
➃ Schedule area
Displays the currently registered cameras and their
corresponding weekly schedules, arranged by day of
the week.
➁ Recording mode list
Select the recording mode.
Only continuous recording can be selected.
➄ [Close]
Closes this window.
➂ Recording settings area
Configure the settings for the recording mode.
➃ [OK] and [Cancel]
Close the dialog box.
5 -3
Specify the Recording Period and Day of the
Week
1
Specify the recording period.
• To record for the entire day without specifying a
starting and ending time, click [All Day].
• To specify a recording period, enter the start time
in [Start Time] and the end time in [End Time]. Use
these items when you want to specify a recording
time that goes past midnight, such as when
recording late into the night. Alternately, select a
duration for the recording (minimum of 15 min.) in
the [Duration] field.
2
Select the check boxes for the days of the week on
which to repeat the recording in [Repeat On].
Configure the Recording Mode
1
Click [Continuous Recording] in the recording mode
list and select the check box.
2
Configure the video format of the recorded image.
➀
➁
➂
➃
➄
➅
Note
• You cannot specify overlapping recording schedules on the
same camera.
• The time of the recording schedules is based on the Storage
Server clock. We recommend that you synchronize the clocks
on all the Storage Server you are using.
• If you set the operating system to automatically handle daylight
saving time, the time will be automatically adjusted on the first
and last days of the daylight saving time period.
➆
➀ [Aspect Ratio]
Specify the aspect ratio ([4:3]).
If you select [Not specified], the camera’s aspect ratio
setting is used for recording.
➁ [Resolution]
Set the [Aspect Ratio] to [4:3] to make this setting
available and specify the resolution ([160x120],
[320x240], [640x480] or [1280x960]).
If you select [Not Specified] for the [Resolution], the
camera’s resolution setting is used for recording.
Important
The size of the recording file increases as the resolution
becomes higher. Make sure there is sufficient hard disk space
available before specifying a higher resolution.
➂ [Video Format]
Fixed at [JPEG].
➃ [Maximum Frame Rate]
Specify the maximum frame rate (number of frames
recorded in one second) in the range from 0.1 to
5 frames per second (fps).
Important
The size of the recording file increases as the frame rate
becomes higher. Make sure there is sufficient hard disk space
available before specifying a higher frame rate.
5 -4
Record on a Regular Basis (Repeating Weekly Schedules)
Note
• It may not be possible to record at the specified frame rate or
recording may pause intermittently, depending on the load on
the Storage Server CPU or the hard disk.
• Recording may be performed at lower than the specified frame
rate, depending on the number of Viewers that are accessing
the camera, the load on the camera and Storage Server,
variation in network traffic, and the environment at the time of
recording.
5
➄ [Record audio if available]
This cannot be used with RM-Lite.
Setting a Recording Schedule
➅ [Advanced]
This cannot be used with RM-Lite.
➆ [Use the recording-mode stream]
This cannot be used with RM-Lite.
You cannot select [1280x960] for the [Resolution].
Save the Recording Schedule
1
Click [OK] to close the dialog box.
The schedule that was set is displayed in the
schedule area. The schedule becomes active as soon
as it is displayed in the schedule area.
5 -5
Edit a Recording Schedule
Editing a Recording Schedule
1
Select the recording schedule you want to edit in the
schedule area, and click [Edit].
2
Change the settings of the recording schedule.
For details on the settings in the [Edit Schedule Item]
dialog box, see “Set a Weekly Schedule” (P. 5-3).
3
Click [OK] to close the dialog box.
Delete a Recording Schedule
1
Select the schedule that you want to delete in the
schedule area.
2
Click [Delete].
The recording schedule is deleted.
5 -6
Chapter
6
Day-to-Day Operations
❏ Viewing live images
❏ Playing recordings
❏ Operating a camera
❏ Changing the layout of a video window
❏ Viewing and checking events
Flow of Operations
View recorded images
Record Now (P. 6-4)
Play a recording (P. 6-6)
Save a snapshot of the displayed image (P. 6-4)
Save part of a recording (P. 6-7)
Search for a recording (P. 6-5)
Zoom in/out of the Viewer display (P. 6-7)
View live images
Get control of a camera (P. 6-8)
Change the camera angle using a panorama image (P. 6-10)
Use the pan/tilt/zoom feature (P. 6-8)
Play back audio (P. 6-10)
Change the camera angle to a preset position (P. 6-9)
Compensate for dark regions in the image (P. 6-11)
Check events
View a live event (P. 6-12)
6 -2
Search for events (P. 6-12)
Viewer Features
➀
➆
➁
➇
6
Day-to-Day Operations
➈
➉
➂
➃
➄
➅
➀ Menu bar and toolbar
Access this software’s functions. The toolbar provides easy access to commonly used functions.
➁ Video window
Display live images from a camera or playback from a recording.
➂ [Panorama]
Change the camera angle using a panorama image.
➃ Viewing area
Place a video window in this area. You can display a grid for arranging video windows.
➄ Timeline
Display the time and date and events that have occurred. Click an event to play back the recording.
➅ Status bar
Displays Viewer status messages and CPU load.
➆ [Audio]
Listen to live audio and transmit audio using the camera’s two-way audio feature.
➇ [Camera Selector]
Display and select cameras added to the Storage Server Group.
➈ [Live Events Log]
Display events that occurred one hour or less after Viewer startup.
➉ [Camera Control]
Get control of the camera and change the camera angle.
6 -3
View Recorded Images
Record Now
Save a Snapshot of the Displayed Image
Start recording while watching the live image.
You can take a snapshot of the displayed image and save
the still image.
1
Click the video window displaying the image to be
recorded.
1
Click [Capture] on the toolbar to display the [Capture
Still Frame] dialog box.
2
Set the still image to be saved.
A white frame surrounding the selected video window
is displayed.
2
Click [Record Now] on the toolbar.
Recording starts. The upper part of the window is red
when recording. Recording stops automatically after
the set time period.
Important
• The maximum frame rate is 5 fps.
➀
➁
• The recording duration can be specified, however, the actual
duration may depend on various settings and on network
delay.
Note
The [Record Now] duration can be changed. For details, see
“Configure the Viewer Display and Operation Settings” (P. 4-3).
Hint
You can use [Record Now] to immediately record during a period
where there is no recording schedule set.
➂
➃
➀ [Display camera name] check box
Select this check box if you want to add the camera
name to the still image.
➁ [Display timestamp] check box
Select this check box if you want to add the time and
date to the lower right side of the saved still image.
(You cannot specify the position, font, size or color.)
➂ [Save As]
Save the preview image.
➃ [Cancel]
Closes the dialog box.
3
Click [Save As].
The [Save As] dialog box appears.
4
Specify the file name and storage location and click
[Save].
The file is saved in the specified location and the
focus is placed on the [Capture Still Frame] dialog
box again.
5
Click [Cancel] to close the dialog box.
If you use the on screen display feature of the camera, the
date and time on the snapshot may look different from the
date and time on the on screen display. In addition, we
recommend that you display characters on the upper right
or upper left of the snapshot.
6 -4
View Recorded Images
3
Important
Click an event in the event display area.
Events not associated with
the selected camera
Do not specify the Windows folder or the Program Files folder
on the system drive as the destination for the snapshot images.
Images cannot be saved to these folders.
Note
• You cannot operate the preview when displaying the [Capture
Still Frame] dialog box. You must operate the camera in
advance to set its angle. For details on operating the camera,
see “Operate the Camera” (P. 6-8).
• The .bmp file format is used for still images.
Images recorded using a recording schedule or [Record
Now] are displayed on the timeline as events. You can
search through the recordings to find the recording that
you want to play back.
Search by Changing the Timeline
6
Events displayed as film icons are images recording for
that period. Click the event to play the recording.
Events associated with the selected camera are also
displayed in the event display area. (The color of these
events represents their priority.) Click the event to play the
recording.
Note
• Events in the display area that not associated with the selected
camera (secondary events) are displayed as transparent. If
you do not select a camera, all events are displayed as
primary events (not transparent).
• Click [View] > [Timeline] to display/hide the timeline.
1
Click the video window.
2
Drag the timeline to display the time and date for the
recording.
➀
Events associated with
the selected camera
Day-to-Day Operations
Search for a Recording
Recording
➁
➂
➀ Slider
Zoom out or zoom in the timeline.
➁ Event display area
Displays events according to the times they occurred.
➂ Time bar
Drag the bar to scroll through the timeline.
Change the recording period displayed in the timeline
using the buttons at each end.
Button
Description
Go back one week
Go back one day
Go back 10% of the current time display
Go forward 10% of the current time display
Go forward one day
Go forward one week
6 -5
Search by Specifying the Time and Date
1
Click a video window.
2
Click [Jump] on the timeline to display the [Jump to
Time] dialog box.
Play a Recording
Use the playback controls on the timeline to control the
image displayed in the video window.
➀
➁
➂
➀ Playback controls
Controls for image playback.
Button
Description
Jump to previous event
3
Rewind (each click changes the speed in
sequence: 1x, 2x, 5x, 10x)
Specify the date and time and click [OK].
The playhead moves to the specified date and time
and the recorded video starts playing in the video
window.
Go to previous frame
/
Play/pause
Go to next frame
Search by Event
Click [Search] on the toolbar or [Search] on the timeline
toolbar to search for an event. Click the event in the
search results to play the associated recording. For
details, see “Play Back an Event” (P. 6-13).
Fast forward (each click changes the
speed in sequence: 2x, 5x, 10x)
Jump to next event
➁ Event display area
Move the playhead to the playback position.
➂ Playhead
Drag the playhead to change the playback position.
Video Window Display for Playback
➀
➁
➀ Playback indicator
Displays the playback status.
➁ Title bar
Displays the camera name and the time and date of the
recording.
6 -6
View Recorded Images
Important
• Because image data is being sent from the Storage Server to
the Viewer during playback, playback response and
smoothness depends on factors such as the amount of
network traffic.
• The time displayed on the timeline corresponds to the clock
on the computer where the Viewer is running.
Save Part of a Recording
You can save a part of a recording with a length of up to
one hour to a file.
1
Select a recording on the timeline.
2
Click [Extract] on the timeline to display the [Extract
Video] dialog box.
3
Specify the time range for the image to be extracted.
Note
• You can play recordings from more than one camera at the
same time.
Day-to-Day Operations
• You can display recordings from one camera in multiple video
windows. You can also play images recorded at different times
simultaneously.
6
➀
➁
• Click [Live] on the timeline toolbar during playback to return to
the live image.
➂
Zoom the Viewing Area In and Out
You can zoom the viewing area in and out in four levels.
1
On the toolbar, click [+] next to [Zoom].
Each click zooms further in on the viewing area.
➀ [From] and [To]
Specify the date and time of the start and end
positions.
➁ [Include audio if available] check box
This cannot be used with RM-Lite.
➂ [OK] and [Cancel]
Close the dialog box.
4
Click [OK].
The [Save As] dialog box appears.
5
Specify the file name and storage location and click
[Save].
Important
• You can extract an image from only one video window at a
time.
2
Click [-] to zoom out.
• Do not specify the Windows folder or the Program Files folder
on the system drive as the destination for the snapshot
images. Images cannot be saved to these folders.
Each click zooms further out of the viewing area.
Note
Important
The quality of the video image in the video window decreases
when you zoom in. To increase the image quality, increase the
resolution (P. 4-7).
Extracted images are saved in QuickTime format (with the .mov
file extension) and can be played with QuickTime Player (or other
players that support the .mov file format). If QuickTime Player is
not installed, you can download it for free from http://
www.apple.com/quicktime. We recommend that you use
QuickTime Player Version 6.5.1 or later.
Note
• Select [Actual Size] from the [View] menu to return the view to
the actual size.
• After selecting [Actual Size], you cannot zoom in further on the
viewing area.
6 -7
Operate the Camera
You can change the camera angle or adjust the image
quality for a camera in the video window.
Note
Get Control of a Camera
• If the camera is idle for one minute, camera control is released
automatically. A count down message is displayed 10 seconds
before the release. If you want to keep control of the camera,
click the video window.
Click the video window.
• If you want to move the video window while you are in control
of the camera, drag the title bar.
Click [Window] > [Camera Control] to display the
[Camera Control] dialog box.
• You can also control the camera while recording. If the camera
angle to be used during recording has been set, the camera
returns to the set position when the Viewer releases camera
control.
1
2
Use the Pan/Tilt/Zoom Feature
➀
➄
Use the Pan/Tilt/Zoom Feature in the [Camera
Control] Dialog Box
You can use the pan/tilt/zoom feature in the [Camera
Control] dialog box after getting control of the camera.
➁
➂
➃
➅
➀ Camera angle control buttons
Change the camera angle.
➁ [Select Preset]
Moves the camera to a preset position.
➀
➁
➂ [Panorama]
Displays the [Panorama] window. Move the camera to
a position using the panorama image.
➃ [Control]/[Release]
Get or release control of the camera.
➄ Zoom slider
Drag to change the zoom position. Drag up to move to
the telephoto position and down to move to the wideangle position.
➅ [Advanced]
Configure the camera’s advanced settings.
3
Click [Control].
You now have control of the camera for a certain
period.
6 -8
➀ Camera angle control buttons
Change the camera angle by clicking the buttons.
Click
in the center to point the camera to the front.
➁ Zoom slider
Drag the slider to change the zoom position.
Drag the slider up to move to the telephoto position
and down to the wide-angle position.
Operate the Camera
Use Pan/Tilt/Zoom from the Video Window
You can also use the pan/tilt/zoom feature from the video
window.
Change the Camera Angle to a Preset
Position
You can select a preset camera angle in the [Camera
Control] dialog box after getting control of a camera.
➀
➁
6
➁ Zoom slider
Change the zoom position using the slider or [+]/[-].
Click [+] or drag the slider up to move to the telephoto
position. Click [-] or drag the slider down to move to the
wide-angle position.
Pan/tilt/zoom is unavailable.
Day-to-Day Operations
➀ Display area
Drag on the area to change the camera angle. Click on
the area to move the camera angle to that point.
Note
You must first configure the presets on the camera before using
this feature. For details, see camera manual.
• Pan/tilt is unavailable.
• Zoom is unavailable when the camera’s digital zoom is
set to [Disable].
6 -9
Change the Camera Angle Using a
Panorama Image
Change the camera angle by specifying a position on a
panorama image.
1
Click [Panorama] in the [Camera Control] dialog box to
display the [Panorama] window.
2
Change the camera angle and zoom using the frame
displayed on the panorama image.
Play Back Audio
If the audio feature on the camera is used, you can play
audio using the audio panel or send audio using a
microphone.
1
Click [Window] > [Audio Panel].
The [Audio] panel appears.
➀
The frame is yellow when you have control of the
camera. Drag the frame to change its size and zoom
the camera in/out.
Drag the center of the frame to move the frame and
change the camera angle.
If you draw a rectangle anywhere on the panorama
image, the frame is redrawn at that location and the
camera angle and zoom change correspondingly.
The frame is blue when you do not have control of the
camera.
A panorama image is not available.
Note
You must first register a panorama image on the camera before
using this feature. For details, see the camera manual.
➁
➂
Options view
➃
➄
➅
➆
➀ [Listen to Audio]
Starts audio playback.
➁ [Use Microphone]
Starts audio transmission.
➂ Show options button
Displays the options for the [Audio] panel.
➃ [Play audio also while using microphone]
Select if you want to play audio even when using a
microphone.
➄ [Use silence detection to reduce network traffic]
Select if you want to detect silent segments when
sending audio. Decreases the amount of data
transmitted during silent segments to decrease the
load on network bandwidth.
➅ [Settings]
Displays the [Silence Detection Settings] dialog box.
➆ Hide options button
Hides the options of the [Audio] panel.
6 -10
Operate the Camera
Silence Detection Settings
Select the [Use silence detection to reduce network
traffic] check box on the [Audio] panel to set the silence
detection sensitivity.
Click [Settings] to display the [Silence Detection Settings]
dialog box and adjust the silence detection sensitivity.
6
Day-to-Day Operations
➀ [Use the default sensitivity settings]
Uses the default sensitivity for silence detection.
➁ [Set the sensitivity manually]
Drag the slider to set the detection sensitivity.
➂ [OK] and [Cancel]
Close the dialog box.
Compensate for Dark Regions in the Image
Use the viewer shade control to compensate for any dark
regions in the image.
1
Click the video window menu button to display the
menu.
2
Click [Viewer Shade Control] and select the amount of
shade from the submenu.
• [Off]
Disable the shade control.
• [Low]/[Medium]/[High]/[Very High]
Enable the shade control. View the video window and
select a compensation value that gives the appropriate
brightness.
Note
• You cannot apply this feature to more than one video window.
• The viewer shade control is a feature of the Viewer, not the
camera. Therefore, it can be used for both live image and
recorded image playback.
6 -11
Check Events
View a Live Event
Search for Events
You can display past events in the [Live Events Log]
window.
You can search past events and playback the event.
1
Click [Search] on the toolbar to display the [Event
Search] dialog box.
2
Specify the search criteria.
➀
➂
➄
When the Viewer starts, the [Live Events Log] window is
displayed, showing all events that occurred within the last
hour. The top row in the list shows item names. You can
sort events in the list by clicking in a column to specify
the item to sort by and the sorting order.
Important
A maximum of 200 events can be displayed in the [Live Events
Log] window.
Note
Click [Window] > [Live Events Log] to display the [Live Events
Log] window.
Event Icon Colors
Different colored icons are displayed for events,
depending on the priority.
Icon color
Priority
Red
Highest
Orange
High
Yellow
Medium
Light Green
Low
Green
Lowest
➁
➃
➅
➆
➀ [Description]
Enter the search criteria (event, camera, priority,
camera tag, or host name).
➁ [When]
Specify the period in which the target event occurred
([Today], [Last 2 Days], [This Week], [This Month],
[This Year], and [All Dates]).
➂ [Search], [Stop]
Start searching or stop a search in progress using
these buttons.
➃ [Advanced Search]
This cannot be used with RM-Lite.
➄ [Search Results]
Displays the search results.
➅ [Play Back Video]
Plays back the recording associated with the search
results.
➆ [Close]
Close this panel.
3
Click [Search] to start searching.
Note
To display the [Event Search] dialog box when the toolbar is
hidden, click [Search] on the timeline or click [Edit] > [Event
Search].
6 -12
Check Events
Play Back an Event
If a recording is associated with an event in the search
results, right-click the event and click [Play Back Video] to
play back the recording in the video window of the
corresponding camera.
If the video window is not displayed, clicking [Play Back
Video] will automatically display the window and start
playback.
Note
6
Click [Live] in the timeline toolbar after playing in the video
window to display the live view.
Day-to-Day Operations
6 -13
6 -14
Chapter
7
Operation and
Management
❏ Error and warning level events
❏ How to check the status of the Storage Server
❏ Disk space management
Storage Server Health Check
Events Indicating Errors or Warning Levels and Corresponding Actions
You can check events to determine if errors related to the Storage Server status have occurred.
When an event indicating an error or a warning level occurs, it is immediately displayed in the event panel or timeline. Take
the appropriate action for the event.
Event Type
Message
Corresponding Action
Low disk space
notification*1
Warning: Low disk space
Occurs when the free disk space
becomes less than the specified
valued, or the disk usage becomes
greater than the specified value. Data
may be deleted before the specified
number of storage days has elapsed.
Starts/stops file deletion
due to low disk space *1
Warning: Files deleted due to low
disk space
Occurs when the free disk space
becomes less than the threshold, or
the disk usage becomes greater than
the threshold.
Pauses/resumes
recording due to low disk
space *1
Recording Suspended
(Low Disk Space (<drive name>)
Occurs when the free disk space
becomes less than the limit level, or
the disk usage becomes greater than
the limit level.
Error connecting to the
camera
Error: Cannot Connect to
Camera
Occurs on an error when connecting
to the camera.
Check the network connection.
Error connecting to the
Storage Server
Error: Cannot Connect to the
Storage Server
Occurs on an error when connecting
to the Storage Server registered with
the Storage Server Group.
Check the network status.
Error connecting to the
Storage Server Group
Error: Cannot Connect to the
Storage Server Group
Occurs on an error when connecting
to the Storage Server Group.
Check the network status.
Change in the recording
frame rate
Recording Frame Rate reduced
due to high load issues
Indicates that the recording frame
rate has been changed due to
increased server load.
Check the recording mode
settings (P. 5-4).
*1 See “Disk Space Management (Important)” (P. 7-4).
7 -2
Event Explanation
Check the recording mode
settings (P. 5-4).
Storage Server Health Check
Status Bar
The status bar displays the Viewer processing status and
load. You can check CPU usage to determine the load on
your computer.
[Storage Servers] tab
This tab displays information (Storage Server Group
name, status, CPU usage, recording bit rate, and
playback bit rate) on the registered Storage Server.
System Information
7
Operation and Management
To get the detailed video processing status of the Storage
Server, click [Window] > [System Information] to display
the [System Information] dialog box. If system operation is
unstable or you are not able to record in the way you
intended to, refer to Chapter 1 and reconsider the system
configuration.
The [System Information] dialog box shows the status on
three different tabs.
[Users] tab
This tab displays the users logged into the Viewer and
related information (user group, host name (Viewer),
Viewer version, host name (Storage Server), Storage
Server Group).
[Cameras] tab
This tab displays recording settings and processing
information (status, specified frame rate, actual frame
rate, receiving bit rate, and recording bit rate) on the
registered cameras.
7 -3
Disk Space Management (Important)
The Storage Server monitors the disk space and responds
according to the amount of available space.
Disk Space Status
Explanation
Notification level indicating
that the remaining disk space
is low
You can specify a reference
value using [Low Disk Space
Warning Level] on the
[Recording Settings] tab in
the [Storage Server Group
Settings] dialog box.
Threshold level
The Storage Server calculates
a reference value based on
various conditions and
settings.
Limit level
Action When the Low Remaining Disk Space
Notification Level is Reached
The Storage Server issues an event when the disk space
available for recording (i.e. available space relative to the
maximum disk space used) goes below a certain level.
If [Maximum Disk Space Used] is not set, the drive
capacity of the disk that stores the recording file is
considered to be the maximum disk space.
Value for
[Maximum Disk
Space Used]
Low Remaining Disk Space Notification Level
Conditions and Calculation Method
If one of the following conditions is met, a low remaining
disk space notification level is indicated.
Condition 1: If the Storage Server disk space usage
exceeds the following values:
M x (100 - A)/100
(M: Value specified in [Maximum Disk Space
Used], A: Value specified in [Low Disk Space
Warning Level])
For example, if the value for [Maximum Disk Space
Used] is 100 GB and the value for [Low Disk
Space Warning Level] is 10%, the Storage Server
reaches the low remaining disk space notification
level when the remaining free disk space becomes
10 GB or less.
Condition 2: If the free disk space falls below the
following values:
Disk space x A/100
(A: Value specified in [Low Disk Space Warning
Level])
For example, if the disk space is 80 GB and the
value for [Low Disk Space Warning Level] is 10%,
the Storage Server reaches the low remaining disk
space notification level when the remaining free
disk space becomes 8 GB or less.
Note
Notification
level
If other applications use the same hard disk, you need to
consider condition 2. Even if the Storage Server uses a small
amount of disk space, it may reach the low remaining disk space
notification level according to condition 2 because other
applications have consumed a portion of the disk space.
Calculation Example
Disk Drive
7 -4
D Drive
E Drive
Disk Space
100 GB
200 GB
Free Disk Space
50 GB
200 GB
Value for
[Maximum Disk
Space Used]
40 GB
200 GB
Value for Low
Remaining Disk
Space Notification
Level
Condition 1:
40 GB x (100-10)/
100 = 36 GB
Condition 2:
100 GB x 10/100 =
10 GB
Condition 1:
200 GB x (100-10)/
100 = 180 GB
Condition 2:
200 GB x 10/100 =
20 GB
Disk Space Management (Important)
Action When the Threshold Level is Reached
Action When the Limit is Reached
Recording continues, however, the Storage Server starts
deleting recording files, beginning with old files, and
issues an event.
The Storage Server stops recording and issues an event
when the free disk space drops to this level.
The Storage Server resumes recording and issues an
event when the free disk space increases above this level
after deleting recording files.
Value for
[Maximum
Disk Space
Used]
Delete
oldest first
Threshold
level
Value for
[Maximum
Disk Space
Used]
Delete
oldest first
Delete
oldest first
7
Limit level
Note
Limit Level Conditions and Calculation Method
The limit level is considered reached when the amount of
free disk space drops below 64 MB. This level is fixed.
Operation and Management
• Recording files are deleted, even if they have not reached the
[Maximum Storage Period]. However, if the oldest file is
currently in use by the Viewer (for example for playback of
recorded video), it will not be deleted and the next oldest file
will be deleted instead. Deletion continues sequentially until
the free disk space exceeds the threshold again. For details on
saving files, see Chapter 8.
Important
• Normally, a recording file for which the minimum storage
period has not elapsed is excluded from deletion. Note that
such files are also deleted if the free disk space cannot reach
and exceed the threshold value by deleting all the other files.
• The threshold level is to protect against reaching the limit
level. We recommend that you take appropriate measures,
such as deleting unnecessary recording data, when the
event for the low remaining disk space notification level
occurs.
Threshold Level Conditions and Calculation Method
The threshold level is considered reached when the
amount of free disk space drops below the following level.
(Number of cameras + 1) x 64 MB
• Storing recordings that cause the threshold level to be
exceeded increases the load on the Storage Server and may
cause recording to be interrupt, resulting in incomplete
recordings. We strongly recommend that you operate the
Storage Server at below the threshold level.
• Note that the threshold level conditions may be met before
the low remaining disk space notification level conditions are
satisfied, depending on the circumstances. For example, a
large number of cameras with limited disk capacity may
cause a value for (Numbers of cameras +1) x 64 MB to be
larger than the value of disk capacity x low free disk space
notification setting/100.
7 -5
7 -6
Chapter
8
Backup
❏ Types of backup target files and their destinations
❏ Restoring a recording file
Backing up data
Destinations of the Backup Files
The data that is saved during a backup consists of
recording data, event data, and configuration files. The
data is saved to the folders described below.
Recording Data
<Destination drive>:\Canon-NVR\videofiles
The following recording data file is backed up:
Event Data
<Destination drive>:\Canon-NVR\eventfiles
The following event data file is backed up:
NVR3_EVENT_ xxxxxxxx _ yyyymmdd _hhmmss.edt
Camera ID Year, month
Time
and day when
recording
started
Note
NVR3_MEDIA_ xxxxxxxx _ yyyymmdd _ hhmmss .edt
Camera ID Year, month
Time
and day the
recording
started
Greenwich Mean Time is used for the time added to the file name
of the recording data.
Images being recorded are saved to a temporary file on
the hard disk. By default, a recording file is created and
saved on the destination drive when the temporary file
size reaches 1 GB.
The settings for the Storage Server and the Viewer are
saved in the following folders on the computer where the
program is installed. You must back up all of these folders
to completely back up the configuration files.
Note
• Greenwich Mean Time is used for the time added to the file
name of the recording data.
• This software uses lossy compression for the recording data.
You do not need to compress the recording files further using a
tape drive or other devices.
Temporary Files
The following is a temporary file, before it is made into a
recording data file by the system. This file cannot be
backed up using the standard backup method.
NVR3_UNINDEXED_MEDIA_xxxxxxxx_ yyyymmdd _hhmmss.edt
Camera ID Year, month and
Time
day when
recording started
Configuration Files
Configuration file path
<System drive>:\ProgramData\Canon\WebView\NVR30\
<System drive>:\Users\<user name>\AppData\Local\
Canon\WebView\NVR30\
Note
• The configuration file names are not displayed unless [Show
hidden files and folders] is selected in the [View] tab of
Windows Explorer [Folder Options].
• You cannot use the shadow backup feature.
Notes on Backup
• You do not need to stop recording to back up recorded data
that is complete. However, the frame rate may change
because of increased disk I/O load and/or CPU load.
• If you want to restore a backed-up recording file, the computer
you restore the backup to must have the same drive
configuration as the original Storage Server. For example, if
you have a C drive for the original Storage Server system and a
D drive for recorded data, you will also need a C and a D drive
for the Storage Server you use when you restore the backup.
Determine the hard disk capacity based on the volume of data
to be restored.
8 -2
How to Restore a Backup
Restoring from Backup Data
Stopping the Storage Server
Use the following procedure to restore a Storage Server
from backup data:
The Storage Server runs in the background as a Windows
service. When you restore backup data, you must follow
the following steps to temporarily stop the Storage Server.
1
Prepare a new Storage Server for the restore.
Click [Start] > [Control Panel].
2
Install this software.
2
Click [System and Security].
3
Stop the Storage Server.
3
Click [Administrative Tools].
4
Double-click [Services].
5
Double-click [RM-Lite Storage Server] to display [RM
Storage Server Properties].
6
Click [Stop].
7
Click [OK] to close the properties.
The new Storage Server must have the same folder
hierarchy as the original Storage Server.
See “Stopping the Storage Server”(P. 8-3) for details
on how to stop the Storage Server.
4
Restore the configuration file for this software to its
original location.
The following folder is used by default:
Configuration file path
<System drive>:\ProgramData\Canon\WebView\
NVR30\
<System drive>:\Users\<user name>\AppData\Local\
Canon\WebView\NVR30\
5
Restore the recording files to their original location.
The following folder is used by default:
<Destination drive>:\Canon-NVR\videofiles\
6
8
Backup
1
Note
To restart the Storage Server, follow the same steps and click
[Start] in step 6.
Restore the event files to their original location.
The following folder is used by default:
<Destination drive>:\Canon-NVR\eventfiles\
7
Start the Storage Server.
8
Make sure that recording is performed correctly. Also
make sure that the restored recording data plays back
correctly.
Important
If the [Ensure video is kept for upto] option is set on the
[Servers] tab in the [Settings] dialog box, any restored
recording data that exceeds the specified storage period will
be deleted when the Storage Server starts.
8 -3
8 -4
Chapter
9
Troubleshooting
❏ Actions required when recording errors occur
❏ Solutions when Viewer problems occur
❏ Error messages
Actions Required When Recording Errors Occur
When a recording error occurs (e.g., data is missing) during playback, you can troubleshoot the cause by checking the
information in the event log and the Storage Server log file.
Log
Event
Cause
Action
Storage Server
Error: Cannot Connect to Camera
CameraServer <host name>
disconnected(<error
information>)
A network error may have
occurred. Look for the cause of
the error by checking the
Winsock error code recorded in
the Storage Server log (P. 9-7).
Check the network (hub, cables,
etc.) for any problems and make
sure that the camera is
operating normally.
Recording Frame Rate reduced
due to high load issues
—
• The effective recording rate is
excessively low (below 50%).
• The load on the Storage
Server CPU may be high.
• Modify the recording
schedule.
• Check the current CPU usage
and terminate any
applications that are a heavy
load on the CPU.
Recording Suspended
(Low Disk Space (<drive name>))
—
The load from writing recorded
data to the hard disk may be too
high.
Shorten the maximum storage
period or consider adding a
hard disk. Additionally, try to
modify the recording schedule.
Solutions When Viewer Problems Occur
If you encounter problems when you use the Viewer, refer to the following solutions:
Viewer and Video windows
Problem
9 -2
Solution
I cannot use the pan, tilt or zoom feature of the
camera in the video window.
• Double-click the video window or click [Control] on the [Camera Control] panel
(P. 6-8).
• If images are being played (the title bar of the video window is gray), you cannot
operate the camera. Click [Live] on the timeline and get control of the camera.
When I click a video window to display the
[Video Window] menu, [Record Now] is gray
(unavailable). But, I can use the feature in
another video window.
Display [<camera name>Properties] for the video window and check on the
[Advanced] tab whether the camera is disabled. If the camera is disabled, click
[Enable Camera]. (P. 3-10).
When I try to use layouts created by other users,
the [Layouts] menu is not displayed. I cannot
select a layout.
Layouts saved in the [User Layouts] folder cannot be seen by other users.
To allow all users to access layouts created by a user, the layouts must be created by
a user with administrator permissions and must be saved in the [Shared Layouts]
folder (P. 4-11).
The quality of live or recorded images displayed
in the video window is not good.
The quality of live or recorded images cannot be changed. The video quality may
depend on the camera settings of the video window. The video quality for the camera
can be increased using the settings on the camera.
None of the cameras will record.
• Is the network cable for the server properly connected?
• Has there been a power failure?
• If link lamps on the hub (switching hub) and on the network connector on the
server do not light, there may be a defect in the server’s cable, hub (switch), or
network connector.
Some cameras do not record.
• Is the power and the network connection for the cameras working?
• Do the cameras reply to a ping?
• Can you view live images on the Viewer for the cameras?
Solutions When Viewer Problems Occur
Problem
Solution
I cannot connect to the Storage Server from the
Viewer.
•
•
•
•
•
Are the login user name and password correct?
Is the network connection between the server and the Viewer working?
Is the IP address of the destination server correct?
Does the server reply to a ping from the Viewer computer?
Is TCP port 80 being used by another application?
I cannot view live images.
• If “Could not connect to camera” is displayed in the video window, check the
camera’s power supply and network connection.
• If a message is displayed in the timeline of the Viewer indicating that an error
occurred when connecting to the camera, check the camera’s power supply and
network connection.
• If the screen goes blank when the layout is switched, but an image is displayed
after a few seconds, the number of cameras or the live frame rate setting exceeds
the performance capabilities of your computer. Reduce the number of cameras, or
decrease the frame rate.
The Storage Server slows down or it takes longer
to perform various configuration changes, such
as registering cameras or recording schedules
from the Viewer.
If the Storage Server is running Windows Vista, use Windows Server 2008 instead.
The Viewer slows down.
• The performance of the Viewer depends largely on the specification of your CPU
and graphics card. When the Viewer seems to slow down, try to reduce the
number of cameras in the Viewer or decrease the live frame rate.
• If the video quality or resolution setting for the cameras is high, the large amount of
image data may cause processing to take longer. Try adjusting the video quality
and video size settings on the camera.
9
Troubleshooting
Timeline
Problem
Nothing happens when I click any of the
playback controls.
Solution
• Move the playhead off of the [Live] position.
• You must select a video window before you can play back images. In addition, the
previous frame and next frame buttons (P. 6-6) and the [Extract] button (P. 6-7) are
enabled only when one video window is selected.
[Extract Video]
Problem
I tried to save a recording, but an error message
is displayed telling me that no video can be
found in the selected timeline segment.
Solution
Make sure that a recorded image is included in the selected portion of the timeline
(P. 6-5).
Recording
Problem
Solution
The [Record Now] feature cannot be used.
Make sure that the camera is not disabled on the [Advanced] tab in [<camera name>
Properties]. If the camera is disabled, click [Enable Camera]. (P. 3-10).
The amount of Storage Server disk space usage
is much higher than the calculated level (P. 1-7,
P. 7-4) and free disk space is low.
When the video quality setting of the camera is high, the amount of data per frame is
large. In addition, if you are using anti-virus software, the software records
communication between the Storage Servers and the cameras and the size of that log
may reach several gigabytes. Change the anti-virus software settings to exclude the
Storage Servers from the target list.
9 -3
Connection Problems
Problem
Solution
The screen goes blank and the “Cannot connect
to camera” message is displayed.
A network error occurred, the camera was disconnected from the network, or the
camera power was turned off.
Error Messages
Messages Displayed in the Viewer
Error Messages in the Video Window
Message
Video window
9 -4
Cause
Connecting to camera.
The Viewer is in the process of connecting to the
camera.
Cannot connect to camera.
The Viewer cannot connect to the camera and live
images cannot be displayed.
Getting camera control.
Displayed after the user tries to get camera control.
Cannot get camera control.
Another user with higher priority is already
controlling the camera when you try to get camera
control.
Control will be lost in <count down> seconds.
Displayed if the camera is idle for one minute;
starts a countdown. The countdown starts at 10
and counts down one second at a time until it
reaches zero.
Camera control lost.
A timeout occurred while the Viewer was
controlling the camera or another user with higher
priority requested camera control. Displayed for
three seconds.
No recorded video.
This message is displayed when playing back a
recording if there is no recorded image at the
current playhead position.
Cannot Connect to the Storage Server.
Displayed when you cannot connect to the Storage
Server to play back a recording.
Please wait.
Displayed when it may take some time to display
an MPEG-4 or H.264 live image.
Could not connect to send audio.
A connection for sending audio to the camera
could not be established, so audio cannot be sent
to the camera.
Could not connect to receive audio.
A connection for receiving audio from the camera
could not be established, so audio cannot be
received from the camera and played back.
Error Messages
Warning Messages in the Viewer
Message
User management
Configuration
Cause
The user name already exists.
Tried adding a user to the Storage Server with a
name that already exists.
Unable to change the user name. The user '<user
name>' aleady exists.
Tried changing a user name on the Storage Server
to a name that already exists.
Please ensure that the password and confirmation
match exactly.
The password in the [Confirm Password] field,
does not match the user password.
Are you sure you want to remove this user?
Tried to delete a user.
The value for maximum must be greater than or
equal to 1 day.
Tried to specify less than one day for the maximum
storage period.
Confirmation Messages in the Viewer
Message
Cause
Adding and editing a camera
Are you sure you want to remove the camera
'<camera name>'? If the camera is removed, you
will not be able to play back recorded video.
Tried to delete the camera.
Managing a layout
This will replace an existing layout of the same
name. Are you sure you want to continue?
Tried to save an open layout to a folder that
contains a layout with the same name. Alternately,
tried to move or copy a layout to a folder that
contains a layout with the same name.
Are you sure you want to delete the selected layout
'<layout name>'?
Tried to delete a layout.
Are you sure you want to delete the folder '<folder
name>'; including all layouts and layout
sequences inside it?
Tried to delete a layout folder.
9
Troubleshooting
Error Messages in the Viewer
Message
Recording schedules
Cause
This schedule item overlaps a previously
scheduled item. Please check your settings and try
again.
Recording schedules overlap.
Recording schedule items must be at least 15
minutes long. Please check your settings and try
again.
Tried to set a schedule with a period shorter than
15 minutes.
Recording schedule items cannot be created for
the following cameras because of a clash with
existing schedules: <camera name>
Tried to drag a recording schedule window to add
multiple recording schedules, however, one
camera has a conflicting schedule.
Failed to create multiple recording schedule items.
All selected cameras have recording schedule
items that clash with a schedule time range.
Tried to add a recording schedule to multiple
cameras using the [Edit Schedule Item] dialog
box, but the schedule time range clashes with
schedules that are already set on the cameras.
At least one day must be selected. Please check
your settings and try again.
[OK] was clicked without specifying the day of the
week.
At least one recording mode must be selected.
Please check your settings and try again.
[OK] was clicked without selecting the check box
for a recording mode.
9 -5
Message
Cause
Communication with the SSG “<storage server
group name>” has failed. To ensure that event and
video data are available from this SSG, identify and
resolve the problem and then press [OK] to
reconnect to the SSG. If you press [Cancel], then
some event data including all future events for
cameras recording to this SSG will not be
available.
A problem occurred connecting to the Storage
Server to display a Viewer window. When multiple
Storage Servers are registered, a window may be
displayed for each server.
Do you want to save changes to this layout?
Tried to close a layout that was modified.
Cannot save it in this folder.
The Windows folder or the Program Files folder
was specified as the destination folder for
snapshots.
Adding and editing a camera
Could not connect to camera. Please verify that the
host name, port number, user name, and
password are correct.
Could not connect to the camera.
Saving the specified image
The length of the extracted video must not exceed
1 hour.
Tried to make the time longer than 1 hour.
Unable to extract video. There is no video data in
the specified timeframe.
Could not save an image because there was no
recorded image in the selected segment.
Cannot save it in this folder.
The Windows folder or the Program Files folder
was specified as the destination folder for a *.mov
file.
This layout cannot be saved using the same name
as an open layout. Please try again using a
different name.
A layout with the same name exists in the
destination, and the name is the same as the layout
currently in use.
You cannot move the folder '<folder name>'
because it contains an open layout.
Tried to move a folder that contains an open layout
to another folder.
You cannot move the layout '<layout name>'
because it is the current layout.
Tried to move the current layout to another folder.
You cannot delete the layout '<layout name>'
because it is the current layout.
Tried to delete the current layout.
You cannot delete the folder '<folder name>'
because it contains the current layout.
Tried to delete the folder containing the current
layout.
Unable to change the layout folder name. The
name '<folder name>' already exists.
Tried to change the name of the folder to the name
that already exists.
Viewer window
Managing a layout
9 -6
Error Messages
Messages Recorded in the Log Files
Log File Locations
The Storage Server log files are saved in the following folder on the computer where the server is installed.
<System drive>:\ProgramData\Canon\WebView\NVR30\Log\
Types of Log Files
File Name
Explanation
storage_server_log_0.csv
Log file for the Storage Server
viewer_log_0.csv
Log file for the Viewer
Error Message List
Messages shown below are recorded in the log file when an error occurs.
Message
Explanation
A temporary file for the configuration file was found, but could not
be renamed.
No configuration file found.
Could not find the Storage Server configuration file.
Cannot delete old config '<file name>', error code <win32 error>
Could not save the configuration.
Cannot rename config from '<temporary file>' to
'storage_server.cfg', error code <win32 error>
Could not save the configuration.
Cannot write to config '{storage server name}
Could not save the configuration.
Configuration file failed consistency check, exiting...
Inconsistency was found in the configuration file. (This occurs
when the configuration file is rewritten directly.)
Error: Local machine not in the config.
Could not find the IP address or host name of the Storage Server in
the configuration file.
Failed to bind to listen port {port number}
The Storage Server could not bind to the port.
Failed to setsockopt for conditional accept()
Could not apply a socket option to the socket for group
communication.
LS_start_service(apache) failed.
Apache startup failed.
Unable to obtain file size on disk, GetFileAttributesEx failed with
error=%d for file %S
Could not determine the size of the media or event file.
CameraServer <host name> disconnected(<error information>)
Could not connect to the camera.
9
Troubleshooting
Cannot rename storage_server.cfg.tmp to storage_server.cfg file
Error Codes
Winsock Error Codes
Code
Error Message
Possible Cause
10038
An operation was attempted on something that is not a
socket.
This may occasionally occur. No action is required.
10048
Only one usage of each socket address (protocol/network
address/port) is normally permitted.
All communication resources are in use.
10050
A socket operation encountered a dead network.
Occurs when the computer recognizes that the network is
down because the router or hub closest to the computer is
powered off. Normally, this cannot be recognized, therefore
this error is rarely reported.
9 -7
Code
Error Message
Possible Cause
10051
A socket operation was attempted to an unreachable
network.
Occurs when other network devices recognize that the
network is down because the router or hub is powered off.
Normally, this cannot be recognized, therefore this error is
rarely reported.
10054
An existing connection was forcibly closed by the remote
host.
The connection was aborted by the camera due to a camera
restart or other causes. This may occur when the camera is
restarted using the restart button on the configuration page
provided by the camera software. However, this rarely
occurs.
10060
A connection attempt failed because the connected party
did not properly respond after a period of time, or
established connection failed because connected host has
failed to respond.
A timeout occurred in the TCP connection with the camera.
(This occurs when the camera is powered off.)
10061
No connection could be made because the target machine
actively refused it.
The camera rejected the TCP connection. (This occurs when
the port number is incorrect or another cause.)
10064
A socket operation failed because the destination host was
down.
Occurs when the camera is powered off. (Normally, 10060
occurs.)
10065
A socket operation was attempted to an unreachable host.
There is no route for connecting to the camera. (This may
also occur when there is a failure in the network cable
connected to the computer or hub.)
10091
WSAStartup cannot function at this time because the
underlying system it uses to provide network services is
currently unavailable.
There is a failure on the computer’s network adapter.
11001
No such host is known.
The host name could not be resolved in the DNS.
11004
The requested name is valid, but no data of the requested
type was found.
The host name could not be resolved in the DNS.
HTTP Error Codes
Code
Error Message
Possible Cause
401
Unauthorized
The user authentication for connecting to the camera is
incorrect.
403
Forbidden
A connection cannot be established due to an IP address
restriction on the camera. (This may also be returned by a
proxy server.)
500
Internal Server Error
Occurs when the HTTP server is running but the Storage
Server is not started. It may also occur during normal
operation if the camera is restarted.
503
Service Unavailable
Occurs when the camera is temporarily unable to process
requests due to server overload (excessive requests from
multiple clients), or an uncompleted start-up process on the
camera, or other reasons.
wininet Error Codes
Code
9 -8
Error Message
Possible Cause
12002
The request has timed out.
A request timeout occurred. Indicates that the connection or
request transmission failed.
12005
The URL is invalid.
The URL is incorrect. (Normally, this does not occur,
however, it may occur when an attempt is made to connect
to an unsupported camera.)
12007
The server name could not be resolved.
The host name could not be resolved. (This error is
generated when a host name that is not registered in the
DNS is specified or when a problem occurred in
communication with the DNS itself.)
Code
Error Message
Possible Cause
12017
The operation was canceled, usually because the handle on
which the request was operating was closed before the
operation completed.
The communication was canceled. (This error does not
indicate a problem and may be generated during normal
operation.)
12029
The attempt to connect to the server failed.
The connection to the camera failed. (Normally, 12002 is
generated.)
12030
The connection with the server has been terminated.
The connection to the camera has been aborted. (The
disconnect process itself is recorded when it executes
normally.)
12031
The connection with the server has been reset.
The connection to the camera has been reset.
Event Information
Event Information
Displayed Message
[Manual Recording Started] or [Manual Recording Stopped]
Recording
[Recording Started] or [Recording Stopped]
Change in the recording frame rate
[Recording Frame Rate reduced due to high load issues] or [Reverted to the
Recording Frame Rate due to resolution of high load issues]
Low Disk Space Warning
[Warning: Files deleted due to low disk space]
Delete recorded files (when disk space is insufficient)
[Delete recorded files (when disk space is insufficient) started] or [Delete
recorded files (when disk space is insufficient) stopped]
Delete recorded files (when disk space is low)
[Delete recorded files (when disk space is low) started] or [Delete recorded files
(when disk space is low) stopped]
Suspending/Resuming Recording
[Recording Suspended] or [Fixed: Recording Resumed]
Camera Communications Error
[Error: Cannot Connect to Camera] or [Connection to Camera Fixed]
Storage Server Starting/Stopping
[Storage Server Started] or [Storage Server Stopped]
9
Troubleshooting
Record Now
9 -9
9 -10
Appendix
Create a Shortcut Icon for Starting the Viewer
You can configure the way the Viewer starts up, for
example, to have it bypass the login screen with the user
name and password (P. 3-3, P. 3-4) by creating a shortcut
icon that specifies Viewer startup options.
2
Click [OK].
3
Right-click the shortcut icon that was created on the
desktop and select [Properties].
4
On the [Shortcut] tab, add a startup option to [Target].
Important
• You cannot reconfigure the shortcut icon that is automatically
created on your desktop when you install this software.
• The login password can be easily viewed in the properties of
the shortcut icon. Make sure to take sufficient security
measures when using this feature.
1
Startup Options
Description
-group nvr://
<username>:<password>@<
storage server group name>
The information in the options
is used to connect to the
server group and start the
Viewer, without displaying the
[Connect to Storage Server
Group] dialog box on startup.
Right-click [Viewer.exe] in the installation folder and
click [Create shortcut].
[Viewer.exe] is located in the following folder by
default:
<System drive>:\Program Files\Canon\WebView\NVR
A dialog box asking whether to create a shortcut on
the desktop is displayed.
5
Click [OK] to close the dialog box.
Note
<System drive> corresponds to the drive containing the system
files of the operating system. If the operating system is installed
on the C drive, the system drive is the C drive.
Camera Maintenance
About the Latest Camera Firmware
You can find the latest firmware and configuration backup
and restore tools for cameras that are supported by this
program at the Canon Web site.
Update the Firmware
To update the firmware for your camera, you must use the
tool that is specific to your camera model.
10 -2
1
Download the latest firmware with the firmware update
tool, and download the configuration backup and
restore tools.
2
Back up the camera configuration using the
configuration backup tool.
3
Update the firmware using the firmware update tool.
Note
If the firmware update fails, restore the configuration using the
configuration restore tool.
How to Check the Version
The steps below explain how to check the version of this
software.
Checking the version of the Storage Server
1
Click the Start button > [Control Panel] > [Uninstall a
program] or [Add or Remove Programs].
2
Check the version of the software in the displayed list.
Checking the version of the Viewer
1
Start the Viewer.
2
Click [Help] > [About].
3
Check the version of the software on the displayed
dialog box.
Functional Limitations for MPEG-4 and H.264 formats
Appendix
The VB-C60, VB-C500D, and VB-C500VD support
MPEG-4 format, while the VB-M40, VB-M600D, VB-C600V
and VB-C700F support the H.264 format. Note that the
following limitations apply.
Live display
• The following video window settings are disabled, and
the frame rate settings on the camera are enabled.
– Maximum Frame Rate
– Auto Adjust Frame Rate
• Synchronization of audio and video is not guaranteed.
10 -3
Index
A
actions required when recording errors occur.............. 9-2
Aperture Mode............................................................... 4-9
audio
play back ............................................................. 6-10
sound settings ....................................................... 2-5
audio panel...........................................................6-3, 6-10
B
backup........................................................................... 8-2
restore.................................................................... 8-3
C
Camera Control ......................................................6-3, 6-8
Camera Selector.....................................................4-5, 6-3
cameras
adding ................................................................... 3-8
advanced settings ................................................. 4-7
control .............................................................6-3, 6-8
editing information ............................................... 3-10
maintenance ........................................................ 10-2
properties ............................................................ 3-10
removing .............................................................. 3-11
searching ............................................................... 3-9
selecting ................................................................ 4-5
settings .................................................................. 4-5
supported .............................................................. 1-4
thumbnail ............................................................. 3-11
capturing a still image ................................................... 6-4
compatibility .................................................................. 1-5
compensation .........................................................4-8, 4-9
E
event notification............................................................ 4-4
events
checking .............................................................. 6-12
errors and warnings............................................... 7-2
searching ............................................................. 6-12
external outputs ........................................................... 4-10
F
firmware ....................................................................... 10-2
focus ............................................................................ 4-10
focus and speed.......................................................... 4-10
format
video .............................................................5-4, 10-3
video window ......................................................... 4-7
10 -4
frame rate ............................................................... 4-3, 5-4
full screen display ......................................................... 4-7
G
Gain ............................................................................... 4-9
grid .............................................................................. 4-11
H
H.264.................................................................... 4-7, 10-3
I
image quality................................................................. 1-7
image size .............................................................. 1-7, 4-6
images
adjustment............................................................. 4-8
compensate for dark regions .............................. 6-11
installation ..................................................................... 2-2
how to install the software ..................................... 2-2
settings after installation........................................ 2-4
Iris.................................................................................. 4-9
J
JPEG ...................................................................... 1-8, 4-7
L
layouts ......................................................................... 4-11
creating ............................................................... 4-11
organizing............................................................ 4-12
saving .................................................................. 4-12
shared ................................................................. 4-12
switching ............................................................. 4-12
live events ................................................................... 6-12
log ................................................................ 6-3, 6-12
live image ............................................................... 6-4, 6-7
log files .......................................................................... 9-7
M
maintenance, camera ................................................. 10-2
maximum disk space used ........................................... 3-6
menu bar ....................................................................... 6-3
messages
error ....................................................................... 9-4
log files .................................................................. 9-7
MPEG-4 ................................................................ 4-7, 10-3
Index
N
network bandwidth........................................................ 1-9
O
operating environment .................................................. 1-2
P
pan ................................................................ 4-10, 6-8, 6-9
panorama ...................................................................... 6-3
image .................................................................. 6-10
playback........................................................................ 6-6
indicator ................................................................ 6-6
playing back........................................................ 6-13
presets .......................................................................... 6-9
preview................................................................. 3-11, 6-4
priority
notification message settings................................ 4-4
Storage Servers
capacity ................................................................. 1-7
license.................................................................... 1-4
settings .................................................................. 3-6
settings flow ........................................................... 3-2
stopping................................................................. 8-3
supported cameras ....................................................... 1-4
system configuration...................................................... 1-6
system design................................................................ 1-7
system information......................................................... 7-3
system requirements ..................................................... 1-2
T
thumbnails ................................................................... 3-11
tilt .................................................................. 4-10, 6-8, 6-9
timeline....................................................................6-3, 6-5
toolbar............................................................................ 6-3
U
R
S
saving a part of a recording.......................................... 6-7
searching
events.................................................................. 6-12
for recordings........................................................ 6-5
settings
viewer .................................................................... 4-3
shared layouts............................................................. 4-12
shortcut icon................................................................ 10-2
shutter speed ......................................................... 4-8, 4-9
silence detection ......................................................... 6-10
settings................................................................ 6-11
starting .......................................................................... 3-3
startup options ............................................................ 10-2
status bar ............................................................... 6-3, 7-3
still image ...................................................................... 6-4
storage period............................................................... 3-6
Storage Server Groups
changing the name ............................................... 3-5
connecting ............................................................ 3-3
settings.................................................................. 3-5
Appendix
Record Now .................................................................. 6-4
recording
manually ................................................................ 6-4
recording mode
settings.................................................................. 5-4
recording schedule
editing ................................................................... 5-6
settings flow .......................................................... 5-2
Weekly................................................................... 5-3
resolution, video window............................................... 4-7
updating.......................................................................10-2
user account control ...................................................... 2-5
user groups..................................................................3-12
user layouts..................................................................4-12
users ............................................................................3-12
adding..................................................................3-13
changing the information .....................................3-13
removing ..............................................................3-14
V
version .........................................................................10-3
video format ............................................................4-7, 5-4
video window ..........................................................4-5, 6-3
controlling the camera ........................................... 6-9
display settings...................................................... 4-6
layout ................................................................... 4-11
menu button........................................................... 4-6
moving .................................................................4-12
placing .................................................................4-11
playback ................................................................ 6-6
Viewer
features .................................................................. 6-3
license.................................................................... 1-4
settings .................................................................. 4-3
settings flow ........................................................... 4-2
shortcut icon ........................................................ 10-2
starting ................................................................... 3-3
viewer shade control....................................................6-11
viewing area................................................................... 6-3
zoom ...................................................................... 6-7
VK-64/16 ........................................................................ 1-5
10 -5
W
Weekly schedule ........................................................... 5-3
settings .................................................................. 5-3
White Balance................................................................ 4-9
Z
zoom ..............................................................4-10, 6-8, 6-9
zooming in/out ............................................................... 6-7
10 -6
Index
Appendix
10 -7
CANON INC.
CANON EUROPA N.V.
30-2, Shimomaruko 3-chome, Ohta-ku, Tokyo 146-8501,
Japan
Bovenkerkerweg 59-61, P.O. Box 2262, 1185 XB
Amstelveen, The Netherlands
CANON U.S.A.,INC.
CANON EUROPE LTD.
One Canon Plaza Lake Success, NY 11042-1198 USA
• If you have any questions, call the CANON U.S.A.
Information Center toll-free at
1-800-828-4040 (U.S.A. only)
3 The Square, Stockley Park, Uxbridge, Middlesex,
UB11 1ET, United Kingdom
CANON CANADA INC. NATIONAL
HEADQUARTERS
CANON FRANCE SAS
17, quai du Président Paul Doumer, 92414 Courbevoie,
France
CANON (UK) LTD.
6390 Dixie Road, Mississauga, Ontario L5T 1P7
Woodhatch, Reigate, Surrey RH2 8BF, United Kingdom
CANON CANADA INC. CALGARY
CANON DEUTSCHLAND GmbH
2828, 16th Street, N.E, Calgary, Alberta T2E 7K7
Europark Fichtenhain A 10, 47807 Krefeld, Germany
CANON CANADA INC. MONTRÉAL
8801 Trans Canada Hwy, St. Laurent Québec H4S 1Z6
• If you have any questions, call the CANON CANADA
Customer Information Centre toll-free at
1-800-OK-CANON (652-2666) (Canada only)
CANON ITALIA S.p.A.
Via Milano, 8, 20097, San Donato Milanese (MI), Italy
CANON (Schweiz) A.G.
Industriestrasse 12, 8305 Dietlikon, Switzerland
CANON MEXICANA, S. DE R.L.DE C.V.
CANON BELGIUM N.V./S.A
Boulevard Manuel Avila Camacho, No. 138 PB, Pisos 15,
16 y 17
Col Lomas de Chapultepec C.P. 11000 México, D.F.
México
Berkenlaan 3, 1831 Diegem (Mechelen), Belgium
CANON SINGAPORE PTE. LTD.
CANON ESPAÑA,S.A.
CANON AUSTRIA GmbH
Oberlaaer Strasse 233, A-1100 Wien, Austria
1 HarbourFront Avenue, #04-01, Keppel Bay Tower
Singapore 098632
Avda. de Europa, 6 Alcobendas, 28108 Madrid, Spain
CANON HONGKONG CO., LTD.
Gustav III:s, Boulevard 26, 169 88 Solna, Sweden
19/F., The Metropolis Tower, 10 Metropolis Drive,
Hunghom, Kowloon, Hong Kong
CANON SVENSKA AB
CANON NORGE A/S
Hallagerbakken 110, P.O. Box 33, Holmlia, N-1201 Oslo,
Norway
CANON AUSTRALIA PTY.LTD.
1 Thomas Holt Drive, North Ryde, Sydney, N.S.W. 2113,
Australia
CANON OY
Huopalahdentie 24, P.O. Box 1, FIN-00351 Helsinki,
Finland
CANON DANMARK A/S
Knud Hoejgaards Vej 1, DK-2860, Soeborg, Denmark
PUB.YT1-1619-002
© CANON INC. 2011