1
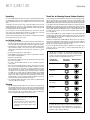
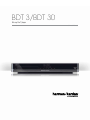
BDT 3/BDT 30
Blu-ray Disc™ player
Owner’s Manual
BDT 3/BDT 30
IMPORTANT safety Instructions
Safety Instructions
3
Unpacking5
Installation Location
5
Cleaning5
Thank You for Choosing Harman Kardon® PRODUCTS5
BDT 3/BDT 30 Features
6
Supplied Accessories
6
Front-Panel Controls
7
Rear-Panel Connectors
8
Remote Control Functions
8
Connecting the Player
10
Preparing the Remote Control
10
SETTING UP THE PLAYER
11
Playing Discs
14
Playing Files from USB Devices and CD Data Discs
16
Using Playlists
18
Troubleshooting19
Specifications20
2
BDT 3/BDT 30
Important Safety Instructions
1.
2.
3.
4.
5.
6.
7.
8.
9.
Read these instructions.
Keep these instructions.
Heed all warnings.
Follow all instructions.
Do not use this apparatus near water.
Clean only with a dry cloth.
Do not block any ventilation openings. Install in accordance with the manufacturer’s instructions.
Do not install near any heat sources such as radiators, heat registers, stoves or other apparatus (including amplifiers) that produce heat.
Do not defeat the safety purpose of the polarized or grounding-type plug. A polarized plug has two blades with one wider than the other. A grounding-type
plug has two blades and a third grounding prong. The wide blade or the third prong is provided for your safety. If the provided plug does not fit into your outlet,
consult an electrician for replacement of the obsolete outlet.
10. Protect the power cord from being walked on or pinched, particularly at plugs, convenience receptacles and the point where they exit from the apparatus.
11. Only use attachments/accessories specified by the manufacturer.
12. Use only with the cart, stand, tripod, bracket or table specified by the manufacturer or sold with the apparatus. When a cart is used, use caution when moving the cart/apparatus combination to avoid injury from tip-over.
13. Unplug this apparatus during lightning storms or when unused for long periods of time.
14. Refer all servicing to qualified service personnel. Servicing is required when the apparatus has been damaged in any way, such as power supply cord or plug
is damaged, liquid has been spilled or objects have fallen into the apparatus, or the apparatus has been exposed to rain or moisture, does not operate normally
or has been dropped.
15. Do not expose this apparatus to dripping or splashing and ensure that no objects filled with liquids, such as vases, are placed on the apparatus.
16. To completely disconnect this apparatus from the AC Mains, disconnect the power supply cord plug from the AC receptacle.
17. The mains plug of the power supply cord shall remain readily operable.
18. Do not expose batteries to excessive heat such as sunshine, fire or the like.
CAUTION
RISK OF ELECTRIC SHOCK
DO NOT OPEN
THE LIGHTNING FLASH WITH AN ARROWHEAD SYMBOL, WITHIN AN EQUILATERAL
TRIANGLE, IS INTENDED TO ALERT THE USER TO THE PRESENCE OF UNINSULATED
“DANGEROUS VOLTAGE” WITHIN THE PRODUCT’S ENCLOSURE THAT MAY BE OF
SUFFICIENT MAGNITUDE TO CONSTITUTE A RISK OF ELECTRIC SHOCK TO PERSONS.
WARNING: TO REDUCE THE RISK OF FIRE OR ELECTRIC SHOCK, DO NOT EXPOSE THIS
APPARATUS TO RAIN OR MOISTURE.
THE EXCLAMATION POINT WITHIN AN EQUILATERAL TRIANGLE IS INTENDED TO
ALERT THE USER TO THE PRESENCE OF IMPORTANT OPERATING AND MAINTENANCE
(SERVICING) INSTRUCTIONS IN THE LITERATURE ACCOMPANYING THE PRODUCT.
SEE MARKING ON BACK OF PRODUCT.
FCC Regulations
FCC Information For Users
This device complies with Part 15 of the FCC Rules. Operation is subject to the following
two conditions: (1) This device may not cause harmful interference; and (2) this device
must accept any interference received, including interference that may cause undesired
operation.
NOTE: Changes or modifications not expressly approved by HARMAN could void the
user’s authority to operate the equipment.
IC Statement and Warning
This Class B digital apparatus complies with Canadian ICES-003. Cet appareil numérique
de la classe B est conforme à la norme NMB-003 du Canada.
Radio and Television Interference
This equipment has been tested and found to comply with the limits for a Class B digital
device, pursuant to Part 15 of the FCC Rules. These limits are designed to provide
reasonable protection against harmful interference in a residential installation. This
equipment generates, uses and can radiate radio frequency energy and, if not installed
and used in accordance with the instructions, may cause harmful interference to radio
communications. However, there is no guarantee that interference will not occur in a
particular installation. If this equipment does cause interference to radio or television
reception, which can be determined by turning the equipment off and then on, the user is
encouraged to try to correct the interference by one or more of the following measures:
•• Increase the separation between the equipment and receiver.
•• Connect the equipment to a different outlet so that the equipment and receiver are
on different branch circuits.
•• Consult the dealer or an experienced radio/TV technician for help.
3
English
Important Safety Instructions
BDT 3/BDT 30
For Canadian Model
Important Safety Instructions
Instructions for Users on Removal and Disposal of Used Batteries.
Specifications of Included Battery Types.
This Class B digital apparatus complies with
Canadian ICES-003. For models having a power
cord with a polarized plug:
CAUTION: To prevent electric shock, match wide
blade of plug to wide slot, fully insert.
For Canadian Model
Cet appareil numérique de la classe B est
conforme à la norme NMB-003 du Canada. Sur
les modèles dont la fiche est polarisee:
ATTENTION: Pour éviter les chocs électriques,
introduire la lame la plus large de la fiche dans
la borne correspondante de la prise et pousser
jusqu’au fond.
These symbols shown on the product or the packaging or in the manual or separate
information sheet mean that the product itself, as well as the batteries included or built
into the product, should never be thrown away with general household waste. Take them
to applicable collection points, where proper treatment, recycling and recovery takes
place, in accordance with national or local legislation, or European Directives 2002/96/
EC and 2006/66/EC.
Correct handling of the product and batteries to be disposed saves resources and
prevents possible negative effects on the environment or human health.
The batteries included with your equipment may be alkaline, carbon zinc/manganese
or lithium (button cells) type. All types should be disposed of according to the above
instructions.
To remove the batteries from your equipment or remote control, reverse the procedure
described for inserting batteries in the owner’s manual.
For products with a built-in battery that lasts for the lifetime of the product, removal
may not be possible for the user. In this case, recycling or recovery centers handle the
dismantling of the product and the removal of the battery. If, for any reason, it becomes
necessary to replace such a battery, this procedure must be performed by authorized
service centers.
CAUTION: This product uses a laser system. To prevent direct exposure to the laser beam,
do not open the cabinet enclosure or defeat any of the safety mechanisms provided for
your protection. DO NOT STARE INTO THE LASER BEAM. To ensure proper use of this
product, please read the owner’s manual carefully and retain it for future use. Should
the unit require maintenance or repair, please contact your local Harman Kardon service
center. Refer servicing to qualified personnel only.
4
BDT 3/BDT 30
Unpacking
Thank You for Choosing Harman Kardon® Products!
The carton and shipping materials used to protect your new player during shipment were
specially designed to cushion it from shock and vibration. We suggest that you save the
carton and packing materials for use in shipping if you move or if the unit ever needs
repair.
For more than fifty years, Harman Kardon products have been at the cutting edge of audio
and home theater technology. The first audio receiver wore a Harman Kardon badge,
and the company has been producing innovative entertainment products ever since. The
BDT 3/BDT 30 Blu-ray Disc™ player is the latest component offered in that proud tradition.
To minimize the size of the carton in storage, you may wish to flatten it. You can do it by
carefully slitting the tape seams on the carton’s bottom and collapsing it. You can store
cardboard inserts in the same manner. Packing materials that cannot be collapsed should
be saved along with the carton in a plastic bag.
Incorporating the latest 3-D, high-definition audio and video processing technologies, the
BDT 3/BDT 30 is an essential part of a modern home theater system. It plays your favorite
Blu-ray Disc movies with up to 1080/24p video resolution when available on the disc, and
thanks to HDMI® (High-Definition Multimedia Interface®) 1.4a with 30/36-bit Deep Color
connectivity, lets you experience the latest 3-D home entertainment when you connect
it to a 3-D-capable TV.
If you do not wish to save the packaging materials, please note that the carton and
other sections of the shipping-protection materials are recyclable. Please respect the
environment and discard those materials at a local recycling center.
Remove the protective plastic film from the front-panel lens. Leaving the film in place will
affect the performance of your remote control.
Installation Location
•• To ensure proper operation and to avoid the potential for safety hazards, place
the unit on a firm and level surface. When placing the unit on a shelf, be certain
that the shelf and any mounting hardware can support the weight of the product.
•• Provide proper space both above and below the unit for ventilation. If this product
will be installed in a cabinet or other enclosed area, make certain that there is
sufficient air movement within the area. Under some circumstances, a fan may
be required.
•• Do not place the unit directly on a carpeted surface.
•• Avoid installation in extremely hot or cold locations, or in an area that is exposed to
direct sunlight or heating equipment.
•• Avoid moist or humid locations.
•• Do not obstruct the ventilation slots on the top and sides of the unit or place objects
directly over or next to them.
•• Do not place the BDT 3/BDT 30 directly on top of a product that generates
excessive heat.
•• Due to the heat generated by the player and other components in your system,
there is the remote possibility that the rubber padding on the bottom of the unit’s
feet may leave marks on certain wood or wood-veneer materials. Use caution
when placing the unit on soft woods or other materials that heat or heavy objects
may damage. Some surface finishes may be particularly sensitive to absorbing
such marks, due to a variety of factors beyond Harman Kardon control, including
the nature of the finish, cleaning materials used, normal heat and vibration caused
by the use of the product, or other factors. Your warranty will not cover this type of
damage to furniture, so exercise caution in choosing an installation location for the
component and in performing normal maintenance practices.
•• Your new Harman Kardon Blu-ray Disc™ player requires a broadband Internet
connection for BD-Live™ interactivity.
Connect the BDT 3/BDT 30 to the Internet, and BD-Live™ interactivity (available with
compatible discs) delivers additional features, updates and news of live events. Even
your older DVD-Video discs will deliver outstanding picture quality when they are
upscaled to 1080p video resolution.
Yet with all of its sophistication, the BDT 3/BDT 30 is simple to operate. Its controls are
similar to those of DVD players, and its enhanced on-screen menu system guides you
every step of the way. Easy to use and delivering outstanding performance, the BDT 3/
BDT 30 is sure to provide enjoyment for many years to come.
If you have any questions about this product, its installation or its operation, please
contact your retailer or custom installer, or visit the Harman Kardon Web site at
www.harmankardon.com.
Your BDT player is designed to be compatible with region management
information that is encoded on most Blu-ray Disc recordings and DVD
recordings. Your player will only play discs that contain region coding for the
area where your player was shipped and intended for sale:
Player Model /
Area Where Sold
Blu-ray Disc
Region Code
DVD Region Code
BDT 3 / USA, Canada
BDT 30 / Europe,
Middle East
BDT 30 / Korea,
S.E. Asia
BDT 3 / Mexico,
Latin America
Cleaning
•• When the unit gets dirty, wipe it with a clean, soft, dry cloth. If necessary, and only
after unplugging the AC power cord, wipe it with a soft cloth dampened with mild
soapy water, then a fresh cloth with clean water. Wipe it dry immediately with a
dry cloth. NEVER use benzene, aerosol cleaners, paint thinner, alcohol or any other
volatile cleaning agent. Do not use abrasive cleaners, as they may damage the
finish of metal parts. Avoid spraying insecticide near the unit.
Please register your product on our Web site at
www.harmankardon.com.
Note: You’ll need the product’s serial number.
At the same time, you can choose to be
notified about our new products and/or special
promotions.
BDT 30 / Australia,
New Zeland
BDT 30 / Russia, India
BDT 30 / China
6
For example, BDT 3 players shipped to and sold in the USA will only play Bluray Discs that contain region code A and DVD discs that contain region code 1.
If there is a Region Code on a disc other than the one your BDT player is
designed for, it will not play in your BDT player.
5
English
Unpacking
BDT 3/BDT 30
BDT 3/BDT 30 Features
BDT 3/BDT 30 Features
Supplied Accessories
Connectivity
If any of these items are missing, please contact Harman Kardon Customer Service via
www.harmankardon.com.
••
••
••
••
••
••
One HDMI connector
One coaxial digital audio output connector
Left and right analog audio output connectors
One composite video output connector
One USB 2.0 port that plays video, audio and photo content from USB devices
Connects to your LAN (local area network) for BD-Live interactivity via the Internet
Ease of Use
•• On-screen menu system
•• Dot-matrix front-panel information display
•• Full-function remote control
Two AAA batteries
Remote control
Disc Player Features
•• HDMI 1.4a with 3-D and 30/36-bit Deep Color
•• Plays 5-inch (12cm) and 3-inch (8cm) discs
•• Video formats supported: BD-Video (single-layer or double-layer), BD-R, BD-RE,
DVD-Video, DVD+R/+RW, DVD-R/-RW, CD-R/RW
•• Audio formats supported: Dolby® Digital, Dolby Digital Plus, Dolby TrueHD, DTS®
Digital, DTS-HD™ High Resolution Audio, DTS-HD Master Audio,™ CDDA (CD digital
audio), PCM, CBR @192kbps, VBR @ 355kbps, MP3: 32kbps – 320kbps bitrates,
including variable bitrate encoding
•• CEC (Consumer Electronics Control) with basic controls over HDMI/CEC
•• Supports JPEG still-image format
•• Supports BD-Live interactivity
•• Video upscaling to 720p and Full HD 1080p
•• Progressive-scan video output
•• JPEG resolution supported: 4,000 x 5,000 pixels (W x H), 20M pixels maximum
•• JPEG still-image rotation in 90-degree increments
•• Thumbnail JPEG still-image menu
•• Fast play rates: 2x, 4x, 8x, 16x, 32x
•• Slow play rates: 1/2x, 1/4x, 1/8x, 1/16x
•• Random play (CDs only)
•• Repeat play
•• Parental-control system with user-programmable password
•• Disc recognition for up to 10 discs
•• Aspect-ratio adjustment
6
HDMI cable
Power cord
(Note: The power cord included will vary depending on where the unit is sold.)
BDT 3/BDT 30
Front-Panel Controls
Front-Panel Controls
Information
Display
Disc
Drawer
USB
Port
English
Power
Indicator
Power
Button
Open/Close
Button
Play
Button
Power Indicator: When the BDT 3/BDT 30 is plugged into AC power and its rear-panel
Main Power switch is set to “On,” the LED turns amber to indicate that the player is in
Standby mode. When you turn the BDT 3/BDT 30 on (by the Power button or the remote
control), the LED turns white.
Power Button: This button toggles the BDT 3/BDT 30 between the On and Standby
modes.
Disc Drawer: Insert a compatible disc into the drawer. The BDT 3/BDT 30 will accept
5-inch (12cm) and 3-inch (8cm) discs.
Open/Close Button: Press this button to open and close the disc drawer. Before
pressing this button, make sure that no objects are blocking the disc drawer.
Play Button: Press this button to play a disc that has been loaded into the player’s disc
drawer. Pressing this button when viewing photos begins a slide show with all photos in
the current folder.
Pause Button: Press this button to pause a disc that is playing. Pressing the button
while a Blu-ray Disc program or DVD program is playing will freeze-frame on the current
video frame. Pressing the button while the disc is paused will resume play. Pressing this
button while viewing photos freezes the current photo on the screen.
Stop Button: Press this button to stop playback. (With some discs, pressing the Play
button will resume playback from the point where it stopped.) Press the Stop button twice
to stop playback fully.
Pause
Button
Previous/
Step
Button
Stop
Next/Step
Button
Button
throughout this manual.
Previous/Step Button: Press this button once to skip to the beginning of the track
or chapter being played – or, when viewing photos, to the previous photo. Press the
button twice to skip to the beginning of the previous chapter or track. Press the button
repeatedly to skip back through the previous chapters or tracks. When video content is
playing, press the Pause button, after which each press of the Previous/Step button will
step the video back by one frame.
Next/Step Button: Press this button once to skip to the beginning of the next track or
chapter – or, when viewing photos, to the next photo. Press the button repeatedly to skip
ahead through the subsequent chapters or tracks. When video content is playing, press
the Pause button, after which each press of the Next/Step button will step the video
forward by one frame.
USB Port: Gently insert a USB flash drive or an HDD disc drive with a USB Standard-A
cable to this port.
IMPORTANT: Do not connect a PC or other USB host/controller to this port, or you
may damage both the BDT 3/BDT 30 and your device.
Orient the device’s plug so it fits all the way into the BDT 3/BDT 30’s USB connector.
You may insert or remove the device at any time – there is no installation or ejection
procedure.
Information Display: Various messages appear on this display in response to
commands and to provide information about the BDT player’s status as described
7
BDT 3/BDT 30
Rear-Panel Connectors/Remote Control Functions
Rear-Panel Connectors
Main Power
Switch
Analog Audio Output
Connectors
Fan
Vents
HDMI Output
Connector
BLU-RAY DISC PLAYER
ON OFF
R
110V-240V –50/60Hz 25W
Power Cord
Connector
Coaxial Digital
Output Connector
L
Composite Video
Output Connector
Network
Connector
NOTE: See Connecting the Player, on page 10, for detailed information about
making connections.
Main Power Switch: This mechanical switch turns the BDT 3/BDT 30’s power
supply on or off. After you have made and verified all connections (see Connecting
the Player, on page 10), set this switch to the “On” position. If you will not be using
the player for an extended period of time, you can set this switch to the “Off” position
to save energy.
Power Cord Connector: After you have made and verified all other connections,
plug the supplied AC power cord into this input and into an unswitched AC outlet.
Network Connector: To be able to use the BD-Live feature, connect this port to
your local area network (LAN) using a Cat. 5/Cat. 5e/RJ45 network cable. See
BD-Live Interactivity, on page 15, for more information.
Coaxial Digital Output Connector: Connect this output to the coaxial digital input
of your audio/video receiver or surround-sound processor. NOTE: If your audio/video
receiver or surround-sound processor has an HDMI connection, we recommend
using it for superior audio quality.
Analog Audio Output Connectors: Connect these outputs to your audio/video
receiver’s, surround-sound processor’s or analog recorder’s analog audio inputs.
Composite Video Output Connector: Connect this output to your TV’s or audio/
video receiver’s composite video input. NOTE: If your TV or audio/video receiver has
an HDMI connection, we recommend using it for superior video quality.
HDMI Output Connector: Connect the BDT player’s HDMI Output connector to the
HDMI input on your TV, audio/video receiver or surround-sound processor. The HDMI
cable transmits both video and audio, so if you’re connecting it directly to the TV
and are connecting the BDT 3/BDT 30’s Coaxial Digital Output connector to a home
theater audio system, we recommend that you disable the BDT 3/BDT 30’s HDMI
Audio Out to take full advantage of the home theater audio system’s superior audio
performance. See Audio Settings: Audio Output, on page 13, for more information.
IMPORTANT: Your BDT 3/BDT 30 is in compliance with HDCP (High-Definition Copy
Protection). Your TV must also be HDCP-compliant to be used with the player’s HDMI
output. For the best results, we do not recommend HDMI connections in excess
of ten feet without a repeater. If your TV has a DVI input, you may use an optional
HDMI-to-DVI cable or adapter for the video connection to the TV. (The DVI connection
is video-only.)
Fan Vents: The BDT 3/BDT 30 has a built-in fan to provide cooling air. To insure
proper operation, make sure that these vents are not blocked.
8
Remote Control Functions
Power On
Power On Button
Button
Settings
Settings
Button
Button
Options
OptionsButton
Button
Angle
Angle
Button
Button
RepeatButton
Button
Repeat
A–BButton
Button
A-B
Prev/Step
Prev/Step
Button
Button
Search/Slow
Search/Slow
ReverseButton
Button
Reverse
Pause
PauseButton
Button
Stop
StopButton
Button
Exit
ExitButton
Button
OK
OKButton
Button
Display
DisplayButton
Button
Program Button
Bookmark Program Button
Bookmark
Button
Button
Open/Close
Open/Close
Button
Button
Power Off
Power
Off
Button
Button
Audio Button
Audio
Button
Find
Button
Find Button
PIP Button
PIP
Button
Home
Home
Button
Button
Subtitle
Subtitle
Button
Button
Resolution
Resolution
Button
Button
Next/Step
Next/Step
Button
Button
Search/Slow
Search/Slow
Forward Button
Forward
Button Play
Play
Button
Popup
Menu Button
Popup Menu
Button
Button
Cursor
Cursor
Buttons
Buttons
Top Menu
Top
Menu
Button
Button
Zoom Button
Zoom
Button
Thumbnail
Thumbnail
Button
Button
Numeric Buttons
Numeric
Buttons
DimmerButton
Button
Dimmer
Clear Button
Clear
Button
Power On button: Press this button when the BDT 3/BDT 30 is in the Standby mode to
turn it on.
Open/Close button: Press this button to open and close the disc drawer. Before pressing
this button, make sure that no objects are blocking the disc drawer.
Power Off button: Press this button when the BDT 3/BDT 30 is on to place it in the
Standby mode.
Settings button: Press this button to display the player’s Settings menu. See Settings
Menus, on page 12, for more information.
Options button: Press this button to display any available options for the item that is
active at the time you press the button.
Home button: Press this button to return the on-screen display to the Home screen from
whatever screen is active when the button is pressed.
Angle button: Press this button to toggle through the multiple camera-angle
optionsfor the current disc. NOTE: This feature is disc-dependent. Not all discs feature
multiplecamera angles and allow you to change camera angles.
Audio button: Press this button to toggle through the different audio tracks that are
available for a disc. NOTE: This feature is disc-dependent. Not all discs feature multiple
audio tracks and allow you to change audio tracks.
Repeat button: When the BDT 3/BDT 30 is playing a Blu-ray Disc recording or DVD,
press this button to cycle through the following repeat modes: Chapter, Title, All, Off.
When the BDT 3/BDT 30 is playing a CD, this button cycles through the following repeat
modes: Track, All, Off. NOTE: This feature is disc-dependent. Not all discs allow repeat
functions.
Subtitle button: Press this button to toggle through the different subtitle options that are
available for the current disc. NOTE: This feature is disc-dependent. Not all discs feature
multiple subtitle options.
A-B button: Press this button to activate the A-B repeat mode. The first press sets the
“A” repeat point; the second press sets the “B” repeat point and begins repeating the
section of the program between the two points. Pressing the A-B button while the A-B
repeat mode is active cancels the A-B repeat mode.
Remote Control Functions
Search/Slow Reverse button: Press this button to reverse through the current disc
track. For Blu-ray Disc programs and DVD programs, each press cycles through 2x,
4x, 8x, 16x and 32x reverse speed. Pressing the button while a Blu-ray Disc recording
or DVD is paused will reverse through the chapter in slow motion. Each press cycles
through 1/2, 1/4, 1/8 and 1/16 normal speed.
Search/Slow Forward button: Press this button to fast-forward through a disc track.
For Blu-ray Disc recordings and DVDs, each press cycles through 2x, 4x, 8x, 16x and
32x normal speed. Pressing the button while a Blu-ray Disc recording or DVD is paused
will play through the chapter in slow motion. Each press cycles through 1/2, 1/4, 1/8 and
1/16 normal speed.
Play button: Press this button to play a disc that has been loaded into the player’s disc
drawer or a music file that has been highlighted on the on-screen menu. Pressing this
button when viewing photos begins a slide show of the photos.
Exit button: Press this button to return to the previous menu or menu level.
Popup Menu button: Pressing this button while playing a Blu-ray Disc recording or DVD
displays its popup menu. NOTE: This feature is disc-dependent. Not all discs have pop-up
menus. If a DVD has no pop-up menu, pressing the Popup Menu button may display the
disc menu, depending on how the disc’s menu system was authored.
OK button: Press this button to select a highlighted item on the on-screen menu.
Cursor buttons: Press these buttons to navigate through items on the on-screen menu.
Display button: Press this button to activate a bar display containing information about
the disc or program that is currently playing.
Top Menu button: Press this button to display the top menu of the Blu-ray Disc recording
or DVD that is playing. NOTE: This feature is disc-dependent. Not all DVDs have top
menus. If the DVD has no top menu, pressing the Top Menu button may display the disc
menu, depending on how the disc’s menu system was authored.
Bookmark (green) button: Press this button to activate the Bookmark function. See
Bookmark Function, on page 15, for more information.
Program (red) button: Press this button to create a programmed playback list for the
disc that is playing. See Programmed Play, on page 15, for more information.
Find button: Press this button during disc playback to activate the search function,
which allows you to jump to a specific location on the disc. You can find a location by
title, chapter or elapsed time.
Zoom (blue) button: Press this button to zoom in on or recede from a video image or
slide. Use the Navigation buttons to zoom in on different sections of the image. NOTE:
This function is disc-dependent. Not all discs allow this function.
Pause button: Press this button to pause a disc or music file that is playing. Pressing
the button while a Blu-ray Disc program or DVD program is playing will freeze-frame on
the current video frame. Pressing the button while the disc is paused will resume play.
Pressing this button while viewing photos freezes the current photo on the screen.
Thumbnail (yellow) button: Press this button while playing a photo slide show to
display thumbnail images of all photos in the active directory.
PIP button: Press to switch to a secondary video stream while playing a Blu-ray Disc
recording with BonusView special features.
Previous/Step button: Press this button once to skip to the beginning of the current
track – or, when viewing photos, to the previous photo. Press the button twice to skip
to the beginning of the previous track. Press the button repeatedly to step through the
previous chapters or tracks. When video content is playing, press the Pause button, after
which each press of the Previous/Step button will reverse the video by one frame.
Next/Step button: Press this button once to skip to the beginning of the next track or,
when viewing photos, to the next photo. Press the button repeatedly to step through the
next chapters or tracks. When video content is playing, press the Pause button first; each
subsequent press of the Next/Step button advances the video one frame.
Red, green, yellow and blue buttons: When the BDT 3/BDT 30 is playing a Blu-ray
Disc recording, these buttons can activate features and menus that may vary from disc
to disc. Refer to the menu instructions for each particular disc for more information.
NOTE: These Blu-ray Disc functions may override the Bookmark, Thumbnail, Program
and Zoom functions.
Numeric buttons: Press these buttons to enter numbers for various items.
Dimmer button: Press this button to toggle through the different brightness levels for the
player’s front-panel display: 100%, 50%, 25%, Auto/Off. When the brightness is set to
Off, the display will temporarily return to full brightness whenever you press any button
on the remote.
Clear button: Press this button to clear an incorrect entry made using the Numeric
buttons.
Stop button: Press this button to stop playback. (Pressing the Play button will resume
playback from the point where it stopped.) Press the Stop button twice to stop playback
fully. NOTE: Some settings and functions will be available only when the player is fully
stopped.
9
English
BDT 3/BDT 30
BDT 3/BDT 30
Connecting the Player/Preparing the Remote Control
Connecting the Player
Power Cord Connector
HDMI Connection
The BDT 3/BDT 30 comes with a detachable AC power cord. This type of cord makes it
easier for you to install and connect all other system wiring to the player’s rear panel.
If Your Receiver/Processor Has an HDMI Connection
Use the supplied HDMI cable to connect the player’s HDMI Output connector to your
receiver/processor’s HDMI input. Use another HDMI cable to connect your receiver/
processor’s HDMI output to your TV’s HDMI input.
NOTES:
•• The power requirement for the BDT 3/BDT 30 is 110 – 240V AC, 50/60Hz, 25W.
Connecting to a power source other than the one listed may damage the player or
cause abnormal operation.
•• Before connecting the AC power cord to a wall outlet, confirm that all of the other
connections have been made correctly.
•• Connect the female end of the BDT 3/BDT 30’s detachable power cord to the
player’s Power Cord connector. Plug the other end into a working, unswitched
AC outlet.
If Your Receiver/Processor Does Not Have an HDMI Connection
Use the supplied HDMI cable to connect the player’s HDMI Output connector directly to
your TV’s HDMI input.
Coaxial Digital Audio Output Connection
If you did not connect the BDT 3/BDT 30’s HDMI Output connector to your receiver/
processor, connect the player’s Coaxial Digital Output connector to your receiver/
processor’s coaxial digital input.
Set the BDT 3/BDT 30’s Main Power switch in the “On” position. The player’s Power
indicator will turn amber, indicating that the player is in the Standby mode.
Preparing the Remote Control
Installing the Batteries
Your BDT 3/BDT 30 remote control uses two AAA batteries (supplied). Insert the batteries
as shown in the illustration, making sure to observe the correct polarity.
Analog Audio Output Connections
Connect the BDT 3/BDT 30’s Analog Audio Output connectors to your receiver/processor’s analog audio inputs or to your analog recorder’s analog audio inputs.
Composite Video Output Connection
–
+
Use a Cat. 5/RJ45 network cable (not supplied) to connect the BDT 3/BDT 30’s Network connector directly to a network router, a network switch, a network modem or an
Ethernet network wall jack that has Internet access. NOTE: The BDT 3/BDT 30 cannot
access content on other networked devices. The network connection enables the BDT 3/
BDT 30’s BD-Live features. See BD-Live Interactivity, on page 15, for more information.
–
Network Connection
+
If you did not connect the BDT 3/BDT 30’s HDMI Output connector to your TV or your
audio/video receiver, connect the player’s Composite Video Output connector to your
TV’s or audio/video receiver’s composite video input.
Using the Remote Control
When using the remote, remember to aim it toward the player’s front panel. Make sure
that no objects, such as furniture, block the remote’s view of the player. Bright lights,
fluorescent lights and plasma video displays may interfere with the function of the
remote.
•• The remote has a range of about 20 feet (6.1m), depending on the lighting
conditions.
•• You can use the remote at an angle of up to 30° from either side of the player.
If the remote does not seem to be operating properly, make sure that the batteries are
inserted correctly. If the remote still does not operate properly, replace both batteries
with new ones.
10
BDT 3/BDT 30
Setting Up the Player
Setup Wizard
Page: 3/5
NOTE: The menu screens shown in this manual are for illustrative purposes and may
differ somewhat from the actual displays.
To set up your BDT 3/BDT 30, you will use the remote to navigate through all of the onscreen menus and make selections from them.
•• Use the Cursor Up/Down buttons to navigate through the menu list. When an item
is highlighted, a border will appear around it.
•• To select a highlighted item, press the OK button. The screen will change
depending on your selection.
•• To return to the previous screen, press the Exit button.
Setup Wizard
When you turn your BDT 3/BDT 30 on for the first time, the on-screen menu will display
the Setup Wizard.
Setup Wizard
Page: 1/5
Please select the highest resolution that your
TV supports. If you are unsure, select “Auto.”
Upon making a selection the screen will be
changed to the chosen resolution. You will be
presented with the option to continue with the
new resolution or “Cancel” to return to the
previous resolution. If the screen remains
blank, please wait 15 seconds without
pressing anything and the system will
automatically return to the previous resolution.
Previous
Auto
480i/576i
480p/576p
720p
English
Setting Up the Player
1080i
1080p
OK
Next
After selecting your TV’s highest resolution, press the OK button, and the Wizard’s
aspect-ratio screen will appear. If you’re unsure of your TV’s highest resolution, select
“Auto,” and the player will automatically select the optimal resolution.
Welcome to the Harman Kardon BDT Setup
Wizard.
Setup Wizard
Page: 4/5
Some simple information is needed to ensure
you get the best experience from your product.
Please select the best aspect ratio
that fits your TV.
You can adjust these settings later in addition
to making changes to more advanced settings
by pressing the ‘Settings’ button on the
remote.
16:9 Full
16:9 Normal
4:3 Pan & Scan
4:3 Letterbox
OK
Next
Before you can use your BDT 3/BDT 30, you need to set the language and make a few
basic settings so that the player’s video output will work properly with your TV. Press the
OK button and the Wizard’s language screen will appear.
Setup Wizard
Page: 2/5
Previous
OK
Next
After selecting the aspect ratio that best fits your TV, press the OK button to save your
setting, and then press it again to exit the Setup Wizard. For more information on aspect
ratios, see Aspect Ratio, on page 13.
Please select which language you
would like the BDT menus to appear.
Previous
OK
Next
After setting the language you want the on-screen menus to use, press the OK button,
and the Wizard’s TV-resolution screen will appear.
11
BDT 3/BDT 30
Setting Up the Player
Settings Menus
Pressing the remote’s Settings button displays the BDT player’s settings menus, which
allow you to configure the player’s functions. Use the remote’s Cursor Left/Right buttons
to change from one menu to another, use the Cursor Up/Down buttons to navigate
through the lists that appear on the various screens, and use the OK button to select
highlighted items. Press the Exit button at any time to return to the previous screen.
•• BD-Live Storage: This option lets you set up how the BDT 3/BDT 30 will
handle stored BD-Live content. You can choose to store the content on a USB
memory device via the BDT 3/BDT 30’s USB port. See BD-Live Interactivity, on
page 15, for more information.
•• Restore Defaults: This option restores the BDT 3/BDT 30 to its factory default
setting values. NOTE: This option will also reset the parental-control password
back to the factory default of 0000. See Parental Control, on this page.
Language: This setting lets you set the language for the disc player and the disc menus,
the preferred audio language and the preferred subtitle language.
•• NOTE: If the selected language is not available on the particular disc being played,
use the disc’s menu to select the language from those available on the disc.
Playback: The Playback option allows you to set the following disc playback features:
General Settings
•• Show Angle Icon: This option lets you select whether or not the angle icon will
automatically be displayed when a disc with multiple camera angles is played.
•• Auto Play: This option lets you select whether discs will automatically begin
playing when they are loaded into the player.
•• Show PIP Icon: This option lets you select whether or not the picture-in-picture
icon will automatically be displayed when you play a Blu-ray Disc recording with
picture-in-picture content.
•• Show Secondary Audio Icon: This option lets you select whether or not the
Secondary Audio icon will automatically be displayed when you play a Blu-ray Disc
recording with secondary audio content.
•• Disc Resume: This option lets you select whether or not a disc that has been
ejected while playing will resume play from that location the next time it is inserted
into the disc player. NOTE: This feature is disc-dependent. Not all discs support
disc resume.
•• DivX® VOD DRM: This option displays your player’s DivX registration information.
Parental Control: This option lets you set the player’s parental-control password and the
level of parental control you want active. NOTE: The default password is 0000.
System
Language
Playback
Parental Control
Network
Select to adjust general settings
General Settings
General Settings
Network: This option allows you to set the following network features:
System
Front Panel Brightness
100%
Language
Screen Saver
Off
Playback
Auto Power Off
Off
Parental Control
CEC
On
Network
One Touch Play
On
One Touch Standby
On
Select to adjust system settings
System: The System option allows you to set the following system features:
•• Front Panel Brightness: This option sets the brightness of the BDT 3/BDT 30’s
information display.
•• Screen Saver: To prevent image burn-in, we recommended activating the Screen
Saver when using the BDT 3/BDT 30 with a CRT or plasma TV.
•• Auto Power Off: This option sets the amount of time the BDT 3/BDT 30 remains on
while idle until it automatically enters the Standby mode.
•• CEC: When this option is set to On, you can enable or disable the CEC One Touch
Play and One Touch Standby functions.
•• One Touch Play and One Touch Standby: When these options are set to On, the
BDT 3/BDT 30 can be placed into the Play or Standby modes upon commands
from the remote control of a TV connected to the player’s HDMI Output connector.
•• System Upgrade: Select this option when you want to install a firmware upgrade
for your BDT 3/BDT 30 that you’ve downloaded from a Harman Kardon source.
•• Setup Wizard: This option activates the BDT 3/BDT 30’s Setup Wizard (see Setup
Wizard, on page 11).
12
•• Information: This option displays your network’s IP, subnet mask, gateway and
DNS addresses.
•• Test Connection: This option tests for a proper network connection to the BDT 3/
BDT 30.
•• IP Configuration: This option lets you enter your network settings, either
automatically or manually. Unless your network administrator instructs you
otherwise, you should use the Auto option.
•• BD-Live Connection: This option lets you set the BDT 3/BDT 30’s BD-Live
connection preferences. “Always Allow” always allows downloading of BD-Live
content. “Limit” allows content downloading only if the disc is officially BD-Live
certified. “Prohibited” does not allow any BD-Live access. See BD-Live Interactivity,
on page 15, for more information.
•• Proxy Setting: “Enabled” allows you to select and set the Proxy Host and Proxy
Port if your network requires a proxy setting. “Disabled” bypasses any Proxy Host
and Proxy Port settings and prevents their selection. This option is for advanced
users only and in most cases should be left set to “Disabled.”
BDT 3/BDT 30
Setting Up the Player
Display Settings
•• Custom: This option lets you adjust the video settings manually. The
Brightness, Saturation (color saturation), Hue and Contrast settings appear
as sliders. The default setting for each adjustment is 0. Use the Cursor Left/
Right buttons to change each setting’s value.
TV
Aspect Ratio
16:9 Full
Video Processing
Resolution
Auto
Color Space
RGB
Film Mode
Off
HDMI Deep Color
Off
Select to adjust display settings
English
Audio Settings
Display Settings
Audio Settings
Audio Out
HDMI Audio Out
Auto
Coaxial Output
PCM
PCM Downsampling
Off
Dynamic Range Ctrl
TV: This option allows you to set the following display parameters:
•• Aspect Ratio: This option lets you select how you want 4:3 programs displayed
on a 16:9 TV, or 16:9 programs displayed on a 4:3 TV. “16:9 Full” stretches 4:3
material to fill a 16:9 TV screen. “16:9 Normal” displays 4:3 programming on a
16:9 TV with black boxes on either side of the image, preserving its original visual
composition without distortion. “4:3 Pan & Scan” zooms in on widescreen material
to fill a 4:3 screen. “4:3 Letterbox” displays 16:9 programming with black bars
above and below the photo, preserving the program’s original visual composition
without distortion.
•• Resolution: This option lets you select the video-output resolution of the BDT 3/
BDT 30. The “Auto” setting will automatically select the best resolution for your TV.
•• Color Space: This option lets you select a predefined color space for the video
photo.
•• Film Mode: If your TV can handle a 1080p 24Hz signal (that is, if it has 1080p
resolution and a video-refresh rate that is a whole-number multiple of 24), set this
option to “On” to get maximum resolution from Blu-ray Disc content mastered at
24 frames per second. If your display cannot handle a 1080p/24Hz signal, set this
option to “Off,” and the BDT 3/BDT 30 will upconvert 24-frame-per-second film
material to the standard video 30Hz refresh rate.
•• HDMI Deep Color: This option allows you to adjust the resolution of color output
to your TV. If your TV accepts Deep Color, this option allows your TV to display an
enhanced color palette.
•• On: The BDT 3/BDT 30 always outputs 36-bit or 30-bit Deep Color.
•• Off: The BDT 3/BDT 30 does not output Deep Color (color resolution
remains at 24 bits).
•• TV Standard: This option lets you set the standard of your TV display.
•• Auto: The BDT 3/BDT 30 automatically sets the standard for your TV.
•• PAL: Sets the video display to the PAL standard.
•• NTSC: Sets the video display to the NTSC standard.
•• HDMI 3D: This option determines how the player handles 3-D programs when
connected to a 3-D-capable TV via the HDMI connection.
•• Auto: The BDT 3/BDT 30 automatically displays video in 3-D when the
program is in 3-D format.
•• Off: The BDT 3/BDT 30 does not display the video in 3-D.
Video Processing: This option allows you to set the BDT 3/BDT 30’s internal video
processing.
•• Video Mode: This option lets you select a preset video-processing option to
optimize the picture for the current program by adjusting the brightness, contrast,
color and sharpness.
Select to adjust Audio output settings
Audio Output: This option lets you set the following items:
•• HDMI Audio Out: In addition to digital video signals, the BDT 3/BDT 30’s HDMI
connection also carries digital audio signals. Four settings are available:
•• Auto: This option causes the BDT player’s HDMI Output connector to output
the digital audio format that best matches the surround-sound decoding
capabilities of the component to which it’s connected.
•• Bitstream Native: This option outputs the program in its native audio format
via the HDMI Output connector.
•• PCM: This option outputs a two-channel downmix derived from the
program’s native audio format via the HDMI Output connector.
•• Off: This option turns the BDT player’s HDMI audio output off. If you are
using the player’s HDMI connection for video only (you have connected
the player’s HDMI output directly to your TV and have connected the
BDT 3/BDT 30 Coaxial Digital Output connector to a home theater audio
system), we recommend that you set the HDMI Audio Out to “Off.”
•• Coaxial Output: If you are using the BDT player’s HDMI connection for video only
and have connected its Coaxial Digital Output connector to your home theater
audio system, select one of these three options:
•• Bitstream Native: This option outputs the program’s native digital audio
soundtrack via the Coaxial Digital Output connector.
•• PCM: This option outputs a two-channel downmix of the original
digital soundtrack via the Coaxial Digital Output connector. (See PCM
Downsampling, below.)
•• Transcode: This option transcodes a program’s lossless format (Dolby
TrueHD or DTS-HD Master Audio) program to a lossy format and outputs it
via the Coaxial Digital Output connector.
•• PCM Downsampling: This option sets the sampling rate of PCM two-channel
downmixed signal. Set this option to the highest sampling rate that the connected
component can handle. NOTE: If the component can handle a 192kHz sampling
rate, set this option to “Off,” which will pass 192kHz sampled material without
downsampling.
•• Standard: Neutral control settings
•• Vivid: For video games
•• Cinema: For movies and many television broadcasts
13
BDT 3/BDT 30
•• Dynamic Range Ctrl: This option lets you set the dynamic range control.
•• Auto: The BDT 3/BDT 30 automatically sets the dynamic range, based on the
range of volume in the audio source.
•• On: The BDT 3/BDT 30 always sets the dynamic range to on.
•• Off: The BDT 3/BDT 30 always sets the dynamic range to off.
Information Menu
Setting Up the Player/Playing Discs
Regional Coding
Your BDT player is designed to be compatible with region management information that
is encoded on most Blu-ray Disc recordings and DVD recordings. If there is a region code
on a disc other than the one your BDT player is designed for, it will not play in your BDT
player.
See the sidebar box on page 5 for complete information about your player's region
coding.
Copyright
Audio-visual material may consist of copyrighted works, which must not be recorded
without the permission of the owner of the copyright. Please refer to relevant laws
covering copyright protection.
Information
Copy Protection
Your BDT player is in compliance with HDCP (High-Definition Copy Protection). A video
display connected via the HDMI Output connector must be HDCP-compliant.
Software Version: BDT V1.04.06
MAC Address: 00 -1B -44 -12 -1D
The BDT player incorporates copy-protection technology. On Blu-ray Disc media and DVD
discs that include a copy-protection code, if the contents of the disc are copied using a
VCR, the copy-protection code prevents the videotape copy from playing normally.
Supported Disc Formats
Select to browse system information
The Information menu will display the BDT 3/BDT 30’s software/firmware version number
and the player’s factory-assigned network MAC Address. This screen is for information
only and allows no user adjustments.
Playing Discs
Disc Handling Precautions
•• To keep the disc clean, handle the disc by its edge. Do not touch the surface.
•• Do not stick paper or tape on the disc. If there is glue (or a similar substance) on
the disc, remove the substance completely before using the disc.
•• Do not expose the disc to direct sunlight or heat sources such as hot air ducts, or
leave it in a car parked in direct sunlight, as there can be a considerable rise in
temperature inside the car.
•• After playing, store the disc in its case.
•• Do not write on the label side with a ballpoint pen or other sharp writing utensils.
•• Be careful not to drop or bend the disc.
Disc Cleaning Precautions
•• Before playing, clean the disc with a cleaning cloth. Wipe the disc from the center
out.
•• Do not use solvents such as benzene, paint thinner, commercially available
cleaners or anti-static spray intended for vinyl LPs.
14
The BDT player can play the following types of discs (in 5"/12cm and 3"/8cm size):
•• BD-Video (single-layer or double-layer)
•• DVD-Video
•• DVD+R/+RW
•• DVD-R/-RW
•• CDDA (CD digital audio)
•• CD-R/RW
NOTE: The compatibility and performance of dual-layer discs is not guaranteed.
Supported Media Codecs
The disc player can play media recorded in the following audio/video codecs:
•• MPEG 1, Layer 1
•• MPEG 2, Layer 2
•• MPEG 2, Layer 3
•• H.264
•• VC-1
•• AAC
•• MP3 (from CD-R/RW, DVD+R/+RW, BD-R/RE and USB)
•• JPEG (from CD-R/RW, DVD+R/+RW, BD-R/RE and USB)
•• DivX 3.x/4.x/5.x (from CD-R/RW, DVD+R/+RW and USB)
NOTE: Due to differences in the formats of certain discs, it is possible that some
discs may include a mix of features, some of which are not compatible with the
BDT 3/BDT 30. Similarly, although Blu-ray Disc recordings and DVDs are capable of a
wide range of features, not all discs include every capability of its system. For example,
although the player is compatible with multi-angle discs, that feature operates only when
the disc is specially encoded for multiple-angle play. To make certain that a specific
feature or soundtrack option is available, please check the options noted on the disc
jacket.
Playback capability of recordable discs may vary due to variations in the quality of the
disc and the recorder used to create the disc.
BDT 3/BDT 30
Playing Discs
Press the Open/Close button to open the disc drawer and insert the disc into the drawer.
Press the Open/Close button again to close the disc drawer.
•• Do not load more than one disc into the disc drawer.
•• Do not load the disc upside down.
After loading a disc into the player, press the Play button to begin playback.
Programmed Play: This option lets you create a programmed playlist for a disc that is
inserted in the BDT 3/BDT 30. The program function works for CDs, DVDs and
Blu-ray Disc recordings. NOTE: Not all Blu-ray Discs support programmed play.
1. Press the Program button. The Program screen will appear (CD program screen
is shown below).
Page: 1/
Use the Play, Pause, Stop, Prev/Step, Next/Step, Search/Slow Forward and Search/Slow
Reverse buttons to control disc playback. See Remote Control Functions, on page 9, for
more information about the functions of these buttons.
Program
CD
Track Total:
15
Playback Features
1
Track: 10
6
-- -- -- --
11
-- -- -- --
Repeat: When you are playing a Blu-ray Disc recording or DVD, pressing the Repeat
button cycles through the following repeat modes: Chapter, Title, All, Off. When you
are playing a CD, this button cycles through the following repeat modes: Track, All, Off.
NOTE: Not all Blue-ray Disc recordings allow repeat.
2
Track: 05
7
-- -- -- --
12
-- -- -- --
3
-- -- -- --
8
-- -- -- --
13
-- -- -- --
4
-- -- -- --
9
-- -- -- --
14
-- -- -- --
5
-- -- -- --
10
-- -- -- --
15
-- -- -- --
Clear
EXIT
Stop
A-B: When you are playing a Blu-ray Disc recording, DVD or music CD, pressing the A-B
button places the player into the A-B repeat mode. The first press sets the “A” repeat
point; the second press sets the “B” repeat point and begins repeating the section of
the disc between the two points. Pressing the A-B button while the player is in the A-B
repeat mode takes the player out of that mode. NOTE: Not all Blu-ray Disc recordings
allow A-B repeat.
Find: Pressing the Find button during disc playback activates the search function,
allowing you to jump to a specific location on the disc. You can find a location by title,
chapter or time. See Find button, on page 9, for more information. NOTE: If you are
playing a disc that does not allow searching by title, use the disc menu to change titles.
Options: Pressing the Options button displays any available options for the disc that
is currently playing. Blu-ray Disc options include title, chapter, time display, audio
options, angle options, subtitle options, picture-in-picture options, second audio track
options, bitrate options, stillframe options, fast advance and scene replay. DVD options
include title, chapter, time display, playback modes, audio options, angle options, bitrate
options, stillframe options, fast advance and scene replay. Audio CD options include
track selection, time display, playback modes, bitrate, instant search and instant replay.
Display Button: When you are playing Blu-ray Disc recordings and DVDs, pressing the
Display button toggles the information bar on and off.
Playback Disc Type
Mode
& Encoding
DVD-VIDEO
1/1
English
MPEG
Dolby Digital 5.1
Audio
Mode
Current
Title
1 / 2
Current
Chapter
1 / 8
Time
Display
TT
00 : 32 : 37
“Find”
Indicators
Top Menu Button: Displays the top menu for the Blu-ray Disc recording or DVD that is
currently playing. NOTE: This feature is disc-dependent. Not all DVDs have top menus. If
a DVD that you are playing has no top menu, pressing the Top Menu button may display
the disc menu, depending on how the disc’s menu system was authored.
Popup Button: Pressing this button while playing a Blu-ray Disc recording or DVD
displays the popup menu.
Bookmark Function: The bookmark function lets you mark up to 12 locations on the
disc that is currently playing. Press the Bookmark button to mark the current location
on the disc. To play the disc from one of your selected bookmark locations, hold the
Bookmark button, which will display the bookmark list. Use the Navigation Left/Right
buttons to select the desired bookmark, and press the OK button to play the disc from
that location.
NOTE: The bookmark function is disc-dependent. Not all discs allow bookmark operation.
Play
CLEAR
English
Loading and Playing Discs
2. Press the OK button and use the Navigation Up/Down buttons to select the title on
the disc (Blu-ray Disc/DVD) or track (CD) for your first program entry. NOTE: Not all
Blu-ray Disc recordings allow selection by title.
3. Press the Navigation Right button and use the Navigation Up/Down buttons to
select the chapter for your first program entry (Blu-ray Disc/DVD only).
4. Repeat steps 2 – 3 for every entry in your programmed list.
5. When you’re finished programming your list, press the Play button to play the
programmed playlist.
BD-Live Interactivity
BD-Live interactivity is available on select Blu-ray Disc recordings. When you select the
BD-Live features from a disc’s menu, you may be able to download additional content or
other information via the Internet (through the Network connection) and onto a memory
device inserted into the BDT 3/BDT 30 USB port.
NOTE: Do not unplug the USB memory device while downloading BD-Live information. If
you do unplug the device and the Harman Kardon splash screen appears, press the Play
button to return to the beginning of the disc.
If you have difficulty accessing the Internet while using a BD-Live disc, press the
Settings button and navigate to the Network Setup menu. Select “Test Connection.”
If the BDT 3/BDT 30 is able to access the Internet, then the computer server that
the BD-Live disc is trying to access may be at fault. Check the disc jacket for more
information, or contact the online content provider. If the Test Connection function fails,
contact your Internet service provider (ISP) to obtain the correct settings for the BDT 3/
BDT 30’s IP Configuration menu. If the problem persists, contact your ISP for further
assistance.
Playing Music CDs
When the BDT 3/BDT 30 is playing a music CD, the top bar shows the current playback
mode icon, the type of disc, the track currently playing, the number of total tracks on the
disc and the time display.
Playback
Mode
Disc
Type
CDDA
Total
Tracks
Current
Track
T
1 / 15
Time
Display
TRACK
00 : 32 : 37
15
BDT 3/BDT 30
Playing Files from USB Devices and CD Data Discs
Playing Files from USB Devices and CD Data Discs
Viewing Photos
Your BDT 3/BDT 30 can play MP3 (up to 320kbps bitrate) and AAC audio files; display
JPEG photos; and show MPEG 1 (layer 1), MPEG 2 (layers 2 and 3) and DivX® (3.x, 4.x,
5.x) audio/video files stored on a USB device or a CD data disc.
In the top directory, select “Photo.” Select a folder containing photo files, and highlight
a photo file in the folder. A thumbnail of the highlighted photo will appear on the right
side of the screen.
IMPORTANT: Only media in the FAT32 file system are compatible with the BDT 3/
BDT 30.
USB
To access files on a device inserted into the player’s USB port, press the Home button
and select “USB” from the source list on the screen.
..
Sunset
Home Menu
Connie1
Type:JPG
Connie2
USB
Size:0.241M
Stadium
Playlist
Resolution:720x524
AB Stand 1
Settings
Type:USB
Size:595.375M
01 / 31
HOME
Exit
OPTIONS
Option
FS:FAT32
Use these remote buttons while viewing photos:
1/4
HOME
Exit
OPTIONS
Option
Regardless of the device’s file structure, the screen will first show three individual folders
named “Photo,” “Music” and “Video.” Select the type of media that you want to play
from these three folders.
Play Button: Press this button to begin a slide show that displays each photo file in the
current folder or directory level (starting with the highlighted JPEG) for 15 seconds in
order as they appear in the folder.
Pause Button: Press this button to freeze the current photo on the screen. Press the Play
button to resume the slide show.
Stop Button: Press this button to end the slide show and return to the directory.
Next/Step and Previous/Step Buttons: Press these buttons to skip to the next or
previous photo file in the slide show or directory.
USB
Cursor Up Button: Press this button while a photo is displayed to rotate the image 180°.
Pressing this button while the directory list is displayed highlights the previous item in
the directory.
..
Cursor Down Button: Press this button while a photo is displayed to show a mirrorimage reflection of the image. Pressing this button while the directory list is displayed
highlights the next item in the directory.
Photo
Music
Video
Cursor Left Button: Press this button while a photo is displayed to rotate the image 90°
counterclockwise. Pressing this button while the directory list is displayed jumps to the
next higher directory level.
Type:Folder
Cursor Right Button: Press this button while a photo is displayed to rotate the image
90° clockwise.
1/3
HOME
Exit
OPTIONS
Option
The screen will then show the device’s file structure. Selecting a folder will show all
of the selected type of media in the folder. If there are files of the selected type in the
device’s root directory, the screen will show them as well.
To move up one directory level, press the Cursor Left button or select the arrow folder.
Options Button: Press this button while a photo is displayed to show the Options menu,
which gives you the following options:
File: Select a file to view.
Play Mode: View files in their normal order, in random order (until you press the Stop
button) or in shuffle order (the screen displays each image in the folder one time in
random order, then returns to the directory).
Slide Show: Select how long you want each image to be displayed: 5 seconds, 15 seconds
or 30 seconds.
Transition: Select from various types of image-to-image transitions.
Pressing the Options button when a directory is displayed shows the Playlist Options box.
See Using Playlists, on page 18, for more information.
16
BDT 3/BDT 30
Playing Files from USB Devices and CD Data Discs
Thumbnail (yellow) Button: Press this button while playing a slide show to display
thumbnail images of all photos in the active directory. Use the Cursor and OK buttons to
highlight and select images to view.
Selecting a music file plays the file. If other music files in the folder follow the selected
file, the BDT 3/BDT 30 will play each one in order as they appear on the on-screen
display. The following screen will appear while music files play:
1 / 25
Move
Previous
Type:
MP3
Total Time:
03:29
Title:
Beanwater Junction, Part 1
Artist:
Jugalbandi
Album:
Night Crazy
Genre:
Progressive
Next
Zoom (blue) Button: Press this button during a slide show to freeze and zoom in 2x size
on the current image. Additional presses of the button change the zoom to 3x, 4x, 1/2x,
1/3x and 1/4x size.
Playing Music Files
In the top directory, select “Music.” Select a folder containing music files, and highlight
one of the files. Information about the highlighted file will appear on the right of the
screen.
If a selected MP3 file has an album cover-art ID3 tag, the art will be displayed on the
screen.
Use the Play, Pause, Stop, Prev/Step, Next/Step, Search/Slow Forward and Search/Slow
Reverse buttons to control music-file playback. See Remote Control Functions, on page
9, for more information about the functions of these buttons.
When the BDT 3/BDT 30 is playing music files from a USB device or CD data disc, the
Repeat and Options functions are slightly different from their functions when the unit is
playing Blu-ray Disc recordings, DVDs and music CDs:
Repeat Button: Pressing this button cycles through the following repeat modes:
1 (song), All (folder), Off. The active repeat mode is indicated in the screen’s top bar.
USB
Options Button: Pressing this button displays any available options for the song that is
xt
currently playing:
..
File: Directly selects a song to play – either the song currently playing or another song.
Beanwater Part 1
Laydown Delivery (Edit 1)
Madagascar Wombat
Time: Displays the track’s elapsed time or the track’s time remaining.
Type:MP3
Total Time:03:29
Title:Beanwater Junction, Part 1
Artist:Jugalbandi
Night Crazy
Album:Night Crazy
The Lost Transit Center
01 / 10
00 : 02 : 37
English
1 / 10
HOME
Genre:Progressive
Exit
OPTIONS
Option
Play Mode: Plays songs in their normal order, in random order (until you press the Stop
button) or in shuffle order (plays each song in the folder one time in random order, then
returns to the directory).
Bitrate: Shows the bitrate of the song that is currently playing.
Advance: Performs a rapid audible search forward through the song.
Replay: Each press of the OK button jumps back ten seconds during play.
While playing music files from a USB device or data CD, you can also view photos that are
on the same medium. Press the Home button while a music file is playing, navigate to a
folder containing photo files, and select a photo file to begin a slide show.
17
BDT 3/BDT 30
Playing Files from USB Devices and CD Data Discs/Using Playlists
Playing Videos
Using Playlists
In the top directory, select “Video.” Select a folder containing video files, and highlight a
video file in the active folder.
Because USB devices and CD-R data discs can contain large numbers of playable files,
you can create a playlist for each disc to help you to access selected files.
To Create a Playlist
NOTE: The procedure is the same for a CD-R playlist and a USB playlist.
USB
1. Press the Home button. The Home menu will appear.
..
2. Select CD data disc or USB. The Photo, Music and Video folders will appear.
Dodgers Sweep Yanks in ‘63
3. Select the type of file you want to create the playlist for. You can create a playlist for
each type of file.
Koufax’s Perfect Game
Gagne Saves 84th Game
4. Search through the directory structure. When you see a file that you want to include
in the playlist for that file type, highlight it and press the Options button. The playlist
options box will appear.
Type:MPEG
Krik Gibson’s Homer
5. To add the item to the playlist, select “Add to Playlist.”
Bums Champs in 1955
01 / 7
HOME
6. Repeat steps 4 – 5 for all items that you want to add to the playlist.
Exit
OPTIONS
Option
The video will automatically play. If there are other video files in the folder, the
BDT 3/BDT 30 will play each of them in order as they appear on the on-screen menu.
Use the Play, Pause, Stop, Prev/Step, Next/Step, Search/Slow Forward and Search/Slow
Reverse buttons to control video-file playback. See Remote Control Functions, on page 9,
for more information about the functions of these buttons.
When the BDT 3/BDT 30 is playing video files from a USB device or CD data disc, the
Repeat and Options functions are slightly different from their functions when the unit is
playing Blu-ray Disc recordings and DVDs:
Repeat Button: Press this button to cycle through the following repeat modes:
1 (current video), All (folder), Off.
Options Button: Press this button to display any available options for the video that is
currently playing:
File: Directly selects a file to play.
Title: Directly selects a title to play (if available).
Chapter: Directly selects a chapter to play (if available).
Time: Displays the elapsed time or the time remaining.
Play Mode: Plays videos in their normal order, in random order (until you press the Stop
button) or in shuffle order (plays each video in the folder one time in random order, then
returns to the directory).
Audio: Selects audio options (if available).
18
To create a playlist for a different file type, repeat steps 1 – 6; but in step 3, select a
different file type.
To Play a Playlist
1. Press the Home button. The Home menu will appear.
2. Select Playlist. The Photo/Music/Video screen will appear.
3. Select the file type of the playlist you want to play. The playlist will open.
4. Select the first item in the playlist and press the Play button. The playlist will play.
5. To repeat the playlist, press the Repeat button. You can repeat one item (“1” on the
screen) or the entire playlist (“All”).
BDT 3/BDT 30
Troubleshooting
Troubleshooting
Problem
Solution
The player won’t power up (the Power indicator is not lit):
•• Check that the player’s AC power cord is properly plugged into the player’s Power
Cord connector.
•• Check that the player’s AC power cord is plugged into a working AC outlet and that
the AC outlet is not controlled by a switch.
•• Make sure that the Master Power switch (on the player’s rear panel) is in the “On”
position.
The disc does not play:
•• Check that the disc is inserted correctly (label side up).
•• Check that the disc is the correct type: BD-Video (single-layer or double-layer),
DVD-Video, DVD+R/+RW, DVD-R/-RW, CDDA (CD digital audio), CD-R/RW. Other
disc types will not play.
No picture:
•• Check the connection between the player and the TV.
•• Check that the TV is turned on and that it is set to the correct input source.
•• Confirm that all of the choices made in the Display Settings menu are correct for
your TV.
•• Check that the TV is HDCP-compliant. The player cannot be used with a TV that is
not HDCP-compliant.
No sound:
•• Check that the HDMI and/or coaxial digital connections are properly made.
•• If you’re using the coaxial digital connection, check that the digital audio settings on
the connected device have been properly set.
•• If you’re using only the HDMI connection, check that the HDMI audio settings on the
connected device have been properly set.
•• If you’re using only the HDMI connection, check that the BDT 3/BDT 30’s HDMI
Audio Output is set to “On.”
The picture appears in the wrong aspect ratio:
•• Change the Aspect Ratio setting in the Display Settings menu to match the TV.
There is noise or other interference in the picture while playing a Blu-ray Disc
recording or DVD:
•• Check that the disc surface is clean and not scratched.
Cannot access media on a connected USB device:
•• Check that the device is formatted in the FAT32 file system. Other file systems are
not compatible with the BDT 3/BDT 30.
The player does not respond to remote-control commands:
•• Replace both remote-control batteries with fresh ones, and make sure that they are
installed correctly.
•• Hold the remote control closer to the player.
•• Check that the player’s remote sensor is in the remote control’s line of sight.
•• Make sure that the protective shipping film has been removed from the player’s
front panel.
The Ø symbol appears on the screen when you press a remote-control button:
•• The selected function is not permitted at the time you press the button.
The player does not respond to commands, or it behaves in an erratic way:
•• Unplug the player’s power cord from the AC outlet, wait 30 seconds, and plug it
back in.
You can find additional troubleshooting information in the FAQs link on the Support page at www.harmankardon.com.
19
English
If your BDT 3/BDT 30 isn’t performing the way you think it should, check to see if the problem is covered in this section before calling your dealer or contacting Harman Kardon
Customer Service.
BDT 3/BDT 30
Safety Instructions
Specifications
Supported disc formats:
Region code (BD/DVD):
Model / Area where sold:
BDT 3 / USA, Canada:
BDT 30 / Europe, Middle East:
BDT 30 / Korea, S. E. Asia:
BDT 3 / Mexico, Latin America:
BDT 30 / Australia, New Zeland:
BDT 30 / Russia, India:
BDT 30 / China:
5-inch (12cm) or 3-inch (8cm) BD-Video (single-layer or double-layer), BD-R, BD-RE,
DVD-Video, DVD+R/+RW, DVD-R/-RW, CDDA (CD digital audio), CD-R/RW discs
A/1
B/2
A/3
A/4
B/4
C/5
C/6
Audio formats:
Dolby Digital, Dolby Digital Plus, Dolby TrueHD, DTS Digital, DTS-HD High Resolution
Audio, DTS-HD Master Audio, PCM, CBR @192kbps, VBR @ 355kbps, MP3: 32kbps –
320kbps bitrates, including variable bitrate encoding
Still-image format:
JPEG
Video signal system:
NTSC (BDT 3); PAL (BDT 30)
HDMI version:
1.4a with 3-D and 30/36-bit Deep Color
Power requirement:
AC 110 – 240V, 50/60Hz
Power consumption:
25W maximum, <0.5W standby
Dimensions (H x W x D):
2-5/8" x 17-5/16" x 13-7/8" (66mm x 440mm x 352mm)
Weight:
8.2 lb (3.7kg)
20
HARMAN Consumer, Inc.
8500 Balboa Boulevard, Northridge, CA 91329 USA
516.255.4545 (USA only)
Made in P.R.C.
© 2011 HARMAN International Industries, Incorporated. All rights reserved.
Harman Kardon is a trademark of HARMAN International Industries, Incorporated, registered in the United States and/or other countries.
Blu-ray Disc and BD-Live are trademarks of the Blu-ray Disc Association. DivX®, DivX Certified® and associated logos are registered
trademarks of DivX, Inc. and are used under license. ABOUT DIVX VIDEO: DivX® is a digital video format created by DivX, Inc. This is an
official DivX Certified device that plays DivX video. Visit www.divx.com for more information and software tools to convert your files into DivX
video. ABOUT DIVX VIDEO ON DEMAND: This DivX Certified® device must be registered in order to play DivX Video-on-Demand (VOD) content.
To generate the registration code, locate the DivX VOD section in the device’s setup menu. Go to vod.divx.com with this code to complete the
registration process and learn more about DivX VOD. Manufactured under license from Dolby Laboratories. Dolby is a registered trademark
of Dolby Laboratories. Manufactured under license under U.S. Patent #’s: 5,451,942; 5,956,674; 5,974,380; 5,978,762; 6,487,535 & other
U.S. and worldwide patents issued & pending. DTS is a registered trademark, and DTS-HD and DTS-HD Master Audio are trademarks, of
DTS, Inc. Product includes software. © DTS, Inc. All Rights Reserved. HDMI, the HDMI logo and High-Definition Multimedia Interface are
registered trademarks of HDMI Licensing LLC. This product incorporates copyright-protection technology that is protected by U.S. patents
and other intellectual-property rights. Use of this copyright-protection technology must be authorized by Rovi Corporation, and is intended
for home and other limited viewing uses only unless otherwise authorized by Rovi Corporation. Reverse engineering or disassembly is
prohibited.
Features, specifications and appearance are subject to change without notice.
Part No. 950-0363-003 Rev.: A
www.harmankardon.com