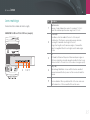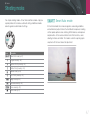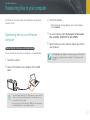
1
User Manual
This user manual includes detailed usage instructions for your camera.
Please read this manual thoroughly.
ENG
Copyright information
• Microsoft Windows and the Windows logo are registered trademarks
of the Microsoft Corporation.
• Mac is a registered trademark of the Apple Corporation.
PlanetFirst represents Samsung Electronics' commitment
to the sustainable development and social responsibility
through eco-driven business and management activities.
• HDMI, the HDMI logo, and the term “High Definition Multimedia
Interface” are trademarks or registered trademarks of HDMI Licensing
LLC.
• Trademarks and trade names used in this manual are the property of
their respective owners.
• Camera specifications or contents of this manual may be changed
without prior notice due to upgrade of camera functions.
• You are not allowed to reuse or distribute any part of this manual
without prior permission.
• For Open Source License information, refer to the
“OpenSourceInfo.pdf” in the provided CD-ROM.
1
Health and safety information
Always comply with the following precautions and usage tips to avoid
dangerous situations and ensure peak performance of your camera.
Warning—situations that could cause injury to
yourself or others
Do not disassemble or attempt to repair your camera.
This may result in electric shock or damage to the camera.
Do not use your camera near flammable or explosive
gases and liquids.
This may cause a fire or explosion.
Do not insert flammable materials into the camera or store
these materials near the camera.
This may cause a fire or electric shock.
Do not handle your camera with wet hands.
This may result in electric shock.
Prevent damage to subjects’ eyesight.
Do not use the flash in close proximity (closer than 1 m/3 ft) to people
or animals. If you use the flash too close to your subject’s eyes, this can
cause temporary or permanent eyesight damage.
Keep your camera away from small children and pets.
Keep your camera and all accessories out of the reach of small
children and animals. Small parts may cause choking or serious injury
if swallowed. Moving parts and accessories may present physical
dangers as well.
Do not expose the camera to direct sunlight or high
temperatures for an extended period of time.
Prolonged exposure to sunlight or extreme temperatures can cause
permanent damage to your camera’s internal components.
Avoid covering the camera with blankets or clothes.
The camera may overheat, which may distort the camera or cause a
fire.
If liquid or foreign objects enter your camera, immediately
disconnect all power sources, such as the battery, and
then contact a Samsung service center.
2
Health and safety information
Caution—situations that could cause damage to your
camera or other equipment
Remove the batteries from your camera when storing it for
an extended period of time.
Installed batteries may leak or corrode over time and cause serious
damage to your camera.
Use only authentic, manufacturer-recommended, Lithiumion replacement batteries. Do not damage or heat the
battery.
Inauthentic, damaged, or heated batteries may cause a fire or personal
injury.
Use only Samsung-approved batteries, chargers, cables
and accessories.
• Using unauthorized batteries, chargers, cables or accessories can
cause batteries to explode, damage your camera, or cause injury.
• Samsung is not responsible for damage or injuries caused by
unapproved batteries, chargers, cables or accessories.
Do not touch the flash while it fires.
The flash is very hot when fired and may burn your skin.
Do not use a damaged power supply cord, plug, or loose
outlet when you charge batteries.
This may cause a fire or electric shock.
Do not force the camera’s parts or apply pressure to the
camera.
This may cause your camera to malfunction.
Exercise caution when you connect cables and install
batteries and memory cards.
If you force the connectors, improperly connect cables, or improperly
install batteries and memory cards, you can damage ports, connectors,
and accessories.
Keep cards with magnetic strips away from the camera
case.
Information stored on the card may be damaged or erased.
Use the battery only for its intended purpose.
Misusing the battery may cause a fire or electric shock.
Never use a damaged battery, or memory card.
This may result in electric shock or camera malfunction or cause a fire.
3
Health and safety information
Check that the camera is operating properly before use.
The manufacturer takes no responsibility for any loss of files or damage
that may result from camera malfunction or improper use.
You must plug the small end of the USB cable into your
camera.
If the cable is reversed, it may damage your files. The manufacturer is
not responsible for any loss of data.
Protect your camera’s lens.
Do not expose the lens to direct sunlight, as this may discolor the image
sensor or cause it to malfunction.
If the camera overheats, remove the battery and allow it to
cool down.
• Prolonged usage of the camera may overheat the battery and raise
the internal temperature of the camera. If the camera stops operating,
remove the battery and allow it to cool down.
• High internal temperatures may result in noise in your photos. This is
normal and does not affect your camera’s overall performance.
4
Indications used in this manual
Icons used in this manual
Icon
Function
Shooting mode indications
Shooting mode
Indication
Additional information
Smart Auto
t
Safety warnings and precautions
Program
P
[ ]
Camera buttons. For example, [Shutter] represents the
shutter button.
Aperture Priority
A
( )
Page number of related information
Shutter Priority
S
Manual
M
Lens Priority
i
►
The order of options or menus you must select to
perform a step; for example: Select 1 ► Quality
(represents select 1, and then Quality).
The number next to the icon may vary depending on
the shooting mode. That is, some options may be
located under 2 or 3.
Magic
N
Panorama
p
Scene
s
Movie
v
*
Annotation
5
Contents
Tips
Chapter 1
Concepts in Photography
My Camera
Shooting postures ....................................................................... 11
Getting started ............................................................................ 25
Unpacking ..................................................................................... 25
Camera layout ............................................................................. 26
Holding the camera .......................................................................... 11
Standing photography...................................................................... 11
Crouching photography ................................................................... 12
Aperture ....................................................................................... 12
Aperture value and the depth of field ................................................ 13
Shutter speed .............................................................................. 14
ISO sensitivity .............................................................................. 15
How the aperture setting, shutter speed, and ISO sensitivity
control exposure ......................................................................... 16
Display icons ............................................................................... 29
In Shooting mode .......................................................................... 29
Capturing photos ............................................................................ 29
Recording videos ............................................................................ 30
In Playback mode .......................................................................... 31
Viewing photos ............................................................................... 31
Playing videos ................................................................................. 31
Correlation between focal length, angle, and perspective ....... 17
Lenses.......................................................................................... 32
Lens layout .................................................................................... 32
Depth of field ............................................................................... 18
Locking or unlocking the lens .......................................................... 33
What controls out-of-focus effects? ................................................. 18
DOF preview .................................................................................... 20
Lens markings ............................................................................... 35
Composition ................................................................................ 20
Rule of Thirds .................................................................................. 20
Photos with two subjects ................................................................. 21
Flash............................................................................................. 22
Accessories .................................................................................
External flash layout .......................................................................
Connecting the flash ......................................................................
GPS module layout (optional).........................................................
Attaching the GPS module ............................................................
36
36
37
39
39
Flash guide number.......................................................................... 22
Bounce Photography ....................................................................... 23
6
Contents
Shooting modes .......................................................................... 41
t Smart Auto mode............................................................ 41
P Program mode........................................................................... 42
Program Shift .................................................................................. 42
A Aperture Priority mode ..............................................................
S Shutter Priority mode .................................................................
M Manual mode............................................................................
Framing mode.................................................................................
Using bulb.......................................................................................
i Lens Priority mode ...................................................................
Using the E mode ................................................................
Using i-Function in PASM modes .................................................
Using i-Zoom ..................................................................................
N Magic mode .........................................................................
p Panorama mode .....................................................................
s Scene mode .....................................................................
v Movie mode ............................................................................
Available functions by shooting mode ............................................
43
43
44
44
44
45
45
46
47
48
48
49
51
52
Chapter 2
Shooting Functions
Size ..............................................................................................
Photo size options .........................................................................
Video size options .........................................................................
Quality ..........................................................................................
Photo quality options .....................................................................
Video quality options .....................................................................
ISO sensitivity ..............................................................................
54
54
55
56
56
56
57
White Balance (light source) ....................................................... 58
White Balance options ................................................................... 58
Customizing preset options ............................................................. 59
Picture Wizard (photo styles)...................................................... 61
AF mode ......................................................................................
Single AF .......................................................................................
Continuous AF...............................................................................
Manual focus .................................................................................
AF area .........................................................................................
Selection AF ..................................................................................
Multi AF .........................................................................................
Face detection AF .........................................................................
Self-portrait AF ..............................................................................
MF assist .....................................................................................
62
62
63
63
64
64
65
65
66
67
Optical Image Stabilization (OIS)................................................ 68
OIS options ................................................................................... 68
7
Contents
Drive (shooting method) .............................................................
Single ............................................................................................
Continuous ....................................................................................
Burst .............................................................................................
Timer .............................................................................................
Auto Exposure Bracketing (AE Bracket) .........................................
White Balance Bracketing (WB Bracket) ........................................
Picture Wizard Bracketing (P Wiz Bracket) .....................................
Bracketing setting..........................................................................
Flash.............................................................................................
Flash options .................................................................................
Correcting the red-eye effect .........................................................
Adjusting the flash intensity............................................................
Metering .......................................................................................
Multi ..............................................................................................
Center-weighted ............................................................................
Spot ..............................................................................................
69
69
69
70
70
71
71
72
72
73
73
74
74
75
75
76
76
Measuring the exposure value of the focus area ............................ 77
Smart Range ................................................................................ 78
Color space ................................................................................. 79
Exposure compensation ............................................................. 80
Video functions............................................................................
Movie AE mode .............................................................................
Multi Motion ..................................................................................
Fader.............................................................................................
Voice .............................................................................................
Chapter 3
Playback/Editing
Searching and managing files ....................................................
Viewing photos ..............................................................................
Viewing image thumbnails .............................................................
Viewing files by category in Smart Album.......................................
Viewing files as a folder..................................................................
Protecting files ...............................................................................
Deleting files ..................................................................................
84
84
84
85
85
85
86
Deleting a single file ......................................................................... 86
Deleting multiple files ....................................................................... 86
Deleting all files................................................................................ 86
Viewing photos ............................................................................
Enlarging a photo ..........................................................................
Viewing a slide show .....................................................................
Auto rotating..................................................................................
Playing videos .............................................................................
Trimming a video during playback ..................................................
Capturing an image during playback .............................................
Editing photos .............................................................................
Options .........................................................................................
87
87
87
88
89
89
90
91
91
81
81
81
82
82
8
Contents
Chapter 4
Chapter 5
Camera settings menu
Connecting to external devices
User settings .............................................................................. 94
ISO customizing ............................................................................ 94
Viewing files on a TV or HDTV .................................................. 104
Viewing files on a TV .................................................................... 104
Viewing files on an HDTV ............................................................. 105
Viewing files on a 3D TV ............................................................. 106
Printing photos .......................................................................... 107
Printing photos with a PictBridge photo printer ............................ 107
ISO step.......................................................................................... 94
Auto ISO range ............................................................................... 94
Noise reduction .............................................................................
DMF ..............................................................................................
AF Priority ......................................................................................
Distortion Correct ..........................................................................
iFn Customizing .............................................................................
User display...................................................................................
Key mapping .................................................................................
Grid Line........................................................................................
AF lamp .........................................................................................
94
94
94
95
95
96
97
97
97
Configuring print settings .............................................................. 108
Creating a print order (DPOF)....................................................... 108
DPOF options ............................................................................... 109
Transferring files to your computer .......................................... 110
Transferring files to your Windows computer ............................... 110
Connecting the camera as a removable disk ................................. 110
Disconnecting the camera (for Windows XP) ................................. 111
Setting 1....................................................................................... 98
Transferring files to your Mac computer ....................................... 111
Setting 2..................................................................................... 100
Using programs on a PC........................................................... 112
Installing software ........................................................................ 112
Setting 3..................................................................................... 101
GPS ............................................................................................ 102
Programs contained on the CD ..................................................... 112
Using Intelli-studio .......................................................................
Requirements................................................................................
Using the Intelli-studio Interface .....................................................
Transferring files using Intelli-studio................................................
Using Samsung RAW Converter ..................................................
Requirements for Windows ...........................................................
Requirements for Mac ...................................................................
Using the Samsung RAW Converter Interface ...............................
Editing RAW format files ................................................................
113
113
114
115
116
116
116
117
117
9
Contents
Chapter 6
Before contacting a service center .......................................... 129
Appendix
Camera specifications .............................................................. 132
Error messages ......................................................................... 120
Lens specifications ................................................................... 136
Maintaining the camera ............................................................ 121
Cleaning the camera.................................................................... 121
Glossary ..................................................................................... 139
Camera lens and display ............................................................... 121
Image sensor ................................................................................ 121
Camera body ................................................................................ 121
Index .......................................................................................... 145
Using or storing the camera.........................................................
Inappropriate places to use or store the camera ............................
Using on beaches or shores ..........................................................
Storing for extended period of time ...............................................
Using the camera with caution in humid environments ..................
Other cautions ..............................................................................
About memory card.....................................................................
Supported memory card ...............................................................
Memory card capacity...................................................................
Cautions when using memory cards .............................................
About the battery.........................................................................
Battery specifications ....................................................................
Battery life .....................................................................................
Low battery message ....................................................................
Notes about using the battery .......................................................
Notes about charging the battery ..................................................
Optional accessories ................................................................ 144
FCC notice ................................................................................. 148
122
122
122
122
123
123
124
124
124
126
126
126
128
128
128
128
10
Concepts in Photography
Shooting postures
A correct posture for stabilizing the camera is necessary for taking a
good photo. Even if you hold a camera correctly, the wrong posture
can cause the camera to shake. Stand up straight and remain still to
maintain a steady base for your camera. When shooting with a low
shutter speed, hold your breath to minimize body movement.
Standing photography
Compose your shot; stand up straight with your feet shoulder-length
apart, and keep your elbows pointed down.
Holding the camera
Hold the camera with your right hand and place you right index finger
on the shutter button. Place your left hand under the lens for support.
11
Concepts in Photography
Crouching photography
Compose your shot, crouch with one knee touching the ground, and
keep a straight posture.
Aperture
The aperture, a hole that controls the amount of light that enters the
camera, is one of the three factors that determine the exposure. The
aperture housing contains thin, metal plates that open and close to let
light through the aperture and into the camera. The size of the aperture
is closely related to the brightness of a photo: the larger the aperture,
the brighter the photo; the smaller the aperture, the darker the photo.
Aperture sizes
Minimum aperture
Darker photo
(aperture opened slightly)
Medium aperture
Maximum aperture
Brighter photo
(aperture opened wide)
12
Concepts in Photography
The size of the aperture is represented by a value known as an
“F-number.” The f-number represents the focal length divided by the
diameter of the lens. For example, if a lens with a 50 mm focal length
has an f-number of F2, the diameter of the aperture is 25 mm.
(50 mm/25 mm=F2) The smaller the f-number, the greater the size of
the aperture.
Aperture value and the depth of field
You can blur or sharpen the background of a photo by controlling the
aperture. It is closely related to the depth of field (DOF), which can be
expressed as small or large.
The opening in the aperture is described as the Exposure Value (EV).
Increasing the Exposure Value (+1 EV) means the amount of light
doubles. Decreasing the Exposure Value (-1 EV) means the amount of
light halves. You can also use the exposure compensation feature to
fine-tune the amount of light by subdividing exposure values into 1/2,
1/3 EV, and so on.
+1 EV
F1.4
-1 EV
F2
A photo with a large DOF
F2.8
F4
F5.6
F8
A photo with a small DOF
The aperture housing contains several blades. These blades move together
and control the amount of light passing through the center of the aperture.
The number of blades also affects the shape of light when shooting night
scenes. If an aperture has an even number of blades, light divides into an
equal number of sections. If the number of blades is odd, the number of
sections is double the number of blades.
Exposure Value Steps
For example, an aperture with 8 blades divides light into 8 sections and an
aperture with 7 blades into 14 sections.
7 blades
8 blades
13
Concepts in Photography
Therefore, the faster the shutter speed, the less light will be let in.
Likewise, the slower the shutter speed, the more light will be let in.
Shutter speed
Shutter speed refers to the amount of time it takes to open and close
the shutter, and it is an important factor in the brightness of a photo, as it
controls the amount of light which passes through the aperture before it
reaches the image sensor.
As the photos below illustrate, a slow shutter speed allows more time
to let light in, so the photo becomes brighter. On the other hand, a fast
shutter speed allows less time to let light in and the photo becomes
darker and more easily freezes subjects in motion.
Usually, the shutter speed is manually adjustable. The measurement
of the shutter speed is known as the “Exposure Value” (EV), which is
marked in intervals of 1 s, 1/2 s, 1/4 s, 1/8 s, 1/15 s, 1/1000 s, 1/2000 s,
and so on.
+1 EV
Exposure
-1 EV
0.8 s
1s
1/2 s
1/4 s
1/8 s
1/15 s
0.004 s
1/30 s
Shutter Speed
14
Concepts in Photography
ISO sensitivity
The exposure of an image is determined by the sensitivity of the
camera. This sensitivity is based on international film standards, known
as ISO standards. On digital cameras, this sensitivity rating is used
to represent the sensitivity of the digital mechanism that captures the
image.
Because a low ISO sensitivity means the camera will be less sensitive
to light, you need more light to have an optimal exposure. When using
a low ISO sensitivity, open the aperture more or reduce the shutter
speed to allow more light to enter the camera. For example, on a sunny
day when light is abundant, a low ISO sensitivity does not require a low
shutter speed. However, in a dark place or at night, a low ISO sensitivity
and a fast shutter speed will result in a blurry photo.
ISO sensitivity doubles as the number doubles. For example, an ISO
200 setting is capable of capturing images at twice the speed of an ISO
100 setting. However, higher ISO settings can result in “noise”—small
specks, spots, and other phenomena in a photo that give the shot
a noisy or dirty appearance. As a general rule, it is best to use a low
ISO setting to prevent noise in your photos, unless you are shooting in
darkened environments or at night.
A photo captured with a tripod and
high sensitivity
A blurred photo with a low ISO sensitivity
Changes in the quality and brightness according to ISO sensitivity
15
Concepts in Photography
How the aperture setting, shutter speed,
and ISO sensitivity control exposure
The aperture setting, shutter speed, and ISO sensitivity are closely
interconnected in photography. The aperture setting controls the
opening that regulates the light that enters the camera, while the shutter
speed determines the length of time that light is allowed to enter.
ISO sensitivity determines the speed at which the film reacts to light.
Together, these three aspects are described as the triangle of exposure.
A change in shutter speed, aperture value, or ISO sensitivity can be
offset by adjustments to the others to maintain the amount of light.
The results, however, change according to the settings. For example,
shutter speed is useful in expressing movement, aperture can control
the depth of field, and ISO sensitivity can control the graininess of a
photo.
Settings
Results
Settings
Shutter speed
Results
Fast speed
= less light
Slow speed
= more light
Fast = still
Slow = blurry
ISO sensitivity
High sensitivity
= more sensitive to light
Low sensitivity
= less sensitive to light
High = more grainy
Low = less grainy
Aperture
Wide aperture
= more light
Narrow aperture
= less light
Wide = small depth of field
Narrow = large depth of field
16
Concepts in Photography
Correlation between focal length, angle,
and perspective
Long focal length
telephoto lens
Focal length, which is measured in millimeters, is the distance between
the middle of the lens to its focal point. It affects the angle and
perspective of captured images. A short focal length translates into a
wide angle, which allows you to capture a wide shot. A long focal length
translates into a narrow angle, which allows you to capture telephoto
shots.
telephoto shot
narrow angle
Short focal length
Look at these photos below and compare the changes.
wide-angle lens
wide shot
wide angle
20 mm angle
50 mm angle
200 mm angle
Normally, a lens with a wide angle is suitable for shooting landscapes and
a lens with a narrow angle is recommended for shooting sports events or
portraits.
17
Concepts in Photography
What controls out-of-focus effects?
Depth of field
Portraits or still-life photos mostly acclaimed by people are the ones on
which the background is out of focus so the subject looks pronounced.
Depending on the focused areas, a photo can be blurred or sharpened.
This is called ‘a low DOF’ or ‘a high DOF’.
The depth of field is the focused area around the subject. Therefore,
a small DOF signifies that the focused area is narrow and a large DOF
means the focused area is wide.
DOF depends on aperture value
The wider the aperture is (namely the lower the aperture value), the
lower the DOF becomes. Under the condition where the other values
including shutter speed and ISO sensitivity are equal, a low aperture
value leads to a photo with a low DOF.
A photo with a small DOF, which stresses the subject and makes the
rest of it blurred, can be obtained by using a telescope lens or selecting
a low aperture value. Conversely, a photo with a large DOF which
shows all the elements on the photo sharply focused can be achieved
by using a wide angle lens or selecting a high aperture value.
50 mm F5.7
Small Depth of Field
50 mm F22
Large Depth of Field
18
Concepts in Photography
DOF depends on focal length
The longer the focal length is, the lower the DOF gets. A telescope lens
with a longer focal length than a telescope lens with a short focal length
is better to capture a photo of a low DOF.
DOF depends on the distance between the subject and
the camera
The shorter the distance between the subject and the camera is, the
lower the DOF gets. Therefore, taking a photo close to a subject can
result in a photo of low DOF.
A photo captured with a 100 mm telescope lens
A photo captured with a 20 mm
telescope lens
A photo captured with a 100 mm
telescope lens
A photo captured close to the subject
19
Concepts in Photography
DOF preview
You can use the Custom button to get an idea of what your shot will
look like before shooting. When you press the button, the camera
adjusts the aperture to the predefined settings and shows the results on
the screen. Set the function of the Custom button to Optical Preview.
(p. 97)
Composition
It is fun to capture a photo of the beauty of world with a camera. No
matter how the world is beautiful, however, a poor composition cannot
capture the beauty of it.
When it comes to composition, it is very important to prioritize subjects.
Composition in photography means arranging objects in a photo.
Usually, abiding by the rule of thirds leads to a good composition.
Rule of Thirds
To use the rule of thirds, divide the image into a 3x3 pattern of equal
rectangles.
To compose photos that best emphasize the subject, make sure the
subject is located at one of the corners of the center rectangle.
20
Concepts in Photography
Using the rule of thirds will create photos with stable and compelling
compositions. Below are a few examples.
Photos with two subjects
If your subject is in one corner of the photo, it creates an unbalanced
composition. You can stabilize the photo by capturing a second subject
in the opposite corner to balance the weight of the photo.
Subject 2
Subject 1
Unstable
Subject 2
Subject 1
Stable
When taking landscape photos, centering the horizon will create an
unbalanced effect. Give more weight to the photo by moving the
horizon up or down.
Subject 1
Subject 1
Subject 2
Subject 2
Unstable
Stable
21
Concepts in Photography
Flash guide number
Flash
Light is one of the most important components in photography. It’s
not easy, however, to have an enough amount of light anytime and
anywhere. Making use of a flash allows you to optimize light settings
and create a variety of effects.
Flash, also known as strobe or speed light, helps to create adequate
exposure in low-light conditions. It is also useful in light-abundant
situations. For example, flash can be used in compensating the
exposure of a subject’s shadow or capturing clearly both the subject
and the background in backlit conditions.
The model number of a flash refers to the flash’s power, and the
maximum amount of light created is represented by a value known
as a “guide number.” The bigger the guide number, the more light is
emitted from the flash. The guide number is achieved by multiplying the
distance from the flash to the subject and the aperture value when the
ISO sensitivity is set to 100.
Guide number = Flash to Subject Distance X Aperture value
Aperture value = Guide number / Flash to Subject Distance
Flash to Subject Distance = Guide number / Aperture value
Therefore, if you know the guide number of a flash, you can estimate an
optimum flash to subject distance when setting the flash manually. For
example, if a flash has a guide number of GN 20 and is 4 meters away
from the subject, the optimal aperture value is F5.0.
Before correction
After correction
22
Concepts in Photography
Bounce Photography
Bounce photography refers to the method of photography which
redirects the light from the subject to the ceiling or walls so that the
light spreads evenly. Normally, photos captured with flash may appear
unnatural and cast shadows. Subjects in photos captured with bounce
photography cast no shadows and look smooth due to evenly spread
light.
23
Chapter 1
My Camera
Learn about your camera’s layout, display icons, basic functions, supplied lens,
and optional accessories.
My Camera
Getting started
Unpacking
Check your product box for the following items.
Camera
(including the body cap
and hot-shoe cover)
External Flash
USB cable
Recharable battery
Battery cradle/AC power cable
Software CD-ROM
(User manual included)
User manual Basic Operation
Strap
• The illustrations may differ from your actual items.
• You can purchase optional accessories at a retailer or a Samsung service center. Samsung is not responsible for any
problems caused by using unauthorized accessories. For information about accessories, refer to page 144.
25
My Camera
Camera layout
1
12
11
10
9
2 3
4
No.
5
6
7
1
8
Name
Mode dial
• t: Smart Auto mode (p. 41)
• P: Program mode (p. 42)
• A: Aperture Priority mode (p. 43)
• S: Shutter Priority mode (p. 43)
• M: Manual mode (p. 44)
• i: Lens Priority mode (p. 45)
• N: Magic mode (p. 48)
• p: Panorama mode (p. 48)
• s: Scene mode (p. 49)
• v: Movie mode (p. 51)
Jog dial
• In the Menu screen: Move to a
desired menu item.
• In Shooting mode: Adjust shutter
2
No.
Name
3
Speaker
4
Microphone
5
Eyelet for camera strap
6
Image sensor
7
Lens release button
8
Lens mount
9
Lens mount index
10
AF-assist light/Timer lamp
11
Power switch
12
Shutter button
speed or aperture value in some
shooting modes and change the size
of a focus area.
• In Playback mode: Enlarge or
reduce a photo, view thumbnails,
adjust the volume level.
26
My Camera >
Camera layout
1 2
No.
3
4
5
6
7
8
Name
1
Hot-shoe cover
2
Hot-shoe
3
No.
8
11 10
9
5
6
Delete/Custom button
• In Shooting mode: Perform the
assigned function. (p. 97)
Video recording button
• In Playback mode: Delete files.
Start recording a video.
Navigation button (Smart dial)
• In Shooting mode
- D: View camera settings and
Status lamp
4
Name
Indicate the status of the camera.
• Blinking: When saving a photo,
shooting a video, sending data to a
computer or printer.
• Steady: When there is no data
transfer or when data transfer to a
computer or printer is complete.
change options
9
• In other situations
Move up, down, left, right,
respectively. (You can also rotate the
navigation wheel.)
EV adjust button W (p. 80)
Press and hold [W], and then scroll the
jog dial to adjust the exposure value.
Fn button f
Access major functions and fine-tune
some settings.
- I: Select an ISO value
- C: Select a drive option
- F: Select an AF mode
10
11
Playback button y
Enter Playback mode.
MENU button m
Access options or menus.
OK button o
• In the Menu screen: Save the
7
selected options.
• In Shooting mode: Allow you to
select a focus area manually in some
shooting modes.
27
My Camera >
Camera layout
No.
1
1
2
5
4
3
Name
USB and A/V port
Connect the camera to a computer or
TV.
2
HDMI port
3
Battery chamber/Memory card cover
4
Tripod mount
5
Display
Insert a memory card and battery.
28
My Camera
Display icons
In Shooting mode
Icon
Capturing photos
1
London
2
3
1. Shooting options (left)
Icon
Description
Photo size
Panorama mode (p. 48)
Histogram (p. 96)
Metering (p. 75)
Shooting mode
White Balance (p. 58)
Focus
White Balance micro adjustment
Flash indicator
Face tone
Shutter speed
Face retouch
Aperture value
Picture Wizard (p. 61)
Exposure value
Smart filter (p. 48)
ISO sensitivity (p. 57)
Magic frame (p. 48)
Memory card not inserted**
Optical Image Stabilization (OIS) (p. 68)
Available number of photos
Description
i-Zoom on
Focus area
i-Zoom ratio
Face detection
GPS activated*
AF mode (p. 62)
Date
Color space
Time
Smart range (p. 78)
Location information*
Description
Drive mode
Flash option
Description
Camera shake
3. Shooting information
Icon
Icon
Flash intensity
Photo quality
2. Shooting options (right)
Icon
Description
: Fully charged
: Partially charged
(Red): Empty (recharge
the battery)
* These icons appear when you attach an optional
GPS module.
** Photos that were captured without inserting a memory
card cannot be printed, or transferred to a memory card
or a computer.
The icons displayed will change according to
the mode you select or the options you set.
Focus aid bar (p. 67)
Auto focus frame
Spot metering area
Distance Scale (p. 96)
29
My Camera >
Display icons
Recording videos
1
1. Shooting options (left)
Icon
2
3
Description
3. Shooting information
Icon
Description
Auto focus activated
Date
Video size
Time
Video quality
Histogram (p. 96)
Multi Motion
Movie AE mode
AF mode (p. 62)
Shutter speed
Fader (p. 82)
Aperture value
Voice recording on (p. 82)
Exposure value
ISO sensitivity
2. Shooting options (right)
Icon
Memory card not inserted
Description
Available recording time
Timer
: Fully charged
: Partially charged
(Red): Empty (recharge the
battery)
Metering (p. 75)
White Balance (p. 58)
Picture Wizard (p. 61)
Optical Image Stabilization (OIS)
(p. 68)
The icons displayed will change according to
the mode you select or the options you set.
30
My Camera >
Display icons
In Playback mode
Viewing photos
1
Playing videos
London
Mode
Metering
Flash
Focal Length
White Balance
EV
Picture Wizard
Photo Size
Date
Icon
2
Information
Movie Size
Date
3
YWXXUW^UWX
Description
Volume
Continuously captured file
4
No.
1
2
Location information
Sound picture file (p. 50)
RAW file
3
Description
Stop
Pause
Icon
Description
Captured photo
Playback speed
RGB histogram (p. 96)
Volume
Shooting mode, Bulb, Metering, Flash,
White Balance, Picture Wizard, Focus
range, Exposure value, Photo size,
Date
Folder number - File number
Current playback time
Video length
3D file
Print information added to file (p. 108)
Protected file
4
Shutter speed, Aperture value, ISO
value, Current file/The total number of
files
Folder number - File number
Location information
Shutter speed
Aperture value
ISO value
Current file/The total number of files
31
My Camera
Lenses
You can purchase optional lenses made exclusively for your NX series
camera. Learn about the functions of each lens and select one that suits
your needs and preferences.
Lens layout
SAMSUNG 20-50 mm F3.5-5.6 ED lens (example)
7
No.
Description
1
2
Lens mount index
3
Lens
4
Focus ring (p. 67)
5
i-Function button (p. 46)
6
Zoom ring
7
Lens contacts
Zoom lock switch
1
2
6
3
5
4
32
My Camera >
Lenses
Locking or unlocking the lens
To unlock the lens, rotate the zoom ring counter-clockwise until you hear
the click.
To lock the lens, pull and hold the zoom lock switch away from the
camera body and rotate the zoom ring clockwise.
You cannot capture a photo when the lens is locked.
33
My Camera >
Lenses
SAMSUNG 18-55 mm F3.5-5.6 OIS II lens (example)
SAMSUNG 16 mm F2.4 lens (example)
8
1
2
5
1
2
3
3
4
4
5
6
7
No.
Description
1
2
Lens mount index
1
2
3
Zoom ring
4
Lens
3
Focus ring (p. 67)
5
Lens contacts
4
Lens hood mount index
5
Lens
6
i-Function button (p. 46)
7
AF/MF switch (p. 62)
8
Lens contacts
No.
Description
i-Function button (p. 46)
Lens mount index
Focus ring (p. 67)
34
My Camera >
Lenses
Lens markings
No.
Find out what the numbers on the lens signify.
1
SAMSUNG 18-200 mm F3.5-6.3 ED lens (example)
Description
Aperture value
A range of supported aperture values. For example, 1:3.5-6.3
means the maximum aperture value range from 3.5 to 6.3.
Focal length
2
The distance from the middle of the lens to its focal point
(in millimeters). This figure is expressed in a range: minimum
focal length to maximum focal length of the lens.
Longer focal lengths result in narrower angles of view and the
subject is magnified. Shorter focal lengths result in wider angles
of view.
ED
3
ED stands for Extra-low Dispersion. Extra-low dispersion glass is
effective in minimizing chromatic aberration (a distortion that occurs
when a lens fails to focus all colors to the same convergence point).
OIS (p. 68)
1
2
3 4 5
4
5
Optical Image Stabilization. Lenses with this feature can detect
camera shake and effectively cancel out the movement inside the
camera.
Ø
The lens diameter. When you attach a filter to the lens, make sure
that the diameters of the lens and the filter are the same.
35
My Camera
Accessories
You can use accessories including external flash and GPS module that
can help you capture better and more convenient photos.
For more information about optional accessories, refer to the manual for
each accessory.
External flash layout
SEF15A (example) (optional)
1
2
3
• The illustrations below may differ from the actual items.
• You can purchase Samsung-approved accessories at a retailer or a
Samsung service center. Samsung is not responsible for damage caused
by using another manufacturer's accessories.
4
5
6
7
No.
Description
1
READY lamp/Test button
2
[MODE] button
3
Power button
4
Hot-shoe fastening dial
5
Hot-shoe connection
6
Battery cover
7
Bulb
36
My Camera >
Accessories
SEF8A (example)
Connecting the flash
1
1
Remove the hot-shoe cover from the camera.
2
Connect the flash by sliding it into the hot-shoe.
2
3
No.
1
2
3
Description
Bulb
Hot-shoe fastening dial
Hot-shoe connection
37
My Camera >
3
Accessories
Lock the flash into place by turning the hot-shoe fastening
dial clockwise.
• You can capture a photo with a flash that is not fully charged, but it is
recommended to use a fully charged flash.
• Available external flashes are SEF8A, SEF15A, SEF20A, and SEF42A.
• The available options may differ depending on the shooting mode.
• There is an interval between two bursts of the flash. Do not move until the
flash fires a second time.
• Flash options and the flash intensity adjustment are available only when
you use the NX exclusive external flash.
• SEF8A, which is bundled with your camera, is not compatible with other
NX series cameras.
• For more details about optional flashes, refer to the user manual for the
flash.
4
Lift up the flash for use.
Use only Samsung-approved flashes. Using incompatible flashes may
damage your camera.
38
My Camera >
Accessories
GPS module layout (optional)
1
Attaching the GPS module
1
Remove the hot-shoe cover from the camera.
2
Mount the GPS module by sliding in into the hot-shoe.
2
3
4
5
No.
Description
1
Status lamp
2
Power button
3
Hot-shoe fastening dial
4
Hot-shoe connection
5
Battery cover
39
My Camera >
Accessories
3
Lock the GPS module into place by turning the hot-shoe
fastening dial counter-clockwise towards LOCK.
4
Press the power button of the GPS module.
40
My Camera
Shooting modes
Two simple shooting modes—Smart Auto and Scene mode—help you
capture photos with numerous automatic settings. Additional modes
allow for greater customization of settings.
Icon
t Smart Auto mode
In Smart Auto mode, the camera recognizes surrounding conditions
and automatically adjusts factors that contribute to exposure, including
shutter speed, aperture value, metering, White Balance, and exposure
compensation. As the camera controls most of the functions, some
shooting functions are limited. This mode is useful for capturing quick
snapshots with the least amount of adjustment.
Description
t Smart Auto mode (p. 41)
P
Program mode (p. 42)
A
Aperture Priority mode (p. 43)
S
Shutter Priority mode (p. 43)
M
Manual mode (p. 44)
i
Lens Priority mode (p. 45)
N
Magic mode (p. 48)
p
Panorama mode (p. 48)
s Scene mode (p. 49)
v
Movie mode (p. 51)
41
My Camera >
Shooting modes
P Program mode
The camera automatically adjusts shutter speed and aperture value so
that an optimal exposure value can be achieved.
This mode is useful when you want to capture shots of constant
exposure while being able to adjust other settings.
Program Shift
Program Shift function lets you adjust the shutter speed and aperture
value while the camera maintains the same exposure. When you scroll
the jog dial to the left or rotate the navigation button counter-clockwise,
the shutter speed decreases and the aperture value increases. When
you scroll the jog dial to the right or rotate the navigation button
clockwise, the shutter speed increases and the aperture value
decreases.
42
My Camera >
Shooting modes
A Aperture Priority mode
S Shutter Priority mode
In Aperture Priority mode, the camera automatically calculates shutter
speed according to the aperture value you choose. You can adjust the
depth of field (DOF) by changing the aperture value. This mode is useful
for taking portraits and landscape shots.
In Shutter Priority mode, the camera automatically adjusts the aperture
value according to the shutter speed you choose. This mode is useful
for capturing photos of fast-moving subjects or for creating tracer
effects in a photo.
For example, set the shutter speed to over 1/500 s to freeze the
subject. To make the subject appear blurred set the shutter speed to
below 1/30 s.
Large Depth of Field
Small Depth of Field
In low-light settings, you may need to increase the ISO sensitivity to prevent
blurred photos.
Slow shutter speed
Fast shutter speed
In order to compensate for the reduced amount of light allowed by fast
shutter speeds, open the aperture and let in more light. If your photos are still
too dark, increase the ISO value.
43
My Camera >
Shooting modes
M Manual mode
Manual mode lets you adjust the shutter speed and aperture value
manually. In this mode, you can fully control the exposure of your
photos.
This mode is useful in controlled shooting environments, such as a
studio, or when it is necessary to fine-tune camera settings. The Manual
mode is also recommended for shooting night scenes or fireworks.
Using bulb
Use a bulb to shoot night scenes or the night sky. During the interval
between the first [Shutter] press and the second [Shutter] press, the
shutter is left open so you can create moving light effects.
To use a bulb,
Completely scroll the jog dial to the left to Bulb. ► press
[Shutter] to start shooting ► press [Shutter] again to stop
shooting.
Framing mode
When you adjust the aperture value or shutter speed, the exposure
changes according to the settings, so the display may darken. With this
function on, the brightness of the display is constant regardless of the
settings, so you can better frame your shot.
To use Framing
Mode,
In Shooting mode, press [m] ► 2 ► Framing
Mode ► an option.
44
My Camera >
Shooting modes
i Lens Priority mode
3
Adjust the focus ring to select a scene or filter effect.
• You can also scroll the jog dial to select a scene or a filter effect.
Using the E mode
You can select an appropriate scene (i-Scene) or a filter effect to the lens
you attached. Available scenes and filter effects may differ depending on
the lens attached.
1
Rotate the mode dial to i.
2
Press [i-Function] on the lens to select E.
• You can also use this function by pressing [f].
Backlight
E
4
Fully press [Shutter] to capture the photo.
Available scene modes and filter effects (for SAMSUNG 20-50 mm F3.5-5.6
ED lens): Beauty Shot, Portrait, Children, Backlight, Landscape, Sunset,
Dawn, Beach & Snow, Night, Vignetting, Miniature, Fish Eye, Sketch, Defog,
Halftone Dots
45
My Camera >
Shooting modes
Using i-Function in PASM modes
3
• You can also scroll the jog dial to select an option.
When you use the i-Function button on an i-Function lens, you can
manually select and adjust shutter speed, aperture value, exposure
value, ISO sensitivity, and White Balance on the lens.
1
Rotate the mode dial to P, A, S or M.
2
Press [i-Function] on the lens to select a setting.
Adjust the focus ring to select an option.
• You can also rotate the navigation button or press [C/F] to
select a setting.
Auto
4
Fully press [Shutter] to capture the photo.
Auto
46
My Camera >
Shooting modes
3
Available options
Adjust the focus ring to select an option.
P
A
S
M
• You can also scroll the jog dial to select an option.
Aperture value
-
O
-
O
• Photo resolution varies according to the zoom rate if you use the
Shutter speed
-
-
O
O
Exposure value
O
O
O
-
ISO
O
O
O
O
White Balance
O
O
O
O
i-Zoom
O
O
O
O
Shooting mode
i-Zoom.
To select items to appear when you press [i-Function] on the lens in
Shooting mode, press [m] ► 5 ► iFn Customizing ► an option.
3:2
16:9
1:1
x1.2
4560X3040
(13.9M)
4560X2568
(11.7M)
3040X3040
(9.2M)
x1.4
3888X2592
(10.1M)
3888X2184
(8.5M)
2592X2592
(6.7M)
x1.7
3264X2176
(7.1M)
3264X1840
(6.0M)
2176X2176
(4.7M)
x2
2736X1824
(5.0M)
2736X1536
(4.2M)
1824X1824
(3.3M)
* These figures are based on the maximum resolution at each image ratio.
Using i-Zoom
The i-Zoom allows you to zoom in on a subject with less degradation of
photo quality than the Digital zoom. However, the photo resolution may
be lower than when you zoom in by rotating the zoom ring.
4
Fully press [Shutter] to capture the photo.
• i-Zoom is not available when you capture burst shots.
• i-Zoom is not available when you capture photos in the RAW file format.
• i-Zoom is deactivated when you record videos by pressing the video
recording button.
1
Rotate the mode dial to P, A, S, M or i.
2
Press [i-Function] on the lens to select i-Zoom.
• You can also rotate the navigation button or press [C/F] to
select a setting.
47
My Camera >
Shooting modes
N Magic mode
p Panorama mode
You can apply various filter effects and frame effects to your photos or
videos to create unique images. The shape and the feel of the photos or
videos will change according to the effect you select.
In Panorama mode, the camera captures and combines a series of
photos to create a panoramic image. You can capture a normal or 3D
panoramic photo. After pressing [Shutter], slowly move the camera to
one of the directions shown on the screen. The camera automatically
captures photos and saves it as a single photo. Captured 3D panoramic
photos can be viewed only on a 3D TV.
To set an effect,
In Shooting mode, press [f] ► Magic Mode ►
Magic Frame or Smart Filter ► a desired effect.
To select a
Panorama mode,
In Shooting mode, press [f] ► Panorama ►
Live Panorama or 3D.
• If you select Sketch among filter effects, the photo size will automatically
change to 5.9M and below.
• If you set a frame effect, the photo size will be automatically set to 2M.
• You cannot record a video with a frame effect.
• If you set a filer effect, the size of the video will be 640X480 or below.
48
My Camera >
Shooting modes
s Scene mode
In Scene mode, the camera selects the best settings for each type of
scene.
You can select a desired scene by pressing [f] in Shooting mode.
Icon
Icon
Description
Children: Make children appear more
noticeable by capturing their clothes
and the background vividly.
Description
Beauty Shot: Hide facial
imperfections.
Night: Capture scenes at night or in
low lighting. Use a tripod to prevent
your camera from shaking that is
caused by low shutter speed.
Landscape: Capture still-life scenes
and landscapes.
Portrait: Automatically detect and
focus on human faces so that you
can achieve clear, soft portraits.
Sports: Capture fast moving
subjects.
Close Up: Capture detailed parts of
a subject or small subjects, such as
flowers or insects.
Text: Clearly capture text from printed
or electronic documents.
Sunset: Capture scenes at sunset,
with natural-looking reds and yellows.
49
My Camera >
Icon
Shooting modes
Description
Dawn: Capture scenes at sunrise.
Icon
Description
Sound picture: Add a voice memo
before and after capturing a photo.
Backlight: Capture backlit subjects.
3D: Capture 3D photos. (p. 106)
Fireworks: Capture colorful fireworks
at night. Use a tripod to prevent your
camera from shaking.
Beach & Snow: Reduce
underexposed photos due to sunlight
reflected from sand or snow.
50
My Camera >
Shooting modes
v Movie mode
• H.264 (MPEG-4 part10/AVC) is the latest video coding format established
In Movie mode, you can shoot videos in High Definition (1920X1080)
and capture sound via the camera’s microphone.
•
In order to adjust the exposure level, you can select Program in the
Movie AE Mode options menu so that the aperture value and shutter
speed can be automatically set or select Aperture Priority to manually
set the aperture value. You can also select Shutter Priority to manually
set the shutter speed or select Manual to manually set both the
aperture value and shutter speed. While shooting a video, press [F] to
activate or deactivate the AF function.
Select Fader to fade in or out a scene. You can also select Voice to
mute or un-mute voice.
The camera lets you capture video files up to 25 minutes in length at
30 or 60 fps, and saves the files in MP4 (H.264) format. 60 fps is
available only with 1280X720.
•
•
•
•
•
•
•
•
in 2003 collaboratively by ISO-IEC and ITU-T. Since this format uses a high
compression rate, more data can be saved in less memory space.
If you have the image stabilizer option on when shooting a movie, the
camera may record the image stabilizer sound.
The zoom sound or other lens sounds may be recorded if you adjust the
lens while recording a video.
When using an optional video lens, the autofocus noise is not recorded.
If you remove the camera lens while recording a movie, the recording will
be interrupted. Do not change the lens while recording.
If you change the shooting angle of the camera suddenly while shooting
a movie, the camera may not be able to record images accurately. Use a
tripod to minimize camera shake.
In Movie mode, the camera supports only the Multi AF function. You
cannot use any other focus area setting functions, such as Face Detection
AF.
When the size of a movie file exceeds 4GB, the camera automatically
stops recording. If this occurs, continue shooting by starting a new movie
file.
If you use a slow writing memory card, the recording of your movie can be
interrupted because the card cannot process data at the rate the video is
being shot. If this occurs, replace the card with a faster memory card or
reduce the image size (for example, from 1280X720 to 640X480).
When formatting a memory card, always format using the camera. If you
format on another camera or a PC, you can lose files on the card or cause
a change in the capacity of the card.
51
My Camera >
Shooting modes
Available functions by shooting mode
Function
Smart Range (p. 78)
P/A/S/M
OIS (p. 68)
P/A/S/M/i/N/s/
v/t
Exposure compensation (p. 80)
P/A/S/i/N/p/s/v
For details about shooting functions, see Chapter 2.
Function
Available in
Size (p. 54)
P/A/S/M/i/N*/s*/
v/t
Quality (p. 56)
P/A/S/M/i/N*/p*/
s*/v
ISO (p. 57)
P/A/S/M*/v*
White Balance (p. 58)
P/A/S/M/v
Picture Wizard (p. 61)
P/A/S/M/v
Color Space (p. 79)
P/A/S/M/i/N/p/
s/t
AF Mode (p. 62)
P/A/S/M/i*/N*/p*/
s*/v*
AF Area (p. 64)
P/A/S/M/i*/p*/s*
MF Assist (p. 67)
P/A/S/M/i/N*/p/s/
v/t
Drive (Continuous/Burst/Timer/
Bracketing) (p. 69)
P/A/S/M/i*/N*/
s*/v*/t*
Flash (p. 73)
P*/A*/S*/M*/N*/
s*/t*
Metering (p. 75)
P/A/S/M/v
Available in
* Some functions are limited in these modes.
52
Chapter 2
Shooting Functions
Learn about the functions you can set in Shooting mode.
You can enjoy more customized photos and videos by using the shooting functions.
Shooting Functions
Size
As you increase the resolution, your photo or video will include more
pixels, so it can be printed on larger paper or displayed on a larger
screen. When you use a high resolution, the file size will also increase.
Select a low resolution for photos that will be displayed in a digital
picture frame or uploaded to the web.
To set the size,
In Shooting mode, press [f] ► Photo Size or Movie Size
► an option.
Icon
Size
Recommended for
2.0M (1728X1152) (3:2)
Printing on A5 paper.
16.9M (5472X3080) (16:9)
Printing on A1 paper or viewing on
an HDTV.
7.8M (3712X2088) (16:9)
Printing on A3 paper or viewing on
an HDTV.
4.9M (2944X1656) (16:9)
Printing on A4 paper or viewing on
an HDTV.
2.1M (1920X1080) (16:9)
Printing on A5 paper or viewing on
an HDTV.
13.3M (3648X3648) (1:1)
Printing a square photo on A1 paper.
7.0M (2640X2640) (1:1)
Printing a square photo on A3 paper.
4.0M (2000X2000) (1:1)
Printing a square photo on A4 paper.
1.1M (1024X1024) (1:1)
Printing a square photo on A5 paper.
Photo size options
Icon
Size
Recommended for
20.0M (5472X3648) (3:2)
Printing on A1 paper.
10.1M (3888X2592) (3:2)
Printing on A2 paper.
5.9M (2976X1984) (3:2)
Printing on A3 paper.
54
Shooting Functions >
Size
Video size options
Icon
Size
Recommended for
1920X1080 (30 fps) (16:9)
Viewing on a Full HDTV.
1280X720 (60 fps) (16:9)
Viewing on an HDTV.
1280X720 (30 fps) (16:9)
Viewing on an HDTV.
640X480 (30 fps) (4:3)
Viewing on a TV.
320X240 (30 fps) (4:3)
Uploading to the web.
55
Shooting Functions
Quality
The camera saves photos in either the JPEG or RAW format.
Icon
Icon
JPEG
• Compressed for normal quality.
• Recommended for printing in small size or
uploading to the web.
RAW files have the file extension “SRW”. To adjust and calibrate
exposures, White Balances, tones, contrasts, and colors of the RAW
files, or to convert them into JPEG or TIFF format, use the Samsung
RAW Converter program found on the supplied CD-ROM. Ensure you
have enough available memory to save photos in the RAW format.
In Shooting mode, press [f] ► Quality ► an option.
Photo quality options
Description
Normal:
Photos captured by a camera are often transformed to the JPEG format
and stored in the memory according to the settings of the camera at the
time of shooting. RAW files are not transformed to the JPEG format and
are stored in the memory without any changes.
To set the quality,
Format
RAW
RAW:
• Save a photo without data loss.
• Recommended for editing after shooting.
RAW+JPEG
RAW + S.Fine: Save a photo in both the JPEG
(S.Fine quality) and RAW format.
RAW+JPEG
RAW + Fine: Save a photo in both the JPEG
(Fine quality) and RAW format.
RAW+JPEG
RAW + Normal: Save a photo in both the JPEG
(Normal quality) and RAW format.
Video quality options
Extension
Description
Super Fine:
MP4 (H.264)
Normal: Record videos in normal quality.
• Compressed for the best quality.
• Recommended for printing in large size.
MP4 (H.264)
HQ: Record videos in high quality.
Format
Description
JPEG
Icon
Fine:
JPEG
• Compressed for better quality.
• Recommended for printing in normal size.
56
Shooting Functions
ISO sensitivity
The ISO sensitivity value represents the sensitivity of camera to light.
Examples
The larger the ISO value, the more sensitive the camera is to light.
Consequently, by selecting a higher ISO sensitivity value, you can
captured photos in dim or dark places at faster shutter speeds.
However, this may increase electronic noise and result in a grainy photo.
To set ISO
sensitivity,
In Shooting mode, press [I] ► an option.
ISO 100
ISO 400
ISO 800
ISO 3200
• Increase the ISO value in places where flash use is prohibited. You can
capture a clear photo by setting a high ISO value without having to secure
more light.
• Use the Noise Reduction function in order to reduce the visual noise that
can appear on photos of a high ISO value. (p. 94)
57
Shooting Functions
White Balance (light source)
The color of a photo depends on the type and quality of the light source.
If you want the color of your photo to be realistic, select an appropriate
lighting condition to calibrate the White Balance, such as Auto WB,
Daylight, Cloudy, or Tungsten, or adjust color temperature manually.
You can also adjust color for the preset light sources so that the colors
of the photo match the actual scene under mixed lighting conditions.
To set the White
Balance,
In Shooting mode, press [f] ► White Balance ►
an option.
Icon
Description
Fluorescent NW*: Select when shooting under a daylight
fluorescent lamp. Especially for white fluorescent light of very
white hues with a temperature of about 5000K.
Fluorescent Daylight*: Select when shooting under a daylight
fluorescent lamp. Especially for white fluorescent light of slightly
bluish hue with a temperature of about 6500K.
Tungsten*: Select when taking indoor photos under
incandescent bulbs or halogen lamps. Incandescent tungsten
bulbs tend to have a reddish hue. This option offsets that effect.
Flash WB*: Select when using a flash.
White Balance options
Icon
Description
Auto WB*: Use automatic settings depending on the lighting
conditions.
Custom Set:
Use your pre-defined settings.
You can manually set the White Balance by shooting a white
sheet of paper. Fill the spot metering circle with the paper and
set the White Balance.
* These options can be customized.
Daylight*: Select when taking outdoor photos on a sunny day.
This option results in photos closest to the natural colors of the
scene.
Cloudy*: Select when taking outdoor photos on a cloudy day or
in shadows. Photos captured on cloudy days tend to be more
bluish than on sunny days. This option offsets that effect.
Fluorescent White*: Select when shooting under a daylight
fluorescent lamp. Especially for white fluorescent light with a
color temperature of about 4200K.
58
Shooting Functions >
Option
White Balance (light source)
Customizing preset options
Description
Color Temperature:
Manually adjust the color temperature of the light source.
Color temperature is a measurement in degrees Kelvin
that indicates the specific type of light source. As the color
temperature increases, the color distribution becomes cooler.
Alternatively, as the color temperature decreases, the color
distribution becomes warmer.
Clear sky
You can also customize preset White Balance options.
To customize
preset options,
In Shooting mode, press [f] ► White Balance ►
an option ► [D] ► rotate the navigation button, scroll
the jog dial, or press [D/I/C/F].
White Balance : Daylight
Fluorescent_H
Daylight
Cloudy
Daylight
Fuorescent_L
Halogen lamp
Back
Reset
Tungsten
Candle light
59
Shooting Functions >
White Balance (light source)
Examples
Auto WB
Daylight
Fluorescent Daylight
Tungsten
60
Shooting Functions
Picture Wizard (photo styles)
Picture Wizard lets you apply different photo styles to your photo to
create various looks and emotional moods. You can also create and
save your own photo styles by adjusting color, saturation, sharpness,
and contrast for each style.
Examples
There is no rule for which style is suitable in which conditions.
Experiment with different styles and find your own settings.
To set a photo style,
In Shooting mode, press [f] ► Picture Wizard ►
an option.
Standard
Vivid
Portrait
Landscape
Forest
Retro
Cool
Calm
Classic
You can also adjust the value of the preset style settings. Select a Picture
Wizard option, press [D], and then adjust color, saturation, sharpness, or
contrast.
61
Shooting Functions
AF mode
Learn how to adjust the camera’s focus according to the subjects.
Single AF
You can select a focusing mode appropriate to the subject among
Single Auto Focus, Continuous Auto Focus, and Manual Focus. The AF
function is activated when you press [Shutter] halfway. In the MF mode,
you have to rotate the focus ring on the lens to focus manually.
Single AF is appropriate for shooting a still subject. When you press
[Shutter] halfway, the focus fixes in the focus area. The area turns green
when the focus is achieved.
In most cases, you can have a focus by selecting Single AF. Fast
moving subjects or subjects of a color similar to the background
are difficult to focus. Select an appropriate focusing mode for such
instances.
If your lens has an AF/MF switch, set the switch to MF to adjust the
focus manually.
When your lens has no AF/MF switch, press [F] to select a desired
AF mode.
To set the auto
focus mode,
In Shooting mode, press [F] ► an option.
62
Shooting Functions >
AF mode
Continuous AF
Manual focus
While you are pressing [Shutter] halfway, the camera continues to
automatic focusing. Once the focus area is fixed on the subject,
the subject is always in focus even when moving. This mode is
recommended for shooting a person on a bicycle, a running dog, or a
car racing scene.
You can manually focus on a subject by rotating the focus ring on the
lens. The MF Assist function lets you easily achieve a focus. While
you are rotating the focus ring, the focus area is magnified or the
focus aid bar appears to help you achieve a clear focus. This mode is
recommended for shooting an object similar in color to the background,
a night scene, or fireworks.
63
Shooting Functions
AF area
The AF area function changes the positions of the focus area.
Selection AF
Generally, cameras focus on the nearest subject. When there are a lot
of subjects, however, unwanted subjects can be in focus. In order to
prevent unwanted subjects from being in focus, change the focus area
so that a desired subject is in focus. You can get a clearer and sharper
photo by selecting an appropriate focus area.
You can set the focus on an area you want. Apply an out-of-focus effect
to make the subject more distinguishable.
To set the auto
focus area,
The focus on the photo below was repositioned and resized so that it
fits the subject’s face.
In Shooting mode, press [f] ► AF Area ► an option.
AF Zoom
Move
To resize or move the focus area, in Shooting mode, press [o]. Use the
navigation button to move the focus area. Scroll the jog dial to resize the
focus area.
64
Shooting Functions >
AF area
Multi AF
Face detection AF
The camera displays a green rectangle in places where focus is set
correctly. The photo is divided into two or more areas, and the camera
obtains focus points of each area. It is recommended for scenery
photos.
The camera focuses on human faces preferentially. Faces of up to
10 people can be detected. This setting is recommended for shooting a
group of people.
When you press [Shutter], the camera displays the focus areas in green
as shown in the photo below.
When you press [Shutter] halfway, the camera focuses on faces as
shown in the photo below. In cases of shooting a group of people, the
camera displays the focus on the nearest person’s face in white and the
rest of the people’s faces in gray.
65
Shooting Functions >
AF area
Self-portrait AF
It can be difficult to check whether your face is in focus when you are
taking a self-portrait. When this function is on, the focus distance is set
to close-up and the beep from the camera gets faster when in focus.
66
Shooting Functions
MF assist
In the manual focus (MF) mode, you have to rotate the focus ring on
the lens to focus manually. When you set the MF Assist function, you
can achieve a clearer focus. This function is only available on a lens that
supports manual focus.
To set the manual
focus assist,
In Shooting mode, press [m] ► 2 or 7 ►
MF Assist ► an option.
* Default
Option
Description
The focus area is magnified by 8 times when you rotate the
focus ring.
Enlarge x8
* Default
Option
Off
Description
Do not use the function.
The focus area is magnified by 5 times when you rotate the
focus ring.
Enlarge x5*
The focus aid bar rises as the focus improves, when you
rotate the focus ring.
FA
67
Shooting Functions
Optical Image Stabilization (OIS)
Use the Optical Image Stabilization (OIS) function to minimize camera
shake. OIS may not be available with some lenses.
OIS options
Icon
Came shake tends to occur in dark places or when shooting indoors. In
such cases, the camera uses slower shutter speeds in order to increase
the amount of light taken in, which can result in a blurry photo. You can
prevent this situation by using the OIS function.
If your lens has an OIS switch, you have to turn the switch to use the
OIS function.
To set OIS
options,
Description
Mode 1: The OIS function is applied only when you press
[Shutter] in full or half.
Mode 2: The OIS function is on.
Off: The OIS function is always off. (This option may not be
available with some lenses.)
In Shooting mode, press [f] ► OIS ► an option.
Without OIS correction
With OIS correction
68
Shooting Functions
Drive (shooting method)
You can set the shooting method such as Continuous, Burst, Timer and
so on.
Select Single to capture one photo at a time. Select Continuous or
Burst to shoot fast moving subjects. Select AE Bracket, WB Bracket,
or P Wiz Bracket to adjust exposure, White Balance, or apply Picture
Wizard effects. You can also select Timer to capture a photo of yourself.
To set the shooting method,
Continuous
Continuously capture photos while you are pressing [Shutter]. You can
capture up to 3 photos (Continuous Low (3fps)) or 7 photos (Continuous
High (7fps)) per second.
In Shooting mode, press [C] ► an option.
Single
Capture one photo whenever you press [Shutter]. Recommended for
general conditions.
69
Shooting Functions >
Drive (shooting method)
Burst
Timer
Consecutively capture up to 10 shots per second (3 seconds), 15 shots
per second (2 seconds), or 30 shots per second (1 second) when you
press [Shutter] once. Recommended for shooting the rapid motion of
fast moving subjects such as racing cars.
Capture a photo with a delay of 2 to 30 seconds. The delay is
adjustable in increments of 1 second.
To set the number of shots, in Shooting mode, press [C] ► Burst, and then
press [D].
To set the delay, in Shooting mode, press [C] ► Timer, and then press
[D].
70
Shooting Functions >
Drive (shooting method)
Auto Exposure Bracketing (AE Bracket)
White Balance Bracketing (WB Bracket)
When you press [Shutter], the camera captures 3 consecutive
photos: the original, one a step darker, and one a step lighter. Use a
tripod to prevent blurry photos as the camera captures three photos
continuously. You can adjust the settings in Bracket Set menu.
When you press [Shutter], the camera captures 3 consecutive photos:
the original and two more with different White Balance settings. The
original photo is captured when you press [Shutter]. The other two are
automatically adjusted according to the White Balance you have set.
You can adjust the settings in Bracket Set menu.
Exposure +2
Exposure -2
Original
WB+2
WB-2
Original
71
Shooting Functions >
Drive (shooting method)
Picture Wizard Bracketing
(P Wiz Bracket)
Bracketing setting
When you press [Shutter], the camera captures three consecutive
photos, each with a different Picture Wizard setting. The camera
captures a photo and applies the three Picture Wizard options you have
set to the image captured. You can select three different settings in
Bracket Set menu.
You can set up the options for AE Bracket, WB Bracket, and P Wiz
Bracket.
To set a
bracketing option,
Option
Standard
Description
AE Bracket Set
Set the order and the area of bracket.
• Bracket Order: Set the order in which the
camera captures the original, lighter, and darker
photo (represented by 0, +, and -).
• Bracket Area: Set the exposure range of the
3 bracketed photos.
WB Bracket Set
Adjust the White Balance interval range of the
3 bracketed photos.
For example, AB-/+3 adjusts the Amber value plus
or minus three steps. MG-/+3 adjusts the Magenta
value the same amount.
P Wiz Bracket Set
Select 3 Picture Wizard settings the camera uses
to capture the 3 bracketed photos.
Retro
Vivid
In Shooting mode, press [m] ► 3 ► Bracket Set
► an option.
72
Shooting Functions
Flash
In order to capture a realistic photo of a subject, the amount of light
should be constant. When the light source varies, you can use a flash
and supply a constant amount of light. Select appropriate settings
according to a light source and a subject.
To set flash options,
In Shooting mode, press [f] ► Flash ►an option.
Flash options
Icon
Description
Icon
Description
1st Curtain: The flash fires
immediately after the shutter
opens. The camera captures a
photo of a subject earlier in an
action sequence clearly.
2nd Curtain: The flash fires just
before the shutter closes. The
camera captures a photo of a
subject later in an action sequence
clearly.
Ball moving direction
Ball moving direction
Off: Do not use the flash.
Smart Flash: The camera automatically adjusts the brightness
of the flash according to the amount of light in the surrounding
environment.
• The available options may differ depending on the shooting mode.
• There is an interval between two bursts of the flash. Do not move until the
Auto: The flash automatically fires in dark places.
• Flash options and the flash intensity adjustment are available only when
Auto Red-eye*: The flash automatically fires and prevents
red-eyes.
flash fires a second time.
you use the NX exclusive external flash.
• You can capture a photo with a flash that is not fully charged, but it is
recommended to use a fully charged flash.
Fill in: The flash fires whenever you capture a photo.
Fill-in Red: The flash fires whenever you capture a photo and
prevents red-eyes.
Use only Samsung-approved flashes. Using incompatible flashes may
damage your camera.
73
Shooting Functions >
Flash
Correcting the red-eye effect
Flash : Fill in
If the flash fires when you capture a photo of a person in the dark, a red
glow may appear in the eyes. To prevent this, select Fill-in Red.
Flash Option
Back
Without red-eye correction
With red-eye correction
If the subject is too far from the camera or moves when the first flash fires,
red-eyes may not be reduced.
Adjusting the flash intensity
Reset
• Adjusting the flash intensity may not be effective when:
- the subject is too close to the camera
- you set a high ISO sensitivity
- the exposure value is too big or too small
• In some shooting modes, you cannot use this function.
• If you attach an intensity-adjustable external flash to the camera, the
intensity settings of the flash will be applied.
• If the subject is too close when you use the flash, some light may be
blocked, resulting in a dark photo. Ensure that the subject is within the
recommended range, which varies by lens.
• When a lens hood is attached, the light from the flash can be blocked by
the hood. Remove the hood to use the flash.
Adjust the flash intensity to avoid overexposure or underexposure.
You can adjust it by ± 2 levels.
To set the flash
intensity,
In Shooting mode, press [f] ► Flash ► an option ►
[D] ► scroll the jog dial or rotate the navigation button, or
press [C/F].
74
Shooting Functions
Metering
The metering mode refers to the way in which a camera measures the
quantity of light.
The camera measures the amount of light in a scene, and in many of its
modes, uses the measurement to adjust various settings. For example,
if a subject looks darker than its actual color, the camera captures an
overexposed photo of it. If a subject looks lighter than its actual color,
the camera captures an underexposed photo of it.
Multi
The Multi mode calculates the amount of light in multiple areas. When
light is sufficient or insufficient, the camera adjusts the exposure by
averaging the overall brightness of the scene. This mode is suitable for
general photos.
The brightness and overall mood of the photo can also be affected by
how the camera measures the amount of light. Select an appropriate
setting for a shooting condition.
To set a metering
option,
In Shooting mode, press [f] ► Metering ► an option.
75
Shooting Functions >
Metering
Center-weighted
Spot
The Center-weighted mode calculates a broader area than the Spot
mode does. It sums up the amount of light in the center portion of
the shot (60 ~ 80 %) and that of the rest of the shot (20 ~ 40 %). It
is recommended for situations where there is a slight difference in
brightness between a subject and a background or an area of the
subject is large compared to the overall composition of the photo.
The Spot mode calculates the amount of light in the center. When you
capture a photo in conditions where there is a strong backlight behind
a subject, the camera adjusts the exposure so as to shoot a subject
correctly. For example, when you select the Multi mode in a strong
backlight condition, the camera calculates that the overall amount of
light is abundant, which results in a darker photo. The Spot mode can
prevent this situation as it calculates the amount of light in a designated
area.
The subject is in bright color while the background is dark. The Spot
mode is recommended for a situation like this where a huge difference in
the exposure exists between a subject and a background.
76
Shooting Functions >
Metering
Measuring the exposure value of the focus area
When this function is turned on, the camera automatically sets an
optimal exposure by calculating the brightness of the focus area.
This function is only available when you select Spot metering or Multi
metering, and Selection AF.
To set this
function,
In Shooting mode, press [m] ► 2 ►
Link AE to AF Point ► an option.
77
Shooting Functions
Smart Range
This function automatically corrects the loss of bright detail that can
occur due to shading differences in the photo.
Without Smart Range effect
To set Smart
Range options,
With Smart Range effect
In Shooting mode, press [f] ► Smart Range ►
an option.
78
Shooting Functions
Color space
Digital imaging devices such as digital cameras, monitors, and printers
have their own methods for representing colors, which are called color
spaces.
Adobe RGB
Your camera lets you select two color spaces: sRGB or Adobe RGB.
sRGB is widely used for creating colors on PC monitors and is also the
standard color space for Exif. sRGB is recommended for regular images
and images you intend to publish on the Internet.
sRGB
Adobe RGB is used for commercial printing and has a larger color range
than sRGB. Its wider range of colors helps you to easily edit photos on a
computer. Note that individual programs are generally compatible with a
limited number of color spaces. If you open an image in a program that
is not compatible with the image’s color space, the colors will appear
lighter.
To set the color
space,
In Shooting mode, press [f] ► Color Space ► an option.
79
Shooting Functions
Exposure compensation
The camera automatically sets the exposure by measuring the levels of
light from the photo’s composition and the position of a subject.
If the exposure set by the camera is higher or lower than you expected,
you can adjust the exposure value manually. The exposure value is
adjustable in ±3 increments. The camera displays the exposure warning
in red for each step beyond ±3 range.
To adjust the exposure value, hold down [W] and scroll left or right on
the jog dial. You can also adjust the exposure value by pressing [f],
and then selecting EVC (Exposure Value Compensation).
+2
-2
Original
You can check the exposure value by the position of the exposure level
indicator.
Exposure warning
Standard exposure index
Exposure level
indicator
Decreased exposure
(darker)
Increased exposure
(brighter)
80
Shooting Functions
Video functions
The functions available for video are explained below.
Multi Motion
Set the playing speed of a video.
Movie AE mode
Set the exposure mode for recording a video.
To set Movie AE
options,
Icon
In Shooting mode, press [f] ► Movie AE Mode ►
an option.
Description
Program: The aperture value and shutter speed are adjusted
automatically.
Aperture Priority: Set the aperture value manually before
recording a video. Scroll the jog dial or rotate the navigation
button to adjust the aperture value.
Shutter Priority: Set the shutter speed manually before recording
a video. Scroll the jog dial or rotate the navigation button to
adjust the shutter speed.
Manual: Set both the aperture value and shutter speed manually
before recording a video. Rotate the navigation button to adjust
the aperture value and scroll the jog dial to adjust the shutter
speed.
To set recording
speed options,
Option
In Shooting mode, press [m] ► 8 ► Multi Motion
► an option.
Description
x0.25
Record a video and play it at 1/4 normal speed.
x0.5
Record a video and play it at 1/2 normal speed.
x1
Record a video and play it at normal speed.
x5
Record a video and play it at 5X normal speed.
x10
Record a video and play it at 10X normal speed.
x20
Record a video and play it at 20X normal speed.
• If you select an option other than x1, sound will not be recorded.
• The available options may differ according to the video size.
81
Shooting Functions >
Video functions
Fader
Voice
You can fade in or fade out a scene using the fader function on the
camera without having to do it on a PC. Use the function appropriately
and add dramatic effects on your videos.
Sometimes, a muted video is more appealing than the one with sound.
Turn the voice off to record a muted video.
To set fader
options,
Icon
In Shooting mode, press [f] ► Fader ► an option.
To set voice
options,
In Shooting mode, press [f] ► Voice ► an option.
Description
Off: Fader function not used.
In: Scene gradually fades in.
Out: Scene gradually fades out.
In-out: The fader function is applied at the start and end of the
scene.
82
Chapter 3
Playback/Editing
Learn about how to play back and edit photos and videos.
Refer to chapter 5 for editing files on a PC.
Playback/Editing
Searching and managing files
Learn how to search photos and videos quickly through the thumbnail
view and to protect and delete files.
Viewing photos
1
Viewing image thumbnails
In order to search for photos and videos you want, convert to the
thumbnail view. The thumbnail view displays multiple images at a time
so that you can easily look through items you wish to find. You can
also classify and display files by their type, day recorded, and week
recorded.
Press [y].
• The most recent file you captured will be displayed.
Filter
2
Rotate the navigation button or press [C/F] to scroll
through files.
Scroll the jog dial to the left to display 3, 15, or
40 thumbnails.
(Scroll the jog dial to the right to return to the previous
mode.)
Alternatively, in Playback mode, press [m] ► x ► View ►
an option.
84
Playback/Editing >
Searching and managing files
Viewing files by category in Smart Album
Viewing files as a folder
1
In the thumbnail view, press [m].
Continuous, burst, and bracketing shots appear as a folder. Deleting a
folder will delete all photos in the folder.
2
Select a category, and then press [o].
Option
3
Description
Type
View files by the file type such as photo or video.
Date
View files by the date they were saved.
Week
View files by the week they were saved.
Location
View file by the place they were saved. (Only the
photos captured with a GPS module have the
location information.)
: Single View
Select an option, and then press [o].
Protecting files
Protect your files from accidental deletion.
1
In Playback mode, press [m] ► z ► Protect ►
an option. (Single, Select, All)
2
Rotate the navigation button or press [C/F] to select a
file, and then press [o].
3
Press [f].
85
Playback/Editing >
Searching and managing files
Deleting files
3
Press [
Delete files in Playback mode and secure more space on your memory
card. Protected files are not deleted.
4
When the pop-up message appears, select Yes.
Deleting all files
Deleting a single file
You can delete all files on the memory card at once.
You can select a single file and delete it.
1
In Playback mode, select a file, and then press [
].
• Alternatively, in Playback mode, press [m] ► z ►
Delete ► Single.
2
].
When the pop-up message appears, select Yes.
1
In Playback mode, press [m].
2
Select z ► Delete ► All.
3
When the pop-up message appears, select Yes.
Deleting multiple files
You can select multiple files and delete them.
1
In Playback mode, press [
] ► Multiple Delete.
• Alternatively, in Playback mode, press [m] ► z ►
Delete ► Select.
2
Select files you want to delete by rotating the navigation
button or pressing [C/F], and then press [o].
• Press [o] again to cancel your selection.
86
Playback/Editing
Viewing photos
Enlarging a photo
Viewing a slide show
You can enlarge photos when viewing them in Playback mode. You can
also use the Trim function to extract the portion of the image displayed
on the screen and save it as a new file.
You can view photos in a slide show, apply various effects to the slide
show, and play background music.
Magnified area
Magnification (the maximum
magnification may differ by
resolution)
1
In Playback mode, press [m].
2
Select
3
Select a slide show effect option.
• Skip to step 4 to start a slide show with no effects.
Option
Full Image
Do this
Move magnified area
Press [D/I/C/F].
Crop the enlarged image
Press [f]. (saved as a new file)
Return to the original image
Press [o].
You can scroll through files by rotating the navigation button, even when a
photo is enlarged.
4
Description
Images
Set the photos you want to view as a slide show.
• All: View all photos in a slide show.
• Date: View photos captured on a specific date in
a slide show.
• Sound picture: View voice recorded photos in a
slide show.
• Select: View selected photos in a slide show.
Effect
Select a transition effect.
Select Off for no effects.
Interval
Select the amount of time each photo is displayed.
Music
Play background music.
Trim
Scroll the jog dial to the right to enlarge a photo.
(Scroll the jog dial to the left to reduce a photo.)
To
.
Select Slide Show ► Play or Repeat.
• Slide show begins right away.
87
Playback/Editing >
Viewing photos
Auto rotating
With Auto Rotate on, the camera automatically rotates photos you have
captured vertically so they fit the screen horizontally.
To set auto rotate
options,
In Playback mode, press [m] ► x ► Auto Rotate
► an option.
88
Playback/Editing
Playing videos
You can play a video, capture an image from a video, or crop a video.
Pause
Stop
Video viewing controls
To
Trimming a video during playback
1
Press [o] at the point where you want the new video to
begin.
2
When paused, press [
3
Press [o] at the point where you want the new video to
end.
4
When paused, press [
5
When the pop-up message appears, select Yes.
].
].
Do this
Rewind
Press [C].
Scan backward in 2X, 4X, and 8X increments
each time you press [C].
Pause/Play
Press [o].
Fast forward
Press [F].
Scan forward in 2X, 4X, and 8X increments each
time you press [F].
Volume control
Scroll the jog dial to the left or right.
Stop
Press [D].
The cut file is saved as a separate file under a new name.
89
Playback/Editing >
Playing videos
Capturing an image during playback
1
Press [o] at the point where you want to save a still
image.
2
Press [I].
• The resolution of the captured image is the same as the video resolution.
• The captured file is saved as a separate file under a new name.
90
Playback/Editing
Editing photos
Perform photo editing tasks, such as resizing, rotating, eliminating
red-eye effects, and adjusting brightness, contrast, or saturation.
Edited photos are saved as new files under different file names.
3D photos and 3D panoramic photos cannot be edited with the Image
Edit function.
To set Image Edit options,
* Default
Icon
Description
Backlight: Correct the brightness of an underexposed photo.
(Off*, On)
In Playback mode, press [f] ►an option.
Before correction
Options
After correction
Resize: Resize the size of a photo.
* Default
Icon
Description
Smart Filter: Apply various filter effects to photos and create
unique images. (Off*, Miniature, Soft Focus, Old Film 1,
Old Film 2, Halftone Dots, Sketch, Fish Eye, Defog,
Negative)
The available resolutions may differ depending on the size of the
selected photo.
Rotate: Rotate a photo. (Off*, Right 90˚, Left 90˚, 180˚,
Horizontal, Vertical)
Face Retouch: Hide facial imperfections.
The new file may be smaller than the original.
The new file may be smaller than the original.
Red-eye Fix: Remove red-eyes on a photo. (Off*, On)
91
Playback/Editing >
Editing photos
* Default
Icon
Description
Brightness: Adjust the brightness of a photo.
The new file may be smaller than the original.
Contrast: Adjust the sharpness of a photo.
The new file may be smaller than the original.
Vignetting: Apply the retro-looking colors, high contrast, and
strong vignette effect of Lomo cameras.
The new file may be smaller than the original.
92
Chapter 4
Camera settings menu
Learn about the user settings and general settings menu.
You can adjust the settings to better suit your needs and preferences.
Camera settings menu
User settings
You can set the user environment with these settings.
Noise reduction
In Shooting mode, press [m] ► u or 5 ►
an option.
To set user options,
Use the Noise Reduction to reduce the visual noise in photos.
* Default
Option
ISO customizing
Description
High ISO NR
This function reduces noise that may occur when you
set a high ISO sensitivity. (Off, On*)
Long Term NR
This function reduces noise when you set the camera
for a long exposure. (Off, On*)
ISO step
You can set the size for the ISO sensitivity by either 1/3 or 1 step.
DMF
You can adjust the focus manually by rotating the focus ring after
achieving the focus by half-pressing [Shutter]. This feature may not be
available with some lenses.
Auto ISO range
You can set the maximum ISO value under which each EV step is
chosen when you set the ISO Auto.
* Default
Option
Value
1 Step
ISO 200, ISO 400, ISO 800*, ISO 1600, ISO 3200
1/3 Step
ISO 125, ISO 160, ISO 200, ISO 250, ISO 320,
ISO 400, ISO 500, ISO 640, ISO 800*, ISO 1000,
ISO 1250, ISO 1600, ISO 2000, ISO 2500, ISO 3200
AF Priority
You can set the camera to capture photos only when the subject is in
focus.
When you capture continuous or burst shots, the camera will capture photos
even if the AF priority function is turned on and the subject is not in focus.
94
Camera settings menu >
User settings
Distortion Correct
iFn Customizing
You can correct lens distortion that might occur from lenses.
This feature may not be available with some lenses.
You can select options that can be adjusted when you press
[i-Function] on an i-Function lens.
* Default
Option
Description
Aperture
Set to adjust the aperture value.
Shutter Speed
Set to adjust the shutter speed.
EV
Set to adjust the exposure value.
ISO
Set to adjust ISO sensitivity.
WB
Set to adjust the white balance.
i-Zoom
Set to adjust the zoom ratio.
95
Camera settings menu >
User settings
User display
No.
Histogram
Set the histogram on the display on or off.
You can add or remove shooting information from the display.
3
2
1
4
5
4
No.
1
2
Left Icons
Set to display icons on the left in Shooting mode.
3
Date & Time
Set to display the date and time.
About histogram
A histogram is a graph that shows the brightness distribution of
a photo. A histogram inclined to the left indicates a dark photo.
A histogram inclined to the right indicates a bright photo. The
height of the graph is related to color information. The graph
gets higher if a specific color is more common.
Insufficient exposure
Description
Right Icons
Set to display icons on the right in Shooting mode.
Description
5
Balanced exposure
Excessive exposure
Distance Scale
Set to display the distance between a subject and the camera
when you attach a lens that supports the Distance Scale
function. (e.g. SAMSUNG 60 mm F2.8 Macro ED OIS SSA
lens) (Off, ft, m*)
This feature is available only when you attach a lens that
supports the Distance Scale function.
96
Camera settings menu >
User settings
Key mapping
You can change the function assigned to the Custom button.
* Default
Button
Custom
Function
Set a function of the Custom button.
• Optical Preview*, which executes the Depth of Field
Preview function for the current aperture value. (p. 20)
• One Touch WB (White Balance), which executes the
Custom White Balance function.
• One Touch RAW +, which activates or deactivates the
RAW+JPEG feature.
• Reset, which resets some settings.
Grid Line
Select a guide to help you compose a scene. (Off*, 3 X 3, 4 X 4, +, X)
AF lamp
When shooting in dark places, turn the AF lamp on in order to have a
better auto focus. The Auto Focus functions more accurately in dark
places when the AF lamp is on.
97
Camera settings menu
Setting 1
Learn about the menu items of the Setting 1.
* Default
Item
To set Setting 1
options,
Set the method of numbering files and folders.
• Reset: After using the reset function, the next file name
is started at 0001.
• Series*: New file numbers continue the existing number
sequence, even if you have installed a new memory
card, formatted the card, or deleted all photos.
In Shooting mode, press [m] ► q ► an option.
* Default
Item
Language
Description
Set a language the camera shows on the display.
Set the method of creating file names.
• Standard*: SAM_XXXX.JPG(sRGB)/
_SAMXXXX.JPG(Adobe RGB)
• Date:
• The first folder name is 100PHOTO, if you have
File Number
- sRGB files - MMDDxxxx.JPG. For example, for a photo
File Name
Description
•
•
captured on Jan. 01, the file name would be
0101xxxx.jpg.
- AdobeRGB files - MDDxxxx.JPG for the months Jan
through Sept. For the months Oct through Dec, the
month number is replaced by the letters A (Oct.),
B (Nov.) and C (Dec.).
For example, for a photo captured on Feb. 03, the file
name would be 203xxxx.jpg. For a photo captured on
Oct. 05, the file name would be A05xxxx.jpg.
•
•
•
Folder Type
selected the sRGB color space and Standard file
naming, the first file name is SAM_0001.
File name numbers are increased by 1 from
SAM_0001 to SAM_9999.
Folder numbers are increased by 1 from 100PHOTO
to 999PHOTO.
The maximum number of files that can be saved in
one folder is 9999.
File numbers are assigned according to DCF (Design
rule for Camera File system) specifications.
If you change a file name (for example, on a
computer), the camera will not be able to play the file.
Set the type of folder.
• Standard*: XXXPHOTO
• Date: XXX_MMDD
98
Camera settings menu >
Setting 1
* Default
Item
Description
Format the memory card. Formatting prepares a memory
card for use in the camera and deletes all existing files
including protected files. (Yes, No)
Format
Reset
Errors can occur if you use a memory card formatted
by another brand of camera, a memory card reader, or
a computer. Please format memory cards in the camera
before using them to capture photos.
Reset the setup menu and shooting options to the factory
defaults. (Date, time, language, and video output settings
do not change.) (Yes, No)
99
Camera settings menu
Setting 2
Learn about the menu items of the Setting 2.
* Default
Item
To set Setting 2
options,
Set power shut off time. The camera shuts off if you do
not use it for the time you set. (30 sec, 1 min*, 3 min,
5 min, 10 min, 30 min)
In Shooting mode, press [m] ► w ► an option.
* Default
Item
Description
Quick View
Set the Quick View time length – the amount of time the
camera displays a photo immediately after you captured
it. (Off, 1 sec*, 3 sec, 5 sec, Hold)
Display
Adjust
Adjust the display brightness, auto brightness setting, or
display color.
• Display Brightness: You can adjust the display
brightness manually.
• Auto Brightness: Turn auto brightness on or off.
(Off, On*)
• Display Color: You can adjust the display color
manually.
Display Save
Set the display off time. The display turns off if you do not
use the camera for the time you set.
(Off, 30 sec*, 1 min, 3 min, 5 min, 10 min)
Description
Power Save
• The camera retains the power-off time setting even if
you replace the battery.
• Power save may not work if the camera is connected
to a computer, TV, or printer, playing a slide show or
movie.
Set date, time, date format, time zone and whether to
imprint the date on photos. (Time Zone, Date, Time,
Type, Imprint)
Date & Time
• The date appears on the lower right side of the photo.
• When you print a photo, some printers may not print
the date appropriately.
Help Guide
Display
Set to display help text about menus and functions.
(Off, On*)
100
Camera settings menu
Setting 3
Learn about the menu items of the Setting 3.
* Default
Item
To set Setting 3
options,
In Shooting mode, press [m] ► e ► an option.
* Default
Item
Description
Anynet+
(HDMICEC)
• System Volume: Set the sound volume or turn all sound
off entirely. (Off, Low, Medium*, High)
Sound
• AF Sound: Set the sound the camera makes in AF mode
on or off. (Off, On*)
• Button Sound: Set the sound the camera makes when
you press buttons on or off. (Off, On*)
• Sensor Cleaning: Remove dust from the sensor.
• Start-Up Action: When on, the camera performs sensor
HDMI
Output
Description
When you connect the camera to an HDTV that supports
Anynet+ (HDMI-CEC), you can control the play function of the
camera with the TV remote control.
• Off: You cannot control the play function of camera with the
TV remote control.
• On*: You can control the play function of camera with the
TV remote control.
When you connect the camera to an HDTV with an HDMI
cable, you can change the resolution of the image.
• NTSC: Auto*, 1080i, 720p, 480p
• PAL: Auto*, 1080i, 720p, 576p
If the connected HDTV does not support the resolution you
select, the camera sets the resolution one level lower.
cleaning each time you turn it on. (Off*, On)
Sensor
Cleaning
Video Out
Display the firmware version of the camera body and lens,
and update the firmware.
• Body Firmware: Display and update the firmware of the
camera body.
• Lens Firmware: Display and update the firmware of the lens.
As this product uses interchangeable lenses, the sensor
can get dust on it when you change lenses. This can lead
to dust particles appearing in the photos you capture. It
is recommended not to change lenses when you are in a
particularly dusty area. Also, make sure to attach the lens cap
to the lens when not using it.
Set the video signal output appropriate for your country when
connecting the camera to an external video device such as a
monitor or TV.
• NTSC*: USA, Canada, Japan, Korea, Taiwan, Mexico
• PAL (Supports only PAL B, D, G, H, or I): Australia, Austria,
Belgium, China, Denmark, Finland, Germany, England,
Italy, Kuwait, Malaysia, New Zealand, Singapore, Spain,
Sweden, Switzerland, Thailand, Norway
Firmware
Update
• You can download firmware upgrades from
www.samsung.com.
• You cannot run a firmware upgrade without a fully charged
the battery. Recharge the battery fully before running a
firmware upgrade.
• If you update the firmware, user settings values will be reset.
(Date, time, language, video out will not change.)
• Do not turn the camera off while the update is in progress.
101
Camera settings menu
GPS
Learn about the menu items of the GPS setting. You should purchase
an optional GPS accessory in order to use the GPS function.
To set GPS
options,
In Shooting mode, press [m] ► 4 ► an option.
* Default
Item
Description
Geotagging
Set to capture photos with location information
using the Global Positioning System (GPS). Location
information is added to the Exif data associated with
the photo. (Off, On*)
GPS Valid Time
Settings
Set the time to use the last location information when
the camera fails to receive GPS signals. If the camera
fails to receive GPS signals after the specified time,
the location information will not be recorded onto the
photos. (15 sec*, 30 sec, 1 min, 3 min, 10 min,
60 min)
Location
Display
Set to display the location information on the top right
screen of Shooting mode. The location information
will appear in Korean only when you are in Korea and
the display language is set to Korean. When another
language is set, the location information will appear in
English. (Off, On*)
GPS Reset
Set to search for GPS satellites closest to your current
position. (Yes, No)
102
Chapter 5
Connecting to external devices
Make full use of the camera by connecting it to external devices such as a computer, TV, or photo printer.
Connecting to external devices
Viewing files on a TV or HDTV
Play back photos or videos by connecting your camera to a TV using
the A/V cable.
4
Make sure the TV and the camera are turned on and then
select the video input mode or source (AV or AV1 for
example) of the TV.
Viewing files on a TV
5
View the videos and photos using the buttons on the
camera.
1
In Shooting or Playback mode, press [m] ► e ►
Video Out.
• Depending on the TV model, you may see some digital noise or part of an
image may not appear.
2
3
Select a video signal output according to your country or
region. (p. 101)
• Images may not be centered on the TV screen depending on your TV
settings.
• You can capture photos or videos while the camera is connected to a TV.
Connect the TV and the camera using the A/V cable.
Video
Audio
104
Connecting to external devices >
Viewing files on a TV or HDTV
Viewing files on an HDTV
1
2
In Shooting or Playback mode, press [m] ► e ►
HDMI Output ► an option.
Connect the HDTV and the camera using the HDMI cable.
• When using the HDMI cable, you can connect the camera to an HDTV
using the Anynet+(CEC) method.
• The Anynet+(CEC) functions allow you to control connected devices using
the TV remote control.
• If the HDTV supports Anynet+(CEC), the TV turns on automatically when
•
•
•
•
If both A/V and HDMI cables are connected at the same time, the HDMI
cable has the priority. Disconnect the A/V cable for better playback.
3
used in conjunction with the camera. This feature may not be available on
some HDTVs.
When connected to an HDTV by an HDMI cable, the camera cannot
capture a photo or video.
When connected to an HDTV, some of the camera’s playback functions
may not be available.
The length of time after which the camera and an HDTV are connected
may vary depending on the SD card that you are using.
As the main feature of an SD card is to increase the transfer speed, it is not
necessarily true to say that an SD card with a faster transfer speed is also
fast in using the HDMI function.
Make sure that the HDTV and camera are turned on, and
then select the HDMI mode on the HDTV.
• The HDTV screen mirrors the camera's display.
4
View the videos and photos using the buttons on the
camera.
105
Connecting to external devices >
Viewing files on a TV or HDTV
Viewing files on a 3D TV
You can view photos captured in 3D mode or 3D Panorama mode on a
3D TV.
1
In Shooting or Playback mode, press [m] ► e ►
HDMI Output ► an option.
6
Turn on your TV's 3D function.
• Refer to your TV's user manual for more details.
7
View 3D photos with the buttons on your TV's remote
control.
• You cannot view an MPO file in 3D effect on TVs that do not support
the file format.
2
Turn off your camera and 3D TV.
3
Connect your camera to your 3D TV with the optional
HDMI cable.
4
Turn on your camera.
• Use proper 3D glasses when you view an MPO file on a 3D TV.
Do not view the 3D images captured by your camera on a 3D TV or
3D monitor for an extended period of time. It may cause unpleasant
symptoms, such as eyestrain, fatigue, nausea, and more.
• If you have an Anynet+ compatible Samsung 3D TV and you
have turned on your camera's Anynet+ function, the 3D TV
turns on automatically and displays the camera screen, while the
camera automatically enters Playback mode.
• If you turn Anynet+ off in your camera, the 3D TV does not turn
on automatically.
5
Press [I] on the camera or the mode switching button
on the TV to switch to 3D TV Mode.
• Press [I] or the mode switching button again to switch to
2D TV Mode.
106
Connecting to external devices
Printing photos
Print photos on your camera by connecting to printers directly or saving
Digital Print Order Format (DPOF) information on a memory card.
2
Turn on your camera.
• When the pop-up message appears on the camera display,
select Printer.
If your printer has the mass storage feature, you must first set the USB
mode to Printer in the settings menu.
Printing photos with a PictBridge photo
printer
You can print photos with a PictBridge-compatible printer by connecting
your camera directly to the printer.
3
1
4
With the printer on, connect your camera to the printer
with the USB cable.
Scroll the jog dial or press [C/F] to select a photo.
• Press [m] to set printing options.
Press [o] to print.
107
Connecting to external devices >
Printing photos
Configuring print settings
Images
One Photo
Size
Layout
Type
Creating a print order (DPOF)
DPOF (Digital Print Order Format) lets you set the print size of a photo
and the number of copies to be printed. The camera saves the DPOF
information in the MISC folder of your memory card. Your camera
displays a DPOF indicator when it displays an image with DPOF
information. If you have set DPOF information for your images, you can
take the memory card to a digital printing shop for printing.
Quality
Date
Exit
Option
Print
To set DPOF
options,
In Playback mode, press [m] ► x ► DPOF ►
an item.
Description
Images
Select whether to print the current photo or all photos.
Size
Specify the size of the print.
Layout
Set the number of photos per page.
Type
Select the type of paper.
Quality
Set the print quality.
Date
Set to print the date.
File Name
Set to print the file name.
Reset
Reset setting to their default values.
Some options may not be supported by some printers.
108
Connecting to external devices >
Printing photos
DPOF options
Option
Description
Standard
You can select photos to print and the number of copies
for photos.
• Select: Select the number of copies for photos you
select. (Select photos you want to print ► Select the
number of copies by scrolling the jog dial left or right,
and then pressing [f].)
• All: Select the number of copies for all photos. (Select
the number of copies by pressing [D/I], and then
pressing [o].)
• Reset: Cancel all DPOF printing quantity selections.
Index
This option lets you print all photos set to be printed as
thumbnails in a single paper. The print size that you have
set is available only with DPOF 1.1-compatible printers.
Size
You can specify the size of the print.
• Select: Select the print size for photos you choose.
(Select photos you want to print ► Select the print size
by scrolling the jog dial left or right, and then pressing
[f].)
• All: Select the print size of all the photos saved in
the memory card. (Select the print size by pressing
[D/I], and then pressing [o].)
• Reset: Cancel the DPOF print size for all photos.
109
Connecting to external devices
Transferring files to your computer
Transfer files on a memory card to your computer by connecting the
camera to the PC.
3
Turn on the camera.
• When the pop-up message appears on the camera display,
select Computer.
Transferring files to your Windows
computer
Connecting the camera as a removable disk
You can connect the camera to your computer as a removable disk.
1
Turn off the camera.
2
Connect the camera to your computer with the USB
cable.
4
On your computer, select My Computer ► Removable
Disk ► DCIM ► XXXPHOTO or XXX_MMDD.
5
Select the files you want, and then drag or save them to
your computer.
If the Folder Type is set to Date, the folder name appears as “XXX_MMDD”.
For example, if you capture a photo on January 1, the folder name will be
"101_0101".
• You must plug the small end of the USB cable into your camera. If the
cable is reversed, it may damage your files. The manufacturer is not
responsible for any loss of data.
• If you try to plug the USB cable into the HDMI port, the camera may
not work properly. If it occurs, restart the camera.
110
Connecting to external devices >
Transferring files to your computer
Disconnecting the camera (for Windows XP)
Transferring files to your Mac computer
With Windows Vista and Windows 7, the methods for disconnecting the
camera are similar.
1
Turn off the camera.
1
2
Connect your camera to a Macintosh computer with the
USB cable.
Ensure that no data is being transferred between the
camera and the computer.
• If the status lamp on your camera is blinking, it means the data
Mac OS 10.4 or later is supported.
transfer is in progress. Please wait until the status lamp stops
blinking.
2
Click
on the tool bar at the bottom right of your
computer screen.
3
Click the pop-up message.
4
Click the message box indicating safely removed.
5
Remove the USB cable.
• You must plug the small end of the USB cable into your camera. If the
cable is reversed, it may damage your files. The manufacturer is not
responsible for any loss of data.
• If you try to plug the USB cable into the HDMI port, the camera may
not work properly. If it occurs, restart the camera.
3
Turn on the camera.
• When the pop-up message appears on the camera display,
select Computer.
4
Open the removable disk.
5
Transfer photos or videos to the computer.
111
Connecting to external devices
Using programs on a PC
Digital photos can be edited in a variety of ways through image editing
programs. Learn to edit photos using the provided editing programs.
Programs contained on the CD
Program
Installing software
Use the included software to transfer files from the camera to your PC.
You can also edit photos and upload them on web.
Purpose
Intelli-studio
Edit photos and videos.
Samsung RAW Converter
Convert RAW files into the desired file
format.
• If your computer does not meet the requirements, videos may not play
correctly or it may take longer to edit videos.
1
Insert the CD-ROM into your PC.
2
When the setting wizard appears, click Samsung Digital
Camera Installer.
3
Select a program you want to install, and then click
Install.
4
Follow the on-screen instructions.
5
When the installation is complete click Exit.
• Install DirectX 9.0c or above before you use the program.
• You must use Windows XP/Vista/7 or Mac OS 10.4 or later to connect the
camera as a removable disk.
Using a self-assembled PC or a PC and OS that are not supported may void
your warranty.
112
Connecting to external devices >
Using programs on a PC
Using Intelli-studio
• The requirements are recommendation only. It may not work properly even
Intelli-studio is a built-in program that allows you to play back and edit
files. You can also upload files to your favorite websites. For details,
select Help ► Help in the program.
•
•
Requirements
Item
Requirements
OS*
Windows XP SP2, Windows Vista, or Windows 7
(32-bit editions)
CPU
Intel® Core 2 Duo 1.66GHz or higher/
AMD Athlon™ X2 Dual-Core 2.2GHz or higher
RAM
Minimum 512 MB RAM
(1 GB or more recommended)
Hard disk capacity
250 MB or more (1 GB and above recommended)
•
•
when the computer meets the requirements, depending on the condition of
your computer.
Intelli-studio is compatible only with Windows.
Intelli-studio supports the following formats:
- Videos: MP4 (Video: H.264, Audio: AAC), WMV (WMV 7/8/9),
AVI (MJPEG)
- Photos: JPG, GIF, BMP, PNG, TIFF
You cannot open the RAW format files with the Intelli-studio program.
You cannot edit files directly on the camera. Transfer files to a folder on
your computer before editing.
• CD-ROM drive
• 1024x768 pixels, 16-bit color display compatible
Others
monitor (1280x1024 pixels, 32-bit color display
recommended)
• USB 2.0 port
• nVIDIA Geforce 7600GT or higher/
ATI X1600 series or higher
• Microsoft DirectX 9.0c or later
* 64-bit editions of Windows XP, Windows Vista, and Windows 7 are not supported.
113
Connecting to external devices >
Using programs on a PC
Using the Intelli-studio Interface
1
2
3
No.
4
5
6
7
Select a file type.
8
View files of the selected folder on your computer.
9
Show or hide files of the connected camera.
10
View files of the selected folder on the camera.
11
View files as thumbnails or on a map.
12
Browse folders in the connected device.
13
Browse folders in your computer.
9
14
Move to the previous or next folder.
10
15
Print files, view files on a map, store files in My Folder, or register
faces.
7
15
14
8
13
12
Description
11
No.
Description
1
Open menus.
2
Display files in the selected folder.
3
Change to the Photo edit mode.
4
Change to the Video edit mode.
5
Change to the Sharing mode. (You can send files by email or
upload files to websites, such as Flickr or YouTube.)
6
Enlarge or reduce the thumbnails in the list.
114
Connecting to external devices >
Using programs on a PC
Transferring files using Intelli-studio
You can easily transfer files on your camera to your computer by using
Intelli-studio.
3
Run Intelli-studio on your computer.
4
Turn on the camera.
• When the pop-up message appears on the camera display,
1
Turn off the camera.
2
Connect the camera to your computer with the USB
cable.
select Computer.
5
Select a folder on your computer to save new files and
select Yes.
• New files will be transferred to the computer.
• If your camera has no new files, the pop-up window for saving
new files will not appear.
• You must plug the end of the cable with the correct connection plug
into your camera. If the cable is reversed, it may damage your files.
The manufacturer is not responsible for any loss of data.
• If you try to plug the USB cable into the HDMI port, the camera may
not work properly. If it occurs, restart the camera.
115
Connecting to external devices >
Using programs on a PC
Using Samsung RAW Converter
Photos captured by a camera are often transformed to JPEG formats
and stored in the memory according to the settings of the camera at
the time of shooting. RAW files are not transformed to JPEG formats
and are stored in the memory without any changes. With Samsung
RAW Converter, you can calibrate exposures, White Balances, tones,
contrasts, and colors of photos.
Requirements for Mac
Item
OS
Apple® Mac OS 10.4 / v10.5 / v10.6
CPU
Intel processor-based or compatible computer
(Core 2 Quad or later recommended) / PowerPC
RAM
1 GB or more recommended
Hard disk capacity
Please reserve at least 100 MB of space. Please
allocate sufficient disk space for image storage.
(One image may use more than 10 MB of disk
space.)
Others
• XGA (1024x768), Full Color (24 bit or higher)
• Keyboard, mouse, or equivalent devices
Requirements for Windows
Item
Requirements
Microsoft Windows XP, Windows Vista, or
Windows 7
OS
CPU
* Administrator rights are needed for installation.
* The program runs as a 32-bit application under the 64-bit
OS.
Intel Pentium®, AMD Athlon™ processor-based
PC or compatible computer (Pentium4, Athlon XP
or later recommended)
Requirements
• Samsung RAW Converter may not perform correctly on some computers,
even when the computer meets the requirements.
• The Mac installation program will not autorun. Please manually run the
setup file on the provided CD-ROM.
* Multi-core processor ready (Intel Core i7, Core 2 Quad,
Core 2 Duo, AMD Phenom IIX4, Phenom X4, etc.)
RAM
1 GB or more recommended
Hard disk capacity
Please reserve at least 100 MB of space. Please
allocate sufficient disk space for image storage.
(One image may use more than 10 MB of disk
space.)
Others
• XGA (1024x768), Full Color (24 bit or higher)
• Keyboard, mouse, or equivalent devices
116
Connecting to external devices >
Using programs on a PC
Using the Samsung RAW Converter Interface
For details about using Samsung RAW Converter, click Help ►
Open software manual.
Editing RAW format files
If you edit the RAW format files with the Samsung RAW Converter,
you can maintain high image quality. You can also edit JPEG and TIFF
format files.
1
2
To adjust the exposure of an image
3
1
Select File ► Open file and open a file.
2
From the editing tools, select W.
4
No.
Description
1
Menu
2
Toolbar
3
Editing tools
4
Open/Close the fine adjustment window for the editing tools.
117
Connecting to external devices >
3
Using programs on a PC
To adjust the contrast of an image
Adjust the exposure with the scroll bar.
Original image
1
Select File ► Open file and open a file.
2
From the editing tools, select
3
Adjust the tone with the scroll bar.
.
Edited image
P Mode, Aperture: f=8,
Shutter Speed: 1/15 sec, ISO=100
Original image
Edited image
To save RAW files in JPEG or TIFF formats
Original image
Edited image
1
Select File ► Open file and open a file.
2
Select File ► Development.
3
Select a file format (JPEG or TIFF) and select Save.
118
Chapter 6
Appendix
Appendix
Error messages
When the following error messages appear, try these remedies.
Error messages
Suggested remedies
Lens is locked
The lens is locked. Rotate the lens counterclockwise until you hear a click. (p. 33)
Card Error
• Turn off your camera, and then turn it on again.
• Remove your memory card and insert it again.
• Format your memory card.
Low Battery
Insert a charged battery or recharge the battery.
No Image File
Capture photos or insert a memory card that
contains photos.
File Error
Delete the damaged file or contact a service center.
Memory Full
Delete unnecessary files or insert a new memory
card.
Card Locked
You can lock SD, SDHC, or SDXC card to prevent
files from being deleted. Unlock the card when
shooting. (p. 124)
Folder and file
number are max
values. Replace
the card
File names do not match the DCF standard.
Transfer the files on the memory card to your
computer and format the card. (p. 99)
Error 00
Turn off your camera and remount the lens. If the
message still appears, contact a service center.
Error 01/02
Turn off your camera, remove the battery, and insert
again. If the message still appears, contact a service
center.
120
Appendix
Maintaining the camera
Cleaning the camera
Camera lens and display
Use a brush to remove dust and wipe the lens gently with a soft cloth. If
any dust remains, apply lens cleaning liquid to a piece of cleaning paper
and wipe gently.
Image sensor
Depending on different shooting conditions, dust may appear in photos
because the image sensor is exposed to the external environment.
This problem is normal, and the exposure to dust occurs in everyday
use of the camera. You can remove dust from the sensor by operating
the sensor cleaning function. (p. 101) If dust remains after cleaning
the sensor, contact a service center. Do not insert the blower into the
mounting opening of the lens.
Camera body
Wipe gently with a soft, dry cloth.
Never use benzene, thinners or alcohol to clean the device. These solutions
can damage the camera or cause it to malfunction.
121
Appendix >
Maintaining the camera
Using or storing the camera
Using on beaches or shores
• Protect your camera from sand and dirt when you use it on beaches
Inappropriate places to use or store the camera
• Avoid exposing the camera to very cold or very hot temperatures.
• Avoid using your camera in areas with extremely high humidity, or
or in other similar areas.
• Your camera is not waterproof. Do not handle the battery, or memory
card with wet hands. Operating the camera with wet hands may
cause damage to your camera.
where the humidity changes drastically.
• Avoid exposing the camera to direct sunlight and storing it in hot,
poorly-ventilated areas, such as in a car during summer time.
• Protect your camera and the display from impact, rough handling, and
excessive vibration to avoid serious damage.
• Avoid using or storing your camera in dusty, dirty, humid, or poorly-
ventilated areas to prevent damage to moving parts and internal
components.
• Do not use your camera near fuels, combustibles, or flammable
Storing for extended period of time
• When you store the camera for an extended period, place it in a
sealed container with an absorbent material, such as silica gel.
• Remove the batteries from your camera when storing it for an
extended period. Installed batteries may leak or corrode over time and
cause serious damage to your camera.
• Over time, unused batteries will discharge and must be recharged
before use.
chemicals. Do not store or carry flammable liquids, gases, or explosive
materials in the same compartment as the camera or its accessories.
• Do not store the camera where there are mothballs.
122
Appendix >
Maintaining the camera
Using the camera with caution in humid environments
• Do not expose the lens to direct sunlight, as this may discolor the
image sensor or cause it to malfunction.
When you transfer the camera from a cold environment to a warm
one, condensation can form on the lens or internal components of the
camera. In this situation, turn off the camera and wait for at least 1
hour. If condensation forms on the memory card, remove the memory
card from the camera and wait until all moisture has evaporated before
reinserting it.
• Protect your lens from fingerprints and scratches. Clean your lens with
a soft, clean, debris-free lens cloth.
• The camera may turn off if impacted from the outside. This is to
protect the memory card. Turn on the camera to use it again.
• While you use the camera, it may heat up. This is normal and should
not affect your camera’s lifespan or performance.
Other cautions
• Do not swing your camera by the strap. This may cause injury to
yourself or others or damage to your camera.
• Do not paint your camera, as paint can clog moving parts and prevent
proper operation.
• Turn off the camera when not using it.
• Your camera consists of delicate parts. Avoid impacts to the camera.
• Protect the display from external force by keeping it in the case when
• When you use the camera in low temperatures, it may take some time
to turn on, the color of the display may be changed temporarily, or
after-images may appear. These conditions are not malfunctions and
they will correct themselves when the camera is returned to normal
temperatures.
• Paint or metal on the outside of the camera may cause allergies,
itchy skin, eczema, or swelling for people with sensitive skin. If
you experience any of these symptoms, stop using the camera
immediately and consult a doctor.
not in use. Protect the camera from scratches by keeping it away from
sand, sharp implements, or loose change.
123
Appendix >
Maintaining the camera
About memory card
Supported memory card
Memory card capacity
The memory capacity may differ depending on shooting scenes or
shooting conditions. These capacities are based on a 1 GB SD card.
Your camera supports SD, SDHC, or SDXC memory cards.
Size
Terminal
Write-protect switch
Label (front)
You can prevent files from being deleted by using the write-protect
switch on an SD, SDHC, or SDXC card. Slide the switch down to lock
or slide it up to unlock. Unlock the card when capturing photos and
videos.
Video
(30 fps)*
Quality
HQ
Normal
1920X1080
Approx. 8' 54''
Approx. 10' 16''
1280X720 (60 fps)
Approx. 8' 21''
Approx. 9' 32''
1280X720 (30 fps)
Approx. 14' 47''
Approx. 16' 37''
640X480
Approx. 37' 16''
Approx. 43' 14''
320X240
Approx. 119' 57'' Approx. 145' 49''
* The recordable time may vary if you use the zoom. Several videos were recorded in
succession to determine the total recording time.
124
Appendix >
Maintaining the camera
Size
Photo
Quality
Super Fine
Fine
Normal
RAW
RAW + S.Fine
RAW + Fine
RAW + Normal
20.0M (5472X3648)
94
185
272
17
13
15
16
10.1M (3888X2592)
192
368
530
-
16
17
17
5.9M (2976X1984)
318
593
834
-
17
18
18
2.0M (1728X1152)
827
1,393
1,806
-
18
18
18
Burst
371
685
954
-
-
-
-
16.9M (5472X3080)
116
227
333
-
14
16
17
7.8M (3712X2088)
246
467
665
-
16
17
18
4.9M (2944X1656)
379
699
972
-
17
18
18
2.1M (1920X1080)
799
1,354
1,762
-
18
18
18
13.3M (3648X3648)
147
284
413
-
15
17
17
7.0M (2640X2640)
272
513
728
-
16
17
18
4.0M (2000X2000)
454
823
1,130
-
17
18
18
1.1M (1024X1024)
1,344
2,062
2,508
-
18
18
19
125
Appendix >
Maintaining the camera
Cautions when using memory cards
• Avoid memory cards to very cold or very hot temperatures (below
0 ºC/32 ºF or above 40 ºC/104 ºF). Extreme temperatures can cause
memory cards to malfunction.
• Insert a memory card in the correct direction. Inserting a memory card
in the wrong direction may damage your camera and memory card.
• Do not use memory cards that have been formatted by other cameras
or by a computer. Reformat the memory card with your camera.
• When you carry a memory card, use a case to protect the card from
electrostatic discharges.
• Transfer important data to other media, such as a hard disk, CD, or
DVD.
• When you use the camera for an extended period, the memory
card may become warm. This is normal and does not indicate a
malfunction.
• Use a memory card that meets the standard requirements.
• Turn off the camera when you insert or remove the memory card.
The manufacturer is not responsible for any loss of data.
• Do not remove the memory card or turn off your camera while the
lamp is blinking, as this may damage your data.
• When the lifespan of a memory card has expired, you cannot store
any more photos on the card. Use a new memory card.
• Do not bend, drop, or subject memory cards to heavy impact or
pressure.
• Avoid using or storing memory cards near strong magnetic fields.
• Avoid using or keeping memory cards in areas with high temperature,
high humidity, or corrosive substances.
• Prevent memory cards from making contact with liquids, dirt, or
foreign substances. If dirty, wipe the memory card clean with a soft
cloth before you insert the memory card in your camera.
• Do not allow liquids, dirt, or foreign substances to come in contact
with memory cards or the memory card slot. Doing so may cause
memory cards or the camera to malfunction.
About the battery
Use only Samsung-approved batteries.
Battery specifications
Model
BP1030
Type
Lithium-ion battery
Cell capacity
1,030 mAh
Voltage
7.4 V
Charging time
(when the camera is switched off)
Approx. 140 min
126
Appendix >
Maintaining the camera
Personal injury or death can occur if the battery is handled carelessly or
improperly. For your safety, follow these instructions for proper battery
handling:
• The battery can ignite or explode if not handled properly. If you notice
any deformities, cracks, or other abnormalities in the battery, immediately
discontinue use of the battery and contact your manufacturer.
• Use only authentic, manufacturer-recommend battery chargers and charge
the battery only by the method described in this user manual.
• Do not place the battery near heating devices or expose to excessively
warm environments, such as the inside of an enclosed car in the
summertime.
• Do not place the battery in a microwave oven.
• Avoid storing or using the battery in hot, humid places, such as spas or
shower enclosures.
• Do not rest the device on flammable surfaces, such as bedding, carpets,
or electric blankets for a prolonged period.
• When the device is switched on, do not leave it in any confined space for a
prolonged period.
• Do not allow battery terminals to come in contact with metallic objects,
such as necklaces, coins, keys, or watches.
• Use only authentic, manufacturer-recommended, Lithium-ion replacement
batteries.
• Do not disassemble the battery or puncture the battery with any sharp
object.
• Avoid exposing the battery to high pressure or crushing forces.
• Avoid exposing the battery to major impacts, such as dropping it from high
places.
• Do not expose the battery to temperatures of 60 °C (140 °F) or above.
• Do not allow the battery to come in contact with moisture or liquids.
• Battery shall not be exposed to excessive heat such as sunshine, fire or the
like.
Disposal guidelines
• Dispose of the battery with care.
• Do not dispose of the battery in a fire.
• Disposal regulations may differ by country or region. Dispose of the battery
in accordance with all local and federal regulations.
Guidelines for charging the battery
Charge the battery only by the method described in this user manual. The
battery can ignite or explode if not charged properly.
127
Appendix >
Maintaining the camera
Battery life
Shooting mode
Notes about using the battery
Average time / Number of photos
Photos
Approx. 160 min/Approx. 320 photos
Videos
Approx. 110 min (Record videos at 1920X1080
resolution and 30 FPS.)
• The figures above are based on Samsung’s test standards. Your
results may differ depending on your actual usage.
• In temperatures below 0 ºC/32 ºF, battery capacity and battery life
may decrease.
• Battery capacity may decrease in low temperatures but will return to
normal in milder temperatures.
• When you use the camera for an extended period, the area around
the battery chamber may become warm. This does not affect the
normal use of the camera.
• Available shooting time differs depending on background, shooting
interval, and use conditions.
• Several videos were recorded in succession to determine the total
Notes about charging the battery
recording time.
• If the indicator light is off, make sure that the battery is inserted
Low battery message
• Do not pull on the power supply cord to disconnect the plug from the
When the battery has fully discharged, the battery icon will turn red and
the "Low Battery" message will appear.
correctly.
power outlet. This may cause a fire or electric shock.
• When the battery is completely discharged, charge it at least
10 minutes before using it with your camera.
• If the indicator light blinks orange or does not illuminate, reconnect the
cable, or remove the battery and insert it again.
• If you charge the battery when the cable is overheated or the
temperature is too high, the indicator light may turn orange. Charging
will start when the battery cools down.
• Do not bend or place heavy objects on the AC cable. Doing so may
damage the cable.
128
Appendix
Before contacting a service center
If you are having trouble with your device, try these troubleshooting
solutions before contacting a service professional.
Situation
Suggested remedies
• There is no space on the memory card.
Delete unnecessary files or insert a new card.
• When the AF Priority function is turned on,
When you leave your camera at a service center, be sure to also leave the
other components that may have contributed to the malfunction, such as the
memory card and battery.
Situation
Cannot turn on the
camera
Suggested remedies
• Ensure that the battery is inserted.
• Ensure that the battery is inserted correctly.
• Charge the battery.
Cannot capture
photos
•
•
•
•
• Charge the battery.
• Your camera may be in Power save mode.
The power turns off
suddenly
(p. 100)
• The camera may be turned off automatically
to prevent the memory card from being
damaged due to excessive heat. Turn on your
camera again.
• The battery may lose power more quickly
The camera is losing
battery power quickly
in low temperatures (below 0 °C/32 °F).
Keep the battery warm by putting it into your
pocket.
• Using the flash or recording videos depletes
the battery quickly. Recharge if needed.
• Batteries are consumable parts that must be
replaced over time. Get a new battery if the
battery life is diminishing quickly.
•
•
you cannot capture a photo unless the focus
is set correctly. Set AF Priority to Off or focus
on the subject correctly. (p. 94)
Format the memory card.
The memory card is defective. Get a new
memory card.
The memory card is locked. Unlock the card.
(p. 124)
Ensure that the camera is switched on.
Charge the battery.
Ensure that the battery is inserted correctly.
The camera freezes
Remove the battery and insert it again.
The camera heats up
While using the camera, it may heat up. This
is normal and should not affect your camera’s
lifespan or performance.
The flash fires
unexpectedly
The flash may fire due to static electricity. The
camera is not malfunctioning.
The flash does not
work
• The flash option may be set to Off. (p. 73)
• You cannot use the flash in some modes.
The date and time are
incorrect
Set the date and time under the w menu.
(p. 100)
129
Appendix >
Before contacting a service center
Situation
The display or
buttons do not work
Suggested remedies
again.
• Remove your memory card, and then insert it
again.
• Format your memory card.
See "Cautions when using memory cards" for
more details. (p. 126)
Your TV or computer
cannot display photos
and videos that are
stored on an SDXC
memory card.
SDXC memory cards use the exFAT file system.
Ensure that the external device is compatible
with the exFAT file system before connecting the
camera to the device.
Your computer does
not recognize an
SDXC memory card.
SDXC memory cards use the exFAT file system.
To use SDXC memory cards on a Windows XP
computer, download and update the exFAT file
system driver from the Microsoft website.
Cannot display files
If you change the name of a file, your camera
may not play the file (the name of the file should
meet the DCF standard). If you encounter this
situation, display files on your computer.
Suggested remedies
• Ensure that the focus option you set is
Remove the battery and insert it again.
• Turn off your camera, and then turn it on
The memory card has
an error
Situation
suitable for the kind of shot you are capturing.
The photo is blurry
• Use a tripod to prevent your camera from
shaking.
• Ensure that the lens is clean. If not, clean the
lens. (p. 121)
The colors in the
photo do not match
the actual scene
An incorrect White Balance can create
unrealistic color. Select the proper White
Balance option to suit the light source. (p. 58)
The photo is too
bright
Your photo is overexposed.
• Adjust the aperture value or the shutter
speed.
• Adjust the ISO sensitivity. (p. 57)
• Turn off the flash. (p. 73)
• Adjust the exposure value. (p. 80)
The photo is too dark
Your photo is underexposed.
• Adjust the aperture value or the shutter
speed.
• Adjust the ISO sensitivity. (p. 57)
• Turn on the flash. (p. 73)
• Adjust the exposure value. (p. 80)
Photos are distorted
This camera can have minute distortion when
using a wide-angle lens that enables shooting
with a wide angle of view. This is normal, and
does not cause malfunction.
130
Appendix >
Before contacting a service center
Situation
Playback screen does
not appear on the
connected external
device
Suggested remedies
• Ensure that A/V or HDMI cable is properly
connected to the external monitor.
• Ensure that the memory card is properly
recorded.
Situation
Cannot set the DPOF
for RAW files
correctly.
• Ensure that your camera is switched on.
• Ensure that you are using a supported
Auto Focus does not
work
operating system.
Your computer
disconnects the
camera while
transferring files
The file transfer may be interrupted by static
electricity. Disconnect the USB cable and
connect it again.
Your computer
cannot play videos
Depending on the software you use, video files
may not play. To play video files captured with
your camera, install and use the Intelli-studio
program on your computer. (p. 112)
Intelli-studio is not
functioning properly
• End Intelli-studio and restart the program.
• You cannot use Intelli-studio on Macintosh
computers.
You cannot set the DPOF for RAW files.
• Subject is not in focus. When the subject is
• Ensure that the USB cable is connected
Your computer does
not recognize your
camera
Suggested remedies
Lens does not work
outside the AF area, shoot by moving the
subject inside the AF area and half pressing
[Shutter].
• Subject is too close. Step back from the
subject and shoot.
• The focus mode is set to MF. Switch the
mode to AF.
• Ensure that the lens is properly mounted.
• Remove the lens from the camera and
re-mount it.
External flash or GPS
does not work
The date & time
settings screen
appears when you
power on the camera
Ensure that the external device is properly
mounted and turned on.
• Set the date and time again.
• This screen appears when the camera’s
internal power source is completely
discharged. Insert a fully charged battery and
wait at least 72 hours in power off status for
the internal power source to be recharged.
131
Appendix
Camera specifications
Image Sensor
Resolution
VGA (640X480) 614 k dots (PenTile)
Type
CMOS
Field of view
Approx. 100 %
Sensor size
23.5 X 15.7 mm
User display
Grid Line, Icons, Histogram, Distance Scale
Effective pixels
Approx. 20.3 mega-pixels
Total pixels
Approx. 21.6 mega-pixels
Color filter
RGB primary color filter
Lens Mount
Focusing
Type
Focusing point
Type
Samsung NX Mount
Available lens
Samsung lenses
Image Stabilization
Type
Lens shift (depends on lens)
Mode
Mode 1 / Mode 2 / Off
Distortion Correct
Close up 35 points
Mode
Single AF, Continuous AF, Manual Focus
AF Assist Lamp
Green LED
Shutter
Type
Electronically controlled vertical-run focal plane
shutter
Speed
• Auto: 1/4,000-30 sec.
• Manual: 1/4,000-30 sec. (1/3 EV Step)
• Bulb (time limit: 4 min)
i-effect (depends on lens), i-Zoom
Exposure
Dust Reduction
Type
• Selection: 1 point (free selection)
• Multi: Normal 15 points,
• Face detection: Max. 10 faces
Lens Distortion Correct on/off (depends on lens)
i-Function
Contrast AF
TTL 221 (17 X 13) Block segment
Super sonic drive
Metering system
Display
Type
AMOLED
Size
3.0" (7.6 cm)
Metering: Multi, Center-weighted, Spot
Metering range: EV 0-17 (ISO100, F2.8)
Compensation
±3 EV (1/3 EV Step)
AE lock
Half-press the shutter button
132
Appendix >
Camera specifications
• 1 Step: Auto, ISO 100, ISO 200, ISO 400,
ISO equivalent
ISO 800, ISO 1600, ISO 3200, ISO 6400,
ISO 12800
• 1/3 Step: Auto, ISO 100, ISO 125,
ISO 160, ISO 200, ISO 250, ISO 320,
ISO 400, ISO 500, ISO 640, ISO 800,
ISO 1000, ISO 1250, ISO 1600, ISO 2000,
ISO 2500, ISO 3200, ISO 4000, ISO 5000,
ISO 6400, ISO 8000, ISO 10000, ISO 12800
Continuous shooting
8 (based on ISO 100)
Angle of view
28 mm (35 mm film equivalent)
Sync speed
Less than 1/180 sec.
Flash EV
-2-+2 EV (0.5 EV Step)
External flash
SEF15A, SEF20A, SEF42A (optional)
Syncro
Hot shoe
White Balance
Drive Mode
Mode
Guide number
Single, Continuous, Burst, Timer, Bracket
(Auto Exposure, White Balance, Picture Wizard)
• JPEG
- High (7 fps): up to 11 shots possible
- Low (3 fps): up to 15 shots possible
• RAW
- High (7 fps), Low (3 fps): up to 8 shots
possible
Mode
Auto WB, Daylight, Cloudy, Fluorescent
White, Fluorescent NW, Fluorescent Daylight,
Tungsten, Flash WB, Custom Set, Color
Temperature (Manual)
Micro adjustment
Amber/Blue/Green/Magenta 7 steps
respectively
Dynamic Range Expansion
Smart range on/off
Burst shooting
• 10, 15, or 30 frames per second
• Up to 30 shots per shutter-press
Bracket shooting
Auto exposure bracketing (±3 EV), White
Balance bracketing, Picture Wizard bracketing
Mode
Standard, Vivid, Portrait, Landscape, Forest,
Retro, Cool, Calm, Classic, Custom1,
Custom2, Custom3
Self-timer
2-30 sec. (1 second interval)
Parameter
Contrast, Sharpness, Saturation, Color
Flash
Picture Wizard
Shooting
Type
External flash only (Bundle with SEF8A)
Mode
Smart Flash, Auto, Auto Red-eye, Fill in,
Fill-in Red, 1st Curtain, 2nd Curtain
Mode
Smart Auto, Program, Aperture Priority,
Shutter Priority, Manual, Lens Priority, Magic,
Panorama, Scene, Movie
133
Appendix >
Camera specifications
Scene mode
Beauty Shot, Night, Landscape, Portrait,
Children, Sports, Close Up, Text, Sunset,
Dawn, Backlight, Fireworks, Beach & Snow,
Sound picture, 3D
JPEG only
Sound picture
Recordable time (before and after shooting,
5 or 10 seconds respectively)
Smart Filter
Vignetting, Miniature, Fish Eye, Sketch, Defog,
Halftone Dots, Soft Focus, Old Film 1,
Old Film 2, Negative
Magic Frame
Old Album, Old Film, Ripple, Full Moon,
Old Record, Magazine, Sunny Day,
Classic TV, Wall Art, Holiday, Billboard 1,
Billboard 2, Newspaper
• JPEG (3:2): 20.0M (5472X3648),
Size
10.1M (3888X2592), 5.9M (2976X1984),
5.0M (2736X1824) (Burst mode only),
2.0M (1728X1152)
• JPEG (16:9): 16.9M (5472X3080),
7.8M (3712X2088), 4.9M (2944X1656),
2.1M (1920X1080)
• JPEG (1:1): 13.3M (3648X3648),
7.0M (2640X2640), 4.0M (2000X2000),
1.1M (1024X1024)
• RAW: 20.0M (5472X3648)
Quality
Super Fine, Fine, Normal
RAW standard
SRW
Color space
sRGB, Adobe RGB
Video
Type
MP4 (H.264)
Format
Movie: H.264, Sound: AAC
Movie AE mode
Program, Aperture Priority, Shutter Priority,
Manual
Movie clip
Audio on/off (Shooting time: up to 25 min)
Size
1920X1080, 1280X720 (60 fps),
1280X720 (30 fps), 640X480, 320X240
Frame rate
30 or 60 frames per second
(60 fps is available only with 1280X720.)
Multi Motion
x0.25 (640X480, 320X240 only),
x0.5 (1280X720, 640X480, 320X240 only), x1,
x5, x10, x20
Quality
HQ, Normal
Sound
Stereo
Edit
Still image capture, Time trimming
Playback
Type
Single image, Thumbnails (3/15/40),
Slide show, Movie
Edit
Smart Filter, Red-eye Fix, Backlight, Resize,
Rotate, Face Retouch, Brightness, Contrast,
Vignetting
Smart filter
Miniature, Soft Focus, Old Film 1, Old Film 2,
Halftone Dots, Sketch, Fish Eye, Defog, Negative
134
Appendix >
Camera specifications
• JPEG (3:2): 5.9M (2976X1984),
Smart filter size
5.0M (2736X1824), 2.0M (1728X1152)
• JPEG (16:9): 6.2M (3328X1872),
4.9M (2944X1656), 2.1M (1920X1080)
• JPEG (1:1): 6.0M (2448X2448),
4.0M (2000X2000), 1.1M (1024X1024)
Interface
Digital output
USB 2.0 (HI-SPEED)
Video output
NTSC, PAL (selectable)
HDMI 1.4a: (1080i, 720p, 576p/480p)
Power Source
• Rechargeable battery: BP1030
Storage
Media
External memory (optional):
SD card (up to 4 GB guaranteed),
SDHC card (up to 32 GB guaranteed),
SDXC card (up to 128 GB guaranteed)
File format
RAW (SRW), JPEG (EXIF 2.21), DCF,
DPOF 1.1, PictBridge 1.0
Direct Printing
Type
(1,030 mAh)
• Charger: BC1030
* The power source may differ depending on
your region.
Dimensions (W X H X D)
116.5 X 62.5 X 36.6 mm (without protrusions)
Weight
PictBridge
220.4 g (without battery and memory card)
GPS
Operating Temperature
Type
Geo-tagging with optional GPS Module
(WGS 84)
Feature
• Location name (English and Korean only)
• Google Map link (with Intelli-studio)
0-40 °C
Operating Humidity
5-85 %
Software
Intelli-studio, Samsung RAW Converter
* This specifications can change without notice to upgrade a performance.
* Other brands and products names are trademarks of respective owners.
135
Appendix
Lens specifications
Lens Name
SAMSUNG 16 mm F2.4
SAMSUNG 20-50 mm F3.5-5.6 ED
SAMSUNG 18-55 mm F3.5-5.6 OIS II
Focus Length
16 mm (equivalent to 24.6 mm in
35 mm format)
20-50 mm (equivalent to 30.8-77 mm in
35 mm format)
18-55 mm (equivalent to 27.7-84.7 mm
in 35 mm format)
Elements in Group
7 elements in 6 groups
(2 aspheric lens included)
9 elements in 8 groups (1 aspheric lens,
1 low dispersive lens included)
12 elements in 9 groups
(1 aspheric lens included)
Angle of View
82.6°
70.2°-31.4°
75.9°-28.7°
Aperture
F2.4 (minimum: F22),
(Number of Blades: 7, Circular Aperture
Diaphragm)
F3.5-5.6 (minimum: F22),
(Number of Blades: 7, Circular Aperture
Diaphragm)
F3.5-5.6 (minimum: F22),
(Number of Blades: 7, Circular Aperture
Diaphragm)
Mount Type
Samsung NX mount
Samsung NX mount
Samsung NX mount
Optical Image Stabilizer
Not included
Not included
Included
Minimum Focus Distance
0.18 m-infinity
0.28 m-infinity
0.28 m-infinity
Maximum Magnification
Approx. 0.12X
Approx. 0.22X
Approx. 0.22X
i-Scene Mode
Supported (Backlight, Landscape,
Sunset, Dawn, Beach & Snow, Night)
Supported (Beauty Shot, Portrait,
Children, Backlight, Landscape, Sunset,
Dawn, Beach & Snow, Night)
Supported (Beauty Shot, Portrait,
Children, Backlight, Landscape, Sunset,
Dawn, Beach & Snow, Night)
Lens Hood
Not included
Not included
Included
Filter Size
43 mm
40.5 mm
58 mm
Max. Diameter X Length
61 X 24 mm
64 X 39.8 mm
63 X 65.1 mm
Weight
Approx. 90 g (without hood)
Approx. 119 g
Approx. 198 g (without hood)
Operating Temperature
0-40 °C
0-40 °C
0-40 °C
Operating Humidity
5-85 %
5-85 %
5-85 %
136
Appendix >
Lens specifications
Lens Name
SAMSUNG 18-200 mm F3.5-6.3 ED
SAMSUNG 50-200 mm F4-5.6 ED OIS II
Focus Length
18-200 mm (equivalent to 27.7-308 mm in 35 mm format)
50-200 mm (equivalent to 77-308 mm in 35 mm format)
Elements in Group
18 elements in 13 groups
(3 aspheric lens, 2 low dispersive lens included)
17 elements in 13 groups
(2 low dispersive lenses included)
Angle of View
75.9°-8.0°
31.4°-8.0°
Aperture
F3.5-6.3 (minimum: F22),
(Number of Blades: 7, Circular Aperture Diaphragm)
F4-5.6 (minimum: F22),
(Number of Blades: 7, Circular Aperture Diaphragm)
Mount Type
Samsung NX mount
Samsung NX mount
Optical Image Stabilizer
Included
Included
Minimum Focus Distance
0.50 m-infinity
0.98 m-infinity
Maximum Magnification
Approx. 0.28X
Approx. 0.2X
i-Scene Mode
Supported (Portrait, Children, Sports, Backlight, Landscape,
Sunset, Dawn, Night)
Supported (Beauty Shot, Portrait, Children, Backlight,
Sports)
Lens Hood
Included
Included
Filter Size
67 mm
52 mm
Max. Diameter X Length
72 X 105.5 mm
70 X 100.5 mm
Weight
Approx. 549 g (without hood)
Approx. 417 g (without hood)
Operating Temperature
0-40 °C
0-40 °C
Operating Humidity
5-85 %
5-85 %
137
Appendix >
Lens specifications
Lens Name
SAMSUNG 20 mm F2.8
SAMSUNG 30 mm F2
SAMSUNG 60 mm F2.8 Macro ED OIS SSA
Focus Length
20 mm (equivalent to 30.8 mm in
35 mm format)
30 mm (equivalent to 46.2 mm in 35 mm
format)
60 mm (equivalent to 92.4 mm in 35 mm
format)
Elements in Group
6 elements in 4 groups
(1 aspheric lens included)
5 elements in 5 groups
(1 aspheric lens included)
12 elements in 9 groups (1 aspheric
lens, 1 low dispersive lens included)
Angle of View
70.2°
50.2°
26.4°
Aperture
F2.8 (minimum: F22), (Number
of Blades: 7, Circular Aperture
Diaphragm)
F2 (minumum: F22), (Number of Blades: 7,
Circular Aperture Diaphragm)
F2.8 (minumum: F32), (Number of
Blades: 7, Circular Aperture Diaphragm)
Mount Type
Samsung NX mount
Samsung NX mount
Samsung NX mount
Optical Image Stabilizer
Not included
Not Included
Included
Minimum Focus Distance
0.17 m-infinity
0.25 m-infinity
0.187 m-infinity
Maximum Magnification
Approx. 0.18X
Approx. 0.16X
Approx. 1X
i-Scene Mode
Supported (Backlight, Landscape,
Sunset, Dawn, Beach & Snow, Night)
Not supported
Supported (Portrait, Children, Backlight,
Close Up, Text)
Lens Hood
Not included
Optional
Included
Filter Size
43 mm
43 mm
52 mm
Max. Diameter X Length
62.2 X 24.5 mm
61.5 X 21.5 mm
73.5 X 84 mm
Weight
Approx. 89 g
Approx. 85 g (without hood)
Approx. 389 g (without hood)
Operating Temperature
0-40 °C
0-40 °C
0-40 °C
Operating Humidity
5-85 %
5-85 %
5-85 %
Lens may differ from your actual items.
138
Appendix
Glossary
AdobeRGB
Aperture
Adobe RGB is used for commercial printing and has a larger color range
than sRGB. Its wider range of colors helps you to easily edit photos on a
computer.
The aperture controls the amount of light that reaches the camera’s
sensor.
Camera shake (Blur)
AEB (Auto Exposure Bracket)
This feature automatically captures several images at different exposures
to help you capture a properly-exposed image.
If the camera is moved while the shutter is open, the entire image may
appear blurred. This occurs more often when the shutter speed is slow.
Prevent camera shake by raising the sensitivity, using the flash, or using
a faster shutter speed. Alternatively, use a tripod or the OIS function to
stabilize the camera.
AF (Auto Focus)
A system that automatically focuses the camera lens on the subject.
Your camera uses the contrast to focus automatically.
Color space
The range of colors that the camera can see.
AMOLED (Active-matrix organic light-emitting diode) /
LCD (Liquid Crystal Display)
AMOLED is a visual display that is very thin and light, as it does not
need backlighting. LCD is a visual display commonly used in consumer
electronics. This display needs a separate backlight, such as CCFL or
LED, to reproduce colors.
Color temperature
Color Temperature is a measurement in degrees Kelvin (K) that indicates
the hue of a specific type of light source. As the color temperature
increases, the color of the light source has a more bluish quality. As the
color temperature decreases, the color of the light source has a more
reddish quality. At 5,500 degrees Kelvin, the color of the light source is
similar to the sun at midday.
139
Appendix >
Glossary
Composition
EV (Exposure Value)
Composition in photography means arranging objects in a photo.
Usually, abiding by the rule of thirds leads to a good composition.
All the combinations of the camera’s shutter speed and lens aperture
that result in the same exposure.
DCF (Design rule for Camera File system)
EV Compensation
A specification to define a file format and file system for digital cameras
created by the Japan Electronics and Information Technology Industries
Association (JEITA).
This feature allows you to quickly adjust the exposure value measured
by the camera, in limited increments, to improve the exposure of your
photos.
Depth of field
Exif (Exchangeable Image File Format)
The distance between the nearest and farthest points that can be
acceptably focused in a photograph. Depth of field varies with lens
aperture, focal length, and distance from the camera to the subject.
Selecting a smaller aperture, for example, will increase the depth of field
and blur the background of a composition.
A specification to define an image file format for digital cameras created
by the Japan Electronic Industries Development Association (JEIDA).
DPOF (Digital Print Order Format)
A format for writing printing information, such as selected images
and number of prints, on a memory card. DPOF-compatible printers,
sometimes available at photo shops, can read the information from the
card for convenient printing.
Exposure
The amount of light allowed to reach the camera’s sensor. Exposure is
controlled by a combination of the shutter speed, the aperture value,
and ISO sensitivity.
Flash
A speed light that helps to create adequate exposure in low-light
conditions.
140
Appendix >
Glossary
Focal length
ISO sensitivity
The distance from the middle of the lens to its focal point(in millimeters).
Longer focal lengths result in narrower angles of view and the subject is
magnified. Shorter focal lengths result in wider angles of view.
The sensitivity of the camera to light, based on the equivalent film speed
used in a film camera. At higher ISO sensitivity settings, the camera
uses a higher shutter speed, which can reduce blur caused by camera
shake and low light. However, images with high sensitivity are more
susceptible to noise.
Histogram
A graphical representation of the brightness of an image. The horizontal
axis represents the brightness and the vertical axis represents the
number of pixels. High points at the left (too dark) and right (too bright)
on the histogram indicate a photo that is improperly exposed.
JPEG (Joint Photographic Experts Group)
A lossy method of compression for digital images. JPEG images are
compressed to reduce their overall file size with minimal deterioration of
the image resolution.
H.264/MPEG-4
A high-compression video format established by international standard
organizations ISO-IEC and ITU-T. This codec is capable of providing
good video quality at low bit rates developed by the Joint Video Team
(JVT).
Metering
The metering refers to the way in which the camera measures the
quantity of light to set the exposure.
MF (Manual Focus)
Image sensor
The physical part of a digital camera that contains a photosite for each
pixel in the image. Each photosite records the brightness of the light
that strikes it during an exposure. Common sensor types are CCD
(Charge-coupled Device) and CMOS (Complementary Metal Oxide
Semiconductor).
A system that manually focuses the camera lens on the subject. You
can use the focus ring to focus on a subject.
141
Appendix >
Glossary
MJPEG (Motion JPEG)
Optical zoom
A video format which is compressed as a JPEG image.
This is a general zoom which can enlarge images with a lens and does
not deteriorate quality of images.
MPO (Multi Picture Object)
An image file format that contains multiple images in a file. An MPO file
provides a 3D effect on MPO-compatible displays, such as 3D TVs or
3D monitors.
PAL (Phase Alternate Line)
A video color encoding standard used in numerous countries throughout
Africa, Asia, Europe, and the Middle East.
Noise
Quality
Misinterpreted pixels in a digital image that may appear as misplaced or
random, bright pixels. Noise usually occurs when photos are shot with a
high sensitivity or when a sensitivity is automatically set in a dark place.
An expression of the rate of compression used in a digital image. Higher
quality images have a lower rate of compression, which usually results in
a larger file size.
NTSC (National Television System Committee)
RAW (CCD raw data)
A video color encoding standard used most commonly in Japan, North
America, the Philippines, South America, South Korea, and Taiwan.
The original, unprocessed data, collected directly from the camera’s
image sensor. White Balance, contrast, saturation, sharpness, and
other data can be manipulated with editing software before the image is
compressed into a standard file format.
142
Appendix >
Glossary
Resolution
Vignetting
The number of pixels present in a digital image. High resolution images
contain more pixels and typically show more detail than low resolution
images.
A reduction of an image’s brightness or saturation at the periphery
(outer edges) compared to the center of the image. Vignetting can draw
interest to subjects positioned in the center of an image.
Shutter speed
White Balance (color balance)
Shutter speed refers to the amount of time it takes to open and close
the shutter, and it is an important factor in the brightness of a photo, as
it controls the amount of light which passes through the aperture before
it reaches the image sensor. A fast shutter speed allows less time to let
light in and the photo becomes darker and more easily freezes subjects
in motion.
An adjustment of the intensities of colors (typically the primary colors
red, green, and blue), in an image. The goal of adjusting the White
Balance, or color balance, is to correctly render the colors in an image.
sRGB (Standard RGB)
International standard of colour space established by the IEC
(International Electrotechnical Commission). This is defined from colour
space for PC monitors and is also used as the standard colour space
for Exif.
143
Appendix
Optional accessories
External Flash
You can purchase external flashes separately.
Camera bag
You can purchase the camera bag
separately.
Camera Case
You can purchase the camera case
separately.
Memory card
This camera accepts SD (Secure Digital),
SDHC (Secure Digital High Capacity), and
SDXC (Secure Digital eXtended Capacity)
memory card.
Strap
You can additionally purchase the straps.
A/V cable
You can connect to other devices by using
the A/V cable.
Filter
You can create different colored effects by
attaching filters to your lens.
USB cable
You can purchase additional USB cables.
HDMI cable
You can view high-definition photos and
videos by connecting the camera to an
HDMI-compatible monitor with the HDMI
(HDMI type C) cable.
Battery pack
You can purchase additional battery packs.
• These illustrations may differ from your actual items. Refer to the user
manuals of these optional accessories for details.
• Use only Samsung-approved accessories. Samsung is not responsible for
damage caused by using another manufacturer’s accessories.
144
Appendix
Index
A
D
Flash 73
Bounce photography 23
Guide number 22
Intensity 74
L
Aperture 12, 16
Depth of Field (DOF) 13, 18
Auto focus 62
Digital Print Order Format
(DPOF) 108
F-number 13
Drive (see Shooting method) 69
Focal length 17
E
G
M
Exposure Value (EV) 13, 80
Glossary 139
Maintenance 121
B
Battery
Life 128
Specifications 126
Bracketing 69, 71
C
Camera
Connecting as removable disk 110
Connecting to PC 110
Disconnecting (Windows) 111
Layout 26
Color space 79
Lenses
Locking 33
Markings 35
Specifications 136
Unlocking 33
Memory card 124
F
I
Fader 82
i-Function 46
Files
Intelli-Studio 113
Deleting 86
Editing RAW format 117
Photo format 56
Protecting 85
Transferring to Mac 111
Transferring to PC 110
Video format 56
Metering 75
MF assist 67
ISO sensitivity 15, 16, 57
O
i-Zoom 47
Optical Image Stabilization
(OIS) 68
Optional accessories
Attach the GPS module 39
Connect the flash 37
Flash layout 36
GPS module layout 39
145
Appendix >
Index
P
S
T
Photos
Samsung RAW Converter 116
Timer 70
Adjusting tone 118
Editing 91
Enlarging 87
Shooting options 54
Viewing on 3D TV 106
Viewing on camera 84
Viewing on HDTV 105
Viewing on TV 104
Photo styles 61
PictBridge 107
Picture Wizard 61
Posture 11
Shooting method 69
Shooting modes
Aperture Priority 43
Lens Priority 45
Magic 48
Manual 44
Movie 51
Panorama mode 48
Program 42
Scene 49
Shutter Priority 43
Smart Auto 41
V
Videos
Options 81
Viewing 89
3
3D Panorama 48
3D Shot 50
Shutter speed 14, 16
Slide show 87
R
Smart Album 85
Red-eye effect 74
Rule of thirds 20
146
Appendix
Correct Disposal of This Product
(Waste Electrical & Electronic Equipment)
(Applicable in the European Union and other European
countries with separate collection systems)
This marking on the product, accessories or literature indicates that
the product and its electronic accessories (e.g. charger, headset, USB
cable) should not be disposed of with other household waste at the
end of their working life. To prevent possible harm to the environment
or human health from uncontrolled waste disposal, please separate
these items from other types of waste and recycle them responsibly to
promote the sustainable reuse of material resources. Household users
should contact either the retailer where they purchased this product,
or their local government office, for details of where and how they can
take these items for environmentally safe recycling. Business users
should contact their supplier and check the terms and conditions of the
purchase contract. This product and its electronic accessories should
not be mixed with other commercial wastes for disposal.
Correct disposal of batteries in this product
(Applicable in the European Union and other European
countries with separate battery return systems)
This marking on the battery, manual or packaging indicates that the
batteries in this product should not be disposed of with other household
waste at the end of their working life. Where marked, the chemical
symbols Hg, Cd or Pb indicate that the battery contains mercury,
cadmium or lead above the reference levels in EC Directive 2006/66.
If batteries are not properly disposed of, these substances can cause
harm to human health or the environment.
To protect natural resources and to promote material reuse, please
separate batteries from other types of waste and recycle them through
your local, free battery return system.
This Class [B] digital apparatus complies with Canadian ICES-003.
Dispose unwanted electronics through an approved recycler.
To find the nearest recycling location, go to our website:
www.samsung.com/recyclingdirect Or call, (877) 278 - 0799
147
Appendix
FCC notice
NOTE:
Declaration of Conformity
This equipment has been tested and found to comply with the limits for
a Class B digital device, pursuant to part 15 of the FCC Rules. These
limits are designed to provide reasonable protection against harmful
interference in a residential installation. This equipment generates, uses
and can radiate radio frequency energy and, if not installed and used in
accordance with the instructions, may cause harmful interference to radio
communications. However, there is no guarantee that interference will
not occur in a particular installation. If this equipment does cause harmful
interference to radio or television reception, which can be determined by
turning the equipment off and on, the user is encouraged to try to correct
the interference by one or more of the following measures:
• Reorient, or relocate, the receiving antenna.
• Increase the distance between the equipment and receiver.
• Connect the equipment into an outlet on a circuit different from that to
which the receiver is connected.
• Consult the dealer or an experienced radio / TV technician for help.
Trade Name
: Samsung Electronics America, Inc.
Model No.
: Samsung NX200
Responsible Party : Samsung Electronics America, Inc.
Address
: 85 Challenger Road, Ridgefield Park, NJ 07660
Telephone No.
: 1-800-SAMSUNG (726-7864)
This device complies with Part 15 of the FCC Rules.
Operation is subject to the following two conditions:
(1) This device may not cause harmful interference, and (2) this device
must accept any interference received, including interference that may
cause undesired operation.
CAUTION:
Changes or modifications not expressly approved by the manufacturer
responsible for compliance could void the user’s authority to operate the
equipment.
148
Please refer to the warranty that came with your product
or visit our website www.samsung.com for after-sales service or inquiries.