1
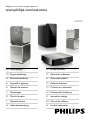
Register your product and get support at
www.philips.com/welcome
CSS9211
EN User manual
NOBrukerhåndbok
DA Brugervejledning
PT Manual do utilizador
DE Benutzerhandbuch
SV Användarhandbok
EL Εγχειρίδιο χρήσης
TR Kullanım kılavuzu
ES Manual del usuario
CS Příručka pro uživatele
FI
Käyttöopas
HU Felhasználói kézikönyv
FR Mode d’emploi
PL Instrukcja obsługi
IT Manuale utente
RO Manual de utilizare
NL Gebruiksaanwijzing
SK Príručka užívateľa
1 Help and support
4
4
4
2Notice
4
4
4
4
3Important
5
5
6
6
4 Your SoundHub
6
6
7
5 Connect your SoundHub
8
6 Use your SoundHub
11
11
12
7 Change settings
12
12
13
8 Product specifications
13
9Troubleshooting
14
10Index
15
FAQs
Contact Philips
Compliance
Mains fuse
Trademarks
Safety
Care for your product
Care of the environment
Main unit
Remote control
English
Contents
Speakers
8
Connectors
9
Connect audio from TV and other devices9
Listen to a connected device
10
Choose your sound
MP3 player
Setup menu options and settings
Apply factory settings
EN
3
1 Help and support
FAQs
If you have a problem, refer to the frequently
asked questions (FAQs) for this SoundHub at
www.philips.com/support.
If you still need help, contact Philips Consumer
Care in your country.
Warning
•• Do not attempt to repair your SoundHub
yourself. This may cause severe injury,
irreparable damage to your SoundHub, or void
your warranty.
Contact Philips
If you contact Philips, you will be asked for the
model and serial number of your product. The
model number and serial number are on the
back or bottom of your product. Note the
numbers before you call Philips:
Model No. __________________________
Serial No. ___________________________
2Notice
This section contains the legal and trademark
notices.
Compliance
This product is in compliance with the essential
requirements and other relevant provisions of
Directives 2006/95/EC (Low Voltage), 2004/108/
EC (EMC).
Mains fuse
This information applies only to products with a
UK mains plug.
This product is fitted with an approved molded
plug. If you replace the fuse, use one with:
• the ratings shown on the plug,
• a BS 1362 approval, and
• the ASTA approval mark.
Contact your dealer if you are not sure about
what type of fuse to use.
Caution: To conform with the EMC directive
(2004/108/EC), do not detach the plug from the
power cord.
Trademarks
Manufactured under license under U.S.
Patent Nos: 5,956,674; 5,974,380; 6,487,535
& other U.S. and worldwide patents issued
& pending. DTS, the Symbol, & DTS and the
Symbol together are registered trademarks
& DTS Digital Surround and the DTS logos
are trademarks of DTS, Inc. Product includes
software. DTS, Inc. All Rights Reserved.
Manufactured under license from Dolby
Laboratories. Dolby and the double-D symbol
are trademarks of Dolby Laboratories.
4
EN
Read and understand all instructions before you
use your SoundHub. If damage is caused by failure
to follow instructions, the warranty does not apply.
Safety
Risk of electric shock or fire!
• Never expose the product and accessories
to rain or water. Never place liquid
containers, such as vases, near the product.
If liquids are spilt on or into the product,
disconnect it from the power outlet
immediately. Contact Philips Consumer
Care to have the product checked before
use.
• Never place the product and accessories
near naked flames or other heat sources,
including direct sunlight.
•• Never insert objects into the ventilation
slots or other openings on the product.
•• Where the mains plug or an appliance
coupler is used as the disconnect device,
the disconnect device shall remain readily
operable.
•• Disconnect the product from the power
outlet before lightning storms.
•• When you disconnect the power cord,
always pull the plug, never the cable.
Risk of short circuit or fire!
•• Before you connect the product to the
power outlet, ensure that the power
voltage matches the value printed on the
back or bottom of the product. Never
connect the product to the power outlet if
the voltage is different.
Risk of injury or damage to the SoundHub!
•• For wall-mountable products, use only the
supplied wall mount bracket. Secure the
wall mount to a wall that can support the
combined weight of the product and the
wall mount. Koninklijke Philips Electronics
N.V. bears no responsibility for improper
wall mounting that results in accident, injury
or damage.
•• Never place the product or any objects
on power cords or on other electrical
equipment.
•• If the product is transported in
temperatures below 5°C, unpack the
product and wait until its temperature
matches room temperature before
connecting it to the power outlet.
•• Parts of this product can be made of
glass. Handle with care to avoid injury and
damage.
Risk of overheating!
•• Never install this product in a confined
space. Always leave a space of at least four
inches around the product for ventilation.
Ensure curtains or other objects never
cover the ventilation slots on the product.
Risk of contamination!
• Do not mix batteries (old and new or
carbon and alkaline, etc.).
• Remove batteries if they are exhausted or
if the remote control is not to be used for a
long time.
• Batteries contain chemical substances, they
should be disposed of properly.
Risk of swallowing batteries!
• The product/remote control may contain a
coin type battery, which can be swallowed.
Keep the battery out of reach of children at
all times!
EN
5
English
3Important
Care for your product
4 Your SoundHub
Use only microfiber cloth to clean the product.
Congratulations on your purchase, and welcome
to Philips! To fully benefit from the support that
Philips offers, register your SoundHub at www.
philips.com/welcome.
Care of the environment
Main unit
Your product is designed and manufactured with
high quality materials and components, which
can be recycled and reused.
When this crossed-out wheeled bin symbol is
attached to a product it means that the product
is covered by the European Directive 2002/96/
EC. Please inform yourself about the local
separate collection system for electrical and
electronic products.
Please act according to your local rules and
do not dispose of your old products with your
normal household waste.
Correct disposal of your old product helps to
prevent potential negative consequences for the
environment and human health.
Your product contains batteries covered by the
European Directive 2006/66/EC, which cannot
be disposed with normal household waste.
Please inform yourself about the local rules on
separate collection of batteries because correct
disposal helps to prevent negative consequences
for the environmental and human health.
6
EN
1
a Standby indicator
b Display panel
2
Remote control
c MUSIC iLINK
d Navigation buttons (
Navigate menus.
/
/
/
English
Switch your audio source to the MUSIC
iLINK connection.
)
eOK
2
17
3
Confirm an entry or selection.
f AUDIO SYNC
Change the audio delay.
g NIGHT MODE
Turn night mode on or off.
4
h
5
i +/- (Volume)
(Mute)
Mute or restore volume.
Increase or decrease volume.
j TREBLE +/-
Increase or decrease treble.
16
15
6
14
13
7
8
9
Increase or decrease bass.
l SURR. SOUND
Switch to auto, stereo, or 360 surround
sound.
m AUTO VOLUME
Turn auto volume on or off.
n SOUND MODE
Select a sound mode.
10
oEXIT
11
pSETUP
12
a
k BASS +/-
Exit a menu.
Access the setup menu.
qCOAXIAL/OPTICAL
Switch your audio source to the coaxial or
optical connection.
(Standby-On)
Switch the SoundHub on or to standby.
bAUX
Switch your audio source to the AUX
connection.
EN
7
5 Connect your
SoundHub
This section helps you connect your SoundHub to
a TV and other devices.
For information about the basic connections of
your SoundHub and accessories, see the quick
start guide. For a comprehensive interactive guide,
see www.connectivityguide.philips.com.
Note
•• For identification and supply ratings, see
the type plate at the back or bottom of the
product.
•• Before you make or change any connections,
make sure that all devices are disconnected
from the power outlet.
Speakers
Position, connect, and set up your speakers for
best surround sound.
Position
Speaker position plays a critical role in setting up
a surround sound effect.
For best results, place your speakers and the
subwoofer as shown below.
Note
•• Surround sound depends on various factors
such as room shape and size, type of wall and
ceiling, windows and reflective surfaces, and
speaker acoustics.
Follow these general guidelines, and then set up
your subwoofer.
Seating position:
This is the center of your listening area.
SPEAKER LEFT (speaker left) and
SPEAKER RIGHT (speaker right) speakers:
Place the left and right speakers in the
front, and equidistant from the main unit
in an arc, so that the two speakers are at
same distance from your seating position.
For best effect, point the speakers towards
the seating position and place the speakers
close to the ear level (when seated).
SUBWOOFER (subwoofer):
Place the subwoofer at least one meter to
the left or right of the TV. Leave about ten
centimeter clearance from the wall.
1
2
3
Connect
Connect your speakers and the subwoofer to
your SoundHub as described in the quick start
guide.
Setup
Set up your subwoofer through the setup menu.
Press SETUP repeatedly to select SUBW
VOL on the display panel (see ‘Setup menu
options and settings’ on page 12).
Press OK.
Press the Navigation buttons ( / ) to
change the volume.
Press OK to confirm.
Press EXIT to exit the menu.
1
2
3
4
5
8
EN
Connectors
SPEAKERS
Connect other devices to your SoundHub.
1
Side right
RIGHT
3
Audio input from an MP3 player.
2
R
SUBWOOFER
L
AUX 1
AUDIO IN
R
AUX 2
4
DIGITAL IN
COAXIAL OPTICAL
aSUBWOOFER
Connect to the supplied subwoofer.
b AUDIO IN-AUX 1/AUX 2
Connect to an analog audio output on the
TV or an analog device.
c DIGITAL IN-COAXIAL
Connect to a coaxial audio output on the
TV or a digital device.
d DIGITAL IN-OPTICAL
2
Connect to the supplied speakers.
3
L
TO MAIN UNIT
aSPEAKERS-RIGHT/LEFT
Main unit’s rear connectors
1
LEFT
AC MAINS~
a MUSIC iLINK
(DC IN)
English
Subwoofer’s rear connectors
Connect to an optical audio output on the
TV or a digital device.
b TO MAIN UNIT
Connect to the main unit.
c AC MAINS~
Connect to the power supply.
Connect audio from TV and
other devices
Play audio from TV or other devices through your
SoundHub.
Use the best quality connection available on other
devices.
Note
•• The audio connections in this user manual are
only recommendations. You can use other
connections too.
Option 1: Connect audio through a digital
optical cable
Best quality audio
Using an optical cable, connect the OPTICAL
connector on your SoundHub to the OPTICAL
OUT connector on the device.
The digital optical connector might be labeled
SPDIF, SPDIF OUT, or OPTICAL.
EN
9
Listen to a connected device
TV
Option 2: Connect audio through a digital
coaxial cable
Good quality audio
Using a coaxial cable, connect the COAXIAL
connector on your SoundHub to the COAXIAL/
DIGITAL OUT connector on the device.
The digital coaxial connector might be labeled
DIGITAL AUDIO OUT.
Option 3: Connect audio through analog
audio cables
Basic quality audio
Using an analog cable, connect the AUX
connectors on your SoundHub to the audio
connectors on the device.
VCR
10
EN
Before you can listen to a connected device, select
the source for the device.
Press AUX, COAXIAL/OPTICAL, or MUSIC
iLINK on the remote control to cycle through
and select an audio source, as shown in the
following table.
Source button
Display text
Audio source
AUX
COAXIAL/
OPTICAL
MUSIC iLINK
AUX1 or AUX2
COAX IN or
OPTI IN
I-LINK
AUX input
Coaxial or
Optical input
MP3 input
This section helps you use the SoundHub to play
audio from connected devices.
Before you start
• Make the necessary connections described
in the quick start guide and the user manual.
• Switch the SoundHub to the correct source
for other devices.
Choose your sound
This section helps you choose the ideal sound for
your video or music.
Night mode
For quiet listening, decrease the volume of loud
sounds when you play discs. Night mode is only
available for Dolby encoded DVD and Blu-ray
discs.
Press NIGHT MODE repeatedly to select a
setting on the display panel:
• ON: Turn on night mode.
• OFF: Turn off night mode.
Note
•• If auto volume is set to ON, you cannot enable
the night mode.
Sound mode
Synchronize picture and sound
Select predefined sound modes to suit your
video or music.
Press SOUND MODE repeatedly to select a
sound setting on the display panel:
• AUTO: Automatically select MOVIE or
MUSIC based on the sound stream.
• MOVIE: Enjoy a cinematic audio experience,
specially enhanced for movies.
• MUSIC: Recreate the original recording
environment of your music, in the studio or
at a concert.
• NEWS: Hear every word with optimized
speech and clear vocals.
• GAMING: Enjoy thrilling arcade sounds,
ideal for action-packed video games or loud
parties.
• ORIGINAL: Experience the original sound
of your movies and music, without added
sound effects.
If the audio and video are not synchronized,
delay the audio to match the video.
Press AUDIO SYNC.
Within two seconds, press the Navigation
buttons ( / ) to change the delay
shown on the display panel.
Press AUDIO SYNC again to exit.
Auto volume
Turn the auto volume on to keep the volume
constant when you switch to a different source.
Press AUTO VOLUME repeatedly to select a
setting on the display panel:
• ON: Turn on auto volume.
• OFF: Turn off auto volume.
1
2
3
Surround sound mode
Experience an immersive audio experience with
surround sound modes.
Press SURR. SOUND repeatedly to select a
setting on the display panel:
• AUTO: Surround sound based on the audio
stream.
• STEREO: Two-channel stereo sound. Ideal
for listening to music.
• 360SOUND: Surround sound for best
cinematic experience.
Note
•• If you play a source with DTS, DTS is displayed
on the display panel for two seconds.
•• If you play a source with Dolby, DOLBY D is
displayed on the display panel for two seconds.
EN
11
English
6 Use your SoundHub
Equalizer
Change the high frequency (treble) and low
frequency (bass) settings of your SoundHub.
Press TREBLE +/- or BASS +/- to change the
frequency shown on the display panel.
7 Change settings
This section helps you to change the settings of
your SoundHub.
Caution
MP3 player
Connect your MP3 player to play your audio files
or music.
What you need
• An MP3 player.
• A 3.5mm stereo audio cable.
Play music
•• Most of the settings are already configured
with the best value for your SoundHub. Unless
you have a reason to change a setting, it is best
to leave it at the default value.
Setup menu options and
settings
1
Setup menu
option
Setting for the option
2
SUBW VOL
DISPLAY
+5, +4, +3, ..., 0, ..., -3, -4, -5
BRIGHT
DIM 1
DIM 2
OFF, 15 MIN, 30 MIN, 45
MIN, 60 MIN
Connect the MP3 player to the SoundHub
as described in the Quick start guide.
Press MUSIC iLINK.
»» I-LINK is displayed on the display panel.
3
Press the buttons on the MP3 player to
select and play audio files or music.
SLEEP
VERSION
Setup menu options
1Press SETUP repeatedly to cycle through
the options on the display panel (see ‘Setup
menu options and settings’ on page 12).
Select an option, and then press OK.
Press the Navigation buttons ( / ) to
select a setting for the option, and then
press OK.
2
3
Note
•• If you do not press a button within ten
seconds, the setup menu exits.
•• To exit the menu, press EXIT.
12
EN
Change the brightness of the SoundHub display
panel.
Press SETUP repeatedly to select DISPLAY
on the display panel (see ‘Setup menu
options and settings’ on page 12).
Press OK.
Press the Navigation buttons ( / ) to
select BRIGHT, DIM 1, or DIM 2, and then
press OK.
1
2
3
Sleep timer
Set timers to switch the SoundHub to standby
after a specified time.
Press SETUP repeatedly to select SLEEP on
the display panel (see ‘Setup menu options
and settings’ on page 12).
Press OK.
Press Navigation buttons ( / ) to set a
sleep time on the display panel.
»» The sleep timer can be set up to 60
minutes. If the sleep timer is set to OFF, it
switches off.
1
2
3
8Product
specifications
Note
•• Specifications and design are subject to change
without notice.
Amplifier
•
•
•
•
•
•• If you switch the SoundHub to standby, the
Apply factory settings
You can reset your SoundHub to the default
settings programmed at the factory.
In COAXIAL mode, within three seconds, press
TREBLE+, VOL-, and BASS+.
»» When the factory settings restore is
complete, the SoundHub automatically
switches off and restarts.
Total output power:
• Europe and Asia: 400W RMS (30%
THD)
• Latin America: 320W RMS (10% THD)
Frequency response: 20 Hz-20 kHz / ±3 dB
Signal-to-noise ratio: > 65 dB (CCIR) /
(A-weighted)
Input sensitivity:
• AUX1, AUX2: 450 mV
• Music iLink: 170 mV
Audio
Note
sleep time that you have set is canceled.
English
Display panel
S/PDIF Digital audio input:
• Coaxial: IEC 60958-3
• Optical: TOSLINK
Main unit
••
••
Dimensions (WxHxD): 150 x 41 x 126 mm
Weight: 0.4 kg
Subwoofer
•
•
•
•
•
•
•
•
•
•
Output power: 100W RMS (30% THD)
Power supply: 220-240 V~, 50 Hz
Power consumption: 55 W
Standby power consumption: ≤ 1 W
Impedance: 4 ohm
Speaker drivers: 165 mm (6.5”) woofer
Frequency response: 20 Hz-150 Hz
Dimensions (WxHxD): 196 x 397 x 357
mm
Weight: 7.6 kg
Cable length: 5 m
EN
13
Speakers
•
•
•
•
•
•
•
Output power: 2 x 150W RMS (30% THD)
Speaker impedance: 6 ohm
Drivers per Satellite speaker: 2 x 64 mm
(2.5”) full range woofers + 1 x 64 mm
(2.5”) woofer + 1 x 25.4 mm (1”) softdome tweeter
Frequency response: 150 Hz-20 kHz
Dimensions (WxHxD): 99 x 247 x 117 mm
Weight: 1.4 kg/each
Cable length: 5 m
Remote control batteries
•
9Troubleshooting
Warning
•• Risk of electric shock. Never remove the
casing of the product.
To keep the warranty valid, never try to repair the
product yourself.
If you have problems using this product, check the
following points before you request service. If you
still have a problem, register your product and get
support at www.philips.com/welcome.
2 x AAA-R03-1.5 V
Sound
No sound from SoundHub.
• Make sure that the SoundHub is not muted.
Press to select MUTE OFF on the display
panel.
• Connect the audio cable from your
SoundHub to your TV or other devices.
• Reset your SoundHub to its factory settings,
and then switch it off and switch on again.
• On your remote control, press AUX,
COAXIAL/OPTICAL, or MUSIC iLINK
repeatedly to select the correct audio
input on the display panel (see ‘Listen to a
connected device’ on page 10).
Distorted sound or echo.
• If you play audio from the TV through the
SoundHub, make sure that the TV is muted.
Audio and video are not synchronized.
• 1) Press AUDIO SYNC. 2) Within two
seconds, press the Navigation buttons (
/ ) to change the delay shown on the
display panel. 3) Press AUDIO SYNC again
to exit.
14
EN
10Index
legal notices4
A
amplifier13
audio
auto volume
11
night mode
11
sound mode
11
specifications
13
surround sound mode
11
audio source
remote control
10
brightness13
C
care
environment6
product6
compliance4
connect
audio (analog cable)
10
audio (coaxial cable - digital)
10
audio (optical cable - digital)
9
audio from TV and other devices
9
speakers8
connectors
back connectors - main unit
9
back connectors - subwoofer
9
side connector
9
D
disable
auto volume
11
night mode
11
display panel6
E
F
main unit
overview6
specifications
13
mains fuse (UK only)4
MP3
play12
N
night mode11
B
enable
auto volume
night mode
M
11
11
factory settings13
FAQs4
O
overview
connectors9
main unit
6
remote control
7
P
play
MP312
position
connectors9
position8
R
recycling6
remote control
batteries14
overview7
S
safety
disposal6
use of the product
5
setup menu
sleep timer
13
subwoofer volume
8
sound
predefined sound mode
11
surround sound mode
11
synchronize picture and sound
11
troubleshooting14
EN
15
English
L
speakers8
subwoofer
connect8
setup8
subwoofer volume8
synchronize picture and sound11
T
trademarks4
troubleshooting
sound14
V
video
synchronize picture and sound
16
EN
11
© 2011 Koninklijke Philips Electronics N.V.
All rights reserved.
sgptt_1132/12_v1
book1 back page.indd 4
12/29/2010 3:28:13 PM