1
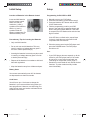
XRU9M OM 2-6-10.indd 1
2/6/2010 1:51:35 PM
Table of Contents
Regulatory Cautions
Regulatory Cautions .................................3
Button Descriptions ..................................4
Initial Setup ...............................................6
Battery Insertion ...................................6
Precautionary tips for batteries ............6
Battery Saver .......................................6
Code Saver ..........................................6
Code Setup...............................................7
Setup for DVD ......................................7
Setup for AUDIO ..................................8
Setup for CABLE ..................................9
Setup for TV .......................................10
Searching for codes ...........................11
Remote Control Range ...........................12
Remote Control Precautions ..................13
Warranty .................................................15
FCC Caution
Congratulations on your purchase of
this Universal Remote Control. With
this Universal Remote, juggling multiple
remote controls is a thing of the past!
Your new remote controls up to 4 devices,
including the most popular brands of TV,
DVD, DVR, Cable, and more.
Note: Some functions from your original
remote may not be controlled by this
remote. Use the original remote, if
available, to control such functions.
Sometimes buttons other than described
in these instructions may actually perform
the function. For example, the CHAN and
VOL buttons might be used to navigate
through menu choices. We recommend
you experiment with the remote to
identify if such situations pertain to your
equipment.
Your new remote is easy to use, easy to
program, and it gives you total control—at
the touch of your fingertips!
2
XRU9M OM 2-6-10.indd 2-3
THIS DEVICE COMPLIES WITH PART 15 OF THE
FCC RULES. OPERATION IS SUBJECT TO THE
FOLLOWING TWO CONDITIONS:
(1) THIS DEVICE MAY NOT CAUSE HARMFUL
INTERFERENCE, AND (2) THIS DEVICE MUST
ACCEPT ANY INTERFERENCE RECEIVED,
INCLUDING INTERFERENCE THAT MAY CAUSE
UNDESIRED OPERATION.
NOTE: This equipment has been tested and
found to comply with the limits for a Class B digital
device, pursuant to part 15 of the FCC Rules.
These limits are designed to provide reasonable
protection against harmful interference in a
residential installation.
This equipment generates, uses and can radiate
radio frequency energy and, if not installed
and used in accordance with the instructions,
may cause harmful interference to radio
communications. However, there is no guarantee
that interference will not occur in a particular
installation. If this equipment does cause harmful
interference to radio or television reception, which
can be determined by turning the equipment off
and on, the user is encouraged to try to correct
the interference by one or more of the following
measures:
• Reorient or relocate the receiving antenna.
• Increase the separation between the equipment
and receiver.
• Connect the equipment into an outlet on a
circuit different from that to which the receiver is
connected.
• Consult the dealer or an experienced radio/TV
technician for help.
NOTE: Modifications to this product will void the
user’s authority to operate this equipment.
Canadian Notice
This Class B digital apparatus complies with limits
for radio noise emissions specified in ICES-003 of
the Department of Communications. This device
complies with RSS-210 of Industry and Science
Canada Operation is subject to the following
two conditions: (1) this device may not cause
interference, and (2) this device must accept any
interference, including interference that may cause
undesired operation of the device.
3
2/6/2010 1:51:43 PM
Button Descriptions
POWER – Press this button to turn the component on or
off.
SET – This button starts all programming of the Remote
Control.
HDMI – Press this button to select the HDMI input. By
pressing it repeatedly you will go through all HDMI inputs
in sequence.
COMP – Press this button to select Component input.
AV – Press this button to select AV (either Composite or
S-Video) input.
DTV – Press this button to select TV input.
PIP – Pressing this button will activate the picture-inpicture feature.
4
XRU9M OM 2-6-10.indd 4-5
Button Descriptions, cont.
P.SIZE – Repeatedly press this button to set the size of
the PIP screen to small, medium, or large.
P.INPUT – Press the button to choose the input source
for the PIP screen.
P.CH – Press this button to change the channels in the
PIP screen when TV is selected as PIP input.
WIDE – This button cycles through the available screen
formats.
FREEZE – Press this button to “Freeze-Frame” the
current screen. Press this button again to continue.
MTS – This button will select the MTS options of Stereo,
SAP, Mono or alternate audio channels, where available.
SWAP – While in PIP mode; pressing SWAP will switch
the displays from the main screen to the sub-screen or
vice versa.
MODE – Use this button to change the picture.
INFO – This button displays the image and system
information display.
P.AUDIO – Press this button to switch the audio from the
main screen to the sub-screen while in PIP mode.
CC – This button will select the Closed Caption mode.
DVD – This button selects a programmed DVD player.
AUDIO – This button selects a programmed Audio
Receiver/Amp/Home Theater System.
CABLE – This button selects a programmed cable TV
set-top box or a satellite TV set-top box.
TV – This button selects a programmed TV.
Note: the remote is pre-programmed to operate VIZIO
TVs by default.
MENU – Use this button for the on-screen menu.
EXIT – Press this button to exit from the on-screen
menu.
OK – Use this button for the on-screen menu. Press it to
confirm or choose a highlighted menu selection.
Up, Down, Left, Right – These buttons are used to
navigate the on-screen menu.
GUIDE – This button displays program guide
information.
LAST – This button recalls the previously viewed
channel.
MEDIA – Press this button to view pictures, listen to
music, or watch movies on a USB drive connected to the
Multi Media port on the side of a VIZIO HDTV.
VOL +/- – This button turns the volume up or down.
CH +/- – This button changes the channels up or down.
MUTE – This button turns the sound on and off.
NUMBER BUTTON PAD – Use these buttons to select
a channel.
INPUT – This button allows the user to cycle through the
available source inputs.
- (DASH) – When selecting a digital channel directly,
use this button between the main and sub-channels. For
example, channel 28-2 would be selected by the button
sequence 2, 8, DASH, 2.
5
2/6/2010 1:51:43 PM
Initial Setup
Setup
Insertion of Batteries in the Remote Control
Programming for BLU-RAY or DVD
Insert two AAA batteries
into the remote control.
Make sure that you
match the (+) and (-)
symbols on the batteries
with the (+) and (-)
symbols inside the
battery compartment. Reattach the battery cover.
1. Manually turn on your DVD player.
2. Press the DVD button on the remote control.
3. Press and hold the SET button until the LED
LIGHT flashes twice.
4. Find the programming code for your DVD
player in the code list (on separate sheet) and
enter it using the Number Buttons. If the code
is accepted, the LED flashes twice after the last
digit is entered.
If the LED does not flash twice, repeat Steps
2 through 4 with the next code listed for the
component and manufacturer.
Precautionary Tips for Inserting the Batteries
• Only use AAA batteries.
• Do not mix new and old batteries. This may
result in cracking or leakage that may pose a
fire risk or lead to personal injury.
5. Point the remote control at the DVD player and
press the POWER button. The DVD player
should turn off.
Note:
• Inserting the batteries incorrectly may also result
in cracking or leakage that may pose a fire risk
or lead to personal injury.
• Dispose of the batteries in accordance with local
laws and regulations.
• Keep the batteries away from children and pets.
•
•
If your DVD player does not respond, try all the
codes for your DVD player brand. If the codes
do not work, or your brand is not listed, see
“Searching for Component Codes, page 11.”
Sometimes a code listed will only include limited
functions. Try other codes that may include
more functionality.
Battery Saver
Your remote automatically turns off if the buttons
are depressed more than 30 seconds.
Code Saver
You will have up to 10 minutes to change the
batteries in your remote without losing codes you
have programmed. However, to avoid losing your
codes, do not press any buttons until batteries are
installed in the remote.
6
XRU9M OM 2-6-10.indd 6-7
7
2/6/2010 1:51:43 PM
Setup, cont.
Setup, cont.
Programming for AUDIO
Programming for CABLE or SATELLITE
1. Manually turn on your AUDIO device.
2. Press the AUDIO button on the remote control.
3. Press and hold the SET button until the LED
LIGHT flashes twice.
4. Find the programming code for your AUDIO
device in the code list (on separate sheet) and
enter it using the Number Buttons. If the code
is accepted, the LED flashes twice after the last
digit is entered.
1. Manually turn on your CABLE box.
2. Press the CABLE button on the remote control.
3. Press and hold the SET button until the LED
LIGHT flashes twice.
4. Find the programming code for your CABLE
box in the code list (on separate sheet) and
enter it using the Number Buttons. If the code
is accepted, the LED flashes twice after the last
digit is entered.
If the LED does not flash twice, repeat Steps
2 through 4 with the next code listed for the
component and manufacturer.
If the LED does not flash twice, repeat Steps
2 through 4 with the next code listed for the
component and manufacturer.
5. Point the remote control at the AUDIO device
and press the POWER button. The AUDIO
device should turn off.
5. Point the remote control at the CABLE box and
press the POWER button. The CABLE box
should turn off.
Note:
Note:
•
•
•
If your AUDIO device does not respond, try all
the codes for your AUDIO device brand. If the
codes do not work, or your brand is not listed,
see “Searching for Component Codes, page
11.”
Sometimes a code listed will only include limited
functions. Try other codes that may include
more functionality.
8
XRU9M OM 2-6-10.indd 8-9
•
If your CABLE or SATELLITE box does not
respond, try all the codes for your CABLE or
SATELLITE box brand. If the codes do not
work, or your brand is not listed, see “Searching
for Component Codes, page 11.”
Sometimes a code listed will only include limited
functions. Try other codes that may include
more functionality.
9
2/6/2010 1:51:43 PM
Setup, cont.
Setup, cont.
Programming for TV
Note: The remote is pre-programmed to
operate VIZIO TVs by default.
Searching for Component Codes
1. Manually turn on your TV.
2. Press the TV button on the remote control.
3. Press and hold the SET button until the LED
LIGHT flashes twice.
4. Find the programming code for your TV in the
code list (on separate sheet) and enter it using
the Number Buttons. If the code is accepted,
the LED flashes twice after the last digit is
entered.
If the LED does not flash twice, repeat Steps
2 through 4 with the next code listed for the
component and manufacturer.
5. Point the remote control at the TV and press the
POWER button. The TV should turn off.
If you cannot find the manufacturer in the
component list or the program code does not work,
you can use the remote control to search for the
correct component code.
To search for a component code:
1. Turn on the component.
2. Press the matching component button on the
remote control (DVD, AUDIO, CABLE, or TV).
3. Press and hold the SET button until the LED
flashes twice.
4. Press 9 9 1. The LED flashes twice.
5. Point the remote control at the component and
then press and hold the POWER button until
the component turns off. Release the POWER
button. If the component does not respond
correctly, repeat the search procedure to find
another code.
Note:
Reset Remote to Factory Settings:
•
•
•
Your VIZIO remote uses code 1000 (Default), to
work your LCD HDTV.
If your TV does not respond, try all the codes
for your TV brand. If the codes do not work,
or your brand is not listed, see “Searching for
Component Codes, page 11.”
Sometimes a code listed will only include limited
functions. Try other codes that may include
more functionality.
1. Press and hold SET until the LED flashes twice.
2. Press 9 1 9 1 9. The LED flashes twice.
Write your codes down here for easy reference
later.
Type
Type Stored
Code
DVD
AUDIO
CABLE
TV
10
XRU9M OM 2-6-10.indd 10-11
11
2/6/2010 1:51:44 PM
Maintenance & Troubleshooting
VIZIO Remote Control Precautions
The remote control should be kept dry and away
from heat sources. Avoid humidity.
If the Component responds erratically to the
remote control or does not respond at all, check
the batteries. If the batteries are low or exhausted,
replace them with fresh batteries.
When not using the remote control for a long
period of time, remove the batteries.
Do not take the batteries apart, heat them, or throw
them into a fire.
Do not subject the remote control to undue
physical stress, such as striking or dropping it.
2. The remote control is not working with my
devices.
o Move closer to the device.
o Point the remote control directly at the
remote sensor on your device.
o Remove any obstacles between the remote
control and the remote sensor.
o Replace dead batteries with new ones.
o Make sure you have pressed the correct
device button at the top of the remote.
3. The remote control does not work with my
device even after programming it.
o Set the remote control code correctly. If the
code that is listed first for your device does
not work, try all the codes for your device
in the order in which they are listed in the
supplied Code List.
Cleaning the Remote Control
Telephone & Technical Support
1. Use a soft cloth for cleaning.
2. If the remote control is seriously contaminated,
use a soft cloth moistened with diluted neutral
cleaner to clean the display. Wring water out of
the cloth before cleaning to prevent water from
penetrating into the housing.
Troubleshooting
1. Remote control does not work:
o Point the remote control directly at the
remote sensor on your TV.
o Remove any obstacles between the remote
control and the remote sensor.
o Replace dead batteries with new ones.
o Press the DTV button on the top of the
remote to return to the TV mode.
Products are often returned due to a technical
problem rather than a defective product that may
result in unnecessary shipping charges billed
to you. Our trained support personnel can often
resolve the problem over the phone. For more
information on warranty service or repair, after
the warranty period, please contact our Support
Department at the number below. Customer
support and quality service are integral parts of
VIZIO’s commitment to service excellence.
For technical assistance contact our VIZIO
Technical Support Department via email or phone.
Email: [email protected] (877) 698-4946
Fax: (949) 585-9563 Hours of operation: Monday Friday: 6 am to 9 pm Saturday – Sunday: 8 am to
4 pm Please have your VIZIO model number, and
date of purchase available before you call VIZIO.
VIZIO
39 Tesla
Irvine, CA 92618, USA
Telephone: (949) 428-2525 Fax: 949-585-9514
Web: www.vizio.com
12
XRU9M OM 2-6-10.indd 12-13
13
2/6/2010 1:51:44 PM
ONE YEAR LIMITED WARRANTY
Covers units purchased as “new” in United States and
Puerto Rico Only.
VIZIO provides a warranty to the original purchaser
of a new Product against defects in materials and
workmanship for a period of one year of non-commercial
usage and ninety (90) days of commercial use. If a
Product covered by this warranty is determined to be
defective within the warranty period, VIZIO will either
repair or replace the unit at its sole option and discretion.
To obtain warranty service, contact VIZIO Technical
Support via email: [email protected] or via
phone at 877 MY VIZIO (877.698.4946) from 6:00AM to
9:00PM Monday through Friday and 8:00AM to 4:00PM
Saturday and Sunday, Pacific Time, or visit www.VIZIO.
com. PRE-AUTHOIRZATION MUST BE OBTAINED
BEFORE SENDING A UNIT TO A VIZIO SERVICE
CENTER. Proof of purchase in the form of a purchase
receipt or copy thereof is required to show that the
Product is within the warranty period.
Parts and Labor
There will be no charge for parts or labor during the
warranty period. Replacement parts and units may be
new or recertified at VIZIO’s option and sole discretion.
Replacement parts and units are warranted for the
remaining portion of the original warranty or for ninety
(90) days from warranty service or replacement,
whichever is greater.
Type of Service
Defective Products must be sent to a VIZIO service
center to obtain warranty service. VIZIO is not
responsible for transportation costs to the service center,
but VIZIO will cover return shipping to the customer.
PRE-AUTHORIZATION IS REQUIRED BEFORE
SENDING ANY UNIT IN FOR WARRANTY SERVICE.
All Product returns to VIZIO’s service center must utilize
either the original blister pack and shipping material or
packaging that affords an equal degree of protection.
VIZIO Technical Support will provide instructions for
packing and shipping the covered Product to the VIZIO
service center.
14
XRU9M OM 2-6-10.indd 14-15
Limitations and Exclusions
VIZIO’s one-year limited warranty only covers defects
in materials and workmanship. This warranty does
not cover, for example: cosmetic damage, normal
wear and tear, improper operation, improper voltage
supply, signal issues, damage from shipping, acts
of God, any type of customer misuse, modification
or adjustments, as well as installation and set-up
issues or any repairs attempted by anyone other than
by a VIZIO authorized service center. Products with
unreadable or removed serial numbers or requiring
routine maintenance are not covered. This one year
limited warranty does not cover Products sold “AS IS”,
“FACTORY RECERTIFIED”, or by a non-authorized
reseller. THERE ARE NO EXPRESS WARRANTIES
OTHER THAN THOSE LISTED OR DESCRIBED
ABOVE. ANY IMPLIED WARRANTIES, INCLUDING
ANY IMPLIED WARRANTY OF MERCHANTABILITY
AND FITNESS FOR A PARTICULAR PURPOSE, SHALL
BE LIMITED IN DURATION TO THE PERIOD OF TIME
SET FORTH ABOVE. VIZIO’S TOTAL LIABILITY FOR
ANY AND ALL LOSSES AND DAMAGES RESULTING
FROM ANY CAUSE WHATSOEVER INCLUDING
VIZIO’S NEGLIGENCE, ALLEGED DAMAGE, OR
DEFECTIVE GOODS, WHETHER SUCH DEFECTS
ARE DISCOVERABLE OR LATENT, SHALL IN NO
EVENT EXCEED THE PURCHASE PRICE OF THE
DEVICE. VIZIO SHALL NOT BE RESPONSIBLE
FOR LOSS OF USE, LOSS OF INFORMATION
OR DATA, COMMERCIAL LOSS, LOST REVENUE
OR LOST PROFITS, OR OTHER INCIDENTAL OR
CONSEQUENTIAL DAMAGES. SOME STATES DO
NOT ALLOW LIMITATIONS ON HOW LONG AN
IMPLIED WARRANTY LASTS OR THE EXCLUSION
OF INCIDENTAL OR CONSEQUENTIAL DAMAGES,
SO THE ABOVE LIMITATIONS OR EXCLUSIONS
MAY NOT APPLY TO YOU. THIS WARRANTY GIVES
YOU SPECIFIC LEGAL RIGHTS, AND YOU MAY
ALSO HAVE OTHER RIGHTS, WHICH VARY FROM
STATE TO STATE. THIS WARRANTY IS SUBJECT TO
CHANGE WITHOUT NOTICE. CHECK www.VIZIO.com
FOR THE MOST CURRENT VERSION.
THE TRADEMARKS SHOWN HEREIN ARE THE
PROPERTY OF THEIR RESPECTIVE OWNERS;
IMAGES USED ARE FOR ILLUSTRATION PURPOSES
ONLY. VIZIO, THE V LOGO AND WHERE VISION
MEETS VALUE AND OTHER VIZIO TRADEMARKS
ARE THE INTELLECTUAL PROPERTY OF VIZIO
INC. PRODUCT SPECIFICATIONS ARE SUBJECT TO
CHANGE WITHOUT NOTICE. © 2010 VIZIO INC. ALL
RIGHTS RESERVED.
15
2/6/2010 1:51:44 PM
Use BLACK back cover
supplied separately
XRU9M OM 2-6-10.indd 16
2/6/2010 1:51:44 PM