1
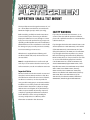
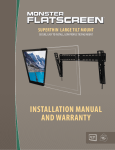
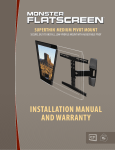
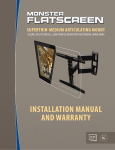
SUPERTHIN Small Tilt MOUNT ™ SECURE, EASY TO INSTALL, LOW PROFILE Tilting MOUNT Installation manual and warranty 10 "–27" (25-68cm) 40 lbs. (18.14kg) SuperThin Small TILT Mount ™ This SuperThin mount is designed to mount 10"– 27" (25 – 68 cm) flatscreen televisions to vertical walls. Maximum weight capacity is 40 lbs. (18.14 kg). Before installing, carefully review the instructions to ensure that no parts are missing or defective. Improper installation can cause damage or serious injury. Do not use this product for any purpose not explicitly specified by Monster or the manufacturer. Neither Monster nor the manufacturer can be liable for damage or injury caused by incorrect assembly, incorrect mounting or incorrect use. All hardware is supplied for the following wall conditions: Wood stud, brick, solid concrete and concrete block. Note: The supplied hardware is not for steel stud walls. If you are uncertain about the nature of your wall construction, consult an installation contractor. Important Notice Monster intends to make this manual accurate and complete, however, Monster makes no claim that the information contained herein covers all details, conditions or variations, nor does it provide for every possible contingency in connection with the installation or use of this product. The information contained in this document is subject to change without notice or obligation of any kind. Monster makes no representation of warranty, expressed or implied, regarding the information contained herein. Monster assumes no responsibility for accuracy, completeness or sufficiency of the information contained in this document. SAFETY WARNING If you don’t understand these directions, or are unsure of how to install this product installation, please call a qualified contractor or contact Monster Cable Products, Inc. If you bought the Product in the United States, Latin America (Mexico 011-882-800-8989), or Asia Pacific (China 400-820-8973), contact Monster, LLC (455 Valley Drive, Brisbane, CA 94005) at 1 877 800-8989. If you bought the Product anywhere else, contact Monster Technology International Ltd., Ballymaley Business Park, Ennis, Co. Clare, Ireland. You can write or use one of the following telephone numbers: Canada 866-348-4171, Ireland 353 65 68 69 354, Austria 0800296482, Belgium 0800-79201, Czech Republic 800-142471, Denmark 8088-2128, Finland 800-112768, France 0800-918201, Germany 0800-1819388, Greece 00800-353-12008, Italy 800-871-479, Netherlands 0800-0228919, Norway 800-10906, Russia 810-800-20051353, Spain 900-982-909, Sweden 020-792650, Switzerland 0800834659, United Kingdom 0800-0569520. 2 4.72" (12.0cm) 2.95" (7.5cm) 2.95" (7.5cm) 3.94" (10.0cm) 3.94" (10.0cm) 2.95" (7.5cm) 4.72" (12.0cm) 1.7" (4.3cm) Specifications and Notes VESA 75×75 / 100×100 Compliant ™ Monster is constantly striving to improve its products. Specifications are subject to change without notice. 3 1 Wall Mounting Plate Security Screw 2 each M4×12 1 TV Mounting Plate 2 Concrete Anchors 2 Lag Bolts 2 Round Washers Screws 4 each M4×15 4 each M5×15 1 Bubble Level Package Contents If any parts are missing, please call the appropriate Monster number for your location. See page 2 for phone numbers. 4 Important! Read Before Installing WARNINGS CAUTIONS A WARNING alerts you to the possibility of serious injury or death if you do not follow the instructions. A CAUTION alerts you the possibility of damage or destruction of equipment if you do not follow the corresponding instruction. (1) DO NOT install on a sloping surface. Install exclusively on a vertical surface. (2) DO NOT mount to cabinetry made of particleboard. (3) DO NOT install in a room with excessively high temperatures or high humidity. Install at least 3 ft. from all water sources. Refer to TV manufacturer’s manual for specific information regarding temperature and humidity. (4) DO NOT install near an air conditioner. (5) DO NOT install in a location where there is excessive dust, smoke or moisture. These sources can create a fire. (6) NEVER apply unnecessary stress or load on the installed unit. Never hang on the unit. (1) To prevent eye fatigue, do not install where there is direct sunlight or excessive light. (2) When carrying out maintenance, disconnect the TV’s power supply to avoid electrical shock. (3) If planning to route AV cable in wall, only use cable that is approved for this use. Masonry Mounting While masonry materials (bolts and concrete anchors) are included, masonry mounting requires specialized knowledge, skills and tools. Monster highly recommends that you seek the assistance of a professional installer when mounting to masonry. DO NOT drill holes in masonry mortar joints. (7) DO NOT install unit alone. Safe installation requires at least two people. (8) DO NOT route your flatscreen TV’s power cord in wall. Check local building/electrical codes for more information. (9) DO NOT over tighten screws or bolts. This can damage the wall plate or the surface of your wall. Thread screws or bolts carefully by hand before tightening. If you feel any resistance, remove the screw or bolt immediately. (10) DO NOT release the wall plate until you are absolutely sure it is secured to the wall. 5 Required Tools Pre-Installation Checklist Wall Stud Mounting ❏❏ For wood stud mounting, your mounting location must have at least one wall stud. Level (included) Electronic studfinder Electric hand drill ³∕₁₆" drill bit Phillips screwdriver Wrench and socket set Masking tape Masonry Mounting (brick, concrete, concrete blocks) Above tools Replace ³∕₁₆" drill bit with ½" masonry drill bit Hammer ❏❏ Your view of the mounting location must be free of glare or other obstructions. ❏❏ Your mounting location must be near an AC power outlet. Ideally the outlet should be behind your TV. This allows you to conceal your display’s power cord. ❏❏ Your mounting location must be at least 3 ft. from any source of heat or water. TIP: To hide your TV’s power cord and AV cables, install a Monster FlatScreen CleanView Cable Manager. ™ ™ 6 Installing the Wall Mounting Plate Remove all pieces of the wall mounting system to ensure you have all necessary parts. The TV mounting plate and wall mounting plate come assembled in the package. Before installing mount, you must detach the two pieces as follows: 1 Detach the TV mounting plate from the wall mounting plate by loosening the security screws on either side of the wall mounting plate. Do not completely remove security screws — it’s much easier to tighten the security screws later if they are already threaded into the wall mounting plate. 2 Lift TV mounting plate and slide off of wall mounting plate. 7 Wood Stud Mounting 1 Using an electronic studfinder, locate a wall stud at your desired mounting location. 2 With the help of another person, position the wall mounting plate on the wall stud. 8 Wood Stud Mounting (cont’d) 3 Suspend a straight edge, such as a ruler, across the top of the mounting plate. Place the provided level on the straight edge and confirm that the wall plate is horizontally straight. Hold the plate firmly in place. Mark the stud center in the top and bottom mounting holes with a pencil. 4 With your electric drill and ³∕₁₆" bit, pre-drill a 3" deep hole at each mark. 5 Position the wall mounting plate over the holes drilled in the wall stud. Make sure the wall plate is level by using the supplied bubble level. Place the provided level on a ruler placed on top of the wall mounting plate and confirm that the wall plate is vertically straight. Hold the plate firmly in place. 9 Wood Stud Mounting (cont’d) 6 With the help of another person, attach the wall plate to the wall using the lag bolts and round washers as shown to the right. Tighten each bolt with your wrench. Turn clockwise until secure. Continue to page 14 to continue your installation. DO NOT over tighten bolts. This can damage the wall plate or the surface of your wall. DO NOT release the wall plate until you are absolutely sure it is secured to the wall. 10 Masonry Mounting Masonry mounting requires specialized knowledge, skills and tools. Monster highly recommends that you seek the help of a professional installer when mounting to masonry. 1 DO NOT drill holes in masonry mortar joints. With the help of a friend, position the mounting plate in the desired location. 2 Suspend a straight edge, such as a ruler, across the top of the mounting plate. Place the provided level on the straight edge and confirm that the wall plate is horizontally straight. Hold the plate firmly in place. Mark the centers of the top and bottom center mounting holes with a pencil. Be careful not to mark a mortar joint. 11 Masonry Mounting (cont’d) 3 With your electric drill and ½" masonry bit, pre-drill a 3" deep hole at each mark. 4 Install the supplied plastic concrete anchors in each hole. Tap into hole with hammer until fully seated. 5 Position the wall mounting plate over the holes drilled in the wall. Make sure the wall plate is level by using the supplied bubble level. Place the level on a ruler placed on top of the wall mounting plate and confirm that it is vertically straight. Hold the plate firmly in place. 12 Masonry Mounting (cont’d) 6 With the help of another person, attach the wall plate to the wall using the lag bolts and round washers as shown to the right. Tighten each bolt with your wrench. Turn clockwise until secure. DO NOT over tighten bolts. This can damage the wall plate or the surface of your wall. DO NOT release the wall plate until you are absolutely sure it is secured to the wall. 13 Setting Your Mount's Adjustment Capabilities This mount features all-directional OmniBall for fine-tuning the position of your display. ™ The OmniBall allows you to pivot your screen any direction and rotate it 360°. Before attaching your flatscreen TV to the four-point TV mounting plate, you can increase or decrease the OmniBall pivot action. 1 Slide the flatscreen TV mounting plate onto the wall plate as shown to the right. 2 By hand, remove the black plastic cap in the center of the mounting plate, revealing the OmniBall tension nut (13mm). 14 Setting Your Mount's Adjustment Capabilities (cont’d) 3 With a socket wrench (13mm or ½"), turn the tension nut clockwise to limit pivot and rotation. 4 Turn the nut counterclockwise to increase pivot and rotation. 15 Attaching Your Flatscreen TV to the TV Mounting Plate Do not lay your TV face down when attaching the TV mounting plate. This can cause permanent damage to your screen. Lean it against a wall or other solid surface so it remains vertically upright. The television should be unplugged before threading any bolt or screw into the back panel. Your mounting system features two sets of screws, M4×15 and M5×15. The M5×15 is the thicker of the two. Determine which set of screws is the correct length for your TV’s inserts. Test one of the screws to ensure it’s the correct choice. 1 2 Locate the threaded inserts on your TV’s back panel. Note the two sets of mounting holes on your TV mounting plate. Determine which set aligns perfectly with the four threaded inserts on your TV’s back panel. 3 By hand, thread the screws through the mounting plate’s mounting holes into the four TV inserts. 4 With a Phillips screwdriver, tighten the screws so the TV mounting plate is securely attached to the TV. Do not over tighten screws. Thread screws carefully by hand before tightening. If you feel any resistance, remove the screw immediately. 16 Hanging Your Flatscreen TV on the Wall Plate 1 Connect the TV’s power cord and any AV cables to the TV before hanging it. Plug the TV’s power cord into a nearby AC outlet. If routing AV cable in wall, run it through the prepared opening in your wall. 2 With the help of another person, lift your TV up to mount level. Raise the TV just above the wall mounting plate. Slide the TV and mounting plate downward onto the wall mounting plate. 3 Firmly secure the TV mounting plate on the wall plate by tightening the provided security screws through the security tabs on either side of the mount. Tighten the screw with a Phillips screwdriver. Do not over tighten. Congratulations You’ve successfully installed your Monster SuperThin FlatScreen Mount. Visit us at www.MonsterCable.com/FlatScreen for more innovative Monster FlatScreen products. ™ 17 More Great Products from Monster FlatScreen ™ Get the Look You Want and the Performance You Need. Monster FlatScreen PowerProtect and PowerCenters ™ ™ Monster FlatScreen CleanView Cable Manager ™ Protect your flatscreen TV from harmful surges and spikes and maximize performance with Monster Dual Mode Plus surge protection and HD Clean Power filtering, designed specifically for HDTVs. Conceal unruly cords and cables for a clean, sleek look. Easy to install with paintable covers to match any decor. Monster FlatScreen Cleaning Kit Monster FlatScreen Cables Safely clean your LCD or plasma flatscreen TV without staining, streaking, or dripping. Ultra-soft MicroFiber cloth won’t scratch delicate screen coatings. Monster Flatscreen Cables are compact and flexible for easy routing and installation. Exclusive Monster patented technologies deliver the advanced performance you need from your flatscreen TV. ™ ® ™ For more details on all our Monster FlatScreen products, visit us at MonsterCable.com/FlatScreen 18 LIMITED WARRANTY FOR CONSUMERS Monster, LLC, 7251 West Lake Mead Blvd., Las Vegas, NV 89128, USA, [PLEASE NOTE THAT MONSTER DOES NOT ACCEPT PRODUCTS SHIPPED TO THIS ADDRESS – FOLLOW INSTRUCTIONS IN “HOW TO MAKE A CLAIM” BELOW] (415) 840-2000 (“Monster”) extends You this Limited Warranty. Statutory or common law may provide You with additional rights or remedies, which shall not be affected by this Limited Warranty. DEFINITIONS “Adequate Use” means use of the Product (i) within a home or dwelling, (ii) for private (as opposed to commercial) purposes, (iii) in conformance with all applicable law, code or regulations (including without limitation building and/or electrical codes), (iv) in accordance with manufacturer recommendations and / or instructions in the materials and documentation that accompany the Product, and (v) if applicable, with proper electrical grounding. “Authorized Dealer” means any distributor, reseller or retailer that (i) was duly authorized to do business in the jurisdiction where it sold the Product to You, (ii) was permitted to sell You the Product under the laws of the jurisdiction where You bought the Product, and (iii) sold You the Product new and in its original packaging. “Formal Warranty Claim” means a claim made in accordance with the section “Formal Warranty Claims” herein. “Product” means a Product (i) that is listed in the Specifications Table below, (ii) that You bought from an Authorized Dealer new and in its original packaging, and (iii) whose serial number, if any, has not been removed, altered, or defaced. “Product Defect” means an inadequacy of the Product that existed at the time when You received the Product from an Authorized Dealer and that causes a failure of the Product to perform in accordance with Monster’s documentation accompanying the Product, unless such failure has been caused completely or partly by (a) any use other than Adequate Use, (b) transportation, neglect, misuse or abuse by anyone other than Monster’s employees; (c) alteration, tampering or modification of the product by anyone other than a Monster employee; (d) accident (other than a malfunction that would otherwise qualify as a Product Defect); (e) maintenance or service of the Product by anyone other than a Monster employee; (f ) exposure of the Product to heat, bright light, sun, liquids, sand or other contaminants; or (g) acts outside the control of Monster, including without limitation acts of God, fire, storms, earthquake or flood. “Warranty Period” means the time period during which Monster must have received Your Formal Warranty Claim. The different Warranty Periods related to Product Defects are defined in the Specifications Table below. The Warranty Period commences on the date when You purchased or received (whichever occurs later) the Product from an Authorized Dealer as evidenced by the Authorized Dealer’s invoice, sales receipt or packing slip. If You do not have written proof of the date of purchase or receipt, then the Warranty Period commences three (3) months after the date when the Product left Monster’s or its factory as evidenced by Monster’s records. The Warranty Period ends after the time defined in the Specifications Table has expired or after You have transferred ownership of the Product, whichever occurs earlier. Also, You must call Monster and obtain a Return Authorization Number (as described under “How to Make a Claim”) within two (2) months after You discover a Product Defect (or should have discovered it, if such Product Defect was obvious). “You” means the first individual person that purchased the Product in its original packaging from an Authorized Dealer. This Limited Warranty does not apply to persons or entities that bought the Product (i) in used or unpackaged form, (ii) for resale, lease or other commercial use, or (iii) from someone other than an Authorized Dealer. SCOPE OF THIS LIMITED WARRANTY PRODUCTS. If a Product contained a Product Defect when You bought it from an Authorized Dealer and Monster receives a Formal Warranty Claim from You within two (2) months after You discover such Product Defect (or should have discovered it, if such Product Defect was obvious) and before the end of the Warranty Period for Product Defects applicable to the affected Product, then Monster will provide You with one of the following remedies: Monster will (1) repair or, at Monster’s sole discretion, replace the Product, or (2) refund to You the purchase price You paid to the Authorized Dealer for the affected Product if repair or replacement is not commercially practicable or cannot be timely made. NOTE: MONSTER DOES NOT ASSUME ANY LIABILITY FOR ANY INCIDENTAL, CONSEQUENTIAL OR INDIRECT DAMAGES UNDER THIS LIMITED WARRANTY. GENERAL PROVISIONS CHOICE OF LAW/JURISDICTION. This Limited Warranty and any disputes arising out of or in connection with this Limited Warranty (“Disputes”) shall be governed by the laws of the jurisdiction where You bought the Product. OTHER RIGHTS. THIS LIMITED WARRANTY GIVES YOU SPECIFIC LEGAL RIGHTS, AND YOU MAY ALSO HAVE OTHER RIGHTS, WHICH VARY FROM JURISDICTION TO 19 LIMITED WARRANTY FOR CONSUMERS (cont’d) JURISDICTION, AND WHICH SHALL NOT BE AFFECTED BY THIS LIMITED WARRANTY. THIS WARRANTY EXTENDS ONLY TO YOU AND CANNOT BE TRANSFERRED OR ASSIGNED. If any provision of this Limited Warranty is unlawful, void or unenforceable, that provision shall be deemed severable and shall not affect any remaining provisions. In case of any inconsistency between the English and other versions of this Limited Warranty, the English version shall prevail. REGISTRATION. Please register Your Product at www.monstercable.com. Failure to register will not diminish Your warranty rights. SPECIFICATIONS TABLE Product Model Warranty Period for Product Monster Flatscreen Superthin Small Tilt Mount Lifetime ”Lifetime” means the lifetime of the original individual purchaser of the Product, or for as long as the original individual purchaser owns the Product, whichever is less in time. ™ Sweden 020-792650, Switzerland 0800834659, United Kingdom 0800-0569520. FURTHER PROCEEDINGS. Monster will determine whether a Product Defect existed. Monster may, at its discretion, direct You to obtain a repair estimate at a service center. If a repair estimate is required, You will be instructed on how to properly submit the estimate and the resulting invoice to Monster for payment. Any fees for repairs may be negotiated by Monster. TIMING. If You bring a Formal Warranty Claim and fully comply with all terms and conditions of this Limited Warranty, Monster will use its best efforts to provide You with a remedy within thirty (30) days after receipt of Your Formal Warranty Claim (if You reside in the United States - forty-five (45) days if You reside elsewhere), unless obstacles outside Monster’s control delay the process. Ver.021710 – GLOBAL ©2003–2011 Monster, LLC FORMAL WARRANTY CLAIM HOW TO MAKE A CLAIM. In the event damage has occurred to Products, You must follow these instructions: (1) Call Monster within two (2) months after You discover a Product Defect (or should have discovered it, if such Product Defect was obvious); (2) Give a detailed explanation of how the damage occurred; (3) Obtain a Return Authorization Number; (4) Return the Products, shipping prepaid by You (to be refunded if You are entitled to a remedy under the Scope of this Limited Warranty), to Monster for verification of damage, along with a copy of Your original sales receipts and proof of purchase (UPC label or packing slip) for such Products, the completed claim form, and printed Return Authorization Number on the outside of the return package (the claim form will include instructions for return). TELEPHONE NUMBERS. If You bought the Product in the United States, Latin America (Mexico 011-882-800-8989), or Asia Pacific (China 400-8208973), contact Monster, LLC (455 Valley Drive, Brisbane, CA 94005) at 1 877 800-8989. If You bought the Product anywhere else, contact Monster Technology International Ltd., Ballymaley Business Park, Ennis, Co. Clare, Ireland. You can write or use one of the following telephone numbers: Canada 866-348-4171, Ireland 353 65 68 69 354, Austria 0800296482, Belgium 0800-79201, Czech Republic 800-142471, Denmark 8088-2128, Finland 800-112768, France 0800-918201, Germany 0800-1819388, Greece 00800-353-12008, Italy 800-871-479, Netherlands 0800-0228919, Norway 800-10906, Russia 810-800-20051353, Spain 900-982-909, 20