Transcript
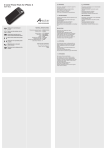
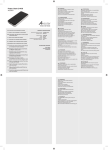
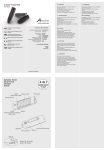
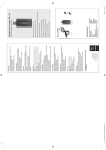
A-solar Universal Slimline Laptop Adapter
AM-650
Warnings
Don’t drop, dissemble or attempt to repair the
charger by yourself.
Avoid exposure to water or high humidity.
Don’t expose to any heat source.
Keep out of reach of children.
Don’t use in the presence of flammable gas.
Waarschuwing
power everywhere
Thank you for purchasing our
product
technical Specifications:
Dimensions product (hxwxd)
Weight product
Dank u voor de aankoop van ons
product
AC input
Vielen Dank, dass Sie sich für
unser Produkt entschieden haben
DC output
Merci d’avoir acheté notre produit
USB output
Grazie per aver acquistato questo
prodotto
125x59x25mm
350 gram
100-240V
1.8A 50-60Hz
5-24V 6A (Max)
90W (Max)
DC 5V 1A (Max)
The package contains:
Adaptor Body
AC power cord
Tips 10 pieces
+N01, N04, N05, N07, N09,
N11, N18, N20, N22, N23
Děkujeme vám za zakoupení
tohoto výrobku
Ďakujeme vám za zakúpenie tohto
výrobku
Charging cables and tips for mobile phone,
MP3, Bluetooth and other digital products
Mini USB cable
AC input
LCD display
DC joint
USB output
DC tips
AC power chord
Mini USB
cable
Mobile phone
cable
N SERIES ANGLED TIPS LIST
No
Tip Spec.
1
N01: 4.8×1.7×10.7mm
2
N04: 4.8×1.7×10.7mm
Output LS-PAB90AL
Voltage
10V
19V
Asus:
Sony:
9.5V 2.315A, 9.5V 3A
10.5V 1.9A
Compaq:
Asus:
NEC:
18.5V1.1A, 18.5V2.7A, 18.5V3.8A, 18.5V3.5A
19V2.64A
19V2.64A
3
N05: 4.0×1.7×10.7mm
19V
HP:
19V 1.58A
4
N07: 5.5×2.5×10.7mm
19V
BenQ:
Dell:
HP:
Compaq:
IBM:
Toshiba:
Gateway:
Acer:
NEC:
DELTA:
Liteon:
Epson:
19V 2.1A
18V 1.9A, 19V 2.4A, 19V 1.58A, 19V 3.16A
18V 2.3A, 19V 2.4A, 19V3.16A
18V 1.9A, 18.5V 1.1A, 18.5V 4.9A, 19V 4.9A
19V 2.4A, 18V 1.9A, 19V 3.16A, 19V 4.2A
18V 1.1A, 18V 1.7A, 19V 1.58A, 19V 3.42A,
19V 4.74A
19V 3.16A, 19V 3.68A, 19V 4.74A
19V 3.42A
19V 2.64A, 19V 3.16A,
19V 2.64A, 19V 3.42A
19V 3.16A, 19V 3.42A, 19V 3.95A, 19V 4.74A
19V 1.23A
Sony: Fujitsu:
19.5V 2.15A, 19.5V 2.3A, 19.5V 3A, 19.5V 4.1A,
19.5V 4.7A
19V 3.16A, 19V 3.69A, 19V 4.22A
5
N09: 6.0×4.4×10.7mm
19.5V
6
N11: 5.5×1.7×10.7mm
19V
Acer: Liteon: Delta: Toshiba: 19V 1.58A, 19V 3.16A, 19V 3.42A
19V 3.42A
20V 3.5A
19V 3.95A
7
N18: φ5.5x2.1x10.7mm
19V
ACER: LITEON: NEC: 19V 3.16A,19V 3.42A, 19V 4.74A
19V 3.16A,19V 3.42A
19V 3.16A
8
N20: 2.35×0.7×9mm
19V
Asus: 19V 2.1A
9
N22: 7.4×5.0×12.5 0.6mm
19.5V
DELL: 19.5V 3.34A, 19.5V 4.62A, etc.
10
N23: 7.4×5.0×12.5 0.6mm
18.5V
HP/COMPAQ:18.5V 3.5A, 18.5V 4.9A, etc.
Probeer de solar lader niet zelf te repareren of te
demonteren.
Vermijd blootstelling aan water of een hoge
luchtvochtigheid.
Niet blootstellen aan een warmtebron.
Buiten bereik van kinderen houden.
Niet gebruiken in de aanwezigheid van brandbaar
gas.
Achtung
Öffnen Sie nicht selbst den Lader.
(Garantieverlust)
Vermeiden Sie den Betrieb bei hoher
Luftfeuchtigkeit oder Einwirkung von Wasser.
Halten Sie den Lader fern von Hitzequellen.
Den Lader bitte fern von Kindern halten.
Das Gerät nicht verwenden in der Nähe von
brennbaren Gasen oder Flüssigkeiten.
UPOZORNĚNÍ
Neupusťte, nerozebírejte, ani se nepokoušejte
spravit nabíječku sami.
Vyvarujte se působení vody nebo vysoké
vlhkosti.
Nevystavujte tepelným zdrojem.
Uchovávejte mimo dosah dětí.
Nepoužívejte v blízkosti hořlavých plynů.
method 1: Charging your Notebook
method 2: Charge using USB
1.connect ac plug into
wall socket
2.Choose the right tip
3.Connect the joint dc
to your device
1.Connect the USB cable
2. connect the USB cable
to digital product
1.Connect the wall
adaptor to a power
outlet.
The display of the AM650
Charger will show a voltage
between 15.0V and 15.6V if not
connected to a connector tip.
2.Choose the right
connector tip for your
Notebook
Connect the connector tip to
the connecting cable of the
AM650 Charger. The display will
immediately show the correct
voltage your Notebook needs.
3.Connect the connecting
cable with the right
connector tip to your
Notebook
When connected to your
Notebook, it will begin to charge
immediately. Optionally any
USB-powered devices can be
recharged using the USB-port
on the AM650 Charger.
1.Charge by using the USB
port
You can charge any device
with the AM650 Charger that
can be charged by USB. Use
the device’s cable to recharge
by connecting one end to the
AM650 Chargers USB-port...
...and Connect the other end to
the device you would like to
recharge.
1.Steek de stekker
van de AM650 in het
stopcontact.
Het display van de AM650
Charger zal een spanning
tussen 15.0V en 15.6V aangeven
indien een connector niet is
aangesloten.
2.Kies de juiste
connector tip voor uw
notebook
Sluit de connector aan op de
aansluitkabel van de AM650.
Het display zal de juiste
spanning van uw notebook
weergeven.
3.Sluit de verbindingskabel met de juiste
connector aan op uw
notebook
Bij aansluiting op uw notebook,
zal uw notebook beginnen te
laden. Tevens kunnen USB
powered apparaten ook worden
opgeladen via de USB-poort op
de AM650.
1.Opladen via de USBpoort
U kunt de batterij van een
USB apparaat opladen met de
AM650. Gebruik de USB kabel
van uw eigen USB apparaat om
op te laden.
1.Verbinden Sie den
Netzadapter an einer
Steckdose.
Das Display des AM650Ladegerät zeigt eine Spannung
zwischen 15,6V und 15,0V, wenn
nicht an einem Konnektor Tipp
angeschlossen.
2.Wählen Sie den
richtigen Konnektor
Tipp für Ihr Notebook
Verbinden Sie den Konnektor
Tipp mit das dafür geeignete
Anschlusskabel des AM650Ladegerät. Das Display zeigt
die richtige Spannung für Ihr
Notebook an.
3.SchlieSSen Sie das
Verbindungskabel
mit dem richtigen
Konnektor Tipp an Ihr
Notebook an.
Wenn Ihr Notebook angeschlossen ist an dem AM650
Ladegerät fängt der Ladezyklus
direkt an. Optional können Sie
während den Ladevorgang
Geräte aufgeladen mit dem USB
Port des AM650 Ladegerätes
1.Laden mithilfe des USBAnschlusses
Sie können jedes Gerät das
mit USB geladen werden kann
auch mit dem AM650 Ladegerät
aufladen. Verwenden Sie das
Kabel des eigenem Gerätes zum
Aufladen. Schließen Sie das
eine Ende des Kabels an der
USB-Schnittstelle des AM650
Ladegerätes...
... und das andere Ende an das
Gerät das Sie aufladen möchten.
Der Ladevorgang fängt direkt
an.
Benutzungshinweise
Bitte beachten Sie vor die
Verwendung des AM650
Ladegerätes das technischen
Datenblatt des Handbuches Ihres
Gerätes um die Komptabilität
zu gewehrleisten. Wir sind nicht
verantwortlich für Schäden durch
unkorrekte Nutzung oder Betrieb.
1.Branchez le chargeur
universel d’ordinateur
portable sur une prise
murale :
Si aucun adaptateur n’est
raccordé au chargeur, l’écran
LCD doit afficher une tension
comprise entre 15 et 15,6 Volts.
2.Choisissez parmi les 8
adaptateurs fournis,
celui compatible avec
le voltage de votre
ordinateur portable :
En fonction du modèle de votre
ordinateur portable, le voltage
demandé par ce dernier sera
différent.
Cette information est indiquée
dans le manuel d’utilisation
de votre ordinateur ou sur
le chargeur original de votre
appareil.
L’écran LCD du chargeur
universel vous permet de
visualiser le voltage utilisé
par l’adaptateur connecté au
chargeur.
3.Connectez le chargeur
universel à votre
ordinateur après avoir
vérifier le voltage de
l’adaptateur utilisé, à
l’aide de l’écran LCD.
Rechargement de vos appareils
fonctionnant avec un voltage de
5 Volts maximum :
2.Connectez le cordon
USB original de votre
appareil sur le port USB
du chargeur universel.
ATTENTION
Avant toute utilisation du chargeur
universel, lisez attentivement
le manuel d’utilisation de votre
ordinateur portable et/ou
caméscope pour vous assurer que
les adaptateurs soient compatibles
avec votre appareil.
1.Collegare l’adattatore
a muro a una presa
elettrica.
Il display del caricatore
AM650 mostrerà una tensione
compresa tra 15,0 V e 15,6 V,
se non collegato ad una punta
connettore.
2.Scegli la punta diritto
connettore per il
vostro notebook
Collegare lo spinotto del cavo
di collegamento del caricatore
AM650. Il display visualizza
immediatamente la tensione
corretta vostre esigenze
Notebook.
3.Collegare il cavo di
collegamento con lo
spinotto giusto per il
vostro Notebook
Quando è collegato
al notebook, inizierà a
caricarsi immediatamente.
Facoltativamente le periferiche
USB-powered possono essere
ricaricate utilizzando la porta
USB del caricatore AM650.
1. Carica utilizzando la
porta USB
È possibile ricaricare qualsiasi
dispositivo con il caricatore
AM650 che possono essere
praticati da USB. Utilizzare
il cavo della periferica
per ricaricare collegando
un’estremità alla Chargers
AM650 porta USB...
...e l’altra estremità al dispositivo
che si desidera ricaricare.
Avvertenze per l’uso
Si prega di fare riferimento alla
scheda tecnica del manuale
del dispositivo che si desidera
ricaricare per assicurare la sua
compatibilità prima dell’uso. Noi
non siamo responsabili per il
eventuali danni causati da errata
uso o funzionamento.
1.Pripojte zástrčku do
zásuvky v stene
Displej bez pripojenej koncovky
zobrazuje hodnotu v rozmedzí
15.0V až 15.6V.
2.Vyberte správnu
koncovku
Pripojte k DC výstupu, displej
teraz ukazuje napätie.
3.Pripojte dc prípojku
k vášmu zariadeniu
Pripojte DC koncovku k vášmu
zariadeniu. S použitím správnej
koncovky môžete nabíjať aj
fotoaparát.
1.Nabite použitím USB
portu
Použite 5V USB výstup vášho
PC
2.Pripojte USB kábel k
vášmu produktu
Potom môže byť nabíjaný.
Poznámka
Prosím čítajte starostlivo
užívateľský návod k vášmu
notebooku, fotoaparátu, kamere,
aby ste sa uistili že technické
parametre sú kompatibilné s
nabíjačkou. Nie sme zodpovední
za škody spôsobené nesprávnym
používaním.
1. Připojte zástrčku do
zásuvky ve zdi
Displej bez připojené koncovky
zobrazuje hodnotu v rozmezí
15.0V až 15.6V.
2.Vyberte správnou
koncovku
Připojte k DC výstupu, displej
nyní ukazuje napětí.
3.Připojte dc přípojku k
vašemu zařízení
Připojte DC koncovku k vašemu
zařízení. S použitím správné
koncovky můžete nabíjet
fotoaparát.
1.Nabijte použitím USB
portu
Použijte 5V USB výstup vašeho
PC
2.Připojte USB kabel k
vašemu produktu
Pak může být nabíjen.
Poznámka
Prosím čtěte pečlivě uživatelský
návod k vašemu notebooku,
fotoaparátu, kameře, abyste se
ujistili že technické parametry
jsou kompatibilní s nabíječkou.
Nejsmezodpovědní za škody
způsobené nesprávným
používáním.
UPOZORNENIA
Neupustite, nerozoberajte, ani sa nepokúšajte
opraviť nabíjačku sami.
Vyvarujte sa pôsobeniu vody alebo vysokej
vlhkosti.
Nevystavujte tepelným zdrojom.
Uchovávajte mimo dosahu detí.
Nepoužívajte v blízkosti horľavých plynov
Usage Notice
Please refer to the technical
datasheet of the manual of the
device you would like to recharge
to ensure its compatibility before
use. We are not responsible for
any damage caused by incorrect
usage or operation.
Attention
Ne laissez pas tomber, de désassembler ou
tenter de réparer la centrale par vous-même.
Eviter l’exposition á l’eau ou à uni humidité
élevée.
Ne pas exposer la centrale électrique d’une
source de chaleur.
Tenir hors de portée des enfants.
Ne pas utiliser en présence de gaz inflammables.
ATTENZIONE
Non usare vicino ad una fiamma.
Non esporre vicino a fonti di calore elevato
Non modificare la struttura o disassemblare
Smettere di utilizzare immediatamente nel caso
si sentano odori strani, calore, o strani rumori
provenire dallo stesso.
Non lasciar giocare bambini con.
Usare solo in luoghi asciutti.
Riciclare l’apparato secondo le norme vigenti
nella nazione di utilizzo.
Information : Les adaptateurs
fournis avec le chargeur universel
sont compatibles avec certains
caméscopes.
Avant toute utilisation du chargeur,
procédez aux vérifications
demandées précédemment (voir
paragraphe 2).
1.Branchez le chargeur
universel sur une prise
murale.
Gebruiksrichtlijnen
Raadpleeg de technische
handleiding van het apparaat dat
u wenst op te laden vóór gebruik
te maken van de AM650 of deze
compatibel is met de AM650. Wij
zijn niet verantwoordelijk voor
eventuele schade veroorzaakt door
onjuist gebruik.
3.Branchez l’autre
extrémité du cordon
USB à votre appareil.
En cas de dommage sur vos
produits à la suite d’une mauvaise
utilisation, notre responsabilité ne
pourra pas être engagée.