Transcript
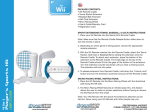
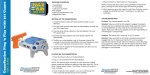
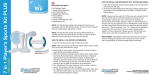
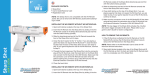
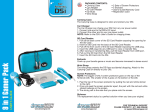
Wireless Motion Control with 130 Games
PACKAGE CONTENTS:
• Console w/ AV cable
• Two (2) Remotes
• Two (2) Remote Holsters
• Two (2) Table Tennis attachments
• Controller attachment
• Baseball Bat attachment
• Golf Club attachment
• Tennis Racket attachment
• Soccer attachment
• Boxing attachments
• User’s Guide/Warranty Card
• Registration Card
MATERIALS NEEDED:
• Each controller needs 3 “AAA” batteries (6 total)
• Console needs 3 “AA” batteries
• Mini-screwdriver
HOW TO SET UP WIRELESS MOTION CONTROL PLUG ‘N PLAY
CONSOLE AND REMOTES
1. Set up the Wireless Motion Control Plug ‘n Play Console on a flat
surface near your television.
NOTE: You need to be directly in front of the Console during gameplay.
You must be within 5-8 feet in front of the Console during gameplay.
2. Remove battery compartment cover located on the bottom of the
console (mini-screwdriver is needed).
3. Insert 3 “AA” batteries and replace battery compartment cover.
4. Plug the AV cables from the console into your AV ports on your television.
NOTE: Make sure the yellow and red plugs are properly and securely
inserted into the correct ports on your television.
NOTE: Make sure that your TV is on the proper channel.
5. Remove battery compartment cover located on the back of the
remote (mini-screwdriver is needed).
6. Insert 3 “AAA” batteries and replace the battery compartment cover.
NOTE: To use the other Remote for 2 player games or games that
require both Remotes, repeat Steps 5 and 6 for other Remote.
7. To turn on console, press the Power button located on the top of
the console.
8. To reset the console at any point, press the Reset button located
on the top of the console. When the Reset button is pressed, it
will bring you back to the Main Menu.
HOW TO INSERT/REMOVE ATTACHMENTS ONTO THE REMOTES
1. Insert the bottom of the attachment to the top of the remote (hole
located near the directional buttons).
2. You will hear a click once the attachment is secured.
3. Insert the remote (with attachment) into the remote holster.
NOTE: There is a plastic pin that holds the remote and attachment
from accidentally coming out of the remote holster during gameplay.
When inserting the remote into the remote holster, place the plastic
pin into the hole on the back of the remote.
4. To remove, pull the remote (with attachment) from the remote
holster. Press the buttons on each side of the remote and pull the
attachment out.
TROUBLESHOOTING
Problem: The LEDs on my remote don’t light up.
Solution: Make sure that you have fresh batteries and they are
properly and securely inserted into the remote. Make sure that the
battery compartment cover is properly closed and locked into place.
Problem: The Console doesn’t turn ON.
Solution: Make sure that you have fresh batteries and they are
properly and securely inserted into the console. Make sure that the
battery compartment cover is properly closed and locked into place.
Make sure that the battery compartment area is free from debris. Make
sure that none of the battery contacts are damaged or compromised.
Problem: The games won’t show up on my TV screen.
Solution: Make sure that the AV cable is properly and securely plugged
into the TV. Make sure that the TV is on the proper channel (the channel
should match the setting on where the plugs are plugged into). Make
sure that the AV cable is free from debris. Make sure that none of the
AV cable contacts on both ends are damaged or compromised.
FOR TECHNICAL SUPPORT
PLEASE CONTACT: 1-877-999-DREAM
or [email protected]