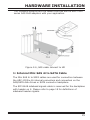
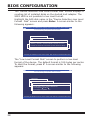
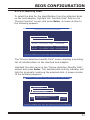
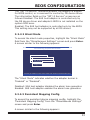
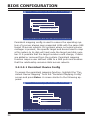
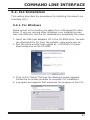
1
SAS Host Adapters
ARC-1320 Series
(PCIe 2.0 x8 Lanes 6Gb/s SAS Host Adapters )
USER’S Manual
Version: 1.0
Issue Date: April, 2010
Copyright and Trademarks
The information of the products in this manual is subject to change
without prior notice and does not represent a commitment on the part
of the vendor, who assumes no liability or responsibility for any errors
that may appear in this manual. All brands and trademarks are the
properties of their respective owners. This manual contains materials
protected under International Copyright Conventions. All rights
reserved. No part of this manual may be reproduced in any form or by
any means, electronic or mechanical, including photocopying, without
the written permission of the manufacturer and the author.
FCC Statement
This equipment has been tested and found to comply with the limits for a Class B digital device, pursuant to part 15 of the FCC Rules.
These limits are designed to provide reasonable protection against interference in a residential installation. This equipment generates, uses,
and can radiate radio frequency energy and, if not installed and used
in accordance with the instructions, may cause harmful interference to
radio communications. However, there is no guarantee that interference will not occur in a particular installation.
Manufacturer’s Declaration for CE Certification
We confirm ARC-1320 series SAS host adapters have been tested and
found comply with the requirements set up in the council directive
on the approximation of the low of member state relating to the EMC
Directive2004/108/EC. For the evaluation regarding to the electromagnetic compatibility, the following standards where applied:
EN 55022: 2006, Class B
EN 61000-3-2: 2006
EN 61000-3-3: 1995+A1: 2001+A2: 2005
EN 55024:1998+A1:2001=A2:2003
IEC61000-4-2: 2001
IEC61000-4-3: 2006
IEC61000-4-4: 2004
IEC61000-4-5: 2005
IEC61000-4-6: 2006
IEC61000-4-8: 2001
IEC61000-4-11: 2004
Contents
1. Introduction................................................................. 6
1.1 Overview..........................................................................6
1.2 Features...........................................................................6
2. Hardware Installation.................................................. 8
2.1 Before Your Begin Installation..............................................8
2.2 Board Layout.....................................................................8
2.3 Installation...................................................................... 13
1: Internal Min SAS 4i to SATA Cable . ................................... 15
2: Internal Min SAS 4i to 4xSFF-8482 Cable............................ 16
3: Internal Min SAS 4i to Internal Min SAS 4i Cable.................. 17
4: External Min SAS 4x Drive Boxes and Drive Expander........... 17
3. Host_BIOS Setup Manager......................................... 23
3.1 Starting the Host_BIOS Setup Manager............................... 23
3.2 Main Menu ..................................................................... 25
3.2.1 Physical Devices.......................................................... 25
3.2.1.1 Display Device Information...................................... 26
3.2.1.2 Low Level Format Disk............................................ 27
3.2.1.3 Verify Disk............................................................. 29
3.2.1.4 Identify Disk.......................................................... 31
3.2.2 Miscellaneous Settings................................................. 32
3.2.2.1 INT 13 Service....................................................... 32
3.2.2.2 Silent Mode........................................................... 33
3.2.2.3 Persistent Mapping Config........................................ 33
3.2.2.4 Staggered Spin-up Config........................................ 36
3.2.3 System Information..................................................... 38
4. Driver Installation...................................................... 40
4.1 Creating the Driver Diskettes............................................. 40
4.2 Driver Installation for Windows.......................................... 42
4.2.1 New Storage Device Drivers in Windows 7/2008/Vista/2003 ....................................................................................... 42
4.2.2 Install Windows 7/2008/Vista/2003/XP on a SAS Host
Adapter Volume................................................................... 42
4.2.3 Installing Controller into an Existing Windows System Installation............................................................................ 44
4.2.4 Making Volume Sets Available to Windows System........... 45
4.2.5 Uninstall Controller from Windows System...................... 45
4.3 Driver Installation for Linux............................................... 46
4.4 Driver Installation for FreeBSD........................................... 46
4.5 Driver Installation for Solaris............................................. 47
4.6 Driver Installation for Existing Mac OS X............................. 47
4.6.1 Making Volume Sets Available to Mac OS X..................... 48
5. CLI Introduction......................................................... 50
5.1 Supported Operating Systems............................................ 50
5.2. CLI Installation............................................................... 51
5.2.1. For Windows.............................................................. 51
5.2.2 For Linux, FreeBSD and Solaris..................................... 52
5.3 Accessing CLI.................................................................. 53
5.3.1 For Windows............................................................... 53
5.3.2 For Linux, FreeBSD and Solaris..................................... 53
5.4. CLI Command Line Configuration...................................... 54
5.4.1 Conventions............................................................... 54
5.4.2 Working Mode............................................................. 54
5.4.2.1 Interactive Mode.................................................... 54
5.4.2.2 Non-interactive Mode.............................................. 55
5.4.3 Command Categories................................................... 57
5.4.3.1 Help Command...................................................... 57
5.4.3.2 Main Command...................................................... 57
5.4.3.3 Set Commands....................................................... 58
5.4.3.4 Disk Commands..................................................... 59
5.4.3.5 Sys Commands...................................................... 59
5.4.3.6 Exp Commands...................................................... 60
5.4.3.7 Enc Commands...................................................... 60
5.4.3.8 Exit Command....................................................... 61
Appendix A..................................................................... 62
Expander CLI Function........................................................... 62
Appendix B..................................................................... 63
Upgrading Adapter Flash ROM Process...................................... 63
Upgrading BIOS Through Oflash.exe Flash DOS Utility................ 63
INTRODUCTION
1. Introduction
This section presents brief overview of the SAS 6Gb/s host adapters:
ARC-1320-8i, ARC-1320-4i4x, ARC-1320-8x and ARC-1320ix-16.
1.1 Overview
The ARC-1320 SAS host adapters are a line of PCIe 2.0 x8 lanes
6Gb/s SAS bus low profile host adapters. The adapters bring the
fastest available connections to SAS/SATA storage on any computer, workstation and server with PCI Express interface. ARC-1320
host adapters provide a blazing-fast storage connectivity solution
with enhanced reliability and performance and a wide variety of
internal and external connector configurations to support any application and tiered storage solution. With connectivity options including 8-internal ports, 4-internal/4-external ports, 8-external ports,
and 16-internal/8-external ports, ARC-1320 6Gb/s host adapters
are ideal for large capacity external server storage RAID and noRAID enclosure.
ARC-1320 6Gb/s SAS host adapters are able to connect to SATA
and SAS hard disk drives, allowing for tiered storage that optimizes
costs and performance. SAS drives are optimal when speed and
reliability are of the utmost concern while SATA drives are appropriate when capacity and cost are more important. System integrators can use the ARC-1320 series to meet different storage infrastructure applications that support both SAS and SATA devices. API
library for customer combines the ARC-1320 series function code to
its monitor utility.
Device drivers are also supported for the major operating systems
for compatibility with a full range of SAS peripherals including hard
disk drives (HDDs), tape drives, tape autoloaders, solid state drives
(SSDs) and removable media (DAS/JBOD).
1.2 Features
Hardware Specification
• PCIe 2.0 x8 lanes (x8, x4, and x1 lane widths)
• Up to 6Gb/s transfer rates per SAS port
6
INTRODUCTION
•
•
•
•
Support 1.5, 3.0 and 6 Gb/s SAS and SATA link rates
Support a maximum 128 SAS/SATA devices using SAS expander
Low-profile form factor
RoHS compliant
Serial Attached SCSI (SAS) 6Gb/s
• Serial Attached SCSI (SAS-2.0) compliant
• Supports Wide port (Any combination of x1, x2, and 4x)
• Supports Serial SCSI Protocol (SSP)
• Supports SAS Management Protocol (SMP)
• Supports Serial ATA Tunneling Protocol (STP)
• Hot-plug capability
• Staggered spin-up control
Easy Management
• Legacy BIOS setup utility
• Supports Command Line Interface (CLI)
• API library for customer to write monitor utility
• Enclosure management for internal port via LED header and
SES2/SGPIO
• Enclosure management for external port via SAS expander
Operating System
•
•
•
•
•
Windows 7, 2008, Vista, 2003 and XP
Linux (Red Hat and SuSE)
FreeBSD
Solaris 10/11 x86/x86-64
Mac OS X 10.4.x/10.5.x/10.6.x/10.7.x
6Gb/s SAS Host Adapter
Model Name
ARC-1320-8i
Host Bus Type
ARC-1320-4i4x
ARC-1320-8x
PCIe 2.0 x8 Lanes
RAID Level
Non-RAID
Form Factor
MD2 Low Profile
Drives Support
128 X 3Gb/s and 6Gb/s SAS/SATA
Connector
Dimension(LxH)
ARC-1320ix-16
2 x SFF-8087
1 x SFF-8087
1 x SFF-8088
167 X 64 mm
Low Profile
2 x SFF-8088
4 x SFF-8087
2 x SFF-8088
214 X 64 mm
7
HARDWARE INSTALLATION
2. Hardware Installation
This section describes the procedures for installing the ARC-1320 series
SAS host adapters.
2.1 Before Your Begin Installation
Thanks for purchasing the ARC-1320 series host adapters as your
data storage subsystem. This user manual gives simple step-bystep instructions for installing and configuring the host adapters.
To ensure personal safety and to protect your equipment and data,
reading the following information package list carefully before you
begin installing.
Package Contents
If your package is missing any of the items listed below, contact
your local dealers before you install.
• 1 x PCIe 2.0 x 8 lanes host adapter in an ESD-protective bag
• 1 x Installation CD – containing driver, relative software, an
electronic version of this manual and other related manual
• 1 x User manual
• 1 x Low-profile bracket
2.2 Board Layout
This section provides the board layout and connector/jumper for
the SAS host adapters.
8
HARDWARE INSTALLATION
Figure 2-1, ARC-1320-8i Host Adapter
Connector
Type
Description
1. (J2)
Manufacture Purpose Port
10-pin header
2. (J1)
Global Fault/Activity LED
4-pin header
3. (D4-D11)
Activity LED for SAS Port 0-7
SMT LED
4. (D12-D19)
Fault LED for SAS Port 0-7
SMT LED
5. (SCN2)
SAS 1-4 Ports (Internal)
SFF-8087
6. (SCN1)
SAS 5-8 Ports (Internal)
SFF-8087
Table 2-1, ARC-1320-8i Connectors
Figure 2-2, ARC-1320-8x Host Adapter
9
HARDWARE INSTALLATION
Connector
Type
Description
1. (J2)
Manufacture Purpose Port
10-pin header
2. (J1)
Global Fault/Activity LED
4-pin header
3. (D4-D11)
Activity LED for SAS Port 0-7
SMT LED
4. (D12-D19)
Fault LED for SAS Port 0-7
SMT LED
5. (SCN3)
SAS 1-4 Ports (External)
SFF-8088
6. (SCN4)
SAS 5-8 Ports (External)
SFF-8088
Table 2-2, ARC-1320-8x Connectors
Figure 2-3, ARC-1320-4i4x SAS Host Adapter
Connector
Type
1. (J2)
Manufacture Purpose Port
10-pin header
2. (J1)
Global Fault/Activity LED
4-pin header
3. (D4-D11)
Activity LED for SAS Port 0-7
SMT LED
4. (D12-D19)
Fault LED for SAS Port 0-7
SMT LED
5. (SCN2)
SAS 1-4 Ports (Internal)
SFF-8087
6. (SCN3)
SAS 5-8 Ports (External)
SFF-8088
Table 2-3, ARC-1320-4i4x Connectors
10
Description
HARDWARE INSTALLATION
Front Side
Back Side
Figure 2-4, ARC-1320ix-16
SAS Host Adapter
Connector
Type
Description
Front Side
1. (J2)
Manufacture Purpose Port
2. (JP1)
RS232 for Expander Configuration
10-pin header
3. (J1)
Global Activity/Fault Header
4-pin header
5. (JP2)
Individual Fault LED Header for SAS
1-8 Ports
8-pin header
6. (JP3)
Individual Fault LED Header for SAS
9-16 Ports
8-pin header
7. (J4)
I2C/LCD Connector
8-pin header
8. (SCN2)
SAS 5-8 Ports (Internal)
SFF-8087
9. (SCN1)
SAS 1-4 Ports (Internal)
SFF-8087
10. (SCN6)
SAS 5-8 Ports (External)
SFF-8088
11. (SCN5)
SAS 1-4 Ports (External)
SFF-8088
12. (SCN4)
SAS 13-16 Ports (Internal)
SFF-8087
13. (SCN3)
SAS 9-12 Ports (Internal)
SFF-8087
10-pin box header
Back Side
Table 2-4, ARC-1320ix-16 Connectors
11
HARDWARE INSTALLATION
Tools Required
An ESD grounding strap or mat is required. Also required are standard hand tools to open your system’s case.
System Requirement
The ARC-1320 series host adapters can be installed in a universal
PCIe slot and requires a motherboard that:
• Comply with the PCIe x 2.0 x8 lanes
It can work on the PCIe 1.0/2.0 expansion slot x1, x4, x8, and
x16 signals with x8 or x16 slot M/B.
Installation Tools
The following items may be needed to assist with installing the
ARC-1320 series host adapters into an available PCIe expansion
slot.
• Small screwdriver
• Host system hardware manuals and manuals for the disk or
enclosure being installed.
Personal Safety Instructions
Use the following safety instructions to help you protect your
computer system from potential damage and to ensure your own
personal safety.
• Always wear a grounding strap or work on an ESD-protective
mat.
• Before opening the system cover, turn off power switches and
unplug the power cords. Do not reconnect the power cords until
you have replaced the covers.
Warning:
High voltages may be found inside computer equipment. Before installing any of the hardware in this package or removing the protective covers of any computer equipment, turn off
power switches and disconnect power cords. Do not reconnect
the power cords until you have replaced the covers.
12
HARDWARE INSTALLATION
Electrostatic Discharge
Static electricity can cause serious damage to the electronic components on this SAS host adapter. To avoid damage caused by
electrostatic discharge, observe the following precautions:
• Do not remove the host adapters from its anti-static packaging
until you are ready to install it into a computer case.
• Handle the host adapters by its edges or by the metal mounting
brackets at its each end.
• Before you handle the host adapters in any way, touch a
grounded, anti-static surface, such as an unpainted portion of the
system chassis, for a few seconds to discharge any built-up static
electricity.
2.3 Installation
Use the following instructions below to install a PCIe host adapter.
Step 1. Unpack the Host Adapters
Unpack and remove the PCIe host adapters from the package.
Inspect it carefully, if anything is missing or damaged, contact your
local dealer.
Step 2. Power PC/Server Off
Turn off computer and remove the AC power cord. Remove the system’s cover. For the instructions, please see the computer system
documentation.
Step 3. Install the PCIe SAS Host Adapters
To install the PCIe host adapters, remove the mounting screw and
existing bracket from the rear panel behind the selected PCIe slot.
Align the gold-fingered edge on the card with the selected PCIe
slot. Press down gently but firmly to ensure that the card is properly seated in the slot, as shown in Figure 2-5. Then, screw the
bracket into the computer chassis. ARC-1320 series host adapters
require a PCIe x8 or x16 slot.
13
HARDWARE INSTALLATION
Figure 2-5, Insert ARC-1320 series host adapters into a PCIe x8
slot
Note:
Some PCIe slots on desktop board support only graphics
boards, these PCIe slots may be not able to support other
add-on cards such as storage adapters.
Step 4. Install Cable
You can connect the end devices to each other through direct
cables or through the SAS expander/backplane connections. The
SAS host adapters support daisy-chain expansion up to 128 end
point devices through SAS expander enclosures. The following is
an example of some internal SAS/SATA cables and an external SAS
cable.
You can connect the SAS/SATA drives to the host adapters through
direct cable and backplane solutions. In the direct connection, SAS/
SATA drives are directly connected to ARC-1320-4i4x or ARC-13208i internal ports with SAS/SATA cables.
14
HARDWARE INSTALLATION
The following pictures are the cables that can use on ARC-1320
series SAS host adapters with your application.
Figure 2-6, SAS cable connect to HD
1: Internal Mini SAS 4i to SATA Cable
The Mini SAS 4i to SATA cables are used for connection between
the ARC-1320ix-16 internal connectors and connectors on the
SAS/SATA disk drives or SATA connector backplane.
The SFF-8448 sideband signals cable is reserved for the backplane
with header on it. Please refer to page 19 for definitions of
sideband header signals.
15
HARDWARE INSTALLATION
Figure 2-7, Internal Min SAS 4i to 4x SATA Cable
2: Internal Mini SAS 4i to 4xSFF-8482 Cable
These host adapters can be installed in a server enclosure
without a backplane. The kind of cable will attach directly to the
SAS disk drives. The following diagram shows the picture of Mini
SAS 4i to 4xSFF-8482 cables.
Figure 2-8, Mini SAS 4i to 4xSFF-8482 Cable
16
HARDWARE INSTALLATION
3: Internal Mini SAS 4i to Internal Mini SAS 4i
Cable
The ARC-1320-4i4x,ARC-1320-8i or ARC-1320ix-16 host adapters have Mini SAS 4i internal connectors, each of them can support up to four SAS/SATA signals. These adapters can be installed
in a server RAID enclosure with Mini SAS 4i internal connectors
backplane. This Mini SAS 4i cable has eight signal pins to support
four SAS/SATA drives and six pins for the SGPIO (Serial General
Purpose Input/Output) side-band signals. The SGPIO bus is used
for efficient LED management and for sensing drive locate status.
Figure 2-9, Mini SAS 4i to Min SAS 4i Cable
4: External Mini SAS 4x Drive Boxes and Drive
Expander
The Mini SAS 4x external cables are used for connection between
the SAS host adapters external connectors and connectors on the
external drive boxes or drive expanders (JBOD). The SAS host
adapters have Mini SAS 4x (SFF-8088) external connector, each
of them can support up to four SAS/SATA signals.
Figure 2-10, Min SAS 4x to Min SAS 4x Cable
17
HARDWARE INSTALLATION
The ARC-1320-4i4x, ARC-1320-8x or ARC-1320ix-16 host
adapters can support daisy-chain up to 128 end point devices
through external expander enclosures. The following figure
shows how to connect the external Mini SAS cable from the
ARC-1320-4i4x or ARC-1320ix-16 series host adapters that have
external SFF-8088 connectors to the external drive boxes or drive
enclosures.
Step 5. Install the LED Cable (option)
The preferred I/O connector for server backplanes is the Mini SAS
4i internal connector. This connector has eight signal pins to supportfour SAS/SATA drives and six pins for the SGPIO (Serial General Purpose Input/Output) side-band signals. The SGPIO bus is used
for efficient LED management and for sensing drive Locate status.
See SFF 8485 for the specification of the SGPIO bus. For backplane
without SGPIO supporting, Please use the individual cables for
fault/activity LED cable installation.
LED Management: The backplane may contain LEDs to indicate
drive status. Light from the LEDs could be transmitted to the outside of the server by using light pipes mounted on the SAS drive
tray. A small microcontroller on the backplane, connected via the
SGPIO bus to a ARC-1320ix-16 could control the LEDs. Activity:
blinking 5 times/second and Fault: solid illuminated.
18
HARDWARE INSTALLATION
Drive Locate Circuitry: The location of a drive may be detected by
sensing the voltage level of one of the pre-charge pins before and
after a drive is installed.
The following signals define the SGPIO assignments for the Mini
SAS 4i internal connector (SFF-8087) in the SAS host adapters.
The pin assignment of the sideband inputs follow SFF-8448
specification.
Pin
Description
Pin
Description
SideBand0
SClock (Clock signal)
SideBand1
SLoad (Last clock of a bit
stream)
SideBand2
Ground
SideBand3
Ground
SideBand4
SDataOut (Serial data
output bit stream)
SideBand5
SDataIn (Serial data input bit
stream)
SideBand6
Reserved
SideBand7
Reserved
The following signal defines the sideband header signals which can
work with Areca sideband cable on its SFF-8087 to 4 SATA cable.
The sideband header is located at backplane. For SGPIO to
work properly, please connect Areca 8-pin sideband cable to the
sideband header as shown below.
There is no SGPIO supported in the most of old version SATA
backplane. The ARC-1320ix-16/ARC-1320-4i4x/ARC-1320-8i host
adapters also provide two kinds of alternative LED cable header to
support the fault/activity status for those backplanes. The Global
Indicator Connector is used by the server global indicator LED.
The following electronics schematic is the ARC-1320ix-16/ARC1320-4i4x/ARC-1320-8i host adapters logical of fault/activity
header. The signal for each pin is cathode (-) side.
19
HARDWARE INSTALLATION
The following diagrams and descriptions describe each type of con
nector.
Note:
A cable for the global indicator comes with your computer
system. Cables for the individual drive LEDs may come with a
drive cage, or you may need to purchase them.
1: Individual Fault LED Connector
Most of the backplane has supported the HDD activity from the
HDD. The ARC-1320ix-16 SAS host adapter also provides the fault
connector for fault LED. Connect the cables for the drive fault LEDs
between the backplane of the cage and the respective connector on
the SAS host adapters.
The following table is the fault LED signal behavior.
LED
Fault LED
20
Normal Status
When the fault LED is solid
illuminated, there is no disk
present. When the fault LED
is off, then disk is present
and status is normal.
Problem Indication
When the fault LED is slow blinking
(2 times/sec), that disk drive has
failed and should be hot-swapped
immediately. When the activity
LED is illuminated and fault LED is
fast blinking (10 times/sec) there
is rebuilding activity on that disk
drive.
HARDWARE INSTALLATION
Figure 2-11, ARC-1320ix-16
individual fault LED for each
channel drive.
2: Global LED Indicator Connector
If the system will use only a single global indicator, attach the LED
to the two pins of the global fault/activity connector. The global
fault pin pair connector is the overall fault signal. This signal
will light up in any disk drive failure. The global activity pin pair
connector is the overall activity. This global activity signal will light
up in any disk activity.
The following diagrams shows global fault/activity connectors and
pin locations.
Figure 2-12, ARC-1320ix-16
global indicator connector for
computer case.
Step 6. Power up the System
Thoroughly check the installation, reinstall the computer cover, and
reconnect the power cord cables. Turn on the power switch at the
rear of the computer (if equipped) and then press the power button at the front of the host computer.
21
HARDWARE INSTALLATION
Step 7. Install Host Adapters Driver
For a new system:
• Driver installation usually takes places as part of operating system installation. Please refer to Chapter 4 Diver Installation for the
detailed installation procedure.
In an existing system:
• To install the host adapters driver into the existing operating
system. For the detailed installation procedure, please refer to the
Chapter 4, Driver Installation.
Step 8. Format, Partition and Mount the Volumes
After you create a unit, it needs to be partitioned, formatted,
and mounted by the operating system. There are various steps,
that depend on what operating system you are using (Windows,
Linux, FreeBSD, Solaris or Mac, etc.). Detailed steps for each operating system are provided on their disk utility. After that, the ARC1320 SAS host adapters can be fully used.
Step 9. Determining the Boot Sequences
The ARC-1320 series host adapters are a bootable host adapter. If
your system already contains a bootable device with an installed
operating system, you can set up your system to boot a second
operating system from the new host adapters. To add a second
bootable host adapter, you may need to enter setup of motherboard BIOS and change the device boot sequence so that the SAS
host adapters head the list. If the system BIOS setup does not allow this change, your system may be not configurable to allow the
ARC-1320 series host adapters to act as a second boot device.
22
BIOS CONFIGURATION
3. Host_BIOS Setup Manager
The system mainboard BIOS automatically configures the following
SAS host adapter parameters at power-up:
•
•
•
•
PCI Bus/Device/Function
I/O Port Address
Interrupt Channel (IRQ)
Adapter ROM Base Address
Use Host_BIOS setup manager to further configure the SAS host
adapters to suit your server hardware and operating system.
3.1 Starting the Host_BIOS Setup Manager
This section explains how to use the Host_BIOS setup manager
to configure your host adapters. The Host_BIOS setup manager is
designed to be user-friendly. It is a menu-driven program, residing
in the flash ROM, which allows you to scroll through various menus
and sub-menus and select among the predetermined configuration
options.
When starting a system with a SAS host adpater installed, it will
display the following message on the monitor during the start-up
sequence (after the system bios startup screen but before the operating system boots):
ARC-1320 PCI-Ex8-2.5G SAS Cntlr - BIOS V1.05 / Date: 2010-2-20
Bus / Dev / Func=1/0/0, I/O-Port=FD9FF000h, IRQ=10, BIOS=D000:0h
[Disk -SATA-ll] P/I/L=0/00/000 <
ST6700630NS
>Size=76(GB)
[Disk -SAS-3.0] P/I/L=1/01/000 <
HUS151436VLS300 >Size=34(GB)
[Disk -SAS-3.0] P/I/L=2/02/000 <
ATLAS10K5_147SAS >Size=137(GB)
[Disk -SAS-3.0] P/I/L=3/03/000 <
HUS151436VLS300 >Size=34(GB)
#Total device(s):<4>, #Int13 device(s):<4>. Areca SAS BIOS installed!
Press <Tab/F6> to enter SETUP menu. 4 second(s) left <ESC to skip>..
The information fields on the adapter setup screen are as follows:
Bus: Indicates the PCI Bus number assigned by the system BIOS
to the selected adapter (range 0 - 255 decimal)
Dev: Indicates the PCI Device assigned by the system BIOS to the
selected adapter (range 0 - 31 decimal)
23
BIOS CONFIGURATION
Fnc: Indicates the PCI Function assigned by the system BIOS to
the selected adapter (range 0 - 7 decimal)
I/O: Indicates the I/O port address assigned by the system BIOS
to an adapter
IRQ: Indicates the interrupt (IRQ) channel of the selected adapter
BIOS: Indicates the BIOS address assigned by the system BIOS to
the selected address
The adapters scan and up to eight devices' information and total
connected device count during system bootup. But,the adapters
can only boot up from the first eight devices on the screen.The
operating system device driver will recognize up to 128 end-point
devices. The bootable devices need to be put on the first eight
devices connected to the controller.
Note:
It is normal when it appears "No BIOS disk found. Areca SAS
controller BIOS not installed!" during system boot. It represents that there was no bootable SAS device such as SAS HDD
found after SAS BIOS detected SAS devices. Thus, above message is shown and this will not affect system operation.
The Host_BIOS setup manager message remains on your screen
for about five seconds, giving you time to start the setup menu by
pressing Tab or F6. If you do not wish to enter setup menu, press
ESC to skip configuration immediately. When activated, the Host_
BIOS setup manager appears showing a selection dialog box listing
the SAS host adapters that are installed in the system.
The legend at the bottom of the screen shows you what keys are
enabled for the screens.
Areca Technology Corporation SAS Controller Setup V1.00, (2008/12/15)
Select An Adapter To Configure
#1 (004/00/0) I/O=FD9FF000h
#2 (049/14/4) I/O=AF948362h
ArrowKey Or AZ:Move Cursor, Enter: Select, **** Press F10(Tab) to Reboot****
24
BIOS CONFIGURATION
The adapter setup screen displays a scrolling list of up to 128 SAS
end point devices in the system, and provides information about
each of them.
Use the Up and Down arrow keys to select the adapter you want
to setup. While the desired adapter is highlighted, press the Enter
key to enter the main menu of the Host_BIOS setup manager.
3.2 Main Menu
The main menu shows all functions that are available for executing
actions, which is accomplished by clicking on the appropriate link.
Esc - Aborts the current context operation, or exits the current
screen. If you have changed settings, you will be asked to confirm
the exit.
Adapter#1- I/O=FD9FF000h, F2(Tab): Select Controller, F10: Reset System
Areca Technology Corporation SAS Controller
Main Menu
Physical Devices
Miscellaneous Settings
System Information
ArrowKey Or AZ:Move Cursor, Enter: Select, ESC: Return To Previous Menu Item
Option
Description
Physical Devices
View individual disk information
Miscellaneous Settings
Configure adapter’s control parameters
System Information
View the host adapter system information
3.2.1 Physical Devices
To access the physical device function screen, highlight the “Physical Devices” field on the adapter’s main menu screen and press
Enter. A screen similar to the following appears:
25
BIOS CONFIGURATION
Adapter#1- I/O=FD9FF000h, F2(Tab): Select Controller, F10: Reset System
Areca Technology Corporation SAS Controller
Main Menu
DeviceDevices
Function
Physical
Miscellaneous
Settings
Display Device
Information
System
Information
Low Level
Format Disk
Verify Disk
Identify Disk
ArrowKey Or AZ:Move Cursor, Enter: Select, ESC: Return To Previous Menu Item
3.2.1.1 Display Device Information
To view all installed devices on the selected host adapter, highlight the “Display Device Information” field and press Enter. A
screen similar to the following appears:
Adapter#1- I/O=FD9FF000h, F2(Tab): Select Controller, F10: Reset System
Areca Technology Corporation SAS Controller
Main Menu
Device
Function
Physical
Devices
Miscellaneous
Settings
DisplaySelection
Device
Information
Device
- Device Information - 4 Device(s)
System
Information
Low Level
Format Disk
Verify
Disk: P/I/L=0/00/000 : 76(GB)
#00
SATA
Identify
#01
SAS Disk
: P/I/L =1/01/000: 34(GB)
#02 SAS : P/I/L =2/02/000:137(GB)
#03 SAS : P/I/L =3/03/000: : 34(GB)
: ST6700630NS
: HUS151436VLS300
: ATLAS10K5_147SAS
: HUS151436VLS300
ArrowKey Or AZ:Move Cursor, Enter: Select, ESC: Return To Previous Menu Item
To display the device information screen for a disk, highlight the
disk name in the "Device Selection-Device Information " screen
and press Enter. A "Device Information" screen similar to the
following appears:
26
BIOS CONFIGURATION
Adapter#1- I/O=FD9FF000h, F2(Tab): Select Controller, F10: Reset System
Areca Technology Corporation SAS Controller
Main Menu
Device Information
Port/Id/Lun
: 0/00/000
Device
Function
Physical
Devices
Device Type
: SATA-ll
Miscellaneous
Settings
SAS
Address
: 500000E015D106E2
Device Device
Selection
- Device Information
- 4 Device(s)
Display
Information
System
Information
Model Disk
Name
: ST6700630NS
Low Level Format
Number : 76(GB)
: J3X7WJMJ
#00 SATA
P/I/L=0/00/000
: ST6700630NS
Verify
Disk : Serial
: A600 : HUS151436VLS300
#01
SASDisk: F/W
P/I/LRevision
=1/01/000: 34(GB)
Identify
Size
: 512(Bytes)
#02 SAS : Sector
P/I/L =2/02/000:137(GB)
: ATLAS10K5_147SAS
76(GB): HUS151436VLS300
#03 SAS : Disk
P/I/LCapacity
=3/03/000: : :34(GB)
Parent Info.
: N/A
Parent F/W Rev. : N/A
ArrowKey Or AZ:Move Cursor, Enter: Select, ESC: Return To Previous Menu Item
The information fields on the "Device Information" screen are as
follows: Port/Id/Lun, Device Type, SAS Address, Model Name,
Serial Number, F/W Revision and Disk Capacity.
3.2.1.2 Low Level Format Disk
To select the SAS disk for the low level format from the attached
disks on the host adapter, highlight the “Low Level Format Disk”
field on the “Device Function” screen and press Enter. A screen
similar to the following appears:
Adapter#1- I/O=FD9FF000h, F2(Tab): Select Controller, F10: Reset System
Areca Technology Corporation SAS Controller
Main Menu
DeviceDevices
Function
Physical
Miscellaneous
Settings
Device
Selection
- Low
Level Format Disk - 4 Device(s)
Display
Device
Information
System Information
Low Level Format Disk
#00 SATA
: P/I/L=0/00/000 : 76(GB) : ST6700630NS
Verify Disk
#01 SAS
: P/I/L
Identify
Disk =1/01/000: 34(GB) : HUS151436VLS300
#02 SAS : P/I/L =2/02/000:137(GB) : ATLAS10K5_147SAS
#03 SAS : P/I/L =3/03/000: : 34(GB) : HUS151436VLS300
ArrowKey Or AZ:Move Cursor, Enter: Select, ESC: Return To Previous Menu Item
27
BIOS CONFIGURATION
The "Device Selection-Low Level Format Disk" screen displays a
scrolling list of installed disks on the slected host adapter. The
SATA HDD is not possible to low level format.
Highlight the SAS disk name in the "Device Selection-Low Level
Format Disk" screen and press Enter. A screen similar to the
following appears:
Adapter#1- I/O=FD9FF000h, F2(Tab): Select Controller, F10: Reset System
Areca Technology Corporation SAS Controller
Main Menu
DeviceDevices
Function
Physical
Miscellaneous
Settings
Device
Selection
- Low
Level Format Disk - 4 Device(s)
Display
Device
Information
System Information
Low Level Format Disk
#00 SATA
: P/I/L=0/00/000 : 76(GB) : ST6700630NS
Verify
Disk
Warning
: All
Data
The Disk34(GB)
Will Be Lost
After Low Level
#01 SAS
: Disk
P/I/L In
=1/01/000:
: HUS151436VLS300
Identify
Format.
Are
Sure
To Proceed?
(Y=Yes,
Others
To Abort)
Are
You
Sure
To
Low
Level
Format Disk
? (Y=Yes,
Others
To Abort)
#02 SAS : You
P/I/L
=2/02/000:137(GB)
: ATLAS10K5_147SAS
#03 SAS : P/I/L =3/03/000: : 34(GB) : HUS151436VLS300
ArrowKey Or AZ:Move Cursor, Enter: Select, ESC: Return To Previous Menu Item
The "Low Level Format Disk" screen to perform a low-level
format of the device. The default format is 512-bytes per sector.
To start the format, press Y. A screen similar to the following
appears:
Adapter#1- I/O=FD9FF000h, F2(Tab): Select Controller, F10: Reset System
Areca Technology Corporation SAS Controller
Main Menu
Physical
Devices
Device
Function
Miscellaneous Settings
Disk Format
(Don’t
Reset Or Power Off The System)
Display
Device
Information
Device
Selection - Device Information
System
Information
Low Level Format Disk
Model
Name
(SAS): HUS151436VLS300
Verify
SATA Disk
: P/I/L=1/00/000
: 76(GB) : ST6700630NS
Time Elapsed:
00:02:16
Identify
Disk
SAS : P/I/L =2/01/000: 34(GB) : HUS151436VLS300
Percentage Completed: 2 %
SAS : P/I/L =3/02/000: 137(GB) : ATLAS10K5_147SAS
SAS : P/I/L =4/03/000: : 34(GB) : HUS151436VLS300
ArrowKey Or AZ:Move Cursor, Enter: Select, ESC: Return To Previous Menu Item
28
BIOS CONFIGURATION
After format begins, you cannot stop or cancel it. The information fields on the “Disk Format” are as follows:
Model Name: Indicates the device name for the format.
Time Elapsed: Displays the time elapsed since the start of the
format operation.
Percentage Completed: Indicates the completion percentage of
the format operation.
Note:
Formatting erases all data on a device. Be sure that you
have a current, valid backup of important data on the device before you format it.
3.2.1.3 Verify Disk
To select the disk for the verification from the attached disks on
the host adapters, highlight the "Verify Disk" field on the "Device
Function" screen and press Enter. A screen similar to the following appears:
Adapter#1- I/O=FD9FF000h, F2(Tab): Select Controller, F10: Reset System
Areca Technology Corporation SAS Controller
Main Menu
Physical
Devices
Device
Function
Device Selection
- Verify Disk - 4 Device(s)
Miscellaneous
Settings
Display Device Information
System Information
Low
Level: Format
Disk
#00
SATA
P/I/L=0/00/000
: 76(GB) : ST6700630NS
Verify
#01
SASDisk: P/I/L =1/01/000: 34(GB) : HUS151436VLS300
Identify
#02
SAS Disk
: P/I/L =2/02/000:137(GB) : ATLAS10K5_147SAS
#03 SAS : P/I/L =3/03/000: : 34(GB) : HUS151436VLS300
ArrowKey Or AZ:Move Cursor, Enter: Select, ESC: Return To Previous Menu Item
The "Device Selection-Verify Disk" screen displays a scrolling
list of installed disks on the selected host adapter. Highlight
the disk name in the "Device Selection-Verify Disk" screen and
press Enter. A screen similar to the following appears:
29
BIOS CONFIGURATION
Adapter#1- I/O=FD9FF000h, F2(Tab): Select Controller, F10: Reset System
Areca Technology Corporation SAS Controller
Main Menu
DeviceDevices
Function
Physical
Device
SelectionSettings
- Verify Disk - 4 Device(s)
Miscellaneous
Display Device
Information
System
Information
Low Level
Format Disk : 76(GB) : ST6700630NS
#00 SATA
: P/I/L=0/00/000
Verify Disk
#01 SAS
: P/I/L =1/01/000: 34(GB) : HUS151436VLS300
Identify
Are SAS
You
Sure
To Verify
The Disk ? (Y=Yes,
Others To Abort)
#02
: Disk
P/I/L
=2/02/000:137(GB)
: ATLAS10K5_147SAS
#03 SAS : P/I/L =3/03/000: : 34(GB) : HUS151436VLS300
ArrowKey Or AZ:Move Cursor, Enter: Select, ESC: Return To Previous Menu Item
The "Disk Verify" screen start to perform a verification of the
selected device. Use the "Verify Disk" function to verify the
sectors on the device and reassign defective Logical Block
Addresses (LBAs). To start the verification of the selected
device, press Y. A screen similar to the following appears:
Adapter#1- I/O=FD9FF000h, F2(Tab): Select Controller, F10: Reset System
Areca Technology Corporation SAS Controller
Main Menu
Physical
Devices
Device
Function
Miscellaneous Settings
Display
Device
Information
Disk Verify
(Don’t Reset
Or Power Off The System)
System
Information
Low
Level
Format- Disk
Device
Selection
Device Information
Verify
Disk(SATA): ST3500630NS
Model
Name
SATA
: Port
ID=0-01 : 76(GB) : ST6700630NS
Identify
Disk - 00:10:20
Time
Elapsed:
SAS : Port
- ID=0-01 : 20
34(GB)
: HUS151436VLS300
Percentage
Completed:
%
SAS : Port - ID=0-02 : 137(GB) : ATLAS10K5_147SAS
SAS : Port - ID=0-03 : 34(GB) : HUS151436VLS300
ArrowKey Or AZ:Move Cursor, Enter: Select, ESC: Return To Previous Menu Item
The information fields on the “Disk Verify” are as follows:
Model Name: Indicates the device name for the verification
inquiry data.
Time Elapsed: Displays the time elapsed since the start of the
verify operation.
Percentage Completed: Indicates the completion percentage of
the verify operation.
30
BIOS CONFIGURATION
3.2.1.4 Identify Disk
To select the disk for the identification from the attached disks
on the host adapter, highlight the "Identify Disk" field on the
"Device Function" screen and press Enter. A screen similar to
the following appears:
Adapter#1- I/O=FD9FF000h, F2(Tab): Select Controller, F10: Reset System
Areca Technology Corporation SAS Controller
Main Menu
DeviceDevices
Function
Physical
Miscellaneous
Settings
Display Device
Information
Device Information
Selection - Identify Disk - 4 Device(s)
System
Low Level Format Disk
#00Verify
SATADisk
: P/I/L=0/00/000 : 76(GB) : ST6700630NS
#01Identify
SAS Disk
: P/I/L =1/01/000: 34(GB) : HUS151436VLS300
#02 SAS : P/I/L =2/02/000:137(GB) : ATLAS10K5_147SAS
#03 SAS : P/I/L =3/03/000: : 34(GB) : HUS151436VLS300
ArrowKey Or AZ:Move Cursor, Enter: Select, ESC: Return To Previous Menu Item
The "Device Selection-Identify Disk" screen displays a scrolling
list of installed disks on the selected host adapter.
Highlight the disk name in the "Device Selection-Identify Disk"
screen and press Enter. The selected disk activity indicator will
light for physically locationg the selected disk. A screen similar
to the following appears:
Adapter#1- I/O=FD9FF000h, F2(Tab): Select Controller, F10: Reset System
Areca Technology Corporation SAS Controller
Main Menu
DeviceDevices
Function
Physical
Miscellaneous
Settings
Display Device
Information
System
Information
LowSelection
Level
Format
DiskDisk - 4 Device(s)
Device
- Identify
Verify Disk
#00 SATA
: Disk
P/I/L=0/00/000 : 76(GB) : ST6700630NS
Identify
#01 SAS Check
: P/I/L
=1/01/000:
: HUS151436VLS300
Drive
LED For34(GB)
Identification!
#02 SAS Press
: P/I/L
=2/02/000:137(GB)
: ATLAS10K5_147SAS
Any
Key To Stop.
#03 SAS : P/I/L =3/03/000: : 34(GB) : HUS151436VLS300
ArrowKey Or AZ:Move Cursor, Enter: Select, ESC: Return To Previous Menu Item
31
BIOS CONFIGURATION
3.2.2 Miscellaneous Settings
To access the host adapter miscellaneous settings properties,
highlight the "Miscellaneous Settings" field on the main menu
screen and press Enter. A screen similar to the following appears:
Adapter#1- I/O=FD9FF000h, F2(Tab): Select Controller, F10: Reset System
Areca Technology Corporation SAS Controller
Main Menu
Miscellaneous
Physical
Devices Settings
Miscellaneous Settings
INT
13
Service
System Information
Silent Mode
Persistent Mapping Config
Staggered Spin-up Config
ArrowKey Or AZ:Move Cursor, Enter: Select, ESC: Return To Previous Menu Item
Changes to the "Miscellaneous Settings" are reflected in the
option field of the "Miscellaneous Settings" menu. However, the
new setting does not take effect until you reboot the system.
3.2.2.1 INT 13 Service
To access the INT 13 service properties, highlight the “INT 13
Service" field from the “Miscellaneous Settings" screen and press
Enter. A screen similar to the following appears:
Adapter#1- I/O=FD9FF000h, F2(Tab): Select Controller, F10: Reset System
Areca Technology Corporation SAS Controller
Main Menu
INT 13 Service
Miscellaneous
Physical
Devices Settings
Disabled
Miscellaneous Settings
INT Information
13 Service Enabled
System
Silent Mode
Persistent Mapping Config
Staggered Spin-up Config
ArrowKey Or AZ:Move Cursor, Enter: Select, ESC: Return To Previous Menu Item
32
BIOS CONFIGURATION
The “INT 13 Service” indicates whether the adapter is eligible
for BIOS control, or is reserved for control by OS device driver.
The information fields on the "INT 13 Service" screen are as
follows:Disabled: The SAS host adapter is controlled only by
the OS device driver and adapter's BIOS is not installed on the
system ROM area.
Enabled: The SAS host adapter is controlled only by the BIOS.
This setting may not be supported by all OS drivers.
3.2.2.2 Silent Mode
To access the silent mode properties, highlight the "Silent Mode"
field from the "Miscellaneous Settings" screen and press Enter.
A screen similar to the following appears:
Adapter#1- I/O=FD9FF000h, F2(Tab): Select Controller, F10: Reset System
Areca Technology Corporation SAS Controller
Main Menu
Miscellaneous
Physical
Devices Settings
Miscellaneous Settings
INT
13
Service
System Information
Silent Mode
Silent Mode
Mode
Silent
Persistent Mapping
Config
Disabled
Disable
Staggered Spin-up
Config
Enabled
ArrowKey Or AZ:Move Cursor, Enter: Select, ESC: Return To Previous Menu Item
The "Silent Mode" indicates whether the adapter buzzer is
"Enabled" or "Disabled".
Disabled: SAS host adapter disables the alarm tone generator.
Enabled: SAS host adapter enables the alarm tone generator.
3.2.2.3 Persistent Mapping Config
To access the persistent device mapping config, highlight the
”Persistent Mapping Config” from the “Miscellaneous Settings”
screen and press Enter.
A screen similar to the following appears:
33
BIOS CONFIGURATION
Adapter#1- I/O=FD9FF000h, F2(Tab): Select Controller, F10: Reset System
Areca Technology Corporation SAS Controller
Main Menu
Miscellaneous
Physical
Devices Settings
Miscellaneous Settings
INT
13
Service
System Information
Silent ModePersistent Mapping Config
Persistent
Persistent Mapping
Mapping Config
Config
Staggered Persistent
Spin-up Config
Device Mapping
Disable
Clear Persistent Mapping
ArrowKey Or AZ:Move Cursor, Enter: Select, ESC: Return To Previous Menu Item
Persistent mapping config is used to ensure the operating system of a server always sees presented LUNs with the same SAS
target ID across reboots. On systems where no logical volume
manager is present, the specific target and device used to map
a file system to its disk will hard code the target and disk number. It is possible that the target number could change, if disks
are added or removed from the system. Persistent mapping
function maps a user defined LUNs to a SAS ports and ensures
that the relationship remains static across reboots.
3.2.2.3.1 Persistent Device Config
To access the persistent mapping function, highlight the ”Persistent Device Mapping” from the “Persistent Mapping Config”
screen and press Enter. A screen similar to the following appears:
Adapter#1- I/O=FD9FF000h, F2(Tab): Select Controller, F10: Reset System
Areca Technology Corporation SAS Controller
Main Menu
Miscellaneous
Physical
Devices Settings
Miscellaneous Settings
INT
13
Service
System Information
Silent ModePersistent Mapping Config
Persistent
Device Mapping
Persistent
Config
Persistent Mapping
Mapping
Config
Staggered Persistent
Spin-up Config
Device Mapping
Disable
Disabled
Clear Persistent Mapping
Enabled
ArrowKey Or AZ:Move Cursor, Enter: Select, ESC: Return To Previous Menu Item
34
BIOS CONFIGURATION
Enabled: LUNs relative mapping remains static across reboots.
Disabled: LUNs relative mapping is gathered from the SAS HBA
device driver on every reboot.
3.2.2.3.2 Clear Persistent Mapping
To enable the clear mapping registry on the HBA, highlight the
”Clear Persistent Mapping” from the “Persistent Mapping Config”
screen and press Enter. A screen similar to the following appears:
Adapter#1- I/O=FD9FF000h, F2(Tab): Select Controller, F10: Reset System
Areca Technology Corporation SAS Controller
Main Menu
Miscellaneous
Physical
Devices Settings
Miscellaneous Settings
INT Information
13 Service
System
Silent ModePersistent Mapping Config
Persistent
Persistent Mapping
Mapping Config
Config
Staggered Persistent
Spin-up Config
Device Mapping
Clear Persistent Mapping
Are You Sure To Clear The Persistent Device Mapping ? (Y=Yes)
ArrowKey Or AZ:Move Cursor, Enter: Select, ESC: Return To Previous Menu Item
The device driver detects the hardware SAS devices via SAS
HBA. This detection phase then stores or maps SAS drive LUNs
information in the HBA when you enable the persistent mapping. When device persistence is in use this operation clears
persistent mappings for devices that are not currently present.
It is required to clear the HBA previous persistent mapping that
ARC-1320 device uses as a bootable device on the new operating system installation. The clear function is for user to reset
the registry store on HBA. To start the clear persistent mapping,
press Y. A screen similar to the following appears:
35
BIOS CONFIGURATION
Adapter#1- I/O=FD9FF000h, F2(Tab): Select Controller, F10: Reset System
Areca Technology Corporation SAS Controller
Main Menu
Miscellaneous
Physical
Devices Settings
Miscellaneous Settings
INT
13
Service
System Information
Silent ModePersistent Mapping Config
Persistent
Persistent Mapping
Mapping Config
Config
Staggered Persistent
Spin-up Config
Device Mapping
Clear Persistent Mapping
Operation Completed Successfully!
Press Any Key To Continue!
ArrowKey Or AZ:Move Cursor, Enter: Select, ESC: Return To Previous Menu Item
3.2.2.4 Staggered Spin-up Config
To access the host adapter staggered spin-up configuration
properties, highlight the "Staggered Spin-up Config" field from
the "Miscellaneous Settings" screen and press Enter. A screen
similar to the following appears:
Adapter#1- I/O=FD9FF000h, F2(Tab): Select Controller, F10: Reset System
Areca Technology Corporation SAS Controller
Main Menu
Miscellaneous
Physical
Devices Settings
Staggered Spin-up Config
Miscellaneous Settings
INT Information
13 Service #Disks
Disk Per
Spin-up
Group
Per
Spin-up
Group
System
Silent Mode
Group Spin-up Delay(Seconds)
Persistent Mapping Config
Staggered Spin-up Config
ArrowKey Or AZ:Move Cursor, Enter: Select, ESC: Return To Previous Menu Item
In a PC system with only one or two drives, the power can supply enough power to spin up both drives simultaneously. But In
a systems with more than two drives, the startup current from
spinning up the drives all at once can overload the power supply, causing damage to the power supply, disk drives and other
system components. This damage can be avoided by allowing
the host to stagger the spin-up of the drives. New SATA drives
have supported staggered spin-up capabilities to boost reliability. Staggered spin-up is a very useful feature for managing
36
BIOS CONFIGURATION
multiple disk drives in a storage subsystem. It gives the host
the ability to spin up the disk drives sequentially or in groups,
allowing the drives to come ready at the optimum time without
straining the system power supply. Staggering drive spin-up in a
multiple drive environment also avoids the extra cost of a power
supply designed to meet short-term startup power demand as
well as steady state conditions.
3.2.2.3.1 #Disks Per Spin-up Group
To define the # of disks per spin-up group, highlight the "#
Disks Per Spin-up Group" field from the "Staggered Spin-up
Config" screen and press Enter. A screen similar to the following
appears:
Adapter#1- I/O=FD9FF000h, F2(Tab): Select Controller, F10: Reset System
Areca Technology Corporation SAS Controller
Main Menu
#Disks Per Spin-up Group
Miscellaneous
Physical
Devices Settings
Staggered Spin-up1Config
Miscellaneous Settings
INT Information
13 Service #Disk
2Group
Disk Per
PerSpin-up
Spin-upGroup
System
Silent Mode
3
Group Spin-up Delay(Seconds)
Persistent Mapping Config
4
Staggered
Spin-up
Config
Staggered Spin-up Config
5
6
7
8
ArrowKey Or AZ:Move Cursor, Enter: Select, ESC: Return To Previous Menu Item
ARC-1320 series host adapters have included the option for
customer to select the number of disk drives group per stagger
power up value. The values can be selected from 1 to 8 disks
per step which powers up the system.
3.2.2.3.2 Group Spin-up Delay(Seconds)
To define the group of disks spin-up delay, highlight the "Group
Spin-up Delay" field from the "Staggered Spin-up Config"
screen and press Enter. A screen similar to the following
appears:
37
BIOS CONFIGURATION
Adapter#1- I/O=FD9FF000h, F2(Tab): Select Controller, F10: Reset System
Areca Technology Corporation SAS Controller
Main Menu
#Group Spin-up Delay(Seconds)
0
Miscellaneous
Physical
Devices Settings
Staggered Spin-up Config
1
Miscellaneous Settings
INT
13
Service
System Information Disk Per Spin-up Group2
3
Silent Mode
Group Spin-up Delay(Seconds)
4
Persistent Mapping Config
Staggered Spin-up Config
5
6
7
ArrowKey Or AZ:Move Cursor, Enter: Select, ESC: Return To Previous Menu Item
Areca host adapters have included the option for customer to
select the group of disk drives sequentially stagger power up
value. The values can be selected from 0s to 7s per step which
powers up one group of disk drives.
3.2.3 System Information
To access the host adapters system information properties, highlight the "System Information" field on the main menu screen and
press Enter. A screen similar to the following appears:
Adapter#1- I/O=FD9FF000h, F2(Tab): Select Controller, F10: Reset System
Areca Technology Corporation SAS Controller
Main Menu
System Information
Physical Devices
Miscellaneous
AdapterSettings
Model Name
SystemVendor
Information
/ Device ID
IRQ Number
BIOS Version / Date
Serial Number
Port 0 SAS Address
Port 1 SAS Address
Port 2 SAS Address
Port 3 SAS Address
Port 4 SAS Address
Port 5 SAS Address
Port 6 SAS Address
Port 7 SAS Address
: ARC-1320
: 17D3 / 1320
: 0A
: V1.05 / 2010-02-10
: FFFFFFFF
: 5005043011AB0000
: 5005043011AB0001
: 5005043011AB0002
: 5005043011AB0003
: 5005043011AB0010
: 5005043011AB0011
: 5005043011AB0012
: 5005043011AB0013
ArrowKey Or AZ:Move Cursor, Enter: Select, ESC: Return To Previous Menu Item
Information fields on the "System Information" properties are as
follows:
38
BIOS CONFIGURATION
Adapter Mode Name: Indicates the name of the host adapter.
Vendor/Device: Indicates the controller's vendor ID and device
name.
IRQ Number: Indicates the Interrupt Request Line used by the
adapter. This is assigned by the system BIOS.
BIOS Version / Date: Indicates the revision version and date of
this adapter BIOS.
Serial Number: Indicates the production serial number from the
manufacture.
Port 0(0 to N) SAS Address: Indicates the SAS address of the the
associated SAS Port (0 to N) as configured on this adapter.
Note:
The adapter can not be used, if the 16-digit adapter SAS address is not displayed.
39
DRIVER INSTALLATION
4. Driver Installation
This chapter describes how to install the ARC-1320 series SAS host
adapters device driver to your operating system. The installation procedures use the following terminology:
Installing operating system on the ARC-1320 volume
If you have a new drive configuration without an operating system
and want to install operating system on a disk drive managed by
the SAS host adapters. The device driver installation is a part of the
operating system installation.
Installing SAS host adapter into an existing operating system
The computer has an existing operating system installed and the
ARC-1320 series host adapters are being installed as a secondary
controller.
Have all required system hardware and software components on
hand before proceeding with the setup and installation.
Materials required:
• Microsoft Windows 7/2008/Vista/2003/XP, Linux, FreeBSD, Solaris,
and Mac Pro installation CD
• ARC-1320 series host adapters software CD
• ARC-1320 series host adapters
4.1 Creating the Driver Diskettes
The software CD disc shipped with the ARC-1320 series host
adapters are a self-booting CD. In order to created driver diskettes
for Windows, Linux, and FreeBSD installation drivers, your system
is required to support booting from the CD-ROM.
If you do not have the software CD disc with the package, contact
your local dealers or you can also download the latest version drivers for Windows 7/2008/Vista/2003/XP, Linux, FreeBSD, Solaris
and Mac Pro from the Areca web site at http://www.areca.com.tw
These driver diskettes are intended for use with new operating
40
DRIVER INSTALLATION
system installations. For Windows 7/2008/Vista, you can copy the
Windows driver file to USB device and installed from it. Determine
the correct kernel version and identify which diskette images
contain drivers for that kernel. If the driver file ends in .img, create
the appropriate driver diskette using “dd” utility. The following
steps are required to create the driver diskettes:
1. The computer system BIOS must be set to boot-up from the
CD-ROM.
2. Insert the ARC-1320 software driver CD disc into the CD-ROM
drive.
3. The system will boot-up from CD-ROM Drive; to create the
driver diskettes, select the “SAS Host Adapter Driver Diskette
Make Utility”, and a screen with several choices will be displayed.
4. Move the highlight bar to the “Create Driver Disk” entry and
press Enter.
5. The screen queries the ARC-1320 SAS host adapters support
driver database and displays a list of available drivers. Move the
highlight bar to the correct driver entry and press Enter to select.
6. The next screen will show “Please insert a formatted diskette
into drive A:!! Press any key to continue”. Insert the formatted
diskette in drive “A” and press any key to continue.
7. The window will display the driver building message: ”Now is
writing to Cylinder…” as it copies the image file from the CD-ROM
to driver diskette.
8. The “Write Complete !!” message will display when the driver
diskette ready.
The driver diskette is made now. Proceed to the following
instruction for installation procedures.
41
DRIVER INSTALLATION
4.2 Driver Installation for Windows
The ARC-1320 series host adapters can be used with Microsoft
Windows 7/2008/Vista/2003/XP/2003. The ARC-1320 series host
adapters support SCSI Miniport and StorPort Drivers for Windows
7/2008/Vista/2003/.
4.2.1 New Storage Device Drivers in Windows
7/2008/Vista/2003
The Storport driver is new to Windows 7/2008/Vista/2003. Storport implements a new architecture designed for better performance in Storage Area Network (SAN) environments. Storport
delivers higher I/O throughput, enhanced manageability, and an
improved miniport interface. Storport better utilizes faster adapters through the use of reduced Delay Procedure Call (DPC) and
improved queue management.
4.2.2 Install Windows 7/2008/Vista/2003/XP on
a SAS Host Adapter Volume
The following instructions explain how to install the ARC-1320
series host adapters device driver while installing Windows
7/2008/Vista/2003/XP. Have your bootable Microsoft Windows
CD and follow the required procedure below to install ARC-1320
series host adapters:
1. Make sure you follow the instructions in Chapter 2 “Hardware
Installation” to install the controller and connect the disk drives or
enclosure.
2. Start the system and then press Tab/F6 to access the Host_
BIOS setup utility. Use the Host_BIOS setup utility to configure
the ARC-1320 series host adapters to which you will install Windows. For details, see Chapter 3 “BIOS Configuration”. Once ARC1320 series host adapters has been configured, continue with
next step to install the operating system.
3. Insert the Windows setup CD and reboot the system to begin
the Windows installation.
42
DRIVER INSTALLATION
Note:
The computer system BIOS must support bootable from CDROM.
4. Press F6 when the following displays at the bottom of the
screen for only 5 seconds, unless you are installing Windows 7,
2008 and Vista.
"Press F6 if you need to install..."
This must be done or else the Windows installer will not prompt
for the driver from the ARC-1320 series host adapters and the
driver diskette will not be recognized.
Note:
If you are installing Windows 7/2008/Vista, click “Load Driver“ to locate the device driver and then click “Next”.
5. The next screen will show:
“Setup could not determine the type of one or more ............”.
Specify an additional ARC-1320 series device driver by pressing
S.
6. Insert the ARC-1320 series driver diskette in drive “A:” and
press Enter.
7. Select the appropriate ARC-1320 series host adapters from the
menu by using the arrow key to highlight it, and then press Enter
to select it.
8. Setup will load support for the following mass storage devices:
“ARECA[Windows X86-32 Storport] SAS Host Adapter”. Press Enter continue and copy the driver files.
9. From this point on, simply follow the Microsoft Windows installation procedure. Follow the on-screen instructions, responding as
needed, to complete the installation. Reboot the system to load
the new driver/operating system.
43
DRIVER INSTALLATION
4.2.3 Installing Controller into an Existing Windows System Installation
In this scenario, you are installing the controller in an existing
Windows system. To install the driver:
1. Follow the instructions in Chapter 2, the “Hardware Installation” chapter, to install the controller and connect the disk drives
or enclosure.
2. Start the system and then press Tab/F6 to enter the controller Host_BIOS setup utility. Use the setup utility to configure
the host adapter parameter. For details, see Chapter 3, BIOS
Configuration. Once the host adapters miscellaneous settings
properties configured, continue with installation of the driver.
3. Boot Windows and the OS will recognize the ARC-1320 series
host adapters and launch the “Found New Hardware Wizard”,
which guides you in installing the ARC-1320 series host adapters
driver.
4. Choose “Display a list of known drivers for this device, so that
you can choose a specific driver.” and click on “Next”.
5. Insert the ARC-1320 series host adapters driver diskette or
the shipping software CD and type-in or browse to the correct
device driver path. Click the “Next”.
8. If the “Digital Signature Not Found” screen appears, click on
“Continue” to continue the installation. This message informs
you that a nonsigned driver is being installed.
9. Windows automatically copies the appropriate driver files and
rebuilds its driver database.
10. Click the “Finish” button to complete the driver installation.
11. Remove the diskette from the drive and click Yes to restart
the computer to load the new drivers.
44
DRIVER INSTALLATION
4.2.4 Making Volume Sets Available to Windows
System
When you reboot the system, log in as a system administrator.
The following steps show how to make any new disk arrays or
independent disks accessible to Windows system.
This procedure assumes that the ARC-1320 series host adapters
hardware, driver, and Windows are installed and operational in
your system.
1. Partition and format the new disks using “Disk Administrator”:
a). Choose “Administrative Tools” from the “Start” menu.
b). Choose “Computer Management” from the “Administrative
Tools” menu.
c). Select “Storage”.
d). Select “Disk Management”.
2. Follow the on-screen prompts to write a signature to the
drive.
3. Right click on the drive and select “Create Volume” from the
menu.
4. Follow the on-screen prompts to create a volume set and to
assign a disk drive letter.
4.2.5 Uninstall Controller from Windows System
To remove the SAS host adapter driver from the Windows system,
follow the instructions below.
1. Ensure that you have closed all applications and are logged in
with administrative rights.
2. Start from “My Computer”, click right side of the mouse. Select “Manage”, then choose “Computer Management”.
3. Select the “Device Manager”, then choose “SCSI and RAID
Controllers”. Right click on the “ARECA(X86-32-STORPORT) SAS
45
DRIVER INSTALLATION
Host Adapter" and click right side of mouse then select “Uninstall”. A “Confirm Device Removal” screen appears.
4. Click Yes to remove the ARC-1320 series host adapters
driver.
4.3 Driver Installation for Linux
This chapter describes how to install the ARC-1320 series host
adapters driver to Red Hat Linux, SuSE and other versions of Linux.
Before installing the ARC-1320 series host adapters driver to the
Linux, complete the following actions:
1. Install host adapter and hard disk drives according to the instructions in Chapter 2 Hardware Installation.
2. Start the system and then press Tab+F6 to enter the Host_
BIOS setup utility. Using the Host_BIOS setup utility to configure
host adapter miscellaneous settings parameter. For details, see
Chapter 3, BIOS Configuration.
Compiled and tested drivers for Red Hat and SuSE Linux are included on the shipped software CD. You can download updated versions
of compiled and tested drivers for RedHat or SuSE Linux from the
Areca web site at http://www.areca.com.tw.
Please refer to the “readme.txt” file on the included software CD or
website to make driver diskette and to install driver on the system.
4.4 Driver Installation for FreeBSD
This chapter describes how to install the ARC-1320 series host
adapters driver to FreeBSD. Before installing the ARC-1320 series
host adapters driver to the FreeBSD, complete the following actions:
1. Install host adapters and hard disk drives according to the
instructions in Chapter 2 Hardware Installation.
2. Start the system and then press Tab+F6 to enter the Host_
BIOS setup utility. Using the Host_BIOS setup utility to configure
46
DRIVER INSTALLATION
host adapters miscellaneous settings parameter. For details, see
Chapter 3. BIOS Configuration.
The supplied software CD that comes with ARC-1320 series host
adapters incluede the compiled and tested drivers for FreeBSD 7.x
(7.2 and onwards) and 8.x (8.0 and onwards). You can download
updated versions of compiled and tested drivers for FreeBSD from
the Areca web site at http://www.areca.com.tw.
Please refer to the “readme.txt” file on the included software CD or
website to make driver diskette and to install driver on the system.
4.5 Driver Installation for Solaris
This chapter describes how to install the ARC-1320 series host
adapters driver to Red Hat Linux, SuSE and other versions of Linux.
Before installing the ARC-1320 series host adapters driver to the
Linux, complete the following actions:
1. Install host adapters and hard disk drives according to the instructions in Chapter 2 Hardware Installation.
2. Start the system and then press Tab+F6 to enter the Host_
BIOS setup utility. Using the Host_BIOS setup utility to configure
host adapters miscellaneous settings parameter. For details, see
Chapter 3, BIOS Configuration.
Compiled and tested drivers for Solaris are included on the shipped
software CD. You can download updated versions of compiled and
tested drivers for Solaris from the Areca web site at http://www.
areca.com.tw.
Please refer to the “readme.txt” file on the included software CD or
website to make driver diskette and to install driver on the system.
4.6 Driver Installation for Existing Mac OS
X
This chapter describes how to install the ARC-1320 series host
adapters Mac Pro device driver. You must have administrative level
permissions to install Areca Mac Pro device driver. You can install
driver on your Mac Pro as below:
47
DRIVER INSTALLATION
1. Insert the Mac Pro Driver & Software CD that came with your
ARC-1320 series host adapters.
2. Double-click on the following file that resides at <CD-ROM>\
packages\MacOS to add the installer on the Finder.
a). ArcSAS-0.0.0.dmg
3. Launch the installer by double-clicking the ArcSAS-0.0.0 virtual
volume on the "Finder".
4. Follow the installer steps to install Mac Pro driver.
5. Reboot your Mac Pro system
4.6.1 Making Volume Sets Available to Mac OS X
When you connect the HDD and install the device driver, the
Mac OS X recognizes that a new disk is avail, and displays a
message asking what you next want to do. If the message does
not show up, start the “Macintosh Disk Utility” manually from
the “Finder”, use the “Go” menu and open the “Utilities” folder.
Double-click on the “Macintosh Disk Utility” program. Follow the
on-screen prompts to create a volume set and to assign a disk
drive letter.
1 In the Mac OS X message, click on the “Initialize” tab.
2 When the "Macintosh Disk Utility" window appears, select the
ARC-1320 series host adapters disks icon on the left in the list of
hard disks that are mounted on the Mac Pro system.
3 In the "Macintosh Disk Utility" window, click on the “Partition”
tab.
48
DRIVER INSTALLATION
4. From the "Volume Scheme" column, click on the “Current” to
show the drop down menu and select the number of partitions
that you want to divide Areca controller.
5. On the right “Volume Information” section, assign a name
for each partition, choose the right volume format (Mac OS
Extended, Mac OS Standard, MS-DOS File System or UNIX File
System) and enter the appropriate size of the partitions. Once
you have finished the setting, click on the “Partition” tab.
6. When a message “Partitioning a disk will destroy all
information on the volume of the disk” asks you to confirm you
want to partition the disk, click on the “Partition“ tab to continue.
It will take a couple of minutes to complete the partition, volume
format and shown up the new volume on your desktop when they
are now available for use.
49
COMMAND LINE INTERFACE
5. CLI Introduction
This Command Line Interface (CLI) is provided for you to configure
and manage the Areca SAS host adapter components in Windows,
Linux and FreeBSD and more environments. The CLI is useful in environments where a graphical user interface (GUI) is not available.
Through the CLI, you perform most of the storage management tasks
that you can perform with the Host-BIOS setup manager. With CLI,
you can also use the CLI commands in both interactive and non-interactive (script) mode, providing higher level API functionalities. Before
using this CLI, we assumes that you have already installed your controller in your system. If you have not yet installed SAS host adapter,
see chapter 2 Hardware Installation for instructions.
5.1 Supported Operating Systems
• Windows: Windows 7, Windows 2008, Windows Vista, Windows
XP and Windows Server 2003.
•Linux: RedHat, SuSE, ……etc.
• FreeBSD
• Solaris 10/11
• Mac OS x10.4.x/10.5.x/10.6.x
CLI supports both 32-bit and 64-bit versions. Be sure you are installing the correct version.
50
COMMAND LINE INTERFACE
5.2. CLI Installation
This section describes the procedures for installing Command Line
Interface (CLI).
5.2.1. For Windows
Below screen in this section are taken from a Windows/XP installation. If you are running other Windows, your installing screen
may look different, but the CLI installation is essentially the same.
1. Insert the SAS host adapters CD in the CD-ROM drive. You aslo
can download the CLI from the website: www.areca.com.tw
2. Run the setup.exe file that resides at: <CD-ROM>\CLI\windows\setup.exe on the CD-ROM.
3. Click on the “Setup” file then the Welcome screen appears.
Follow the on-screen prompts to complete CLI installation.
4. A program bar appears that measures the progress of the CLI.
51
COMMAND LINE INTERFACE
5. When this screen complete, you have completed the CLI software setup.
6. After a successful installation, the setup completed dialog box
of the installation program is displayed.
Click the “Finish” button to complete the installation.
5.2.2 For Linux, FreeBSD and Solaris
The CLI utility can be installed from the Areca shipping software
CD, or downloaded from the web site: www.areca.com.tw
The following is the CLI installation procedure in the Linux, FreeBSD and Solaris.
1. Insert the SAS host adapter CD in the CD-ROM drive.
2. Copy the file CLI to the installation directory from which you
want to run the program.
52
COMMAND LINE INTERFACE
5.3 Accessing CLI
5.3.1 For Windows
This section discusses the methods for accessing the CLI in Windows.
To access the CLI:
1. Click on the “Start” button in the Windows XP/2003 task bar
and then click “Program”.
2. CLI screen appears.
The CLI prompt is displayed in a DOS console window.
5.3.2 For Linux, FreeBSD and Solaris
To access the CLI from the Linux/FreeBSD/Solaris prompt, display
a window and type CLI in the directory. When the system displays
the CLI> prompt, which indicates that you can start to use CLI
commands.
For the commands to work in any directory, the path in the startup, please see your Linux/FreeBSD/Solaris documentation for
information on setting up directory paths.
53
COMMAND LINE INTERFACE
5.4. CLI Command Line Configuration
5.4.1 Conventions
You can enter only valid CLI commands at the command line
prompt.
All commands use the following syntax:
<CMD> [sub-command] [parameters]
The CLI syntax uses the following conventions for parameter:
<text> indicates items that you must specify.
[text] the text item within brackets is optional.
< ¦ > indicates an ‘or’ situation where the user has a choice between more than one option, but only one can be speci
fied.
< ~ > indicates a range values where the user has a choice between these two values, but only one can be specified.
< , > comma, indicates a separation between integer value.
5.4.2 Working Mode
You can also use the CLI commands in both interactive and noninteractive (script) mode.
• Interactive mode: Entering CLI commands at the main prompt
• Non-interactive mode: As a series of single commands or creating a script file (a multiple commands input)
5.4.2.1 Interactive Mode
You can run CLI in interactive mode, entering commands at the
main prompt and observing the results on the screen. The examples shown in this CLI manual reflect this interactive mode.
To run the CLI in the interactive mode:
1. To enter interactive mode, type CLI and press Enter.
The main prompt (CLI>) is displayed. This indicates that the
CLI program is waiting for a command input.
54
COMMAND LINE INTERFACE
2. At the CLI prompt, you can input the commands.
Syntax
Set <curctrl=xx>
Parameters
curctrl=xx
Example: CLI > set curctrl=1 [Enter]
Use this command to select the controller 1 on which to perform
an action.
5.4.2.2 Non-interactive Mode
To run the CLI in a single command, you can use CLI with syntax and parameters, processing a single command at a time. To
process it, simply enter the command with syntax and parameters.
Syntax
CLI <command line with syntax and parameters>
CLI set <curctrl=xx>
Example: CLI set curctrl=1
Use this command to select the controller 1 on which to perform
an action.
To run the CLI using automated script
This part describes how to write batch files and CLI command
scripts to perform the controller details task. You can run CLI
scripts by executing a batch file. The batch file is a text file containing a valid list of CLI commands which you have included in
the file. A carriage return linefeed follows each command. You
can use the CLI commands alone in CLI command scripts or
in DOS batch files. You should already understand how to write
DOS batch files and be familiar with Windows-related backup
commands.
To execute a CLI command script, type the file name that contains the CLI commands.
55
COMMAND LINE INTERFACE
Syntax
<filename>
Where <filename> is the name of the text file you want to execute.
Creating an automated script example.
In its simplest example form, a text file contains two valid CLI
commands. A carriage return linefeed follows each command.
The setsys is the file included the following two commands:
CLI set curctrl=1
CLI sys info
To run the automated script, enter: setsys
56
COMMAND LINE INTERFACE
5.4.3 Command Categories
This chapter provides detailed information about the SAS
host adapter CLI commands. From a functional point of view,
command can be grouped into the following functional categories.
This list may vary depending upon the SAS host adapter model
and the installed features.
5.4.3.1 Help Command
This command provides an on-line table of contents, providing
brief descriptions of the help sub-commands. You can use the
<CMD> -h or –help to get detail information about the subcommand.
Syntax
<CMD> -h or help
CMD: main, set, disk, sys, exp, or enc.
The following table is the CLI command summary:
CMD
main
Description
Show command categories
set
Open the controller to accept the CLI. It includes the controller
assignment and password check
disk
Physical Drive Functions, view individual disk information
sys
System Functions, view host adapter system information properties
exp
Expander Functions, View all expanders information
enc
Enclosure Function, monitor information shows all enclosure
environment status
exit
Exit CLI
5.4.3.2 Main Command
Main command in this category allows you to display main command in the SAS host adapters. The main command shows the
currently selected host adapter and all host adapters installed in
the system. This command provides a table of contents, providing brief descriptions of the commands and controller installed in
the system. You can use the following command to get the main
57
COMMAND LINE INTERFACE
command function and description.
Syntax
CLI> main [Enter]
5.4.3.3 Set Commands
If there is more than one SAS host adapters in the system (up
to 64 are supported), use this command to select the appropriate controller on which to perform an action. All actions or
commands will be performed only on the currently selected host
adapter.
To prepare a SAS host adapter to receive a CLI command, you
first need to select the host adapter. To select the adapter and
prepare it to receive CLI commands. You can use the following
command to get the set command function and description.
CLI > set help [Enter]
Typical output looks like:
58
COMMAND LINE INTERFACE
5.4.3.4 Disk Commands
The disk commands perform all disk operations on the drives
connect to the SAS host adapters. Typical operations include:
identify and view disk information from the SAS host adapter.
You can use the following command to get the disk command
function and description.
CLI > disk help [Enter]
Typical output looks like:
5.4.3.5 Sys Commands
Choose this option to display the host adapter system information properties. You can use the following command to get the
sys command function and description.
CLI > sys help [Enter]
Typical output looks like:
59
COMMAND LINE INTERFACE
5.4.3.6 Exp Commands
Exp command is used to view all SAS expander’s information
which connected to SAS host adapter. Typical information includes: vendor, model name, serial/unit number, expander port
number/chip revision/boot revision/firmware version, CFG data
file, GAL id, table route, work mode and work time. You can use
the following command to get the exp command function and
description.
CLI > exp help [Enter]
Typical output looks like:
5.4.3.7 Enc Commands
The Enc command allows you to display enclosure monitor information that have been collected by enclosure controllers. The
enclosure monitor information provides the temperature and
fan speed (chassis fan) of the SAS JBOD enclosure. You can use
the following command to get the enc command function and
description.
CLI > enc help [Enter]
Typical output looks like:
60
COMMAND LINE INTERFACE
5.4.3.8 Exit Command
To close the currently selected controller and exit the CLI, use
the exit command.
Syntax
CLI> exit
61
APPENDIX
Appendix A
Expander CLI Function
This Command Line Interface (CLI) is provided for you to configure
the ARC-1320ix-16 SAS host adapter expander functions. The CLI
is useful in environments where a graphical user interface (GUI)
is not available. The CLI provides user to read or adjust the ARC1320ix-16 on-board SAS expander parameters.
The CLI function can be done by using an ANSI/VT-100 compatible terminal emulation program. You must complete the appropriate installation procedure before proceeding with the CLI function.
Whichever terminal emulation program is used must support the
1K XMODEM file transfer protocol.
The serial port on the SAS expander controller’s back panel can
be used in VT100 mode. The provided interface cable converts the
RS232 signal of the RJ11 connector on the SAS expander controller into a 9-pin D-Sub male connector. The firmware-based terminal SAS expander management interface can access the expander
through this RS-232 port. You can attach a VT-100 compatible
terminal or a PC running a VT-100 terminal emulation program
to the serial port for accessing the text-based setup menu. The
ARC-1680ix Expander-CLI manual for expander is included on the
shipped software <CD-ROM>\Documents\ARC-1680ix ExpanderCLI.PDF. You can also download the latest version ARC-1680ix
Expander-CLI manual from the websie http://www.areca.com.tw/
support/main.htm.
62
APPENDIX
Appendix B
Upgrading Adapter Flash ROM Process
Since the PCIe SAS host adapter features flash ROM firmware,
it is not necessary to change the hardware flash chip in order to
upgrade the adapter BIOS. The user can simply re-program the old
BIOS through the In-Band PCIe bus, using the oflash.exe flash DOS
utility. The shipped CD contains the oflash.exe executable utility
and a separate adapter flash image on the <CD-ROM>\BIOS\. New
releases of the adapter BIOS is available in the form of a DOS file
on the shipped CD or Areca website. The following files name is
available at the FTP site or the shipped CD :
i13_1320.bin: PCIe card BIOS for system board using readme.txt
contains the history information of the BIOS code change in the
main directory. Read this file first to make sure you are upgrading
to the proper binary file. The BIOS version and date will be shown
on the adapter BIOS startup banner. Select the right version file for
the upgrade. Normally, user upgrades the i13_1320.bin for system
M/B compatibility.
Upgrading BIOS Through Oflash.exe Flash
DOS Utility
The oflash.exe flash utility program is a DOS application, which
runs in the DOS operating system. Be sure of ensuring properly to
communicate between SAS host adapter and oflash.exe flash DOS
utility. Please make a bootable DOS floppy disk or UBS devices
from other Windows operating system and copy SAS adapter BIOS
package: oflash.exe and i13_1320.bin files to it.
Starting the OflashFlash Utility
You do not need to short any jumper cap on running oflash.exe
flash utility. The oflasah.exe flash utility provides an on-line table of
contents, brief descriptions of the help sub-commands.
63
APPENDIX
Help Command
This –h or –help command provides an on-line table of contents,
providing brief descriptions of the help sub-commands that the
oflashflash utility recognizes.
The command syntax for the oflash-h or -help command is as
follows:
\> oflash–h or -help --- display the oflashflash utility sub-command
option.
The below example shows that oflashflash utility oflash-h or –help
command gets detail information about its sub-command.
-
C:\>oflash
======================================
= Copyright (c) 2009 Areca, Inc. All rights reserved.
=
= Areca SAS Host Adapter Flash Utility, Version: 1.04
=
======================================
command: oflash[options]
/c ctlr#
-- assign controller number, default 0
/r filename -- read, backup binary into filename from flash
/w filename -- write, write binary into flash from filename
/l
-- list, list all adapters found
Example:
Write flash from file i13_1320.bin into adapter#0
command: oflash/ /c 0 /w i13_1320.bin [Enter]
c:\>_
/l Command
This /l command uses to display the oflash-supported SAS host
adapter installed on your computer. Use this command to see which
SAS host adapters are installed, and to identify the ID numbers
assigned to each physical host adapter.
The command syntax for the /l command is as follows:
\> oflash/l --- list all SAS host adapters found.
This example shows a typical system response to a /l command:
C:\> oflash/l
64
APPENDIX
-
C:\>oflash/ l
======================================
= Copyright (c) 2009 Areca, Inc. All rights reserved.
=
= Areca SAS Host Adapter Flash Utility, Version: 1.00
=
======================================
Adapter Information
Adapter#00
Vendor ID/DeviceID/Bus/DevFunc: 17D3/1320/01/00 I/O Address: EFC80000
Adapter#01
DeviceID/Bus/DevFunc: 1320/1/0 I/O Address:
CF00
c:\>_
/c Command
This /c command uses to select the host adapter for the /r read
command or /w write command.
The command syntax for the /l command is as follows:
oflash/c ctlr# --- Assign controller number, default number=0
ctlr# is the SAS host adapter IDs representing the set of adapter(s)
on which the command can be performed. By default, the oflash
flash utility value set is host adapter 0.
/r Commands
This /r command uses to saves the contents of a SAS host adapter’
s flash ROM contents into in a file. The name of the save file is
based on the command syntax filename.
The command syntax for the /r command is as follows:
oflash/c filename --- read, backup binary into filename from the
flash.
The below example shows that oflashflash utility saves the SAS
host adapter’s flash ROM contents from SAS adapter 1 to a file
name: 1320bak.bin.
C:\> oflash/c 1 /r 1320bak.bin
65
APPENDIX
-
C:\>oflash/c 1 /r 1320bak.bin
======================================
= Copyright (c) 2009 Areca, Inc. All rights reserved.
=
= Areca SAS Host Adapter Flash Utility, Version: 1.00
=
======================================
Controller Information
Controller#01
DeviceID/Bus/DevFunc: 1320/1/0 I/O Address: CF00
Current : Adapter #00 [AT25F2048]
Writing 262144 bytes into file 1320bak.bin: 100%
Read flash OK
c:\>_
/w Commands
This /w command uses to write a flash image data into SAS host
adapter’s flash ROM from the file. You must restart the computer
for new BIOS to take effect after you complete the /w command.
The command syntax for the write command is as follows:
oflash/w filename – write, write binary into flash from filename
The following example shows a typical system response after
you completed the BIOS updated for the host adapter 1 from the
i13_1320.bin file:
C:\> oflash c/1 /w i13_1320.bin
-
C:\>oflash/c 1 /w i13_1320.bin
======================================
= Copyright (c) 2009 Areca, Inc. All rights reserved.
=
= Areca SAS Host Adapter Flash Utility, Version: 1.00
=
======================================
Controller Information
Controller#01
DeviceID/Bus/DevFunc: 1320/4/0 I/O Address: CF00
Current : Adapter #00 [AT25F2048]
Writing 55808 bytes into flash 100%
Write flash OK
c:\>_
66
APPENDIX
The following step by step instructions provide the process to
update the flash.
1. Make the SAS adapter’s BIOS package on bootable floppy disk or
USB devices.
2. Insert the oflash floppy disk or USB device and restart your
computer.
Note:
If your computer has not been set up to boot from the
bootable floppy disk or USB device, enter the system BIOS
setup utility to change the setting.
3. At the DOS command, type oflashfollowed by a /l command to
list all SAS host adapter installed on your computer.
4. Update the flash ROM using oflash/c <ctlr#> /w <filename>
command.
Where <ctlr#> is the number of the SAS host adapter which
update its BIOS using the <filename> image data.
5. The oflashflash utility reads the image data from floppy disk or
USB device and updates the flash ROM on the host adapter.
67