1
E-MANUAL
imagine the possibilities
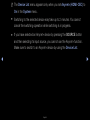
Thank you for purchasing this Samsung product.
To receive more complete service, please register
your product at
www.samsung.com/register
Model______________ Serial No.______________
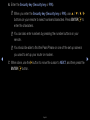
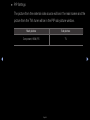
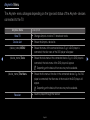
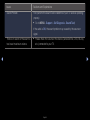
Contents
Advanced Features
Preference Features
Menú Canal
• Using the Channel Menu
1
• Wired Network Connection
68
• 3D
161
• Using the Favorite Channels
21
• Wireless Network Connection
79
• Smart Hub
171
• Memorizing Channels
25
• Setting the Time
111
• Setting up Smart Hub
185
• Other Features
29
• Blocking Programs
119
• Using Smart Hub
207
• Other Features
131
• Videos
217
• Economical Solutions
136
• Music
224
• Picture In Picture (PIP)
144
• Photos
228
• Support Menu
148
• Smart Hub - Additional Functions
230
• Using Samsung Apps
236
• AllShare™
267
• Anynet+(HDMI-CEC)
273
Basic Features
• Changing the Preset Picture Mode
31
• Adjusting Picture Settings
32
• Changing the Picture Size
34
• Changing the Picture Options
40
• Using the TV with Your PC
53
• Changing the Preset Sound Modes
57
• Adjusting Sound Settings
58
Other Information
• TroubleShooting
286
• Anti-theft Kensington Lock
298
• License
300
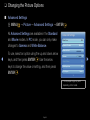
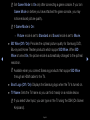
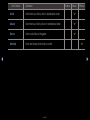
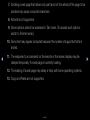
Menú Canal
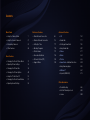
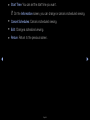
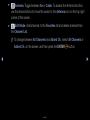
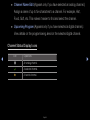
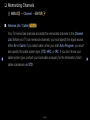
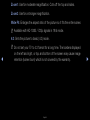
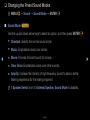
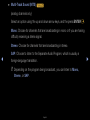
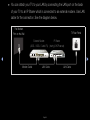
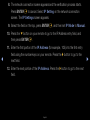
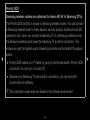
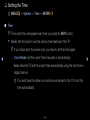
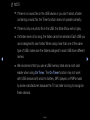
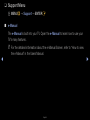
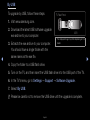
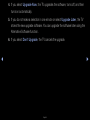
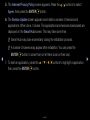
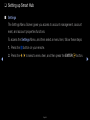
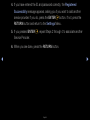
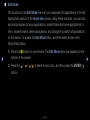
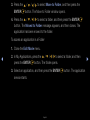
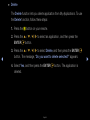
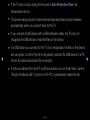
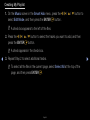
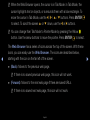
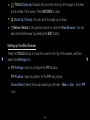
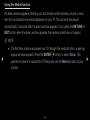
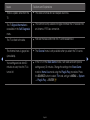
❑❑ Using the Channel Menu
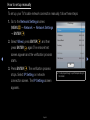
To access the Channel menu, press the
SMART HUB button on your remote. After
Smart Hub appears, use the arrow buttons on
your remote to select Channel, and then press
the ENTERE button.
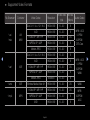
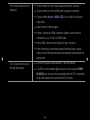
Search
Recommended
Favorites
Schedule Men...
Channel
Web Browser
Videos
Photos
Music
Source
a Login
b Sort by
{ Edit Mode
} Settings
●● The displayed image may differ depending on the
model.
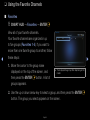
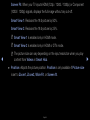
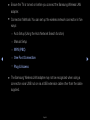
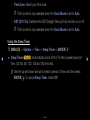
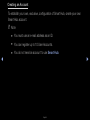
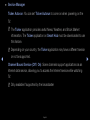
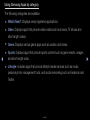
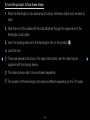
■■ Schedule Manager
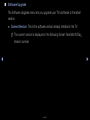
OO SMART HUB → Schedule Manager → ENTERE
Press the SMART HUB button on your remote, and then select Schedule Manager
to access the Timer Viewing function. Timer Viewing lets you display the channel
you want at the time of your choice.
English
▶
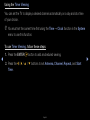
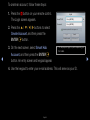
Using the Timer Viewing
You can set the TV to display a desired channel automatically on a day and at a time
of your choice.
NN You must set the current time first using the Time → Clock function in the System
menu to use this function.
To use Timer Viewing, follow these steps:
◀
1. Press the ENTERE button to add a scheduled viewing.
2. Press the l / r / u / d buttons to set Antenna, Channel, Repeat, and Start
Time.
English
▶
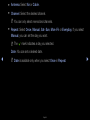
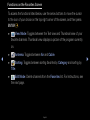
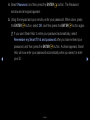
●● Antenna: Select Air or Cable.
●● Channel: Select the desired channel.
NN You can only select memorized channels.
●● Repeat: Select Once, Manual, Sat~Sun, Mon~Fri or Everyday. If you select
Manual, you can set the day you want.
NN The c mark indicates a day you selected.
Date: You can set a desired date.
◀
NN Date is available only when you select Once in Repeat.
English
▶
●● Start Time: You can set the start time you want.
NN On the Information screen, you can change or cancel a scheduled viewing.
●● Cancel Schedules: Cancel a scheduled viewing.
●● Edit: Change a scheduled viewing.
●● Return: Return to the previous screen.
◀
▶
English
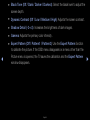
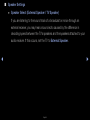
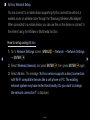
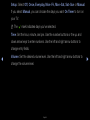
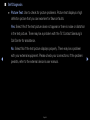
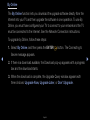
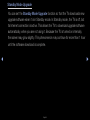
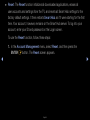
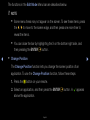
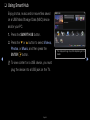
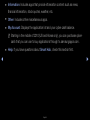
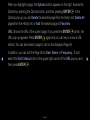
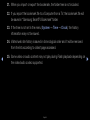
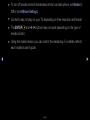
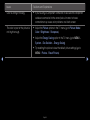
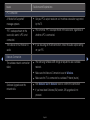
■■ Channel List
The Channel List contains the channels your
TV displays (Added Channels) when you press
the CH LIST button on your remote. On the
Channel List, you can view Added Channels,
channel information, Favorites, and manage
channels.
OO When you press the CH LIST button on
◀
the remote control, Channel List screen is
displayed immediately.
English
Channel List
Added Channels
6
Air
6-1
TV #6
7
Air
8
Air
9
Air
No Information
9-2
TV #10
9-3
TV #11
9
Air
10-1
TV #12
10-2
TV #13
10
Air
11
Air
Air
a Antenna { Program View L Ch.Mode E Watch k Page
●● The displayed image may differ depending on the
model.
▶
●● Added Channels: Show all added channels.
●● Favorites 1-5: Show all favorite channels, in up to five groups. Each group has
a separate screen.
NN If you want to view the list of favorite channels, press the CH LIST button,
and then press the r (CH Mode) button to display Favorites 1-5. Press the
l button to return to the Added Channels.
NN The TV displays Favorites only if you have added favorites using Add to
◀
Favorites.
▶
Using the colored and function buttons with the Channel List.
●● a Red (Antenna): Switches the mode and display between Air or Cable.
●● { Yellow (Program View / Channel View): For digital channels, switches the
display between Program View and Channel View. When you select a digital
channel in Channel View, press once to display a list of programs on that
channel. Press again to re-display the Channel List.
English
●● l / r (CH Mode): Toggles between the Favorites list (if you have added
favorites using Add to Favorites) and the Added Channels.
●● E (Watch): Press to watch the channel you selected.
●● k (Page): Scrolls the Channel List to the next or previous page.
Channel Status Display Icons
Icon
◀
Operations
a
An analog channel.
)
A reserved program.
▶
English
How to use Timer Viewing in Channel List (digital channels only)
You can use Timer Viewing in the Channel List to schedule a digital channel
program for viewing. The TV will turn on and display the digital channel program
when the program begins.
To schedule a digital program, follow these steps:
1. Press the CH LIST button, then select a desired digital channel.
2. Press the { (Program View) button.
◀
▶
English
3. Press the u or d buttons to select the desired program, and then press the
INFO button.
4. Press the l or r buttons to select Timer Viewing, and then press the
ENTERE button.
5. Press RETURN twice to exit.
NN If you want to cancel Timer Viewing, follow Steps 1 through 3, and then
select Cancel Schedules.
◀
▶
English
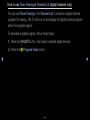
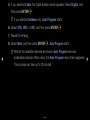
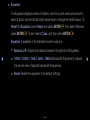
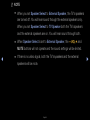
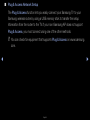
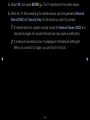
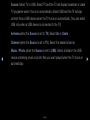
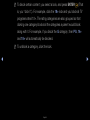
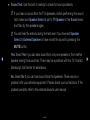
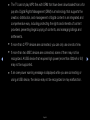
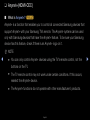
■■ Channel
OO SMART HUB → Channel → ENTERE
◀
Using the Channel function, you can add
channels, delete Added channels, set Favorite
channels, use the program guide for digital
broadcasts and change between the All
Channels and Added Ch. screen. You can
also change the antenna or channel settings by
selecting the icons in the top right corner of the
screen.
English
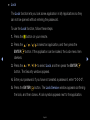
Channel
All Channels
6
Air
10
Air
6-1
TV #6
10-1
TV #13
7
Air
10-2
TV #14
8
Air
11
Air
9
Air
12
Air
9-1
TV #9
13
Air
9-2
TV #10
13-1
TV #15
9-3
TV #11
14
Air
9-4
TV #12
15
Air
Added Ch.
●● The displayed image may differ depending on the
model.
▶
●●
Antenna: Toggle between Air or Cable. To access the Antenna function,
use the arrow buttons to move the cursor to the Antenna icon on the top right
corner of the screen.
●●
Edit Mode: Add channels to the Favorites list and delete channels from
the Channel List.
NN To change between All Channels and Added Ch., select All Channels or
Added Ch. on the screen, and then press the ENTERE button.
◀
▶
English
●● Edit Mode: Setting channels you watch frequently as favorites.
1. Select the
Edit Mode icon on the upper right of your screen, and
then press the ENTERE button.
2. Press the arrow buttons to select a channel as a favorite, and then press
ENTERE. A check appears to the left of the channel.
NN You can select more than one channel.
NN Pressing ENTERE again deselects the channel.
◀
3. Select Edit Favorites at the bottom of your screen, and then press
ENTERE button. The Edit Favorites pop-up appears.
English
▶
4. Highlight a group on the Favorites list, and then press ENTERE.
NN The Edit Favorites screen has five groups (Favorites 1, Favorites 2,
etc.). You can add a favorite channel to any one of the groups. Select a
group using the up and down arrows on your remote.
5. Select OK, press ENTERE, and then press ENTERE again.
●● Using Edit Mode to Delete a Channel from the Channel
◀
1. Select the
Edit Mode icon on the upper right of your screen, and
then press the ENTERE button.
English
▶
2. Press the l / r / u / d buttons to select a channel, and then press
ENTERE. A c mark appears to the left of the channel.
NN You can select more than one channel.
NN Pressing ENTERE again deselects the channel.
3. Select Delete at the bottom of your screen, and then press ENTERE.
A pop-up appears asking if you want to delete the item.
◀
4. Select OK, press ENTERE, and then press ENTERE again. The
channel is deleted from the Channel.
English
▶
NN Using the TOOLS button with Channel
To use the TOOLS button functions, highlight a channel in the Added Channel
list or All Channels list, and then press the TOOLS button.
●● Add / Delete: Add a channel or delete a channel from the Added Channel
list. When you use the Channel button on your remote to change channels,
your TV only displays the channels on the Added Channel list.
To Add a channel using the TOOLS button in Channel, follow these steps:
◀
1. Use the arrow buttons to select All Channels, and then press ENTERE.
NN All Channels will be at the very top or bottom of the screen.
2. On the All Channels screen, select a greyed out channel.
3. Press the TOOLS button.
4. Select Add on the TOOLS menu, press ENTERE, and then press
ENTERE again.
English
▶
To Delete a channel using the TOOLS button in Channel, follow these steps:
1. Use the arrow buttons to select Added Channels, and then press
ENTERE.
NN Added Channels will be at the very top or bottom of the screen.
2. On the Added Channels screen, select a greyed out channel.
3. Press the TOOLS button.
◀
4. Select Delete on the TOOLS menu, press ENTERE, and then press
ENTERE again.
English
▶
NN NOTE
●● Your TV lists all available channels, both added and deleted, on the
All Channels menu.
●● A gray-colored channel indicates the channel has been deleted.
●● Add only appears if you have selected a deleted channel on the All
Channel list.
●● Delete only appears if you have selected an Added channel on the
◀
Added Ch. or All Channels list.
●● You can also delete a channel on the All Channels list. Added
channels are bright. Deleted channels are dim. To delete an Added
channel on the All Channels list, select a bright channel, press
the TOOLS button, select Delete, press ENTERE, then press
ENTERE again.
English
▶
●● Edit Favorites: Setting channels you watch frequently as favorites.
To set channels as favorites, follow these steps:
1. Highlight a channel in the Channel List or All Channels list, and then
press the TOOLS button.
2. Select Edit Favorites in the TOOLS menu, and then press the
ENTERE button.
◀
3. Highlight a group on the Edit Favorites screen (Favorite 1, Favorite 2,
etc.), and then press the ENTERE button.
NN The Edit Favorites screen has five groups. You can add a favorite
channel to any one of the groups. Select a group using the up and
down arrows on your remote.
4. Select OK, and then press the ENTERE button. The channel is made
a favorite and is assigned to the favorite group you selected.
NN The TV displays the “F” symbol next to the channel, indicating it is a favorite.
English
▶
●● Edit Favorites: Removing a channel from list of favorites using the TOOLS
buton.
To remove a channel from the list of favorites, follow these steps:
1. Highlight a favorite channel in the Channel List or All Channels list, and
then press the TOOLS button.
2. Select Edit Favorites in the TOOLS menu, and then press the
ENTERE button. The Edit Favorites screen appears.
◀
3. The group this favorite is assigned to has a green square in front of it.
Highlight that group on the Edit Favorites screen, press the ENTERE
button, and then press the ENTERE button again.
4. Select OK, press the ENTERE button, and then press the ENTERE
button again. The channel is removed from the list of favorites.
English
▶
●● Channel Name Edit (Appears only if you have selected an analog channel.):
Assign a name of up to five characters to a channel. For example, Hist,
Food, Golf, etc. This makes it easier to find and select the channel.
●● Upcoming Program (Appears only if you have selected a digital channel.):
View details on the program being aired on the selected digital channel.
Channel Status Display Icons
◀
Icon
Operations
a
An analog channel.
c
A selected channel.
F
A favorite channel.
▶
English
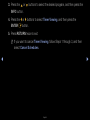
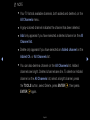
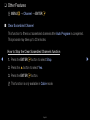
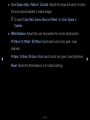
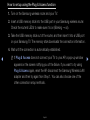
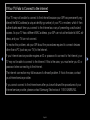
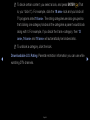
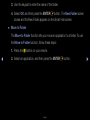
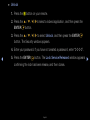
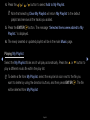
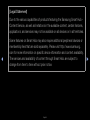
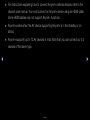
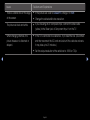
❑❑ Using the Favorite Channels
■■ Favorites
OO SMART HUB → Favorites → ENTERE
◀
View all of your favorite channels.
Your favorite channels are organized in up
to five groups (Favorites 1-5). If you want to
move from one favorite group to another, follow
these steps:
1. Move the cursor to the group name
displayed on the top of the screen, and
then press the ENTERE button. A list of
groups appears.
Favorites
Favorites 1
6
Air
10
Air
▶
Favorites 2
●● The displayed image may differ depending on the
model.
2. Use the up or down arrow key to select a group, and then press the ENTERE
button. The group you select appears on the screen.
English
Functions on the Favorites Screen
To access the functions listed below, use the arrow buttons to move the cursor
to the icon of your choice on the top right corner of the screen, and then press
ENTERE.
●●
◀
●●
View Mode: Toggles between the Text view and Thumbnail view of your
favorite channels. Thumbnail view displays a picture of the program currently
on.
Antenna: Toggles between Air and Cable.
●●
Sorting: Toggles between sorting favorites by Category and sorting by
Title.
●●
Edit Mode: Delete channels from the Favorites list. For instructions, see
the next page.
English
▶
To use View Mode, Antenna, or Sorting, select the appropriate icon as described
previous page, and then press ENTERE. Use the left or right arrow button to
make your selection, and then press ENTERE.
Using Edit Mode to Delete a Favorite
Edit Mode icon on the upper right of your screen, and then
1. Select the
press the ENTERE button.
◀
2. Press the l / r / u / d buttons to select a channel, and then press
ENTERE. A c mark appears to the left of the channel.
NN You can select more than one channel.
NN Press ENTERE again to deselect the channel.
3. Select Delete at the bottom of your screen, and then press ENTERE. A popup appears asking if you want to delete the item.
English
▶
4. Select OK, press ENTERE, and then press ENTERE again. The channel is
deleted from Favorites.
NN If you have assigned a channel to more than one favorite group (say
Favorites 1 and Favorites 2), you must repeat this process in both groups to
remove a channel entirely from your Favorites.
◀
▶
English
❑❑ Memorizing Channels
OO MENUm → Channel → ENTERE
■■ Antenna (Air / Cable) t
◀
Your TV memorizes channels and adds the memorized channels to the Channel
List. Before your TV can memorize channels, you must specify the signal source,
either Air or Cable. If you select cable, when your start Auto Program, you must
also specify the cable system type, STD, HRC, or IRC. If you don’t know your
cable system type, contact your local cable company for the information. Most
cable companies use STD.
English
▶
To select Air or Cable, follow these steps:
1. Push MENUm → Channel → ENTERE on your remote.
2. Select Antenna, and then press ENTERE.
3. Select the source of your TV signal, Air or Cable, and then press the RETURN
button.
◀
▶
English
■■ Auto Program
Scans for channels automatically and stores them in the TV’s memory.
To start Auto Program, follow these steps:
1. Push MENUm → Channel → ENTERE on your remote.
2. Select Auto Program, and then press ENTERE.
3. Select Air or Cable or both by highlighting and then pressing ENTERE.
NN If you selected Air or Cable or both on the Antenna screen, your choice will
◀
▶
already be selected.
4. Select Next, and then press ENTERE.
English
5. If you selected Cable, the Cable System screen appears. Select Digital, and
then press ENTERE.
NN If you selected Antenna only, Auto Program starts.
6. Select STD, HRC, or IRC, and then press ENTERE.
7. Repeat for Analog.
8. Select Next, and then press ENTERE. Auto Program starts.
NN After all the available channels are stored, Auto Program removes
◀
scrambled channels. When done, the Auto Program menu then reappears.
This process can take up to 30 minutes
English
▶
❑❑ Other Features
OO MENUm → Channel → ENTERE
■■ Clear Scrambled Channel
This function to filters out scrambled channels after Auto Program is completed.
This process may take up to 30 minutes.
How to Stop the Clear Scrambled Channels function
◀
1. Press the ENTERE button to select Stop.
2. Press the u button to select Yes.
3. Press the ENTERE button.
NN This function is only available in Cable mode.
English
▶
■■ Fine Tune
(analog channels only)
If the reception is clear, you do not have to fine tune the channel, as this is done
automatically during the search and store operation. If the signal is weak or
distorted, fine tune the channel manually. Scroll to the left or right until the image is
clear.
NN Settings are applied to the channel you’re currently watching.
◀
NN Fine tuned channels that have been saved are marked with an asterisk “*” on
the right-hand side of the channel number in the channel banner.
NN To reset the fine-tuning, select Reset.
English
▶
Basic Features
❑❑ Changing the Preset Picture Mode
OO MENUm → Picture → Picture Mode → ENTERE
■■ Picture Mode t
Picture modes apply preset adjustments to the picture. Select a mode using the
up and down arrow keys, and then press the ENTERE button.
NN In PC mode, you can only select Entertain and Standard.
◀
●● Dynamic: Suitable for a bright room.
●● Standard: Suitable for a normal environment.
●● Natural: Suitable for reducing eye strain.
●● Movie: Suitable for watching movies in a dark room.
●● Entertain (In PC mode only): Suitable for watching movies and games.
English
▶
❑❑ Adjusting Picture Settings
OO MENUm → Picture → ENTERE
■■ Backlight / Contrast / Brightness / Sharpness / Color / Tint (G/R)
Your television has several options for adjusting picture quality. Select an option
using the up and down arrow keys, and then press ENTERE. Use the arrow
keys to adjust the option value or select an option setting. When done, press
ENTERE.
◀
▶
English
NN When you make changes to Backlight, Contrast, Brightness, Sharpness,
Color or Tint (G/R), the OSD will be adjusted accordingly.
NN In PC mode, you can only make changes to Backlight, Contrast, Brightness,
and Sharpness.
NN You can adjust and store Settings for each external device connected to the TV.
NN Lowering picture brightness reduces power consumption.
◀
▶
English
❑❑ Changing the Picture Size
OO MENUm → Picture → Screen Adjustment → ENTERE
■■ Screen Adjustment
Screen Adjustment provides various picture size and aspect ratio options. Select
an option using the up and down arrow keys, and then press ENTERE. Use the
arrow keys to select an option in the sub-menu, and then press ENTERE.
◀
●● Picture Size: If you have a cable box or satellite receiver, it may have its own
set of screen sizes as well. However, we highly recommend you use your TV’s
16:9 mode most of the time.
NN If you have set Double (à, Œ) mode in PIP (Picture-in-Picture), you
cannot adjust the Picture Size.
16:9: Sets the picture to 16:9 wide mode.
English
▶
Zoom1: Use for moderate magnification. Cuts off the top and sides.
Zoom2: Use for a stronger magnification.
Wide Fit: Enlarges the aspect ratio of the picture so it fits the entire screen.
NN Available with HD 1080i / 720p signals in 16:9 mode.
4:3: Sets the picture to basic (4:3) mode.
NN Do not set your TV to 4:3 format for a long time. The borders displayed
◀
on the left and right, or top and bottom of the screen may cause image
retention (screen burn) which is not covered by the warranty.
English
▶
Screen Fit: When your TV inputs HDMI (720p / 1080i / 1080p) or Component
(1080i / 1080p) signals, displays the full image without any cut-off.
Smart View 1: Reduces the 16:9 picture by 50%.
Smart View 2: Reduces the 16:9 picture by 25%.
NN Smart View 1 is enabled only in HDMI mode.
NN Smart View 2 is enabled only in HDMI or DTV mode.
◀
NN The picture size can vary depending on the input resolution when you play
content from Videos in Smart Hub.
●● Position: Adjusts the picture position. Position is only available if Picture size
is set to Zoom1, Zoom2, Wide Fit, or Screen fit.
English
▶
NN To use the Position function after selecting Zoom1, Zoom2 or Wide Fit, follow
these steps:
●● When Double (à, Œ) mode has been set in PIP (Picture-in-Picture), the
Picture Size cannot be set.
1. Press the d button to select Position.
2. Press the ENTERE button.
3. Press the u or d button to move the picture up or down.
◀
4. Press the ENTERE button.
▶
5. Select Close by pressing the d and r buttons sequentially. To reset the
picture position, press Reset.
English
NN To use the Position function after selecting Screen Fit in HDMI (1080i/1080p)
or Component (1080i/1080p), follow these steps:
1. Press the d button to select Position.
2. Press the ENTERE button.
3. Press the u, d, l or r button to move the picture.
4. Press the ENTERE button.
5. Select Close by pressing the d and r buttons sequentially.
◀
NN If you want to reset the picture to its original position, select Reset in the
Position screen. The picture will be set to its default position.
English
▶
●● HD (High Definition): 16:9 - 1080i/1080p (1920x1080), 720p (1280x720)
●● You can adjust and store settings for each external device you have connected
to an input on the TV.
●● Picture Sizes available by Input Source:
◀
Input Source
Picture Size
ATV, AV, Component (480i, 480p)
16:9, Zoom1, Zoom2, 4:3
HDMI (720p, 1080i, 1080p)
Smart View 1
DTV(1080i), HDMI (720p, 1080i, 1080p)
Smart View 2
DTV(1080i), Component (1080i, 1080p),
HDMI (720p, 1080i, 1080p)
16:9, 4:3, Wide Fit, Screen Fit
PC
16:9, 4:3
English
▶
❑❑ Changing the Picture Options
■■ Advanced Settings
OO MENUm → Picture → Advanced Settings → ENTERE
All Advanced Settings are available in the Standard
and Movie modes. In PC mode, you can only make
changes to Gamma and White Balance.
◀
To use, select an option using the up and down arrow
keys, and then press ENTERE. Use the arrow
keys to change the value or setting, and then press
ENTERE.
Advanced Settings
Black Tone
Off
Dynamic Contrast
Medium
Shadow Detail
-2
Gamma
0
Expert Pattern
Off
RGB Only Mode
Off
Color Space
Native
●● The displayed image may differ
depending on the model.
English
▶
●● Black Tone (Off / Dark / Darker / Darkest): Select the black level to adjust the
screen depth.
●● Dynamic Contrast (Off / Low / Medium / High): Adjusts the screen contrast.
●● Shadow Detail (-2~+2): Increases the brightness of dark images.
●● Gamma: Adjusts the primary color intensity.
●● Expert Pattern (Off / Pattern1 / Pattern2): Use the Expert Pattern function
◀
to calibrate the picture. If the OSD menu disappears or a menu other than the
Picture menu is opened, the TV saves the calibration and the Expert Pattern
window disappears.
English
▶
Off: Turns the Expert Pattern function off.
Pattern1: This test screen demonstrates the effect of the display settings on
shades of grey and black.
Pattern2: This test screen demonstrates the effect of the display settings on
colors.
NN After selecting Pattern1 or Pattern2, you can adjust any of the advanced
settings for the desired effect.
◀
NN While the Expert Pattern is running, the TV does not output sound.
NN Only enabled in DTV, Component, and HDMI modes.
●● RGB Only Mode (Off / Red / Green / Blue): Displays the Red, Green and
Blue colors so you can make fine adjustments to hue and saturation.
English
▶
●● Color Space (Auto / Native / Custom): Adjusts the range and variety of colors
(the color space) available to create images.
NN To adjust Color, Red, Green, Blue and Reset, set Color Space to
Custom.
●● White Balance: Adjusts the color temperature for a more natural picture.
R-Offset / G-Offset / B-Offset: Adjusts each color’s (red, green, blue)
darkness.
◀
R-Gain / G-Gain / B-Gain: Adjusts each color’s (red, green, blue) brightness.
Reset: Resets the White Balance to it’s default settings.
English
▶
●● 10p White Balance (Off / On): Controls the white balance in 10 point intervals
by adjusting the red, green, and blue brightness.
NN Available for all inputs when you set the picture mode to Movie.
NN Some external devices may not support this function.
Interval: Select interval to adjust.
Red: Adjust the red level.
Green: Adjust the green level.
◀
▶
Blue: Adjust the blue level.
Reset: Resets the 10p White Balance to its default settings.
English
●● Flesh Tone: Emphasizes pink “Flesh Tone.”
●● Edge Enhancement (Off / On): Emphasizes object boundaries.
●● Motion Lighting (Off / On): Reduces power consumption by reducing screen
brightness when the picture on the screen is in motion.
NN 3D is not supported.
NN When you change the Contrast, the TV sets Motion Lightning to Off.
◀
▶
English
●● xvYCC (Off / On): Setting xvYCC on increases picture detail and enlarges the
color space when your are watching movies input from an external device (e.g.
BD/DVD player) connected to the TV’s HDMI or Component IN jacks.
NN Available only when you set the picture mode to Movie and the external
input to HDMI or Component.
NN Some external devices may not support this function.
●● LED Motion Plus (Off / On): Removes blur and judder from scenes with a lot
◀
of fast movement to provide a clearer picture.
English
▶
■■ Picture Options
OO MENUm → Picture → Picture Options → ENTERE
Select an option using the up and down arrow keys, and the press ENTERE.
Use the arrow keys to change the setting, and then press ENTERE.
NN In PC mode, you can only make changes to Color
Tone.
Color Tone Standard
●● Color Tone (Cool / Standard / Warm1 / Warm2)
◀
Picture Options
NN Warm1 or Warm2 will be deactivated when
the picture mode is Dynamic.
NN You can adjust and store settings for each
external device connected to an input on the
TV.
English
Digital Noise Filter
Auto
MPEG Noise Filter
Auto
HDMI Black Level
Normal
Film Mode
Off
Auto Motion Plus Standard
●● The displayed image may differ
depending on the model.
▶
●● Digital Noise Filter (Off / Low / Medium / High / Auto / Auto Visualization):
If the broadcast signal received by your TV is weak, you can activate the Digital
Noise Filter feature to reduce any static and ghosting that may appear on the
screen.
NN When the signal is weak, try all the options until the the TV displays the best
picture.
Auto Visualization: When changing analog channels, displays signal strength.
◀
NN Only available for analog channels.
NN When the bar is green, you are receiving the best possible signal.
●● MPEG Noise Filter (Off / Low / Medium / High / Auto): Reduces MPEG
noise to provide improved picture quality.
English
▶
●● HDMI Black Level (Normal / Low): Lets you adjust the screen depth by
selecting a black level.
NN Available only in HDMI mode.
●● Film Mode (Off / Auto1 / Auto2): Sets the TV so that it senses and then
processes film signals from all sources automatically and adjusts the picture
for optimum quality. The Cinema Smooth function is only active when the TV
inputs an HDMI 24Hz signal.
◀
NN Available in TV, AV, COMPONENT (480i / 1080i) and HDMI (480i / 1080i).
●● Auto Motion Plus (Off / Clear / Standard / Smooth / Custom / Demo):
Removes blur and judder from scenes with large amounts of rapid movement
to provide a clearer picture.
English
▶
NN The info screen on your TV displays the resolution and frequency of the
incoming video signal (60 Hz). This displayed frequency is not the frequency
of the picture the TV is displaying when you have Auto Motion Plus on.
NN If noise occurs on the screen, please set Auto Motion Plus to Off. If you
set Auto Motion Plus to Custom, you can control Blur Reduction and
Judder Reduction manually and use Reset to reset both to their default
settings.
NN If you set Auto Motion Plus to Demo, you can compare the difference
◀
between a picture with Auto Motion Plus on and Auto Motion Plus off.
English
▶
Blur Reduction: Adjusts the blur reduction level for signals input from all video
sources.
Judder Reduction: Adjusts the judder reduction level for signals input from a
video source through which you are playing a movie.
Reset: Reset the custom settings.
◀
▶
English
■■ Reset Picture (Yes / No)
Resets your current picture mode to its default settings.
◀
▶
English
❑❑ Using the TV with Your PC
Set the input source to PC.
■■ Auto Adjustment t
OO MENUm → Picture → Auto Adjustment → ENTERE
Automatically adjusts the picture’s frequency, position, and fine tune settings in the
PC mode.
◀
NN Available in PC mode only.
NN Not available if you connect your PC with an HDMI to DVI cable.
English
▶
■■ PC Screen Adjustment
OO MENUm → Picture → Screen Adjustment → PC Screen Adjustment →
ENTERE
NN Available in PC mode only.
●● Coarse / Fine: Removes or reduces picture noise. If the noise is not removed
◀
by Fine-tuning alone, use the Coarse function to adjust the frequency as best
as possible (Coarse) and Fine-tune again. After the noise has been reduced,
re-adjust the picture so that it is aligned with the center of screen.
●● Position: To adjust the PC’s screen position if it is not centered or does not fit
the TV screen. Press the u or d button to adjust the Vertical Position. Press
the l or r button to adjust the Horizontal Position.
●● Image Reset: Resets the image to the default settings.
English
▶
Using Your TV as a Computer (PC) Display
Entering the Video Settings (Based on Windows XP)
For your TV to work properly as a computer display, you must enter the correct video
settings.
NN Depending on your version of Windows and your video card, the procedure on
◀
your PC will probably differ slightly from the procedure presented here. However,
the same basic information will apply in most cases. (If not, contact your computer
manufacturer or Samsung Dealer.)
English
▶
1. Click “Control Panel” on the Windows start menu.
2. Click “Appearance and Themes” in the “Control Panel” window. A display dialogbox appear.
3. Click “Display”. Another display dialog box appears.
4. Click the “Settings” tab on the display dialog-box.
●● On the Settings tab, set the correct resolution (screen size). The optimal
resolution for this TV is 1920 x 1080.
◀
●● If a vertical-frequency option exists on your display settings dialog box, select
“60” or “60 Hz”. Otherwise, just click “OK” and exit the dialog box.
English
▶
Sound Menu
❑❑ Changing the Preset Sound Modes
OO MENUm → Sound → Sound Mode → ENTERE
■■ Sound Mode t
Use the up and down arrow keys to select an option, and then press ENTERE.
●● Standard: Selects the normal sound mode.
●● Music: Emphasizes music over voices.
◀
●● Movie: Provides the best sound for movies.
●● Clear Voice: Emphasizes voices over other sounds.
●● Amplify: Increase the intensity of high-frequency sound to allow a better
listening experience for the hearing impaired.
NN If Speaker Select is set to External Speaker, Sound Mode is disabled.
English
▶
❑❑ Adjusting Sound Settings
OO MENUm → Sound → Sound Effect → ENTERE
■■ Sound Effect
NN If Speaker Select is set to External Speaker, Sound Effect is disabled.
NN Available only when Sound Mode is set to Standard.
●● SRS TruSurround HD (Off / On) t
◀
This function provides a virtual 5.1 channel surround sound experience through
a pair of speakers using HRTF (Head Related Transfer Function) technology.
●● SRS TruDialog (Off / On)
This function allows you to increase the intensity of a voice over background
music or sound effects so that dialog can be heard more clearly.
English
▶
●● Equalizer
The Equalizer displays a series of sliders. Use the up and down arrow keys to
select a slider. Use the left and right arrow keys to change the slider’s value. To
Reset the Equalizer, select Reset and press ENTERE, then select Yes and
press ENTERE. To exit, select Close, and then press ENTERE.
Equalizer is available in the standard sound mode only.
●● Balance L/R: Adjusts the balance between the right and left speaker.
◀
●● 100Hz / 300Hz / 1kHz / 3kHz / 10kHz (Bandwidth Adjustment): Adjusts
the volume level of specific bandwidth frequencies.
●● Reset: Resets the equalizer to its default settings.
English
▶
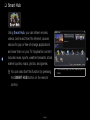
■■ 3D Audio
for LED 6400 Series and above
3D audio technology provides an immersive sound effect corresponding to
the immersive perspective effect of 3D video through audio depth control in
perspective.
NN Available only when your are watching 3D images.
◀
▶
English
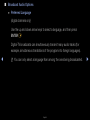
■■ Broadcast Audio Options
●● Preferred Language
(digital channels only)
Use the up and down arrow keys to select a language, and then press
ENTERE.
Digital-TV broadcasts can simultaneously transmit many audio tracks (for
example, simultaneous translations of the program into foreign languages).
◀
NN You can only select a language from among the ones being broadcasted.
English
▶
●● Multi-Track Sound (MTS) t
(analog channels only)
Select an option using the up and down arrow keys, and the press ENTERE.
Mono: Choose for channels that are broadcasting in mono or if you are having
difficulty receiving a stereo signal.
Stereo: Choose for channels that are broadcasting in stereo.
◀
SAP: Choose to listen to the Separate Audio Program, which is usually a
foreign-language translation.
NN Depending on the program being broadcast, you can listen to Mono,
Stereo, or SAP.
English
▶
■■ SPDIF Output
SPDIF (Sony Philips Digital Interface) provides digital audio output to speakers and
various digital devices such as A/V Receivers and Home Theaters which reduces
interference and distortion.
●● Audio Format: You can select the Digital Audio output (SPDIF) format. The
available Digital Audio output (SPDIF) format may differ depending on the input
source.
◀
●● Audio Delay: Lets you correct timing mismatches between the audio track and
the video when you are watching the TV and listening to digital audio output
from the TV through an external device such as an AV receiver. When you
select Audio Delay, a slider appears. User the left and right arrow buttons to
adjust the slider. Press ENTERE when done (0ms ~ 250ms).
English
▶
■■ Speaker Settings
●● Speaker Select (External Speaker / TV Speaker)
If you are listening to the sound track of a broadcast or movie through an
external receiver, you may hear a sound echo caused by the difference in
decoding speed between the TV’s speakers and the speakers attached to your
audio receiver. If this occurs, set the TV to External Speaker.
◀
▶
English
NN NOTE
●● When you set Speaker Select to External Speaker, the TV’s speakers
are turned off. You will hear sound through the external speakers only.
When you set Speaker Select to TV Speaker both the TV’s speakers
and the external speakers are on. You will hear sound through both.
●● When Speaker Select is set to External Speaker, the y and
MUTE buttons will not operate and the sound settings will be limited.
◀
●● If there is no video signal, both the TV’s speakers and the external
speakers will be mute.
English
▶
●● Auto Volume (Off / Normal / Night)
Normal equalizes the volume level on each channel, so that when you change
channels, the volume level is the same.
Night equalizes and decrease the volume level on each channel, so each
channel is quieter. Night is useful at night, when you may want to keep the
volume low.
NN To use the volume control of a connected source device, set Auto Volume
◀
to Off. A change to the volume control of the connected source device may
not be applied if Auto Volume is set to Normal or Night.
English
▶
■■ Sound Reset (OK / Cancel)
Reset all sound settings to the factory defaults. Select Reset, press ENTERE,
select OK in the pop-up, and then press ENTERE again.
◀
▶
English
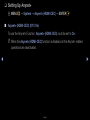
Preference Features
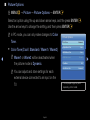
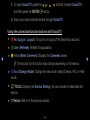
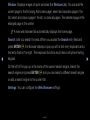
❑❑ Wired Network Connection
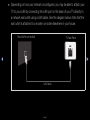
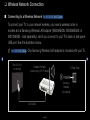
■■ Connecting to a Wired Network
There are three ways to attach your TV to your LAN using cable:
●● You can attach your TV to your LAN by connecting the LAN port on the back of
your TV to an external modem using a LAN cable. See the diagram below.
The Modem Port on the Wall
External Modem
(ADSL / VDSL / Cable TV)
◀
Modem Cable
TV Rear Panel
LAN Cable
English
▶
●● You can attach your TV to your LAN by connecting the LAN port on the back
of your TV to an IP Sharer which is connected to an external modem. Use LAN
cable for the connection. See the diagram below.
The Modem
Port on the Wall
TV Rear Panel
External Modem
IP Sharer
(ADSL / VDSL / Cable TV) (having DHCP server)
◀
▶
Modem Cable
LAN Cable
English
LAN Cable
●● Depending on how your network is configured, you may be able to attach your
TV to your LAN by connecting the LAN port on the back of your TV directly to
a network wall outlet using a LAN cable. See the diagram below. Note that the
wall outlet is attached to a modem or router elsewhere in your house.
The LAN Port on the Wall
TV Rear Panel
◀
▶
LAN Cable
English
●● If you have a Dynamic Network, you should use an ADSL modem or router
that supports the Dynamic Host Configuration Protocol (DHCP). Modems and
routers that support DHCP automatically provide the IP address, subnet mask,
gateway, and DNS values your TV needs to access the Internet so you do not
have to enter them manually. Most home networks are Dynamic Networks.
◀
Some networks require a Static IP address. If your network requires a Static
IP address, you must enter the IP address, subnet mask, gateway, and DNS
values manually on your TV’s Cable Setup Screen when you set up the network
connection. To get the IP address, subnet mask, gateway, and DNS values,
contact your Internet Service Provider (ISP). If you have a Windows computer,
you can also get these values through your computer.
NN You can use ADSL modems that support DHCP if your network requires a
Static IP address. ADSL modems that support DHCP also let you use Static
IP addresses.
English
▶
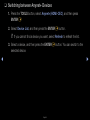
■■ Network Settings
OO MENUm → Network → Network Settings → ENTERE
Set the network connection to use various Internet services such as Smart Hub,
AllShare™ and perform software upgrades.
■■ Network Status
OO MENUm → Network → Network Status → ENTERE
◀
You can check the current network and Internet status.
■■ AllShare Settings
OO MENUm → Network → AllShare Settings → ENTERE
Selects whether to use the call arrivals text message contents and schedules set
on the network. For details on set up options, refer to the “AllShare™” instructions.
English
▶
■■ Automatic Network Setup
Use the Automatic Network Settings when connecting your TV to a network
that supports DHCP. To set up your TV’s cable network connection automatically,
follow these steps:
How to set up automatically
◀
1. Go to the Network Settings screen.
(MENUm → Network → Network
Settings → ENTERE)
2. Select Wired, press ENTERE, and then
press ENTERE again.
3. The network test screen appears and
verifies the network connection. When the
connection has been verified, the “Internet
connection successful.” message appears.
English
Network Settings
Select a network connection type.
Wired
Wireless (General)
WPS(PBC)
One Foot Connection
Previous
Connect to the network using
LAN cable. Please make sure
Next
that the LAN cable is connected.
Cancel
●● The displayed image may differ depending on the
model.
▶
NN If the connection process fails, check the
LAN port connection.
Network Setting
6/6
Wired network and Internet connection completed.
NN If the automatic process cannot find the
network connection values or if you want to
set the connection manually, go to the next
secton, Manual Network Setup.
◀
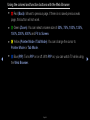
SEC_LinkShare
MAC Address
IP Address
Subnet Mask
Gateway
DNS Server
00:12:fb:2b:56:4d
192.168.11.4
255.255.255.0
192.168.11.1
192.168.11.1
IP Setting
Internet is connected successfully.
If you have a problem with using Internet Service, contact your Internet service
OK
provider.
●● The displayed image may differ depending on the
model.
▶
English
■■ Manual Network Setup
Use the Manual Network Setup when connecting your TV to a network that
requires a Static IP address.
Getting the Network Connection Values
To view the Network connection values on most Windows computers, follow these
steps:
1. Right click the Network icon on the bottom right of the screen.
◀
2. In the pop-up menu that appears, click Status.
3. On the dialog that appears, click the Support tab.
4. On the Support Tab, click the Details button. The Network connection values
are displayed.
English
▶
How to set up manually
To set up your TV’s cable network connection manually, follow these steps:
1. Go to the Network Settings screen.
(MENUm → Network → Network Settings
→ ENTERE)
◀
2. Select Wired, press ENTERE, and then
press ENTERE again.The network test
screen appears and the verification process
starts.
3. Press ENTERE. The verification process
stops. Select IP Setting on network
connection screen. The IP Settings screen
appears.
English
IP Settings
IP Mode
Manual
IP Address
0.0.0.0
Subnet Mask
0.0.0.0
Gateway
0.0.0.0
DNS Mode
Manual
DNS Server
0.0.0.0
OK
● The displayed image may differ depending on
the model.
▶
4. Select the field at the top, press ENTERE, and then set IP Mode to Manual.
5. Press the d button on your remote to go to the IP Address entry field, and
then press ENTERE.
6. Enter the first portion of the IP Address (for example, 105) into the first entry
field using the number keys on your remote. Press the right arrow button to go
to the next field.
◀
7. Enter the next portion of the IP Address. Press the right arrow button to go to
the next field.
8. Repeat the entry process for each field in the IP Address.
NN If you make a mistake when entering a number, re-enter the number to
correct it. You can also press the up or down arrow button to change the
number one unit at a time.
English
▶
9. When done entering the IP Address, press ENTERE.
10. Press the down arrow key to go to the Subnet Mask fields, and then press
ENTERE.
11. Repeat the same entry process for Subnet Mask, Gateway, and DNS Server.
◀
12. When done, select OK at the bottom of the page, and then press ENTERE.
The network test screen appears and the verification process starts. When the
connection has been verified, the “Internet connection successful.” message
appears.
English
▶
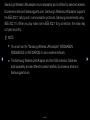
❑❑ Wireless Network Connection
■■ Connecting to a Wireless Network
For LED 6000~6450 Series
To connect your TV to your network wireless, you need a wireless router or
modem and a Samsung Wireless LAN adapter (WIS09ABGN, WIS09ABGN2 or
WIS10ABGN - sold separately), which you connect to your TV’s back or side panel
USB port. See the illustration below.
NN For LED 6050 Series : One Samsung Wireless LAN adapter is included with your TV.
◀
The LAN Port
on the Wall
▶
Wireless IP sharer
(router having DHCP server)
TV Rear Panel
Samsung
Wireless
LAN adapter
LAN Cable
English
Samsung’s Wireless LAN adapter is sold separately and is offered by selected retailers,
Ecommerce sites and Samsungparts.com. Samsung’s Wireless LAN adapter supports
the IEEE 802.11a/b/g and n communication protocols. Samsung recommends using
IEEE 802.11n. When you play video over a IEEE 802.11b/g connection, the video may
not play smoothly.
NN NOTE
●● You must use the “Samsung Wireless LAN adapter” (WIS09ABGN,
WIS09ABGN2 or WIS10ABGN) to use a wireless network.
◀
●● The Samsung Wireless LAN Adapter and the USB extension Cable are
sold separately and are offered by select retailers, Ecommerce sites and
Samsungparts.com.
English
▶
●● To use a wireless network, your TV must be connected to a wireless IP sharer
(either a router or a modem). If the wireless IP sharer supports DHCP, your TV
can use a DHCP or static IP address to connect to the wireless network.
●● Select a channel for the wireless IP sharer that is not currently being used. If the
channel set for the wireless IP sharer is currently being used by another device
nearby, this will result in interference and communication failure.
●● Your TV supports only the following wireless network security protocols:
◀
–– Authentication Mode : WEP, WPAPSK, WPA2PSK
–– Encryption Type : WEP, TKIP, AES.
English
▶
●● If you select the Pure High-throughput (Greenfield) 802.11n mode and the
Encryption type is set to WEP, TKIP or TKIP AES (WPS2Mixed) on your AP or
wireless router, Samsung TVs will not support a connection in compliance with
new Wi-Fi certification specifications.
●● If your wireless router supports WPS (Wi-Fi Protected Setup), you can
connect to the network via PBC (Push Button Configuration) or PIN (Personal
Identification Number). WPS will automatically configure the SSID and WPA key
in either mode.
◀
●● If your router, modem, or device is not certified, it may not connect to the TV
via the “Samsung Wireless LAN adapter.”
English
▶
●● Ensure the TV is turned on before you connect the Samsung Wireless LAN
adapter.
●● Connection Methods: You can set up the wireless network connection in five
ways:
–– Auto Setup (Using the Auto Network Search function)
–– Manual Setup
–– WPS (PBC)
◀
–– One Foot Connection
▶
–– Plug & Access
●● The Samsung Wireless LAN adapter may not be recognized when using a
connection via a USB hub or via a USB extension cable other than the cable
supplied.
English
Notice
The picture may appear corrupted or have static for some channels when the TV
is connected to the Samsung Wireless LAN adapter. If this occurs, establish a
connection using one of the following methods or connect the Samsung Wireless LAN
adapter using a USB cable in a place that is not affected by radio interference.
●● Method 1: Connecting the Samsung Wireless LAN adapter using the USB right
angle adapter.
◀
for LED TV
To connect the Samsung Wireless LAN adapter using the USB right angle adapter,
follow these steps:
1. Connect the USB right angle adapter to
the Samsung Wireless LAN adapter.
2. Connect the other end of the right angle
adapter to the USB 1 (HDD) port.
●● The design of the right angle adapter and the
location of the USB port may differ depending on
the model.
English
▶
●● Method 2: Connecting the Samsung Wireless LAN adapter via an extension cable.
for LED and PDP TV
To connect the Samsung Wireless LAN adapter using the extension cable, follow
these steps:
1. Connect the extension cable to the USB 1 (HDD) port.
2. Connect the extension cable and Samsung Wireless LAN adapter.
◀
3. Attach the Samsung Wireless LAN adapter to the back of the TV near the top,
using double-sided adhesive tape.
English
▶
❑❑ Connecting to a Wireless Network
for LED 6500 Series and above
You can connect your TV to your LAN through a standard wireless router or
modem.
The LAN Port on the Wall
Wireless IP sharer
(router having DHCP server)
◀
▶
LAN Cable
English
This TV supports the IEEE 802.11a/b/g and n communication protocols. Samsung
recommends using IEEE 802.11n. When you play video over a IEEE 802.11b/g
connection, the video may not play smoothly.
NN NOTE
●● To use a wireless network, your TV must be connected to a wireless IP sharer
(either a router or a modem). If the wireless IP sharer supports DHCP, your TV
can use a DHCP or static IP address to connect to the wireless network.
◀
●● Select a channel for the wireless IP sharer that is not currently being used. If the
channel set for the wireless IP sharer is currently being used by another device
nearby, this will result in interference and communication failure.
English
▶
●● Your TV supports only the following wireless network security protocols:
–– Authentication Mode : WEP, WPAPSK, WPA2PSK
–– Encryption Type : WEP, TKIP, AES
●● If you select the Pure High-throughput (Greenfield) 802.11n mode and the
Encryption type is set to WEP, TKIP or TKIPAES (WPS2Mixed) on your AP or
wireless router, Samsung TVs will not support a connection in compliance with
new Wi-Fi certification specifications.
◀
●● If your AP supports WPS (Wi-Fi Protected Setup), you can connect to the
network via PBC (Push Button Configuration) or PIN (Personal Identification
Number). WPS will automatically configure the SSID and WPA key in either
mode.
English
▶
●● Connection Methods: You can setup the wireless network connection in five
ways:
–– Auto Setup (Using the Auto Network Search function)
–– Manual Setup
–– WPS (PBC)
–– One Foot Connection
–– Plug & Access
◀
▶
English
■■ Automatic Network Setup
◀
Most wireless networks have an optional security system that requires devices that
access the network to transmit an encrypted security code called an Access or
Security Key. The Security Key is based on a Pass Phrase, typically a word or a
series of letters and numbers of a specified length you were asked to enter when
you set up security for your wireless network. If you use this method of setting
up the network connection, and have a Security Key for your wireless network,
you will have to enter the Pass Phrase during the the automatic or manual setup
process.
English
▶
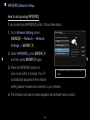
How to set up automatically
1. Go to the Network Settings screen.
(MENUm → Network → Network
Settings → ENTERE.
2. Select Wireless (General), press
ENTERE, and then press ENTERE
again.
◀
3. The Network function searches for available
wireless networks. When done, it displays a
list of the available networks.
Network Settings
2/6
Select a network connection type.
Wired
Wireless(General)
WPS(PBC)
One Foot Connection
Previous
Set up wireless network by
selecting your Access Point. You
Next
may need to enter security key
depending on the setting of the
Access Point.
Cancel
●● The displayed image may differ depending on the
model.
4. In the list of networks, press the u or d button to select a network, and then
press the ENTERE button twice.
NN If the wireless router is set to Hidden (Invisible), you have to select Add
Network and enter the correct Network Name (SSID) and Security key to
establish the connection.
English
▶
5. If the Security Key screen appears, go to
step 6. If you select a wireless router that
does not have security, go to step 8.
6. If the Enter wireless router has security,
enter the Security key (Security key or
PIN).
NN When you enter the Security key
◀
Network Setting
4/6
Enter security key
0 entered
a
b
c
d
e
f
1
2
3
g
h
i
j
k
l
4
5
6
m
n
o
p
q
r
7
8
9
s
t
u
v
w
x
y
z
0
a/A
Delete
Previous
Next
Cancel
Space
●● The displayed image may differ depending on the
model.
(Security key or PIN), use u / d / l / r
buttons on your remote to select number/characters. Press the ENTERE
button to enter the characters.
NN You can also enter numbers by pressing the number buttons on your
remote.
7. When done, use the right arrow button to move the cursor to NEXT, and then
press ENTERE.
English
▶
8. The network connection screen appears and the verification process starts.
When the connection has been verified, the “Internet connection successful.”
message appears.
NN If the network does not accept the Security key (Security key or PIN),
select Retry or select IP Settings to enter the settings manually.
NN If you want to set up the connection manually, select IP Settings. Then, go
to the next section, “How to set up manually”.
◀
▶
English
■■ Manual Network Setup
Use the Manual Network Setup when connecting your TV to a network that
requires a Static IP address or if the automatic connection process has failed.
Getting the Network Connection Values
To view the Network connection values on most Windows computers, follow these
steps:
1. Right click the Network icon on the bottom right of the screen.
◀
2. In the pop-up menu that appears, click Status.
3. On the dialog that appears, click the Support tab.
4. On the Support Tab, click the Details button. The Network connection values
are displayed.
English
▶
How to set up manually
To set up your TV’s cable network connection manually, follow these steps:
1. Go to the Network Settings screen.
(MENUm → Network → Network Settings
→ ENTERE)
2. Select Wireless (General), press the
ENTERE, then press ENTERE again.
◀
3. The Network function searches for available
wireless networks. When done, it displays a
list of the available networks.
English
IP Settings
IP Mode
Manual
IP Address
0.0.0.0
Subnet Mask
0.0.0.0
Gateway
0.0.0.0
DNS Mode
Manual
DNS Server
0.0.0.0
OK
● The displayed image may differ depending on
the model.
▶
4. In the list of networks, press the u or d button to select a network, and then
press the ENTERE button twice.
NN If the Access Point (AP) is set to Hidden (Invisible), you have to select Add
Network and enter the correct network Name (SSID) and Security key to
establish the connection.
5. If the Enter Security key screen appears, go to step 6. If you selected an AP
that does not have security, go to step 8.
◀
▶
English
6. Enter the Security key (Security key or PIN).
NN When you enter the Security key (Security key or PIN), use u / d / l / r
buttons on your remote to select numbers/characters. Press ENTERE to
enter the characters.
NN You can also enter numbers by pressing the number buttons on your
remote.
NN You should be able to find the Pass Phrase on one of the set up screens
◀
you used to set up your router or modem.
7. When done, use the r button to move the cursor to NEXT, and then press the
ENTERE button.
English
▶
8. The network connection screen appears and the verification process starts.
Press ENTERE to cancel. Select IP Setting on the network connection
screen. The IP Settings screen appears.
9. Select the field on the top, press ENTERE, and then set IP Mode to Manual.
10. Press the d button on your remote to go to the IP Address entry field, and
then press ENTERE.
◀
11. Enter the first portion of the IP Address (for example, 105) into the first entry
field using the number keys on your remote. Press the r button to go to the
next field.
12. Enter the next portion of the IP Address. Press the r button to go to the next
field.
English
▶
13. Repeat the entry process for each field in the IP Address.
NN If you make a mistake when entering a number, re-enter the number to
correct it. You can also press the u or d button to change the number one
unit at a time.
14. When done entering the IP Address, press ENTERE.
15. Press the d button to go to the Subnet Mask fields, and then press
ENTERE.
◀
16. Repeat the same entry process for Subnet Mask, Gateway, and DNS Server.
17. When done, select OK at the bottom of the page, and then press ENTERE.
The network connection screen appears and the verification process tarts.
When the connection has been verified, the “Internet connection successful.”
message appears.
English
▶
■■ WPS(PBC) Network Setup
How to set up using WPS(PBC)
If your router has a WPS(PBC) button, follow these steps:
1. Go to Network Setting screen.
(MENUm → Network → Network
Settings → ENTERE).
◀
2. Select WPS(PBC), press ENTERE,
and then press ENTERE again.
Network Settings
2/6
Select a network connection type.
Wired
Wireless (General)
WPS(PBC)
One Foot Connection
Previous
Connect to the Access Point
easily by pressing the WPS(PBC)
Next
button. Choose this if your Access
Point supports Push Button
Cancel
Configuration(PBC)
3. Press the WPS(PBC) button on
●● The displayed image may differ depending on the
model.
your router within 2 minutes. Your TV
automatically acquires all the network
setting values it needs and connects to your network.
4. The network connection screen appears, and network setup is done.
English
▶
■■ One Foot Connection Network Setup
The One Foot Connection function lets you connect your Samsung TV
automatically to a Samsung wireless router. If your wireless router does not support
One Foot Connection, you must connect using one of the other methods.
NN You can check for equipment that supports One Foot Connection on www.
samsung.com.
◀
▶
English
How to set up using One Foot Connection
1. Turn on the Samsung wireless router and the TV.
2. Go to Network Settings screen.
Network Settings
(MENUm → Network → Network Settings
→ ENTERE).
3. Select One Foot Connection, and press
ENTERE, then press ENTERE again.
◀
2/6
Select a network connection type.
Wired
Wireless(General)
WPS(PBC)
One Foot Connection
Previous
Connect to the wireless network
Next
automatically if your access point
supports One Foot Connection.
Cancel
Select this connection type after
placing the Access Point within 10
inches (25cm) of your TV.
●● The displayed image may differ depending on the
model.
English
▶
4. Place the wireless router in parallel with the Samsung Wireless LAN adapter or
your TV set (if you do not need to use the Adapter), and no farther away than
25cm (about 9 3/4 inches).
NN If One Foot Connection does not connect your TV to your Router, a pop-up
window appears on the screen notifying you of the failure. If you want to try
using One Foot Connection again, reset the wireless router, disconnect the
Samsung Wireless LAN adapter and then try again from Step 1. You can also
choose one of the other connection setup methods.
◀ 5. The network connection screen appears, and network setup is done.
6. Place the wireless router in a desired location.
NN If the wireless router’s settings change or you install a new wireless router, you
must perform the One Foot Connection procedure again, beginning from Step
1.
English
▶
■■ Plug & Access Network Setup
The Plug & Access function lets you easily connect your Samsung TV to your
Samsung wireless router by using a USB memory stick to transfer the setup
information from the router to the TV. If your non-Samsung AP does not support
Plug & Access, you must connect using one of the other methods.
NN You can check for equipment that supports Plug & Access on www.samsung.
com.
◀
▶
English
How to set up using the Plug & Access function
1. Turn on the Samsung wireless router and your TV.
2. Insert a USB memory stick into the USB port in your Samsung wireless router.
Check the router’s LED’s to make sure it is on (Blinking → on).
3. Take the USB memory stick out of the router, and then insert it into a USB port
on your Samsung TV. The memory stick downloads the connection information.
4. Wait until the connection is automatically established.
◀
NN If Plug & Access does not connect your TV to your AP, a pop-up window
appears on the screen notifying you of the failure. If you want to try using
Plug & Access again, reset the AP, disconnect the Samsung Wireless LAN
adapter and then try again from Step 1. You can also choose one of the
other connection setup methods.
English
▶
5. The network connection screen appears, and the network setup is done.
6. Place the wireless router in a desired location.
NN If the wireless router’s settings change or you install a new wireless router,
you must perform the Plug & Access procedure again, beginning from Step
1.
◀
▶
English
Priority QOS
◀
Samsung wireless routers are optimized to stream HD AV to Samsung DTVs.
This Priority QOS function is unique to Samsung wireless routers. You can connect
a Samsung wireless router to many devices, such as laptops, mobile phones, BD
players etc. But, when you connect a Samsung TV to a Samsung wireless router,
the Samsung wireless router gives the Samsung TV a priority connection. This
ensures you get the highest quality streaming contents and the fastest throughput
speed.
●● Priority QOS makes your TV faster by giving it priority bandwidth. (Priority QOS
is optional. You can turn it on and off.)
●● Because your Samsung TV has a priority connection, you can enjoy HD
content without buffering.
NN The connection speed may vary based on the network environment.
English
▶
■■ Ad hoc Network Setup
You can connect to a mobile device supporting Ad-hoc connections without a
wireless router or wireless router through the “Samsung Wireless LAN adapter”.
When connected to a mobile device, you can use files on the device or connect to
the Internet using the AllShare or Multimedia function.
How to set up using Ad hoc
◀
1. Go to Network Settings screen. (MENUm → Network → Network Settings
→ ENTERE).
2. Select Wireless (General), and press ENTERE, then press ENTERE again.
3. Select Ad hoc. The message “Ad hoc service supports a direct connection
with Wi-Fi compatible devices like a cell phone or PC. The existing
network system may have limited functionality. Do you want to change
the network connection?” is displayed.
English
▶
4. Select OK, and press ENTERE. The TV searches for the mobile device.
5. When the TV finish searching for mobile devices, input the generated Network
Name (SSID) and Security Key into the device you want to connect.
NN If network does not operate normally, check the Network Name (SSID) and
Security key again. An incorrect Security key may cause a malfunction.
NN If a device is connected once, it is displayed in the Network Setting list.
When you connect to it again, you can find it in the List.
◀
▶
English
If Your TV Fails to Connect to the Internet
Your TV may not be able to connect to the Internet because your ISP has permanently registered the MAC address (a unique identifying number) of your PC or modem, which it then
authenticates each time you connect to the Internet as a way of preventing unauthorized
access. As your TV has a different MAC address, your ISP can not authenticate its MAC address, and your TV can not connect.
To resolve this problem, ask your ISP about the procedures required to connect devices
other than a PC (such as your TV) to the Internet.
◀
If your Internet service provider requires an ID or password to connect to the Internet, your
TV may not be able to connect to the Internet. If this is the case, you must enter your ID or
password when connecting to the Internet.
The internet connection may fail because of a firewall problem. If this is the case, contact
your Internet service provider.
If you cannot connect to the Internet even after you have followed the procedures of your
Internet service provider, please contact Samsung Electronics at 1-800-SAMSUNG.
English
▶
❑❑ Setting the Time
OO MENUm → System → Time → ENTERE
■■ Time
OO The current time will appear every time you press the INFO button.
●● Clock: Set the clock to use the various timer features of the TV.
NN If you disconnect the power cord, you have to set the clock again.
◀
–– Clock Mode: Set the current time manually or automatically.
Auto: Have the TV set the current time automatically using the time from a
digital channel.
NN You must have the cable or an antenna connected to the TV to set the
time automatically.
English
▶
Manual: Set the current time manually.
NN Depending on the broadcast station and signal, the auto time set up
may not be correct. In this case, set the time manually.
–– Clock Set: Set the Date and Time.
◀
Select Clock Set. Select Date or Time, and then press ENTERE. Use the
number buttons to enter numbers or press the up and down arrow buttons.
Use the left and right arrow buttons to move from one entry field to the next.
Press ENTERE when done. To exit Clock Set, select Close, and then
press ENTERE.
NN Available only when Clock Mode is set to Manual.
NN You can set the Date and Time directly by pressing the number buttons
on the remote control.
English
▶
–– Time Zone: Select your time zone.
NN This function is only available when the Clock Mode is set to Auto.
–– DST (Off / On): Switches the DST (Daylight Saving Time) function on or off.
NN This function is only available when the Clock Mode is set to Auto.
Using the Sleep Timer
OO MENUm → System → Time → Sleep Timer → ENTERE
◀
●● Sleep Timer t: Automatically shuts off the TV after a preset period of
time. (30, 60, 90, 120, 150 and 180 minutes).
NN Use the up and down arrows to select a period of time, and then press
ENTERE. To cancel Sleep Timer, select Off.
English
▶
Setting the On / Off Timer
O MENUm → System → Time → ENTERE
Set On Timer so that your TV turns on
automatically at a time and on a day of your
choosing.
● On Timer: You can set up three separate On
◀
Timer configurations. (On Timer 1, On Timer
2, On Timer 3)
N You must set the clock before you can
use On Timer.
On Timer 1
Setup
Off
Sun
Mon
Tur
Wed
Time
The
Fri
Sat
12:00 am
Volume
20
Source
TV
Antenna
Cable
Channel
3
Close
● The displayed image may differ depending on
the model.
English
▶
Setup: Select Off, Once, Everyday, Mon~Fri, Mon~Sat, Sat~Sun or Manual.
If you select Manual, you can choose the days you want On Timer to turn on
your TV.
NN The c mark indicates days you’ve selected.
Time: Set the hour, minute, am/pm. Use the number buttons or the up and
down arrow keys to enter numbers. Use the left and right arrow buttons to
change entry fields.
◀
Volume: Set the desired volume level. Use the left and right arrow buttons to
change the volume level.
English
▶
Source: Select TV or USB. Select TV and the TV will display broadcast or cable
TV programs when it turns on automatically. Select USB and the TV will play
content from a USB device when the TV turns on automatically. (You can select
USB only when a USB device is connected to the TV)
Antenna (when the Source is set to TV): Select Air or Cable.
Channel (when the Source is set to TV): Select the desired channel.
◀
Music / Photo (when the Source is set to USB): Select a folder in the USB
device containing music or photo files you want played when the TV turns on
automatically.
English
▶
NN NOTE
●● If there is no music file on the USB device or you don’t select a folder
containing a music file, the Timer function does not operate correctly.
●● If there is only one photo file in the USB, the Slide Show will not play.
●● If a folder name is too long, the folder cannot be selected. Each USB you
◀
use is assigned its own folder. When using more than one of the same
type of USB, make sure the folders assigned to each USB have different
names.
●● We recommend that you use a USB memory stick and a multi card
reader when using On Timer. The On Timer function may not work
with USB devices with a built-in battery, MP3 players, or PMPs made
by some manufacturers because the TV can take too long to recognize
these devices.
English
▶
● Off Timer 1 / Off Timer 2 / Off Timer 3:
You can set up three separate Off Timer
configurations. (Off Timer 1, Off Timer 2, Off
Timer 3)
Off Timer 1
Setup
Off
Sun
Sun
Tur
Wed
Time
Thu
Fri
Sat
12:00 am
N You must set the clock before you can
use Off Timer.
◀
Close
Setup: Select Off, Once, Everyday,
Mon~Fri, Mon~Sat, Sat~Sun or Manual. If
you select Manual, you can choose the days
you want Off Timer to turn off your TV.
● The displayed image may differ depending on
the model.
N The c mark indicates days you’ve selected.
Time: Set the hour, minute, and am/pm. Use the number buttons or the up
and down arrow keys to enter numbers. Use the left and right arrow buttons to
change entry fields.
English
▶
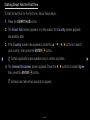
❑❑ Blocking Programs
OO MENUm → System → Security → ENTERE
■■ Security
When you access the Security functions for the first time, the PIN input screen
appears. Enter a 4 digit PIN you will remember. The PIN screen closes and the
Securty Menu appears. Every time you access the Security functions, the PIN
screen will appear and you must enter that PIN.
◀
●● Program Rating Lock (Off / On): When turned on, the Program Rating Lock
feature can automatically block programs that you deem inappropriate for your
children. You must enter a PIN (personal identification number) before you can
set or change any of the Program Rating Lock restrictions.
NN Program Rating Lock is not available in HDMI, Component or PC mode.
NN The default PIN number for a new TV set is “0-0-0-0”.
English
▶
TV Rating: You can block TV programs based on their ratings. This function
allows you to control what your children can watch. TV Rating displays a grid
with locks. The following categories are on the left side:
–– TV-Y: Young children / TV-Y7: Children 7 and over / TV-G: General
audience / TV-PG: Parental guidance / TV-14: Viewers 14 and over / TVMA: Mature audience
◀
▶
English
The following categories are on top:
–– ALL: Lock all TV ratings. / FV: Fantasy violence / V: Violence / S: Sexual
situation / L: Adult Language / D: Sexually Suggestive Dialog
NN To block certain content, you select a lock, and press ENTERE (That
◀
is, you “click it”.). For example, click the lock at the intersection of V
and TV-MA, and you block all programs that are rated violent and
for mature adults. The locks are also assigned to related groups. For
example, if you click TV-Y under All, then TV-Y7 will also automatically
be blocked. Similarly, if you click TV-G under ALL, then all the categories
in the young adult group will be blocked (TV-G, TV-PG, TV-14 and TVMA). The sub-ratings (D, L, S, V) work similarly. So, if you block the L
sub-rating in TVPG, then the L sub-ratings in TV-14 and TV-MA will
automatically be blocked.
English
▶
NN To unblock a category, click the lock. To unblock all the categories in a
row, click the lock under ALL.
NN To watch a blocked program, you must enter the Security code when
requested.
◀
Movie Rating (MPAA): You can block movies based on their MPAA rating.
The Motion Picture Association of America (MPAA) has implemented a rating
system that provides parents or guardians with advanced information on which
films are appropriate for children.
English
▶
Movie Rating displays a column with locks and the following ratings
categories:
–– G: General audience (no restrictions). / PG: Parental guidance suggested.
/ PG-13: Parents strongly cautioned. / R: Restricted. Children under 17
should be accompanied by an adult. / NC-17: No children under age 17. / X:
Adults only. / NR: Not rated.
NN To block certain content, you select a lock, and press ENTERE (That
◀
is, you “click it”.). For example, click the X lock and you block all X-rated
movies. The rating categories are also grouped so that clicking one
category blocks all the categories a parent would block along with it.
For example, if you block the PG-13 category, then R, NC-17 and X will
automatically be blocked also.
NN To unblock a category, click the lock.
English
▶
Canadian English Rating: You can block TV programs based on their
Anglophone Canadian rating.
Canadian English Rating displays a column with locks and the following
ratings categories:
–– C: Programming intended for children under age 8. / C8+: Programming
◀
generally considered acceptable for children 8 years and over to watch
on their own. / G: General programming, suitable for all audiences. / PG:
Parental Guidance. / 14+: Programming contains themes or content
which may not be suitable for viewers under the age of 14. / 18+: Adult
programming.
English
▶
NN To block certain content, you select a lock, and press ENTERE (That
is, you “click it”.). For example, click the 18+ lock and you block all TV
programs rated 18+. The rating categories are also grouped so that
clicking one category blocks all the categories a parent would block
along with it. For example, if you block the G category, then PG, 14+
and 18+ will automatically be blocked.
NN To unblock a category, click the lock.
◀
▶
English
Canadian French Rating: You can block TV programs based on their French
Canadian rating.
Canadian French Rating displays a column with locks and the following
ratings categories:
–– G: General / 8 ans+: Programming generally considered acceptable for
◀
children 8 years and over to watch on their own. / 13 ans+: Programming
may not be suitable for children under the age of 13. / 16 ans+:
Programming is not suitable for children under the age of 16. / 18 ans+:
Programming restricted to adults.
English
▶
NN To block certain content, you select a lock, and press ENTERE (That
is, you “click it”.). For example, click the 18 ans+ lock and you block all
TV programs rated 18 ans+. The rating categories are also grouped so
that clicking one category blocks all the categories a parent would block
along with it. For example, if you block the 8 ans+ category, then 13
ans+, 16 ans+ and 18 ans+ will automatically be blocked also.
NN To unblock a category, click the lock.
◀
Downloadable U.S. Rating: Parental restriction information you can use while
watching DTV channels.
English
▶
NN NOTE
●● If information is not downloaded from the broadcasting station,
Downloadable U.S. Rating menu is deactivated.
●● Parental restriction information is automatically downloaded while you
watch DTV channels. It may take several seconds.
●● The Downloadable U.S. Rating menu is available for use after
◀
information is downloaded from the broadcasting station. However,
depending on the information from the broadcasting station, it may not
be available for use.
●● Parental restriction levels differ depending on the broadcasting station.
The default menu name and Downloadable U.S. Ratings change
depending on the downloaded information.
English
▶
●● Even if you set the on-screen display to another language, the
Downloadable U.S. Rating menu will appear in English only.
●● Blocking one rating level will automatically block other categories that
deal with more sensitive material.
●● The rating titles (For example: Humor Level..etc) and TV ratings (For
example: DH, MH, H..etc) may differ depending on the broadcasting
station.
◀
●● Change PIN: The Change PIN screen will appear. Choose any 4 digits for your
PIN and enter it in Enter New PIN. Re-enter the same 4 digits in Confirm New
PIN. When the Confirm screen disappears, press the OK button. The TV has
memorized your new PIN.
English
▶
How to watch a restricted program or movie
If the TV is tuned to a restricted program or movie, the Program Rating Lock will
block it. The screen will go blank and the following message will appear:
“This channel is blocked by Program Rating Lock. Please enter the PIN to
unblock.”
Enter the PIN to unblock the program or movie.
NN If you forget the PIN, press the remote-control buttons in the following
◀
sequence, which resets the pin to “0-0-0-0:” POWER (off) → MUTE → 8 → 2
→ 4 → POWER (on)
English
▶
❑❑ Other Features
OO MENUm → System → ENTERE
■■ Menu Language
Set the menu language.
1. Select Menu Language, and then press the ENTERE button.
2. Choose a language, and then press the ENTERE button.
◀
NN Choose from English, Español, and Français.
English
▶
■■ Caption
(On-Screen Text Messages)
●● Caption (Off / On): You can switch the caption function on or off. If captions
are not available, they will not be displayed on the screen.
NN The Caption feature does not work with devices connected to the TV
through the Component, HDMI or PC input jacks.
●● Caption Mode: You can select the desired caption mode.
◀
NN The availability of captions depends on the program being broadcast.
Default / CC1~CC4 / Text1~Text4: (analog channels only) The Analog Caption
function operates in either analog TV channel mode or when a signal is supplied
from an external device to the TV. (Depending on the broadcasting signal, the
Analog Caption function may or may not work with digital channels.)
English
▶
Default / Service1~Service6 / CC1~CC4 / Text1~Text4: (digital channels
only) The Digital Captions function works with digital channels.
NN Service1~6 may not be available in digital caption mode depending on the
broadcast.
●● Digital Caption Options: (digital channels only) Adjusts the each option. When
done, select Close.
◀
Size: Options include Default, Small, Standard and Large. The default is
Standard.
Font Style: Options include Default and Styles 0 to 7. The default is Style 0.
Foreground Color: You can change the color of the letters. Options include
Default, White, Black, Red, Green, Blue, Yellow, Magenta and Cyan. The default
is White.
English
▶
Background Color: You can change the background color of the caption.
Options include Default, White, Black, Red, Green, Blue, Yellow, Magenta and
Cyan. The default is Black.
Foreground Opacity: This adjusts the opacity of text. Options include Default,
Transparent, Translucent, Solid and Flashing.
Background Opacity: This adjusts the opacity of the caption background.
Options include Default, Transparent, Translucent, Solid and Flashing.
◀
Default: This option sets each Size, Font Style, Foreground Color, Background
Color, Foreground Opacity and Background Opacity to their default.
Return to Default: This option sets each Size, Font Style, Foreground Color,
Background Color, Foreground Opacity and Background Opacity to its default.
English
▶
NN NOTE
●● Digital Caption Options are available only when you can select Default
and Service1 ~ Service6 in Caption mode.
●● The availability of captions depends on the program being broadcast.
●● The Default setting follows the standards set by the broadcaster.
●● You cannot set the Foreground and Background to the same color.
◀
●● You cannot set both the Foreground Opacity and the Background
Opacity to the same color.
English
▶
❑❑ Economical Solutions
■■ Eco Solution
OO MENUm → System → Eco Solution → ENTERE
●● Energy Saving (Off / Low / Medium / High / Picture Off): Lets you adjusts
the brightness of the TV in order to reduce power consumption. If you select
Picture Off, the screen is turned off, but the sound remains on. Press any
button except the volume button to turn on the screen.
◀
●● Eco Sensor (Off / On): To enhance your power savings, the picture settings
will automatically adapt to the light in the room.
NN If you adjust Backlight in the Picture menu, Eco Sensor will be set to Off.
English
▶
Min Backlight: When Eco sensor is On, you can manually adjust the minimum
screen brightness.
NN If Eco Sensor is On, the display brightness may change (become slightly
darker or brighter) depending on the surrounding light intensity. You can
control the screen’s minimum brightness with the Min Backlight function.
●● No Signal Power Off (Off / 15 min. / 30 min. / 60 min.): To avoid unnecessary
◀
energy consumption, you can set how long you want the TV to remain on if it’s
not receiving a signal.
NN Disabled when an attached PC is in power saving mode.
●● Auto Power Off (Off / On): The TV will automatically turn off if you don’t press
a button on the remote or touch a button on TV’s front panel within 4 hours to
prevent overheating.
English
▶
■■ Auto Protection Time (Off / 2 hours / 4 hours / 8 hours / 10 hours)
If the screen displays a still image for a certain period of time you define, the TV
activates the screen saver to prevent the formation of burnt in ghost images on the
screen.
◀
▶
English
■■ General
●● Game Mode (Off / On): When you have connected a game console such as
a PlayStation™ or Xbox™ to the TV, you can enjoy a more realistic gaming
experience if you set Game Mode on.
NN Precautions and limitations for Game Mode:
–– Before disconnecting a game console and connecting another external
device, set Game Mode to Off in the System menu.
◀
–– If you display the TV menu in Game Mode, the screen shakes slightly.
NN Game Mode is not available when the input source is set to TV or PC.
English
▶
NN Set Game Mode to On only after connecting a game console. If you turn
Game Mode on before you have attached the game console, you may
notice reduced picture quality.
NN If Game Mode is On:
–– Picture mode is set to Standard and Sound mode is set to Movie.
●● BD Wise (Off / On): Provides the optimal picture quality for Samsung DVD,
◀
Blu-ray and Home Theater products which support BD Wise. When BD
Wise is turned On, the picture mode is automatically changed to the optimal
resolution.
NN Available when you connect Samsung products that support BD Wise
through an HDMI cable to the TV.
●● Boot Logo (Off / On): Displays the Samsung logo when the TV is turned on.
●● TV Name: Sets the TV name so you can find it easily on a mobile device.
NN If you select User Input, you can type on the TV using the OSK (On Screen
Keyboard).
English
▶
■■ Anynet+(HDMI-CEC)
For details on set up options, refer to the “What is Anynet+?” instructions.
◀
▶
English
■■ DivX® Video On Demand
Shows the registration code authorized for the TV. If you connect to the DivX web
site and register using that code, you can download the VOD registration file. If you
activate the VOD registration using My Contents, the registration is completed.
NN For more information about DivX® VOD, visit “http://vod.divx.com”.
◀
▶
English
■■ Network Remote Control (On / Off)
Turn on/off or give permission to Samsung mobile phone devices to connect with
and control the TV.
You must have a Samsung Mobile phone/device which supports Wireless Remote
Control. For more details, refer to each device’s manual.
◀
▶
English
❑❑ Picture In Picture (PIP)
OO MENUm → System → PIP → ENTERE
■■ PIP t
◀
You can watch a program whose signal has passed through the TV’s tuner and
video from one external video source simultaneously. For example, if you have a
cable box connected to the Cable In jack, you can use PIP to watch programs
from the cable box and a movie from a Blu-ray player attached to the HDMI In
jack.
English
▶
NN NOTE
●● For PIP sound, refer to the Sound Select instructions.
●● If you turn the TV off while watching in the PIP mode, the PIP function is
reset to off. When you turn your TV on, you must turn PIP on again to watch
in the PIP mode.
●● You may notice that the picture in the PIP window becomes slightly
unnatural when you use the main screen to view a game or karaoke.
◀
●● While Smart Hub or Program Rating Lock is on, you cannot use PIP.
●● PIP is not supported in 3D mode.
English
▶
●● PIP Settings
The picture from the external video source will be in the main screen and the
picture from the TV’s tuner will be in the PIP sub-picture window.
Main picture
Sub picture
Component, HDMI, PC
TV
◀
▶
English
●● PIP (Off / On): Activate or deactivate the PIP function.
●● Air/Cable (Air / Cable): Select either Air or Cable as the input source for the
sub-screen.
●● Channel: Select the channel for the sub-screen.
●● Size (õ / ã / à / Œ): Select a size for the subpicture.
●● Position (ã / – / — / œ): Select a position for the sub-picture.
NN In Double (à, Œ) mode, you cannot select Position.
◀
●● Sound Select (Main / Sub): You can choose to listen to the sound from the
Main picture or the Sub picture.
English
▶
Support Menu
❑❑ Support Menu
OO MENUm → Support → ENTERE
■■ e-Manual
The e-Manual is built into your TV. Open the e-Manual to learn how to use your
TV’s many features.
NN For the detailed information about the e-Manual Screen, refer to “How to view
◀
the e-Manual” in the Users Manual.
English
▶
■■ Self Diagnosis
●● Picture Test: Use to check for picture problems. Picture test displays a high
definition picture that you can examine for flaws or faults.
Yes: Select Yes if the test picture does not appear or there is noise or distortion
in the test picture. There may be a problem with the TV. Contact Samsung’s
Call Center for assistance.
◀
No: Select No if the test picture displays properly. There may be a problem
with your external equipment. Please check your connections. If the problem
persists, refer to the external device’s user manual.
English
▶
●● Sound Test: Use the built-in melody to check for sound problems.
NN If you hear no sound from the TV’s speakers, before performing the sound
test, make sure Speaker Select is set to TV Speaker in the Sound menu,
and then try the speakers again.
NN You will hear the melody during the test even if you have set Speaker
Select to External Speaker or have muted the sound by pressing the
MUTE button.
◀
Yes: Select Yes if you can hear sound from only one speaker or from neither
speaker during the sound test. There may be a problem with the TV. Contact
Samsung’s Call Center for assistance.
No: Select No if you can hear sound from the speakers. There may be a
problem with your external equipment. Please check your connections. If the
problem persists, refer to the external device’s user manual.
English
▶
●● Signal Information: (digital channels only) The reception quality of over-the-air
HD channels is either perfect or the channels are unavailable. Signal Information
displays HD channel signal strength so you can adjust your antenna to increase
signal strength and receive HD channels.
●● Troubleshooting: Displays a troubleshooting guide organized into four
symptom categories: Poor or Distorted Picture, Distorted Sound or No Sound,
RF or PC Issues, and Other Issues. If your TV seems to be having a problem,
access the troubleshooting guide for a solution.
◀
▶
English
■■ Software Upgrade
The Software Upgrade menu lets you upgrade your TV’s software to the latest
version.
●● Current Version: This is the software version already installed in the TV.
NN The current version is displayed in the following format: Year/Month/Day_
Version number.
◀
▶
English
Upgrading to the Latest Version
You can upgrade in four ways:
• By USB
• By Online
• Alternative Software
• By Standby Mode Upgrade
◀
The three methods are explained in the following pages.
NN Be careful not to turn off the power until the upgrade is complete. The TV will
turn off and on automatically after completing the software upgrade. When
you upgrade software, all video and audio settings you have made will return
to their default settings. We advise you to write down your settings so that you
can easily reset them after the upgrade.
English
▶
By USB
To upgrade by USB, follow these steps:
TV Rear Panel
1. Visit www.samsung.com.
2. Download the latest USB software upgrade
exe archive to your computer.
◀
3. Extracts the exe archive to your computer.
You should have a single folder with the
same name as the exe file.
USB
●● The displayed image may differ depending on the
model.
4. Copy the folder to a USB flash drive.
5. Turn on the TV, and then insert the USB flash drive into the USB port of the TV.
6. In the TV’s menu, go to Settings → Support → Software Upgrade.
7. Select By USB.
NN Please be careful not to remove the USB drive until the upgrade is complete.
English
▶
By Online
The By Online function lets you download the upgrade software directly from the
Internet into your TV and then upgrade the software in one operation. To use By
Online, you must have configured your TV to connect to your network and the TV
must be connected to the Internet. See the Network Connection instructions.
To upgrade by Online, follow these steps:
◀
1. Select By Online, and then press the ENTERE button. The Connecting to
Server message appears.
2. If there is a download available, the Download pop-up appears with a progress
bar and the download starts.
3. When the download is complete, the Upgrade Query window appears with
three choices: Upgrade Now, Upgrade Later, or Don’t Upgrade.
English
▶
4. If you select Upgrade Now, the TV upgrades the software, turns off, and then
turns on automatically.
5. If you do not make a selection in one minute or select Upgrade Later, the TV
stores the new upgrade software. You can upgrade the software later using the
Alternative Software function.
6. If you select Don’t Upgrade, the TV cancels the upgrade.
◀
▶
English
Alternative Software
The Alternative Software option lets you upgrade using a file the TV downloaded
earlier, but you decided not to install immediately, or a file downloaded by the TV in
Standby Mode (See Standby Mode Upgrade on the next page).
To upgrade By Alternative Software, follow these steps:
1. If upgrade software has been downloaded, you will see the software version
number to the right of Alternative Software.
◀
2. Select Alternative Software, and then press the ENTERE button.
3. The TV displays a message asking if you want to upgrade. Select Yes. The TV
begins the upgrade.
4. When the upgrade is complete, the TV turns off automatically, and then turns
on.
English
▶
Standby Mode Upgrade
You can set the Standby Mode Upgrade function so that the TV downloads new
upgrade software when it is in Standby mode. In Standby mode, the TV is off, but
its Internet connection is active. This allows the TV to download upgrade software
automatically, when you are not using it. Because the TV is turned on internally,
the screen may glow slightly. This phenomenon may continue for more than 1 hour
until the software download is complete.
◀
▶
English
To set Standby Mode Upgrade, follow these steps:
1. Press the arrow buttons to select Upgrade in Standby Mode, and then press
the ENTERE button.
2. Select On or Off.
●● Off: If you select Off, the TV will notify you with a pop up message when
new upgrade software is available.
●● On: If you select On, the TV will automatically download new upgrade
◀
software when it is in Standby mode with the power off. If it downloads new
upgrade software, the TV will ask you if you want to install it when you turn
the TV on.
NN To use the Standby Mode Upgrade function, your TV must be connected to
the Internet.
English
▶
■■ Contact Samsung
View this information when your TV does not work properly or when you want to
upgrade the software. You can find information regarding our call centers and how
to download products and software.
◀
▶
English
Advanced Features
❑❑ 3D
OO MENUm → Picture → 3D → ENTERE
■■ Using the 3D function
◀
For LED 6400 Series and above
This exciting new feature enables you to view 3D content. To fully enjoy this
feature, you must purchase a pair of Samsung 3D Active Glasses (SSG-3100GB,
SSG-3300GR, SSG-3300CR, SSG-3700CR) to view 3D video. Samsung 3D
Active Glasses are sold separately. For more detailed purchasing information,
contact the retailer where you purchased this TV.
English
▶
IMPORTANT HEALTH AND SAFETY INFORMATION FOR 3D PICTURES.
Read and understand the following safety information before using the TV’s
3D function.
[[ WARNING
●● Some viewers may experience discomfort while viewing 3D TV such as
dizziness, nausea and headaches. If you experience any such symptom,
stop viewing 3D TV, remove the 3D Active Glasses and rest.
◀
●● Watching 3D images for an extended period of time may cause eye strain. If
you feel eye strain, stop viewing 3D TV, remove your 3D Active Glasses and
rest.
English
▶
●● A responsible adult should frequently check on children who are using the
3D function. If there are any reports of tired eyes, headaches, dizziness, or
nausea, have the child stop viewing 3D TV and rest.
●● Do not use the 3D Active Glasses for other purposes (such as general
eyeglasses, sunglasses, protective goggles, etc.)
●● Do not use the 3D function or 3D Active Glasses while walking or moving
◀
around. If you use the 3D function or 3D Active Glasses while walking or
moving around you can injure yourself by running into objects, tripping, or
falling.
English
▶
●● 3D Mode: Select the 3D input format.
NN If you want to experience the 3D effect fully, put the 3D Active Glasses on
first, and then select the 3D Mode from the list below that provides the best
3D viewing experience.
3D Mode
3D
◀
Operation
Off
Turns the 3D function off.
2D → 3D
Changes a 2D image to 3D.
Side by Side
Displays two images next to each other.
Top & Bottom
Displays one image above another.
NN Some file formats may not support the “2D → 3D.”
NN “Side by Side” and “Top & Bottom” are available when the resolution is
720p, 1080i and 1080p in DTV, HDMI and USB mode or when you set the
TV’s source to PC and your PC is connected through an HDMI/DVI cable.
English
▶
●● 3D Perspective (-5 ~ +5): Adjust overall 3D perspective of on-screen image.
●● Depth (1~10): Adjust overall depth.
●● L/R Change (L/R Image / R/L Image): Swap the left and right pictures.
●● 3D → 2D (Off / On): Displays the image for the left eye only.
NN This function is deactivated when 3D Mode set to “2D → 3D” or Off.
●● 3D Optimize: Automatically adjusts the picture overall to provide an optimal 3D
effect.
◀
Resolution supported for HDMI PC mode
The optimal resolution for the HDMI PC mode is 1920 x 1080.
If the input resolution is not 1920 x 1080, the TV may not display images properly
in 3D display or full screen mode.
English
▶
How to watch the 3D images
NN Some 3D modes may not be available depending on the format of the image
source.
NN To watch in 3D, you must wear 3D Active Glasses and turn the glasses on by
pressing the power button.
◀
1. Press the MENU button on your remote, use the u
or d button to select Picture, and then press the
ENTERE button.
2. Use the u or d button to select 3D, and then press
the ENTERE button.
3D
3D Mode
3D Perspective
0
Depth
5
L/R Change L/R Image
3D → 2D
Off
3D Optimize
0
●● The displayed image may differ
depending on the model.
English
3D
▶
3. Use the u or d button to select 3D Mode,
and then press the ENTERE button.
4. Using the l or r buttons on your remote
control, select the 3D Mode of the image
you want to view.
3D mode
Cancel
●● The displayed image may differ depending on the
model.
◀
▶
English
Supported formats and operating specifications for Standard HDMI 3D
NN The 3D formats listed below are recommended by the HDMI association and
must be supported by 3D TVs.
Source signal format
Standard HDMI 1.4 3D
1920x1080p@24Hz x 2
1920x2205p@24Hz
1280x720p@60Hz x 2
1280x1470p@60Hz
◀
▶
English
Read These Notes Before Using the 3D Function...
NN NOTE
●● 3D Mode is set to Off automatically when you access Smart Hub or
e-Manual functions.
●● 3D Mode is set to its memorized configuration value automatically when
you change the input source.
●● Some Picture functions are disabled in 3D mode.
◀
●● PIP is not supported in 3D mode.
●● 3D Active Glasses from Samsung’s previous product (IR type) or other
manufacturers are not be supported.
●● When the TV is initially powered on, it may take some time until the 3D
display is optimized.
English
▶
●● The 3D Active Glasses may not work properly if there is any other 3D
product or electronic devices turned on near the glasses or TV. If there is a
problem, keep other electronic devices as far away as possible from the 3D
Active Glasses.
●● Be sure to stay within the viewing angle and optimum TV viewing distance
when watching 3D pictures. Otherwise, you may not be able to see 3D
effects properly.
◀
●● The ideal 3D viewing distance is three times or more the height of the
screen. For example, if your screen is two feet high, you should sit at least
six feet from the screen. We recommend sitting so that your eyes are level
with the screen.
English
▶
Smart Hub
❑❑ Smart Hub
◀
Using Smart Hub, you can stream movies,
videos, and music from the Internet, access
various for pay or free-of-charge applications
and view them on your TV. Application content
includes news, sports, weather forecasts, stock
market quotes, maps, photos, and games.
OO You can also start this function by pressing
the SMART HUB button on the remote
control.
English
Search
Recommended
Favorites
Schedule Ma...
Channel
Web Browser
Videos
Photos
Music
▶
Source
a Login
b Sort by
{ Edit Mode
} Settings
●● The displayed image may differ depending on the
model.
Smart Hub at a Glance
You can search for various
types of content that
can be used on your
TV. Enter a keyword to
search for media, various
applications, or online
information that you can
use on the TV.
◀
TV Screen: Displays the
current input source
screen..
Exit: Exits the SMART HUB.
Search
Samsung Apps : You can
download various for pay or
free-of-charge application
services.
Recommended
Favorites
Schedule Ma...
Channel
Web Browser
Videos
Photos
Music
Source
a Login
b Sort by
Information: Displays
notices, new applications,
and advertisements
brought to you by
Samsung product
introductions.
{ Edit Mode
} Settings
Recommended : Displays
recommended contents
managed by Samsung.
My Applications: Displays
your personal gallery of
applications which you can
add to, modify, and delete..
Controls:
●● a Red (Login): To log in to Smart Hub.
●● b Green (Sort by): To sort the applications.
●● { Yellow (Edit Mode): To edit the applications.
●● } Blue (Settings): To change the settings of Smart Hub.
NN The colored buttons may work differently depending on the
application.
English
▶
NN NOTE
●● Samsung Electronics takes no legal responsibility for any interruption of the
Smart Hub service caused by the service provider for any reason.
●● The Smart Hub service downloads and processes data via the Internet so
that you can enjoy the Internet contents on your TV screen. If the Internet
connection is unstable, the service may be delayed or interrupted. Furthermore,
the player may turn off automatically in response to conditions on the Internet.
If this occurs, check the Internet connection and try again.
◀
●● Application services may be provided in English only and the contents available
may vary, depending on your area.
English
▶
●● For more information about a Smart Hub service, visit the web site of the
applicable service provider.
●● The services provided are subject to change by the Smart Hub service provider
without notice.
●● The Smart Hub service contents may differ depending on the player’s firmware
version.
●● For pay DivX contents with copy protection can only be played through a
◀
composite, a component or an HDMI cable.
English
▶
Starting Smart Hub the First Time
To start Smart Hub for the first time, follow these steps :
1. Press the SMART HUB button.
2. The Smart Hub screen appears. In a few cases, the Country screen appears
immediately after.
3. If the Country screen has appeared, press the u / d / l / r buttons to select
your country, then press the ENTERE button.
◀
NN Certain applications are available only in certain countries.
4. The General Disclaimer screen appears. Press the l / r buttons to select Agree,
then press the ENTERE button.
NN Screens can take a few seconds to appear.
English
▶
5. The Internet Privacy Policy screen appears. Press the l / r buttons to select
Agree, then press the ENTERE button.
6. The Service Update screen appears and installs a number of services and
applications. When done, it closes. The applications and services downloaded are
displayed on the Smart Hub screen. This may take some time.
NN Smart Hub may close momentarily during the installation process.
NN A number of screens may appear after installation. You can press the
ENTERE button to close them or let them close on their own.
◀ 7. To start an application, press the u / d / l / r buttons to highlight a application,
then press the ENTERE button.
English
▶
Using the Keypad
Through your remote, you can use the On-Screen Keypad to enter letters,
numbers, and symbols.
●● Entering Text, Numbers and Symbols
◀
To enter text, press the number button on the remote that corresponds to the letter
you want to enter. Press the button rapidly to enter a letter that is not the first letter
listed on the On-Screen keypad button. For example, if you want to enter the letter
b, press the 2 button on your remote rapidly twice. To enter the first letter listed on
a button, press, release, and then wait.
To move within the text, use the arrow buttons. To delete text, move the cursor to
the right of the character you want to delete, and then press the PRE-CH button.
To change case or enter numbers or punctuation, press the - button.
English
▶
Creating an Account
To establish your own, exclusive, configuration of Smart Hub, create your own
Smart Hub account.
NN Note
●● You must use an e-mail address as an ID.
●● You can register up to 10 User Accounts.
●● You do not need an account to use Smart Hub.
◀
▶
English
To create an account, follow these steps:
1. Press the a button on your remote control.
The Login screen appears.
2. Press the u / d / l / r buttons to select
Create Account, and then press the
ENTERE button.
◀
3. On the next screen, select Smart Hub
Account, and then press the ENTERE
button. An entry screen and keypad appear.
Login
Smart TV ID
Press [ENTER]
Password
Press [ENTER]
Remember my Smart TV id and password
Login
Cancel
Create Account
Find Password
●● The displayed image may differ depending on
the model.
4. Use the keypad to enter your e-mail address. This will serve as your ID.
English
▶
5. When done, press the ENTERE button to select OK, and then press the
ENTERE button again. The Login screen re-appears.
6. Select Password, and then press the ENTERE button. The Password screen
and a keyboard appear.
7. Use the keypad to enter a password. The password can be any combination of
letters, numbers, and symbols.
NN Press the a button on your remote to show or hide the password as you
◀
enter it.
▶
English
8. When done, press the ENTERE button to select OK, and then press the
ENTERE button again. The Login screen re-appears.
9. Select Confirm, and then press the ENTERE button.
10. Repeat Steps 7 and 8.
11. When the Login screen re-appears, select Create Account, and then press the
ENTERE button. The Confirmation window appears.
◀
12. Select OK, and then press the ENTERE button. The Continue to Register
Service window appears.
13. Select Connect Service, and then press the ENTERE button.
English
▶
14. The Register Service Account Window appears.
NN If you have existing accounts with any of the listed providers, you can
associate the provider account and the provider account password with
your Smart Hub account.
Registration makes it easier to access the providers web site. For
registration instructions, go to Step 2 in Account Management under
Settings in the Setting Up Smart Hub section of this manual.
NN If you don’t have existing provider accounts or do not want to register
◀
existing accounts at this time, select OK, and then press the ENTERE
button. You can also let the window close on its own in about a minute.
English
▶
Account Log In
To log in to your Smart Hub account, follow these steps:
1. With the Smart Hub main screen displayed on your TV, press the a button on
your remote. The Login screen appears.
2. Select the ^ next to the Smart TV ID field, and then press the ENTERE
button.
◀
3. Select your ID from the list that appears, and then press the ENTERE button.
The Login screen re-appears.
English
▶
4. Select Password, and then press the ENTERE button. The Password
window and a keypad appears.
5. Using the keypad and your remote, enter your password. When done, press
the ENTERE button, select OK, and then press the ENTERE button again.
NN If you want Smart Hub to enter your password automatically, select
◀
Remember my Smart TV id and password after you have entered your
password, and then press the ENTERE button. A check appears. Smart
Hub will now enter your password automatically when you select or enter
your ID.
English
▶
❑❑ Setting up Smart Hub
■■ Settings
The Settings Menu Screen gives you access to account management, account
reset, and account properties functions.
To access the Settings Menu, and then select a menu item, follow these steps:
1. Press the } button on your remote.
◀
2. Press the l / r to select a menu item, and then press the ENTERE button.
English
▶
The functions on the Settings Menu screen are described below.
● Account Management
Settings
The Account Management Menu contains
functions that let you register your service
provider accounts, change your Smart Hub
password, and delete or deactivate your
Smart Hub account.
Account Management
Service Manager
Reset
Properties
Close
● The displayed image may differ depending on
the model.
◀
English
▶
Register Service Account: If you have existing accounts with any of the
providers listed by the Register Service Account function, you can associate
the provider account and the provider account password with your Smart Hub
account. If you associate the account, you will be able to log onto the account
through Smart Hub easily, without entering your account name or password.
To use the Account Management function, follow these steps:
◀
1. In the Account Management menu, select Register Service Account, and
then press the ENTERE button. The Register Service Account Window
appears.
English
▶
2. Press the u / d arrow buttons to select a Service Provider you want to
associate with your Smart Hub account, and then press the ENTERE
button.
NN If you have a Samsung account and you want to use the Samsung
Apps function in Smart Hub, you must register your Samsung Apps
account here.
3. Using your remote and the on-screen Keypad, enter your site ID and
password. When done, press the ENTERE button.
◀
NN This is the ID and password you normally use to access your account on
this site.
English
▶
4. If you have entered the ID and password correctly, the Registered
Successfully message appears, asking you if you want to add another
service provider. If you do, press the ENTERE button. If not, press the
RETURN button and return to the Settings Menu.
5. If you pressed ENTERE, repeat Steps 2 through 4 to associate another
Service Provider.
6. When you are done, press the RETURN button.
◀
▶
English
Change Password: The Change Password function lets you change your
Smart Hub password. To change the password, follow these steps:
1. Select Change Password, and then press the ENTERE button.
2. Enter your current password. The next screen appears.
3. On the next screen, enter a new password on the first line. Enter it again on
the second line to confirm.
◀
4. The Changing Password Complete message screen appears. Press the
ENTERE button or wait for the screen to close - about 5 seconds.
English
▶
Remove from TV Account List: The Remove From TV Account List function
cancels all your current registered Service Accounts that you registered on the
Register Service Account screen.
Deactivate Account: The Deactivate Account function deactivates your
Smart TV ID and deletes it and all your account settings entirely from Smart
Hub.
◀
▶
English
●● Service Manager
Ticker Autorun: You can set Ticker Autorun to come on when powering on the
TV.
NN The Ticker application provides useful News, Weather, and Stock Market
information. The Ticker application on Smart Hub must be downloaded to use
this feature.
NN Depending on your country, the Ticker application may have a different service
◀
or not be supported.
Channel Bound Service (Off / On): Some channels support applications as an
Internet data service, allowing you to access the Internet service while watching
TV.
NN Only available if supported by the broadcaster
English
▶
●● Reset: The Reset function initializes all downloaded applications, erases all
user accounts and settings from the TV, and resets all Smart Hub settings to the
factory default settings. It then restarts Smart Hub as if it were starting for the first
time. Your account, however, remains on the Smart Hub server. To log into your
account, enter your ID and password on the Login screen.
To use the Reset function, follow these steps:
1. In the Account Management menu, select Reset, and then press the
ENTERE button. The Reset screen appears.
◀
▶
English
2. Enter the your security password.
NN The default password set is “0-0-0-0.”
NN If you forget the PIN code, press the remote control buttons in the following
sequence in Standby mode, which resets the PIN to “0-0-0-0”: MUTE → 8
→ 2 → 4 → POWER (on).
◀
3. After a few moments, Smart Hub automatically resets. The screen may
go black, then Smart Hub re-appears. In a few moments, it starts the reinitialization procedure.
4. To complete the re-initialization, go to Step 4 in Starting Smart Hub for the First
Time.
English
▶
●● Properties
The Properties menu item lists three functions that display information about Smart
Hub :
Detail: Lists information about Smart Hub including version number, the number of
services installed, memory usage, and the unique product ID.
Terms of Service Agreement: Display the Terms of Service Agreement.
◀
▶
English
■■ Edit Mode
The functions in the Edit Mode menu let you manipulate the applications in the My
Applications section of the Smart Hub screen. Using these functions, you can lock
and unlock access to some applications, create folders and move applications to
them, rename folders, delete applications, and change the position of applications
on the screen. To access the Edit Mode Menu, and then select a menu item,
follow these steps:
◀
1. Press the { button on your remote. The Edit Mode menu bar appears on the
bottom of the screen.
2. Press the u / d / l / r to select a menu item, and then press the ENTERE
button.
English
▶
The functions in the Edit Mode Menu bar are described below.
NN NOTE
●● Some menu items may not appear on the screen. To see these items, press
the l / r to move to the screen edge, and then press one more time to
reveal the items.
●● You can close the bar by highlighting the X on the bottom right side, and
then pressing the ENTERE button.
◀
●● Change Position
▶
The Change Position function lets you change the screen position of an
application. To use the Change Position function, follow these steps:
1. Press the { button on your remote.
2. Select an application, and then press the ENTERE button. A c appears
above the application.
English
3. Press the u / d / l / r to select Change Position, and then press the
ENTERE button. A position change icon appears above the application.
4. Press the u / d / l / r to move the icon. Press the ENTERE button
when the icon is in the position of your choice. The application moves to its
new location.
●● New Folder
◀
The New Folder function lets you create and name new folders. Once you
have created a folder, you can move applications into it.
To use the New Folder function, follow these steps:
1. Press the { button on your remote.
2. Press the u / d / l / r to move the cursor to New Folder, and then press
the ENTERE button. The Create Folder window and a keypad appear.
English
▶
3. Use the keypad to enter the name of the folder.
4. Select OK, and then press the ENTERE button. The New Folder screen
closes and the New Folder appears on the Smart Hub screen.
●● Move to Folder
The Move to Folder function lets you move an application to a folder. To use
the Move to Folder function, follow these steps:
1. Press the { button on your remote.
◀
2. Select an application, and then press the ENTERE button.
English
▶
3. Press the u / d / l / r to select Move to Folder, and then press the
ENTERE button. The Move to Folder window opens.
4. Press the u / d / l / r to select a folder, and then press the ENTERE
button. The Moved to Folder message appears, and then closes. The
application has been moved to the folder.
To access an application in a Folder
1. Close the Edit Mode menu.
◀
2. In My Applications, press the u / d / l / r to select a folder, and then
press the ENTERE button. The folder opens.
3. Select an application, and then press the ENTERE button. The application
service starts.
English
▶
To Edit Items in a Folder
Select a folder, and then press the ENTERE button. The folder opens. Press
the { button on your remote. The Edit buttons appear at the bottom of the
screen.
These buttons work the same as the Edit Mode menu buttons on the main
screen. For example, to move an application back to the My Applications main
screen:
◀
1. Select the application.
2. Select Move to Folder, and then press the ENTERE button. The Move
to Folder window appears.
3. Select My Applications, and then press the ENTERE button. The Move
to Folder window closes and the application returns to the main My
Applications screen.
English
▶
●● Rename Folder
The Rename Folder function lets you rename folders. To use the Rename
Folder function, follow these steps:
1. Press the { button on your remote.
2. Press the u / d / l / r to select a folder, and then press the ENTERE
button.
◀
3. Press the u / d / l / r to select Rename a Folder, and then press the
ENTERE button. The Folder Rename window and a keyboard appears.
4. Use the key board to enter a new name.
5. Select OK, and then press the ENTERE button twice. The Rename
window closes and the new name appears below the folder.
English
▶
●● Lock
The Lock function lets you lock some application in My Applications so they
can not be opened without entering the password.
To use the Lock function, follow these steps:
1. Press the { button on your remote.
◀
2. Press the u / d / l / rto select an application, and then press the
ENTERE button. If the application can be locked, the Lock menu item
darkens.
3. Press the u / d / l / r to select Lock, and then press the ENTERE
button. The Security window appears.
4. Enter your password. If you have not created a password, enter “0-0-0-0”.
5. Press the ENTERE button. The Lock Service window appears confirming
the lock, and then closes. A lock symbol appears next to the application.
English
▶
●● Unlock
1. Press the { button on your remote.
2. Press the u / d / l / rto select a locked application, and then press the
ENTERE button.
3. Press the u / d / l / r to select Unlock, and then press the ENTERE
button. The Security window appears.
4. Enter your password. If you have not created a password, enter “0-0-0-0”.
◀
5. Press the ENTERE button. The Lock Service Released window appears
confirming the lock has been release, and then closes.
English
▶
●● Delete
The Delete function lets you delete application from My Applications. To use
the Delete function, follow these steps:
1. Press the { button on your remote.
2. Press the u / d / l / r to select an application, and then press the
ENTERE button.
◀
3. Press the u / d / l / r to select Delete, and then press the ENTERE
button. The message, “Do you want to delete selected?” appears.
4. Select Yes, and then press the ENTERE button. The application is
deleted.
English
▶
■■ Sort by
The functions in the Sort Menu let you sort the applications in My Applications
by Name, Date, Frequency (of use), and Category. If you manually change the
position of an application, the Sort Menu automatically highlights User Defined
when you start it.
To sort the applications in My Applications, follow these steps:
1. Press the b button on your remote.
◀
2. Press the u / d / l / r to select a sorting method, and then press the
ENTERE button. Smart Hub sorts the applications by the method you have
chosen.
English
▶
❑❑ Using Smart Hub
Enjoy photos, music and/or movie files saved
on a USB Mass Storage Class (MSC) device
and/or your PC.
1. Press the SMART HUB button.
◀
Search
Recommended
Favorites
2. Press the d or u button to select Videos,
Photos, or Music, and then press the
ENTERE button.
NN To view content on a USB device, you must
plug the device into a USB jack on the TV.
English
Schedule Ma...
Channel
Web Browser
Videos
Photos
Music
Source
a Login
b Sort by
{ Edit Mode
} Settings
●● The displayed image may differ depending on the
model.
▶
❑❑ Connecting a USB Device
1. Turn on your TV.
2. Connect a USB device containing photo,
music and/or movie files to the USB
[1(HDD), 2 or 3] port on the back or side
panel of the TV.
◀
3. When a USB device is connected to the TV,
the Connected Device window appears.
Select a connected device, and then press
ENTERE.
TV Rear Panel
USB Drive
●● The displayed image may differ depending on the
model.
NN The TV may display the files on the USB device automatically if it is the only
device connected.
English
▶
Read this information before using Smart Hub with a USB device .
●● The USB function might not work properly with unlicenced multimedia files.
●● MTP (Media Transfer Protocol) is not supported.
●● The file system supports FAT16, FAT32 and NTFS.
●● Certain types of USB Digital camera and audio devices may not be compatible
with this TV.
●● Smart Hub supports only the Sequential jpeg format. It does not support the
◀
▶
Progressive jpeg format.
●● Smart Hub supports only USB Mass Storage Class (MSC) devices. MSC is a
Mass Storage Class Bulk-Only Transport device. Examples of MSC are Thumb
drives, Flash Card Readers and USB HDD (USB HUB are not supported).
Devices should be connected directly to the TV’s USB port.
English
●● Before connecting your device to the TV, please back up your files to prevent
them from damage or loss of data. SAMSUNG is not responsible for any data
file damage or data loss.
●● Connect a USB HDD to the dedicated USB 1 (HDD) port.
●● Do not disconnect the USB device while it is loading.
●● The higher the resolution of the image, the longer it takes to display on the
screen.
◀
●● The maximum supported JPEG resolution is 15360 X 8640 pixels.
●● If a file is corrupted or the TV does not support the file type, the “Not Supported
File Format” message apears.
●● If the files are sorted by Folder View, up to 1000 files can be displayed in each
folder.
English
▶
●● The TV cannot play MP3 files with DRM that have been downloaded from a for
pay site. Digital Rights Management (DRM) is a technology that supports the
creation, distribution, and management of digital content in an integrated and
comprehensive way, including protecting the rights and interests of content
providers, preventing illegal copying of contents, and managing billings and
settlements.
●● If more than 2 PTP devices are connected, you can only use one at a time.
●● If more than two MSC devices are connected, some of them may not be
◀
recognized. A USB device that requires high power (more than 500mA or 5V)
may not be supported.
●● If an over-power warning message is displayed while you are connecting or
using a USB device, the device may not be recognized or may malfunction.
English
▶
●● If the TV has no input during the time set in Auto Protection Time, the
Screensaver will run.
●● The power-saving mode of some external hard disk drives may be released
automatically when you connect them to the TV.
●● If you connect a USB device with a USB extension cable, the TV may not
recognize the USB device or read the files on the device.
●● If a USB device you connect to the TV is not recognized, the files on the device
◀
are corrupted, or a file in the list is not played, connect the USB device to a PC,
format the device and check the connection.
●● If a file you deleted from the PC is still found when you run Smart Hub, use the
“Empty the Recycle Bin” function on the PC to permanently delete the file.
English
▶
❑❑ Connecting to a PC through a network
You can play pictures, music, and videos saved in your PC through a network
connection in the AllShare mode.
NN For more information on how to configure your TV and connect it to your
network, see ‘Network Connection’.
NN To view content located on your PC, you must have connected your TV and
◀
your PC to your LAN and downloaded and installed AllShare PC Software on
your PC.
NN We recommend you locate both your TV and PC in the same network subnet.
IP addresses have four parts, separated by periods (111.222.333.444). If your
TV and PC are in the same subnet, the first 3 parts of the TV IP address and
the PC IP address (111.222.333) will be the same and only the last part (the
host address) will be different.
English
▶
NN The following Smart Hub functions are not supported when you are playing media
from a PC connected through a network:
●● The Background Music and Background Music Setting functions.
●● Sorting files by preference in the Photos, Music, and Videos folders.
●● The π (REW) or µ (FF) button while a movie is playing.
NN Divx DRM, Multi-audio, embedded captions are not supported.
NN Set your PC firewall program so that AllShare PC Software is a permitted program.
◀
▶
English
NN Depending on the Internet server, when you use Smart Hub through a network
connection:
●● The sorting method may vary.
●● The Scene Search function may not be supported.
●● The Resume function, which resumes playing of a video, may not be
supported.
–– The Resume function does not support multiple users. (It memorizes only
◀
the point where the most recent user stopped playing a video.)
●● The l or r button may not work depending on the content information.
NN You may experience file stuttering while playing a video in Smart Hub through a
network connection.
English
▶
❑❑ Screen Display
Move to the file you want to play using the up/down/right/left buttons, and then
press the ENTERE or � (Play) button. The file is played.
Device name: Displays the
name of the connected
device
◀
File List Section: Displays
files sorted according to
your criteria.
Music
Home: Return to content
home
SUM
Upper Folder
Sweet Candy
I Love Music
Music_5
Ming
No Singer
Music_1
Music_6
No Singer
No Singer
Music_2
Music_7
No Singer
No Singer
Music_3
Music_8
No Singer
No Singer
Music_4
Music_9
No Singer
No Singer
Move to another page containing a list of files.
English
Change Content/Device:
Changes the content type or
connected device.
Sorting: Displays sort criteria.
Sort criteria differ, depending
on the content.
Edit Mode: Select and play
multiple files or assign them
to My Playlist. This function is
available only for Music.
▶
❑❑ Videos
Playing a Video
1. Press the l / r / u / d button to select the
desired video in the file list.
Play
1:02:15 / 2:04:10
Movie 1.avi
2. Press the ENTERE button or ∂ (Play)
button.
◀
●● The file name appears on the top with its
playing time.
●● If video time information is unknown, the
●● The displayed image may differ depending on the
model.
playing time and progress bar are not
displayed.
●● During video playback, you can search using the l and r buttons.
English
▶
●● You can use the � (REW), µ (FF), Pause, Stop, and Play buttons on the
bottom of your remote during playback.
●● Press the RETURN button to exit the movie
●● Supported Video Subitle Formats (for language subtiles, etc.)
◀
Name
File extension
Format
MPEG-4 time-based text
.ttxt
XML
SAMI
.smi
HTML
SubRip
.srt
string-based
SubViewer
.sub
string-based
Micro DVD
.sub or .txt
string-based
English
▶
●● Supported Video Formats
File Extension
*.avi
*.mkv
Container
AVI
MKV
◀
*.asf
*.wmv
*.mp4
ASF
ASF
MP4
Video Codec
Resolution
Frame rate
(fps)
Bit rate
(Mbps)
Divx 3.11 / 4.x / 5.1 / 6.0
1920x1080
6 ~ 30
8
XviD
1920x1080
6 ~ 30
8
H.264 BP / MP / HP
1920x1080
6 ~ 30
25
MPEG4 SP / ASP
1920x1080
6 ~ 30
8
Motion JPEG
1920x1080
6 ~ 30
8
Divx 3.11 / 4.x / 5.1 / 6.0
1920x1080
6 ~ 30
8
XviD
1920x1080
6 ~ 30
8
H.264 BP / MP / HP
1920x1080
6 ~ 30
25
MPEG4 SP / ASP
1920x1080
6 ~ 30
8
Motion JPEG
800x600
6 ~ 30
8
Window Media Video v9
1920x1080
6 ~ 30
25
WMA
H.264 BP / MP / HP
1920x1080
6 ~ 30
25
MPEG4 SP / ASP
1920x1080
6 ~ 30
8
XVID
1920x1080
6 ~ 30
8
MP3 /
ADPCM /
AAC
English
Audio Codec
MP3 / AC3
/ LPCM /
ADPCM /
DTS Core
MP3 / AC3
/ LPCM /
ADPCM /
WMA
▶
File Extension
*.3gp
3GPP
*.vro
VRO
VOB
*.mpg
*.mpeg
◀
Container
*.ts
*.tp
*.trp
PS
TS
Video Codec
Resolution
Frame rate
(fps)
Bit rate
(Mbps)
H.264 BP / MP / HP
1920x1080
6 ~ 30
25
MPEG4 SP / ASP
1920x1080
6 ~ 30
8
MPEG1
352x288
24 / 25 / 30
30
MPEG2
1920x1080
24 / 25 / 30
30
MPEG1
352x288
24 / 25 / 30
30
MPEG2
1920x1080
24 / 25 / 30
30
H.264
1920x1080
6 ~ 30
25
MPEG2
1920x1080
24 / 25 / 30
30
H.264
1920x1080
6 ~ 30
25
VC1
1920x1080
6 ~ 30
25
English
Audio Codec
ADPCM /
AAC / HEAAC
AC3 / MPEG
/ LPCM
AC3 / MPEG
/ LPCM /
AAC
AC3 / AAC /
MP3 / DD+ /
HE-AAC
▶
Other Restrictions
NN NOTE
●● Video content will not play, or not play correctly, if there is an error in the
content or the container.
●● Sound or video may not work if the contents have a standard bitrate/frame rate
above the compatible Frame/sec listed in the table above.
●● If the Index Table is in error, the Seek (Jump) function is not supported.
◀
●● You may experience file stuttering while playing a video through a network
connection.
English
▶
●● The menu may take longer to appear if the video’s bit rate exceeds 10Mbps.
●● Some USB/digital camera devices may not be compatible with the player.
Video Decoder
Audio Decoder
•• Supports up to H.264, Level 4.1
•• H.264 FMO / ASO / RS, VC1 SP / MP / AP L4
and AVCHD are not supported.
multi channel or lossless audio.
•• XVID, MPEG4 SP, ASP:
•• WMA sampling rate 22050Hz mono is not
supported.
−− Below 1280 x 720: 60 frame max
◀
•• Supports up to WMA 7, 8, 9, STD
•• WMA 9 PRO does not support 2 channel excess
−− Above 1280 x 720: 30 frame max
▶
•• GMC 2 over is not supported.
English
Using the Play Continuously Function (Resume Play)
If you exit a movie when it is playing, you can play the movie later from the point where
you stopped it.
NN The Resume function does not support multiple users. (It will only memorize the
point where the most recent user stopped playing.)
1. Select the movie file you stopped and want to resume by pressing the l or r
button.
◀
2. Press the ∂ (Play) or ENTERE button.
3. Press Resume Icon on control panel for resume. The Movie will begin to play from
where you stopped it.
NN Resume is only available when you resume playing a movie you had stopped.
English
▶
❑❑ Music
Playing Music
1. Press the l / r / u / d button to select the
desired music file in the file list.
2. Press the ENTERE button or ∂ (Play)
button.
◀
Music
Playlist
I Love You
Ming
using the � (REW) and µ (FF) button.
NN Smart Hub only displays files with MP3 file
Music_3
No Singe
g r
Love
R&B
2011-01-01
1.2MB
01:01/03
03:12
:12
●● When the music is playing, you can search
I Love You
Ming
Music_4
No Singer
Music_5
No Singer
Music_6
No Singer
Music_7
No Singer
Music_8
No Singer
●● The displayed image may differ depending on the
model.
extensions. Other file extensions are not
displayed, even if they are saved on the same USB device.
NN If the sound is abnormal when you play MP3 files, adjust the Equalizer in the
Sound menu. (An over-modulated MP3 file may cause a sound problem.)
English
13/30
Music_1
No Singer
Music_2
No Singer
▶
Creating My Playlist
1. On the Music screen in the Smart Hub menu, press the l / r / u / d button to
select Edit Mode, and then press the ENTERE button.
NN A check box appears to the left of the files.
2. Press the l / r / u / d button to select the tracks you want to add, and then
press the ENTERE button.
NN A check appears in the check box.
◀ 3. Repeat Step 2 to select additional tracks.
NN To select all the files in the current page, select Select All at the top of the
page, and then press ENTERE.
English
▶
4. Press the l / r / u / d button to select Add to My Playlist.
NN Note that selecting Clear My Playlist will return My Playlist to the default
playlist and remove all the tracks you added.
5. Press the ENTERE button. The message “Selected items were added to My
Playlist.” is displayed.
6. The newly created or updated playlist will be in the main Music page.
Playing My Playlist
◀ Select the My Playlist folder and it will play automatically. Press the u or d button to ▶
play a different music file within the play list.
NN To delete a file from My Playlist, select the recycle bin icon next to the file you
want to delete by using the direction buttons, and then press ENTERE. The file
will be deleted from My Playlist.
English
Playing Selected Music Files
1. On the Music screen in the Smart Hub menu, press the l / r / u / d button to
select Edit Mode on the far right side of the screen, and then press the ENTERE
button.
2. Press the l / r / u /d button to select the desired music file in the file list, and
then ENTERE button.
NN The c mark appears to the left of the selected files.
◀
3. Repeat Step 2 to select additional tracks.
NN To select all the files in the current page, select Select All at the top.
NN To cancel a selection, press the ENTERE button again.
4. Press the l / r / u / d button to select Play at the bottom of the screen, and
then press ENTERE. The selected music files play.
English
▶
❑❑ Photos
Viewing a Photo (or Slide Show)
1. Press the l/r/u/d button to select the
desired file in the file list.
Normal
Friends.jpg
1024 X 768
2011/01/03
2. Press the ENTERE button.
●● To view files manually, one at a time, press
◀
the left or right arrow buttons.
●● To start the slide show, press the ENTERE
button when the file you selected is
displayed.
●● The displayed image may differ depending on the
model.
●● During the slide show, all files in the file list are displayed in order, starting from
the file you selected
English
▶
NN When you press the � (Play) button in the file list, the slide show will start
immediately.
NN During a Slide show, press the TOOLS button to access additional functions such
as Slide Show Speed, Background Music, Zoom, and Rotate.
NN You can add background music to a slide show if you have music files on your
USB device or PC by setting Background Music to On in the Tools menu, and then
selecting music files to play.
◀
NN The Background Music (BGM) Mode cannot be changed until the BGM has
finished loading.
NN You can use the Pause, Stop, and Play buttons on the bottom of your remote
during a slide show.
NN When you press the Stop or Return button, the slide show stops and the main
photo screen re-appears.
English
▶
❑❑ Smart Hub - Additional Functions
Sorting the file lists
To sort files in the file lists, select the
(Sort) icon in the top right of the screen
by using the l / r / u / d button. Then, press the ENTERE button. The checks
below indicate which media the sort criteria apply to.
Sort Criteria
◀
Operation
Videos
Music
Photos
Folder View
Displays the whole folder. You can view the file name
and thumbnail by selecting the folder.
>
>
>
Title
Sorts and displays the file title in Symbol/Number/
Alphabet/Special order.
>
>
>
Latest Date
Sorts and shows files by the latest date.
>
>
Earliest Date
Sorts and shows files by the earliest date.
>
>
English
▶
Sort Criteria
Operation
Videos
Music
Artist
Sorts the music file by artist in alphabetical order.
>
Album
Sorts the music file by album in alphabetical order.
>
Genre
Sorts music files by the genre.
>
Monthly
Sorts and shows photo files by month.
◀
Photos
>
▶
English
Videos/Music/Photos Play Option menu
When playing video, music, or photo files, you can press the TOOLS button to display
an Options menu. Below are a series of tables listing the options available and the
media each option applies to.
Option Name
◀
Operations
List
Return to the file list.
Previous / Next
Go to previous / next photo file.
Shuffle
You can play the music sequentially or randomly.
Resume
You can restart a movie file from where you
stopped it.
English
Videos
Music
Photos
>
>
>
>
>
>
▶
Option Name
◀
Operations
Videos
Title Search
You can move directly to another Title.
>
Time Search
You can search the movie using l and r buttons
at intervals of 10 seconds.
>
Subtitle
You can view a subtitle. You can select a specific
language if the subtitle file contains multiple
languages.
>
Repeat Mode
You can play movie and music files repeatedly.
>
Picture Size
You can adjust the picture size to your preference.
>
Picture Mode
You can change the Picture Mode.
>
English
Music
Photos
>
▶
>
Option Name
◀
Operations
Videos
Music
Photos
>
>
Sound Mode
You can change the Sound Mode.
>
Audio Language
You can enjoy video in one of supported
languages. The function is enabled only when you
play stream-type files which support multiple audio
formats.
>
Subtitle Setting
Displays the Subtitle Setting. You can set up a
subtitle option.
>
Start Slide Show /
Stop Slide Show
You can start or stop a slide show. Alternatively,
use the � or � button on the remote.
>
Slide Show Speed
You can select the slide show speed during the
slide show. Alternatively, use the � or µ button
on the remote.
>
English
>
▶
Option Name
◀
Operations
Videos
Music
Photos
Slide Show Effect
You can set various slide show effects.
>
Background Music
On / Off
You can start or stop background music.
>
Background Music
Setting
You can set and select background music when
watching a photo file or slide show.
>
Zoom
You can zoom into images in full screen mode.
>
Rotate
You can rotate images.
>
NN Pressing the INFO button while a device name is selected will display information
about the selected device.
NN Pressing the INFO button while a file is selected will display information about the
selected file.
English
▶
❑❑ Using Samsung Apps
■■ Samsung Apps
Samsung Apps is a store from which you can download applications to use on
Samsung TV/AV equipment.
You can enjoy a variety of contents such as videos, music, photos, games, useful
information etc. using the downloaded applications.
◀
New applications are added regularly.
▶
English
NN Using the colored buttons with Samsung Apps.
●● a Red (Login): To log in to the Internet
What’s New?
What’s New?
service.
Video
Game
●● b Green (List View / Thumbnail View):
To toggle the view between List and
Thumbnail.
Sports
Lifestyle
Welcome to Samsung Apps! More apps are in store for you to enjoy.
Accu Weather
TV store Test User001
World Clock
TV store Test User002
Twitter
Information
TV store Test User003
Other
Facebook
My Account
Help
TV store Test User004
Picasa Web
TV store Test User005
a Login
●● } Blue (Sort by): To sort the
◀
applications by Recommended, Most
downloaded, Most recent or Name.
●● �µ (Page): Move to previous or next page.
English
�µ page
R Return
●● The displayed image may differ depending on the
model.
NN You can sort all categories except What’s New?.
●● R Return: Moves to previous menu.
b Thumbnail View
▶
Using Samsung Apps by category
The following categories are available:
●● What’s New?: Displays newly registered applications.
●● Video: Displays apps that provide video media such as movies, TV shows and
short length videos.
●● Game: Displays various game apps such as sudoku and chess.
●● Sports: Displays apps that provide sports content such as game results, images
◀
▶
and short length video.
●● Lifestyle: Includes apps that provide lifestyle media services such as music,
personal photo management tools, and social networking such as Facebook and
Twitter.
English
●● Information: Includes apps that provide information content such as news,
financial information, stock quotes, weather, etc.
●● Other: Includes other miscellaneous apps.
●● My Account: Displays the application list and your cyber cash balance.
NN Starting in the middle of 2010 (US and Korea only), you can purchase cyber-
cash that you can use to buy applications through tv.samsungapps.com.
●● Help: If you have questions about Smart Hub, check this section first.
◀
▶
English
■■ Social TV
(May not be available, depending on your country.)
◀
Share your TV viewing experience with your friends via social networking services
(SNS). Using the Social TV function provided by the Smart Hub, you can use an
SNS function such as Twitter, Facebook or Google Talk while watching TV in the
same way you use it on a PC. For detailed information about using a service, refer
to the corresponding website.
NN To use the Social TV function, you have to sign in uniformly first. If you don’t
have a Smart Hub account, create a Smart Hub ID and log in first. If the Smart
Hub account is not linked with the user account of the SNS, you have to
register the SNS account in Smart Hub to use the service through Smart Hub.
For more information about registering a service site, refer to “How to create a
Smart Hub ID”
English
▶
1. To open Social TV, press the l / r / u / d buttons to select Social TV,
and then press the ENTERE button.
2. Enjoy your social network service through Social TV
Using the colored and function buttons with Social TV
●● a Red (Log in / Logout): To log into or logout of the Smart Hub account.
●● b Green (Refresh): Refresh the application.
◀
●● { Yellow (Write Comment): Displays the Comment screen.
NN The function for this button may change depending on the service.
●● } Blue (Change Mode): Change the view mode. Select Overlay, PIG, or Hide
mode.
●● T TOOLS: Displays the Service Setting. You can activate or deactivate the
service.
●● R Return: Return to the previous screen.
English
▶
■■ Search
(May not be available, depending on your country.)
Easily search for and access content from diverse sources (e.g. applications, Your
Video, AllShare)
◀
●● Usable while using SMART HUB
●● For easy access, use the SEARCH button on the remote control.
●● For detailed instructions to use search function, please visit www.samsung.
com.
English
▶
1. To open Search, press the l / r / u / d buttons to select Search, and
then press the ENTERE button.
2. If you want to input a search term directly, press the ENTERE button. A
keypad screen appears. Enter the search term using the remote control.
NN If you want to select a category, press the d button. You can select a
category to search.
◀
▶
English
■■ Your Video
(May not be available, depending on your country.)
Provides recommendations for videos based on your tastes.
●● Lets you see movie recommendations based on your previous preferences.
◀
●● Lets you select a movie, displays a list of VOD (Video on Demand) providers
that have the movie, and then lets you choose a provider for streaming.
(Streaming is unavailable in some areas.)
●● For instructions to use Your Video, please visit www.samsung.com.
English
▶
Your Video: Personalize your movie-watching with a customized video on demand
(VOD) recommendation service.
Most Searched: You can search for a video by selecting a key word in the key
word list. The key word list displays words you frequently use for searches
Top Application: You can search top video applications and services for a video.
Search History: You can search for a video by selecting a keyword in the History
list.
◀
▶
English
■■ Web Browser
For LED 6300 and 6900 Series
(May not be available, depending on your country.)
Using the Web Browser function provided by the Smart Hub, you can surf the
Internet on your TV.
◀
1. To open Web Browser, press the l / r / u / d buttons to select Web
Browser, and then press the ENTERE button.
2. Surf the Internet in the much the same way as on a PC.
English
▶
NN When the Web Browser opens, the cursor is in Tab Mode. In Tab Mode, the
cursor highlights text or objects, or surrounds them with a blue rectangle. To
move the cursor in Tab Mode, use the l / r / u / d buttons. Press ENTERE
to select. To scroll the screen u or d down, use the l or r buttons.
NN You can change from Tab Mode to Pointer Mode by pressing the Yellow {
button. Use the arrow buttons to move the pointer. Press ENTERE to select.
◀
The Web Browser has a series of icons across the top of the screen. With these
icons, you can easily use the Web Browser. The icons are described below,
starting with the icon on the far left of the screen.
●● (Back): Moves to the previous web page.
NN If there is no saved previous web page, this icon will not work.
●● (Forward): Moves to the next web page if there are saved URLs.
NN If there is no saved next web page, this icon will not work.
English
▶
Refresh / Stop: Refreshes the current page or stops the current connection from
loading.
Home: Goes to the URL you specified as your the home page.
Zoom: You can select a zoom level of 50%, 75%, 100%, 125%, 150%, 200%,
400% and Fit to Screen.
Favorite: Displays the Favorites List screen. You can set the current page as a
Favorite or select a favorite page to visit from the Favorites page list.
◀
History: Displays the History screen. You can select a web page to visit in the
History list. You can also sort the History list by Date, Name, or Frequency. To
sort, select the Sort Criteria button in the upper right corner of the History screen
and then press ENTERE.
English
▶
When you highlight a page, the Options button appears on the right. Access the
Options by selectng the Options button, and then pressing ENTERE. In the
Options pop-up you can Delete the selected page from the history list, Delete All
pages from the History list, or Add the selected page to Favorites.
URL: Shows the URL of the current page. If you press the ENTERE button, the
URL pop-up appears. Press ENTERE again and you can key in a new a URL
directly. You can also select a page to visit on the displayed Page list.
◀
In addition, you can sort the Page list by Date, Name, or Frequency. To sort,
select the Sort Criteria button in the upper right corner of the URL pop-up and
then press ENTERE.
English
▶
Window: Displays images of open windows (the Window List). You can add the
current page to the list (using Add a new page), select and access a page in the
list, select and close a page in the list, or close all pages. The selected page is the
enlarged page in the center.
NN A new web browser tab automatically displays the home page.
◀
Search: Lets you search the web. When you access the Search entry field and
press ENTERE, the Browser displays a pop-up with a text entry keyboard and a
text entry field on the right. The keyboard functions much like a cell phone texting
keypad.
On the left of the pop up is the name of the current search engine. Select the
search engine and press ENTERE, and you can select a different search engine
or add a search engine to the current list.
Settings: You can configure the Web Browser settings.
English
▶
Using the colored and function buttons with the Web Browser
●● a Red (Back): Moves to previous page. If there is no saved previous web
page, this button will not work.
●● b Green (Zoom): You can select a screen size of 50%, 75%, 100%, 125%,
150%, 200%, 400% and Fit to Screen.
●● { Yellow (Pointer Mode / Tab Mode): You can change the cursor to
Pointer Mode or Tab Mode.
◀
●● } Blue (PIP): Turns PIP on or off. With PIP on, you can watch TV while using
the Web Browser.
English
▶
●● T TOOLS (Options): Displays the icons from the top of the page in a toolbar
in the middle of the screen. Press RETURN to close.
●● U (Scroll Up / Down): You can scroll the page up or down.
●● R Return: Return to the previous screen or close the Web Browser. You can
also close the Browser by pressing the EXIT button.
Setting up the Web Browser
◀
Press the TOOLS button or move the cursor to the top of the screen, and then
select the Settings icon.
●● PIP Settings: Lets you configure the PIP function.
PIP Position: Select a position for the PIP sub-picture.
Sound Select: Select the audio source you will hear - Main or Sub - when PIP
is on.
English
▶
●● Reading Tool: Provides an easy-to-read page by enlarging the main text.
●● Clean Site: When Clean Site is on, you can only access the web pages
registered in Clean Site. Use Clean Site to restrict your children’s access to
appropriate web pages.
To access the Clean Site function, you must enter your Clean Site password. If
you have not created a Clean Site password, enter the default password 0 0 0 0.
Clean Site Feature (On / Off): Turn Clean Site, on and off.
◀
Clean Site Password Manage: Enter a new password.
English
▶
●● Add Current Site: Lets you add the currently displayed web site to the Clean
Site list.
Clean Site Manage: Lets you key in URLs to add to the Clean Site List and
delete sites from the Clean Site List.
NN If you turn Clean Site on and have not added any sites to the Clean Site
List, you will not be able to acces any Internet sites.
●● Private Browsing: Enable or disable the Browser Privacy Mode. When the
◀
Browser Privacy Mode is enabled, the browser does not retain the URLs
of sites you visit. If you want to enable Private Browsing, Select Yes. If the
Private Browsing function is running, the "Stop" icon appears in front of the
URL at the top of the screen.To disable Private Browsing, select it again when
Private Browsing is enabled.
English
▶
●● Options: You can configure Web Browser options.
Home Settings: You can set the home page.
–– Most Visited Sites: Set the most frequently visited URL as the home page.
–– CurrentPage: Sets the current page as the home page.
–– Direct Input: Lets you key in the URL of the page you want for your home
page. The keyboard works like a cell phone texting keyboard.
Pop Up Block Settings: Turns the Pop Up Blocker on or off.
◀
Advertisement Block Settings: You can determine whether to block
advertisements and select the URLs for which advertisements are blocked.
English
▶
–– Advertisement Block (On / Off): Turns the Advertisement Block on or off.
–– Block Current Site: Adds the current page to the blocked list.
–– Manage Advertisement Block: Displays the Advertisement Block Site
Management screen. You can add a website for which advertisements
should be blocked by directly keying in the URL, or you can delete a website
from the list.
Delete Personal Info: You can delete your personal information.
◀
–– Delete Visited History: Deletes the website history.
–– Delete Internet use Info: Deletes Internet access information such as
cookies.
English
▶
Encoding: You can set the Encoding setting for webpages to Automatic or
Manual.
–– Automatic Selection (On / Off): Select the Encoding settings for webpages
automatically.
–– Settings: Select the Encoding settings for webpages manually. Select an
encoding format from the encoding format list.
◀
Pointer: You can set the speed of the cursor when the cursor is set to Pointer
Mode.
–– Pointer Speed (Slower / Slow / Standard / Fast / Faster): Select a
pointer speed.
Version Info: You can view the version information of the Web Browser.
User Guide: Refer to this information before using the Web Browser.
English
▶
■■ Skype
For LED 6300, 6500 and 6900 Series
Skype created a little piece of software that
makes communicating with people around the
world easy and fun. With Skype you can say
hello or share a laugh with anyone, anywhere.
And if both of you are on Skype, it’s free.
Communicate with people around the world!
Buy and use the TV camera (SAMSUNG only).
◀
samsung
Echo / Sound Test Serivce
Contact
Voice Call
Voice Call
Chat
Chat
History
Call phones
Settings
a Sign Out { Add a Contact R Return
●● The displayed image may differ depending on the
model.
NN Other company’s TV Cameras are not
compatible with Skype on your TV.
NN For more information, download the Skype user’s manual from “www.samsung.
com.”
■■ BEST BUY APPLICATION
For LED 6420 and 6900 Series
For more information, visit “BestBuy.com/connected”.
English
▶
[Legal Statement]
Due to the various capabilities of products featuring the Samsung Smart Hub Content Service, as well as limitations in the available content, certain features,
applications, and services may not be available on all devices or in all territories.
◀
Some features on Smart Hub may also require additional peripheral devices or
membership fees that are sold separately. Please visit http://www.samsung.
com for more information on specific device information and content availability.
The services and availability of content through Smart Hub are subject to
change from time to time without prior notice.
English
▶
❑❑ Troubleshooting for Smart Hub
◀
Problem
Possible Solution
Some application contents only
appear in English. How can I change
the language?
The Application content language may be different from the
application user interface language.
Some application services do not
work.
Check with the service provider.
When a network error occurs, I can
only use the setting menu.
If network connection doesn’t work, your service might be
limited, as all functions except the setting menu are needed to
connect to the internet.
The ability to change the language depends on the service
provider.
Refer to the help website for application service provider
information.
English
▶
■■ Troubleshooting for Web Browser
1. To open Web Browser, press the u / d / l / r buttons to select Web
Browser, and then press the ENTERE button. The Web Browser may be
displayed differently with PC.
2. The Web Browser is not compatible with a Java application.
3. When attempted to download a file, but the file could not be saved and an error
message appeared.
◀
4. Access may be blocked to some websites or to web browsers operated by
certain businesses.
5. Playback of Flash video may be restricted.
6. E-commerce, for purchasing products online, is not supported.
English
▶
7. Scrolling a web page that allows only part (and not the whole) of the page to be
scrolled may cause corrupted characters.
8. ActiveX is not supported.
9. Some options cannot be accessed in Tab mode. (To access such options,
switch to Pointer mode.)
10. Some text may appear corrupted because the number of supported fonts is
limited.
◀
11. The response to a command on the remote or the screen display may be
delayed temporarily if a web page is currently loading.
12. The loading of a web page may delay or stop with some operating systems.
13. Copy and Paste are not supported.
English
▶
14. When writing emails or posting messages, some functions (Such as changing
the size or colours.) may not be supported.
15. The number of bookmarks and logs that can be saved is limited.
16. The maximum number of windows that can open at the same time may vary
depending on the browsing condition or TV model.
17. The web browsing speed depends on the network conditions.
◀
18. PIP will automatically be deactivated if a video is played in the browser. Videos
may not commence playback after PIP interruption and a possible refresh for
the page may be required.
19. The Web Browser can play MP3 audio files only.
20. The function for importing or exporting bookmarks is compatible with bookmark
files in a particular file format only. (Compatible format: Netscape-bookmarkfile-1)
English
▶
21. When you import or export the bookmark, the folder tree is not included.
22. If you import the bookmark file to a Computer from a TV, the bookmark file will
be saved in “Samsung SmartTV Bookmark” folder.
23. If the time is not set in the menu (System → Time → Clock), the history
information may not be saved.
24. Visited web site history is saved in chronological order and It will be removed
from the list according to oldest page accessed.
◀
25. Some video or audio content may not play during Flash playback depending on
the video/audio codec supported.
English
▶
All content and services accessible through this device belong to third parties and are protected by
copyright, patent, trademark and/or other intellectual property laws. Such content and services are
provided solely for your personal noncommercial use. You may not use any content or services in a
manner that has not been authorized by the content owner or service provider. Without limiting the
foregoing, unless expressly authorized by the applicable content owner or service provider, you may not
modify, copy, republish, upload, post, transmit, translate, sell, create derivative works, exploit, or distribute
in any manner or medium any content or services displayed through this device.
◀
YOU EXPRESSLY ACKNOWLEDGE AND AGREE THAT USE OF THE DEVICE IS AT YOUR SOLE RISK
AND THAT THE ENTIRE RISK AS TO SATISFACTORY QUALITY, PERFORMANCE AND ACCURACY
IS WITH YOU. THE DEVICE AND ALL THIRD PARTY CONTENT AND SERVICES ARE PROVIDED “AS
IS” WITHOUT WARRANTY OF ANY KIND, EITHER EXPRESS OR IMPLIED. SAMSUNG EXPRESSLY
DISCLAIMS ALL WARRANTIES AND CONDITIONS WITH RESPECT TO THE DEVICE AND ANY CONTENT
AND SERVICES, EITHER EXPRESS OR, IMPLIED, INCLUDING BUT NOT LIMITED TO, WARRANTIES
OF MERCHANTABILITY, OF SATISFACTORY QUALITY, FITNESS FOR A PARTICULAR PURPOSE, OF
ACCURACY, OF QUIET ENJOYMENT, AND NON-INFRINGEMENT OF THIRD PARTY RIGHTS. SAMSUNG
DOES NOT GUARANTEE THE ACCURACY, VALIDITY, TIMELINESS, LEGALITY, OR COMPLETENESS
OF ANY CONTENT OR SERVICE MADE AVAILABLE THROUGH THIS DEVICE AND DOES NOT
WARRANT THAT THE DEVICE, CONTENT OR SERVICES WILL MEET YOUR REQUIREMENTS, OR THAT
OPERATION OF THE DEVICE OR SERVICES WILL BE UNINTERRUPTED OR ERROR-FREE.
English
▶
UNDER NO CIRCUMSTANCES, INCLUDING NEGLIGENCE, SHALL SAMSUNG BE LIABLE, WHETHER
IN CONTRACT OR TORT, FOR ANY DIRECT, INDIRECT, INCIDENTAL, SPECIAL OR CONSEQUENTIAL
DAMAGES, ATTORNEY FEES, EXPENSES, OR ANY OTHER DAMAGES ARISING OUT OF, OR IN
CONNECTION WITH, ANY INFORMATION CONTAINED IN, OR AS A RESULT OF THE USE OF THE
DEVICE, OR ANY CONTENT OR SERVICE ACCESSED BY YOU OR ANY THIRD PARTY, EVEN IF
ADVISED OF THE POSSIBILITY OF SUCH DAMAGES.
◀
Third party services may be changed, suspended, removed, terminated or interrupted, or access may be
disabled at any time, without notice, and Samsung makes no representation or warranty that any content
or service will remain available for any period of time. Content and services are transmitted by third parties
by means of networks and transmission facilities over which Samsung has no control. Without limiting
the generality of this disclaimer, Samsung expressly disclaims any responsibility or liability for any change,
interruption, disabling, removal of or suspension of any content or service made available through this
device. Samsung may impose limits on the use of or access to certain services or content, in any case and
without notice or liability.
Samsung is neither responsible nor liable for customer service related to the content and services. Any
question or request for service relating to the content or services should be made directly to the respective
content and service providers.
English
▶
❑❑ AllShare™
AllShare™ connects your TV and compatible Samsung mobile phones/ devices
through a network. On your TV, you can view call arrivals and SMS messages
received by your mobile phones. In addition, you can play media contents including
videos, photos, and music saved on your mobile phones or the other devices (such
as your PC) by controlling them on the TV via the network. Additionally, you can
use your TV for browsing web pages on your mobile phones.
NN For more information, visit “www.samsung.com” or contact the Samsung call
◀
center. Mobile devices may need additional software installation. For details,
refer to each device’s user’s guide.
English
▶
All Share
NN If your Samsung TV connects to a non-Samsung DLNA server, a compatibility
issue may occur during video playback.
NN By connecting your Samsung TV to a network via AllShare™, you can use
Samsung’s original functions as follows:
–– Playback of various video formats (DivX,XVID, MP4, 3GPP, AVI, ASF, MKV,
etc.)
–– Video thumbnail feature
◀
–– Bookmark function (to resume video playback)
–– Auto-chaptering (scene navigation)
–– Digital content management
–– Compatibility with various subtitle formats (SRT, SMI, SUB, TXT, TTXT)
–– Search with file names
–– And many others
NN To use the original DLNA functions of Samsung fully, it is recommended that
you use the AllShare™ software provided with your TV.
English
▶
❑❑ Setting Up AllShare™
OO MENU → Network → AllShare Settings → ENTERE
■■ AllShare Settings
●● Media (On / Off): Enables or disables the media
function. When the media function is on, you can
control Media contents play using mobile phones
or other devices that support DLNA DMC.
AllShare Settings
Media
◀
▶
●● The displayed image may differ
depending on the model.
English
■■ Media
Shows a list of mobile phones or connected devices which have been set up to
use the Media function with this TV.
NN The Media function is available in all devices which support DLNA DMC.
●● Allowed / Denied: Allows/Blocks the devices.
●● Delete: Deletes the devices from the list.
NN This function only deletes the name of the device from the list. If the deleted
◀
device is turned on or tries to connect to the TV, it may appear on the list
again.
English
▶
Using the Media Function
An alarm window appears informing you that media contents (videos, photos, music)
sent from a mobile phone will be displayed on your TV. The contents are played
automatically 3 seconds after the alarm window appears. If you press the RETURN or
EXIT button when the alarm window appears, the media contents are not played.
NN NOTE
●● The first time a device accesses your TV through the media function, a warning
◀
popup window appears. Press the ENTERE button to select Allow. This
permits the phone to access the TV freely and use the Media function to play
content.
English
▶
●● To turn off media contents transmissions from a mobile phone, set Media to
Off in the AllShare Settings.
●● Contents may not play on your TV depending on their resolution and format.
●● The ENTERE and l / r buttons may not work depending on the type of
media content.
●● Using the mobile device, you can control the media play. For details, refer to
each mobile’s user’s guide.
◀
▶
English
❑❑ Anynet+(HDMI-CEC)
■■ What is Anynet+? t
Anynet+ is a function that enables you to control all connected Samsung devices that
support Anynet+ with your Samsung TV’s remote. The Anynet+ system can be used
only with Samsung devices that have the Anynet+ feature. To be sure your Samsung
device has this feature, check if there is an Anynet+ logo on it.
NN NOTE
◀
●● You can only control Anynet+ devices using the TV’s remote control, not the
buttons on the TV.
●● The TV remote control may not work under certain conditions. If this occurs,
reselect the Anynet+ device.
●● The Anynet+ functions do not operate with other manufacturers’ products.
English
▶
●● For instructions explaining how to connect Anynet+ external devices, refer to the
device’s user manual. You must connect an Anynet+ device using an HDMI cable.
Some HDMI cables may not support Anynet+ functions.
●● Anynet+ works when the AV device supporting Anynet+ is in the standby or on
status.
●● Anynet+ supports up to 12 AV devices in total. Note that you can connect up to 3
devices of the same type.
◀
▶
English
●● However, you can connect only one Anynet+ Home Theater. To connect an
Anynet+ Home Theate, connect the Home Theater to the TV using an HDMI cable
then:
–– To hear sound from the Home Theater’s Front, Left and Right speakers and the
subwoofer only, connect a Digital Optical cable between the DIGITAL AUDIO
OUT (OPTICAL) jack on your TV and the Digital Audio Input on the Home
Theater.
–– To hear 5.1 channel audio, connect HDMI cables to your Anynet+ DVD player,
◀
satellite box, etc. Then, connect the DIGITAL AUDIO OUT (OPTICAL) jack on
your DVD player, Satellite Box, etc. (i.e. Anynet + Device 1 or 2) directly to the
Home Theater, not the TV.
English
▶
Anynet+ Menu
The Anynet+ menu changes depending on the type and status of the Anynet+ devices
connected to the TV.
Anynet+ Menu
View TV
Device List
(device_name) MENU
Description
•• Changes Anynet+ mode to TV broadcast mode.
•• Shows the Anynet+ device list.
•• Shows the menu of the connected device. E.g. if a DVD player is
connected, the disc menu of the DVD player will appear.
◀
(device_name) Tools
•• Shows the tools menu of the connected device. E.g. if a DVD player is
connected, the tools menu of the DVD player will appear.
NN Depending on the device, this menu may not be available.
(device_name) Title Menu
•• Shows the title menu of the disc in the connected device. E.g. If a DVD
player is connected, the title menu of the movie in the DVD player will
appear.
NN Depending on the device, this menu may not be available.
Receiver
•• Sound is played through the receiver.
English
▶
❑❑ Setting Up Anynet+
OO MENUm → System → Anynet+ (HDMI-CEC) → ENTERE
■■ Anynet+ (HDMI-CEC) (Off / On)
To use the Anynet+ Function, Anynet+ (HDMI-CEC) must be set to On.
NN When the Anynet+ (HDMI-CEC) function is disabled, all the Anynet+ related
operations are deactivated.
◀
▶
English
■■ Auto Turn Off (No / Yes)
Set an Anynet+ Device to turn off automatically when the TV is turned off.
NN If Auto Turn Off is set to Yes, running external devices will turn off at the same
time as the TV powers off.
NN May not be enabled depending on the device.
◀
▶
English
❑❑ Switching between Anynet+ Devices
1. Press the TOOLS button, select Anynet+ (HDMI-CEC), and then press
ENTERE.
2. Select Device List, and then press the ENTERE button.
NN If you cannot find a device you want, select Refresh to refresh the list.
3. Select a device, and then press the ENTERE button. You can switch to the
selected device.
◀
▶
English
NN The Device List menu appears only when you set Anynet+ (HDMI-CEC) to
On in the System menu.
●● Switching to the selected device may take up to 2 minutes. You cannot
cancel the switching operation while switching is in progress.
●● If you have selected an Anynet+ device by pressing the SOURCE button
and then selecting its input source, you cannot use the Anynet+ function.
Make sure to switch to an Anynet+ device by using the Device List.
◀
▶
English
❑❑ Listening through a Receiver
You can listen to sound through a receiver (i.e Home Theater) instead of the TV
Speaker.
1. Select Receiver and set to On.
2. Press the EXIT button to exit.
NN If your receiver supports audio only, it may not appear in the device list.
NN The receiver will work when you have properly connected the optical in jack
◀
of the receiver to the DIGITAL AUDIO OUT (OPTICAL) jack of the TV.
NN When the receiver (i.e Home Theater) is set to On, you can hear sound
output from the TV’s Optical jack. When the TV is displaying a DTV (air)
signal, the TV will send out 5.1 channel sound to the receiver. When the
source is a digital component such as a DVD player and it is connected to
the TV via HDMI, you will hear only 2 channel sound from the receiver.
English
▶
Using the ARC function
You can listen to sound through a receiver connected using an HDMI cable without
connecting a separate optical cable.
1. Select Receiver and set to On.
2. Press the EXIT button to exit.
NN To use the ARC function, a receiver which supports the HDMI-CEC and ARC
features must be connected to the HDMI IN 2 (ARC) port.
◀
NN To disable the ARC function, set the Receiver to Off. Even if the TV transmits
the ARC signal continuously, the receiver will be blocked from receiving the
signal.
English
▶
❑❑ Troubleshooting for Anynet+
Problem
Anynet+ does not work.
Possible Solution
•• Check if the device is an Anynet+ device. The Anynet+ system
supports Anynet+ devices only.
••
••
••
••
◀
You can connect only one receiver (home theater).
Check if the Anynet+ device power cord is properly connected.
Check the Anynet+ device’s Video/Audio/HDMI cable connections.
Check whether Anynet+ (HDMI-CEC) is set to On in the Anynet+
setup menu.
•• Check whether the TV remote control is in TV mode.
•• Check whether the remote control is Anynet+ compatible.
•• Anynet+ doesn’t work in certain situations. (Searching channels,
operating Smart Hub or Plug & Play (initial setup), etc.)
•• If you have removed and then reconnected the HDMI cable, please
make sure to search devices again or turn your TV off and on again.
•• Check if the Anynet+ function of the Anynet device is set on.
English
▶
I want to start Anynet+.
•• Check if the Anynet+ device is properly connected to the TV and
check if the Anynet+ (HDMI-CEC) is set to On in the Anynet+
Setup menu.
•• Press the TOOLS button to display the Anynet+ menu and select a
menu you want.
I want to exit Anynet+.
•• Select View TV in the Anynet+ menu.
•• Press the SOURCE button on the TV remote control and select a
non- Anynet+ device.
•• Press z and PRE-CH to change the TV mode. (Note that
◀
the channel button operates only when a tuner-embedded Anynet+
device is not connected.)
The message “Connecting to
Anynet+ device...” appears on
the screen.
•• You cannot use the remote control when you are configuring
Anynet+ or switching to a view mode.
•• Use the remote control after the TV has completed Anynet+
configuration or has finished switching to Anynet+.
The Anynet+ device does not
play.
•• You cannot use the play function when Plug & Play (initial setup) is
in progress.
English
▶
The connected device is not
displayed.
•• Check whether or not the device supports Anynet+ functions.
•• Check whether or not the HDMI cable is properly connected.
•• Check whether Anynet+ (HDMI-CEC) is set to On in the Anynet+
setup menu.
•• Search Anynet+ devices again.
•• Anynet+ requires an HDMI connection. Make sure the device is
connected to your TV with an HDMI cable.
•• Some HDMI cables may not support Anynet+ functions.
•• If the connection is terminated because there has been a power
◀
failure or the HDMI cable has been disconnected, please repeat the
device scan.
The TV sound is not output
through the receiver.
•• Connect the optical cable between TV and the receiver.
•• The ARC function enables digital output of sound using the HDMI
IN 2(ARC) port and can only be operated when the TV is connected
to an audio receiver that supports the ARC function.
English
▶
Other Information
❑❑ TroubleShooting
If your TV seems to have a problem, first review this list of issues and solutions. If none
of these troubleshooting tips apply, please visit “www. samsung.com,” and then click
on Support, or contact the Samsung call center.
◀
Issues
Solutions and Explanations
Picture Quality
First, perform the Picture Test and to see if your TV is properly displaying
the test image.
•• Go to MENU - Support - Self Diagnosis - Picture Test
If the test image is properly displayed, the poor picture may be caused
by the source or signal.
English
▶
Issues
Solutions and Explanations
The TV image does not look as
good as it did in the store.
•• Store displays are all tuned to digital, HD (high definition) channels.
•• If you have an analog cable/set top box, upgrade to a digital set top
box. Use HDMI or Component cables to deliver HD (high definition)
picture quality.
•• Cable/Satellite subscribers: Try HD channels from the channel line up.
•• Air/Cable Antenna connection: Try HD channels after performing an
Auto program.
NN Many HD channels are up scaled from SD (Standard Definition)
contents. Look for a channel that is broadcasting true HD content.
◀
The picture is distorted: macro
block error, small block, dots,
pixelization
•• Adjust the Cable/Sat box video output resolution to 1080i or 720p.
•• The compression of video contents may cause picture distortion
especially in fast moving pictures such as sports and action movies.
•• A weak or bad quality signal can cause picture distortion. This is not a
TV issue.
•• Mobile phones used close to the TV (within 3.3 ft) may cause noise in
the picture on analog and digital channels.
English
▶
Issues
Solutions and Explanations
Color is wrong or missing.
•• If you’re using a Component connection, make sure the component
cables are connected to the correct jacks. Incorrect or loose
connections may cause color problems or a blank screen.
The color is poor or the picture is
not bright enough.
•• Adjust the Picture options in the TV menu (go to Picture Mode /
Color / Brightness / Sharpness)
•• Adjust the Energy Saving option in the TV menu (go to MENU –
System – Eco Solution – Energy Saving)
•• Try resetting the picture to view the default picture settings (go to
MENU - Picture - Reset Picture)
◀
▶
English
Issues
Solutions and Explanations
There is a dotted line on the edge
of the screen.
•• If the picture size is set to Screen Fit, change it to 16:9.
•• Change the cable/satellite box resolution.
•• If you are using an AV composite input, connect the video cable
The picture is black and white.
(yellow) to the Green jack of Component Input 1 on the TV.
When changing channels, the
picture freezes or is distorted or
delayed.
•• If the TV is connected to a cable box, try to reset the box. (Disconnect
and then reconnect the AC cord and wait until the cable box reboots.
It may take up to 20 minutes.)
•• Set the output resolution of the cable box to 1080i or 720p.
◀
▶
English
Issues
Solutions and Explanations
3D
The 3D Active Glasses are not
working correctly
•• Make sure the glasses are turned on.
•• The 3D Active Glasses may not work properly if there is any other 3D
product or electronic devices turned on near the glasses or TV.
•• If there is a problem, keep other electronic devices as far away as
possible from the 3D Active Glasses.
The 3D images don’t look quite
right.
•• The ideal viewing distance is three times or more the height of the
screen.
•• We also recommend sitting with viewer’s eyes on a level with the
◀
screen
The batteries in the 3D glasses
don’t last
•• Turn off 3D glasses while not using them. If you leave 3D glasses on,
battery lifespan is shortened
English
▶
Issues
Solutions and Explanations
Sound Problem
First, perform the Sound Test to determine if your TV audio is operating
properly.
•• Go to MENU - Support - Self Diagnosis - Sound Test)
If the audio is OK, the sound problem may caused by the source or
signal.
There is no sound or the sound is
too low at maximum volume.
•• Please check the volume of the device (Cable/Sat Box, DVD, Blu-ray
etc.) connected to your TV.
◀
▶
English
Issues
Solutions and Explanations
The picture is good but there is
no sound.
•• Set the Speaker Select option to TV Speaker in the Sound menu.
•• If you are using an external device, check the device’s audio output
option. (Ex. You may need to change your cable box’s audio option
to HDMI if you have the box connected to your TV using an HDMI
cable.)
•• If you are using a DVI to HDMI cable, a separate audio cable is
required.
•• If your TV has a headphone jack, make sure there is nothing plugged
into it.
•• Reboot the connected device by disconnecting, and then
◀
reconnecting device’s power cable.
The speakers are making an
inappropriate noise.
•• Check cable connections. Make sure a video cable is not connected
to an audio input.
•• For antenna or cable connections, check the signal information. A low
signal level may cause sound distortion.
•• Perform the Sound Test as explained on a previous page.
English
▶
Issues
Solutions and Explanations
RF (Cable/Antenna) Connection
The TV is not receiving all
channels.
•• Make sure the coaxial cable is connected securely.
•• Run Auto Program to add available channels to the channel list. Go
to MENU - Channel - Auto Program then select Auto and make
sure to select the correct Cable TV signal type. There are 3 options,
STD, HRC and IRC. Most cable systems use STD.
No caption on digital channels.
•• Verify the antenna is positioned correctly.
•• Check the Caption Setup menu. Try changing Caption Mode
Service1 to CC1.
◀
The picture is distorted: macro
block error, small block, dots,
pixelization.
•• Some channels may not have caption data.
•• The compression of video contents may cause picture distortion,
especially with fast moving pictures such as sports and action movies.
•• A weak signal can cause picture distortion. This is not a TV problem.
English
▶
Issues
Solutions and Explanations
PC Connection
◀
A “Mode Not Supported”
message appears.
•• Set your PC’s output resolution so it matches a resolution supported
“PC” is always shown on the
source list, even if a PC is not
connected.
•• This is normal. “PC” is always shown in the source list, regardless of
The video is OK but there is no
audio.
•• If you are using an HDMI connection, check the audio output setting
by the TV.
whether a PC is connected.
on your PC.
Network Connection
The wireless network connection
failed.
Software Upgrade over the
network fails.
•• The Samsung Wireless USB dongle is required to use a wireless
network.
••
••
••
••
Make sure the Network Connection is set to Wireless.
Make sure the TV is connected to a wireless IP sharer (router).
Run Network Test in Network menu to confirm the connection.
If you have latest Software (SW) version, SW upgrade will not
proceed.
English
▶
Issues
Solutions and Explanations
Others
Purple/green rolling horizontal
bars and buzzing noise from the
TV speakers with a Component
cable connection.
•• Remove the left and right audio connections from the set-top-
The picture won’t display in full
screen.
•• HD channels will have black bars on either side of the screen when
box. If the buzzing stops, this indicates that the set-top-box has a
grounding issue. Replace the Component video cables with an HDMI
connection.
displaying up scaled SD (4:3) contents.
•• Black bars will appear on the top and bottom of the screen when you
watch movies that have aspect ratios different from your TV.
◀
•• Adjust the picture size options on your external device or the TV to full
screen.
A “Mode Not Supported”
message appears.
Caption on TV menu is greyed
out.
•• Check the supported resolution of the TV, and adjust the external
device’s output resolution accordingly. Refer to the resolution settings
on User manual.
•• The external device’s Capton function must also be activated
•• You cannot select the Caption menu if you have selected a source
connected to the TV via HDMI or Component.
•• The external device’s Caption function must also be activated.
English
▶
◀
Issues
Solutions and Explanations
There is a plastic smell from the
TV.
•• This smell is normal and will dissipate over time.
The TV Signal Information is
unavailable in the Self Diagnosis
menu.
•• This function is only available for digital channels the TV receives from
The TV is tilted to the side.
•• Remove the base stand from the TV and reassemble it.
The channel menu is greyed out
(unavailable).
•• The Channel menu is only available when you select the TV source.
Your settings are lost after 30
minutes or every time the TV is
turned off.
•• If the TV is in the Store Demo mode, it will reset audio and picture
an Antenna / RF/Coax connection.
settings every 30 minutes. Change the settings from Store Demo
mode to Home Use mode using the Plug & Play procedure. Press
the SOURCE button to select TV mode, and go to MENU → System
→ Plug & Play → ENTERE.
English
▶
Issues
Solutions and Explanations
You have intermittent loss of
audio or video.
•• Check the cable connections and reconnect them.
•• Loss of audio or video can be caused by using overly rigid or thick
cables. Make sure the cables are flexible enough for long term use.
If mounting the TV to a wall, we recommend using cables with 90
degree connectors.
◀
You see small particles when you
look closely at the edge of the
frame of the TV.
•• This is part of the product’s design and is not a defect.
The PIP menu is not available.
•• PIP functionality is only available when you are using an HDMI, PC, or
Component source.
POP (TV’s internal banner ad)
appears on the screen.
•• Select Home Use under Plug & Play mode. For details, refer to the
Plug & Play Feature.
English
▶
❑❑ Anti-theft Kensington Lock
A Kenisngton Lock is a device you can use
to physically fix your TV in place when using
it in a public place. You wrap the Kensington
Lock’s cable around a large, immobile object
and then attach the lock to the Kensington
slot on the back of the TV.
◀
<TV Rear>
1
<Optional>
The appearance and locking method may
differ from the illustration below depending
on the manufacturer. Refer to the manual provided with the Kensington Lock for
additional information on proper use. The Kensington Lock is not supplied by
Samsung.
NN Please find a “K” icon on the rear of the TV. The Kensington slot is beside the
“K” icon.
English
▶
To lock the product, follow these steps:
1. Wrap the Kensington Lock cable around a large, stationary object such as desk or
chair.
2. Slide the end of the cable with the lock attached through the looped end of the
Kensington Lock cable.
3. Insert the locking device into the Kensington slot on the product 1.
4. Lock the lock.
◀
NN These are general instructions. For exact instructions, see the User manual
supplied with the locking device.
NN The locking device has to be purchased separately.
NN The location of the Kensington slot may be different depending on the TV model.
English
▶
❑❑ License
TheaterSound, SRS and the
symbol are trademarks of SRS Labs, Inc.
TheaterSound technology is incorporated under license from SRS Labs, Inc.
Manufactured under license from Dolby Laboratories. Dolby and the double-D symbol are
trademarks of Dolby Laboratories.
◀
Manufactured under license under U.S. Patent #’s: 5,451,942; 5,956,674; 5,974,380;
5,978,762; 6,487,535 & other U.S. and worldwide patents issued & pending. DTS and
the Symbol are registered trademarks. & DTS 2.0+ Digital Out and the DTS logos are
trademarks of DTS, Inc. Product Includes software. © DTS, Inc. All Rights Reserved.
English
▶
DivX Certified® to play DivX® video up to HD 1080p, including premium content.
DivX®, DivX Certified® and associated logos are trademarks of DivX, Inc. and are used
under license.
ABOUT DIVX VIDEO: DivX® is a digital video format created by DivX, Inc. This is an official DivX Certified®
device that plays DivX video. Visit www.divx.com for more information and software tools to convert your
files into DivX video.
ABOUT DIVX VIDEO-ON-DEMAND: This DivX Certified® device must be registered in order to play
purchased DivX Video-on-Demand (VOD) movies. To obtain your registration code, locate the DivX VOD
section in your device setup menu. Go to vod.divx.com for more information on how to complete your
registration.
◀
Covered by one or more of the following U.S. patents : 7,295,673; 7,460,668; 7,515,710; 7,519,274
Open Source License Notice
In the case of using open source software, Open Source Licenses are available on the product menu.
Open Source License Notice is written only English.
English