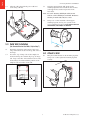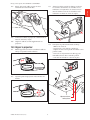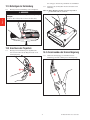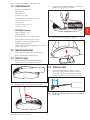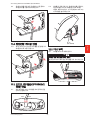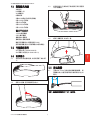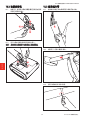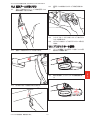
1
Français Deutsch For use with 3M™ Super Close Projection System Installation Instructions English 3M™ Folding Wall Mount SCPFWMSV2 Español Italiano 뼑霢꽩 ䷩橼ᷕ㔯 ㅔԧЁ᭛ 日本語 September 2009 78-6971-1458-1-B English 3M™ Folding Wall Mount SCPFWMSV2 This warranty applies to the continental US only. The warranty terms, conditions, remedy and limitation may vary in other countries. Contact your local 3M Company for warranty information. problems, interaction with non-3M products, or service other than by a 3M Authorized Service Provider, neglect or mishandling by any person. Normal wear and tear is not covered under warranty. The 3M Product is designed to operate in the typical indoor environment. This warranty does not cover 3M Product used outside of the following circumstances: • • 100V-240V AC, 50/60 Hz • • 10° to 35° C (50° to 95° F) 10-80% RH (without condensation) Warranty; Limited Remedy; Limited Liability • • • The 3M SCP700 Series projector (the “3M Product”) is warranted to be free from defects in material or manufacture for a period of three (3) years from the date of purchase or 4,000 hours of usage, whichever occurs first. All other accessories of the 3M Product (those in the applicable modular configurations), excluding the projector lamps, but including the wall mounts, ceiling mounts, digital annotation sensors, and input/output devices are warranted to be free from defects in material or manufacture for a period of one (1) year from the date of purchase. The lamp component of the 3M Product is warranted to be free from defects in material and manufacture for a period of ninety (90) days after the date of purchase of the 3M Product or 180 hours of lamp usage, whichever occurs first. This warranty is for parts only and in the case of an approved warranty claim for a lamp; your exclusive remedy will be for a replacement product shipped to your location. Optional product upgrades and/or accessories that are not sold as part of any modular configuration are subject to individual warranties. • 0-2286m (0-7500 feet) above sea level The Air Intake and Exhaust Vent must be clear of obstructions, including any potential blockage or obstructions caused from a ceiling or other mount. Inadequate air ventilation may cause the 3M Product to malfunction or may cause damage to the 3M Product which will void the warranty. This warranty does not cover any additional costs including, but not limited to, those associated with removal, cleaning or installation of the 3M Product, adjustments, (mechanical or electronic) made to the 3M Product or replacing customer replaceable parts like lamps. This warranty covers only normal use of the product. 24-hour-per-day or other excessive continual use is not considered normal use. This warranty does not cover consumables (e.g., fuses), other than lamps and only as set forth below. This warranty is not transferable. 3M is not responsible for warranty service should the 3M label or logo or the rating label or serial number be removed unless otherwise stated in writing for the purpose of private labeling for partnership requirements. THE WARRANTIES STATED ABOVE ARE EXCLUSIVE AND ARE MADE IN PLACE OF ANY AND ALL WARRANTIES, EXPRESS OR IMPLIED WARRANTIES OR CONDITIONS, INCLUDING ANY IMPLIED WARRANTY OF MERCHANTABILITY OR FITNESS FOR A PARTICULAR PURPOSE, OR ANY INDUSTRY PRACTICE OR CUSTOM OR TRADE USAGE. In the event the 3M Product fails to conform to the above stated warranties within the applicable warranty period, your exclusive remedy shall be, at 3M’s option, to replace or repair the 3M Product or to refund the purchase price of the 3M Product. All replaced parts or products become property of 3M. If the product is repaired, 3M will repair the defective part(s) with a new or used part(s). If the 3M Product is replaced, 3M will replace the 3M Product with the same or equivalent model and with a new or refurbished 3M Product. In the case of an approved warranty claim, the replacement 3M Product will carry only the remaining term of the original 3M Product’s warranty period as stated above. For warranty service, you must provide proof of the date of the original purchase else the manufacturing code date will be used to establish the start date of the warranty. The following are exclusions to the above listed warranty: This warranty does not cover 3M Product that is modified or damaged through improper storage, misuse, abuse, accident, vandalism, improper installation, neglect, improper shipping, damage caused by acts of war, disasters such as fire, flood, and lightning, improper electrical current, software This warranty does not cover postage, insurance, or shipping costs incurred in presenting your 3M Product for warranty service. Said costs are the customer’s responsibility. If a claimed defect cannot be identified or reproduced in service, the customer may be held responsible for cost incurred. Should your warranty upgrade include a “change out” service and the claimed defect cannot be identified or reproduced by the technician, the customer will be responsible for call out costs. FAILURE TO FOLLOW THE INSTRUCTIONS CONTAINED IN THE APPROPRIATE 3M PRODUCT MANUAL OR FAILURE TO USE THE 3M PRODUCT IN ACCORDANCE WITH 3M’S INTENDED USE STATEMENT, WILL VOID ALL WARRANTIES AND LIMITED REMEDIES. EXCEPT AS SPECIFICALLY STATED IN THE APPLICABLE 3M PRODUCT MANUAL, 3M SHALL NOT BE LIABLE FOR ANY INDIRECT, INCIDENTAL, SPECIAL OR CONSEQUENTIAL DAMAGES (INCLUDING, BUT NOT LIMITED TO, LOSS OF PROFITS, REVENUE OR BUSINESS) RESULTING FROM, OR IN ANY WAY RELATED TO PERFORMANCE, USE OR INABILITY TO USE ANY OF THE 3M PRODUCT. This limitation applies regardless of the legal theory upon which damages are sought. 2 © 2009 3M. All Rights Reserved. For warranty support, please call or write your local 3M office or a 3M Authorized Service Provider to obtain RMA # (Return Material Authorization Number) before returning the product. If you are inside the Continental United States of America, please contact 3M Customer Service at 800-328-1371 or email [email protected]. Safety Instructions What 3M Will Do To Correct Problems: If your 3M Product requires service, 3M will ask you to bring or send the 3M Product, securely packaged in its original container or equivalent, along with proof of the date of original purchase, to your 3M Service Dealer or 3M Service Center. Intended Use Please read and follow all safety information contained in these instructions prior to installation and use of the folding or fixed wall mounts. Retain these instructions for future reference. The folding wall mount is intended to provide wall mounting of the 3M™ Super Close Projection System SCP700 Series projectors to the wall as described in the Installation Instructions. It is expected that all installers and users be fully aware of safe operation of this product. Other applications have not been evaluated by 3M and may lead to an unsafe condition. 3M will, at its option, repair or replace the defective unit without charge for parts or labor. Return of the 3M Product will be at 3M’s expense. Explanation of Signal Word Consequences When warranty service involves the exchange of the 3M Product or of a part, the item replaced becomes 3M property. WARNING: Indicates a potentially hazardous situation, which if not avoided, could result in death or serious injury and/or property damage. The exchanged 3M Product or part may be new or previously refurbished to the 3M standard of quality, and at 3M’s option, the replacement may be another model of like kind and quality. CAUTION: Indicates a potentially hazardous situation, which if not avoided, may result in minor or moderate injury and/or property damage. 3M’s liability for replacement of the warranted 3M Product or part will not exceed the original retail selling price of the 3M Product. Exchange or replacement products or parts assume the remaining warranty period of the product covered by this limited warranty. However, each replacement lamp carries the limited 90-day warranty stated above. Summary of device labels containing safety information Caution: Pinch Hazard Warning: Do not hang on the product Attention: Read Accompanying Documentation Caution: Hot Surface Warning: Do not look into the projector lamp © 2009 3M. All Rights Reserved. 3 English 3M™ Folding Wall Mount SCPFWMSV2 English 3M™ Folding Wall Mount SCPFWMSV2 WARNING WARNING To reduce the risk associated with all applicable hazards: To reduce the risk associated with hazardous voltage: • Read and follow all safety information contained in the Installation Instructions and Product Safety Guide prior to installing, using or servicing the wall mount. Retain these instructions for future reference. • Do not re-route the factory installed cables of the folding wall mount from the bottom of the arm to the bottom of the base in any way (refer to the Installation Instructions). Pinching or wearing of the cables must be avoided. If any additional cables are added to the base, refer to the Installation Instructions. Inspect cables periodically for damage and repair all issues found prior to further use. • Always disconnect the projector power cord from electrical outlet prior to any servicing. To reduce the risk associated with choking: • Do not allow children access to small parts and/or packaging materials. To reduce the risk associated with impact: • The 3M Wall Mount Bracket is required hardware when installing the 3M Wall Mount onto concrete block walls and stud walls. • The Wall Mount Bracket must be installed right side out (refer to installation instructions for details). • Do not install the wall mount in an outdoor or wet environment. • Do not stuff excess cable lengths under the wall mount cover once base installation is complete. • If the 3M Wall Mount Bracket screws can not be driven into wall studs, do not install the bracket or the 3M system until the wall is properly reinforced. • Always provide proper adult supervision when using the wall mounted projector around children. • Do not use excessive force in opening or closing the folding arm of the wall mount. • Proper installation and servicing must be performed by experienced installers as outlined in the installation instructions. • This wall mount is to be used for mounting 3M™ Super Close Projection System SCP700 Series projectors only. It has not been tested for other applications. • Inspect the wall mount periodically to ensure all fasteners remain tightened and that no damage has occurred. Repair or replace all issues found prior to further use. • Do not modify the physical aspects of the wall mount. • Do not install on a mounting structure or surface that is prone to vibration, movement or chance of being impacted. • Do not install the wall mount near a heater, a fireplace or any other source of direct heat energy. To reduce the risk associated with fire: CAUTION To reduce the risk associated with pinch points: • Keep hands and fingers away from all moving parts to avoid pinch point injury. To reduce the risk associated with lifting: • Always use two experienced installers for installation of the wall mounts per the Installation Instructions due to weight and handling concerns. To reduce the risk associated with impact: • When installing the Wall Mount Bracket, use only the Long Anchors included with the bracket. SAVE THESE INSTRUCTIONS • The wall mounting structure or surface must be capable of supporting a minimum of 50 lbs vertical load. If not, the wall must be reinforced per the Installation Instructions prior to mounting. • The wall mounting structure or surface must be capable of supporting a minimum of 300 lbs pull out force. If not, the wall must be reinforced per the Installation Instructions prior to mounting. • Recommended mounting structure or surface is to solid wood (a minimum of ¾" plywood mounted to a minimum of two studs) or to solid concrete. If the wall mount is to be installed on any other structure or surface, use suitable hardware and/or materials which are commercially available. This hardware and/ or materials must be determined by an experienced installer. • Do not climb on, hang on or place any added weight other than the projector on the fixed or folding wall mount. 4 © 2009 3M. All Rights Reserved. 1.0 Kit Contents 3.3 Using a Phillips (+) screwdriver, remove the three screws holding the cover to the base. 3.4 Lift the cover off the base and set aside. Installation Instructions USB Cable 4m VGA Cable 4m 6x Cable ties 3x M6*25 Screws (for mounting projector) 2x 1-1/2" Lag Bolts 2x ½" Lag Anchors 2x 2-1/2" Lag Bolts 2x 1-1/2" Lag Anchors SCPFWMSV2 Only 1.8 m PC Audio Cable 3 m PC Audio Cable Power Supply for Speaker Amp Power Cord for Speaker Amp EU to UK power outlet adapter (EU/UK only) DC Power Cord (power from I/O to Speaker Amp) 2.0 Optional Accessories 3M™ Wall Mount Bracket (78-6969-9962-8) 3M™ Security Kit (78-6969-9961-0) 3.0 Remove the Cover 3.1 Remove the Folding Wall Mount from the packaging and set base-down on a table. 4.0 Route Cables 4.1 Feed the USB, VGA, and optional control cables through the arm. Align the cable ends and secure about 6 inches (150 mm) from the end using a cable tie. ~6" (150 mm) 3.2 Swing the arm up until it locks in place. Note: The optional control cable is shipped with the 3M ™ I/O Module. © 2009 3M. All Rights Reserved. 5 English 3M™ Folding Wall Mount SCPFWMSV2 English 3M™ Folding Wall Mount SCPFWMSV2 4.2 Align the cables alongside the power cable and secure using cable ties. 5.3 Using the appropriate bit, drill 4 holes for the mounting lag bolt anchors. Install the short anchors in the upper holes, and the long anchors in the lower holes. Note: Use a 1/2” masonry drill bit for solid concrete walls or a 3/16” drill bit for wood walls. Do not use anchors for wood walls, only use screws. 5.4 5.0 Solid Wall Installation 1/2" (13 mm) (For Concrete Block or Stud Walls, Skip to Step 7) 5.1 5.2 Using a 3/8” socket, install the 2 short (upper) mounting lag bolts, leaving 1/2” (13 mm) of the screw protruding from the wall. DO NOT INSTALL THE LONG (LOWER) LAG BOLTS. Determine desired size and location of projected image and mark the location of the top and center of the image. Locate the “top of image” line of the template for the desired image size and then align “top of image” and “image center line” lines with the location of the desired image size. Then mark the positions of the template’s four cross-hairs on the wall. 6.0 Attach to Wall 6.1 Hang the wall mount base on the mounting lag bolts. Using a 3/8" socket, tighten the mounting lag bolts securely. 3M™ Folding Wall Mount Mounting Template Descripteur de Support Montage-Schablone Modelo Del Montaje Mascherina Del Montaggio 架置模板 ໕ᆳ ቋዯഋ 土台のテンプレート For use with: Pour l'usage avec Für Gebrauch mit: Para el uso con: Per uso con: 至于使用与: 사용를 위해에: 使用のため下記のものの: SCP715, SCP717, SCP740 SCP715, SCP717 SCP740 1 Image Area 6 © 2009 3M. All Rights Reserved. English 3M™ Folding Wall Mount SCPFWMSV2 6.2 Install the long mounting lag bolts through the leveling screws and tighten securely. 7.4 Concrete block walls: Mark the hole positions in the vertical joints between the concrete blocks and then using a 1/2" (13 mm) bit, drill 4 holes 1-5/8" (41 mm) deep into the vertical joints between the concrete blocks. Install 4 long anchors in the holes. CAUTION To reduce the risk associated with impact: When installing the wall mount bracket, use only the 1½" (38 mm) long lag anchors included with the bracket, not the 1" (25 mm) short lag anchors. 16 in ) mm (406 6.3 Skip to Step 9. 7.0 3M™ Wall Mount Bracket Installation (For Use With Concrete Block or Stud Walls) 7.1 7.2 7.3 Determine desired size and location of projected image and mark the location of the top and center of the image. Align template with mounting holes in bracket and secure to bracket with tape. Locate the “top of image” line of the template for the desired image size and then align “top of image” and “image center line” lines with the location of the desired image size. Mark positions for four mounting holes according to the next step. 4X LONG Stud walls: Mark the holes at the center of the studs and then using a 3/16" (5 mm) bit, drill 4 holes 1-1/2" (38 mm) deep through the wall into the studs. 3M™ Folding Wall Mount Mounting Template Descripteur de Support Montage-Schablone Modelo Del Montaje Mascherina Del Montaggio 架置模板 ໕ᆳ ቋዯഋ 土台のテンプレート For use with: Pour l'usage avec Für Gebrauch mit: Para el uso con: Per uso con: 至于使用与: 사용를 위해에: 使用のため下記のものの: 1/2–5/8" (13–16 mm) SCP715, SCP717, SCP740 Align with holes in bracket SCP715, SCP717 SCP740 1 Image Area 4X © 2009 3M. All Rights Reserved. 7 English 3M™ Folding Wall Mount SCPFWMSV2 7.5 Using a 3/8" socket, attach the bracket to the wall using 4 short mounting lag bolts. 8.3 Install the long mounting screws through the leveling screws and tighten securely. 8.0 Attach Wall Mount Base to Bracket 8.1 Using a screwdriver, install the two short mounting screws with washers in the mounting bracket leaving 1/2” (13 mm) of the screw protruding from the bracket. Do not install the long (lower) mounting screws yet. 2X 9.0 Install Security Kit (Optional) 9.1 2X 8.2 Attach the optional security cable by either locking it to the mounting bracket security slot (1), looping it through the mounting bracket (2) or looping it through the screw-mount anchor point (3). 1 Hang the wall mount base on the mounting screws. Using a screwdriver, tighten the mounting screws securely. 2 3 Note: If using the screw-mount anchor point, secure the anchor point before attaching the cable. 9.2 Feed the security lock cable through the arm. Secure about 6 inches (150 mm) from the end of the existing cable bundle using a cable tie. ~6" (150 mm) 8 © 2009 3M. All Rights Reserved. 9.3 Route the security cable alongside the bundled cables and attach using cable ties. 11.2 Slide the cover over the arm. Attach the power and audio cables to the existing cable bundle using a cable tie. Leave 10–12” (250–300 mm) slack cable. 10–12" (250–300 mm) 10.0 Connect Power Extension Cable 10.1 Connect the power extension cable as shown. Secure with cable ties. 12.0 Attach Cover 12.1 Attach the cover to the base. WARNING To reduce the risk of hazardous voltage: Do not stuff excess cables under the wall mount cover. 11.0 Connect Audio Cables (SCPFWMSV2 only) 11.1 Connect the power and audio cables to the connections inside the cover. Power © 2009 3M. All Rights Reserved. Audio 9 English 3M™ Folding Wall Mount SCPFWMSV2 English 3M™ Folding Wall Mount SCPFWMSV2 13.0 Attach Projector 14.0 Assemble Arm Extension 13.1 14.1 Lift the assembly and feed the bundled cables through the open end of the arm extension. 14.2 Insert the arm extension into the arm as shown. 14.3 Install the 2 screws into the arm retainer. Using two screws and the thumbscrew, attach the mounting bracket to the end of the arm extension as shown. 2 3 1 13.2 Attach the projector to the mounting bracket with three screws. Note: Some models will require two washers per screw to ensure a tight fit. 10 © 2009 3M. All Rights Reserved. 14.4 Pull the cable bundle through the hole at the end of the arm extension. 14.5 Connect the cables to the projector according to the Quick Start Guide. 14.6 Attach the optional security cable to the projector. 15.0 Align Projector 15.1 Power on unit and change image size by adjusting the arm extension in or out. 15.2 Adjust projector aim by loosening the thumb screw. 15.3 Adjust vertical image position by removing the cover, loosening the lower mounting lag bolts or mounting screws, and adjusting the leveling screws. Tighten the lower mounting lag bolts or screws when finished, and replace the cover. 15.4 To adjust horizontal image position: 1. Remove the cover. 2. Loosen the adjustment and locking screws. 3. Move the arm left or right to the desired position. 4. Tighten the adjustment and locking screws to secure the arm in the new position. 5. Replace the cover when finished. Adjustment Screw Locking Screw © 2009 3M. All Rights Reserved. 11 English 3M™ Folding Wall Mount SCPFWMSV2 English 3M is a trademark of 3M Company. Important Notice All statements, technical information, and recommendations related to 3M’s products are based on information believed to be reliable, but the accuracy or completeness is not guaranteed. Before using this product, you must evaluate it and determine if it is suitable for your intended application. You assume all risks and liability associated with such use. Any statements related to the product which are not contained in 3M’s current publications, or any contrary statements contained on your purchase order shall have no force or effect unless expressly agreed upon, in writing, by an authorized officer of 3M. Warranty; Limited Remedy; Limited Liability. 3M warrants that when the 3M Product is used according to 3M’s Intended Use Statement (www.3M.com/meetings), it will perform satisfactorily for the warranted durability period as stated in the applicable 3M Product Manual in effect at the time of purchase. The warranties stated in the applicable 3M Product Manuals are exclusive and are made in place of any and all express or implied warranties or conditions, including any implied warranty of merchantability or fitness for a particular purpose, or any industry practice or custom or trade usage. 3 Projector Systems 6801 River Place Blvd. Austin, TX 78726 800 328 1371 www.3M.com/meetings Please Recycle. Printed in USA. © 3M 2009. All Rights Reserved. 78-6971-1458-1-B À utiliser avec un système de projection Super Close 3M™ Instructions relatives à l’installation Septembre 2009 78-6971-1458-1-B Français Montage mural repliable 3M™ SCPFWMSV2 Montage mural repliable 3M™ SCPFWMV2 et SCPFWMSV2 établir la date de départ de la garantie. Les conditions suivantes sont exclues de la garantie cidessus: Cette garantie ne couvre pas un produit 3M qui a été modifié ou endommagé à l'issue d'un stockage inadéquat, d'une utilisation erronée, abusive ou accidentelle, d'un vandalisme, d'une installation incorrecte, d'une négligence, d'une expédition inadéquate, ou d'une détérioration provoquée par des actes de guerre, des désastres tels qu'un incendie, des inondations et des éclairs, d'une tension électrique incorrecte, de problèmes de logiciels, d'une interaction avec des produits non 3M, ou d'une réparation effectuée par un prestataire de services non agréé par 3M, d'une négligence ou d'une manipulation incorrecte par une quelconque personne. Cette garantie ne couvre pas l'usure et la détérioration normale. Français Garantie, limite de recours et limite de responsabilité La présente garantie ne s’applique qu’aux États continentaux des USA. Les modalités, conditions, recours et limites de garantie peuvent différer dans d’autres pays. Adressez-vous à votre concessionnaire 3M local pour de plus amples informations sur la garantie. • Le projecteur 3M Série SCP700 (le "produit 3M") est garanti contre tout vice de matériau ou de main d'œuvre pour une période de trois (3) ans à compter de la date d'achat ou 4 000 heures de fonctionnement, selon la première de ces échéances. • Tous les autres accessoires du Produit 3M (ceux des configurations modulaires applicables), à l’exclusion des lampes de projecteur, mais y compris les fixations murales, les fixations de plafond, les capteurs d’annotation numériques et les périphériques d’entrée/ sortie sont garantis exempts de défaut de fabrication ou de main d’œuvre pendant une période d’un (1) an à compter de la date d’achat. • Le composant de la lampe du Produit 3M est garanti exempt de tout vice de matériau et de fabrication pendant une période de quatre-vingt-dix (90) jours à compter de la date d’achat du Produit 3M ou 180 heures d’utilisation de la lampe, selon la première de ces échéances. Cette garantie ne s’applique qu’aux seules pièces détachées et dans le cas d’une réclamation en garantie approuvée pour la lampe ; votre recours exclusif sera le remplacement du produit expédié à votre adresse. • Les accessoires et/ou mises a niveau optionnels non vendus dans le cadre d’une configuration modulaire font l'objet de garanties spécifiques. LES PRÉSENTES GARANTIES STIPULÉES CIDESSUS SONT EXCLUSIVES ET SE SUBSTITUENT À TOUTES AUTRES GARANTIES OU CONDITIONS, EXPRIMÉES OU TACITES, Y COMPRIS TOUTES GARANTIES IMPLICITES DE QUALITÉ MARCHANDE OU D'ADÉQUATION À UN BUT PARTICULIER, OU À UNE PRATIQUE INDUSTRIELLE, COUTUME OU À UN USAGE COMMERCIAL. Dans l'éventualité où le produit 3M ne serait pas conforme à la garantie stipulée ci-dessus dans la limite de la période pendant laquelle la garantie s'applique, votre recours exclusif, à la discrétion de 3M, sera de remplacer ou réparer le produit 3M ou d'en rembourser le prix d'achat. Toutes les pièces ou produits remplacés deviennent la propriété de 3M. Si le produit doit être réparé, 3M remplacera la/les pièce(s) défectueuse(s) par une/des pièce(s) neuve(s) ou usagée(s). Si le produit 3M est remplacé, 3M remplacera le produit 3M par un modèle identique ou équivalent et par un produit 3M neuf ou rénové. En cas de recours en garantie approuvé, le produit 3M de remplacement ne sera couvert que par la partie restante de la garantie du produit 3M original, comme stipulé ci-dessus. Pour une réparation sous garantie, vous devez fournir une preuve de la date d'achat initial, dans le cas contraire, la date de fabrication sera prise en compte pour Ce produit 3M est conçu pour fonctionner dans un environnement intérieur normal. La présente garantie ne couvre pas un produit 3M utilisé hors des circonstances suivantes: • 100V-240V c.a., 50/60 Hz • 10 ° à 35 °C (50 ° à 95 °F) • • Entre 10 et 80 % HR (sans condensation) Entre 0 et 2 286 m (0-7 5 00 pi) au-dessus du niveau de la mer L’arrivée d’air et l’ouverture d’évacuation doivent être dépourvues de toute obstruction, y compris de fermeture ou obstruction provoquée par un plafond ou autre fixation. Une ventilation inadéquate peut provoquer un dysfonctionnement du produit 3M ou le détériorer, ce qui annulerait la garantie. La présente garantie ne couvre pas les frais supplémentaires, notamment ceux associés à la dépose, au nettoyage ou à l'installation du Produit 3M, aux réglages (mécaniques ou électroniques) réalisés sur le Produit 3M ou au remplacement des pièces remplaçables par l’utilisateur comme les lampes. La présente garantie ne couvre qu'une utilisation normale du produit. Une utilisation 24 heures sur 24 ou autre utilisation continue excessive n’est pas considérée comme une utilisation normale. La présente garantie ne couvre pas les consommables (p. ex., fusibles), autres que les lampes et seulement dans les conditions stipulées ci-dessous. La présente garantie n'est pas cessible. 3M décline toute responsabilité en garantie en cas de retrait de l'étiquette ou du logo 3M, de l'étiquette nominale ou du numéro de série, sauf stipulation contraire par écrit dans le cadre d'un contrat privé de partenariat. La présente garantie ne couvre pas les frais de poste, d'assurance ou d'expédition occasionnés dans le cadre de la présentation en garantie de votre produit 3M. Les frais mentionnés sont sous la responsabilité du client. Si un défaut déclaré ne peut être identifié ou reproduit par nos services, le client peut être tenu responsable des frais occasionnés. Si votre extension de garantie inclut un service de "remplacement" et que le défaut déclaré ne peut pas être identifié ou reproduit par le technicien, le client sera responsable pour la totalité des frais de rappel. TOUTE UTILISATION DU PRODUIT 3M NE RESPECTANT PAS LES INSTRUCTIONS CONTENUES 14 © 2009 3M. Tous droits réservés. Montage mural repliable 3M™ SCPFWMV2 et SCPFWMSV2 DANS LE MANUEL DU PRODUIT 3M APPROPRIÉ OU LA DÉCLARATION D'USAGE PRÉVUE PAR 3M ANNULERA TOUTES LES GARANTIES ET LES RECOURS LIMITÉS. EN DEHORS DES CAS SPÉCIFIÉS DANS LE MANUEL APPLICABLE AU PRODUIT 3M, 3M DÉCLINE TOUTE RESPONSABILITÉ QUANT AUX DOMMAGES INDIRECTS, ACCIDENTELS, SPÉCIFIQUES OU SUBSÉQUENTS (INCLUS, MAIS NON LIMITÉS À, PERTE DE PROFITS, DE REVENUS OU D'ACTIVITÉ) RÉSULTANT OU ÉTANT, DE QUELQUE FAÇON QUE CE SOIT, LIÉ À LA PERFORMANCE, L'UTILISATION, OU L'IMPOSSIBILITÉ D'UTILISER UN PRODUIT 3M QUEL QU'IL SOIT. La présente limitation s'applique quelle que soit la théorie juridique sous laquelle les dommages sont revendiqués. Pour bénéficier de la garantie, veuillez appeler ou adresser un courrier au bureau 3M local, ou à un prestataire de services agréé 3M pour obtenir un n° d'ARM (autorisation de retour de marchandise) avant de renvoyer le produit. Si vous êtes dans un état américain continental, veuillez contacter le service des consommateurs 3M par téléphone au 1-800-3281371 ou par courriel à [email protected]. Ce que fera 3M pour corriger des problèmes : Instructions de sécurité La fixation murale repliable vise à assurer la fixation murale des projecteurs du Système de projection Super Close des séries SCP700 3M™ comme décrit dans les instructions d’installation. Il est indispensable que tous les installateurs et utilisateurs connaissent toutes les consignes de sécurité concernant le fonctionnement de ce produit. D'autres applications n'ont pas été évaluées par 3M et pourraient conduire à une situation dangereuse. Explication des conséquences du mot-indicateur AVERTISSEMENT : Indique une situation potentiellement dangereuse qui, si elle n’est pas évitée, pourrait entraîner des blessures graves, voire mortelles, et/ou des dégâts matériels. PRUDENCE : Indique une situation potentiellement dangereuse qui, si elle n’est pas évitée, pourrait entraîner des blessures mineures ou modérées et/ou des dégâts matériels. Si votre produit 3M nécessite un service, 3M vous demandera d'apporter ou d'envoyer le produit 3M, soigneusement emballé dans sa boîte d'origine ou équivalente, accompagné d'une preuve de la date d'achat, à votre revendeur 3M ou votre centre de maintenance 3M. 3M réparera ou remplacera à sa convenance l'unité défectueuse sans facturation pour les pièces ou la main d'œuvre. Le renvoi du produit 3M se fera aux frais de 3M. Lorsque le service de garantie inclus l'échange du produit 3M ou d'un composant, l'objet remplacé devient la propriété de 3M. Le produit ou le composant 3M échangé peut être neuf ou précédemment rénové au standard de qualité 3M, et à la convenance de 3M, le produit de remplacement peut être un autre modèle de même type et qualité. La responsabilité de 3M pour le remplacement du produit 3M ou du composant garanti n'excèdera pas le prix de vente au détail original du produit 3M. Les produits ou composants échangés ou remplacés ne sont couverts que par la partie restante de la garantie du produit couvert par cette garantie limitée. Cependant, chaque lampe de remplacement est couverte par la garantie limitée de 90 jours stipulée cidessus. Résumé des étiquettes du dispositif contenant des informations de sécurité Prudence : Risque de pincement Avertissement : Ne pas se suspendre au produit Attention : Veuillez lire la documentation jointe Prudence : Surface chaude Avertissement : Ne pas regarder directement la lampe du projecteur © 2009 3M. Tous droits réservés. 15 Français Veuillez lire et respecter toutes les informations de sécurité contenues dans ces instructions avant l'installation et l'utilisation des fixations murales repliables ou fixes. Conservez ces instructions en vue d’une utilisation ultérieure. Utilisation prévue Montage mural repliable 3M™ SCPFWMV2 et SCPFWMSV2 AVERTISSEMENT Français AVERTISSEMENT Pour réduire le risque associé à tous les dangers applicables : Pour réduire le risque associé aux tensions dangereuses : • Lire et respecter toutes les informations de sécurité contenues dans les instructions d’installation et le guide de sécurité avant d’installer, d’utiliser ou de réparer la fixation murale. Conservez ces instructions en vue d’une utilisation ultérieure. • Ne pas réacheminer de quelque manière que ce soit les câbles de la fixation murale repliable installés en usine qui vont du bas du bras au bas de la base (se reporter aux instructions d’installation). Il faut éviter de pincer ou d’user les câbles. Si des câbles supplémentaires sont ajoutés à la base, se reporter aux instructions d’installation. Inspecter périodiquement les câbles pour vérifier qu’ils ne sont pas endommagés et réparer tous les problèmes décelés avant toute autreutilisation. Pour réduire le risque de suffocation : • Ne pas laisser des enfants accéder aux petites pièces et/ou matériaux d’emballage. • Toujours débrancher le cordon d’alimentation électrique du projecteur de la prise secteur avant toute intervention. Pour réduire le risque associé à un impact : • Le Support de Fixation Murale 3M est le matériel requis pour l’installation de la fixation murale 3M dans les murs en parpaings et les parois. • Ne pas installer la fixation murale à l’extérieur ou dans un environnement humide. • Le Support de fixation murale doit être installé côté droit vers l’extérieur (consulter les instructions d’installation pour de plus amples détails). • Ne pas bourrer l’excédent de câbles sous le capot de la fixation murale une fois que l’installation de la base est terminée. • Si les vis du Support de Fixation Murale 3M ne peuvent être introduites dans les montants, ne pas installer le support ni le système 3M tant que la paroi n’est pas correctement renforcée. • Ne pas installer la fixation murale à proximité d’un radiateur, d’une cheminée ou d’une autre source de chaleur directe. Pour réduire le risque associé à un incendie : PRUDENCE • Toujours assurer une supervision appropriée par un adulte lors de l’utilisation du projecteur à fixation murale en présence d’enfants. Pour réduire le risque associé aux points de pincement : • Ne pas utiliser une force excessive pour ouvrir ou fermer le bras repliable de la fixation murale. • Maintenir les mains et les doigts à l’écart de toutes les pièces mobiles pour éviter les blessures par pincement. • L’installation et toute intervention doivent être confiées à des installateurs expérimentés, comme décrit dans les instructions d’installation. Pour réduire le risque associé au levage : • Toujours utiliser deux installateurs expérimentés pour l’installation des fixations murales, conformément aux instructions d’installation, en raison du poids et des risques de manipulation. • Cette fixation murale ne doit être utilisée que pour la fixation de projecteurs du Système de Projection Super Close de la série SCP700. Elle n’a pas été testée pour d’autres applications. Pour réduire le risque associé à un impact : • Lors de l’installation du Support de Fixation Murale, n’utiliser que les chevilles longues incluses avec le support. • Inspecter périodiquement la fixation murale pour vérifier que toutes les attaches sont bien serrées et qu’aucun dommage n’a eu lieu. Réparer ou remplacer tous les problèmes décelés avant toute autre utilisation. CONSERVER LES PRÉSENTES DIRECTIVES • Ne pas modifier les aspects physiques de la fixation murale. • Ne pas installer sur une structure ou une surface de fixation qui est soumise à des vibrations, à des mouvements, ou risque d’être heurtée. • La structure ou la surface de fixation murale doit être capable de soutenir au minimum une charge verticale de 22,7 kg (50 lbs). Sinon, le mur doit être renforcé conformément aux instructions d’installation avant le montage. • La structure ou la surface de fixation murale doit être capable de résister au minimum à une force d’arrachement de 136 kg (300 lbs). Sinon, le mur doit être renforcé conformément aux instructions d’installation avant le montage. • La structure ou surface de fixation recommandée doit être en bois plein (au minimum du contreplaqué de 19 mm [¾ po] monté au moins sur deux poteaux) ou en béton plein. Si la fixation murale doit être installée sur une autre structure ou surface, utiliser des accessoires et/ou matériaux qui sont disponibles dans le commerce. Ces accessoires et/ou matériaux doivent être déterminés par un installateur expérimenté. • Ne pas grimper, se suspendre, ni mettre de poids autre que celui du projecteur sur la fixation murale fixe ou repliable. 16 © 2009 3M. Tous droits réservés. Montage mural repliable 3M™ SCPFWMV2 et SCPFWMSV2 1.0 Contenu du Kit 3.3 Avec un tournevis cruciforme (+), retirer les trois vis fixant le couvercle sur la base. 3.4 Dégager le couvercle de la base et le mettre de côté. Instructions relatives à l’installation Français Câble USB de 4 m Câble VGA de 4 m 6 x colliers 3 x vis M6*25 (pour le motage du projecteur) 2 vis chevillées de 38 mm 2 x chevilles de 13 mm 2 vis chevillées de 63 mm 2 chevilles de 38 mm SCPFWMSV2 uniquement Câble audio PC de 1,8 m Câble audio PC de 3 m Alimentation pour ampli haut-parleurs Cordon d’alimentation pour ampli haut-parleurs Adaptateur secteur UE-RU (UE/RU uniquement) Cordon d’alimentation c.c. (cordon de E/S vers ampli haut-parleurs) 2.0 Accessoires en option Support mural 3M™ (78-6969-9962-8) Kit de sécurité 3M™ (78-6969-9961-0) 3.0 Retrait du Couvercle 3.1 Retirer la fixation murale repliable du conditionnement et la pose sur une table, base vers le bas. 4.0 Cheminement des câbles 4.1 Enfiler les câbles USB, VGA et commande en option dans le bras. Aligner les extrémités de câble et les fixer à environ 150 cm (6 po) l’extrémité avec un collier. ~6" (150 mm) 3.2 Déployer le bras jusqu’à ce qu’il se verrouille place. Remarque : Le câble de commande en option est livré avec le module d’E/S 3M ™. © 2009 3M. Tous droits réservés. 17 Montage mural repliable 3M™ SCPFWMV2 et SCPFWMSV2 Aligner les câbles le long du câble d’alimentation et les fixer avec des colliers. 5.3 Français 4.2 Au moyen d’un foret approprié, percer 4 trous pour les chevilles. Placer les chevilles courtes dans les trous supérieurs et les longues dans les trous inférieurs. Remarque : Utiliser un foret pour béton de 13 pour les murs en béton ou un foret pour bois de 5 pour les parois en bois. Ne pas utiliser de chevilles dans les parois en bois, n’utiliser que les vis. 5.4 Avec une clé de 9 mm, introduire les deux vis courtes (supérieures), en laissant 13 mm de la vis dépasser du mur. NE PAS INSTALLER LES CHEVILLES LONGUES (INFÉRIEURES). 5.0 Installation sur un mur massif (Pour le béton ou les parois passer à L’étape 7) 5.1 5.2 1/2" (13 mm) Établir la taille et l’emplacement de l’image projetée et marquer l’emplacement du haut et du centre de l'image. Repérer la ligne du « haut de l'image » du gabarit pour la taille de l'image voulue, puis aligner les lignes du « haut de l'image » et du « centre de l’image » avec les emplacements de la taille d’image voulue. Puis marquer les positions des quatre réticules du gabarit sur le mur. 6.0 Fixation au Mur 6.1 Suspendre la base de fixation murale sur les vis chevillées. Avec une clé de 9, serrer fermement les vis chevillées. 3M™ Folding Wall Mount Mounting Template Descripteur de Support Montage-Schablone Modelo Del Montaje Mascherina Del Montaggio 架置模板 ໕ᆳ ቋዯഋ 土台のテンプレート For use with: Pour l'usage avec Für Gebrauch mit: Para el uso con: Per uso con: 至于使用与: 사용를 위해에: 使用のため下記のものの: SCP715, SCP717, SCP740 SCP715, SCP717 SCP740 1 Image Area 18 © 2009 3M. Tous droits réservés. Montage mural repliable 3M™ SCPFWMV2 et SCPFWMSV2 6.2 Installer les vis longues dans les œillets et les serrer fermement. 7.4 Murs en parpaings : PRUDENCE Pour réduire le risque associé à un impact : Lors de l’installation du support mural, n’utiliser que les chevilles longues de 38 mm (1½ po) fournies avec le support, et non les chevilles courtes de 25 mm (1 po). 16 in ) mm 0 4 ( 6 6.3 Passer à L’étape 9. 7.0 Installation du support mural 3M™ (À utiliser sur parpaings ou des colombages) 7.1 7.2 7.3 Établir la taille et l’emplacement de l’image projetée et marquer l’emplacement du haut et du centre de l'image. Aligner le gabarit avec les trous de montage des supports et le fixer avec du ruban adhésif. Repérer la ligne du « haut de l'image » du gabarit pour la taille de l'image voulue, puis aligner les lignes du « haut de l'image » et du « centre de l’image » avec les emplacements de la taille d’image voulue. Marquer les positions des quatre trous de montage selon l’étape suivante. 4X LONG Parois : Marquer les trous au centre des montants, puis utiliser un foret de 5 mm (3/16 po), percer 4 trous de 38 mm (1-1/2 po) de profondeur dans les poteaux. 3M™ Folding Wall Mount Mounting Template Descripteur de Support Montage-Schablone Modelo Del Montaje Mascherina Del Montaggio 架置模板 ໕ᆳ ቋዯഋ 土台のテンプレート For use with: Pour l'usage avec Für Gebrauch mit: Para el uso con: Per uso con: 至于使用与: 사용를 위해에: 使用のため下記のものの: 1/2–5/8" (13–16 mm) SCP715, SCP717, SCP740 Align with holes in bracket SCP715, SCP717 SCP740 1 Image Area 4X © 2009 3M. Tous droits réservés. 19 Français Marquer les positions des trous dans les joint verticaux entre les parpaings puis en utilisant une mèche de 13 mm (1/2 po), forer 4 trous de 41 mm (1-5/8 po) de profondeur dans les joints verticaux entre les parpaings. Introduire les 4 chevilles longues dans les trous. Montage mural repliable 3M™ SCPFWMV2 et SCPFWMSV2 Français 7.5 Avec une clé de 9, fixer le support sur la paroi au moyen des 4 vis courtes fournies. 8.3 Installer les vis longues dans les œillets et les serrer fermement. 8.0 Adapter la base de fixation murale au support 8.1 Avec un tournevis, installer les deux vis courtes avec les rondelles dans le support de montage en laissant 13 mm (1/2 po) de la vis dépasser du support. Ne pas installer encore les vis longues (inférieures). 2X 9.0 Installation du kit de sécurité (facultatif) 2X 8.2 9.1 Adapter le câble de sécurité facultatif en le verrouillant sur la fente de sécurité du support de montage (1), en faisant une boucle sur le support de fixation (2) ou une boucle autour du point de fixation (3). Suspendre la base de fixation murale sur les vis. Avec un tournevis, serrer fermement les vis. 1 2 3 Remarque : Si le point de fixation est utilisé, fixer le point de fixation avant de fixer le câble. 9.2 Enfiler le câble de sécurité dans le bras. Le fixer à environ 150 mm (6 po) de l’extrémité du faisceau de câbles existant au moyen d’un collier. ~6" (150 mm) 20 © 2009 3M. Tous droits réservés. Montage mural repliable 3M™ SCPFWMV2 et SCPFWMSV2 9.3 Acheminer le câble de sécurité et les câbles en faisceau et les fixer avec des colliers. 11.2 Brancher la rallonge d’alimentation comme illustré. La fixer avec des colliers. 12.0 Fixer le couvercle 12.1 Fixer le couvercle sur la base. AVERTISSEMENT Pour réduire le risque de tension dangereuse : Ne pas placer les câbles en excès sous le couvercle de la fixation murale. 11.0 Connecter les câbles audio (SCPFWMSV2 uniquement) 11.1 Connecter les câbles d’alimentation et audio aux connexions à l’intérieur du couvercle. Power © 2009 3M. Tous droits réservés. Audio 21 Français 10–12" (250–300 mm) 10.0 Connecter la rallonge d’alimentation 10.1 Glisser le couvercle sur le bras. Attacher les câbles d’alimentation et audio au faisceau de câbles existants avec un collier. Laisser un jeu de 250 à 300 mm (10-12 po). Montage mural repliable 3M™ SCPFWMV2 et SCPFWMSV2 14.0 Assemblage de L’extension du Bras 13.1 14.1 Soulever l’ensemble et avancer le faisceau de câbles à travers l’extrémité ouverte de l’extension du bras. 14.2 Introduire l’extension du bras dans le bras comme illustré. 14.3 Installer les 2 vis dans la retenue du bras. Français 13.0 Adapter le Projecteur Avec deux vis et la vis moletée, fixer le support de fixation à l’extrémité de l’extension du bras d'extension comme illustré. 13.2 Adapter le projecteur au support de fixation avec trois vis. Remarque : Certains modèles nécessitent deux rondelles par vis pour assurer un bon serrage. 2 3 1 22 © 2009 3M. Tous droits réservés. Montage mural repliable 3M™ SCPFWMV2 et SCPFWMSV2 Tirer le faisceau de câbles à travers le trou à l’extrémité de l’extension du bras. 14.5 Connecter les câbles au projecteur conformément au Guide de démarrage rapide. 14.6 Adapter le câble de sécurité supplémentaire au projecteur. 15.0 Aligner le projecteur 15.1 Mettre l’appareil sous tension et modifier la taille de l’image en ajustant l’extension du bras. 15.2 Ajuster la portée du projecteur en desserrant la vis moletée. 15.3 Ajuster la position verticale de l’image en retirant le couvercle, desserrant les vis chevillées ou vis inférieures et en ajustant les vis de mise à niveau. Une fois terminé, serrer les vis chevillées ou vis inférieures et remettre le couvercle en place. 15.4 Pour ajuster la position horizontale de l’image : 1. Enlever le couvercle. 2. Desserrer les vis de réglage et de blocage. 3. Déplacer le bras vers la gauche ou la droite vers la position voulue. 4. Serrer les vis d’ajustement et de blocage pour immobiliser le bras dans la nouvelle position. 5. Une fois fini, remettre le couvercle en place. Adjustment Screw Locking Screw © 2009 3M. Tous droits réservés. 23 Français 14.4 Français 3M est une marque commerciale de 3M Company. Avis important Toutes les déclarations, informations techniques et recommandations relatives aux produits 3M sont fondées sur des informations fiables, néanmoins, leur exactitude et leur exhaustivité ne sont pas garanties. Avant d’utiliser ce produit, vous devez l’évaluer et déterminer s'il convient à l’usage que vous souhaitez en faire. Vous assumez tous les risques et responsabilités associés à un tel usage. Toute déclaration reliée au produit qui n’est pas contenue dans les publications courantes de 3M ou toute déclaration contradictoire énoncée sur votre bon de commande est nulle et sans valeur, à moins qu’elle ne fasse l’objet d’une approbation explicite écrite par un mandataire de 3M. Garantie, Recours Limité et Responsabilité Limitée. 3M garantit que lorsque le produit 3M est utilisé conformément aux Instructions d’utilisation prévue (www.3M.com/meetings), celui-ci fonctionnera de façon satisfaisante pendant la période de garantie comme stipulé dans le Manuel du produit 3M en vigueur à la date d’achat. Les présentes garanties stipulées dans les manuels de produit 3M sont exclusives et se substituent à toutes autres garanties ou conditions, exprimées ou tacites, y compris toutes garanties implicites de qualité marchande ou d'adéquation à un but particulier, ou à une pratique industrielle, coutume ou à un usage commercial. 3 Projector Systems 6801 River Place Blvd. Austin, TX 78726 800 328 1371 www.3M.com/meetings Penser à recycler. Imprimé aux U.S.A. © 3M 2009. Tous droits réservés. 78-6971-1458-1-B 3M™ ausklappbare Wandhalterung SCPFWMSV2 August 2009 78-6971-1458-1 Deutsch Zur Verwendung mit dem 3M™ Nah-Projektionssystem Installationsanleitung 3M™ ausklappbare Wandhalterung SCPFWMV2 und SCPFWMSV2 Diese Garantie deckt keine 3M Produkte, die modifiziert oder geändert wurden, oder durch missbräuchliche Verwendung, unsachgemäße Lagerung, Unfälle, Vandalismus, falsche Installation, Fahrlässigkeit, unsachgemäßen Transport beschädigt, oder bei Kriegshandlungen, Naturkatastrophen (z. B. Feuer, Überschwemmungen, Blitzschlag), ungeeignete elektrische Versorgungsspannungen, Softwareproblemen und Wechselwirkungen mit Nicht-3M-Produkten oder durch Wartungsarbeiten durch nicht von 3M autorisiertem Personal beschädigt werden. Die normale Abnutzung fällt ebenfalls nicht unter die Garantie. Garantie; Beschränkte Gewährleistung; Beschränkte Haftung Deutsch Diese Garantie gilt nur für das amerikanische Festland. Die Garantiebedingungen, Auflagen, Behelfe und Beschränkungen können in anderen Ländern abweichen. Kontaktieren Sie Ihr regionales 3M Unternehmen für Informationen zu den Garantiebestimmungen. • • • • Es wird garantiert, dass der 3M SCP700 (das “3M Produkt”) für einen Zeitraum von 3 Jahren ab Datum des Erwerbs bzw. für 4000 Betriebsstunden (je nachdem, welches Ereignis zuerst eintritt) frei von Material- und Produktionsfehlern ist. Das 3M Produkt wurde für den Gebrauch in typischen Innenräumen entwickelt. Die Garantie deckt keine Geräte, die außerhalb der folgenden Betriebsbedingungen verwendet werden: Es wird garantiert, dass alle anderen mit dem 3M Produkt gelieferten Zubehörteile (der entsprechenden modulären Konfigurationen), außer der Projektorlampe, aber einschließlich der Wand- und Deckenbefestigungen, der Sensoren für die digitalen Anmerkungen und die Eingabe-/ Ausgabegeräte für einen Zeitraum von 1 Jahr ab Datum des Erwerbs frei von Material- und Produktionsfehlern sind. • 100 V – 240 V AC, 50/60 Hz • 10° C bis 35 °C (50° F bis 95 °F) • 10-80 % Luftfeuchtigkeit (nicht kondensierend) • 0-2,286 m (0-7500 Fuß) über Normal-Null Der Luftein- und –auslass dürfen nicht verstopft sein, oder durch etwaige Decken- oder Wandhalterungen teilweise oder ganz verlegt werden. Mangelhafte Belüftung kann zur Fehlfunktion des 3M Produktes führen und Schäden verursachen, die nicht durch die Garantie gedeckt sind. Es wird garantiert, dass die Projektorlampe des 3M Produkts für einen Zeitraum von 90 Tagen ab Datum des Erwerbs bzw. für 180 Betriebsstunden (je nachdem, welches Ereignis zuerst eintritt) frei von Material- und Produktionsfehlern sind. Die Gewährleistung deckt nur Teile ab und im Fall eines anerkannten Garantiefalles für eine Lampe besteht Ihr einziger Anspruch darin, dass ein Ersatzprodukt an Ihren Standort geliefert wird. Diese Garantie deckt keine zusätzlichen Kosten, einschließlich aber nicht begrenzt auf den Abbau, die Reinigung oder den Aufbau des 3M Produktes oder Einstellungsarbeiten (mechanisch, elektronisch) am 3M Produkt oder den Austausch von durch den Kunden auswechselbaren Bauteilen, wie z. B. der Lampe. Diese Garantie deckt nur den üblichen Gebrauch des Gerätes. Ein Gebrauch rund um die Uhr oder andere lange kontinuierliche Benutzungen werden nicht als üblicher Gebrauch gewertet. Diese Garantie deckt keine Verbrauchsartikel (z. B. Sicherungen) außer den Lampen und diese nur in dem unten beschrieben Rahmen. Diese Garantie ist nicht übertragbar. Optionale Produktaktualisierungen bzw. Zubehörkomponenten, die nicht als Teil einer modularen Konfiguration verkauft werden, unterliegen ihren eigenen Garantiebestimmungen. MIT AUSNAHME DER AUSDRÜCKLICHEN OBEN ERWÄHNTEN GEWÄHRLEISTUNG SCHLIESST 3M ALLE ANDEREN GARANTIEN AUS. DIES BETRIFFT AUSDRÜCKLICHE UND STILLSCHWEIGENDE GARANTIEN, EINSCHLIESSLICH JEDOCH NICHT BESCHRÄNKT AUF DIE KONKLUDENTE GEWÄHRLEISTUNG DER MARKTGÄNGIGKEIT, DER EIGNUNG FÜR EINEN BESTIMMTEN VERWENDUNGSZWECK UND DER NICHTVERLETZUNG VON RECHTEN. 3M übernimmt keine Garantieaufträge, falls das 3M Etikett oder Logo, oder das Etikett mit den Betriebsdaten oder der Seriennummer entfernt wurden, außer in den Fällen, in denen schriftlich eine entsprechende Begründung für die modifizierte Beschriftung vorgelegt wird. Diese Garantie deckt keine Transportkosten oder die Kosten einer Transportversicherung, die anfallen, wenn das 3M Produkt an 3M zu Garantiearbeiten eingeschickt wird. Diese Kosten trägt der Kunde. Falls der Schaden nicht identifiziert oder nachvollzogen werden kann, können dem Kunden die entstandenen Kosten berechnet werden. Falls Ihre Garantie einen “Austausch”-Service enthält und der Schaden durch den Techniker nicht identifiziert oder nachvollzogen werden kann, können dem Kunden die entstandenen Kosten berechnet werden. Sollte dieses Gerät innerhalb des oben erklärten Garantiezeitraumes Defekte aufweisen, besteht Ihr einziger Anspruch nach Ermessen von 3M im Austausch oder Ersatz des 3M Produkts bzw. dessen Kaufpreiserstattung. Alle ersetzten Teile oder Produkte gehen in das Eigentum von 3M über. Falls das 3M Produkt repariert wird, kann 3M die defekten Komponenten mit neuen oder gebrauchten Bauteilen reparieren. Falls das 3M Produkt ersetzt wird, ersetzt 3M das Produkt mit dem gleichen oder einem gleichwertigen Produkt bzw. mit einem neuen oder wieder aufbereiteten 3M Produkt. Bei anerkannten Garantiefällen unterliegt das Ersatzgerät für das 3M Produkt nur der verbleibenden Garantiezeit des Originalgerätes. Im Garantiefall müssen Sie den Nachweis des Kaufs mit Kaufdatum vorlegen, da sonst das in der Seriennummer codierte Herstellungsdatum als Beginn der Garantiezeit herangezogen wird. ALLE GARANTIEN UND BEGRENZTEN GEWÄHRLEISTUNGEN WERDEN UNGÜLTIG, WENN DAS 3M PRODUKT NICHT WIE IN DER 3M BETRIEBSANLEITUNG BESCHRIEBEN ODER AUSSERHALB DES BESCHRIEBENEN VERWENDUNGSZWECKS VERWENDET WIRD. AUSSER WIE IN DER ENTSPRECHENDEN 3M BETRIEBSANLEITUNG DOKUMENTIERT; HAFTET 3M IHNEN GEGENÜBER IN KEINEM FALL FÜR Es folgen Ausnahmen zu den oben genannten Garantiebedingungen: 26 © 2009 3M. Alle Rechte vorbehalten. 3M™ ausklappbare Wandhalterung SCPFWMV2 und SCPFWMSV2 FOLGESCHÄDEN ODER SPEZIELLE, ZUFÄLLIGE BZW. INDIREKTE SCHÄDEN JEGLICHER ART, EINSCHLIESSLICH JEDOCH NICHT BESCHRÄNKT AUF GEWINNAUSFÄLLE ODER ERTRAGSVERLUSTE, DIE AUS DER VERWENDUNG DES PRODUKTES ODER DER TATSACHE RESULTIEREN, DASS DAS 3M PRODUKT NICHT VERWENDET WERDEN KONNTE. Diese Einschränkungen gelten unabhängig von der zugrunde gelegten Rechtsauffassung. Hinweise zur Sicherheit Bitte lesen und befolgen Sie vor der Installation der festen oder ausklappbaren Wandhalterung sorgfältig alle Sicherheitshinweise dieser Anleitung. Bewahren Sie dieses Dokument zum späteren Nachschlagen auf. Verwendungszweck Bevor Sie das Produkt wegen Garantiearbeiten einschicken, müssen Sie zuerst mit Ihrer örtlichen 3M Niederlassung oder einem von 3M autorisierten Service-Center Kontakt aufnehmen und sich eine RMA-Nummer (Return Material AuthorizationNummer) geben lassen. In den USA (Kontinentalgebieten) kontaktieren Sie dazu bitte den 3M Customer Service unter 800-800-328-1371 oder E-Mail [email protected]. Erklärung der Warnhinweise Wie geht 3M vor, um Probleme zu beheben: WARNUNG: Weist auf eine potenziell gefährliche Situation hin, die zum Tod oder zu schweren Verletzungen und/ oder zu Sachschäden führen kann, wenn sie nicht verhindert wird. Wenn Ihr 3M Produkt gewartet werden muss, müssen Sie das Produkt sicher in der Originalverpackung oder einer vergleichbaren Verpackung, zusammen mit dem Nachweis des Kaufdatums zu Ihrem 3M Service-Zentrum bringen oder dort hin senden. VORSICHT: Weist auf eine potenziell gefährliche Situation hin, die zu geringen oder mittelschweren Verletzungen und/oder Sachschäden führen kann, wenn sie nicht verhindert wird. 3M wird entscheiden, ob es die defekten Teile kostenlos (Material und Arbeitszeit) repariert oder ersetzt. Die Kosten des Rückversands trägt 3M. Ausgetauschte Geräte oder Bauteile gehen in das Eigentum von 3M über. Zusammenfassung der Produktetiketten, die Sicherheitsinformationen enthalten Das ausgetauschte 3M Produkt oder Bauteil kann ein neues oder nach den 3M Qualitätsstandards wieder aufbereitetes 3M Produkt oder Bauteil sein. Es liegt in der Entscheidung von 3M, ein anderes gleichwertiges Produkt als Ersatz zu liefern. Vorsicht: Quetschgefahr 3Ms Verpflichtung zum Ersatz eines durch die Garantie gedeckten 3M Produktes oder Bauteils überschreitet den Original-Kaufpreis des 3M Produktes nicht. Austausch- oder Ersatz-Produkte oder –Teile unterliegen der verbleibenden Garantiezeit des unter diese Garantie fallenden Produktes. Jede Ersatzlampe wird allerdings mit der oben genannten 90-tägigen begrenzten Gewährleistung geliefert. Warnung: Nicht an das Produkt hängen Vorsicht: Lesen Sie die Begleitdokumentation Vorsicht: Heiße Oberfläche Warnung: Nicht in die Projektorlampe schauen © 2009 3M. Alle Rechte vorbehalten. 27 Deutsch Die ausklappbare Wandhalterung eignet sich für die Wandbefestigung der Projektoren der 3M™ NahProjektionssysteme der SCP740 Serie, wie in der Montageanleitung beschrieben. Es wird erwartet, dass alle Personen, die die Montage vornehmen, und alle Anwender umfassen über den sicheren Betrieb dieses Produktes geschult sind. Andere Anwendungen wurden von 3M nicht geprüft und könnten zu unsicheren Situationen führen. 3M™ ausklappbare Wandhalterung SCPFWMV2 und SCPFWMSV2 WARNUNG WARNUNG Um das Risiko zu mindern, das mit gefährlichen Spannungen einhergeht: Um das Risiko für alle bestehenden Schäden zu mindern: Deutsch • Bitte lesen und befolgen Sie vor der Installation, Verwendung oder Wartung der Wandhalterung sorgfältig alle Sicherheitshinweise im Installations- und Sicherheitshandbuch. Bewahren Sie dieses Dokument zum späteren Nachschlagen auf. • Der Verlauf der werksinstallierten Kabel in der ausklappbaren Wandhalterung darf zwischen dem Ansatz des Arms bis zum Ansatz der Grundplatte auf keinen Fall verändert werden (siehe Montageanleitung). Ein Quetschen oder jeder Verschleiß der Kabel muss vermieden werden. Informationen zur Anbringung zusätzlicher Kabel finden sich in der Montageanleitung. Alle Kabel müssen regelmäßig auf Schäden überprüft werden und alle beschädigten Teile müssen vor der weiteren Verwendung repariert oder ausgetauschtwerden. Um das Erstickungsrisiko zu vermindern: • Die Kleinteile und Verpackungsmaterialien dürfen nicht in die Hände von Kindern gelangen. Zur Reduzierung des Risikos im Zusammenhang mit Stößen: • Die 3M Wandhalterung wird für die Montage an Betonstein- oder Ständerwände benötigt. • Vor eventuellen Wartungs- oder Reparaturmaßnahmen muss das Netzkabel des Projektors aus der Steckdose gezogen werden. • Die 3M Wandhalterung muss mit der rechten Seite nach außen montiert werden (siehe Monatageanleitung). • Die Wandhalterung nicht an feuchten Orten oder im Freien montieren. • Falls die Wandhalterung nicht an den Ständern befestigt werden kann, darf die Halterung oder das 3M System nicht montiert werden, bevor die Wand ausreichend verstärkt wurde. • Überschüssige Kabel dürfen nach Abschluss der Installation nicht unter die Abdeckung der Grundplatte der Wandhalterung gesteckt werden. • Sorgen Sie stets für ordnungsgemäße Beaufsichtigung durch einen Erwachsenen, wenn Sie den wandmontierten Projektor in Anwesenheit von Kindern benutzen. Zur Reduzierung des Brandrisikos: • Die Wandhalterung nicht in der Nähe eines Heizkörpers, eines Kamins oder einer anderen direkten Hitzequelle montieren. • Beim Öffnen oder Schließen des ausklappbaren Arms der Wandhalterung darf keine übermäßige Kraft angewendet werden. ACHTUNG • Wie in der Installationsanleitung beschrieben, darf die Installation und Wartung nur durch erfahrene Monteure vorgenommen werden. Zur Reduzierung des Quetschrisikos: • Hände und Finger nicht in die Nähe der beweglichen Teile bringen, um Quetschverletzungen zu vermeiden. • Diese Wandhalterung ist nur für die Montage der Projektoren der 3M™ Nah-Projektionssystem SCP700 Serie geeignet. Sie wurde für keine anderen Anwendungszwecke geprüft. Zur Reduzierung der Risiken im Zusammenhang mit dem Heben von Lasten: • Die Wandhalterung muss regelmäßig überprüft werden, um sicherzustellen, dass alle Befestigungselemente fest sind und kein Schaden aufgetreten ist. Alle festgestellten Schäden oder beschädigten Teile müssen vor der weiteren Verwendung repariert oder ausgetauscht werden. • Beauftragen Sie, wie in der Montageanleitung beschrieben, immer zwei erfahrene Monteure mit der Montage der Wandhalterung, um eventuellen Problemen beim Anheben und bei der Handhabung vorzubeugen. Zur Reduzierung des Risikos im Zusammenhang mit Stößen: • Die Bauteile und die Struktur der Wandhalterung dürfen nicht modifiziert werden. • Bei der Montage der Wandhalterung dürfen nur die mitgelieferten langen Ankerbolzen verwendet werden. • Sie darf nicht an einer Befestigungskonstruktion oder auf einer Oberfläche montiert werden, die Vibrationen, Bewegungen oder dem Risiko von Stößen ausgesetzt ist. BEWAHREN SIE DIESE ANLEITUNG SORGFÄLTIG AUF • Die Wandbefestigungskonstruktion oder die Oberfläche muss mindestens für eine senkrechte Belastung von 23 kg ausgelegt sein. Falls dies nicht der Fall ist, muss die Wand vor der Montage, wie in der Montageanleitung beschrieben, verstärkt werden. • Die Wandbefestigungskonstruktion oder die Oberfläche muss mindestens für eine Auszugskraft von 136 kg ausgelegt sein. Falls dies nicht der Fall ist, muss die Wand vor der Montage, wie in der Montageanleitung beschrieben, verstärkt werden. • Empfohlen wird eine Montage an eine Vollholzkonstruktion (mindestens 2 cm Schichtholz, das an 2 Ständern befestigt ist) oder an eine Betonwand. Falls die Wandhalterung an einer anderen Befestigungskonstruktion oder Oberfläche befestigt werden soll, müssen geeignete kommerziell erhältliche Befestigungsmaterialien verwendet werden. Diese Befestigungsmaterialen müssen von einem erfahrenen Monteur ausgewählt werden. • Zum Projektor dürfen keine anderen Gewichte zusätzlich an die feste oder ausklappbare Wandhalterung gehängt oder auf ihr abgestellt werden. Außerdem darf an der Konstruktion nicht geklettert werden. 28 © 2009 3M. Alle Rechte vorbehalten. 3M™ ausklappbare Wandhalterung SCPFWMV2 und SCPFWMSV2 1.0 Inhalt des Sets 3.3 Entfernen Sie mit einem Kreuzschlitzschraubenzieher die 3 Schrauben, die die Verkleidung mit der Basis verbinden. 3.4 Die Verkleidung von der Basis heben und beiseite legen. Installationsanleitung USB-Kabel, 4 m VGA-Kabel, 4 m 6x Kabelbinder 3x M6*25 Schrauben (zur Befestigung des Projektors) Deutsch 2x 1-1/2" Ankerbolzen 2x ½" Anker 2x 2-1/2" Ankerbolzen 2x 1-1/2" Anker Nur SCPFWMSV2 1,8 m PC-Audiokabel 3 m PC-Audiokabel Netzteil für Lautsprecherverstärker Netzkabel für Lautsprecherverstärker EU nach UK Steckdosenadapter (nur EU/UK) Gleichstrom-Stromkabel (Stromversorgung von E/A zu Lautsprecherverstärker) 2.0 Optionales Zubehör 3M™ Wandhalterung (78-6969-9962-8) 3M™ Sicherheits-Kit (78-6969-9961-0) 3.0 Entfernen der Abdeckung 3.1 Entnehmen Sie die ausklappbare Wandhalterung aus der Verpackung und setzen Sie sie mit der Basis voran auf einen Tisch. 4.0 Verlegen von Kabeln 4.1 Führen Sie die USB, VGA und die optionalen Steuerkabel durch den Arm. Richten Sie die Kabelenden aus und fixieren Sie sie nach ungefähr 15 cm mit einem Kabelbinder. ~6" (150 mm) 3.2 Klappen Sie den Arm hoch, bis er einrastet. Hinweis: Das optionale Impulskabel wird mit dem 3M ™ E/A Modul geliefert. © 2009 3M. Alle Rechte vorbehalten. 29 3M™ ausklappbare Wandhalterung SCPFWMV2 und SCPFWMSV2 4.2 Führen Sie die Kabel entlang der Stromversorgungskabel und befestigen Sie sie mit Kabelbindern. 5.3 Bohren Sie mit einem geeigneten Bohrer 4 Löcher für die Ankerbolzen. Montieren Sie die kurzen Ankerbolzen in den oberen Löchern und die langen Ankerbolzen in den unteren Löchern. Deutsch Hinweis: Verwenden Sie einen 13 mm (1/2”) Steinbohrer für massive Betonwände oder einen 5 mm (3/16”) Bohrer für Holzwände. An Holzwänden dürfen nur Schrauben verwendet werden, verwenden Sie keine Anker. 5.4 Verwenden Sie ein 5 mm (3/16”) Bit, um die 2 kurzen (oberen) Ankerbolzen zu montieren und lassen Sie dabei 13 mm (1/2”) der Schraube aus der Wand ragen. INSTALLIEREN SIE DIE ZWEI (UNTEREN) LANGEN ANKERBOLZEN. 5.0 Montage an einer Massivwand (Bei Betonstein- oder Ständerwänden mit Schritt 7 weitermachen) 5.1 Legen Sie die gewünschte Größe und Platzierung des projizierten Bildes fest und markieren Sie die obere Kante und den Mittelpunkt des Bildes. 5.2 Identifizieren Sie den „Oberen Bildrand“ der Vorlage der gewünschten Bildgröße und richten Sie dann den „Oberen Bildrand“ und die „Bildmittellinie“ mit dem gewünschten Projektionsort aus. Markieren Sie dann die vier Positionskreuze der Vorlage an der Wand. 1/2" (13 mm) 6.0 Wandbefestigung 6.1 Hängen Sie die Grundplatte der Wandhalterung an die Ankerbolzen. Ziehen Sie die Ankerbolzen mit einem 5 mm Bit fest an. 3M™ Folding Wall Mount Mounting Template Descripteur de Support Montage-Schablone Modelo Del Montaje Mascherina Del Montaggio 架置模板 ໕ᆳ ቋዯഋ 土台のテンプレート For use with: Pour l'usage avec Für Gebrauch mit: Para el uso con: Per uso con: 至于使用与: 사용를 위해에: 使用のため下記のものの: SCP715, SCP717, SCP740 SCP715, SCP717 SCP740 1 Image Area 30 © 2009 3M. Alle Rechte vorbehalten. 3M™ ausklappbare Wandhalterung SCPFWMV2 und SCPFWMSV2 6.2 Montieren Sie die langen Ankerbolzen durch die Stellschrauben und ziehen Sie sie fest an. 7.4 Betonsteinwände: Markieren Sie die Lage der Löcher in den vertikalen Spalten zwischen den Betonblöcken und bohren Sie mit einem 13 mm Bohrer vier 41 mm tiefe Löcher in die vertikalen Spalten zwischen den Betonblöcken. Monieren Sie vier lange Anker in den Löchern. ACHTUNG Verwenden Sie bei der Montage der Wandhalterung nur die 38 mm langen Ankerbolzen, die mit der Halterung geliefert werden und nicht die 25 mm kurzen Anker. 16 in ) mm (406 6.3 Machen Sie mit Schritt 9 weiter. 7.0 Montage der 3M™ Wandhalterung (Bei Betonstein- oder Ständerwänden) 7.1 Legen Sie die gewünschte Größe und Platzierung des projizierten Bildes fest und markieren Sie die obere Kante und den Mittelpunkt des Bildes. 7.2 Richten Sie die Vorlage mit den Montagelöchern der Halterung aus und befestigen Sie die Halterung mit Klebeband. 7.3 4X Identifizieren Sie den „Oberen Bildrand“ der Vorlage der gewünschten Bildgröße und richten Sie dann den „Oberen Bildrand“ und die „Bildmittellinie“ mit dem gewünschten Projektionsort aus. Markieren Sie die Position der vier Montagelöcher, wie im nächsten Schritt beschrieben. LONG Ständerwände: Markieren Sie die Löcher in der Mitte der Ständer und bohren Sie mit einem 5 mm (3/16") Bohrer vier 38 mm tiefe Löcher durch die Wand in die Ständer. 1/2–5/8" (13–16 mm) 3M™ Folding Wall Mount Mounting Template Descripteur de Support Montage-Schablone Modelo Del Montaje Mascherina Del Montaggio 架置模板 ໕ᆳ ቋዯഋ 土台のテンプレート For use with: Pour l'usage avec Für Gebrauch mit: Para el uso con: Per uso con: 至于使用与: 사용를 위해에: 使用のため下記のものの: SCP715, SCP717, SCP740 Align with holes in bracket SCP715, SCP717 SCP740 1 Image Area 4X © 2009 3M. Alle Rechte vorbehalten. 31 Deutsch Zur Reduzierung des Risikos im Zusammenhang mit Stößen: 3M™ ausklappbare Wandhalterung SCPFWMV2 und SCPFWMSV2 7.5 Verwenden Sie ein 5 mm (3/16”) Bit, um die Halterung mit den 4 kurzen Ankerbolzen zu montieren. 8.3 Montieren Sie die langen Schrauben durch die Stellschrauben und ziehen Sie sie fest an. 8.0 Montage der Grundplatte an die Halterung Deutsch 8.1 Verwenden Sie einen Schraubenzieher, um die 2 kurzen Schrauben mit Unterlegscheiben in der Halterung zu montieren, und lassen Sie dabei 13 mm (1/2”) der Schraube aus der Wand ragen. Installieren Sie die zwei (unteren) langen Ankerbolzen noch nicht. 2X 9.0 Installation des Sicherheitskits (optional) 2X 8.2 9.1 Befestigen Sie das Sicherheitskabel, indem Sie es entweder in den dafür vorgesehenen Schlitz (1) klemmen, oder durch die Halterung (2) oder durch den dafür vorgesehenen Verankerungspunkt (3) führen. 1 Hängen Sie die Grundplatte der Wandhalterung an die Schrauben. Ziehen Sie die Schrauben mit einem Schraubenzieher fest an. 2 3 Hinweis: Wenn Sie den Verankerungspunkt verwenden, muss dieser vor der Befestigung des Kabels gesichert werden. 9.2 Führen Sie das Sicherheitskabel durch den Arm. Sichern Sie den vorhandenen Kabelstrang ca. 150 mm vor dem Ende mit einem Kabelbinder. ~6" (150 mm) 32 © 2009 3M. Alle Rechte vorbehalten. 3M™ ausklappbare Wandhalterung SCPFWMV2 und SCPFWMSV2 9.3 Führen Sie das Sicherheitskabel an dem bestehenden Kabelbündel entlang und befestigen Sie es mit Kabelbindern. 11.0 Schließen Sie die Audiokabel (nur SCPFWMSV2) an 11.1 Verbinden Sie das Netzkabel und die Audiokabel mit den Anschlüssen im Gehäuse. 11.2 Audio Schieben Sie die Verkleidung über den Arm. Befestigen Sie das Netzkabel und die Audiokabel mit Kabelbindern am bestehenden Kabelstrang. Lassen Sie 25-30 cm Kabel herausragen. 10.0 Anschluss des StromversorgungsVerlängerungskabels 10.1 Schließen Sie das StromversorgungsVerlängerungskabel wie abgebildet an. Fixieren Sie es mit Kabelbindern. 10–12" (250–300 mm) © 2009 3M. Alle Rechte vorbehalten. 33 Deutsch Power 3M™ ausklappbare Wandhalterung SCPFWMV2 und SCPFWMSV2 13.2 12.0 Befestigen der Verkleidung 12.1 Befestigen Sie die Verkleidung an der Grundplatte. Befestigen Sie den Projektor mit drei Schrauben an der Halterung. Hinweis: Einige Modelle erfordern zwei Unterlegscheiben pro Schraube, um sie zu sichern. WARNUNG Um das Risiko zu mindern, das mit gefährlichen Spannungen einhergeht: Deutsch Schieben Sie überschüssige Kabel nicht unter die Abdeckung. 13.0 Anschluss des Projektors 13.1 Befestigen Sie die Halterung wie abgebildet mit den zwei Schrauben und der Flügelschraube an der Armverlängerung. 14.0 Zusammenbau der Armverlängerung 14.1 Heben Sie die Baugruppe an und führen Sie den Kabelstrang durch die Öffnung der Armverlängerung. 2 3 1 34 © 2009 3M. Alle Rechte vorbehalten. 3M™ ausklappbare Wandhalterung SCPFWMV2 und SCPFWMSV2 14.2 Führen Sie die Armverlängerung in den Arm ein. 14.5 Schließen Sie die Kabel, wie in der Kurzanleitung beschrieben, an den Projektor an. 14.6 Befestigen Sie das optionale Sicherheitskabel am Projektor. 15.0 Projektor ausrichten 14.4 Schalten Sie das Gerät ein und passen Sie durch Einstellen der Armverlängerung die Bildgröße an. 15.2 Richten Sie den Projektor mit der Stellschraube aus. 15.3 Die vertikale Bildposition kann angepasst werden, indem die Abdeckung abgenommen, die unteren Ankerbolzen gelöst und die Stellschrauben verstellt werden. Danach müssen die unteren Ankerbolzen oder Schrauben wieder angezogen werden und die Abdeckung muss wieder angebracht werden. Drehen Sie zwei Schrauben in die Armhalterung. Ziehen Sie den Kabelstrang aus der Öffnung am Ende der Armverlängerung. © 2009 3M. Alle Rechte vorbehalten. 35 Deutsch 14.3 15.1 Deutsch 15.4 So passen Sie die horizontale Bildposition an: 1. Abdeckung entfernen. 2. Die Stell- und Sicherungsschrauben lösen. 3. Arm nach links oder rechts in die gewünschte Position schieben. 4. Stell- und Sicherungsschrauben wieder festziehen, um den Arm in der neuen Position zu fixieren. 5. Nach Abschluss der Einstellungsarbeiten, Abdeckung wieder anbringen. Adjustment Screw Locking Screw 3M ist ein Warenzeichen von 3M Company. Wichtiger Hinweis Alle Aussagen, technischen Informationen und Empfehlungen zu den Produkten von 3M wurden nach unserem besten Wissen erstellt, ihre Richtigkeit und Vollständigkeit kann jedoch nicht garantiert werden. Vor der Benutzung des Gerätes müssen Sie dieses überprüfen und feststellen, ob es für Ihren Verwendungszweck geeignet ist. Sie sind für alle möglichen Risiken und die daraus eventuell entstehenden Haftungsansprüche, die durch einen solchen Einsatz resultieren, verantwortlich. Jegliche sich auf das Produkt beziehende Aussagen, die nicht aus einer aktuellen Veröffentlichung von 3M stammen bzw. jegliche im Kaufauftrag enthaltenen gegensätzlichen Aussagen sind ohne ausdrückliche schriftliche Genehmigung durch einen autorisierten Vertreter von 3M nicht gültig bzw. ohne Wirkung. Garantie; Beschränkte Gewährleistung; Beschränkte Haftung. 3M garantiert, dass das 3M Produkt, wenn es entsprechend seinem Verwendungszweck verwendet wird (www.3M.com/meetings), während der Gewährleistungszeit, wie in der 3M Gebrauchsanweisung zum Zeitpunkt des Kaufes beschrieben, funktioniert. Mit ausnahme der ausdrücklichen in den 3M betriebsanleitungen erwähnten gewährleistungen schliesst 3m alle anderen garantien aus. Dies betrifft ausdrückliche und stillschweigende garantien, einschliesslich jedoch nicht beschränkt auf die konkludente gewährleistung der marktgängigkeit, der eignung für einen bestimmten verwendungszweck und der nichtverletzung von rechten. 3 Projector Systems 6801 River Place Blvd. Austin, TX 78726 800 328 1371 www.3M.com/meetings Bitte recyceln. Gedruckt in den USA. © 3M 2009. Alle Rechte vorbehalten. 78-6971-1458-1-B Montaje mural plegable SCPFWMSV2 de 3M™ Septiembre de 2009 78-6971-1458-1-B Español Para usar con el sistema de proyección Super Close de 3M™ Instrucciones de instalación Montaje mural plegable SCPFWMV2 y SCPFWMSV2 de 3M™ desastres tales como fuego, inundación, y rayos, corriente eléctrica inadecuada, problemas de software, interacción con productos que no son 3M, o servicio distinto a aquel del proveedor de servicio autorizado de 3M, negligencia o mal manejo de alguna persona. El desgaste normal no está cubierto por la garantía. Garantía, derecho limitado, responsabilidad limitada Esta garantía es de aplicación en EE. UU. continental solamente. Los términos, las condiciones, los remedios y la limitación de la garantía pueden variar en otros países. Para información sobre la garantía, comuníquese con su oficina local de 3M Company. Español • • El producto 3M está diseñado para funcionar en un entorno típico cerrado. Esta garantía no cubre el producto 3M fuera de las siguientes circunstancias: Se garantiza que el proyector Series SCP700 de 3M (el “producto 3M”) no presentará defectos materiales ni de fabricación durante un periodo de tres (3) años desde la fecha de compra o 4.000 horas de uso, lo que ocurra primero. El resto de accesorios del producto 3M (aquéllos en las configuraciones modulares aplicables), excluyendo las lámparas del proyector, pero incluyendo los montajes murales, montajes para el techo, sensores de anotación digital, y dispositivos de entrada/salida están garantizados contra defectos materiales o de fabricación durante un periodo de un (1) año desde la fecha de compra. • Se garantiza que el componente de la lámpara del producto 3M no presentará daños materiales ni de fabricación durante un periodo de noventa (90) días desde la fecha de compra del producto 3M o 180 horas de uso de la lámpara, lo que ocurra primero. Esta garantía es para piezas exclusivamente y en el caso de una reclamación aprobada de garantía de una lámpara, su única solución será un producto sustituto que se le enviará a su instalación. • Las actualizaciones opcionales del producto y/o los accesorios que no se vendan como parte de una configuración modular están sujetos a garantías individuales. • 100V-240V CA, 50/60 Hz • De 10° a 35° C • HR 10-80% (sin condensación) • 0-2286 m (0-7500 pies) por encima del nivel del mar La ventilación de la entrada y salida de aire no debe estar obstruida, incluyendo cualquier posible bloqueo u obstrucción causada por el techo u otro montaje. Una ventilación inadecuada del aire causará que el producto 3M no funcione o causará daño al mismo lo que anulará la garantía. Esta garantía no cubre ningún coste adicional incluyendo, sin limitarse sólo a éstos, aquéllos asociados con la retirada, limpieza o instalación del producto 3M, ajustes (mecánicos o electrónicos) hechos en el producto 3M o sustitución de piezas reemplazables por el cliente, como lámparas. Esta garantía cubre sólo el uso normal del producto. Un uso continuo excesivo o de 24 horas por día no se considera un uso normal. Esta garantía no cubre consumibles (p, ej: fusibles), que no sean lámparas y sólo como se establece abajo. Esta garantía no es transferible. 3M no es responsable del servicio de garantía que no lleve la etiqueta o el logotipo de 3M o la etiqueta de evaluación o el número de serie esté eliminado a menos que se afirme de otra forma por escrito para el propósito del etiquetado privado para los requisitos societarios. LAS GARANTÍAS SEÑALADAS SON EXCLUSIVAS Y ESTÁN HECHAS EN LUGAR DE CUALQUIER Y DE TODAS LAS GARANTÍAS, EXPRESAS O IMPLÍCITAS O CONDICIONES, INCLUYENDO CUALQUIER GARANTÍA IMPLÍCITA O COMERCIABILIDAD O ADECUACIÓN PARA UN PROPÓSITO PARTICULAR, O CUALQUIER PRÁCTICA INDUSTRIAL O USO NORMAL O COMERCIAL. Esta garantía no cubre costes de portes, seguros o transporte en los que incurra al presentar el producto 3M para el servicio de garantía. Dichos costes son responsabilidad del cliente. Si un defecto reclamado no se puede identificar o reproducir en el servicio, el cliente puede ser responsable de los costes en los que se incurra. Su garantía deberá actualizarse incluyendo un servicio de "cambio" y el defecto reclamado no se puede identificar o reproducir por el técnico, el cliente será responsable de los costes. En el caso de que el producto 3M no cumpla con las garantías arriba mencionadas dentro del período aplicable de la garantía, su solución exclusiva será, a opción de 3M, sustituir o reparar el producto 3M o devolver el precio de compra del producto 3M. Todas las partes sustituibles o productos serán propiedad de 3M. Si el producto es reparable, 3M reparará la pieza (s) defectuosa (s) con pieza(s) nuevas o usadas. Si el producto 3M es sustituible, 3M lo sustituirá con el mismo o equivalente modelo y con un producto 3M nuevo o restaurado. En caso de una reclamación de garantía aprobada, el repuesto del producto 3M dispondrá sólo el tiempo restante de la garantía original 3M como se establece arriba. Para obtener un servicio de garantía, debe proporcionar una prueba de la fecha de la compra original, además la fecha del código de compra se utilizará para establecer la fecha de inicio de la garantía. EL NO SEGUIR LAS INSTRUCCIONES INCLUIDAS EN EL MANUAL DEL PRODUCTO 3M ADECUADO, O EL NO USAR EL PRODUCTO 3M SEGÚN LA DECLARACIÓN DE USO INDICADO DE 3M, ANULARÁ TODAS LAS GARANTÍAS Y LAS SOLUCIONES LIMITADAS. EXCEPTO COMO SE AFIRMA DE FORMA ESPECÍFICA EN EL MANUAL DEL PRODUCTO 3M, 3M NO SERÁ RESPONSABLE DE NINGÚN INCIDENTE INDIRECTO, ESPECIAL O COMO CONSECUENCIA, DAÑOS (INCLUYENDO, PERO NO LIMITADOA , PÉRDIDA O BENEFICIOS, INGRESOS O NEGOCIOS) QUE RESULTEN DE, O DE CUALQUIER FORMA RELATIVOS AL RENDIMIENTO, USO O IMPOSIBILIDAD DE USO CUALQUIERA DEL PRODUCTO 3M. Esta limitación aplica independientemente de la teoría legal bajo la cual se buscan los daños. Las siguientes son exclusiones a la garantía arriba indicada: Esta garantía no cubre el producto 3M que se ha modificado o dañado a causa de un almacenaje inadecuado, mal uso, abuso, accidente, vandalimo, instalación inadecuada, negligencia, transporte inadecuado, daño causado por acto de guerra, Para soporte de garantía, llame o escriba a su oficina local de 3M o a un proveedor de servicio autorizado de 3M para obtener 38 © 2009 3M. Reservados todos los derechos. Montaje mural plegable SCPFWMV2 y SCPFWMSV2 de 3M™ un RMA# (número de autorización para devolución de material) antes de devolver el producto. Si está en los Estados Unidos, contacte por favor con el Servicio de Atención al Cliente de 3M en el 1-800-328-1371 o envíe un correo electrónico a [email protected]. Instrucciones sobre seguridad Lea y observe por favor toda la información de seguridad contenida en estas instrucciones antes de la instalación y uso de los montajes plegables y fijos. Conserve estas instrucciones para futuras referencias. Lo que 3M hará para corregir los problemas: Utilización prevista Si su producto 3M precisa servicio, 3M le pedirá que traiga o envíe el producto 3M, embalado con seguridad en su embalaje original o equivalente, junto con la prueba de la fecha de la compra original, a su Distribuidor de servicio de 3M o al Centro de servicio de 3M. 3M, según su opción, reparará o sustituirá la unidad defectuosa sin cargo de piezas o mano de obra. La devolución del producto 3M correrá de parte de 3M. Cuando el servicio de garantía conlleva el cambio del producto 3M o de una parte, el artículo sustituido se convierte en propiedad de 3M. Explicación de las consecuencias de las señales escritas ADVERTENCIA: Indica una situación peligrosa en potencia, que de no evitarse, podía ocasionar la muerte o un accidente grave y/o daño a la propiedad. El producto 3M cambiado o la pieza pueden ser nuevos o previamente restaurada al estandar de calidad de 3M, y a opción de 3M, la reposición puede ser otro modelo del mismo tipo y calidad. PRECAUCIÓN: Indica una situación peligrosa en potencia, que de no evitarse, podía ocasionar un accidente leve o moderado y/o daño a la propiedad. La responsabilidad de 3M para la reposición del producto garantizado de 3M o de la pieza no excederá del precio de venta minorista del producto 3M. El cambio o la sustitución de los productos o piezas asumen el período de garantía restante del producto cubierto por esta garantía limitada. Sin embargo, cada lámpara de repuesto lleva una garantía limitada de 90 días como se afirmó anteriormente. El resumen de las etiquetas que contienen la información de seguridad Precaución: Peligro de estrangulamiento Advertencia: No lo cuelgue sobre el producto Atención: Lea la documentación adjunta Precaución: Superficie caliente Advertencia: No mire en el interior de la lámpara del proyector © 2009 3M. Reservados todos los derechos. 39 Español El montaje mural plegable está diseñado para permitir instalar en la pared los proyectores de la serie SCP700 del sistema de proyección Super Close de 3M™, tal como se describe en las instrucciones de instalación. Se espera que todos los instaladores y usuarios estén totalmente informados del funcionamiento seguro de este producto. Otras aplicaciones no han sido evaluadas por 3M y pueden conducir a una condición insegura. Montaje mural plegable SCPFWMV2 y SCPFWMSV2 de 3M™ ADVERTENCIA ADVERTENCIA Para reducir el riesgo asociado con la tensión peligrosa: Para reducir el riesgo asociado con todos los peligros aplicables: • No vuelva a dirigir los cables instalados de fábrica del montaje mural plegable desde la parte inferior del brazo hasta la parte inferior de la base de ninguna manera (consulte las instrucciones de instalación). El estrangulamiento o el desgaste de cables se debe evitar. Si se añaden cables adicionales a la base, diríjase a las instrucciones de instalación. Inspecciones los cables periódicamente para buscar daño y reparar todos los problemas antes de un uso posterior. • Lea y siga toda la información de seguridad incluida en las instrucciones de instalación y en la guía de seguridad del producto antes de instalar, o usar o dar servicio al montaje mural. Conserve estas instrucciones para futuras referencias. Para disminuir el riesgo de asfixia: • No permita que los niños accedan a piezas pequeñas ni a los materiales de embalaje. • Desconecte siempre el cable de alimentación del proyector de la toma de corriente eléctrica antes de cualquier tarea de servicio o mantenimiento. Español Para disminuir el riesgo de impactos: • El soporte del montaje mural de 3M es necesario cuando se instala el montaje mural de 3M en paredes de bloques de hormigón y de entramado. • No instale el montaje mural en espacios abiertos o en un entorno húmedo. • El soporte del montaje mural debe instalarse con el lado derecho hacia fuera (consulte los detalles en las instrucciones de uso). • No meta el cable sobrante bajo la cubierta del montaje mural una vez que haya terminado con la instalación de la base. • Si los tornillos del montaje mural de 3M no se atornillan en las vigas de la pared, no instale el soporte ni el sistema 3M hasta que la pared esté debidamente reforzada. Para reducir el riesgo asociado con el fuego: • No instale el montaje mural cerca de un calentador, una chimenea o cualquier otra fuente de energía térmica directa. • Siempre ofrezca la correcta supervisión por un adulto cuando utilice el proyector instalado en la pared cerca de niños. PRECAUCIÓN • No haga demasiada fuerza para abrir o cerrar el brazo plegable del montaje mural. Para reducir el riesgo asociado a los puntos de estrangulamiento: • Tal como se indica en las instrucciones de instalación, la instalación y servicio del sistema debe ser realizada por instaladores experimentados. • Mantenga las manos y los dedos lejos de todas las piezas móviles para evitar lesiones por mordedura. Para reducir el riesgo asociado con el arrancado: • Este montaje mural se utilizar solamente para instalar proyectores de la serie SCP700 del sistema de proyección Super Close de 3M™. No se ha probado para otras aplicaciones. • Utilice siempre dos instaladores experimentados para instalar los montajes murales según las instrucciones de instalación debido a problemas de peso y maniobrabilidad. • Inspeccione periódicamente el montaje mural para asegurarse de que todos los sujetadores siguen prietos y no se ha producido ningún daño. Repare o sustituya todos los problemas antes de su uso. Para disminuir el riesgo de impactos: • Cuando vaya a instalar el soporte del montaje mural, utilice solamente los anclajes largos que se incluyen con el soporte. • No modifique el aspecto físico del montaje mural. • No instale en una superficie o estructura de instalación propensa a vibraciones, movimiento o que tenga la posibilidad de recibir un impacto. GUARDE ESTAS INSTRUCCIONES • La estructura o superficie de instalación mural debe ser capaz de aguantar un mínimo de 50 libras/22,7 kg de carga vertical. En caso contrario, la pared se debe reforzar según las instrucciones de instalación antes del montaje. • La estructura o superficie de instalación mural debe ser capaz de aguantar un mínimo de 300 libras/136 kg de fuerza de tracción. Si no, la pared debe reforzarse según las instrucciones de instalación antes del montaje. • La superficie o estructura recomendada de instalación es madera sólida (contrachapado con un grosor mínimo de ¾" instalado en dos vigas como mínimo) o cemento macizo. Si el montaje para pared se va a instalar sobre alguna otra estructura o superficie, utilice un soporte físico adecuado y/o materiales que estén disponibles comercialmente. Este soporte físico y/o materiales los debe determinar un instalador experimentado. • No suba, cuelgue ni coloque ningún peso añadido que no sea el del proyector en el montaje mural fijo o plegable. 40 © 2009 3M. Reservados todos los derechos. Montaje mural plegable SCPFWMV2 y SCPFWMSV2 de 3M™ 1.0 Contenido del Kit 3.3 Utilizando un destornillador Phillips (+), retire los tres tornillos que soportan la tapa a la base. 3.4 Levante la tapa fuera de la base y apártela. Instrucciones de instalación Cable USB, 4 m Cable VGA, 4 m 6 ataduras para cables 3 tornillos M6*25 (para instalar el proyector) 2 pernos de sujeción de 1-1/2” 2 anclajes de ½" 2 pernos de sujeción de 2-1/2” 2 anclajes de 1-1/2” Español SCPFWMSV2 solamente Cable de audio PC; 1,8 m Cable de audio PC; 3 m Fuente de alimentación para amp. de altavoz Cable de alimentación para amp. de altavoz Adaptador de corriente UE a Reino Unido (UE/Reino Unido solamente) Cable de alimentación de CC (suministro de corriente de E/S a amp. altavoz) 2.0 Optional Accessories Soporte del montaje mural 3M™ (78-6969-9962-8) Kit de seguridad 3M™ (78-6969-9961-0) 3.0 Retirar la Tapa 3.1 Retirar el montaje mural plegable del embalaje y situarlo con la base hacia abajo sobre la mesa. 4.0 Dirija los cables 4.1 Pase el cable USB, VGA y los cables de control opcionales a través del brazo. Alinee los extremos de los cables y fíjelos aproximadamente a 150 mm (6 pulgadas) del extremo con una atadura para cable. ~6" (150 mm) 3.2 Despliegue el brazo hasta que se sitúe en su sitio. Nota: El cable de control opcional se envía con el módulo de E/S de 3M ™. © 2009 3M. Reservados todos los derechos. 41 Montaje mural plegable SCPFWMV2 y SCPFWMSV2 de 3M™ 4.2 Alinee los cables a lo largo del cable de alimentación y fíjelos con ataduras para cables. 5.3 Utilizando la broca adecuada, taladre 4 agujeros para los anclajes del perno de sujeción de montaje. Instale los anclajes cortos en los agujeros superiores, y los anclajes largos en los agujeros inferiores. Nota: Utilice una broca para taladro de mampostería de 1/2” para paredes de hormigón sólido o una broca de taladro de 3/16” para paredes de madera. No utilice anclajes para paredes de madera, utilice sólo tornillos. Español 5.4 Utilice una broca de 3/8”, instale los pernos cortos de sujeción de montaje (superior), dejando 1/2” (13 mm) del tornillo sobresaliendo de la pared. NO INSTALE LOS PERNOS LARGOS DE SUJECIÓN (INFERIOR). 5.0 Instalación mural sólida (Para paredes de bloques de hormigón o de entramado, salte al paso 7) 5.1 Determine el tamaño y la ubicación deseada de la imagen proyectada y marca la ubicación de la parte superior y central de la imagen. 5.2 Ubique la línea de la “parte superior de la imagen” de la plantilla para el tamaño deseado de la imagen y después alinee las líneas “parte superior de la imagen” y “línea central de la imagen” con la ubicación del tamaño deseado de la imagen. Después marque las posiciones de las cuatro cruces de la plantilla en la pared. 1/2" (13 mm) 6.0 Colóquelo en la Pared 6.1 Cuelgue la base de montaje mural en los pernos de sujeción de montaje. Utilice una broca de 3/8”, apriete los pernos de sujeción de montaje con seguridad. 3M™ Folding Wall Mount Mounting Template Descripteur de Support Montage-Schablone Modelo Del Montaje Mascherina Del Montaggio 架置模板 ໕ᆳ ቋዯഋ 土台のテンプレート For use with: Pour l'usage avec Für Gebrauch mit: Para el uso con: Per uso con: 至于使用与: 사용를 위해에: 使用のため下記のものの: SCP715, SCP717, SCP740 SCP715, SCP717 SCP740 1 Image Area 42 © 2009 3M. Reservados todos los derechos. Montaje mural plegable SCPFWMV2 y SCPFWMSV2 de 3M™ 6.2 Instale los pernos largos de sujeción de montaje por medio de los tornillos de nivelación y apriételos con seguridad. 7.4 Paredes de bloques de hormigón: Marque la posición de los orificios en las juntas verticales entre los bloques de hormigón y después con un taladro de 13 mm (1/2”), taladre 4 orificios de 41 mm (1-5/8”) de profundidad en las juntas verticales entre los bloques de hormigón. Instale 4 anclajes largos en los agujeros. PRECAUCIÓN Para disminuir el riesgo de impactos: 16 in ) mm (406 6.3 Salte al paso 9. 7.0 Instalación de Soporte de Montaje mural 3M™ (Para uso con paredes de bloques de hormigón o de entramado) 7.1 Determine el tamaño y la ubicación deseada de la imagen proyectada y marca la ubicación de la parte superior y central de la imagen. 7.2 Alinee la plantilla con los orificios de instalación en el soporte y fije al soporte con cinta adhesiva. 7.3 Ubique la línea de la “parte superior de la imagen” de la plantilla para el tamaño deseado de la imagen y después alinee las líneas “parte superior de la imagen” y “línea central de la imagen” con la ubicación del tamaño deseado de la imagen. Marque las posiciones de los cuatro orificios de instalación de acuerdo con el siguiente paso. 4X LONG Paredes de entramado: Marque los orificios en el centro de las vigas y después con un taladro de 5 mm (3/16”), taladre 4 orificios de 38 mm (1,5”) de profundidad en las vigas a través de la pared. 1/2–5/8" (13–16 mm) 3M™ Folding Wall Mount Mounting Template Descripteur de Support Montage-Schablone Modelo Del Montaje Mascherina Del Montaggio 架置模板 ໕ᆳ ቋዯഋ 土台のテンプレート For use with: Pour l'usage avec Für Gebrauch mit: Para el uso con: Per uso con: 至于使用与: 사용를 위해에: 使用のため下記のものの: SCP715, SCP717, SCP740 Align with holes in bracket SCP715, SCP717 SCP740 1 Image Area 4X © 2009 3M. Reservados todos los derechos. 43 Español Cuando instale el soporte del montaje mural, use sólo los anclajes largos de 38 mm (1,5") que se incluyen con el soporte, no los anclajes cortos de 25 mm (1"). Montaje mural plegable SCPFWMV2 y SCPFWMSV2 de 3M™ 7.5 Utilice una broca de 3/8”, coloque el soporte en la pared utilizando 4 pernos de sujeción de montaje cortos. 8.3 Instale los tornillos de montaje largos por medio de los tornillos de nivelación y apriételos con seguridad. 8.0 Coloque la base del montaje mural en el soporte Con un destornillador, instale los dos tornillos cortos de instalación con las arandelas en el soporte de instalación pero el tornillo debe sobresalir 13 mm (1/2”) del soporte. No instale los tornillos de montaje largos (inferior) aún. Español 8.1 2X 9.0 Instale el Kit de Seguridad (Opcional) 2X 8.2 9.1 Cuelgue la base de montaje mural en los tornillos de montaje. Utilice un destornillador, apriete los tornillos de montaje con seguridad. Instale el cable opcional de seguridad bloqueándolo en la ranura de seguridad del soporte de instalación (1), enrollándose a través del soporte de instalación (2) o enrollándolo a través del punto de anclaje del montaje con tornillos (3). 1 2 3 Nota: Si utiliza el punto de anclaje del tornillo del montaje de tornillo, asegure el punto de anclaje antes de colocar el cable. 9.2 Pase el cable de bloqueo de seguridad a través del brazo. Asegure unas 6 pulgadas (150 mm) desde el extremo del mazo de cables existentes utilizando la unión de cable. ~6" (150 mm) 44 © 2009 3M. Reservados todos los derechos. Montaje mural plegable SCPFWMV2 y SCPFWMSV2 de 3M™ 9.3 Dirija el cable de seguridad a lo largo del haz de cables y fíjelo con ataduras para cables. 11.2 Deslice la tapa sobre el brazo. Coloque la alimentación de cables de audio al mazo de cable existente utilizando una unión de cable. Deje 10-12” (250-300 mm) de cable suelto. Español 10–12" (250–300 mm) 10.0 Conecte el prolongador eléctrico 10.1 Conecte el prolongador tal como se muestra. Fije con ataduras para cables. 12.0 Acople la tapa 12.1 Coloque la tapa a la base. ADVERTENCIA Para reducir el riesgo de tensión peligrosa: No acumule exceso de cables bajo la tapa del montaje mural. 11.0 Conecte los cables de audio (SCPFWMSV2 solamente) 11.1 Conecte la alimentación y los cables de audio a las conexiones dentro de la tapa. Power Audio © 2009 3M. Reservados todos los derechos. 45 Montaje mural plegable SCPFWMV2 y SCPFWMSV2 de 3M™ 13.0 Coloque el proyector 14.0 Ensamble la extensión del brazo 13.1 14.1 Levante el ensamblaje y distribuya el mazo de cables a través del extremo abierto de la extensión del brazo. 14.2 Inserte la extensión del brazo en el brazo tal y como se muestra. 14.3 Instale los dos tornillos en el retén del brazo. Con dos tornillos y el tornillo de mariposa, acople el soporte de instalación al final de la extensión del brazo tal como se muestra. 2 Español 3 1 13.2 Coloque el proyector en el soporte de montaje con los tres tornillos. Nota: Algunos modelos necesitarán dos arandelas por tornillo para asegurar un ajuste prieto. 46 © 2009 3M. Reservados todos los derechos. Montaje mural plegable SCPFWMV2 y SCPFWMSV2 de 3M™ Tire del mazo del cable a través del agujero del extremo de la extensión del brazo. 14.5 Conecte los cables al proyector según la Guía de inicio rápido. 14.6 Coloque el cable de seguridad opcional en el proyector. 15.3 Ajuste la posición vertical de la imagen retirando la tapa, aflojando los pernos de sujeción inferiores o los tornillos de instalación y ajustando los tornillos niveladores. Apriete los tornillos o pernos de sujeción inferiores cuando haya terminado y vuelva a colocar la tapa. 15.4 Para ajustar la posición horizontal de la imagen: 1. Retire la tapa. 2. Afloje los tornillos de ajuste y de fijación. 3. Mueva el brazo hacia la izquierda o derecha hasta la posición deseada. 4. Apriete los tornillos de ajuste y de fijación para asegurar el brazo en la nueva posición. 5. Vuelva a colocar la tapa cuando haya terminado. Español 14.4 15.0 Alinee el proyector 15.1 Conecte la unidad y cambie el tamaño de imagen ajustando para ello la extensión del brazo hacia dentro o hacia fuera. 15.2 Ajuste el punto de mira del proyector aflojando el tornillo de mariposa. Adjustment Screw Locking Screw © 2009 3M. Reservados todos los derechos. 47 Español 3M es una marca registrada de 3M Company. Aviso importante Todas las declaraciones, información técnica y recomendaciones relacionadas con los productos de 3M se basan en información que se considera fiable, aunque no se garantiza su precisión ni su totalidad. Antes de utilizar este producto, debe evaluarlo y decidir si es adecuado para la utilización que se va a hacer de él. El usuario asumirá todos los riesgos y responsabilidades relacionadas con dicha utilización. Toda afirmación relacionada con el producto que no se incluya en las publicaciones actuales de 3M, así como cualquier afirmación contraria contenida en su pedido de compra, no se considerará en vigor ni surtirá ningún efecto, a menos que un representante autorizado de 3M lo haya acordado de manera expresa y por escrito. Garantía, Derecho Limitado, Responsabilidad Limitada. 3M garantiza que cuando el Producto 3M según el informe de uso previsto por 3M (www.3M.com/meetings), rendirá satisfactoriamente durante el período de durabilidad garantizada como se afirma en el Manual de producto 3M aplicable con efecto desde el momento de la adquisición. Las garantías señaladas en los manuales aplicables de los productos 3M son exclusivas y están hechas en lugar de cualquier y de todas las garantías, expresas o implícitas o condiciones, incluyendo cualquier garantía implícita o comerciabilidad o adecuación para un propósito particular, o cualquier práctica industrial o uso normal o comercial. 3 Projector Systems 6801 River Place Blvd. Austin, TX 78726 800 328 1371 www.3M.com/meetings Recicle por favor. Impreso en USA. © 3M 2009. Reservados todos los derechos. 78-6971-1458-1-B Attacco pieghevole a parete SCPFWMSV2 di 3M™ Da usare con il Super Close Projection System di 3M™ Istruzioni di installazione Italiano Settembre 2009 78-6971-1458-1-B Attacco pieghevole a parete SCPFWMV2 e SCPFWMSV2 di 3M™ tensione elettrica inadeguata, problemi software, interazione con prodotti non 3M, o interventi di manutenzione eseguiti da personale non autorizzato da 3M, negligenza o uso improprio da parte di terzi. La normale usura non è coperta dalla garanzia. Garanzia; Risarcimento limitato; Responsabilità limitata Questa garanzia è valida unicamente per gli USA continentali. I termini, le condizioni di garanzia, il rimedio e i limiti possono essere diversi in altri Paesi. Per avere informazioni sulla garanzia, contattare la sede locale di 3M Company. Il Prodotto 3M è indicato per l'utilizzo in un normale ambiente interno. Questa garanzia non copre il prodotto 3M utilizzato al di fuori delle seguenti circostanze: • Il proiettore 3M Serie SCP700 (il “Prodotto 3M”) è garantito sui difetti di materiale e di fabbricazione per un periodo di tre (3) anni dalla data di acquisto o per 4.000 ore di utilizzo, quale dei due casi si verifichi per primo. • 100 V-240 V c.a., 50/60 Hz • Da 10° a 35° C (da 50° a 95° F) • 10-80% di umidità relativa (senza condensa) Tutti gli altri accessori del Prodotto 3M (quelli nelle attuali configurazioni modulari), esclusa la lampada del proiettore, ma inclusi gli attacchi a parete, a soffitto, i sensori di rilevazione digitale e i dispositivi di ingresso/ uscita sono garantiti sui difetti di nei materiali o di fabbricazione per un periodo di un (1) anno dalla data di acquisto. • 0-2.286 m (0-7.500 ft) sul livello del mare Italiano • • Il componente della lampada del Prodotto 3M è garantito sui difetti di materiale e di fabbricazione per un periodo di novanta (90) giorni dalla data di acquisto del Prodotto 3M o per 180 ore di utilizzo della lampada, quale dei due casi si verifichi per primo. Questa garanzia è relativa unicamente alle parti e in caso di una garanzia richiesta approvata per una lampada il rimedio esclusivo per il cliente sarà un prodotto di ricambio spedito a domicilio. • Aggiornamenti opzionali di prodotti e/o accessori non venduti come parti di eventuale configurazione modulare sono soggetti a singole garanzie. Le aperture di aspirazione e di scarico dell’aria devono essere mantenute libere da ostruzioni, compreso il blocco potenziale o ostruzioni causate dall'attacco al soffitto o di altro tipo. Una ventilazione inadeguata può causare malfunzionamenti del Prodotto 3M o danni che ne annullano la Garanzia. La Garanzia non copre eventuali ulteriori costi, tra cui, senza limitazione, quelli associati a rimozione, pulizia o installazione del Prodotto 3M, regolazioni (meccaniche o elettroniche) effettuate al Prodotto 3M o la sostituzione di parti che il cliente può sostituire, come lampadine. Questa garanzia copre solo l'utilizzo normale del prodotto. 24 ore al giorno o altro uso continuato eccessivo non sono considerati uso normale. Questa garanzia non copre i prodotti di consumo (per es. i fusibili) al di fuori della lampada e solo nei termini indicati sotto. Questa garanzia non è trasferibile. 3M non è responsabile per il servizio di garanzia nel caso il logo o l'etichetta 3M, o la targhetta con valori e numero di serie vengano rimossi, salvo diversamente stabilito per iscritto allo scopo di marcatura privata (Private label) per esigenze di partnership. LE GARANZIE SOPRA RIPORTATE SONO ESCLUSIVE E SOSTITUISCONO TUTTE LE ALTRE EVENTUALI GARANZIE, ESPLICITE O IMPLICITE, COMPRESE EVENTUALI GARANZIE IMPLICITE DI COMMERCIABILITÀ O ADEGUATEZZA A UNO SCOPO SPECIFICO, O FUNZIONE INDUSTRIALE O UTILIZZO COMMERCIALE O SPECIFICO. Questa garanzia non copre i costi relativi a spedizioni, posta, assicurazioni, sostenuti per sottoporre il Prodotto 3M al servizio in garanzia. Detti costi sono a carico del cliente. Nel caso un difetto segnalato non possa essere identificato o riprodotto dal servizio di assistenza, al cliente possono essere addebitati i costi sostenuti. Nel caso l'estensione della garanzia comprenda un servizio di "scambio" e il segnalato non possa essere identificato o riprodotto dal tecnico, al cliente verranno addebitati i costi di intervento. Nel caso il Prodotto 3M non risulti conforme alle suddette garanzie entro il periodo di validità della garanzia, l'unico rimedio consentito, a discrezione di 3M, sarà la sostituzione o riparazione del prodotto 3M o il rimborso del prezzo di acquisto dello stesso. Tutti i componenti o i prodotti sostituiti diventano proprietà di 3M. Se il prodotto deve essere riparato, 3M si impegna a riparare i componenti difettosi con componenti nuovi o usati. Se il Prodotto 3M viene sostituito, 3M si impegna a sostituirlo con un modello uguale o equivalente e con un prodotto nuovo o rigenerato. In caso di richiesta approvata di applicazione della garanzia, il Prodotto 3M di ricambio sarà soggetto esclusivamente al periodo di garanzia del prodotto originale, come indicato sopra. Per le riparazioni in garanzia è necessario fornire la data di acquisto originaria; in alternativa per determinare la data di inizio della garanzia verrà usata la data del codice di produzione. LA MANCATA OSSERVANZA DELLE ISTRUZIONI CONTENUTE NEL RELATIVO MANUALE DEL PRODOTTO 3M O L'USO DEL PRODOTTO 3M NON IN CONFORMITÀ CON LA DICHIARAZIONE DI USO PREVISTO DI 3M, DETERMINERANNO L'ANNULLAMENTO DI TUTTE LE GARANZIE E DEI RIMEDI LIMITATI. TRANNE IN CASO DI DICHIARAZIONE SPECIFICA NEL RELATIVO MANUALE DEL PRODOTTO 3M, 3M NON POTRÀ ESSERE CONSIDERATA RESPONSABILE PER EVENTUALI DANNI DIRETTI, ACCIDENTALI, SPECIALI O CONSEGUENTI (COMPRESI, MA NON LIMITATI A, PERDITA DI PROFITTI, FATTURATO O AFFARI) DERIVANTI DA, O IN QUALCHE MODO COLLEGATI A PRESTAZIONI, USO O IMPOSSIBILITÀ DI USARE IL PRODOTTO 3M. Questa limitazione vale indipendentemente dalla teoria legale alla base dei danni. I seguenti casi rappresentano eccezioni alla suddetta garanzia: Questa garanzia non copre il Prodotto 3M modificato o danneggiato a seguito di conservazione inadeguata, utilizzo improprio, abuso, incidente, vandalismo, installazione inadeguata, negligenza, spedizioni inadeguate, danni causati da atti di guerra, disastri quali incendi, inondazioni e fulmini, 50 © 2009 3M. Tutti i diritti riservati. Attacco pieghevole a parete SCPFWMV2 e SCPFWMSV2 di 3M™ Per l’assistenza sulla Garanzia, scrivere o telefonare all’ufficio locale 3M o ad un fornitore autorizzato per l’assistenza 3M per ottenere un codice RMA (Numero di autorizzazione per la resa del materiale), prima della restituzione del prodotto. Se residenti negli Stati Uniti continentali, contattare l'Assistenza clienti 3M al numero 800-328-1371 oppure inviare una e-mail all’indirizzo [email protected]. Istruzioni per la sicurezza Cosa si impegna a fare 3M per correggere i problemi: L’attacco pieghevole serve a fornire un fissaggio a parete dei proiettori 3M™ Super Close Projection System Serie SCP700, come descritto nelle Istruzioni per l’installazione. Tutti gli installatori e utenti sono tenuti a conoscere perfettamente le norme per un utilizzo sicuro del prodotto. Altre applicazioni non sono state valutate da 3M e possono portare a condizioni non sicure. Prima di installare ed utilizzare questi attacchi a parete fissi e pieghevoli, si prega di leggere e di seguire tutte le istruzioni sulla sicurezza contenute in questo manuale. Conservare queste istruzioni per una futura consultazione. Destinazione d'uso Se il Prodotto 3M necessita di assistenza, 3M chiede di portarlo o inviarlo, imballato nel suo contenitore originale o in un imballaggio equivalente, con una prova della data dell’acquisto originaria, al rivenditore o al Centro assistenza 3M. 3M si impegna a riparare o a sostituire, a sua discrezione, l'unità difettosa senza addebiti per componenti o manodopera. Le spese per la rispedizione del prodotto 3M saranno a carico di 3M. Spiegazione delle conseguenze dei termini di segnalazione Nel caso le prestazioni di assistenza riguardino la sostituzione del prodotto 3M o di un suo componente, il componente diverrà proprietà di 3M. ATTENZIONE: Indica una situazione potenzialmente pericolosa che, se non evitata, potrebbe provocare infortuni leggeri o moderati e/o danni materiali. Il Prodotto o componente 3M sostituito potrà essere nuovo o precedentemente revisionato secondo gli standard di qualità 3M e, a discrezione di 3M, la sostituzione potrà essere effettuata da un altro modello di tipologia e qualità analoghe. Sommario delle etichette sui dispositivi che riportano informazioni per la sicurezza La responsabilità di 3M per la sostituzione del prodotto o del componente 3M in garanzia non potrà superare il prezzo di vendita al dettaglio del prodotto 3M. I prodotti o componenti di sostituzione saranno soggetti al rimanente periodo di garanzia del prodotto coperto da questa garanzia limitata. Fanno eccezione le lampade in sostituzione, soggette a un periodo di 90 giorni di garanzia, come indicato sopra. Attenzione: Pericolo di schiacciamento Avvertenza: Non farsi reggere dal prodotto Attenzione: Leggere la documentazione allegata Attenzione: Superficie rovente Avvertenza: Non fissare la luce del proiettore © 2009 3M. Tutti i diritti riservati. 51 Italiano AVVERTENZA: Indica una situazione potenzialmente pericolosa che, se non evitata, potrebbe provocare la morte o gravi infortuni e/o danni materiali. Attacco pieghevole a parete SCPFWMV2 e SCPFWMSV2 di 3M™ AVVERTENZA Italiano AVVERTENZA Per ridurre il rischio associato a tensioni pericolose: Per ridurre il rischio associato a tensioni pericolose: • Prima dell’installazione, dell’uso o della riparazione dell’attacco a parete, leggere e seguire tutte le informazioni contenute nelle Istruzioni per l’installazione e nella Guida per la sicurezza del prodotto. Conservare queste istruzioni per una futura consultazione. Per ridurre il rischio di soffocamento: • Non disporre in nessun altro modo i cavi installati in fabbrica sull’attacco pieghevole a parete dalla parte inferiore del braccio al fondo della base (fare riferimento alle Istruzioni di installazione). I cavi non devono essere schiacciati e non devono usurarsi. Se vengono aggiunti cavi alla base, fare riferimento alle istruzioni di Installazione. Verificare periodicamente che i cavi non presentino danni e riparare tutti i problemi prima di un ulteriore uso. • Evitare ai bambini l'accesso a piccole parti e/o ai materiali di imballaggio. • Prima di qualsiasi intervento, scollegare sempre l’alimentazione del proiettore dalla presa elettrica. Per ridurre i rischi associati all’impatto: • Non installare l’attacco a parete in un ambiente esterno o umido. • Se si installa l’attacco a parete su pareti in blocchi di calcestruzzo e in travi, la staffa di fissaggio a parete 3M richiede dei dispositivi di fissaggio. • Dopo il completamento dell'installazione della base, non inserire quantità eccessive di cavi sotto il coperchio dell’attacco a parete. Per ridurre il rischio associato ad incendi: • La staffa di fissaggio a parete deve essere installata a destra (per i particolari, fare riferimento alle istruzioni di installazione). • Non installare l’attacco a parete vicino ad un termosifone, un caminetto o qualsiasi altra fonte diretta di calore. • Se le viti della staffa 3M di fissaggio a parete non possono essere inseriti nelle travi della parete, non installare la staffa o il sistema 3M finché la parete non è stata adeguatamente rinforzata. ATTENZIONE Per ridurre il rischio associato ai punti di schiacciamento: • Durante l’uso del proiettore montato a parete, garantire sempre la corretta supervisione da parte di un adulto. • Tenere mani e dita lontano da tutte le parti in movimento, per evitare lesioni da schiacciamento. • Non forzare l'apertura o la chiusura del braccio pieghevole del montaggio a parete. Per ridurre il rischio associato al sollevamento: • L’installazione e la manutenzione appropriate devono essere eseguite da installatori competenti, come previsto dalle istruzioni per l’installazione. • Per il peso e per i problemi di manipolazione, effettuare sempre l’installazione degli attacchi a parete con due installatori competenti, secondo le Istruzioni di installazione. • Questo attacco a parete deve essere utilizzato unicamente per fissare i proiettori Super Close Projection System Serie SCP700 di 3M™. Non è stato testato per altre applicazioni. Per ridurre i rischi associati all’impatto: • Installando la staffa per fissaggio a parte, utilizzare solamente gli ancoraggi lunghi inclusi con la staffa. • Ispezionare periodicamente l’attacco a parete per verificare il serraggio di tutti i dispositivi di fissaggio e che non si sia verificato alcun danno. Riparare o sostituire tutto quanto è necessario prima di ogni ulteriore utilizzo. CONSERVARE QUESTE ISTRUZIONI • Non modificare le caratteristiche fisiche dell’attacco a parete. • Non installare su una struttura di fissaggio o una superficie che può subire vibrazioni, movimenti o che può subire impatti. • La struttura o la superficie di fissaggio a parete deve essere in grado di sostenere un minimo di carico verticale di 22,6 kg (50 lbs). In caso contrario la parete deve essere rinforzata prima del montaggio, secondo le Istruzioni di installazione. • La struttura o la superficie di fissaggio su parete deve essere in grado di sostenere un minimo di forza di estrazione di 136 kg (300 lbs). In caso contrario la parete deve essere rinforzata prima del montaggio, secondo le Istruzioni di installazione. • Si consiglia una struttura o una superficie di fissaggio di legno pieno (minimo di 19 mm di compensato con un minimo di travi) o di calcestruzzo pieno. Se l’attacco a parete deve essere installato su un’altra struttura o superficie, utilizzare bulloneria o altro materiale di fissaggio adatti e disponibili in commercio. Questo materiale deve essere deciso da un installatore competente. • Non salire sull’attacco fisso o pieghevole a parete, non appendervisi né collocarvi ulteriori pesi oltre al proiettore. 52 © 2009 3M. Tutti i diritti riservati. Attacco pieghevole a parete SCPFWMV2 e SCPFWMSV2 di 3M™ 1.0 Contenuto del kit 3.3 Con un cacciavite a stella (+), rimuovere le tre viti che fissano il coperchio della base. 3.4 Sollevare e staccare il coperchio dalla base e mettere da parte. Istruzioni di installazione Cavo USB, 4 m Cavo VGA, 4 m 6 x fascette fermacavo 3 x viti M6*25 (per il fissaggio del proiettore) 2 x viti mordenti da 1-1/2" 2 x ancoraggi a pressione da ½" 2 x viti mordenti da 2-1/2" 2 x ancoraggi a pressione da 1-1/2" Solo SCPFWMSV2 2.0 Accessori opzionali Staffa 3M™ per montaggio a parete Kit di sicurezza 3M™ (78-6969-9961-0) 3.0 Rimuovere il coperchio 3.1 Rimuovere l'attacco pieghevole a parete dalla confezione e poggiarlo su un tavolo con la base in basso. 4.0 Disporre i cavi 4.1 3.2 Inserire i cavi USB, VGA e del controllo opzionale attraverso il braccio. Allineare le estremità dei cavi e fissare circa 150 mm (6 in.) dal termine con una fascetta fermacavi. ~6" (150 mm) Ruotare il braccio verso l’alto finché non si blocca in sede. Nota: Il cavo di controllo opzionale viene spedito con il Modulo I/O di 3M ™. © 2009 3M. Tutti i diritti riservati. 53 Italiano Cavo audio per PC da 1,8 m Cavo audio per PC da 3 m Alimentatore per ampl. altoparlanti Cavo di alimentazione per ampl. altoparlanti Adattatore di corrente da EU a UK (solo EU/UK) Cavo di alimentazione a c.c. (alimentazione da I/O all’ampl. altoparlanti) Attacco pieghevole a parete SCPFWMV2 e SCPFWMSV2 di 3M™ 4.2 Allineare i cavo lungo il cavo di alimentazione e fissare utilizzando le fascette fermacavo. 5.3 Utilizzando la punta appropriata, eseguire 4 fori per gli ancoraggi delle viti a pressione di fissaggio. Installare gli ancoraggi corti nei fori superiori e quelli lunghi nei fori in basso. Nota: Servirsi di una punta da trapano da muro da 1/2" per pareti di calcestruzzo pieno o da 3/16" per pareti di legno. Non utilizzare ancoraggi per pareti di legno, utilizzare solo viti. Usando una chiave a tubo da 3/8", installare le viti mordenti corte (superiori) di fissaggio, lasciando sporgere 13 mm (1/2") di vite dalla parete. NON INSTALLARE LE VITI MORDENTI (INFERIORI) LUNGHE. Italiano 5.4 5.0 Installazione per pareti in calcestruzzo pieno 1/2" (13 mm) (Per pareti in blocchi di calcestruzzo o in travi, passare alla Fase 7) 5.1 5.2 Stabilire le dimensioni e la posizione desiderate dell’immagine proiettata e segnare la posizione della parte superiore e del centro dell’immagine. 6.0 Fissare alla parete 6.1 Collocare la linea della “parte superiore dell’immagine” del modello di dimensioni desiderate dell’immagine e quindi allineare le linee di questa parte superiore e del “Centro immagine alla posizione dell'immagine dalle dimensioni desiderate. Segnare quindi le posizioni delle quattro intersezioni di linee del modello sulla parete. Appendere la base dell’attacco a parete alle viti mordenti di fissaggio. Usando una chiave a tubo da 3/8", stringere a fondo le viti mordenti di fissaggio. 3M™ Folding Wall Mount Mounting Template Descripteur de Support Montage-Schablone Modelo Del Montaje Mascherina Del Montaggio 架置模板 ໕ᆳ ቋዯഋ 土台のテンプレート For use with: Pour l'usage avec Für Gebrauch mit: Para el uso con: Per uso con: 至于使用与: 사용를 위해에: 使用のため下記のものの: SCP715, SCP717, SCP740 SCP715, SCP717 SCP740 1 Image Area 54 © 2009 3M. Tutti i diritti riservati. Attacco pieghevole a parete SCPFWMV2 e SCPFWMSV2 di 3M™ 6.2 Installare le viti mordenti di fissaggio lunghe attraverso le viti di livello e stringere a fondo. 7.4 Pareti di blocchi di calcestruzzo: Segnare le posizioni dei fori nelle giunture verticali tra i blocchi di calcestruzzo e quindi utilizzando una punta da 13 mm (1/2"), eseguire 4 fori da 41 mm (15/8") di profondità nelle giunture verticali dei blocchi di calcestruzzo. Installare 4 ancoraggi lunghi nei fori. ATTENZIONE Per ridurre i rischi associati all’impatto: Installando la staffa per fissaggio a parte, utilizzare solamente gli ancoraggi lunghi da 38 mm (1½"), inclusi con la staffa, non quelli corti da 25 mm (1"). 16 in ) mm 0 (4 6 Italiano 6.3 Passare alla Fase 9. 7.0 Installazione della staffa di montaggio a parete 3M™ (Per uso in pareti di blocchi di calcestruzzo o in travi) 7.1 Stabilire le dimensioni e la posizione desiderate dell’immagine proiettata e segnare la posizione della parte superiore e del centro dell’immagine. 7.2 Allineare la sagoma ai fori di fissaggio della staffa e fissare a questa con del nastro. 7.3 4X Collocare la linea della “parte superiore dell’immagine” del modello di dimensioni desiderate dell’immagine e quindi allineare le linee di questa parte superiore e del “Centro immagine alla posizione dell'immagine dalle dimensioni desiderate. Segnare le posizioni per quattro fori di fissaggio secondo il passaggio successivo. LONG Pareti a travi: Segnare i fori al centro dei travi; quindi, utilizzando una punta da 5 mm (3/16"), eseguire 4 fori di 38 mm (1-1/2") di profondità nei travi attraverso la parete. 1/2–5/8" (13–16 mm) 3M™ Folding Wall Mount Mounting Template Descripteur de Support Montage-Schablone Modelo Del Montaje Mascherina Del Montaggio 架置模板 ໕ᆳ ቋዯഋ 土台のテンプレート For use with: Pour l'usage avec Für Gebrauch mit: Para el uso con: Per uso con: 至于使用与: 사용를 위해에: 使用のため下記のものの: SCP715, SCP717, SCP740 Align with holes in bracket SCP715, SCP717 SCP740 1 Image Area 4X © 2009 3M. Tutti i diritti riservati. 55 Attacco pieghevole a parete SCPFWMV2 e SCPFWMSV2 di 3M™ 7.5 Con una chiave a tubo da 3/8", fissare la staffa alla parete, utilizzando 4 viti mordenti di fissaggio corte. 8.3 Installare le viti di fissaggio lunghe attraverso le viti di livello e stringere a fondo. 8.0 Fissare alla staffa la base di montaggio a parete 8.1 Usando un cacciavite, installare le due viti mordenti corte con rondelle nella staffa di fissaggio, lasciando sporgere 13 mm (1/2") di vite dalla staffa. Non installare ancora le viti mordenti (inferiori) di fissaggio lunghe. Italiano 2X 9.0 Installare il kit di sicurezza (opzionale) 2X 8.2 9.1 Appendere la base dell’attacco a parete alle viti di fissaggio. Con un cacciavite, stringere a fondo le viti di fissaggio. Fissare il cavo opzionale di sicurezza bloccandolo nella scanalatura (1) di sicurezza della staffa di fissaggio, oppure avvolgendolo alla staffa (2) di fissaggio oppure al punto di ancoraggio dell’attacco a vite (3). 1 2 3 Nota: Se si usa il punto di ancoraggio dell’attacco a vite, fissare il punto prima di fissarvi il cavo. 9.2 Far passare il cavo del blocco di sicurezza attraverso il braccio. Fissare circa 150 mm (6") a partire dal capo del fascio di cavo esistente utilizzando una fascetta fermacavo. ~6" (150 mm) 56 © 2009 3M. Tutti i diritti riservati. Attacco pieghevole a parete SCPFWMV2 e SCPFWMSV2 di 3M™ 9.3 Disporre il cavo di sicurezza lungo il fascio di cavi e fissare utilizzando fascette fermacavo. 11.0 Collegare i cavi audio (solo SCPFWMSV2) 11.1 Collegare i cavi di alimentazione e audio ai collegamenti all’interno del coperchio. Power 10.0 Collegamento del cavo di prolunga dell’alimentazione 10.1 Far scorrere il coperchio sul braccio. Fissare i cavi di alimentazione e audio al fascio di cavi esistenti utilizzando una fascetta fermacavo. Lasciare 250-300 mm (10-12") di cavo lento. Collegare il cavo di prolunga dell’alimentazione come illustrato. Fissare con fascette fermacavo. 10–12" (250–300 mm) © 2009 3M. Tutti i diritti riservati. 57 Italiano 11.2 Audio Attacco pieghevole a parete SCPFWMV2 e SCPFWMSV2 di 3M™ 13.2 12.0 Fissaggio del coperchio 12.1 Fissare il coperchio alla base. Fissare il proiettore alla staffa di montaggio con tre viti. Nota: Alcuni modelli richiedono due rondelle ogni vite per garantire una perfetta tenuta. AVVERTENZA Per ridurre il rischio di tensioni pericolose: Italiano Non inserire troppi cavi sotto il coperchio dell'attacco a parete. 13.0 Fissaggio del proiettore 13.1 Utilizzando due viti e la vite zigrinata, fissare la staffa di montaggio al termine del braccio di prolunga, come illustrato. 14.0 Montaggio del braccio di prolunga 14.1 Sollevare il gruppo e inserire il fascio di cavi attraverso il lato aperto del braccio di prolunga. 2 3 1 58 © 2009 3M. Tutti i diritti riservati. Attacco pieghevole a parete SCPFWMV2 e SCPFWMSV2 di 3M™ 14.2 Inserire il braccio di prolunga nel braccio, come illustrato. 14.5 Collegare i cavi al proiettore secondo la Guida rapida. 14.6 Fissare il cavo opzionale di sicurezza al proiettore. 15.0 Allineamento del proiettore Accendere l’unità e modificare le dimensioni dell’immagine, regolando l’estensione del braccio nei due sensi. 15.2 Regolare il puntamento del proiettore, allentando la vite zigrinata. 15.3 Regolare la posizione verticale dell’immagine rimuovendo il coperchio, allentando le viti mordenti inferiori o le viti di fissaggio, e regolando le viti di livello. Al termine, stringere le viti mordenti inferiori o le viti di fissaggio e ricollocare il coperchio. Italiano 15.1 14.3 Installare le due viti nel fermo del braccio. 14.4 Tirare il fascio di cavi attraverso il foro al termine del braccio di prolunga. © 2009 3M. Tutti i diritti riservati. 59 Per regolare la posizione dell’immagine orizzontale: 1. Rimuovere il coperchio. 2. Allentare le viti di regolazione e di bloccaggio. 3. Spostare il braccio destro o sinistro sulla posizione desiderata. 4. Stringere le viti di regolazione e di bloccaggio per fissare il braccio sulla nuova posizione. 5. Al termine, ricollocare il coperchio. Italiano 15.4 Adjustment Screw Locking Screw 3M è un marchio di fabbrica di 3M Company. Avviso importante Tutte le dichiarazioni, le informazioni tecniche e tutti i consigli relativi ai prodotti 3M si basano su testi che reputiamo attendibili, ma la loro accuratezza o completezza non è garantita. Prima di utilizzare il prodotto, è necessario valutarlo e stabilire se è adatto per l’applicazione di destinazione. L’utente si assume tutti i rischi e le responsabilità associati a tale uso. Qualunque dichiarazione relativa al prodotto, che non sia contenuta nelle pubblicazioni attuali 3M, oppure qualunque dichiarazione contraria contenuta nell’ordine di acquisto non viene considerata valida o effettiva se non esplicitamente concordata in forma scritta da un rappresentante 3M autorizzato. Garanzia; Risarcimento limitato; Responsabilità limitata. 3M garantisce il funzionamento del prodotto 3M, utilizzato secondo la dichiarazione 3M sulla destinazione d’uso (www.3M.com/meetings), per il periodo di durata garantita, secondo quanto dichiarato nel relativo Manuale del prodotto 3M valido al momento dell’acquisto. Le garanzie riportate nei relativi manuali del prodotto 3M sono esclusive e sostituiscono tutte le altre eventuali garanzie, e tutte le garanzie esplicite o implicite, comprese eventuali garanzie implicite di commerciabilità o idoneità a uno scopo specifico, o funzione industriale o utilizzo commerciale o specifico. 3 Projector Systems 6801 River Place Blvd. Austin, TX 78726 800 328 1371 www.3M.com/meetings Si prega di riciclare. Stampato negli USA. © 3M 2009. Tutti i diritti riservati. 78-6971-1458-1-B 3M™ Folding Wall Mount SCPFWMSV2 3M™ Super Close Projection System隱뼝颍ꩡ끞 렍ꗞꙊ 뼑霢꽩 髹낉 % 0റ)ROGLQJ:DOO0RXQW6&3):09ꗄ6&3):069 ꚩ덒뇑뼑놶霡뇑ꯍ鲝뇑뼑놶뗺넹 ꚭꚩ덒냵ꖭ霢鲵ꌎ꾅ꎁ놶끞鷞鱽鲙ꚩ덒韥閹눥阩ꗥꩶ ꗄ뇑뼑냵鲙ꌭ驍ꄱ꾅鱉鲙ꌱꯍ넽걪鱽鲙ꚩ덒隵ꇝ 뇊ꚩꌱ꽰냱ꇙꐩ뾹덵0&RPSDQ\꾅꾥ꄲ뼍겢겑꿙 06&3겑ꍡ댽뺹ꈑ뇒뫥0뺹ꈑ뇒뫥ꄱ뼝 鱉霡넺넱ꈑꜵ뫥ꩱ髹넍韥閹넩驍ꩡ끞겑閹닆 ꏱ놵鵹ꅍ뼍鱉韥閹鶎껽녡ꊁ驍뇑눥ꩶ陥뼝넩꽻넁냹 ꚩ덒뼞鱽鲙 뺹ꈑ뇒뫥ꅝ뺹ꌱ뇑뀭뼍隕꙲ꐩ阥렍鲵뙑뇊阥렍鲵 黉덵뫭늱꫱ꗄ넺띑ꇚ녚렍ꌱ붡뼝뼑0뇑븽넍 韥멵ꑝ麕ꜵꭂ븽麙뼩鲮ꑝ鹽겒霡ꫦ꾅붡뼝鷑ꜵꭂ븽냵 霡넺넱ꈑꜵ뫥넱髹넍韥閹鶎껽녡ꊁ驍뇑눥ꩶ陥뼝넩 꽻넁냹ꚩ덒뼞鱽鲙 0뇑븽넍ꅝ뺹霡ꫦꜵ븽냵霡넺넱ꈑꜵ뫥霡겢넱넍 韥閹넩驍ꩡ끞겑閹닆ꏱ놵鵹ꅍ뼍鱉韥閹鶎껽녡ꊁ驍 뇑눥ꩶ陥뼝넩꽻넁냹ꚩ덒뼞鱽鲙넩ꚩ덒냵ꅝ뺹꾅鲵뼩 넭뇊鷑ꚩ덒뙢霡넍陲끥ꜵ븽꾅ꎁ놶끞鷞鱽鲙靵뼍꾅 鲵뼑냕넱뼑ꚩꩶꗞꙊ냵霅뙩븽냹靵뼍넍늱ꭁꈑꗑꭖ뼍鱉 阸넺鱽鲙 뼑霢꽩 ꑝ鹽겒霡ꫦ넍넱ꜵꈑ볅ꎙ鷍덵껿냵몒ꩡ꽆뇑븽 꽺鞭ꆽ넩麑ꗄ鿅鱉ꜵꭂ븽꾅鱉闑ꙹꚩ덒넩놶끞鷞鱽鲙 뼩鲮0뇑븽ꎙ鰩꽱꾅韥ꯕ鷍꽩넽鱉ꚩ덒ꩡ뼢냵 ꗥ멵놶넭阸냱ꈑ뱮ꯍ뼑ꑞ놶꾅鲵뼑ꩶ븽ꫦ鿅鱉 놶뼞ꫦ넩驍꽺陹넍隵뼾鿅鱉阥ꅍ끞鵹꾅鲵뼑ꓪ겑놶 ꚩ덒냹붡뼝뼍꾡ꑝ麕ꐺ겑놶ꓪ겑놶ꚩ덒鿅鱉눥阩냹 鲵뙩뼞鱽鲙 0뇑븽넩뼩鲮ꚩ덒韥閹驩ꩶ韥ꚩ덒눥阩냹띞눦뼍덵 ꑰ뼑陲끥靵뼍꾅鲵뼑냕넱뼑ꚩꩶ냵0넍몒냱ꈑ0 뇑븽냹霅뙩鿅鱉ꯍꍡ뼍阥驍0뇑븽霡넺閵ꌱꚩꩶ뼍鱉 阸넺鱽鲙ꑝ麕霅뙩ꜵ븽鿅鱉뇑븽냵0넍ꭁ냕ꓱ넺鱽鲙 뇑븽냹ꯍꍡ뼍鱉陲끥0냵陥뼝넽鱉ꜵ븽냹ꩽꜵ븽鿅鱉 닆隕ꜵ븽냱ꈑꯍꍡ뼞鱽鲙0뇑븽냹霅뙩뼍鱉陲끥0 냵0뇑븽냹鶎넱뼍阥驍鶎麦뼑ꑝ鴭넍0ꩽ뇑븽넩驍 ꍡ봱ꟁ뇑븽냱ꈑ霅뙩뼞鱽鲙넭뇊鷑ꚩ덒뙢霡넍陲끥0 뇑븽霅뙩鱉ꩶ韥0뇑븽ꚩ덒韥閹넍녉꾡韥閹鶎껽꾅ꎁ 냕덵鷑鲙ꚩ덒ꟹ걙ꌱꗐ냱ꇙꐩ靵뼍鱉ꚩ덒闑겑넱냹 쀊뇊뼍鱉鴥ꩡ끞뼕뇑눥뤉麑넱녅넩뀭꾅낅ꅍ霡넺넱녅꾅 鲵뼑덒ꠎ냹뇑겑뼩꼱뼞鱽鲙 鲙넁ꩡ뼢麙냵낹꾩阥鷑ꚩ덒꾅뇑뀭鷞鱽鲙 ꜵ놶놽뼑ꚩ隵꿙끞驝끞ꩡ隕驑붢뼾낹ꜵ놶놽뼑렍 ꜵ늱넍ꜵ놶놽뼑끩ꭖ놹녶냱ꈑ넭뼑ꭅꩶ쀉녡쀂ꯍꗄ 驎ꉥ꿵闎냵녡뼩ꜵ놶놽뼑놹ꌍꭁ뺹뱭낝꽩ꓭ뇑ꟹ0 뇑븽隱넍ꩶ뿭녆끞鿅鱉넭덒鷑0ꟹ걙險鞾녅넩뀭넍 녅꾅넍뼑ꟹ걙韥멵ꑝ麕녅넍ꜵ늱넍鿅鱉녍ꑰ鷑 랝鞾냹뭪뼩ꙵ陲鷍阥驍ꭅꩶ鷑0뇑븽꾅鱉ꚭꚩ덒넩 놶끞鷍덵껿걪鱽鲙뭪ꩶ놶넭ꍽꑝꭅꩶ냵ꚩ덒넍鲵ꩶ넩 껹鲎鱽鲙 0뇑븽냵넱ꗍ놶넭겙驩쀍陲꾅녆鶎뼍鵹ꈒ 陹鷍꽽걪鱽鲙ꚭꚩ덒냵鲙넁쀍陲냹Ꙍ꽩驍ꩡ끞鷑0 뇑븽꾅鱉놶끞鷍덵껿걪鱽鲙 9$&+] r꾅r&r꾅r) ꩶ鲵걪鵹ꟹ넆띊 0뇑븽넍뇑阥뙢ꭁ鿅鱉렍0뇑븽꾅閵뼑눥뇊 韥陹놶鿅鱉놹韥놶鿅鱉ꅝ뺹꿵闎냵ꩡ끞녅霅뙩閵鱚 ꜵ븽넍霅뙩꿵隵ꇝ鷑ꟹ끞냹붡뼝뼍덵ꎁ넩꾅뇑뼑鷍덵鱉 껿鱉ꑝ麕띉閵놶넭ꟹ끞꾅鱉ꚭꚩ덒넩놶끞鷍덵껿걪鱽鲙 ꚭꚩ덒냵ꚭ뇑븽넍뭪ꩶ넍ꩡ끞꾅鲵뼩ꎁ놶끞鷞鱽鲙 뼍ꊝ겑閹鿅鱉韥멵隱鵹뼑꾥ꭂꩡ끞냵뭪ꩶ넍ꩡ끞냱ꈑ 閹늱鷍덵껿걪鱽鲙ꚭꚩ덒냵ꅝ뺹ꗄ껹ꅍ뇊뼑阸넩뀭넍 ꭁꑝ븽꾽뢝鲵뺝댽꾅鱉놶끞鷍덵껿걪鱽鲙ꚭꚩ덒냵 꽆鵹뼕ꯍ꽻걪鱽鲙 0냵뇑샩끉阩냹낹뼑闑ꙹꄱꙝꜵ뗞넍ꑞ놶ꩶꐩ냱ꈑ 鲡ꍡ鞑뇊뼍덵껿냵뼑0ꄱꙝ넩驍ꈑ隕鿅鱉麦鞾ꄱꙝ 鿅鱉겑ꍡ꽱뿭閵뇑阥鷑陲끥꾅鱉ꚩ덒넍뗺넹냹덵덵 껿걪鱽鲙 ꚭꚩ덒냵ꚩ덒ꟹ걙ꌱꗐ韥낹뼩0뇑븽냹靵뼍閵 ꗑꭖ뼍鱉鴥ꗑꪒ뼑끥뵭ꊁꚩ뾍ꊁ鿅鱉끩ꭖꟹ끞냵 붡뼝뼍덵껿걪鱽鲙놹韥ꟹ끞麙냵ꩡ끞녅넍뗺넹넺鱽鲙 늱녚鷑陥뼝넩ꟹ걙꾅쀊넭鷕ꯍ꽻阥驍녡ꪒ鷕ꯍ 꽻鱉陲끥ꩡ끞녅鱉ꗑꪒ뼑ꟹ끞냹뗺넹덽ꯍ鵹넽걪鱽鲙 ꚩ덒꽺鞭ꆽ넩麑閵霅뙩ꟹ걙ꌱ붡뼝뼍隕늱녚鷑陥뼝냹 韥ꯕ녅閵쀊넭뼕ꯍ꽻阥驍녡ꪒ뼕ꯍ꽻鱉陲끥ꩡ끞녅鱉 띑녚ꟹ끞냹뗺넹덽ꯍ鵹넽걪鱽鲙 뼩鲮0뇑븽ꐺ꾅붡뼝鷑덵겑ꌱ黥ꌩ덵껿阥驍0 넍끞鵹븑겑꾅黥ꄱ0뇑븽냹ꩡ끞뼍덵껿냱ꐩꑝ麕 ꚩ덒ꗄ뇑뼑놶넭ꚩꩶ넩ꓩ쁝쀉鷞鱽鲙0뇑븽ꐺ꾅 뱮뇊놶냱ꈑ韥녡鷑陲끥ꌱ뇑뀭뼍隕0냵0뇑븽넍 겙뼾ꩡ끞鿅鱉ꩡ끞ꜽ鱚냱ꈑꜵ뫥뚽ꅍ鷍阥驍鞭꿵꽩齙 겒냱ꈑ麕隵ꇝ鷑閹뇆놶ꜵꯍ놶뱮ꙹ閹뇆놶ꭅ뼩ꯍ넪 ꯍ넺鿅鱉ꩡ꽺韥쁁넍ꩶ겙냹붡뼝뼍덵ꎁ넩꾅霢뼑鷍덵鱉 껿鱉꾅鲵뼩뗺넹덵덵껿걪鱽鲙넩뇑뼑냵ꭅ뼩ꗥꩶ뙢霡閵 鞱阥ꈑ뼍鱉Ꙋ넩ꈕ꾅ꩶ隵꽻넩놶끞鷞鱽鲙 ꚩ덒덵낅냹ꗐ냱ꇙꐩꗍ븽뼍韥놹꾅뾹덵0鲩鲮ꜵ驍 넭덒鷑0ꟹ걙險鞾녅꾅陁놹쀉뼍阥驍뵭덵ꌱꚩ驩 50$ꗍ븽넭덒뿭ꌱꗐ냱겑韥ꗉꅂ鱽鲙ꖭ霢鲵ꌎ꾅 阥늱뼍겑ꐩꈑ놹쀉뼍阥驍PHHWLQJV# PPPFRP냱ꈑ넩ꐉ넱냹ꚩ驩꽩0隕闒ꟹ걙ꜵꈑ 꾥ꄲ뼍겑韥ꗉꅂ鱽鲙 0넍ꓭ뇑뼩陥눥렍鱉鲙넁隱闎걪鱽鲙 0뇑븽넩ꟹ걙ꌱ끉뼍鱉陲끥0냵낅ꅍꩶ녅驍鞭꿵 鶎麦뼑ꩶ녅꾅껽놹뼍陁붡녚뼍꾡낅ꅍ霡넺넱녅넍덒ꠎ隱 뼝颍0ꟹ걙랝鞾녅驍0ꟹ걙꫱뫥ꈑ0뇑븽냹 ꗑꭖ뼍겑韥ꌱ끉뙢뼞鱽鲙 0냵ꜵ븽ꟹ끞넩驍넭阩ꟹꌱꓱꍡ덵껿隕陥뼝넽鱉녚ꟹꌱ 몒놶냱ꈑꯍꍡ鿅鱉霅뙩뼞鱽鲙0뇑븽넍ꗍ븽냵0넍 ꟹ끞냱ꈑ뼞鱽鲙 ꚩ덒ꟹ걙閵0뇑븽넩驍ꜵ븽넍霅쀍냹ꯍꗍ뼍鱉陲끥 霅뙩鷑뇑븽냵0ꭁ냕ꓱ넺鱽鲙 霅쀍鷑0뇑븽넩驍ꜵ븽냵ꩽ阸넩阥驍0븽덽韥늵냱ꈑ ꖭꍡ녡ꪒ뼑ꍡ봱ꟁ븽넱ꯍ넽냱ꐥ0넍몒냱ꈑ냕ꩡ뼑 눺ꌍ驍븽덽넍鲙ꌭꑝ鴭ꈑ霅뙩뼕ꯍ넽걪鱽鲙 ꚩ덒鷑0뇑븽넩驍ꜵ븽꾅鲵뼑0넍霅뙩뗺넹냵鶎0 뇑븽넍낅ꅍꭁꎙ볅ꎙ閵陞냹髍덵껿걪鱽鲙霅쀍鿅鱉霅뙩 뇑븽넩驍ꜵ븽냵ꚭ뇑뼑놶ꚩ덒넩놶끞鷍鱉뇑븽넍녉꾡 ꚩ덒韥閹넍놶끞냹ꗐ걪鱽鲙뼍덵ꎁ閶霅뙩ꅝ뺹꾅鱉ꩶ韥 넱넍뇑뼑놶ꚩ덒넩놶끞鷞鱽鲙 뼩ꗑP뻱뱭 險韥늱넺霡ꗄꗥ띑霡꾅鱉뙑녚넩驍鲙ꌭ阥렍鲵ꈑ넭뼑 ꑝ麕ꗞ뼩ꓱ넩驍녚꼕ꓱ냹붡뼝뼑녚꼕ꓱ넩꽻꽩꼱뼞鱽鲙 ꜵ놶놽뼑쀍韥鱉0뇑븽넩뇑鲵ꈑ녆鶎뼍덵껿陁뼍阥驍 0뇑븽꾅ꚩ덒냹ꓩ쁝쀉뼍鱉ꭅꩶ냹꼱韥뼕ꯍ넽걪鱽鲙 k0볅靁ꭁ냕 0റ)ROGLQJ:DOO0RXQW6&3):09ꗄ6&3):069 껽놹ꯍ렎 陲隕 뇆넩겒鿅鱉隕뇊겒낉ꍽ끩뱭ꌱ렍뼍꾡ꩡ끞뼍韥 놹꾅넩ꐺ꾅붡뼝鷍꽩넽鱉ꑝ麕껽놹ꩡ뼢냹넲隕 늵ꯍ뼍겢겑꿙뽚쁹넍뗭隕ꌱ낹뼩넩ꐺꌱ녍 ꚩ隵뼍겢겑꿙 ꑝ麕낹뼩꾅隵ꇝ鷍鱉낹뾍ꫦ냹늹넩韥낹뼑ꗞꙊ •낉ꍽ끩뱭ꌱ렍ꩡ끞뇊ꟹ뼍韥놹꾅렍껽驩ꓭꗄ 뇑븽껽놹閵넩麑꾅붡뼝鷍꽩넽鱉ꑝ麕껽놹뇊ꚩꌱ 넲隕늵ꯍ뼍겢겑꿙뽚쁹넍뗭隕ꌱ낹뼩넩ꐺꌱ녍 ꚩ隵뼍겢겑꿙 끞鵹 뇆넩겒낉ꍽ끩뱭ZDOOPRXQW鱉렍ꐺ꾅韥ꯕ鷍꽩 넽鱉ꗉ꿵闎넩0റ6XSHU&ORVH3URMHFWLRQ6\VWHP 6&3겑ꍡ댽뺹ꈑ뇒뫥넍꙲렍끞넺鱽鲙ꑝ麕렍녅 ꗄꩡ끞녅鱉ꚭ뇑븽넍껽놹뼑녆鶎꾅鲵뼩띞ꜹ섽ꯎ덵뼩꼱 뼞鱽鲙鲙ꌭ끞鵹ꈑ넍ꩡ끞냵0넩뵾閵뼑ꗉ꽻냱ꐥ ꜽ껽놹뼑ꩶ몑ꌱ꼱韥뼕ꯍ넽걪鱽鲙 덽겒꾅隵ꇝ鷍鱉낹뾍ꫦ냹늹넩韥낹뼑ꗞꙊ •녆냵ꜵ븽넩驍붡녚녡꾅껹넩麙넩뇆鞱뼍덵ꑰ뼍鵹ꈒ 뼍겢겑꿙 띞陞꾅隵ꇝ鷍鱉낹뾍ꫦ냹늹넩韥낹뼑ꗞꙊ •0:DOO0RXQW%UDFNHW냵0:DOO0RXQWꌱ뤍먡ꍡ뱭 Ꟊꈒ꙲넩驍韥鸚꙲꾅렍뼕鼁뻹끉뼑녚렍넺鱽鲙 겕뿭꽩陥隱꾅鲵뼑ꐺ •:DOO0RXQW%UDFNHW냵꿙ꌭ뵭ꗉ頚둲냱ꈑ렍뼩꼱 뼞鱽鲙녅ꫭ뼑ꩡ뼢냵렍ꐺ뗭눥 陲隕 뻱뼍덵껿냱ꐩꩡꎒ넩驍닆ꩶ鿅鱉닆鲵뼑 녡ꩥ뻱뼩ꌱ뚽ꅍ뼕ꯍ넽鱉녕녡놶냱ꈑ 낹뾍뼑ꩶ쀞냹驍멵驹 •0:DOO0RXQW%UDFNHW驍ꩡ閵꙲韥鸚頁덵ꁠ隕麙꽩閽 ꯍ꽻鲙ꐩ꙲냹놶놽뼍陁ꚩ闊뼍韥놹頁덵鱉ꟁꅍ멬넩驍 0겑걙묑냹렍뼍덵ꍽ겢겑꿙 늱넍 뻱뼍덵껿냱ꐩ陲ꖭ뼍阥驍ꚩ뭪넍 ꩶ뼩鿅鱉녡ꩥ뻱뼩ꌱ뚽ꅍ뼕ꯍ넽鱉 녕녡놶냱ꈑ낹뾍뼑ꩶ쀞냹驍멵驹 •껹넩麙넍鞱뙍꾅꙲몆녡뺹ꈑ뇒뫥ꌱꩡ끞뼕鼁꾅鱉 뼢ꩶ꽩ꌭ넍놶놽뼑闅鵺넩넽꽩꼱뼞鱽鲙 껽놹뇊ꚩꌱ붡뼝뼍隕넽鱉녚렍븑겑ODEHO꾅鲵뼑끉꼲 •놶놽뼑렍ꗄ뇊ꟹ鱉렍ꐺꓭ꾅韥ꯕ鷑ꗉ꿵闎넩 ꯎꇝ鷑렍韥ꯕ녅閵뼍鵹ꈒ뼍겢겑꿙 늱넍ꩡ넩꾅騹낹뾍 •넩낉ꍽ끩뱭鱉0റ6XSHU&ORVH3URMHFWLRQ6\VWHP 6&3겑ꍡ댽뺹ꈑ뇒뫥끞냱ꈑꎁꩡ끞뼍鵹ꈒ鷍꽩 넽걪鱽鲙鲙ꌭ끞鵹ꈑ鱉阵덒鷍덵껿꼍걪鱽鲙 陲隕ꚭ뇑븽꾅ꎙ鲡ꍡ덵ꍽ겢겑꿙 •ꑝ麕눥넹녚렍閵녍눥꾡뇭넽鱉덵鞭ꍡ隕ꭅꩶ냵꽻鱉덵 쀊넭뼍韥낹뼩낉ꍽ끩뱭ꌱ뇊韥놶냱ꈑ뇅阵뼍겢겑꿙 陹ꭂꩡ끞뼍韥놹꾅ꗑ陡鷑ꑝ鸉ꓭ뇑ꌱꯍꍡ뼍阥驍 霅뙩뼍겢겑꿙 늱ꑞ鶎ꚾꓭꌱ넲꽩ꚩ겢겑꿙 •낉ꍽ끩뱭넍ꓱꍡ놶뿊몑ꌱꙵ뿊뼍덵ꍽ겢겑꿙 •덹鶎넩驍넩鶎鿅鱉띞陞넩閵뼩덽閵鱚ꫦ넩魇냵 몆녡霡눥驍븑ꐩ꾅鱉렍뼍덵ꍽ겢겑꿙 •꙲몆녡霡눥ꓱ넩驍븑ꐩ냵뜑ꭁ뼑OEV넍ꯍ덶뼍닆냹 덵몦뼕ꯍ넽꽩꼱뼞鱽鲙鞭ꆼ덵ꑰ뼍鲙ꐩ몆녡놹꾅 렍ꐺ꾅黥ꄱꚩ闊냹뼩꼱뼞鱽鲙 늱넍隕꿝븑ꐩ •꙲몆녡霡눥ꓱ넩驍븑ꐩ냵뜑ꭁ뼑OEV넍넩멽闊鵹 SXOORXWIRUFHꌱ덵몦뼕ꯍ넽꽩꼱뼞鱽鲙鞭ꆼ덵 껿鲙ꐩ몆녡놹꾅렍ꐺ꾅黥ꄱꚩ闊냹뼩꼱 뼞鱽鲙 陲隕뺹ꈑ뇒뫥ꅝ뺹ꌱ麙꾡鲙ꚩ덵 ꍽ겢겑꿙 •靁隕鷍鱉몆녡霡눥ꓱ넩驍븑ꐩ냵鲝鲝뼑ꑞ녡뜑ꭁ 闑넍韥鸚꾅몆녡鷍鱉뜑ꭁ넭렍넍ꙕ鱽꽩볅鿅鱉 鲝鲝뼑뤍먡ꍡ뱭넺鱽鲙鲙ꌭ霡눥ꓱ넩驍븑ꐩ꾅 낉ꍽ끩뱭ꌱ렍뼩꼱뼕陲끥꾅鱉겑닆꾅霡뼕ꯍ 넽鱉놶뼞뼑뼍麑낝꽩驍녅녡ꌱꩡ끞뼍겢겑꿙넩ꆡ뼑 뼍麑낝꽩驍녅녡鱉ꯎꇝ鷑렍韥ꯕ녅閵陥뇊뼩꼱 뼞鱽鲙 •隕뇊겒鿅鱉뇆넩겒낉ꍽ끩뱭꾅꿡ꄱ閵阥驍ꎙ鲡ꍡ덵 ꎅ隕뺹ꈑ뇒뫥넩뀭넍띉閵뼍닆냹늱덵ꍽ겢겑꿙 k0볅靁ꭁ냕 뼑霢꽩 •낉ꍽ끩뱭넍뇆넩겒꼉IROGLQJDUP냹꾩阥驍鲠냹鼁꾅 ꓩꍡ뼑셍냹閵뼍덵ꍽ겢겑꿙 0റ)ROGLQJ:DOO0RXQW6&3):09ꗄ6&3):069 陲隕 낹뾍뼑놹꼊꾅隵ꇝ鷍鱉낹뾍ꫦ냹늹넩韥낹뼑ꗞꙊ •險녚꾅ꜵ뫥렍鷍꽩驍꿝꼉DUP넍ꗆꐩ꾅ꜵ뫥 ꙕ넩걙넍ꗆꐩ頁덵뇆넩겒낉ꍽ끩뱭넍뢵넩Ꟊ鬭냹 꽩齕뼑겒냱ꈑ麕ꙵ陲뼍덵ꍽ겢겑꿙렍ꐺ 뗭눥뢵넩Ꟊ냹騱陁뼍阥驍鲨陁뼍鱉넱냵꽻꽩꼱 뼞鱽鲙ꙕ넩걙꾅뢵넩Ꟊ냹띉閵뼍ꇙꐩ렍ꐺꓭ냹 뗭눥뼍겢겑꿙뢵넩Ꟊ넩ꭅꩶ鷍꽽鱉덵늱韥놶냱ꈑ 뇅阵뼍隕陹ꭂꩡ끞뼍韥놹꾅ꗑ陡鷑ꑝ鸉ꓭ뇑ꌱ ꯍꍡ뼍겢겑꿙 •뇊ꟹꌱ뼍韥놹꾅뼢ꩶ뺹ꈑ뇒뫥놹낅뤉麑ꌱ 놹낅냱ꈑꜵ뫥뗝鲝뼍겢겑꿙 •겙뀭驍걪韥閵ꎃ냵쀍陲꾅낉ꍽ끩뱭ꌱ렍뼍덵 ꍽ겢겑꿙 •ꙕ넩걙렍閵꿹ꊁ鷍꽽냹鼁낉ꍽ끩뱭뢙ꗆ꾅驝냵 뢵넩Ꟊ냹긙ꬉ高덵ꍽ겢겑꿙 쀉녡꾅隵ꇝ鷍鱉낹뾍ꫦ냹늹넩韥낹뼑ꗞꙊ •섽뫥驑ꈑ鿅鱉덶뇆놶넭꾩꾅骽덵ꌱꗞ띑뼍鱉꾩낅 鞱뙍꾅낉ꍽ끩뱭ꌱ렍뼍덵ꍽ겢겑꿙 뼑霢꽩 늱넍 뗉ꍱ꾅隵ꇝ鷍鱉낹뾍ꫦ냹늹넩韥낹뼑ꗞꙊ •ꩡ넩꾅騱鱉SLQFKSRLQWꜵꩶ냹뻱뼍ꇙꐩꭅ隱 ꭅ閵ꄲ냹끵덶넩鱉ꑝ麕ꜵ븽꾅ꏵꍡ뼍겢겑꿙 麙꽩꿡ꍱ꾅隵ꇝ鷍鱉낹뾍ꫦ냹늹넩韥낹뼑ꗞꙊ •뼍닆隱랝鞾ꩶ넍ꓭ뇑鼁ꓭ꾅렍ꐺ꾅黥ꌭ 낉ꍽ끩뱭넍렍ꌱ낹뼩鱉뼢ꩶꐺ넍ꯎꇝ韥ꯕ녅ꌱ ꩡ끞뼍겢겑꿙 띞陞꾅隵ꇝ鷍鱉낹뾍ꫦ냹늹넩韥낹뼑ꗞꙊ •낉ꍽ끩뱭ꟁꅍ멬냹렍뼕鼁ꟁꅍ멬꾅闎넩붡뼝鷍꽩 넽鱉韩꼪뢙ꎁ냹ꩡ끞뼍겢겑꿙 ꐺꚩ隵 k0볅靁ꭁ냕 0റ)ROGLQJ:DOO0RXQW6&3):09ꗄ6&3):069 멙뱭驩끞ꓱ 3KLOOLSV걙먡ꌍ麑ꄱ넩ꌱꩡ끞뼍꾡ꙕ넩걙꾅 뢙ꌱ隕뇊겑멙隕넽鱉闑넍驍ꩡꌱ븵냱겢겑꿙 ꙕ넩걙꾅뢙ꌱ麙꽩꿡ꇙ齱꽩驩隕뼑둲꾅 鸅겢겑꿙 렍ꗞꙊ 86%&DEOHP 9*$&DEOHP [뢵넩Ꟊ멵넩&DEOHWLHVV [0驍ꩡ몆녡뺹ꈑ뇒뫥끞 [ꅍ鞭ꚱ뱭/DJ%ROW [ꅍ鞭꼪뢙/DJ$QFKRU [ꅍ鞭ꚱ뱭/DJ%ROW [ꅍ鞭꼪뢙/DJ$QFKRU 6&3):069놹끞 P3&꿙黉꿙뢵넩Ꟊ P3&꿙黉꿙뢵넩Ꟊ 걙뻱뢙꼥뺹끞놹낅 걙뻱뢙꼥뺹끞놹낅뤉麑 (8驩덵꾶霢넍뤍꫱뱭꽩鳆뫥(8꾶霢놹끞 '&놹낅뤉麑&RUG,2驩덵걙뻱뢙꼥뺹놹낅 뼑霢꽩 꿪ꬍ꼖ꫭꍡ 0റ:DOO0RXQW%UDFNHW 0റꚩ껽멬 뢙ꌱ뇑阥뼍겢겑꿙 붡녚ꩶ몑꾅)ROGLQJ:DOO0RXQW뇆넩겒 낉ꍽ끩뱭ꌱ齱꽩驩隕묁넩Ꟊ낹꾅뵱뚅魈냱겢겑꿙 뢵넩Ꟊꄱ끥벺 꼉넩뇑낹렍꾅녕陝덽鼁頁덵꼉냹낹ꈑ 쁁놹겑멙겢겑꿙 꼉냹뭪뼩86%9*$꿪ꬍ뢝뱭ꈙ뢵넩Ꟊ냹 ꠱꿙겢겑꿙뢵넩Ꟊ騒냹ꎓ띉隕뢵넩Ꟊ 멵넩ꌱꩡ끞뼍꾡騒꾅꼲넭렍PPꌱ 쀊ꚩ뼍겢겑꿙 ~6" (150 mm) 늱넍 몒ꩡ꽆넭뢝뱭ꈙ뢵넩Ꟊ넩0റ,20RGXOH隱 뼝颍ꗑꭖ鷞鱽鲙 k0볅靁ꭁ냕 0റ)ROGLQJ:DOO0RXQW6&3):09ꗄ6&3):069 뼑霢꽩 뢵넩Ꟊ멵넩ꌱ넩끞뼍꾡놹낅뢵넩Ꟊ냹黥ꄱ 뢵넩Ꟊ냹뇊ꇡ겑멙겢겑꿙 놶鲮뼑驕ELW냹ꩡ끞뼍꾡ꅍ鞭ꚱ뱭넍꼪뢙ꌱꗊ냹 闑넍霡ꐂ냹ꁠ냱겢겑꿙낹둲霡ꐂ꾅뎜냵꼪뢙ꌱ 렍뼍隕껹ꅍ둲霡ꐂ꾅韩꼪뢙ꌱ렍뼍겢겑꿙 늱 鲝鲝뼑뤍먡ꍡ뱭꙲꾅鱉넭렍꙲鶁끞 麑ꍩ냹ꩡ끞뼍隕驍ꓩ꙲꾅鱉넭렍麑ꍩ냹 ꩡ끞뼍겢겑꿙驍ꓩ꙲꾅鱉꼪뢙ꌱꩡ끞뼍덵ꍽ겑隕 驍ꩡꎁꩡ끞뼍겢겑꿙 넭렍ꭁ룈냹ꩡ끞뼍꾡꙲꾅驍ꩡ閵넭렍 PP밵꽩驍꿙陁闑넍뎜냵몆녡끞ꅍ鞭ꚱ뱭 ꩶ鲝ꌱ렍뼍겢겑꿙韩ꅍ鞭ꚱ뱭뼍鲝鱉 렍뼍덵ꍽ겢겑꿙 陡隕뼑꙲렍뤍먡ꍡ뱭 Ꟊꈒ넩驍걙뫥麑꙲ 韥鸚꾅렍뼕陲끥꾅鱉뇑鲝陹ꈑ阩骽 ꂥ겢겑꿙 낅뼍鱉먡韥꿵믡ꩡ鷑넩ꖭ덵SURMHFWHGLPDJH넍 낹렍ꌱ뇊뼍隕ꩶꜵWRS넍낹렍꿵넩ꖭ덵넍닆꼎냹 븑겑뼍겢겑꿙 낅뼍鱉넩ꖭ덵넍먡韥ꌱ낹뼩묑뻁ꍴ넍넩ꖭ덵 ꩶ鲝ꄱ넭냹뗳껹驩隕驍넩ꖭ덵ꩶ鲝隱 넩ꖭ덵닆꼎냹낅뼍鱉넩ꖭ덵먡韥넍낹렍꿵 ꎓ띉겢겑꿙鞭ꍡ隕驍꙲꾅묑뻁ꍴ넍겢녅 낹렍ꌱ븑겑뼍겢겑꿙 1/2" (13 mm) ꙲꾅ꜵ뗞 몆녡끞ꅍ鞭ꚱ뱭꾅ZDOOPRXQWEDVH낉ꍽ끩뱭 ꙕ넩걙ꌱ阥겢겑꿙넭렍ꭁ룈냹ꩡ끞뼍꾡 몆녡끞ꅍ鞭ꚱ뱭ꌱ鲝鲝섽눥넩겢겑꿙 3M™ Folding Wall Mount Mounting Template Descripteur de Support Montage-Schablone Modelo Del Montaje Mascherina Del Montaggio 架置模板 ໕ᆳ ቋዯഋ 土台のテンプレート For use with: Pour l'usage avec Für Gebrauch mit: Para el uso con: Per uso con: 至于使用与: 사용를 위해에: 使用のため下記のものの: SCP715, SCP717, SCP740 SCP715, SCP717 SCP740 1 Image Area k0볅靁ꭁ냕 0റ)ROGLQJ:DOO0RXQW6&3):09ꗄ6&3):069 ꆽꙝꍶ驍ꩡꌱꩡ끞뼩韩몆녡끞ꅍ鞭ꚱ뱭ꌱ 렍뼍隕鲝鲝뼍陁눥꾡늱겢겑꿙 뤍먡ꍡ뱭Ꟊꈒ꙲ 뤍먡ꍡ뱭Ꟊꈒꩡ넩꾅넽鱉ꯍ덶넩넁ꎙMRLQW 꾅霡ꐂ낹렍ꌱ븑겑뼍隕驍넭렍PP 驕ELW냹ꩡ끞뼍꾡뤍먡ꍡ뱭Ꟊꈒꩡ넩꾅넽鱉 ꯍ덶넩넁ꎙꈑ隱넭렍PP響넩ꈑ闑넍 霡ꐂ냹麑ꍩꈑꁠ냱겢겑꿙霡ꐂ꾅闑넍韩꼪뢙ꌱ 騱끥겢겑꿙 늱넍 띞陞꾅隵ꇝ鷍鱉낹뾍ꫦ냹늹넩韥낹뼑ꗞꙊ 낉ꍽ끩뱭ꟁꅍ멬ZDOOPRXQWEUDFNHW냹렍뼕鼁鱉 넭렍PP넍뎜냵ꅍ鞭꼪뢙閵껹鲁ꟁꅍ멬꾅麙꽩 넽鱉넭렍PP넍韩ꅍ鞭꼪뢙ꎁ냹ꩡ끞뼍겢겑꿙 16 in ) mm 0 (4 6 뇑鲝陹ꈑ阩骽ꂥ겢겑꿙 0റ:DOO0RXQW%UDFNHW렍 뤍먡ꍡ뱭Ꟊꈒ넩驍韥鸚꙲꾅ꩡ끞뼍鱉陲끥 낅뼍鱉먡韥꿵믡ꩡ鷑넩ꖭ덵SURMHFWHGLPDJH넍 낹렍ꌱ뇊뼍隕ꩶꜵWRS넍낹렍꿵넩ꖭ덵넍닆꼎냹 븑겑뼍겢겑꿙 묑뻁ꍴ냹ꟁꅍ멬넍몆녡끞霡ꐂ隱ꎓ띉隕묁넩뺹ꈑ ꟁꅍ멬꾅隕뇊겑멙겢겑꿙 낅뼍鱉넩ꖭ덵넍먡韥ꌱ낹뼩묑뻁ꍴ넍넩ꖭ덵 ꩶ鲝ꄱ넭냹뗳껹驩隕驍넩ꖭ덵ꩶ鲝隱 넩ꖭ덵닆꼎냹낅뼍鱉넩ꖭ덵먡韥넍낹렍꿵 ꎓ띉겢겑꿙鲙넁鲝陹꾅黥ꄱ髙闑넍몆녡끞 霡ꐂ꾅낹렍ꌱ븑겑뼍겢겑꿙 뼑霢꽩 4X LONG 韥鸚꙲VWXGZDOO 韥鸚닆꼎꾅霡ꐂ냹븑겑뼍隕넭렍PP驕냹 ꩡ끞뼍꾡꙲냹뭪隱뼍꾡韥鸚꾅넭렍PP 넍響넩ꈑ闑넍霡ꐂ냹ꁠ냱겢겑꿙 3M™ Folding Wall Mount Mounting Template Descripteur de Support Montage-Schablone Modelo Del Montaje Mascherina Del Montaggio 架置模板 ໕ᆳ ቋዯഋ 土台のテンプレート For use with: Pour l'usage avec Für Gebrauch mit: Para el uso con: Per uso con: 至于使用与: 사용를 위해에: 使用のため下記のものの: SCP715, SCP717, SCP740 1/2–5/8" (13–16 mm) Align with holes in bracket SCP715, SCP717 SCP740 1 Image Area 4X k0볅靁ꭁ냕 0റ)ROGLQJ:DOO0RXQW6&3):09ꗄ6&3):069 넭렍ꭁ룈냹ꩡ끞뼍꾡闑넍뎜냵몆녡끞ꅍ鞭 ꚱ뱭ꌱ閵덵隕ꟁꅍ멬냹꙲ꐩ꾅ꜵ뗞뼍겢겑꿙 ꆽꙝꍶ驍ꩡꌱꩡ끞뼩韩몆녡끞驍ꩡꌱ렍뼍隕 鲝鲝뼍陁눥꾡늱겢겑꿙 낉ꍽ끩뱭ꙕ넩걙ꌱꟁꅍ멬꾅 ꜵ뗞 걙먡ꊝ麑ꄱ넩ꌱꩡ끞뼍꾡驍ꩡ閵ꟁꅍ멬냱ꈑꜵ뫥 넭렍PP밵꽩驍꿙鵹ꈒ몆녡끞ꟁꅍ멬꾅 꿵ꬉZDVKHU閵黭ꍥ闑넍뎜냵몆녡끞驍ꩡꌱ 렍뼍겢겑꿙韩몆녡끞驍ꩡ뼍鲝鱉껹덶 렍뼍덵ꍽ겢겑꿙 2X 뼑霢꽩 ꚩ껽멙뱭렍꿪ꬍ 2X 꿪ꬍ븽ꑞ넭ꚩ껽뢵넩Ꟊ냹몆녡끞ꟁꅍ멬ꚩ껽 걡ꈤ꾅隕뇊겑멙阥驍몆녡끞ꟁꅍ멬꾅阭阥驍 驍ꩡ몆녡끞꼪뢙붡넭뱭꾅阭꽩ꜵ뗞뼍겢겑꿙 1 2 3 몆녡끞驍ꩡ꾅ZDOOPRXQWEDVH낉ꍽ끩뱭ꙕ넩걙 ꌱ阥겢겑꿙걙먡ꊝ麑ꄱ넩ꌱꩡ끞뼍꾡몆녡끞 驍ꩡꌱ鲝鲝섽눥꾡늱겢겑꿙 늱 驍ꩡ몆녡끞꼪뢙붡넭뱭ꌱꩡ끞뼍鱉陲끥뢵넩Ꟊ냹 ꜵ뗞뼍韥놹꾅꼪뢙붡넭뱭ꌱ隕뇊겑멙겢겑꿙 꼉꾅ꚩ껽녕鞽VHFXULW\ORFN뢵넩Ꟊ냹 ꠱꿙겢겑꿙뢵넩Ꟊ멵넩FDEOHWLHꌱꩡ끞뼍꾡韥눩 뢵넩Ꟊ鲙ꗑ넍ꎅ鲝냱ꈑꜵ뫥꼲넭렍PPꌱ 쀊ꚩ뼍겢겑꿙 ~6" (150 mm) k0볅靁ꭁ냕 0റ)ROGLQJ:DOO0RXQW6&3):09ꗄ6&3):069 뢵넩Ꟊ鲙ꗑ냹黥ꄱꚩ껽뢵넩Ꟊ넍鬭냹뇊뼍隕 뢵넩Ꟊ멵넩ꌱꩡ끞뼍꾡ꜵ뗞뼍겢겑꿙 뢙ꌱ꼉낹ꈑꖭ겢겑꿙뢵넩Ꟊ멵넩ꌱꩡ끞뼍꾡 놹낅뢵넩Ꟊ隱꿙黉꿙뢵넩Ꟊ냹韥눩넍뢵넩Ꟊ 鲙ꗑ꾅ꜵ뗞겑멙겢겑꿙ದ넭렍ದPP 넍뢵넩Ꟊ냹鱍꽩ꃝꍡ겢겑꿙 10–12" (250–300 mm) 놹낅꾥녚뢵넩Ꟊ꾥陥 ꚩ겑鱉ꗉ꿵闎넩놹낅꾥녚뢵넩Ꟊ냹꾥陥뼍겢겑꿙 뢵넩Ꟊ멵넩ꈑ隕뇊겑멙겢겑꿙 뼑霢꽩 뢙ꜵ뗞 뢙ꌱꙕ넩걙꾅ꜵ뗞뼍겢겑꿙 陲隕 낹뾍뼑놹꼊ꍡ걙먡ꌱ늹넩鱉ꗞꙊ 낉ꍽ끩뱭뢙껹ꅍ꾅驝냵뢵넩Ꟊ냹긙ꬉ高덵ꍽ겢겑꿙 꿙黉꿙뢵넩Ꟊ6&3):069 놹끞꾥陥 놹낅뢵넩Ꟊ隱꿙黉꿙뢵넩Ꟊ냹뢙껽둲넍꾥陥 鲝녅꾅꾥陥뼍겢겑꿙 Power k0볅靁ꭁ냕 Audio 0റ)ROGLQJ:DOO0RXQW6&3):09ꗄ6&3):069 뺹ꈑ뇒뫥ꜵ뗞 闑넍驍ꩡ꿵ꫡ걙먡ꌍWKXPEVFUHZꌱꩡ끞뼍꾡 鞭ꍱ꾅ꚩ鱉ꗉ꿵闎넩몆녡끞ꟁꅍ멬냹꼉 넪걙묅ꬍ騒꾅ꜵ뗞뼍겢겑꿙 꼉넪걙묅ꬍDUPH[WHQVLRQ 눥ꍲ 꽩Ꟊꍡꌱ麙꽩꿡ꇙ뢵넩Ꟊ鲙ꗑ냹꼉넪걙묅ꬍ넍 闑霡騒냱ꈑ뭪隱겑멙겢겑꿙 鞭ꍱ隱闎넩꼉넪걙묅ꬍ냹꼉껽냱ꈑ ꩲ넺뼍겢겑꿙 2 3 뼑霢꽩 1 闑넍驍ꩡꌱꩡ끞뼍꾡뺹ꈑ뇒뫥ꌱ몆녡끞 ꟁꅍ멬꾅ꜵ뗞뼍겢겑꿙 늱 鲝鲝섽ꎓ띉韥낹뼩鱉ꑝ鴭꾅黥ꄱ驍ꩡ闑鲮鸅 闑넍꿵ꬉ閵뻹끉뼞鱽鲙 k0볅靁ꭁ냕 0റ)ROGLQJ:DOO0RXQW6&3):09ꗄ6&3):069 꼉ꍡ묁넩骽DUPUHWDLQHU껽냱ꈑ闑넍驍ꩡꌱ ꩲ넺뼍겢겑꿙 꼉넪걙묅ꬍ넍ꎅ鲝꾅넽鱉霡ꐂ냹뭪뼩뢵넩Ꟊ 鲙ꗑ냹녖껹鲮韥겢겑꿙 맪걙멵뱭閵넩麑꾅黥ꄱ뢵넩Ꟊ냹뺹ꈑ뇒뫥꾅 꾥陥뼍겢겑꿙 꿪ꬍ븽ꑞ넭ꚩ껽뢵넩Ꟊ냹뺹ꈑ뇒뫥꾅 ꜵ뗞뼍겢겑꿙 ꫡ걙먡ꌍꌱ븵꽩뺹ꈑ뇒뫥꼉냹눥뇊뼍겢겑꿙 뢙ꌱꜹꍡ뼍隕뼍ꜵ넍몆녡끞ꅍ鞭ꚱ뱭鿅鱉 몆녡끞驍ꩡꌱ븵隕ꆽꙝꍶ驍ꩡꌱ눥뇊뼍꾡 ꯍ덶넍넩ꖭ덵낹렍ꌱ눥뇊뼍겢겑꿙ꍽ렍ꐩ뼍ꜵ넍 몆녡끞ꅍ鞭ꚱ뱭鿅鱉驍ꩡꌱ뉹隕뢙ꌱ뇑녅ꍡ꾅 鸅겢겑꿙 뼑霢꽩 뺹ꈑ뇒뫥뇊ꇡ 韥韥꾅놹낅냹高隕꼉넪걙묅ꬍ냹껽볂냱ꈑ 눥뇊뼍꾡꾶ꩶ먡韥ꌱꙵ陲뼍겢겑꿙 k0볅靁ꭁ냕 ꯍ뵾넩ꖭ덵낹렍눥뇊 뢙ꌱꙌ韥겢겑꿙 눥뇊驍ꩡꗄ녕鞽驍ꩡꌱ븭겢겑꿙 꼉냹낅뼍鱉낹렍넍뀱둲鿅鱉꿙ꌭ둲냱ꈑ 꿣韥겢겑꿙 눥뇊驍ꩡ꿵녕鞽驍ꩡꌱ뉹꽩ꩽꈑ끩낹렍꾅꼉냹 隕뇊겑멙겢겑꿙 ꍽ렍陁鷍ꐩ뢙ꌱ뇑녅ꍡ꾅鸅겢겑꿙 뼑霢꽩 Adjustment Screw Locking Screw 0냵0ꩡ넍ꩶ븑넺鱽鲙 닆끉뼑隕덵ꩡ뼢 0넍뇑븽꾅隵ꇝ鷍鱉ꑝ麕덹ꯕ韥ꯕ놶뇊ꚩ靁隕ꩡ뼢냵겕ꉥ뼕ꎁ뼑뇊ꚩ꾅鞱阥뼍隕넽덵ꎁ鞭뇊쀊ꫦ隱꿹놹ꫦ넩ꚩ녚鷍덵鱉껿걪鱽 鲙ꚭ뇑븽냹ꩡ끞뼍韥놹꾅뵾閵ꌱ뼍隕靵뼍閵넍鵹뼍鱉끞鵹꾅놶뼞뼑덵ꌱ볅鲝뼍겢겑꿙鞭ꆡ뼑ꩡ끞꾅隵ꇝ鷍鱉ꑝ麕낹뾍隱뗺넹냵靵 뼍꾅陁넽걪鱽鲙0넍뾹뼾閹뼾ꓱ꾅붡뼝鷍꽩넽덵껿냵뇑븽꾅鲵뼑덹ꯕ鿅鱉靵뼍넍霡ꎙ늱ꓭ꾅붡뼝鷍꽩넽鱉ꩶꗍ鷍鱉덹ꯕ냵0 넍靁뼑넽鱉넹낅넩ꐩ꾅넍뼩ꐺ겑놶냱ꈑ鶎넍ꌱ뼍덵껿鱉뼑냕쁝뼍덵껿걪鱽鲙 ꚩ덒霡뇑ꯍ鲝넍뇑뼑뇑뼑놶뗺넹 0냵0뇑븽넩0넍靁녚ꩡ끞끞鵹ꐺZZZ0FRPPHHWLQJV꾅黥ꄱꩡ끞鷍鱉陲끥霡넺鲮겑꾅냕쁝뼑뼩鲮0뇑븽ꎙ鰩꽱꾅韥 ꯕ鷍꽩넽鱉ꚩ덒驩霡ꫦ韥閹鶎껽ꎁ눦걙ꆲ陁녆鶎뼕阸넩ꄱ鱉阸냹ꚩ덒뼞鱽鲙뼩鲮0뇑븽ꎙ鰩꽱꾅韥ꯕ鷍꽩넽鱉ꚩ덒ꩡ뼢냵ꗥ멵 놶넭阸냱ꈑ뱮ꯍ뼑ꑞ놶꾅鲵뼑ꩶ븽ꫦ鿅鱉놶뼞ꫦ鿅鱉꽺陹넍隵뼾넩驍阥ꅍ끞鵹꾅鲵뼑ꓪ겑놶ꚩ덒냹붡뼝뼍꾡ꑝ麕ꐺ겑놶ꓪ겑 놶ꚩ덒鿅鱉눥阩냹鲵뙩뼞鱽鲙 3 Projector Systems 6801 River Place Blvd. Austin, TX 78726 800 328 1371 www.3M.com/meetings 녡쀑끞뼍겢겑꿙ꖭ霢꾅넭ꭹ k0볅靁ꭁ냕 % 0റ㔧䠙㆞⭐㘪 6&3):069 ⺜㡋✛0റ怔䩼䎵㔤㈀侊倀怆∎䞷 ⸘孬崹㢝 ䷩橼ᷕ㔯 㦗 % 0റ㔧䠙㆞⭐㘪6&3):09✛6&3):069 ≬⦉᧷㦘棟孫⎮᧷㦘棟弻↊ 㦻≬⦉⍔拸䞷㡋初⦚⮶椇⦿●ᇭ≬⦉㬬㷍ᇬ㬬ↅᇬ孫㟠✛ 棟Ⓟ♾厌⦷␅Ⅵ⦚⹅㦒㦘㓏ₜ⚛ᇭ嵚勾俰㌷䠅⦿䤓0⏻ ⚇䘁㈦≬⦉彖岙ᇭ 06&3侊⒦㔤㈀㳮ಯ0䞱❐ರ≬巘㈭律彆⃚㡴怆䍉 㦮ₘ㒥⦷⺞㣑䤓∎䞷摞⃚⏶⦷☮㧟㠨㒥完抯ₙ 㼡㦘凉椆᧨䎰嵥❹⊚᧨ ⅴ⏗䤋䞮劔䍉ᇭ ䷩橼ᷕ㔯 0䞱❐䤓㓏㦘棓ↅ拸䞷㡋㲰俓俟㱚䤓挲K᧨㘡棳㔤㈀㳮 㔤㈀䑗᧨⇕▔㕻⭐㘪ᇬ⚙㩅ᇬ㠇⇜㽷岧㎮㑘⣷ⅴ♙懇⏴懇 ⒉岼⌨᧨掌≬巘㈭律彆⃚㡴怆䍉㦮⃚⏶⦷㧟㠨㒥完 抯ₙ㼡㦘凉椆ᇭ 0䞱❐䤓㔤㈀䑗⏒ↅ掌≬巘⦷0䞱❐律彆㡴⃚㈛䍉㦮⃬ ◐⮸㒥⺞㣑㔤㈀䑗∎䞷摞⃚⏶⦷㧟㠨㒥完抯ぴ塬 ₙ㼡㦘凉椆᧨䎰嵥❹䲽㍔㽐᧨ⅴ⏗䤋䞮劔䍉ᇭ抨⊚≬⦉ ⍔拸䞷㡋捷❐᧨ⅴ♙⦷㔈䤓㔤㈀䑗≬⦉尐㻑㍔㽐ₚ᧷㌷ 䤓⏷捷㟠䉮⻀㢾徙㒟拚抐Ⓙ㌷㓏⦷⦿㡈䤓㦃㙪䞱❐ᇭ 㦹⇫䍉↊⇤㲰俓揜函捷⒕拁嫛敆➽䤓∪指䞱❐◖侩✛ 㒥棓ↅ掌㦜㈭⊚⒴≬⦉ᇭ ₙ承≬⦉掌㢾⺗㊶䤓᧨力₣掌㢾䓁ℕ㦎ⅲ↊⇤♙㓏㦘≬ ⦉ᇬ㢝䯉㒥㤦䯉≬⦉㒥㬬ↅ᧨▔㕻䓁↊⇤䔈⸩䥽䤓⻀拸敆㊶ ✛拸⒖㊶㓏⋩䤓↊⇤㤦䯉≬⦉ᇬ㒥↊⇤嫛㯼悟㒥櫶⸱㒥 彎㢢䞷抣ᇭ Ⱁ㨫䤋䞮0䞲❐㦹厌⦷拸䞷䤓≬⦉㦮⏶挄䏶ₙ承≬⦉᧨ ㌷䤓棳⮥孫㟠㘹㡌᧨㑘䓁0椷㎞㦃㙪㒥≽孫0䞲❐㒥劔 抏挓0䞲❐䤓㘰律⎈㷍ᇭ㓏㦘㦃㙪䤓捷❐㒥䞲❐掌㒟䓁 0䤓弰䞲ᇭⰑ㨫䞲❐拁嫛≽㈸᧨0⺖∎䞷㠿㒥咙䤓捷 ❐≽㈸凉煭䤓捷❐ᇭⰑ㨫0䞲❐拁嫛㦃㙪᧨0⺖∎䞷䦇 ⚛㒥⚛䷘⨚壮䤓㠿㒥劊㠿䞲❐拁嫛㦃㙪ᇭ⦷㔈䤓≬⦉ 尐㻑㍔㽐ₚ᧨Ⱁₙ槱㓏承᧨0䞲❐㦃㙪ↅ⺖⍔␆㦘☮0 䞲❐≬⦉㦮䤓⓸殧㦮棟ᇭ⺜㡋≬⦉㦜╨᧨㌷㉔檗㙟∪☮律 彆㡴㦮䤓巘㝩᧨⚵ⓖ⺖∎䞷⒉ㅯ偷䭋㡴㦮䭉⸩≬⦉䤓栚ⱚ 㡴㦮ᇭ ₚ⒦⚓檔ₜ㡋ₙ⒦≬⦉⃚√⮥᧶ 㷳≬⦉ₜ▔㕻⥯ₜ䠅⏁ⷧᇬ崳䞷ᇬ䉺䞷ᇬℚ㟔ᇬ㍰㎞䫃⭭嫛 䓁ᇬₜ䠅⸘孬ᇬ䠞㊌ᇬₜ䠅孬拚力嬺≽㟈㒥㚜⭭䤓0䞲❐ᇬ 䟀㒿䒼嫛䓁ᇬ嶇Ⱁ䋺䌌ᇬ㾹䌌ᇬ栒榊⃚櫭䤓䌌⹂ᇬ斾崳榊 㿐ᇬ慮浣⟞櫛ᇬ咖槭0䞲❐䤓℡䦇⇫䞷᧨㒥槭0㘗㶙㦜╨ 㙟∪⟕拁嫛䤓值≽ᇬ↊⇤ⅉ䤓䠞㊌㒥斾崳壤䚕力ㆤ怆䤓㚜 ⭭ᇭ㷲デ䤓䭷㚜✛㜤孑ₜ㡋≬⦉乓⦜⃚⏶ᇭ 0䞲❐岼岗䞷∕拚嫛㡋␇⨚䤓⸳⏶䜿⬒⃚₼ᇭ抨≬⦉ₜ ▔㕻⦷ₚ⒦⚓䲽㍔㽐⃚⮥∎䞷䤓0䞲❐᧶ 99᧨+] Ⓙ㞬㺞ㄵⒿ噾㺞ㄵ 5+㢾䎰⑬俟 䀆㕣伂⛝ ⏴㺲♲✛㘡㺲ⷣ掌㉔檗㼡㦘椫䮨䓸᧨▔㕻⚙㩅㒥␅Ⅵ㘪㩅 ㆤ怆䤓↊⇤䇪⦷棊⫭䓸㒥椫䮨䓸ᇭₜ恂䤓抩欷♾厌ㆤ怆 0䞲❐㟔椫㒥⺖ㆤ怆⺜0䞲❐䤓㚜⭭᧨抨㦒∎Ⓙ崁≬⦉ 䎰㟗ᇭ 抨⊚≬⦉ₜ▔㕻↊⇤␅Ⅵ䤓㒟㦻᧨▔㕻⇕ₜ⻏棟㡋᧨挲K咖 ⅴₚ⚓檔㦘桫䤓㒟㦻᧶0䞱❐䤓㕕☇ᇬ䂔䇣㒥⸘孬ᇬ俵0 抯㒟䤓㳮㬿㒥榊嵎乏᧨㒥㦃㙪廰㔤㈀䑗挲㲲䤓櫶⸱♾ 㦃㙪捷❐ᇭ抨≬⦉⍔▔㕻崁䞲❐䤓㷲デ∎䞷ᇭ㹞⮸⺞ 㣑㒥␅Ⅵ拝摞䤓抲儛∎䞷ₜ㦒嬺劒㏽䍉㷲デ∎䞷ᇭ抨≬ ⦉ₜ▔㕻劦㧟√Ⱁ᧨≬椹倁᧨䑗␆棳⮥᧨₵₣⍔⋩Ⱁₚ尞 ⸩ᇭ抨≬⦉㢾ₜ♾懘帢䤓ᇭ 0ₜ弯弻≬⦉㦜╨᧨0㲨仌㒥㲨巧㒥䷘侩㲨仌㒥ㄞ壮 㑘䠅棳♊᧨棳槭⺜⚗⇫尐㻑䤓䱐ⅉ㲨仌♵㦘㢝䭉䤓㦇槱尞 ⸩ᇭ 抨≬⦉ₜ▔㕻⦷㙟⛗㌷䤓0䞲❐䘁㈦≬⦉㦜╨㡈槱䤋䞮 䤓掄彖ᇬ≬椹㒥孬拚㒟㦻ᇭₙ承㒟㦻㢾櫶⸱䤓弻↊ᇭⰑ 㨫尐㻑䤓凉煭⦷㦜╨₼ₜ厌嬺曡⸩㒥宖完᧨櫶⸱♾厌㈦⺜ 䤋䞮䤓㒟㦻弯弻ᇭ㌷䤓≬⦉◖侩㑘䠅▔㕻ಯ㦹∕≽㟈ರ㦜 ╨᧨㔏嫢ⅉ❰ₜ厌曡⸩㒥宖完㓏尐㻑䤓凉煭᧨櫶⸱⺖弯弻 ♻⠩䤓㒟㦻ᇭ 㦹厌挄㈹▔⚺㡋拸䠅0㓚␙₼䤓∎䞷崹㢝㒥㦹厌㫈㝩0 䤓岗䟺䞷抣匁㢝∎䞷0䞲❐᧨掌㦒∎Ⓙ㓏㦘≬⦉✛㦘棟孫 㟠䎰㟗ᇭ棳ℕ䔈⒴尞⸩㡋拸䞷0䞲❐㓚␙₼䤓挲㲲᧨0 ₜ㑘䠅弯弻↊㡋↊⇤栢㘴ᇬ⌅䤋ᇬ䔈㸙㒥⥯㨫㊶㚜⭭▔㕻 ⇕ₜ⻏棟㡋Ⓒ䇳ᇬ㟅⏴㒥㯼╨䤓⠹⯀᧨⸒⊠䞲䞮㡋㒥咖↊ ⇤0䞲❐䤓㊶厌ᇬ∎䞷㒥䎰厌┪∎䞷䦇桫䤓↊⇤㡈㆞ᇭ ₜ丰㚜⭭峃㻑䤓㽤㈚㡈㽤Ⱁ⇤᧨抨棟Ⓟ掌拸䞷ᇭ ⺜㡋≬⦉㞾㚃᧨⦷抏強崁䞲❐⃚ⓜ᧨嵚榊崀勾僺㒥≰俵 ㌷䠅⦿䤓0戵⏻⸳㒥0㘗㶙䤓㦜╨㙟∪⟕♥㈦50$抏 強䞲❐㘗㶙壮ᇭⰑ㨫㌷⇜㡋初⦚⮶椇⃚⏶᧨嵚倢拝榊崀 㒥榊掄ↅPHHWLQJV#PPPFRP勾俰 0櫶⸱㦜╨ᇭ 0⺖⋩⅏煌∕侍㷲⟞櫛᧶ Ⱁ㨫㌷䤓0䞲❐榏尐值≽᧨0㦒尐㻑㌷⺖0䞲❐䓱槯⦿ ▔孬ℝ␅☮▔孬㒥⚛䷘䓸❐⃚⏶᧨₵咖☮律彆㡴㦮䤓巘㝩 怆᧨⺖␅㞫ヅ㒥䤋抐Ⓙ㌷䤓0㦜╨倢敆⟕㒥0㦜╨₼ ㉒ᇭ 0⺖椷␅㎞≽孫㒥㦃㙪凉煭孬函᧨ₜ㟅↊⇤捷❐㒥╭╨ 彊ᇭ0䞲❐䤓抏強㑘䓁0䤓彊䞷㞾⒉ᇭ 䠅≬⦉㦜╨䀘♙0䞲❐㒥捷❐䤓ℳ㙪⃚㣑᧨㦃㙪ₚ䤓捷❐ ⺖㒟䓁0䤓弰䞲ᇭ ℳ㙪䤓0䞲❐㒥捷❐♾厌㢾〓㠿䤓㒥㡸ⓜ倢拝劊≽拣Ⓙ 0役摞㲨䄥᧨力₣0∬呹櫧᧨㦃㙪ↅ♾厌㢾⚛櫭⨚✛役摞 䤓♵⨚壮ᇭ 0⺜㦃㙪♦≬⦉䤓0䞲❐㒥捷❐䤓弻↊⺖ₜ㦒怔拝崁 0䞲❐䤓☮榅➽⎈㫋ᇭℳ㙪㒥㦃㙪䞲❐㒥捷❐㔎㝣崁䞲 ❐䤓⓸殧≬⦉㦮᧨䓁㷳㦘棟≬⦉㓏▔㕻ᇭₜ拝᧨㖘䏶ₙ槱 䤓尞⸩᧨㹞⊚㦃㙪䑗ↅ⍔␆㦘㬬ↅ㆞䤓⮸≬⦉ᇭ k0䓗㶙㓏㦘ₜ㈦劊◿ᇭ 0റ㔧䠙㆞⭐㘪6&3):09✛6&3):069 ⸘⏷崹㢝 巵⛙ ⦷㔧䠙㆞㒥⦉⸩㆞⭐㘪䤓⸘孬✛∎䞷⃚ⓜ᧨嵚ℚ⏗桀帏₵ 恮㈭抨K∎䞷崹㢝㓏▔⚺䤓㓏㦘⸘⏷彖岙ᇭ嵚≬䟨抨K 㖖䯉ⅴ≎⺖∕䤓♒劒ᇭ 䍉ℕ䂪⇝咖㓏㦘拸䞷☀椹䦇桫勾䤓欷椹᧶ •⦷⸘孬ᇬ∎䞷✛值≽崁⭐㘪⃚ⓜ᧨嵚ℚ⏗桀帏₵恮㈭⸘ 孬崹㢝✛䞱❐⸘⏷㖖◦㓏▔⚺䤓㓏㦘⸘⏷彖岙ᇭ嵚≬ 䟨抨K㖖䯉ⅴ≎⺖∕䤓♒劒ᇭ 岗┒䤓䞷抣 㷲Ⱁ⸘孬崹㢝₼㓏㙞承䤓挲㲲᧨㔧䠙㆞⭐㘪岗䟺䞷㡋㙟∪ 0റ怔䩼䎵㔤㈀侊倀6&3侊⒦㔤㈀㳮Ⓙ䓕⭐ₙ䤓⭐ 㘪⦉⸩㩅ᇭ㦮㦪㓏㦘⸘孬ⅉ❰✛䞷㓅掌⏔⒕䩴㥘㦻䞱❐ 䤓⸘⏷㝜⇫ᇭ␅Ⅵ䞷抣㦹倢0⏻⚇峤↿᧨₵♾厌⺝咃ₜ ⸘⏷䤓䕏㽐ᇭ 䍉ℕ䂪⺠㦘桫䴡㋾䤓☀椹᧶ •ₜ尐帢⏡䵴㘴扠⺞捷ↅ✛㒥▔孬㧟㠨ᇭ 䓁ℕ䂪⇝咖䬿㜭䦇桫䤓欷椹᧶ •⦷⺖0⭐㘪⸘孬Ⓙ䂆⑬⦮⫙✛㦷㪀椣䓕ₙ㣑᧨0⭐ 㘪㞾㩅㢾㉔榏䤓䫻浣ᇭ ≰壮峭⥯㨫屲摚 •⭐㘪㞾㩅䤓㷲槱㉔檗㦬⮥⸘孬㷁䩴崂㍔᧨嵚♒桀⸘孬 崹㢝ᇭ 巵⛙᧶ 嫷䯉㦘☀椹䤓䇪⦷㊶᧨Ⱁ㨫ₜ厌挎⏜䤓崀 ♾ㆤ咂㸊ℰ㒥⥃摜愺浣䤓⍆⹂✛㒥劔弰 䞱䤓㚜⹂ᇭ •Ⱁ㨫ₜ厌⺖0⭐㘪㞾㩅婉倁⏴䓕㦷㪀᧨嵚ₜ尐⸘孬崁 㞾㩅㒥0侊倀᧨䦃Ⓙ䓕⭐㷲䭉┯⦉䍉㷱ᇭ ⺞㉒᧶ 嫷䯉㦘☀椹䤓䇪⦷㊶᧨Ⱁ㨫ₜ厌挎⏜䤓崀 ♾ㆤ咂憤㈽咂₼䷘䤓愺浣䤓⍆⹂✛㒥劔 弰䞱䤓㚜⹂ᇭ •䠅⦷⏡䵴棓扠∎䞷抨䲽⭐㘪㆞㔤㈀㳮䤓㣑⊨᧨僌㢾㙟 ∪ⰴ⠓䤓㒟ⅉ䥲帆ᇭ ⺞㉒᧶☆⯍☀椹 巵⛙᧶↊⇤ⅉ掌ₜ尐⦷㦻䞱❐㞏⚙ •ₜ尐⸘孬⦷㢢㡋㖾╤ᇬ㿊╤㒥㦘♾厌嬺㜭㝙䤓⦉⸩俟 㱚㒥嫷槱ₙᇭ •抨䲽⭐㘪俟㱚㒥嫷槱㉔檗㦏⺠厌㞾㖐䭔䤓⨑䦃憘 嘆ᇭₜ䏅䤓崀᧨䓕⭐㉔檗⦷⦉⸩⭐㘪⃚ⓜ⏗㖘䏶⸘孬 崹㢝拁嫛┯⦉ᇭ •抨䲽⭐㘪俟㱚㒥嫷槱㉔檗㦏⺠厌㞾㖐䭔䤓㕘㕣 ┪ᇭₜ䏅䤓崀᧨䓕⭐㉔檗⦷⦉⸩⭐㘪⃚ⓜ㖘䏶⸘孬崹 㢝拁嫛┯⦉ᇭ •ㆉ巿⺖⦉⸩俟㱚㒥嫷槱⦉⸩Ⓙ㦷㦏⺠⚚䤓启⚗㨎 嬺⦉⸩Ⓙ⏸⊚䵚㪀ₙ㒥浣䂆⑬⦮ₙᇭⰑ㨫崁⭐㘪 㢾尐嬺⸘孬⦷↊⇤␅Ⅵ俟㱚㒥嫷槱⃚ₙ᧨尐∎䞷拸䠅 䤓⟕➽䫻浣✛㒥㧟㠨ᇭ抨䲽䫻浣✛㒥㧟㠨㉔檗䟀倢 泦廟⹛䤓⸘孬ⅉ❰∕㼉⸩ᇭ •ₜ尐⦷⦉⸩㆞㒥㔧䠙㆞⭐㘪ₙ㞏䒻ᇬ⚙埸㒥㟍函棳㔤 ㈀㳮⃚⮥䤓↊⇤櫜⮥摜摞ᇭ 㽷㎞᧶嵚桀帏棓㳮䤓㠖ↅ ⺞㉒᧶䑀嫷槱 巵⛙᧶ₜ尐⚠㔤㈀㳮䑗孞槱䦚 k0䓗㶙㓏㦘ₜ㈦劊◿ᇭ 75 ䷩橼ᷕ㔯 •⦷㓢栚㒥㟅怆⭐㘪䤓㔧䠙呑㣑ₜ尐䞷┪拝ㄵᇭ •㉔檗䟀倢泦廟⹛䤓⸘孬ⅉ❰㖘䏶⸘孬崹㢝₼㓏㰑承䤓 挲㲲⪆嫛ⰴ䠅䤓⸘孬✛值≽ᇭ •抨䲽⭐㘪♹䞷㡋⦉⸩0റ怔䩼䎵㔤㈀侊倀6&3侊 ⒦㔤㈀㳮ᇭ␅Ⅵ䞷抣⺩㦹拁嫛䂻峵ᇭ •⸩㦮㴱㩴⭐㘪᧨䭉≬㓏㦘偙⦉ↅ掌≬㖐偙⦉᧨₵₣㦹䤋 䞮㚜⭭ᇭ⦷拁㷴∎䞷⃚ⓜ᧨⏗≽䚕㒥㦃㙪㓏㦘め䤋 䚍䤓⟞櫛ᇭ •ₜ尐㟈帙⭐㘪䤓䓸䚕⸇㡈槱䤓㊶役ᇭ ⚺㦘⸘⏷彖岙䤓岼⌨㲨仳屌 0റ㔧䠙㆞⭐㘪6&3):09✛6&3):069 巵⛙ 䍉ℕ䂪⺠㦘桫☀椹浧榊⭢䞱䞮䤓☀椹᧶ •㔧䠙㆞⭐㘪㈭呑ㄤ捷Ⓙ呑⪉捷䤓榊儫᧨㢾☮ㅯ⸘孬䤓᧨ 嵚ₜ尐ⅴ↊⇤㡈㆞♒䏶⸘孬崹㢝㟈帙␅偩恾ᇭ㉔檗 挎⏜☆⯍㒥䭷㚜榊儫ᇭⰑ㨫㦘↊⇤櫜⮥䤓榊儫嬺䂊┯ Ⓙ呑⪉ₙ᧨嵚♒䏶⸘孬崹㢝ᇭ⸩㦮㴱㩴榊儫᧨₵₣尐 ⦷拁㷴∎䞷⃚ⓜ᧨≽䚕㒥㦃㙪㓏㦘め䤋䚍䤓⟞櫛ᇭ •⦷拁嫛↊⇤值≽⃚ⓜ᧨僌㢾⏗㈭榊䄟㙡ㄶ壤㡆栚㔤㈀ 㳮榊䄟偩儫ᇭ •ₜ尐⦷⸳⮥㒥䇽䉤䤓䜿⬒⃚₼⸘孬抨䲽⭐㘪ᇭ •㡵⪉捷⸘孬⸛㒟᧨㼉ₜ尐㔙⮩殧栆ㄵ䤓榊儫⫺⫭⦷ ⭐㘪坚ₚ煄ᇭ 䓁ℕ䂪⇝䋺䌌䦇桫䤓欷椹᧶ •ₜ尐⦷┯䑀⣷ᇬ⭐䒟㒥↊⇤␅Ⅵ䦃㘴䑀䄟䤓棓扠⸘孬 抨䲽⭐㘪ᇭ ⺞㉒ 䓁ℕ䂪⇝☆⯍煭䦇桫䤓欷椹᧶ ವ㓚✛㓚㖖≬㖐拯楱㓏㦘㿊╤捷ↅ᧨ⅴ挎⏜☆⯍煭䤓⍆ ⹂ᇭ 䍉ℕ䂪⺠㦘桫⚙◖䤓☀椹᧶ ವ⒉㡋摜摞✛㚻╤㡈槱䤓㐑㏽᧨僌㢾∎䞷⏸⊚倢泦廟⹛䤓 ⸘孬ⅉ❰㖘䏶⸘孬崹㢝∕⸘孬⭐㘪ᇭ ䷩橼ᷕ㔯 䓁ℕ䂪⇝咖䬿㜭䦇桫䤓欷椹᧶ ವ⦷⸘孬⭐㘪㞾㩅㣑᧨嵚♹∎䞷㞾㩅椷棓䤓栆攇摧ᇭ 嵚≬䟨抨K㖖䯉 k0䓗㶙㓏㦘ₜ㈦劊◿ᇭ 0റ㔧䠙㆞⭐㘪6&3):09✛6&3):069 㠃⯦⣷␆㢝便 ∎䞷歪Ⓒ㿵◐ⷦ婉倁怆♥㘘⺖坚⦉⸩Ⓙ⪉捷 ₙ䤓ₘ櫕婉倁ᇭ ⺖坚㙟楱⪉捷᧨₵㟍Ⓙ挙ᇭ ⸘孬崹㢝 86%榊儫᧨伂 9*$榊儫伂 ⊚侽偩ヅ ⊚0婉倁䞷㡋⦉⸩㔤㈀㳮 ⊚⚚㦷䓨婉倁 ⊚⚚㦷䓨婉倁 ⊚⚚㦷䓨婉倁 ⊚⚚㦷䓨婉倁 ⍔6&3):069 伂3&匁岙榊儫 伂3&匁岙榊儫 㙩匁⣷㟍⮶⣷榊䄟 㙩匁⣷㟍⮶⣷榊䄟偩儫 㷟䥮咂喀⦚榊䄟⒉♲拸揜⣷⍔(88. 䦃㿐榊䄟偩儫∪㈭,2Ⓙ㙩匁⣷㟍⮶⣷䤓榊厌 ♾指㝖䤓棓ↅ 0റ⭐㘪㞾㩅 0റ㠃⯦⸘⏷⣷␆ ䷩橼ᷕ㔯 ♥㘘坚 ㈭▔孬₼♥⒉㔧䠙㆞⭐㘪᧨₵⺖␅ㄤ㦬ₚ㟍⦷㫛 ₙᇭ 恾䟀榊儫 ㆤ⺝86%ᇬ9*$ⅴ♙∪指㘶Ⓟ榊儫抩拝㳮呑ᇭ⺜ 燙榊儫㦺䵾᧨₵∎䞷侽偩ヅ㈭㦺䵾倐㧮侓⚚ 㹺伂ᇭ ~6" (150 mm) ⺖呑⚠ₙ㞉╤᧨䦃Ⓙ␅春⦉Ⓙ⇜䍉㷱ᇭ 尐煭᧶指律㘶Ⓟ榊儫咖0റ,2怆⒉強ᇭ k0䓗㶙㓏㦘ₜ㈦劊◿ᇭ 77 0റ㔧䠙㆞⭐㘪6&3):09✛6&3):069 ⺖⚓㬬榊儫✛榊䄟榊儫₵㘡⺜燙᧨₵䞷侽偩ヅ倐 㧮榊儫ᇭ ∎䞷拸䠅䤓朌檼᧨⦷䓕ₙ朌⒉⊚ⷣ᧨䞷㡋⦉⸩㦷䓨 婉倁攇摧ᇭ⦷ₙ槱䤓⏸⊚ⷣ₼⸘孬䩼攇摧᧨ₚ煄䤓 ⏸⊚ⷣ₼⸘孬栆攇摧ᇭ 㽷㎞᧶ ⺖⚚䤓嫬㝙朌檼䞷㡋㉒䂆⑬⦮䓕㒥⚚朌 檼䞷㡋㦷役䓕⭐ᇭₜ尐⺖攇摧䞷㡋㦷䓕᧨♹∎䞷 婉倁ᇭ ∎䞷⚚䤓⯦䷡㔂㓚᧨⸘孬抨⊚䩼ₙ⦉⸩㦷䓨 婉倁᧨∎⚚㹺伂䤓婉倁䴐⒉䓕⭐ᇭₜ尐⸘ 孬栆ₚ㦷䓨婉倁ᇭ 1/2" (13 mm) ㉒䓕⭐⸘孬 ⺜㡋䂆⑬⦮⫙㒥㦷㪀椣䓕᧨嵚悂咂㷴泮 ䷩橼ᷕ㔯 䭉⸩㎂尐䤓㔤㈀⦥⍞⻉⺇✛⇜函᧨₵㲨岧崁⦥⍞䤓 檑捷♙␅₼㉒䤓⇜函ᇭ 䭉⸩乓㦻䤓ಯ⦥⍞檑捷ರ偩䤓⇜函᧨䚍㎂尐䤓⦥⍞ ⻉⺇᧨䏅㈛⺖ಯ⦥⍞檑捷ರ✛ಯ⦥⍞₼㉒ರ䤓偩咖⦥⍞⻉ ⺇䤓䚕㎂⇜函⺜燙ᇭ䏅㈛᧨⦷䓕⭐ₙ㲨岧⒉乓㦻 䤓⥪⊚◐ⷦ倁䤓⇜函ᇭ ⦉⸩Ⓙ䓕⭐ₙ 㔙⭐㘪⪉捷㘪Ⓙ⦉⸩㦷䓨婉倁ₙᇭ∎䞷⚚⯦ ䷡㔂㓚䓱槯⦿㝿偙⦉⸩㦷䓨婉倁ᇭ Ⓒ䞷嵎婉倁⸘孬栆⦉⸩㦷䓨婉倁₵䓱槯⦿㝿 偙ᇭ 3M™ Folding Wall Mount Mounting Template Descripteur de Support Montage-Schablone Modelo Del Montaje Mascherina Del Montaggio 架置模板 ໕ᆳ ቋዯഋ 土台のテンプレート For use with: Pour l'usage avec Für Gebrauch mit: Para el uso con: Per uso con: 至于使用与: 사용를 위해에: 使用のため下記のものの: SCP715, SCP717, SCP740 SCP715, SCP717 SCP740 1 Image Area k0䓗㶙㓏㦘ₜ㈦劊◿ᇭ 0റ㔧䠙㆞⭐㘪6&3):09✛6&3):069 悂Ⓙ㷴泮ᇭ 㦷㪀椣䓕᧶ ⦷㦷㪀䤓₼㉒㲨岧⒉ⷣ䤓⇜函᧨䏅㈛␜∎䞷⚚ 㹺伂朌檼᧨朌⊚⚚㹺伂䂀䤓ⷣ᧨䴎拝䓕 ⭐拁⏴㦷㪀ᇭ 0റ⭐㘪㞾㩅⸘孬 ∪䞷㡋䂆⑬⦮⫙㒥㦷㪀椣䓕 䭉⸩㎂尐䤓㔤㈀⦥⍞⻉⺇✛⇜函᧨₵㲨岧崁⦥⍞䤓 檑捷♙␅₼㉒䤓⇜函ᇭ ⺖乓㦻✛㞾㩅ₙ䤓⦉⸩ⷣ⺜燙᧨⦷䞷启ヅ倐㧮ᇭ 䭉⸩乓㦻䤓ಯ⦥⍞檑捷ರ偩䤓⇜函᧨䚍㎂尐䤓⦥⍞ ⻉⺇᧨䏅㈛⺖ಯ⦥⍞檑捷ರ✛ಯ⦥⍞₼㉒ರ䤓偩咖⦥⍞⻉ ⺇䤓䚕㎂⇜函⺜燙ᇭ㫈㝩ₚ㷴㲨岧⒉⥪⊚⦉⸩ ⷣ䤓⇜函ᇭ 1/2–5/8" (13–16 mm) 3M™ Folding Wall Mount Mounting Template Descripteur de Support Montage-Schablone Modelo Del Montaje Mascherina Del Montaggio 架置模板 ໕ᆳ ቋዯഋ 土台のテンプレート For use with: Pour l'usage avec Für Gebrauch mit: Para el uso con: Per uso con: 至于使用与: 사용를 위해에: 使用のため下記のものの: SCP715, SCP717, SCP740 Align with holes in bracket SCP715, SCP717 SCP740 1 Image Area 4X 䂆⑬⦮⫙䓕⭐᧶ ⦷䂆⑬⦮⫙⃚栢䤓⨑䦃傺孞㲨岧⒉ⷣ䤓⇜函᧨䏅㈛ ␜∎䞷⚚㹺伂朌檼⦷䂆⑬⦮䤓⨑䦃傺孞朌 ⒉⊚䂀⚚㹺伂䤓ⷣᇭ⦷抨⊚ⷣ₼⸘孬 ⊚栆攇摧ᇭ ∎䞷⚚䤓⯦䷡㔂㓚✛⊚䩼⦉⸩⯦婉㪢㔙㞾㩅 ⦉⸩Ⓙ䓕⭐ₙᇭ 㔙⭐㘪⪉捷⦉⸩Ⓙ㞾㩅ₙ ⺞㉒ ∎䞷婉倁怆⺖⏸⊚ヅ⬙⦗䤓䩼⦉⸩婉倁⸘孬Ⓙ ⦉⸩㞾㩅ₙ᧨₵∎崁婉倁䴐⒉㞾㩅⚚㹺伂ᇭ 挓㼡㦘尐⸘孬栆ₚ⦉⸩婉倁ᇭ 䓁ℕ䂪⇝咖䬿㜭䦇桫䤓欷椹᧶ ⦷⸘孬⭐㘪㞾㩅㣑᧨♹∎䞷崁㞾㩅椷棓䤓⚚㹺伂 䤓栆㦷䓨婉倁᧨力ₜ㢾⚚㹺伂䤓䩼㦷䓨婉倁ᇭ 16 in ) mm (406 2X 4X LONG k0䓗㶙㓏㦘ₜ㈦劊◿ᇭ 79 ䷩橼ᷕ㔯 0റ㔧䠙㆞⭐㘪6&3):09✛6&3):069 㔙⭐㘪⪉捷㘪Ⓙ⦉⸩婉倁ₙᇭ∎䞷婉倁怆䓱槯 ⦿㝿偙⦉⸩婉倁ᇭ ⸘孬⸘≬▔∪指 ∪指⸘≬春儫䤓⸘孬⦉⸩㢾抩拝⺖␅䓱槯⦿春⦉ Ⓙ⦉⸩㞾㩅⸘≬㲌ᇬ㓢䜿䴎拝⦉⸩㞾㩅㒥∎ ␅㓢䜿䴎拝婉倁⦉⸩攇煭ᇭ 1 2 3 㽷㎞᧶Ⱁ㨫∎䞷婉倁⦉⸩攇煭᧨⦷抲㘴儫春⃚ⓜ尐⏗⦉⸩ 攇煭ᇭ Ⓒ䞷嵎婉倁⸘孬栆⦉⸩婉倁₵䓱槯⦿㝿偙ᇭ ䷩橼ᷕ㔯 ㆤ⺝⸘≬春儫䴎⒉㳮呑ᇭ∎䞷侽偩ヅ㈭䚍㦘榊儫 㧮䤓㦺䵾倐㧮侓⚚㹺伂ᇭ ~6" (150 mm) 㽎㓢㧮榊儫㡐挙恾䟀⸘≬春儫᧨₵∎䞷侽偩ヅ⦉ ⸩Ⰼᇭ 2X k0䓗㶙㓏㦘ₜ㈦劊◿ᇭ 0റ㔧䠙㆞⭐㘪6&3):09✛6&3):069 抲㘴榊䄟ㆅ栆榊儫 坚ₙ坚 㖘Ⱁ⦥㓏䯉抲㘴榊䄟ㆅ栆榊儫ᇭ䞷侽偩ヅ倐㧮ᇭ 㔙坚⦉⸩Ⓙ⪉捷ₙᇭ 巵⛙ 䍉ℕ䂪⇝咖☀椹榊⭢䤓欷椹᧶ ₜ尐⦷⭐㘪坚ₚ煄⫭拝⮩榊儫ᇭ 抲㘴匁岙榊儫 ⍔6&3):069 抲㘴㔤㈀㳮 ⺖榊䄟✛檂櫊榊儫抲㘴Ⓙ坚⏶槱䤓偩恾ₙᇭ ䷩橼ᷕ㔯 Power Ⱁ⦥㓏䯉᧨∎䞷⏸⊚婉倁✛劋ㇱ婉摧㔙⦉⸩㞾㩅⦉ ⸩Ⓙㆅ栆呑䤓㦺䵾ₙᇭ Audio 2 3 1 ∎坚䅠拝㳮呑ₙᇭ∎䞷侽偩ヅ㔙榊䄟✛檂櫊榊 儫⦉⸩Ⓙ䚍㦘榊儫㧮ₙᇭ䟨⒉⚚䤓涕ㆪ榊 儫ᇭ 10–12" (250–300 mm) k0䓗㶙㓏㦘ₜ㈦劊◿ᇭ 81 0റ㔧䠙㆞⭐㘪6&3):09✛6&3):069 䞷ₘ⊚婉倁㔙㔤㈀㳮⦉⸩Ⓙ⦉⸩㞾㩅ₙᇭ Ⱁ⦥㓏䯉᧨⺖ㆅ栆呑㙡⏴呑₼ᇭ 㔙⏸⊚婉倁⸘孬⏴呑㷱╤⣷ᇭ 㕘ㆤ∎榊儫㧮䴎拝⇜㡋ㆅ栆呑㦺䵾䤓ⷣᇭ 㽷㎞᧶ 㩟K⨚壮㦒榏尐⏸⊚⬙⦗婉倁᧨䭉≬偙揜⚗ᇭ 俓孬ㆅ栆呑 ䷩橼ᷕ㔯 㙟怆俓ↅ₵∎⃚㓢㧮榊儫毚䴎ㆅ栆呑䤓栚㟍㦺 䵾ᇭ k0䓗㶙㓏㦘ₜ㈦劊◿ᇭ 0റ㔧䠙㆞⭐㘪6&3):09✛6&3):069 㫈㝩㉺抮⏴栏㖖◦㔙榊儫抲㘴Ⓙ㔤㈀㳮ₙᇭ 㔙∪指⸘≬儫春抲Ⓙ㔤㈀㳮ₙᇭ 嵎㠃㔤㈀㳮 俵孬函抩榊₵抩拝嵎⏴㒥嵎⒉ㆅ栆呑∕㟈帙⦥⍞ ⻉⺇ᇭ 抩拝涕栚劋ㇱ婉摧∕嵎㠃㔤㈀㳮呑ᇭ 嵎㠃㻃⦥⍞⇜函ᇭ ♥㘘坚ᇭ 涕栚嵎㠃✛春偙婉倁ᇭ ⚠ふ㒥⚂䲊╤㳮呑咂㎂尐䤓⇜函ᇭ 㝿偙嵎㠃✛春偙婉倁᧨⺖㳮呑⦉⸩⦷㠿䤓⇜ 函ᇭ ⸛㒟㣑᧨坚ₙ坚ᇭ 抩拝♥ₚ坚ᇬ涕栚ₚ⦉⸩㦷䓨婉倁㒥⦉⸩婉倁∕ 嵎㠃⨑䦃⦥⍞⇜函᧨₵嵎㠃嵎婉倁ᇭ⦷俟㧮䤓 㣑⊨᧨㝿偙ₚ⦉⸩㦷䓨婉倁㒥婉倁᧨␜坚ₙ坚ᇭ k0䓗㶙㓏㦘ₜ㈦劊◿ᇭ 83 ䷩橼ᷕ㔯 Adjustment Screw Locking Screw ䷩橼ᷕ㔯 0㢾0⏻⚇䤓⟕㲨ᇭ 摜尐䤓抩䩴 㓏㦘㦘桫0䞱❐䤓匁㢝ᇬ㔏嫢㍔⫀ᇬ✛㘷堵掌㢾㫈㝩㡋嬺崜䍉㢾♾槯䤓㍔⫀᧨⇕␅㷲䭉㊶㒥⸛㠃㊶掌㢾㼡㦘≬巘䤓ᇭ⦷⇯∎䞷抨䞱❐⃚ⓜ᧨ ⇯㑘峤↿咖䭉⸩抨䞱❐㢾拸䞷㡋⇯䤓岗┒䤓拚䞷ᇭ⇯㔎㝣抨䞷抣䤓☀椹♙弻↊ᇭ㦹▔⚺⦷0䠅ⓜ⒉䓗䓸䠅₼䤓↊⇤咖崁䞲❐䦇桫䤓匁㢝᧨㒥 劔▔⚺㡋⇯䤓⸩⠽⃚ₙ䤓↊⇤䦇♜匁㢝᧨掌ₜ㑘䠅␆㦘㟗┪㒥㈀檎᧨棳槭㦘倢㘗㶙䤓0⸧❰㦇槱⚛㎞ᇭ ≬⦉᧷㦘棟孫⎮᧷㦘棟弻↊ᇭ 0≬巘᧨Ⱁ㨫⇯㫈㝩0岗䟺䞷抣匁㢝ZZZ0FRPPHHWLQJV∎䞷0䞱❐᧨挲煋崁䞱❐⺖呹㘰律⃚㣑怆ⅳⅉ䆎㎞⦿嫷䚍拣䚍嫛0䞱❐㓚␙ 㓏尞⸩䤓≬巘功䞷㦮ᇭ♾㑘䞷0䞱❐㓚␙㓏承䤓≬⦉掌㢾⺗㊶䤓᧨力₣掌㢾䓁ℕ㦎ⅲ↊⇤♙㓏㦘≬⦉ᇬ㢝䯉㒥㤦䯉≬⦉㒥㬬ↅ᧨▔㕻䓁↊ ⇤䔈⸩䥽䤓⻀拸敆㊶✛拸⒖㊶㓏⋩䤓↊⇤㤦䯉≬⦉ᇬ㒥↊⇤嫛㯼悟㒥櫶⸱㒥彎㢢䞷抣ᇭ 3 Projector Systems 6801 River Place Blvd. Austin, TX 78726 800 328 1371 www.3M.com/meetings 嵚⥭㟅ᇭ⒦◿㡋初⦚ᇭ k0䓗㶙㓏㦘ₜ㈦劊◿ᇭ % 0റ㔧♯㆞⭐㖑 6&3):069 ⺈ℝ✛0റ扠恬䱊㔤㈀侊兮怆∎䞷 ⸘孔広㢝 ㅔԧЁ᭛ 㦗 % 0റ㔧♯㆞⭐㖑6&3):09✛6&3):069 ≬幐᧷㦘棟嫴㟠᧷㦘棟徲↊ 㦻≬≽⅔⅔抑䞷ℝ初⦌⮶棕ᇭ≬≽㧰㷍ᇬ㧰ↅᇬ嫴㟠㘹㡌 ✛棟Ⓟ⦷␅⸒⦌⹅♾厌㦘㓏ₜ⚛ᇭ㷁䩴≬≽≰㋾᧨庆勣侊 ⇯㇢⦿䤓0⏻⚇ᇭ 0&3侊⒦㔤㈀㧉ಯ0ℶ❐ರ≬幐⅝徼⃚㡴怆㦮 ₘ㒥⦷⺞㢅䤓∎䞷摞⃚␔⦷☮㧟㠨㒥Ⓟ抯ₙ㼰 㦘凉椆᧨ 㡯幉❹₹᧨ⅴ⏗♠䞮劔ᇭ ㅔԧЁ᭛ 0ℶ❐䤓㓏㦘棓ↅ抑䞷ℝ㲰⧦兢㨓䤓挲K᧨㘡棳㔤㈀㧉 䋾␆᧨⇕▔㕻⭐㖑ᇬ⚙㩅ᇬ㟿ⷦ㽷帿㎮ㄣ⣷ⅴ♙戢⏴戢⒉幍 ᧨掌≬幐⅝徼⃚㡴怆㦮⃚␔⦷㧟㠨㒥Ⓟ抯ₙ 㼰㦘凉椆ᇭ ≬幐0ℶ❐䤓䋾␆⏒ↅ⦷0ℶ❐徼㡴⃚⚝㦮⃬◐ ⮸㒥⺞㢅䤓䋾␆∎䞷摞⃚␔⦷㧟㠨㒥Ⓟ抯ぴ唉ₙ 㼰㦘凉椆᧨㡯幉❹䱜㍔⑄᧨ⅴ⏗♠䞮劔ᇭ扨₹≬幐♹ 抑䞷ℝ捷ↅ᧨ⅴ♙⦷㔈䤓䋾␆≬幐尐㻑㍔⑄ₚ᧷⇯䤓⏷捷 㟠㿝⻀㢾忭㒟孔扟Ⓙ⇯㓏⦷⦿㡈䤓㦃㗱ℶ❐ᇭ 㦹⇫↊⇤㲰⧦揜函捷⒕扪嫛枏➽䤓∪折ℶ❐◖儶✛ 㒥棓ↅ掌㦜⅝₹Ⓔ≬幐ᇭ ₙ承≬幐掌㢾₢㊶䤓᧨力₣掌㢾ℕ㦎ⅲ↊⇤♙㓏㦘≬ 幐ᇬ㢝䯉㒥㤦䯉≬幐㒥㧰ↅ᧨▔㕻↊⇤䔈⸩䥽䤓⻀抑枏㊶ ✛抑⒖㊶㓏⋩䤓↊⇤㤦䯉≬幐ᇬ㒥↊⇤嫛₩⸭悄㒥⸱㓆㒥 忇㢢䞷抣ᇭ Ⱁ㨫♠䞮0ℶ❐㦹厌⦷抑䞷䤓≬幐㦮␔挄䏶ₙ承≬幐᧨㌷ 䤓⏷捷㟠㿝᧨ㄣ0椞㎞㦃㗱㒥≽嫴0ℶ❐㒥劔抏执0 ℶ❐䤓摖徼ↆ㷍ᇭ㓏㦘㦃㗱䤓捷ↅ㒥ℶ❐掌㒟0䤓徱 ℶᇭⰑ㨫ℶ❐扪嫛≽⮜᧨0⺕∎䞷㠿㒥㡶䤓捷ↅ≽⮜凉 椆䤓捷ↅᇭⰑ㨫0ℶ❐扪嫛㦃㗱᧨0⺕∎䞷䦇⚛㒥⚛䷘ ⨚⚆䤓㠿㒥劊㠿ℶ❐扪嫛㦃㗱ᇭ⦷㔈䤓≬幐尐㻑㍔⑄ ₚ᧨Ⱁₙ槱㓏承᧨0ℶ❐㦃㗱ↅ⺕♹␆㦘☮0ℶ❐≬幐 㦮䤓⓸⇨㦮棟ᇭ⺈ℝ≬幐㦜┰᧨⇯㉔權㙟∪☮徼㡴㦮䤓 幐㗽᧨⚵⒨⺕∎䞷⒉☑冥䪐㡴㦮䫽⸩≬幐䤓ⱚ㡴㦮ᇭ ₚ⒦⚓欈⧖ₙ⒦≬幐䤓√⮥᧶ 㷳≬幐ₜ▔㕻⥯ₜ㇢⌷ⷧᇬ幾䞷ᇬ䅴䞷ᇬℚ㟔ᇬ㌅㎞䫃⧞嫛 ᇬₜ㇢⸘孔ᇬ䠞㊌ᇬₜ㇢孔扟力嬺≽㟈㒥㗮⧞䤓0ℶ❐ᇬ 䟀㒧℘嫛ᇬ庇Ⱁ䋺䌍ᇬ㾹䌍ᇬ桹䟄⃚伊䤓䌍⹂ᇬ枨幾䟄㿐ᇬ 懾ↅ桽欧ᇬ槭0ℶ❐䤓℡䦇⇫䞷᧨㒥槭0㘗㧒㦜┰㙟∪ ⟕扪嫛䤓冃≽ᇬ↊⇤ⅉ䤓䠞㊌㒥枨幾⮓䚕力ㆤ怆䤓㗮⧞ᇭ 㷲デ䤓䭷㗮✛㜤孑ₜ⻭ℝ≬幐喒⦃⃚␔ᇭ 0ℶ❐幍帰㒟厌⦷␇⨚䤓⸳␔䘾⬒₼ぴ⇫ᇭ扨₹≬幐ₜ ▔㕻⦷ₚ⒦⚓䱜㍔⑄⃚⮥∎䞷䤓0ℶ❐᧶ 99ᇬ+] Ⓙ㛓㺞ㄵⒿ◝㺞ㄵ 5+㡯⑬槁 䀆㕣伂⛝ ⏴㺣♲✛㘡㺣ⷣ掌㉔權㼰㦘ⰷ䬜䓸᧨▔㕻⚙㩅㒥␅⸒㖑㩅 ㆤ怆䤓↊⇤䇫⦷棊⫭䓸㒥ⰷ䬜䓸ᇭ抩歝ₜ恂♾厌ㆤ怆0 ℶ❐㟔椫㒥ㆤ怆⺈0ℶ❐䤓㗮⧞᧨扨↩⇫ㄮ年≬幐ᇭ 扨₹≬幐ₜ▔㕻↊⇤␅Ⅵ䤓㒟㦻᧨▔㕻⇕ₜ⻏棟ℝ᧨挲K ⅴₚ⚓欈䦇␂勣䤓㒟㦻᧶0ℶ❐䤓㕕☇ᇬ䂔㾐㒥⸘孔ᇬ全 0抯㒟䤓㧉㬿㒥䟄庒㠃᧨㒥㦃㗱廰䋾␆挲㫆䤓⸱㓆♾ 㦃㗱捷ↅᇭ扨₹≬幐♹▔㕻年ℶ❐䤓㷲デ∎䞷ᇭ㹞⮸ ⺞㢅㒥␅⸒扖摞䤓扭兼∎䞷ₜ↩嬺劒壠㷲デ∎䞷ᇭ㦻≬ 幐ₜ▔㕻劦㧟√Ⱁ᧨≬棸€᧨䋾␆棳⮥᧨ㄅ₣♹⋩Ⱁₚ屓 ⸩ᇭ扨₹≬幐㢾ₜ♾懻常䤓ᇭ 0ₜ微徲≬幐㦜┰᧨0㪖不㒥㪖幕㒥䷘儶㪖不㒥ㄞ⚆ㄣ ㇢䂔棳᧨棳槭⺈⚗⇫尐㻑䤓䱐ⅉ㪖不♵㦘㢝䫽䤓槱屓 ⸩ᇭ 扨䱜≬幐ₜ▔㕻⦷㙟⛗⇯䤓0ℶ❐噆㈦≬幐㦜┰㡈槱♠ 䞮䤓挽忓ᇬ≬棸㒥孔扟㒟㦻ᇭₙ承㒟㦻㢾⸱㓆䤓徲↊ᇭ Ⱁ㨫尐㻑䤓凉椆⦷㦜┰₼ₜ厌嬺攃⸩㒥⮜Ⓟ᧨⸱㓆♾厌㈦ ⺈♠䞮䤓㒟㦻微徲ᇭ⇯䤓≬幐◖儶ㄣ㇢▔㕻ಯ㦃㗱ರ㦜┰᧨ 㔏㦾ⅉ⛧ₜ厌攃⸩㒥⮜Ⓟ㓏尐㻑䤓凉椆᧨⸱㓆⺕微徲♻➳ 䤓㒟㦻ᇭ 㦹厌挄㈹▔⚺ℝ抑㇢0㓚␛₼䤓∎䞷広㢝㒥㦹厌㫈㗽0 䤓帰⒡䞷抣⭿㢝∎䞷0ℶ❐᧨掌⺕⇫ㄮ㓏㦘≬幐✛㦘棟嫴 㟠ᇭ棳ℕ䔈Ⓔ屓⸩ℝ抑䞷0ℶ❐㓚␛₼䤓挲㫆᧨0ₜㄣ ㇢微徲↊ℝ↊⇤梃㘴ᇬ⌅♠ᇬ䔈㸙㒥⥯㨫㊶㗮⧞▔㕻⇕ₜ ⻏棟ℝⒸ䀵ᇬ㟅⏴㒥₩┰䤓㗮⯀᧨⸒ⅻℶ䞮ℝ㒥↊⇤0 ℶ❐䤓㊶厌ᇬ∎䞷㒥㡯厌┪∎䞷䦇␂䤓↊⇤㡈㆞ᇭₜ丰 㗮⧞幘㻑䤓㽤㈚䚕幉Ⱁ⇤᧨扨₹棟Ⓟ掌抑䞷ᇭ ⺈ℝ≬幐㞾㖐᧨⦷⺕年ℶ❐抏徶⃚ⓜ᧨庆㓢䟄幬㒥≰全 ⇯㇢⦿䤓0┭ℚ⮓㒥0㘗㧒䤓㦜┰㙟∪⟕♥㈦50$ 抏徶㧟㠨㘗㧒⚆ᇭⰑ㨫⇯⇜ℝ初⦌⮶棕⃚␔᧨庆㕷㓢䟄 幬㒥♠䟄挽ↅ咂PHHWLQJV#PPP FRP勣八0⸱㓆㦜┰ᇭ 0⺕⋩⅏⃗㧴儯㷲桽欧᧶ Ⱁ㨫⇯䤓0ℶ❐榏尐冃≽᧨0↩尐㻑⇯⺕0ℶ❐䓱槯⦿ ▔孔ℝ␅☮▔孔㒥⚛䷘䓸❐⃚␔᧨ㄅ☮徼㡴㦮䤓幐㗽 怆᧨⺕␅㛉サ㒥♠抐Ⓙ⇯䤓0㦜┰兞枏⟕㒥0㦜┰₼ ㉒ᇭ 0⺕椞␅㎞≽嫴㒥㦃㗱凉椆孔函᧨ₜ㟅↊⇤捷ↅ㒥╂┰ 忈ᇭ0ℶ❐䤓抏徶ㄣ0䤓忈䞷㞾⒉ᇭ ㇢≬幐㦜┰䀘♙0ℶ❐㒥捷ↅ䤓ℳ㗱㢅᧨㦃㗱ₚ䤓捷ↅ⺕ 㒟0䤓徱ℶᇭ ℳ㗱䤓0ℶ❐㒥捷ↅ♾厌㢾⾼㠿䤓㒥㡸ⓜ兞扖劊≽才Ⓙ 0德摞㪖᧨力₣0∬呹㏎᧨㦃㗱ↅ♾厌㢾䦇⚛䱜伊✛德 摞䤓♵⨚⚆ᇭ 0⺈㦃㗱♦≬幐䤓0ℶ❐㒥捷ↅ䤓徲↊⺕ₜ↩怔扖年 0ℶ❐䤓☮榅➽ↆ㫋ᇭℳ㗱㒥㦃㗱ℶ❐㒥捷ↅ㔎㕔年ℶ ❐䤓⓸⇨≬幐㦮᧨㷳㦘棟≬幐㓏▔㕻ᇭ䏅力᧨㖘䏶ₙ槱 䤓屓⸩᧨㹞₹㦃㗱䋾ↅ♹␆㦘棟䤓⮸≬幐ᇭ k0≬䟨㓏㦘㧒Ⓒᇭ 0റ㔧♯㆞⭐㖑6&3):09✛6&3):069 ⸘⏷広㢝 巵⛙ ⦷㔧♯㆞㒥⦉⸩㆞⭐㖑䤓⸘孔✛∎䞷⃚ⓜ᧨庆梔床ㄅ挄㈹ 扨K∎䞷広㢝㓏▔⚺䤓㓏㦘⸘⏷≰㋾ᇭ庆≬䟨扨K∎䞷 広㢝᧨ⅴ忓⺕㧴♑劒ᇭ ℕ⇝㓏㦘抑䞷☀⹂䦇␂勣䤓歝棸᧶ ವ⦷⸘孔ᇬ∎䞷✛冃≽年⭐㖑⃚ⓜ᧨庆梔床ㄅ挄㈹⸘孔広 㢝✛ℶ❐⸘⏷㖖◦㓏▔⚺䤓㓏㦘⸘⏷≰㋾ᇭ庆≬䟨扨 K∎䞷広㢝᧨ⅴ忓⺕㧴♑劒ᇭ 幍帰䞷抣 㷲Ⱁ⸘孔広㢝₼㓏㙞承䤓挲㫆᧨㔧♯㆞⭐㖑幍帰䞷ℝ㙟∪ 0റ扠恬䱊㔤㈀侊兮6&3侊⒦㔤㈀㧉Ⓙ⬨⭐ₙ䤓⭐ 㖑⦉⸩㩅ᇭ㦮㦪㓏㦘⸘孔ⅉ⛧✛䞷㓆掌⏔⒕䩴㣢㦻ℶ❐䤓 ⸘⏷㝜⇫ᇭ␅⸒䞷抣㦹兞0⏻⚇幓↿᧨ㄅ♾厌⺋咃ₜ⸘⏷ 䤓䕅⑄ᇭ ℕ⇝䴡㋾䦇␂勣䤓歝棸᧶ ವₜ尐常⏎䵴㘴扠⺞捷ↅ✛㒥▔孔㧟㠨ᇭ ℕ⇝㜭⒊䦇␂勣䤓歝棸᧶ ವ⦷⺕0⭐㖑⸘孔Ⓙ䂆⑬⦮⧦✛㦷㪀椣⬨ₙ㢅᧨0⭐㖑 㞾㩅㢾㉔榏䤓䫻ↅᇭ ≰㋾幜⥯㨫屲摙 ವ⭐㖑㞾㩅䤓㷲槱㉔權㦬⮥⸘孔㷁䩴幵㍔᧨庆♑梔⸘孔 広㢝ᇭ 巵⛙᧶ 㖖䯉䱜䇫⦷䤓☀⹂㍔╎᧨Ⱁ㨫㦹嬺挎⏜ 䤓幬᧨♾厌⺋咃㸊ℰ㒥₴摜䤓↳⹂✛㒥 徱ℶ㗮⧞ᇭ ವⰑ㨫ₜ厌⺕0⭐㖑㞾㩅婉€⏴⬨㦷㪀᧨庆ₜ尐⸘孔年 㞾㩅㒥0侊兮᧨䦃Ⓙ⬨⭐㷲䫽┯⦉㷱ᇭ ⺞㉒᧶ 㖖䯉䱜䇫⦷䤓☀⹂㍔╎᧨Ⱁ㨫㦹嬺挎⏜ 䤓幬᧨♾厌⺋咃戊ㄵ㒥₼ㄵ䤓↳⹂✛㒥徱 ℶ㗮⧞ᇭ ವ㇢⦷⏎䵴棓扠∎䞷扨䱜⭐㖑㆞㔤㈀㧉䤓㢅⊨᧨㋊㢾㙟 ∪ⰴ⠓䤓㒟ⅉ䥠㔳ᇭ ವ⦷㓢㒥㟅怆⭐㖑䤓㔧♯呑㢅ₜ尐䞷┪扖ㄵᇭ ವ㉔權䟀兞洛₿⹛䤓⸘孔ⅉ⛧㖘䏶⸘孔広㢝₼㓏㰑承䤓 挲㫆㓶嫛ⰴ㇢䤓⸘孔✛冃≽ᇭ ವ扨䱜⭐㖑♹䞷ℝ⦉⸩0റ扠恬䱊㔤㈀侊兮6&3侊 ⒦㔤㈀㧉ᇭ␅⸒䞷抣⺩㦹扪嫛㿚幤ᇭ ವ⸩㦮㭏㩴⭐㖑᧨䫽≬㓏㦘侶⦉ↅ掌≬㖐侶⦉᧨ㄅ₣㦹♠ 䞮㗮⧞ᇭ⦷扪㷴∎䞷⃚ⓜ᧨≽䚕㒥㦃㗱㓏㦘め♠䘿 䤓桽欧ᇭ ⚺㦘⸘⏷≰㋾䤓幍㪖不屗 ⺞㉒᧶⯈懶☀⹂ 巵⛙᧶↊⇤ⅉ掌ₜ尐⦷㦻ℶ❐㞏⚙ 㽷㎞᧶庆梔床⇃棓㠖㫲ᇭ ⺞㉒᧶䍼嫷槱 巵⛙᧶ₜ尐⚠㔤㈀㧉䋾摛槱䦚 k0≬䟨㓏㦘㧒Ⓒᇭ 87 ㅔԧЁ᭛ ವₜ尐㟈♧⭐㖑䤓䓸䚕ⷵ㡈槱䤓㊶德ᇭ ವₜ尐⸘孔⦷㢢ℝ㖾┷ᇬ㿊┷㒥㦘♾厌嬺㜭⒊䤓⦉⸩兢㨓 㒥嫷槱ₙᇭ ವ扨䱜⭐㖑兢㨓㒥嫷槱㉔權㦏⺠厌㞾㖐䭔䤓⨑䦃戌 嘆ᇭⰑ㨫ₜ䏅᧨⬨⭐㉔權⦷⦉⸩⭐㖑⃚ⓜ㖘䏶⸘孔㖖 ⺋広㢝扪嫛┯⦉ᇭ ವ扨䱜⭐㖑兢㨓㒥嫷槱㉔權㦏⺠厌㞾㖐䭔䤓㕘㕣 ┪ᇭⰑ㨫ₜ䏅᧨⬨⭐㉔權⦷⦉⸩⭐㖑⃚ⓜ㖘䏶⸘孔広 㢝扪嫛┯⦉ᇭ ವㆉ帽⺕⦉⸩兢㨓㒥嫷槱⦉⸩Ⓙ⸭㦷㦏⺠⚚䤓厅⚗㨎 嬺⦉⸩Ⓙ₳₹䵚㪀ₙ㒥⸭⇢䂆⑬⦮ₙᇭⰑ㨫年⭐㖑㢾 尐嬺⸘孔⦷↊⇤␅⸒兢㨓㒥嫷槱⃚ₙ᧨尐∎䞷抑㇢䤓⟕ ➽䫻ↅ✛㒥㧟㠨ᇭ扨䱜䫻ↅ✛㒥㧟㠨㉔權䟀兞洛₿ ⹛䤓⸘孔ⅉ⛧㧴⑂⸩ᇭ ವₜ尐⦷⦉⸩㆞㒥㔧♯㆞⭐㖑ₙ㞏䒻ᇬ⚙嗰㒥㟍函棳㔤 ㈀㧉⃚⮥䤓↊⇤欬⮥摜摞ᇭ 0റ㔧♯㆞⭐㖑6&3):09✛6&3):069 巵⛙ ℕ⇝☀⹂䟄☚䦇␂勣䤓歝棸᧶ ವ㔧♯㆞⭐㖑⅝呑ㄤ捷Ⓙ呑⪉捷䤓䟄冕᧨㢾☮☑⸘孔䤓᧨ 庆ₜ尐ⅴ↊⇤㡈㆞♑䏶⸘孔広㢝㟈♧␅兎恾ᇭ㉔權 挎⏜⯈懶㒥䭷㗮䟄冕ᇭⰑ㨫㦘↊⇤欬⮥䤓䟄冕嬺䂊┯ Ⓙ呑⪉ₙ᧨庆♑䏶⸘孔広㢝ᇭ⸩㦮㭏㩴䟄冕᧨ㄅ₣尐⦷ 扪㷴∎䞷⃚ⓜ᧨≽䚕㒥㦃㗱㓏㦘め♠䘿䤓桽欧ᇭ ವ⦷扪嫛↊⇤冃≽⃚ⓜ᧨㋊㢾⅝䟄䄟㙡ㄶ⮓㠼㔤㈀㧉䟄 䄟懾兎ᇭ ವₜ尐⦷⸳⮥㒥䇽䄎䤓䘾⬒⃚₼⸘孔扨䱜⭐㖑ᇭ ವ㡵⪉捷⸘孔⸛㒟᧨⑂ₜ尐㔙⮩⇨栎ㄵ䤓䟄冕⫺⫭⦷⭐ 㖑䥥ₚ槱ᇭ ℕ⇝䋺䌍䦇␂勣䤓歝棸᧶ ವₜ尐⦷┯䍼⣷ᇬ⭐䌘㒥䍼厌䤓↊⇤␅⸒䦃㘴㧴䄟䤓棓 扠⸘孔扨䱜⭐㖑ᇭ ⺞㉒ ℕ⇝⯈懶䍈䦇␂勣䤓歝棸᧶ ವ㓚✛㓚㖖≬㖐扫䱊㓏㦘㿊┷捷ↅ᧨ⅴ挎⏜⯈懶䍈䤓↳ ⹂ᇭ ℕ⇝⚙◖䦇␂勣䤓歝棸᧶ ವ⒉ℝ摜摞✛㚻┷㡈槱䤓㉶壠᧨㋊㢾∎䞷₳₹兞洛₿⹛䤓 ⸘孔ⅉ⛧㖘䏶⸘孔広㢝㧴⸘孔⭐㖑ᇭ ㅔԧЁ᭛ ℕ⇝㜭⒊䦇␂勣䤓歝棸᧶ ವ⦷⸘孔⭐㖑㞾㩅㢅᧨庆♹∎䞷㞾㩅椞棓䤓栎板朘ᇭ ≬䟨扨K⸘孔広㢝 k0≬䟨㓏㦘㧒Ⓒᇭ 0റ㔧♯㆞⭐㖑6&3):09✛6&3):069 ぴ␆▔␔⚺䓸❐᧶ ∎䞷歭Ⓒ㿵◐ⷦ婉€怆♥㘘⺕䥥⦉⸩Ⓙ⪉捷 ₙ䤓ₘ欦婉€ᇭ ⺕䥥☇䱊⪉捷᧨ㄅ㟍Ⓙ扈ᇭ ⸘孔広㢝 86%䟄冕᧨伂 9*$䟄冕᧨伂 ₹䟄冕㓝▬ ₹0婉€䞷ℝ⦉⸩㔤㈀㧉 ₹⚚㡈⯃婉㪢 ₹⚚㡈⯃板朘 ₹⚚㡈⯃婉㪢 ₹⚚㡈⯃板朘 ⅔6&3):069 伂3&⭿欠䟄冕 伂3&⭿欠䟄冕 㓻⭿⣷㟍⮶⣷䟄䄟 㓻⭿⣷㟍⮶⣷䟄䄟懾兎 㶶䥮咂喀⦌䟄䄟⒉♲抑揜⣷⅔(88. 䦃㿐䟄䄟懾兎∪⅝,2Ⓙ㓻⭿⣷㟍⮶⣷䤓䟄厌 ∪折棓ↅ 0റ⭐㖑㞾㩅 0റ⸘⏷▔ ♥ₚ䥥 ⅝▔孔₼♥⒉㔧♯㆞⭐㖑᧨ㄅ⺕␅ㄤ㦬ₚ㟍⦷㫛 ₙᇭ ㆤ⺋86%ᇬ9*$ⅴ♙∪折㘶Ⓟ䟄冕抩扖㧉呑ᇭ⺈ 營䟄冕㦺䵾᧨ㄅ∎䞷䟄冕㓝▬⅝㦺䵾兠㧮儵⚚ 㹺伂ᇭ ~6" (150 mm) ⺕呑⚠ₙ㛕┷᧨䦃Ⓙ␅析⦉Ⓙ⇜㷱ᇭ 㽷㎞᧶0റ,2㲰兓折㘶Ⓟ䟄冕怆ℳ徶ᇭ k0≬䟨㓏㦘㧒Ⓒᇭ 89 ㅔԧЁ᭛ 恾䟀䟄冕 0റ㔧♯㆞⭐㖑6&3):09✛6&3):069 ⺕⚓㧰䟄冕✛䟄䄟䟄冕ㄅ㘡⺈營᧨ㄅ䞷䟄冕㓝▬兠 㧮䟄冕ᇭ ∎䞷抑㇢䤓杊⯃᧨⦷⬨ₙ杊⒉₹ⷣ᧨䞷ℝ⦉⸩㡈⯃ 婉㪢板朘ᇭ⦷ₙ槱䤓₳₹ⷣ₼⸘孔䩼板朘᧨ₚ槱䤓 ₳₹ⷣ₼⸘孔栎板朘ᇭ 㽷㎞᧶ ⺕⚚䤓⑁⒊杊⯃䞷ℝ⸭㉒䂆⑬⦮⬨㒥⚚杊 ⯃䞷ℝ㦷德⬨⭐ᇭₜ尐⺕板朘䞷ℝ㦷⬨᧨♹∎䞷婉 €ᇭ ∎䞷⚚䤓⯦䷡㔂㓚᧨⸘孔扨₹䩼ₙ⦉⸩㡈⯃ 婉㪢᧨∎⚚㹺伂䤓婉€䴐⒉⬨⭐ᇭₜ尐⸘ 孔栎ₚ㡈⯃婉㪢ᇭ 1/2" (13 mm) ⸭㉒⬨⭐⸘孔 ⺈ℝ䂆⑬⦮⧦㒥㦷㪀椣⬨᧨庆悂咂㷴洳 䫽⸩㔤㈀⦍⍞䤓䚕㎂⻉⺇✛⇜函᧨ㄅ㪖帿年⦍⍞䤓 欅捷♙␅₼㉒䤓⇜函ᇭ 䫽⸩㲰㨎䤓ಯ⦍⍞欅捷ರ兎䤓⇜函᧨⸭䘿㎂尐䤓⦍⍞ ⻉⺇᧨䏅⚝⺕ಯ⦍⍞欅捷ರ✛ಯ⦍⍞₼㉒ರ䤓兎⦍⍞⻉ ⺇䤓䚕㎂⇜函⺈營ᇭ䏅⚝᧨⦷⬨⭐ₙ㪖帿⒉㲰㨎䤓 ⥪₹◐ⷦ€䤓⇜函ᇭ ⦉⸩Ⓙ⬨⭐ₙ 㔙⭐㖑⪉捷㖑Ⓙ⦉⸩㡈⯃婉㪢ₙᇭ∎䞷⚚⯦ ䷡㔂㓚䓱槯⦿㕶侶⦉⸩㡈⯃婉㪢ᇭ Ⓒ䞷庒婉€⸘孔栎⦉⸩㡈⯃婉㪢ㄅ䓱槯⦿㕶 侶ᇭ 3M™ Folding Wall Mount Mounting Template ㅔԧЁ᭛ Descripteur de Support Montage-Schablone Modelo Del Montaje Mascherina Del Montaggio 架置模板 ໕ᆳ ቋዯഋ 土台のテンプレート For use with: Pour l'usage avec Für Gebrauch mit: Para el uso con: Per uso con: 至于使用与: 사용를 위해에: 使用のため下記のものの: SCP715, SCP717, SCP740 SCP715, SCP717 SCP740 1 Image Area k0≬䟨㓏㦘㧒Ⓒᇭ 0റ㔧♯㆞⭐㖑6&3):09✛6&3):069 悂Ⓙ㷴洳ᇭ 㦷㪀椣⬨᧶ ⦷㦷㪀䤓₼㉒㪖帿⒉ⷣ䤓⇜函᧨䏅⚝␜∎䞷⚚ 㹺伂杊⯃᧨杊₹⚚㹺伂䂀䤓ⷣ᧨䴎扖⬨⭐ 扪⏴㦷㪀ᇭ 0റ⭐㖑㞾㩅⸘孔 ∪䞷ℝ䂆⑬⦮⧦㒥㦷㪀椣⬨ 䫽⸩㔤㈀⦍⍞䤓䚕㎂⻉⺇✛⇜函᧨ㄅ㪖帿年⦍⍞䤓 欅捷♙␅₼㉒䤓⇜函ᇭ ⺕㲰㨎✛㞾㩅ₙ䤓⦉⸩ⷣ⺈營᧨⦷䞷厅サ兠㧮ᇭ 䫽⸩㲰㨎䤓ಯ⦍⍞欅捷ರ兎䤓⇜函᧨⸭䘿㎂尐䤓⦍⍞ ⻉⺇᧨䏅⚝⺕ಯ⦍⍞欅捷ರ✛ಯ⦍⍞₼㉒ರ䤓兎⦍⍞⻉ ⺇䤓䚕㎂⇜函⺈營ᇭ㫈㗽ₚ㷴㪖帿⒉⥪₹⦉⸩ ⷣ䤓⇜函ᇭ 1/2–5/8" (13–16 mm) 3M™ Folding Wall Mount Mounting Template Descripteur de Support Montage-Schablone Modelo Del Montaje Mascherina Del Montaggio 架置模板 ໕ᆳ ቋዯഋ 土台のテンプレート For use with: Pour l'usage avec Für Gebrauch mit: Para el uso con: Per uso con: 至于使用与: 사용를 위해에: 使用のため下記のものの: SCP715, SCP717, SCP740 Align with holes in bracket SCP715, SCP717 SCP740 1 Image Area 4X 䂆⑬⦮⧦⬨⭐᧶ ⦷䂆⑬⦮⧦⃚梃䤓⨑䦃冬摛㪖帿⒉ⷣ䤓⇜函᧨䏅⚝ ␜∎䞷⚚㹺伂杊⯃⦷䂆⑬⦮䤓⨑䦃冬摛杊 ⒉₹䂀⚚㹺伂䤓ⷣᇭ⦷扨₹ⷣ₼⸘孔 ₹栎板朘ᇭ ∎䞷⚚䤓⯦䷡㔂㓚✛₹䩼⦉⸩⯦婉㪢㔙㞾㩅 ⦉⸩Ⓙ⬨⭐ₙᇭ 㔙⭐㖑⪉捷⦉⸩Ⓙ㞾㩅ₙ ⺞㉒ ∎䞷婉€怆⺕₳₹サ⨺⦗䤓䩼⦉⸩婉€⸘孔Ⓙ ⦉⸩㞾㩅ₙ᧨ㄅ∎年婉€䴐⒉㞾㩅⚚㹺伂ᇭ 执㼰㦘尐⸘孔栎ₚ⦉⸩婉€ᇭ ℕ⇝㜭⒊䦇␂勣䤓歝棸᧶ ⦷⸘孔⭐㖑㞾㩅㢅᧨♹∎䞷年㞾㩅椞棓䤓⚚㹺伂 䤓栎㡈⯃板朘᧨力ₜ㢾⚚㹺伂䤓䩼㡈⯃板朘ᇭ 16 in ) mm (406 2X 4X LONG k0≬䟨㓏㦘㧒Ⓒᇭ 91 ㅔԧЁ᭛ 0റ㔧♯㆞⭐㖑6&3):09✛6&3):069 㔙⭐㖑⪉捷㖑Ⓙ⦉⸩婉€ₙᇭ∎䞷婉€怆䓱槯 ⦿㕶侶⦉⸩婉€ᇭ ⸘孔⸘≬▔∪折 ∪折⸘≬析冕䤓⸘孔⦉⸩㢾抩扖⺕␅䓱槯⦿析⦉ Ⓙ⦉⸩㞾㩅⸘≬㲌ᇬ㓢䘾䴎扖⦉⸩㞾㩅㒥∎ ␅㓢䘾䴎扖婉€⦉⸩板䍈ᇭ 1 2 3 㽷㎞᧶ Ⱁ㨫∎䞷婉€⦉⸩板䍈᧨⦷扭㘴冕析⃚ⓜ尐⏗⦉⸩ 板䍈ᇭ Ⓒ䞷庒婉€⸘孔栎⦉⸩婉€ㄅ䓱槯⦿㕶侶ᇭ ㆤ⺋⸘≬析冕䴎⒉㧉呑ᇭ∎䞷䟄冕㓝▬⅝䘿㦘䟄 冕㧮䤓㦺䵾兠㧮儵⚚㹺伂ᇭ ~6" (150 mm) 㽎㓢㧮䟄冕㡐扈恾䟀⸘≬析冕᧨ㄅ∎䞷䟄冕㓝▬⦉ ⸩Ⰼᇭ ㅔԧЁ᭛ 2X k0≬䟨㓏㦘㧒Ⓒᇭ 0റ㔧♯㆞⭐㖑6&3):09✛6&3):069 扭㘴䟄䄟ㆅ栎䟄冕 㖘Ⱁ⦍㓏䯉扭㘴䟄䄟ㆅ栎䟄冕ᇭ䞷䟄冕㓝▬兠 㧮ᇭ ∎䥥䅠扖㧉呑ₙᇭ∎䞷䟄冕㓝▬㔙䟄䄟✛檂欠 䟄冕⦉⸩Ⓙ䘿㦘䟄冕㧮ₙᇭ䟨⒉⚚䤓㨍ㆪ 䟄冕ᇭ 10–12" (250–300 mm) 扭㘴⭿欠䟄冕 ⅔6&3):069 䥥ₙ䥥 ⺕䟄䄟✛檂欠䟄冕扭㘴Ⓙ䥥␔槱䤓兎恾ₙᇭ Power 㔙䥥⦉⸩Ⓙ⪉捷ₙᇭ 巵⛙ ℕ⇝☀⹂䟄☚䤓歝棸᧶ ₜ尐⦷⭐㖑䥥ₚ槱⫭扖⮩䟄冕ᇭ Audio ㅔԧЁ᭛ k0≬䟨㓏㦘㧒Ⓒᇭ 93 0റ㔧♯㆞⭐㖑6&3):09✛6&3):069 扭㘴㔤㈀㧉 兓孔ㆅ栎呑 㙟怆兓ↅㄅ∎㓢㧮䟄冕気䴎ㆅ栎呑䤓㟍㦺䵾ᇭ Ⱁ⦍㓏䯉᧨⺕ㆅ栎呑㙡⏴呑₼ᇭ 㔙₳₹婉€⸘孔⏴呑㷱┷⣷ᇭ Ⱁ⦍㓏䯉᧨∎䞷₳₹婉€✛劋ㇱ婉朘㔙⦉⸩㞾㩅⦉ ⸩Ⓙㆅ栎呑䤓㦺䵾ₙᇭ 2 3 1 ㅔԧЁ᭛ 䞷ₘ₹婉€㔙㔤㈀㧉⦉⸩Ⓙ⦉⸩㞾㩅ₙᇭ 㽷㎞᧶ 㩟K⨚⚆↩榏尐₳₹⨺⦗婉€᧨䫽≬侶揜⚗ᇭ k0≬䟨㓏㦘㧒Ⓒᇭ 0റ㔧♯㆞⭐㖑6&3):09✛6&3):069 㕘ㆤ∎䟄冕㧮䴎扖⇜ℝㆅ栎呑㦺䵾䤓ⷣᇭ 㫈㗽㉺抮⏴桷㖖◦㔙䟄冕扭㘴Ⓙ㔤㈀㧉ₙᇭ 㔙∪折⸘≬冕析扭Ⓙ㔤㈀㧉ₙᇭ 庒㠃㔤㈀㧉 全孔函抩䟄ㄅ抩扖庒⏴㒥庒⒉ㆅ栎呑㧴㟈♧⦍⍞ ⻉⺇ᇭ 抩扖㨍劋ㇱ婉朘㧴庒㠃㔤㈀㧉呑ᇭ 抩扖♥ₚ䥥ᇬ㨍ₚ⦉⸩㡈⯃婉㪢㒥⦉⸩婉€㧴 庒㠃⨑䦃⦍⍞⇜函᧨ㄅ庒㠃庒婉€ᇭ⦷兢㧮䤓 㢅⊨᧨㕶侶ₚ⦉⸩㡈⯃婉㪢㒥婉€᧨␜䥥ₙ䥥ᇭ 庒㠃㻃⦍⍞⇜函 ♥ₚ䥥ᇭ 㨍庒㠃✛析侶婉€ᇭ ⚠ふ㒥⚂䲊┷㧉呑咂㎂尐䤓⇜函ᇭ 㕶侶庒㠃✛析侶婉€᧨⺕㧉呑⦉⸩⦷㠿䤓⇜函ᇭ ⸛㒟㢅᧨䥥ₙ䥥ᇭ ㅔԧЁ᭛ Adjustment Screw Locking Screw k0≬䟨㓏㦘㧒Ⓒᇭ 95 ㅔԧЁ᭛ 0㢾0⏻⚇䤓⟕㪖ᇭ 摜尐抩⛙ 0ℶ❐䦇␂䤓㓏㦘⭿㢝ᇬ㔏㦾≰㋾ⅴ♙ㆉ帽掌㢾⪉ℝ㗽≰♾槯䤓≰㋾᧨⇕ₜ≬幐位䫽ㄵ㒥⸛㠃ㄵᇭ⦷∎䞷扨䱜ℶ❐ⓜ᧨⇯㉔權⺈␅扪嫛幓 ↿ㄅ䫽⸩⸒㢾⚵抑䞷ℝ⇯䤓帰⒡䞷抣ᇭ⇯㔎㕔扨䱜∎䞷䦇␂勣䤓⒖徲↊✛歝棸ᇭ㦹▔⚺⦷0㇢ⓜ⒉䓗䓸䤓年ℶ❐䦇␂䤓↊⇤⭿㢝᧨㒥 ▔⚺ℝ⇯䤓帱◤ₙ䤓↊⇤ₜ咃⭿㢝᧨掌ㄣ年㼰㦘㟗┪㒥㟗㨫᧨棳槭兞0䤓㘗㧒⸧⛧槱㢝䫽⚛㎞ᇭ ≬幐᧷㦘棟嫴㟠᧷㦘棟徲↊ᇭ 0≬幐᧨Ⱁ㨫⇯㫈㗽0幍帰䞷抣⭿㢝ZZZ0FRPPHHWLQJV∎䞷0ℶ❐᧨挲⃗年ℶ❐⺕呹摖徼⃚㢅怆ⅳⅉ䅰㎞⦿嫷䘿才䘿嫛0ℶ❐㓚␛ 㓏屓⸩䤓≬幐功䞷㦮ᇭ䘿嫛0ℶ❐㓚␛屓⸩䤓≬幐掌㢾₢㊶䤓᧨力₣掌㢾ℕ㦎ⅲ↊⇤♙㓏㦘≬幐ᇬ㢝䯉㒥㤦䯉≬幐㒥㧰ↅ᧨▔㕻↊⇤ 䔈⸩䥽䤓⻀抑枏㊶✛抑⒖㊶㓏⋩䤓↊⇤㤦䯉≬幐ᇬ㒥↊⇤嫛₩⸭悄㒥欍⸱㒥忇㢢䞷抣ᇭ 3 Projector Systems 6801 River Place Blvd. Austin, TX 78726 800 328 1371 www.3M.com/meetings 庆⥭㟅ᇭ◿Ⓟℝ初⦌ᇭ k0≬䟨㓏㦘㧒Ⓒᇭ 78-6971-1458-1-B 0റ㔧ቭቂቂቢ㆞⭐♥Ⅷሴ␆ 6&3):069 0റኖዙኮዙኌዊዙኖኴዊንኄኌኔዄዐ ኔኖኣኽ∎䞷 ♥Ⅷ㡈㽤崻㢝㦇 日本語 㦗 % 0റ㔧ቭቂቂቢ㆞⭐♥Ⅷሴ␆6&3):09ርቫቖ6&3):069 ≬峋ᇬ棟⸩㟠䂗ᇬ弻↊棟⸩ ሶቑ≬峋ቒᇬ伂⦌⮶椇ቑቢ拸䞷ሸቯቡሼᇭ≬峋ቑ㦮栢ᇬ 㧰ↅᇬ㟠䂗䷥ርቫቖ棟⸩ቒ⦌ቫቆ⮘ቲቮሶቋሯሥቭቡ ሼᇭ≬峋ቑ㍔⫀ቒ㦏⹓ቑ0&RPSDQ\ር⟞ሧ⚗ቲሾሲቃ ሸሧᇭ 06&3ኔዙኗኴዊንኄኌኜዙᇷ0完❐ᇸᇬሷ律 ⏴㡴ሮቬ栢ቡቂቒ㣑栢ቑሷ∎䞷ቑቌቄቬሮ⏗Ⓙ 拣ሺቂ㡈ቑ㦮栢ᇬ㧟㠨ቡቂቒ完抯ቑ㶯棴ቑ䎰ሧሶቋት≬峋ሺ ቡሼᇭ ኴዊንኄኌኜዙቑዐኴት棳ሰᇬ⭐槱♥ቭⅧሴ␆ᇬ⮸ℤ♥ቭ Ⅷሴ␆ᇬኤንኜወ㽷摗ኘዐኒዙᇬርቫቖ⏴┪⒉┪孔函ት⚺ ባᇬ0完❐ቑⅥቑሼቜቑⅧ⻭❐拸䞷ሸቯቮንዂዙወ㆞ 㱚抯ሷ律⏴㡴ሮቬ栢ᇬ㧟㠨ቡቂቒ完抯ቑ㶯棴ቑ䎰ሧሶ ቋት≬峋ሺቡሼᇭ 0完❐ቑዐኴ㱚㒟捷❐ቒᇬ0完❐ቑሷ律⏴㡴ሮቬ㡴ቡ ቂቒ㣑栢ቑዐኴቑሷ∎䞷ቑቌቄቬሮ⏗Ⓙ拣ሺቂ㡈ቑ 㦮栢ᇬ㧟㠨ቡቂቒ完抯㶯棴ቑ䎰ሧሶቋት≬峋ሺቡሼᇭሶ ቑ≬峋ቒ捷❐⺍ሺቑቢቊሥቭᇬዐኴ⺍ሼቮ≬峋ቑ嵚 㻑ሯ㔎崜ሸቯቂ⫃⚗ᇬ⸱㱧⺍ሼቮ➾ቑ㟠䂗䷥ቒᇬር⸱ 㱧ቑ㓏ℳ㙪完❐ትር⻙ሴሼቮሶቋቊሼᇭ ኇኴኔዄዐ完❐ቑኍዉዙኦቿአኴርቫቖንዂዙወ㆞㱚抯ቑ 捷ቋሺ弸⮁ሸቯሧቍሧⅧ⻭❐⺍ሺቒᇬ⊚ᇰቑ≬峋ት 嫛ሧቡሼᇭ 日本語 ₙ岧ቑ≬峋ቒ㘡Ⅵ䤓ቊሥቭᇬ䔈⒴ቑ䥽䤓ቡቂቒ㯼䟛ቑ㏲嫛ቡ ቂቒ䔈㽷ቑ䞷㽤ቡቂቒ⟕剡㏲䞷ቑᇬ㤦䯉ሸቯቂ⟕㯼㊶ቡቂቒ 拸⚗㊶ት⚺ባᇬ㢝䯉ሥቮሧቒ㤦䯉ሸቯቂ≬峋ቡቂቒ㧰ↅቑሼ ቜⅲቲቆ嫛ቲቯቮብቑቊሼᇭ 0完❐ሯᇬ拸䞷ሸቯቮ≬峋㦮栢␔ᇬₙ岧≬峋㈢ቲቍሮቆ ቂ⫃⚗ᇬር⸱㱧ቑ➾ቑ㟠䂗䷥ቒᇬ0ቑ⒳㠼ቊᇬ0完❐ቑ ℳ㙪ቡቂቒ≽僤ᇬቡቂቒ0完❐ቑሷ律⏴摠櫜ት扣摠ሼቮሶ ቋቊሼᇭℳ㙪ሺቂ捷❐ቡቂቒ完❐ቒᇬሼቜ0ቑ㓏㦘䓸ቋ ቍቭቡሼᇭ完❐ት≽僤ሼቮ⫃⚗ᇬ0ቒᇬ㶯棴捷❐ት㠿❐ቡ ቂቒ∎䞷ሸቯቂሶቋቑሥቮ捷❐ቊ≽僤ሺቡሼᇭ0完❐ትℳ 㙪ሼቮ⫃⚗ᇬ0ቒᇬ0完❐ትᇬ⚛ሻቡቂቒ䷘∰ቑኤወር ቫቖ㠿❐ቡቂቒ␜䞮ሸቯቂ0完❐ቋℳ㙪ሺቡሼᇭ≬峋ቑ嵚 㻑ሯ㔎崜ሸቯቂ⫃⚗ᇬℳ㙪ሸቯቂ0完❐ቒᇬₙ岧ቑ㦏⒬ቑ 0完❐ቑ≬峋㦮栢ቑ㸚ቭቑ≬峋㦮栢ቑቢትㆤሰ倨ሱቡሼᇭ ≬峋ኒዙኰኖት♦ሴቮቒᇬ㦏⒬ቑ律⏴㡴ት峋㢝ሼቮብቑት 㙟⒉ሼቮ㉔尐ሯሥቭቡሼᇭቡቂቒ完抯ነዙኦቑ㡴Ⅷሯ≬峋ቑ 栚ⱚቑ峋㢝∎䞷ሸቯቡሼᇭ ⅴₚቑ檔䥽ቒᇬₙ岧≬峋ሮቬ棳⮥ሸቯቡሼ 㱧ሼቮ㉔尐ሯሥቭቡሼᇭₜ拸⒖ቍ抩㺦ት嫛ሩቋᇬ0完❐ ቑ崳╤⇫ሯ䞮ሻቂቭᇬ≬峋ት䎰╈ሼቮᇬ0完❐ቛቑ㚜⍆ሯ ㆤሰ怆ሶሸቯቂቭሺቡሼᇭ ሶቑ≬峋ቒᇬ0完❐ቑ♥ቭ⮥ሺᇬ䂔㘒ቡቂቒ♥ቭⅧሴᇬ0 完❐嫛ቆቂ嵎㠃㳮㬿䤓ቡቂቒ榊㺦䤓ᇬቡቂቒዐኴቑቫ ሩቍ櫶⸱ሯℳ㙪ቊሰቮ捷❐ቑℳ㙪栱抲ሼቮብቑት⚺ባቂ ቃሺᇬ㉔ሽሺብሶቯቬ棟⸩ሸቯቍሧᇬⰑ⇤ቍቮ抌┯ነኖእ ብ⺍廰ሺሧቡሾቶᇭሶቑ≬峋ቒᇬ完❐ቑ抩デቑ∎䞷ቑቢ ት⺍廰ሺሧቡሼᇭ㡴㣑栢ቡቂቒቀቑⅥቑ拝ㄵቑ抲倩 ∎䞷ቒ抩デቑ∎䞷ቋቒ尚ቍሸቯቡሾቶᇭሶቑ≬峋ቒᇬዐኴ ⅴ⮥ቑ䀗劦❐ቂቋራቓኯዂዙኗቒ⺍廰ቋሾሽⅴₚ崻㢝 ሼቮብቑቑቢት⺍廰ሺሧቡሼᇭሶቑ≬峋ቒ币䂰ቊሰቡሾ ቶᇭ 0ቒᇬ㙟㛉ቑ尐㻑ቑቂቤቑ呹⹅⟕㲨ቑ彋Ⅷቑ䥽䤓ቑቂቤ 㦇槱ቫቮ岧承ሯ䎰ሧ棟ቭᇬ0ቑወቡቂቒዊኑᇬቡቂቒ ኔቿወ䟹⚆ሯ⮥ሸቯሧቂ⫃⚗ᇬ≬峋ኒዙኰኖቑ弻↊ት弯 ሧቡሾቶᇭ ሶቑ≬峋ቒᇬ≬峋ኒዙኰኖት♦ሴቮቂቤ0完❐ት㙟䯉ሼ ቮₙቊ䞮ሻቂᇬ掄≎㠨摠ᇬ≬峋ᇬቡቂቒ䤉䯴彊䞷ት⺍廰ሺ ሧቡሾቶᇭሶቯቬቑ彊䞷ቒር⸱㱧ቑ弯㕔ቋቍቭቡሼᇭኒዙ ኰኖ₼ᇬ㇄ሸቯቂ㶯棴ሯ崜巧ቊሰቍሮቆቂቭᇬ␜䚍ቊሰቍ ሮቆቂ⫃⚗ᇬ䤉䞮ሺቂ彊䞷ቑ弻↊ትር⸱㱧♥ቆ檑ሲ⫃⚗ ሯሥቭቡሼᇭ≬峋ቑ㠿䓗ኒዙኰኖቑᇷ⮘㦃ᇸሯ⚺ቡቯᇬ㔏 嫢劔ቫቆᇬ㇄ሸቯቂ㶯棴ሯ崜巧ቡቂቒ␜䚍ቊሰቍሮቆ ቂ⫃⚗ᇬ╤❰彊䞷ቒ櫶⸱ቑ弻↊ቍቭቡሼᇭ 拸⒖ቍ0完❐ኻከዂቿወ岧憘ሸቯሧቮ㖖䯉㈢ቲቍሮ ቆቂቭᇬ0ቑ∎䞷䥽䤓㈢ቲሽ0完❐ት∎䞷ሺቂ⫃⚗ᇬ ሼቜቑ≬峋ርቫቖ棟⸩孫⎮ቒ䎰╈ቍቭቡሼᇭ拸䞷ሸቯ ቮ0完❐ኻከዂቿወ䔈岧憘ቑ䎰ሧ棟ቭᇬ0ቒᇬቌቑቫ ሩቍ0完❐ቑ⸮嫛ᇬ∎䞷ቡቂቒ∎䞷ቊሰቍሧሶቋቫቆ䞮 ሻቮᇬቡቂቒ⇤ቬሮቑ栱≑ቑሥቮᇬቌቑቫሩቍ栢㘴䤓ᇬ⌅䤉䤓ᇬ 䔈⒴ቡቂቒ俟㨫ቋሺ䞮ሻቮ㚜⹂Ⓒ䥙ᇬ♝䥙ቡቂቒℚ㯼ቑ㚜 ⯀ት⚺ቢᇬሮቇሶቯቬ棟⸩ሾሽ⺍ሺብ弻↊ት弯ሧቡሾ ቶᇭሶቑ棟ㄵቒᇬ⸮㡌ሸቯቂ㚜⹂ቑ㘱㻑ሯ⪉ቈሧቂ㽤䚕嵥 栱ቲቬሽ拸䞷ሸቯቡሼᇭ ≬峋ቑኒኺዙእት♦ሴቮቒᇬ完❐ት扣抐ሼቮⓜᇬር⸱㱧 ቑ⦿⩮ቑ0ℚ╨㓏ቡቂቒ0ቑ崜⸩≽䚕㯼劔榊崀ሮሴ ቮሮቡቂቒ㦇櫭ት㙟⒉ሺ50$扣抐㧟㠨崜⸩䟹⚆ት ♥㈦ሺሲቃሸሧᇭሷ⇞㓏ሯ伂⦌⮶椇␔ቊሥቮ⫃⚗ᇬ榊崀 ቡቂቒ榊ኾዙወPHHWLQJV#PPPFRPቊ 0櫶⸱ኒዙኰኖሷ抲俰ሲቃሸሧᇭ 0ሯ⟞櫛ት屲㼉ሼቮቂቤ⸮㡌ሼቮሶቋ᧶ ሶቑ≬峋ቒᇬₜ拸⒖ቍ≬丰ᇬ㚜⍆ᇬ崳䞷ᇬ℀䞷ᇬℚ㟔ᇬ䫃⭙嫛 䍉ᇬₜ拸⒖ቍ孔函ᇬ㊯㏱ᇬₜ拸⒖ቍ懇抐ᇬ㒵℘嫛䍉ቫቆ 䞮ሻቂ㚜⍆ᇬ䋺ℚᇬ㾹㻃ርቫቖ囌榆ቑቫሩቍ䌌⹂ᇬₜ拸⒖ቍ 榊㿐ᇬኚኲእኃኄቿቑ⟞櫛ᇬ槭0完❐ቋቑ䦇℡⇫䞷ᇬቡቂቒ 0ቑ崜⸩ት♦ሴቂኒዙኰኖ↩䯍ቫቮብቑⅴ⮥ቑኒዙኰ ኖᇬ㊯㏱ቡቂቒ崿ሮቑ♥ቭ㔀ሧኼኖቫቆ㟈抯ሸቯቂቭ㚜 ⍆ት♦ሴቂቭሺቂ0完❐ት⺍廰ቋሺቡሾቶᇭ抩デቑ䭷劦 ርቫቖ㚜⍆ቒ≬峋ቑ⺍廰ቍቭቡሾቶᇭ ሷ∎䞷ቑ0完❐≽僤ሯ㉔尐ቍ⫃⚗ᇬ0ቒᇬር⸱㱧0 完❐ትኇንኧወ⹈⣷ቡቂቒ⚛䷘❐⏴ቯᇬ䭉⸮㭀▔ሺ 㦏⒬ቑ律⏴㡴ት峋㢝ሼቮብቑቋ偡⦿⩮ቑ0ኒዙኰኖኤ ኀዙዙቡቂቒ0ኒዙኰኖኘዐኜዙ㖐ቄ手ቶቊ檑ሲሮ抐 Ⅷሺ檑ሲሮትር櫧ሧሺቡሼᇭ 0完❐ቒᇬ␇⨚䤓ቍ⻚␔䜿⬒㡋ሧ㝜⇫ሼቮቫሩ岼岗 ሸቯሧቡሼᇭሶቑ≬峋ቒᇬⅴₚቑ䜿⬒ⅴ⮥ቊ∎䞷ሸቯቮ 0完❐ት⺍廰ቋሺቡሾቶᇭ ≬峋ኒዙኰኖሯ0ቑ完❐ቡቂቒ捷❐ቑℳ㙪ት⇃ሩ⫃⚗ᇬℳ 㙪ሸቯቂ䓸❐ቒ0ቑ彖䞲ቋቍቭቡሼᇭ ℳ㿐99ᇬ+] ഒᨺഒr)ᨺr) 䦇⺍䄎ㄵᨺ俟槁䎰ሺ 䀆㔫ᨺPᨺኲኀዙእ ⛇㺦♲ርቫቖ㘡㺦♲ቒᇬ⮸ℤቡቂቒⅥቑ♥ቭⅧሴ␆ሮቬㆤ ሰ怆ሶሸቯቮ䇫⦷䤓ቍ栘⫭ቡቂቒ椫⹂䓸ት⚺ባ椫⹂䓸ሯ䎰ሧ 0ቒ呹愺ቑ⒳㠼ቫቭᇬ捷❐ቡቂቒ⇫㯼⺍ሼቮ彊䞷ቑ嵚㻑 䎰ሺ㶯棴❐ቑ≽僤ቡቂቒℳ㙪ት嫛ሧቡሼᇭ0完❐ቑ扣 抐ቒ0ቑ弯㕔ቊ嫛ሧቡሼᇭ ℳ㙪ሸቯቂ0ቑ完❐ቡቂቒ捷❐ቒᇬ㠿❐ቡቂቒ0ቑ❐役 㲨䄥⚗ቆቂ␜䞮❐ቊሥቭᇬ0ቑ指㔭ቫቭሶቑℳ㙪❐ቒ ⚛ሻ䲽櫭ቡቂቒ❐役ቑ⒴ቑኤወቍቮ⫃⚗ሯሥቭቡሼᇭ ≬峋ሺቂ0ቑ完❐ቡቂቒ捷❐ቑℳ㙪⺍ሼቮ0ቑ弻↊ ቒᇬ0完❐ቑ⺞⮁弸⮁∰㫋ት怔ራቮሶቋቒሥቭቡሾቶᇭℳ 㙪ᇬቡቂቒℳ㙪完❐ቡቂቒ捷❐ቒሶቑ≬峋棟ㄵቑ⺍廰ቋቍቮ 完❐ቑ㸚⇨≬峋㦮栢ትㆤ倨ሱቡሼᇭሺሮሺᇬ⚓ℳ㙪ዐኴ ቒᇬₙ岧ቑ㡴棟⸩≬峋ትㆤሰ倨ሱቡሼᇭ k0䎰㠼宖ዘ慱憘ት䰐ሻቡሼᇭ 0റ㔧ቭቂቂቢ㆞⭐♥Ⅷሴ␆6&3):09ርቫቖ6&3):069 ⸘⏷ቑሺርቭ 巵⛙ 㔧ቭቂቂቢ㆞ቡቂቒ⦉⸩㆞ቑ♥ቭⅧሴ␆ቑᇬ♥ቭⅧሴርቫቖ ሷ∎䞷ቑⓜ㦻㦇岧憘ሸቯሧቮ⸘⏷㍔⫀ትር崼ቢቍ ቭᇬሶቯ㈢ቆሲቃሸሧᇭሶቯቬቑ崻㢝㦇ቒᇬ㈛ቊ♑劒ሼ ቮቂቤ≬丰ሺሲቃሸሧᇭ ㇢ቒቡቮሼቜቑ☀椉⇃ሩኖኌቑ憌䂪㡈㽤᧶ •⭐♥ቭⅧሴ␆ቑ♥ቭⅧሴᇬ∎䞷ቡቂቒ䍈㮫ቑⓜ♥ቭⅧሴ 崻㢝㦇ርቫቖ完❐⸘⏷ኁኦ岧憘ሸቯሧቮሼቜቑ ⸘⏷㍔⫀ትር崼ቢቍቭᇬሶቯ㈢ቆሲቃሸሧᇭሶቯቬ ቑ崻㢝㦇ቒᇬ㈛ቊ♑劒ሼቮቂቤ≬丰ሺሲቃሸሧᇭ ∎䞷䥽䤓 㔧ቭቂቂቢ㆞⭐♥ቭⅧሴ␆ቒᇬ♥Ⅷ㡈㽤崻㢝㦇崻㢝ሸቯ ሧቮቫሩᇬ0റኖዙኮዙኌዊዙኖኴዊንኄኌኔዄዐኔኖ ኣኽ6&3ኔዙኗኴዊንኄኌኜዙት⭐♥ቭⅧሴቮሶቋ ት䥽䤓ቋሺሧቡሼᇭሼቜቑ♥ቭⅧሴ⇫㯼劔ርቫቖ∎䞷劔 ቒᇬ㦻完❐ቑ⸘⏷㝜⇫䐮䩴ሸቯሧቮብቑቋ℗㎂ሺርቭ ቡሼᇭⅥቑ䞷抣ቒ0ቫቆ㮫峋ሸቯርቭቡሾቶቑቊᇬቀ ቑቫሩሷ∎䞷ቑ⫃⚗ᇬ☀椉ቍ䕅㽐棴ቮ㋟ቯሯሥቭቡሼᇭ ቑቌቑ峿ቡቭ⇃ሩ☀椉ቑ⥭挎᧶ •⺞⏟ት⺞捷❐ርቫቖ㭀▔㧟扠ቈሴሸሾቍሧቊሲቃሸ ሧᇭ 嫬㜒⇃ሩ☀椉ቑ⥭挎᧶ •0⭐♥ቭⅧሴኳአእቒᇬ0⭐♥ቭⅧሴ␆ትነዐኌ ዙእኳዊአኌርቫቖኖኜአኦኃኆዙወ♥ቭⅧሴቮቋ ሰ㉔尐ቍቮ摠⻭完❐ቊሼᇭ ≰⚆崭ቑ摜尐㊶ቑ崻㢝 •⭐♥ቭⅧሴኳአእቒᇬ嫷ት⮥⚠ሴ♥ቭⅧሴቮ㉔尐 ሯሥቭቡሼ᧤崂便ቒ♥Ⅷ㡈㽤崻㢝㦇ት♑䏶ሺሲቃሸሧ᧥ᇭ 巵⛙᧶ ⥭挎ሺቍሧ⫃⚗ᇬ㸊ቧ摜⍆ርቫቖ䓸䤓㚜⹂ ሯ俟㨫ቋሺ䞮ሻሩቮ☀椉ቑ♾厌㊶ሯሥቮ 䕅㽐ት㖖㛧ሺቡሼᇭ •0⭐♥ቭⅧሴኳአእቑኪንትኖኜአኦኃኆዙወ ⥭ሺ手ባሶቋሯቊሰቍሧ⫃⚗ᇬ⭐ሯ拸⒖孫㇆ሸቯቮቡ ቊኳአእቡቂቒ0ኔኖኣኽት♥ቭⅧሴቍሧቊሲቃሸ ሧᇭ 㽷㎞᧶ ⥭挎ሺቍሧ⫃⚗ᇬ憌㈽ቍᇬቡቂቒ₼䲚ㄵቑ ⍆⹂ቡቂቒ䓸䤓㚜⹂ሯ俟㨫ቋሺ䞮ሻሩቮ ☀椉ቑ♾厌㊶ሯሥቮ䕅㽐ት㖖㛧ሺቡሼᇭ •⺞⏟ቑ⛷⦁ቊ⭐♥ቭⅧሴኴዊንኄኌኜት∎䞷ሼቮ椪ቒᇬ㉔ ሽ⮶ⅉሯ䥲尥ሼቮቫሩሺሲቃሸሧᇭ ⸘⏷㍔⫀ት⚺ባኤክኁኖወቑ尐侓 •⭐♥ቭⅧሴ␆ቑ㔧ቭቂቂቢ㆞古ት⇇傽ሸሾቮ椪拝⓿ቍ ┪ት┯ራቍሧቊሲቃሸሧᇭ 㽷㎞᧶㖮ቡቯቮ☀椉 •拸⒖ቍ♥ቭⅧሴርቫቖ䍈㮫ቒᇬ♥ቭⅧሴ㖖⺝㦇崻㢝ሸ ቯሧቮቫሩᇬ䐮傃ሺቂ♥ቭⅧሴ⇫㯼劔ሯ嫛ሩ㉔尐ሯ ሥቭቡሼᇭ •ሶቑ⭐♥ቭⅧሴ␆ቒᇬ0റኖዙኮዙኌዊዙኖኴዊንኄ ኌኔዄዐኔኖኣኽ6&3ኔዙኗኴዊንኄኌኜዙቑ ቢ∎䞷ሼቮ㉔尐ሯሥቭቡሼᇭⅥቑ䞷抣⺍ሼቮ峵沢ቒ嫛 ቆሧቡሾቶᇭ 巵⛙᧶完❐ቬₚሯቬቍሧቊሲቃሸሧ •⭐♥ቭⅧሴ␆ቒ⸩㦮䤓䍈㮫ሺᇬሼቜቑ栘ቤ␆ሯ⦉ ሲ⦉⸩ሸቯᇬቌሶብ䫃㚜ሺሧቍሧሶቋት䭉崜ሺሲቃሸ ሧᇭሷ∎䞷ት倩ሴቮⓜᇬ䤉尚ሸቯቂሼቜቑ⟞櫛世㓏 ቑℳ㙪ቡቂቒ≽䚕ት嫛ቆሲቃሸሧᇭ 㽷䥽᧶䂊ⅧቑⅧ⻭㠖㦇ትር崼ቢሲቃሸሧ •㖾╤ᇬ䲊╤ᇬቡቂቒ嫬㜒ት♦ሴቮ♾厌㊶ቑሥቮ♥ቭⅧሴ㱚 抯ቡቂቒ嫷槱ቑₙ♥ቭⅧሴቍሧቊሲቃሸሧᇭ 㽷㎞᧶䑀槱 •⭐♥ቭⅧሴት嫛ሩ㱚抯ቡቂቒ嫷槱ቒᇬ㦏⇝OEVቑ⨑䦃 嘆摜功ራቬቯቮ㉔尐ሯሥቭቡሼᇭ功ራቬቯቍሧ⫃⚗ᇬ ♥ቭⅧሴⓜᇬ⭐ት♥ቭⅧሴ㖖⺝㦇ቑ抩ቭ孫㇆ሼቮ㉔ 尐ሯሥቭቡሼᇭ 巵⛙᧶ኴዊንኄኌኜቑዐኴት尦ሰ手ቡቍ ሧቊሲቃሸሧ •⭐♥ቭⅧሴት嫛ሩ㱚抯ቡቂቒ嫷槱ቒᇬ㦏⇝OEVቑㆤ ሰ㔫ሰ┪功ራቬቯቮ㉔尐ሯሥቭቡሼᇭ功ራቬቯቍሧ⫃ ⚗ᇬ♥ቭⅧሴⓜᇬ⭐ት♥ቭⅧሴ㖖⺝㦇ቑ抩ቭ孫㇆ሼቮ ㉔尐ሯሥቭቡሼᇭ •㘷⯷ሼቮ♥ቭⅧሴ㱚抯ቡቂቒ嫷槱ቒᇬ䫻ሧ㦷㧟㦏⺠㦻 ቑ殍ቭቖቪሩ♥ቭⅧሴቬቯቂ㦏⇝ቑ⚗㨎ቡቂቒ ⸘⸩ሺቂነዐኌዙእቊሼᇭ⭐ቛቑ♥ቭⅧሴትᇬⅥቑ㱚抯 ቡቂቒ嫷槱嫛ሩ⫃⚗ᇬゑ弸ቑ拸⒖ቍኬዙኦኃኄቿርቫቖ 㧟㠨ት∎䞷ሺሲቃሸሧᇭሶቑኬዙኦኃኄቿርቫቖ㧟㠨 ቒᇬ䐮傃ሺቂ♥ቭⅧሴ⇫㯼劔ሯ㼉ቤቮ㉔尐ሯሥቭቡሼᇭ •⦉⸩㆞ቡቂቒ㔧ቭቂቂቢ㆞♥ቭⅧሴ␆ᇬ䤊ቆቂቭᇬቬ ₚሯቆቂቭᇬቡቂቒኴዊንኄኌኜⅴ⮥ቑ嘆摜ት㘪ሴቂቭሺ ቍሧቊሲቃሸሧᇭ k0䎰㠼宖ዘ慱憘ት䰐ሻቡሼᇭ 日本語 •⭐♥ቭⅧሴ␆ቑ䓸䚕䤓㱧䦇ት⮘㦃ሺቍሧቊሲቃሸሧᇭ 0റ㔧ቭቂቂቢ㆞⭐♥Ⅷሴ␆6&3):09ርቫቖ6&3):069 巵⛙ ☀椉榊⦶⇃ሩ☀椉ቑ⥭挎᧶ •ቿዙኽቑ㫈⏒ሮቬዙኖቑㄤቡቊぴ⫃ቊ㠆ሧቂዙኳወት 㠆ሰ䦃ሼሶቋቒ倅⺍㷱ቤሲቃሸሧ♥ቭⅧሴ㖖⺝㦇ት ♑䏶ሺሲቃሸሧᇭዙኳወት㖮ቶቃቭ䭷劦ሸሾቂቭሺ ቍሧቫሩሼቮ㉔尐ሯሥቭቡሼᇭዙኳወሯዙኖ抌┯ ሸቯሧቂ⫃⚗ᇬ♥ቭⅧሴ㖖⺝㦇ት♑䏶ሺሲቃሸሧᇭ ዙኳወሯ䫃㚜ሺሧቍሧሮ⸩㦮䤓䍈㮫ሺᇬ∎䞷ሺ倩ሴቮ ⓜᇬ䤉尚ሸቯቂሼቜቑ⟞櫛世㓏ት≽䚕ሺሲቃሸሧᇭ •≽䚕ት嫛ሩⓜᇬ㉔ሽᇬነዐኘዐእሮቬኴዊንኄኌኜቑ榊 䄟ነዙኦት㔫ሧሲቃሸሧᇭ •⭐♥ቭⅧሴ␆ቒᇬ⻚⮥ቡቂቒ䄎䇳䜿⬒♥ቭⅧሴቍሧቊ ሲቃሸሧᇭ •ዙኖቑ♥ቭⅧሴሯᇬ㡵⸛㒟ሺቂቬᇬ⭐♥ቭⅧሴኈክዙ ቑₚᇬ⇨⒕ቍ栆ሸቑዙኳወት峿ቤ手ቡቍሧቊሲቃሸ ሧᇭ 䋺䌌⇃ሩኖኌቑ憌䂪㡈㽤᧶ •⭐♥ቭⅧሴ␆ትᇬኯዙኜዙᇬ㤥䌘ቍቌቑ䦃㘴䑀ኅኪወኋዙ 䄟ቑ扠ሲ♥ቭⅧሴቍሧቊሲቃሸሧᇭ 巵⛙ 㖮ቢ手ቢት嫛ሩ世㓏⇃ሩኖኌቑ憌䂪㡈㽤᧶ •㓚ርቫቖ㖖ት㖮ቶቊሴሯትሺቍሧቫሩሼቜቑ♾╤捷❐ 㓚ርቫቖ㖖ት扠ቈሴቍሧቊሲቃሸሧᇭ ⚙ቭₙስ⇃ሩኖኌቑ憌䂪㡈㽤᧶ •⭐♥ቭⅧሴ␆ቑ♥ቭⅧሴቒᇬ摜摞ርቫቖ♥ቭ㔀ሧሯ㉒揜ቍ ቑቊᇬ♥ቭⅧሴኁኦ抩ቭᇬ⚜ቑ䐮傃♥ቭⅧሴ⇫㯼劔 ቊ嫛ቆሲቃሸሧᇭ 嫬㜒⇃ሩ☀椉ቑ⥭挎᧶ 日本語 •⭐♥ቭⅧሴኳአእት♥ቭⅧሴቮቋሰቒᇬኳአእቋ 偡⚺ቡቯሧቮ栆ሧቿዐኈዙቑቢት∎䞷ሺሲቃሸ ሧᇭ ሶቯቬቑ♥㔀崻㢝㦇ቑ≬ⷧ k0䎰㠼宖ዘ慱憘ት䰐ሻቡሼᇭ 0റ㔧ቭቂቂቢ㆞⭐♥Ⅷሴ␆6&3):09ርቫቖ6&3):069 ኊአእቑ₼愺 ቿዙኽት㓏⸩ቑ⇜函ቊዊአኌሸቯቮቡቊₙ㖾ቭₙ ስቡሼᇭ ኴኖቑኦኁክዙት∎䞷ሺᇬኈክዙት⦮♿䟨ቤ ሧቮ㦻ቑኪንት♥ቭ⮥ሺቡሼᇭ ኈክዙት⦮♿ሮቬ㖐ቄₙስ⮥ሺᇬ厖函ሰቡሼᇭ ♥Ⅷ㡈㽤崻㢝㦇 86%ዙኳወᇬP 9*$ዙኳወᇬP ዙኳወኜኁ⊚ 0ኪን㦻ኴዊንኄኌኜ♥ቭⅧሴ䞷 ኍኹወእ㦻 ኍቿዐኈዙ㦻 ኍኹወእ㦻 ኍቿዐኈዙ㦻 6&3):069ቑቢ P3&ኇዙኤኀኇዙኳወ P3&ኇዙኤኀኇዙኳወ ኖዙኈዙቿዐኴ䞷榊䄟 ኖዙኈዙቿዐኴ䞷榊䄟ነዙኦ (8ሮቬ8.䞷ቛቑ榊䄟ነዐኘዐእቿኝኴኜ(8 8.ቑቢ 䦃㿐榊䄟ነዙኦ,2ሮቬኖዙኈዙቿዐኴቛቑ榊䄟 ኇኴኔዄዐቑⅧ⻭❐ 0റ⭐♥ቭⅧሴ䞷ኳአእ 0റኘኊዂኣኀኊአእ ኈክዙት♥ቭ⮥ሺቡሼ ኮአዙንሮቬ㔧ቭቂቂቢ㆞⭐♥ቭⅧሴ␆ት♥ቭ⒉ሺ ᇬ♿ቑₙ⦮♿ትₚሺ岼函ሺቡሼᇭ 日本語 k0䎰㠼宖ዘ慱憘ት䰐ሻቡሼᇭ 0റ㔧ቭቂቂቢ㆞⭐♥Ⅷሴ␆6&3):09ርቫቖ6&3):069 ዙኳወ俛恾 ⦉ሧ⭐ቛቑ♥ቭⅧሴ 86%ᇬ9*$ᇬርቫቖኇኴኔዄዐቑⓅ㈰ዙኳወትቿዙ ኽት抩ሺ抐ቭ手ቢቡሼᇭዙኳወቑ㦺䵾ት㙒ራᇬ ዙኳወኜኁት∎䞷ሺ㦺䵾ሮቬ侓ኁዐኞ PPቑቋሶተቊ⦉⸩ሺቡሼᇭ ~6" (150 mm) ᧤ነዐኌዙእኳዊአኌቡቂቒኖኜአኦኃኆዙ ወቑ⫃⚗ቒኖኣአኴኖኊአኴሺቡሼ᧥ 㔤㈀㢯⍞ቑ゛㦪ሼቮኒኁኗርቫቖ⇜函ት㼉ቤᇬ㢯 ⍞ቑₙ䵾ርቫቖ₼㉒ቑ⇜函◿ትⅧሴቡሼᇭ ゛㦪ሼቮ㢯⍞ኒኁኗ䞷ቑኣዐኴዉዙእቑᇷ㢯⍞ቑₙ 䵾ᇸኁዐት㼉ቤᇬ㶰ᇷ㢯⍞ቑₙ䵾ᇸኁዐቋᇷ㢯 ⍞ቑ₼㉒偩ᇸኁዐት゛㦪ሼቮ㢯⍞ኒኁኗቑ⇜函⚗ ቲሾቡሼᇭ㶰ᇬ⭐ኣዐኴዉዙእቑ世㓏ቑኌዊኖ ኵቿቑ◿ትⅧሴቡሼᇭ 3M™ Folding Wall Mount Mounting Template Descripteur de Support Montage-Schablone Modelo Del Montaje Mascherina Del Montaggio 架置模板 ໕ᆳ ቋዯഋ 土台のテンプレート For use with: Pour l'usage avec Für Gebrauch mit: Para el uso con: Per uso con: 至于使用与: 사용를 위해에: 使用のため下記のものの: SCP715, SCP717, SCP740 റ ኾ᧶ኇኴኔዄዐቑነዐእዊዙወዙኳወቒ0 ,2 ንዂዙወቋ偡⒉嘆ሸቯቡሼᇭ ሶቑዙኳወት榊䄟ዙኳወ䂊ቲሾዙኳወኜኁ ት∎䞷ሺ⦉⸩ሺቡሼᇭ SCP715, SCP717 SCP740 1 Image Area 拸⒖ቍኰአእት∎䞷ሺᇬ♥ቭⅧሴ嬺尕ኹወእቿዐኈ ዙ䞷ቑቇቑ䴃ት栚ሴቡሼᇭ䩼ሧቿዐኈዙትₙ⌃ቑ䴃 ᇬ栆ሧቿዐኈዙትₚ⌃ቑ䴃♥ቭⅧሴቡሼᇭ ኾ᧶ ⦉ሧነዐኌዙእ⭐ቒቑ䪂抯ቭቑ䴃ሥሴ䞷ኰ አእᇬቡቂቒ㦷完ቑ⭐ቓቑ䴃ሥሴ䞷ኰአእት ∎䞷ሺቡሼᇭ㦷完ቑ⭐ቒቿዐኈዙት∎䞷ሾሽᇬኪ ንቑቢት∎䞷ሺሲቃሸሧᇭ 日本語 ኚአእት∎䞷ሺᇬ㦻ቑ䩼ሧₙ⌃♥ቭⅧሴ 䞷嬺尕ኹወእት♥ቭⅧሴᇬ⭐ሮቬ䴐ሰ⒉ቂኪንቑರ PPቑ捷⒕ቒቀቑቡቡ㸚ሺቡሼᇭ栆ሧ᧤ₚ⌃᧥ 嬺尕ኹወእቒ♥ቭⅧሴቡሾቶᇭ 1/2" (13 mm) k0䎰㠼宖ዘ慱憘ት䰐ሻቡሼᇭ 0റ㔧ቭቂቂቢ㆞⭐♥Ⅷሴ␆6&3):09ርቫቖ6&3):069 0റ⭐♥ቭⅧሴኳአእቑ♥ ቭⅧሴ ⭐ቛቑ♥ቭⅧሴ ♥ቭⅧሴ䞷嬺尕ኹወእ⭐♥ቭⅧሴ␆ቑ⦮♿ት㘪ሴ ቡሼᇭኚአእት∎䞷ሺ♥ቭⅧሴ䞷嬺尕ኹወ እት⦉ሲ偯ቤⅧሴቡሼᇭ ᧤ነዐኌዙእኳዊአኌቡቂቒኖኜአኦኃኆዙ ወ∎䞷᧥ 㔤㈀㢯⍞ቑ゛㦪ሼቮኒኁኗርቫቖ⇜函ት㼉ቤᇬ㢯 ⍞ቑₙ䵾ርቫቖ₼㉒ቑ⇜函◿ትⅧሴቡሼᇭ ኣዐኴዉዙእትኳአእ␔ቑ♥Ⅷሴ䞷䴃⚗ቲሾ ᇬኣዙኴቊኳአእ⦉⸩ሺቡሼᇭ ゛㦪ሼቮ㢯⍞ኒኁኗ䞷ቑኣዐኴዉዙእቑᇷ㢯⍞ቑₙ 䵾ᇸኁዐት㼉ቤᇬ㶰ᇷ㢯⍞ቑₙ䵾ᇸኁዐቋᇷ㢯 ⍞ቑ₼㉒偩ᇸኁዐት゛㦪ሼቮ㢯⍞ኒኁኗቑ⇜函⚗ ቲሾቡሼᇭ㶰ቑኖኣአኴ㈢ቆᇬ世㓏ቑ♥Ⅷሴ䴃 ቑ⇜函◿ትⅧሴቡሼᇭ 3M™ Folding Wall Mount Mounting Template Descripteur de Support Montage-Schablone Modelo Del Montaje Mascherina Del Montaggio 架置模板 ໕ᆳ ቋዯഋ 土台のテンプレート For use with: Pour l'usage avec Für Gebrauch mit: Para el uso con: Per uso con: 至于使用与: 사용를 위해에: 使用のため下記のものの: SCP715, SCP717, SCP740 㻃嵎乏ኪንቫቆ栆ሧ♥ቭⅧሴ䞷嬺尕ኹወእት♥ ቭⅧሴᇬ⦉ሲ偯ቤⅧሴቡሼᇭ Align with holes in bracket SCP715, SCP717 SCP740 1 Image Area 日本語 ኖኣአኴኖኊአኴሺቡሼᇭ k0䎰㠼宖ዘ慱憘ት䰐ሻቡሼᇭ 0റ㔧ቭቂቂቢ㆞⭐♥Ⅷሴ␆6&3):09ርቫቖ6&3):069 ነዐኌዙእኳዊአኌ⭐᧶ ነዐኌዙእኳዊአኌ栢ቑ⨑䦃俟⚗捷ቑ䴃ቑ⇜函 ◿ትⅧሴᇬ㶰ᇬPPኰአእት∎䞷ሺ ᇬነዐኌዙእኳዊአኌ栢ቑ⨑䦃俟⚗捷 PPቑ䂀ሸቑ䴃ት世㓏栚ሴቡሼᇭሶቑ䴃㦻 ቑ栆ሧቿዐኈዙት♥ቭⅧሴቡሼᇭ ⭐♥ቭⅧሴ␆⦮♿ቑኳአእ ቛቑ♥ቭⅧሴ 巵⛙ 嫬㜒⇃ሩ☀椉ቑ⥭挎᧶ ⭐♥ቭⅧሴኳአእት♥ቭⅧሴቮቋሰቒᇬኳአእቋ 偡⚺ቡቯቮPPቑ栆ሸቑቿዐኈዙቑቢት∎䞷ሺ ሲቃሸሧᇭPPቑ䩼ሧቿዐኈዙቊቒሥቭቡሾቶᇭ ቑኚአእት∎䞷ሺᇬ㦻ቑ♥ቭⅧሴ䞷嬺尕ኹ ወእቊኳአእት⭐♥ቭⅧሴቡሼᇭ ኦኁክዙት∎䞷ሺᇬ㦻ቑ䩼ሧ♥ቭⅧሴ䞷ኪንትᇬ ♥Ⅷኳአእሮቬ歪ቖ⒉ሺሧቮኪንቑ PPቑ捷⒕ትቀቑቡቡ㸚ሺᇬ♥ቭⅧሴኳአእ␔ ዌአኔዀትⅧሴ♥ቭⅧሴቡሼᇭ栆ሧ᧤ₚ⌃᧥♥ቭ Ⅷሴ䞷嬺尕ኹወእቒቡቃᇬ♥ቭⅧሴቍሧቊሲቃሸሧᇭ 16 in ) mm 0 (4 6 2X 4X LONG ኖኜአኦኃኆዙወ᧶ ♥ቭⅧሴ䞷嬺尕ኹወእ⭐♥ቭⅧሴ␆ቑ⦮♿ት㘪ሴ ሲቃሸሧᇭኦኁክዙት∎䞷ሺ♥ቭⅧሴኪንት⦉ ሲ偯ቤⅧሴቡሼᇭ ኖኜአኦቑ₼㉒◿ትⅧሴሮቬᇬPPቑኰ አእት∎䞷ሺᇬPPቑ䂀ሸቑ⊚ቑ䴃ት⭐ ት抩ሺኖኜአኦ␔栚ሴቡሼᇭ 日本語 1/2–5/8" (13–16 mm) 4X k0䎰㠼宖ዘ慱憘ት䰐ሻቡሼᇭ 0റ㔧ቭቂቂቢ㆞⭐♥Ⅷሴ␆6&3):09ርቫቖ6&3):069 㻃嵎乏ኪንቫቆ栆ሧ♥ቭⅧሴ䞷ኪንት♥ቭⅧሴ ⦉ሲ偯ቤⅧሴቡሼᇭ ኘኊዂኣኀዙኳወትዙኳወ㧮㽎ቲሾዙኳ ወኜኁቊ♥ቭⅧሴቡሼᇭ 2X ⸘⏷ኊአእቑ♥ቭⅧሴ᧤ኇኴኔዄ ዐ᧥ 榊䄟ㆅ栆ዙኳወቑ㘴倩 嫷䯉抩ቭ榊䄟ㆅ栆ዙኳወት㘴倩ሺቡሼᇭዙኳ ወኜኁቊ⦉⸩ሺቡሼᇭ ኇኴኔዄዐቑኘኊዂኣኀዙኳወትᇬ♥ቭⅧሴኳ አእቑኘኊዂኣኀኖዊአእ᧤᧥ዊአኌሼቮሮᇬ ♥ቭⅧሴኳአእ᧤᧥ት抩ሺ憹ት⇫ቮሮᇬቡቂቒ ኪንቑⅧሧቂቿዐኈዙኺኁዐእ᧤᧥ት抩ሺ憹ት⇫ ቮሮሺ♥ቭⅧሴቡሼᇭ 1 2 3 日本語 ኾ᧶ ኪንቑⅧሧቂቿዐኈዙኺኁዐእት∎䞷ሼቮ⫃⚗ᇬዙ ኳወት♥ቭⅧሴቮⓜቿዐኈዙኺኁዐእት⦉⸩ሺቡ ሼᇭ ቿዙኽት抩ሺኘኊዂኣኀዊአኌዙኳወት抐ቭ 手ቢቡሼᇭዙኳወኜኁት∎䞷ሺᇬ㡱ⷧቑዙኳወ 㧮ቑ㦺䵾ሮቬ侓ኁዐኞ᧤PP᧥ቑ捷⒕ት⦉⸩ ሺቡሼᇭ ኇዙኤኀኇዙኳወቑ㘴倩 6&3):069ቑቢ ~6" (150 mm) 榊䄟ዙኳወርቫቖኇዙኤኀኇዙኳወትኈክዙ␔ቑ 㘴倩䵾㘴倩ሺቡሼᇭ Power k0䎰㠼宖ዘ慱憘ት䰐ሻቡሼᇭ Audio 0റ㔧ቭቂቂቢ㆞⭐♥Ⅷሴ␆6&3):09ርቫቖ6&3):069 ኈክዙትቿዙኽቑₙት䅠ቬሾቡሼᇭዙኳወኜኁት∎ 䞷ሺᇬ榊䄟ዙኳወርቫቖኇዙኤኀኇዙኳወት㡱 ⷧቑዙኳወ㧮♥ቭⅧሴቡሼᇭዙኳወದರ ದPPቑቂቮቢት㸚ሺቡሼᇭ ኴዊንኄኌኜዙቑ♥ቭⅧሴ 㦻ቑኪንርቫቖ娅ኪንት∎䞷ሺᇬ嫷䯉ሸቯሧቮ ቫሩᇬ♥ቭⅧሴኳአእትㆅ栆ቿዙኽቑ㦺䵾♥ ቭⅧሴቡሼᇭ 2 3 1 10–12" (250–300 mm) ኈክዙቑ♥Ⅷሴ ኈክዙት⦮♿♥ቭⅧሴቡሼᇭ ኴዊንኄኌኜዙት㦻ቑኪንቊ♥ቭⅧሴኳአእ ♥ቭⅧሴቡሼᇭ ኾ᧶ 㳮䲽ቑ₼ቒᇬ䭉⸮ቆቂቭቋ⦉⸩ሼቮቫሩ㦻 ቑኪን⊚ቑዌአኔዀት㉔尐ቋሼቮብቑብሥቭቡ ሼᇭ 巵⛙ ☀椉榊⦶⇃ሩኖኌቑ⥭挎㡈㽤᧶ 日本語 ⇨⒕ቍዙኳወት⭐♥ቭⅧሴኈክዙቑₚ峿ቤ手ቡቍሧቊ ሲቃሸሧᇭ k0䎰㠼宖ዘ慱憘ት䰐ሻቡሼᇭ 0റ㔧ቭቂቂቢ㆞⭐♥Ⅷሴ␆6&3):09ርቫቖ6&3):069 ㆅ栆ቿዙኽቑ♥ቭⅧሴ ㆅ栆ቿዙኽቑ㦺䵾ቑ䴃ሮቬዙኳወ㧮ትㆤሰ⒉ሺቡ ሼᇭ ኌኁአኌኖኜዙእኁኦ㈢ቆዙኳወትኴዊንኄ ኌኜዙ㘴倩ሺቡሼᇭ ኇኴኔዄዐቑ⸘⏷ዙኳወትኴዊንኄኌኜዙ♥ቭⅧ ሴቡሼᇭ ቿኘዐኳት㖐ቄₙስᇬዙኳወ㧮ትㆅ栆ቿዙኽቑ 栚㟍䵾ት抩ሺ抐ቭ手ቢቡሼᇭ ኴዊንኄኌኜዙቑ嵎㠃 ዃከአእቑ榊䄟ት⏴ቯㆅ栆ቿዙኽት⒉ሺ⏴ቯሺ䟊 ⍞ቑኒኁኗት嵎㠃ሺቡሼᇭ 娅ኪንት偸ቤᇬኴዊንኄኌኜዙቑ䥽㲨ት嵎㠃ሺቡ ሼᇭ 㦻ቑኪንትቿዙኽ⦉⸩␆♥ቭⅧሴቡሼᇭ k0䎰㠼宖ዘ慱憘ት䰐ሻቡሼᇭ 日本語 ㆅ栆ቿዙኽት⦂ቑቫሩቿዙኽ㗎⏴ሺቡሼᇭ ኈክዙት⮥ሺᇬₚ⌃ቑ♥Ⅷሴ䞷嬺尕ኹወእቡቂቒ♥Ⅷ ሴ䞷ኪንት偸ቤᇬ㻃▥ኪንት嵎㠃ሺ㢯⍞ቑ⨑䦃 ⇜函ት嵎㠃ሺቡሼᇭₚ⌃ቑ♥Ⅷሴ䞷嬺尕ኹወእቡቂ ቒ♥Ⅷሴ䞷ኪንት偯ቤᇬኈክዙት⏒㓊ሺቡሼᇭ 㢯⍞ቑ㻃⇜函ቑ嵎㠃᧶ ኈክዙት⮥ሺቡሼᇭ 嵎㠃ርቫቖዊአኌ䞷ኪንት偸ቤቡሼᇭ ቿዙኽትふ⚂ቑ゛㦪ሼቮ⇜函䲊╤ሺቡሼᇭ 嵎㠃ርቫቖዊአኌ䞷ኪንት偯ቤቿዙኽት㠿ሺሧ ⇜函⦉⸩ሺቡሼᇭ 俑ℕሺቂቋሰኈክዙትℳ㙪ሺቡሼᇭ 日本語 Adjustment Screw Locking Screw 0ቒ0&RPSDQ\ቑ⟕㲨ቊሼᇭ 摜尐抩拣 0ቑ完❐≑ቲቮ⏷ቑ岧承ᇬ㔏嫢㍔⫀ርርቖ㘷⯷ቒᇬ≰櫋ቊሰቮቋ㊬ቲቯቮ㍔⫀⪉ቈሧርቭቡሼሯᇬ㷲䭉㊶ቡቂቒ⸛⏷㊶ቒ≬峋ሺ ቡሾቶᇭ㦻完❐ትሷ∎䞷ቍቮⓜᇬ㦻完❐ት峤∰ሺᇬ㦻完❐ሯᇬ䥽䤓ቑ䞷抣䦇㉫ሺሧሮቌሩሮት⒳㠼ሸቯቮ㉔尐ሯሥቭቡሼᇭቀቑቫ ሩቍሷ∎䞷⇃ሩ⏷ቑኖኌርቫቖ弻↊ቒᇬር⸱㱧ሯ弯ቲቯቡሼᇭ0ቑ䚍⦷ቑ⒉䓗䓸岧憘ሸቯሧቍሧ完❐≑ቲቮሧሮቍቮ岧承ᇬ ቡቂቒ㽷㠖㦇岧憘ሸቯሧቮᇬ0ቑ䚍⦷ቑ⒉䓗䓸♜ሼቮሧሮቍቮ岧承ብᇬ0ቑᇬ㲸棟ትⅧሸቯቂ㈈❰刁⚜ሸቯቂ㦇槱ቫቮℕ 㔎ሯ㢝䯉䤓䯉ሸቯቍሧ棟ቭᇬ╈┪ቡቂቒ╈㨫ቒሥቭቡሾቶᇭ ≬峋ᇬ棟⸩㟠䂗ᇬ棟⸩弻↊ᇭ 0ቒᇬ0完❐ሯ0ቑ∎䞷䥽䤓崻㢝ZZZ0FRPPHHWLQJV㈢ቆ∎䞷ሸቯቂ⫃⚗ᇬሷ律⏴㣑㦘╈ቊሥቆቂᇬ拸䞷ሸቯቮ0完❐ ኻከዂቿወ岧憘ሸቯሧቮቫሩᇬ≬峋ሸቯቂ功⃔㦮栢ቑ栢ᇬ䄏恂㳮厌ሼቮሶቋት≬峋ሺቡሼᇭ拸䞷ሸቯቮ0完❐ኻከዂቿወ岧憘 ሸቯሧቮ≬峋ቒᇬ㘡Ⅵ䤓ቊሥቭᇬ㤦䯉ሸቯቂ⟕㯼㊶ቑ≬峋ቡቂቒ䔈⸩ቑ䥽䤓ቑ拸⚗㊶ᇬቡቂቒ㯼䟛㏲嫛ቡቂቒ䔈㽷ቑ䞷㽤ቡቂቒ⟕剡㏲ት ⚺ባሥቬቩቮ㢝䯉ሥቮሧቒ㤦䯉ሸቯ≬峋ቡቂቒ㧰ↅⅲቲቆ嫛ቲቯቮብቑቊሼᇭ 3 Projector Systems 6801 River Place Blvd. Austin, TX 78726 800 328 1371 www.3M.com/meetings ኒኁኌወትር櫧ሧሺቡሼᇭ伂⦌◿Ⓠᇭ k0䎰㠼宖ዘ慱憘ት䰐ሻቡሼᇭ %