Transcript
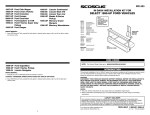
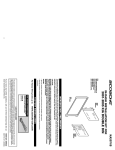
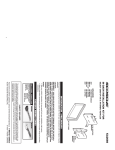
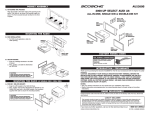
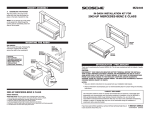
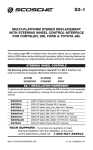
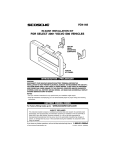
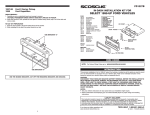
ILLUSTRATION 2
KIT PANEL ASSEMBLY
A. SINGLE ISO DIN INSTALLATION
For ISO installation, attach
ISO brackets to panel supplied
(4) screws. (See Illustration 1)
ILLUSTRATION 1
B. ATTACHING THE POCKET
ILLUSTRATION 4
1. Align the pocket to the lower edge of the opening in the panel. Then slide in, as shown. The
front of the pocket should rest flush to front of panel.
(See Illustration 2)
2. Install (2) pocket screws as shown.
(See Illustration 3)
ILLUSTRATION 3
(2 Single ISO DIN/DBL ISO DIN)
Align, Position and bolt ISO-DIN head unit and snap trim ring into place. (See Illustration 4)
C. MOUNTING THE RADIO
MOUNTING THE RADIO
1. For ISO installation, attach ISO brackets to panel supplied (4) screws.
2. Align, position and bolt the aftermarket
two ISO-DIN or one Double DIN head unit,
and snap trim ring into place.
(See Illustration 5)
ILLUSTRATION 5
RADIO REMOVAL
2
1. Using a panel removal tool, unsnap panel located beneath radio inside storage compartment.
2. Extract two 8mm bolts from behind panel, securing factory radio to dash chassis.
3. The panel closest to foot pedal will have a release knob that will have to be turned counter
clockwise to release panel; unsnap the remaining attached portion of the panel.
4. Using a panel removal tool, unsnap knee guard under steering wheel.
5. Extract (1) Phillips head screw securing dash bezel located at the left of the steering wheel.
6. Using panel removal tool, unsnap the parameter of the top dash surrounding radio and
instrument cluster.
7. Radio is attached to the dash bezel.
8. Lift away, disconnect harness, and remove.
HA1561DGB/HA1561ETB/HA1561BMB
2006 HONDA CIVIC
6073
BRACKET
(RIGHT)
6071
DOUBLE-DIN
TRIM RING
6074
BRACKET
(LEFT)
DASH REPLACEMENT KIT
6069
PANEL
6072
POCKET
6070
SINGLE DIN
TRIM RING
INTRODUCTION
This premium installation kit is for 2006 Honda Civic vehicles. Included are all the parts you need to
mount your car stereo/cassette or CD player into your vehicle's dash. Refer to the individual
instruction in this manual to remove your vehicle's factory radio and assemble the kit.
CAUTION:
DISCONNECT YOUR VEHICLE'S NEGATIVE BATTERY TERMINAL BEFORE THE INSTALLATION TO HELP PREVENT ELECTRICAL DAMAGE. WE RECOMMEND THE USE OF A VOLT/
OHN METER OVER A TEST LIGHT TO CHECK WIRING. A TEST LIGHT OR GROUNDED WIRE
PROBE CAN CAUSE DAMAGE TO THE VEHICLE'S COMPUTER AND/OR DIAGNOSTIC
SYSTEMS. AVOID ALL FACTORY AIRBAG WIRING - AIRBAGS CAN ACCIDENTALLY DEPLOY
CAUSING SERIOUS INJURY OR DEATH.
2006-UP Honda
HAAB
HA10
HAAB
www.scosche-cars.com
FACTORY WIRING CODES
NOTES:
• See your vehicle's instructions for any special tools your installation might require.
• Read all instructions accompanying your car stereo/cassette player for proper wiring and mounting
instructions.
For Factory Wiring Codes go to:
HA10
PROVIDE EASY CONNECTION OF YOUR CAR
STEREO TO FACTORY WIRING HARNESS.
CAR STEREO CONNECTORS
2006-UP Honda
LIABILITY DISCLAIMER
SI 03/07-HA1561DGB/HA1561ETB/HA1561BMB (3000468)
TECH HELP 1-800-621-3695, ext. 3
This instruction booklet is based on carefully documented data and research of automobile dash disassembly, wire harness/codes and
information pertaining to installation of this kit (HA1561DGB/HA1561ETB) in 2006 Honda Civic Vehicles. Scosche Industries, Inc. can
not be held responsible for discrepancies/inconsistencies that may occur due to the automobile manufacturing changes or options, or
damage that may occur in the automobile during the installation of components while using this booklet.
SCOSCHE INDUSTRIES, INC.
If you have any further questions, call
©2007