1
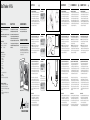
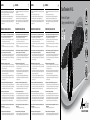
Warning
Warning
Warning
Warning
1. Keep it away from fire, water and moist places in order to avoid explosion, leakage
and moisture. Never put the charger at the outdoor environment unattended.
2. Any severe shock to the solar charger is forbidden.
3. No one except professional technicians is permitted to disassemble the solar
charger without our permission in order to avoid damaging the charger.
4. Before you use this charger, please choose correct voltage. If you can not know the
charger’s voltage of your device, you must choose voltage from 5.5V to 9.5V to
portect your device.
1. Keep it away from fire, water and moist places in order to avoid explosion, leakage
and moisture.
2. Any severe shock to the solar charger is forbidden.
3. No one except professional technicians is permitted to disassemble the solar
charger without our permission in order to avoid damaging the charger.
4. Before you use this charger, please choose correct voltage. If you can not know the
charger’s voltage of your device, you must choose voltage from 5.5V to 9.5V to
portect your device.
Frequently Asked Questions
Frequently Asked Questions
Frequently Asked Questions
Frequently Asked Questions
1. My A-solar charger has been outside, in the sun but when I connected it to my
device, it only charged for a short time and did not deliver much power?
• Please ensure the first charge is given by the USB cable.
• Please make sure you have removed the protective film from the solat cells as
this will radically reduce the effectiviness of the cells.
• Please ensure A-solar charger is given exposure to sunny conditions for between
5 to 10 hours.
• Ensure the A-solar charger is outside, facing south, in an unshaded position.
2. How do I know when the A-solar charger hub is fully charged and can I use the
power from A-solar charger even if it’s not fully charged?
• There is no indication A-solar charger gives when the battery hub is fully charged
from the solar cells. However, this is not strictly necessary because A-solar
charger will deliver power whatever state of charge is in its battery hub except if
the hub is completely empty.
3. What performance I can expect from A-solar charger?
• After 1 day in full sun (9am to 6pm) the A-solar chargers hub will be pretty much
fully charged. When connected to your device it will deliver power for 20 minutes
to 1 hour depending in the device.
• Please do not charge the A-solar charger behind a window but outside. Because
UV filters in windows will naturally reduce the mount of irradiation needed to
enable solar panels to operate effectively.
• Cloudy conditions, A-solar charger may take approximately 1 1/2 times longer
to charge than the above mentioned times, but this is depending on the time of
year, desity of cloud, etc.
4. Can I charge my A-solar hub whilst at the same time powering a device?
• No. If A-solar charger hub is empty you will not be able to simultaneously charge
and deliver power. The reason is that A-solar chargers delivers power to a device
approximately 10 times quicker than its solar cells can charge up its hub.
5. Can I leave the A-solar charger out in the rain?
• No we do not recommend getting the A-solar charger wet, however, should this
happen accidentially, please dry both hub and cells in a dry airy position away from
children and food stuffs. The solar cells should be fine; however, the hub/battery
may be unsalvageable. A trial will soon tell, however, we would recommend this
trial be done outside by the solar cells only and NOT the USB charge cable.
6. I have a device that can be charged via my computers USB port can the A-solar
charger charge it?
• Yes the A-solar charger should be able to charge it.
6. I have a device that can be charged via my computers USB port can the A-solar
charger charge it?
• Yes the A-solar charger should be able to charge it.
6. I have a device that can be charged via my computers USB port can the A-solar
charger charge it?
• Yes the A-solar charger should be able to charge it.
6. I have a device that can be charged via my computers USB port can the A-solar
charger charge it?
• Yes the A-solar charger should be able to charge it.
7. Are there any devices that A-solar charger cannot power?
• A-solar charger has a voltage range of 3V to 5.5V, so any device that needs a higher
voltage such as a laptop or video camera is outside the range of A-solar charger.
7. Are there any devices that A-solar charger cannot power?
• A-solar charger has a voltage range of 3V to 5.5V, so any device that needs a higher
voltage such as a laptop or video camera is outside the range of A-solar charger.
7. Are there any devices that A-solar charger cannot power?
• A-solar charger has a voltage range of 3V to 5.5V, so any device that needs a higher
voltage such as a laptop or video camera is outside the range of A-solar charger.
7. Are there any devices that A-solar charger cannot power?
• A-solar charger has a voltage range of 3V to 5.5V, so any device that needs a higher
voltage such as a laptop or video camera is outside the range of A-solar charger.
Sun Traveler AM-106
Never out of power
Charge your mobile life in style
mobile phone
MP3 /iPod
navigation
game console
power everywhere
Sun Traveler AM-106
HOW TO USE
INTRODUCTION
what it does
more information
Please remove the thin film of the panel before
first us.
You can charge in the Sun or use our supplied
USB charging cable to charge the Li-ion inside
For more information about A-solar visit
www.a-solar.eu or mail to [email protected].
We recommend that you charge the A-solar charger
for the first time via the USB port
Major brand mobile phone adapter such as Nokia,
Sony-ericsson, Samsung, Simens and Motorola are
provide for one set charger does not match your
mobile phone, please buy the local agent or market
send in your pictures
Specifications
Battery:
Lithium 3.7V - 1100mAh
Dimensions:
14.5 x 6.8 x 35mm
Weight:
150 grams
WHAT IS INCLUDED
1. Solar Charger connectors
2. Cell Phone adapters:
Nokia (2x)
Samsung (2x)
Sony Ericsson
Mini USB
Micro USB
NDS Lite
Female USB
LG
iPod & iPhone (with own cable)
Sony PSP
3. AC-DC adapter
4. USB charging + connecting cable included
Electronic Characteristic
1. Solar Panel (Mono crystalline) :3V 120mA
2. Charging time for the cell phone: 1-2 hours
3. Charging time for the Li-ion battery using adapter:
2-3 hours
4. Charging time for the Li-ion battery using solar
panel: 12hours
Also can supply power to other digital devices, for
example: Digital camera, PDA, Mp3, IPOD, Portable
DVD and so on.
Ut ate vulla augait numsan ut augue magna cor augait
nullumsan enisi. Im vulluptat. Exer ipis euisl dunt
praesto er augiam ex exercil iquam, sit lobore mod
tet do etummy num dolobor ipsummolum diam, conse
faccum ver aliquat, quis ea feugiamet nulla faccum ing
eui eugait prat ip enisi.
1. Charge in the Sunlight:
This is the process to charge the solar panel. First,
open the two wings and keep the solar panel side
facing in the sunlight. The display will show out
“Solar Charge OK”. It means the Li-ion battery is
being charged. When the battery is fully charged,
the display will stop automatically. If the panel is not
face to the sunlight, the display will be powered off,
the solar panel will stop working.
Display shows:
2. Charge with the USB charging cable:
This is the process to charge the battery inside.
Method 1: Plug the charging cable into the small
USB socket of the charger and connect into the
laptop or PC USB socket.
Method 2: Plug the build in USB into the laptop
or PC USB socket. The display will show out
“SystemChecking” and the information of the power
remain in the charger. Please pull out the plug when
display show out the “Batt 100%“
Display shows:
3. Charge the portable digital device:
This is the process to charge digital devices For
instance, select correct voltage (cell phone is
usually 5.5V), plug the USB cable in the charger,
then connect the cable with your cell phone. (Select
the suitable adaptor )The Display will turn on and
show our how many amp power charging into your
device, that means the charger is at work.
Display shows:
www.a-solar.eu
After about 1-2 hours, the display will stop
automatically , that means the charger is out of
power and the charging process is finished. Please
pull out the USB cable from the charger, you have to
charge in the sun or with the USB charging cable. In
addition, you also can open the cover in the sun to
charge the Li-ion battery and the cell phone at the
same time.
Special Notice:
1. Please always pay attention to the display message.
2. It is not quality problem, if it has terminated its
unstable output in order to protect your device.
3. You can continue to charge your device only after
several hours charging to the solar.
4. Never charge the device via mini-USB port while
using the external USB port at the same time.
power everywhere
Solar
chrg OK
Method 2
Bat.
checking
Batt 100%
USB Out
XXXmA
Remark:
“Bat.checking” will flashing 25
time, after that it will show out
the power remain in the charger.
Bat.
checking
Method 1
HOe het werkt
So verwenden sie
COMMENT UTILISER
1. Charge in the Sunlight:
This is the process to charge the solar panel. First,
open the two wings and keep the solar panel side
facing in the sunlight. The display will show out
“Solar Charge OK”, It means the Li-ion battery is
being charged. When the battery is fully charged,
the display will stop automatically. If the panel is not
face to the sunlight, the display will be powered off,
the solar panel will stop working.
2. Charge with the USB charging cable:
This is the process to charge the battery inside.
Method 1: Plug the charging cable into the small
USB socket of the charger and connect into the
laptop or PC USB socket.
Method 2: Plug the build in USB into the laptop
or PC USB socket. The display will show out
“SystemChecking” and the information of the power
remain in the charger. Please pull out the plug when
display show out the “Batt 100%“
3. Charge the portable digital device:
This is the process to charge digital devices For
instance, select correct voltage (cell phone is
usually 5.5V), plug the USB cable in the charger,
then connect the cable with your cell phone. (Select
the suitable adaptor )The Display will turn on and
show our how many amp power charging into your
device, that means the charger is at work.
After about 1~2 hours, the display will stop
automatically , that means the charger is out of
power and the charging process is finished. Please
pull out the USB cable from the charger, you have to
charge in the sun or with the USB charging cable. In
addition, you also can open the cover in the sun to
charge the Li-ion battery and the cell phone at the
same time.
Special Notice:
1. Please always pay attention to the display message.
2. It is not quality problem, if it has terminated its
unstable output in order to protect your device.
3. You can continue to charge your device only after
several hours charging to the solar.
4. Never charge the device via mini-USB port while
usingthe external USB port at the same time