1
Getting into the details
The information in this document is subject to change without notice and does not represent a commitment on the part of
Steinberg Media Technologies GmbH. The software described by this document is subject to a License Agreement and
may not be copied to other media except as specifically allowed in the License Agreement. No part of this publication may
be copied, reproduced or otherwise transmitted or recorded, for any purpose, without prior written permission by Steinberg
Media Technologies GmbH.
All product and company names are ™ or ® trademarks of their respective owners. Windows XP is a trademark of Microsoft
Corporation. Windows Vista and Windows 7 are registered trademarks or trademarks of Microsoft Corporation in the United
States and/or other countries. The Mac logo is a trademark used under license. Macintosh and Power Macintosh are registered
trademarks. MP3SURROUND and the MP3SURROUND logo are registered trademarks of Thomson SA, registered in the US
and other countries, and are used under license from Thomson Licensing SAS.
Release Date: August 31, 2010
© Steinberg Media Technologies GmbH, 2010.
All rights reserved.
Contents
1 WaveLab 7 Help
1
2 Getting Help
2.1
Help menu . . . . . . . . . . . . . . . . . . . . . . . . . . . . . . . . . . . . . . . .
3
4
3 Using the interface
3.1
About Tool Windows .
3.2
Adjusting Envelopes .
3.3
Command bars . . . .
3.4
Context menus . . . .
3.5
Docking windows . .
3.6
Double clicking . . . .
3.7
Dragging operations .
3.8
Playback shortcuts . .
3.9
Select-clicking . . . .
3.10 Shortcut system . . .
3.11 Sliders . . . . . . . . .
3.12 Status Bar . . . . . . .
3.13 Switcher window . . .
3.14 Tab Groups . . . . . .
3.15 Transport controls . .
3.16 Value editing . . . . . .
3.17 Workspaces . . . . . .
3.18 Zooming and scrolling
.
.
.
.
.
.
.
.
.
.
.
.
.
.
.
.
.
.
.
.
.
.
.
.
.
.
.
.
.
.
.
.
.
.
.
.
.
.
.
.
.
.
.
.
.
.
.
.
.
.
.
.
.
.
.
.
.
.
.
.
.
.
.
.
.
.
.
.
.
.
.
.
.
.
.
.
.
.
.
.
.
.
.
.
.
.
.
.
.
.
.
.
.
.
.
.
.
.
.
.
.
.
.
.
.
.
.
.
.
.
.
.
.
.
.
.
.
.
.
.
.
.
.
.
.
.
.
.
.
.
.
.
.
.
.
.
.
.
.
.
.
.
.
.
.
.
.
.
.
.
.
.
.
.
.
.
.
.
.
.
.
.
.
.
.
.
.
.
.
.
.
.
.
.
.
.
.
.
.
.
.
.
.
.
.
.
.
.
.
.
.
.
.
.
.
.
.
.
.
.
.
.
.
.
.
.
.
.
.
.
.
.
.
.
.
.
.
.
.
.
.
.
.
.
.
.
.
.
.
.
.
.
.
.
.
.
.
.
.
.
.
.
.
.
.
.
.
.
.
.
.
.
.
.
.
.
.
.
.
.
.
.
.
.
.
.
.
.
.
.
.
.
.
.
.
.
.
.
.
.
.
.
.
.
.
.
.
.
.
.
.
.
.
.
.
.
.
.
.
.
.
.
.
.
.
.
.
.
.
.
.
.
.
.
.
.
.
.
.
.
.
.
.
.
.
.
.
.
.
.
.
.
.
.
.
.
.
.
.
.
.
.
.
.
.
.
.
.
.
.
.
.
.
.
.
.
.
.
.
.
.
.
.
.
.
.
.
.
.
.
.
.
.
.
.
.
.
.
.
.
.
.
.
.
.
.
.
.
.
.
.
.
.
.
.
.
.
.
.
.
.
.
.
.
.
.
.
.
.
.
.
.
.
.
.
.
.
.
.
.
.
.
.
.
.
.
.
.
.
.
.
.
.
.
.
.
.
.
.
.
.
.
.
.
.
.
.
.
.
.
.
.
.
.
.
.
.
.
.
.
.
.
.
.
.
.
.
.
.
.
.
.
.
.
.
.
.
.
.
.
.
.
.
.
.
.
.
.
.
.
.
.
.
.
.
.
.
.
.
.
.
.
.
.
5
6
7
8
9
10
11
12
14
15
15
17
18
19
19
21
22
23
24
4 WaveLab Concepts
4.1
Features Overview . . . . . . . .
4.2
Analysis . . . . . . . . . . . . . .
4.2.1
Global analysis . . . . .
4.2.2
Audio file comparer . . .
4.2.3
3D Frequency Analysis .
4.2.4
Loudness distribution .
4.3
Authoring CDs and DVDs . . .
4.4
Markers . . . . . . . . . . . . . . .
4.4.1
Marker types . . . . . . .
4.5
Metering . . . . . . . . . . . . . .
4.5.1
VU Meter . . . . . . . . .
4.5.2
Spectroscope . . . . . .
4.5.3
Oscilloscope . . . . . . .
4.5.4
Bit Meter . . . . . . . . .
4.5.5
Phasescope . . . . . . .
4.5.6
Spectrometer . . . . . .
4.5.7
Wavescope . . . . . . .
.
.
.
.
.
.
.
.
.
.
.
.
.
.
.
.
.
.
.
.
.
.
.
.
.
.
.
.
.
.
.
.
.
.
.
.
.
.
.
.
.
.
.
.
.
.
.
.
.
.
.
.
.
.
.
.
.
.
.
.
.
.
.
.
.
.
.
.
.
.
.
.
.
.
.
.
.
.
.
.
.
.
.
.
.
.
.
.
.
.
.
.
.
.
.
.
.
.
.
.
.
.
.
.
.
.
.
.
.
.
.
.
.
.
.
.
.
.
.
.
.
.
.
.
.
.
.
.
.
.
.
.
.
.
.
.
.
.
.
.
.
.
.
.
.
.
.
.
.
.
.
.
.
.
.
.
.
.
.
.
.
.
.
.
.
.
.
.
.
.
.
.
.
.
.
.
.
.
.
.
.
.
.
.
.
.
.
.
.
.
.
.
.
.
.
.
.
.
.
.
.
.
.
.
.
.
.
.
.
.
.
.
.
.
.
.
.
.
.
.
.
.
.
.
.
.
.
.
.
.
.
.
.
.
.
.
.
.
.
.
.
.
.
.
.
.
.
.
.
.
.
.
.
.
.
.
.
.
.
.
.
.
.
.
.
.
.
.
.
.
.
.
.
.
.
.
.
.
.
.
.
.
.
.
.
.
.
.
.
.
.
.
.
.
.
.
.
.
.
.
.
.
.
.
.
.
.
.
.
.
.
.
.
.
.
.
.
.
.
.
.
.
.
.
.
.
.
.
.
.
.
.
.
.
.
.
.
.
.
.
.
.
.
.
.
.
.
.
.
.
.
.
.
.
.
.
.
.
.
.
.
.
.
.
.
.
.
.
.
.
.
.
.
.
.
.
.
.
.
.
.
.
.
.
.
.
.
.
.
.
.
.
.
.
.
.
.
.
.
.
.
.
.
.
.
.
.
.
.
.
.
.
.
.
.
.
.
.
.
.
.
.
.
.
.
.
.
.
.
.
.
.
.
.
.
.
.
.
.
.
.
.
.
.
.
.
.
.
.
.
.
.
.
.
.
.
.
.
.
27
27
28
29
30
30
31
32
34
37
38
39
40
41
41
43
44
45
.
.
.
.
.
.
.
.
.
.
.
.
.
.
.
.
.
.
.
.
.
.
.
.
.
.
.
.
.
.
.
.
.
.
.
.
.
.
.
.
.
.
.
.
.
.
.
.
.
.
.
.
.
.
.
.
.
.
.
.
.
.
.
.
.
.
.
.
.
.
.
.
.
.
.
.
.
.
.
.
.
.
.
.
.
.
.
.
.
.
ii
CONTENTS
4.6
4.7
4.8
4.9
4.10
4.11
4.12
Offline processing . . . . . . . . . . . . . . . .
4.6.1
Change Level . . . . . . . . . . . . . .
4.6.2
Level envelope . . . . . . . . . . . . . .
4.6.3
Normalize Level . . . . . . . . . . . . .
4.6.4
Silence Generator . . . . . . . . . . .
4.6.5
Loop Tone Uniformizer . . . . . . . . .
4.6.6
Pitch correction . . . . . . . . . . . . .
4.6.7
Time stretching . . . . . . . . . . . . .
4.6.8
Loop Tweaker . . . . . . . . . . . . . .
4.6.9
Effect morphing . . . . . . . . . . . . .
4.6.10 Loudness distribution . . . . . . . . .
4.6.11 Loudness normalizer . . . . . . . . . .
4.6.12 Pan Normalizer . . . . . . . . . . . . .
4.6.13 Pitch bend . . . . . . . . . . . . . . . .
4.6.14 Pitch quantize . . . . . . . . . . . . . .
4.6.15 Presets . . . . . . . . . . . . . . . . . .
4.6.16 Rendering . . . . . . . . . . . . . . . .
Presets . . . . . . . . . . . . . . . . . . . . . . .
Rendering . . . . . . . . . . . . . . . . . . . . .
Scripting . . . . . . . . . . . . . . . . . . . . . .
4.9.1
WaveLab Scripting Language . . . .
4.9.2
ECMAScript Reference . . . . . . . .
The Spectrum display . . . . . . . . . . . . . .
4.10.1 Spectrogram options . . . . . . . . . .
Spectrum editor . . . . . . . . . . . . . . . . .
4.11.0.1 Spectrum Processing Modes
About Regular Expressions . . . . . . . . . . .
5 Audio File editing
5.1
Offline processing . . . . . . . .
5.1.1
Change Level . . . . . .
5.1.2
Level envelope . . . . . .
5.1.3
Normalize Level . . . . .
5.1.4
Silence Generator . . .
5.1.5
Loop Tone Uniformizer .
5.1.6
Pitch correction . . . . .
5.1.7
Time stretching . . . . .
5.1.8
Loop Tweaker . . . . . .
5.1.9
Effect morphing . . . . .
5.1.10 Loudness distribution .
5.1.11 Loudness normalizer . .
5.1.12 Pan Normalizer . . . . .
5.1.13 Pitch bend . . . . . . . .
5.1.14 Pitch quantize . . . . . .
5.1.15 Presets . . . . . . . . . .
5.1.16 Rendering . . . . . . . .
5.2
Analysis . . . . . . . . . . . . . .
5.2.1
Global analysis . . . . .
5.2.2
Audio file comparer . . .
5.2.3
3D Frequency Analysis .
5.2.4
Loudness distribution .
5.3
Metering . . . . . . . . . . . . . .
5.3.1
VU Meter . . . . . . . . .
5.3.2
Spectroscope . . . . . .
.
.
.
.
.
.
.
.
.
.
.
.
.
.
.
.
.
.
.
.
.
.
.
.
.
.
.
.
.
.
.
.
.
.
.
.
.
.
.
.
.
.
.
.
.
.
.
.
.
.
.
.
.
.
.
.
.
.
.
.
.
.
.
.
.
.
.
.
.
.
.
.
.
.
.
.
.
.
.
.
.
.
.
.
.
.
.
.
.
.
.
.
.
.
.
.
.
.
.
.
.
.
.
.
.
.
.
.
.
.
.
.
.
.
.
.
.
.
.
.
.
.
.
.
.
.
.
.
.
.
.
.
.
.
.
.
.
.
.
.
.
.
.
.
.
.
.
.
.
.
.
.
.
.
.
.
.
.
.
.
.
.
.
.
.
.
.
.
.
.
.
.
.
.
.
.
.
.
.
.
.
.
.
.
.
.
.
.
.
.
.
.
.
.
.
.
.
.
.
.
.
.
.
.
.
.
.
.
.
.
.
.
.
.
.
.
.
.
.
.
.
.
.
.
.
.
.
.
.
.
.
.
.
.
.
.
.
.
.
.
.
.
.
.
.
.
.
.
.
.
.
.
.
.
.
.
.
.
.
.
.
.
.
.
.
.
.
.
.
.
.
.
.
.
.
.
.
.
.
.
.
.
.
.
.
.
.
.
.
.
.
.
.
.
.
.
.
.
.
.
.
.
.
.
.
.
.
.
.
.
.
.
.
.
.
.
.
.
.
.
.
.
.
.
.
.
.
.
.
.
.
.
.
.
.
.
.
.
.
.
.
.
.
.
.
.
.
.
.
.
.
.
.
.
.
.
.
.
.
.
.
.
.
.
.
.
.
.
.
.
.
.
.
.
.
.
.
.
.
.
.
.
.
.
.
.
.
.
.
.
.
.
.
.
.
.
.
.
.
.
.
.
.
.
.
.
.
.
.
.
.
.
.
.
.
.
.
.
.
.
.
.
.
.
.
.
.
.
.
.
.
.
.
.
.
.
.
.
.
.
.
.
.
.
.
.
.
.
.
.
.
.
.
.
.
.
.
.
.
.
.
.
.
.
.
.
.
.
.
.
.
.
.
.
.
.
.
.
.
.
.
.
.
.
.
.
.
.
.
.
.
.
.
.
.
.
.
.
.
.
.
.
.
.
.
.
.
.
.
.
.
.
.
.
.
.
.
.
.
.
.
.
.
.
.
.
.
.
.
.
.
.
.
.
.
.
.
.
.
.
.
.
.
.
.
.
.
.
.
.
.
.
.
.
.
.
.
.
.
.
.
.
.
.
.
.
.
.
.
.
.
.
.
.
.
.
.
.
.
.
.
.
.
.
.
.
.
.
.
.
.
.
.
.
.
.
.
.
.
.
.
.
.
.
.
.
.
.
.
.
.
.
.
.
.
.
.
.
.
.
.
.
.
.
.
.
.
.
.
.
.
.
.
.
.
.
.
.
.
.
.
.
.
.
.
.
.
.
.
.
.
.
.
.
.
.
.
.
.
.
.
.
.
.
.
.
.
.
.
.
.
.
.
.
.
.
.
.
.
.
.
.
.
.
.
.
.
.
.
.
.
.
.
.
.
.
.
.
.
.
.
.
.
.
.
.
.
.
.
.
.
.
.
46
47
48
48
49
49
50
50
51
52
53
53
54
54
55
55
58
59
61
62
65
71
79
79
80
82
83
.
.
.
.
.
.
.
.
.
.
.
.
.
.
.
.
.
.
.
.
.
.
.
.
.
.
.
.
.
.
.
.
.
.
.
.
.
.
.
.
.
.
.
.
.
.
.
.
.
.
.
.
.
.
.
.
.
.
.
.
.
.
.
.
.
.
.
.
.
.
.
.
.
.
.
.
.
.
.
.
.
.
.
.
.
.
.
.
.
.
.
.
.
.
.
.
.
.
.
.
.
.
.
.
.
.
.
.
.
.
.
.
.
.
.
.
.
.
.
.
.
.
.
.
.
.
.
.
.
.
.
.
.
.
.
.
.
.
.
.
.
.
.
.
.
.
.
.
.
.
.
.
.
.
.
.
.
.
.
.
.
.
.
.
.
.
.
.
.
.
.
.
.
.
.
.
.
.
.
.
.
.
.
.
.
.
.
.
.
.
.
.
.
.
.
.
.
.
.
.
.
.
.
.
.
.
.
.
.
.
.
.
.
.
.
.
.
.
.
.
.
.
.
.
.
.
.
.
.
.
.
.
.
.
.
.
.
.
.
.
.
.
.
.
.
.
.
.
.
.
.
.
.
.
.
.
.
.
.
.
.
.
.
.
.
.
.
.
.
.
.
.
.
.
.
.
.
.
.
.
.
.
.
.
.
.
.
.
.
.
.
.
.
.
.
.
.
.
.
.
.
.
.
.
.
.
.
.
.
.
.
.
.
.
.
.
.
.
.
.
.
.
.
.
.
.
.
.
.
.
.
.
.
.
.
.
.
.
.
.
.
.
.
.
.
.
.
.
.
.
.
.
.
.
.
.
.
.
.
.
.
.
.
.
.
.
.
.
.
.
.
.
.
.
.
.
.
.
.
.
.
.
.
.
.
.
.
.
.
.
.
.
.
.
.
.
.
.
.
.
.
.
.
.
.
.
.
.
.
.
.
.
.
.
.
.
.
.
.
.
.
.
.
.
.
.
.
.
.
.
.
.
.
.
.
.
.
.
.
.
.
.
.
.
.
.
.
.
.
.
.
.
.
.
.
.
.
.
.
.
.
.
.
.
.
.
.
.
.
.
.
.
.
.
.
89
91
93
93
94
94
94
95
96
97
98
98
99
100
100
100
101
103
105
105
106
106
107
108
109
111
WaveLab 7
CONTENTS
5.4
5.5
5.6
5.7
5.8
5.3.3
Oscilloscope . . . . . . . . . . . . . . . . . .
5.3.4
Bit Meter . . . . . . . . . . . . . . . . . . . .
5.3.5
Phasescope . . . . . . . . . . . . . . . . . .
5.3.6
Spectrometer . . . . . . . . . . . . . . . . .
5.3.7
Wavescope . . . . . . . . . . . . . . . . . .
Transport controls . . . . . . . . . . . . . . . . . . .
Specific tool windows . . . . . . . . . . . . . . . . .
5.5.1
Basic Audio CD . . . . . . . . . . . . . . . .
5.5.2
Error detection and correction . . . . . . .
5.5.3
File Browser . . . . . . . . . . . . . . . . . .
5.5.4
Marker Window . . . . . . . . . . . . . . . .
5.5.5
Metadata window . . . . . . . . . . . . . . .
5.5.6
Sample attributes . . . . . . . . . . . . . . .
5.5.7
Scripting window (Audio File Workspace)
5.5.8
Spectrum editor . . . . . . . . . . . . . . . .
5.5.8.1 Spectrum Processing Modes . . .
Shared tool windows . . . . . . . . . . . . . . . . .
5.6.1
Phasescope . . . . . . . . . . . . . . . . . .
5.6.2
VU Meter . . . . . . . . . . . . . . . . . . . .
5.6.3
Oscilloscope . . . . . . . . . . . . . . . . . .
5.6.4
Bit Meter . . . . . . . . . . . . . . . . . . . .
5.6.5
Spectroscope . . . . . . . . . . . . . . . . .
5.6.6
Spectrometer . . . . . . . . . . . . . . . . .
5.6.7
Wavescope . . . . . . . . . . . . . . . . . .
5.6.8
Timecode . . . . . . . . . . . . . . . . . . . .
5.6.9
Background task monitor . . . . . . . . . .
5.6.10 Log window . . . . . . . . . . . . . . . . . .
Tools . . . . . . . . . . . . . . . . . . . . . . . . . . .
5.7.1
Error detection and correction . . . . . . .
5.7.2
Auto Split . . . . . . . . . . . . . . . . . . . .
5.7.3
Signal generator . . . . . . . . . . . . . . . .
5.7.4
DTMF Generator . . . . . . . . . . . . . . .
Peak Files . . . . . . . . . . . . . . . . . . . . . . . .
6 Audio Montages
6.1
Metering . . . . . . . . . . . . . .
6.1.1
VU Meter . . . . . . . . .
6.1.2
Spectroscope . . . . . .
6.1.3
Oscilloscope . . . . . . .
6.1.4
Bit Meter . . . . . . . . .
6.1.5
Phasescope . . . . . . .
6.1.6
Spectrometer . . . . . .
6.1.7
Wavescope . . . . . . .
6.2
Tools . . . . . . . . . . . . . . . .
6.2.1
Meta-normalizer . . . . .
6.2.2
Configure external tools
6.3
Transport controls . . . . . . . .
6.4
Specific tool windows . . . . . .
6.4.1
File . . . . . . . . . . . . .
6.4.2
CD . . . . . . . . . . . . .
6.4.3
File Browser . . . . . . .
6.4.4
Marker Window . . . . .
6.4.5
History . . . . . . . . . .
6.4.6
Clips . . . . . . . . . . . .
WaveLab 7
iii
.
.
.
.
.
.
.
.
.
.
.
.
.
.
.
.
.
.
.
.
.
.
.
.
.
.
.
.
.
.
.
.
.
.
.
.
.
.
.
.
.
.
.
.
.
.
.
.
.
.
.
.
.
.
.
.
.
.
.
.
.
.
.
.
.
.
.
.
.
.
.
.
.
.
.
.
.
.
.
.
.
.
.
.
.
.
.
.
.
.
.
.
.
.
.
.
.
.
.
.
.
.
.
.
.
.
.
.
.
.
.
.
.
.
.
.
.
.
.
.
.
.
.
.
.
.
.
.
.
.
.
.
.
.
.
.
.
.
.
.
.
.
.
.
.
.
.
.
.
.
.
.
.
.
.
.
.
.
.
.
.
.
.
.
.
.
.
.
.
.
.
.
.
.
.
.
.
.
.
.
.
.
.
.
.
.
.
.
.
.
.
.
.
.
.
.
.
.
.
.
.
.
.
.
.
.
.
.
.
.
.
.
.
.
.
.
.
.
.
.
.
.
.
.
.
.
.
.
.
.
.
.
.
.
.
.
.
.
.
.
.
.
.
.
.
.
.
.
.
.
.
.
.
.
.
.
.
.
.
.
.
.
.
.
.
.
.
.
.
.
.
.
.
.
.
.
.
.
.
.
.
.
.
.
.
.
.
.
.
.
.
.
.
.
.
.
.
.
.
.
.
.
.
.
.
.
.
.
.
.
.
.
.
.
.
.
.
.
.
.
.
.
.
.
.
.
.
.
.
.
.
.
.
.
.
.
.
.
.
.
.
.
.
.
.
.
.
.
.
.
.
.
.
.
.
.
.
.
.
.
.
.
.
.
.
.
.
.
.
.
.
.
.
.
.
.
.
.
.
.
.
.
.
.
.
.
.
.
.
.
.
.
.
.
.
.
.
.
.
.
.
.
.
.
.
.
.
.
.
.
.
.
.
.
.
.
.
.
.
.
.
.
.
.
.
.
.
.
.
.
.
.
.
.
.
.
.
.
.
.
.
.
.
.
.
.
.
.
.
.
.
.
.
.
.
.
.
.
.
.
.
.
.
.
.
.
.
.
.
.
.
.
.
.
.
.
.
.
.
.
.
.
.
.
.
.
.
.
.
.
.
.
.
.
.
.
.
.
.
.
.
.
.
.
.
.
.
.
.
.
.
.
.
.
.
.
.
.
.
.
.
.
.
.
.
.
.
.
.
.
.
.
.
.
.
.
.
.
.
.
.
.
.
.
.
.
.
.
.
.
.
.
.
.
.
.
.
.
.
.
.
.
.
.
.
.
.
.
.
.
.
.
.
.
.
.
.
.
.
.
.
.
.
.
.
.
.
.
.
.
.
.
.
.
.
.
.
.
.
.
.
.
.
.
.
.
.
.
.
.
.
.
.
.
.
.
.
.
.
.
.
.
.
.
.
.
.
.
.
.
.
.
.
.
.
.
.
.
.
.
.
.
.
.
.
.
.
.
.
.
.
.
.
.
.
.
.
.
.
.
.
.
.
.
.
.
.
.
.
.
.
.
.
.
.
.
.
.
.
.
.
.
.
.
.
.
.
.
.
.
.
.
.
.
.
.
.
.
.
.
.
.
.
.
.
.
.
.
.
.
.
.
.
.
.
.
.
.
.
.
.
.
.
.
.
.
.
.
.
.
.
.
.
.
.
.
.
111
111
113
114
115
116
117
117
119
120
121
122
123
123
124
126
127
128
129
130
130
132
132
133
134
134
135
136
136
137
138
138
139
.
.
.
.
.
.
.
.
.
.
.
.
.
.
.
.
.
.
.
.
.
.
.
.
.
.
.
.
.
.
.
.
.
.
.
.
.
.
.
.
.
.
.
.
.
.
.
.
.
.
.
.
.
.
.
.
.
.
.
.
.
.
.
.
.
.
.
.
.
.
.
.
.
.
.
.
.
.
.
.
.
.
.
.
.
.
.
.
.
.
.
.
.
.
.
.
.
.
.
.
.
.
.
.
.
.
.
.
.
.
.
.
.
.
.
.
.
.
.
.
.
.
.
.
.
.
.
.
.
.
.
.
.
.
.
.
.
.
.
.
.
.
.
.
.
.
.
.
.
.
.
.
.
.
.
.
.
.
.
.
.
.
.
.
.
.
.
.
.
.
.
.
.
.
.
.
.
.
.
.
.
.
.
.
.
.
.
.
.
.
.
.
.
.
.
.
.
.
.
.
.
.
.
.
.
.
.
.
.
.
.
.
.
.
.
.
.
.
.
.
.
.
.
.
.
.
.
.
.
.
.
.
.
.
.
.
.
.
.
.
.
.
.
.
.
.
.
.
.
.
.
.
.
.
.
.
.
.
.
.
.
.
.
.
.
.
.
.
.
.
.
.
.
.
.
.
.
.
.
.
.
.
.
.
.
.
.
.
.
.
.
.
.
.
.
.
.
.
.
.
.
.
.
.
141
149
150
151
152
152
153
155
156
156
157
157
158
159
159
160
162
163
164
164
iv
CONTENTS
6.4.7
Focused Clip window . . . . . . . . . . . . . . . .
6.4.8
Notes . . . . . . . . . . . . . . . . . . . . . . . . . .
6.4.9
Scripting window (Audio Montage Workspace) .
6.4.10 Groups . . . . . . . . . . . . . . . . . . . . . . . . .
6.4.11 DVD-Audio . . . . . . . . . . . . . . . . . . . . . . .
6.4.12 Navigator . . . . . . . . . . . . . . . . . . . . . . . .
6.4.13 Zoom . . . . . . . . . . . . . . . . . . . . . . . . . .
6.4.14 Effects . . . . . . . . . . . . . . . . . . . . . . . . .
6.4.15 Snapshots . . . . . . . . . . . . . . . . . . . . . . .
6.5
Shared tool windows . . . . . . . . . . . . . . . . . . . . .
6.5.1
Phasescope . . . . . . . . . . . . . . . . . . . . . .
6.5.2
VU Meter . . . . . . . . . . . . . . . . . . . . . . . .
6.5.3
Oscilloscope . . . . . . . . . . . . . . . . . . . . . .
6.5.4
Bit Meter . . . . . . . . . . . . . . . . . . . . . . . .
6.5.5
Spectroscope . . . . . . . . . . . . . . . . . . . . .
6.5.6
Spectrometer . . . . . . . . . . . . . . . . . . . . .
6.5.7
Wavescope . . . . . . . . . . . . . . . . . . . . . .
6.5.8
Timecode . . . . . . . . . . . . . . . . . . . . . . . .
6.5.9
Background task monitor . . . . . . . . . . . . . .
6.5.10 Log window . . . . . . . . . . . . . . . . . . . . . .
6.6
Audio Montage Colors . . . . . . . . . . . . . . . . . . . .
6.7
Audio Montage contextual information . . . . . . . . . . .
7 Batch Processing
7.1
Specific tool windows . . . . . . . . .
7.1.1
File Browser . . . . . . . . . .
7.1.2
Batch Processing Plug-ins .
7.1.2.1 Audio Injector . . . . .
7.1.2.2 Trimmer . . . . . . . .
7.1.2.3 Resizer . . . . . . . . .
7.1.2.4 Fade-In/Out . . . . . .
7.1.2.5 Instructor . . . . . . .
7.1.2.6 Time Stretch . . . . .
7.1.2.7 Pitch Correction . . .
7.1.2.8 Normalize Level . . . .
7.1.2.9 Stereo to Mono . . . .
7.1.2.10 Pan Normalizer . . . .
7.1.2.11 Loudness normalizer
7.1.2.12 DC Remover . . . . .
7.1.2.13 Loudness Restorer .
7.1.2.14 Meta-Normalizer . . .
7.1.2.15 Meta-Leveler . . . . .
7.2
Shared tool windows . . . . . . . . .
7.2.1
Background task monitor . .
7.2.2
Log window . . . . . . . . . .
7.3
Batch Processing Plug-ins . . . . . .
7.3.0.1 Audio Injector . . . . .
7.3.0.2 Trimmer . . . . . . . .
7.3.0.3 Resizer . . . . . . . . .
7.3.0.4 Fade-In/Out . . . . . .
7.3.0.5 Instructor . . . . . . .
7.3.0.6 Time Stretch . . . . .
7.3.0.7 Pitch Correction . . .
7.3.0.8 Normalize Level . . . .
.
.
.
.
.
.
.
.
.
.
.
.
.
.
.
.
.
.
.
.
.
.
.
.
.
.
.
.
.
.
.
.
.
.
.
.
.
.
.
.
.
.
.
.
.
.
.
.
.
.
.
.
.
.
.
.
.
.
.
.
.
.
.
.
.
.
.
.
.
.
.
.
.
.
.
.
.
.
.
.
.
.
.
.
.
.
.
.
.
.
.
.
.
.
.
.
.
.
.
.
.
.
.
.
.
.
.
.
.
.
.
.
.
.
.
.
.
.
.
.
.
.
.
.
.
.
.
.
.
.
.
.
.
.
.
.
.
.
.
.
.
.
.
.
.
.
.
.
.
.
.
.
.
.
.
.
.
.
.
.
.
.
.
.
.
.
.
.
.
.
.
.
.
.
.
.
.
.
.
.
.
.
.
.
.
.
.
.
.
.
.
.
.
.
.
.
.
.
.
.
.
.
.
.
.
.
.
.
.
.
.
.
.
.
.
.
.
.
.
.
.
.
.
.
.
.
.
.
.
.
.
.
.
.
.
.
.
.
.
.
.
.
.
.
.
.
.
.
.
.
.
.
.
.
.
.
.
.
.
.
.
.
.
.
.
.
.
.
.
.
.
.
.
.
.
.
.
.
.
.
.
.
.
.
.
.
.
.
.
.
.
.
.
.
.
.
.
.
.
.
.
.
.
.
.
.
.
.
.
.
.
.
.
.
.
.
.
.
.
.
.
.
.
.
.
.
.
.
.
.
.
.
.
.
.
.
.
.
.
.
.
.
.
.
.
.
.
.
.
.
.
.
.
.
.
.
.
.
.
.
.
.
.
.
.
.
.
.
.
.
.
.
.
.
.
.
.
.
.
.
.
.
.
.
.
.
.
.
.
.
.
.
.
.
.
.
.
.
.
.
.
.
.
.
.
.
.
.
.
.
.
.
.
.
.
.
.
.
.
.
.
.
.
.
.
.
.
.
.
.
.
.
.
.
.
.
.
.
.
.
.
.
.
.
.
.
.
.
.
.
.
.
.
.
.
.
.
.
.
.
.
.
.
.
.
.
.
.
.
.
.
.
.
.
.
.
.
.
.
.
.
.
.
.
.
.
.
.
.
.
.
.
.
.
.
.
.
.
.
.
.
.
.
.
.
.
.
.
.
.
.
.
.
.
.
.
.
.
.
.
.
.
.
.
.
.
.
.
.
.
.
.
.
.
.
.
.
.
.
.
.
.
.
.
.
.
.
.
.
.
.
.
.
.
.
.
.
.
.
.
.
.
.
.
.
.
.
.
.
.
.
.
.
.
.
.
.
.
.
.
.
.
.
.
.
.
.
.
.
.
.
.
.
.
.
.
.
.
.
.
.
.
.
.
.
.
.
.
.
.
.
.
.
.
.
.
.
.
.
.
.
.
.
.
165
166
166
167
168
169
170
170
171
171
172
173
174
175
176
176
178
178
179
179
180
180
.
.
.
.
.
.
.
.
.
.
.
.
.
.
.
.
.
.
.
.
.
.
.
.
.
.
.
.
.
.
.
.
.
.
.
.
.
.
.
.
.
.
.
.
.
.
.
.
.
.
.
.
.
.
.
.
.
.
.
.
.
.
.
.
.
.
.
.
.
.
.
.
.
.
.
.
.
.
.
.
.
.
.
.
.
.
.
.
.
.
.
.
.
.
.
.
.
.
.
.
.
.
.
.
.
.
.
.
.
.
.
.
.
.
.
.
.
.
.
.
.
.
.
.
.
.
.
.
.
.
.
.
.
.
.
.
.
.
.
.
.
.
.
.
.
.
.
.
.
.
.
.
.
.
.
.
.
.
.
.
.
.
.
.
.
.
.
.
.
.
.
.
.
.
.
.
.
.
.
.
.
.
.
.
.
.
.
.
.
.
.
.
.
.
.
.
.
.
.
.
.
.
.
.
.
.
.
.
.
.
.
.
.
.
.
.
.
.
.
.
.
.
.
.
.
.
.
.
.
.
.
.
.
.
.
.
.
.
.
.
.
.
.
.
.
.
.
.
.
.
.
.
.
.
.
.
.
.
.
.
.
.
.
.
.
.
.
.
.
.
.
.
.
.
.
.
.
.
.
.
.
.
.
.
.
.
.
.
.
.
.
.
.
.
.
.
.
.
.
.
.
.
.
.
.
.
.
.
.
.
.
.
.
.
.
.
.
.
.
.
.
.
.
.
.
.
.
.
.
.
.
.
.
.
.
.
.
.
.
.
.
.
.
.
.
.
.
.
.
.
.
.
.
.
.
.
.
.
.
.
183
185
185
186
188
188
189
189
189
190
190
191
191
191
192
192
193
193
194
194
195
195
196
197
198
198
198
199
199
200
200
WaveLab 7
CONTENTS
v
7.3.0.9
7.3.0.10
7.3.0.11
7.3.0.12
7.3.0.13
7.3.0.14
7.3.0.15
Stereo to Mono . . . .
Pan Normalizer . . . .
Loudness normalizer
DC Remover . . . . .
Loudness Restorer .
Meta-Normalizer . . .
Meta-Leveler . . . . .
8 Podcasts
8.1
FTP site . . . . . . . .
8.2
Episodes menu . . . .
8.3
Publish menu . . . . .
8.4
Specific tool windows
8.4.1
File Browser .
.
.
.
.
.
.
.
.
.
.
.
.
.
.
.
.
.
.
.
.
.
.
.
.
.
.
.
.
.
.
.
.
.
.
.
.
.
.
.
.
.
.
.
.
.
.
.
.
.
.
.
.
.
.
.
.
.
.
.
.
.
.
.
.
.
.
.
.
.
.
.
.
.
.
.
.
.
.
.
.
.
.
.
.
.
.
.
.
.
.
.
.
.
.
.
.
.
.
.
.
.
.
.
.
.
.
.
.
.
.
.
.
.
.
.
.
.
.
.
.
.
.
.
.
.
.
.
.
.
.
.
.
.
.
.
.
.
.
.
.
.
.
.
.
.
.
.
.
.
.
.
.
.
.
.
.
.
.
.
.
.
.
.
.
.
.
.
.
200
201
201
202
202
203
203
.
.
.
.
.
.
.
.
.
.
.
.
.
.
.
.
.
.
.
.
.
.
.
.
.
.
.
.
.
.
.
.
.
.
.
.
.
.
.
.
.
.
.
.
.
.
.
.
.
.
.
.
.
.
.
.
.
.
.
.
.
.
.
.
.
.
.
.
.
.
.
.
.
.
.
.
.
.
.
.
.
.
.
.
.
.
.
.
.
.
.
.
.
.
.
.
.
.
.
.
.
.
.
.
.
.
.
.
.
.
.
.
.
.
.
.
.
.
.
.
.
.
.
.
.
.
.
.
.
.
.
.
.
.
.
205
207
207
207
208
209
9 Control Window
9.1
Specific tool windows . . . . . . .
9.2
Shared tool windows . . . . . . .
9.2.1
Phasescope . . . . . . . .
9.2.2
VU Meter . . . . . . . . . .
9.2.3
Oscilloscope . . . . . . . .
9.2.4
Bit Meter . . . . . . . . . .
9.2.5
Spectroscope . . . . . . .
9.2.6
Spectrometer . . . . . . .
9.2.7
Wavescope . . . . . . . .
9.2.8
Timecode . . . . . . . . . .
9.2.9
Background task monitor
9.2.10 Log window . . . . . . . .
9.3
Metering . . . . . . . . . . . . . . .
9.3.1
VU Meter . . . . . . . . . .
9.3.2
Spectroscope . . . . . . .
9.3.3
Oscilloscope . . . . . . . .
9.3.4
Bit Meter . . . . . . . . . .
9.3.5
Phasescope . . . . . . . .
9.3.6
Spectrometer . . . . . . .
9.3.7
Wavescope . . . . . . . .
.
.
.
.
.
.
.
.
.
.
.
.
.
.
.
.
.
.
.
.
.
.
.
.
.
.
.
.
.
.
.
.
.
.
.
.
.
.
.
.
.
.
.
.
.
.
.
.
.
.
.
.
.
.
.
.
.
.
.
.
.
.
.
.
.
.
.
.
.
.
.
.
.
.
.
.
.
.
.
.
.
.
.
.
.
.
.
.
.
.
.
.
.
.
.
.
.
.
.
.
.
.
.
.
.
.
.
.
.
.
.
.
.
.
.
.
.
.
.
.
.
.
.
.
.
.
.
.
.
.
.
.
.
.
.
.
.
.
.
.
.
.
.
.
.
.
.
.
.
.
.
.
.
.
.
.
.
.
.
.
.
.
.
.
.
.
.
.
.
.
.
.
.
.
.
.
.
.
.
.
.
.
.
.
.
.
.
.
.
.
.
.
.
.
.
.
.
.
.
.
.
.
.
.
.
.
.
.
.
.
.
.
.
.
.
.
.
.
.
.
.
.
.
.
.
.
.
.
.
.
.
.
.
.
.
.
.
.
.
.
.
.
.
.
.
.
.
.
.
.
.
.
.
.
.
.
.
.
.
.
.
.
.
.
.
.
.
.
.
.
.
.
.
.
.
.
.
.
.
.
.
.
.
.
.
.
.
.
.
.
.
.
.
.
.
.
.
.
.
.
.
.
.
.
.
.
.
.
.
.
.
.
.
.
.
.
.
.
.
.
.
.
.
.
.
.
.
.
.
.
.
.
.
.
.
.
.
.
.
.
.
.
.
.
.
.
.
.
.
.
.
.
.
.
.
.
.
.
.
.
.
.
.
.
.
.
.
.
.
.
.
.
.
.
.
.
.
.
.
.
.
.
.
.
.
.
.
.
.
.
.
.
.
.
.
.
.
.
.
.
.
.
.
.
.
.
.
.
.
.
.
.
.
.
.
.
.
.
.
.
.
.
.
.
.
.
.
.
.
.
.
.
.
.
.
.
.
.
.
.
.
.
.
.
.
.
.
.
.
.
.
.
.
.
.
.
.
.
.
.
.
.
.
.
.
.
.
.
.
.
.
.
.
.
.
.
.
.
.
.
.
.
.
.
.
.
.
.
.
.
.
.
.
.
.
.
.
.
.
.
.
.
.
.
.
.
.
.
.
.
.
.
.
.
.
.
.
.
.
.
211
212
213
213
215
216
216
217
218
219
220
220
221
221
223
224
224
225
226
227
228
.
.
.
.
.
.
.
.
.
.
.
.
.
.
.
.
.
.
.
.
.
.
.
.
.
.
.
.
.
.
10 Master Section
231
10.1 Render Wave window . . . . . . . . . . . . . . . . . . . . . . . . . . . . . . . . . 232
10.2 Render Montage window . . . . . . . . . . . . . . . . . . . . . . . . . . . . . . . 233
10.3 Plug-ins settings . . . . . . . . . . . . . . . . . . . . . . . . . . . . . . . . . . . . 233
11 Interface Elements
11.1 Dialogs . . . . . . . . . . . . . . . . .
11.1.1 Insert link . . . . . . . . . . .
11.1.2 Align Clips . . . . . . . . . .
11.1.3 Recording channels . . . .
11.1.4 Audio CD Report . . . . . .
11.1.5 Audio file comparer . . . . .
11.1.6 Audio File Format Dialog . .
11.1.7 Audio Montage properties .
11.1.8 Split Clip at silences . . . .
11.1.9 Audio properties dialog . .
11.1.10 Audio Range . . . . . . . . .
WaveLab 7
.
.
.
.
.
.
.
.
.
.
.
.
.
.
.
.
.
.
.
.
.
.
.
.
.
.
.
.
.
.
.
.
.
.
.
.
.
.
.
.
.
.
.
.
.
.
.
.
.
.
.
.
.
.
.
.
.
.
.
.
.
.
.
.
.
.
.
.
.
.
.
.
.
.
.
.
.
.
.
.
.
.
.
.
.
.
.
.
.
.
.
.
.
.
.
.
.
.
.
.
.
.
.
.
.
.
.
.
.
.
.
.
.
.
.
.
.
.
.
.
.
.
.
.
.
.
.
.
.
.
.
.
.
.
.
.
.
.
.
.
.
.
.
.
.
.
.
.
.
.
.
.
.
.
.
.
.
.
.
.
.
.
.
.
.
.
.
.
.
.
.
.
.
.
.
.
.
.
.
.
.
.
.
.
.
.
.
.
.
.
.
.
.
.
.
.
.
.
.
.
.
.
.
.
.
.
.
.
.
.
.
.
.
.
.
.
.
.
.
.
.
.
.
.
.
.
.
.
.
.
.
.
.
.
.
.
.
.
.
.
.
.
.
.
.
.
.
.
.
.
.
.
.
.
.
.
.
.
.
.
.
.
.
.
.
.
.
.
.
.
.
.
.
.
.
235
235
238
239
239
239
240
240
240
241
241
242
vi
CONTENTS
11.1.11
11.1.12
11.1.13
11.1.14
11.1.15
11.1.16
11.1.17
11.1.18
11.1.19
11.1.20
11.1.21
11.1.22
11.1.23
11.1.24
11.1.25
11.1.26
11.1.27
11.1.28
11.1.29
11.1.30
11.1.31
11.1.32
11.1.33
11.1.34
11.1.35
11.1.36
11.1.37
11.1.38
11.1.39
11.1.40
11.1.41
11.1.42
11.1.43
11.1.44
11.1.45
11.1.46
11.1.47
11.1.48
11.1.49
11.1.50
11.1.51
11.1.52
11.1.53
11.1.54
11.1.55
11.1.56
11.1.57
11.1.58
11.1.59
11.1.60
11.1.61
11.1.62
11.1.63
11.1.64
Audio Streaming Settings . . .
Auto Split . . . . . . . . . . . . .
Batch Conversion . . . . . . . .
Basic Audio CD Settings . . .
Batch Renaming . . . . . . . .
CD Text Editor . . . . . . . . . .
CD-Text Browser . . . . . . . .
CD Wizard . . . . . . . . . . . .
Copy audio information . . . .
Customize Commands . . . . .
Data CD/DVD . . . . . . . . . .
DVD-Audio options . . . . . . .
DVD-Audio Creation . . . . . .
Document list dialog . . . . . .
Ducking options . . . . . . . . .
Effect morphing . . . . . . . . .
Edit playback times . . . . . . .
Error detection and correction
Configure external tools . . . .
Folder Preferences dialog . . .
Frequency range . . . . . . . .
FTP site . . . . . . . . . . . . . .
Change Level . . . . . . . . . .
File attributes (OGG/WMA) .
Global analysis . . . . . . . . .
Import Audio CD . . . . . . . .
Insert Audio Files . . . . . . . .
Level envelope . . . . . . . . . .
Loop Tone Uniformizer . . . . .
Loudness distribution . . . . .
Loudness normalizer . . . . . .
Global Preferences . . . . . . .
Convert marker type . . . . . .
Load Master Section Preset .
Save Master Section Preset .
Audio Montage Clone . . . . .
Write Audio CD . . . . . . . . .
Meta-normalizer . . . . . . . . .
Audio Montage Preferences .
MP2 encoding . . . . . . . . . .
MP3 attributes . . . . . . . . . .
MP3 encoding . . . . . . . . . .
Normalize Level . . . . . . . . .
OGG encoding . . . . . . . . .
Open files list . . . . . . . . . .
Pan Normalizer . . . . . . . . .
Mix dialog . . . . . . . . . . . . .
Pitch bend . . . . . . . . . . . .
Pitch correction . . . . . . . . .
Pitch quantize . . . . . . . . . .
Playback speed . . . . . . . . .
Podcast options . . . . . . . . .
Text format . . . . . . . . . . . .
Repeat Clip . . . . . . . . . . .
.
.
.
.
.
.
.
.
.
.
.
.
.
.
.
.
.
.
.
.
.
.
.
.
.
.
.
.
.
.
.
.
.
.
.
.
.
.
.
.
.
.
.
.
.
.
.
.
.
.
.
.
.
.
.
.
.
.
.
.
.
.
.
.
.
.
.
.
.
.
.
.
.
.
.
.
.
.
.
.
.
.
.
.
.
.
.
.
.
.
.
.
.
.
.
.
.
.
.
.
.
.
.
.
.
.
.
.
.
.
.
.
.
.
.
.
.
.
.
.
.
.
.
.
.
.
.
.
.
.
.
.
.
.
.
.
.
.
.
.
.
.
.
.
.
.
.
.
.
.
.
.
.
.
.
.
.
.
.
.
.
.
.
.
.
.
.
.
.
.
.
.
.
.
.
.
.
.
.
.
.
.
.
.
.
.
.
.
.
.
.
.
.
.
.
.
.
.
.
.
.
.
.
.
.
.
.
.
.
.
.
.
.
.
.
.
.
.
.
.
.
.
.
.
.
.
.
.
.
.
.
.
.
.
.
.
.
.
.
.
.
.
.
.
.
.
.
.
.
.
.
.
.
.
.
.
.
.
.
.
.
.
.
.
.
.
.
.
.
.
.
.
.
.
.
.
.
.
.
.
.
.
.
.
.
.
.
.
.
.
.
.
.
.
.
.
.
.
.
.
.
.
.
.
.
.
.
.
.
.
.
.
.
.
.
.
.
.
.
.
.
.
.
.
.
.
.
.
.
.
.
.
.
.
.
.
.
.
.
.
.
.
.
.
.
.
.
.
.
.
.
.
.
.
.
.
.
.
.
.
.
.
.
.
.
.
.
.
.
.
.
.
.
.
.
.
.
.
.
.
.
.
.
.
.
.
.
.
.
.
.
.
.
.
.
.
.
.
.
.
.
.
.
.
.
.
.
.
.
.
.
.
.
.
.
.
.
.
.
.
.
.
.
.
.
.
.
.
.
.
.
.
.
.
.
.
.
.
.
.
.
.
.
.
.
.
.
.
.
.
.
.
.
.
.
.
.
.
.
.
.
.
.
.
.
.
.
.
.
.
.
.
.
.
.
.
.
.
.
.
.
.
.
.
.
.
.
.
.
.
.
.
.
.
.
.
.
.
.
.
.
.
.
.
.
.
.
.
.
.
.
.
.
.
.
.
.
.
.
.
.
.
.
.
.
.
.
.
.
.
.
.
.
.
.
.
.
.
.
.
.
.
.
.
.
.
.
.
.
.
.
.
.
.
.
.
.
.
.
.
.
.
.
.
.
.
.
.
.
.
.
.
.
.
.
.
.
.
.
.
.
.
.
.
.
.
.
.
.
.
.
.
.
.
.
.
.
.
.
.
.
.
.
.
.
.
.
.
.
.
.
.
.
.
.
.
.
.
.
.
.
.
.
.
.
.
.
.
.
.
.
.
.
.
.
.
.
.
.
.
.
.
.
.
.
.
.
.
.
.
.
.
.
.
.
.
.
.
.
.
.
.
.
.
.
.
.
.
.
.
.
.
.
.
.
.
.
.
.
.
.
.
.
.
.
.
.
.
.
.
.
.
.
.
.
.
.
.
.
.
.
.
.
.
.
.
.
.
.
.
.
.
.
.
.
.
.
.
.
.
.
.
.
.
.
.
.
.
.
.
.
.
.
.
.
.
.
.
.
.
.
.
.
.
.
.
.
.
.
.
.
.
.
.
.
.
.
.
.
.
.
.
.
.
.
.
.
.
.
.
.
.
.
.
.
.
.
.
.
.
.
.
.
.
.
.
.
.
.
.
.
.
.
.
.
.
.
.
.
.
.
.
.
.
.
.
.
.
.
.
.
.
.
.
.
.
.
.
.
.
.
.
.
.
.
.
.
.
.
.
.
.
.
.
.
.
.
.
.
.
.
.
.
.
.
.
.
.
.
.
.
.
.
.
.
.
.
.
.
.
.
.
.
.
.
.
.
.
.
.
.
.
.
.
.
.
.
.
.
.
.
.
.
.
.
.
.
.
.
.
.
.
.
.
.
.
.
.
.
.
.
.
.
.
.
.
.
.
.
.
.
.
.
.
.
.
.
.
.
.
.
.
.
.
.
.
.
.
.
.
.
.
.
.
.
.
.
.
.
.
.
.
.
.
.
.
.
.
.
.
.
.
.
.
.
.
.
.
.
.
.
.
.
.
.
.
.
.
.
.
.
.
.
.
.
.
.
.
.
.
.
.
.
.
.
.
.
.
.
.
.
.
.
.
.
.
.
.
.
.
.
.
.
.
.
.
.
.
.
.
.
.
.
.
.
.
.
.
.
.
.
.
.
.
.
.
.
.
.
.
.
.
.
.
.
.
.
.
.
.
.
.
.
.
.
.
.
.
.
.
.
.
.
.
.
.
.
.
.
.
.
.
.
.
.
.
.
.
.
.
.
.
.
.
.
.
.
.
.
.
.
.
.
.
.
.
.
.
.
.
.
.
.
.
.
.
.
.
.
.
.
.
.
.
.
.
.
.
.
.
.
.
.
.
.
.
.
.
.
.
.
.
.
.
.
.
.
.
.
.
.
.
.
.
.
.
.
.
.
.
.
.
.
.
.
.
.
.
.
.
.
.
.
.
.
.
.
.
.
.
.
.
.
.
.
.
.
.
.
.
.
.
.
.
.
.
.
.
.
.
.
.
.
.
.
.
.
.
.
.
.
.
.
.
.
.
.
.
.
.
.
.
.
.
.
.
.
.
.
.
.
.
.
.
.
.
.
.
.
.
.
.
.
.
.
.
.
.
.
.
.
.
.
.
.
.
.
.
.
.
.
.
242
243
244
244
245
245
246
246
247
247
248
250
250
250
251
251
252
252
253
254
254
254
255
255
256
257
257
258
258
259
260
260
261
261
262
262
263
263
263
264
264
264
265
265
266
266
266
267
267
268
268
269
269
270
WaveLab 7
CONTENTS
11.1.65 Recently used files . . . . . . . . . . . . . . . . . .
11.1.66 Recording Dialog . . . . . . . . . . . . . . . . . . .
11.1.67 Record create marker . . . . . . . . . . . . . . . .
11.1.68 Rename File dialog . . . . . . . . . . . . . . . . . .
11.1.69 Render ASIO input to file . . . . . . . . . . . . . .
11.1.70 Render Montage window . . . . . . . . . . . . . .
11.1.71 Render Wave window . . . . . . . . . . . . . . . .
11.1.72 Loudness envelope options . . . . . . . . . . . . .
11.1.73 Sample attributes . . . . . . . . . . . . . . . . . . .
11.1.74 Modified files dialog . . . . . . . . . . . . . . . . .
11.1.75 Save Audio File dialog . . . . . . . . . . . . . . . .
11.1.76 Select where and how Audio Files will be saved
11.1.77 Save Batch Processor . . . . . . . . . . . . . . . .
11.1.78 Save File As . . . . . . . . . . . . . . . . . . . . . .
11.1.79 Save Preset As . . . . . . . . . . . . . . . . . . . .
11.1.80 Save picture of active window . . . . . . . . . . .
11.1.81 Scripting window (Audio Montage Workspace) .
11.1.82 Scripting window (Audio File Workspace) . . . .
11.1.83 Definition of shortcut(s) . . . . . . . . . . . . . . .
11.1.84 Signal generator . . . . . . . . . . . . . . . . . . . .
11.1.85 Silence Generator . . . . . . . . . . . . . . . . . .
11.1.86 Smart bypass . . . . . . . . . . . . . . . . . . . . .
11.1.87 Special File Format . . . . . . . . . . . . . . . . . .
11.1.88 Spectrogram options . . . . . . . . . . . . . . . . .
11.1.89 Surround Panner . . . . . . . . . . . . . . . . . . .
11.1.90 Create Document Template . . . . . . . . . . . . .
11.1.91 Template List Dialog . . . . . . . . . . . . . . . . .
11.1.92 Time Format dialog . . . . . . . . . . . . . . . . . .
11.1.93 Time stretching . . . . . . . . . . . . . . . . . . . .
11.1.94 Track dispatching . . . . . . . . . . . . . . . . . . .
11.1.95 Value Format . . . . . . . . . . . . . . . . . . . . . .
11.1.96 File attributes . . . . . . . . . . . . . . . . . . . . .
11.1.97 Audio File editing preferences . . . . . . . . . . .
11.1.98 Write Audio CD . . . . . . . . . . . . . . . . . . . .
11.1.99 WMA encoding . . . . . . . . . . . . . . . . . . . .
11.1.100 Workspace layout . . . . . . . . . . . . . . . . . . .
11.1.101 Write Data CD/DVD . . . . . . . . . . . . . . . . .
11.1.102 Loop Tweaker . . . . . . . . . . . . . . . . . . . . .
11.1.103 Zoom factor . . . . . . . . . . . . . . . . . . . . . .
11.2 Shared tool windows . . . . . . . . . . . . . . . . . . . . .
11.2.1 Phasescope . . . . . . . . . . . . . . . . . . . . . .
11.2.2 VU Meter . . . . . . . . . . . . . . . . . . . . . . . .
11.2.3 Oscilloscope . . . . . . . . . . . . . . . . . . . . . .
11.2.4 Bit Meter . . . . . . . . . . . . . . . . . . . . . . . .
11.2.5 Spectroscope . . . . . . . . . . . . . . . . . . . . .
11.2.6 Spectrometer . . . . . . . . . . . . . . . . . . . . .
11.2.7 Wavescope . . . . . . . . . . . . . . . . . . . . . .
11.2.8 Timecode . . . . . . . . . . . . . . . . . . . . . . . .
11.2.9 Background task monitor . . . . . . . . . . . . . .
11.2.10 Log window . . . . . . . . . . . . . . . . . . . . . .
11.3 Specific tool windows . . . . . . . . . . . . . . . . . . . . .
11.3.1 File Browser . . . . . . . . . . . . . . . . . . . . . .
11.3.2 Spectrum editor . . . . . . . . . . . . . . . . . . . .
11.3.2.1 Spectrum Processing Modes . . . . . . .
WaveLab 7
vii
.
.
.
.
.
.
.
.
.
.
.
.
.
.
.
.
.
.
.
.
.
.
.
.
.
.
.
.
.
.
.
.
.
.
.
.
.
.
.
.
.
.
.
.
.
.
.
.
.
.
.
.
.
.
.
.
.
.
.
.
.
.
.
.
.
.
.
.
.
.
.
.
.
.
.
.
.
.
.
.
.
.
.
.
.
.
.
.
.
.
.
.
.
.
.
.
.
.
.
.
.
.
.
.
.
.
.
.
.
.
.
.
.
.
.
.
.
.
.
.
.
.
.
.
.
.
.
.
.
.
.
.
.
.
.
.
.
.
.
.
.
.
.
.
.
.
.
.
.
.
.
.
.
.
.
.
.
.
.
.
.
.
.
.
.
.
.
.
.
.
.
.
.
.
.
.
.
.
.
.
.
.
.
.
.
.
.
.
.
.
.
.
.
.
.
.
.
.
.
.
.
.
.
.
.
.
.
.
.
.
.
.
.
.
.
.
.
.
.
.
.
.
.
.
.
.
.
.
.
.
.
.
.
.
.
.
.
.
.
.
.
.
.
.
.
.
.
.
.
.
.
.
.
.
.
.
.
.
.
.
.
.
.
.
.
.
.
.
.
.
.
.
.
.
.
.
.
.
.
.
.
.
.
.
.
.
.
.
.
.
.
.
.
.
.
.
.
.
.
.
.
.
.
.
.
.
.
.
.
.
.
.
.
.
.
.
.
.
.
.
.
.
.
.
.
.
.
.
.
.
.
.
.
.
.
.
.
.
.
.
.
.
.
.
.
.
.
.
.
.
.
.
.
.
.
.
.
.
.
.
.
.
.
.
.
.
.
.
.
.
.
.
.
.
.
.
.
.
.
.
.
.
.
.
.
.
.
.
.
.
.
.
.
.
.
.
.
.
.
.
.
.
.
.
.
.
.
.
.
.
.
.
.
.
.
.
.
.
.
.
.
.
.
.
.
.
.
.
.
.
.
.
.
.
.
.
.
.
.
.
.
.
.
.
.
.
.
.
.
.
.
.
.
.
.
.
.
.
.
.
.
.
.
.
.
.
.
.
.
.
.
.
.
.
.
.
.
.
.
.
.
.
.
.
.
.
.
.
.
.
.
.
.
.
.
.
.
.
.
.
.
.
.
.
.
.
.
.
.
.
.
.
.
.
.
.
.
.
.
.
.
.
.
.
.
.
.
.
.
.
.
.
.
.
.
.
.
.
.
.
.
.
.
.
.
.
.
.
.
.
.
.
.
.
.
.
.
.
.
.
.
.
.
.
.
.
.
.
.
.
.
.
.
.
.
.
.
.
.
.
.
.
.
.
.
.
.
.
.
.
.
.
.
.
.
.
.
.
.
.
.
.
.
.
.
.
.
.
.
.
.
.
.
.
.
.
.
.
.
.
.
.
.
.
.
.
.
.
.
.
.
.
.
.
.
.
.
.
.
.
.
.
.
.
.
.
.
.
270
270
271
272
272
273
273
274
274
274
275
275
276
276
276
277
277
277
278
279
280
280
280
281
281
282
283
283
284
284
285
285
286
286
287
287
287
288
289
289
290
291
292
293
294
294
296
296
297
297
298
299
300
302
viii
CONTENTS
11.3.3
11.3.4
11.3.5
11.3.6
11.3.7
11.3.8
11.3.9
11.3.10
11.3.11
11.3.12
11.3.13
11.3.14
11.3.15
11.3.16
11.3.17
11.3.18
11.3.19
11.3.20
11.3.21
11.3.22
Basic Audio CD . . . . . . . . . . . . . . . . . . . .
Scripting window (Audio File Workspace) . . . .
Metadata window . . . . . . . . . . . . . . . . . . .
Marker Window . . . . . . . . . . . . . . . . . . . .
Sample attributes . . . . . . . . . . . . . . . . . . .
Error detection and correction . . . . . . . . . . .
Master Project . . . . . . . . . . . . . . . . . . . . .
Focused Clip window . . . . . . . . . . . . . . . .
Snapshots . . . . . . . . . . . . . . . . . . . . . . .
File . . . . . . . . . . . . . . . . . . . . . . . . . . . .
Zoom . . . . . . . . . . . . . . . . . . . . . . . . . .
CD . . . . . . . . . . . . . . . . . . . . . . . . . . . .
Clips . . . . . . . . . . . . . . . . . . . . . . . . . . .
Notes . . . . . . . . . . . . . . . . . . . . . . . . . .
Effects . . . . . . . . . . . . . . . . . . . . . . . . .
DVD-Audio . . . . . . . . . . . . . . . . . . . . . . .
Scripting window (Audio Montage Workspace) .
History . . . . . . . . . . . . . . . . . . . . . . . . .
Navigator . . . . . . . . . . . . . . . . . . . . . . . .
Groups . . . . . . . . . . . . . . . . . . . . . . . . .
12 Audio Plug-ins
12.1 Audio Input . . . . . . . . . . . . .
12.2 Using External effects . . . . . . .
12.3 Sonnox DeClicker . . . . . . . . .
12.4 Sonnox DeNoiser . . . . . . . . . .
12.5 Sonnox DeBuzzer . . . . . . . . .
12.6 Steinberg Autopan . . . . . . . . .
12.7 Steinberg Chorus . . . . . . . . .
12.8 Steinberg Compressor . . . . . .
12.9 Steinberg DeEsser . . . . . . . . .
12.10 Steinberg Mono Delay . . . . . . .
12.11 Steinberg Distortion . . . . . . . .
12.12 Steinberg Dual Filter . . . . . . . .
12.13 Steinberg Envelope Shaper . . .
12.14 Steinberg Expander . . . . . . . .
12.15 Steinberg Gate . . . . . . . . . . .
12.16 Steinberg GEQ-10/GEQ-30 . .
12.17 Steinberg Limiter . . . . . . . . . .
12.18 Steinberg Maximizer . . . . . . . .
12.19 Steinberg Mix 6 to 2 . . . . . . . .
12.20 Steinberg Mix 8 to 2 . . . . . . . .
12.21 Steinberg Mono to Stereo . . . .
12.22 Steinberg Multiband Compressor
12.23 Steinberg Octaver . . . . . . . . .
12.24 Steinberg Pingpong Delay . . . .
12.25 Steinberg PostFilter . . . . . . . .
12.26 Steinberg Roomworks . . . . . . .
12.27 Steinberg Roomworks SE . . . .
12.28 Stereo Delay . . . . . . . . . . . .
12.29 Steinberg Stereo Enhancer . . . .
12.30 Steinberg Studio Chorus . . . . .
12.31 Steinberg Studio EQ . . . . . . .
12.32 Steinberg Test Generator . . . . .
.
.
.
.
.
.
.
.
.
.
.
.
.
.
.
.
.
.
.
.
.
.
.
.
.
.
.
.
.
.
.
.
.
.
.
.
.
.
.
.
.
.
.
.
.
.
.
.
.
.
.
.
.
.
.
.
.
.
.
.
.
.
.
.
.
.
.
.
.
.
.
.
.
.
.
.
.
.
.
.
.
.
.
.
.
.
.
.
.
.
.
.
.
.
.
.
.
.
.
.
.
.
.
.
.
.
.
.
.
.
.
.
.
.
.
.
.
.
.
.
.
.
.
.
.
.
.
.
.
.
.
.
.
.
.
.
.
.
.
.
.
.
.
.
.
.
.
.
.
.
.
.
.
.
.
.
.
.
.
.
.
.
.
.
.
.
.
.
.
.
.
.
.
.
.
.
.
.
.
.
.
.
.
.
.
.
.
.
.
.
.
.
.
.
.
.
.
.
.
.
.
.
.
.
.
.
.
.
.
.
.
.
.
.
.
.
.
.
.
.
.
.
.
.
.
.
.
.
.
.
.
.
.
.
.
.
.
.
.
.
.
.
.
.
.
.
.
.
.
.
.
.
.
.
.
.
.
.
.
.
.
.
.
.
.
.
.
.
.
.
.
.
.
.
.
.
.
.
.
.
.
.
.
.
.
.
.
.
.
.
.
.
.
.
.
.
.
.
.
.
.
.
.
.
.
.
.
.
.
.
.
.
.
.
.
.
.
.
.
.
.
.
.
.
.
.
.
.
.
.
.
.
.
.
.
.
.
.
.
.
.
.
.
.
.
.
.
.
.
.
.
.
.
.
.
.
.
.
.
.
.
.
.
.
.
.
.
.
.
.
.
.
.
.
.
.
.
.
.
.
.
.
.
.
.
.
.
.
.
.
.
.
.
.
.
.
.
.
.
.
.
.
.
.
.
.
.
.
.
.
.
.
.
.
.
.
.
.
.
.
.
.
.
.
.
.
.
.
.
.
.
.
.
.
.
.
.
.
.
.
.
.
.
.
.
.
.
.
.
.
.
.
.
.
.
.
.
.
.
.
.
.
.
.
.
.
.
.
.
.
.
.
.
.
.
.
.
.
.
.
.
.
.
.
.
.
.
.
.
.
.
.
.
.
.
.
.
.
.
.
.
.
.
.
.
.
.
.
.
.
.
.
.
.
.
.
.
.
.
.
.
.
.
.
.
.
.
.
.
.
.
.
.
.
.
.
.
.
.
.
.
.
.
.
.
.
.
.
.
.
.
.
.
.
.
.
.
.
.
.
.
.
.
.
.
.
.
.
.
.
.
.
.
.
.
.
.
.
.
.
.
.
.
.
.
.
.
.
.
.
.
.
.
.
.
.
.
.
.
.
.
.
.
.
.
.
.
.
.
.
.
.
.
.
.
.
.
.
.
.
.
.
.
.
.
.
.
.
.
.
.
.
.
.
.
.
.
.
.
.
.
.
.
.
.
.
.
.
.
.
.
.
.
.
.
.
.
.
.
.
.
.
.
.
.
.
.
.
.
.
.
.
.
.
.
.
.
.
.
.
.
.
.
.
.
.
.
.
304
306
306
306
308
308
309
310
311
311
312
312
314
315
315
316
317
317
318
318
.
.
.
.
.
.
.
.
.
.
.
.
.
.
.
.
.
.
.
.
.
.
.
.
.
.
.
.
.
.
.
.
.
.
.
.
.
.
.
.
.
.
.
.
.
.
.
.
.
.
.
.
.
.
.
.
.
.
.
.
.
.
.
.
.
.
.
.
.
.
.
.
.
.
.
.
.
.
.
.
.
.
.
.
.
.
.
.
.
.
.
.
.
.
.
.
.
.
.
.
.
.
.
.
.
.
.
.
.
.
.
.
.
.
.
.
.
.
.
.
.
.
.
.
.
.
.
.
.
.
.
.
.
.
.
.
.
.
.
.
.
.
.
.
.
.
.
.
.
.
.
.
.
.
.
.
.
.
.
.
.
.
.
.
.
.
.
.
.
.
.
.
.
.
.
.
.
.
.
.
.
.
.
.
.
.
.
.
.
.
.
.
.
.
.
.
.
.
.
.
.
.
.
.
.
.
.
.
.
.
.
.
.
.
.
.
.
.
.
.
.
.
.
.
.
.
.
.
.
.
.
.
.
.
.
.
.
.
.
.
.
.
.
.
.
.
.
.
.
.
.
.
.
.
.
.
.
.
.
.
.
.
.
.
.
.
.
.
.
.
.
.
.
.
.
.
.
.
.
.
.
.
.
.
.
.
.
.
.
.
.
.
.
.
.
.
.
.
.
.
.
.
.
.
.
.
.
.
.
.
.
.
.
.
.
.
.
.
.
.
.
.
.
.
.
.
.
.
.
.
.
.
.
.
.
.
.
.
.
.
.
.
.
.
.
.
.
.
.
.
.
.
.
.
.
.
.
.
.
.
.
.
.
.
.
.
.
.
.
.
.
.
.
.
.
.
.
.
.
.
.
.
.
.
321
323
324
326
328
331
335
335
337
338
340
341
342
343
344
345
347
348
349
350
351
352
353
355
355
357
359
362
363
364
365
366
368
WaveLab 7
CONTENTS
12.33
12.34
12.35
12.36
12.37
12.38
12.39
12.40
12.41
12.42
ix
.
.
.
.
.
.
.
.
.
.
.
.
.
.
.
.
.
.
.
.
.
.
.
.
.
.
.
.
.
.
.
.
.
.
.
.
.
.
.
.
.
.
.
.
.
.
.
.
.
.
.
.
.
.
.
.
.
.
.
.
.
.
.
.
.
.
.
.
.
.
.
.
.
.
.
.
.
.
.
.
.
.
.
.
.
.
.
.
.
.
.
.
.
.
.
.
.
.
.
.
.
.
.
.
.
.
.
.
.
.
.
.
.
.
.
.
.
.
.
.
.
.
.
.
.
.
.
.
.
.
.
.
.
.
.
.
.
.
.
.
.
.
.
.
.
.
.
.
.
.
.
.
.
.
.
.
.
.
.
.
.
.
.
.
.
.
.
.
.
.
.
.
.
.
.
.
.
.
.
.
.
.
.
.
.
.
.
.
.
.
.
.
.
.
.
.
.
.
.
.
.
.
.
.
.
.
.
.
.
.
.
.
.
.
.
.
.
.
.
.
.
.
.
.
.
.
.
.
.
.
.
.
.
.
.
.
.
.
.
.
.
.
.
.
.
.
.
.
.
.
.
.
.
.
.
.
.
.
.
.
.
.
.
.
.
.
.
.
.
.
369
370
371
374
375
375
376
377
377
378
13 Utilities
13.1 Import Audio CD . . . . . . . . . .
13.2 Burn Audio CD from DDP Image
13.3 Data CD/DVD . . . . . . . . . . .
13.4 Batch Conversion . . . . . . . . .
13.5 Batch Renaming . . . . . . . . . .
13.6 Log window . . . . . . . . . . . . .
13.7 Background task monitor . . . . .
13.8 Timecode . . . . . . . . . . . . . .
.
.
.
.
.
.
.
.
.
.
.
.
.
.
.
.
.
.
.
.
.
.
.
.
.
.
.
.
.
.
.
.
.
.
.
.
.
.
.
.
.
.
.
.
.
.
.
.
.
.
.
.
.
.
.
.
.
.
.
.
.
.
.
.
.
.
.
.
.
.
.
.
.
.
.
.
.
.
.
.
.
.
.
.
.
.
.
.
.
.
.
.
.
.
.
.
.
.
.
.
.
.
.
.
.
.
.
.
.
.
.
.
.
.
.
.
.
.
.
.
.
.
.
.
.
.
.
.
.
.
.
.
.
.
.
.
.
.
.
.
.
.
.
.
.
.
.
.
.
.
.
.
.
.
.
.
.
.
.
.
.
.
.
.
.
.
.
.
.
.
.
.
.
.
.
.
.
.
.
.
.
.
.
.
.
.
.
.
.
.
.
.
.
.
.
.
.
.
.
.
.
.
.
.
.
.
.
.
379
379
380
380
382
382
383
384
384
14 How do I...
14.1 ... import songs from an audio CD into WaveLab? . . . . . .
14.2 ... use VST Plug-ins? . . . . . . . . . . . . . . . . . . . . . . .
14.3 ... edit an existing Audio File? . . . . . . . . . . . . . . . . . .
14.4 ... compile and edit several Audio Files on multiple tracks? .
14.5 ... apply processing to an Audio File? . . . . . . . . . . . . .
14.6 ... convert an Audio File into another audio format? . . . . .
14.7 ... play back with real-time effects? . . . . . . . . . . . . . . .
14.8 ... record new Audio File? . . . . . . . . . . . . . . . . . . . .
14.9 ... convert the sample rate of an Audio File? . . . . . . . . .
14.10 ... create a Podcast? . . . . . . . . . . . . . . . . . . . . . . . .
14.11 ... open an aac, m4a or m4p Audio File from Apple iTunes?
.
.
.
.
.
.
.
.
.
.
.
.
.
.
.
.
.
.
.
.
.
.
.
.
.
.
.
.
.
.
.
.
.
.
.
.
.
.
.
.
.
.
.
.
.
.
.
.
.
.
.
.
.
.
.
.
.
.
.
.
.
.
.
.
.
.
.
.
.
.
.
.
.
.
.
.
.
.
.
.
.
.
.
.
.
.
.
.
.
.
.
.
.
.
.
.
.
.
.
.
.
.
.
.
.
.
.
.
.
.
387
387
387
388
388
388
389
389
389
389
390
390
15 Glossary
15.1 ADPCM . . . . . . .
15.2 AES31 . . . . . . . .
15.3 AIFF files . . . . . . .
15.4 Apple Lossless files
15.5 ALAW files . . . . . .
15.6 Aliasing . . . . . . . .
15.7 Amplitude . . . . . .
15.8 ASIO . . . . . . . . .
15.9 Attack . . . . . . . . .
15.10 Audio montage . . .
15.11 Bandwidth . . . . . .
15.12 Bit depth . . . . . . .
15.13 Blu-ray Disk . . . . .
15.14 CD Frame . . . . . .
15.15 CD Pre-emphasis .
15.16 CD Text . . . . . . .
15.17 Chorus . . . . . . . .
15.18 Clip . . . . . . . . . .
15.19 Clipping . . . . . . .
.
.
.
.
.
.
.
.
.
.
.
.
.
.
.
.
.
.
.
.
.
.
.
.
.
.
.
.
.
.
.
.
.
.
.
.
.
.
.
.
.
.
.
.
.
.
.
.
.
.
.
.
.
.
.
.
.
.
.
.
.
.
.
.
.
.
.
.
.
.
.
.
.
.
.
.
.
.
.
.
.
.
.
.
.
.
.
.
.
.
.
.
.
.
.
.
.
.
.
.
.
.
.
.
.
.
.
.
.
.
.
.
.
.
.
.
.
.
.
.
.
.
.
.
.
.
.
.
.
.
.
.
.
.
.
.
.
.
.
.
.
.
.
.
.
.
.
.
.
.
.
.
.
.
.
.
.
.
.
.
.
.
.
.
.
.
.
.
.
.
.
.
.
.
.
.
.
.
.
.
.
.
.
.
.
.
.
.
.
.
391
394
394
394
395
395
395
395
395
396
396
396
396
396
397
397
397
398
398
398
WaveLab 7
UV22HR Dithering . . . . . . . .
Steinberg Vintage Compressor
Steinberg VST Dynamics . . . .
Crystal Resampler . . . . . . . .
Leveler . . . . . . . . . . . . . . .
Leveler Multi . . . . . . . . . . . .
Peak Master . . . . . . . . . . . .
Silence . . . . . . . . . . . . . . .
Stereo Expander . . . . . . . . .
Internal Dithering . . . . . . . . .
.
.
.
.
.
.
.
.
.
.
.
.
.
.
.
.
.
.
.
.
.
.
.
.
.
.
.
.
.
.
.
.
.
.
.
.
.
.
.
.
.
.
.
.
.
.
.
.
.
.
.
.
.
.
.
.
.
.
.
.
.
.
.
.
.
.
.
.
.
.
.
.
.
.
.
.
.
.
.
.
.
.
.
.
.
.
.
.
.
.
.
.
.
.
.
.
.
.
.
.
.
.
.
.
.
.
.
.
.
.
.
.
.
.
.
.
.
.
.
.
.
.
.
.
.
.
.
.
.
.
.
.
.
.
.
.
.
.
.
.
.
.
.
.
.
.
.
.
.
.
.
.
.
.
.
.
.
.
.
.
.
.
.
.
.
.
.
.
.
.
.
.
.
.
.
.
.
.
.
.
.
.
.
.
.
.
.
.
.
.
.
.
.
.
.
.
.
.
.
.
.
.
.
.
.
.
.
.
.
.
.
.
.
.
.
.
.
.
.
.
.
.
.
.
.
.
.
.
.
.
.
.
.
.
.
.
.
.
.
.
.
.
.
.
.
.
.
.
.
.
.
.
.
.
.
.
.
.
.
.
.
.
.
.
.
.
.
.
.
.
.
.
.
.
.
.
.
.
.
.
.
.
.
.
.
.
.
.
.
.
.
.
.
.
.
.
.
.
.
.
.
.
.
.
.
.
.
.
.
.
.
.
.
.
.
.
.
.
.
.
.
.
.
.
.
.
.
.
.
.
.
.
.
.
.
.
.
.
.
.
.
.
.
.
.
.
.
.
.
.
.
.
.
.
.
.
.
.
.
.
.
.
.
.
.
.
.
.
.
.
.
.
.
.
.
.
.
.
.
.
.
.
.
.
.
.
.
.
.
.
.
.
.
.
.
.
.
.
.
.
.
.
.
.
.
.
.
.
.
.
.
.
.
.
.
.
.
.
.
.
.
.
.
.
.
.
.
.
.
.
.
.
.
.
.
.
.
.
.
.
.
.
.
.
.
.
.
.
.
.
.
.
.
.
.
.
x
CONTENTS
15.20
15.21
15.22
15.23
15.24
15.25
15.26
15.27
15.28
15.29
15.30
15.31
15.32
15.33
15.34
15.35
15.36
15.37
15.38
15.39
15.40
15.41
15.42
15.43
15.44
15.45
15.46
15.47
15.48
15.49
15.50
15.51
15.52
15.53
15.54
15.55
15.56
15.57
15.58
15.59
15.60
15.61
15.62
15.63
15.64
15.65
15.66
15.67
15.68
15.69
15.70
15.71
15.72
15.73
Compression . . . . . . .
Cross fade . . . . . . . . .
DAW . . . . . . . . . . . .
DC Offset . . . . . . . . .
DDP files . . . . . . . . . .
Decibel (dB) . . . . . . . .
Dithering . . . . . . . . . .
DVD-A . . . . . . . . . . .
ECMAScript . . . . . . . .
Ensoniq Paris files . . . .
Equalization . . . . . . . .
FFT . . . . . . . . . . . . .
Focused Clip . . . . . . .
Formant . . . . . . . . . .
FTP Site . . . . . . . . . .
Headroom . . . . . . . . .
ISO image . . . . . . . . .
ISRC . . . . . . . . . . . .
Loops . . . . . . . . . . . .
Loudness . . . . . . . . .
Markers . . . . . . . . . . .
Media Catalog Number .
MIDI . . . . . . . . . . . .
MIDI Channels . . . . . .
Mixing . . . . . . . . . . . .
Mobile phone Audio Files
MP2 files . . . . . . . . . .
MP3 files . . . . . . . . . .
Non-destructive editing .
Normalize . . . . . . . . .
NTSC . . . . . . . . . . . .
Ogg Vorbis files . . . . . .
OSQ files . . . . . . . . .
PAL/SECAM . . . . . . .
Pan . . . . . . . . . . . . .
Peak level . . . . . . . . .
Plug-ins . . . . . . . . . .
Pre-roll and Post-roll . . .
Preset system . . . . . . .
Processor cores . . . . .
Quantization . . . . . . . .
Raw PCM files . . . . . .
Red Book CD-DA . . . .
Regular Expressions . . .
RF64 files . . . . . . . . .
RMS . . . . . . . . . . . .
Sample rate . . . . . . . .
SMPTE timecode . . . .
Sound Designer II files .
Spectrogram . . . . . . .
Sun/Java files . . . . . . .
Tempo . . . . . . . . . . .
Text/Excel files . . . . . .
ULAW files . . . . . . . .
.
.
.
.
.
.
.
.
.
.
.
.
.
.
.
.
.
.
.
.
.
.
.
.
.
.
.
.
.
.
.
.
.
.
.
.
.
.
.
.
.
.
.
.
.
.
.
.
.
.
.
.
.
.
.
.
.
.
.
.
.
.
.
.
.
.
.
.
.
.
.
.
.
.
.
.
.
.
.
.
.
.
.
.
.
.
.
.
.
.
.
.
.
.
.
.
.
.
.
.
.
.
.
.
.
.
.
.
.
.
.
.
.
.
.
.
.
.
.
.
.
.
.
.
.
.
.
.
.
.
.
.
.
.
.
.
.
.
.
.
.
.
.
.
.
.
.
.
.
.
.
.
.
.
.
.
.
.
.
.
.
.
.
.
.
.
.
.
.
.
.
.
.
.
.
.
.
.
.
.
.
.
.
.
.
.
.
.
.
.
.
.
.
.
.
.
.
.
.
.
.
.
.
.
.
.
.
.
.
.
.
.
.
.
.
.
.
.
.
.
.
.
.
.
.
.
.
.
.
.
.
.
.
.
.
.
.
.
.
.
.
.
.
.
.
.
.
.
.
.
.
.
.
.
.
.
.
.
.
.
.
.
.
.
.
.
.
.
.
.
.
.
.
.
.
.
.
.
.
.
.
.
.
.
.
.
.
.
.
.
.
.
.
.
.
.
.
.
.
.
.
.
.
.
.
.
.
.
.
.
.
.
.
.
.
.
.
.
.
.
.
.
.
.
.
.
.
.
.
.
.
.
.
.
.
.
.
.
.
.
.
.
.
.
.
.
.
.
.
.
.
.
.
.
.
.
.
.
.
.
.
.
.
.
.
.
.
.
.
.
.
.
.
.
.
.
.
.
.
.
.
.
.
.
.
.
.
.
.
.
.
.
.
.
.
.
.
.
.
.
.
.
.
.
.
.
.
.
.
.
.
.
.
.
.
.
.
.
.
.
.
.
.
.
.
.
.
.
.
.
.
.
.
.
.
.
.
.
.
.
.
.
.
.
.
.
.
.
.
.
.
.
.
.
.
.
.
.
.
.
.
.
.
.
.
.
.
.
.
.
.
.
.
.
.
.
.
.
.
.
.
.
.
.
.
.
.
.
.
.
.
.
.
.
.
.
.
.
.
.
.
.
.
.
.
.
.
.
.
.
.
.
.
.
.
.
.
.
.
.
.
.
.
.
.
.
.
.
.
.
.
.
.
.
.
.
.
.
.
.
.
.
.
.
.
.
.
.
.
.
.
.
.
.
.
.
.
.
.
.
.
.
.
.
.
.
.
.
.
.
.
.
.
.
.
.
.
.
.
.
.
.
.
.
.
.
.
.
.
.
.
.
.
.
.
.
.
.
.
.
.
.
.
.
.
.
.
.
.
.
.
.
.
.
.
.
.
.
.
.
.
.
.
.
.
.
.
.
.
.
.
.
.
.
.
.
.
.
.
.
.
.
.
.
.
.
.
.
.
.
.
.
.
.
.
.
.
.
.
.
.
.
.
.
.
.
.
.
.
.
.
.
.
.
.
.
.
.
.
.
.
.
.
.
.
.
.
.
.
.
.
.
.
.
.
.
.
.
.
.
.
.
.
.
.
.
.
.
.
.
.
.
.
.
.
.
.
.
.
.
.
.
.
.
.
.
.
.
.
.
.
.
.
.
.
.
.
.
.
.
.
.
.
.
.
.
.
.
.
.
.
.
.
.
.
.
.
.
.
.
.
.
.
.
.
.
.
.
.
.
.
.
.
.
.
.
.
.
.
.
.
.
.
.
.
.
.
.
.
.
.
.
.
.
.
.
.
.
.
.
.
.
.
.
.
.
.
.
.
.
.
.
.
.
.
.
.
.
.
.
.
.
.
.
.
.
.
.
.
.
.
.
.
.
.
.
.
.
.
.
.
.
.
.
.
.
.
.
.
.
.
.
.
.
.
.
.
.
.
.
.
.
.
.
.
.
.
.
.
.
.
.
.
.
.
.
.
.
.
.
.
.
.
.
.
.
.
.
.
.
.
.
.
.
.
.
.
.
.
.
.
.
.
.
.
.
.
.
.
.
.
.
.
.
.
.
.
.
.
.
.
.
.
.
.
.
.
.
.
.
.
.
.
.
.
.
.
.
.
.
.
.
.
.
.
.
.
.
.
.
.
.
.
.
.
.
.
.
.
.
.
.
.
.
.
.
.
.
.
.
.
.
.
.
.
.
.
.
.
.
.
.
.
.
.
.
.
.
.
.
.
.
.
.
.
.
.
.
.
.
.
.
.
.
.
.
.
.
.
.
.
.
.
.
.
.
.
.
.
.
.
.
.
.
.
.
.
.
.
.
.
.
.
.
.
.
.
.
.
.
.
.
.
.
.
.
.
.
.
.
.
.
.
.
.
.
.
.
.
.
.
.
.
.
.
.
.
.
.
.
.
.
.
.
.
.
.
.
.
.
.
.
.
.
.
.
.
.
.
.
.
.
.
.
.
.
.
.
.
.
.
.
.
.
.
.
.
.
.
.
.
.
.
.
.
.
.
.
.
.
.
.
.
.
.
.
.
.
.
.
.
.
.
.
.
.
.
.
.
.
.
.
.
.
.
.
.
.
.
.
.
.
.
.
.
.
.
.
.
.
.
.
.
.
.
.
.
.
.
.
.
.
.
.
.
.
.
.
.
.
.
.
.
.
.
.
.
.
.
.
.
.
.
.
.
.
.
.
.
.
.
.
.
.
.
.
.
.
.
.
.
.
.
.
.
.
.
.
.
.
.
.
.
.
.
.
.
.
.
.
.
.
.
.
.
.
.
.
.
.
.
.
.
.
.
.
.
.
.
.
.
.
.
.
.
.
.
.
.
.
.
.
.
.
.
.
.
.
.
.
.
.
.
.
.
.
.
.
.
.
.
.
.
.
.
.
.
.
.
.
.
.
.
.
.
.
.
.
.
.
.
.
.
.
.
.
.
.
.
.
.
.
.
.
.
.
.
.
.
.
.
.
.
.
.
.
.
.
.
.
.
.
.
.
.
.
.
.
.
.
.
.
.
.
.
.
.
.
.
.
.
.
.
.
.
.
.
.
.
.
.
.
.
.
.
.
.
.
.
.
.
.
.
.
.
.
.
.
.
.
.
.
.
.
.
.
.
.
.
.
.
.
.
.
.
.
.
.
.
.
.
.
.
.
.
.
.
.
.
.
.
.
.
.
.
.
.
.
.
.
.
.
.
.
.
.
.
.
.
.
.
.
.
.
.
.
.
.
.
.
.
.
.
.
.
.
.
.
.
.
.
.
.
.
.
.
.
.
.
.
.
.
.
.
.
.
.
.
.
.
.
.
.
.
.
.
.
.
.
.
.
.
.
.
.
.
.
.
.
.
.
.
.
.
.
.
.
.
.
.
.
.
.
.
.
.
.
.
.
.
.
.
.
.
.
.
.
.
.
.
.
.
.
.
.
.
.
.
.
.
.
.
.
.
.
.
.
.
.
.
.
.
.
.
.
.
.
.
.
.
.
.
.
.
.
.
.
.
.
.
.
.
.
.
.
.
.
.
.
.
.
.
.
.
.
.
.
.
.
.
.
.
.
.
.
.
.
.
.
.
.
.
.
.
.
.
.
.
.
.
.
.
.
.
.
.
.
.
.
.
.
.
.
.
.
.
.
.
.
.
.
.
.
.
.
.
.
.
.
.
.
.
.
.
.
.
.
.
.
.
.
.
.
.
.
.
.
.
.
.
.
.
.
.
.
.
.
.
.
.
.
.
.
.
.
.
.
.
.
.
.
.
.
.
398
399
399
399
399
400
400
400
401
401
401
401
401
402
402
402
402
402
403
403
403
404
404
404
404
404
405
405
405
405
406
406
406
406
407
407
407
408
408
408
408
409
409
409
410
410
410
410
411
411
411
411
411
412
WaveLab 7
CONTENTS
15.74
15.75
15.76
15.77
15.78
15.79
15.80
WaveLab 7
UPC/EAN . .
WAV files . .
WAV64 files .
Waveform . .
Wet/Dry . . .
WMA files . .
Zero crossing
xi
.
.
.
.
.
.
.
.
.
.
.
.
.
.
.
.
.
.
.
.
.
.
.
.
.
.
.
.
.
.
.
.
.
.
.
.
.
.
.
.
.
.
.
.
.
.
.
.
.
.
.
.
.
.
.
.
.
.
.
.
.
.
.
.
.
.
.
.
.
.
.
.
.
.
.
.
.
.
.
.
.
.
.
.
.
.
.
.
.
.
.
.
.
.
.
.
.
.
.
.
.
.
.
.
.
.
.
.
.
.
.
.
.
.
.
.
.
.
.
.
.
.
.
.
.
.
.
.
.
.
.
.
.
.
.
.
.
.
.
.
.
.
.
.
.
.
.
.
.
.
.
.
.
.
.
.
.
.
.
.
.
.
.
.
.
.
.
.
.
.
.
.
.
.
.
.
.
.
.
.
.
.
.
.
.
.
.
.
.
.
.
.
.
.
.
.
.
.
.
.
.
.
.
.
.
.
.
.
.
.
.
.
.
.
.
.
.
.
.
.
.
.
.
.
.
.
.
.
.
.
.
.
.
.
.
.
.
.
.
.
.
.
.
.
.
.
.
.
.
.
.
.
.
.
.
.
.
.
.
.
.
.
.
.
.
.
412
412
413
413
413
413
413
Chapter 1
WaveLab 7 Help
Welcome to the WaveLab Help browser. You can expand the tree structure in the panel on
the left (under the Contents tab) to find individual Help topics. You can also use the Index
and Bookmarks tabs, in addition to a powerful Search feature (under the Search tab).
Please see Getting Help for more ways of using the Help browser and other help features
available throughout WaveLab.
For a quick overview of the features provided in WaveLab see Features Overview.
Top-level topics
Getting Help
Using the interface
WaveLab Concepts
Audio File editing
Audio Montages
Batch Processing
Podcasts
Control Window
Master Section
Master Project
Interface Elements
Audio Plug-ins
Utilities
How do I...
Glossary
2
WaveLab 7 Help
WaveLab 7
Chapter 2
Getting Help
WaveLab's detailed help system makes it easy to look up interface features and get information from within the program. There are three main types of help available:
What is this?
Access this by clicking on the
icon, or the question mark icon in a dialog window titlebar,
or by holding down [Shift]+[F1]. Once activated, the cursor changes to a question mark.
Click on an interface feature for information on what it does and details of any settings/values/functions involved. This is a quick way to learn about the more detailed features of
WaveLab.
When a Context menu is open, holding down [Shift]+[F1] allows the "What is This?" mode
to activate while the menu is open, and this is actually the only way to get help for Context
menu features.
It is worth noting too that "What is This?" help is sometimes available for sub-parts of controls,
such as List headers.
Tooltips
Hold your cursor over a button to show a brief description of its function wherever available.
Help window
This window provides you with detailed information on WaveLab's features and functionality.
You can access this help window in several ways:
via the Help menu. See Help menu.
from each dialog window provided with a Help button. This opens the Help window at
the relevant entry.
by pressing [F1]/[Command]+[?]. If a window is active, the Help window opens to the
relevant entry. If a dialog box is open, the dialog is described.
4
Getting Help
Related topics
Help menu
Command bars
2.1
Help menu
The Help menu gives you a convenient point of access to WaveLab's Help system.
Help about the active window...
Select this (or press [F1]/[Command]+[?]) to give help on the active window. If a dialog
box is open, the dialog is described.
Contents...
This lists the Help contents as a "tree structure" in the Contents window. Like many
WaveLab windows, you can make this a floating window, if you want to park it in a
convenient place on screen.
Index...
This accesses an Index to Help entries. Type in the "Look for:" box, or scroll down the
alphabetical list. If there is more than one entry for the Index item, you'll be given a
choice of entries to be displayed, in the "Choose Topic" box.
Search...
Type the name of the topic you wish to find in the "Search for:" box. If more than one
topic is found to match the search string, a list is displayed: click on the most likely
entry to display the topic. If there are too many entries, you can refine the search by
clicking on [+] "Advanced search".
Bookmarks...
Click the [+] Add button to add the displayed topic to the list of Bookmarked favorites.
Now you can return to the entry speedily.
What is this?
This gives a short "Tooltip" explanation by pointing and clicking on the interface feature
you need information on. This can also be used to get help on any menu item. Activate the question mark icon by selecting "What is this?" from the Help system; using
[Shift]+[F1]; or by selecting
from the command bar button.
Steinberg on the internet - This fly-out menu opens a window on your browser with
the appropriate URL to support, update, upgrade or register WaveLab. You can also
access the Steinberg Home Page.
Related topics
Getting Help
WaveLab 7
Chapter 3
Using the interface
This section gives information on interface features that may not be obvious and which may
help to speed up your workflow, especially as your experience with WaveLab increases.
WaveLab is incredibly flexible in the ways that you can set up your working environment.
Interface elements can be arranged to suit your workflow, the type of project you are creating
and the size and number of your displays.
You can move, reorder and detach windows and tabs from frames and tear off groups of buttons in the Toolbar. You can slide and quickly partition different panes (areas) of the WaveLab
window.It's easy to set up different layouts for different projects and switch between them.
WaveLab has distinct Workspaces where you can work on a "session". Each Workspace
lets you collect a number of files that you want to keep together. This could be all of the
Audio Files used in a single song for instance, or all the Audio Files that go to make up a
Podcast episode.
Tip: If you're a user of Nuendo (a Steinberg product), don't forget that you can drag files
directly from within WaveLab.
Related topics
About Tool Windows
Adjusting Envelopes
Command bars
Context menus
Docking windows
Double clicking
Dragging operations
Playback shortcuts
Select-clicking
Shortcut system
Sliders
Status Bar
6
Using the interface
Switcher window
Tab Groups
Transport controls
Value editing
Workspaces
Zooming and scrolling
3.1
About Tool Windows
Throughout WaveLab there are various tool windows available that enable you to view, analyze and edit the current active document. Generally the content of a tool window is synchronized with the active document, with the exception of the audio meters which can display
information related to other documents.
There are two types of Tool windows:
Specific tool windows - these are dedicated to a given Workspace type. The File
Browser and Marker windows are examples of specific tool windows.
Shared tool windows - Only one instance of these windows can exist at any one
time in WaveLab, and it can be shared between Workspaces. The Master Section is
an example of a shared window and as such there is only ever one instance of it.
All tool windows can be accessed via the Workspace menu. See Docking windows for
information on docking and undocking tool windows.
Specific Tool windows
Specific tool windows are specific to the current Workspace and are dedicated to that
Workspace type. They perform useful tasks in the active Workspace. The File Browser
and Marker windows are examples of specific tool windows.
Specific tool windows can be docked and un-docked anywhere within their Workspace,
and saved in your custom layouts. They can also float as standalone windows in a specific
Workspace.
Shared tool windows
Shared tool windows are shared between certain Workspaces and are independent of any
one Workspace. Like specific tool windows, they can be docked and un-docked, and saved
in your custom layouts. The Master Section is an example of a shared window.
The main difference with Specific tool windows is that only one instance of a Shared tool
window can exist at any one time in WaveLab. When you open a shared tool window that is
referenced in another Workspace it will "move" from the other Workspace to the active one.
A shared tool window can be moved and docked exactly like a specific tool window, however in addition Shared tool windows can "float as an independent window", that is, independent of any Workspace. Each shared tool window has a menu entry to allow this floating
WaveLab 7
3.2 Adjusting Envelopes
7
mode.They can also be placed in the Control Window, in a tab group. Each shared tool
window has a menu entry to allow this ("Place in Control Window").
Differences between Mac and Windows
Floating windows behave slightly differently on Apple Mac and Windows, due to some basic
differences between the platforms:
Mac - On the Mac, a tool window is always on top of all other windows and a floating
window remains visible even if its dependent Workspace is not active or is minimized.
If WaveLab is no longer the active application, all its floating windows are hidden.
Windows - A floating window is hidden when its dependent Workspace is minimized
or covered by another window. If WaveLab is no longer the active application, all its
independent floating windows are hidden.
Saving a windows location
Once you have your tools windows, command bars and tab groups set up the way you wish
to work, you can save their location in the current Workspace by choosing Workspace >
Layout > Save as... and saving a preset; or you can save the current layout as the default
layout by choosing Workspace > Layout > Save current layout as default.
If you wish to save the location of all Workspaces, then use the global option by choosing
Global > General Window Layout > Save as... and saving a preset; or you can save
the current layout as the default layout by choosing Global > General Window Layout >
Save current layout as default.
Related topics
Workspaces
Shared tool windows
Specific tool windows
3.2
Adjusting Envelopes
At various places in WaveLab, envelopes are used to constrain the way effects are expressed.
Some offline processes such as Level Envelope, use envelopes to adjust an effect over time.
You can edit the profile of these envelopes quickly and easily.
Adjusting an envelope
Edit the envelope using the envelope editor window in the following ways:
Create and erase points by double clicking.
Select points by clicking on them.
WaveLab 7
8
Using the interface
To select more than one point, press [Ctrl]/[Command] when clicking - you can then
move them together. Selected points don't have to be contiguous. You can also click
anywhere in the window and drag the cursor over the envelope points to select them.
You can drag any segment to move the whole envelope profile up and down.
You can drag a single segment vertically by pressing [Ctrl]/[Command] and move the
segment up and down.
You can drag a single segment horizontally by pressing [Ctrl]/[Command] + [Shift]
and move the segment left and right.
You can also use the controls at the top of the editor window to delete or reset points in
the envelope. Use the envelope smoothing button to toggle the envelope points between a
linear (polygonal) or a curved path. The envelope is not applied until you click "Apply".
For an explanation of each parameter and interface feature, click on , or the 'What's this?'
question mark icon. For more information see Getting Help
Related topics
Level envelope
Time stretching
Pitch correction
Pitch bend
3.3
Command bars
Commonly used tools, shortcuts and commands are represented by "Command buttons",
each with their own icon. Related buttons are grouped into various Command bars. You
can dock Command bars to any window edge and rearrange them. Each Workspace has
an appropriate set of command bars that are available to be displayed. All the commands
accessed via the Command buttons can also be found in the menus.
Hiding and displaying Command bars
To view a list of available command bars right-click on an empty part of the top edge of the
Workspace. More precisely, on Windows computers right click anywhere along the window's
top menu, on Apple Macintosh computers right click in the window's caption bar. This displays the Peripheral Windows context menu, which you can use to select which Command
bars are displayed.You can also choose which individual Command buttons are displayed
from the Customize commands dialog.
To move a set of Command bar tools
Drag on the left side of the command, or at top for vertical command bars - the pointer
when you have "grip". Drag the group of Commands to any side of the applichanges to
WaveLab 7
3.4 Context menus
9
cation window and release the mouse button. The application window and other Command
bars will automatically make space for the Command bar in its new position.
By default, Command bars are docked and don't float. You can make them float individually
or not, by right clicking and selecting the desired option from the menu. Once the option has
been selected, move the command bar.
You can drag Command groups below an existing row to form a new row (or next to an
existing column, to form a new column). You can also reorder their position within a row or
column, to customize your layout.
If a Command bar does not have room to display all of its icons, it will have a double right (or
down) arrow >>. Click on the double arrow to reveal any obscured Command buttons.
Finding out what a Command button does
Hover over an individual Command button to display its tooltip. If no tooltip appears, make
sure "Show tips when mouse stays over buttons" is activated in Preferences... > Global
Preferences > Display tab.
For an explanation of each parameter and interface feature, click on , or the 'What's this?'
question mark icon. For more information see Getting Help
Related topics
Global Preferences
Customize Commands
Context menus
3.4
Context menus
Throughout WaveLab there are various Context menus available. These menus group together a range of commands and/or options specific to the window you are working in. They
appear when clicking with the right mouse button in certain places and may be useful for
speeding up your workflow.
Some Context menus have colored title bars (these were formerly known as "Speed menus"
in WaveLab 6), and their title indicates the part of the interface they relate to.
Using Context Menus
To bring up a context menu, right-click in the desired area. This is normally somewhere
along the edges of a window, or in some cases anywhere on the window itself or its title.
Right-clicking on a File tab, for example, shows a context menu with some relevant file options. Right-clicking on the waveform window header brings up the Time Ruler context menu
allowing you to access a number options for changing the Time Ruler display format.
Tip: Most context menu commands can be found on the normal menu bar but some unique
commands are only found in context menus. As they are not always obvious, when
searching for a function, it may be worth checking for a Context menu in the window in which
you are working by right-clicking on it, or around its edges.
WaveLab 7
10
Using the interface
Related topics
Shortcut system
3.5
Docking windows
All of WaveLab's tool windows can be used as docked windows or as stand-alone "floating"
windows. They can be freely dragged around and docked at various locations. Command
bars can also be freely moved around and docked along the edges of most windows. See
Command bars for more information.
Undocking a window
Double-click on the title bar. This works with all tool windows, Specific and Shared.
About Specific tool windows
To undock a Specific tool window use one of the following methods:
double-click on the title bar.
click on the small double window icon which is located at the top left hand corner of
the window.
click and drag the window by its title bar.
Once un-docked, you can freely drag the window around by clicking and dragging on the
window's title header bar.
To dock the window again, drag it to any location where you are visually prompted to release
the window. Around the edges and the top of the Workspace is where this normally occurs.
Most windows can be docked horizontally or vertically, but some can only be docked in one
direction, because of the nature of their contents. To dock the window again, you can also
double-click in the title bar.
Tip: To move a window and prevent it from docking, hold down [Ctrl]/[Command] before
you begin to undock the window. This will avoid the window docking again and allow you to
place it anywhere. Once you begin to drag, you can release [Ctrl]/[Command].
About Shared tool windows
Shared tool windows such as the meters and the Master Section are slightly different to
other tool windows as there is only ever one of them available and it can only appear in
one Workspace at a time. As such, when you open a shared tool window from the menus
in another Workspace it undocks and moves from its original Workspace. An empty tab
container with a vertical title bar will remain in its previous Workspace.
button at the top left of these
To retrieve a window again from another Workspace use the
empty containers. For example, if you have the VU Meter displayed in the Audio Montage
WaveLab 7
3.6 Double clicking
11
Workspace and you wish to display it in the Audio File Workspace, you can simply click the
blue button and the VU Meter window will move back into its tab container.
You can choose to deactivate the default moving behavior by deselecting Workspace >
Auto move shared tool windows. Shared tool windows do not then move when you
switch between Workspaces.
Docking/Undocking in the Control Window
Certain windows (those with a Window and Global menu in their title header) can also be
arranged in the Control Window. These are placed centrally - slightly differently to how they
behave in the other Workspaces. For more information on docking/undocking windows in
the Control Window see Control Window.
Related topics
Tab Groups
About Tool Windows
Command bars
Control Window
3.6
Double clicking
A double click is the act of pressing the mouse button twice quickly without moving the
mouse.
Throughout WaveLab you can achieve the following by double clicking in certain places:
Create a new empty document - double click on the empty part of a tab bar. See
Tab Groups for more information.
Edit a marker name - double click at the right side of a marker's icon (in the Audio
File or Montage Workspace) above the time ruler.
Select a region (Audio File Workspace) - double click to select the whole Audio
File. Where markers exist, the region between the markers is selected. If markers exist
and you wish to select the entire file you can triple-click to select the whole file.
Set zoom to display entire waveform (Audio File/Montage Workspace) - dou-
ble click on the horizontal zoom wheel to reset the zoom to display the whole Audio
File.
Set zoom to default value (Audio File/Montage Workspace) - double click on
the vertical zoom wheel to reset the zoom to its default value.
Center the waveform (Audio File Workspace) - double click on the vertical scroll
bar to center the waveform around the horizontal axis.
WaveLab 7
12
Using the interface
Start playback (Audio File/Montage Workspace) - double click in the time line to
start playback from that point.
In addition to these specific examples, in various places throughout WaveLab, doubleclicking can be used to begin editing certain values. Depending on the context the type
of editing triggered will vary. In most list views for example, double-clicking in a cell will allow
you to edit its value.
Related topics
Tab Groups
Select-clicking
3.7
Dragging operations
WaveLab makes much use of "drag-and-drop" techniques to perform various operations,
some of which can't be performed otherwise. These are referred to as drag operations in
this documentation.
To drag an object, press and hold down the left mouse button while over the object and drag
it to the desired destination. Drop the object by releasing the button.
Many types of objects can be dragged between different source and destination locations
including files, text, Clips, the playback head and markers.
Tip: This help entry describes some of the most important drag and drop operations. There
are many other possibilities, especially within the various list views for example where you
can possibly drag from the list to an external window, drag a file into the list (to import), or
reorder, these vary of course according to the context). Therefore we encourage you to try
drag and drop wherever you feel it may make sense.
Within Workspaces
Drag objects within and between Workspaces to perform the following functions:
Docking a tool window - drag a window's title bar to any side of the Workspace,
beside or above an existing tool window, to dock the window at a new place.
Moving a Command bar - drag the bar grip at the left-hand end of a command bar
and reposition it. See Command bars for more information.
Moving a Document Tab - drag the tab to a new location within its own tabbed group
to reorder.You can also drag a tab to another group of tabs.
Open a file - drag a compatible file from the WaveLab's File Browser, from the oper-
ating system's file browser or from another application to the tab bar.
Insert a file in another Workspace - drag an Audio File by its title bar tab between
the Audio File and Audio Montage Workspaces. You can also use the Switcher window
to drag any object to another Workspace. Drag the object over the corresponding
Workspace icon in the Switcher window and wait until the new Workspace becomes
active. Then you can release the file in the target Workspace.
WaveLab 7
3.7 Dragging operations
13
Within the Audio File Workspace
Drag objects within the Audio File Workspace to perform the following functions:
Paste an Audio File - drag a document's title bar tab or document button
onto the
waveform area of another file, to copy and paste its audio content. You can also drag
a compatible file directly from the File Browser, the operating system's file browser, or
from another application.
Delete/Move a marker - drag the marker along the time ruler to change its position.
Drag while pressing the [Shift] key to create a copy of this marker. Drag above the
time ruler to delete the marker.
Copy an audio selection - drag a selected region of audio onto the waveform area
of the same file, or of another file. Left, right or both channels can be copied.
Create a new file from an audio selection - drag a selected region of audio onto
the empty space of a tab bar to create a new copy of the audio. If dragging happens
right after double clicking, the selection is quantized and extended up to the marker's
"region" under the mouse.
Modify a selection - drag left or right to change the extent of the selection.
Move the waveform - drag anywhere above the time ruler to move it horizontally.
Create a marker from selected text - drop text that you have selected in an external
application onto the time ruler to create a generic marker there. The text becomes the
marker's name.
Scroll the waveform - drag the cursor to the left or right sides of the waveform area
to display the region before or after.
Mix to Mono - by holding down [Control + Alt]/[Command + Alt] while dragging the
file to a new tab, you can quickly mix a stereo file to mono.
Convert from Mono to Stereo - by holding down [Control + Alt]/[Command + Alt]
while dragging the file to a new tab, you can quickly convert a mono file to stereo .
Tip: When aligning some objects in the waveform area, labeled prompts will help you to
snap to other locations in the waveform (for example, the end points of Audio Files, markers
or cursors).
Audio Montage Workspace
Drag objects within the Audio Montage Workspace to perform the following functions:
Paste an Audio File - drag a document's title bar tab or document button
onto
the Montage area of another file, to copy and paste its audio content. You can also drag
a compatible file directly from the File Browser, the operating system's file browser, or
from another application.
WaveLab 7
14
Using the interface
Delete/Move a marker - drag the marker along the time ruler to change its position.
Drag while pressing the [Shift] key to create a copy of this marker. Drag above the
time ruler to delete the marker.
Create a marker from selected text - drop text that you have selected in an external
application onto the time ruler to create a generic marker there. The text becomes the
marker's name.
Scroll the Montage - drag the cursor to the left and right sides of the Montage to
display what comes before or after.
Paste a Clip - drag a document's title bar tab or document button
onto the Montage
area to copy and paste its audio content. You can also drag a compatible file directly
from the File Browser, the operating system's file browser, or from another application.
Within the Podcast Workspace
You can drag episodes in the Episodes list to reorder them.
Within the Master Section
You can drag effects between different Effects slots to change the order of processing (which
takes place from top to bottom).
Within the Batch Processor Workspace
Change the order of effects - you can change the order in which plug-ins are pro-
cessed by dragging plug-ins within the Audio plug-in chain window.
Add to batch process - you can drag a file (via its tab) to the batch conversion tool
or batch processor, for "instant" processing.
Related topics
Docking windows
Switcher window
3.8
Playback shortcuts
Playing back audio is a common repetitive task in WaveLab. In addition to the playback
command buttons in the Transport controls, there are a few extra commands that can only be
accessed via special keyboard shortcuts. These shortcuts can be used even when the audio
window is not the active window. These special keyboard shortcuts cannot be customized.
They are:
Space bar - Start/Stop
WaveLab 7
3.9 Select-clicking
15
0 or F7 - Stop. When pressed while already stopped, the cursor jumps to the previous
playback start position. A further "0" returns the cursor to the start of the file.
Enter (Numeric Pad) or F8 - Start
[Ctrl]/[Command] + F6 - Plays from the beginning to the end of the selection, if any.
Where there are markers it plays between them. If there are no markers it plays from
the beginning to the end of the Audio File.
[Win]/[Ctrl] + F6 - As above, but playback starts with a preroll before the region and
stops at its end.
[Shift] + F6 - As above, but playback ends with a postroll after the region.
[Win]/[Ctrl] + [Shift] + F6 - As above, but playback starts with a preroll before the
region and ends with a postroll after the region.
Related topics
Transport controls
3.9
Select-clicking
Select-clicking is the act of selecting an object with the mouse and while it is selected,
clicking again. This is a common interface interaction when renaming a file or folder in your
computer's native file browser.
Throughout WaveLab there are places where you need to select-click fields to edit values. In
some lists such as the Basic Audio CD window, you need to select-click cells to edit a track
name or ISRC code. Generally if a value can be edited, a double click selects all characters
in that cell and allows you to begin editing; if not, then try select-clicking the cell instead.
Related topics
Tab Groups
Double clicking
3.10
Shortcut system
Throughout WaveLab there are many predefined shortcuts and custom commands that can
be used to speed up your workflow. The offline process "Fade-in", for example can be triggered from its menu entry, from its command bar icon, using a custom key sequence, and you
can use MIDI events as well. Each shortcut is restricted to its specific Workspace, which
means you can re-use the same shortcut in different Workspaces. When a command is
available from more than one Workspace, then the shortcut applies to all Workspaces and
cannot be reused.
WaveLab 7
16
Using the interface
Not all commands are restricted to a Workspace, for example, all Master Section commands
are global to the application, and Record commands (Record dialog) are active only when
the Record dialog has focus. In addition, a few specific Global shortcuts can be defined
from Preferences... > Global Preferences > Global shortcuts tab.
Shortcuts are defined and can be edited in the Customize commands dialog. There are
various places where you can access this dialog, and each dialog restricts editing of the
shortcut to the related context. You can generate a summary of custom commands in a Print
preview or HTML format from the dialog's "Summary" button.
There are several types of shortcuts available in WaveLab:
Key sequences
You can define a sequence of up to four keys to trigger a desired action. Note that these
keys must be pressed/released one after the other, and the action is performed when the last
key has been pressed. Key stroke sequences give you a very large choice of combinations,
which is useful in an application with a large feature set. There are however possible pitfalls,
if for example:
Shortcut #1 is defined with the sequence: Control+D, Control+E
Shortcut #2 is defined with the sequence: Control+D
The application watches for key strokes, and when Control+D is pressed, Shortcut #2 won't
be triggered because Control+D is also used in a longer sequence (the application can't
know if it should wait for Control+E or not).
Note: A few very basic shortcuts cannot be redefined. If this is the case, the relevant edit
field is disabled. On the Mac, only the first key of native menus can be displayed.
MIDI event sequences
This is the same as with keyboard sequences, but using MIDI events sent from an external
MIDI device instead.
Keywords
Unless you use them frequently, key sequences are not always easy to remember but keywords normally are. In WaveLab you can define any unique keyword to trigger a command.
Type the keyword in the dedicated "Keyword" field in the "Definition of shortcut(s)" dialog,
and click OK.
To trigger the command, enter the keyword in the Keyword command bar, found in all
Workspace, and press Return. This command bar keeps a list of recent commands, to improve performance.
Keywords are useful in conjunction with presets, because a specific preset is easier to remember from a keyword (for example, "norm-1" to trigger a "Normalize to -1dB" process, if
such a preset has been set).
WaveLab 7
3.11 Sliders
17
Adding menu items to a Command bar button
Each Workspace has a number of default Command bars defined, but you can add further
menu items to customize Command bars.
Each menu command with an icon can be potentially added to a Command bar. Commands
are internally grouped by functionality, so the button always appears in its related command
bar (File commands appear in the File command bar, for example).
Add a menu command using the Customize commands dialog. Each command has a checkbox in the "Bar" column.
Other shortcuts
There are many other shortcuts in WaveLab that are accessed using the mouse. These are
described in Double clicking, Dragging operations and Tab Groups. Clicking the right button
on the mouse in certain places will produce a Context menu which offers quick access to
relevant commands.
Related topics
Customize Commands
Definition of shortcut(s)
Double clicking
Dragging operations
Tab Groups
Context menus
3.11
Sliders
At various places in WaveLab, slider controls are available to change parameters. There are
a number of ways to change a slider's value:
Turn the mouse wheel over the slider (no click is required). Press [Ctrl]/[Command]
simultaneously to scroll faster. This modifier also applies to the zoom wheels.
Left click on the button to move it.
Left click outside the button to move the button directly to that position.
Right click before or after the button, to move the button step by step. Keep the mouse
button pressed to automatically step to the next value.
Middle click anywhere to reset the slider to the default value (if a default is available).
Left click and press [Ctrl]/[Command] anywhere to reset the default value (if a default
value is available).
Double click on the button to reset the default value (if a default value is available).
WaveLab 7
18
Using the interface
Related topics
Adjusting Envelopes
3.12
Status Bar
The Status bar is normally displayed at the bottom of the screen and shows information about
the active window using the units specified in the rulers.
The Wave and Mouse cursor time positions are shown using the same units of time as in the
rulers and dialog boxes. Level positions are always shown in dB. This information is updated
depending on the cursor position and whether you have a region of audio selected. In the
case of the Audio File Workspace it gives the following information about the Audio File.
From left to right:
Time/Level (dB) - at the mouse cursor position.
Wave cursor Time - displays the time at the position of the Wave cursor. This infor-
mation changes when you click to reposition the cursor. Click on this status bar field to
show the Cursor position dialog, which you can use to accurately position the cursor.
Audio selection indicator - displays the length of the current selection, or the total
length of the Audio File if there is no selection. Right-click on this to display the entire
audio range.In WaveLab Left-click also opens the Audio Range dialog, so you can
define or refine a selection.
Zoom indicator - displays the current zoom factor. Click this to edit the zoom factor;
right-click to display a pop-up menu (equivalent to selecting View > Zoom).
File format details - displays the number of audio channels, bit resolution and sample
rate; Click to display Audio properties dialog.
Document button -
allows you to click and drag the current Audio File into another document (for example, in the Audio Montage Workspace). This is equivalent to
dragging the file Tab.
Sample Key indicator - indicates the key of the current Audio File (if defined) and
opens the Sample Attributes window. The status bar also indicates the progress
of some background operations, such as rendering an effect. The operation can be
paused or canceled using the buttons provided.
and
allow you to completely bypass the
The "Play through Master Section" buttons
Master Section for playback, or not, with a setting for each file (Audio File and Montage).
There are also the Save/Restore Master Section presets buttons, which allow you to store/restore these settings for each file. See Save Master Section Preset.
For an explanation of each parameter and interface feature, click on , or the 'What's this?'
question mark icon. For more information see Getting Help
WaveLab 7
3.13 Switcher window
19
Related topics
Time Format dialog
Zoom factor
Audio properties dialog
3.13
Switcher window
This small floating window allows you to switch between each of the main Workspaces in
WaveLab, and also to open and create documents.
It is visible at all times and floats above all other windows. You can choose which Workspace
buttons are visible and adjust its transparency in Global Preferences. You can resize, rotate
and move the Switcher window anywhere on your monitor(s).
It is useful to use a file in a different Workspace. For example, you can drag an Audio File
from the Audio File Workspace over the Audio Montage icon in the Switcher window
and wait until the Audio Montage Workspace becomes active before inserting the file
in a montage.
To switch between Workspaces: click on a Workspace button and if the Workspace is
not already open, a menu opens and offers several options.
If two instances of the same Workspace are open, you can toggle between them by
repeatedly clicking on the appropriate icon.
To create a new document in any Workspace: click + [Ctrl]/[Command] on a
Workspace button.
To open a document in any Workspace: click + [Shift] on a Workspace button.
To display a menu listing the files used recently in a particular Workspace, click on any
Workspace icon and hold the button down. This means that with just one click you can
access the history of a document from any Workspace. From the same menu, you can
also create a new document or open the file selector box. If you click on the icon of the
active workspace, you don't need to hold the button down. Alternatively, you can right
click to show a menu instantly.
Related topics
Workspaces
Docking windows
3.14
Tab Groups
A tab group is a region within a Workspace that contains windows that can be activated by
a tab, each with its own content and title bar. Only one tab can be active at a time.
WaveLab 7
20
Using the interface
In an editing Workspace, a tab group contains one or more documents (e.g. Audio Files).In
the Control Window, a tab group contains one or more shared tool windows. In WaveLab it
is possible to create more than one tab group.To activate a tab, simply click on the title bar
of the tab you wish to work on.
Tip: Because it can be useful to quickly display multiple files side by side, the Audio File
Workspace has a Tile mode that can be activated from the Tabs menu. To make this possible,
a single tab group must exist.
Using Tabs for editing audio
Tabs have a variety of useful behaviors depending on the type of window contained by the tab
group.Tabs that display meters and other tool windows can be dragged and moved around
in the Control window.Tabs that contain Audio Files (in the Audio File Workspace) symbolize
a whole Audio File and where applicable allow you to perform many other useful functions:
Reorder the tab bar - by dragging and dropping the tab at a new position on the tab
bar.
Move it to another Workspace - by dragging and dropping the tab in the editing
window of another Workspace.
Paste it into an Audio File - by dragging and dropping the tab onto the waveform
display at the cursor position you want to insert the copied audio.
Paste it into another application - by dropping the tab into the relevant window of
the other application. The result depends on the target aplication.
Tip: You can also achieve the same actions by dragging the Audio File from the document
button
on the status bar at the bottom right of each window.
Other useful functions can be accessed using tab groups:
Create a new empty document - by double clicking on an empty part of the tab bar
(on the right normally). The new file is created by using the active file as template (for
example, Sample rate).
Display the document file path - by keeping the mouse over a tab for a small mo-
ment. This displays a popup that indicates the full file path of the associated document.
Access additional tab functions - by right clicking on a tab.
Access the Recent file list - by Right-clicking in the empty tab area.
Move a file between tab groups - by dragging a tab from one tab group to another.
Copy a file - by holding down [Ctrl]/[Command] to create a copy by dragging the
file elsewhere in the tab area.
Mix to Mono - (Audio File Workspace) by holding down [Control + Alt]/[Command +
Alt] to mix a stereo file to mono while dragging the file to a new tab.
WaveLab 7
3.15 Transport controls
21
Convert from Mono to Stereo - (Audio File Workspace) by holding down [Control
+ Alt]/[Command + Alt] to convert a mono file from mono to stereo while dragging the
file to a new tab.
Quickly switch between tabs - by moving the mouse wheel while over the tab bar.
This switches the focus between the different tabs.
Tip: An option in global preferences allows you to hide the title bar if there is only one tab
open Global preferences > User Interface > Show tab if there is a single window.
Related topics
About Tool Windows
Docking windows
3.15
Transport controls
The transport controls allow you to control playback within an Audio File or montage, and to
open the record window. It can be accessed via the Transport menu or the Transport toolbar.
See Command bars for more information.
The Transport menu gives access to (and shows keyboard shortcuts to) the same functions
that are available in the transport toolbar.
The Transport toolbar gives quick access to most of these functions. If the toolbar is hidden, select Workspace > Command bars > Transport commands. Transport functions
operate on the current Audio File.
The basic transport functions are:
Loop On/Off
- Toggles looping on/off for the currently selected Audio File or montage.
Start of file
/ End of File
- Move the cursor to the beginning or end of the currently selected Audio File.
Skip forward
/ Skip backward
- Skip the cursor forwards or backwards within the currently selected Audio File.
Play
- Begin playback of the current Audio File.
Stop
- Stop playback of the current Audio File. A second click moves the cursor to the
beginning of the last start position. A further click returns the cursor to the start of the
file.
Record
- Opens the recording window from which you can start recording.
WaveLab 7
22
Using the interface
Additional transport functions such as start, skip and stopping playback options are also
available from the transport command bar. In WaveLab additional playback speed and
jog/shuttle shortcuts are also provided.
For an explanation of each parameter and interface feature, click on , or the 'What's this?'
question mark icon. For more information see Getting Help
Related topics
Playback speed
Recording Dialog
Command bars
3.16
Value editing
At various places in WaveLab, numerical values can be edited using a combination of text
fields and spin controls.
These values are sometimes made of several parts, for example, 12 mn 30 sec 120 ms. Each
value can be edited using the following methods:
With the value selected, type a new value.
Use the up and down arrow keys to change the value by one unit at a time.
Use the page up and page down keys to change the value by several units.
Use the home and end keys to jump to the maximum and minimum values.
Use the left and right arrow keys to move from one part to another.
Click on the small button arrows (the spin controls), to change the value.
Move the mouse cursor over the desired section. Now use the mouse wheel to change
the value, without clicking. The hovered section will be highlighted when the wheel
spins.
Move the mouse cursor over the part you wish to change. Click and drag up and down
to change the value.
Tip: Right clicking on the edit control may display a context menu, where additional functions
are available.
Related topics
Sliders
WaveLab 7
3.17 Workspaces
3.17
23
Workspaces
A Workspace is a window that provides an editing and playback environment for a particular
audio document type. Each type of Workspace presents the functions related to the specific
file types it is made for; this reduces clutter in the user interface.
In WaveLab there is a Workspace for each main type of file to edit:
Audio File Workspace - for viewing and editing Audio Files. See Audio File editing
Audio Montage Workspace - for assembling and editing audio montages. See
Audio Montages
Batch Processing - allows you to process a list of Audio Files with offline effects,
VST-plug-ins and Master Section presets. Each file is processed and then outputted
to a folder of your choice. You can run batches repeatedly if required. See Batch
Processing.
Control Window - for hosting and organizing tool windows (e.g. meters), especially
in a multi-monitor setup. You can choose not to use it if you do not find it convenient,
since removing the Control Window does not remove any features of WaveLab. See
Control Window.
Podcast Workspace - for preparing and uploading Podcasts. See Podcasts
A Workspace is highly customizable, to match your workflow, experience and screen setups
(which may vary from a studio-based multi-screen DAW to a single-screen laptop on the
road). A Workspace can appear in a wide variety of styles, from a simple window with a
single menu in its most uncluttered form, to a sophisticated arrangement of Command bars,
tool windows, Tab groups and active meters.To meet the varied needs of users, custom
layouts can be saved (using Global > General window layout > Save as...) and restored
from a menu or shortcut. When a file is opened from a given Workspace, it is added to the
active tab group of this Workspace.If a file is opened from the application Workspace, a new
Workspace is created for it. You can have several instances of the same Workspace type
open simultaneously (for example, you could have two Audio File Workspaces open with
different layouts). However, for performance reasons it is generally better to have just one
instance of a Workspace type open at a time. You can drag files between Workspaces if
they both share compatible formats. For example, you can drag an Audio File from the Audio
File Workspace and drop it into the Audio Montage Workspace by using its tab bar or its
document button
(this is located on the status bar at the bottom right of the Workspace).
For more information on using shortcuts to speed up your workflow in different Workspaces
see Dragging operations and Tab Groups.
Elements of a Workspace
Each Workspace is comprised of:
A Menu bar. Each Workspace has a different Menu bar, but certain menus are
shared among all Workspaces and each menu can be customized in various ways.
The Workspace menu has a sub-menu to show/hide the available Command bars and
tool windows. Alternatively, you can right-click in the menu (Windows) or caption bar
(Mac) area to access the Peripheral Windows Context menu.
WaveLab 7
24
Using the interface
One or more Command bars, for quick access to functions via buttons. Command
bars can be customized extensively. See Customize Commands.
Tab groups, to host the document(s) to edit. This is a central part of the Workspace:
you can reorder the tab bar, move it to another Workspace, create a new empty document, display the document filepath and access other functions by right-clicking. See
Tab Groups.
A set of Specific tool windows. The specific tools offered vary according to the
Workspace; their display can be turned on or off individually, and the windows can float
or be docked. See Specific tool windows.
A set of Shared tool windows. The shared tools offered vary according to the
Workspace; their display can be turned on or off individually, and the windows can
float or be docked. See Shared tool windows.
Tip: To switch easily between different Workspaces use the floating Switcher window.
Related topics
Audio File editing
Audio Montages
Podcasts
Control Window
Batch Processing
Customize Commands
Specific tool windows
Shared tool windows
Command bars
Tab Groups
Docking windows
Switcher window
3.18
Zooming and scrolling
In WaveLab you can use several mouse and keyboard shortcuts for scrolling and zooming in
the Audio File and Audio Montage Workspaces.
Scrolling with the Mousewheel
With the cursor in the wave window you can scroll the view horizontally using the mouse
wheel.
Zooming with the Mousewheel
WaveLab 7
3.18 Zooming and scrolling
25
With the cursor in the wave window hold down [Ctrl]/[Command] while rotating the
mouse wheel. The view will zoom horizontally; if you hold down [Shift] the view will
zoom vertically.
Activating the zoom tool
Activate the zoom tool by holding down [Ctrl]/[Command] and click on the waveform
( [Ctrl]/[Command] must be pressed first).
Zooming with the Mouse
Holding your cursor over the Time Ruler and moving the mouse up and down also zooms
the view horizontally. Hold down the [Shift] key to do the same thing while maintaining
the edit cursor in the same position.
Zoom by dragging the thumb edges of the scroll bars in the Audio File and Montage
windows.
Zoom by acting on the wheel controls in the bottom right corners of the Audio File and
Montage windows, by click and drag or using the mouse wheel.
Zoom and scrolling can be undone or redone by the View > Navigate backwards/-
forwards commands.
Changing the Zoom level
you can make quick changes to the zoom level using the View All
or Zoom In
buttons in the control bar. Scrubbing the vertical or horizontal Zoom Wheel (located
in the bottom right hand corner of Main wave window) also alters the zoom level.
Related topics
Shortcut system
WaveLab 7
26
Using the interface
WaveLab 7
Chapter 4
WaveLab Concepts
WaveLab is an incredibly powerful tool and has many features which can be used for a wide
variety of audio editing, mastering and mixing purposes. This section provides you with links
to some of the main concepts used throughout WaveLab. Understanding these concepts
can help you to get the most out of WaveLab.
Related topics
Features Overview
Analysis
Authoring CDs and DVDs
Markers
Metering
Offline processing
Presets
Rendering
Scripting
The Spectrum display
Spectrum editor
About Regular Expressions
4.1
Features Overview
WaveLab 7 Pro - Audio Editing and Mastering Suite
WaveLab 7 Pro is the all-in-one solution for professional mastering, high resolution multichannel audio editing, audio restoration, sample design, radio broadcast and podcasting
work, right through to complete CD/DVD-A production. For some time, WaveLab has been
the standard application for digital audio editing and processing due to its outstanding flexibility and pristine audio quality. Version 7 of the application adds a dazzling collection of
28
WaveLab Concepts
features to satisfy the needs of top professionals and audio enthusiasts.
Sample accurate time and spectrum audio editing
Now available for both the Mac and PC platforms, ideally suited to high performance
multi-screen setups
Excellent performance and outstanding audio quality with support for all common bit-
rates: 8-, 16-, 20-, 24- and 32-bit floating point resolution, at up to 384 kHz.
Powerful Audio Montage for simultaneous non-destructive editing across several tracks
Red Book-compatible CD mastering and Audio CD/DVD-A authoring and burning
Comprehensive suite of real-time metering and analysis tools, including global analy-
sis, 3D-spectrum analysis, VU meter, spectroscope, oscilloscope, phasescope and a
powerful Spectrum editor
A large library of plug-ins are provided, including the entire Steinberg collection, Sonnox
audio restoration and batch specific plug-ins.
An unlimited number of audio lanes, with unlimited file size (over 2GB)
Extensive batch file processing and full scripting for professional users
A totally flexible and customizable GUI: store master project custom file sets, save
multiple Workspace layouts and tabs. Menus, keyword commands and MIDI shortcuts
may all be customized.
Suite of offline processors provided, including effect morphing, pitch bend, error detection and correction and high-end DIRAC ©time stretching and pitch correction
Full range of different marker types for looping, CD creation, tagging errors, etc.
Full range of tools: Auto split, Audio File comparison, signal generation, programming
utilities, etc.
Author and publish podcasts directly from within the application
All major Audio File formats are supported, including WAV, AIFF, AU, MP3, MP2, Og-
gVorbis, Windows Media 9, AES-3, RIFF64, Sony Wave64, Raw.
4.2
Analysis
WaveLab provides you with a comprehensive set of tools for analyzing your audio and diagnosing any errors. You can view your Audio File in many different ways using the suite of
audio meters, via its frequency spectrum, or even in three dimensions. There are also several
tools to interrogate any sample of your audio and find any errors or anomalies.In WaveLab
WaveLab 7
4.2 Analysis
29
you can even compare two Audio Files with the Audio file compare tool and view audio in a
Spectrum or Loudness view for greater precision when editing. Below you can find links to
some of these tools used in WaveLab. Most of them can be found in the Analysis menu. The
meters can be found in the Meters menu or via the Workspace > Shared tool windows.
More specialized tools also exist as part of some offline processing dialogs, such as the "Find
current peak level" command in the Change level dialog, or the "Eliminate DC Offset" dialog,
for example.
Related topics
Global analysis
Audio file comparer
3D Frequency Analysis
Loudness distribution
Metering
The Spectrum display
Audio File editing
Offline processing
4.2.1
Global analysis
This dialog allows you to perform advanced analysis on your audio to identify areas with specified properties. It can be used to find problem areas such as glitches or clipped samples,
or just to check general information such as the pitch of a sound.
How it works When you analyze a section of an Audio File, WaveLab scans it and extracts
information which it displays in the dialog. It also "pin-points" sections of the file that meet
specific characteristics, for example, sections being very loud or almost silent. You can then
browse between these points, set markers or zoom in on them.
Types of analysis On most of the tabs, you will find settings determining exactly how the
analysis will be performed. Each tab focuses on a particular analysis area:
Peaks - this tab is for finding individual samples with very high decibel values.
Loudness - this tab is for finding sections that are perceived by the human ear as
louder or weaker in volume. WaveLab uses an accurate method (RMS - Root Mean
Square), to measure a consecutive section of samples and then average their value.
Pitch - this tab is used for finding the exact average pitch of a section of audio. The
method works best on monophonic material (single notes, without chords or harmonies)
and assumes the analyzed section has a relatively stable pitch. As a general rule try to
analyze the sustain portion of a sound, rather than the attack.
Extras - this tab is for informing you about DC offsets and the significant bit resolution
of the file. This can be useful, for example, if you wanted to check whether a 16 bit
file really uses 16 bits (or if it was actually recorded with only 8 bit resolution and then
upscaled to 16 bits).
WaveLab 7
30
WaveLab Concepts
Errors - this tab is to help you find glitches and sections where the audio has clipped
(gone beyond 0 dB).For more control over the analysis, use Error detection and correction. Checking and browsing the results Checking the results on the Pitch and
Extra tabs is simple, since only one value is returned for the whole section of analyzed
audio. For all the other tabs, the analysis methods returns a series of exact points ("hot
points") in the file or section of audio. Use the relevant buttons in each tab to select the
"hot points" you wish to look at in more detail. Using the slider you can then browse
or skip between these points, adding markers or focusing the waveform display at that
particular point in the file.
You can access this dialog in the Audio File Workspace via Analysis > Global Analysis....
For an explanation of each parameter and interface feature, click on , or the 'What's this?'
question mark icon. For more information see Getting Help
Related topics
Error detection and correction
3D Frequency Analysis
4.2.2
Audio file comparer
This analysis tool allows you to compare two Audio Files for differences between them. It
can create a "delta file" that contains these differences. It can also drop markers at positions
where differences are found.
This can be useful for:
Judging the effect of using an equalizer by comparing the file before and after. The delta
file will show what was added or removed.
Check the noise added by a processor.
Compare two digitally recorded files to check for dropouts.
Note - Make sure that the two documents you want to compare are open.
You can access this dialog via Analysis > File comparator....
For an explanation of each parameter and interface feature, click on , or the 'What's this?'
question mark icon. For more information see Getting Help
Related topics
4.2.3
3D Frequency Analysis
This function in WaveLab allows you to view a wave file in both the frequency and time
domains. Although a wave display (time domain) tells you a lot about where one sound
starts or ends in a file, for example, it doesn't tell you anything about the timbral contents
of the file. A frequency graph (frequency domain) allows you to investigate the individual
frequency components of an Audio File. With the addition of the time dimension you can
follow these frequencies in your Audio File over time and pick out individual snare hits or
WaveLab 7
4.2 Analysis
31
vocal notes in a song, for example. The graph used in WaveLab is sometimes called a 3DSpectrogram.
Displaying and viewing the graph
You can choose to analyze a selection of audio or an entire file. If you select a stereo recording, a mix of the two channels will be analyzed. Once you have your region selected or no
region (in the case you wish to analyze the whole file) choose Analysis > 3D Frequency
Analysis.... The graph window will appear.
There is a scrub wheel that allows you to rotate the view around and a settings button that
displays the range of frequencies currently displayed. Click on this button to open the settings dialog and edit the frequency range displayed, as well as to access other options.
Tip: The length of the selection affects the accuracy of the analysis. For short selections
the result will be very detailed. For longer selections (over a minute or so) the results are
generally less detailed as the harmonic content may vary between "measuring points", and
as such are not included in the graph. You might for example make a separate analysis of
the attack (beginning) of a sound, since the most drastic variations usually occur there.
Some example uses for 3D Frequency Analysis
The 3d Frequency Analysis graph in WaveLab can be used for many purposes, for example:
to see how the frequency spectrum is distributed in a mix.
as a basis for EQ-ing, so that you know which frequencies to reduce or boost.
to see which parts of the audio spectrum a certain background noise occupies (for
removing by filtering).
for educational purposes - these graphs tell you a lot about how different sounds are
"built".
For detailed spectrum analysis, the 2D Spectrometer remains the best choice, as it provides
more accurate viewing and more options.
Related topics
Frequency range
Metering
4.2.4
Loudness distribution
This dialog allows you to measure the most frequent loudness values found in an Audio File
(this is not the same as average loudness). The graphic peaks found by the analysis represent
these values.
The tool gives an answer to the question: "How often does a given loudness (vertical scale,
in dB) appear in the whole file?". The percentage figure is relative to other peaks. Some
simple examples:
WaveLab 7
32
WaveLab Concepts
1. If, for instance, you have a sine of 0 dB / 2 second followed by a sine of -6 dB /
2 seconds. This means the global audio material has as much 0 dB material as - 6dB
material: you will see 2 peaks (0 / -6 dB), each at 100%.
2. If, for instance, uou have a sine of 0 dB / 1 second followed by a sine of -6 dB / 3
seconds. This means there are 3 times more -6 dB material than 0 dB material. You
will see a peak of about 33% at 0 dB, and another peak of 100% at -6 dB.
This analysis is useful for learning about how the loudness of your music is distributed.
You can access this dialog in the Wave File Workspace via Analysis > Loudness distribution....
For an explanation of each parameter and interface feature, click on , or the 'What's this?'
question mark icon. For more information see Getting Help
Related topics
Loudness
4.3
Authoring CDs and DVDs
WaveLab provides extensive tools for authoring all types of audio and data CDs or DVDs.
Depending on your connected optical hardware you can burn CD-R, CD-RW and DVDR/DVD+R disks. WaveLab allows you to author professional audio CD and DVD-Audio
disks with full control over track indexes, CD-Text, PQ and ISRC/EAN codes etc. You can
validate your disks before burning to make sure they conform to valid CD standards (such
as the Red Book standard) or choose to author using newer formats with CD-Text support
or gapless tracks. When it comes to outputting your final disk you can choose to output
your audio CD as a DDP image or burn it straight to optical media. If you are creating a
DVD-A, you can output to AUDIO TS and VIDEO TS folders or burn a DVD straight from
within WaveLab. You can also burn a data CD or DVD directly from the application or save
them as ISO disk images.
Important note for Mac OSX users
When using the CD-R/DVD-R drive on Apple OSX computers for importing or burning it is
important to note the following. If you insert a optical CD or DVD disk in the drive while the
drive is not selected in WaveLab for import or burning, WaveLab will not be able to "see" the
drive. The disk drive is "taken over" by other applications under Mac OSX and is not seen by
WaveLab when this happens. To avoid this occurring, make sure there is no disk in the drive
when opening any CD window within WaveLab.
Audio CD authoring basics
You can author an audio CD from within both the Audio Files and the Audio Montage
Workspaces. From the Audio Montage Workspace you can additionally create DVD-Audio
disks and you have a more comprehensive set of tools for creating audio CDs and DVDs.
Many of the tools provided in WaveLab also work together in conjunction to enable you to
create your own workflow for audio CD authoring.
WaveLab 7
4.3 Authoring CDs and DVDs
33
Track markers and CD authoring
In WaveLab one of the main concepts to understand about audio CDs is the use of markers to
define tracks, and the breaks between tracks. Each track must at least have a track start and
track end marker. Some of the various authoring tools provided by WaveLab will generate
these track markers for you automatically but you can also manually define, modify and edit
them using the marker window or directly in the main editing window. You can also use other
marker types to determine where track indexes are and to cross fade two tracks together
seamlessly to create a gapless CD. See "CD/DVD-A authoring markers" in Marker types for
more information on the specific function of different markers.
Authoring in the Audio Montage Workspace
In the Audio Montage Workspace you can use the following tools to author your audio disks:
CD window - this window contains a variety of tools for authoring and burning CDs
with a great deal of precision and control. It even has a CD Wizard to create CD tracks
quickly from your montage Clips. This window provides full control over your audio CD.
See CD window for more details.
DVD Audio window - use this window for authoring and burning DVD-Audio disks.
It uses Audio Montage files to create tracks for your DVD-A disk. See DVD-Audio
window for more details.
Marker window - use this window in conjunction with the CD window to edit CD track
names and times. You can also drag markers in the main Audio Montage editing window
to adjust start/end times and double-click on a marker's name to edit its marker/track
name.
Authoring in the Audio File Workspace
In the Audio File Workspace there are also some tools to allow you to create and author
audio CDs, these include:
Basic Audio CD - use this window to quickly create an audio CD from individual Audio
Files. Any track markers you have previously created will be used to define tracks or
WaveLab will automatically define track markers for you for each Audio File if you haven't
created any. If you wish to have more control over your audio CD, you can export your
Basic Audio CD session to the Audio Montage Workspace. You could do this for
example, if you wanted to create a DVD-Audio disk or wanted to add and adjust cross
fading between tracks. See Basic Audio CD window for more details.
Marker window - use this window to add and edit CD track names and times to an
Audio File. You can also drag markers in the main Audio Files editing window to adjust
start/end times and double-click on a marker's name to edit its marker/track name.
Your markers are saved along with Audio Files (unless you deactivate this option in
preferences) and are used by WaveLab for example, if you import the file later to create
a Basic Audio CD.
WaveLab 7
34
WaveLab Concepts
Authoring a data disk
You can also burn data CDs and DVDs using the Data CD/DVD window throughout WaveLab (if you wish to back up all your session files, for example). You can access this window
via Utilities > Data CD/DVD.... You can add any file to a new data CD or dvd at anytime
via the File > Special > Add to DATA CD/DVD function in both the Audio File and Audio
Montage Workspaces. Note that all files referenced by the data disk must be saved before
attempting to create a data CD/DVD. For more information see Data CD/DVD.
Burning your CD/DVD
Once you have compiled an audio CD using any of the tools mentioned you can burn it by
button which opens the Write Audio CD dialog. Here you can choose
choosing the
either the device you wish to burn with or to save the disk as a DDP image. This dialog also
allows you to choose standard options as to how the disk will be burnt. For more information
see Write Audio CD.
As well as saving DDP images you can also burn them from within WaveLab. To burn a DDP
image simply select Utilities > Burn Audio CD form DDP Image.... For more information
see Burn Audio CD from DDP Image.
CD burning preferences
Some preferences for CD burning and DDP image creation are set in Global Preferences.
Select Preferences... > Global preferences > CD Burning tab and use "What's this?"
to get more detailed information on the options available.
Related topics
DDP files
Audio CD Report
Write Audio CD
CD Wizard
Data CD/DVD
CD Text Editor
CD
4.4
Markers
Markers are visible indicators that can be used to save and name specific time positions in an
audio or audio montage file. In WaveLab, markers can be used for adding comments, editing,
synchronizing, defining loops, and defining CD/DVD-A tracks. Markers can be used in pairs
as well as individually to mark regions or places for future reference. Once you have defined
some markers in your file you can quickly move the playhead to a marker during editing, or
select the audio between two markers. Markers can also be used to identify an audio cue,
or the beginning or end of a filter or effect.
WaveLab 7
4.4 Markers
35
About marker types
There are many types of markers, all of which, in addition to visually marking locations in a
file, can be used to assist editing and playback. Some like the Loop and CD Track markers
have a unique function. For information on each type and how to use them see Marker types.
Adding markers
The most common way to create markers is from the Marker window. If this is not visible
make sure that "Markers" is ticked in the menu Workspace > Specific tool windows >
Markers. Add markers by:
Placing a single marker
Play back the wave. When the cursor is at the position where you want a marker:
Press [Insert] on the PC or 'M' on the Mac (there is no Insert key on the Mac) to insert
a generic marker.
Click a marker button on the Marker window toolbar. Tooltips for each type of marker
are shown when hovering the cursor over its button.
Select a marker of a specific type from the Marker Window Insert menu.
Placing a pair of markers
Some markers come in pairs. To create a pair of markers make a selection around the audio
region where you wish to define a start and end:
Click a marker pair button on the Marker window toolbar. The types of marker are shown
when hovering the cursor over each button.
Select "Create region type from selection" from the Marker Window Insert menu, choos-
ing the type of marker pair you wish to use. You need to specify a region for these marker
types to become available.
Some types of markers can be added during recording via the recording dialog. You can
also create a marker by dragging a selection of text from a text application to a Time Ruler.
Moving markers
Once placed, markers can be dragged into a new position in the Waveform windows. If you
hover the mouse cursor over a marker, the exact time position is displayed. Dragging the
marker with the left mouse button held down causes the time display to be updated as you
drag. You can also move a marker by editing its time entry in the Marker window.
Removing markers
In the Waveform window, click on the head of the marker you want to delete. Drag the marker
vertically out of the wave window - a delete symbol is shown as confirmation. You can also
use the "Delete selected markers" function from the Marker Window Functions menu.
WaveLab 7
36
WaveLab Concepts
Using markers for editing and playback
Once you have defined one or more markers in an audio montage or Audio File you can use
them to:
Control playback - you can access various commands to start at, stop at, loop be-
tween and skip markers during playback via the Transport menu. These can also be
accessed from the Transport toolbar.
Define a selection - you can use markers to help you make selections in a waveform.
These can be accessed by various selection commands in the Edit > Select menu.You
can also access it from the Audio Range dialog.
About importing and saving loop markers
There is an important point to consider when importing files with loops into WaveLab. Both
Wave and AIFF file formats can store limited information about markers (e.g. loop points)
in the Audio File, but WaveLab can store much more information (such as extended marker
types and comments) in external ".mrk" files that are independent of file formats. Because
loop markers may be stored in two ways, there is a potential risk for conflict:
When you import a file that has never been used in WaveLab before, and which contains
loops, the loops are "imported" and displayed as loop markers.
When you then save the file in AIFF or Wave format, the loop points are stored, both
as part of the actual file (so that other applications can read them) and in the ".mrk" file
(for WaveLab).
When you open a file that has been used in WaveLab before, loop tags that were orig-
inally in the file, (before you used it in WaveLab) are ignored. Only the loop information
in the ".mrk" file is used.
Using markers in the Audio Montage Workspace
There are some additional marker functions that are specific to the Audio Montage
Workspace which allow you to bind selected markers to individual Clips. These functions
are useful as they allow you to freely move Clips about and perform editing functions without
fear of loosing the exact position of a marker. These additional marker functions are located
in the Marker Window when editing in the Audio Montage Workspace:
Bind selected marker to start of focused clip
Bind selected marker to end of focused clip
Detach selected marker from its associated clip
Bind selected marker to audio samples of focused clip -
Related topics
Marker types
Marker Window
WaveLab 7
4.4 Markers
4.4.1
37
Marker types
Markers have a variety of uses in editing and playback, such as indicating cue points, absolute
time locations, highlighting "problem" sections and for visually separating tracks.WaveLab
provides a set of specialized markers for creating CD/DVD-A tracks, muting or skipping
sections and for use with the Error Correction tool.
Basic markers
Generic markers - these are mainly used for locating certain important positions
and for editing (for selecting all the audio between two points, for example). Generic
markers can be created directly during recording.
Temporary markers - these markers can be used for any purpose, but they only
persist while a file is open, so are "self-clearing" when the file is closed.
CD/DVD-A authoring markers
CD Track start and end markers - these denote where a CD track begins
and ends. They also serve for DVD-A disks. CD/DVD markers must be used as a pair.
CD Track splice markers - a CD track splice is used when a CD track starts just
where another one ends. They also serve for DVD-A disks.
CD Track index markers - these are used to create "index" points in CD tracks.
They also serve for DVD-A disks.
Editing/Navigation markers
Region start and end markers - these markers can be created directly
during recording; they can be used to define start and end points for generic regions.
Editing/Navigation markers must be used as a pair.
Playback start markers - This marker is used to program a playback start point.
Exclusion start and end markers - these let you temporarily silence a certain
section. Sections between Exclusion regions are skipped if this option is activated on
the Transport menu (Skip options > Skip Exclusion regions). In addition, Exclusion
regions can be skipped during file rendering if this option is activated in the Render
dialog. Exclusion markers must be used as a pair.
Loop markers
Loop start and end markers - These are used for defining loop points and
are required to access loop editing functions in the Process menu of the Audio File
Workspace: they are directly connected to the playback Loop mode. These markers
are often useful during editing and for creating loops before transferring a sound to a
sampler. Loop markers must be used as a pair.
WaveLab 7
38
WaveLab Concepts
Error correction markers
These two marker pairs may be placed manually, but their main use is with the Error Detection and Correction tool - see Error detection and correction. You can access this tool by
choosing Workspace > Specific tool windows > Error Correction.
Error start and end markers - these markers are used to highlight errors
such as clicks. They can also be saved in an Audio File Workspace file by choosing the
corresponding preference in Audio file editing prefences.
Correction start and end markers - these markers are used to highlight
corrections done on regions previously marked as errors. They can also be saved in
an Audio File Workspace file by choosing the corresponding preference in Audio file
editing preferences.
Related topics
Markers
Marker Window
Error detection and correction
4.5
Metering
WaveLab contains a variety of audio meters to help in monitoring and analyzing audio.Meters
can be used to monitor audio during playback, rendering, recording and also to analyze a
specific selection of audio. There are seven different audio meters in WaveLab, each with
its own separate window. The meters are accessed via the Meters menu, the Shared Tool
windows menu, or from the Meters control bar.
Monitor Modes
You can choose the audio source and the mode for displaying information in the meters.
You can access the following monitoring functions from the Meters menu or via the Meters
command bar:
Monitor Playback - the meters display the audio output of the Master Section
after the dithering section, unlike the Master Section's own meter.
Monitor Audio Input - the meters display the audio input you have chosen in the
Audio Streaming Settings. This is useful for monitoring audio while recording.
Monitor File Rendering - the meters display what is being written to disk during
file rendering, taking into account Master Section settings, with average, minimum and
maximum peak values computed. After rendering, the meter(s) freeze, and remain frozen
until you refresh or change the monitor mode.
Monitor Edit cursor position - the meters display static information about the
audio beneath the edit cursor. Note that the Master Section settings are not taken into
account in this mode.
WaveLab 7
4.5 Metering
39
Analyze audio selection - this allows you to make a selection and have the
meters display the average values over the selected range as a static display. The
Master Section settings are not taken into account in this mode. When you change the
selection, you need to update the meter displays by selecting
"Refresh selection
analysis" from the Meters menu (or by clicking the Refresh button on the Meters control
bar).
If you have one of the continuous display modes chosen, you can also select to freeze the
meters at any time using the
"Freeze meters" command.
Using meter windows
There can only be one instance of each Audio Meter. For example, if you dock one meter in a
Workspace, it will be automatically removed from the place where it was previously located.
Audio Meters can appear in the Audio File, Audio Montage Workspaces as well as the Control Window. They can be used:
as a docked window in a Workspace
as a tabbed window in the control window
as an independent floating window. In this mode, it can be useful to make the window
"frameless" from Window > Hide frame, to save screen space. In this case, the whole
menu is accessed by right-clicking.
The axis of most Audio Meters may be rotated, to view the graphics horizontally or vertically.
Some meters can also have their visual style and display parameters customized via their
corresponding settings dialog. This can be accessed through the Functions > Settings...
menu in each meter window, or by using the
icon.
Related topics
VU Meter
Spectroscope
Oscilloscope
Bit Meter
Phasescope
Spectrometer
Wavescope
4.5.1
VU Meter
The vu-meter is used to display the peak and average loudness/decibel level of your Audio
File. It also displays the pan, or the balance between the left and right channels in a stereo
file.
The upper part of the level/pan meter window shows the peak level and average loudness,
in the following way:
WaveLab 7
40
WaveLab Concepts
The Peak Level meters display the peak levels of each channel, graphically and numeri-
cally. By default, the meter segments and numerical peak values are displayed in green
for low levels, yellow for levels between -6dB and -2dB, and red for levels above -2dB.
You can change both the colors and the range boundaries if you wish via the Level/Pan
Meter Settings dialog. This can be accessed through the Functions > Settings...
menu, or by using the
icon.
The VU (Volume Unit) meters measure the average loudness (RMS) of each channel.
These meters have a built-in inertia, evening out loudness variations over a user-defined
time span. If you are monitoring playback or audio input, you will also note two vertical
lines following each VU meter bar, seemingly "trying to reach" the current RMS value.
These lines indicate the average of the most recent minimum RMS values (left line)
and the average of the most recent maximum RMS values (right line). To the left, the
difference between the minimum and maximum average values is displayed (the level
value in brackets) - this gives you an overview of the dynamic range of the audio material.
If you are monitoring real-time audio (playback or input), the maximum peak and loud-
ness values are displayed numerically to the right of the meter bars. Numbers in brackets to the right of the Maximum Peak values indicate the number of successive clips
(0dB signal peaks). Recording levels should be set so that they only rarely clip. If the
master level is set too high, the sound quality and frequency response will be compromised at high recording levels, with unwanted clipping effects. If the level is set too
low, noise levels may be high relative to the main sound being recorded.
Pan meters
The lower part of the window shows the pan (the difference in level between the left and
right channel, only applicable when monitoring stereo audio):
The upper pan meters show the peak level difference between the channels, graphically
and numerically. Note that the pan meters are "two-sided"; the level bars can go to the
left or right, indicating which channel is the loudest. The two sides are shown in different
colors (which can be changed via the Settings dialog as explained previously).
The lower pan meters show the average difference in loudness between the channels,
in a similar way. This gives you a visual indication of whether a stereo recording is
properly centered, for example.
If you are monitoring real-time audio (playback or input), the maximum balance differ-
ence value (peak and loudness) for each channel is displayed numerically to the left and
right of the meter bars. The VU meter can be found in the Meters menu of the Audio
Files and Audio Montage Workspaces.It can be used either as a floating window, or
docked in the Workspace or the Control Window.
Related topics
Metering
4.5.2
Spectroscope
The Spectroscope shows a continuous graphical representation of the frequency spectrum,
analyzed into 60 separate frequency bands, represented as vertical bars. Peak levels are
WaveLab 7
4.5 Metering
41
shown as a short horizontal lines above the corresponding band, indicating recent peak/maximum values. The Spectroscope offers a quick spectrum overview. For a more detailed
analysis of the audio spectrum, use the Spectrometer. The Spectroscope can be found in
the Meters menu of the Audio Files and Audio Montage Workspaces. It can be used either as a floating window, or docked in the Workspace.It can also be docked in the Control
Window.
Related topics
Metering
Spectrometer
4.5.3
Oscilloscope
The Oscilloscope offers a highly magnified view of the waveform around the playback cursor
position.
If you are analyzing a stereo file, the Oscilloscope normally shows the separate levels of
the two channels. However, if you activate the option "Show Sum and Subtraction" on the
Functions menu (or click the +/- icon), the upper half of the Oscilloscope shows the sum of
the two channels and the lower half shows the subtraction.
Making settings
By opening the Settings dialog you can adjust the display colors, and choose to activate
Auto-zoom or not. With Auto-zoom activated, the display is optimized so that the highest
level reaches the top of the display at all times. The Settings dialog can be accessed through
the Functions > Settings... menu, or by using the
icon.
The Oscilloscope can be found in the Meters menu of the Audio Files and Audio Montage
Workspaces. It can be used either as a floating window, or docked in the Workspace.It can
also be docked in the Control Window.
Related topics
Metering
4.5.4
Bit Meter
The Bit Meter shows the resolution or the number of bits used in the digital audio being
monitored. Normally the maximum number of bits in an Audio File is the same as the resolution
of the Audio File (e.g. a 16 bit Audio File shows that up to 16 bits are used), but sometimes
this is not the case.
As soon as you perform any kind of real-time processing on an Audio File, the audio data is
treated at a much higher resolution (32 bit floating point), to allow for pristine audio quality.
Examples of such processing include level adjustments, effects, the mixing of two or more
files, etc. In fact, the only time when a 16 bit file is played back at 16 bit resolution is if
you play it without any fades or effects, and with the Master Faders set to 0.00 (no level
WaveLab 7
42
WaveLab Concepts
adjustment). You can try this out for yourself by playing back a 16 bit Audio File and viewing
the Bit Meter - as soon as you adjust the Master Faders, note that 24 bits are used and the
"inter" indicator is lit (more on this below).
How to read the Bit Meter
The innermost meters (closest to the bit scale) show the number of bits in use. You can
adjust this display in the Settings dialog.
The outer meters are "history" meters, showing how many bits were recently in use. You
can adjust the hold time in the Settings dialog.
The "over" segment indicates clipping, similar to a clip indicator.
If the "below" segment is lit, there are more than 24 bits. The bit meter will show the 24
higher bits, and the "below" segment indicates the existence of extra, lower bits. Note
that audio is always processed with more than 24 bits internally.
If the "inter" segment is lit, this indicates that the audio data cannot really be expressed
on a regular 24 bit scale (there are floating point values "in between" bits, thus the label
"inter"). This is typically the case if you apply effects; thus the "inter" segment allows
you to differentiate processed from non-processed 24 bit PCM files.
When to use the Bit Meter
To check whether dithering is necessary or not. As a rule, if you're playing back or
mixing down to 16 bits, and the Bit Meter shows that more than 16 bits are used, you
should apply dithering.
To see the "actual" resolution of an Audio File. For example, even though a file is in 24
bit format, only 16 bits may be used. Or, a 32 bit file may only use 24 bits (in this case,
the "below" segment would not be lit). For this purpose, the Bit Meter is best used in
"Analyze selection" mode.
To see whether a "zeroed" plug-in still affects your signal, or whether a plug-in uses
16 bit internal processing, or more generally, to detect any signal modifier stage in the
audio chain between reading and playing.
To adjust the Bit Meter settings, select "Settings..." from the Options pop-up menu or by
using the
icon.
The Bit meter can be found in the Meters menu of the Audio Files and Audio Montage
Workspaces. It can be used either as a floating window, or docked in the Workspace or the
Control Window.
Related topics
Metering
Dithering
WaveLab 7
4.5 Metering
4.5.5
43
Phasescope
The Phasescope indicates the phase and amplitude relationship between two stereo channels. It is only really relevant when monitoring stereo audio material.
Reading the Phasescope
It can be interpreted as follows:
A vertical line indicates a perfect mono signal (the left and right channels are the same).
A horizontal line indicates that the left channel is the same as the right, but with an
inverse phase.
A random but roughly elliptical shape indicates a well balanced stereo signal. If the
shape "leans" to the left, there is more energy in the left channel and vice versa (the
extreme case of this is if one side is muted, in which case the Phasescope will show a
straight line, angled 45 degrees to the other side).
A perfect circle indicates a sine wave on one channel, and the same sine wave shifted
by 90 degrees on the other.
Generally, the more you can see a "thread" shape, the more bass there is in the signal;
the more "spray-like" the display, the more high frequencies are in the signal.
Phase Correlation meter
At the bottom of the display, you will find a Phase Correlation meter, which shows the same
information but in a different way:
The green line shows the current phase correlation, while the two red lines show the
recent peak minimum and maximum values, respectively (these are the default colors,
which you can change).
With a mono signal, the meter would show +1, indicating that both channels are per-
fectly in phase.
Similarly, -1 indicates that the two channels are the same, but one is inverted.
Generally, for a "good" mix, the meter should show a value between 0 and +1.
Unlike the main Phasescope, the Phase Correlation meter is also available in "Analyze audio
selection" mode, showing an average value for the selected range.
Changing settings
You can define display colors, peak hold time, and the resolution or number of samples to
display from the Functions > Settings... menu.
The Phasescope meter can be found in the Meters menu of the Audio Files and Audio Montage Workspaces. It can be used either as a floating window, or docked in the Workspace
or the Control Window.
WaveLab 7
44
WaveLab Concepts
Related topics
Metering
4.5.6
Spectrometer
The Spectrometer uses FFT (Fast Fourier Transform) techniques to display a continuous
frequency graph, providing a very precise and detailed real-time frequency analysis.
The current frequency spectrum is shown as a linear graph.
Spectrum "peaks" are shown as a short horizontal lines, indicating recent peak/maxi-
mum values.
Snapshots
"Erase last snapshot" buttons, you can take and erase
By using the "Add snapshot" and
snapshots of the current spectrum. These will be superimposed over the current peak spectrum graph, in a color you can customize, until you click the icon again to take a new snapshot.
One use for this is to check the effects of adding EQ, for example. Up to five snapshots can
be superimposed on the display; the sixth snapshot replaces the earliest one in the display,
and so on. (Don't confuse the order of snapshots with the numbered buttons - these are
Spectrometer presets, see below.)
Zooming
You can adjust the frequency scale and range in the Settings dialog as described below,
but it's also possible to temporarily zoom in on a frequency area of interest. This is done by
clicking and dragging a rectangle in the Spectroscope display. When you release the mouse
button, the display is zoomed in so that the enclosed frequency range fills the window. To
return to full-scale display, select "Zoom-out fully" from the Functions menu, or double-click
anywhere on the display.
Making settings
You can adjust the behavior and display of the meters as desired, and assign up to five sets
of Spectrometer settings to the Preset buttons, for instant access. Open the Settings dialog
by selecting "Settings" from the Functions menu or clicking the
"tool" icon. Note that you
can apply your settings without closing the dialog, by clicking the Apply button.
If you want to store your settings for later use (or assign them to a Preset button), select "Save
as..." from the pop-up menu in the lower part of the dialog, and specify a name for the preset
in the file dialog that appears. Now, you can choose to make the settings instantly available
for selection in the FFT Meter window, by using the "Assign to preset button" submenu on
the pop-up menu.
When you are finished, click OK to close the dialog.
WaveLab 7
4.5 Metering
45
Selecting Spectrometer presets
If you have assigned your settings to the Preset buttons in the Settings dialog, you can quickly
switch between different level scales and display modes, by clicking one of the Preset icons
[1]-[5], or selecting the desired preset from the Options pop-up menu.
Exporting FFT data as ASCII text
When using the Spectrometer in off-line mode ("Monitor Edit cursor Position" or "Analyze
audio election" mode) you can export the displayed FFT data as a text file, by selecting
"Export FFT data as ASCII" from the Options pop-up menu. The resulting text file can then
be imported into applications that allow graph plotting from text files (Microsoft Excel, for
example).
The Spectrometer can be found in the Meters menu of the Audio Files and Audio Montage
Workspaces. It can be used either as a floating window, or docked in the Workspace or the
Control Window.
Related topics
Metering
Spectroscope
4.5.7
Wavescope
The Wavescope meter displays a real-time waveform drawing of the audio signal being monitored.
It can be useful when recording or rendering a file if "Monitor File rendering" mode is active.
Making settings
You can adjust settings for the display via the Wavescope Settings dialog. This can be
accessed via Functions > Settings... menu, or by using the
icon. Here you can set
various color options for the background, grid and waveform display, as well as setting the
waveform rendering speed and vertical zoom. If "Clear waveform when reaching right of
pane" is checked the waveform display is cleared each time the cursor reaches the right end
of the display. If unchecked, the previous waveform is overwritten.
Tip: Wavescope is a useful meter for visualizing audio during recording. The Wavescope
meter can be found in the Meters menu of the Audio Files and Audio Montage Workspaces.
It can be used either as a floating window, or docked in the Workspace or the Control Window.
Related topics
Metering
WaveLab 7
46
4.6
WaveLab Concepts
Offline processing
Offline processes are used for a variety of editing purposes and creative effects. Offline
processing refers to functions that are only performed when saving the file.
"Offline" means the process can't be monitored during playback, either because they require
too much processing power or because they require an analysis pass prior to processing.
Note that WaveLab only writes temporary files when applying an effect, so the original Audio
File is safe. Only when saving the original is the original audio possibly modified.
These offline processes differ to realtime processes (such as listening to effects via the
Master Section for example), which only temporarily render an effect while audio is played
"through" them.
Applying processing
Processing can be applied to a selection or to a whole Audio File. For certain processing
operations processing the entire file is necessary. This will be indicated by the effects respective dialog. If "Process whole file if there is no selection" is selected in the Audio File
editing preferences editing tab, the whole file will automatically be processed if no selection
exists.
To apply processing to some audio, proceed as follows:
1. Make a selection. If the file is in stereo, you can apply processing to either channel or
both, by selecting one channel or both.
2. Select the desired offline process from the Process menu.
3. If a dialog appears, make the appropriate settings. If the dialog uses presets, you can
load one of them to fill out the settings automatically.
4. When you have finished with the settings in the dialog, click the Apply/Paste/Process
button to permanently render the effect to file.
In some cases a status bar dialog is displayed showing the progress of the operation. If you
need to interrupt a long process, click the "Cancel" button on the status bar dialog.
Undo/Redo processing
Even though offline processes appear to alter the file permanently, you can always reinstate
a previous version using WaveLab's "undo" feature. The number of Undo/Redo commands
is limited only by your available hard drive space. Access the Undo and Redo commands via
Edit > Undo or Edit > Redo.
Tips for using Offline Processing
Processing dialogs are non-modal - meaning that they stay open and on screen even after
processing has been applied. This means that you can still playback audio and access undo/redo commands to audition the results of your effect and make any further adjustments to
any settings. You can also use key commands and access any other menu commands while
leaving the offline process dialog open. Remember that using and saving presets when you
have settings you are happy with can also save you time.
WaveLab 7
4.6 Offline processing
47
WaveLab contains a powerful array of offline processing tools including the following:
Change Level
Level envelope
Normalize Level
Silence Generator
Loop Tone Uniformizer
Pitch correction
Time stretching
Loop Tweaker
Effect morphing
Loudness distribution
Loudness normalizer
Pan Normalizer
Pitch bend
Pitch quantize
Related topics
Presets
Rendering
4.6.1
Change Level
This dialog allows you to apply a gain to change the level of an Audio File.
You can also use "Find current peak level" to obtain a report on the peak level of the current
audio selection (or the peak level in the whole file, if "Process whole file if there is no selection"
is selected in the preferences). This can be useful if you wish to calculate how much you can
increase the overall gain of a file without introducing clipping (exceeding 0dB), for example.
To change the level, enter the desired gain and click Apply.
You can access this dialog by choosing Process > Change level... in the Audio File
Workspace.
For an explanation of each parameter and interface feature, click on , or the 'What's this?'
question mark icon. For more information see Getting Help
Related topics
Audio File editing
Value editing
WaveLab 7
48
WaveLab Concepts
4.6.2
Level envelope
This dialog allows you to create a volume envelope which can be applied to a selected range
or a whole Audio File. This could be useful if you need to even-out loud and quiet parts, for
example.
You can edit the envelope by:
Double clicking on the line to add a point: double click on a point to remove it.
Selecting multiple points (using [Shift] click) allows you to move the selection as a
group.
You can also use the controls to delete or reset points in the envelope. Use the envelope
smoothing button to toggle the envelope points between a straight (polygonal) line or a
curved path.
Click Apply to apply the envelope to the audio selection or file.
You can access this dialog in the Audio File Workspace via Process > Level envelope....
For an explanation of each parameter and interface feature, click on , or the 'What's this?'
question mark icon. For more information see Getting Help
Related topics
Audio File editing
Adjusting Envelopes
4.6.3
Normalize Level
This dialog allows you to change the peak level of your Audio File.
Enter the desired peak level (in dB) that you wish the audio selection to have. You can also
use "Find current peak level" to obtain a report on the peak level of the current audio selection
(or the peak level in the whole file, if "Process whole file if there is no selection" is selected
in the preferences). You can choose to apply the same gain to both stereo channels (Stereo
Link) or mix down to a mono file (Mix to Mono) with the assurance that no clipping will occur
when both channels are mixed together.
To normalize the selected audio, enter the desired peak level and click Apply.
You can access this dialog by choosing Process > Level Normalizer... in the Audio File
Workspace.
This function is also available as a batch processing plug-in. You can access it from Batch
Processing Workspace > Plug-ins window > Multipass Plug-ins > Normalizer.
For an explanation of each parameter and interface feature, click on , or the 'What's this?'
question mark icon. For more information see Getting Help
Related topics
Audio File editing
Value editing
WaveLab 7
4.6 Offline processing
4.6.4
49
Silence Generator
This dialog allows you to generate "silence", either by replacing an audio selection, or by
specifying a duration.
You can also specify a cross fade at each end of the silent region, for a smoother transition.
Radio buttons determine where the silent period is placed in the audio.
In WaveLab you can also specify a file to be inserted instead of "true" silence. This can be
useful for example, if you wish to keep the ambience, or background noise of a particular
environment in a recording.
You can access this dialog in the Audio File Workspace via Edit > Silence (advanced)....
For an explanation of each parameter and interface feature, click on , or the 'What's this?'
question mark icon. For more information see Getting Help
Related topics
Silence
4.6.5
Loop Tone Uniformizer
This dialog allows you to create sounds that will loop, from audio that is seemingly "unloopable". These are normally sounds that constantly decay in level or continuously change
in timbre. The Loop Tone Uniformizer applies processing to the sound that evens out changes
in level and timbral characteristics in order for a sound to loop properly. For example, this
could be useful for creating looped samples for a softsynth or hardware sampler.
To use the Loop Tone Uniformizer you need to have a loop defined using a pair of loop markers
. The original length of the loop is not changed.
Uniformizers
This tab allows you to specify the method/s used to even out the sound you wish to loop.
Choose between "Slice mixing" and/or "Chorus smoothing". For a full explanation of how
each of these methods operate use the "What's this?" help function.
For slice mixing, you may need to experiment to see how many slices are needed. Generally
the more slices you use, the more natural the sound will be (up to a certain point).
Pre Cross fade
The Loop Tone Uniformizer also includes the option to cross fade the end of the loop with
the start of the newly processed section so that transition into the newly looped section is
smoother during playback. Use the envelope drag points or value sliders to adjust the cross
fade.
A note about Post Cross fading
If you have used the Loop Tone Uniformizer within a region of an Audio File, the transition
from the end of the loop into the original file in many cases won't be very natural. This can
be fixed as follows:
1. Close the Loop Tone Uniformizer and open the Loop Tweaker.
2. Click on the Cross fade tab and deactivate the Cross fade option (the check box).
3. Click on the Post Cross fade tab and make sure Cross fade is activated.
WaveLab 7
50
WaveLab Concepts
4. Set up the post cross fade parameters and click Apply.
It can also be a useful tip to lock the loop markers after you use this command on a selection
within an Audio File. Once the loop is processed in place, moving the loop markers will upset
playback of the loop.
You can access this dialog in the Audio File Workspace via Process > Loop Tone Uniformizer....
For an explanation of each parameter and interface feature, click on , or the 'What's this?'
question mark icon. For more information see Getting Help
Related topics
Markers
Adjusting Envelopes
4.6.6
Pitch correction
This dialog allows you to detect and change the pitch of a sound without affecting its length.
Amount of Shift - use these controls to find out the current pitch of the audio and if
desired, calculate the required shift to match a specific pitch.
Method - use these controls to adjust the method and quality you wish to use when
processing the pitch change. You can also choose how the length of the sound is
affected by the operation. By default this process will not change the length of the
sound.
This tool could be useful for fixing an off-key vocal note in a live recording, or tuning the pitch
of a kick drum sample to fit a particular song, for example.
You can access this dialog from the Audio File Workspace via Process > Pitch Correction....
Pitch correction is also available as a batch processing plug-in in the Batch Processor
Workspace. In addition, Pitch correction for a Clip is available from the Focused Clip window
(via Edit > Pitch shift...).
Note that for Batch processing and Clip processes, the envelope option is not available.
For an explanation of each parameter and interface feature, click on , or the 'What's this?'
question mark icon. For more information see Getting Help
Related topics
Adjusting Envelopes
4.6.7
Time stretching
This dialog allows you to change the duration of an audio selection (usually without changing
its pitch).
WaveLab 7
4.6 Offline processing
51
You can view exact time information on the original audio selection you wish to stretch and
choose the amount you wish to "stretch" it in seconds, beats per minute or as a percentage.
You can also choose which method WaveLab uses to stretch the audio and the quality/speed
of the processing.
If you select "Use modulation envelope" you can vary the time stretch over time using an
envelope editor that becomes available. When choosing a method, it is useful to experiment
with the different algorithms available to find which one suits your source material the best.
Use "What's this?" to find out more information on each method and determine which one
will produce the best time stretch without introducing unwanted artifacts.
This function is useful if you want to speed up or slow down a recording to match other
material, such as matching the tempo of two drum beats, or fitting an audio track to a section
of video, for example.
Time stretching is also available as a batch processing plug-in in the Batch Processor
Workspace. In addition, Time stretching for a Clip is available from the Focused Clip window.
Note that for batch processing and Clip processing, the modulation envelope option is not
available. You can access this dialog from the Audio File Workspace by choosing Process
> Time stretching....
For an explanation of each parameter and interface feature, click on , or the 'What's this?'
question mark icon. For more information see Getting Help
Related topics
Adjusting Envelopes
4.6.8
Loop Tweaker
This dialog allows you to refine a region of audio to loop seamlessly.
The Loop Tweaker can just be used to "tweak" an existing loop selection so that it loops
perfectly or you can also use it to create a loop from material which does not naturally repeat.
To use the Loop Tweaker you must first have a loop defined using a pair of loop markers
.
The Loop Tweaker consists of the following tabs:
Loop points adjustment
This is a visualization of the beginning and end of the waveform between the loop markers.
You use this dialog to manually refine a loop selection by dragging on the waveform left/right
or using the automatic search buttons to find the nearest "good" loop point. The aim is to
align the waveforms so they meet in the middle at a zero-crossing point with the waveforms
matching as closely as possible, being "in phase". When you adjust your loop start and end
points within the dialog the start and end loop markers in the main waveform window will
adjust accordingly. Note that this movement may or may not be visible depending on the
amount you move the markers and the zoom factor you have selected.
It is helpful to have the transport looped during playback so you can hear the difference when
you adjust the loop markers within the dialog. Use the Display options to adjust how the Loop
Tweaker waveform is visualized. You can also use the temporary memory buttons to capture
a number of different loop "candidates" and audition them one by one. Note that if you are
not using a cross fade or post cross fade you do not need to click Apply when just tweaking
WaveLab 7
52
WaveLab Concepts
loop points. You can also leave this dialog window open and manually adjust the position of
the markers in the main waveform windows if you need to make large adjustments.
Cross fade
This tab allows you to apply a cross fade at the end of a loop by mixing a copy of the beginning
of the loop with it. This can be useful to smooth the transition between the end of a loop and
its beginning - especially when using material that doesn't naturally loop. Use the envelope
drag points or value sliders to adjust the cross fade envelope. Click Apply to process the
cross fade.
Post cross fade
This tab allows you to cross fade the loop back into the audio after the end of the loop. This
is done by mixing a copy of the loop back into the audio. Use the envelope drag points or
value sliders to adjust the cross fade envelope. Click Apply to process the post cross fade.
Using the "Copy" button you can insert multiple copies of the loop into the active Audio File,
creating a smooth audio sequence, since copies will loop without an audible transition.
You can access this dialog by choosing Process > Loop Tweaker....
For an explanation of each parameter and interface feature, click on , or the 'What's this?'
question mark icon. For more information see Getting Help
Related topics
Markers
Adjusting Envelopes
Zero crossing
4.6.9
Effect morphing
This dialog within the Audio File Workspace allows you to gradually mix two audio ranges
that have different effects/processing applied to them.
Effect morphing allows you to smoothly "morph" or blend from one effect to another, or from
an unprocessed audio segment to a processed audio segment. Effect Morphing always
involves two audio ranges. Normally, these are two versions of the same audio range, of
which one is unprocessed and the other processed.
Effect morphing works by using WaveLab's Undo buffer to mix a copy of the processed audio
with the unprocessed version. You can also use any other bit of audio from the application's
clipboard that has the same length as the one you wish to morph with.
To set up a basic effect morph, proceed as follows:
1. Start by making a selection range over the time you wish the effect morphing to take
place.
2. Now process this range using any Master Section effect(s), or use some other off-line
processing. You cannot use processing/effects that alter the length of the selection,
e.g. time stretching.
3. Open the Effect Morphing dialog by choosing Edit>Effect Morphing....
WaveLab 7
4.6 Offline processing
53
4. Adjust your envelope points over time between 0% and 100%. This will determine the
level and direction of the morph. For example, starting at 100% and ending at 0% will
fade out the effect you just applied.
5. Choose "Unprocessed selection" for this example. As mentioned previously you can
also use any audio of the same duration from the clipboard.
6. Click Apply to apply the Effect morphing.
You can access this dialog in the Audio File Workspace via Edit > Effect morphing....
For an explanation of each parameter and interface feature, click on , or the 'What's this?'
question mark icon. For more information see Getting Help
4.6.10 Loudness distribution
This dialog allows you to measure the most frequent loudness values found in an Audio File
(this is not the same as average loudness). The graphic peaks found by the analysis represent
these values.
The tool gives an answer to the question: "How often does a given loudness (vertical scale,
in dB) appear in the whole file?". The percentage figure is relative to other peaks. Some
simple examples:
1. If, for instance, you have a sine of 0 dB / 2 second followed by a sine of -6 dB /
2 seconds. This means the global audio material has as much 0 dB material as - 6dB
material: you will see 2 peaks (0 / -6 dB), each at 100%.
2. If, for instance, uou have a sine of 0 dB / 1 second followed by a sine of -6 dB / 3
seconds. This means there are 3 times more -6 dB material than 0 dB material. You
will see a peak of about 33% at 0 dB, and another peak of 100% at -6 dB.
This analysis is useful for learning about how the loudness of your music is distributed.
You can access this dialog in the Wave File Workspace via Analysis > Loudness distribution....
For an explanation of each parameter and interface feature, click on , or the 'What's this?'
question mark icon. For more information see Getting Help
Related topics
Loudness
4.6.11 Loudness normalizer
This dialog allows you to adjust the loudness of a file. Because it relates to loudness as
opposed to maximum peak level, this tool works quite differently from the Level Normalizer. A
typical application is to specify a loudness, for example -12dB, and the Loudness Normalizer
processes the audio to match this level of loudness.
Like Gain Change, increasing the loudness to a certain value can introduce clipping. To avoid
this occurring, a peak limiter (the Peak Master plug-in) can be used as part of the process.
WaveLab 7
54
WaveLab Concepts
The Loudness Normalizer raises the loudness and limits peaks in the signal at the same time
(if needed), to achieve the target loudness.
In the case of stereo files, both channels are processed independently. This process happens
over several stages; analysis precedes the final rendering. The Loudness Normalizer dialog
gives access to useful statistics about the file and the Loudness distribution tool, and you
can choose to remove any DC offset in the file.
You can access this dialog from the Audio File Workspace via Process > Loudness normalizer....
This function is also available as a batch processing plug-in. You can access it from Batch
Processing Workspace > Plug-ins window > Multipass Plug-ins > Loudness Normalizer.
For an explanation of each parameter and interface feature, click on , or the 'What's this?'
question mark icon. For more information see Getting Help
Related topics
Loudness
DC Offset
Loudness distribution
4.6.12 Pan Normalizer
This dialog allows you to ensure that both channels of a stereo file have the same level or
loudness. Since loudnesss is more important than peak volume in the perception of sound,
this is a powerful tool to get the best possible stereo balance.
This process uses two passes to first analyze the audio and then render any level changes
required.
You must have a stereo selection in a stereo file to apply this process.
You can access this dialog from the Audio File Workspace via Process > Pan Normalizer....
This function is also available as a batch processing plug-in. You can access it from the Batch
Processor Workspace via Plug-ins window > Multipass Plug-ins > Pan Normalizer.
For an explanation of each parameter and interface feature, click on , or the 'What's this?'
question mark icon. For more information see Getting Help
Related topics
4.6.13 Pitch bend
This dialog allows you to change the pitch of a sound over time. Note that changing the pitch
using Pitch bend will affect its duration unless length preservation is activated.
Using an envelope you can 'draw' the curve you wish the pitch to follow. The pitch offset is
displayed along the vertical ruler of the envelope and the range the envelope effects can be
adjusted using the spin control. Positive pitch values produce sounds with a higher pitch and
of shorter length, negative values produce sounds with a lower pitch and of longer length.
WaveLab 7
4.6 Offline processing
55
If length preservation is activated, you can choose the algorithm that is used to perform the
pitch bend operation. Depending on the type of audio material you are processing, choose
the appropriate mode. For more information on the different modes, use the "What's This?"
tool. You can also adjust the quality used when processing the pitch bend. The quality setting
and the selected mode will affect the processing time for this effect.
This function could be used for creating the classic 'tape stop' effect, or for blending the
tempo/pitch of one track into another, for example.
You can access this dialog from the Audio File Workspace via Process > Pitch bend....
For an explanation of each parameter and interface feature, click on , or the 'What's this?'
question mark icon. For more information see Getting Help
Related topics
Adjusting Envelopes
4.6.14 Pitch quantize
This dialog allows you to correct the pitch of an Audio File.
The musical notes in the audio selection are quantized to the nearest semitone. Pitch quantize works best on recordings that have a single fundamental frequency, such as voice or
single instruments. It can be useful for 're-tuning' the pitch of an imperfect recorded vocal
performance, for example.
The dialog allows you to choose the reference frequency (normally 440 Hz) and the time
taken for the pitch correction to reach the nearest semitone. An explanation of when and
how to adjust the Slur time is given using the 'What's this?' tooltips.
You can also choose to preserve the formants of the original material. Choosing this option
can sometimes help to produce a more realistic result when correcting the pitch of vocals or
acoustic instrument sounds.
You can access this dialog from the Audio File Workspace via Process > Pitch quantizing....
For an explanation of each parameter and interface feature, click on , or the 'What's this?'
question mark icon. For more information see Getting Help
Related topics
Adjusting Envelopes
Formant
4.6.15 Presets
WaveLab's powerful preset system allows you to create your own presets to store commonly
used settings. They are available every time you open WaveLab. Presets can be saved for
many parameters such as plug-in settings, Audio File Formats or File Attributes, for example.
You can access the Presets pop-up menu wherever you see one of these icons:
or
.
Presets are saved as local files on your hard drive, allowing you to conveniently back-up or
WaveLab 7
56
WaveLab Concepts
copy them for use on another computer.They are also useful when used in conjunction with
batch conversions and Scripting.
Working with Presets
When working with Presets you save/edit and load them from their own pop-up menu. Depending on the context, the available functions sometimes vary but generally you can:
Save/Save As... - creates a new Preset file by saving the currently selected settings
to your hard disk.
Explore presets... - opens the folder where any existing Presets are stored. This
allows you to delete, duplicate and organize your settings into sub-folders using the
flexibility of the operating system's file browser.
Restore factory settings - restores the current settings to the factory default.
Preset list - select a Preset from the list of those currently available.
Store/restore temporary presets - when available, use the temporary slots provided
to save your settings for the duration of the session. This is useful if you want to quickly
test and compare different settings. Select the option "Store temporarily" and from the
submenu select the number under which you want to save (#1 - #5). To quickly load the
saved settings again, select the corresponding number from the "Restore" submenu.
Define shortcut for the current setting - when available, this allows you to assign a
shortcut to the current preset using either a key shortcut, keyword or via a MIDI trigger.
For example, if you have a preset to normalize audio at -0.1 dB and you assign it a
key shortcut then everytime you execute the shortcut, the preset is applied to the audio
selection, without the need to open the dialog.
VST-2 Presets
VST plug-ins have their own preset handling. When you click the preset button for this type
of effect the following options are available:
Load/Save Bank - this allows you to load and save complete sets of presets. The file
format is compatible with Cubase.
Load/Save Default Bank - this loads the default bank of presets, or saves the current
set of presets as the default bank.
Load/Save Effect - this loads or saves one preset at a time. The file format is again
compatible with Cubase.
Edit name of current program - allows you to define or edit the name for the currently
selected preset.
Preset list - select a Preset from the list of those currently available.
VST-3 plugins have a simplified list of options.
WaveLab 7
4.6 Offline processing
57
About Preset files
Each preset is stored as an individual file inside WaveLab's main presets folder. This makes
it easy to back them up or copy them to another computer. You can change the location of
this main Presets folder via Global Preferences > Setting location. You have the choice
of the following locations:
a standardized location that can be accessed by all users of the computer. That is, all
users will share the same settings.
a standardized location accessed by the current user (the default). That is, each user
has his/her own private settings.
any specific location of your choice. This allows you to customize it for your own re-
quirements.
a location relative to the application. This allows you to use the application from an
USB dongle.
Default locations - By default the main Presets folder is found at:
Windows
7\Presets
7 - C:\Users\[User Name]\AppData\Roaming\Steinberg\WaveLab
Windows XP - C:\Documents
Data\Steinberg\WaveLab 7\Presets
and
Settings\[User
Name]\Application
Mac OS X - root/[User Name]/Library/Prefences/WaveLab 7/Presets/
You can also find this folder by using the "Open active settings folder" link in the preferences
pane. This opens your file browser to wherever the main Presets folder is currently located.
Inside this Presets folder each type of preset file has its own folder.
For example, all the presets for the Normalizer are stored within C:\Users\[User
Name]\AppData\Roaming\Steinberg\WaveLab 7\Presets\Normalizer\
on Windows
7. When you open the Normalizer dialog and choose a preset via the pop-up menu, the
files in this directory will appear as available presets. The reason each preset type has its
own dedicated folder is so that WaveLab can locate them automatically when you open the
preset pop-up menu.
You can organize your presets into sub-folders so they appear as sub-menus. This can be
useful if you wish to organize a lot of presets into your own categories. You can continue to
nest folders inside one another to build a standard tree structured menu system. Below is
an example of how this looks for a set of window layout presets:
WaveLab 7
58
WaveLab Concepts
Related topics
Scripting
4.6.16 Rendering
To Render effects into a temporary or final file, you use the Render function (note that the
"Save" function from the File menu does not Render!). The Render function is part of the
Master Section and in other applications is sometimes referred to as "bouncing down" or
"mixing down".
Rendering a file "prints" all audible settings and effects that the audio is being routed through
in the Master section, to the resultant Audio File. This includes any plug-ins, the level of the
faders and any dithering you have set in the Master Section. In WaveLab you normally use
the Render function to:
Mix down a file in a Wave window to a new Audio File, complete with Master Section
effects, dithering and other settings.
Mix down a complete Audio Montage to an Audio File.
"Apply" all settings in the Master Section to a file in a Wave window.
When you render a file you can choose the format of the new Audio File and whether you
wish to create a new file or render the file in place. When the file is rendering you will
see a progress bar in the status bar.In WaveLab you can also view this Progress bar in the
Background tasks window (a shared tool window that can be set to float independently).This
allows you to monitor the progress of rendering, pause and if necessary cancel the rendering
process.
Rendering tips
When you are new to the rendering process in WaveLab there are a few things to note:
when rendering a file with the default option "Bypass Master Section on resulting Audio
File" selected in the Render dialog, the Master Section will be bypassed completely
when the new file has finished rendering. If this option is not selected you will hear the
Master Section effects being played back on top of the newly rendered effects. You can
check if the Master Section has been bypassed by checking the status of the
"Play
through Master Section" button, which is located at the bottom right hand corner of the
status bar.
the Master Section's
"Bypass" switch affects playback only. So even if you can't
hear effects when you are playing back your audio, any applied effects are still rendered.
the
"Effect on/off" switch for each individual plug-in affects both playback and
Rendering.
if you are working with an Audio File/montage that contains lots of effects and/or tracks
and you experience playback problems, it can be useful to mix down a copy of your
WaveLab 7
4.7 Presets
59
montage/audio file to free up some processing power. You can then continue editing
the resultant file with the effects rendered. Remember to save a copy of your session
before doing this so you can go back and edit any levels or effects if you need to.
For more information about choosing settings when rendering see the Render Wave window
and Render Montage window. For more information on applying effects see the Master
Section.
Related topics
Render Wave window
Render Montage window
Master Section
Audio Plug-ins
4.7
Presets
WaveLab's powerful preset system allows you to create your own presets to store commonly
used settings. They are available every time you open WaveLab. Presets can be saved for
many parameters such as plug-in settings, Audio File Formats or File Attributes, for example.
You can access the Presets pop-up menu wherever you see one of these icons:
or
.
Presets are saved as local files on your hard drive, allowing you to conveniently back-up or
copy them for use on another computer.They are also useful when used in conjunction with
batch conversions and Scripting.
Working with Presets
When working with Presets you save/edit and load them from their own pop-up menu. Depending on the context, the available functions sometimes vary but generally you can:
Save/Save As... - creates a new Preset file by saving the currently selected settings
to your hard disk.
Explore presets... - opens the folder where any existing Presets are stored. This
allows you to delete, duplicate and organize your settings into sub-folders using the
flexibility of the operating system's file browser.
Restore factory settings - restores the current settings to the factory default.
Preset list - select a Preset from the list of those currently available.
Store/restore temporary presets - when available, use the temporary slots provided
to save your settings for the duration of the session. This is useful if you want to quickly
test and compare different settings. Select the option "Store temporarily" and from the
submenu select the number under which you want to save (#1 - #5). To quickly load the
saved settings again, select the corresponding number from the "Restore" submenu.
WaveLab 7
60
WaveLab Concepts
Define shortcut for the current setting - when available, this allows you to assign a
shortcut to the current preset using either a key shortcut, keyword or via a MIDI trigger.
For example, if you have a preset to normalize audio at -0.1 dB and you assign it a
key shortcut then everytime you execute the shortcut, the preset is applied to the audio
selection, without the need to open the dialog.
VST-2 Presets
VST plug-ins have their own preset handling. When you click the preset button for this type
of effect the following options are available:
Load/Save Bank - this allows you to load and save complete sets of presets. The file
format is compatible with Cubase.
Load/Save Default Bank - this loads the default bank of presets, or saves the current
set of presets as the default bank.
Load/Save Effect - this loads or saves one preset at a time. The file format is again
compatible with Cubase.
Edit name of current program - allows you to define or edit the name for the currently
selected preset.
Preset list - select a Preset from the list of those currently available.
VST-3 plugins have a simplified list of options.
About Preset files
Each preset is stored as an individual file inside WaveLab's main presets folder. This makes
it easy to back them up or copy them to another computer. You can change the location of
this main Presets folder via Global Preferences > Setting location. You have the choice
of the following locations:
a standardized location that can be accessed by all users of the computer. That is, all
users will share the same settings.
a standardized location accessed by the current user (the default). That is, each user
has his/her own private settings.
any specific location of your choice. This allows you to customize it for your own re-
quirements.
a location relative to the application. This allows you to use the application from an
USB dongle.
Default locations - By default the main Presets folder is found at:
Windows
7\Presets
7 - C:\Users\[User Name]\AppData\Roaming\Steinberg\WaveLab
WaveLab 7
4.8 Rendering
Windows XP - C:\Documents
Data\Steinberg\WaveLab 7\Presets
61
and
Settings\[User
Name]\Application
Mac OS X - root/[User Name]/Library/Prefences/WaveLab 7/Presets/
You can also find this folder by using the "Open active settings folder" link in the preferences
pane. This opens your file browser to wherever the main Presets folder is currently located.
Inside this Presets folder each type of preset file has its own folder.
For example, all the presets for the Normalizer are stored within C:\Users\[User
Name]\AppData\Roaming\Steinberg\WaveLab 7\Presets\Normalizer\
on Windows
7. When you open the Normalizer dialog and choose a preset via the pop-up menu, the
files in this directory will appear as available presets. The reason each preset type has its
own dedicated folder is so that WaveLab can locate them automatically when you open the
preset pop-up menu.
You can organize your presets into sub-folders so they appear as sub-menus. This can be
useful if you wish to organize a lot of presets into your own categories. You can continue to
nest folders inside one another to build a standard tree structured menu system. Below is
an example of how this looks for a set of window layout presets:
Related topics
Scripting
4.8
Rendering
To Render effects into a temporary or final file, you use the Render function (note that the
"Save" function from the File menu does not Render!). The Render function is part of the
Master Section and in other applications is sometimes referred to as "bouncing down" or
"mixing down".
Rendering a file "prints" all audible settings and effects that the audio is being routed through
in the Master section, to the resultant Audio File. This includes any plug-ins, the level of the
faders and any dithering you have set in the Master Section. In WaveLab you normally use
the Render function to:
Mix down a file in a Wave window to a new Audio File, complete with Master Section
effects, dithering and other settings.
Mix down a complete Audio Montage to an Audio File.
WaveLab 7
62
WaveLab Concepts
"Apply" all settings in the Master Section to a file in a Wave window.
When you render a file you can choose the format of the new Audio File and whether you
wish to create a new file or render the file in place. When the file is rendering you will
see a progress bar in the status bar.In WaveLab you can also view this Progress bar in the
Background tasks window (a shared tool window that can be set to float independently).This
allows you to monitor the progress of rendering, pause and if necessary cancel the rendering
process.
Rendering tips
When you are new to the rendering process in WaveLab there are a few things to note:
when rendering a file with the default option "Bypass Master Section on resulting Audio
File" selected in the Render dialog, the Master Section will be bypassed completely
when the new file has finished rendering. If this option is not selected you will hear the
Master Section effects being played back on top of the newly rendered effects. You can
"Play
check if the Master Section has been bypassed by checking the status of the
through Master Section" button, which is located at the bottom right hand corner of the
status bar.
the Master Section's
"Bypass" switch affects playback only. So even if you can't
hear effects when you are playing back your audio, any applied effects are still rendered.
the
"Effect on/off" switch for each individual plug-in affects both playback and
Rendering.
if you are working with an Audio File/montage that contains lots of effects and/or tracks
and you experience playback problems, it can be useful to mix down a copy of your
montage/audio file to free up some processing power. You can then continue editing
the resultant file with the effects rendered. Remember to save a copy of your session
before doing this so you can go back and edit any levels or effects if you need to.
For more information about choosing settings when rendering see the Render Wave window
and Render Montage window. For more information on applying effects see the Master
Section.
Related topics
Render Wave window
Render Montage window
Master Section
Audio Plug-ins
4.9
Scripting
WaveLab contains a powerful scripting language to help advanced users create their own
scripts to automate tasks. Using basic scripts can be useful for automating repetitive editing
WaveLab 7
4.9 Scripting
63
tasks such as trimming and cropping a file at specific times, for example. You can write
scripts that perform other basic editing commands, apply offline processing, place markers,
and display information about the active file. You can script commands to edit the active
Audio File or the active Audio Montage. If you have some experience of programming with
modern scripting languages you should have no problem writing utility scripts for WaveLab.
The WaveLab Scripting language is based on ECMAScript, with the addition of WaveLab
specific commands. If you have had any experience with Javascript, Jscript or Actionscript
the code syntax will be familiar to you as they are all based on ECMAScript too. If not, there
is a large amount of teaching and reference material available online. A Javascript reference
such as www.w3schools.com for example, or a book like JavaScript: The Definitive
Guide are good places to start.
To begin exploring the WaveLab specific functions available see WaveLab Scripting Language. For a broader look at the complete subset of commands available see ECMAScript
Reference.
Getting started
To write and execute a script:
1. Open the Script window in either the Audio File or Audio Montage Workspaces.
2. Type your script directly in the Script window or copy and paste it from an external text
editor.
3. Run the script by clicking
Execute Script or selecting it from the Functions menu.
The script will run if there are no syntax errors. Any errors will appear in a dialog box to help
you debug them.
Tip: There are several free utility text editors that are context sensitive. This means that they
can color and highlight parts of your code to make it more readable. If you use one of these
for writing and editing your scripts, choose Javascript as the editing language and/or save
the file with a .js (Javascript) extension.
Using the Log window
It is a good idea to begin by writing some simple scripts that output some text to the Log
window. The Log window is part of the Control Window and can be accessed via Utilities
> Log. To output a simple text message:
1. Open the Log window.
2. Open an Audio File in the Audio File Workspace.
3. Copy and paste the following script into the Script window and try executing it.
//output the number of samples in the active wave as text in the log window.
logWindow.printInfo("This file has " + activeWave.size() + " samples");
Note: Any lines of a script that begin with two forward slashes // are comments, and are
ignored when the script is executed. For commenting multiple lines you can use the following
syntax:
/* This a long comment,
that wraps onto more than one line. */
WaveLab 7
64
WaveLab Concepts
Scripting window contexts
It is important to note that certain scripting commands are only available in the Audio File
Workspace and others only in the Audio Montage Workspace. Others are "global", meaning
you can use them in either Workspace. To begin exploring the WaveLab Scripting Language
in more detail see the WaveLab Scripting Language.
A basic scripting example
Below is a basic scripting example which uses some WaveLab scripting functions to perform
some simple operations on an Audio File in the Audio File Workspace. The script first displays
information about the Audio File, fades in the start and fades out the end of the file, and then
adds ten markers at 1 second intervals. Examine it line by line and read the comments for
each operation to see how it works.
/*
-
To run this script:
open an Audio File that is at least 10 seconds long
open the Log window via the Utilities menu
copy and paste this script into the Script window
choose Functions > Execute Script */
//clear the log window
logWindow.clear();
//show some information about the active wave file in the log window
logWindow.printInfo("This wave file has " + activeWave.size() + " samples");
logWindow.printInfo("Its sample rate is " + activeWave.sampleRate());
logWindow.printInfo("It has " +activeWave.numChannels() + " channels");
//Work out how long the file is in seconds and round to a whole number
var lengthSecs = activeWave.size() / activeWave.sampleRate();
logWindow.printInfo("This wave file is " + lengthSecs + " seconds long");
//Select the first 10 seconds of the file
activeWave.select(0, 10 * activeWave.sampleRate());
//Trim the file to 10 seconds
activeWave.trim();
//select the first two seconds of the file and fade it in
activeWave.select(0, 2 * activeWave.sampleRate()); //sample rate multiplied by tw
o = 2 seconds
activeWave.fadeIn(linear);
//select the last two seconds of the file and fade it out
activeWave.select(activeWave.size() - (2 * activeWave.sampleRate()), activeWave.s
ize());
activeWave.fadeOut(linear);
//loop through 10 times and add a marker each second
for (i = 1; i <= 10; i++)
{
//work out next cursor time
var nextCursorPosition = i * activeWave.sampleRate();
//set cursor position forwards by a second
activeWave.setCursorPosition(nextCursorPosition);
//add a generic marker at the next cursor position and give it a name and comme
nt
WaveLab 7
4.9 Scripting
65
activeWave.addMarker(generic, "Marker "+i, "A comment for marker "+i);
//write some information about the new marker
var cursorTimeSecs = nextCursorPosition/activeWave.sampleRate();
logWindow.printInfo("created a new marker at " + cursorTimeSecs + " seconds");
}
Related topics
WaveLab Scripting Language
ECMAScript Reference
Scripting window (Audio File Workspace)
Scripting window (Audio Montage Workspace)
Control Window
4.9.1
WaveLab Scripting Language
WaveLab's scripting language varies slightly between Workspaces. This Help entry briefly
introduces you to the commands that are available in each Workspace and to those that are
global.
Global Commands
These are scripting commands that are available in all scripting contexts.
logWindow
Object representing the Log window, where you can output messages to. If the log window
is not open, all functions are ignored (as they are not visible anyway).
Functions
printInfo(messageString) - Outputs an informal message to the Log window. The message argument must be typed as a String - i.e. between inverted commas.
Example:
logWindow.printInfo("start");
printWarning(messageString) - Outputs a warning message to the Log window.
printError(messageString) - Outputs an error message to the Log window.
clear() - Clears the log window.
Example:
logWindow.clear();
WaveLab 7
66
WaveLab Concepts
Audio File Scripting Commands
Objects
activeWave
Object representing the active Audio File.
Many functions make use of presets as an argument. For example, the normalize() function
accepts a preset as an argument:
activeWave.normalize("myPreset");
The advantage is that you don't need to specify many parameters in your scripts, instead you
can use the corresponding dialog to define the settings of a particular function, and then
save them as a preset file. Since each type of preset is unique, you don't need to specify a
full path name to the preset. Only specifying the preset name is enough, there is no need for
its extension. Since presets can also be stored in a sub-folder, you can use a relative path
name if necessary.
So if for example, you wanted to normalize a file using a preset you had defined in the Normalize level dialog (and saved in a sub-folder as a preset), it would look like this:
activeWave.normalize("mySubFolder/myPreset");
All audio processing functions operate on the selected audio range. If there is no selection
the whole file range will be processed (if that editing option is selected in Audio File editing
preferences). If the cursor or selection is in one channel only, only that channel is processed.
In other words, it operates exactly the same as if you were applying a process from within a
dialog.
All positions and sizes are measured in sample units. If you wish to specify a time range in
another unit you will need to convert it from samples.
var twoSeconds = 2 * activeWave.sampleRate();
Functions
size() - Returns the number of samples in the Audio File.
sampleRate() - Returns the sample rate of the Audio File.
numChannels() - Returns the number of channels of the Audio File.
cursorPosition() - Returns the current cursor position (in samples).
setCursorPosition(pos) - Sets the current cursor position at a certain sample location.
selectionStart() - Returns the index of the first selected sample, or -1 if there is no selection.
selectionSize() - Returns the number of selected samples.
select(presetName) - Loads the audio range preset and applies its setting to the active
Audio File.
select(start, size) - Selects a number of samples, starting from a given position.
setCursorChannel(channel) - Sets the cursor position to a new channel, Use leftCh,
rightCh or allCh as arguments.
WaveLab 7
4.9 Scripting
67
addMarker(type, name, comment) - Add a marker at the cursor position. Possible values
for type are:
generic
temporary
cdTrackStart
cdTrackEnd
cdTrackFrontier
cdTrackIndex
loopStart
loopEnd
muteStart
muteEnd
playbackStarter
regionStart
regionEnd
errorStart
errorEnd
correctionStart
correctionEnd
Example:
activeWave.addMarker(generic, "SomeName", "SomeComment");
findNextMarkerPosition(posStartSearch, type) - Searches for the next marker of type,
from a given position. Returns the marker position, if any is found, or -1.
normalize(presetName) - Loads the normalizer preset and applies its setting to an audio
range.
normalizeLoudness(presetName) - Loads the loudness normalizer preset and applies its
setting to an audio range.
normalizePan(presetName) - Loads the pan normalizer preset and applies its setting to
an audio range.
silence(presetName) - Loads the silence preset and applies its setting to an audio range.
timeStretch(presetName) - Loads the time stretch preset and applies its setting to an
audio range.
pitchCorrection(presetName) - Loads the pitch correction preset and applies its setting
to an audio range.
pitchQuantize(presetName) - Loads the pitch quantize preset and applies its setting to
an audio range.
WaveLab 7
68
WaveLab Concepts
changeLevel(dbValue) - Changes the level of the selected audio range.
fadeIn(shape) and fadeOut(shape) - Applies a fade on the selected audio range. shape
can be one of the following:
linear
sinus
squareRoot
sinusoid
log
exp
expp
Example:
activeWave.fadeIn(squareRoot);
levelEnvelope(presetName) - Loads the envelope shape and applies its setting to an
audio range.
morph(presetName) - Loads an effect morphing preset and applies it according to its
settings.
invertPhase() - Inverts the phase of the samples in the audio range.
reverse() - Reverses the order of the samples in the audio range.
cut() - Cuts the selected audio range.
copy() - Copies the selected audio range.
paste() - Pastes audio from the clipboard to the current cursor position.
trim() - Trims the selected audio range.
remove() - Deletes the selected audio range.
removeSmooth() - Deletes the selected audio range and cross fades the resulting regions
together.
mute() - Mutes the selected audio range.
swapChannels() - Swaps stereo channels.
undo() - Undoes the last command.
removeDcOffset() - Removes the DC offset in the audio range.
readSamples(channelIndex, from, numSamples) - Reads a number of samples from a
given cursor position, on a given channel:
Use 0 for the left channel
Use 1 for the right channel
Returns the result in an array. Example:
WaveLab 7
4.9 Scripting
69
buf = activeWave.readSamples(0, 20, 100); // read 100 samples on left channel, fr
om sample index 20
for (i = 0; i < 100; i++)
{
logWindow.printInfo(buf[i]);
}
Audio Montage Scripting Commands
Functions
Preliminary info: the Scripting API is an open project and will evolve according to user requests.
size() - Returns the number of samples in the Audio Montage.
sampleRate() - Returns the sample rate of the Audio Montage.
numChannels() - Returns the number of output channels of the Audio Montage.
numTracks() - Returns the number of tracks of the Audio Montage.
cursorPosition() - Returns the current cursor position (in samples).
setCursorPosition(pos) - Sets the current cursor position at a certain sample location.
selectionStart() - Returns the index of the first selected sample, or -1 if there is no selection.
selectionSize() - Returns the number of selected samples.
select(presetName) - Loads the audio range preset and applies its setting to the active
Audio Montage.
select(start, size) - Selects a number of samples, starting from a given position.
setFocusedTrack(index) - Sets the focused track.
addMarker(type, name, comment) - Add a marker at the cursor position. Possible values
for type are:
generic
temporary
cdTrackStart
cdTrackEnd
cdTrackFrontier
cdTrackIndex
loopStart
loopEnd
muteStart
muteEnd
playbackStarter
regionStart
WaveLab 7
70
WaveLab Concepts
regionEnd
errorStart
errorEnd
correctionStart
correctionEnd
Example:
activeWave.addMarker(generic, "SomeName", "SomeComment");
findNextMarkerPosition(posStartSearch, type) - Searches for the next marker of type,
from a given position. Returns the marker position, if any is found, or -1.
insertMonoTrack(where) - Adds a Mono Audio Track at index 'where'
insertStereoTrack(where) - Adds a Stereo Audio Track at index 'where'
insertClip(iTrack, timePosition, fileName, autoShift) - Creates a Clip from 'fileName',
inserts it in track 'iTrack', on the time line at posision 'timePosition', add possibly shift other
Clips to make room according to parameter 'autoShift' autoShift can be one of the following:
autoShiftNo
autoShiftTrack
autoShiftGlobal
This function returns the ID of first created Clip, or 0.
clipWithName(name) - Returns the ID of first Clip with name 'name', or 0.
clipWithFile(name) - Returns the ID of first Clip that refers to 'fileName', or 0.
firstClip() - Returns the first Montage Clip ID, or 0, if the Montage is empty.
nextClip(clipId) - Returns the ID of the Clip stored after 'clipId', or 0. Clips are not sorted
in any special order. Using both firstClip and nextClip allow to access all Montage Clips.
clipName(clipId) - Returns the name of the Clip identified by 'clipId'
clipPosition(clipId) - Returns the time line position of the Clip identified by 'clipId'
clipSize(clipId) - Returns the size of the Clip identified by 'clipId'
setClipName(clipId, name) - Rename the Clip identified by 'clipId'
setTrackName(index, name) - Rename the Track identified by 'index'
moveClip(clipId, newPos) - Move on the time line the Clip identified by 'clipId'
resizeClip(clipId, qlonglong newSize) - Resize the Clip identified by 'clipId'. The size
will be limited by the Audio File referenced by the Clip.
setClipDefaultFadeIn(clipId) - Sets the default fade-in shape and time for the Clip identified by 'clipId'
setClipDefaultFadeOut(clipId) - Sets the default fade-out shape and time for the Clip
identified by 'clipId'
undo() - Undoes the last command.
WaveLab 7
4.9 Scripting
71
Related topics
ECMAScript Reference
4.9.2
ECMAScript Reference
WaveLab's scripting language is based on the ECMAScript scripting language, as defined
in standard ECMA-262 Microsoft's JScript, Netscape's JavaScript and Adobe's Actionscript
are also based on the ECMAScript standard. If you are not familiar with the ECMAScript
language, there is a large amount of teaching and reference material available online.
This reference page contains a list of all ECMAScript objects, functions and properties supported by the WaveLab scripting system. These are available in any scripting context but are
not WaveLab specific. When scripting for the Audio File Workspace for example, (using the
Scripting window (Audio File Workspace)) there are specific additional functions that allow
you to perform editing commands. For a list of these WaveLab specific scripting commands
and functions see WaveLab Scripting Language.
Tip: Some basic scripting examples are included below so you can see the scripting syntax
in context. These scripts will work if you copy, paste and execute them in a script window.
Supported ECMAScript subset
The Global Object
Values
NaN
Infinity
undefined
Math
Functions
eval(x)
parseInt(string, radix)
parseFloat(string)
isNaN(number)
isFinite(number)
decodeURI(encodedURI)
decodeURIComponent(encodedURIComponent)
encodeURI(uri)
encodeURIComponent(uriComponent)
WaveLab 7
72
WaveLab Concepts
Objects
Object
Function
Array
String
Boolean
Number
Date
RegExp
Error
Examples:
//Test if a value is not a number
var isNumber = isNaN("this is a string");
//Print the result in the log window
logWindow.printInfo(isNumber); //Traces "true" because it is a String
//Convert a string to a number
var numStr = "2.345";
var num = parseFloat(numStr);
//Print the result in the log window
logWindow.printInfo(num);
//Encode a string into an internet valid ASCII String
var str = "a sentence with spaces";
var encodedStr = encodeURI(str);
logWindow.printInfo(encodedStr);
Function Object
Prototypes
toString()
toLocaleString()
valueOf()
hasOwnProperty(V)
isPrototypeOf(V)
propertyIsEnumerable(V)
WaveLab 7
4.9 Scripting
Functions
toString()
apply(thisArg, argArray)
call(thisArg [, arg1 [, arg2, ...]])
Example:
//Create a new custom marker Object
function customMarker(name, comment, timeSecs)
{
this.name=name;
this.comment=comment;
this.timeSecs=timeSecs;
}
//Create a new instance of the custom marker
var myMarker=new customMarker("A custom marker", "My custom marker comments",5);
//Use prototype function to add a new property to it
customMarker.prototype.samples = null;
myMarker.samples = activeWave.sampleRate() * myMarker.timeSecs;
//Trace the results in the log window
logWindow.printInfo(myMarker.name);
logWindow.printInfo(myMarker.samples);
Array Objects
Functions
toString()
toLocaleString()
concat([item1 [, item2 [, ...]]])
join(separator)
pop()
push([item1 [, item2 [, ...]]])
reverse()
shift()
slice(start, end)
sort(comparefn)
splice(start, deleteCount[, item1 [, item2 [, ...]]])
unshift([item1 [, item2 [, ...]]])
Example:
WaveLab 7
73
74
WaveLab Concepts
//Create an empty array
var a = new Array();
//Add some items to it
a.push("first array item");
a.push("next array item", "last array item");
//Print them out in the Log window
logWindow.printInfo(a.toString());
//Call the Array's reverse function
a.reverse();
//View the results in the Log window
logWindow.printInfo(a.toString());
String Objects
Functions
toString()
valueOf()
charAt(pos)
charCodeAt(pos)
concat([string1 [, string2 [, ...]]])
indexOf(searchString ,position)
lastIndexOf(searchString, position)
localeCompare(that)
match(regexp)
replace(searchValue, replaceValue)
search(regexp)
slice(start, end)
split(separator, limit)
substring(start, end)
toLowerCase()
toLocaleLowerCase()
toUpperCase()
toLocaleUpperCase()
Example:
//Create a string variable
var str = new String("WaveLab is a powerful editing tool");
//Make it all upper case
var capsStr = str.toUpperCase();
//View the results in the Log window
logWindow.printInfo(capsStr);
WaveLab 7
4.9 Scripting
Boolean objects
Functions
toString()
valueOf()
Example:
//Test if an equation is true or false
var isTrue = (1 + 1 == 3);
//Convert the Boolean to a String and trace in the Log window
logWindow.printInfo(isTrue.toString());
Number Objects
Functions
toString(radix)
toLocaleString()
toFixed(fractionDigits)
toExponential(fractionDigits)
toPrecision(precision)
Example:
//Convert a number into exponential notation
var num = new Number(13.3714);
//Show the result in the Log window
logWindow.printInfo(num.toExponential());
Math Objects
Values
E
LN10
LN2
LOG2E
LOG10E
PI
SQRT1 2
SQRT2
WaveLab 7
75
76
WaveLab Concepts
Functions
abs(x)
acos(x)
asin(x)
atan(x)
atan2(y, x)
ceil(x)
cos(x)
exp(x)
floor(x)
log(x)
max([value1 [, value2 [, ...]]])
min([value1 [, value2 [, ...]]])
pow(x, y)
random()
round(x)
sin(x)
sqrt(x)
tan(x)
Examples:
//Get a random number from 0 to 1
var r = Math.random();
//Print it out in the log window
logWindow.printInfo(r);
//Trace out Pi in the log window
logWindow.printInfo(Math.PI);
Date Objects
Functions
toString()
toDateString()
toTimeString()
toLocaleString()
WaveLab 7
4.9 Scripting
toLocaleDateString()
toLocaleTimeString()
valueOf()
getTime()
getFullYear()
getUTCFullYear()
getMonth()
getUTCMonth()
getDate()
getUTCDate()
getDay()
getUTCDay()
getHours()
getUTCHours()
getMinutes()
getUTCMinutes()
getSeconds()
getUTCSeconds()
getMilliseconds()
getUTCMilliseconds()
getTimeZoneOffset()
setTime(time)
setMilliseconds(ms)
setUTCMilliseconds(ms)
setSeconds(sec [, ms])
setUTCSeconds(sec [, ms])
setMinutes(min [, sec [, ms]])
setUTCMinutes(min [, sec [, ms]])
setHours(hour [, min [, sec [, ms]]])
setUTCHours(hour [, min [, sec [, ms]]])
setDate(date)
setUTCDate(date)
setMonth(month [, date])
WaveLab 7
77
78
WaveLab Concepts
setUTCMonth(month [, date])
setFullYear(year [, month [, date]])
setUTCFullYear(year [, month [, date]])
toUTCString()
Example:
//Create a new date object
var d = new Date();
//Print it out in the log window
logWindow.printInfo(d);
//Get just the hours
logWindow.printInfo(d.getHours());
RegExp Objects
Functions
exec(string)
test(string)
toString()
Example:
//Create a new regular expression defining a 5 digit number
var reg = new RegExp(/^\d{5}$/);
//Test a string with it to see if it contains a 5 digit number
var isFiveDigit = reg.test("12345");
//Trace the result to the log window
logWindow.printInfo(isFiveDigit);
Error Objects
Values
name
message
Functions
toString()
WaveLab 7
4.10 The Spectrum display
79
Types of Native Errors available
EvalError
RangeError
ReferenceError
SyntaxError
TypeError
URIError
Related topics
WaveLab Scripting Language
Scripting window (Audio File Workspace)
Scripting window (Audio Montage Workspace)
4.10
The Spectrum display
In WaveLab's Audio File Workspace, the main wave editing and overview windows can be
set to display your audio as a spectrogram (Spectrum).This spectrum mode allows a unique
view of your audio and when used in conjunction with the Spectrum editor offers powerful
audio restoration and processing functions. The Spectrum display is a "spectrogram", where
each vertical line represents the frequency spectrum at the corresponding time location.
The bottom of the display corresponds to the lower frequencies while the upper part of the
display represents the higher frequencies. The intensity or level of the frequencies are either
represented as a color spectrum, from red (maximum intensity) to purple/black (minimum
intensity), or as a monochrome intensity (depending on the setting in the Spectrum options
dialog). The vertical ruler on the left shows the frequency area (in Hz) for the spectrum.
You can view the Spectrum display in the Audio File Workspace by choosing the "Spectrum"
tab below either of the waveform display windows.
Related topics
Spectrogram options
Spectrum editor
4.10.1 Spectrogram options
This dialog allows you to adjust how the Spectrogram is displayed.
You can adjust the visual style of the spectrogram and its resolution. You can also specify
a cut-off point above which frequencies are displayed and to plot them using a linear or
logarithmic scale. This can be useful for isolating a certain range of frequencies: for example,
in sound restoration you may wish to focus on a high frequency band which is more accurately
displayed using a linear scale.
WaveLab 7
80
WaveLab Concepts
You can access this dialog from both wave windows in the Audio File Workspace via the
Spectrum tab >
Edit settings....
For an explanation of each parameter and interface feature, click on , or the 'What's this?'
question mark icon. For more information see Getting Help
Related topics
The Spectrum display
Spectrum editor
4.11
Spectrum editor
This specific tool window allows you to select and perform operations on an Audio File via
its audio spectrum.
It uses high quality linear-phase filters to process a spectrum selection both in the time domain and in the frequency domain. This can be useful for advanced audio restoration tasks
like removing noise from a specific source in a recording, for example.
Making and editing selections
Spectrum editing can only be performed when a waveform is first displayed in Spectrum
display mode and when a spectrum selection is defined. To activate the Spectrum editor,
click on the Spectrum edit tool
in the command bar (or via Workspace > Specific tool
windows > Spectrum Editor). This displays the Spectrogram if this is not already the case
(see The Spectrum display).
To select a region, point and drag to define a rectangle. The region selection defines a time
and a specific frequency range. This allows you to edit and process audio both in the time
domain and in a specific frequency domain, as opposed to standard wave editing which
always operates in the full frequency domain.
Notes on spectrum selections:
When defining a region in a stereo file, a "mirrored" region is automatically created in
the other channel. To define a region in only one channel, press [Shift] while drawing
the region.
Once you have a region selected, if you place your mouse cursor inside the region,
a pop-up appears showing the currently set frequency range (Hz) and the time range
(seconds/milliseconds) for the selection.
A selected region can be moved in any direction by clicking and dragging the region
with the cursor.
If you press [Shift] whilst dragging a region, it only moves horizontally thus retaining
your selected frequency range. If you press [Ctrl]/[Command] + [Shift] the region
only moves vertically thus retaining the selected time range.
WaveLab 7
4.11 Spectrum editor
81
You can resize a region by placing the mouse cursor at the edges of the region (so that
a double-arrow appears) and then clicking and dragging.
To remove a region that you have drawn, click anywhere else on the waveform and it
disappears.
If you have defined a region as a Source or Target, it can be selected at any time to
create a new selection using the same dimensions.
Spectrum editor functions
The Spectrum Editor has the following parts:
Selection - use this part to refine and define your selection(s). You can expand se-
lections, shift selections around and define a source and target region for performing
copy operations.
Operations - use this part to perform copying, filtering and processing operations.
For copying operations, you require both a source and a target region to have been
defined using the Selection tab. You can choose which method to copy audio between
the Source and Target regions. You can also choose to apply processing to a single
spectrum region using a variety of different modes. See Spectrum Processing Modes
for information on each mode type.
Master Section - use this part to process and route selected spectral audio regions
through the Master Section and its effects plug-ins. This allows for frequency-selective
processing. A selected region's frequency spectrum can be routed to the Master Section where you can choose to process it separately from the non-selected frequency
spectrum. The signal is split so that one part (region spectrum or non-selected spectrum) is sent to the plug-ins, while the other part can be mixed with this processed
signal, after the Master Section output.
Using the Spectrum editor
You can use the Spectrum editor in two main operational modes:
Region copying and filtering (Operations tab)
This is mainly intended for audio restoration applied over brief time ranges. Selections can
be copied, pasted, and filtered. This type of processing is mainly used to reduce, remove
or replace unwanted sound artifacts in the audio material, and can be carried out with great
precision. This could be useful for example, to replace part of a live recording that contains
an unwanted noise (such as a mobile phone ring tone), with a copy of a similar region of the
spectrum that only contains a "clean" signal. In general, the spectral Copy/Paste combination
gives the best results, given that the source and destination regions are properly choosen.
Master Section processing (Master Section tab)
This allows you to process a specific frequency range via the Master Section. The selected
or non-selected regions of the spectrum can be processed differently. You can also employ
a number of filters (Bandpass/Low-pass/High-pass) to further refine the particular range of
frequencies to be affected by any Master Section effects.
A selected spectrum region can either be:
WaveLab 7
82
WaveLab Concepts
Processed separately by the Master Section plug-ins. The non-selected spectrum can
either be bypassed or sent to the Master Section.
Bypassed. This removes the selected spectrum region from the Audio File. The non-
selected spectrum can either be routed to the Master Section input or the Master Section output.
Sent to Master Section output. The non-selected spectrum can either be bypassed
or sent to the Master Section input. If the latter is selected, it will be mixed with the
selected spectrum region at the Master Section output.
You can access this window by choosing Workspace > Specific tool windows > Spectrum Editor.
For an explanation of each parameter and interface feature, click on , or the 'What's this?'
question mark icon. For more information see Getting Help
Related topics
The Spectrum display
Spectrum Processing Modes
Spectrogram options
Spectrometer
4.11.0.1 Spectrum Processing Modes
When applying processing to a spectrum region in the Spectrum Editor you can use a variety
of different modes:
Damp
This is used to attenuate the level of a region. The Gain parameter specifies the level of the
attenuation (it is also possible to set positive gain values, i.e. to boost the frequencies in the
region). Three filter types are available to perform the damping:
Bandpass filter: All frequencies in the region are equally attenuated.
Low-pass filter: Higher frequencies in the region will be more attenuated.
High-pass filter: Lower frequencies in the region will be more attenuated.
For the Low- and High-pass filters, a low Filter steepness setting is normally used (around 6
to 18dB).
Blur peaks
This filter operation analyzes the region to find the frequencies with the highest level. The
level of these frequencies will be attenuated (or boosted) according to the set Gain value. If
the gain is negative, these frequencies will be "blurred" and disappear in the mix as a whole.
The purpose of the filter is to mask the loudest frequencies (e.g. it could be used to eliminate
a sudden burst of pitched but unwanted sound in the audio material, like acoustic feedback).
WaveLab 7
4.12 About Regular Expressions
83
This mode works best with the Infinite steepness setting, which is automatically selected
when Blur peaks is used. You can, however, freely set any Filter steepness setting. The filter
type options are not available when this mode is selected.
Dispersion
This is a special filter that "smears" the dynamics and pitch of the region, without changing
the actual frequency content. This works best on lower frequencies, to mask the identity of
a signal without changing the frequency spectrum.
This mode works best with the Infinite steepness setting, which is automatically selected
when Dispersion is used. You can, however, freely set any Filter steepness setting. The filter
type options are not available when this mode is selected. Dispersion can also be used to
create special effects as it warps the sound in an unique way.
Fade Out
This can be used with any of the three filter types (Bandpass/Low-pass/High-pass). It gradually filters the frequencies in the region along the time axis (from nothing at the left edge of
the region, to maximum allowed by the gain parameter at the right edge), useful for gradually
removing frequencies from a region.
Fade In
This works like Fade out but inversed. It can also be used in conjunction with any of the three
filter types (Bandpass/Low-pass/High-pass).
Fade out then in
This is a mix of the two previous options; the filtering effect gradually fades out until the
middle of the region, then fades back in. It can also be used in conjunction with any of the
three filter types (Bandpass/Low-pass/High-pass).
Fade in then out
The inverse of the above. It can also be used in conjunction with any of the three filter types
(Bandpass/Low-pass/High-pass).
Related topics
The Spectrum display
Spectrogram options
Spectrum editor
4.12
About Regular Expressions
At various places in WaveLab you can use Regular Expressions to build complex text matching capabilities into your conversion and renaming processes. A regular expression is a set
of text symbols that describe a method to find a specific text string within a large body of
text, and then apply a specific operation to this text string. Regular expressions are available
for the advanced user to perform powerful string search/replace operations, for example, in
batch renaming or batch processing.
there is a field where you can
Throughout WaveLab, wherever you see this bulb icon
create your own regular expressions. A fly-out menu containing shortcuts to build up the
basic syntax of an expression is also available.
WaveLab 7
84
WaveLab Concepts
It is beyond the scope of this Help system to describe this subject thoroughly (there are good
internet resources available), but please read on if you wish to check out the basic building
blocks used in regular expressions.
Common expressions
A regular expression is a formula composed of characters that have special meanings (called
operators). Other characters are just plain letters and numbers that are searched for.
The search engine browses the target text one character at a time and stops as soon as
it finds a sequence of characters that matches the regular expression. Searches are not
case-sensitive. Note that there are various versions of regular expressions: WaveLab uses
a version that represents a good compromise between power and ease-of-use.
The term expression refers to a single character, a character class, or a sub-expression
enclosed with () or {}.
The following items are available on the Regular Expression pop-up menu:
WaveLab 7
4.12 About Regular Expressions
Menu item
Any character
Character in range
Operator
.
[]
Character not in range
[∧ ]
Slash
/
0 or 1 match (1 if possible)
?
0 or 1 match (0 if possible)
??
0 or more matches (as
many as possible)
∗
0 or more matches (as few
as possible)
∗?
1 or more matches (as
many as possible)
+
WaveLab 7
1 or more matches (as few
as possible)
+?
85
Description
Symbolizes any character
A bracketed text is treated
as a single character, for
example: [AEW13] means
A or E or W or 1 or 3. A
hyphen within the brackets
specifies a range of
characters. For example,
[F-I] means F or G or H or I,
and [A-Z0-9] matches all
letters and all digits.
A circumflex located at the
first position in a bracket is
a complement operator. In
other words, all characters
match except those
included in the bracket.
Example: [∧ E] means any
character except E.
A slash before a character
means that this character is
to be treated literally, not as
an operator.
Matches 0 or 1 time the
preceding expression. 1
repeat if possible is
grabbed, then the rest of
the regular expression
continues to be evaluated.
Matches 0 or 1 time the
preceding expression. 0
repeat if possible (the
NEXT step in the regular
expression is also
evaluated and has priority).
Matches 0 or more times
the preceding expression.
As many repeats as
possible are grabbed, then
the rest of the regular
expression continues to be
evaluated.
Matches 0 or more times
the preceding expression.
As few repeats as possible
are grabbed (the NEXT
step in the regular
expression is also
evaluated and has priority).
Matches 1 or more times
the preceding expression.
As many repeats as
possible are grabbed, then
the rest of the regular
expression continues to be
evaluated.
Matches 1 or more times
the preceding expression.
As few repeats as possible
are grabbed (the next step
86
WaveLab Concepts
The Shortcuts sub-menu on the Regular Expression pop-up menu contains the following
options:
Menu item
Any digit
Operator
/d
Any non-digit
/D
Any letter
/l
Any non-letter
/L
Any non-alphabetic
/W
Any number
/u
Number with possible +before.
/i
Quoted string
/q
Simple word
/z
Description
Special code to symbolize
any digit, as [0-9].
Special code to symbolize
any non-digit, as [∧ 0-9].
Special code to symbolize
any letter, as [a-z].
Special code to symbolize
any non-letter, as [∧ a-z]. Any alphabetic /w Special
code to symbolize any
alphabetic character, as
[0-9a-z].
Special code to symbolize
any non-alphabetic
character, as [∧ 0-9a-z].
Special code to symbolize
a number (without a sign).
Special code to symbolize
a number which can be
preceded by a + or - sign.
Special code to symbolize
quoted text.
Special code to symbolize
a simple word (a sequence
of letters surrounded by
non-letters, e.g. spaces).
All special characters used for regular expressions are available from the "Special characters"
submenu. There is also a Presets sub-menu with pre-defined operations, which include the
following:
Menu item
1st/2nd/3rd word
Last word
1st/2nd/3rd expression in parentheses
Last expression in parentheses
1st/2nd/3rd expression in brackets
Last expression in brackets
Description
This searches for the first, second or third
word, respectively (separated by a space).
This searches for the last word (separated
by a space).
This searches for the first, second or third
string enclosed in parentheses,
respectively.
This searches for the last string enclosed
in parentheses.
This searches for the first, second or third
string enclosed in brackets, respectively.
This searches for the last string enclosed
in brackets.
Related topics
Batch Renaming
Convert marker type
WaveLab 7
4.12 About Regular Expressions
Regular Expressions
WaveLab 7
87
88
WaveLab Concepts
WaveLab 7
Chapter 5
Audio File editing
The Audio File Workspace's Wave window is the heart of WaveLab's audio editing capabilities. This is where you view, play back and edit individual Audio Files.
The Wave window gives you a graphical representation of an Audio File. It consists of two
parts:
The upper waveform (Overview)
This is mainly used for navigating through long files. Since you can have different zoom
factors in the two areas, the Overview can display the entire wave while the Main view
only shows you a detailed portion for precise editing.
The lower waveform area (Main view)
This is where the audio editing action takes place. You can perform various operations
on the wave such as copying, cutting, pasting, moving and deleting.
Waveform views
In the Audio File Workspace, the main wave editing window and the overview can independently be set to display one of three display modes:
Wave - this is the default waveform display.
Loudness - this displays the average loudness of an Audio File, which can be useful
in many circumstances. For example, this display mode gives you an overview of the
amount of compression applied to a song. The more dips in the curve, the more dynamics in the audio material. An even curve with few dips indicates that the material
is compressed with a limited dynamic range (which is common for modern pop/dance
music). Up to four different curves can be shown simultaneously in the Loudness envelope display. These curves have different colors and represent the average loudness of
the signal in different areas of the frequency spectrum. This can be useful to visualize
where in the frequency domain the loudness is "spread" at a given time, or to display
the loudness of a specific part of the spectrum. The curves can be shown individually
or in any combination.See Loudness envelope options for more details.
Spectrum - This displays the audio as a "spectrogram" which allows you to view the
level intensity of each area in the frequency spectrum across the time line. The Spectrum display mode in conjunction with the Spectrum editor provides you with a unique
90
Audio File editing
editing/restoration tool. See The Spectrum display for more information on the unique
Spectrum display mode.
Rulers
There are both time and level rulers. These can be hidden and displayed (see the Ruler and
Wave Display context menus). You can also set which units of time and level they show. To
access the settings for both rulers, right-click anywhere on the relevant ruler.
Editing Tools
Precise editing of your audio is achieved in the main (lower) waveform window. There are
three main tools that are used for directly editing an Audio File:
Time Selection cursor - This is the default cursor and allows you to select and resize
regions of audio you wish to edit. Click and drag in the main waveform window to make a
selection. You can modify the selected region by click-dragging on the edges of the selection.
You can also modify a selected audio region by holding down [Shift] and clicking on the
waveform. The selection extends/shrinks to the clicked point. If you hold the cursor over one
channel of a stereo file you can make selections in that individual channel. You can doubleclick inside a region to select it then drag the mouse to select the next or previous regions,
that is, you snap to markers while dragging.
Spectrum Selection cursor - this cursor allows you to select and define regions when
in the Spectrum view. See Spectrum editor for more information on making selections and
using the Spectrum view for advanced editing purposes.
Pen tool - this tool allows
you to redraw the waveform directly in the wave window. It can be used to quickly repair
waveform errors by hand. The Pen tool can only be used if the Zoom resolution is set to at
least 1:8 (one pixel on the screen equals 8 samples) or higher. If you wish to redraw the
waveform of both channels in a stereo file at once, press [Shift] while drawing.
Once you have defined an audio selection there are many editing tools available in the Edit
menu of the Audio File Workspace for you to explore. These range from basic editing commands such as Copy and Paste to special functions which can perform tasks such as trimming, muting, crossfading, appending, prepending, silencing and repeating an audio selection, for example. It is well worth exploring the tools available in this menu.
There a number of options available that affect editing in the waveform window. See Audio
File editing preferences for more information on the various preferences available.
Editing Shortcuts
You can navigate through your Audio File by dragging the Time Selection cursor. Alternatively
you can use the following keyboard shortcuts:
Use the [Left Arrow] and [Right Arrow] to move the cursor one pixel in either direction.
Use [Ctrl]/[Command] + [Left Arrow] and [Right Arrow] to move the cursor twenty
pixels in either direction. You can also use the [Page up] and [Page Down] keys.
Use the [Home] and [End] keys to navigate to the beginning and end of the wave.
You can also scroll and zoom within the Audio File Workspace using several other mouse
and keyboard shortcuts. See Zooming and scrolling for more detailed information.
WaveLab 7
5.1 Offline processing
91
To audition your Audio File hold down [Alt]/[Option] and click anywhere in the waveform to
begin playback.
Dragging can also be used with several editing functions in the Audio File Workspace. See
Audio File Workspace in Dragging operations for more information.
Related topics
Offline processing
Analysis
Metering
Transport controls
Specific tool windows
Shared tool windows
Mix dialog
The Spectrum display
Spectrum editor
Tools
Zoom factor
Peak Files
5.1
Offline processing
Offline processes are used for a variety of editing purposes and creative effects. Offline
processing refers to functions that are only performed when saving the file.
"Offline" means the process can't be monitored during playback, either because they require
too much processing power or because they require an analysis pass prior to processing.
Note that WaveLab only writes temporary files when applying an effect, so the original Audio
File is safe. Only when saving the original is the original audio possibly modified.
These offline processes differ to realtime processes (such as listening to effects via the
Master Section for example), which only temporarily render an effect while audio is played
"through" them.
Applying processing
Processing can be applied to a selection or to a whole Audio File. For certain processing
operations processing the entire file is necessary. This will be indicated by the effects respective dialog. If "Process whole file if there is no selection" is selected in the Audio File
editing preferences editing tab, the whole file will automatically be processed if no selection
exists.
To apply processing to some audio, proceed as follows:
1. Make a selection. If the file is in stereo, you can apply processing to either channel or
both, by selecting one channel or both.
WaveLab 7
92
Audio File editing
2. Select the desired offline process from the Process menu.
3. If a dialog appears, make the appropriate settings. If the dialog uses presets, you can
load one of them to fill out the settings automatically.
4. When you have finished with the settings in the dialog, click the Apply/Paste/Process
button to permanently render the effect to file.
In some cases a status bar dialog is displayed showing the progress of the operation. If you
need to interrupt a long process, click the "Cancel" button on the status bar dialog.
Undo/Redo processing
Even though offline processes appear to alter the file permanently, you can always reinstate
a previous version using WaveLab's "undo" feature. The number of Undo/Redo commands
is limited only by your available hard drive space. Access the Undo and Redo commands via
Edit > Undo or Edit > Redo.
Tips for using Offline Processing
Processing dialogs are non-modal - meaning that they stay open and on screen even after
processing has been applied. This means that you can still playback audio and access undo/redo commands to audition the results of your effect and make any further adjustments to
any settings. You can also use key commands and access any other menu commands while
leaving the offline process dialog open. Remember that using and saving presets when you
have settings you are happy with can also save you time.
WaveLab contains a powerful array of offline processing tools including the following:
Change Level
Level envelope
Normalize Level
Silence Generator
Loop Tone Uniformizer
Pitch correction
Time stretching
Loop Tweaker
Effect morphing
Loudness distribution
Loudness normalizer
Pan Normalizer
Pitch bend
Pitch quantize
Related topics
WaveLab 7
5.1 Offline processing
93
Presets
Rendering
5.1.1
Change Level
This dialog allows you to apply a gain to change the level of an Audio File.
You can also use "Find current peak level" to obtain a report on the peak level of the current
audio selection (or the peak level in the whole file, if "Process whole file if there is no selection"
is selected in the preferences). This can be useful if you wish to calculate how much you can
increase the overall gain of a file without introducing clipping (exceeding 0dB), for example.
To change the level, enter the desired gain and click Apply.
You can access this dialog by choosing Process > Change level... in the Audio File
Workspace.
For an explanation of each parameter and interface feature, click on , or the 'What's this?'
question mark icon. For more information see Getting Help
Related topics
Audio File editing
Value editing
5.1.2
Level envelope
This dialog allows you to create a volume envelope which can be applied to a selected range
or a whole Audio File. This could be useful if you need to even-out loud and quiet parts, for
example.
You can edit the envelope by:
Double clicking on the line to add a point: double click on a point to remove it.
Selecting multiple points (using [Shift] click) allows you to move the selection as a
group.
You can also use the controls to delete or reset points in the envelope. Use the envelope
smoothing button to toggle the envelope points between a straight (polygonal) line or a
curved path.
Click Apply to apply the envelope to the audio selection or file.
You can access this dialog in the Audio File Workspace via Process > Level envelope....
For an explanation of each parameter and interface feature, click on , or the 'What's this?'
question mark icon. For more information see Getting Help
Related topics
Audio File editing
Adjusting Envelopes
WaveLab 7
94
5.1.3
Audio File editing
Normalize Level
This dialog allows you to change the peak level of your Audio File.
Enter the desired peak level (in dB) that you wish the audio selection to have. You can also
use "Find current peak level" to obtain a report on the peak level of the current audio selection
(or the peak level in the whole file, if "Process whole file if there is no selection" is selected
in the preferences). You can choose to apply the same gain to both stereo channels (Stereo
Link) or mix down to a mono file (Mix to Mono) with the assurance that no clipping will occur
when both channels are mixed together.
To normalize the selected audio, enter the desired peak level and click Apply.
You can access this dialog by choosing Process > Level Normalizer... in the Audio File
Workspace.
This function is also available as a batch processing plug-in. You can access it from Batch
Processing Workspace > Plug-ins window > Multipass Plug-ins > Normalizer.
For an explanation of each parameter and interface feature, click on , or the 'What's this?'
question mark icon. For more information see Getting Help
Related topics
Audio File editing
Value editing
5.1.4
Silence Generator
This dialog allows you to generate "silence", either by replacing an audio selection, or by
specifying a duration.
You can also specify a cross fade at each end of the silent region, for a smoother transition.
Radio buttons determine where the silent period is placed in the audio.
In WaveLab you can also specify a file to be inserted instead of "true" silence. This can be
useful for example, if you wish to keep the ambience, or background noise of a particular
environment in a recording.
You can access this dialog in the Audio File Workspace via Edit > Silence (advanced)....
For an explanation of each parameter and interface feature, click on , or the 'What's this?'
question mark icon. For more information see Getting Help
Related topics
Silence
5.1.5
Loop Tone Uniformizer
This dialog allows you to create sounds that will loop, from audio that is seemingly "unloopable". These are normally sounds that constantly decay in level or continuously change
in timbre. The Loop Tone Uniformizer applies processing to the sound that evens out changes
WaveLab 7
5.1 Offline processing
95
in level and timbral characteristics in order for a sound to loop properly. For example, this
could be useful for creating looped samples for a softsynth or hardware sampler.
To use the Loop Tone Uniformizer you need to have a loop defined using a pair of loop markers
. The original length of the loop is not changed.
Uniformizers
This tab allows you to specify the method/s used to even out the sound you wish to loop.
Choose between "Slice mixing" and/or "Chorus smoothing". For a full explanation of how
each of these methods operate use the "What's this?" help function.
For slice mixing, you may need to experiment to see how many slices are needed. Generally
the more slices you use, the more natural the sound will be (up to a certain point).
Pre Cross fade
The Loop Tone Uniformizer also includes the option to cross fade the end of the loop with
the start of the newly processed section so that transition into the newly looped section is
smoother during playback. Use the envelope drag points or value sliders to adjust the cross
fade.
A note about Post Cross fading
If you have used the Loop Tone Uniformizer within a region of an Audio File, the transition
from the end of the loop into the original file in many cases won't be very natural. This can
be fixed as follows:
1. Close the Loop Tone Uniformizer and open the Loop Tweaker.
2. Click on the Cross fade tab and deactivate the Cross fade option (the check box).
3. Click on the Post Cross fade tab and make sure Cross fade is activated.
4. Set up the post cross fade parameters and click Apply.
It can also be a useful tip to lock the loop markers after you use this command on a selection
within an Audio File. Once the loop is processed in place, moving the loop markers will upset
playback of the loop.
You can access this dialog in the Audio File Workspace via Process > Loop Tone Uniformizer....
For an explanation of each parameter and interface feature, click on , or the 'What's this?'
question mark icon. For more information see Getting Help
Related topics
Markers
Adjusting Envelopes
5.1.6
Pitch correction
This dialog allows you to detect and change the pitch of a sound without affecting its length.
Amount of Shift - use these controls to find out the current pitch of the audio and if
desired, calculate the required shift to match a specific pitch.
WaveLab 7
96
Audio File editing
Method - use these controls to adjust the method and quality you wish to use when
processing the pitch change. You can also choose how the length of the sound is
affected by the operation. By default this process will not change the length of the
sound.
This tool could be useful for fixing an off-key vocal note in a live recording, or tuning the pitch
of a kick drum sample to fit a particular song, for example.
You can access this dialog from the Audio File Workspace via Process > Pitch Correction....
Pitch correction is also available as a batch processing plug-in in the Batch Processor
Workspace. In addition, Pitch correction for a Clip is available from the Focused Clip window
(via Edit > Pitch shift...).
Note that for Batch processing and Clip processes, the envelope option is not available.
For an explanation of each parameter and interface feature, click on , or the 'What's this?'
question mark icon. For more information see Getting Help
Related topics
Adjusting Envelopes
5.1.7
Time stretching
This dialog allows you to change the duration of an audio selection (usually without changing
its pitch).
You can view exact time information on the original audio selection you wish to stretch and
choose the amount you wish to "stretch" it in seconds, beats per minute or as a percentage.
You can also choose which method WaveLab uses to stretch the audio and the quality/speed
of the processing.
If you select "Use modulation envelope" you can vary the time stretch over time using an
envelope editor that becomes available. When choosing a method, it is useful to experiment
with the different algorithms available to find which one suits your source material the best.
Use "What's this?" to find out more information on each method and determine which one
will produce the best time stretch without introducing unwanted artifacts.
This function is useful if you want to speed up or slow down a recording to match other
material, such as matching the tempo of two drum beats, or fitting an audio track to a section
of video, for example.
Time stretching is also available as a batch processing plug-in in the Batch Processor
Workspace. In addition, Time stretching for a Clip is available from the Focused Clip window.
Note that for batch processing and Clip processing, the modulation envelope option is not
available. You can access this dialog from the Audio File Workspace by choosing Process
> Time stretching....
For an explanation of each parameter and interface feature, click on , or the 'What's this?'
question mark icon. For more information see Getting Help
Related topics
WaveLab 7
5.1 Offline processing
97
Adjusting Envelopes
5.1.8
Loop Tweaker
This dialog allows you to refine a region of audio to loop seamlessly.
The Loop Tweaker can just be used to "tweak" an existing loop selection so that it loops
perfectly or you can also use it to create a loop from material which does not naturally repeat.
To use the Loop Tweaker you must first have a loop defined using a pair of loop markers
.
The Loop Tweaker consists of the following tabs:
Loop points adjustment
This is a visualization of the beginning and end of the waveform between the loop markers.
You use this dialog to manually refine a loop selection by dragging on the waveform left/right
or using the automatic search buttons to find the nearest "good" loop point. The aim is to
align the waveforms so they meet in the middle at a zero-crossing point with the waveforms
matching as closely as possible, being "in phase". When you adjust your loop start and end
points within the dialog the start and end loop markers in the main waveform window will
adjust accordingly. Note that this movement may or may not be visible depending on the
amount you move the markers and the zoom factor you have selected.
It is helpful to have the transport looped during playback so you can hear the difference when
you adjust the loop markers within the dialog. Use the Display options to adjust how the Loop
Tweaker waveform is visualized. You can also use the temporary memory buttons to capture
a number of different loop "candidates" and audition them one by one. Note that if you are
not using a cross fade or post cross fade you do not need to click Apply when just tweaking
loop points. You can also leave this dialog window open and manually adjust the position of
the markers in the main waveform windows if you need to make large adjustments.
Cross fade
This tab allows you to apply a cross fade at the end of a loop by mixing a copy of the beginning
of the loop with it. This can be useful to smooth the transition between the end of a loop and
its beginning - especially when using material that doesn't naturally loop. Use the envelope
drag points or value sliders to adjust the cross fade envelope. Click Apply to process the
cross fade.
Post cross fade
This tab allows you to cross fade the loop back into the audio after the end of the loop. This
is done by mixing a copy of the loop back into the audio. Use the envelope drag points or
value sliders to adjust the cross fade envelope. Click Apply to process the post cross fade.
Using the "Copy" button you can insert multiple copies of the loop into the active Audio File,
creating a smooth audio sequence, since copies will loop without an audible transition.
You can access this dialog by choosing Process > Loop Tweaker....
For an explanation of each parameter and interface feature, click on , or the 'What's this?'
question mark icon. For more information see Getting Help
Related topics
Markers
WaveLab 7
98
Audio File editing
Adjusting Envelopes
Zero crossing
5.1.9
Effect morphing
This dialog within the Audio File Workspace allows you to gradually mix two audio ranges
that have different effects/processing applied to them.
Effect morphing allows you to smoothly "morph" or blend from one effect to another, or from
an unprocessed audio segment to a processed audio segment. Effect Morphing always
involves two audio ranges. Normally, these are two versions of the same audio range, of
which one is unprocessed and the other processed.
Effect morphing works by using WaveLab's Undo buffer to mix a copy of the processed audio
with the unprocessed version. You can also use any other bit of audio from the application's
clipboard that has the same length as the one you wish to morph with.
To set up a basic effect morph, proceed as follows:
1. Start by making a selection range over the time you wish the effect morphing to take
place.
2. Now process this range using any Master Section effect(s), or use some other off-line
processing. You cannot use processing/effects that alter the length of the selection,
e.g. time stretching.
3. Open the Effect Morphing dialog by choosing Edit>Effect Morphing....
4. Adjust your envelope points over time between 0% and 100%. This will determine the
level and direction of the morph. For example, starting at 100% and ending at 0% will
fade out the effect you just applied.
5. Choose "Unprocessed selection" for this example. As mentioned previously you can
also use any audio of the same duration from the clipboard.
6. Click Apply to apply the Effect morphing.
You can access this dialog in the Audio File Workspace via Edit > Effect morphing....
For an explanation of each parameter and interface feature, click on , or the 'What's this?'
question mark icon. For more information see Getting Help
5.1.10 Loudness distribution
This dialog allows you to measure the most frequent loudness values found in an Audio File
(this is not the same as average loudness). The graphic peaks found by the analysis represent
these values.
The tool gives an answer to the question: "How often does a given loudness (vertical scale,
in dB) appear in the whole file?". The percentage figure is relative to other peaks. Some
simple examples:
1. If, for instance, you have a sine of 0 dB / 2 second followed by a sine of -6 dB /
2 seconds. This means the global audio material has as much 0 dB material as - 6dB
material: you will see 2 peaks (0 / -6 dB), each at 100%.
WaveLab 7
5.1 Offline processing
99
2. If, for instance, uou have a sine of 0 dB / 1 second followed by a sine of -6 dB / 3
seconds. This means there are 3 times more -6 dB material than 0 dB material. You
will see a peak of about 33% at 0 dB, and another peak of 100% at -6 dB.
This analysis is useful for learning about how the loudness of your music is distributed.
You can access this dialog in the Wave File Workspace via Analysis > Loudness distribution....
For an explanation of each parameter and interface feature, click on , or the 'What's this?'
question mark icon. For more information see Getting Help
Related topics
Loudness
5.1.11 Loudness normalizer
This dialog allows you to adjust the loudness of a file. Because it relates to loudness as
opposed to maximum peak level, this tool works quite differently from the Level Normalizer. A
typical application is to specify a loudness, for example -12dB, and the Loudness Normalizer
processes the audio to match this level of loudness.
Like Gain Change, increasing the loudness to a certain value can introduce clipping. To avoid
this occurring, a peak limiter (the Peak Master plug-in) can be used as part of the process.
The Loudness Normalizer raises the loudness and limits peaks in the signal at the same time
(if needed), to achieve the target loudness.
In the case of stereo files, both channels are processed independently. This process happens
over several stages; analysis precedes the final rendering. The Loudness Normalizer dialog
gives access to useful statistics about the file and the Loudness distribution tool, and you
can choose to remove any DC offset in the file.
You can access this dialog from the Audio File Workspace via Process > Loudness normalizer....
This function is also available as a batch processing plug-in. You can access it from Batch
Processing Workspace > Plug-ins window > Multipass Plug-ins > Loudness Normalizer.
For an explanation of each parameter and interface feature, click on , or the 'What's this?'
question mark icon. For more information see Getting Help
Related topics
Loudness
DC Offset
Loudness distribution
WaveLab 7
100
Audio File editing
5.1.12 Pan Normalizer
This dialog allows you to ensure that both channels of a stereo file have the same level or
loudness. Since loudnesss is more important than peak volume in the perception of sound,
this is a powerful tool to get the best possible stereo balance.
This process uses two passes to first analyze the audio and then render any level changes
required.
You must have a stereo selection in a stereo file to apply this process.
You can access this dialog from the Audio File Workspace via Process > Pan Normalizer....
This function is also available as a batch processing plug-in. You can access it from the Batch
Processor Workspace via Plug-ins window > Multipass Plug-ins > Pan Normalizer.
For an explanation of each parameter and interface feature, click on , or the 'What's this?'
question mark icon. For more information see Getting Help
Related topics
5.1.13 Pitch bend
This dialog allows you to change the pitch of a sound over time. Note that changing the pitch
using Pitch bend will affect its duration unless length preservation is activated.
Using an envelope you can 'draw' the curve you wish the pitch to follow. The pitch offset is
displayed along the vertical ruler of the envelope and the range the envelope effects can be
adjusted using the spin control. Positive pitch values produce sounds with a higher pitch and
of shorter length, negative values produce sounds with a lower pitch and of longer length.
If length preservation is activated, you can choose the algorithm that is used to perform the
pitch bend operation. Depending on the type of audio material you are processing, choose
the appropriate mode. For more information on the different modes, use the "What's This?"
tool. You can also adjust the quality used when processing the pitch bend. The quality setting
and the selected mode will affect the processing time for this effect.
This function could be used for creating the classic 'tape stop' effect, or for blending the
tempo/pitch of one track into another, for example.
You can access this dialog from the Audio File Workspace via Process > Pitch bend....
For an explanation of each parameter and interface feature, click on , or the 'What's this?'
question mark icon. For more information see Getting Help
Related topics
Adjusting Envelopes
5.1.14 Pitch quantize
This dialog allows you to correct the pitch of an Audio File.
The musical notes in the audio selection are quantized to the nearest semitone. Pitch quantize works best on recordings that have a single fundamental frequency, such as voice or
WaveLab 7
5.1 Offline processing
101
single instruments. It can be useful for 're-tuning' the pitch of an imperfect recorded vocal
performance, for example.
The dialog allows you to choose the reference frequency (normally 440 Hz) and the time
taken for the pitch correction to reach the nearest semitone. An explanation of when and
how to adjust the Slur time is given using the 'What's this?' tooltips.
You can also choose to preserve the formants of the original material. Choosing this option
can sometimes help to produce a more realistic result when correcting the pitch of vocals or
acoustic instrument sounds.
You can access this dialog from the Audio File Workspace via Process > Pitch quantizing....
For an explanation of each parameter and interface feature, click on , or the 'What's this?'
question mark icon. For more information see Getting Help
Related topics
Adjusting Envelopes
Formant
5.1.15 Presets
WaveLab's powerful preset system allows you to create your own presets to store commonly
used settings. They are available every time you open WaveLab. Presets can be saved for
many parameters such as plug-in settings, Audio File Formats or File Attributes, for example.
You can access the Presets pop-up menu wherever you see one of these icons:
or
.
Presets are saved as local files on your hard drive, allowing you to conveniently back-up or
copy them for use on another computer.They are also useful when used in conjunction with
batch conversions and Scripting.
Working with Presets
When working with Presets you save/edit and load them from their own pop-up menu. Depending on the context, the available functions sometimes vary but generally you can:
Save/Save As... - creates a new Preset file by saving the currently selected settings
to your hard disk.
Explore presets... - opens the folder where any existing Presets are stored. This
allows you to delete, duplicate and organize your settings into sub-folders using the
flexibility of the operating system's file browser.
Restore factory settings - restores the current settings to the factory default.
Preset list - select a Preset from the list of those currently available.
Store/restore temporary presets - when available, use the temporary slots provided
to save your settings for the duration of the session. This is useful if you want to quickly
test and compare different settings. Select the option "Store temporarily" and from the
WaveLab 7
102
Audio File editing
submenu select the number under which you want to save (#1 - #5). To quickly load the
saved settings again, select the corresponding number from the "Restore" submenu.
Define shortcut for the current setting - when available, this allows you to assign a
shortcut to the current preset using either a key shortcut, keyword or via a MIDI trigger.
For example, if you have a preset to normalize audio at -0.1 dB and you assign it a
key shortcut then everytime you execute the shortcut, the preset is applied to the audio
selection, without the need to open the dialog.
VST-2 Presets
VST plug-ins have their own preset handling. When you click the preset button for this type
of effect the following options are available:
Load/Save Bank - this allows you to load and save complete sets of presets. The file
format is compatible with Cubase.
Load/Save Default Bank - this loads the default bank of presets, or saves the current
set of presets as the default bank.
Load/Save Effect - this loads or saves one preset at a time. The file format is again
compatible with Cubase.
Edit name of current program - allows you to define or edit the name for the currently
selected preset.
Preset list - select a Preset from the list of those currently available.
VST-3 plugins have a simplified list of options.
About Preset files
Each preset is stored as an individual file inside WaveLab's main presets folder. This makes
it easy to back them up or copy them to another computer. You can change the location of
this main Presets folder via Global Preferences > Setting location. You have the choice
of the following locations:
a standardized location that can be accessed by all users of the computer. That is, all
users will share the same settings.
a standardized location accessed by the current user (the default). That is, each user
has his/her own private settings.
any specific location of your choice. This allows you to customize it for your own re-
quirements.
a location relative to the application. This allows you to use the application from an
USB dongle.
Default locations - By default the main Presets folder is found at:
WaveLab 7
5.1 Offline processing
Windows
7\Presets
103
7 - C:\Users\[User Name]\AppData\Roaming\Steinberg\WaveLab
Windows XP - C:\Documents
Data\Steinberg\WaveLab 7\Presets
and
Settings\[User
Name]\Application
Mac OS X - root/[User Name]/Library/Prefences/WaveLab 7/Presets/
You can also find this folder by using the "Open active settings folder" link in the preferences
pane. This opens your file browser to wherever the main Presets folder is currently located.
Inside this Presets folder each type of preset file has its own folder.
For example, all the presets for the Normalizer are stored within C:\Users\[User
Name]\AppData\Roaming\Steinberg\WaveLab 7\Presets\Normalizer\
on Windows
7. When you open the Normalizer dialog and choose a preset via the pop-up menu, the
files in this directory will appear as available presets. The reason each preset type has its
own dedicated folder is so that WaveLab can locate them automatically when you open the
preset pop-up menu.
You can organize your presets into sub-folders so they appear as sub-menus. This can be
useful if you wish to organize a lot of presets into your own categories. You can continue to
nest folders inside one another to build a standard tree structured menu system. Below is
an example of how this looks for a set of window layout presets:
Related topics
Scripting
5.1.16 Rendering
To Render effects into a temporary or final file, you use the Render function (note that the
"Save" function from the File menu does not Render!). The Render function is part of the
Master Section and in other applications is sometimes referred to as "bouncing down" or
"mixing down".
Rendering a file "prints" all audible settings and effects that the audio is being routed through
in the Master section, to the resultant Audio File. This includes any plug-ins, the level of the
faders and any dithering you have set in the Master Section. In WaveLab you normally use
the Render function to:
Mix down a file in a Wave window to a new Audio File, complete with Master Section
effects, dithering and other settings.
WaveLab 7
104
Audio File editing
Mix down a complete Audio Montage to an Audio File.
"Apply" all settings in the Master Section to a file in a Wave window.
When you render a file you can choose the format of the new Audio File and whether you
wish to create a new file or render the file in place. When the file is rendering you will
see a progress bar in the status bar.In WaveLab you can also view this Progress bar in the
Background tasks window (a shared tool window that can be set to float independently).This
allows you to monitor the progress of rendering, pause and if necessary cancel the rendering
process.
Rendering tips
When you are new to the rendering process in WaveLab there are a few things to note:
when rendering a file with the default option "Bypass Master Section on resulting Audio
File" selected in the Render dialog, the Master Section will be bypassed completely
when the new file has finished rendering. If this option is not selected you will hear the
Master Section effects being played back on top of the newly rendered effects. You can
check if the Master Section has been bypassed by checking the status of the
"Play
through Master Section" button, which is located at the bottom right hand corner of the
status bar.
the Master Section's
"Bypass" switch affects playback only. So even if you can't
hear effects when you are playing back your audio, any applied effects are still rendered.
the
"Effect on/off" switch for each individual plug-in affects both playback and
Rendering.
if you are working with an Audio File/montage that contains lots of effects and/or tracks
and you experience playback problems, it can be useful to mix down a copy of your
montage/audio file to free up some processing power. You can then continue editing
the resultant file with the effects rendered. Remember to save a copy of your session
before doing this so you can go back and edit any levels or effects if you need to.
For more information about choosing settings when rendering see the Render Wave window
and Render Montage window. For more information on applying effects see the Master
Section.
Related topics
Render Wave window
Render Montage window
Master Section
Audio Plug-ins
WaveLab 7
5.2 Analysis
5.2
105
Analysis
WaveLab provides you with a comprehensive set of tools for analyzing your audio and diagnosing any errors. You can view your Audio File in many different ways using the suite of
audio meters, via its frequency spectrum, or even in three dimensions. There are also several
tools to interrogate any sample of your audio and find any errors or anomalies.In WaveLab
you can even compare two Audio Files with the Audio file compare tool and view audio in a
Spectrum or Loudness view for greater precision when editing. Below you can find links to
some of these tools used in WaveLab. Most of them can be found in the Analysis menu. The
meters can be found in the Meters menu or via the Workspace > Shared tool windows.
More specialized tools also exist as part of some offline processing dialogs, such as the "Find
current peak level" command in the Change level dialog, or the "Eliminate DC Offset" dialog,
for example.
Related topics
Global analysis
Audio file comparer
3D Frequency Analysis
Loudness distribution
Metering
The Spectrum display
Audio File editing
Offline processing
5.2.1
Global analysis
This dialog allows you to perform advanced analysis on your audio to identify areas with specified properties. It can be used to find problem areas such as glitches or clipped samples,
or just to check general information such as the pitch of a sound.
How it works When you analyze a section of an Audio File, WaveLab scans it and extracts
information which it displays in the dialog. It also "pin-points" sections of the file that meet
specific characteristics, for example, sections being very loud or almost silent. You can then
browse between these points, set markers or zoom in on them.
Types of analysis On most of the tabs, you will find settings determining exactly how the
analysis will be performed. Each tab focuses on a particular analysis area:
Peaks - this tab is for finding individual samples with very high decibel values.
Loudness - this tab is for finding sections that are perceived by the human ear as
louder or weaker in volume. WaveLab uses an accurate method (RMS - Root Mean
Square), to measure a consecutive section of samples and then average their value.
Pitch - this tab is used for finding the exact average pitch of a section of audio. The
method works best on monophonic material (single notes, without chords or harmonies)
and assumes the analyzed section has a relatively stable pitch. As a general rule try to
analyze the sustain portion of a sound, rather than the attack.
WaveLab 7
106
Audio File editing
Extras - this tab is for informing you about DC offsets and the significant bit resolution
of the file. This can be useful, for example, if you wanted to check whether a 16 bit
file really uses 16 bits (or if it was actually recorded with only 8 bit resolution and then
upscaled to 16 bits).
Errors - this tab is to help you find glitches and sections where the audio has clipped
(gone beyond 0 dB).For more control over the analysis, use Error detection and correction. Checking and browsing the results Checking the results on the Pitch and
Extra tabs is simple, since only one value is returned for the whole section of analyzed
audio. For all the other tabs, the analysis methods returns a series of exact points ("hot
points") in the file or section of audio. Use the relevant buttons in each tab to select the
"hot points" you wish to look at in more detail. Using the slider you can then browse
or skip between these points, adding markers or focusing the waveform display at that
particular point in the file.
You can access this dialog in the Audio File Workspace via Analysis > Global Analysis....
For an explanation of each parameter and interface feature, click on , or the 'What's this?'
question mark icon. For more information see Getting Help
Related topics
Error detection and correction
3D Frequency Analysis
5.2.2
Audio file comparer
This analysis tool allows you to compare two Audio Files for differences between them. It
can create a "delta file" that contains these differences. It can also drop markers at positions
where differences are found.
This can be useful for:
Judging the effect of using an equalizer by comparing the file before and after. The delta
file will show what was added or removed.
Check the noise added by a processor.
Compare two digitally recorded files to check for dropouts.
Note - Make sure that the two documents you want to compare are open.
You can access this dialog via Analysis > File comparator....
For an explanation of each parameter and interface feature, click on , or the 'What's this?'
question mark icon. For more information see Getting Help
Related topics
5.2.3
3D Frequency Analysis
This function in WaveLab allows you to view a wave file in both the frequency and time
domains. Although a wave display (time domain) tells you a lot about where one sound
WaveLab 7
5.2 Analysis
107
starts or ends in a file, for example, it doesn't tell you anything about the timbral contents
of the file. A frequency graph (frequency domain) allows you to investigate the individual
frequency components of an Audio File. With the addition of the time dimension you can
follow these frequencies in your Audio File over time and pick out individual snare hits or
vocal notes in a song, for example. The graph used in WaveLab is sometimes called a 3DSpectrogram.
Displaying and viewing the graph
You can choose to analyze a selection of audio or an entire file. If you select a stereo recording, a mix of the two channels will be analyzed. Once you have your region selected or no
region (in the case you wish to analyze the whole file) choose Analysis > 3D Frequency
Analysis.... The graph window will appear.
There is a scrub wheel that allows you to rotate the view around and a settings button that
displays the range of frequencies currently displayed. Click on this button to open the settings dialog and edit the frequency range displayed, as well as to access other options.
Tip: The length of the selection affects the accuracy of the analysis. For short selections
the result will be very detailed. For longer selections (over a minute or so) the results are
generally less detailed as the harmonic content may vary between "measuring points", and
as such are not included in the graph. You might for example make a separate analysis of
the attack (beginning) of a sound, since the most drastic variations usually occur there.
Some example uses for 3D Frequency Analysis
The 3d Frequency Analysis graph in WaveLab can be used for many purposes, for example:
to see how the frequency spectrum is distributed in a mix.
as a basis for EQ-ing, so that you know which frequencies to reduce or boost.
to see which parts of the audio spectrum a certain background noise occupies (for
removing by filtering).
for educational purposes - these graphs tell you a lot about how different sounds are
"built".
For detailed spectrum analysis, the 2D Spectrometer remains the best choice, as it provides
more accurate viewing and more options.
Related topics
Frequency range
Metering
5.2.4
Loudness distribution
This dialog allows you to measure the most frequent loudness values found in an Audio File
(this is not the same as average loudness). The graphic peaks found by the analysis represent
these values.
WaveLab 7
108
Audio File editing
The tool gives an answer to the question: "How often does a given loudness (vertical scale,
in dB) appear in the whole file?". The percentage figure is relative to other peaks. Some
simple examples:
1. If, for instance, you have a sine of 0 dB / 2 second followed by a sine of -6 dB /
2 seconds. This means the global audio material has as much 0 dB material as - 6dB
material: you will see 2 peaks (0 / -6 dB), each at 100%.
2. If, for instance, uou have a sine of 0 dB / 1 second followed by a sine of -6 dB / 3
seconds. This means there are 3 times more -6 dB material than 0 dB material. You
will see a peak of about 33% at 0 dB, and another peak of 100% at -6 dB.
This analysis is useful for learning about how the loudness of your music is distributed.
You can access this dialog in the Wave File Workspace via Analysis > Loudness distribution....
For an explanation of each parameter and interface feature, click on , or the 'What's this?'
question mark icon. For more information see Getting Help
Related topics
Loudness
5.3
Metering
WaveLab contains a variety of audio meters to help in monitoring and analyzing audio.Meters
can be used to monitor audio during playback, rendering, recording and also to analyze a
specific selection of audio. There are seven different audio meters in WaveLab, each with
its own separate window. The meters are accessed via the Meters menu, the Shared Tool
windows menu, or from the Meters control bar.
Monitor Modes
You can choose the audio source and the mode for displaying information in the meters.
You can access the following monitoring functions from the Meters menu or via the Meters
command bar:
Monitor Playback - the meters display the audio output of the Master Section
after the dithering section, unlike the Master Section's own meter.
Monitor Audio Input - the meters display the audio input you have chosen in the
Audio Streaming Settings. This is useful for monitoring audio while recording.
Monitor File Rendering - the meters display what is being written to disk during
file rendering, taking into account Master Section settings, with average, minimum and
maximum peak values computed. After rendering, the meter(s) freeze, and remain frozen
until you refresh or change the monitor mode.
WaveLab 7
5.3 Metering
109
Monitor Edit cursor position - the meters display static information about the
audio beneath the edit cursor. Note that the Master Section settings are not taken into
account in this mode.
Analyze audio selection - this allows you to make a selection and have the
meters display the average values over the selected range as a static display. The
Master Section settings are not taken into account in this mode. When you change the
selection, you need to update the meter displays by selecting
"Refresh selection
analysis" from the Meters menu (or by clicking the Refresh button on the Meters control
bar).
If you have one of the continuous display modes chosen, you can also select to freeze the
meters at any time using the
"Freeze meters" command.
Using meter windows
There can only be one instance of each Audio Meter. For example, if you dock one meter in a
Workspace, it will be automatically removed from the place where it was previously located.
Audio Meters can appear in the Audio File, Audio Montage Workspaces as well as the Control Window. They can be used:
as a docked window in a Workspace
as a tabbed window in the control window
as an independent floating window. In this mode, it can be useful to make the window
"frameless" from Window > Hide frame, to save screen space. In this case, the whole
menu is accessed by right-clicking.
The axis of most Audio Meters may be rotated, to view the graphics horizontally or vertically.
Some meters can also have their visual style and display parameters customized via their
corresponding settings dialog. This can be accessed through the Functions > Settings...
menu in each meter window, or by using the
icon.
Related topics
VU Meter
Spectroscope
Oscilloscope
Bit Meter
Phasescope
Spectrometer
Wavescope
5.3.1
VU Meter
The vu-meter is used to display the peak and average loudness/decibel level of your Audio
File. It also displays the pan, or the balance between the left and right channels in a stereo
WaveLab 7
110
Audio File editing
file.
The upper part of the level/pan meter window shows the peak level and average loudness,
in the following way:
The Peak Level meters display the peak levels of each channel, graphically and numeri-
cally. By default, the meter segments and numerical peak values are displayed in green
for low levels, yellow for levels between -6dB and -2dB, and red for levels above -2dB.
You can change both the colors and the range boundaries if you wish via the Level/Pan
Meter Settings dialog. This can be accessed through the Functions > Settings...
menu, or by using the
icon.
The VU (Volume Unit) meters measure the average loudness (RMS) of each channel.
These meters have a built-in inertia, evening out loudness variations over a user-defined
time span. If you are monitoring playback or audio input, you will also note two vertical
lines following each VU meter bar, seemingly "trying to reach" the current RMS value.
These lines indicate the average of the most recent minimum RMS values (left line)
and the average of the most recent maximum RMS values (right line). To the left, the
difference between the minimum and maximum average values is displayed (the level
value in brackets) - this gives you an overview of the dynamic range of the audio material.
If you are monitoring real-time audio (playback or input), the maximum peak and loud-
ness values are displayed numerically to the right of the meter bars. Numbers in brackets to the right of the Maximum Peak values indicate the number of successive clips
(0dB signal peaks). Recording levels should be set so that they only rarely clip. If the
master level is set too high, the sound quality and frequency response will be compromised at high recording levels, with unwanted clipping effects. If the level is set too
low, noise levels may be high relative to the main sound being recorded.
Pan meters
The lower part of the window shows the pan (the difference in level between the left and
right channel, only applicable when monitoring stereo audio):
The upper pan meters show the peak level difference between the channels, graphically
and numerically. Note that the pan meters are "two-sided"; the level bars can go to the
left or right, indicating which channel is the loudest. The two sides are shown in different
colors (which can be changed via the Settings dialog as explained previously).
The lower pan meters show the average difference in loudness between the channels,
in a similar way. This gives you a visual indication of whether a stereo recording is
properly centered, for example.
If you are monitoring real-time audio (playback or input), the maximum balance differ-
ence value (peak and loudness) for each channel is displayed numerically to the left and
right of the meter bars. The VU meter can be found in the Meters menu of the Audio
Files and Audio Montage Workspaces.It can be used either as a floating window, or
docked in the Workspace or the Control Window.
Related topics
Metering
WaveLab 7
5.3 Metering
5.3.2
111
Spectroscope
The Spectroscope shows a continuous graphical representation of the frequency spectrum,
analyzed into 60 separate frequency bands, represented as vertical bars. Peak levels are
shown as a short horizontal lines above the corresponding band, indicating recent peak/maximum values. The Spectroscope offers a quick spectrum overview. For a more detailed
analysis of the audio spectrum, use the Spectrometer. The Spectroscope can be found in
the Meters menu of the Audio Files and Audio Montage Workspaces. It can be used either as a floating window, or docked in the Workspace.It can also be docked in the Control
Window.
Related topics
Metering
Spectrometer
5.3.3
Oscilloscope
The Oscilloscope offers a highly magnified view of the waveform around the playback cursor
position.
If you are analyzing a stereo file, the Oscilloscope normally shows the separate levels of
the two channels. However, if you activate the option "Show Sum and Subtraction" on the
Functions menu (or click the +/- icon), the upper half of the Oscilloscope shows the sum of
the two channels and the lower half shows the subtraction.
Making settings
By opening the Settings dialog you can adjust the display colors, and choose to activate
Auto-zoom or not. With Auto-zoom activated, the display is optimized so that the highest
level reaches the top of the display at all times. The Settings dialog can be accessed through
the Functions > Settings... menu, or by using the
icon.
The Oscilloscope can be found in the Meters menu of the Audio Files and Audio Montage
Workspaces. It can be used either as a floating window, or docked in the Workspace.It can
also be docked in the Control Window.
Related topics
Metering
5.3.4
Bit Meter
The Bit Meter shows the resolution or the number of bits used in the digital audio being
monitored. Normally the maximum number of bits in an Audio File is the same as the resolution
of the Audio File (e.g. a 16 bit Audio File shows that up to 16 bits are used), but sometimes
this is not the case.
WaveLab 7
112
Audio File editing
As soon as you perform any kind of real-time processing on an Audio File, the audio data is
treated at a much higher resolution (32 bit floating point), to allow for pristine audio quality.
Examples of such processing include level adjustments, effects, the mixing of two or more
files, etc. In fact, the only time when a 16 bit file is played back at 16 bit resolution is if
you play it without any fades or effects, and with the Master Faders set to 0.00 (no level
adjustment). You can try this out for yourself by playing back a 16 bit Audio File and viewing
the Bit Meter - as soon as you adjust the Master Faders, note that 24 bits are used and the
"inter" indicator is lit (more on this below).
How to read the Bit Meter
The innermost meters (closest to the bit scale) show the number of bits in use. You can
adjust this display in the Settings dialog.
The outer meters are "history" meters, showing how many bits were recently in use. You
can adjust the hold time in the Settings dialog.
The "over" segment indicates clipping, similar to a clip indicator.
If the "below" segment is lit, there are more than 24 bits. The bit meter will show the 24
higher bits, and the "below" segment indicates the existence of extra, lower bits. Note
that audio is always processed with more than 24 bits internally.
If the "inter" segment is lit, this indicates that the audio data cannot really be expressed
on a regular 24 bit scale (there are floating point values "in between" bits, thus the label
"inter"). This is typically the case if you apply effects; thus the "inter" segment allows
you to differentiate processed from non-processed 24 bit PCM files.
When to use the Bit Meter
To check whether dithering is necessary or not. As a rule, if you're playing back or
mixing down to 16 bits, and the Bit Meter shows that more than 16 bits are used, you
should apply dithering.
To see the "actual" resolution of an Audio File. For example, even though a file is in 24
bit format, only 16 bits may be used. Or, a 32 bit file may only use 24 bits (in this case,
the "below" segment would not be lit). For this purpose, the Bit Meter is best used in
"Analyze selection" mode.
To see whether a "zeroed" plug-in still affects your signal, or whether a plug-in uses
16 bit internal processing, or more generally, to detect any signal modifier stage in the
audio chain between reading and playing.
To adjust the Bit Meter settings, select "Settings..." from the Options pop-up menu or by
icon.
using the
The Bit meter can be found in the Meters menu of the Audio Files and Audio Montage
Workspaces. It can be used either as a floating window, or docked in the Workspace or the
Control Window.
WaveLab 7
5.3 Metering
113
Related topics
Metering
Dithering
5.3.5
Phasescope
The Phasescope indicates the phase and amplitude relationship between two stereo channels. It is only really relevant when monitoring stereo audio material.
Reading the Phasescope
It can be interpreted as follows:
A vertical line indicates a perfect mono signal (the left and right channels are the same).
A horizontal line indicates that the left channel is the same as the right, but with an
inverse phase.
A random but roughly elliptical shape indicates a well balanced stereo signal. If the
shape "leans" to the left, there is more energy in the left channel and vice versa (the
extreme case of this is if one side is muted, in which case the Phasescope will show a
straight line, angled 45 degrees to the other side).
A perfect circle indicates a sine wave on one channel, and the same sine wave shifted
by 90 degrees on the other.
Generally, the more you can see a "thread" shape, the more bass there is in the signal;
the more "spray-like" the display, the more high frequencies are in the signal.
Phase Correlation meter
At the bottom of the display, you will find a Phase Correlation meter, which shows the same
information but in a different way:
The green line shows the current phase correlation, while the two red lines show the
recent peak minimum and maximum values, respectively (these are the default colors,
which you can change).
With a mono signal, the meter would show +1, indicating that both channels are per-
fectly in phase.
Similarly, -1 indicates that the two channels are the same, but one is inverted.
Generally, for a "good" mix, the meter should show a value between 0 and +1.
Unlike the main Phasescope, the Phase Correlation meter is also available in "Analyze audio
selection" mode, showing an average value for the selected range.
WaveLab 7
114
Audio File editing
Changing settings
You can define display colors, peak hold time, and the resolution or number of samples to
display from the Functions > Settings... menu.
The Phasescope meter can be found in the Meters menu of the Audio Files and Audio Montage Workspaces. It can be used either as a floating window, or docked in the Workspace
or the Control Window.
Related topics
Metering
5.3.6
Spectrometer
The Spectrometer uses FFT (Fast Fourier Transform) techniques to display a continuous
frequency graph, providing a very precise and detailed real-time frequency analysis.
The current frequency spectrum is shown as a linear graph.
Spectrum "peaks" are shown as a short horizontal lines, indicating recent peak/maxi-
mum values.
Snapshots
By using the "Add snapshot" and
"Erase last snapshot" buttons, you can take and erase
snapshots of the current spectrum. These will be superimposed over the current peak spectrum graph, in a color you can customize, until you click the icon again to take a new snapshot.
One use for this is to check the effects of adding EQ, for example. Up to five snapshots can
be superimposed on the display; the sixth snapshot replaces the earliest one in the display,
and so on. (Don't confuse the order of snapshots with the numbered buttons - these are
Spectrometer presets, see below.)
Zooming
You can adjust the frequency scale and range in the Settings dialog as described below,
but it's also possible to temporarily zoom in on a frequency area of interest. This is done by
clicking and dragging a rectangle in the Spectroscope display. When you release the mouse
button, the display is zoomed in so that the enclosed frequency range fills the window. To
return to full-scale display, select "Zoom-out fully" from the Functions menu, or double-click
anywhere on the display.
Making settings
You can adjust the behavior and display of the meters as desired, and assign up to five sets
of Spectrometer settings to the Preset buttons, for instant access. Open the Settings dialog
by selecting "Settings" from the Functions menu or clicking the
"tool" icon. Note that you
can apply your settings without closing the dialog, by clicking the Apply button.
WaveLab 7
5.3 Metering
115
If you want to store your settings for later use (or assign them to a Preset button), select "Save
as..." from the pop-up menu in the lower part of the dialog, and specify a name for the preset
in the file dialog that appears. Now, you can choose to make the settings instantly available
for selection in the FFT Meter window, by using the "Assign to preset button" submenu on
the pop-up menu.
When you are finished, click OK to close the dialog.
Selecting Spectrometer presets
If you have assigned your settings to the Preset buttons in the Settings dialog, you can quickly
switch between different level scales and display modes, by clicking one of the Preset icons
[1]-[5], or selecting the desired preset from the Options pop-up menu.
Exporting FFT data as ASCII text
When using the Spectrometer in off-line mode ("Monitor Edit cursor Position" or "Analyze
audio election" mode) you can export the displayed FFT data as a text file, by selecting
"Export FFT data as ASCII" from the Options pop-up menu. The resulting text file can then
be imported into applications that allow graph plotting from text files (Microsoft Excel, for
example).
The Spectrometer can be found in the Meters menu of the Audio Files and Audio Montage
Workspaces. It can be used either as a floating window, or docked in the Workspace or the
Control Window.
Related topics
Metering
Spectroscope
5.3.7
Wavescope
The Wavescope meter displays a real-time waveform drawing of the audio signal being monitored.
It can be useful when recording or rendering a file if "Monitor File rendering" mode is active.
Making settings
You can adjust settings for the display via the Wavescope Settings dialog. This can be
accessed via Functions > Settings... menu, or by using the
icon. Here you can set
various color options for the background, grid and waveform display, as well as setting the
waveform rendering speed and vertical zoom. If "Clear waveform when reaching right of
pane" is checked the waveform display is cleared each time the cursor reaches the right end
of the display. If unchecked, the previous waveform is overwritten.
Tip: Wavescope is a useful meter for visualizing audio during recording. The Wavescope
meter can be found in the Meters menu of the Audio Files and Audio Montage Workspaces.
WaveLab 7
116
Audio File editing
It can be used either as a floating window, or docked in the Workspace or the Control Window.
Related topics
Metering
5.4
Transport controls
The transport controls allow you to control playback within an Audio File or montage, and to
open the record window. It can be accessed via the Transport menu or the Transport toolbar.
See Command bars for more information.
The Transport menu gives access to (and shows keyboard shortcuts to) the same functions
that are available in the transport toolbar.
The Transport toolbar gives quick access to most of these functions. If the toolbar is hidden, select Workspace > Command bars > Transport commands. Transport functions
operate on the current Audio File.
The basic transport functions are:
Loop On/Off
- Toggles looping on/off for the currently selected Audio File or montage.
Start of file
/ End of File
- Move the cursor to the beginning or end of the currently selected Audio File.
Skip forward
/ Skip backward
- Skip the cursor forwards or backwards within the currently selected Audio File.
Play
- Begin playback of the current Audio File.
Stop
- Stop playback of the current Audio File. A second click moves the cursor to the
beginning of the last start position. A further click returns the cursor to the start of the
file.
Record
- Opens the recording window from which you can start recording.
Additional transport functions such as start, skip and stopping playback options are also
available from the transport command bar. In WaveLab additional playback speed and
jog/shuttle shortcuts are also provided.
For an explanation of each parameter and interface feature, click on , or the 'What's this?'
question mark icon. For more information see Getting Help
WaveLab 7
5.5 Specific tool windows
117
Related topics
Playback speed
Recording Dialog
Command bars
5.5
Specific tool windows
Specific tool windows are windows that are specific to the current Workspace. They can
perform useful tasks in the active Workspace.
They can be docked and un-docked, and saved in your custom layouts.
Audio File Workspace specific tool windows
The following specific tool windows are available within the Audio File Workspace:
Basic Audio CD
Error detection and correction
File Browser
Marker Window
Master Project
Metadata window
Sample attributes
Scripting window (Audio File Workspace)
Spectrum editor
5.5.1
Basic Audio CD
This specific tool window allows you to burn basic "Red Book compatible" audio CDs. You
create your audio CD by adding Audio Files to create a list of tracks. Each track contains
a reference to the external Audio File. This means that you can save your Basic Audio CD
layout as its own session and continue editing individual tracks, for example. Once you are
happy with your CD layout you can choose to check the cd for conformity to the Red Book
standard, burn the CD or export it to the Audio Montage Workspace to edit further. You
can also choose to consolidate the Audio Files in the CD into a single Audio File with track
markers.
Adding tracks to your audio CD
To create tracks in your audio CD:
Drag Audio Files directly - drag Audio Files directly from your computer's file browser
into the window. You can also drag Audio Files from the Audio File Workspace by their
WaveLab 7
118
Audio File editing
tab or document icon. This creates CD track markers at the file edges, quantized on
CD frame boundaries.
Drag an audio selection - dragging a selection (rather than a whole file) into the
basic audio CD creates a CD track with markers at the edges, but quantized on CD
frame boundaries, not necessarily exactly on the exact position of the selection edges.
Browse for Audio Files - select File > Add track(s)... from the Basic Audio CD
menu. You can then select Audio Files to insert in your CD.
Once you have added your tracks, information about each track is displayed. Each track also
has its marker information nested within it. To access this information click on the left most
arrow icon to expand the track view.
Using the track list
Once you have added a number of tracks to your audio CD you can use the track list to:
Audition playback - you can audition each track, with or without pre-roll, by clicking
on the leftmost icons. Click on
in the "audition" column to play the track from that
track's start marker with a pre-roll. Click on the right hand button to playback the track
exactly from the start marker position. You will notice a progress display appears at the
bottom of the window to show you the playback position/time and track number. You
can also start playback with or without a pre-roll from the tracks start or end markers
using the same controls. If the markers are not visible click on the track expand arrow
to reveal the track's markers.
Edit a track's start pause time - for all tracks except the first one you can adjust
the pause duration before the track begins playing. If the pause checkbox is not visible
click on the track expand arrow to reveal the track's markers and pause time setting.
Double click in the cell to edit the value.
Add ISRC code - add an ISRC code for a track by Select-clicking on the field under
the ISRC column.
Edit a track name - by Select-clicking on the name in the list. This also renames the
track's start marker labels.
Add a comment - add a comment to each track by Select-clicking to edit its value.
Editing track times - you cannot edit track start and end times directly in the track
listing. Instead, open the tracks accompanying Audio File via Edit > Edit Audio and
adjust the track start and track end marker locations in the main waveform display. The
start and end times will update accordingly.
Completing your Audio CD
In addition to editing via the track window you can also set overall CD settings via the Basic
Audio CD Settings dialog. You can use this dialog to add UPC/EAN codes and adjust
WaveLab 7
5.5 Specific tool windows
119
pauses and silences in your CD. The Master Section is never used to process the signal to
burn, unlike in the montage. This is why playback through the Master Section is an option
that is off by default.
When you are happy with your CD layout or you wish to further refine it further you can:
Check CD conformity - before burning your CD you can first check its Red Book
conformity by choosing Edit > Check CD conformity.
Write audio CD - choose to burn the CD using the Write Audio CD dialog.
Convert to Audio Montage - convert the CD layout into an audio montage for
further editing by choosing Edit > Convert to Audio Montage
For an explanation of each parameter and interface feature, click on , or the 'What's this?'
question mark icon. For more information see Getting Help
Related topics
Authoring CDs and DVDs
Basic Audio CD Settings
Write Audio CD
Select-clicking
5.5.2
Error detection and correction
This specific tool window allows you to search for unwanted clicks and digital artifacts in an
Audio File. Several detection and restoration methods are available. You can detect, mark
and name, jump to, play back and remove individual audio errors.
The settings for error detection and correction are organized within the following groups of
controls:
Detection tab - choose the method used to detect any errors. Each different method
has its own settings to determine when it will detect an error. Click Detection 1 and 2
will search for clicks in certain frequency ranges while Digital Click Detection looks for
clicks that are caused by clicks typical to digital errors.
Correction tab - specify the method used to correct any errors.
Search Area tab - specify the range of audio you wish to search for errors.
Options tab - this provides a range of preferences for playing back, viewing, and
marking any errors found.
Browse & Correct panel - step through your defined search region detecting each
error in turn. You can choose to correct any errors or mark them for later correction.
There are controls to skip between error markers and make fine adjustments to the
selection. You can also automatically detect and correct all marked errors in the search
region.
WaveLab 7
120
Audio File editing
Strategies to detect and correct errors
There are several strategies that you can employ when detecting and correcting errors:
Define an audio selection where you have identified an error, then click "Correct", or
"Mark for subsequent correction".
Use the function "Detect next error" to let WaveLab automatically find the next error,
and then click "Correct", or "Mark for subsequent correction".
Use the function "Detect all errors" to let WaveLab automatically find all errors in the
predefined range. Then browse the marked errors, removing or adjusting each audio
range in turn, and click "Correct" to correct any specific errors, or you can use the
option "Correct all".
You can access this dialog by choosing Workspace > Specific tool windows > Error
Correction.
For an explanation of each parameter and interface feature, click on , or the 'What's this?'
question mark icon. For more information see Getting Help
Related topics
Marker types
5.5.3
File Browser
This dialog allows you to browse files directly from within WaveLab rather than using your
operating system's file browser.
It provides you with all the standard browsing functions (such as List and Icon views)as well
as additional controls to audition Audio Files and any marker defined regions.You can use
it to open or insert an entire file or a specific region of a file by dragging and releasing the
file in the location you wish to insert the file. In the Audio Montage Workspace you can also
choose to only view certain types of WaveLab specific files. The File Browser can be very
useful in speeding up the process of auditioning a long list of sound files. It can also be used
to drag to windows such as Data CD/DVD, including dragging folders.
The playback functions
Play file
Once you have selected a file in the File Browser list, you can audition it by
clicking Play in the File Browser's toolbar. Click again to stop.
You can also have files play back automatically as soon as they are selected.
Auto-play
To do this, activate Auto-Play mode.
Tip: To audition a long list of Audio Files, enable Auto-play and use the UP and DOWN
cursor keys to step through each Audio File in quick succession.
WaveLab 7
5.5 Specific tool windows
121
Opening and inserting a file or region
Once you have chosen a file you wish to open, double-click it to open the file in the current
Workspace. You can also open it by dragging it onto an empty tabbed group, or onto the
tab bar of a tabbed group.
You can also drag the file over a wave view to insert it at a given point. When you drag a file
over a wave view, a beam is displayed so as to clearly display the insertion point.
When browsing Audio Files, the file browser also has a region panel. When you select an
Audio File, its related regions are listed in this panel. You can then drag the region from
the list, to insert only that part of the audio. Double-clicking on a region has the effect of
opening the file in the Workspace and selecting that region. You can access this dialog via
Workspace > Specific tool windows > File Browser.
For an explanation of each parameter and interface feature, click on , or the 'What's this?'
question mark icon. For more information see Getting Help
Related topics
Specific tool windows
5.5.4
Marker Window
The marker window is a specific tool window that allows you to create, edit and use markers
while working on an audio waveform.
From the Functions menu you can also access useful functions to convert marker types,
rename multiple markers and export the marker list as text.
The Marker list
The marker window contains a list of any markers placed in the currently active file along
with their corresponding details. Click on a column header to sort the list in ascending or
descending order based on the values in that column. You can also use the Filter menu to
toggle which types of markers are displayed in the list.
From this list of markers you can use the fields, controls and menus to:
Create a new marker at the playback head position - click on a marker icon (at
the top of the window) or choose a marker type from the Insert menu to drop a marker
at the current playhead location.
Create a pair of markers from a selection - make a selection in the waveform and
then click on a pair of marker icons (at the top of the window) or choose a "Create
region" command from the Insert menu to drop a pair of markers at either side of the
current selection.
Start playback - It is possible to start playback at the selected marker position, with
in the "audition"
or without pre-roll, by clicking on the leftmost icons. Click on
column to play the wave from that marker position with a pre-roll. Click on the right
hand button to play the wave exactly from the marker position.
WaveLab 7
122
Audio File editing
Change marker types - You can change a marker type by (left) clicking on its icon
and choosing another marker type from the pop-up list that appears.
Edit a marker's name/time/comments - double click in a cell to edit a value (to
align the marker to an exact time, for instance). You can edit the name of the marker,
its time position and any comments.
Lock a marker's position - select the checkbox to lock the marker. This prevents it
from being accidentally dragged to a new position in the Waveform window.
For more information on using markers see Markers. For details on the different marker
types and their uses see Marker types. Note that there are more marker features available in
the Montage version compared to the Audio File version. See "Using markers in the Audio
Montage Workspace" in Markers for more details.
You can access this specific tool window within the Audio Files and Audio Montage
Workspaces via Workspace > Specific tool windows > Markers.
For an explanation of each parameter and interface feature, click on , or the 'What's this?'
question mark icon. For more information see Getting Help
Related topics
Specific tool windows
Markers
Marker types
Convert marker type
Text format
5.5.5
Metadata window
This specific tool window displays any Meta-data tags belonging to the currently active file.
This usually consists of a set of tags that describe the audio contents. For example it might
include the title of the track, the author, and the date it was created. This data will vary
depending on the file type, and not all file types store this information so it may be blank. To
edit the file's meta-data tags click anywhere in the window. This will open the corresponding
file attributes dialog.
You can access this dialog in the Audio File Workspace via Workspace > Specific tool
windows > Meta-Data.
For an explanation of each parameter and interface feature, click on , or the 'What's this?'
question mark icon. For more information see Getting Help
Related topics
Specific tool windows
WaveLab 7
5.5 Specific tool windows
5.5.6
123
Sample attributes
This dialog allows you to define settings for an audio sample before loading it into a hardware
or software sampler.
The settings do not process the sample in any way, they just give the file properties that the
receiving sampler can use. This includes information about the pitch of the sample (which
can be detected automatically by WaveLab), the key range that the sample should span, and
the velocity range to occupy. For WAV and AIFF files, this information is stored in the file's
header.
By default, there are no sample attributes in an Audio File. Therefore you must explicitly create
this information by clicking on the "Create" button first. This dialog is useful if your sampler
can take advantage of these additional tags. If supported by your sampler, it can save you
time by allowing you to both edit and define a samples properties from within WaveLab.
You can access this dialog via Workspace > Specific tool windows > Sample Attributes....
For an explanation of each parameter and interface feature, click on , or the 'What's this?'
question mark icon. For more information see Getting Help
Related topics
5.5.7
Scripting window (Audio File Workspace)
This window allows you to write and execute scripts in the Audio File Workspace.
The inbuilt text editor helps you when writing scripts by highlighting the different parts of
the script with colors, making it more readable. A script can also be written in another text
editor, and loaded via the File menu. To run a script, from within the script window choose
Functions > Execute script.
For a general description of scripting, see Scripting. For an overview of the scripting language, see ECMAScript Reference.
You can access this dialog from the Audio File Workspace via Workspace > Specific tool
windows > Script.
Note: To view trace or log messages when executing scripts that contain the logWindow() function, ensure that the Log window is visible and that it's warning filter buttons are selected.
For an explanation of each parameter and interface feature, click on , or the 'What's this?'
question mark icon. For more information see Getting Help
Related topics
Scripting
ECMAScript Reference
Log window
WaveLab 7
124
Audio File editing
5.5.8
Spectrum editor
This specific tool window allows you to select and perform operations on an Audio File via
its audio spectrum.
It uses high quality linear-phase filters to process a spectrum selection both in the time domain and in the frequency domain. This can be useful for advanced audio restoration tasks
like removing noise from a specific source in a recording, for example.
Making and editing selections
Spectrum editing can only be performed when a waveform is first displayed in Spectrum
display mode and when a spectrum selection is defined. To activate the Spectrum editor,
click on the Spectrum edit tool
in the command bar (or via Workspace > Specific tool
windows > Spectrum Editor). This displays the Spectrogram if this is not already the case
(see The Spectrum display).
To select a region, point and drag to define a rectangle. The region selection defines a time
and a specific frequency range. This allows you to edit and process audio both in the time
domain and in a specific frequency domain, as opposed to standard wave editing which
always operates in the full frequency domain.
Notes on spectrum selections:
When defining a region in a stereo file, a "mirrored" region is automatically created in
the other channel. To define a region in only one channel, press [Shift] while drawing
the region.
Once you have a region selected, if you place your mouse cursor inside the region,
a pop-up appears showing the currently set frequency range (Hz) and the time range
(seconds/milliseconds) for the selection.
A selected region can be moved in any direction by clicking and dragging the region
with the cursor.
If you press [Shift] whilst dragging a region, it only moves horizontally thus retaining
your selected frequency range. If you press [Ctrl]/[Command] + [Shift] the region
only moves vertically thus retaining the selected time range.
You can resize a region by placing the mouse cursor at the edges of the region (so that
a double-arrow appears) and then clicking and dragging.
To remove a region that you have drawn, click anywhere else on the waveform and it
disappears.
If you have defined a region as a Source or Target, it can be selected at any time to
create a new selection using the same dimensions.
Spectrum editor functions
The Spectrum Editor has the following parts:
WaveLab 7
5.5 Specific tool windows
125
Selection - use this part to refine and define your selection(s). You can expand se-
lections, shift selections around and define a source and target region for performing
copy operations.
Operations - use this part to perform copying, filtering and processing operations.
For copying operations, you require both a source and a target region to have been
defined using the Selection tab. You can choose which method to copy audio between
the Source and Target regions. You can also choose to apply processing to a single
spectrum region using a variety of different modes. See Spectrum Processing Modes
for information on each mode type.
Master Section - use this part to process and route selected spectral audio regions
through the Master Section and its effects plug-ins. This allows for frequency-selective
processing. A selected region's frequency spectrum can be routed to the Master Section where you can choose to process it separately from the non-selected frequency
spectrum. The signal is split so that one part (region spectrum or non-selected spectrum) is sent to the plug-ins, while the other part can be mixed with this processed
signal, after the Master Section output.
Using the Spectrum editor
You can use the Spectrum editor in two main operational modes:
Region copying and filtering (Operations tab)
This is mainly intended for audio restoration applied over brief time ranges. Selections can
be copied, pasted, and filtered. This type of processing is mainly used to reduce, remove
or replace unwanted sound artifacts in the audio material, and can be carried out with great
precision. This could be useful for example, to replace part of a live recording that contains
an unwanted noise (such as a mobile phone ring tone), with a copy of a similar region of the
spectrum that only contains a "clean" signal. In general, the spectral Copy/Paste combination
gives the best results, given that the source and destination regions are properly choosen.
Master Section processing (Master Section tab)
This allows you to process a specific frequency range via the Master Section. The selected
or non-selected regions of the spectrum can be processed differently. You can also employ
a number of filters (Bandpass/Low-pass/High-pass) to further refine the particular range of
frequencies to be affected by any Master Section effects.
A selected spectrum region can either be:
Processed separately by the Master Section plug-ins. The non-selected spectrum can
either be bypassed or sent to the Master Section.
Bypassed. This removes the selected spectrum region from the Audio File. The non-
selected spectrum can either be routed to the Master Section input or the Master Section output.
Sent to Master Section output. The non-selected spectrum can either be bypassed
or sent to the Master Section input. If the latter is selected, it will be mixed with the
selected spectrum region at the Master Section output.
You can access this window by choosing Workspace > Specific tool windows > Spectrum Editor.
WaveLab 7
126
Audio File editing
For an explanation of each parameter and interface feature, click on , or the 'What's this?'
question mark icon. For more information see Getting Help
Related topics
The Spectrum display
Spectrum Processing Modes
Spectrogram options
Spectrometer
5.5.8.1
Spectrum Processing Modes
When applying processing to a spectrum region in the Spectrum Editor you can use a variety
of different modes:
Damp
This is used to attenuate the level of a region. The Gain parameter specifies the level of the
attenuation (it is also possible to set positive gain values, i.e. to boost the frequencies in the
region). Three filter types are available to perform the damping:
Bandpass filter: All frequencies in the region are equally attenuated.
Low-pass filter: Higher frequencies in the region will be more attenuated.
High-pass filter: Lower frequencies in the region will be more attenuated.
For the Low- and High-pass filters, a low Filter steepness setting is normally used (around 6
to 18dB).
Blur peaks
This filter operation analyzes the region to find the frequencies with the highest level. The
level of these frequencies will be attenuated (or boosted) according to the set Gain value. If
the gain is negative, these frequencies will be "blurred" and disappear in the mix as a whole.
The purpose of the filter is to mask the loudest frequencies (e.g. it could be used to eliminate
a sudden burst of pitched but unwanted sound in the audio material, like acoustic feedback).
This mode works best with the Infinite steepness setting, which is automatically selected
when Blur peaks is used. You can, however, freely set any Filter steepness setting. The filter
type options are not available when this mode is selected.
Dispersion
This is a special filter that "smears" the dynamics and pitch of the region, without changing
the actual frequency content. This works best on lower frequencies, to mask the identity of
a signal without changing the frequency spectrum.
This mode works best with the Infinite steepness setting, which is automatically selected
when Dispersion is used. You can, however, freely set any Filter steepness setting. The filter
type options are not available when this mode is selected. Dispersion can also be used to
create special effects as it warps the sound in an unique way.
Fade Out
This can be used with any of the three filter types (Bandpass/Low-pass/High-pass). It gradually filters the frequencies in the region along the time axis (from nothing at the left edge of
WaveLab 7
5.6 Shared tool windows
127
the region, to maximum allowed by the gain parameter at the right edge), useful for gradually
removing frequencies from a region.
Fade In
This works like Fade out but inversed. It can also be used in conjunction with any of the three
filter types (Bandpass/Low-pass/High-pass).
Fade out then in
This is a mix of the two previous options; the filtering effect gradually fades out until the
middle of the region, then fades back in. It can also be used in conjunction with any of the
three filter types (Bandpass/Low-pass/High-pass).
Fade in then out
The inverse of the above. It can also be used in conjunction with any of the three filter types
(Bandpass/Low-pass/High-pass).
Related topics
The Spectrum display
Spectrogram options
Spectrum editor
5.6
Shared tool windows
Shared tool windows are windows that can only exist in one place at a time and are shared
between Workspaces. They perform useful tasks in the active Workspace.
They can be docked and un-docked, and saved in your custom layouts.
Shared tool windows:
Phasescope
VU Meter
Oscilloscope
Bit Meter
Spectroscope
Spectrometer
Wavescope
Timecode
Background task monitor
Log window
Master Section
WaveLab 7
128
Audio File editing
Related topics
About Tool Windows
Metering
Docking windows
5.6.1
Phasescope
The Phasescope indicates the phase and amplitude relationship between two stereo channels. It is only really relevant when monitoring stereo audio material.
Reading the Phasescope
It can be interpreted as follows:
A vertical line indicates a perfect mono signal (the left and right channels are the same).
A horizontal line indicates that the left channel is the same as the right, but with an
inverse phase.
A random but roughly elliptical shape indicates a well balanced stereo signal. If the
shape "leans" to the left, there is more energy in the left channel and vice versa (the
extreme case of this is if one side is muted, in which case the Phasescope will show a
straight line, angled 45 degrees to the other side).
A perfect circle indicates a sine wave on one channel, and the same sine wave shifted
by 90 degrees on the other.
Generally, the more you can see a "thread" shape, the more bass there is in the signal;
the more "spray-like" the display, the more high frequencies are in the signal.
Phase Correlation meter
At the bottom of the display, you will find a Phase Correlation meter, which shows the same
information but in a different way:
The green line shows the current phase correlation, while the two red lines show the
recent peak minimum and maximum values, respectively (these are the default colors,
which you can change).
With a mono signal, the meter would show +1, indicating that both channels are per-
fectly in phase.
Similarly, -1 indicates that the two channels are the same, but one is inverted.
Generally, for a "good" mix, the meter should show a value between 0 and +1.
Unlike the main Phasescope, the Phase Correlation meter is also available in "Analyze audio
selection" mode, showing an average value for the selected range.
WaveLab 7
5.6 Shared tool windows
129
Changing settings
You can define display colors, peak hold time, and the resolution or number of samples to
display from the Functions > Settings... menu.
The Phasescope meter can be found in the Meters menu of the Audio Files and Audio Montage Workspaces. It can be used either as a floating window, or docked in the Workspace
or the Control Window.
Related topics
Metering
5.6.2
VU Meter
The vu-meter is used to display the peak and average loudness/decibel level of your Audio
File. It also displays the pan, or the balance between the left and right channels in a stereo
file.
The upper part of the level/pan meter window shows the peak level and average loudness,
in the following way:
The Peak Level meters display the peak levels of each channel, graphically and numeri-
cally. By default, the meter segments and numerical peak values are displayed in green
for low levels, yellow for levels between -6dB and -2dB, and red for levels above -2dB.
You can change both the colors and the range boundaries if you wish via the Level/Pan
Meter Settings dialog. This can be accessed through the Functions > Settings...
menu, or by using the
icon.
The VU (Volume Unit) meters measure the average loudness (RMS) of each channel.
These meters have a built-in inertia, evening out loudness variations over a user-defined
time span. If you are monitoring playback or audio input, you will also note two vertical
lines following each VU meter bar, seemingly "trying to reach" the current RMS value.
These lines indicate the average of the most recent minimum RMS values (left line)
and the average of the most recent maximum RMS values (right line). To the left, the
difference between the minimum and maximum average values is displayed (the level
value in brackets) - this gives you an overview of the dynamic range of the audio material.
If you are monitoring real-time audio (playback or input), the maximum peak and loud-
ness values are displayed numerically to the right of the meter bars. Numbers in brackets to the right of the Maximum Peak values indicate the number of successive clips
(0dB signal peaks). Recording levels should be set so that they only rarely clip. If the
master level is set too high, the sound quality and frequency response will be compromised at high recording levels, with unwanted clipping effects. If the level is set too
low, noise levels may be high relative to the main sound being recorded.
Pan meters
The lower part of the window shows the pan (the difference in level between the left and
right channel, only applicable when monitoring stereo audio):
WaveLab 7
130
Audio File editing
The upper pan meters show the peak level difference between the channels, graphically
and numerically. Note that the pan meters are "two-sided"; the level bars can go to the
left or right, indicating which channel is the loudest. The two sides are shown in different
colors (which can be changed via the Settings dialog as explained previously).
The lower pan meters show the average difference in loudness between the channels,
in a similar way. This gives you a visual indication of whether a stereo recording is
properly centered, for example.
If you are monitoring real-time audio (playback or input), the maximum balance differ-
ence value (peak and loudness) for each channel is displayed numerically to the left and
right of the meter bars. The VU meter can be found in the Meters menu of the Audio
Files and Audio Montage Workspaces.It can be used either as a floating window, or
docked in the Workspace or the Control Window.
Related topics
Metering
5.6.3
Oscilloscope
The Oscilloscope offers a highly magnified view of the waveform around the playback cursor
position.
If you are analyzing a stereo file, the Oscilloscope normally shows the separate levels of
the two channels. However, if you activate the option "Show Sum and Subtraction" on the
Functions menu (or click the +/- icon), the upper half of the Oscilloscope shows the sum of
the two channels and the lower half shows the subtraction.
Making settings
By opening the Settings dialog you can adjust the display colors, and choose to activate
Auto-zoom or not. With Auto-zoom activated, the display is optimized so that the highest
level reaches the top of the display at all times. The Settings dialog can be accessed through
the Functions > Settings... menu, or by using the
icon.
The Oscilloscope can be found in the Meters menu of the Audio Files and Audio Montage
Workspaces. It can be used either as a floating window, or docked in the Workspace.It can
also be docked in the Control Window.
Related topics
Metering
5.6.4
Bit Meter
The Bit Meter shows the resolution or the number of bits used in the digital audio being
monitored. Normally the maximum number of bits in an Audio File is the same as the resolution
WaveLab 7
5.6 Shared tool windows
131
of the Audio File (e.g. a 16 bit Audio File shows that up to 16 bits are used), but sometimes
this is not the case.
As soon as you perform any kind of real-time processing on an Audio File, the audio data is
treated at a much higher resolution (32 bit floating point), to allow for pristine audio quality.
Examples of such processing include level adjustments, effects, the mixing of two or more
files, etc. In fact, the only time when a 16 bit file is played back at 16 bit resolution is if
you play it without any fades or effects, and with the Master Faders set to 0.00 (no level
adjustment). You can try this out for yourself by playing back a 16 bit Audio File and viewing
the Bit Meter - as soon as you adjust the Master Faders, note that 24 bits are used and the
"inter" indicator is lit (more on this below).
How to read the Bit Meter
The innermost meters (closest to the bit scale) show the number of bits in use. You can
adjust this display in the Settings dialog.
The outer meters are "history" meters, showing how many bits were recently in use. You
can adjust the hold time in the Settings dialog.
The "over" segment indicates clipping, similar to a clip indicator.
If the "below" segment is lit, there are more than 24 bits. The bit meter will show the 24
higher bits, and the "below" segment indicates the existence of extra, lower bits. Note
that audio is always processed with more than 24 bits internally.
If the "inter" segment is lit, this indicates that the audio data cannot really be expressed
on a regular 24 bit scale (there are floating point values "in between" bits, thus the label
"inter"). This is typically the case if you apply effects; thus the "inter" segment allows
you to differentiate processed from non-processed 24 bit PCM files.
When to use the Bit Meter
To check whether dithering is necessary or not. As a rule, if you're playing back or
mixing down to 16 bits, and the Bit Meter shows that more than 16 bits are used, you
should apply dithering.
To see the "actual" resolution of an Audio File. For example, even though a file is in 24
bit format, only 16 bits may be used. Or, a 32 bit file may only use 24 bits (in this case,
the "below" segment would not be lit). For this purpose, the Bit Meter is best used in
"Analyze selection" mode.
To see whether a "zeroed" plug-in still affects your signal, or whether a plug-in uses
16 bit internal processing, or more generally, to detect any signal modifier stage in the
audio chain between reading and playing.
To adjust the Bit Meter settings, select "Settings..." from the Options pop-up menu or by
using the
icon.
The Bit meter can be found in the Meters menu of the Audio Files and Audio Montage
Workspaces. It can be used either as a floating window, or docked in the Workspace or the
Control Window.
WaveLab 7
132
Audio File editing
Related topics
Metering
Dithering
5.6.5
Spectroscope
The Spectroscope shows a continuous graphical representation of the frequency spectrum,
analyzed into 60 separate frequency bands, represented as vertical bars. Peak levels are
shown as a short horizontal lines above the corresponding band, indicating recent peak/maximum values. The Spectroscope offers a quick spectrum overview. For a more detailed
analysis of the audio spectrum, use the Spectrometer. The Spectroscope can be found in
the Meters menu of the Audio Files and Audio Montage Workspaces. It can be used either as a floating window, or docked in the Workspace.It can also be docked in the Control
Window.
Related topics
Metering
Spectrometer
5.6.6
Spectrometer
The Spectrometer uses FFT (Fast Fourier Transform) techniques to display a continuous
frequency graph, providing a very precise and detailed real-time frequency analysis.
The current frequency spectrum is shown as a linear graph.
Spectrum "peaks" are shown as a short horizontal lines, indicating recent peak/maxi-
mum values.
Snapshots
By using the "Add snapshot" and
"Erase last snapshot" buttons, you can take and erase
snapshots of the current spectrum. These will be superimposed over the current peak spectrum graph, in a color you can customize, until you click the icon again to take a new snapshot.
One use for this is to check the effects of adding EQ, for example. Up to five snapshots can
be superimposed on the display; the sixth snapshot replaces the earliest one in the display,
and so on. (Don't confuse the order of snapshots with the numbered buttons - these are
Spectrometer presets, see below.)
Zooming
You can adjust the frequency scale and range in the Settings dialog as described below,
but it's also possible to temporarily zoom in on a frequency area of interest. This is done by
clicking and dragging a rectangle in the Spectroscope display. When you release the mouse
button, the display is zoomed in so that the enclosed frequency range fills the window. To
WaveLab 7
5.6 Shared tool windows
133
return to full-scale display, select "Zoom-out fully" from the Functions menu, or double-click
anywhere on the display.
Making settings
You can adjust the behavior and display of the meters as desired, and assign up to five sets
of Spectrometer settings to the Preset buttons, for instant access. Open the Settings dialog
by selecting "Settings" from the Functions menu or clicking the
"tool" icon. Note that you
can apply your settings without closing the dialog, by clicking the Apply button.
If you want to store your settings for later use (or assign them to a Preset button), select "Save
as..." from the pop-up menu in the lower part of the dialog, and specify a name for the preset
in the file dialog that appears. Now, you can choose to make the settings instantly available
for selection in the FFT Meter window, by using the "Assign to preset button" submenu on
the pop-up menu.
When you are finished, click OK to close the dialog.
Selecting Spectrometer presets
If you have assigned your settings to the Preset buttons in the Settings dialog, you can quickly
switch between different level scales and display modes, by clicking one of the Preset icons
[1]-[5], or selecting the desired preset from the Options pop-up menu.
Exporting FFT data as ASCII text
When using the Spectrometer in off-line mode ("Monitor Edit cursor Position" or "Analyze
audio election" mode) you can export the displayed FFT data as a text file, by selecting
"Export FFT data as ASCII" from the Options pop-up menu. The resulting text file can then
be imported into applications that allow graph plotting from text files (Microsoft Excel, for
example).
The Spectrometer can be found in the Meters menu of the Audio Files and Audio Montage
Workspaces. It can be used either as a floating window, or docked in the Workspace or the
Control Window.
Related topics
Metering
Spectroscope
5.6.7
Wavescope
The Wavescope meter displays a real-time waveform drawing of the audio signal being monitored.
It can be useful when recording or rendering a file if "Monitor File rendering" mode is active.
WaveLab 7
134
Audio File editing
Making settings
You can adjust settings for the display via the Wavescope Settings dialog. This can be
accessed via Functions > Settings... menu, or by using the
icon. Here you can set
various color options for the background, grid and waveform display, as well as setting the
waveform rendering speed and vertical zoom. If "Clear waveform when reaching right of
pane" is checked the waveform display is cleared each time the cursor reaches the right end
of the display. If unchecked, the previous waveform is overwritten.
Tip: Wavescope is a useful meter for visualizing audio during recording. The Wavescope
meter can be found in the Meters menu of the Audio Files and Audio Montage Workspaces.
It can be used either as a floating window, or docked in the Workspace or the Control Window.
Related topics
Metering
5.6.8
Timecode
This shared tool window displays the current time of the playback head (or the cursor position
if not playing back), in the timecode format currently selected in the Time Format dialog.
The current time can be in a range of standard SMPTE formats, CD or DVD specific formats,
or a custom one - see Time Format dialog.
The most common use for this window is for working with video or film. You can use it to
display the playback head position of the current Audio File in a SMPTE format to frame level
resolution (i.e. hours:minutes:seconds:frames). You can also use it to display CD frames
(minutes:seconds:frames) when you are authoring CD or DVDs.
You can access this window by choosing Workspace > Shared tool windows > Timecode. It is available in the Control Window, Audio File Workspace and Audio Montage
Workspace.
For an explanation of each parameter and interface feature, click on , or the 'What's this?'
question mark icon. For more information see Getting Help
Related topics
Time Format dialog
CD Frame
SMPTE timecode
Authoring CDs and DVDs
5.6.9
Background task monitor
This specific tool window allows you to view all background rendering processes that are in
progress.
WaveLab 7
5.6 Shared tool windows
135
You can adjust the priority with which they are processed, pause or cancel them. It is useful
if you have a number of lengthy processes underway and want to free up some processing
power to focus on editing. You can either lower the priority of a task so it does not use as
much of the computer processor's capacity, or pause the task temporarily.
You can access this window by choosing Workspace > Shared tool windows > Background task monitor. It is available in the Control Window, Audio File Workspace and
Audio Montage Workspace. You can also access this window in the Control Window by
choosing Utilities > Background task monitor.
You can choose to automatically open the Background task monitor when a rendering process begins. To enable this option, select the checkbox via Options > Global Preferences
> Options > Make the Background Task Monitor visible when a task starts . Since
this window is a Shared tool window, the location where it opens may vary.
For an explanation of each parameter and interface feature, click on , or the 'What's this?'
question mark icon. For more information see Getting Help
Related topics
Specific tool windows
Control Window
Rendering
5.6.10 Log window
This shared tool window allows you to view log messages that have been issued by WaveLab.
When using WaveLab's scripting language for example, the logWindow( ) function outputs
messages to this window. There are a number of toggle buttons and these allow you to filter
the types of messages displayed.
Note: When using the logWindow( ) method you need to have the
"Show informal notes"
button selected for the messages to be visible. If no log messages are displayed, make sure
all the toggle buttons are selected .
You can access this window via Workspace > Shared tool windows > Log. It is available
in the Control Window, Audio File Workspace and Audio Montage Workspace. You can also
access this window in the Control Window via Utilities > Log.
For an explanation of each parameter and interface feature, click on , or the 'What's this?'
question mark icon. For more information see Getting Help
Related topics
Control Window
Specific tool windows
Scripting
WaveLab 7
136
Audio File editing
5.7
Tools
In the Audio File Workspace, WaveLab provides you with powerful tools for generating audio,
splitting files, importing audio from CD and working with external applications. This page
contains links to these tools which can be accessed from the Tools menu.
Related topics
Error detection and correction
Auto Split
Signal generator
DTMF Generator
5.7.1
Error detection and correction
This specific tool window allows you to search for unwanted clicks and digital artifacts in an
Audio File. Several detection and restoration methods are available. You can detect, mark
and name, jump to, play back and remove individual audio errors.
The settings for error detection and correction are organized within the following groups of
controls:
Detection tab - choose the method used to detect any errors. Each different method
has its own settings to determine when it will detect an error. Click Detection 1 and 2
will search for clicks in certain frequency ranges while Digital Click Detection looks for
clicks that are caused by clicks typical to digital errors.
Correction tab - specify the method used to correct any errors.
Search Area tab - specify the range of audio you wish to search for errors.
Options tab - this provides a range of preferences for playing back, viewing, and
marking any errors found.
Browse & Correct panel - step through your defined search region detecting each
error in turn. You can choose to correct any errors or mark them for later correction.
There are controls to skip between error markers and make fine adjustments to the
selection. You can also automatically detect and correct all marked errors in the search
region.
Strategies to detect and correct errors
There are several strategies that you can employ when detecting and correcting errors:
Define an audio selection where you have identified an error, then click "Correct", or
"Mark for subsequent correction".
WaveLab 7
5.7 Tools
137
Use the function "Detect next error" to let WaveLab automatically find the next error,
and then click "Correct", or "Mark for subsequent correction".
Use the function "Detect all errors" to let WaveLab automatically find all errors in the
predefined range. Then browse the marked errors, removing or adjusting each audio
range in turn, and click "Correct" to correct any specific errors, or you can use the
option "Correct all".
You can access this dialog by choosing Workspace > Specific tool windows > Error
Correction.
For an explanation of each parameter and interface feature, click on , or the 'What's this?'
question mark icon. For more information see Getting Help
Related topics
Marker types
5.7.2
Auto Split
This dialog allows you to automatically split an Audio File into separate Audio Files according
to certain specified rules.
You can split files:
...at marker points
...at specific time intervals
...at regions containing silences
...at beat points using beat detection
...according to a description of regions stored in a text file
The Auto Split function can be used in many situations such as:
cutting up a single Audio File of a recording session into its individual takes (using the
silence threshold)
cutting up a drum loop into its individual drum hit samples (using beat detection)
outputting individual tracks from an album master file (using marker detection or "Learn
regions from text file")
converting marker types from one type to another (by using the option "Do not split,
only create markers at splitting points")
silencing the regions between audio information in an instrumental take (using "Mute
audio outside regions")
The Auto Split tool is made up of several pages of dialogs which take you through the process
of splitting your audio. Note that the sequence of pages is not always the same and depends
on the choices you make.
You can access this dialog in the Audio File Workspace via Tools > Auto Split....
For an explanation of each parameter and interface feature, click on , or the 'What's this?'
question mark icon. For more information see Getting Help
WaveLab 7
138
Audio File editing
Related topics
Split Clip at silences
5.7.3
Signal generator
This dialog allows you to generate complex synthesized sounds in mono or stereo.
You can layer different waveform generators together and if outputting a stereo file, adjust
different settings for both the left and right channels. There are a multitude of settings to
adjust the character (Source tab), frequency (Frequency tab) and amplitude (Level tab) of
the generated signals.
To generate a sound follow these basic steps:
choose whether the file is to be mono or stereo, and define the number of samples, and
bit depth using the Audio properties dialog.
choose how many layers of signal generators you wish to use (up to 64).
for each layer, use the source tab to choose the type of signal generator you wish to
use, switch to the frequency tab to define a frequency and its envelope, and use the
level tab to define a level envelope. If you have chosen a stereo file you can also choose
to adjust left and right channels independently.
once all settings are made, choose
Generate and WaveLab calculates an Audio File
according to your specifications. The file is generated and opens up in a new window.
Generating signals can be useful for a variety of testing and measurement purposes. For
example, you could use the Signal Generator to create a sine wave sweep from say 20Hz to
20,000kHz to test your monitoring environment for resonant frequencies.
You can access this dialog in the Audio File Workspace via Tools > Signal Generator....
For an explanation of each parameter and interface feature, click on , or the 'What's this?'
question mark icon. For more information see Getting Help
Related topics
Audio properties dialog
DTMF Generator
5.7.4
DTMF Generator
This dialog allows you to generate DTMF (Dual-tone multi-frequency) or MF tones as used
by some analog telephone systems.
These signals are created by combining two sine waves with variable frequencies together.
Push button telephones generate these two sine waves at different frequencies depending
on the number you press. These dial pulses are then decoded by the telephone exchange
to identify which letters or numbers you pressed.
WaveLab 7
5.8 Peak Files
139
The DTMF system uses eight different frequency signals transmitted in pairs to represent sixteen different numbers, symbols and letters. The characters you can use are:
0123456789ABCD∗#,)
The MF system is limited to only fifteen characters: 0123456789ABC∗#,
The DTMF Generator allows you to generate these DTMF/MF tones to create an Audio File.
You can enter the string of numbers and letters, specify the durations of the tones and set
the amplitude and output type.
You can access this dialog from the Audio File Workspace via Tools > DTMF Generator....
For an explanation of each parameter and interface feature, click on , or the 'What's this?'
question mark icon. For more information see Getting Help
Related topics
Signal generator
5.8
Peak Files
A peak file is a small file with the extension ".gpk" that is automatically created by WaveLab
each time a file is modified or opened in WaveLab for the first time.
The peak file contains information about the waveform and determines how it is drawn in the
wave window. The purpose of the peak file created by WaveLab is to speed up the time it
takes to draw a file's waveform.
By default, the peak file is stored in the same location as the Audio File whose waveform it
represents. You can choose to store a peak file in another location and/or delete it when you
close an Audio File. These settings are found in the Audio File editing preferences.
WaveLab 7
140
Audio File editing
WaveLab 7
Chapter 6
Audio Montages
The WaveLab Audio Montage Workspace is a non-destructive editing environment that allows you to arrange, edit, play back audio Clips. Features include both track and Clip-based
effects, volume and pan automation, and wide-ranging fade and cross fade functions. The
Audio Montage is a great tool for creating music CDs, mastering, multimedia work, radio spot
production, etc. You can create intricate multi-track compositions and author professional
audio CDs. Support for Multichannel and DVD-Audio disks allows you to create surround
sound mixes too.
Basic terminology
The Audio Montage window is where you assemble audio "Clips" into a montage. Once
imported, you can arrange, edit and play back Clips on an unlimited number of both stereo
or mono tracks. These provide a way for the user to structure the work graphically, but they
should not be viewed as "virtual tape tracks".
On an audio track, you can place any number of Clips. These are "containers" for the audio,
and include a number of settings and functions such as volume and pan curves, fades, etc.
A Clip contains a reference to a source Audio File on your hard disk, as well as start and end
positions in the file (allowing Clips to play back smaller sections of their source Audio Files).
Any number of Clips can reference the same source file.
Creating a Montage
To create a blank new montage file choose File > New... to open the Audio Montage
properties dialog. From this dialog you can define the mode, number of channels and sample
rate to use for your new montage. The default setup is a stereo 44.1kHz montage. If you
wish to change the number of channels at a later stage you can by opening this dialog again
via Edit > Audio Montage properties.... See "Multi-channel surround setup" below for
more information on setting up for multiple channels.
There are also ways to generate a new montage automatically. If you are working in the Audio
File Workspace you can choose Edit > Create Montage from Audio File... to create a
new Audio Montage with a selection or an entire Audio File. You can also create a montage
by importing different file formats directly into the Audio Montage Workspace. Several of
these are found in the File > Import > menu. You can create a montage file:
by importing an audio DDP file as an Audio Montage.
142
Audio Montages
importing an audio CD Cue file/CD image as an Audio Montage. This function allows
you to open a cue file – a text file containing information about how CD tracks correspond to the audio in an associated CD image file. The result will be a montage with
Clips corresponding to the tracks in the cue sheet. Cue sheets and CD images can be
created in many programs, including WaveLab.
by importing audio CD tracks directly to a montage using the Import Audio CD dialog
from the Utilities menu.
by converting a Basic Audio CD into an audio montage from the Audio File Workspace.
by creating a montage from an Audio File using the Auto Split function.
by opening an Audio File in the Audio File Workspace and selecting "Create Audio
Montage from Audio File" from the Edit menu.
by importing an AES-31 project file. You can for example, export a complete Nuendo
project as an AES-31 file, and import this into WaveLab, where a Montage containing
all the tracks and files of the original Nuendo project is created.
by importing an XML text file previously exported by WaveLab.
Multi-channel surround setup
In addition to the default stereo mode, WaveLab supports up to 8 channel operation and up
to 6 channel surround operation. To enable multichannel operation mode, a proper audio
driver must first have been selected in the Audio Streaming Settings. Once you have setup
your sound card to receive multiple channels you can choose the number of output channels
you wish in your Montage via the Audio Montage properties dialog. You can then route
different tracks to different channels using the Track dispatching dialog and adjust the pan
between different surround channels using the Surround Panner dialog or the mini surround
pan window in the track's control window.
Tracks and Clips
The main montage window is divided into a number of horizontal "tracks" which you can add
and remove. Tracks can be mono/stereo audio or picture tracks. You layout your Clips on
audio tracks to create your montage.
Adding new tracks
You can add new tracks of any type:
by using the Track > Add [track type] menu, or
by clicking on a track's number button to bring up the Track context menu and choosing
"Add [track type] track".
See "Managing tracks" below for more information on working with tracks.
Adding new Clips
You then import audio to your audio tracks to begin assembling them as Clips in your montage. You can create Clips by copying audio selections from the Audio File Workspace into
the Audio Montage as well as importing external files directly. Add an Audio File/s to a track:
WaveLab 7
143
by using drag and drop from the Audio File Workspace (via a tab or the document icon).
by dragging an Audio File directly from your operating system's file browser.
by copying and pasting audio from an Audio File in the Audio File Workspace and
pasting it into a track.
by dragging from the File Browser window.
by dragging a track from the Basic Audio CD window.
by dragging regions from the files view.
Editing a Montage
Editing/arranging Clips
Once you have imported your audio Clips you can begin laying them out and editing them in a
multitude of ways. Most of the functions for editing Clips are accessible via the Focused Clip
window. You can cut, copy, paste, delete, move, repeat, split, pitch shift, lock, time stretch
and change the referenced Audio File for all Clips in your montage. By dragging the edges
of two Clips on the same track up against other you can automatically add a cross fade. The
cross fade type can be adjusted and you can also add envelope points for volume and pan.
See the Focused Clip window for more information.
Shortcut: You can also access the Edit pane commands from the Focused Clip editor by
right-clicking on a Clip to reveal a context menu.
Modes
The Modes menu provides you with an array of options to help you when moving and crossfading Clips. You can choose how you wish Clips to be handled when moving and adjust
whether automatic fades are created or not and how they react when moving Clips.
Editing context menus
There are many context menus in the Audio Montage Workspace to help you while editing
your montages. They exist for managing tracks (Track) , Clips (Clip) and inserting Audio
Files into your montage (Insert). You can also save selections of Clips as Groups so that
you can easily re-select a number of Clips via the Groups window. See Groups for more
information on using Groups. Dragging can be used with several editing functions in the
Montage Workspace. See Dragging operations for more information.
Tip: Editing multiple envelopes
When editing a cross fade length with the mouse, or the envelope level, you can press
[Alt]/[Option] at the same time, and this will adjust the fade of all selected Clips.
Getting around the Audio Montage window In addition to some of the standard zooming
and playback controls present in the Audio File Workspace there are some that are unique to
the Audio Montage Workspace. There are two magnifying glass icons near the scroll wheel
which allow you to zoom in and out in the track window. Clicking each icon will display more
or less tracks. The active track is zoomed in while the remaining tracks shrink down to allow
you to concentrate on one track. See Zooming and scrolling for more information. There is
also the handy Navigator for quickly moving around the visible Workspace in the montage
main window. To make it easy to quickly move between different views and zoom levels,
WaveLab 7
144
Audio Montages
you can also capture view settings as "snapshots", and apply these at any time using the
Snapshots window.
The info line
The info line is the grey area below the main montage track view. It indicates what will
happen when you click the mouse buttons (with or without modifier keys), depending on the
location of your mouse (much like tool tips for buttons). This is useful since editing in the
audio montage is based on mouse zones – you click in different areas of the Clips to perform
different actions. The info line will also display positions and lengths when you are moving,
copying or resizing Clips. For more information see Audio Montage contextual information.
Working with Clips
When you add a single Clip to the montage (by pasting, importing from disk or using drag
and drop), the Paste context menu appears. By selecting one of the menu items, you can
specify how the Clip is inserted, and whether existing Clips should be affected or not, etc.
You can choose from:
Add/Mix - The Clip is inserted without affecting any Clips that already exist on the
destination track. The exception is if an inserted audio Clip partially overlaps another
audio Clip, in which case a cross fade is created in the overlapping zone (this is only
the case if the Auto crossfade mode is activated).
Add/Mix & bind right Clips (track) - When the Clip is inserted, all Clips to the right
of it (on the same track) are moved to the right, to make room for the inserted Clip.
Add/Mix & bind right Clips (global) - When the Clip is inserted, all Clips to the
right of it (on all tracks) are moved to the right, to make room for the inserted Clip.
Split/Insert - This option is only available if the insertion point is within an existing
Clip (audio tracks only). When the Clip is inserted, the existing Clip is split and the
right section is moved to the right to make room for the inserted Clip. Other Clips are
not affected.
Split/Insert & bind right Clips (track) - As Split/Insert, but other Clips to the right
on the same track are also moved accordingly (audio tracks only).
Split/Insert & bind right Clips (global) - As Split/Insert, but other Clips to the right
on all tracks are also moved accordingly (audio tracks only).
Replace selected range - Only available if there is a selection range on the destina-
tion track. The Clip with the selection range will be split at the selection range edges,
the inserted Clip will replace the range and the section to the right of the range is moved
to the left or right (depending on the length of the inserted Clip vs. the length of the
selection range), so that there is no gap after the inserted Clip.
Replace selected range (trim source accordingly) - This is only possible if there
is a selection range on the destination track, and if that selection range is shorter than
the range of the Clip to be inserted. The inserted Clip will overwrite the selected range
only, that is, the range to be inserted will be trimmed according to the current selection.
WaveLab 7
145
Replace selected range & bind right Clips (track) - As Replace selected range,
but other Clips to the right on the same track are also moved accordingly.
Replace selected range & bind right Clips (global) - As Replace selected range,
but other Clips to the right on all tracks are also moved accordingly.
Overwrite from cursor - If the inserted Clip overlaps any other Clips, the overlapped
regions are removed from the existing Clips.
Cancel - No Clip is added (you can also cancel the insertion by clicking outside the
pop-up menu).
Focused Clip versus Select Clips
It is important to note that there is a difference between a "focused" Clip and a "selected"
Clip. Some editing functions can only be executed on an individual Clip or "focused Clip",
while some others can be executed on multiple Clips or "selected Clips".
Focused Clip - there can only ever be one or no focused Clip at a time. The focused
Clip's name is displayed in red. It's necessary to identify the Clip as focused because
there are certain functions that can only be executed on a single Clip. You use the
Focused Clip window to perform these functions.
Selected Clip - there can be many selected Clips. This allows you to edit multiple
Clips at the same time. You can perform functions such as copy, delete, move, etc.
Selected Clips have a different background color.
Managing tracks
Managing tracks is done mainly in the area to the left of each track in the main window. In the
middle of this area is a button with the number of the track. Clicking this button brings up
the track pop-up menu, which contains most of the track functions. There are also controls
for:
Minimizing/folding a track - use the small drop-down arrow to save screen space
by toggling the track between a zoomed to closed "folded" view.
Soloing a track - the small diamond-shaped button allows you to solo a track so that
all other tracks are muted but it is heard.
Muting a track - the small round shaped button allows you to mute/unmute a track.
Gray means the mute button is engaged and the track is not audible. Green means that
mute is off and the track is audible.
Choose a track's output channel - the small "Lf:Rf" button allows you to dispatch
audio to different channels.
Adjust track's volume - the two small channel faders allow you to adjust that
track's volume on both left and right channels (for a stereo track). Holding down
[Ctrl]/[Command] will reset the sliders to 0dB. In a stereo track holding down [Shift]
or right-clicking and dragging on either the left or right fader will allow you to adjust the
balance of one channel at a time. Use [Shift] or right-click and [Ctrl]/[Command] to
reset a single fader to 0dB.
WaveLab 7
146
Audio Montages
Multiple Clips and Groups
It is possible to group multiple Clips together by holding down [Shift] or [Ctrl]/[Command]
while selecting them. You can then save them as a "selection group" so that later you can
easily select all Clips in that Group with a single click. You can even nest Groups inside each
other. See Groups for more information.
Playing back and using effects
Playback in the Audio Montage works in much the same way as in the Audio File Workspace.
There are however some additional points to note:
Audio tracks are normally routed through the Master Section
This allows you to add global effects to the Audio Montage or use the Render function to
create a mixdown Audio File, separate Audio Files in the case of a multichannel Montage or
an intermediary Basic Audio CD. You can also choose to route the audio from a track to the
nearest track above for use with Clip effects that allow modulating audio inputs (such as the
Ducker plug-in). The routing is done using the "Route to" options on the Track context menu.
Effects can be added to Clips or Tracks
Each independent Clip and/or audio track in the Montage can be independently processed
by up totenVST effect plug-ins. Effects are configured either as Inserts, when all sound is
processed by the effect, or as Send effects. See Effects for more information.
Using markers in the montage
Markers work in much the same way as in the Audio File Workspace however there are some
additional functions available that are useful for working with Clips. You can for example, bind
a marker to a Clip so that it moves with the Clip. For more information use "What's this?" or
see "Using markers in the Audio Montage Workspace" in Markers for more details.
Mixing down – The Render function
The Render function in the Master Section allows you to "mix down" the whole Montage (or
sections of it) to a single Audio File, or to several files in case of a multichannel Montage. It
also allows you to render to a basic audio CD or CD image and cue sheet, or even a new
Audio Montage. This can be useful for example when you wish to "print" any effects to file.
The Render function can be used in many ways:
It's useful if you want to burn a CD from a CPU-intensive Montage, as it allows you to
first render all track and Clip effect processing to recreate a new montage and then
burn the CD in a second pass.
Surround channels can be rendered as multiple files, retaining the stereo/mono status
of the individual surround channels.
You can create a CD image and cue-sheet
You can create a Basic Audio CD
WaveLab 7
147
It allows you to render a whole Montage to a single file, or various parts to multiple
Audio Files in one operation (for example: rendering regions, Groups or Clips)
For more information see Rendering and Render Montage window.
CD Preparation
The Audio Montage Workspace is an especially powerful tool when it comes to authoring
professional Audio CDs. You can easily author a CD using the CD window. This window
contains a variety of tools for authoring and burning CDs, including a CD Wizard to get you
started, full CD playback previewing, the ability to add and edit CD-Text, the generation of
CD reports and the ability to check the conformity of your disk to common standards. In
conjunction with the Marker Window you can edit, create and delete different Track marker
types with precision, giving you the ability to create gap-less CDs and control the pauses
between track etc. Any changes you make to Track markers will be reflected in the CD
window too. Once you are happy with your CD layout you can burn a CD directly from the
CD window or save a DDP image using the Write Audio CD window.
For more information on burning CDs see Authoring CDs and DVDs and the CD window.
DVD-Audio burning
You can also author and burn DVD-Audio disks in the Audio Montage Workspace. This is
done using the dedicated DVD-Audio window. The process is similar to creating CDs but
there are some differences. Montages are always rendered prior to the DVD burning process.
A DVD-Audio project can contain up to 9 Montages with up to 99 tracks in each Montage.
Thus, for DVD-Audio you will probably make preparations for several separate Montages that
are to be included on the DVD first, then proceed to the DVD-Audio window to configure
the DVD-Audio project where you add the separate Montages as groups. Lastly you render
the files before the actual burning process takes place. Each Montage can have a different
channel configuration, bit resolution and sample rate in the DVD-Audio project.
For more information on authoring DVD-Audio disks see DVD-Audio.
DVD-A picture tracks
DVD-A picture tracks can be added to Montages that are to be burned to DVD. These tracks
have no functionality in WaveLab itself, other than offering the ability to place pictures along
the time line which will be shown together with the audio when the final DVD-A is played back
in a compatible player connected to a video display. To add a picture first add a new picture
track via the track menu. Place your cursor where you would like to insert your image and
right-click on the track to display the Insert context menu where you can browse for an image
file to include. You can also adjust picture settings or add default images via the DVD-Audio
options dialog.
Exporting and importing AES-31 files
You can import and export AES-31 files into and out of WaveLab. You can for example, import a project created in Steinberg’s Nuendo into WaveLab by importing an AES-31 file. It
is possible to add specific codes to the names of markers in Nuendo to facilitate their conversion into WaveLab specific markers so that when the AES-31 file exported from Nuendo
WaveLab 7
148
Audio Montages
is imported into WaveLab, the markers it contains will be interpreted as WaveLab markers
upon import.
For the various CD track markers, the codes to use are as follows:
Marker type
Code
Example marker name
CD track start
[t-start]
So it begins [t-start]
CD track end
[t-end]
The end [t-end] of the
road
CD track splice
t-splice]
Intermission [t-splice]
CD track index
[t-index]
[t-index] Hello
You must use Nuendo 2.0 or later if you want to create specially named markers that
will be interpreted as WaveLab markers.
In Nuendo, a marker track has to be created for the specially named markers.
When importing AES-31 projects containing specially named markers, the marker
codes (e.g. [t-end]) will not be displayed in WaveLab.
For more information on AES-31 files see AES31.
XML Export/Import of Audio Montages
This is available on the Save special (Montage) submenu, and is solely intended for users
familiar with XML. XML stands for "E Xtensible Markup Language" and is a markup language
much like HTML.
This feature can be useful for example, if you wish to change many file names used by the
Audio Montage (export then import). It could also be used to generate Audio Montages
from scratch (or from a template), or to convert another DAW file format to WaveLab's Audio
Montage. Another application could be to compare two Audio Montages using a text file
comparison tool.
There are many freeware XML editors available, but a simple text editor can also be used.
It is beyond the scope of this manual to provide details about how to edit XML files, however
here's some basic information:
All strings are included in a CDATA section, in the UTF-8 format.
All integer values are in simple textual form: 127 = "127"
All float and double values are stored in Base64 format.
Any binary data is stored in Base64 format.
Related topics
Metering
WaveLab 7
6.1 Metering
149
Tools
Transport controls
Specific tool windows
Shared tool windows
Utilities
Audio Montage Colors
Clip
Audio Montage contextual information
6.1
Metering
WaveLab contains a variety of audio meters to help in monitoring and analyzing audio.Meters
can be used to monitor audio during playback, rendering, recording and also to analyze a
specific selection of audio. There are seven different audio meters in WaveLab, each with
its own separate window. The meters are accessed via the Meters menu, the Shared Tool
windows menu, or from the Meters control bar.
Monitor Modes
You can choose the audio source and the mode for displaying information in the meters.
You can access the following monitoring functions from the Meters menu or via the Meters
command bar:
Monitor Playback - the meters display the audio output of the Master Section
after the dithering section, unlike the Master Section's own meter.
Monitor Audio Input - the meters display the audio input you have chosen in the
Audio Streaming Settings. This is useful for monitoring audio while recording.
Monitor File Rendering - the meters display what is being written to disk during
file rendering, taking into account Master Section settings, with average, minimum and
maximum peak values computed. After rendering, the meter(s) freeze, and remain frozen
until you refresh or change the monitor mode.
Monitor Edit cursor position - the meters display static information about the
audio beneath the edit cursor. Note that the Master Section settings are not taken into
account in this mode.
Analyze audio selection - this allows you to make a selection and have the
meters display the average values over the selected range as a static display. The
Master Section settings are not taken into account in this mode. When you change the
"Refresh selection
selection, you need to update the meter displays by selecting
analysis" from the Meters menu (or by clicking the Refresh button on the Meters control
bar).
If you have one of the continuous display modes chosen, you can also select to freeze the
"Freeze meters" command.
meters at any time using the
WaveLab 7
150
Audio Montages
Using meter windows
There can only be one instance of each Audio Meter. For example, if you dock one meter in a
Workspace, it will be automatically removed from the place where it was previously located.
Audio Meters can appear in the Audio File, Audio Montage Workspaces as well as the Control Window. They can be used:
as a docked window in a Workspace
as a tabbed window in the control window
as an independent floating window. In this mode, it can be useful to make the window
"frameless" from Window > Hide frame, to save screen space. In this case, the whole
menu is accessed by right-clicking.
The axis of most Audio Meters may be rotated, to view the graphics horizontally or vertically.
Some meters can also have their visual style and display parameters customized via their
corresponding settings dialog. This can be accessed through the Functions > Settings...
icon.
menu in each meter window, or by using the
Related topics
VU Meter
Spectroscope
Oscilloscope
Bit Meter
Phasescope
Spectrometer
Wavescope
6.1.1
VU Meter
The vu-meter is used to display the peak and average loudness/decibel level of your Audio
File. It also displays the pan, or the balance between the left and right channels in a stereo
file.
The upper part of the level/pan meter window shows the peak level and average loudness,
in the following way:
The Peak Level meters display the peak levels of each channel, graphically and numeri-
cally. By default, the meter segments and numerical peak values are displayed in green
for low levels, yellow for levels between -6dB and -2dB, and red for levels above -2dB.
You can change both the colors and the range boundaries if you wish via the Level/Pan
Meter Settings dialog. This can be accessed through the Functions > Settings...
icon.
menu, or by using the
The VU (Volume Unit) meters measure the average loudness (RMS) of each channel.
These meters have a built-in inertia, evening out loudness variations over a user-defined
WaveLab 7
6.1 Metering
151
time span. If you are monitoring playback or audio input, you will also note two vertical
lines following each VU meter bar, seemingly "trying to reach" the current RMS value.
These lines indicate the average of the most recent minimum RMS values (left line)
and the average of the most recent maximum RMS values (right line). To the left, the
difference between the minimum and maximum average values is displayed (the level
value in brackets) - this gives you an overview of the dynamic range of the audio material.
If you are monitoring real-time audio (playback or input), the maximum peak and loud-
ness values are displayed numerically to the right of the meter bars. Numbers in brackets to the right of the Maximum Peak values indicate the number of successive clips
(0dB signal peaks). Recording levels should be set so that they only rarely clip. If the
master level is set too high, the sound quality and frequency response will be compromised at high recording levels, with unwanted clipping effects. If the level is set too
low, noise levels may be high relative to the main sound being recorded.
Pan meters
The lower part of the window shows the pan (the difference in level between the left and
right channel, only applicable when monitoring stereo audio):
The upper pan meters show the peak level difference between the channels, graphically
and numerically. Note that the pan meters are "two-sided"; the level bars can go to the
left or right, indicating which channel is the loudest. The two sides are shown in different
colors (which can be changed via the Settings dialog as explained previously).
The lower pan meters show the average difference in loudness between the channels,
in a similar way. This gives you a visual indication of whether a stereo recording is
properly centered, for example.
If you are monitoring real-time audio (playback or input), the maximum balance differ-
ence value (peak and loudness) for each channel is displayed numerically to the left and
right of the meter bars. The VU meter can be found in the Meters menu of the Audio
Files and Audio Montage Workspaces.It can be used either as a floating window, or
docked in the Workspace or the Control Window.
Related topics
Metering
6.1.2
Spectroscope
The Spectroscope shows a continuous graphical representation of the frequency spectrum,
analyzed into 60 separate frequency bands, represented as vertical bars. Peak levels are
shown as a short horizontal lines above the corresponding band, indicating recent peak/maximum values. The Spectroscope offers a quick spectrum overview. For a more detailed
analysis of the audio spectrum, use the Spectrometer. The Spectroscope can be found in
the Meters menu of the Audio Files and Audio Montage Workspaces. It can be used either as a floating window, or docked in the Workspace.It can also be docked in the Control
Window.
WaveLab 7
152
Audio Montages
Related topics
Metering
Spectrometer
6.1.3
Oscilloscope
The Oscilloscope offers a highly magnified view of the waveform around the playback cursor
position.
If you are analyzing a stereo file, the Oscilloscope normally shows the separate levels of
the two channels. However, if you activate the option "Show Sum and Subtraction" on the
Functions menu (or click the +/- icon), the upper half of the Oscilloscope shows the sum of
the two channels and the lower half shows the subtraction.
Making settings
By opening the Settings dialog you can adjust the display colors, and choose to activate
Auto-zoom or not. With Auto-zoom activated, the display is optimized so that the highest
level reaches the top of the display at all times. The Settings dialog can be accessed through
the Functions > Settings... menu, or by using the
icon.
The Oscilloscope can be found in the Meters menu of the Audio Files and Audio Montage
Workspaces. It can be used either as a floating window, or docked in the Workspace.It can
also be docked in the Control Window.
Related topics
Metering
6.1.4
Bit Meter
The Bit Meter shows the resolution or the number of bits used in the digital audio being
monitored. Normally the maximum number of bits in an Audio File is the same as the resolution
of the Audio File (e.g. a 16 bit Audio File shows that up to 16 bits are used), but sometimes
this is not the case.
As soon as you perform any kind of real-time processing on an Audio File, the audio data is
treated at a much higher resolution (32 bit floating point), to allow for pristine audio quality.
Examples of such processing include level adjustments, effects, the mixing of two or more
files, etc. In fact, the only time when a 16 bit file is played back at 16 bit resolution is if
you play it without any fades or effects, and with the Master Faders set to 0.00 (no level
adjustment). You can try this out for yourself by playing back a 16 bit Audio File and viewing
the Bit Meter - as soon as you adjust the Master Faders, note that 24 bits are used and the
"inter" indicator is lit (more on this below).
How to read the Bit Meter
The innermost meters (closest to the bit scale) show the number of bits in use. You can
adjust this display in the Settings dialog.
WaveLab 7
6.1 Metering
153
The outer meters are "history" meters, showing how many bits were recently in use. You
can adjust the hold time in the Settings dialog.
The "over" segment indicates clipping, similar to a clip indicator.
If the "below" segment is lit, there are more than 24 bits. The bit meter will show the 24
higher bits, and the "below" segment indicates the existence of extra, lower bits. Note
that audio is always processed with more than 24 bits internally.
If the "inter" segment is lit, this indicates that the audio data cannot really be expressed
on a regular 24 bit scale (there are floating point values "in between" bits, thus the label
"inter"). This is typically the case if you apply effects; thus the "inter" segment allows
you to differentiate processed from non-processed 24 bit PCM files.
When to use the Bit Meter
To check whether dithering is necessary or not. As a rule, if you're playing back or
mixing down to 16 bits, and the Bit Meter shows that more than 16 bits are used, you
should apply dithering.
To see the "actual" resolution of an Audio File. For example, even though a file is in 24
bit format, only 16 bits may be used. Or, a 32 bit file may only use 24 bits (in this case,
the "below" segment would not be lit). For this purpose, the Bit Meter is best used in
"Analyze selection" mode.
To see whether a "zeroed" plug-in still affects your signal, or whether a plug-in uses
16 bit internal processing, or more generally, to detect any signal modifier stage in the
audio chain between reading and playing.
To adjust the Bit Meter settings, select "Settings..." from the Options pop-up menu or by
using the
icon.
The Bit meter can be found in the Meters menu of the Audio Files and Audio Montage
Workspaces. It can be used either as a floating window, or docked in the Workspace or the
Control Window.
Related topics
Metering
Dithering
6.1.5
Phasescope
The Phasescope indicates the phase and amplitude relationship between two stereo channels. It is only really relevant when monitoring stereo audio material.
WaveLab 7
154
Audio Montages
Reading the Phasescope
It can be interpreted as follows:
A vertical line indicates a perfect mono signal (the left and right channels are the same).
A horizontal line indicates that the left channel is the same as the right, but with an
inverse phase.
A random but roughly elliptical shape indicates a well balanced stereo signal. If the
shape "leans" to the left, there is more energy in the left channel and vice versa (the
extreme case of this is if one side is muted, in which case the Phasescope will show a
straight line, angled 45 degrees to the other side).
A perfect circle indicates a sine wave on one channel, and the same sine wave shifted
by 90 degrees on the other.
Generally, the more you can see a "thread" shape, the more bass there is in the signal;
the more "spray-like" the display, the more high frequencies are in the signal.
Phase Correlation meter
At the bottom of the display, you will find a Phase Correlation meter, which shows the same
information but in a different way:
The green line shows the current phase correlation, while the two red lines show the
recent peak minimum and maximum values, respectively (these are the default colors,
which you can change).
With a mono signal, the meter would show +1, indicating that both channels are per-
fectly in phase.
Similarly, -1 indicates that the two channels are the same, but one is inverted.
Generally, for a "good" mix, the meter should show a value between 0 and +1.
Unlike the main Phasescope, the Phase Correlation meter is also available in "Analyze audio
selection" mode, showing an average value for the selected range.
Changing settings
You can define display colors, peak hold time, and the resolution or number of samples to
display from the Functions > Settings... menu.
The Phasescope meter can be found in the Meters menu of the Audio Files and Audio Montage Workspaces. It can be used either as a floating window, or docked in the Workspace
or the Control Window.
Related topics
Metering
WaveLab 7
6.1 Metering
6.1.6
155
Spectrometer
The Spectrometer uses FFT (Fast Fourier Transform) techniques to display a continuous
frequency graph, providing a very precise and detailed real-time frequency analysis.
The current frequency spectrum is shown as a linear graph.
Spectrum "peaks" are shown as a short horizontal lines, indicating recent peak/maxi-
mum values.
Snapshots
By using the "Add snapshot" and
"Erase last snapshot" buttons, you can take and erase
snapshots of the current spectrum. These will be superimposed over the current peak spectrum graph, in a color you can customize, until you click the icon again to take a new snapshot.
One use for this is to check the effects of adding EQ, for example. Up to five snapshots can
be superimposed on the display; the sixth snapshot replaces the earliest one in the display,
and so on. (Don't confuse the order of snapshots with the numbered buttons - these are
Spectrometer presets, see below.)
Zooming
You can adjust the frequency scale and range in the Settings dialog as described below,
but it's also possible to temporarily zoom in on a frequency area of interest. This is done by
clicking and dragging a rectangle in the Spectroscope display. When you release the mouse
button, the display is zoomed in so that the enclosed frequency range fills the window. To
return to full-scale display, select "Zoom-out fully" from the Functions menu, or double-click
anywhere on the display.
Making settings
You can adjust the behavior and display of the meters as desired, and assign up to five sets
of Spectrometer settings to the Preset buttons, for instant access. Open the Settings dialog
by selecting "Settings" from the Functions menu or clicking the
"tool" icon. Note that you
can apply your settings without closing the dialog, by clicking the Apply button.
If you want to store your settings for later use (or assign them to a Preset button), select "Save
as..." from the pop-up menu in the lower part of the dialog, and specify a name for the preset
in the file dialog that appears. Now, you can choose to make the settings instantly available
for selection in the FFT Meter window, by using the "Assign to preset button" submenu on
the pop-up menu.
When you are finished, click OK to close the dialog.
Selecting Spectrometer presets
If you have assigned your settings to the Preset buttons in the Settings dialog, you can quickly
switch between different level scales and display modes, by clicking one of the Preset icons
[1]-[5], or selecting the desired preset from the Options pop-up menu.
WaveLab 7
156
Audio Montages
Exporting FFT data as ASCII text
When using the Spectrometer in off-line mode ("Monitor Edit cursor Position" or "Analyze
audio election" mode) you can export the displayed FFT data as a text file, by selecting
"Export FFT data as ASCII" from the Options pop-up menu. The resulting text file can then
be imported into applications that allow graph plotting from text files (Microsoft Excel, for
example).
The Spectrometer can be found in the Meters menu of the Audio Files and Audio Montage
Workspaces. It can be used either as a floating window, or docked in the Workspace or the
Control Window.
Related topics
Metering
Spectroscope
6.1.7
Wavescope
The Wavescope meter displays a real-time waveform drawing of the audio signal being monitored.
It can be useful when recording or rendering a file if "Monitor File rendering" mode is active.
Making settings
You can adjust settings for the display via the Wavescope Settings dialog. This can be
icon. Here you can set
accessed via Functions > Settings... menu, or by using the
various color options for the background, grid and waveform display, as well as setting the
waveform rendering speed and vertical zoom. If "Clear waveform when reaching right of
pane" is checked the waveform display is cleared each time the cursor reaches the right end
of the display. If unchecked, the previous waveform is overwritten.
Tip: Wavescope is a useful meter for visualizing audio during recording. The Wavescope
meter can be found in the Meters menu of the Audio Files and Audio Montage Workspaces.
It can be used either as a floating window, or docked in the Workspace or the Control Window.
Related topics
Metering
6.2
Tools
In the Audio Montage Workspace, WaveLab provides you with some tools for assisting you
in editing your montages. This page contains links to these tools which can be accessed
from the Tools menu.
WaveLab 7
6.2 Tools
157
Related topics
Meta-normalizer
Configure external tools
6.2.1
Meta-normalizer
This dialog allows you to adjust the loudness of each Clip so that they get the same loudness.
You can use it to equalize the volume of all the Clips within a montage, either by peak level
or loudness. This can be an easy way to ensure that all Clips playback at a similar volume.
You can choose to only equalize the volume of selected Clips, and effects can be excluded
if you wish.
This tool is to achieve the same level of loudness in all Clips (the highest loudness found, if
possible), while ensuring that no Clip will cause sample clipping.
For each Clip, a specific gain is computed by the algorithm after all Clips have been analyzed
(and prior to changing the Clip gain to achieve the common loudness). If it is not possible to
match the highest found loudness, the level of the Clip with the highest loudness is reduced,
so that other Clips can achieve the same loudness.
To avoid clipping the Master Section you can also normalize the mixdown output of the montage (before it goes into the Master Section), and/or the Master Section output.
You can access this dialog from the Audio Montage Workspace by choosing Tools > Metanormalizer....
For an explanation of each parameter and interface feature, click on , or the 'What's this?'
question mark icon. For more information see Getting Help
Related topics
Master Section
6.2.2
Configure external tools
This dialog allows you to configure WaveLab to work with external applications. You can pass
command line arguments to the external applications so that they can process the current
file/folder you are working on, or even the WaveLab's settings folder. This function can be
useful if you wish to edit an Audio File in another application, or wish to compress all your
settings files into a backup zip file, for example.
Note that an external tool only works within the Workspace in which it is defined. This is by
design, so that each type of Workspace can have its own external "toolkit".
To define an external tool you need to:
Give the command a title
Specify the path to the application's executable file
Choose which arguments you wish to pass to the external application
Additionally you can specify an initial folder to direct the external application to
WaveLab 7
158
Audio Montages
Select how you wish WaveLab to behave before the external tool is launched.
Once you have defined an external tool in this way, you can run it by selecting its title from
the Tools menu from within its Workspace.
You can access this dialog by choosing Tools > Configure external tools....
For an explanation of each parameter and interface feature, click on , or the 'What's this?'
question mark icon. For more information see Getting Help
6.3
Transport controls
The transport controls allow you to control playback within an Audio File or montage, and to
open the record window. It can be accessed via the Transport menu or the Transport toolbar.
See Command bars for more information.
The Transport menu gives access to (and shows keyboard shortcuts to) the same functions
that are available in the transport toolbar.
The Transport toolbar gives quick access to most of these functions. If the toolbar is hidden, select Workspace > Command bars > Transport commands. Transport functions
operate on the current Audio File.
The basic transport functions are:
Loop On/Off
- Toggles looping on/off for the currently selected Audio File or montage.
Start of file
/ End of File
- Move the cursor to the beginning or end of the currently selected Audio File.
Skip forward
/ Skip backward
- Skip the cursor forwards or backwards within the currently selected Audio File.
Play
- Begin playback of the current Audio File.
Stop
- Stop playback of the current Audio File. A second click moves the cursor to the
beginning of the last start position. A further click returns the cursor to the start of the
file.
Record
- Opens the recording window from which you can start recording.
Additional transport functions such as start, skip and stopping playback options are also
available from the transport command bar. In WaveLab additional playback speed and
jog/shuttle shortcuts are also provided.
For an explanation of each parameter and interface feature, click on , or the 'What's this?'
question mark icon. For more information see Getting Help
WaveLab 7
6.4 Specific tool windows
159
Related topics
Playback speed
Recording Dialog
Command bars
6.4
Specific tool windows
Specific tool windows are windows that are specific to the current Workspace. They perform
useful tasks in the active Workspace.
They can be docked and un-docked, and saved in your custom layouts.
Audio Montage Workspace specific tool windows
The following specific tool windows are available within the Audio Montage Workspace: File
CD
File Browser
Marker Window
History
Clips
Focused Clip window
Notes
Master Project
Scripting window (Audio Montage Workspace)
Groups
DVD-Audio
Navigator
Zoom
Effects
Snapshots
6.4.1
File
This specific tool window helps you to manage files that are used in the current Audio Montage.
It displays all current files that are being used by Clips in the current montage, along with their
location, size and last modified date. In addition a number of file operations are available:
add one or more Audio Files to a montage, this will open the Insert Audio Files window
when one than one file is selected
WaveLab 7
160
Audio Montages
replace individual files in a montage (this will update any Clip references)
rename a file (this updates all internal Clip references)
select Clips that are referenced by a specific file
open a file in the Audio File Workspace, and view the file in your computer's file browser.
This window is a useful tool to use when constructing and editing your montage.
You can access this dialog in the Audio Montage Workspace by choosing Workspace >
Specific tool windows > Files.
For an explanation of each parameter and interface feature, click on , or the 'What's this?'
question mark icon. For more information see Getting Help
Related topics
Specific tool windows
Insert Audio Files
6.4.2
CD
This specific tool window brings together all the functions for creating an audio CD or DVD-A
within WaveLab.
It displays a list of CD tracks along with information about each track. You can edit each track
and the CD's playback properties as well as access functions to check its conformity to Red
Book standards, add and edit CD-text, add UPC/EAN codes, generate a CD report and
burn the CD. There are also controls to preview skipping between each track and a number
of other options including the ability to choose the "Audio in Pause" mode to determine
whether gaps between track markers are replaced with silence (the normal default) or if they
contain sound.
Adding tracks
To create an audio CD in WaveLab you must at least have a CD start and end marker pair.
You can generate these automatically from audio Clips in the montage using the CD Wizard
or by adding track markers manually.For more information on creating a CD or DVD-A see
Authoring CDs and DVDs.
The Track list
Once you have created one or more tracks, the CD window displays a list of all tracks in
the currently active montage along with their corresponding properties. From this list of CD
tracks you can use the fields, controls and menus to:
Audition playback - It is possible to audition playback at the selected track's start
time, with or without pre-roll, by clicking on the leftmost icons. Click on the left hand
in the "audition" column to play the track from its start time with a pre-roll.
button
Click on the right hand button to play the track exactly from its start time.
WaveLab 7
6.4 Specific tool windows
161
Edit a tracks's name - You can add/edit a name for each track. Double click in a cell
to edit. Note that to change the track name is to indirectly edit the marker name.
Edit a track's start/end time - You can edit the start and end time for each track.
This is the same as moving the track markers physically but can be done with more
precision. Double-click in a cell to edit.
Pre-gap time - This displays the gap between the CD track start marker and where
the first track's audio actually begins. It can only be edited by physically moving the CD
track start marker.
Post-gap time - This displays the gap between the end of the audio of the CD's last
track and the CD track end marker. It can only be edited by physically moving the CD
track end marker.
Copy protection
- Select the checkbox to include a copy protection flag with the
track. This may prevent it from later being imported by software that recognises this
flag.
Emphasis
- This setting is used to indicate if the track was recorded with emphasis
or not. Please note that this does not apply/remove emphasis from the audio, it is just
an indicator as to how the file was created. Normally it is left off.
ISRC Code - This allows you to enter an optional International Standard Recording
Code. Double-click in a cell to add/edit a code.
CD-Text - You can optionally enter CD-Text information for each track and the entire
CD/DVD-A. Double clicking a cell will open the CD Text Editor.
Add/Edit a tracks's comments - You can add/edit text comments for a track. Double
click in a cell to edit. Note that this text comment is for reference only: nothing is burnt
on CD.
Note that CD tracks can be reorderd by dragging them into new positons: this means Clips
and markers are moved accordingly.
For an explanation of each parameter and interface feature, click on , or the 'What's this?'
question mark icon. For more information see Getting Help
Related topics
Specific tool windows
Authoring CDs and DVDs
Write Audio CD
CD Wizard
CD Text Editor
Audio CD Report
CD Pre-emphasis
WaveLab 7
162
Audio Montages
Red Book CD-DA
CD Text
ISRC
UPC/EAN
6.4.3
File Browser
This dialog allows you to browse files directly from within WaveLab rather than using your
operating system's file browser.
It provides you with all the standard browsing functions (such as List and Icon views)as well
as additional controls to audition Audio Files and any marker defined regions.You can use
it to open or insert an entire file or a specific region of a file by dragging and releasing the
file in the location you wish to insert the file. In the Audio Montage Workspace you can also
choose to only view certain types of WaveLab specific files. The File Browser can be very
useful in speeding up the process of auditioning a long list of sound files. It can also be used
to drag to windows such as Data CD/DVD, including dragging folders.
The playback functions
Once you have selected a file in the File Browser list, you can audition it by
Play file
clicking Play in the File Browser's toolbar. Click again to stop.
Auto-play
You can also have files play back automatically as soon as they are selected.
To do this, activate Auto-Play mode.
Tip: To audition a long list of Audio Files, enable Auto-play and use the UP and DOWN
cursor keys to step through each Audio File in quick succession.
Opening and inserting a file or region
Once you have chosen a file you wish to open, double-click it to open the file in the current
Workspace. You can also open it by dragging it onto an empty tabbed group, or onto the
tab bar of a tabbed group.
You can also drag the file over a wave view to insert it at a given point. When you drag a file
over a wave view, a beam is displayed so as to clearly display the insertion point.
When browsing Audio Files, the file browser also has a region panel. When you select an
Audio File, its related regions are listed in this panel. You can then drag the region from
the list, to insert only that part of the audio. Double-clicking on a region has the effect of
opening the file in the Workspace and selecting that region. You can access this dialog via
Workspace > Specific tool windows > File Browser.
For an explanation of each parameter and interface feature, click on , or the 'What's this?'
question mark icon. For more information see Getting Help
Related topics
Specific tool windows
WaveLab 7
6.4 Specific tool windows
6.4.4
163
Marker Window
The marker window is a specific tool window that allows you to create, edit and use markers
while working on an audio waveform.
From the Functions menu you can also access useful functions to convert marker types,
rename multiple markers and export the marker list as text.
The Marker list
The marker window contains a list of any markers placed in the currently active file along
with their corresponding details. Click on a column header to sort the list in ascending or
descending order based on the values in that column. You can also use the Filter menu to
toggle which types of markers are displayed in the list.
From this list of markers you can use the fields, controls and menus to:
Create a new marker at the playback head position - click on a marker icon (at
the top of the window) or choose a marker type from the Insert menu to drop a marker
at the current playhead location.
Create a pair of markers from a selection - make a selection in the waveform and
then click on a pair of marker icons (at the top of the window) or choose a "Create
region" command from the Insert menu to drop a pair of markers at either side of the
current selection.
Start playback - It is possible to start playback at the selected marker position, with
or without pre-roll, by clicking on the leftmost icons. Click on
in the "audition"
column to play the wave from that marker position with a pre-roll. Click on the right
hand button to play the wave exactly from the marker position.
Change marker types - You can change a marker type by (left) clicking on its icon
and choosing another marker type from the pop-up list that appears.
Edit a marker's name/time/comments - double click in a cell to edit a value (to
align the marker to an exact time, for instance). You can edit the name of the marker,
its time position and any comments.
Lock a marker's position - select the checkbox to lock the marker. This prevents it
from being accidentally dragged to a new position in the Waveform window.
For more information on using markers see Markers. For details on the different marker
types and their uses see Marker types. Note that there are more marker features available in
the Montage version compared to the Audio File version. See "Using markers in the Audio
Montage Workspace" in Markers for more details.
You can access this specific tool window within the Audio Files and Audio Montage
Workspaces via Workspace > Specific tool windows > Markers.
For an explanation of each parameter and interface feature, click on , or the 'What's this?'
question mark icon. For more information see Getting Help
WaveLab 7
164
Audio Montages
Related topics
Specific tool windows
Markers
Marker types
Convert marker type
Text format
6.4.5
History
This specific tool window allows you to view a history of all your recent editing operations.
You can revert the current montage to a previous state by selecting the operation you want
to return to and double clicking on it. You can then use the redo command (Edit > Redo) to
return to any state. Use the history menu options (Edit > History >) to undo all operations,
redo all operations, or clear the history.
There are a couple of history options available in the Audio Montage preferences window.
You can choose to empty the history each time you save a montage file and also to group
similar types of sequential operations into a single operation. Both of these options enable
you to use less memory when storing the operation history.
You can access this window in the Audio Montage Workspace via Workspace > Specific
tool windows > History.
For an explanation of each parameter and interface feature, click on , or the 'What's this?'
question mark icon. For more information see Getting Help
Related topics
Audio Montage Preferences
6.4.6
Clips
This specific tool window contains a list of any Clips placed in the currently active montage
file together with their corresponding details.
Click on a column header to sort the list in ascending or descending order based on the
values in that column. Clicking on any row of the list will move the main window's view to
show the selected Clip. To change a value, double click in a cell to begin editing (to align
the Clip to an exact time, for instance). Clips may be dragged into new positions in the list.
From this list of Clips you can use the input fields and controls to:
Start playback - It is possible to start playback at the selected Clip position, with
in the "audition"
or without pre-roll, by clicking on the leftmost icons. Click on
column to play the montage from that Clip's position with a pre-roll. Click on the right
hand button to playback the montage exactly from the start of the Clip.
Edit a Clips's name/start/end/length/comments - edit the name of the Clip, its
start/end time position and any comments.
WaveLab 7
6.4 Specific tool windows
165
Lock a Clips's position - select the checkbox to lock the Clip. This prevents it from
being accidentally edited or dragged to a new position.
Change Gain - use this control to increase/decrease the gain of the Clip. Double click
in the cell to edit the value.
Mute - select this to mute the Clip. Its color changes in the track view and it is no
longer audible during playback.
A wide range of Clip selection features, Clip functions, and Clip display options are available
from the Clips menu. Use "What's This?" help for information on individual menu entries.
You can access this window in the Audio Montage Workspace via Workspace > Specific
tool windows > Clips.
For an explanation of each parameter and interface feature, click on , or the 'What's this?'
question mark icon. For more information see Getting Help
Related topics
Specific tool windows
Audio Montages
Clip
6.4.7
Focused Clip window
The Focused Clip window is an accordion control that contains some sophisticated editing
commands. Each collapsible panel can be expanded by clicking on its title and allows you
to access a range of tools for working with the selected or "focused" Clip.
Using the Focused Clip window
To use the Focused Clip window you first need to select a Clip. Once you have selected a
Clip with your cursor its name will highlight in red. You can now choose one of the Focused
Clip accordion's tabs. The accordion will open to reveal options for that particular pane's
selection of editing shortcuts and tools. There are a number of panes including:
Edit - provides you with a range of common playback shortcuts and editing tools for
working with Clips.
Cue Point - a cue point is a defined position marker that belongs to a Clip. It helps to
align Clips together by making Clips snap to other Clips at the cue point position. Cue
points are displayed as dotted vertical lines. This pane provides you with a number of
shortcuts for creating and working with Cue Points.
Envelope - allows you to access a number of controls for editing and working with a
Clip's different envelopes.
Fade-in - provides you with a range of tools for adjusting a Clip's Fade-in curve.
WaveLab 7
166
Audio Montages
Fade-out - provides you with a range of tools for adjusting a Clip's Fade-out curve.
Colors - up to 20 colors may be assigned to help distinguish particular Clips visually.
Select a Clip then click on a color. Custom colors can be defined with great subtlety
from Options > Colors... Select the Custom color to be defined, then the parts to which
it is applied, then define the color value using the color wheel (or type a set of RGB Red, Green, Blue values). See Audio Montage Colors for more information.
When you choose a different Clip the properties in the Focused Clip window will update.
So for example, if you select "Envelope" the corresponding controls will update to reflect the
selected Clip's envelope information.
The Focused Clip window can be docked or floated. You can reveal or hide the focused Clip
window in the Audio Montage Workspace via Workspace > Specific tool windows >
Focused clip.
For an explanation of each parameter and interface feature, click on , or the 'What's this?'
question mark icon. For more information see Getting Help
Related topics
Clip
Audio Streaming Settings
Customize Commands
Audio Montage Colors
6.4.8
Notes
This specific tool window allows you to keep notes about the current Audio Montage session.
You can type into the window and use the standard HTML text editor controls to format your
text, add images, hyperlinks and lists. These notes are saved along with the Audio Montage
file.
You can access this dialog in the Audio Montage Workspace via Workspace > Specific
tool windows > Notes.
For an explanation of each parameter and interface feature, click on , or the 'What's this?'
question mark icon. For more information see Getting Help
Related topics
Specific tool windows
6.4.9
Scripting window (Audio Montage Workspace)
This window allows you to write and execute scripts in the Audio Montage Workspace.
The inbuilt text editor helps you when writing scripts by highlighting the different parts of
the script with colors, making it more readable. A script can also be written in another text
WaveLab 7
6.4 Specific tool windows
167
editor, and loaded via the File menu. To run a script, from within the script window choose
Functions > Execute script.
For a general description of scripting, see Scripting. For an overview of the scripting language, see ECMAScript Reference.
You can access this dialog from the Audio Montage Workspace via Workspace > Specific
tool windows > Script.
Note: To view trace or log messages when executing scripts that contain the logWindow() function, ensure that the Log window is visible and that it's warning filter buttons are selected.
For an explanation of each parameter and interface feature, click on , or the 'What's this?'
question mark icon. For more information see Getting Help
Related topics
Scripting
ECMAScript Reference
Log window
6.4.10 Groups
This specific tool window displays a list of Groups within the current Audio Montage. Groups
are a selection of Clips that you can quickly re-select via the Groups window. You can group
a number of Clips and nest Groups inside each other. It is also possible to disable individual
Groups and color Groups so you can identify them easily.
Grouping Clips
To create a Group from a number of Clips:
1. Select the Clips you want to group.
2. Make sure you have the Groups window displayed.
3. Select "Group selected clips" from the drop down menu or click the Group icon.
4. Enter a name for the Group in the dialog that appears and click OK.
The new Group appears in the Group list. All Clips included in the Group will also have the
name of the Group prepended to the Clip names in each track. Clicking on a Group in the
Groups window will select all the Clips in your Montage so you can edit them together.
Adding Clips to an existing Group
If you already have a Group, and want to add one or several more Clips to it:
1. Select the Clips you want to add.
2. In the Groups view, select "Group selected clips", or click the corresponding icon.
WaveLab 7
168
Audio Montages
3. In the dialog that appears, select the Group to which you want to add the Clips.
4. Click OK.
Removing Groups
1. Select the Group by clicking on its name in the Groups view list.
2. Pull down the Grouping menu and select "Remove selected group". The Group is
removed (the Clips are not affected).
Using Groups
There are some important things to remember when using Groups:
A Clip cannot be part of more than one Group. If you add a Clip to a Group, it is
automatically removed from any other Group it is part of.
It is possible to create nested Groups, by adding a Group to another Group.
You can temporarily "turn off" a Group by deactivating the checkbox to the left of a
Group in the list. When a Group is deactivated, you can move individual Clips in the
Group, as if they were not grouped.
You can select a specific color for a Group to make it easy to discern it in the track view.
Double-click to rename a Group
You can nest a Group inside another Group by dragging it
The Render option is available to render all Groups as individual files (Render dialog)
You can access this window in the Audio Montage Workspace via Workspace > Specific
tool windows > Groups.
For an explanation of each parameter and interface feature, click on , or the 'What's this?'
question mark icon. For more information see Getting Help
Related topics
Specific tool windows
Render Montage window
6.4.11 DVD-Audio
This specific tool window allows you to author a DVD-Audio disk from a collection of audio
montages.
You can add your finished audio montages into this window, check the DVD-Audio layout for
conformity and output a DVD-Audio disk all from this window. Note: All included montages
need to be in DVD-A mode (this can be set via Audio Montage properties).
Although DVD-A has a different specification from an Audio CD, its track concept makes
is similair to an Audio CD - this is why creating a DVD-A is almost like creating a CD with
WaveLab 7
6.4 Specific tool windows
169
WaveLab's Audio Montage. It is worth noting that throughout WaveLab, where "CD" is
mentioned (for example, in messages), one can usually substitute "DVD-A".
To create a DVD-Audio disk, follow these basic steps:
Create an audio montage - you need at least one audio montage in order to create
a DVD-A. You can import any currently open ones or add them as ∗.mon files. Note that
the Audio Montage must have DVD tracks defined with red (track) markers.
Add Montage(s) - choose File > Add Audio Montage(s) from the DVD-Audio win-
dow to add one or more montages to your DVD-Audio. Each montage will then be
displayed along with its details in the DVD-Audio window. You can drag the montages
vertically to determine the track order. Montages can also be added by dragging montage files directly into the DVD Audio track listing window.
Choose Options - from the DVD-Audio window choose Options > Options... to
open DVD-Audio options dialog. You can then define settings for your DVD-A including
its name and volume information details, whether it will be played back on PAL or NTSC,
and the duration and effects/transitions that included images will use. Images to be
included can be laid out in a picture track in your audio montage or a single default
image can be chosen. If a default image is used it will displayed at the beginning of
each montage
Check and burn your DVD-A - once you are finished laying out your DVD-A and
choosing any options, you can check that it conforms to DVD-Audio specifications
by choosing Edit > Check DVD-Audio conformity.... If everything is OK, choose
Edit > Burn DVD-Audio... to open the DVD-Audio Creation dialog where you can
then render out the disk as a collection of files ready for burning. Once these files are
successfully outputted the Write Data CD/DVD dialog will open automatically allowing
you to burn your DVD-Audio files to an optical DVD.
Note that WaveLab automatically creates some basic DVD menus to access the audio tracks
from the DVD-Player.
For more information on authoring DVD-Audio disk see Authoring CDs and DVDs.
You can access this dialog in the Audio Montage Workspace via Workspace > Specific
tool windows > DVD-Audio.
For an explanation of each parameter and interface feature, click on , or the 'What's this?'
question mark icon. For more information see Getting Help
Related topics
Audio Montages
DVD-Audio Creation
DVD-Audio options
Write Data CD/DVD
6.4.12 Navigator
This specific tool window displays a representative view of the entire active montage and
enables you to quickly navigate around it.
WaveLab 7
170
Audio Montages
Each track is represented by a horizontal colored block. By default, stereo tracks are dark
blue and monotracks are purple or pink (any custom colors you set for a track or via the
Groups window are also displayed).
The visible Workspace is shown by a surrounding black rectangle. Dragging this rectangle
scrolls the main montage window, enabling you to easily navigate to a location in your montage. You can also resize the rectangle vertically and horizontally to adjust the zoom setting
of the active window. This window can be useful when you have a large montage with many
Clips and tracks.
Left click on a Clip block to zoom on it
Right click anywhere to completely zoom out
You can access this window in the Audio Montage Workspace by choosing Workspace >
Specific tool windows > Navigator.
For an explanation of each parameter and interface feature, click on , or the 'What's this?'
question mark icon. For more information see Getting Help
Related topics
Audio Montages
Groups
6.4.13 Zoom
This specific tool window displays a magnified view of the selected track and allows you to
accurately adjust the cross fade point for two adjacent Clips.
You can adjust the zoom level of the selected track, manually shift the Clip's position or
allow WaveLab to find the best location to begin a cross fade between two Clips. You can
adjust the amount that WaveLab will search for the best cross fade position to avoid phase
cancellation issues, and also view the envelope points of the Clips. Mouse operations are
identical to those in the main Clip view.
You can access this window in the Audio Montage Workspace via Workspace > Specific
tool windows > Zoom.
For an explanation of each parameter and interface feature, click on , or the 'What's this?'
question mark icon. For more information see Getting Help
Related topics
Audio Montages
6.4.14 Effects
This specific tool window allows you to add VST effect plug-ins, both to individual Clips
and tracks. The difference between Clip effects and track effects are that Clip effects affect
individual Clips only, whereas track effects affect all Clips on a track.
WaveLab 7
6.5 Shared tool windows
171
Each independent Clip and/or audio track in the Montage can be independently processed
by up to ten VST effect plug-ins. Effects are configured either as Inserts, when all sound is
processed by the effect, or as Send effects where the balance between the unprocessed
sound and the effect send level can be adjusted or controlled by effect envelope curves
(clip effects only). Note that not all effects are capable of "Send", and if this feature is not
available, it is disabled.
The window only shows the effects of the focused Clip, or the focused track according to
the active mode. Each plugin and track can be understood as being associated with a small
"Master Section". A plug-in can be inserted and sorted, and you double-click on an effect
to Edit it. When you close an effect window, its parameters are saved into the montage and
it can be be undone if necessary. Use "What's This?" help on the column headers for more
details.
You can access this dialog in the Audio Montage Workspace via Workspace > Specific
tool windows > Effects.
For an explanation of each parameter and interface feature, click on , or the 'What's this?'
question mark icon. For more information see Getting Help
Related topics
Audio Montages
6.4.15 Snapshots
This dialog enables you to save a number of "views" of your montage. You can then recall a
particular view or snapshot at any time.
When you save a snapshot you capture the current zoom factor, the current cursor position,
the current scroll position and the current time range displayed. You can name each snapshot
and update an existing snapshot too. To recall a snapshot, just click on its title in the list.
This restores all of its view settings. You can also choose to recall all or just one of its view
properties by clicking the appropriate icon.
You can access this dialog in the Audio Montage Workspace via Workspace > Specific
tool windows > Snapshots.
For an explanation of each parameter and interface feature, click on , or the 'What's this?'
question mark icon. For more information see Getting Help
Related topics
Audio Montages
6.5
Shared tool windows
Shared tool windows are windows that can only exist in one place at a time and are shared
between Workspaces. They perform useful tasks in the active Workspace.
They can be docked and un-docked, and saved in your custom layouts.
WaveLab 7
172
Audio Montages
Shared tool windows:
Phasescope
VU Meter
Oscilloscope
Bit Meter
Spectroscope
Spectrometer
Wavescope
Timecode
Background task monitor
Log window
Master Section
Related topics
About Tool Windows
Metering
Docking windows
6.5.1
Phasescope
The Phasescope indicates the phase and amplitude relationship between two stereo channels. It is only really relevant when monitoring stereo audio material.
Reading the Phasescope
It can be interpreted as follows:
A vertical line indicates a perfect mono signal (the left and right channels are the same).
A horizontal line indicates that the left channel is the same as the right, but with an
inverse phase.
A random but roughly elliptical shape indicates a well balanced stereo signal. If the
shape "leans" to the left, there is more energy in the left channel and vice versa (the
extreme case of this is if one side is muted, in which case the Phasescope will show a
straight line, angled 45 degrees to the other side).
A perfect circle indicates a sine wave on one channel, and the same sine wave shifted
by 90 degrees on the other.
Generally, the more you can see a "thread" shape, the more bass there is in the signal;
the more "spray-like" the display, the more high frequencies are in the signal.
WaveLab 7
6.5 Shared tool windows
173
Phase Correlation meter
At the bottom of the display, you will find a Phase Correlation meter, which shows the same
information but in a different way:
The green line shows the current phase correlation, while the two red lines show the
recent peak minimum and maximum values, respectively (these are the default colors,
which you can change).
With a mono signal, the meter would show +1, indicating that both channels are per-
fectly in phase.
Similarly, -1 indicates that the two channels are the same, but one is inverted.
Generally, for a "good" mix, the meter should show a value between 0 and +1.
Unlike the main Phasescope, the Phase Correlation meter is also available in "Analyze audio
selection" mode, showing an average value for the selected range.
Changing settings
You can define display colors, peak hold time, and the resolution or number of samples to
display from the Functions > Settings... menu.
The Phasescope meter can be found in the Meters menu of the Audio Files and Audio Montage Workspaces. It can be used either as a floating window, or docked in the Workspace
or the Control Window.
Related topics
Metering
6.5.2
VU Meter
The vu-meter is used to display the peak and average loudness/decibel level of your Audio
File. It also displays the pan, or the balance between the left and right channels in a stereo
file.
The upper part of the level/pan meter window shows the peak level and average loudness,
in the following way:
The Peak Level meters display the peak levels of each channel, graphically and numeri-
cally. By default, the meter segments and numerical peak values are displayed in green
for low levels, yellow for levels between -6dB and -2dB, and red for levels above -2dB.
You can change both the colors and the range boundaries if you wish via the Level/Pan
Meter Settings dialog. This can be accessed through the Functions > Settings...
icon.
menu, or by using the
The VU (Volume Unit) meters measure the average loudness (RMS) of each channel.
These meters have a built-in inertia, evening out loudness variations over a user-defined
WaveLab 7
174
Audio Montages
time span. If you are monitoring playback or audio input, you will also note two vertical
lines following each VU meter bar, seemingly "trying to reach" the current RMS value.
These lines indicate the average of the most recent minimum RMS values (left line)
and the average of the most recent maximum RMS values (right line). To the left, the
difference between the minimum and maximum average values is displayed (the level
value in brackets) - this gives you an overview of the dynamic range of the audio material.
If you are monitoring real-time audio (playback or input), the maximum peak and loud-
ness values are displayed numerically to the right of the meter bars. Numbers in brackets to the right of the Maximum Peak values indicate the number of successive clips
(0dB signal peaks). Recording levels should be set so that they only rarely clip. If the
master level is set too high, the sound quality and frequency response will be compromised at high recording levels, with unwanted clipping effects. If the level is set too
low, noise levels may be high relative to the main sound being recorded.
Pan meters
The lower part of the window shows the pan (the difference in level between the left and
right channel, only applicable when monitoring stereo audio):
The upper pan meters show the peak level difference between the channels, graphically
and numerically. Note that the pan meters are "two-sided"; the level bars can go to the
left or right, indicating which channel is the loudest. The two sides are shown in different
colors (which can be changed via the Settings dialog as explained previously).
The lower pan meters show the average difference in loudness between the channels,
in a similar way. This gives you a visual indication of whether a stereo recording is
properly centered, for example.
If you are monitoring real-time audio (playback or input), the maximum balance differ-
ence value (peak and loudness) for each channel is displayed numerically to the left and
right of the meter bars. The VU meter can be found in the Meters menu of the Audio
Files and Audio Montage Workspaces.It can be used either as a floating window, or
docked in the Workspace or the Control Window.
Related topics
Metering
6.5.3
Oscilloscope
The Oscilloscope offers a highly magnified view of the waveform around the playback cursor
position.
If you are analyzing a stereo file, the Oscilloscope normally shows the separate levels of
the two channels. However, if you activate the option "Show Sum and Subtraction" on the
Functions menu (or click the +/- icon), the upper half of the Oscilloscope shows the sum of
the two channels and the lower half shows the subtraction.
WaveLab 7
6.5 Shared tool windows
175
Making settings
By opening the Settings dialog you can adjust the display colors, and choose to activate
Auto-zoom or not. With Auto-zoom activated, the display is optimized so that the highest
level reaches the top of the display at all times. The Settings dialog can be accessed through
the Functions > Settings... menu, or by using the
icon.
The Oscilloscope can be found in the Meters menu of the Audio Files and Audio Montage
Workspaces. It can be used either as a floating window, or docked in the Workspace.It can
also be docked in the Control Window.
Related topics
Metering
6.5.4
Bit Meter
The Bit Meter shows the resolution or the number of bits used in the digital audio being
monitored. Normally the maximum number of bits in an Audio File is the same as the resolution
of the Audio File (e.g. a 16 bit Audio File shows that up to 16 bits are used), but sometimes
this is not the case.
As soon as you perform any kind of real-time processing on an Audio File, the audio data is
treated at a much higher resolution (32 bit floating point), to allow for pristine audio quality.
Examples of such processing include level adjustments, effects, the mixing of two or more
files, etc. In fact, the only time when a 16 bit file is played back at 16 bit resolution is if
you play it without any fades or effects, and with the Master Faders set to 0.00 (no level
adjustment). You can try this out for yourself by playing back a 16 bit Audio File and viewing
the Bit Meter - as soon as you adjust the Master Faders, note that 24 bits are used and the
"inter" indicator is lit (more on this below).
How to read the Bit Meter
The innermost meters (closest to the bit scale) show the number of bits in use. You can
adjust this display in the Settings dialog.
The outer meters are "history" meters, showing how many bits were recently in use. You
can adjust the hold time in the Settings dialog.
The "over" segment indicates clipping, similar to a clip indicator.
If the "below" segment is lit, there are more than 24 bits. The bit meter will show the 24
higher bits, and the "below" segment indicates the existence of extra, lower bits. Note
that audio is always processed with more than 24 bits internally.
If the "inter" segment is lit, this indicates that the audio data cannot really be expressed
on a regular 24 bit scale (there are floating point values "in between" bits, thus the label
"inter"). This is typically the case if you apply effects; thus the "inter" segment allows
you to differentiate processed from non-processed 24 bit PCM files.
WaveLab 7
176
Audio Montages
When to use the Bit Meter
To check whether dithering is necessary or not. As a rule, if you're playing back or
mixing down to 16 bits, and the Bit Meter shows that more than 16 bits are used, you
should apply dithering.
To see the "actual" resolution of an Audio File. For example, even though a file is in 24
bit format, only 16 bits may be used. Or, a 32 bit file may only use 24 bits (in this case,
the "below" segment would not be lit). For this purpose, the Bit Meter is best used in
"Analyze selection" mode.
To see whether a "zeroed" plug-in still affects your signal, or whether a plug-in uses
16 bit internal processing, or more generally, to detect any signal modifier stage in the
audio chain between reading and playing.
To adjust the Bit Meter settings, select "Settings..." from the Options pop-up menu or by
using the
icon.
The Bit meter can be found in the Meters menu of the Audio Files and Audio Montage
Workspaces. It can be used either as a floating window, or docked in the Workspace or the
Control Window.
Related topics
Metering
Dithering
6.5.5
Spectroscope
The Spectroscope shows a continuous graphical representation of the frequency spectrum,
analyzed into 60 separate frequency bands, represented as vertical bars. Peak levels are
shown as a short horizontal lines above the corresponding band, indicating recent peak/maximum values. The Spectroscope offers a quick spectrum overview. For a more detailed
analysis of the audio spectrum, use the Spectrometer. The Spectroscope can be found in
the Meters menu of the Audio Files and Audio Montage Workspaces. It can be used either as a floating window, or docked in the Workspace.It can also be docked in the Control
Window.
Related topics
Metering
Spectrometer
6.5.6
Spectrometer
The Spectrometer uses FFT (Fast Fourier Transform) techniques to display a continuous
frequency graph, providing a very precise and detailed real-time frequency analysis.
WaveLab 7
6.5 Shared tool windows
177
The current frequency spectrum is shown as a linear graph.
Spectrum "peaks" are shown as a short horizontal lines, indicating recent peak/maxi-
mum values.
Snapshots
By using the "Add snapshot" and
"Erase last snapshot" buttons, you can take and erase
snapshots of the current spectrum. These will be superimposed over the current peak spectrum graph, in a color you can customize, until you click the icon again to take a new snapshot.
One use for this is to check the effects of adding EQ, for example. Up to five snapshots can
be superimposed on the display; the sixth snapshot replaces the earliest one in the display,
and so on. (Don't confuse the order of snapshots with the numbered buttons - these are
Spectrometer presets, see below.)
Zooming
You can adjust the frequency scale and range in the Settings dialog as described below,
but it's also possible to temporarily zoom in on a frequency area of interest. This is done by
clicking and dragging a rectangle in the Spectroscope display. When you release the mouse
button, the display is zoomed in so that the enclosed frequency range fills the window. To
return to full-scale display, select "Zoom-out fully" from the Functions menu, or double-click
anywhere on the display.
Making settings
You can adjust the behavior and display of the meters as desired, and assign up to five sets
of Spectrometer settings to the Preset buttons, for instant access. Open the Settings dialog
by selecting "Settings" from the Functions menu or clicking the
"tool" icon. Note that you
can apply your settings without closing the dialog, by clicking the Apply button.
If you want to store your settings for later use (or assign them to a Preset button), select "Save
as..." from the pop-up menu in the lower part of the dialog, and specify a name for the preset
in the file dialog that appears. Now, you can choose to make the settings instantly available
for selection in the FFT Meter window, by using the "Assign to preset button" submenu on
the pop-up menu.
When you are finished, click OK to close the dialog.
Selecting Spectrometer presets
If you have assigned your settings to the Preset buttons in the Settings dialog, you can quickly
switch between different level scales and display modes, by clicking one of the Preset icons
[1]-[5], or selecting the desired preset from the Options pop-up menu.
Exporting FFT data as ASCII text
When using the Spectrometer in off-line mode ("Monitor Edit cursor Position" or "Analyze
audio election" mode) you can export the displayed FFT data as a text file, by selecting
WaveLab 7
178
Audio Montages
"Export FFT data as ASCII" from the Options pop-up menu. The resulting text file can then
be imported into applications that allow graph plotting from text files (Microsoft Excel, for
example).
The Spectrometer can be found in the Meters menu of the Audio Files and Audio Montage
Workspaces. It can be used either as a floating window, or docked in the Workspace or the
Control Window.
Related topics
Metering
Spectroscope
6.5.7
Wavescope
The Wavescope meter displays a real-time waveform drawing of the audio signal being monitored.
It can be useful when recording or rendering a file if "Monitor File rendering" mode is active.
Making settings
You can adjust settings for the display via the Wavescope Settings dialog. This can be
accessed via Functions > Settings... menu, or by using the
icon. Here you can set
various color options for the background, grid and waveform display, as well as setting the
waveform rendering speed and vertical zoom. If "Clear waveform when reaching right of
pane" is checked the waveform display is cleared each time the cursor reaches the right end
of the display. If unchecked, the previous waveform is overwritten.
Tip: Wavescope is a useful meter for visualizing audio during recording. The Wavescope
meter can be found in the Meters menu of the Audio Files and Audio Montage Workspaces.
It can be used either as a floating window, or docked in the Workspace or the Control Window.
Related topics
Metering
6.5.8
Timecode
This shared tool window displays the current time of the playback head (or the cursor position
if not playing back), in the timecode format currently selected in the Time Format dialog.
The current time can be in a range of standard SMPTE formats, CD or DVD specific formats,
or a custom one - see Time Format dialog.
The most common use for this window is for working with video or film. You can use it to
display the playback head position of the current Audio File in a SMPTE format to frame level
resolution (i.e. hours:minutes:seconds:frames). You can also use it to display CD frames
(minutes:seconds:frames) when you are authoring CD or DVDs.
WaveLab 7
6.5 Shared tool windows
179
You can access this window by choosing Workspace > Shared tool windows > Timecode. It is available in the Control Window, Audio File Workspace and Audio Montage
Workspace.
For an explanation of each parameter and interface feature, click on , or the 'What's this?'
question mark icon. For more information see Getting Help
Related topics
Time Format dialog
CD Frame
SMPTE timecode
Authoring CDs and DVDs
6.5.9
Background task monitor
This specific tool window allows you to view all background rendering processes that are in
progress.
You can adjust the priority with which they are processed, pause or cancel them. It is useful
if you have a number of lengthy processes underway and want to free up some processing
power to focus on editing. You can either lower the priority of a task so it does not use as
much of the computer processor's capacity, or pause the task temporarily.
You can access this window by choosing Workspace > Shared tool windows > Background task monitor. It is available in the Control Window, Audio File Workspace and
Audio Montage Workspace. You can also access this window in the Control Window by
choosing Utilities > Background task monitor.
You can choose to automatically open the Background task monitor when a rendering process begins. To enable this option, select the checkbox via Options > Global Preferences
> Options > Make the Background Task Monitor visible when a task starts . Since
this window is a Shared tool window, the location where it opens may vary.
For an explanation of each parameter and interface feature, click on , or the 'What's this?'
question mark icon. For more information see Getting Help
Related topics
Specific tool windows
Control Window
Rendering
6.5.10 Log window
This shared tool window allows you to view log messages that have been issued by WaveLab.
When using WaveLab's scripting language for example, the logWindow( ) function outputs
messages to this window. There are a number of toggle buttons and these allow you to filter
the types of messages displayed.
WaveLab 7
180
Audio Montages
Note: When using the logWindow( ) method you need to have the
"Show informal notes"
button selected for the messages to be visible. If no log messages are displayed, make sure
all the toggle buttons are selected .
You can access this window via Workspace > Shared tool windows > Log. It is available
in the Control Window, Audio File Workspace and Audio Montage Workspace. You can also
access this window in the Control Window via Utilities > Log.
For an explanation of each parameter and interface feature, click on , or the 'What's this?'
question mark icon. For more information see Getting Help
Related topics
Control Window
Specific tool windows
Scripting
6.6
Audio Montage Colors
You can create and assign different color schemes to different Clips and parts of a Clip, to
help you find your way through the Montage.
Default colors are provided, but you can also define custom colors. To define a new color
scheme, select the color name to be defined (click once and overtype to rename), select the
parts to which it is applied, then define the color value using the color wheel (or type a set
of RGB - Red, Green, Blue values).
You can use the Copy color and Paste buttons to transfer colors between various parts of
the montage. In addition, you can drag groups of color settings onto another location in the
list - you are asked to confirm. You could, for example, copy "Custom 1" to "Custom 3" as a
time saver, before customizing details of "Custom 3".
Color settings made in this dialog apply to all montages.
For an explanation of each parameter and interface feature, click on , or the 'What's this?'
question mark icon. For more information see Getting Help
Related topics
Audio Montages
6.7
Audio Montage contextual information
When working in the Audio Montage window there is a multitude of editing actions available.
In order to learn them all you can take advantage of the contextual information displayed in
the status bar (which is enabled by default). This display at the bottom of the main window
shows hints to all the possible actions you can perform as you move the cursor around the
main Audio Montage window. The info line will also display positions and lengths when you
are moving, copying or resizing Clips.
WaveLab 7
6.7 Audio Montage contextual information
181
The object you are directly over is indicated, along with any possible actions you can perform
and any modifier keys that will enable further functions. These hints are displayed using icons
and text descriptions from left to right.
This option is enabled/disabled in the Audio Montage Workspace via Options > Audio
Montage preferences > All Audio Montages > Display indications of possible actions.
Icons
The following symbols are used in the contextual information display:
- if this appears, this means there is a context menu available
- indicates a left mouse click
- indicates a double click
- indicates the object can be dragged in any direction inside the montage
- indicates the object can be dragged in any direction inside or outside the montage
- indicates the object can be dragged vertically
- indicates the object can be dragged horizontally
Modifier keys
All hints are displayed along with any possible modifier key combinations. Modifier keys are
represented by the following symbols:
- [Alt]/[Option] key
- [Shift] key
- [Ctrl]/[Command] key
Example
From left to right, the example below describes the following possible actions:
a context menu is available
a single left mouse click will select the Clip
a double click will select the Clip underneath (if it exists)
WaveLab 7
182
Audio Montages
clicking and dragging will move the click in any direction
There are a number of modifier keys available also including (from left to right):
the [Alt]/[Option] key
the [Ctrl]/[Command] key
the [Shift] key
Various combinations also exist:
the [Alt]/[Option] key + the [Ctrl]/[Command] key
the [Alt]/[Option] key + the [Shift] key
the [Ctrl]/[Command] key + the [Shift] key
Related topics
WaveLab 7
Chapter 7
Batch Processing
This special Workspace allows you to process any number of audio or audio montage files
with Master Section plug-ins and presets, offline effects, and other plug-ins that are unique
to Batch Processing. Each file is processed and then saved to a folder of your choice. You
can choose a different file format, rename the file according to a set of rules, and run an
external application when the batch is finished.
You can process as many files as you wish taking advantage of multi-processing on multicore processors, if available. You can save batch process files: this allows you to run batches
repeatedly if required.
For example, you may have a folder of 24-bit Audio Files which you wish to Normalize, add a
fade out to and dither down to 16-bit 44.1kHz. You could save this as a batch process file
and then each time you update the original higher sample rate files, you can re-run the batch.
Creating and running a batch process
To set up and run a batch, follow these steps:
Create a new batch processor file - use the Special > Add to Batch Processor
menu entry in another Workspace, or simply use the File > New command. You can
save the newly created batch at any time for later reuse.
Add files to the batch - from within the Batch processor Workspace either use the
File Browser, the Edit > Add files from folder... command, drag a file directly from
another Workspace or your computer's file browser, or right-click in the "Files to process" pane and choose Insert all open Audio Files.
Add plug-ins and effects - drag any plug-in processors/effects you wish from the
Batch Processing Plug-ins to the "Audio Plug-in chain" pane. Right click on any effect
(and select Edit) to adjust its settings, and drag the plug-ins to change the order in
which they are processed.
Define an output folder - from the "Output" tab define a location for the resulting files.
In addition you can select "Renaming" to change the name of output files according to a
number of conditions. The resulting names are previewed in the "File to process" pane.
Choose a file format - use the "Format" tab to define the file format that files are
saved in.
184
Batch Processing
Run an external task - you can choose to run an external application after batch
processing has completed using the "External Tool" tab. The external tool must be
set up first via the Configure external tools dialog. You can access this from Tools >
Configure external tools.
Define any options - choose any options using the "Options" tab and/or annotate
your batch using the "Comments" tab.
Choose any Multitasking options - if you have a multi-core processor in your com-
puter you can also choose how many tasks are completed simultaneously. You can
choose how many cores of your processor to dedicate to batch processing, adjusting
this setting even during processing.
Start processing - when you are happy with all the settings, choose Process > Start
or click the shortcut button
to begin processing the batch. You can monitor the
progress of each task (and pause, cancel or reassign priorities on lengthier tasks) using
the Background tasks window. From the built-in Progress pane you can choose to
pause or cancel the batch at any time.
Batch the batch processor
As you may have noticed in the Plug-ins window, you can access Master Section plug-ins
and many of WaveLab's built in offline processes. In addition there are some plug-ins which
are unique to the Batch Processor Workspace and each is explained in more detail in Batch
Processing Plug-ins. Obviously the order in which you process plug-ins is important. You
can change the sequence by dragging the plug-in to the position you wish within the "Audio
Plug-in chain" list and releasing the mouse button.
For example, a typical batch processing effects chain might resemble the following:
DC Remover > Normalizer > Denoiser > Compressor > Limiter > MPEG Encoder
The batch processor operates using a number of processing passes. The number of passes
depends on the type of plug-ins you use. Some plug-ins require multiple passes of the
Audio File in order to determine how to process the audio, others can process in a single
pass. Besides the plug-ins shared with the Master section, there are three other types of
plug-in types available in the Batch Processor Workspace:
Monopass - these plug-ins only require one pass when processing.
Multipass - these plug-ins require two or more passes (an analysis and a process
pass). The Normalizer is an example of a Multipass effect.
Metapass - these plug-ins are unique to the Batch Processor and require several
passes before processing the audio. After analysing ALL Audio Files, a metapass
plug-in takes into account the analysis performed by itself on ALL these files, before
processing them individually in a second round. The Meta Normalizer is an example of
a Metapass effect.
Once all passes have been completed, the resulting file is written to your hard disk. It is
useful to note that WaveLab keeps the audio in the 32-bit domain for all calculations before
writing a file to disk. To optimize performance, all batch process calculations are performed
and stored in RAM rather than using temporary files.
WaveLab 7
7.1 Specific tool windows
185
Understanding the signal path
To understand how the signal flow of your plug-in chain is processed you can look closely at
the audio signal path display, which consists of a number of colored arrows in columns and
rows. Each arrow represents how each plug-in processes any audio passed into it. Each
vertical column represents a processing pass. Use the
"What's this?" arrow on that
column for more information.
Re-using a batch
Once you have created and run a batch file you can re-use it by:
Choosing Edit > Reset the status of all files and then running your batch again.
This will process all of the files in the batch.
Alternatively you can selectively re-run a batch process on certain files by right-clicking
on the "Files to process" pane, choosing "Reset status" or "Remove" and then running
your batch again.
Related topics
Specific tool windows
Shared tool windows
Batch Processing Plug-ins
Batch Conversion
Batch Renaming
7.1
Specific tool windows
Specific tool windows are windows that are specific to the current Workspace. They perform
useful tasks in the active Workspace.
They can be docked and un-docked, and saved in your custom layouts.
Batch Processing Workspace specific tool windows
The following specific tool windows are available within the Batch Processor Workspace:
Master Project
File Browser
Batch Processing Plug-ins
7.1.1
File Browser
This dialog allows you to browse files directly from within WaveLab rather than using your
operating system's file browser.
WaveLab 7
186
Batch Processing
It provides you with all the standard browsing functions (such as List and Icon views)as well
as additional controls to audition Audio Files and any marker defined regions.You can use
it to open or insert an entire file or a specific region of a file by dragging and releasing the
file in the location you wish to insert the file. In the Audio Montage Workspace you can also
choose to only view certain types of WaveLab specific files. The File Browser can be very
useful in speeding up the process of auditioning a long list of sound files. It can also be used
to drag to windows such as Data CD/DVD, including dragging folders.
The playback functions
Play file
Once you have selected a file in the File Browser list, you can audition it by
clicking Play in the File Browser's toolbar. Click again to stop.
Auto-play
You can also have files play back automatically as soon as they are selected.
To do this, activate Auto-Play mode.
Tip: To audition a long list of Audio Files, enable Auto-play and use the UP and DOWN
cursor keys to step through each Audio File in quick succession.
Opening and inserting a file or region
Once you have chosen a file you wish to open, double-click it to open the file in the current
Workspace. You can also open it by dragging it onto an empty tabbed group, or onto the
tab bar of a tabbed group.
You can also drag the file over a wave view to insert it at a given point. When you drag a file
over a wave view, a beam is displayed so as to clearly display the insertion point.
When browsing Audio Files, the file browser also has a region panel. When you select an
Audio File, its related regions are listed in this panel. You can then drag the region from
the list, to insert only that part of the audio. Double-clicking on a region has the effect of
opening the file in the Workspace and selecting that region. You can access this dialog via
Workspace > Specific tool windows > File Browser.
For an explanation of each parameter and interface feature, click on , or the 'What's this?'
question mark icon. For more information see Getting Help
Related topics
Specific tool windows
7.1.2
Batch Processing Plug-ins
The Batch Processor Workspace allows you to add a sequence of plug-ins that can be used
to process a batch of Audio Files. Some of these plug-ins are standard plug-ins available
from the Master Section; others are offline processes available in the Audio File Workspace,
and there are others that are only available within batch processing.
To add a plug-in: First create a new Audio Plug-in chain window: click on the Create an
empty document icon in the Batch Processors Workspace. Select a category of plug-ins
from the Plug-ins accordion (Double-click to add the plug-in at the end, or drag the plug-in
into position in the batch processor chain).
WaveLab 7
7.1 Specific tool windows
187
To remove a plug-in: Right-click on the plug-in to use the pop-up menu "Remove" option,
or drag it back onto the plugin window.
Master Section presets
These are Master Section presets (not to be confused with individual plugin presets, so it's
always a chain, even if it's a chain with one member). As these presets can contain multiple
effects, they can be put to powerful use in batch processing.
Master Section Plug-ins
These are all the plug-ins available from the Master Section, sorted in the same manner.
Monopass Plug-ins
Monopass plug-ins only require one pass when processing. A Monopass plug-in effect
processes the signal then outputs it to any subsequent plug-in. This is like real-time plugins.
The following Monopass plug-ins are available in the Batch Processor Workspace:
Audio Injector
Trimmer
Resizer
Fade-In
Instructor
Time Stretch
Pitch Correction
Multipass Plug-ins
Multipass plug-ins require two or more passes (an analysis pass followed by a process pass)
before processing the audio. Some are unique to the Batch Processor while others are also
found as Offline Processors in the Audio File Workspace.
The following Multipass plug-ins are available in the Batch Processor Workspace:
Normalize Level
Stereo to Mono
Pan Normalizer
Loudness normalizer
Fade-out
DC Remover
Loudness Restorer
WaveLab 7
188
Batch Processing
Metapass Plug-ins
Metapass plug-ins are unique to the Batch Processor and require several passes before
processing the audio. After analyzing the audio, a metapass plug-in takes into account all
other plug-ins in the effects chain before processing the audio.
The following Metapass plug-ins are available in the Batch Processor Workspace:
Meta-Normalizer
Meta-Leveler
Related topics
Audio Plug-ins
Offline processing
7.1.2.1
Audio Injector
This dialog is exclusive to the Batch Processor Workspace and allows you to insert an Audio
File at the beginning and/or end of the Audio File being processed. The inserted file can also
be cross faded with the original Audio File, if required.
You can access this dialog from from the Batch Processor Workspace via Plug-ins window
> Monopass Plug-ins > AudioInjector.
For an explanation of each parameter and interface feature, click on , or the 'What's this?'
question mark icon. For more information see Getting Help
Related topics
Batch Processing Plug-ins
7.1.2.2
Trimmer
This dialog is exclusive to the Batch Processor Workspace and allows you to remove a specified duration (from 0ms to 60s) of audio from the head and/or tail of an Audio File.
You can access this dialog from the Batch Processor Workspace via Plug-ins window >
Monopass Plug-ins > Trimmer.
For an explanation of each parameter and interface feature, click on , or the 'What's this?'
question mark icon. For more information see Getting Help
Related topics
Batch Processing Plug-ins
WaveLab 7
7.1 Specific tool windows
7.1.2.3
189
Resizer
This dialog is exclusive to the Batch Processor Workspace and allows you to adjust the
duration of an Audio File.
You can set a desired length of file and choose whether to insert silence after the end of the
chosen duration.
You can access this dialog from the Batch Processor Workspace via Plug-ins window >
Monopass Plug-ins > Resizer.
For an explanation of each parameter and interface feature, click on , or the 'What's this?'
question mark icon. For more information see Getting Help
Related topics
Batch Processing Plug-ins
7.1.2.4
Fade-In/Out
This dialog is exclusive to the Batch Processor Workspace and allows you to fade the beginning (Fade-In) or the end (Fade-Out) of a batch audio file. You can choose the length and
shape of the fade, its duration and the gain you wish it to start/end at.
You can access the fade out dialog from Batch Processing Workspace > Plug-ins window > Multipass Plug-ins > Fade-Out.
You can access the fade in dialog from the Batch Processor Workspace via Plug-ins window > Monopass Plug-ins > Fade-In.
For an explanation of each parameter and interface feature, click on , or the 'What's this?'
question mark icon. For more information see Getting Help
Related topics
Batch Processing Plug-ins
7.1.2.5
Instructor
This dialog is exclusive to the Batch Processor Workspace and is a special utility plug-in
that allows you to "instruct" the next plug-in in the batch with information about the audio it
needs to process. This is useful for situations where you want to use plug-ins that require
an analysis stage. In effect, the Instructor plug-in turns a monopass plug-in into a dual pass
one.
Some Monopass plugins, such as Denoisers or DeBuzzer, need to learn about the audio they
are to process before they can begin processing correctly. The "Instructor" plugin can help
in this situation, since it can "teach" the next plug-in in the audio chain about the audio it is
about to process.
The Instructor plugin must be used as a pair:
1. The first instance replicates the start of the audio stream. This means the next plug-in
in the chain will receive the start of the audio stream twice.
WaveLab 7
190
Batch Processing
2. The second instance of the plug-in comes after the plugin being "instructed". It simply
cuts out the extra audio injected by the first instance of the Instructor plug-in.
This means, for example, that the Denoiser plug-in has time to sufficiently analyze the audio
stream before the second stream start is injected. The "badly" processed first part of the
stream is skipped by the second instance of the Instructor plug-in.
You can set the Instructor plug-in to replicate up to 20 seconds of audio. Be careful not to
set a value that is longer than the shortest file in the batch, otherwise a short file will be over
truncated by the second instance of the plug-in.
You can access this dialog from the Batch Processor Workspace via Plug-ins window >
Monopass Plug-ins > Instructor.
For an explanation of each parameter and interface feature, click on , or the 'What's this?'
question mark icon. For more information see Getting Help
Related topics
Batch Processing Plug-ins
7.1.2.6
Time Stretch
This dialog is exclusive to the Batch Processor Workspace and allows you to change the
duration of an audio selection (usually without changing its pitch). For more information on
the Time Stretch dialog parameters see Time stretching.
You can access this dialog from Batch Processing Workspace > Plug-ins window >
Monopass Plug-ins > Time Stretch.
For an explanation of each parameter and interface feature, click on , or the 'What's this?'
question mark icon. For more information see Getting Help
Related topics
Time stretching
Batch Processing Plug-ins
7.1.2.7
Pitch Correction
This dialog is exclusive to the Batch Processor Workspace and allows you to detect and
change the pitch of a sound without affecting its length. For more information on the Pitch
Correction dialog parameters see Pitch correction.
You can access this dialog from Batch Processing Workspace > Plug-ins window >
MonoPass Plug-ins > Pitch Correction.
For an explanation of each parameter and interface feature, click on , or the 'What's this?'
question mark icon. For more information see Getting Help
Related topics
WaveLab 7
7.1 Specific tool windows
191
Pitch correction
Batch Processing Plug-ins
7.1.2.8
Normalize Level
This dialog allows you to change the peak level of your Audio File.
Enter the desired peak level (in dB) that you wish the audio selection to have. You can also
use "Find current peak level" to obtain a report on the peak level of the current audio selection
(or the peak level in the whole file, if "Process whole file if there is no selection" is selected
in the preferences). You can choose to apply the same gain to both stereo channels (Stereo
Link) or mix down to a mono file (Mix to Mono) with the assurance that no clipping will occur
when both channels are mixed together.
To normalize the selected audio, enter the desired peak level and click Apply.
You can access this dialog by choosing Process > Level Normalizer... in the Audio File
Workspace.
This function is also available as a batch processing plug-in. You can access it from Batch
Processing Workspace > Plug-ins window > Multipass Plug-ins > Normalizer.
For an explanation of each parameter and interface feature, click on , or the 'What's this?'
question mark icon. For more information see Getting Help
Related topics
Audio File editing
Value editing
7.1.2.9
Stereo to Mono
This dialog is exclusive to the Batch Processor Workspace and allows you to mix a stereo
signal down to a mono one while being certain not to clip while mixing channels.
You can choose to use the same peak level that the stereo file contains, or set the gain to be
applied and/or the maximum level to be reached in the resulting mono file.
You can access this dialog from the Batch Processor Workspace via Plug-ins window >
Multipass Plug-ins > Stereo to Mono.
For an explanation of each parameter and interface feature, click on , or the 'What's this?'
question mark icon. For more information see Getting Help
Related topics
Batch Processing Plug-ins
7.1.2.10 Pan Normalizer
This dialog allows you to ensure that both channels of a stereo file have the same level or
loudness. Since loudnesss is more important than peak volume in the perception of sound,
WaveLab 7
192
Batch Processing
this is a powerful tool to get the best possible stereo balance.
This process uses two passes to first analyze the audio and then render any level changes
required.
You must have a stereo selection in a stereo file to apply this process.
You can access this dialog from the Audio File Workspace via Process > Pan Normalizer....
This function is also available as a batch processing plug-in. You can access it from the Batch
Processor Workspace via Plug-ins window > Multipass Plug-ins > Pan Normalizer.
For an explanation of each parameter and interface feature, click on , or the 'What's this?'
question mark icon. For more information see Getting Help
Related topics
7.1.2.11 Loudness normalizer
This dialog allows you to adjust the loudness of a file. Because it relates to loudness as
opposed to maximum peak level, this tool works quite differently from the Level Normalizer. A
typical application is to specify a loudness, for example -12dB, and the Loudness Normalizer
processes the audio to match this level of loudness.
Like Gain Change, increasing the loudness to a certain value can introduce clipping. To avoid
this occurring, a peak limiter (the Peak Master plug-in) can be used as part of the process.
The Loudness Normalizer raises the loudness and limits peaks in the signal at the same time
(if needed), to achieve the target loudness.
In the case of stereo files, both channels are processed independently. This process happens
over several stages; analysis precedes the final rendering. The Loudness Normalizer dialog
gives access to useful statistics about the file and the Loudness distribution tool, and you
can choose to remove any DC offset in the file.
You can access this dialog from the Audio File Workspace via Process > Loudness normalizer....
This function is also available as a batch processing plug-in. You can access it from Batch
Processing Workspace > Plug-ins window > Multipass Plug-ins > Loudness Normalizer.
For an explanation of each parameter and interface feature, click on , or the 'What's this?'
question mark icon. For more information see Getting Help
Related topics
Loudness
DC Offset
Loudness distribution
7.1.2.12 DC Remover
This dialog is exclusive to the Batch Processor Workspace and allows you to eliminate any
DC Offset from an Audio File.
WaveLab 7
7.1 Specific tool windows
193
It can be useful to apply this plug-in first in a batch before other plug-ins to avoid further
processing a file containing any DC Offset. For example, an Audio File that has a DC offset
will not be at its loudest possible volume when normalized, because the offset consumes
headroom.
You can access this dialog from the Batch Processor Workspace via Plug-ins window >
Multipass Plug-ins > DC Remover.
For an explanation of each parameter and interface feature, click on , or the 'What's this?'
question mark icon. For more information see Getting Help
Related topics
Batch Processing Plug-ins
DC Offset
7.1.2.13 Loudness Restorer
This dialog is exclusive to the Batch Processor Workspace and allows you to restore the
loudness of an Audio File.
The Loudness Restorer plug-in must be used as a pair - the first instance is used to read
the audio signal, the second instance uses this information to adjust the loudness or peak
level of the file.
To use the plug-in:
1. Place an instance of the plug-in in the batch chain and choose "Capture" as the mode.
2. Place a second instance of the plug-in after the first one and choose either "Restore
peak level" or "Restore loudness (RMS)".
You can access this dialog from the Batch Processor Workspace via Plug-ins window >
Multipass Plug-ins > Loudness Restorer.
For an explanation of each parameter and interface feature, click on , or the 'What's this?'
question mark icon. For more information see Getting Help
Related topics
Batch Processing Plug-ins
7.1.2.14 Meta-Normalizer
This dialog is exclusive to the Batch Processor Workspace and allows you to normalize a
batch of files all to the same level.
The core purpose of this plug-in is to achieve the same loudness in all files (the highest
loudness found, if possible), while being certain that no file will clip. For each file, a specific
gain is computed by the plug-in once all files have been analyzed and prior to actually applying
any gain to achieve the common loudness. If it is not possible to match the highest found
loudness, the level of the file with the highest loudness is reduced, so that other files can get
the same loudness.
WaveLab 7
194
Batch Processing
You can choose between peak level or loudness (RMS) as a method of determing the "equal"
level between all files in the batch. This "equal" level is then used to apply a gain to each file
in the batch.
You can access this dialog from the Batch Processor Workspace via Plug-ins window >
Metapass Plug-ins > Meta-Normalizer.
For an explanation of each parameter and interface feature, click on , or the 'What's this?'
question mark icon. For more information see Getting Help
Related topics
Batch Processing Plug-ins
7.1.2.15 Meta-Leveler
This dialog is exclusive to the Batch Processor Workspace and allows you to match the level
of a batch of files.
The core purpose of this plug-in is to to apply the same gain to all files, while being certain
that a specific peak level will never be exceeded in any file. The unique gain that you wish
to apply is (possibly) reduced by the plug-in, once all files in the batch have been analyzed,
and prior to actually applying the gain across the batch.
You can access this dialog from the Batch Processor Workspace via Plug-ins window >
Metapass Plug-ins > Meta-Leveler.
For an explanation of each parameter and interface feature, click on , or the 'What's this?'
question mark icon. For more information see Getting Help
Related topics
Batch Processing Plug-ins
7.2
Shared tool windows
Shared tool windows are windows that can only exist in one place at a time and are shared
between Workspaces. They perform useful tasks in the active Workspace.
They can be docked and un-docked, and saved in your custom layouts.
Shared tool windows:
Background task monitor
Log window
Related topics
About Tool Windows
WaveLab 7
7.2 Shared tool windows
195
Docking windows
7.2.1
Background task monitor
This specific tool window allows you to view all background rendering processes that are in
progress.
You can adjust the priority with which they are processed, pause or cancel them. It is useful
if you have a number of lengthy processes underway and want to free up some processing
power to focus on editing. You can either lower the priority of a task so it does not use as
much of the computer processor's capacity, or pause the task temporarily.
You can access this window by choosing Workspace > Shared tool windows > Background task monitor. It is available in the Control Window, Audio File Workspace and
Audio Montage Workspace. You can also access this window in the Control Window by
choosing Utilities > Background task monitor.
You can choose to automatically open the Background task monitor when a rendering process begins. To enable this option, select the checkbox via Options > Global Preferences
> Options > Make the Background Task Monitor visible when a task starts . Since
this window is a Shared tool window, the location where it opens may vary.
For an explanation of each parameter and interface feature, click on , or the 'What's this?'
question mark icon. For more information see Getting Help
Related topics
Specific tool windows
Control Window
Rendering
7.2.2
Log window
This shared tool window allows you to view log messages that have been issued by WaveLab.
When using WaveLab's scripting language for example, the logWindow( ) function outputs
messages to this window. There are a number of toggle buttons and these allow you to filter
the types of messages displayed.
Note: When using the logWindow( ) method you need to have the
"Show informal notes"
button selected for the messages to be visible. If no log messages are displayed, make sure
all the toggle buttons are selected .
You can access this window via Workspace > Shared tool windows > Log. It is available
in the Control Window, Audio File Workspace and Audio Montage Workspace. You can also
access this window in the Control Window via Utilities > Log.
For an explanation of each parameter and interface feature, click on , or the 'What's this?'
question mark icon. For more information see Getting Help
Related topics
WaveLab 7
196
Batch Processing
Control Window
Specific tool windows
Scripting
7.3
Batch Processing Plug-ins
The Batch Processor Workspace allows you to add a sequence of plug-ins that can be used
to process a batch of Audio Files. Some of these plug-ins are standard plug-ins available
from the Master Section; others are offline processes available in the Audio File Workspace,
and there are others that are only available within batch processing.
To add a plug-in: First create a new Audio Plug-in chain window: click on the Create an
empty document icon in the Batch Processors Workspace. Select a category of plug-ins
from the Plug-ins accordion (Double-click to add the plug-in at the end, or drag the plug-in
into position in the batch processor chain).
To remove a plug-in: Right-click on the plug-in to use the pop-up menu "Remove" option,
or drag it back onto the plugin window.
Master Section presets
These are Master Section presets (not to be confused with individual plugin presets, so it's
always a chain, even if it's a chain with one member). As these presets can contain multiple
effects, they can be put to powerful use in batch processing.
Master Section Plug-ins
These are all the plug-ins available from the Master Section, sorted in the same manner.
Monopass Plug-ins
Monopass plug-ins only require one pass when processing. A Monopass plug-in effect
processes the signal then outputs it to any subsequent plug-in. This is like real-time plugins.
The following Monopass plug-ins are available in the Batch Processor Workspace:
Audio Injector
Trimmer
Resizer
Fade-In
Instructor
Time Stretch
Pitch Correction
WaveLab 7
7.3 Batch Processing Plug-ins
197
Multipass Plug-ins
Multipass plug-ins require two or more passes (an analysis pass followed by a process pass)
before processing the audio. Some are unique to the Batch Processor while others are also
found as Offline Processors in the Audio File Workspace.
The following Multipass plug-ins are available in the Batch Processor Workspace:
Normalize Level
Stereo to Mono
Pan Normalizer
Loudness normalizer
Fade-out
DC Remover
Loudness Restorer
Metapass Plug-ins
Metapass plug-ins are unique to the Batch Processor and require several passes before
processing the audio. After analyzing the audio, a metapass plug-in takes into account all
other plug-ins in the effects chain before processing the audio.
The following Metapass plug-ins are available in the Batch Processor Workspace:
Meta-Normalizer
Meta-Leveler
Related topics
Audio Plug-ins
Offline processing
7.3.0.1
Audio Injector
This dialog is exclusive to the Batch Processor Workspace and allows you to insert an Audio
File at the beginning and/or end of the Audio File being processed. The inserted file can also
be cross faded with the original Audio File, if required.
You can access this dialog from from the Batch Processor Workspace via Plug-ins window
> Monopass Plug-ins > AudioInjector.
For an explanation of each parameter and interface feature, click on , or the 'What's this?'
question mark icon. For more information see Getting Help
Related topics
Batch Processing Plug-ins
WaveLab 7
198
7.3.0.2
Batch Processing
Trimmer
This dialog is exclusive to the Batch Processor Workspace and allows you to remove a specified duration (from 0ms to 60s) of audio from the head and/or tail of an Audio File.
You can access this dialog from the Batch Processor Workspace via Plug-ins window >
Monopass Plug-ins > Trimmer.
For an explanation of each parameter and interface feature, click on , or the 'What's this?'
question mark icon. For more information see Getting Help
Related topics
Batch Processing Plug-ins
7.3.0.3
Resizer
This dialog is exclusive to the Batch Processor Workspace and allows you to adjust the
duration of an Audio File.
You can set a desired length of file and choose whether to insert silence after the end of the
chosen duration.
You can access this dialog from the Batch Processor Workspace via Plug-ins window >
Monopass Plug-ins > Resizer.
For an explanation of each parameter and interface feature, click on , or the 'What's this?'
question mark icon. For more information see Getting Help
Related topics
Batch Processing Plug-ins
7.3.0.4
Fade-In/Out
This dialog is exclusive to the Batch Processor Workspace and allows you to fade the beginning (Fade-In) or the end (Fade-Out) of a batch audio file. You can choose the length and
shape of the fade, its duration and the gain you wish it to start/end at.
You can access the fade out dialog from Batch Processing Workspace > Plug-ins window > Multipass Plug-ins > Fade-Out.
You can access the fade in dialog from the Batch Processor Workspace via Plug-ins window > Monopass Plug-ins > Fade-In.
For an explanation of each parameter and interface feature, click on , or the 'What's this?'
question mark icon. For more information see Getting Help
Related topics
Batch Processing Plug-ins
WaveLab 7
7.3 Batch Processing Plug-ins
7.3.0.5
199
Instructor
This dialog is exclusive to the Batch Processor Workspace and is a special utility plug-in
that allows you to "instruct" the next plug-in in the batch with information about the audio it
needs to process. This is useful for situations where you want to use plug-ins that require
an analysis stage. In effect, the Instructor plug-in turns a monopass plug-in into a dual pass
one.
Some Monopass plugins, such as Denoisers or DeBuzzer, need to learn about the audio they
are to process before they can begin processing correctly. The "Instructor" plugin can help
in this situation, since it can "teach" the next plug-in in the audio chain about the audio it is
about to process.
The Instructor plugin must be used as a pair:
1. The first instance replicates the start of the audio stream. This means the next plug-in
in the chain will receive the start of the audio stream twice.
2. The second instance of the plug-in comes after the plugin being "instructed". It simply
cuts out the extra audio injected by the first instance of the Instructor plug-in.
This means, for example, that the Denoiser plug-in has time to sufficiently analyze the audio
stream before the second stream start is injected. The "badly" processed first part of the
stream is skipped by the second instance of the Instructor plug-in.
You can set the Instructor plug-in to replicate up to 20 seconds of audio. Be careful not to
set a value that is longer than the shortest file in the batch, otherwise a short file will be over
truncated by the second instance of the plug-in.
You can access this dialog from the Batch Processor Workspace via Plug-ins window >
Monopass Plug-ins > Instructor.
For an explanation of each parameter and interface feature, click on , or the 'What's this?'
question mark icon. For more information see Getting Help
Related topics
Batch Processing Plug-ins
7.3.0.6
Time Stretch
This dialog is exclusive to the Batch Processor Workspace and allows you to change the
duration of an audio selection (usually without changing its pitch). For more information on
the Time Stretch dialog parameters see Time stretching.
You can access this dialog from Batch Processing Workspace > Plug-ins window >
Monopass Plug-ins > Time Stretch.
For an explanation of each parameter and interface feature, click on , or the 'What's this?'
question mark icon. For more information see Getting Help
Related topics
Time stretching
Batch Processing Plug-ins
WaveLab 7
200
7.3.0.7
Batch Processing
Pitch Correction
This dialog is exclusive to the Batch Processor Workspace and allows you to detect and
change the pitch of a sound without affecting its length. For more information on the Pitch
Correction dialog parameters see Pitch correction.
You can access this dialog from Batch Processing Workspace > Plug-ins window >
MonoPass Plug-ins > Pitch Correction.
For an explanation of each parameter and interface feature, click on , or the 'What's this?'
question mark icon. For more information see Getting Help
Related topics
Pitch correction
Batch Processing Plug-ins
7.3.0.8
Normalize Level
This dialog allows you to change the peak level of your Audio File.
Enter the desired peak level (in dB) that you wish the audio selection to have. You can also
use "Find current peak level" to obtain a report on the peak level of the current audio selection
(or the peak level in the whole file, if "Process whole file if there is no selection" is selected
in the preferences). You can choose to apply the same gain to both stereo channels (Stereo
Link) or mix down to a mono file (Mix to Mono) with the assurance that no clipping will occur
when both channels are mixed together.
To normalize the selected audio, enter the desired peak level and click Apply.
You can access this dialog by choosing Process > Level Normalizer... in the Audio File
Workspace.
This function is also available as a batch processing plug-in. You can access it from Batch
Processing Workspace > Plug-ins window > Multipass Plug-ins > Normalizer.
For an explanation of each parameter and interface feature, click on , or the 'What's this?'
question mark icon. For more information see Getting Help
Related topics
Audio File editing
Value editing
7.3.0.9
Stereo to Mono
This dialog is exclusive to the Batch Processor Workspace and allows you to mix a stereo
signal down to a mono one while being certain not to clip while mixing channels.
You can choose to use the same peak level that the stereo file contains, or set the gain to be
applied and/or the maximum level to be reached in the resulting mono file.
You can access this dialog from the Batch Processor Workspace via Plug-ins window >
Multipass Plug-ins > Stereo to Mono.
WaveLab 7
7.3 Batch Processing Plug-ins
201
For an explanation of each parameter and interface feature, click on , or the 'What's this?'
question mark icon. For more information see Getting Help
Related topics
Batch Processing Plug-ins
7.3.0.10 Pan Normalizer
This dialog allows you to ensure that both channels of a stereo file have the same level or
loudness. Since loudnesss is more important than peak volume in the perception of sound,
this is a powerful tool to get the best possible stereo balance.
This process uses two passes to first analyze the audio and then render any level changes
required.
You must have a stereo selection in a stereo file to apply this process.
You can access this dialog from the Audio File Workspace via Process > Pan Normalizer....
This function is also available as a batch processing plug-in. You can access it from the Batch
Processor Workspace via Plug-ins window > Multipass Plug-ins > Pan Normalizer.
For an explanation of each parameter and interface feature, click on , or the 'What's this?'
question mark icon. For more information see Getting Help
Related topics
7.3.0.11 Loudness normalizer
This dialog allows you to adjust the loudness of a file. Because it relates to loudness as
opposed to maximum peak level, this tool works quite differently from the Level Normalizer. A
typical application is to specify a loudness, for example -12dB, and the Loudness Normalizer
processes the audio to match this level of loudness.
Like Gain Change, increasing the loudness to a certain value can introduce clipping. To avoid
this occurring, a peak limiter (the Peak Master plug-in) can be used as part of the process.
The Loudness Normalizer raises the loudness and limits peaks in the signal at the same time
(if needed), to achieve the target loudness.
In the case of stereo files, both channels are processed independently. This process happens
over several stages; analysis precedes the final rendering. The Loudness Normalizer dialog
gives access to useful statistics about the file and the Loudness distribution tool, and you
can choose to remove any DC offset in the file.
You can access this dialog from the Audio File Workspace via Process > Loudness normalizer....
This function is also available as a batch processing plug-in. You can access it from Batch
Processing Workspace > Plug-ins window > Multipass Plug-ins > Loudness Normalizer.
For an explanation of each parameter and interface feature, click on , or the 'What's this?'
question mark icon. For more information see Getting Help
WaveLab 7
202
Batch Processing
Related topics
Loudness
DC Offset
Loudness distribution
7.3.0.12 DC Remover
This dialog is exclusive to the Batch Processor Workspace and allows you to eliminate any
DC Offset from an Audio File.
It can be useful to apply this plug-in first in a batch before other plug-ins to avoid further
processing a file containing any DC Offset. For example, an Audio File that has a DC offset
will not be at its loudest possible volume when normalized, because the offset consumes
headroom.
You can access this dialog from the Batch Processor Workspace via Plug-ins window >
Multipass Plug-ins > DC Remover.
For an explanation of each parameter and interface feature, click on , or the 'What's this?'
question mark icon. For more information see Getting Help
Related topics
Batch Processing Plug-ins
DC Offset
7.3.0.13 Loudness Restorer
This dialog is exclusive to the Batch Processor Workspace and allows you to restore the
loudness of an Audio File.
The Loudness Restorer plug-in must be used as a pair - the first instance is used to read
the audio signal, the second instance uses this information to adjust the loudness or peak
level of the file.
To use the plug-in:
1. Place an instance of the plug-in in the batch chain and choose "Capture" as the mode.
2. Place a second instance of the plug-in after the first one and choose either "Restore
peak level" or "Restore loudness (RMS)".
You can access this dialog from the Batch Processor Workspace via Plug-ins window >
Multipass Plug-ins > Loudness Restorer.
For an explanation of each parameter and interface feature, click on , or the 'What's this?'
question mark icon. For more information see Getting Help
Related topics
Batch Processing Plug-ins
WaveLab 7
7.3 Batch Processing Plug-ins
203
7.3.0.14 Meta-Normalizer
This dialog is exclusive to the Batch Processor Workspace and allows you to normalize a
batch of files all to the same level.
The core purpose of this plug-in is to achieve the same loudness in all files (the highest
loudness found, if possible), while being certain that no file will clip. For each file, a specific
gain is computed by the plug-in once all files have been analyzed and prior to actually applying
any gain to achieve the common loudness. If it is not possible to match the highest found
loudness, the level of the file with the highest loudness is reduced, so that other files can get
the same loudness.
You can choose between peak level or loudness (RMS) as a method of determing the "equal"
level between all files in the batch. This "equal" level is then used to apply a gain to each file
in the batch.
You can access this dialog from the Batch Processor Workspace via Plug-ins window >
Metapass Plug-ins > Meta-Normalizer.
For an explanation of each parameter and interface feature, click on , or the 'What's this?'
question mark icon. For more information see Getting Help
Related topics
Batch Processing Plug-ins
7.3.0.15 Meta-Leveler
This dialog is exclusive to the Batch Processor Workspace and allows you to match the level
of a batch of files.
The core purpose of this plug-in is to to apply the same gain to all files, while being certain
that a specific peak level will never be exceeded in any file. The unique gain that you wish
to apply is (possibly) reduced by the plug-in, once all files in the batch have been analyzed,
and prior to actually applying the gain across the batch.
You can access this dialog from the Batch Processor Workspace via Plug-ins window >
Metapass Plug-ins > Meta-Leveler.
For an explanation of each parameter and interface feature, click on , or the 'What's this?'
question mark icon. For more information see Getting Help
Related topics
Batch Processing Plug-ins
WaveLab 7
204
Batch Processing
WaveLab 7
Chapter 8
Podcasts
About Podcasts
Once set up, you can produce high quality audio podcast episodes directly from WaveLab.
Audio podcasts are ordered and commented sets of digital Audio Files, generally in the
form of 'episodes' with a consistent theme or presenter. Episodes may be downloaded from
the Internet, usually via an automated feed. Compression is an important consideration in
exporting an audio podcast file, since the listener is likely to encounter bandwidth bottlenecks,
so the file formats .mp4a, .mp3 and Ogg Vorbis are commonly used for podcasts.
The Podcast window
The Podcast window is divided into two panes. The upper pane shows the information for
the Feed or an Episode, depending on the item selected in the list below. This is where you
will be adding files, Internet links or textual information to the Podcast feed and its episodes.
The lower pane shows an item list of the basic feed and all Episodes included in the Podcast.
Adding, moving and deleting episodes
There are two ways to add an episode to a Podcast:
Select "New" from the Podcast window's Episodes menu. This will add a new untitled
episode without any information being present.
Select an existing episode in the Podcast window's item list, then select "Duplicate"
from the Episodes menu. This adds a new episode, copying all information from the existing episode to the new one. Episodes can be re-ordered using the "Move up/down"
functions in the Episodes menu, or by dragging them to a new location in the item list.
See Dragging operations for more information.
To delete an episode, select it in the item list and use the "Delete selected" function in the
Episodes menu. Alternatively, you can exclude an Episode from the Podcast by unchecking
the "Enabled" box.
There must be at least one episode present in the Podcast.
206
Podcasts
Adding information to the Podcast
The upper pane of the Podcast window shows various fields and settings that are related to
the basic Feed or Episode, depending on what you have selected in the lower pane's item
list (the fields are slightly different for the Feed and Episodes).
Field labels in bold letters point at a field that is mandatory to fill. For quick publishing of your
Podcast it is sufficient to fill these fields only.
The following settings are available for the Feed and Episode items:
Title
This sets the title of the feed (e.g. the topic of your podcast). This is a mandatory field
for Feed and Episode.
Description
This gives space for a further description of the feed content. This is a mandatory field
for Feed and Episode.
Internet link (URL)
Your feed's main link presented to the user. Use this to direct people to a certain website
that is related to your feed. This is a mandatory field. Clicking
will open the specified
URL in your system's default Internet browser, so make sure that the link is correct. This
is a mandatory field for Feed.
Picture (Feed only)
This picture cannot be larger than 144 x 400 pixels according to the RSS standard,
so the picture is automatically resized if required. Clicking
will open the specified
picture in your system's default image viewer.
Audio file (Episode only)
This sets the path to the Audio File you want to add to the episode. The Audio File
could be any file type that is supported by the web browser's media reader, but an
.mp3 file is best for compatibility. Clicking the
button lists the Audio Files already
open in WaveLab. Select one for your episode. Alternatively, you can drag the icon
of an Audio File into the Audio File pane. Clicking
opens the specified file in your
system's default media player or viewer, as a preview or check.
Publication date and time
This sets the publication date and time of the Feed or Episode. Clicking the
button will transfer your system's current date and time.
"Now"
For the Feed, if "As most recent episode" is checked, this automatically matches the date
and time of the most recent Episode.
Related topics
FTP site
Episodes menu
Publish menu
Specific tool windows
WaveLab 7
8.1 FTP site
8.1
207
FTP site
This dialog allows you to enter information for uploading your Podcast and all related files to
an online FTP server.
You must specify all log-in details for your FTP site, the relative path to your podcast XML
file and the web site address where the link to your Podcast is found, including the path to
the feed. If in doubt about your FTP settings they can normally be supplied by your ISP.
You can access this dialog via Publish > FTP Site... in the Podcast Workspace.
For an explanation of each parameter and interface feature, click on , or the 'What's this?'
question mark icon. For more information see Getting Help
Related topics
Podcasts
8.2
Episodes menu
This menu provides commands for managing individual Episodes within a Podcast.
New
This adds a new untitled episode without any information being present.
Duplicate selected
This adds a new episode, copying all information from the existing episode to the new
one.
Delete selected
To delete an episode, select it in the item list and use this function. Alternatively, you
can exclude an Episode from the Podcast by unchecking the "Enabled" box.
Move up/down
Episodes can be re-ordered using this function, or by dragging them to a new position
in the item list.
8.3
Publish menu
This is where you define where your Podcast is going to be uploaded to via FTP.
FTP site
The WaveLab's FTP site manager stores all information required for the Podcast upload
process. Selecting "FTP site..." from the Podcast window's Publish menu brings up the FTP
site dialog. See FTP site for more information.
WaveLab 7
208
Podcasts
Uploading the Podcast
Once you have specified the FTP site settings, uploading the Podcast is rather simple by
using the functions in the Podcast window's Publish menu.
Update all items on FTP
This uploads/updates the XML Podcast file on the FTP; it also uploads all items' media
files, but only if they are not already present on the FTP. This is the most common
function to upload and update your Podcast.
Upload/Replace all items on FTP
This is the same as above, but it always uploads/replaces all of the media files belonging
to the item. This is useful if you have changed the audio data, for example.
Update selected item on FTP
This uploads/updates the XML Podcast file on the FTP. It also uploads the media file of
the currently selected item in the list, but only if it is not already present on the FTP.
Upload/Replace selected item on FTP
This is the same as above, but it always uploads/replaces the media file of the currently
selected item in the list. This is useful if you have changed the audio data, for example.
View published Podcast
This opens your Podcast (from the URL specified in your FTP site settings), using your
default browser.
FTP site
This is where you specify your Podcast FTP settings. See FTP site.
Tip
Please note that "all items" in fact means all items that have their "Enabled" box in the item
list checked. If not enabled, these episodes are simply omitted from the Podcast.
Related topics
FTP site
8.4
Specific tool windows
Specific tool windows are windows that are specific to the current Workspace. They perform
useful tasks in the active Workspace.
They can be docked and un-docked, and saved in your custom layouts.
WaveLab 7
8.4 Specific tool windows
209
Podcast Workspace specific tool windows
The following specific tool windows are available within the Podcast Workspace:
Master Project
File Browser
8.4.1
File Browser
This dialog allows you to browse files directly from within WaveLab rather than using your
operating system's file browser.
It provides you with all the standard browsing functions (such as List and Icon views)as well
as additional controls to audition Audio Files and any marker defined regions.You can use
it to open or insert an entire file or a specific region of a file by dragging and releasing the
file in the location you wish to insert the file. In the Audio Montage Workspace you can also
choose to only view certain types of WaveLab specific files. The File Browser can be very
useful in speeding up the process of auditioning a long list of sound files. It can also be used
to drag to windows such as Data CD/DVD, including dragging folders.
The playback functions
Play file
Once you have selected a file in the File Browser list, you can audition it by
clicking Play in the File Browser's toolbar. Click again to stop.
Auto-play
You can also have files play back automatically as soon as they are selected.
To do this, activate Auto-Play mode.
Tip: To audition a long list of Audio Files, enable Auto-play and use the UP and DOWN
cursor keys to step through each Audio File in quick succession.
Opening and inserting a file or region
Once you have chosen a file you wish to open, double-click it to open the file in the current
Workspace. You can also open it by dragging it onto an empty tabbed group, or onto the
tab bar of a tabbed group.
You can also drag the file over a wave view to insert it at a given point. When you drag a file
over a wave view, a beam is displayed so as to clearly display the insertion point.
When browsing Audio Files, the file browser also has a region panel. When you select an
Audio File, its related regions are listed in this panel. You can then drag the region from
the list, to insert only that part of the audio. Double-clicking on a region has the effect of
opening the file in the Workspace and selecting that region. You can access this dialog via
Workspace > Specific tool windows > File Browser.
For an explanation of each parameter and interface feature, click on , or the 'What's this?'
question mark icon. For more information see Getting Help
Related topics
Specific tool windows
WaveLab 7
210
Podcasts
WaveLab 7
Chapter 9
Control Window
This is a special Workspace that allows you to create your own control window layout. This
window does not edit any files, but is used as a placeholder to organize certain tool windows
(for example a selection of meters). This is especially useful if you have multiple monitors:
you can place the Control Window on your secondary display and use it to manage all the
tool windows you commonly refer to.
This window has some special features:
the ability to host sub-windows that monitor events happening in other windows. You
can dock the following windows: All Meters, Master Section, Master Project, Log window, Background task monitor, Import Audio CD and Data CD/DVD.
if you work with multiple monitors, the Control Window can occupy a dedicated screen.
the ability to organize all your audio meters in one place, as an assembly of tabbed
sub-windows.
Adding Tabbed Groups
The Control Window uses the tab group system to allow for sophisticated panel arrangements. You can arrange tabs horizontally or vertically, split and divide them. For setups with
a single monitor, independent floating windows are recommended for small screens, and
docked windows for large screens.
To setup a number of tab groups in the Control Window:
Choose a predefined arrangement of tabs from Workspace > Tab Group Shortcuts
>
Add an individual Tab Group using the menu commands Workspace > Add Tab
Group at right or Workspace > Add Tab Group at left
or to sub-divide a window, right-click on any empty pane and choose either "Split hor-
izontally" or "Split vertically"
212
Control Window
Docking/Undocking windows
The process for docking/undocking windows in the Control Window is slightly different to
that in other Workspaces. To dock a window in the Control Window:
1. Undock the window so it is floating as an independent window.
2. Choose a pane in which you want to place the window. This is done by clicking on an
empty pane; an arrow icon
will appear to indicate it is selected.
3. Choose the following command from the floating window's menu: Window > Place
in Control window.
You can also simply drag a tab from one tab group to another, to move it there.
Once docked in the Control Window you can move a window around by dragging it to any
other free space in the control window.
To undock a window from the Control Window either:
right click on the tab title bar or the window itself and choose "Set as independent
floating window" from the context menu or,
click on the
button at the top right of the Control Window
For more information on docking/undocking windows see Docking windows.
Related topics
Specific tool windows
Shared tool windows
Metering
Master Section
Master Project
Scripting
Tab Groups
9.1
Specific tool windows
Specific tool windows are windows that are specific to the current Workspace. They perform
useful tasks in the active Workspace.
They can be docked and un-docked, and saved in your custom layouts.
Control Window specific tool window
The following specific tool window is available within the Control Window:
Master Project
WaveLab 7
9.2 Shared tool windows
213
Related topics
About Tool Windows
Docking windows
9.2
Shared tool windows
Shared tool windows are windows that can only exist in one place at a time and are shared
between Workspaces. They perform useful tasks in relationship to the active Workspace.
They can be docked and un-docked, and saved in your custom layouts.
Shared tool windows:
Phasescope
VU Meter
Oscilloscope
Bit Meter
Spectroscope
Spectrometer
Wavescope
Timecode
Background task monitor
Log window
Master Section
Related topics
About Tool Windows
Metering
Docking windows
9.2.1
Phasescope
The Phasescope indicates the phase and amplitude relationship between two stereo channels. It is only really relevant when monitoring stereo audio material.
Reading the Phasescope
It can be interpreted as follows:
A vertical line indicates a perfect mono signal (the left and right channels are the same).
WaveLab 7
214
Control Window
A horizontal line indicates that the left channel is the same as the right, but with an
inverse phase.
A random but roughly elliptical shape indicates a well balanced stereo signal. If the
shape "leans" to the left, there is more energy in the left channel and vice versa (the
extreme case of this is if one side is muted, in which case the Phasescope will show a
straight line, angled 45 degrees to the other side).
A perfect circle indicates a sine wave on one channel, and the same sine wave shifted
by 90 degrees on the other.
Generally, the more you can see a "thread" shape, the more bass there is in the signal;
the more "spray-like" the display, the more high frequencies are in the signal.
Phase Correlation meter
At the bottom of the display, you will find a Phase Correlation meter, which shows the same
information but in a different way:
The green line shows the current phase correlation, while the two red lines show the
recent peak minimum and maximum values, respectively (these are the default colors,
which you can change).
With a mono signal, the meter would show +1, indicating that both channels are per-
fectly in phase.
Similarly, -1 indicates that the two channels are the same, but one is inverted.
Generally, for a "good" mix, the meter should show a value between 0 and +1.
Unlike the main Phasescope, the Phase Correlation meter is also available in "Analyze audio
selection" mode, showing an average value for the selected range.
Changing settings
You can define display colors, peak hold time, and the resolution or number of samples to
display from the Functions > Settings... menu.
The Phasescope meter can be found in the Meters menu of the Audio Files and Audio Montage Workspaces. It can be used either as a floating window, or docked in the Workspace
or the Control Window.
Related topics
Metering
WaveLab 7
9.2 Shared tool windows
9.2.2
215
VU Meter
The vu-meter is used to display the peak and average loudness/decibel level of your Audio
File. It also displays the pan, or the balance between the left and right channels in a stereo
file.
The upper part of the level/pan meter window shows the peak level and average loudness,
in the following way:
The Peak Level meters display the peak levels of each channel, graphically and numeri-
cally. By default, the meter segments and numerical peak values are displayed in green
for low levels, yellow for levels between -6dB and -2dB, and red for levels above -2dB.
You can change both the colors and the range boundaries if you wish via the Level/Pan
Meter Settings dialog. This can be accessed through the Functions > Settings...
menu, or by using the
icon.
The VU (Volume Unit) meters measure the average loudness (RMS) of each channel.
These meters have a built-in inertia, evening out loudness variations over a user-defined
time span. If you are monitoring playback or audio input, you will also note two vertical
lines following each VU meter bar, seemingly "trying to reach" the current RMS value.
These lines indicate the average of the most recent minimum RMS values (left line)
and the average of the most recent maximum RMS values (right line). To the left, the
difference between the minimum and maximum average values is displayed (the level
value in brackets) - this gives you an overview of the dynamic range of the audio material.
If you are monitoring real-time audio (playback or input), the maximum peak and loud-
ness values are displayed numerically to the right of the meter bars. Numbers in brackets to the right of the Maximum Peak values indicate the number of successive clips
(0dB signal peaks). Recording levels should be set so that they only rarely clip. If the
master level is set too high, the sound quality and frequency response will be compromised at high recording levels, with unwanted clipping effects. If the level is set too
low, noise levels may be high relative to the main sound being recorded.
Pan meters
The lower part of the window shows the pan (the difference in level between the left and
right channel, only applicable when monitoring stereo audio):
The upper pan meters show the peak level difference between the channels, graphically
and numerically. Note that the pan meters are "two-sided"; the level bars can go to the
left or right, indicating which channel is the loudest. The two sides are shown in different
colors (which can be changed via the Settings dialog as explained previously).
The lower pan meters show the average difference in loudness between the channels,
in a similar way. This gives you a visual indication of whether a stereo recording is
properly centered, for example.
If you are monitoring real-time audio (playback or input), the maximum balance differ-
ence value (peak and loudness) for each channel is displayed numerically to the left and
right of the meter bars. The VU meter can be found in the Meters menu of the Audio
Files and Audio Montage Workspaces.It can be used either as a floating window, or
docked in the Workspace or the Control Window.
WaveLab 7
216
Control Window
Related topics
Metering
9.2.3
Oscilloscope
The Oscilloscope offers a highly magnified view of the waveform around the playback cursor
position.
If you are analyzing a stereo file, the Oscilloscope normally shows the separate levels of
the two channels. However, if you activate the option "Show Sum and Subtraction" on the
Functions menu (or click the +/- icon), the upper half of the Oscilloscope shows the sum of
the two channels and the lower half shows the subtraction.
Making settings
By opening the Settings dialog you can adjust the display colors, and choose to activate
Auto-zoom or not. With Auto-zoom activated, the display is optimized so that the highest
level reaches the top of the display at all times. The Settings dialog can be accessed through
the Functions > Settings... menu, or by using the
icon.
The Oscilloscope can be found in the Meters menu of the Audio Files and Audio Montage
Workspaces. It can be used either as a floating window, or docked in the Workspace.It can
also be docked in the Control Window.
Related topics
Metering
9.2.4
Bit Meter
The Bit Meter shows the resolution or the number of bits used in the digital audio being
monitored. Normally the maximum number of bits in an Audio File is the same as the resolution
of the Audio File (e.g. a 16 bit Audio File shows that up to 16 bits are used), but sometimes
this is not the case.
As soon as you perform any kind of real-time processing on an Audio File, the audio data is
treated at a much higher resolution (32 bit floating point), to allow for pristine audio quality.
Examples of such processing include level adjustments, effects, the mixing of two or more
files, etc. In fact, the only time when a 16 bit file is played back at 16 bit resolution is if
you play it without any fades or effects, and with the Master Faders set to 0.00 (no level
adjustment). You can try this out for yourself by playing back a 16 bit Audio File and viewing
the Bit Meter - as soon as you adjust the Master Faders, note that 24 bits are used and the
"inter" indicator is lit (more on this below).
How to read the Bit Meter
The innermost meters (closest to the bit scale) show the number of bits in use. You can
adjust this display in the Settings dialog.
WaveLab 7
9.2 Shared tool windows
217
The outer meters are "history" meters, showing how many bits were recently in use. You
can adjust the hold time in the Settings dialog.
The "over" segment indicates clipping, similar to a clip indicator.
If the "below" segment is lit, there are more than 24 bits. The bit meter will show the 24
higher bits, and the "below" segment indicates the existence of extra, lower bits. Note
that audio is always processed with more than 24 bits internally.
If the "inter" segment is lit, this indicates that the audio data cannot really be expressed
on a regular 24 bit scale (there are floating point values "in between" bits, thus the label
"inter"). This is typically the case if you apply effects; thus the "inter" segment allows
you to differentiate processed from non-processed 24 bit PCM files.
When to use the Bit Meter
To check whether dithering is necessary or not. As a rule, if you're playing back or
mixing down to 16 bits, and the Bit Meter shows that more than 16 bits are used, you
should apply dithering.
To see the "actual" resolution of an Audio File. For example, even though a file is in 24
bit format, only 16 bits may be used. Or, a 32 bit file may only use 24 bits (in this case,
the "below" segment would not be lit). For this purpose, the Bit Meter is best used in
"Analyze selection" mode.
To see whether a "zeroed" plug-in still affects your signal, or whether a plug-in uses
16 bit internal processing, or more generally, to detect any signal modifier stage in the
audio chain between reading and playing.
To adjust the Bit Meter settings, select "Settings..." from the Options pop-up menu or by
using the
icon.
The Bit meter can be found in the Meters menu of the Audio Files and Audio Montage
Workspaces. It can be used either as a floating window, or docked in the Workspace or the
Control Window.
Related topics
Metering
Dithering
9.2.5
Spectroscope
The Spectroscope shows a continuous graphical representation of the frequency spectrum,
analyzed into 60 separate frequency bands, represented as vertical bars. Peak levels are
shown as a short horizontal lines above the corresponding band, indicating recent peak/maximum values. The Spectroscope offers a quick spectrum overview. For a more detailed
analysis of the audio spectrum, use the Spectrometer. The Spectroscope can be found in
the Meters menu of the Audio Files and Audio Montage Workspaces. It can be used either as a floating window, or docked in the Workspace.It can also be docked in the Control
Window.
WaveLab 7
218
Control Window
Related topics
Metering
Spectrometer
9.2.6
Spectrometer
The Spectrometer uses FFT (Fast Fourier Transform) techniques to display a continuous
frequency graph, providing a very precise and detailed real-time frequency analysis.
The current frequency spectrum is shown as a linear graph.
Spectrum "peaks" are shown as a short horizontal lines, indicating recent peak/maxi-
mum values.
Snapshots
By using the "Add snapshot" and
"Erase last snapshot" buttons, you can take and erase
snapshots of the current spectrum. These will be superimposed over the current peak spectrum graph, in a color you can customize, until you click the icon again to take a new snapshot.
One use for this is to check the effects of adding EQ, for example. Up to five snapshots can
be superimposed on the display; the sixth snapshot replaces the earliest one in the display,
and so on. (Don't confuse the order of snapshots with the numbered buttons - these are
Spectrometer presets, see below.)
Zooming
You can adjust the frequency scale and range in the Settings dialog as described below,
but it's also possible to temporarily zoom in on a frequency area of interest. This is done by
clicking and dragging a rectangle in the Spectroscope display. When you release the mouse
button, the display is zoomed in so that the enclosed frequency range fills the window. To
return to full-scale display, select "Zoom-out fully" from the Functions menu, or double-click
anywhere on the display.
Making settings
You can adjust the behavior and display of the meters as desired, and assign up to five sets
of Spectrometer settings to the Preset buttons, for instant access. Open the Settings dialog
by selecting "Settings" from the Functions menu or clicking the
"tool" icon. Note that you
can apply your settings without closing the dialog, by clicking the Apply button.
If you want to store your settings for later use (or assign them to a Preset button), select "Save
as..." from the pop-up menu in the lower part of the dialog, and specify a name for the preset
in the file dialog that appears. Now, you can choose to make the settings instantly available
for selection in the FFT Meter window, by using the "Assign to preset button" submenu on
the pop-up menu.
When you are finished, click OK to close the dialog.
WaveLab 7
9.2 Shared tool windows
219
Selecting Spectrometer presets
If you have assigned your settings to the Preset buttons in the Settings dialog, you can quickly
switch between different level scales and display modes, by clicking one of the Preset icons
[1]-[5], or selecting the desired preset from the Options pop-up menu.
Exporting FFT data as ASCII text
When using the Spectrometer in off-line mode ("Monitor Edit cursor Position" or "Analyze
audio election" mode) you can export the displayed FFT data as a text file, by selecting
"Export FFT data as ASCII" from the Options pop-up menu. The resulting text file can then
be imported into applications that allow graph plotting from text files (Microsoft Excel, for
example).
The Spectrometer can be found in the Meters menu of the Audio Files and Audio Montage
Workspaces. It can be used either as a floating window, or docked in the Workspace or the
Control Window.
Related topics
Metering
Spectroscope
9.2.7
Wavescope
The Wavescope meter displays a real-time waveform drawing of the audio signal being monitored.
It can be useful when recording or rendering a file if "Monitor File rendering" mode is active.
Making settings
You can adjust settings for the display via the Wavescope Settings dialog. This can be
accessed via Functions > Settings... menu, or by using the
icon. Here you can set
various color options for the background, grid and waveform display, as well as setting the
waveform rendering speed and vertical zoom. If "Clear waveform when reaching right of
pane" is checked the waveform display is cleared each time the cursor reaches the right end
of the display. If unchecked, the previous waveform is overwritten.
Tip: Wavescope is a useful meter for visualizing audio during recording. The Wavescope
meter can be found in the Meters menu of the Audio Files and Audio Montage Workspaces.
It can be used either as a floating window, or docked in the Workspace or the Control Window.
Related topics
Metering
WaveLab 7
220
9.2.8
Control Window
Timecode
This shared tool window displays the current time of the playback head (or the cursor position
if not playing back), in the timecode format currently selected in the Time Format dialog.
The current time can be in a range of standard SMPTE formats, CD or DVD specific formats,
or a custom one - see Time Format dialog.
The most common use for this window is for working with video or film. You can use it to
display the playback head position of the current Audio File in a SMPTE format to frame level
resolution (i.e. hours:minutes:seconds:frames). You can also use it to display CD frames
(minutes:seconds:frames) when you are authoring CD or DVDs.
You can access this window by choosing Workspace > Shared tool windows > Timecode. It is available in the Control Window, Audio File Workspace and Audio Montage
Workspace.
For an explanation of each parameter and interface feature, click on , or the 'What's this?'
question mark icon. For more information see Getting Help
Related topics
Time Format dialog
CD Frame
SMPTE timecode
Authoring CDs and DVDs
9.2.9
Background task monitor
This specific tool window allows you to view all background rendering processes that are in
progress.
You can adjust the priority with which they are processed, pause or cancel them. It is useful
if you have a number of lengthy processes underway and want to free up some processing
power to focus on editing. You can either lower the priority of a task so it does not use as
much of the computer processor's capacity, or pause the task temporarily.
You can access this window by choosing Workspace > Shared tool windows > Background task monitor. It is available in the Control Window, Audio File Workspace and
Audio Montage Workspace. You can also access this window in the Control Window by
choosing Utilities > Background task monitor.
You can choose to automatically open the Background task monitor when a rendering process begins. To enable this option, select the checkbox via Options > Global Preferences
> Options > Make the Background Task Monitor visible when a task starts . Since
this window is a Shared tool window, the location where it opens may vary.
For an explanation of each parameter and interface feature, click on , or the 'What's this?'
question mark icon. For more information see Getting Help
Related topics
Specific tool windows
WaveLab 7
9.3 Metering
221
Control Window
Rendering
9.2.10 Log window
This shared tool window allows you to view log messages that have been issued by WaveLab.
When using WaveLab's scripting language for example, the logWindow( ) function outputs
messages to this window. There are a number of toggle buttons and these allow you to filter
the types of messages displayed.
Note: When using the logWindow( ) method you need to have the
"Show informal notes"
button selected for the messages to be visible. If no log messages are displayed, make sure
.
all the toggle buttons are selected You can access this window via Workspace > Shared tool windows > Log. It is available
in the Control Window, Audio File Workspace and Audio Montage Workspace. You can also
access this window in the Control Window via Utilities > Log.
For an explanation of each parameter and interface feature, click on , or the 'What's this?'
question mark icon. For more information see Getting Help
Related topics
Control Window
Specific tool windows
Scripting
9.3
Metering
WaveLab contains a variety of audio meters to help in monitoring and analyzing audio.Meters
can be used to monitor audio during playback, rendering, recording and also to analyze a
specific selection of audio. There are seven different audio meters in WaveLab, each with
its own separate window. The meters are accessed via the Meters menu, the Shared Tool
windows menu, or from the Meters control bar.
Monitor Modes
You can choose the audio source and the mode for displaying information in the meters.
You can access the following monitoring functions from the Meters menu or via the Meters
command bar:
Monitor Playback - the meters display the audio output of the Master Section
after the dithering section, unlike the Master Section's own meter.
Monitor Audio Input - the meters display the audio input you have chosen in the
Audio Streaming Settings. This is useful for monitoring audio while recording.
WaveLab 7
222
Control Window
Monitor File Rendering - the meters display what is being written to disk during
file rendering, taking into account Master Section settings, with average, minimum and
maximum peak values computed. After rendering, the meter(s) freeze, and remain frozen
until you refresh or change the monitor mode.
Monitor Edit cursor position - the meters display static information about the
audio beneath the edit cursor. Note that the Master Section settings are not taken into
account in this mode.
Analyze audio selection - this allows you to make a selection and have the
meters display the average values over the selected range as a static display. The
Master Section settings are not taken into account in this mode. When you change the
selection, you need to update the meter displays by selecting
"Refresh selection
analysis" from the Meters menu (or by clicking the Refresh button on the Meters control
bar).
If you have one of the continuous display modes chosen, you can also select to freeze the
meters at any time using the
"Freeze meters" command.
Using meter windows
There can only be one instance of each Audio Meter. For example, if you dock one meter in a
Workspace, it will be automatically removed from the place where it was previously located.
Audio Meters can appear in the Audio File, Audio Montage Workspaces as well as the Control Window. They can be used:
as a docked window in a Workspace
as a tabbed window in the control window
as an independent floating window. In this mode, it can be useful to make the window
"frameless" from Window > Hide frame, to save screen space. In this case, the whole
menu is accessed by right-clicking.
The axis of most Audio Meters may be rotated, to view the graphics horizontally or vertically.
Some meters can also have their visual style and display parameters customized via their
corresponding settings dialog. This can be accessed through the Functions > Settings...
menu in each meter window, or by using the
icon.
Related topics
VU Meter
Spectroscope
Oscilloscope
Bit Meter
Phasescope
Spectrometer
Wavescope
WaveLab 7
9.3 Metering
9.3.1
223
VU Meter
The vu-meter is used to display the peak and average loudness/decibel level of your Audio
File. It also displays the pan, or the balance between the left and right channels in a stereo
file.
The upper part of the level/pan meter window shows the peak level and average loudness,
in the following way:
The Peak Level meters display the peak levels of each channel, graphically and numeri-
cally. By default, the meter segments and numerical peak values are displayed in green
for low levels, yellow for levels between -6dB and -2dB, and red for levels above -2dB.
You can change both the colors and the range boundaries if you wish via the Level/Pan
Meter Settings dialog. This can be accessed through the Functions > Settings...
menu, or by using the
icon.
The VU (Volume Unit) meters measure the average loudness (RMS) of each channel.
These meters have a built-in inertia, evening out loudness variations over a user-defined
time span. If you are monitoring playback or audio input, you will also note two vertical
lines following each VU meter bar, seemingly "trying to reach" the current RMS value.
These lines indicate the average of the most recent minimum RMS values (left line)
and the average of the most recent maximum RMS values (right line). To the left, the
difference between the minimum and maximum average values is displayed (the level
value in brackets) - this gives you an overview of the dynamic range of the audio material.
If you are monitoring real-time audio (playback or input), the maximum peak and loud-
ness values are displayed numerically to the right of the meter bars. Numbers in brackets to the right of the Maximum Peak values indicate the number of successive clips
(0dB signal peaks). Recording levels should be set so that they only rarely clip. If the
master level is set too high, the sound quality and frequency response will be compromised at high recording levels, with unwanted clipping effects. If the level is set too
low, noise levels may be high relative to the main sound being recorded.
Pan meters
The lower part of the window shows the pan (the difference in level between the left and
right channel, only applicable when monitoring stereo audio):
The upper pan meters show the peak level difference between the channels, graphically
and numerically. Note that the pan meters are "two-sided"; the level bars can go to the
left or right, indicating which channel is the loudest. The two sides are shown in different
colors (which can be changed via the Settings dialog as explained previously).
The lower pan meters show the average difference in loudness between the channels,
in a similar way. This gives you a visual indication of whether a stereo recording is
properly centered, for example.
If you are monitoring real-time audio (playback or input), the maximum balance differ-
ence value (peak and loudness) for each channel is displayed numerically to the left and
right of the meter bars. The VU meter can be found in the Meters menu of the Audio
Files and Audio Montage Workspaces.It can be used either as a floating window, or
docked in the Workspace or the Control Window.
WaveLab 7
224
Control Window
Related topics
Metering
9.3.2
Spectroscope
The Spectroscope shows a continuous graphical representation of the frequency spectrum,
analyzed into 60 separate frequency bands, represented as vertical bars. Peak levels are
shown as a short horizontal lines above the corresponding band, indicating recent peak/maximum values. The Spectroscope offers a quick spectrum overview. For a more detailed
analysis of the audio spectrum, use the Spectrometer. The Spectroscope can be found in
the Meters menu of the Audio Files and Audio Montage Workspaces. It can be used either as a floating window, or docked in the Workspace.It can also be docked in the Control
Window.
Related topics
Metering
Spectrometer
9.3.3
Oscilloscope
The Oscilloscope offers a highly magnified view of the waveform around the playback cursor
position.
If you are analyzing a stereo file, the Oscilloscope normally shows the separate levels of
the two channels. However, if you activate the option "Show Sum and Subtraction" on the
Functions menu (or click the +/- icon), the upper half of the Oscilloscope shows the sum of
the two channels and the lower half shows the subtraction.
Making settings
By opening the Settings dialog you can adjust the display colors, and choose to activate
Auto-zoom or not. With Auto-zoom activated, the display is optimized so that the highest
level reaches the top of the display at all times. The Settings dialog can be accessed through
the Functions > Settings... menu, or by using the
icon.
The Oscilloscope can be found in the Meters menu of the Audio Files and Audio Montage
Workspaces. It can be used either as a floating window, or docked in the Workspace.It can
also be docked in the Control Window.
Related topics
Metering
WaveLab 7
9.3 Metering
9.3.4
225
Bit Meter
The Bit Meter shows the resolution or the number of bits used in the digital audio being
monitored. Normally the maximum number of bits in an Audio File is the same as the resolution
of the Audio File (e.g. a 16 bit Audio File shows that up to 16 bits are used), but sometimes
this is not the case.
As soon as you perform any kind of real-time processing on an Audio File, the audio data is
treated at a much higher resolution (32 bit floating point), to allow for pristine audio quality.
Examples of such processing include level adjustments, effects, the mixing of two or more
files, etc. In fact, the only time when a 16 bit file is played back at 16 bit resolution is if
you play it without any fades or effects, and with the Master Faders set to 0.00 (no level
adjustment). You can try this out for yourself by playing back a 16 bit Audio File and viewing
the Bit Meter - as soon as you adjust the Master Faders, note that 24 bits are used and the
"inter" indicator is lit (more on this below).
How to read the Bit Meter
The innermost meters (closest to the bit scale) show the number of bits in use. You can
adjust this display in the Settings dialog.
The outer meters are "history" meters, showing how many bits were recently in use. You
can adjust the hold time in the Settings dialog.
The "over" segment indicates clipping, similar to a clip indicator.
If the "below" segment is lit, there are more than 24 bits. The bit meter will show the 24
higher bits, and the "below" segment indicates the existence of extra, lower bits. Note
that audio is always processed with more than 24 bits internally.
If the "inter" segment is lit, this indicates that the audio data cannot really be expressed
on a regular 24 bit scale (there are floating point values "in between" bits, thus the label
"inter"). This is typically the case if you apply effects; thus the "inter" segment allows
you to differentiate processed from non-processed 24 bit PCM files.
When to use the Bit Meter
To check whether dithering is necessary or not. As a rule, if you're playing back or
mixing down to 16 bits, and the Bit Meter shows that more than 16 bits are used, you
should apply dithering.
To see the "actual" resolution of an Audio File. For example, even though a file is in 24
bit format, only 16 bits may be used. Or, a 32 bit file may only use 24 bits (in this case,
the "below" segment would not be lit). For this purpose, the Bit Meter is best used in
"Analyze selection" mode.
To see whether a "zeroed" plug-in still affects your signal, or whether a plug-in uses
16 bit internal processing, or more generally, to detect any signal modifier stage in the
audio chain between reading and playing.
WaveLab 7
226
Control Window
To adjust the Bit Meter settings, select "Settings..." from the Options pop-up menu or by
using the
icon.
The Bit meter can be found in the Meters menu of the Audio Files and Audio Montage
Workspaces. It can be used either as a floating window, or docked in the Workspace or the
Control Window.
Related topics
Metering
Dithering
9.3.5
Phasescope
The Phasescope indicates the phase and amplitude relationship between two stereo channels. It is only really relevant when monitoring stereo audio material.
Reading the Phasescope
It can be interpreted as follows:
A vertical line indicates a perfect mono signal (the left and right channels are the same).
A horizontal line indicates that the left channel is the same as the right, but with an
inverse phase.
A random but roughly elliptical shape indicates a well balanced stereo signal. If the
shape "leans" to the left, there is more energy in the left channel and vice versa (the
extreme case of this is if one side is muted, in which case the Phasescope will show a
straight line, angled 45 degrees to the other side).
A perfect circle indicates a sine wave on one channel, and the same sine wave shifted
by 90 degrees on the other.
Generally, the more you can see a "thread" shape, the more bass there is in the signal;
the more "spray-like" the display, the more high frequencies are in the signal.
Phase Correlation meter
At the bottom of the display, you will find a Phase Correlation meter, which shows the same
information but in a different way:
The green line shows the current phase correlation, while the two red lines show the
recent peak minimum and maximum values, respectively (these are the default colors,
which you can change).
With a mono signal, the meter would show +1, indicating that both channels are per-
fectly in phase.
WaveLab 7
9.3 Metering
227
Similarly, -1 indicates that the two channels are the same, but one is inverted.
Generally, for a "good" mix, the meter should show a value between 0 and +1.
Unlike the main Phasescope, the Phase Correlation meter is also available in "Analyze audio
selection" mode, showing an average value for the selected range.
Changing settings
You can define display colors, peak hold time, and the resolution or number of samples to
display from the Functions > Settings... menu.
The Phasescope meter can be found in the Meters menu of the Audio Files and Audio Montage Workspaces. It can be used either as a floating window, or docked in the Workspace
or the Control Window.
Related topics
Metering
9.3.6
Spectrometer
The Spectrometer uses FFT (Fast Fourier Transform) techniques to display a continuous
frequency graph, providing a very precise and detailed real-time frequency analysis.
The current frequency spectrum is shown as a linear graph.
Spectrum "peaks" are shown as a short horizontal lines, indicating recent peak/maxi-
mum values.
Snapshots
By using the "Add snapshot" and
"Erase last snapshot" buttons, you can take and erase
snapshots of the current spectrum. These will be superimposed over the current peak spectrum graph, in a color you can customize, until you click the icon again to take a new snapshot.
One use for this is to check the effects of adding EQ, for example. Up to five snapshots can
be superimposed on the display; the sixth snapshot replaces the earliest one in the display,
and so on. (Don't confuse the order of snapshots with the numbered buttons - these are
Spectrometer presets, see below.)
Zooming
You can adjust the frequency scale and range in the Settings dialog as described below,
but it's also possible to temporarily zoom in on a frequency area of interest. This is done by
clicking and dragging a rectangle in the Spectroscope display. When you release the mouse
button, the display is zoomed in so that the enclosed frequency range fills the window. To
return to full-scale display, select "Zoom-out fully" from the Functions menu, or double-click
anywhere on the display.
WaveLab 7
228
Control Window
Making settings
You can adjust the behavior and display of the meters as desired, and assign up to five sets
of Spectrometer settings to the Preset buttons, for instant access. Open the Settings dialog
by selecting "Settings" from the Functions menu or clicking the
"tool" icon. Note that you
can apply your settings without closing the dialog, by clicking the Apply button.
If you want to store your settings for later use (or assign them to a Preset button), select "Save
as..." from the pop-up menu in the lower part of the dialog, and specify a name for the preset
in the file dialog that appears. Now, you can choose to make the settings instantly available
for selection in the FFT Meter window, by using the "Assign to preset button" submenu on
the pop-up menu.
When you are finished, click OK to close the dialog.
Selecting Spectrometer presets
If you have assigned your settings to the Preset buttons in the Settings dialog, you can quickly
switch between different level scales and display modes, by clicking one of the Preset icons
[1]-[5], or selecting the desired preset from the Options pop-up menu.
Exporting FFT data as ASCII text
When using the Spectrometer in off-line mode ("Monitor Edit cursor Position" or "Analyze
audio election" mode) you can export the displayed FFT data as a text file, by selecting
"Export FFT data as ASCII" from the Options pop-up menu. The resulting text file can then
be imported into applications that allow graph plotting from text files (Microsoft Excel, for
example).
The Spectrometer can be found in the Meters menu of the Audio Files and Audio Montage
Workspaces. It can be used either as a floating window, or docked in the Workspace or the
Control Window.
Related topics
Metering
Spectroscope
9.3.7
Wavescope
The Wavescope meter displays a real-time waveform drawing of the audio signal being monitored.
It can be useful when recording or rendering a file if "Monitor File rendering" mode is active.
Making settings
You can adjust settings for the display via the Wavescope Settings dialog. This can be
accessed via Functions > Settings... menu, or by using the
icon. Here you can set
WaveLab 7
9.3 Metering
229
various color options for the background, grid and waveform display, as well as setting the
waveform rendering speed and vertical zoom. If "Clear waveform when reaching right of
pane" is checked the waveform display is cleared each time the cursor reaches the right end
of the display. If unchecked, the previous waveform is overwritten.
Tip: Wavescope is a useful meter for visualizing audio during recording. The Wavescope
meter can be found in the Meters menu of the Audio Files and Audio Montage Workspaces.
It can be used either as a floating window, or docked in the Workspace or the Control Window.
Related topics
Metering
WaveLab 7
230
Control Window
WaveLab 7
Chapter 10
Master Section
The Master section contains WaveLab's "Real Time Engine" and is the final element in the
signal path, before your audio material is passed on to the audio hardware, or before it is
rendered to disk as an Audio File. The Master section is where you can set the master
volume level and add effects processors.
The Master Section is a "shared tool window". This means there is a unique instance of
it: it can only show up at one place at a time. You can access it from Workspace menu >
Shared tool windows. If the Master section is not visible, click on
to dock it in the relevant
Workspace.
The Master Section includes:
Effects slots For adding real-time effect plug-in processors such as Crystal Resam-
pler, Steinberg Studio EQ, etc. WaveLab provides a number of effects slots. Click on
to access plug-ins. If you need more effects than you have slots available, you can
render the tracks and add further effects in a subsequent pass before storing the final
Audio File.
Plug-ins can be individually by-passed for playback by toggling
affect the rendering process.
to
, but this does not
To give priority to a single effect (that is, to switch the other effects off temporarily), press 'S'
(Solo bypass).
The
icon allows you to store, access and manage plug-in presets. For Steinberg VST3
effects, an interesting set of Factory presets are provided from the drop-down submenu.
Other buttons in this row allow you to hide or display the effect's control panel and switch
an effect on (
) or off (
) - for both playback and rendering.
Master level faders The right and left faders are normally linked, but you can press
"Unlink" to control the output levels independently. Select "Mono" to sum the audio
channels into a single mono output. "Reset peaks" clears the last peak level indicator.
The tools at the bottom pane are:
Smart Bypass - this opens the Smart bypass dialog, which allows you to choose
whether to bypass all the active effects in the Effects slots, including faders. The purpose of this feature is to allow you to compensate for any level difference introduced
by the Master Section. Note that this is for playback only, not for file rendering.
232
Master Section
Reset all - removes all the active effects from the Effects slots and sets the master
output to 0dB.
Settings menu - provides access to various options.
Rendering functions - brings up the Render Wave window. This allows you to
process the Audio File or Audio Montage with the effects you have selected and create
a temporary or final Audio File. By rendering the effects, they become a permanent
part of the file, rather than using them in real-time to test a set of effects on the file.
The rendering options differ slightly so they are appropriate for Audio Files and Audio
Montages.
Master section On/Off - removes the Master section from the signal path. Note
that this is for playback only, not for file rendering.
Tip: When working in the Master Section window, the mouse wheel can be used to adjust
the master volume. You have to point the cursor in the Master Section for this to work.
Docking/Undocking Master Section
The Master Section is a shared tool window and can be docked and un-docked like other
Shared tool windows. There are however, some exceptions to its behavior, because of its
central importance in WaveLab.
If you dock the Master Section in a Workspace, then close that Workspace, the Master
Section will be automatically un-docked and re-displayed as an independent floating window.
This is done so that the Master Section remains visible at all times and is not closed with the
Workspace (the normal behavior for a Shared tool window). If however, you place it in the
Control Window then it is not docked but part of a tab group. As such if you then close the
Control Window it will also hide the Master Section.
The "Global" menu (in all menu bars), always has an entry "Master Section", to easily reveal
the Master Section if it is ever hidden in this manner. If the Master Section is docked or in
a tab group, its main host will be made visible again. The Master Section can be docked in
some Workspaces (Audio File, Montage), but not in some others (for example, the Podcast
Workspace).
Related topics
Render Wave window
Render Montage window
Plug-ins settings
Audio Plug-ins
10.1
Render Wave window
This dialog allows you to process the Audio File or selection you are working on, applying
any effects you have active.
WaveLab 7
10.2 Render Montage window
233
It applies all active plug-ins to the selected audio region or the whole file, and you can optionally change the format of the rendered file. This process is sometimes also referred to as
"mixing" or "bouncing down".
You can select options for which regions of the session are rendered, whether to create a
new file or process in place, and whether to mute the effects chain when finished. You can
also choose to copy marker locations to the new file.
You can access this dialog in the Audio File Workspace via the
Master Section window.
Render button from the
For an explanation of each parameter and interface feature, click on , or the 'What's this?'
question mark icon. For more information see Getting Help
Related topics
Rendering
Audio Plug-ins
Audio File Format Dialog
Master Section
10.2
Render Montage window
This dialog allows you to process the montage session you are working on, mixing down
multiple tracks into a mono or stereo file and applying any active plug-in effects you have
active. This process is sometimes also referred to as mixing or bouncing down.
You can select options for which regions of the session are rendered, whether to create a
named file or a temporary, untitled file, and whether to mute the effects chain when finished.
There are various options to render all or parts of the Montage, into one or more files - use
"What's this..."
You can access this dialog in the Audio Montage Workspace via the
the Master Section window.
Render button from
For an explanation of each parameter and interface feature, click on , or the 'What's this?'
question mark icon. For more information see Getting Help
Related topics
Rendering
Audio Plug-ins
Audio File Format Dialog
Master Section
10.3
Plug-ins settings
This dialog allows you to access a number of options for managing your VST plug-ins.
WaveLab 7
234
Master Section
You can specify where WaveLab should search for your VST plug-ins and which ones it
should ignore. It also allows you to choose how your VST plug-in knobs respond to mouse
interactions and how frequently they are updated visually.
If you use your own file structure to organize and store VST Plug-ins, this dialog allows you
to have full control over which ones are loaded or not. This can be particularly useful if you
want to disable a particular plug-in that you suspect of not functioning properly, or to only
load a certain set of plug-ins for a specific project, for example.
You can access this dialog from the Master Section via Options > VST Plug-in settings....
For an explanation of each parameter and interface feature, click on , or the 'What's this?'
question mark icon. For more information see Getting Help
Related topics
Audio Plug-ins
WaveLab 7
Chapter 11
Interface Elements
This section contains links to all of the various types of windows and dialogs within WaveLab.
Related topics
Dialogs
Shared tool windows
Specific tool windows
11.1
Dialogs
There are many dialog windows within WaveLab that allow you to access all its features and
processing power. You can get help on a particular dialog by using the
Help button
"What's this?" tool will help you to access detailed
from within the dialog. Using the
information on a dialog's parameters. See Getting Help for more information on.
The following is a list of all the dialogs within WaveLab that have help entries available:
Insert link
Align Clips
Recording channels
Audio CD Report
Audio file comparer
Audio File Format Dialog
Audio Montage properties
Split Clip at silences
Audio properties dialog
Audio Range
Audio Streaming Settings
Auto Split
236
Interface Elements
Batch Conversion
Basic Audio CD Settings
Batch Renaming
CD Text Editor
CD-Text Browser
CD Wizard
Copy audio information
Customize Commands
Data CD/DVD
DVD-Audio options
DVD-Audio Creation
Document list dialog
Ducking options
Effect morphing
Edit playback times
Error detection and correction
Configure external tools
Folder Preferences dialog
Frequency range
FTP site
Change Level
File attributes (OGG/WMA)
Global analysis
Import Audio CD
Insert Audio Files
Level envelope
Loop Tone Uniformizer
Loudness distribution
Loudness normalizer
Global Preferences
Convert marker type
Load Master Section Preset
Save Master Section Preset
Audio Montage Clone
Write Audio CD
Meta-normalizer
WaveLab 7
11.1 Dialogs
Audio Montage Preferences
MP2 encoding
MP3 attributes
MP3 encoding
Normalize Level
OGG encoding
Open files list
Pan Normalizer
Mix dialog
Pitch bend
Pitch correction
Pitch quantize
Playback speed
Podcast options
Text format
Repeat Clip
Recently used files
Recording Dialog
Record create marker
Rename File dialog
Render ASIO input to file
Render Montage window
Render Wave window
Loudness envelope options
Sample attributes
Modified files dialog
Save Audio File dialog
Select where and how Audio Files will be saved
Save Batch Processor
Save File As
Save Preset As
Save picture of active window
Scripting window (Audio Montage Workspace)
Scripting window (Audio File Workspace)
Definition of shortcut(s)
Signal generator
WaveLab 7
237
238
Interface Elements
Silence Generator
Smart bypass
Special File Format
Spectrogram options
Surround Panner
Create Document Template
Template List Dialog
Time Format dialog
Time stretching
Track dispatching
Value Format
File attributes
Audio File editing preferences
Write Audio CD
WMA encoding
Workspace layout
Write Data CD/DVD
Loop Tweaker
Zoom factor
11.1.1 Insert link
This dialog allows you to insert a hyperlink to a web page in your podcast episode description.
In "Title" enter the text that will form the active link.
In "URL" enter the Uniform Resource Locator (i.e.
web address) you wish
it to open when clicked.
Remember to include the full URL, for example:
http://www.personalwebsite.com/index.html
You can access this dialog from the Podcast Workspace via Episode in the list of Items, then
click on
above the "Description" field. The description of the feed content is a mandatory
field.
For an explanation of each parameter and interface feature, click on , or the 'What's this?'
question mark icon. For more information see Getting Help
Related topics
Podcasts
WaveLab 7
11.1 Dialogs
239
11.1.2 Align Clips
This dialog allows you to align Clips along the focused track at specific intervals, with or
without a space between them. You must select at least two Clips to use this function.
You can access this dialog in the Audio Montage Workspace's Clip window via Functions
> Align selected clips of focused track... or via its icon.
For an explanation of each parameter and interface feature, click on , or the 'What's this?'
question mark icon. For more information see Getting Help
Related topics
Clips
11.1.3 Recording channels
This dialog allows you to select which input channels you want to record from. If you have
an audio card with multiple inputs, you can record up to eight channels simultaneously.
You can access this dialog via Record > Set input.
For an explanation of each parameter and interface feature, click on , or the 'What's this?'
question mark icon. For more information see Getting Help
Related topics
Recording Dialog
11.1.4 Audio CD Report
This dialog allows you to generate a detailed report about the active audio CD. This report
includes a full track listing with ISRC codes (if entered), track times and CD-Text.
The Audio CD report can be output in HTML or Adobe PDF format or printed directly from
WaveLab. You can choose the details of what is displayed and include your custom logo.
You might send the Audio CD report to your client, an album artwork designer or to the CD
replication house when presenting them with a master CD, for example.
You can control the formatting of values in your report via the Value Format window. To open
this dialog click on the "Value Format" link.
You can access this dialog in the Audio Montage Workspace's via CD window > Functions
> Generate Audio CD report...
For an explanation of each parameter and interface feature, click on , or the 'What's this?'
question mark icon. For more information see Getting Help
Related topics
Value Format
Authoring CDs and DVDs
WaveLab 7
240
Interface Elements
11.1.5 Audio file comparer
This analysis tool allows you to compare two Audio Files for differences between them. It
can create a "delta file" that contains these differences. It can also drop markers at positions
where differences are found.
This can be useful for:
Judging the effect of using an equalizer by comparing the file before and after. The delta
file will show what was added or removed.
Check the noise added by a processor.
Compare two digitally recorded files to check for dropouts.
Note - Make sure that the two documents you want to compare are open.
You can access this dialog via Analysis > File comparator....
For an explanation of each parameter and interface feature, click on , or the 'What's this?'
question mark icon. For more information see Getting Help
Related topics
11.1.6 Audio File Format Dialog
This dialog allows you to set the type of Audio File to be saved. Some file types will make
some options unavailable.
Clicking
in Attributes (meta-data) produces the File Attributes dialog for adding nonaudio information associated with a file. This option is only available for Wave, MPEG-1
Layer 3 (MP3), Windows WMA and Ogg Vorbis file types, and for each of these, the Edit
command leads to a different dialog box.
You can also save and restore settings. See Presets.
You can access this dialog via File > Save as...> Output Format
. The dialog is
also available from other locations where Audio Files are saved, for example, via the Master
Section's render dialog.
For an explanation of each parameter and interface feature, click on , or the 'What's this?'
question mark icon. For more information see Getting Help
Related topics
Presets
11.1.7 Audio Montage properties
This dialog allows you to set/change the audio properties and number of channels of the
active montage file. It appears when you first create an audio montage file and can also
be edited later. It allows you to select an output mode for your project, choose how many
channels you wish to work with and set the sample rate of the montage.
WaveLab 7
11.1 Dialogs
241
Changing the values in this dialog will not process the audio in your montage in any way.
However if you change the sample rate, the file will play back at the wrong pitch.
You can access this dialog from the Audio Montage Workspace by choosing Edit > Audio
Montage properties.... It is also displayed when you create a new audio montage by
clicking on the "Create an empty document" icon or via File > New....
For an explanation of each parameter and interface feature, click on , or the 'What's this?'
question mark icon. For more information see Getting Help
Related topics
Workspaces
11.1.8 Split Clip at silences
This dialog allows you to split a single Clip into new ones according to any silence detected
in its audio.
Effects and envelopes are ignored, only the source material is analyzed. You can define
several factors which control the threshold at which silence is detected including the duration
of a silence, the signal level, and the gap between silent regions in the Clip. You can choose
to use a single- or two-stage analysis process and also to separate the resulting new Clips.
You can access this dialog in the Audio Montage Workspace via Focused Clip > Edit >
Split at silences....
For an explanation of each parameter and interface feature, click on , or the 'What's this?'
question mark icon. For more information see Getting Help
Related topics
Audio Montages
11.1.9 Audio properties dialog
This dialog reports the audio properties of the active Audio File. It allows you to change the
number of audio samples per second (the sample rate) and the accuracy of samples in the
audio stream (the bit-rate).
Changing the values in this dialog does not process the file in any way (in contrast to using
Save as). However, the following rules apply:
If you change the sample rate, the file will play back at the wrong pitch.
If you change the bit resolution the file will be converted to the new resolution the next
time you save it.
Note that there is no Undo for this operation. If you save with a lower bit resolution, the file
is permanently converted.
You can access this dialog in the Audio File Workspace by choosing Edit > Audio properties.... It is also displayed when you create a new Audio File using Edit > New....
WaveLab 7
242
Interface Elements
For an explanation of each parameter and interface feature, click on , or the 'What's this?'
question mark icon. For more information see Getting Help
Related topics
11.1.10
Audio Range
This dialog allows you to define accurately a specific audio range. This audio range is then
used to create a selection. There are many options you can choose to easily select a specific
part of your Audio File.
You can also audition your selection using the various playback buttons provided.
In order to select a region of the Audio File, first select a From and To point using one of the
methods available. Additional options allow you to control your selection further.
You can access this dialog in the Audio File and Audio Montage Workspaces by choosing
Edit > Select > Edit....
For an explanation of each parameter and interface feature, click on , or the 'What's this?'
question mark icon. For more information see Getting Help
Related topics
11.1.11
Audio Streaming Settings
This dialog allows you to specify how WaveLab's internal input and output channels are
connected to your sound card and which device you intend to use for audio playback and
recording. You can define the buffer settings for your device as well as setting up connections
to external gear such as external effects units. You should select at least two channels for
stereo playback and recording.
Control Panel - clicking this will launch your sound card settings application (usually
installed with the audio card). In most cases this will provide settings for buffer size,
digital formats, additional I/O connections, etc. depending on your sound card and
driver.
Playback tab - this allows you to select and name audio ports used for playback.If you
are monitoring on a surround system, specify your surround speaker outputs here.
Recording tab - this allows you to select and name your audio ports used for recording
and input monitoring. The inputs you define here will then be available in the recording
window.
External gear tab - this allows you to select inputs and outputs to external audio
processing equipment. For example, you can use this to buss audio out to an outboard
effects unit and back into /app.
Options tab - use this tab to specify the number of buffers and control driver function-
ality (e.g. release the driver when the application is in the background, so that it can be
used by other applications). You can also specify pre-roll and post-roll times.
WaveLab 7
11.1 Dialogs
243
Windows MME/Built-In Audio If you do not have a third-party audio card you can select
the Windows MME or Built-in Audio (Mac) options.
You can also use MME with most third party audio cards, with the advantage that you can
record and play at different sample rates. However, Windows MME drivers don't allow Audio
Monitoring in the record dialog, and other drivers generally offer better sound quality and
performance.
You can access this dialog from Workspaces that support the playback of Audio Files by
choosing Options > Audio Streaming Settings....
For an explanation of each parameter and interface feature, click on , or the 'What's this?'
question mark icon. For more information see Getting Help
Related topics
Recording Dialog
11.1.12
Auto Split
This dialog allows you to automatically split an Audio File into separate Audio Files according
to certain specified rules.
You can split files:
...at marker points
...at specific time intervals
...at regions containing silences
...at beat points using beat detection
...according to a description of regions stored in a text file
The Auto Split function can be used in many situations such as:
cutting up a single Audio File of a recording session into its individual takes (using the
silence threshold)
cutting up a drum loop into its individual drum hit samples (using beat detection)
outputting individual tracks from an album master file (using marker detection or "Learn
regions from text file")
converting marker types from one type to another (by using the option "Do not split,
only create markers at splitting points")
silencing the regions between audio information in an instrumental take (using "Mute
audio outside regions")
The Auto Split tool is made up of several pages of dialogs which take you through the process
of splitting your audio. Note that the sequence of pages is not always the same and depends
on the choices you make.
You can access this dialog in the Audio File Workspace via Tools > Auto Split....
For an explanation of each parameter and interface feature, click on , or the 'What's this?'
question mark icon. For more information see Getting Help
WaveLab 7
244
Interface Elements
Related topics
Split Clip at silences
11.1.13
Batch Conversion
This dialog allows you to convert the file format of a group of Audio Files.
This could be useful for example, if you have a large number of Audio Files that you wish to
encode as MP3 files, or a group of stereo files that you need to downsample and convert
to mono. You can also take maximum advantage of your computer's architecture if you have
a multiple processor cores, by spreading the processing load across them. These settings
are selected in the Multitasking tab.
To use the Batch Converter tool:
1. Click on the
plus sign icon to add files, (or just drag the files directly into the pane)
2. Define an output file location and file format
3. Choose any options or performance settings from the Options and Multi-tasking tabs
4. Click Start to begin (you can also choose an option to start the process automatically
when dragging the file in).
You can access this dialog by choosing Utilities > Batch conversion of Audio Files...
For an explanation of each parameter and interface feature, click on , or the 'What's this?'
question mark icon. For more information see Getting Help
Related topics
Audio File Format Dialog
11.1.14
Basic Audio CD Settings
This dialog allows you to edit various settings for the Basic Audio CD. You can add optional
UPC/EAN codes to your CD, adjust the pause time before the first track and add additional
silence at the beginning and end of tracks. You can also choose to play the audio through
the Master Section and its effects before burning your audio CD. See Basic Audio CD for
more information.
You can access this dialog from the Basic Audio CD window in the Audio File Workspace
by choosing the Options > Options... or by clicking on the spanner icon.
For an explanation of each parameter and interface feature, click on , or the 'What's this?'
question mark icon. For more information see Getting Help
Related topics
Authoring CDs and DVDs
Basic Audio CD
WaveLab 7
11.1 Dialogs
11.1.15
245
Batch Renaming
This dialog appears in various locations in WaveLab and allows you to rename a batch of
files, Clips or markers.
The Batch Renaming dialog offers a powerful set of facilities to convert, remove, format,
replace and insert text into existing names. You can use simple options to match text, or you
can build your own regular expressions, as required.
Batch renaming can be useful with large projects for example, so you can apply easily identifiable names to all referenced files, markers and Clips belonging to the project.
Batch renaming can be used for the following operations:
to rename files
to rename Clips in Audio Montages
to rename markers in Audio Files and Audio Montages.
These functions share most of the same features, with some minor differences. The Batch
Renaming dialog has three pages. The first page defines which files/clips/markers should
be renamed; the second dialog page defines how the renaming should be executed. The
third page shows you a preview of the names that will be produced, before you commit to
the changes.
You can access this dialog in various places throughout WaveLab:
from any Workspace: via Utilities > Batch file renaming...
from the Marker window: via Functions > Batch marker renaming...
from the Clips window in the Audio Montage Workspace: viaFunctions > Batch clip
renaming....
For an explanation of each parameter and interface feature, click on , or the 'What's this?'
question mark icon. For more information see Getting Help
Related topics
Batch Conversion
Marker Window
About Regular Expressions
Regular Expressions
11.1.16
CD Text Editor
This dialog allows you to add CD-Text data to an audio CD. CD-Text is an extension of
the Red Book Compact Disc standard and allows you to store text information on an audio
CD. Information such as the disk title, songwriter, composer and disc ID, can be added for
example. The text data you enter is displayed by CD players that support the CD-Text format.
WaveLab 7
246
Interface Elements
In WaveLab you can add information about the disk itself and each individual track. This
information is entered in a series of text fields that scroll together horizontally. There is one
pane of fields for the disk itself and a pane for each track. You can scroll between these with
a slider bar. Buttons allow you to copy between fields to make entering information easier.
Tip: Make sure the "Enable CD-Text Burning" checkbox is ticked before burning an audio
CD if you wish to write CD-Text data.
For an explanation of each parameter and interface feature, click on , or the 'What's this?'
question mark icon. For more information see Getting Help
Related topics
CD
Authoring CDs and DVDs
Write Audio CD
11.1.17
CD-Text Browser
This dialog allows you to view CD text information about the selected disk when importing
an audio CD using the Import Audio CD dialog.
You can access this dialog from the Import Audio CD dialog via Functions> Examine
CD-Text.... You can also access it via its icon in the Import Audio CD window.
For an explanation of each parameter and interface feature, click on , or the 'What's this?'
question mark icon. For more information see Getting Help
Related topics
Import Audio CD
11.1.18
CD Wizard
This dialog allows you to quickly create an audio CD track listing from the active montage.
The Clips in the montage are used to automatically generate CD track and splice markers
from the Clip regions and cross fade points. You can adjust any pause time before tracks,
adjust the gaps between track start markers and the track audio playing as well as generating
any ISRC and UPC/EAN codes. Once you have chosen the options you require click "Apply"
to generate the CD track listing in the CD window. You can further edit the track listing that
is created and then burn your audio CD using the Write Audio CD dialog.
For more information on creating Audio CDs see Authoring CDs and DVDs.
You can access this dialog from the Audio Montage Workspace's CD window by choosing
Functions > CD Wizard... or by clicking on the
icon.
For an explanation of each parameter and interface feature, click on , or the 'What's this?'
question mark icon. For more information see Getting Help
Related topics
WaveLab 7
11.1 Dialogs
247
CD
Authoring CDs and DVDs
Write Audio CD
ISRC
11.1.19
Copy audio information
This dialog allows you to copy information about the name and location of the selected Audio
File, including any selection information and cursor position. The information is copied to the
clipboard and can be pasted into an external text application.
This can be a useful feature to use when making notes on a particular session or when you
need accurate file path/selection information when writing a script.
You can access this dialog in both the Audio File and Audio Montage Workspaces via Edit
> Copy Audio information....
For an explanation of each parameter and interface feature, click on , or the 'What's this?'
question mark icon. For more information see Getting Help
11.1.20
Customize Commands
This dialog allows you to customize your own shortcuts for WaveLab. It shows a list of already
assigned shortcuts for WaveLab commands and menu options. Each shortcut is restricted
to a specific context, so you can re-use the same shortcut combination in different places.
The exception is the Master Section where all shortcuts are global to the application.
To edit shortcuts, double click on the shortcut text or its placeholder, or select a command
and click Edit shortcut... See Definition of shortcut(s) for more information.
Please note that some shortcuts cannot be edited, these are unavailable (grayed out). New
keyboard shortcuts are displayed in blue.
Showing/hiding in menus - you can decide whether to hide/show certain com-
mands in their respective menu by deselecting/selecting their checkbox in the "Menu"
column.
Triggering via a keyword - you can enter a keyword which you can later use to
activate a command by typing it into the Keyword field command bar.
Triggering from an external MIDI device - you can assign a command to be trig-
gered by an external MIDI device using the "MIDI Trigger" checkbox. For example,
this could be useful for issuing transport commands from your midi keyboard. You can
specify a sequence of up to three midi events.
Please note that according to the context not all types of shortcuts are available. For example,
triggering via a keyword is not available within the recording context.
Display in command bar - For certain commands (those with icons displayed) you
can also choose whether to display them in their corresponding command bar. To do
this, select/deselect the option in the "Bar" column. You can define one key shortcut
per command, each shortcut can be a sequence of up to four keystrokes. Note that for
WaveLab 7
248
Interface Elements
the Macintosh only, if a shortcut is made up of two or more keystrokes, the main menu
only displays the first keystroke (this is a Mac OS X limitation).
To reset some or all types of shortcuts to their factory defaults use the "Reset" button.
To generate a reference of your customized shortcuts, use the "Summary" button to either
view a webpage summary or to print out a list of all your command shortcuts.
You can access this window from within various other dialogs in WaveLab when you see the
icon, or by choosing Options > Customize Commands....
For an explanation of each parameter and interface feature, click on , or the 'What's this?'
question mark icon. For more information see Getting Help
Related topics
Definition of shortcut(s)
Command bars
11.1.21
Data CD/DVD
This dialog allows you to arrange files and folders into a structure that you can later write as
a "data" disk.
You can prepare a disk for a variety of media (CD-DA, DVD or Blu-ray Disk). The list of media
devices displays the amount of data that will fit on each type of disk. As you add files, an
indicator on the left (and a text display at the bottom) display how "full" your new disk is. You
can enter a name for your disk and change the disk file structure before writing your data to
an ISO image or writeable optical disk.
Note: Although you can prepare a disk in any format, the types of physical disk you can
burn will be limited by the optical drive connected to your computer. If you do not have a
Blu-ray Disk writer connected, for example, you will not be able to write a Blu-ray Disk you
may have prepared. However, you can still save it as an ISO Disk image and transfer it for
remote burning.
To prepare a data disk, follow these steps:
Adding files
Add files and folders to the disk by:
dragging them directly from your computer's file browser.
dragging a file from any Workspace by either dragging it by its title bar tab or using the
document button
.
choosing File > Special > Add to Data CD/DVD from any of the editing Workspaces
to add the currently focused file.
WaveLab 7
11.1 Dialogs
249
Removing files
To remove files from the file structure:
select the files/folders you wish to remove and click on the red cross icon. To remove
a group of files, hold down [Shift] while selecting the files/folders to remove. Please
note that this does not delete the files from the computer, only a reference to them.
to remove all files/folders from the layout choose
Reset.
Editing the file structure
To edit the arrangement of the files in your disk:
drag files/folders to a different location in the file list pane. To move multiple files/folders
hold down [Shift] while selecting the files/folders you wish to move.
drag file/folders over a folder icon to move them into that directory.
to add a new folder click on the
folder icon.
to edit the name of a file/folder, double click on its title.
Burning your disk
Once you are happy with your disk layout you can write it to a disk or disk image:
select a media type from the list of media devices. This will determine the maximum
size and type of medium you will be writing to, whether it be CD, DVD, Blu-ray Disk or
an ISO image of any of these. You can change the media type at any stage.
enter the name that you want your disk to display when it is mounted as a data volume.
to write your disk, click
write CD/DVD icon. This opens the write CD/DVD dialog
which enables you to burn your data disk to an ISO image or to an optical disk using a
connected CD/DVD/Blu-ray Disk writer.
For an explanation of each parameter and interface feature, click on , or the 'What's this?'
question mark icon. For more information see Getting Help
Related topics
Write Audio CD
Blu-ray Disk
ISO image
WaveLab 7
250
11.1.22
Interface Elements
DVD-Audio options
This dialog allows you to choose settings for creating a DVD-Audio disk. You can enter
disk identification and volume information, choose the TV format (PAL or NTSC), provide still
picture tracks and adjust various options.
You can access this dialog in the Audio Montage Workspace via Workspace > Specific
tool windows > DVD-Audio > Options....
For an explanation of each parameter and interface feature, click on , or the 'What's this?'
question mark icon. For more information see Getting Help
Related topics
DVD-A
11.1.23
DVD-Audio Creation
This dialog allows you to choose settings when creating a DVD-Audio disk.
You can choose to just test the DVD-A, how to render the audio for each Audio Montage and
choose an output folder for the DVD-Audio files that are created. Once the files have been
rendered to the hard disk by WaveLab, the Write Data CD/DVD dialog opens automatically,
allowing you to burn your DVD-Audio files to an optical DVD.
You can access this dialog in the Audio Montage Workspace via Workspace > Specific
tool windows > DVD-Audio > Burn DVD-Audio....
For an explanation of each parameter and interface feature, click on , or the 'What's this?'
question mark icon. For more information see Getting Help
Related topics
DVD-A
11.1.24
Document list dialog
This dialog allows you to add a file to a document in a different Workspace.
You can add the file to a new or existing Workspace document. Open documents are displayed in the list box, or you can browse to find an existing document, or create a new one.
For example, to add your Audio File to a Podcast, choose File > Special > Add to Podcast.... The Podcast can be a new or existing Podcast. Open Podcasts are displayed in the
list box.
You can access this dialog by choosing File > Special > Add to [Workspace]....
For an explanation of each parameter and interface feature, click on , or the 'What's this?'
question mark icon. For more information see Getting Help
Related topics
WaveLab 7
11.1 Dialogs
251
Podcasts
11.1.25
Ducking options
This dialog allows you to choose options when using WaveLab's ducking feature. The ducking function allows you to use a Clip's volume envelope to modulate the volume envelope
of an adjacent channel's Clip. The most obvious application of this feature is when mixing
background music with a voice-over. When the voice-over starts, the level of the music is
automatically lowered and when the voice-over stops, the level of the music is restored to
the original level. This is done by automatically creating volume envelope curves.
To use this feature you first need to select the Clip you wish to alter the volume envelope of
and then from the dialog choose the track containing the Clip you wish to duck. The focused
Clip must be located within the time range of the Clip you wish to use as the modulator.
You can access this dialog in the Audio Montage Workspace via Focused Clip > Envelope
> Duck according to other track....
For an explanation of each parameter and interface feature, click on , or the 'What's this?'
question mark icon. For more information see Getting Help
Related topics
Adjusting Envelopes
11.1.26
Effect morphing
This dialog within the Audio File Workspace allows you to gradually mix two audio ranges
that have different effects/processing applied to them.
Effect morphing allows you to smoothly "morph" or blend from one effect to another, or from
an unprocessed audio segment to a processed audio segment. Effect Morphing always
involves two audio ranges. Normally, these are two versions of the same audio range, of
which one is unprocessed and the other processed.
Effect morphing works by using WaveLab's Undo buffer to mix a copy of the processed audio
with the unprocessed version. You can also use any other bit of audio from the application's
clipboard that has the same length as the one you wish to morph with.
To set up a basic effect morph, proceed as follows:
1. Start by making a selection range over the time you wish the effect morphing to take
place.
2. Now process this range using any Master Section effect(s), or use some other off-line
processing. You cannot use processing/effects that alter the length of the selection,
e.g. time stretching.
3. Open the Effect Morphing dialog by choosing Edit>Effect Morphing....
4. Adjust your envelope points over time between 0% and 100%. This will determine the
level and direction of the morph. For example, starting at 100% and ending at 0% will
fade out the effect you just applied.
WaveLab 7
252
Interface Elements
5. Choose "Unprocessed selection" for this example. As mentioned previously you can
also use any audio of the same duration from the clipboard.
6. Click Apply to apply the Effect morphing.
You can access this dialog in the Audio File Workspace via Edit > Effect morphing....
For an explanation of each parameter and interface feature, click on , or the 'What's this?'
question mark icon. For more information see Getting Help
11.1.27
Edit playback times
This dialog allows you to set parameters that are used to evaluate the CD when using the
command "Play all CD Track starts".
You can set the track pre-roll time, toggle one-second of silence before playback, and set
the time each track is played before jumping to the next track.
You can access this dialog from the Audio Montage Workspace via CD > Options > Edit
playback times....
For an explanation of each parameter and interface feature, click on , or the 'What's this?'
question mark icon. For more information see Getting Help
11.1.28
Error detection and correction
This specific tool window allows you to search for unwanted clicks and digital artifacts in an
Audio File. Several detection and restoration methods are available. You can detect, mark
and name, jump to, play back and remove individual audio errors.
The settings for error detection and correction are organized within the following groups of
controls:
Detection tab - choose the method used to detect any errors. Each different method
has its own settings to determine when it will detect an error. Click Detection 1 and 2
will search for clicks in certain frequency ranges while Digital Click Detection looks for
clicks that are caused by clicks typical to digital errors.
Correction tab - specify the method used to correct any errors.
Search Area tab - specify the range of audio you wish to search for errors.
Options tab - this provides a range of preferences for playing back, viewing, and
marking any errors found.
Browse & Correct panel - step through your defined search region detecting each
error in turn. You can choose to correct any errors or mark them for later correction.
There are controls to skip between error markers and make fine adjustments to the
selection. You can also automatically detect and correct all marked errors in the search
region.
WaveLab 7
11.1 Dialogs
253
Strategies to detect and correct errors
There are several strategies that you can employ when detecting and correcting errors:
Define an audio selection where you have identified an error, then click "Correct", or
"Mark for subsequent correction".
Use the function "Detect next error" to let WaveLab automatically find the next error,
and then click "Correct", or "Mark for subsequent correction".
Use the function "Detect all errors" to let WaveLab automatically find all errors in the
predefined range. Then browse the marked errors, removing or adjusting each audio
range in turn, and click "Correct" to correct any specific errors, or you can use the
option "Correct all".
You can access this dialog by choosing Workspace > Specific tool windows > Error
Correction.
For an explanation of each parameter and interface feature, click on , or the 'What's this?'
question mark icon. For more information see Getting Help
Related topics
Marker types
11.1.29
Configure external tools
This dialog allows you to configure WaveLab to work with external applications. You can pass
command line arguments to the external applications so that they can process the current
file/folder you are working on, or even the WaveLab's settings folder. This function can be
useful if you wish to edit an Audio File in another application, or wish to compress all your
settings files into a backup zip file, for example.
Note that an external tool only works within the Workspace in which it is defined. This is by
design, so that each type of Workspace can have its own external "toolkit".
To define an external tool you need to:
Give the command a title
Specify the path to the application's executable file
Choose which arguments you wish to pass to the external application
Additionally you can specify an initial folder to direct the external application to
Select how you wish WaveLab to behave before the external tool is launched.
Once you have defined an external tool in this way, you can run it by selecting its title from
the Tools menu from within its Workspace.
You can access this dialog by choosing Tools > Configure external tools....
For an explanation of each parameter and interface feature, click on , or the 'What's this?'
question mark icon. For more information see Getting Help
WaveLab 7
254
11.1.30
Interface Elements
Folder Preferences dialog
This dialog allows you to set the folders where you prefer to save and open files, as well as
options about how to automatically update them, or not, while using WaveLab.
Select a folder category from the list and then either type in the path to the directory or
browse to select the folder via a standard file dialog.
Each Workspace has its own set of preferred folders, which are set from the Folder Preferences dialog from that Workspace.
If you open this dialog from the Control Window, you can set the preferred folders for all
Workspaces. To use this dialog, first select a folder category (from the left) and then define
its path and options (on the right).
A note on temporary files - this folder category specifies where WaveLab should store its
temporary files. These are used for operations such as Undo. If you have multiple drives, you
should allocate each temporary folder to a unique physical drive. WaveLab then selects the
source and destination folders on different physical drives, which speeds up file operations
considerably.
You can access this dialog by choosing Options > Folders....
For an explanation of each parameter and interface feature, click on , or the 'What's this?'
question mark icon. For more information see Getting Help
11.1.31
Frequency range
This dialog allows you to adjust the range of frequencies displayed in the 3D Frequency
Analysis window. Use the spin controls to adjust the highest and lowest frequencies you
wish to view. This can be useful for isolating a particular frequency range which you are
trying to analyze.
You can also choose to display frequencies using logarithmic or linear scaling, alter the color
of the background and waveform, plus change the scale of the ruler.
You can access this dialog via Analysis > 3D Frequency Analysis > Edit frequency
range (click on the frequency button).
For an explanation of each parameter and interface feature, click on , or the 'What's this?'
question mark icon. For more information see Getting Help
Related topics
3D Frequency Analysis
Value editing
11.1.32
FTP site
This dialog allows you to enter information for uploading your Podcast and all related files to
an online FTP server.
You must specify all log-in details for your FTP site, the relative path to your podcast XML
file and the web site address where the link to your Podcast is found, including the path to
the feed. If in doubt about your FTP settings they can normally be supplied by your ISP.
WaveLab 7
11.1 Dialogs
255
You can access this dialog via Publish > FTP Site... in the Podcast Workspace.
For an explanation of each parameter and interface feature, click on , or the 'What's this?'
question mark icon. For more information see Getting Help
Related topics
Podcasts
11.1.33
Change Level
This dialog allows you to apply a gain to change the level of an Audio File.
You can also use "Find current peak level" to obtain a report on the peak level of the current
audio selection (or the peak level in the whole file, if "Process whole file if there is no selection"
is selected in the preferences). This can be useful if you wish to calculate how much you can
increase the overall gain of a file without introducing clipping (exceeding 0dB), for example.
To change the level, enter the desired gain and click Apply.
You can access this dialog by choosing Process > Change level... in the Audio File
Workspace.
For an explanation of each parameter and interface feature, click on , or the 'What's this?'
question mark icon. For more information see Getting Help
Related topics
Audio File editing
Value editing
11.1.34
File attributes (OGG/WMA)
This dialog allows you to enter/edit the meta-tags for an OGG Vorbis (OGG) or Window
Media Audio (WMA) encoded file. Double click on the tags provided to edit an entry.
In the Audio File Workspace you can access this dialog by opening a WMA or Ogg Vorbis
file and clicking in the Meta-Data specific tool window. You can also access it by choosing
Save as... > Output format > Attributes > Edit... when saving a WMA or Ogg Vorbis
file, and from most places where you are able to select an output file format, like the Render
dialog.
For an explanation of each parameter and interface feature, click on , or the 'What's this?'
question mark icon. For more information see Getting Help
Related topics
Metadata window
Audio File Format Dialog
OGG encoding
WaveLab 7
256
Interface Elements
Ogg Vorbis files
11.1.35
Global analysis
This dialog allows you to perform advanced analysis on your audio to identify areas with specified properties. It can be used to find problem areas such as glitches or clipped samples,
or just to check general information such as the pitch of a sound.
How it works When you analyze a section of an Audio File, WaveLab scans it and extracts
information which it displays in the dialog. It also "pin-points" sections of the file that meet
specific characteristics, for example, sections being very loud or almost silent. You can then
browse between these points, set markers or zoom in on them.
Types of analysis On most of the tabs, you will find settings determining exactly how the
analysis will be performed. Each tab focuses on a particular analysis area:
Peaks - this tab is for finding individual samples with very high decibel values.
Loudness - this tab is for finding sections that are perceived by the human ear as
louder or weaker in volume. WaveLab uses an accurate method (RMS - Root Mean
Square), to measure a consecutive section of samples and then average their value.
Pitch - this tab is used for finding the exact average pitch of a section of audio. The
method works best on monophonic material (single notes, without chords or harmonies)
and assumes the analyzed section has a relatively stable pitch. As a general rule try to
analyze the sustain portion of a sound, rather than the attack.
Extras - this tab is for informing you about DC offsets and the significant bit resolution
of the file. This can be useful, for example, if you wanted to check whether a 16 bit
file really uses 16 bits (or if it was actually recorded with only 8 bit resolution and then
upscaled to 16 bits).
Errors - this tab is to help you find glitches and sections where the audio has clipped
(gone beyond 0 dB).For more control over the analysis, use Error detection and correction. Checking and browsing the results Checking the results on the Pitch and
Extra tabs is simple, since only one value is returned for the whole section of analyzed
audio. For all the other tabs, the analysis methods returns a series of exact points ("hot
points") in the file or section of audio. Use the relevant buttons in each tab to select the
"hot points" you wish to look at in more detail. Using the slider you can then browse
or skip between these points, adding markers or focusing the waveform display at that
particular point in the file.
You can access this dialog in the Audio File Workspace via Analysis > Global Analysis....
For an explanation of each parameter and interface feature, click on , or the 'What's this?'
question mark icon. For more information see Getting Help
Related topics
Error detection and correction
3D Frequency Analysis
WaveLab 7
11.1 Dialogs
11.1.36
257
Import Audio CD
This dialog allows you to import one or more tracks from an audio CD.
Once you have identified the source CD, you can select the track or tracks to import. You
must specify a folder location and file format before the file or files can be saved to disk.
Actions tab Specify the optical disk drive from the drop-down list, and the disk reading
speed. The title and track details are automatically completed. If no track names appear,
to refresh CD reading.
click
From this list you can select the tracks (or define the start and end points of a single track).
The "Rename tracks" menu option automatically adds the track order number to the name in
a range of different styles. You can select a track name for text editing by double-clicking.
In "Output", accept the default Folder location or choose another. Clicking
Audio File Format dialog for changing details of the Audio File's format.
produces the
Options tab This accesses a list of tickable options to refine how the tracks are read and
output to file.
You can access this dialog via Utilities > Import Audio CD tracks....
For an explanation of each parameter and interface feature, click on , or the 'What's this?'
question mark icon. For more information see Getting Help
Related topics
Audio File Format Dialog
11.1.37
Insert Audio Files
This dialog allows you to choose how imported Audio Files will be arranged in the active
audio montage.
It displays a list of the Audio Files you have selected to import and allows you to add or
remove files, rearrange their order, choose whether to create new tracks for each Clip or lay
them out on a single track, and where to insert the Clips. To adjust the spacing between
Clips that you import, see Audio Montage Preferences.
This dialog appears when adding two or more Audio Files to a montage. You can access it
from the Montage Workspace via Insert context menu > Insert Audio Files..., or when
you drag Audio Files directly from your computer's file system.You can also access it from
the Montage Workspace via Workspace > Specific tool windows > Files > File > Add
Audio Files(s) at cursor....
For an explanation of each parameter and interface feature, click on , or the 'What's this?'
question mark icon. For more information see Getting Help
Related topics
Podcasts
File
Audio Montage Preferences
WaveLab 7
258
Interface Elements
11.1.38
Level envelope
This dialog allows you to create a volume envelope which can be applied to a selected range
or a whole Audio File. This could be useful if you need to even-out loud and quiet parts, for
example.
You can edit the envelope by:
Double clicking on the line to add a point: double click on a point to remove it.
Selecting multiple points (using [Shift] click) allows you to move the selection as a
group.
You can also use the controls to delete or reset points in the envelope. Use the envelope
smoothing button to toggle the envelope points between a straight (polygonal) line or a
curved path.
Click Apply to apply the envelope to the audio selection or file.
You can access this dialog in the Audio File Workspace via Process > Level envelope....
For an explanation of each parameter and interface feature, click on , or the 'What's this?'
question mark icon. For more information see Getting Help
Related topics
Audio File editing
Adjusting Envelopes
11.1.39
Loop Tone Uniformizer
This dialog allows you to create sounds that will loop, from audio that is seemingly "unloopable". These are normally sounds that constantly decay in level or continuously change
in timbre. The Loop Tone Uniformizer applies processing to the sound that evens out changes
in level and timbral characteristics in order for a sound to loop properly. For example, this
could be useful for creating looped samples for a softsynth or hardware sampler.
To use the Loop Tone Uniformizer you need to have a loop defined using a pair of loop markers
. The original length of the loop is not changed.
Uniformizers
This tab allows you to specify the method/s used to even out the sound you wish to loop.
Choose between "Slice mixing" and/or "Chorus smoothing". For a full explanation of how
each of these methods operate use the "What's this?" help function.
For slice mixing, you may need to experiment to see how many slices are needed. Generally
the more slices you use, the more natural the sound will be (up to a certain point).
Pre Cross fade
The Loop Tone Uniformizer also includes the option to cross fade the end of the loop with
the start of the newly processed section so that transition into the newly looped section is
smoother during playback. Use the envelope drag points or value sliders to adjust the cross
fade.
A note about Post Cross fading
WaveLab 7
11.1 Dialogs
259
If you have used the Loop Tone Uniformizer within a region of an Audio File, the transition
from the end of the loop into the original file in many cases won't be very natural. This can
be fixed as follows:
1. Close the Loop Tone Uniformizer and open the Loop Tweaker.
2. Click on the Cross fade tab and deactivate the Cross fade option (the check box).
3. Click on the Post Cross fade tab and make sure Cross fade is activated.
4. Set up the post cross fade parameters and click Apply.
It can also be a useful tip to lock the loop markers after you use this command on a selection
within an Audio File. Once the loop is processed in place, moving the loop markers will upset
playback of the loop.
You can access this dialog in the Audio File Workspace via Process > Loop Tone Uniformizer....
For an explanation of each parameter and interface feature, click on , or the 'What's this?'
question mark icon. For more information see Getting Help
Related topics
Markers
Adjusting Envelopes
11.1.40
Loudness distribution
This dialog allows you to measure the most frequent loudness values found in an Audio File
(this is not the same as average loudness). The graphic peaks found by the analysis represent
these values.
The tool gives an answer to the question: "How often does a given loudness (vertical scale,
in dB) appear in the whole file?". The percentage figure is relative to other peaks. Some
simple examples:
1. If, for instance, you have a sine of 0 dB / 2 second followed by a sine of -6 dB /
2 seconds. This means the global audio material has as much 0 dB material as - 6dB
material: you will see 2 peaks (0 / -6 dB), each at 100%.
2. If, for instance, uou have a sine of 0 dB / 1 second followed by a sine of -6 dB / 3
seconds. This means there are 3 times more -6 dB material than 0 dB material. You
will see a peak of about 33% at 0 dB, and another peak of 100% at -6 dB.
This analysis is useful for learning about how the loudness of your music is distributed.
You can access this dialog in the Wave File Workspace via Analysis > Loudness distribution....
For an explanation of each parameter and interface feature, click on , or the 'What's this?'
question mark icon. For more information see Getting Help
WaveLab 7
260
Interface Elements
Related topics
Loudness
11.1.41
Loudness normalizer
This dialog allows you to adjust the loudness of a file. Because it relates to loudness as
opposed to maximum peak level, this tool works quite differently from the Level Normalizer. A
typical application is to specify a loudness, for example -12dB, and the Loudness Normalizer
processes the audio to match this level of loudness.
Like Gain Change, increasing the loudness to a certain value can introduce clipping. To avoid
this occurring, a peak limiter (the Peak Master plug-in) can be used as part of the process.
The Loudness Normalizer raises the loudness and limits peaks in the signal at the same time
(if needed), to achieve the target loudness.
In the case of stereo files, both channels are processed independently. This process happens
over several stages; analysis precedes the final rendering. The Loudness Normalizer dialog
gives access to useful statistics about the file and the Loudness distribution tool, and you
can choose to remove any DC offset in the file.
You can access this dialog from the Audio File Workspace via Process > Loudness normalizer....
This function is also available as a batch processing plug-in. You can access it from Batch
Processing Workspace > Plug-ins window > Multipass Plug-ins > Loudness Normalizer.
For an explanation of each parameter and interface feature, click on , or the 'What's this?'
question mark icon. For more information see Getting Help
Related topics
Loudness
DC Offset
Loudness distribution
11.1.42
Global Preferences
This dialog allows you to view and change options that are common throughout the application's Workspaces.
You can adjust the following settings:
General - this tab allows you to change the location of WaveLab's settings files and
the user interface language. You need to restart the application for changes to take
effect.
Display - this tab allows you change many aspects of the user interface that apply
across the whole application. These options provide useful information and usability
functions but can be deactivated to streamline the interface. "Use Window Switcher"
is an import panel that controls the appearance of the Window Switcher panel and
whether you want particular Workspaces to appear.
WaveLab 7
11.1 Dialogs
261
Formats - this tab allows you to adjust settings for some of the audio formats and units
that WaveLab uses.
CD Burning - this tab allows you to set a number of parameters for CD burning.
Options - this tab allows you to control application-wide start-up options and transport
settings. You can also reset default answers. This can be useful for example, if you
deactivated any "Don't show this message again" warning messages that you now wish
to restore.
Global shortcuts - this tab allows you edit key sequences for shortcuts available
across all Workspaces.
You can access this dialog via WaveLab > Preferences....
For an explanation of each parameter and interface feature, click on , or the 'What's this?'
question mark icon. For more information see Getting Help
Related topics
Workspaces
11.1.43
Convert marker type
This dialog allows you to convert marker types in the current file. You can choose to convert
all markers in the file or only those within a current waveform selection.
You can convert up to three different types of markers to other types. There is also the ability
to set conditions that a marker's name must match in order for it to be converted. These
conditions can be expressed as text matches or regular expressions. A regular expression is
a precise way of matching strings of text. When you choose to use regular expressions for
your conditionals an additional pop-up menu allows you to access a list of common regular
expressions. You can also save presets of common conversions you make using the standard
presets control.
You can access this dialog from the Marker window via Functions > Convert marker
types....
For an explanation of each parameter and interface feature, click on , or the 'What's this?'
question mark icon. For more information see Getting Help
Related topics
Marker Window
Markers
About Regular Expressions
11.1.44
Load Master Section Preset
This dialog allows you to choose whether plug-ins, dithering, and master level settings are
overwritten or used (the default action) when loading an existing Master Section preset.
WaveLab 7
262
Interface Elements
This can be useful if you wish to keep some/all of the current plug-ins and level settings you
have in the Master Section when you load another preset. For example, you may wish to
maintain the current master level and dithering settings but replace the effects chain that you
have set up with one you commonly use from another preset. You can use the checkboxes
provided to adjust which settings from the new Master Section preset are used or ignored.
You can access this dialog from the Master Section by opening any Master Section preset
from the preset menu
when you have the "Open option box when selecting preset" option
selected. You can also access it from the Status Bar.
For an explanation of each parameter and interface feature, click on , or the 'What's this?'
question mark icon. For more information see Getting Help
Related topics
Master Section
11.1.45
Save Master Section Preset
This dialog allows you to save the current settings of the Master Section as a preset.
You can choose whether plug-ins, dithering, and master levels are saved or ignored. This
can be useful for example, for saving chains of effects plug-ins (and their settings) that you
commonly use.
You can access this dialog from the Master Section by choosing
Master Section preset
menu > Save as.... You can also access it from the Status Bar.
For an explanation of each parameter and interface feature, click on , or the 'What's this?'
question mark icon. For more information see Getting Help
Related topics
Master Section
Audio Plug-ins
11.1.46
Audio Montage Clone
This dialog allows you to clone your active Audio Montage and its associated Audio Files.
You can choose a number of options that determine how WaveLab will consolidate the montage and its related audio Clips when making the clone.
You can access this dialog from the Audio Montage Workspace via File > Save special >
Clone completely....
For an explanation of each parameter and interface feature, click on , or the 'What's this?'
question mark icon. For more information see Getting Help
WaveLab 7
11.1 Dialogs
263
Related topics
11.1.47
Write Audio CD
This dialog allows you to define some options when creating a new audio montage from
an Audio File that is open in the Audio File Workspace. You can choose whether to use
a selection or the whole Audio File to create a new Montage file, and how to interpret any
markers that are present.
You can access this dialog in the Audio File Workspace via Edit > Create Montage from
Audio File....
For an explanation of each parameter and interface feature, click on , or the 'What's this?'
question mark icon. For more information see Getting Help
Related topics
Audio Montages
11.1.48
Meta-normalizer
This dialog allows you to adjust the loudness of each Clip so that they get the same loudness.
You can use it to equalize the volume of all the Clips within a montage, either by peak level
or loudness. This can be an easy way to ensure that all Clips playback at a similar volume.
You can choose to only equalize the volume of selected Clips, and effects can be excluded
if you wish.
This tool is to achieve the same level of loudness in all Clips (the highest loudness found, if
possible), while ensuring that no Clip will cause sample clipping.
For each Clip, a specific gain is computed by the algorithm after all Clips have been analyzed
(and prior to changing the Clip gain to achieve the common loudness). If it is not possible to
match the highest found loudness, the level of the Clip with the highest loudness is reduced,
so that other Clips can achieve the same loudness.
To avoid clipping the Master Section you can also normalize the mixdown output of the montage (before it goes into the Master Section), and/or the Master Section output.
You can access this dialog from the Audio Montage Workspace by choosing Tools > Metanormalizer....
For an explanation of each parameter and interface feature, click on , or the 'What's this?'
question mark icon. For more information see Getting Help
Related topics
Master Section
11.1.49
Audio Montage Preferences
This dialog allows you to define settings for working in the Audio Montage Workspace.
WaveLab 7
264
Interface Elements
Using the two tabs you can define settings for both the active audio montage and for all
audio montages. You can adjust default settings for how WaveLab works with audio Clips
and effects plug-ins in an audio montage, as well as to define backup and display options.
You can access this dialog from the Audio Montage Workspace via Options > Audio Montage preferences....
For an explanation of each parameter and interface feature, click on , or the 'What's this?'
question mark icon. For more information see Getting Help
Related topics
Workspaces
11.1.50
MP2 encoding
This dialog allows you to specify the encoding options when you save an MP2 Audio File.
You can select the bit rate and stereo encoding format, as well as define other options.
You can access this dialog via Save as... > Output Format (select type MPEG-1 Layer
2) > Encoding > Edit..., and from most places where you can select an output file format,
such as the Render dialog.
For an explanation of each parameter and interface feature, click on , or the 'What's this?'
question mark icon. For more information see Getting Help
Related topics
MP2 files
11.1.51
MP3 attributes
This dialog allows you to enter/edit the meta-tags (ID3 tags) for an MPEG 3 encoded file.
You can access this dialog via Edit > File attributes... when you have an MP3 file open in
the Audio File Workspace.
For an explanation of each parameter and interface feature, click on , or the 'What's this?'
question mark icon. For more information see Getting Help
Related topics
MP3 files
11.1.52
MP3 encoding
This dialog allows you to specify the encoding options when you save an MP3 Audio File.
You can select which encoder to use and adjust the bit rate and quality of the file. You can
also choose the format and method the encoder uses to output the file, as well as select
other advanced options.
WaveLab 7
11.1 Dialogs
265
You can access this dialog by choosing Save as... > Output Format (select type MPEG1 Layer 3) > Encoding > Edit..., and from most places where you can select an output file
format, such as the Render dialog.
For an explanation of each parameter and interface feature, click on , or the 'What's this?'
question mark icon. For more information see Getting Help
Related topics
MP3 files
11.1.53
Normalize Level
This dialog allows you to change the peak level of your Audio File.
Enter the desired peak level (in dB) that you wish the audio selection to have. You can also
use "Find current peak level" to obtain a report on the peak level of the current audio selection
(or the peak level in the whole file, if "Process whole file if there is no selection" is selected
in the preferences). You can choose to apply the same gain to both stereo channels (Stereo
Link) or mix down to a mono file (Mix to Mono) with the assurance that no clipping will occur
when both channels are mixed together.
To normalize the selected audio, enter the desired peak level and click Apply.
You can access this dialog by choosing Process > Level Normalizer... in the Audio File
Workspace.
This function is also available as a batch processing plug-in. You can access it from Batch
Processing Workspace > Plug-ins window > Multipass Plug-ins > Normalizer.
For an explanation of each parameter and interface feature, click on , or the 'What's this?'
question mark icon. For more information see Getting Help
Related topics
Audio File editing
Value editing
11.1.54
OGG encoding
This dialog allows you to specify the encoding options when you save an Ogg Vorbis Audio
File.
You can choose between using an average or variable bit rate to adjust the size and quality
of the file.
You can access this dialog via Save as... > Output Format (select type Ogg Vorbis) >
Encoding > Edit..., and from most places where you can select an output file format, such
as the Render dialog.
For an explanation of each parameter and interface feature, click on , or the 'What's this?'
question mark icon. For more information see Getting Help
WaveLab 7
266
Interface Elements
Related topics
Ogg Vorbis files
11.1.55
Open files list
This dialog allows you to view a list of all currently open files and documents in WaveLab.
Documents from all the different Workspaces are displayed and can be open, closed, renamed, saved and in the case of Audio Files, auditioned. The list can also be filtered to only
display the files you are interested in.
When accessed by a shortcut key, this dialog is a quick way to jump from one file to another if
you have many of them open and spread across various Workspaces. This dialog is designed
for productivity.
Keeping this dialog open means that it will automatically be updated if any document is
closed/opened, saved or edited.
You can navigate the list using the arrow keys, or by using a-z on your keyboard.
You can access this dialog via Global > List of all open files...
For an explanation of each parameter and interface feature, click on , or the 'What's this?'
question mark icon. For more information see Getting Help
Related topics
11.1.56
Pan Normalizer
This dialog allows you to ensure that both channels of a stereo file have the same level or
loudness. Since loudnesss is more important than peak volume in the perception of sound,
this is a powerful tool to get the best possible stereo balance.
This process uses two passes to first analyze the audio and then render any level changes
required.
You must have a stereo selection in a stereo file to apply this process.
You can access this dialog from the Audio File Workspace via Process > Pan Normalizer....
This function is also available as a batch processing plug-in. You can access it from the Batch
Processor Workspace via Plug-ins window > Multipass Plug-ins > Pan Normalizer.
For an explanation of each parameter and interface feature, click on , or the 'What's this?'
question mark icon. For more information see Getting Help
Related topics
11.1.57
Mix dialog
This dialog allows you to specify a change in gain while pasting audio.
You can adjust the gain of the copy of audio contained in the clipboard, and/or the audio at
the destination so you can control how the two components mix together.
WaveLab 7
11.1 Dialogs
267
You can access this dialog from the Audio File Workspace via Edit > Paste special >
Mix....
For an explanation of each parameter and interface feature, click on , or the 'What's this?'
question mark icon. For more information see Getting Help
Related topics
11.1.58
Pitch bend
This dialog allows you to change the pitch of a sound over time. Note that changing the pitch
using Pitch bend will affect its duration unless length preservation is activated.
Using an envelope you can 'draw' the curve you wish the pitch to follow. The pitch offset is
displayed along the vertical ruler of the envelope and the range the envelope effects can be
adjusted using the spin control. Positive pitch values produce sounds with a higher pitch and
of shorter length, negative values produce sounds with a lower pitch and of longer length.
If length preservation is activated, you can choose the algorithm that is used to perform the
pitch bend operation. Depending on the type of audio material you are processing, choose
the appropriate mode. For more information on the different modes, use the "What's This?"
tool. You can also adjust the quality used when processing the pitch bend. The quality setting
and the selected mode will affect the processing time for this effect.
This function could be used for creating the classic 'tape stop' effect, or for blending the
tempo/pitch of one track into another, for example.
You can access this dialog from the Audio File Workspace via Process > Pitch bend....
For an explanation of each parameter and interface feature, click on , or the 'What's this?'
question mark icon. For more information see Getting Help
Related topics
Adjusting Envelopes
11.1.59
Pitch correction
This dialog allows you to detect and change the pitch of a sound without affecting its length.
Amount of Shift - use these controls to find out the current pitch of the audio and if
desired, calculate the required shift to match a specific pitch.
Method - use these controls to adjust the method and quality you wish to use when
processing the pitch change. You can also choose how the length of the sound is
affected by the operation. By default this process will not change the length of the
sound.
This tool could be useful for fixing an off-key vocal note in a live recording, or tuning the pitch
of a kick drum sample to fit a particular song, for example.
You can access this dialog from the Audio File Workspace via Process > Pitch Correction....
WaveLab 7
268
Interface Elements
Pitch correction is also available as a batch processing plug-in in the Batch Processor
Workspace. In addition, Pitch correction for a Clip is available from the Focused Clip window
(via Edit > Pitch shift...).
Note that for Batch processing and Clip processes, the envelope option is not available.
For an explanation of each parameter and interface feature, click on , or the 'What's this?'
question mark icon. For more information see Getting Help
Related topics
Adjusting Envelopes
11.1.60
Pitch quantize
This dialog allows you to correct the pitch of an Audio File.
The musical notes in the audio selection are quantized to the nearest semitone. Pitch quantize works best on recordings that have a single fundamental frequency, such as voice or
single instruments. It can be useful for 're-tuning' the pitch of an imperfect recorded vocal
performance, for example.
The dialog allows you to choose the reference frequency (normally 440 Hz) and the time
taken for the pitch correction to reach the nearest semitone. An explanation of when and
how to adjust the Slur time is given using the 'What's this?' tooltips.
You can also choose to preserve the formants of the original material. Choosing this option
can sometimes help to produce a more realistic result when correcting the pitch of vocals or
acoustic instrument sounds.
You can access this dialog from the Audio File Workspace via Process > Pitch quantizing....
For an explanation of each parameter and interface feature, click on , or the 'What's this?'
question mark icon. For more information see Getting Help
Related topics
Adjusting Envelopes
Formant
11.1.61
Playback speed
This dialog allows you to change the playback speed for open audio documents with or
without affecting the pitch of the audio. Playback speed can be set for both the Audio File
Workspace and the Audio Montage Workspace (all Clips in a montage are affected).
Each open wave or montage file can be assigned its own independent playback speed. For
example, you can have several wave windows open and change the playback speed for one
of them, without affecting the playback speed of the other windows when you switch to them.
This requires that you deactivate the option "Transport settings are global to all windows" in
the Global preferences > Options tab.
This function can be useful in a number of ways:
WaveLab 7
11.1 Dialogs
269
A common application is to speed up the listening time of an interview or conference
speech.
You can increase playback speed to quickly locate specific positions in the audio
You can decrease the playback speed in order to practice a tricky recording take.
By optionally defining presets you can easily switch between your favorite playback speeds.
Once defined, you can quickly jump between them using the Speed context menu in the
transport's command bar.
If you are experiencing problems using different playback speeds, there are a number of
options to help you balance processing quality with CPU usage.
You can access this dialog in the Audio File and Audio Montage Workspaces via Transport
> Playback speed > Edit speed....
For an explanation of each parameter and interface feature, click on , or the 'What's this?'
question mark icon. For more information see Getting Help
Related topics
Transport controls
Command bars
Context menus
Global Preferences
11.1.62
Podcast options
This dialog allows you to define a number of options for working with Podcasts. You can
choose how WaveLab handles pictures added to your Podcast, select a different timezone
to publish for, and/or define an external HTML editor.
You can access this dialog from the Podcast Section via Options > Options....
For an explanation of each parameter and interface feature, click on , or the 'What's this?'
question mark icon. For more information see Getting Help
Related topics
11.1.63
Text format
This dialog allows you to export text information from WaveLab in a choice of text formats, or
you send the text directly to your printer.
You can access this dialog from various locations in WaveLab, wherever text is produced for
output.
For an explanation of each parameter and interface feature, click on , or the 'What's this?'
question mark icon. For more information see Getting Help
WaveLab 7
270
Interface Elements
Related topics
11.1.64
Repeat Clip
This dialog allows you to make a number of copies of a Clip and lay them out at various
intervals on the current track of your audio montage. You can specify the number of clones
to produce, and control their placement, alignment and spacing.
You can access this dialog in the Audio Montage Workspace by right-clicking on the track's
waveform and choosing Repeat clip... from the Clip context menu.
For an explanation of each parameter and interface feature, click on , or the 'What's this?'
question mark icon. For more information see Getting Help
Related topics
Audio Montages
Clip
11.1.65
Recently used files
This dialog allows you to view all the files you have recently used in WaveLab. You can use
it to find a specific file and open it. Information on the full path of each file, its name and the
date it was last accessed, is displayed.
To find a file quickly, begin typing the name of the file. You can also choose to remove
individual files from the list or those that can no longer be located by the application. The
number of recently opened files remembered by WaveLab is set in the Global Preferences.
You can access this dialog from all Workspaces via File > Edit list of recently opened
files.... You can also open it from various menus that list recently used files such as the File
> Favorites files....
For an explanation of each parameter and interface feature, click on , or the 'What's this?'
question mark icon. For more information see Getting Help
Related topics
Global Preferences
11.1.66
Recording Dialog
This dialog enables you to set up and record an Audio File from the input device specified in
the Audio Streaming Settings dialog.
To set up a recording:
In the "File to create" section, select Temporary File, or select Named File and browse
to the folder where the recorded audio will be saved.
WaveLab 7
11.1 Dialogs
271
Click the down arrow to select a preset audio format, or click the audio format text to
display the Audio File Format dialog, and set up the format for your recorded audio.
Here, you can create new Audio File Format presets, if required, for later use.
Choose from Level or Spectrum display. If you choose Level, click the Settings button
to bring up the Level/Pan Meter Settings dialog.
Click Record. While the recording is in progress, you can create named markers by
clicking on the marker icons in the Actions section.
Click Stop when the recording is complete. An unsuitable recording is easily discarded,
or you can Close the dialog to edit the recorded file in the Audio File Workspace.
In WaveLab you also have further options available:
Method - use this tab to define options for starting/stopping/pausing the recording
automatically. You can select an input device and choose to start a recording at a
specific time or stop it after a specific duration. In WaveLab you can also choose to
drop markers automatically and split a file into while recording.
Options - use this tab to determine various options affecting how the recording dialog
window behaves while recording.
Values - use this tab to define numerical values for the various recording options avail-
able.
You can access this dialog from the Transport controls
> Record.
button or by choosing Transport
For an explanation of each parameter and interface feature, click on , or the 'What's this?'
question mark icon. For more information see Getting Help
Related topics
Audio Streaming Settings
Audio File Format Dialog
Record create marker
11.1.67
Record create marker
This dialog allows you to name markers to drop while you are recording an Audio File. You
can enter a name for each marker and an optional time offset.
Creating named markers can be useful for junping to these points quickly when later reviewing or editing the recording.
You can access this dialog while recording from the Recording dialog, dropping a marker by
clicking the
button.
You must have the "Confirm name of markers to drop" option selected for this dialog to
appear. This option is located in the Options tab of the Record dialog.
For an explanation of each parameter and interface feature, click on , or the 'What's this?'
question mark icon. For more information see Getting Help
WaveLab 7
272
Interface Elements
Related topics
Recording Dialog
11.1.68
Rename File dialog
This dialog allows you to rename a file, and/or optionally change the folder where it is stored.
The file suffix may be selected from the drop-down list. All open documents that have a
reference to the file are updated. Associated peak and marker files are also updated.
This function is particularly useful when renaming Audio Files. If you rename an Audio File
outside WaveLab (using your computer's file browser), the next time you open an Audio
Montage with a reference to that file, WaveLab will not find it.
To avoid this, use this dialog to rename files and all references to the file from the open Audio
Montage are automatically updated to use the newly named file.
You can access this dialog by choosing File > Rename....
For an explanation of each parameter and interface feature, click on , or the 'What's this?'
question mark icon. For more information see Getting Help
Related topics
11.1.69
Render ASIO input to file
This dialog allows you to record an Audio File directly to disk from an ASIO input. The audio
is collected from the audio input, not from the Audio File or Montage. The ASIO input audio
is rendered through the Master Section and any of its plug-ins and saved as a file, as when
rendering normally. This is in fact, another way to record. When you record normally, no plugins are used, but more options are possible. On a Mac, this function should work without
ASIO.
Note: It is impossible for WaveLab to know when the input should stop, so it is possible to
record for hours unless you manually stop this process using the Transport controls.
You can access this dialog from the Master Section when you select the Asio Input plugin
and then press the Master Section Render button.
For an explanation of each parameter and interface feature, click on , or the 'What's this?'
question mark icon. For more information see Getting Help
Related topics
Rendering
Recording Dialog
Master Section
WaveLab 7
11.1 Dialogs
11.1.70
273
Render Montage window
This dialog allows you to process the montage session you are working on, mixing down
multiple tracks into a mono or stereo file and applying any active plug-in effects you have
active. This process is sometimes also referred to as mixing or bouncing down.
You can select options for which regions of the session are rendered, whether to create a
named file or a temporary, untitled file, and whether to mute the effects chain when finished.
There are various options to render all or parts of the Montage, into one or more files - use
"What's this..."
You can access this dialog in the Audio Montage Workspace via the
the Master Section window.
Render button from
For an explanation of each parameter and interface feature, click on , or the 'What's this?'
question mark icon. For more information see Getting Help
Related topics
Rendering
Audio Plug-ins
Audio File Format Dialog
Master Section
11.1.71
Render Wave window
This dialog allows you to process the Audio File or selection you are working on, applying
any effects you have active.
It applies all active plug-ins to the selected audio region or the whole file, and you can optionally change the format of the rendered file. This process is sometimes also referred to as
"mixing" or "bouncing down".
You can select options for which regions of the session are rendered, whether to create a
new file or process in place, and whether to mute the effects chain when finished. You can
also choose to copy marker locations to the new file.
You can access this dialog in the Audio File Workspace via the
Master Section window.
Render button from the
For an explanation of each parameter and interface feature, click on , or the 'What's this?'
question mark icon. For more information see Getting Help
Related topics
Rendering
Audio Plug-ins
Audio File Format Dialog
Master Section
WaveLab 7
274
11.1.72
Interface Elements
Loudness envelope options
This dialog allows you to adjust how the Loudness envelope waveform is displayed.
You can adjust the granularity of the analysis, or if the loudness analysis is based on small or
longer segment. You can also see the loudness of specified frequency regions (by using the
low/band/high pass filters to define which frequencies are displayed). This can be useful for
isolating a particular "problem" range of frequencies which you want to focus on, for example.
This analysis is computationally intensive, so it may occasionally be slow to redraw.
You can access this dialog from both wave windows in the Audio File Workspace via the
Loudness tab >
Edit settings....
For an explanation of each parameter and interface feature, click on , or the 'What's this?'
question mark icon. For more information see Getting Help
Related topics
11.1.73
Sample attributes
This dialog allows you to define settings for an audio sample before loading it into a hardware
or software sampler.
The settings do not process the sample in any way, they just give the file properties that the
receiving sampler can use. This includes information about the pitch of the sample (which
can be detected automatically by WaveLab), the key range that the sample should span, and
the velocity range to occupy. For WAV and AIFF files, this information is stored in the file's
header.
By default, there are no sample attributes in an Audio File. Therefore you must explicitly create
this information by clicking on the "Create" button first. This dialog is useful if your sampler
can take advantage of these additional tags. If supported by your sampler, it can save you
time by allowing you to both edit and define a samples properties from within WaveLab.
You can access this dialog via Workspace > Specific tool windows > Sample Attributes....
For an explanation of each parameter and interface feature, click on , or the 'What's this?'
question mark icon. For more information see Getting Help
Related topics
11.1.74
Modified files dialog
This dialog allows you to save any currently open files that have been modified.
You can choose which files in the active Workspace you wish to save and which to ignore. If
you have a large number of currently active files, it can be useful to choose "Select All" and
then deselect any items you do not wish to save. Choosing "Cancel" safely returns you to
the application without saving the modified files or quitting.
You can access this dialog throughout WaveLab via File > Save all.
This dialog is also shown when closing a Workspace with more than one modified file, or
when closing the application.
WaveLab 7
11.1 Dialogs
275
In WaveLab you can also access this dialog from the Control Window via File > Save all
documents in all windows
For an explanation of each parameter and interface feature, click on , or the 'What's this?'
question mark icon. For more information see Getting Help
Related topics
11.1.75
Save Audio File dialog
This dialog allows you to choose the name, file format and the location where you wish to
save an Audio File.
The provided default location depends on what path you have specified for the 'Audio File
Save folder' in Folder preferences. This can be overtyped, or you can click
to browse
folders, browse files, or explore the Operating System browser dialog.
You can also change the type of file format used to encode the file using the Audio File Format
dialog. In addition there is an option to remember the file format you use so it appears the
next time you save a file.
You can access this dialog from the Audio File Workspace and Montage Workspace via File
> Save as....
For an explanation of each parameter and interface feature, click on , or the 'What's this?'
question mark icon. For more information see Getting Help
Related topics
Folder Preferences dialog
Audio File Format Dialog
11.1.76
Select where and how Audio Files will be saved
This dialog allows you to choose where Audio Files are saved when saving each CD track
as an Audio File from the Basic Audio CD window. You can choose the destination folder
location and the format of the Audio Files which will be saved.
You can access this dialog in the Audio File Workspace via Basic Audio CD window >
File > Save each CD track as....
For an explanation of each parameter and interface feature, click on , or the 'What's this?'
question mark icon. For more information see Getting Help
Related topics
Basic Audio CD
Audio File Format Dialog
WaveLab 7
276
11.1.77
Interface Elements
Save Batch Processor
This dialog allows you to save a copy of the batch processor file that you currently have open.
You can specify a new file name and location. Optionally you can choose to save the list of
files in the batch process, along with status of each file.
The default location depends on what path you have specified for the 'Batch Processor Save folder' in Folder preferences. This can be overtyped, or you can click
to browse
folders, browse files or explore the Operating System browser dialog.
You can access this dialog in the Batch Processor Workspace via File > Save as....
For an explanation of each parameter and interface feature, click on , or the 'What's this?'
question mark icon. For more information see Getting Help
Related topics
Folder Preferences dialog
11.1.78
Save File As
This dialog allows you to save a copy of a file that you currently have open. You can specify
a new file name and location.
The default location depends on the path you have specified for the active Workspace's 'Save
folder' in Folder preferences. This can be overtyped, or you can click
to browse folders,
browse files or explore the Operating System browse dialog.
You can access this dialog in various Workspaces in WaveLab via File > Save as....
For an explanation of each parameter and interface feature, click on , or the 'What's this?'
question mark icon. For more information see Getting Help
Related topics
Folder Preferences dialog
11.1.79
Save Preset As
This dialog allows you to save a copy of a preset you have altered with a different name. You
can also define and create a root folder to hold for all presets of its kind.
You can access this dialog in various places throughout WaveLab where you choose presets
and a menu containing Save as....
- that is, wherever you see this icon
For an explanation of each parameter and interface feature, click on , or the 'What's this?'
question mark icon. For more information see Getting Help
Related topics
Presets
WaveLab 7
11.1 Dialogs
11.1.80
277
Save picture of active window
This dialog allows you to save a picture of the active WaveLab window.
You can save the picture with or without the enclosing window frame and the resulting picture
can be copied to the clipboard or saved to a file. If the second option is selected, you can
specify where the picture is saved and the format: BMP, JPG/JPEG and PNG formats are
offered.
You can access this dialog from most Workspaces in WaveLab via View > Save picture
of active window....
For an explanation of each parameter and interface feature, click on , or the 'What's this?'
question mark icon. For more information see Getting Help
Related topics
11.1.81
Scripting window (Audio Montage Workspace)
This window allows you to write and execute scripts in the Audio Montage Workspace.
The inbuilt text editor helps you when writing scripts by highlighting the different parts of
the script with colors, making it more readable. A script can also be written in another text
editor, and loaded via the File menu. To run a script, from within the script window choose
Functions > Execute script.
For a general description of scripting, see Scripting. For an overview of the scripting language, see ECMAScript Reference.
You can access this dialog from the Audio Montage Workspace via Workspace > Specific
tool windows > Script.
Note: To view trace or log messages when executing scripts that contain the logWindow() function, ensure that the Log window is visible and that it's warning filter buttons are selected.
For an explanation of each parameter and interface feature, click on , or the 'What's this?'
question mark icon. For more information see Getting Help
Related topics
Scripting
ECMAScript Reference
Log window
11.1.82
Scripting window (Audio File Workspace)
This window allows you to write and execute scripts in the Audio File Workspace.
The inbuilt text editor helps you when writing scripts by highlighting the different parts of
the script with colors, making it more readable. A script can also be written in another text
editor, and loaded via the File menu. To run a script, from within the script window choose
Functions > Execute script.
WaveLab 7
278
Interface Elements
For a general description of scripting, see Scripting. For an overview of the scripting language, see ECMAScript Reference.
You can access this dialog from the Audio File Workspace via Workspace > Specific tool
windows > Script.
Note: To view trace or log messages when executing scripts that contain the logWindow() function, ensure that the Log window is visible and that it's warning filter buttons are selected.
For an explanation of each parameter and interface feature, click on , or the 'What's this?'
question mark icon. For more information see Getting Help
Related topics
Scripting
ECMAScript Reference
Log window
11.1.83
Definition of shortcut(s)
This dialog allows you to define your own customized shortcut(s) for a particular function
(selected from Customize Commands). These custom shortcuts can save you time and
speed up your workflow in WaveLab.
You can define a shortcut using a:
Key sequence - any existing keyboard shortcut is displayed in the first keystroke field
and can be overwritten. There are some standard shortcuts that cannot be redefined;
in this case the related edit fields are disabled. Each shortcut is restricted to a specific
Workspace, so you can use the same shortcut in different Workspaces.
Press the key combination you wish to use and it will be displayed. If a keyboard shortcut
is already used by another command, a warning is given. Use the Clear button to erase any
shortcut entries already present.
There are additional spaces to allow you to define sequences containing up to four key
strokes. Please note these keys must be pressed/released one after the other, and the
action is performed when the last key has been pressed.
Keyword - enter a keyword which you can later use to activate the command by typing
it into the Keyword field command bar.
MIDI event sequence - use an external MIDI device (such as a MIDI keyboard or
dedicated control surface) to define a sequence of up to three MIDI events. First you
need to select the MIDI interface for incoming messages. Press the key or button on
your MIDI device and the corresponding MIDI event number will be displayed. You
can define a sequence by continuing to input further MIDI messages. You could use a
Program or Bank change message as a "modifier", for example.
Defining MIDI shortcuts can be useful if you want to use your external MIDI device to control
the transport in WaveLab, for example. You can also use your external MIDI device to control
WaveLab 7
11.1 Dialogs
279
almost any function within WaveLab. Select a MIDI device via Preferences... > Options
tab, activate "Use MIDI shortcuts" and specify a MIDI input port so that MIDI events are sent
rather than keyboard events.
You can access this dialog from the Customize commands window by selecting a command
and choosing Edit shortcut....
For an explanation of each parameter and interface feature, click on , or the 'What's this?'
question mark icon. For more information see Getting Help
Related topics
Customize Commands
Command bars
11.1.84
Signal generator
This dialog allows you to generate complex synthesized sounds in mono or stereo.
You can layer different waveform generators together and if outputting a stereo file, adjust
different settings for both the left and right channels. There are a multitude of settings to
adjust the character (Source tab), frequency (Frequency tab) and amplitude (Level tab) of
the generated signals.
To generate a sound follow these basic steps:
choose whether the file is to be mono or stereo, and define the number of samples, and
bit depth using the Audio properties dialog.
choose how many layers of signal generators you wish to use (up to 64).
for each layer, use the source tab to choose the type of signal generator you wish to
use, switch to the frequency tab to define a frequency and its envelope, and use the
level tab to define a level envelope. If you have chosen a stereo file you can also choose
to adjust left and right channels independently.
once all settings are made, choose
Generate and WaveLab calculates an Audio File
according to your specifications. The file is generated and opens up in a new window.
Generating signals can be useful for a variety of testing and measurement purposes. For
example, you could use the Signal Generator to create a sine wave sweep from say 20Hz to
20,000kHz to test your monitoring environment for resonant frequencies.
You can access this dialog in the Audio File Workspace via Tools > Signal Generator....
For an explanation of each parameter and interface feature, click on , or the 'What's this?'
question mark icon. For more information see Getting Help
Related topics
Audio properties dialog
DTMF Generator
WaveLab 7
280
11.1.85
Interface Elements
Silence Generator
This dialog allows you to generate "silence", either by replacing an audio selection, or by
specifying a duration.
You can also specify a cross fade at each end of the silent region, for a smoother transition.
Radio buttons determine where the silent period is placed in the audio.
In WaveLab you can also specify a file to be inserted instead of "true" silence. This can be
useful for example, if you wish to keep the ambience, or background noise of a particular
environment in a recording.
You can access this dialog in the Audio File Workspace via Edit > Silence (advanced)....
For an explanation of each parameter and interface feature, click on , or the 'What's this?'
question mark icon. For more information see Getting Help
Related topics
Silence
11.1.86
Smart bypass
This dialog allows you to correct for any level change introduced by plug-in effects in the
Master Section.
Some effects, when applied to the signal chain, can cause an increase or decrease in level
between their input and output signals and this impairs objective comparisons between processed and unprocessed sounds. By compensating this level shift, an objective A/B comparison is possible. This is the core purpose of this feature, which is a must-have tool for
Mastering.
Although some plug-ins have an output level or make-up gain control (such as most compressors for example), it can be quite difficult to determine the increase/decrease of level
when multiple plug-ins are used in an effects chain. This dialog can determine this difference in level and adjust the output gain accordingly. You can choose to hear the original
audio, the processed audio or the processed audio with the correction in level applied while
playing back audio. You can also select the method used to calculate the amount of level
correction used.
You can access this dialog from the Master Section via
Smart bypass.
For an explanation of each parameter and interface feature, click on , or the 'What's this?'
question mark icon. For more information see Getting Help
Related topics
Master Section
11.1.87
Special File Format
This dialog allows you to choose options as to how WaveLab will interpret any unrecognized
file formats or files containing raw data that you wish to open. You can define the sample
WaveLab 7
11.1 Dialogs
281
format, byte order, sample rate, file extension and whether or not the file contains mono or
stereo channels. You can also choose to ignore the file's header (start) or end of file data.
Once you have specified a format for a particular type of file, WaveLab remembers the new
format for the next time. This function can be useful for example, if you are working with a
rarely used Audio File format like those used by some game platforms or mobile phone ring
tones.
You can access this dialog in the Audio File Workspace via File > Open as....
For an explanation of each parameter and interface feature, click on , or the 'What's this?'
question mark icon. For more information see Getting Help
Related topics
Audio File Format Dialog
11.1.88
Spectrogram options
This dialog allows you to adjust how the Spectrogram is displayed.
You can adjust the visual style of the spectrogram and its resolution. You can also specify
a cut-off point above which frequencies are displayed and to plot them using a linear or
logarithmic scale. This can be useful for isolating a certain range of frequencies: for example,
in sound restoration you may wish to focus on a high frequency band which is more accurately
displayed using a linear scale.
You can access this dialog from both wave windows in the Audio File Workspace via the
Spectrum tab >
Edit settings....
For an explanation of each parameter and interface feature, click on , or the 'What's this?'
question mark icon. For more information see Getting Help
Related topics
The Spectrum display
Spectrum editor
11.1.89
Surround Panner
This dialog allows you to adjust the pan of your audio between surround sound channels.
In the graphic display, the positions of the clip left/right audio channels are shown as small
squares. The proportional signal levels from the individual speakers are indicated by colored
lines from the speakers to the center of the display.
The graphic display shows the surround imaging of either the left/top (blue) clip audio channel, or the right/bottom (red) clip audio channel – the color of the speaker lines shows which
channel is selected for viewing and editing.
If you are viewing the left/top channel, you will see a blue square indicating the position of the
audio. The other, gray square (which is mirrored horizontally) represents the other channel.
Click this to view and edit this channel instead, it will be shown in red and red speaker
lines indicate the speaker levels.
WaveLab 7
282
Interface Elements
Each track can have its own Surround Pan window and you can have several of these open
at the same time if you need to.
To pan the sound, click the blue square and drag it to the desired position. This pans the
audio of the left/top channel – the other channel is automatically mirrored horizontally.
If you right-click in the graphical display, a pop-up menu appears allowing you to choose from
a number of positioning "presets". This can be a quick way to pan a signal fully left-front, for
example.
This dialog is closely related to surround panning envelopes. Indeed, you can automate
surround panning for individual Clips using envelopes. These envelopes can be selected
from the Focused Clip editor panel. You can choose to view either the Left-Right, Front-Rear
or the LFE curve. This is slightly different from using regular volume and pan envelopes.
The important point to understand: internally, there is a single surround pan envelope where
each envelope point contains a complete surround state (left-right position, frontrear position and LFE amount).
If you add an envelope point to the Left-Right surround pan envelope for example, you will
find that a point is automatically added to the Front-Rear and LFE envelopes, at the same
position in the Clip. This is because there is actually only a single surround pan envelope.
When you add an envelope point you are really adding it to this "full" surround pan envelope,
and it is shown in all three views. In other words, the Left-Right, Front-Rear and LFE curves
are three views of the same multidimensional envelope.
Note that if you move an envelope point, all surround pan envelopes are affected!
You can use the Surround Pan window to "program" each envelope point – this
makes it easy to set up automated surround panning for a Clip. While the Surround Pan
window is open, click on a surround pan envelope point. Its position is reflected in the
Surround Pan window. You can then simply edit the point in the Surround Pan window
rather than on the envelope.
You can access this dialog in the Audio Montage Workspace by right clicking on the small
surround panner window in the track view column.
For an explanation of each parameter and interface feature, click on , or the 'What's this?'
question mark icon. For more information see Getting Help
Related topics
Audio Montages
11.1.90
Create Document Template
This dialog allows you to create a template from an active Audio Montage, Podcast or Batch
processor file. Starting a new document from a template can be a great time-saver.
Each template you create retains all the settings of the current document plus any tracks you
have created, although any data in the file, such as Clip references, are not saved. The next
time you create a new document you can choose a template file from a list which is then used
as a basis for the new document.
You can use this dialog to create a set of templates that you commonly use. For example,
if you are frequently mastering CDs in the Audio Montage Workspace you could create a
montage template specifically for that purpose.
WaveLab 7
11.1 Dialogs
283
You can access this dialog from the Audio Montage, Podcast or Batch processor Workspace
via File > Save special > Save as template....
For an explanation of each parameter and interface feature, click on , or the 'What's this?'
question mark icon. For more information see Getting Help
Related topics
Template List Dialog
11.1.91
Template List Dialog
This dialog allows you to choose a previously saved template from an active Audio Montage,
Podcast or Batch processor file. Starting a new document from a template can be a great
time-saver.
Templates are saved using the Create Document Template dialog. You can choose to use
an existing template as the basis for your new file or choose "None" to define a new blank
one.
You can only access this dialog if you have created at least one template previously by choosing File > New... from the Audio Montage Workspace.
For an explanation of each parameter and interface feature, click on , or the 'What's this?'
question mark icon. For more information see Getting Help
Related topics
Create Document Template
11.1.92
Time Format dialog
This dialog allows you to specify the way in which time is displayed on the waveform time
rulers and in several time-based fields related to the file.
You can set options using the following tabs:
Timecode - this provides a list of frames per second for various SMPTE timecodes,
and for CD resolution. Selecting "Other" allows you to enter a custom value. You can
also choose which frames/units are displayed. For example, if you are working with PAL
video you might choose 25 frames per second - or "25(SMPTE EBU)".
Clock - this allows you to display time units or to present the clock units in a compact
format.
Meter - this offers time signature, tempo (bpm) and ticks per quarter note (to allow the
time units to be compatible with your MIDI sequencer).
Offset - this provides a number of ways to specify a time offset for the time ruler. This
can be useful if you wish to move the "time zero" point of the file. For example, you
might want to have the time display zero on the first note of a recorded performance
whilst still maintaining the pre-roll part of the Audio File.
WaveLab 7
284
Interface Elements
You can access this dialog in the Audio File Workspace via View > Main view display >
Time Ruler > Time format.... Alternatively, you can access it by right clicking anywhere
on the time ruler in either waveform window to produce the Time Ruler context menu, and
choosing Time format....
For an explanation of each parameter and interface feature, click on , or the 'What's this?'
question mark icon. For more information see Getting Help
Related topics
Timecode
Audio File editing
11.1.93
Time stretching
This dialog allows you to change the duration of an audio selection (usually without changing
its pitch).
You can view exact time information on the original audio selection you wish to stretch and
choose the amount you wish to "stretch" it in seconds, beats per minute or as a percentage.
You can also choose which method WaveLab uses to stretch the audio and the quality/speed
of the processing.
If you select "Use modulation envelope" you can vary the time stretch over time using an
envelope editor that becomes available. When choosing a method, it is useful to experiment
with the different algorithms available to find which one suits your source material the best.
Use "What's this?" to find out more information on each method and determine which one
will produce the best time stretch without introducing unwanted artifacts.
This function is useful if you want to speed up or slow down a recording to match other
material, such as matching the tempo of two drum beats, or fitting an audio track to a section
of video, for example.
Time stretching is also available as a batch processing plug-in in the Batch Processor
Workspace. In addition, Time stretching for a Clip is available from the Focused Clip window.
Note that for batch processing and Clip processing, the modulation envelope option is not
available. You can access this dialog from the Audio File Workspace by choosing Process
> Time stretching....
For an explanation of each parameter and interface feature, click on , or the 'What's this?'
question mark icon. For more information see Getting Help
Related topics
Adjusting Envelopes
11.1.94
Track dispatching
This dialog allows you to control the output of different tracks in your audio montage.
The purpose of this dialog is to provide an answer to the question "Into which
<b>output</b> channel will the mono channel, or the left and right channels, be mixed?"
WaveLab 7
11.1 Dialogs
285
For instance, in the case of surround output, there can be six destinations for a track channel.
Track allocation is dependent on the mode and how many channels you have selected when
defining your Audio Montage settings. This in turn defines how many outputs are available
from this dialog. For playback, your soundcard must also have the available number of corresponding channels. These are set up in the Audio Streaming Settings.
You can choose single or multiple channel outputs for each stereo and mono track in your
audio montage. For stereo tracks, you can define channels individually for both the left and
right channels of a stereo track. You can also apply a low pass filter to the Low Frequency
Effects ("sub-woofer") channel in order to eliminate unwanted higher frequencies from being
sent to sub-woofer speakers.
You can access this dialog in the Audio Montage Workspace by clicking on the Lf:Rf icon
at the left hand edge of each track.
For an explanation of each parameter and interface feature, click on , or the 'What's this?'
question mark icon. For more information see Getting Help
Related topics
Audio Montages
11.1.95
Value Format
This dialog allows you to control the formatting of the different types of data values in your CD
report. These include the date, time, audio time, track indexing and serial number formats.
For example, you may wish to display dates in the format "date/month/year" instead of with
a full time and date stamp (the default). You can choose from the many formatting options
available for each data type in its corresponding drop down menu.
You can access this dialog in the Audio Montage Workspace's CD window via Functions
> Generate Audio CD report... > Value Format.
For an explanation of each parameter and interface feature, click on , or the 'What's this?'
question mark icon. For more information see Getting Help
Related topics
CD
Audio CD Report
11.1.96
File attributes
This dialog allows you to define the file attributes (or meta-data) to be embedded in your
exported Audio File.
You can choose between entering standard WAV file meta-data tags or the extended file
header information available in Broadcast Wave Format (BWF).
Fill in the relevant information using the text fields provided, although it is not mandatory to
complete all fields.
In some cases there are buttons to assist you in entering data:
WaveLab 7
286
Interface Elements
- Uses the current date and time to fill in the Origination Date/Time field.
- Uses WaveLab as the name of the originator software.
You can access this dialog in the Audio File Workspace via Edit > File Attributes....
For an explanation of each parameter and interface feature, click on , or the 'What's this?'
question mark icon. For more information see Getting Help
Related topics
WAV files
11.1.97
Audio File editing preferences
This dialog allows you to define settings for editing in the Audio File Workspace.
You can choose defaults for editing and playback, adjust the visual appearance of the waveform displays, and determine how WaveLab works with audio and peak files.
You can access this dialog in the Audio File Workspace via Options > Audio File editing
preferences....
For an explanation of each parameter and interface feature, click on , or the 'What's this?'
question mark icon. For more information see Getting Help
Related topics
Audio File editing
11.1.98
Write Audio CD
This dialog allows you to write an audio CD to either a DDP image or a physical CD-ROM
disk using your computer's CD-R or DVD-R drive, or burn an audio CD from an existing
DDP Image. The dialog has controls for refreshing the list of attached devices, opening
the CD/DVD drive and erasing a CD-RW/DVD-RW disk or the contents of the DDP Image
directory. You can also choose to bypass audio from passing through the Master Section
before it is written. If you choose to burn a DDP image, the dialog allows you to select the
directory to output the DDP files, as well as the option to write a table of contents and customer information.Choosing a CD-R or DVD-R drive displays choices for setting the speed,
number of copies and other options.
Important note for Mac OSX users
When using the CD-R/DVD-R drive on Apple OSX computers for importing or burning it is
important to note the following. If you insert a optical CD or DVD disk in the drive while the
drive is not selected in WaveLab for import or burning, WaveLab will not be able to "see" the
drive. The disk drive is "taken over" by other applications under Mac OSX and is not seen by
WaveLab when this happens. To avoid this occurring, make sure there is no disk in the drive
when opening any CD window within WaveLab.
WaveLab 7
11.1 Dialogs
287
For an explanation of each parameter and interface feature, click on , or the 'What's this?'
question mark icon. For more information see Getting Help
Related topics
DDP files
Authoring CDs and DVDs
11.1.99
WMA encoding
This dialog allows you to specify the encoding options when you save a WMA Audio File.
You can select which encoder to use and adjust the output sample rate and bit resolution.
Depending on the encoder chosen, you can also define various quality options and whether
the resulting file is stereo or mono.
You can access this dialog by choosing Save as... > Output Format (select type Windows Media Audio) > Encoding > Edit..., and from most places where you can select
an output file format, like the Render dialog.
For an explanation of each parameter and interface feature, click on , or the 'What's this?'
question mark icon. For more information see Getting Help
Related topics
WMA files
11.1.100 Workspace layout
This dialog allows you to define options when saving the layout of a Workspace.
You can choose to save the placement of the Workspace and all its windows and/or the layout
of tabbed windows. It allows you to choose whether to retain or discard these elements of
your current layout arrangement when saving a new layout.
You can access this dialog from all Workspaces via Workspace > Layout > Save as....
For an explanation of each parameter and interface feature, click on , or the 'What's this?'
question mark icon. For more information see Getting Help
Related topics
Workspaces
11.1.101 Write Data CD/DVD
This dialog allows you to write a data CD/DVD to either a physical DVD/CD-ROM disk using
your computer's CD-R or DVD-R drive, or burn an ISO disk image. The dialog has controls
for refreshing the list of attached devices, opening the CD/DVD drive and erasing a CDRW/DVD-RW disk.
WaveLab 7
288
Interface Elements
If you choose to burn an ISO disk image the dialog allows you to select a filename for the
resultant ISO file. Choosing a CD-R or DVD-R drive displays choices for setting the speed
or to try a test burn.
Important note for Mac OSX users
When using CD-R/DVD-R drive on Apple OSX computers for importing or burning it is
important to note the following. If you insert a optical CD or DVD disk in the drive while the
drive is not selected in WaveLab for import or burning, WaveLab will not be able to "see" the
drive. The disk drive is "taken over" by other applications under Mac OSX and is not seen by
WaveLab when this happens. To avoid this occurring, make sure there is no disk in the drive
when opening any CD window within WaveLab.
For an explanation of each parameter and interface feature, click on , or the 'What's this?'
question mark icon. For more information see Getting Help
Related topics
Authoring CDs and DVDs
11.1.102 Loop Tweaker
This dialog allows you to refine a region of audio to loop seamlessly.
The Loop Tweaker can just be used to "tweak" an existing loop selection so that it loops
perfectly or you can also use it to create a loop from material which does not naturally repeat.
To use the Loop Tweaker you must first have a loop defined using a pair of loop markers
.
The Loop Tweaker consists of the following tabs:
Loop points adjustment
This is a visualization of the beginning and end of the waveform between the loop markers.
You use this dialog to manually refine a loop selection by dragging on the waveform left/right
or using the automatic search buttons to find the nearest "good" loop point. The aim is to
align the waveforms so they meet in the middle at a zero-crossing point with the waveforms
matching as closely as possible, being "in phase". When you adjust your loop start and end
points within the dialog the start and end loop markers in the main waveform window will
adjust accordingly. Note that this movement may or may not be visible depending on the
amount you move the markers and the zoom factor you have selected.
It is helpful to have the transport looped during playback so you can hear the difference when
you adjust the loop markers within the dialog. Use the Display options to adjust how the Loop
Tweaker waveform is visualized. You can also use the temporary memory buttons to capture
a number of different loop "candidates" and audition them one by one. Note that if you are
not using a cross fade or post cross fade you do not need to click Apply when just tweaking
loop points. You can also leave this dialog window open and manually adjust the position of
the markers in the main waveform windows if you need to make large adjustments.
Cross fade
This tab allows you to apply a cross fade at the end of a loop by mixing a copy of the beginning
of the loop with it. This can be useful to smooth the transition between the end of a loop and
its beginning - especially when using material that doesn't naturally loop. Use the envelope
WaveLab 7
11.2 Shared tool windows
289
drag points or value sliders to adjust the cross fade envelope. Click Apply to process the
cross fade.
Post cross fade
This tab allows you to cross fade the loop back into the audio after the end of the loop. This
is done by mixing a copy of the loop back into the audio. Use the envelope drag points or
value sliders to adjust the cross fade envelope. Click Apply to process the post cross fade.
Using the "Copy" button you can insert multiple copies of the loop into the active Audio File,
creating a smooth audio sequence, since copies will loop without an audible transition.
You can access this dialog by choosing Process > Loop Tweaker....
For an explanation of each parameter and interface feature, click on , or the 'What's this?'
question mark icon. For more information see Getting Help
Related topics
Markers
Adjusting Envelopes
Zero crossing
11.1.103 Zoom factor
This dialog allows you to set the level of magnification of the waveform in the main wave view
with precision.
Choose the zoom factor unit and enter an amount using the spin control box, or change the
amount by dragging up or down with the mouse or use the mouse wheel without clicking see Value editing.
You can access this dialog by left-clicking on the zoom factor box in the Status Bar. A rightclick on the zoom factor box gives you various zoom options.
See Zooming and scrolling for other methods of zooming - for example, you can press [arrow
up] or [arrow down] to zoom in or out.
For an explanation of each parameter and interface feature, click on , or the 'What's this?'
question mark icon. For more information see Getting Help
Related topics
Zooming and scrolling
Value editing
Status Bar
11.2
Shared tool windows
Shared tool windows are windows that can only exist in one place at a time and are shared
between Workspaces. They perform useful tasks in the active Workspace.
WaveLab 7
290
Interface Elements
They can be docked and un-docked, and saved in your custom layouts.
Shared tool windows:
Phasescope
VU Meter
Oscilloscope
Bit Meter
Spectroscope
Spectrometer
Wavescope
Timecode
Background task monitor
Log window
Master Section
Related topics
About Tool Windows
Metering
Docking windows
11.2.1 Phasescope
The Phasescope indicates the phase and amplitude relationship between two stereo channels. It is only really relevant when monitoring stereo audio material.
Reading the Phasescope
It can be interpreted as follows:
A vertical line indicates a perfect mono signal (the left and right channels are the same).
A horizontal line indicates that the left channel is the same as the right, but with an
inverse phase.
A random but roughly elliptical shape indicates a well balanced stereo signal. If the
shape "leans" to the left, there is more energy in the left channel and vice versa (the
extreme case of this is if one side is muted, in which case the Phasescope will show a
straight line, angled 45 degrees to the other side).
A perfect circle indicates a sine wave on one channel, and the same sine wave shifted
by 90 degrees on the other.
WaveLab 7
11.2 Shared tool windows
291
Generally, the more you can see a "thread" shape, the more bass there is in the signal;
the more "spray-like" the display, the more high frequencies are in the signal.
Phase Correlation meter
At the bottom of the display, you will find a Phase Correlation meter, which shows the same
information but in a different way:
The green line shows the current phase correlation, while the two red lines show the
recent peak minimum and maximum values, respectively (these are the default colors,
which you can change).
With a mono signal, the meter would show +1, indicating that both channels are per-
fectly in phase.
Similarly, -1 indicates that the two channels are the same, but one is inverted.
Generally, for a "good" mix, the meter should show a value between 0 and +1.
Unlike the main Phasescope, the Phase Correlation meter is also available in "Analyze audio
selection" mode, showing an average value for the selected range.
Changing settings
You can define display colors, peak hold time, and the resolution or number of samples to
display from the Functions > Settings... menu.
The Phasescope meter can be found in the Meters menu of the Audio Files and Audio Montage Workspaces. It can be used either as a floating window, or docked in the Workspace
or the Control Window.
Related topics
Metering
11.2.2 VU Meter
The vu-meter is used to display the peak and average loudness/decibel level of your Audio
File. It also displays the pan, or the balance between the left and right channels in a stereo
file.
The upper part of the level/pan meter window shows the peak level and average loudness,
in the following way:
The Peak Level meters display the peak levels of each channel, graphically and numeri-
cally. By default, the meter segments and numerical peak values are displayed in green
for low levels, yellow for levels between -6dB and -2dB, and red for levels above -2dB.
You can change both the colors and the range boundaries if you wish via the Level/Pan
Meter Settings dialog. This can be accessed through the Functions > Settings...
icon.
menu, or by using the
WaveLab 7
292
Interface Elements
The VU (Volume Unit) meters measure the average loudness (RMS) of each channel.
These meters have a built-in inertia, evening out loudness variations over a user-defined
time span. If you are monitoring playback or audio input, you will also note two vertical
lines following each VU meter bar, seemingly "trying to reach" the current RMS value.
These lines indicate the average of the most recent minimum RMS values (left line)
and the average of the most recent maximum RMS values (right line). To the left, the
difference between the minimum and maximum average values is displayed (the level
value in brackets) - this gives you an overview of the dynamic range of the audio material.
If you are monitoring real-time audio (playback or input), the maximum peak and loud-
ness values are displayed numerically to the right of the meter bars. Numbers in brackets to the right of the Maximum Peak values indicate the number of successive clips
(0dB signal peaks). Recording levels should be set so that they only rarely clip. If the
master level is set too high, the sound quality and frequency response will be compromised at high recording levels, with unwanted clipping effects. If the level is set too
low, noise levels may be high relative to the main sound being recorded.
Pan meters
The lower part of the window shows the pan (the difference in level between the left and
right channel, only applicable when monitoring stereo audio):
The upper pan meters show the peak level difference between the channels, graphically
and numerically. Note that the pan meters are "two-sided"; the level bars can go to the
left or right, indicating which channel is the loudest. The two sides are shown in different
colors (which can be changed via the Settings dialog as explained previously).
The lower pan meters show the average difference in loudness between the channels,
in a similar way. This gives you a visual indication of whether a stereo recording is
properly centered, for example.
If you are monitoring real-time audio (playback or input), the maximum balance differ-
ence value (peak and loudness) for each channel is displayed numerically to the left and
right of the meter bars. The VU meter can be found in the Meters menu of the Audio
Files and Audio Montage Workspaces.It can be used either as a floating window, or
docked in the Workspace or the Control Window.
Related topics
Metering
11.2.3 Oscilloscope
The Oscilloscope offers a highly magnified view of the waveform around the playback cursor
position.
If you are analyzing a stereo file, the Oscilloscope normally shows the separate levels of
the two channels. However, if you activate the option "Show Sum and Subtraction" on the
Functions menu (or click the +/- icon), the upper half of the Oscilloscope shows the sum of
the two channels and the lower half shows the subtraction.
WaveLab 7
11.2 Shared tool windows
293
Making settings
By opening the Settings dialog you can adjust the display colors, and choose to activate
Auto-zoom or not. With Auto-zoom activated, the display is optimized so that the highest
level reaches the top of the display at all times. The Settings dialog can be accessed through
the Functions > Settings... menu, or by using the
icon.
The Oscilloscope can be found in the Meters menu of the Audio Files and Audio Montage
Workspaces. It can be used either as a floating window, or docked in the Workspace.It can
also be docked in the Control Window.
Related topics
Metering
11.2.4 Bit Meter
The Bit Meter shows the resolution or the number of bits used in the digital audio being
monitored. Normally the maximum number of bits in an Audio File is the same as the resolution
of the Audio File (e.g. a 16 bit Audio File shows that up to 16 bits are used), but sometimes
this is not the case.
As soon as you perform any kind of real-time processing on an Audio File, the audio data is
treated at a much higher resolution (32 bit floating point), to allow for pristine audio quality.
Examples of such processing include level adjustments, effects, the mixing of two or more
files, etc. In fact, the only time when a 16 bit file is played back at 16 bit resolution is if
you play it without any fades or effects, and with the Master Faders set to 0.00 (no level
adjustment). You can try this out for yourself by playing back a 16 bit Audio File and viewing
the Bit Meter - as soon as you adjust the Master Faders, note that 24 bits are used and the
"inter" indicator is lit (more on this below).
How to read the Bit Meter
The innermost meters (closest to the bit scale) show the number of bits in use. You can
adjust this display in the Settings dialog.
The outer meters are "history" meters, showing how many bits were recently in use. You
can adjust the hold time in the Settings dialog.
The "over" segment indicates clipping, similar to a clip indicator.
If the "below" segment is lit, there are more than 24 bits. The bit meter will show the 24
higher bits, and the "below" segment indicates the existence of extra, lower bits. Note
that audio is always processed with more than 24 bits internally.
If the "inter" segment is lit, this indicates that the audio data cannot really be expressed
on a regular 24 bit scale (there are floating point values "in between" bits, thus the label
"inter"). This is typically the case if you apply effects; thus the "inter" segment allows
you to differentiate processed from non-processed 24 bit PCM files.
WaveLab 7
294
Interface Elements
When to use the Bit Meter
To check whether dithering is necessary or not. As a rule, if you're playing back or
mixing down to 16 bits, and the Bit Meter shows that more than 16 bits are used, you
should apply dithering.
To see the "actual" resolution of an Audio File. For example, even though a file is in 24
bit format, only 16 bits may be used. Or, a 32 bit file may only use 24 bits (in this case,
the "below" segment would not be lit). For this purpose, the Bit Meter is best used in
"Analyze selection" mode.
To see whether a "zeroed" plug-in still affects your signal, or whether a plug-in uses
16 bit internal processing, or more generally, to detect any signal modifier stage in the
audio chain between reading and playing.
To adjust the Bit Meter settings, select "Settings..." from the Options pop-up menu or by
using the
icon.
The Bit meter can be found in the Meters menu of the Audio Files and Audio Montage
Workspaces. It can be used either as a floating window, or docked in the Workspace or the
Control Window.
Related topics
Metering
Dithering
11.2.5 Spectroscope
The Spectroscope shows a continuous graphical representation of the frequency spectrum,
analyzed into 60 separate frequency bands, represented as vertical bars. Peak levels are
shown as a short horizontal lines above the corresponding band, indicating recent peak/maximum values. The Spectroscope offers a quick spectrum overview. For a more detailed
analysis of the audio spectrum, use the Spectrometer. The Spectroscope can be found in
the Meters menu of the Audio Files and Audio Montage Workspaces. It can be used either as a floating window, or docked in the Workspace.It can also be docked in the Control
Window.
Related topics
Metering
Spectrometer
11.2.6 Spectrometer
The Spectrometer uses FFT (Fast Fourier Transform) techniques to display a continuous
frequency graph, providing a very precise and detailed real-time frequency analysis.
WaveLab 7
11.2 Shared tool windows
295
The current frequency spectrum is shown as a linear graph.
Spectrum "peaks" are shown as a short horizontal lines, indicating recent peak/maxi-
mum values.
Snapshots
By using the "Add snapshot" and
"Erase last snapshot" buttons, you can take and erase
snapshots of the current spectrum. These will be superimposed over the current peak spectrum graph, in a color you can customize, until you click the icon again to take a new snapshot.
One use for this is to check the effects of adding EQ, for example. Up to five snapshots can
be superimposed on the display; the sixth snapshot replaces the earliest one in the display,
and so on. (Don't confuse the order of snapshots with the numbered buttons - these are
Spectrometer presets, see below.)
Zooming
You can adjust the frequency scale and range in the Settings dialog as described below,
but it's also possible to temporarily zoom in on a frequency area of interest. This is done by
clicking and dragging a rectangle in the Spectroscope display. When you release the mouse
button, the display is zoomed in so that the enclosed frequency range fills the window. To
return to full-scale display, select "Zoom-out fully" from the Functions menu, or double-click
anywhere on the display.
Making settings
You can adjust the behavior and display of the meters as desired, and assign up to five sets
of Spectrometer settings to the Preset buttons, for instant access. Open the Settings dialog
by selecting "Settings" from the Functions menu or clicking the
"tool" icon. Note that you
can apply your settings without closing the dialog, by clicking the Apply button.
If you want to store your settings for later use (or assign them to a Preset button), select "Save
as..." from the pop-up menu in the lower part of the dialog, and specify a name for the preset
in the file dialog that appears. Now, you can choose to make the settings instantly available
for selection in the FFT Meter window, by using the "Assign to preset button" submenu on
the pop-up menu.
When you are finished, click OK to close the dialog.
Selecting Spectrometer presets
If you have assigned your settings to the Preset buttons in the Settings dialog, you can quickly
switch between different level scales and display modes, by clicking one of the Preset icons
[1]-[5], or selecting the desired preset from the Options pop-up menu.
Exporting FFT data as ASCII text
When using the Spectrometer in off-line mode ("Monitor Edit cursor Position" or "Analyze
audio election" mode) you can export the displayed FFT data as a text file, by selecting
WaveLab 7
296
Interface Elements
"Export FFT data as ASCII" from the Options pop-up menu. The resulting text file can then
be imported into applications that allow graph plotting from text files (Microsoft Excel, for
example).
The Spectrometer can be found in the Meters menu of the Audio Files and Audio Montage
Workspaces. It can be used either as a floating window, or docked in the Workspace or the
Control Window.
Related topics
Metering
Spectroscope
11.2.7 Wavescope
The Wavescope meter displays a real-time waveform drawing of the audio signal being monitored.
It can be useful when recording or rendering a file if "Monitor File rendering" mode is active.
Making settings
You can adjust settings for the display via the Wavescope Settings dialog. This can be
accessed via Functions > Settings... menu, or by using the
icon. Here you can set
various color options for the background, grid and waveform display, as well as setting the
waveform rendering speed and vertical zoom. If "Clear waveform when reaching right of
pane" is checked the waveform display is cleared each time the cursor reaches the right end
of the display. If unchecked, the previous waveform is overwritten.
Tip: Wavescope is a useful meter for visualizing audio during recording. The Wavescope
meter can be found in the Meters menu of the Audio Files and Audio Montage Workspaces.
It can be used either as a floating window, or docked in the Workspace or the Control Window.
Related topics
Metering
11.2.8 Timecode
This shared tool window displays the current time of the playback head (or the cursor position
if not playing back), in the timecode format currently selected in the Time Format dialog.
The current time can be in a range of standard SMPTE formats, CD or DVD specific formats,
or a custom one - see Time Format dialog.
The most common use for this window is for working with video or film. You can use it to
display the playback head position of the current Audio File in a SMPTE format to frame level
resolution (i.e. hours:minutes:seconds:frames). You can also use it to display CD frames
(minutes:seconds:frames) when you are authoring CD or DVDs.
WaveLab 7
11.2 Shared tool windows
297
You can access this window by choosing Workspace > Shared tool windows > Timecode. It is available in the Control Window, Audio File Workspace and Audio Montage
Workspace.
For an explanation of each parameter and interface feature, click on , or the 'What's this?'
question mark icon. For more information see Getting Help
Related topics
Time Format dialog
CD Frame
SMPTE timecode
Authoring CDs and DVDs
11.2.9 Background task monitor
This specific tool window allows you to view all background rendering processes that are in
progress.
You can adjust the priority with which they are processed, pause or cancel them. It is useful
if you have a number of lengthy processes underway and want to free up some processing
power to focus on editing. You can either lower the priority of a task so it does not use as
much of the computer processor's capacity, or pause the task temporarily.
You can access this window by choosing Workspace > Shared tool windows > Background task monitor. It is available in the Control Window, Audio File Workspace and
Audio Montage Workspace. You can also access this window in the Control Window by
choosing Utilities > Background task monitor.
You can choose to automatically open the Background task monitor when a rendering process begins. To enable this option, select the checkbox via Options > Global Preferences
> Options > Make the Background Task Monitor visible when a task starts . Since
this window is a Shared tool window, the location where it opens may vary.
For an explanation of each parameter and interface feature, click on , or the 'What's this?'
question mark icon. For more information see Getting Help
Related topics
Specific tool windows
Control Window
Rendering
11.2.10
Log window
This shared tool window allows you to view log messages that have been issued by WaveLab.
When using WaveLab's scripting language for example, the logWindow( ) function outputs
messages to this window. There are a number of toggle buttons and these allow you to filter
the types of messages displayed.
WaveLab 7
298
Interface Elements
Note: When using the logWindow( ) method you need to have the
"Show informal notes"
button selected for the messages to be visible. If no log messages are displayed, make sure
all the toggle buttons are selected .
You can access this window via Workspace > Shared tool windows > Log. It is available
in the Control Window, Audio File Workspace and Audio Montage Workspace. You can also
access this window in the Control Window via Utilities > Log.
For an explanation of each parameter and interface feature, click on , or the 'What's this?'
question mark icon. For more information see Getting Help
Related topics
Control Window
Specific tool windows
Scripting
11.3
Specific tool windows
Specific tool windows are windows that are specific to the current Workspace. They perform
useful tasks in the active Workspace.
They can be docked and un-docked, and saved in your custom layouts.
Audio File Workspace tool windows:
File Browser
Spectrum editor
Basic Audio CD
Scripting window (Audio File Workspace)
Metadata window
Marker Window
Sample attributes
Error detection and correction
Master Project
Audio Montage Workspace tool windows:
Focused Clip window
Marker Window
Snapshots
File
File Browser
WaveLab 7
11.3 Specific tool windows
299
Zoom
CD
Clips
Notes
Effects
DVD-Audio
Scripting window (Audio Montage Workspace)
History
Navigator
Groups
Master Project
Podcast Workspace tool windows:
Master Project
File Browser
Batch Processor Workspace tool windows:
Master Project
File Browser
Batch Processing Plug-ins
Control Window tool windows:
Master Project
Related topics
About Tool Windows
11.3.1 File Browser
This dialog allows you to browse files directly from within WaveLab rather than using your
operating system's file browser.
It provides you with all the standard browsing functions (such as List and Icon views)as well
as additional controls to audition Audio Files and any marker defined regions.You can use
it to open or insert an entire file or a specific region of a file by dragging and releasing the
file in the location you wish to insert the file. In the Audio Montage Workspace you can also
choose to only view certain types of WaveLab specific files. The File Browser can be very
useful in speeding up the process of auditioning a long list of sound files. It can also be used
to drag to windows such as Data CD/DVD, including dragging folders.
WaveLab 7
300
Interface Elements
The playback functions
Play file
Once you have selected a file in the File Browser list, you can audition it by
clicking Play in the File Browser's toolbar. Click again to stop.
You can also have files play back automatically as soon as they are selected.
Auto-play
To do this, activate Auto-Play mode.
Tip: To audition a long list of Audio Files, enable Auto-play and use the UP and DOWN
cursor keys to step through each Audio File in quick succession.
Opening and inserting a file or region
Once you have chosen a file you wish to open, double-click it to open the file in the current
Workspace. You can also open it by dragging it onto an empty tabbed group, or onto the
tab bar of a tabbed group.
You can also drag the file over a wave view to insert it at a given point. When you drag a file
over a wave view, a beam is displayed so as to clearly display the insertion point.
When browsing Audio Files, the file browser also has a region panel. When you select an
Audio File, its related regions are listed in this panel. You can then drag the region from
the list, to insert only that part of the audio. Double-clicking on a region has the effect of
opening the file in the Workspace and selecting that region. You can access this dialog via
Workspace > Specific tool windows > File Browser.
For an explanation of each parameter and interface feature, click on , or the 'What's this?'
question mark icon. For more information see Getting Help
Related topics
Specific tool windows
11.3.2 Spectrum editor
This specific tool window allows you to select and perform operations on an Audio File via
its audio spectrum.
It uses high quality linear-phase filters to process a spectrum selection both in the time domain and in the frequency domain. This can be useful for advanced audio restoration tasks
like removing noise from a specific source in a recording, for example.
Making and editing selections
Spectrum editing can only be performed when a waveform is first displayed in Spectrum
display mode and when a spectrum selection is defined. To activate the Spectrum editor,
in the command bar (or via Workspace > Specific tool
click on the Spectrum edit tool
windows > Spectrum Editor). This displays the Spectrogram if this is not already the case
(see The Spectrum display).
To select a region, point and drag to define a rectangle. The region selection defines a time
and a specific frequency range. This allows you to edit and process audio both in the time
WaveLab 7
11.3 Specific tool windows
301
domain and in a specific frequency domain, as opposed to standard wave editing which
always operates in the full frequency domain.
Notes on spectrum selections:
When defining a region in a stereo file, a "mirrored" region is automatically created in
the other channel. To define a region in only one channel, press [Shift] while drawing
the region.
Once you have a region selected, if you place your mouse cursor inside the region,
a pop-up appears showing the currently set frequency range (Hz) and the time range
(seconds/milliseconds) for the selection.
A selected region can be moved in any direction by clicking and dragging the region
with the cursor.
If you press [Shift] whilst dragging a region, it only moves horizontally thus retaining
your selected frequency range. If you press [Ctrl]/[Command] + [Shift] the region
only moves vertically thus retaining the selected time range.
You can resize a region by placing the mouse cursor at the edges of the region (so that
a double-arrow appears) and then clicking and dragging.
To remove a region that you have drawn, click anywhere else on the waveform and it
disappears.
If you have defined a region as a Source or Target, it can be selected at any time to
create a new selection using the same dimensions.
Spectrum editor functions
The Spectrum Editor has the following parts:
Selection - use this part to refine and define your selection(s). You can expand se-
lections, shift selections around and define a source and target region for performing
copy operations.
Operations - use this part to perform copying, filtering and processing operations.
For copying operations, you require both a source and a target region to have been
defined using the Selection tab. You can choose which method to copy audio between
the Source and Target regions. You can also choose to apply processing to a single
spectrum region using a variety of different modes. See Spectrum Processing Modes
for information on each mode type.
Master Section - use this part to process and route selected spectral audio regions
through the Master Section and its effects plug-ins. This allows for frequency-selective
processing. A selected region's frequency spectrum can be routed to the Master Section where you can choose to process it separately from the non-selected frequency
spectrum. The signal is split so that one part (region spectrum or non-selected spectrum) is sent to the plug-ins, while the other part can be mixed with this processed
signal, after the Master Section output.
WaveLab 7
302
Interface Elements
Using the Spectrum editor
You can use the Spectrum editor in two main operational modes:
Region copying and filtering (Operations tab)
This is mainly intended for audio restoration applied over brief time ranges. Selections can
be copied, pasted, and filtered. This type of processing is mainly used to reduce, remove
or replace unwanted sound artifacts in the audio material, and can be carried out with great
precision. This could be useful for example, to replace part of a live recording that contains
an unwanted noise (such as a mobile phone ring tone), with a copy of a similar region of the
spectrum that only contains a "clean" signal. In general, the spectral Copy/Paste combination
gives the best results, given that the source and destination regions are properly choosen.
Master Section processing (Master Section tab)
This allows you to process a specific frequency range via the Master Section. The selected
or non-selected regions of the spectrum can be processed differently. You can also employ
a number of filters (Bandpass/Low-pass/High-pass) to further refine the particular range of
frequencies to be affected by any Master Section effects.
A selected spectrum region can either be:
Processed separately by the Master Section plug-ins. The non-selected spectrum can
either be bypassed or sent to the Master Section.
Bypassed. This removes the selected spectrum region from the Audio File. The non-
selected spectrum can either be routed to the Master Section input or the Master Section output.
Sent to Master Section output. The non-selected spectrum can either be bypassed
or sent to the Master Section input. If the latter is selected, it will be mixed with the
selected spectrum region at the Master Section output.
You can access this window by choosing Workspace > Specific tool windows > Spectrum Editor.
For an explanation of each parameter and interface feature, click on , or the 'What's this?'
question mark icon. For more information see Getting Help
Related topics
The Spectrum display
Spectrum Processing Modes
Spectrogram options
Spectrometer
11.3.2.1 Spectrum Processing Modes
When applying processing to a spectrum region in the Spectrum Editor you can use a variety
of different modes:
Damp
WaveLab 7
11.3 Specific tool windows
303
This is used to attenuate the level of a region. The Gain parameter specifies the level of the
attenuation (it is also possible to set positive gain values, i.e. to boost the frequencies in the
region). Three filter types are available to perform the damping:
Bandpass filter: All frequencies in the region are equally attenuated.
Low-pass filter: Higher frequencies in the region will be more attenuated.
High-pass filter: Lower frequencies in the region will be more attenuated.
For the Low- and High-pass filters, a low Filter steepness setting is normally used (around 6
to 18dB).
Blur peaks
This filter operation analyzes the region to find the frequencies with the highest level. The
level of these frequencies will be attenuated (or boosted) according to the set Gain value. If
the gain is negative, these frequencies will be "blurred" and disappear in the mix as a whole.
The purpose of the filter is to mask the loudest frequencies (e.g. it could be used to eliminate
a sudden burst of pitched but unwanted sound in the audio material, like acoustic feedback).
This mode works best with the Infinite steepness setting, which is automatically selected
when Blur peaks is used. You can, however, freely set any Filter steepness setting. The filter
type options are not available when this mode is selected.
Dispersion
This is a special filter that "smears" the dynamics and pitch of the region, without changing
the actual frequency content. This works best on lower frequencies, to mask the identity of
a signal without changing the frequency spectrum.
This mode works best with the Infinite steepness setting, which is automatically selected
when Dispersion is used. You can, however, freely set any Filter steepness setting. The filter
type options are not available when this mode is selected. Dispersion can also be used to
create special effects as it warps the sound in an unique way.
Fade Out
This can be used with any of the three filter types (Bandpass/Low-pass/High-pass). It gradually filters the frequencies in the region along the time axis (from nothing at the left edge of
the region, to maximum allowed by the gain parameter at the right edge), useful for gradually
removing frequencies from a region.
Fade In
This works like Fade out but inversed. It can also be used in conjunction with any of the three
filter types (Bandpass/Low-pass/High-pass).
Fade out then in
This is a mix of the two previous options; the filtering effect gradually fades out until the
middle of the region, then fades back in. It can also be used in conjunction with any of the
three filter types (Bandpass/Low-pass/High-pass).
Fade in then out
The inverse of the above. It can also be used in conjunction with any of the three filter types
(Bandpass/Low-pass/High-pass).
Related topics
WaveLab 7
304
Interface Elements
The Spectrum display
Spectrogram options
Spectrum editor
11.3.3 Basic Audio CD
This specific tool window allows you to burn basic "Red Book compatible" audio CDs. You
create your audio CD by adding Audio Files to create a list of tracks. Each track contains
a reference to the external Audio File. This means that you can save your Basic Audio CD
layout as its own session and continue editing individual tracks, for example. Once you are
happy with your CD layout you can choose to check the cd for conformity to the Red Book
standard, burn the CD or export it to the Audio Montage Workspace to edit further. You
can also choose to consolidate the Audio Files in the CD into a single Audio File with track
markers.
Adding tracks to your audio CD
To create tracks in your audio CD:
Drag Audio Files directly - drag Audio Files directly from your computer's file browser
into the window. You can also drag Audio Files from the Audio File Workspace by their
tab or document icon. This creates CD track markers at the file edges, quantized on
CD frame boundaries.
Drag an audio selection - dragging a selection (rather than a whole file) into the
basic audio CD creates a CD track with markers at the edges, but quantized on CD
frame boundaries, not necessarily exactly on the exact position of the selection edges.
Browse for Audio Files - select File > Add track(s)... from the Basic Audio CD
menu. You can then select Audio Files to insert in your CD.
Once you have added your tracks, information about each track is displayed. Each track also
has its marker information nested within it. To access this information click on the left most
arrow icon to expand the track view.
Using the track list
Once you have added a number of tracks to your audio CD you can use the track list to:
Audition playback - you can audition each track, with or without pre-roll, by clicking
on the leftmost icons. Click on
in the "audition" column to play the track from that
track's start marker with a pre-roll. Click on the right hand button to playback the track
exactly from the start marker position. You will notice a progress display appears at the
bottom of the window to show you the playback position/time and track number. You
can also start playback with or without a pre-roll from the tracks start or end markers
using the same controls. If the markers are not visible click on the track expand arrow
to reveal the track's markers.
WaveLab 7
11.3 Specific tool windows
305
Edit a track's start pause time - for all tracks except the first one you can adjust
the pause duration before the track begins playing. If the pause checkbox is not visible
click on the track expand arrow to reveal the track's markers and pause time setting.
Double click in the cell to edit the value.
Add ISRC code - add an ISRC code for a track by Select-clicking on the field under
the ISRC column.
Edit a track name - by Select-clicking on the name in the list. This also renames the
track's start marker labels.
Add a comment - add a comment to each track by Select-clicking to edit its value.
Editing track times - you cannot edit track start and end times directly in the track
listing. Instead, open the tracks accompanying Audio File via Edit > Edit Audio and
adjust the track start and track end marker locations in the main waveform display. The
start and end times will update accordingly.
Completing your Audio CD
In addition to editing via the track window you can also set overall CD settings via the Basic
Audio CD Settings dialog. You can use this dialog to add UPC/EAN codes and adjust
pauses and silences in your CD. The Master Section is never used to process the signal to
burn, unlike in the montage. This is why playback through the Master Section is an option
that is off by default.
When you are happy with your CD layout or you wish to further refine it further you can:
Check CD conformity - before burning your CD you can first check its Red Book
conformity by choosing Edit > Check CD conformity.
Write audio CD - choose to burn the CD using the Write Audio CD dialog.
Convert to Audio Montage - convert the CD layout into an audio montage for
further editing by choosing Edit > Convert to Audio Montage
For an explanation of each parameter and interface feature, click on , or the 'What's this?'
question mark icon. For more information see Getting Help
Related topics
Authoring CDs and DVDs
Basic Audio CD Settings
Write Audio CD
Select-clicking
WaveLab 7
306
Interface Elements
11.3.4 Scripting window (Audio File Workspace)
This window allows you to write and execute scripts in the Audio File Workspace.
The inbuilt text editor helps you when writing scripts by highlighting the different parts of
the script with colors, making it more readable. A script can also be written in another text
editor, and loaded via the File menu. To run a script, from within the script window choose
Functions > Execute script.
For a general description of scripting, see Scripting. For an overview of the scripting language, see ECMAScript Reference.
You can access this dialog from the Audio File Workspace via Workspace > Specific tool
windows > Script.
Note: To view trace or log messages when executing scripts that contain the logWindow() function, ensure that the Log window is visible and that it's warning filter buttons are selected.
For an explanation of each parameter and interface feature, click on , or the 'What's this?'
question mark icon. For more information see Getting Help
Related topics
Scripting
ECMAScript Reference
Log window
11.3.5 Metadata window
This specific tool window displays any Meta-data tags belonging to the currently active file.
This usually consists of a set of tags that describe the audio contents. For example it might
include the title of the track, the author, and the date it was created. This data will vary
depending on the file type, and not all file types store this information so it may be blank. To
edit the file's meta-data tags click anywhere in the window. This will open the corresponding
file attributes dialog.
You can access this dialog in the Audio File Workspace via Workspace > Specific tool
windows > Meta-Data.
For an explanation of each parameter and interface feature, click on , or the 'What's this?'
question mark icon. For more information see Getting Help
Related topics
Specific tool windows
11.3.6 Marker Window
The marker window is a specific tool window that allows you to create, edit and use markers
while working on an audio waveform.
WaveLab 7
11.3 Specific tool windows
307
From the Functions menu you can also access useful functions to convert marker types,
rename multiple markers and export the marker list as text.
The Marker list
The marker window contains a list of any markers placed in the currently active file along
with their corresponding details. Click on a column header to sort the list in ascending or
descending order based on the values in that column. You can also use the Filter menu to
toggle which types of markers are displayed in the list.
From this list of markers you can use the fields, controls and menus to:
Create a new marker at the playback head position - click on a marker icon (at
the top of the window) or choose a marker type from the Insert menu to drop a marker
at the current playhead location.
Create a pair of markers from a selection - make a selection in the waveform and
then click on a pair of marker icons (at the top of the window) or choose a "Create
region" command from the Insert menu to drop a pair of markers at either side of the
current selection.
Start playback - It is possible to start playback at the selected marker position, with
or without pre-roll, by clicking on the leftmost icons. Click on
in the "audition"
column to play the wave from that marker position with a pre-roll. Click on the right
hand button to play the wave exactly from the marker position.
Change marker types - You can change a marker type by (left) clicking on its icon
and choosing another marker type from the pop-up list that appears.
Edit a marker's name/time/comments - double click in a cell to edit a value (to
align the marker to an exact time, for instance). You can edit the name of the marker,
its time position and any comments.
Lock a marker's position - select the checkbox to lock the marker. This prevents it
from being accidentally dragged to a new position in the Waveform window.
For more information on using markers see Markers. For details on the different marker
types and their uses see Marker types. Note that there are more marker features available in
the Montage version compared to the Audio File version. See "Using markers in the Audio
Montage Workspace" in Markers for more details.
You can access this specific tool window within the Audio Files and Audio Montage
Workspaces via Workspace > Specific tool windows > Markers.
For an explanation of each parameter and interface feature, click on , or the 'What's this?'
question mark icon. For more information see Getting Help
Related topics
Specific tool windows
Markers
WaveLab 7
308
Interface Elements
Marker types
Convert marker type
Text format
11.3.7 Sample attributes
This dialog allows you to define settings for an audio sample before loading it into a hardware
or software sampler.
The settings do not process the sample in any way, they just give the file properties that the
receiving sampler can use. This includes information about the pitch of the sample (which
can be detected automatically by WaveLab), the key range that the sample should span, and
the velocity range to occupy. For WAV and AIFF files, this information is stored in the file's
header.
By default, there are no sample attributes in an Audio File. Therefore you must explicitly create
this information by clicking on the "Create" button first. This dialog is useful if your sampler
can take advantage of these additional tags. If supported by your sampler, it can save you
time by allowing you to both edit and define a samples properties from within WaveLab.
You can access this dialog via Workspace > Specific tool windows > Sample Attributes....
For an explanation of each parameter and interface feature, click on , or the 'What's this?'
question mark icon. For more information see Getting Help
Related topics
11.3.8 Error detection and correction
This specific tool window allows you to search for unwanted clicks and digital artifacts in an
Audio File. Several detection and restoration methods are available. You can detect, mark
and name, jump to, play back and remove individual audio errors.
The settings for error detection and correction are organized within the following groups of
controls:
Detection tab - choose the method used to detect any errors. Each different method
has its own settings to determine when it will detect an error. Click Detection 1 and 2
will search for clicks in certain frequency ranges while Digital Click Detection looks for
clicks that are caused by clicks typical to digital errors.
Correction tab - specify the method used to correct any errors.
Search Area tab - specify the range of audio you wish to search for errors.
Options tab - this provides a range of preferences for playing back, viewing, and
marking any errors found.
Browse & Correct panel - step through your defined search region detecting each
error in turn. You can choose to correct any errors or mark them for later correction.
There are controls to skip between error markers and make fine adjustments to the
WaveLab 7
11.3 Specific tool windows
309
selection. You can also automatically detect and correct all marked errors in the search
region.
Strategies to detect and correct errors
There are several strategies that you can employ when detecting and correcting errors:
Define an audio selection where you have identified an error, then click "Correct", or
"Mark for subsequent correction".
Use the function "Detect next error" to let WaveLab automatically find the next error,
and then click "Correct", or "Mark for subsequent correction".
Use the function "Detect all errors" to let WaveLab automatically find all errors in the
predefined range. Then browse the marked errors, removing or adjusting each audio
range in turn, and click "Correct" to correct any specific errors, or you can use the
option "Correct all".
You can access this dialog by choosing Workspace > Specific tool windows > Error
Correction.
For an explanation of each parameter and interface feature, click on , or the 'What's this?'
question mark icon. For more information see Getting Help
Related topics
Marker types
11.3.9 Master Project
This Specific tool window allows you to access and open all the files related to a project from
one place: the Master Project window.
If you are working on a large project that consists of several montage files, Audio Files and
editing notes (all the files belonging to an album project, for example), you may find it useful
to open them from this window. You can organize the files in folders and sub-folders as you
wish, with each file annotated with a note using the text editor provided.
You can place documents from any 'draggable' location into the Master Project (and of
course, drag files from the Master Project back to external locations). Each file is listed
with the pathname of the enclosing Folder and an editable Comment field. As in a standard
file system, you can't put two files with the same name in the same folder.
The entire contents of a Master Project can also be archived to CD/DVD via a dedicated
command. You can access this feature from the Master Project window via File > Add to
Data CD/DVD..., which is available if the Master Project has been saved to file once (i.e. it
is not untitled).
Only one Master Project can be opened at a time, but it can appear as a tool window in each
Workspace. In other words, there is a single content that can be visualized independently
in various windows. These windows may be docked or floated.
WaveLab 7
310
Interface Elements
You can access this Specific tool window from any Workspace via Workspace > Specific
tool windows > Master Project.
For an explanation of each parameter and interface feature, click on , or the 'What's this?'
question mark icon. For more information see Getting Help
Related topics
Dragging operations
Recently used files
11.3.10
Focused Clip window
The Focused Clip window is an accordion control that contains some sophisticated editing
commands. Each collapsible panel can be expanded by clicking on its title and allows you
to access a range of tools for working with the selected or "focused" Clip.
Using the Focused Clip window
To use the Focused Clip window you first need to select a Clip. Once you have selected a
Clip with your cursor its name will highlight in red. You can now choose one of the Focused
Clip accordion's tabs. The accordion will open to reveal options for that particular pane's
selection of editing shortcuts and tools. There are a number of panes including:
Edit - provides you with a range of common playback shortcuts and editing tools for
working with Clips.
Cue Point - a cue point is a defined position marker that belongs to a Clip. It helps to
align Clips together by making Clips snap to other Clips at the cue point position. Cue
points are displayed as dotted vertical lines. This pane provides you with a number of
shortcuts for creating and working with Cue Points.
Envelope - allows you to access a number of controls for editing and working with a
Clip's different envelopes.
Fade-in - provides you with a range of tools for adjusting a Clip's Fade-in curve.
Fade-out - provides you with a range of tools for adjusting a Clip's Fade-out curve.
Colors - up to 20 colors may be assigned to help distinguish particular Clips visually.
Select a Clip then click on a color. Custom colors can be defined with great subtlety
from Options > Colors... Select the Custom color to be defined, then the parts to which
it is applied, then define the color value using the color wheel (or type a set of RGB Red, Green, Blue values). See Audio Montage Colors for more information.
When you choose a different Clip the properties in the Focused Clip window will update.
So for example, if you select "Envelope" the corresponding controls will update to reflect the
selected Clip's envelope information.
WaveLab 7
11.3 Specific tool windows
311
The Focused Clip window can be docked or floated. You can reveal or hide the focused Clip
window in the Audio Montage Workspace via Workspace > Specific tool windows >
Focused clip.
For an explanation of each parameter and interface feature, click on , or the 'What's this?'
question mark icon. For more information see Getting Help
Related topics
Clip
Audio Streaming Settings
Customize Commands
Audio Montage Colors
11.3.11
Snapshots
This dialog enables you to save a number of "views" of your montage. You can then recall a
particular view or snapshot at any time.
When you save a snapshot you capture the current zoom factor, the current cursor position,
the current scroll position and the current time range displayed. You can name each snapshot
and update an existing snapshot too. To recall a snapshot, just click on its title in the list.
This restores all of its view settings. You can also choose to recall all or just one of its view
properties by clicking the appropriate icon.
You can access this dialog in the Audio Montage Workspace via Workspace > Specific
tool windows > Snapshots.
For an explanation of each parameter and interface feature, click on , or the 'What's this?'
question mark icon. For more information see Getting Help
Related topics
Audio Montages
11.3.12
File
This specific tool window helps you to manage files that are used in the current Audio Montage.
It displays all current files that are being used by Clips in the current montage, along with their
location, size and last modified date. In addition a number of file operations are available:
add one or more Audio Files to a montage, this will open the Insert Audio Files window
when one than one file is selected
replace individual files in a montage (this will update any Clip references)
rename a file (this updates all internal Clip references)
WaveLab 7
312
Interface Elements
select Clips that are referenced by a specific file
open a file in the Audio File Workspace, and view the file in your computer's file browser.
This window is a useful tool to use when constructing and editing your montage.
You can access this dialog in the Audio Montage Workspace by choosing Workspace >
Specific tool windows > Files.
For an explanation of each parameter and interface feature, click on , or the 'What's this?'
question mark icon. For more information see Getting Help
Related topics
Specific tool windows
Insert Audio Files
11.3.13
Zoom
This specific tool window displays a magnified view of the selected track and allows you to
accurately adjust the cross fade point for two adjacent Clips.
You can adjust the zoom level of the selected track, manually shift the Clip's position or
allow WaveLab to find the best location to begin a cross fade between two Clips. You can
adjust the amount that WaveLab will search for the best cross fade position to avoid phase
cancellation issues, and also view the envelope points of the Clips. Mouse operations are
identical to those in the main Clip view.
You can access this window in the Audio Montage Workspace via Workspace > Specific
tool windows > Zoom.
For an explanation of each parameter and interface feature, click on , or the 'What's this?'
question mark icon. For more information see Getting Help
Related topics
Audio Montages
11.3.14
CD
This specific tool window brings together all the functions for creating an audio CD or DVD-A
within WaveLab.
It displays a list of CD tracks along with information about each track. You can edit each track
and the CD's playback properties as well as access functions to check its conformity to Red
Book standards, add and edit CD-text, add UPC/EAN codes, generate a CD report and
burn the CD. There are also controls to preview skipping between each track and a number
of other options including the ability to choose the "Audio in Pause" mode to determine
whether gaps between track markers are replaced with silence (the normal default) or if they
contain sound.
WaveLab 7
11.3 Specific tool windows
313
Adding tracks
To create an audio CD in WaveLab you must at least have a CD start and end marker pair.
You can generate these automatically from audio Clips in the montage using the CD Wizard
or by adding track markers manually.For more information on creating a CD or DVD-A see
Authoring CDs and DVDs.
The Track list
Once you have created one or more tracks, the CD window displays a list of all tracks in
the currently active montage along with their corresponding properties. From this list of CD
tracks you can use the fields, controls and menus to:
Audition playback - It is possible to audition playback at the selected track's start
time, with or without pre-roll, by clicking on the leftmost icons. Click on the left hand
button
in the "audition" column to play the track from its start time with a pre-roll.
Click on the right hand button to play the track exactly from its start time.
Edit a tracks's name - You can add/edit a name for each track. Double click in a cell
to edit. Note that to change the track name is to indirectly edit the marker name.
Edit a track's start/end time - You can edit the start and end time for each track.
This is the same as moving the track markers physically but can be done with more
precision. Double-click in a cell to edit.
Pre-gap time - This displays the gap between the CD track start marker and where
the first track's audio actually begins. It can only be edited by physically moving the CD
track start marker.
Post-gap time - This displays the gap between the end of the audio of the CD's last
track and the CD track end marker. It can only be edited by physically moving the CD
track end marker.
Copy protection
- Select the checkbox to include a copy protection flag with the
track. This may prevent it from later being imported by software that recognises this
flag.
Emphasis
- This setting is used to indicate if the track was recorded with emphasis
or not. Please note that this does not apply/remove emphasis from the audio, it is just
an indicator as to how the file was created. Normally it is left off.
ISRC Code - This allows you to enter an optional International Standard Recording
Code. Double-click in a cell to add/edit a code.
CD-Text - You can optionally enter CD-Text information for each track and the entire
CD/DVD-A. Double clicking a cell will open the CD Text Editor.
Add/Edit a tracks's comments - You can add/edit text comments for a track. Double
click in a cell to edit. Note that this text comment is for reference only: nothing is burnt
on CD.
WaveLab 7
314
Interface Elements
Note that CD tracks can be reorderd by dragging them into new positons: this means Clips
and markers are moved accordingly.
For an explanation of each parameter and interface feature, click on , or the 'What's this?'
question mark icon. For more information see Getting Help
Related topics
Specific tool windows
Authoring CDs and DVDs
Write Audio CD
CD Wizard
CD Text Editor
Audio CD Report
CD Pre-emphasis
Red Book CD-DA
CD Text
ISRC
UPC/EAN
11.3.15
Clips
This specific tool window contains a list of any Clips placed in the currently active montage
file together with their corresponding details.
Click on a column header to sort the list in ascending or descending order based on the
values in that column. Clicking on any row of the list will move the main window's view to
show the selected Clip. To change a value, double click in a cell to begin editing (to align
the Clip to an exact time, for instance). Clips may be dragged into new positions in the list.
From this list of Clips you can use the input fields and controls to:
Start playback - It is possible to start playback at the selected Clip position, with
or without pre-roll, by clicking on the leftmost icons. Click on
in the "audition"
column to play the montage from that Clip's position with a pre-roll. Click on the right
hand button to playback the montage exactly from the start of the Clip.
Edit a Clips's name/start/end/length/comments - edit the name of the Clip, its
start/end time position and any comments.
Lock a Clips's position - select the checkbox to lock the Clip. This prevents it from
being accidentally edited or dragged to a new position.
Change Gain - use this control to increase/decrease the gain of the Clip. Double click
in the cell to edit the value.
Mute - select this to mute the Clip. Its color changes in the track view and it is no
longer audible during playback.
WaveLab 7
11.3 Specific tool windows
315
A wide range of Clip selection features, Clip functions, and Clip display options are available
from the Clips menu. Use "What's This?" help for information on individual menu entries.
You can access this window in the Audio Montage Workspace via Workspace > Specific
tool windows > Clips.
For an explanation of each parameter and interface feature, click on , or the 'What's this?'
question mark icon. For more information see Getting Help
Related topics
Specific tool windows
Audio Montages
Clip
11.3.16
Notes
This specific tool window allows you to keep notes about the current Audio Montage session.
You can type into the window and use the standard HTML text editor controls to format your
text, add images, hyperlinks and lists. These notes are saved along with the Audio Montage
file.
You can access this dialog in the Audio Montage Workspace via Workspace > Specific
tool windows > Notes.
For an explanation of each parameter and interface feature, click on , or the 'What's this?'
question mark icon. For more information see Getting Help
Related topics
Specific tool windows
11.3.17
Effects
This specific tool window allows you to add VST effect plug-ins, both to individual Clips
and tracks. The difference between Clip effects and track effects are that Clip effects affect
individual Clips only, whereas track effects affect all Clips on a track.
Each independent Clip and/or audio track in the Montage can be independently processed
by up to ten VST effect plug-ins. Effects are configured either as Inserts, when all sound is
processed by the effect, or as Send effects where the balance between the unprocessed
sound and the effect send level can be adjusted or controlled by effect envelope curves
(clip effects only). Note that not all effects are capable of "Send", and if this feature is not
available, it is disabled.
The window only shows the effects of the focused Clip, or the focused track according to
the active mode. Each plugin and track can be understood as being associated with a small
"Master Section". A plug-in can be inserted and sorted, and you double-click on an effect
to Edit it. When you close an effect window, its parameters are saved into the montage and
it can be be undone if necessary. Use "What's This?" help on the column headers for more
details.
WaveLab 7
316
Interface Elements
You can access this dialog in the Audio Montage Workspace via Workspace > Specific
tool windows > Effects.
For an explanation of each parameter and interface feature, click on , or the 'What's this?'
question mark icon. For more information see Getting Help
Related topics
Audio Montages
11.3.18
DVD-Audio
This specific tool window allows you to author a DVD-Audio disk from a collection of audio
montages.
You can add your finished audio montages into this window, check the DVD-Audio layout for
conformity and output a DVD-Audio disk all from this window. Note: All included montages
need to be in DVD-A mode (this can be set via Audio Montage properties).
Although DVD-A has a different specification from an Audio CD, its track concept makes
is similair to an Audio CD - this is why creating a DVD-A is almost like creating a CD with
WaveLab's Audio Montage. It is worth noting that throughout WaveLab, where "CD" is
mentioned (for example, in messages), one can usually substitute "DVD-A".
To create a DVD-Audio disk, follow these basic steps:
Create an audio montage - you need at least one audio montage in order to create
a DVD-A. You can import any currently open ones or add them as ∗.mon files. Note that
the Audio Montage must have DVD tracks defined with red (track) markers.
Add Montage(s) - choose File > Add Audio Montage(s) from the DVD-Audio win-
dow to add one or more montages to your DVD-Audio. Each montage will then be
displayed along with its details in the DVD-Audio window. You can drag the montages
vertically to determine the track order. Montages can also be added by dragging montage files directly into the DVD Audio track listing window.
Choose Options - from the DVD-Audio window choose Options > Options... to
open DVD-Audio options dialog. You can then define settings for your DVD-A including
its name and volume information details, whether it will be played back on PAL or NTSC,
and the duration and effects/transitions that included images will use. Images to be
included can be laid out in a picture track in your audio montage or a single default
image can be chosen. If a default image is used it will displayed at the beginning of
each montage
Check and burn your DVD-A - once you are finished laying out your DVD-A and
choosing any options, you can check that it conforms to DVD-Audio specifications
by choosing Edit > Check DVD-Audio conformity.... If everything is OK, choose
Edit > Burn DVD-Audio... to open the DVD-Audio Creation dialog where you can
then render out the disk as a collection of files ready for burning. Once these files are
successfully outputted the Write Data CD/DVD dialog will open automatically allowing
you to burn your DVD-Audio files to an optical DVD.
WaveLab 7
11.3 Specific tool windows
317
Note that WaveLab automatically creates some basic DVD menus to access the audio tracks
from the DVD-Player.
For more information on authoring DVD-Audio disk see Authoring CDs and DVDs.
You can access this dialog in the Audio Montage Workspace via Workspace > Specific
tool windows > DVD-Audio.
For an explanation of each parameter and interface feature, click on , or the 'What's this?'
question mark icon. For more information see Getting Help
Related topics
Audio Montages
DVD-Audio Creation
DVD-Audio options
Write Data CD/DVD
11.3.19
Scripting window (Audio Montage Workspace)
This window allows you to write and execute scripts in the Audio Montage Workspace.
The inbuilt text editor helps you when writing scripts by highlighting the different parts of
the script with colors, making it more readable. A script can also be written in another text
editor, and loaded via the File menu. To run a script, from within the script window choose
Functions > Execute script.
For a general description of scripting, see Scripting. For an overview of the scripting language, see ECMAScript Reference.
You can access this dialog from the Audio Montage Workspace via Workspace > Specific
tool windows > Script.
Note: To view trace or log messages when executing scripts that contain the logWindow() function, ensure that the Log window is visible and that it's warning filter buttons are selected.
For an explanation of each parameter and interface feature, click on , or the 'What's this?'
question mark icon. For more information see Getting Help
Related topics
Scripting
ECMAScript Reference
Log window
11.3.20
History
This specific tool window allows you to view a history of all your recent editing operations.
You can revert the current montage to a previous state by selecting the operation you want
to return to and double clicking on it. You can then use the redo command (Edit > Redo) to
WaveLab 7
318
Interface Elements
return to any state. Use the history menu options (Edit > History >) to undo all operations,
redo all operations, or clear the history.
There are a couple of history options available in the Audio Montage preferences window.
You can choose to empty the history each time you save a montage file and also to group
similar types of sequential operations into a single operation. Both of these options enable
you to use less memory when storing the operation history.
You can access this window in the Audio Montage Workspace via Workspace > Specific
tool windows > History.
For an explanation of each parameter and interface feature, click on , or the 'What's this?'
question mark icon. For more information see Getting Help
Related topics
Audio Montage Preferences
11.3.21
Navigator
This specific tool window displays a representative view of the entire active montage and
enables you to quickly navigate around it.
Each track is represented by a horizontal colored block. By default, stereo tracks are dark
blue and monotracks are purple or pink (any custom colors you set for a track or via the
Groups window are also displayed).
The visible Workspace is shown by a surrounding black rectangle. Dragging this rectangle
scrolls the main montage window, enabling you to easily navigate to a location in your montage. You can also resize the rectangle vertically and horizontally to adjust the zoom setting
of the active window. This window can be useful when you have a large montage with many
Clips and tracks.
Left click on a Clip block to zoom on it
Right click anywhere to completely zoom out
You can access this window in the Audio Montage Workspace by choosing Workspace >
Specific tool windows > Navigator.
For an explanation of each parameter and interface feature, click on , or the 'What's this?'
question mark icon. For more information see Getting Help
Related topics
Audio Montages
Groups
11.3.22
Groups
This specific tool window displays a list of Groups within the current Audio Montage. Groups
are a selection of Clips that you can quickly re-select via the Groups window. You can group
WaveLab 7
11.3 Specific tool windows
319
a number of Clips and nest Groups inside each other. It is also possible to disable individual
Groups and color Groups so you can identify them easily.
Grouping Clips
To create a Group from a number of Clips:
1. Select the Clips you want to group.
2. Make sure you have the Groups window displayed.
3. Select "Group selected clips" from the drop down menu or click the Group icon.
4. Enter a name for the Group in the dialog that appears and click OK.
The new Group appears in the Group list. All Clips included in the Group will also have the
name of the Group prepended to the Clip names in each track. Clicking on a Group in the
Groups window will select all the Clips in your Montage so you can edit them together.
Adding Clips to an existing Group
If you already have a Group, and want to add one or several more Clips to it:
1. Select the Clips you want to add.
2. In the Groups view, select "Group selected clips", or click the corresponding icon.
3. In the dialog that appears, select the Group to which you want to add the Clips.
4. Click OK.
Removing Groups
1. Select the Group by clicking on its name in the Groups view list.
2. Pull down the Grouping menu and select "Remove selected group". The Group is
removed (the Clips are not affected).
Using Groups
There are some important things to remember when using Groups:
A Clip cannot be part of more than one Group. If you add a Clip to a Group, it is
automatically removed from any other Group it is part of.
It is possible to create nested Groups, by adding a Group to another Group.
You can temporarily "turn off" a Group by deactivating the checkbox to the left of a
Group in the list. When a Group is deactivated, you can move individual Clips in the
Group, as if they were not grouped.
You can select a specific color for a Group to make it easy to discern it in the track view.
WaveLab 7
320
Interface Elements
Double-click to rename a Group
You can nest a Group inside another Group by dragging it
The Render option is available to render all Groups as individual files (Render dialog)
You can access this window in the Audio Montage Workspace via Workspace > Specific
tool windows > Groups.
For an explanation of each parameter and interface feature, click on , or the 'What's this?'
question mark icon. For more information see Getting Help
Related topics
Specific tool windows
Render Montage window
WaveLab 7
Chapter 12
Audio Plug-ins
Steinberg created Virtual Studio Technology (VST) to allow effect plug-ins to be integrated
with audio editors (such as WaveLab). VST uses Digital Signal Processing (DSP) to closely
simulate in software the effects of familiar recording studio hardware. A vast number of plugins are available - from freeware to high-end commercial products - and can greatly extend
the functionality of programs such as WaveLab.
The order of processing is significant. You can change the order in which effects are processed by moving the effects icons
by dragging them between slots. See Dragging
operations for more information.
WaveLab provides slots for up to ten plug-ins.
The more complex plug-ins provide a custom GUI, often displaying controls similar to the
physical switches and knobs on audio hardware; other plug-ins rely on the host application
for their UI.
The following plug-ins are supplied with WaveLab:
ASIO plug-ins
Audio Input
Using External effects
Legacy plug-ins
Under Windows, a set of plug-ins is provided for compatibility with audio projects that referenced these effects when using earlier versions of WaveLab. An Audio Montage which
referenced these plug-ins would otherwise require cumbersome user intervention to open,
for instance. Their use with new audio projects is not recommended and they are not documented.
Sonnox Ltd VST-3 plug-ins
Sonnox DeClicker
Sonnox DeNoiser
322
Audio Plug-ins
Sonnox DeBuzzer
Steinberg VST-3 plug-ins
Steinberg Autopan
Steinberg Chorus
Steinberg Compressor
Steinberg DeEsser
Steinberg Mono Delay
Steinberg Distortion
Steinberg Dual Filter
Steinberg Envelope Shaper
Steinberg Expander
Steinberg Gate
Steinberg GEQ-10/GEQ-30
Steinberg Limiter
Steinberg Maximizer
Steinberg Mix 6 to 2
Steinberg Mix 8 to 2
Steinberg Mono to Stereo
Steinberg Multiband Compressor
Steinberg Octaver
Steinberg Pingpong Delay
Steinberg PostFilter
Steinberg Roomworks
Steinberg Roomworks SE
Stereo Delay
Steinberg Stereo Enhancer
Steinberg Studio Chorus
Steinberg Studio EQ
Steinberg Test Generator
UV22HR Dithering
Steinberg Vintage Compressor
Steinberg VST Dynamics
Built-in plug-ins
Crystal Resampler
WaveLab 7
12.1 Audio Input
323
Leveler
Leveler Multi
Peak Master
Silence
Stereo Expander
Dithering plug-ins
Internal Dithering
12.1
Audio Input
The Audio Input is a special Master Section plug-in that allows you to render a signal coming
in to a sound card's input(s) together with any Master Section effects. This signal can be
anything your sound card accepts, for example a feed from a mixer, a recorder or a microphone.
By default, this plug-in is located in the ASIO sub-menu of the Master Section effects. An
ASIO driver must be used, and only one instance of this plug-in is allowed in the Master
Section plug-in chain.
To use the External gear plug-in, proceed as follows:
1. Set the Audio Device to ASIO
You can access this dialog from Workspaces that support the recording of Audio Files by
choosing Options > Audio Streaming Settings.... Set the Audio Device to "ASIO".
2. Assign the Device Input channels
From the Recording tab, select the channels to be used for device input and name them for
use in WaveLab. Note that you only have to set the ASIO inputs – the ASIO outputs are not
relevant for Audio Input. Press "OK" when you are done.
3. Set options for the Audio Input plug-in
Click in the top Master Section effect slot and select "Audio Input" from the ASIO plug-in
sub-menu. The Audio Input control panel opens and you can set the following options:
"Num.Inputs" Using the slider, set this to the number of inputs assigned in step 2.
"Samp.Rate" Using the slider, set this to the sampling rate required (from 11025 to
19200Hz).
4. Monitor the Audio input
WaveLab 7
324
Audio Plug-ins
Press Play on the transport. Normal wave playback does not happen (the cursor does not
move), but the Play button is lit and you can now monitor the input source. Pressing Stop
ends input monitoring.
If you change the settings in the control panel, press Stop and restart playback to apply
them. Note that if you are using any non-multichannel plug-ins in the Master Section
effect chain, these are limited to two channels. You also have to match the number
of inputs in the ASIO Connections dialog to the number of inputs selected here - a
warning message appears if they do not match.
Click the Render button. A dialog appears allowing you to select a name, an audio
format and a location for the file to be rendered. When you click OK, recording (or
rendering) starts, recording the external input from the output of the Master Section,
including all real-time processing. You can monitor the recording as it happens.
Click Stop on the transport to stop the recording/rendering.
Related topics
Master Section
Audio Streaming Settings
How do I add effects?
Presets
12.2
Using External effects
The External Gear Master Section plug-in allows you to process Audio Files using external
hardware processors. One or more ASIO outputs are used to send the audio signal to your
processor, and corresponding ASIO inputs are used to return the signal from the external
processor.
By default, this plug-in is located in the ASIO sub-menu of the Master Section effects. An
ASIO driver must be used, and only one instance of this plug-in is allowed in the Master
Section plug-in chain.
To use the External Gear plug-in, proceed as follows:
1. Set the Audio Device to ASIO
You can access this dialog from Workspaces that support the playback of Audio Files by
choosing Options > Audio Streaming Settings.... Set the Audio Device to "ASIO".
2. Assign the output and input channels
WaveLab 7
12.2 Using External effects
325
From the External gear plug-in tab, select the channels to be used for device output (to gear)
and for device input (from gear). These should normally be different I/O channels than the
ones you use for playback/recording. The number of available outputs in this plug-in equals
the number of inputs (up to 8). Press "OK" when you are done.
3. Set options for the External Gear plug-in
Click in a Master Section effect slot and select "External Gear" from the ASIO plug-in submenu. The External Gear control panel opens and you can set the following options:
"Num.Outputs" Normally the number of outputs is the same as the number of inputs
(the "As Inputs" option). You can however use a mono in/stereo out configuration in
which case, set this parameter to "2" with the slider.
"Latency" External gear may introduce latency. WaveLab can automatically compensate
for this if you select "Auto" (only active during rendering), or you can set this latency
compensation yourself (up to 2000 milliseconds). The latency introduced by the ASIO
driver is automatically taken into account by WaveLab.
"Send level" The Send level should normally be set to 0 dB, but you can adjust the input
level on the external effect, if necessary.
4. Process the signal
Now you can process a signal through the external processor, just as if it was a software
plug-in effect. If you render a file using the External Gear plug-in, playback is not available
during the rendering.
Related topics
Master Section
Audio Streaming Settings
How do I add effects?
Presets
WaveLab 7
326
Audio Plug-ins
12.3
Sonnox DeClicker
Sonnox DeClicker is one of three plug-ins that form the Sonnox Restoration Toolkit. The
tools are not just for restoring old material, but also for removing the clicks, pops, buzzes and
background noise that can sometimes accidentally occur in new recordings.
A note on Touch Pad controls
Several controls in these plug-ins are Touch Pads. These controls give a clear display of the
numeric value of a control, and respond to the following actions:
Left-Click and drag up/down: Increase/decrease the value
Right-Click and drag up/down: Fine adjustment of value
Double Click: Directly edit value
Shift + Left-Click and drag up/down: Fine adjustment of value
Control + Left-Click (Windows), Cmd + Click (Mac): Set to default
Additionally, for all controls (including faders and knobs, not just Touch Pads)
Control + Left-Click (Windows), Cmd + Click (Mac): Set to default
DeClicker screen controls
Sonnox Menu Options Button
Clicking this button brings down a menu of options and preferences. It allows choice
of:
the input/output meter clip light hold duration (permanent, 2s, 5s), and
the splash screen to examine the version number and build date.
WaveLab 7
12.3 Sonnox DeClicker
327
Input Level Meter
The Input Meter is designed to give exactly 1dB per LED for the top 18dB of dynamic
range, and 2dB per LED thereafter. This gives a clear and intuitive impression of the
working headroom.
Input Gain Trim Touch Pad (dB)
This allows you to adjust the input signal level by up to ±12dB.
Sensitivity Fader and Touch Pad (%) (Pop; Click; Crackle)
This controls the sensitivity of the detection circuits. Fully sensitive might allow the
detection circuit to react to low level signals and possibly mis-classify programme as
pops or clicks. Stronger pops and clicks will require a less sensitive setting.
In Button (Pop; Click; Crackle)
This button enables the pop, click or crackle removal processing. It is important to
note that with this button "off" (i.e. the repair processing is disabled), the pop, click or
crackle detection circuit is still enabled and the detect display will still show the degree
of event detection.
Detect Meter Display (Pop; Click; Crackle)
The Detect meter display combines two indications. The main rising column indicates
the sum of the energy of events that have been detected. With the "In" button deselected (i.e. the repair circuit disabled), this column is colored orange/red. With the
repair circuit active the column is colored blue. The bottom segment of the meter is an
indication of each individual detected event.
Output Level Meter (dB)
The output meter is designed to give exactly 1dB per LED for the top 18dB of dynamic
range, and 2dB per LED thereafter. There is a peak-hold feature that holds the highest
peak, helping to give a better impression of the working dynamic range.
Output Gain Trim Touch Pad (dB)
This allows you to reduce the output level by up to 12dB. Dithering is applied after
output gain control, so it may be necessary to reduce this value by a small amount to
avoid clipping.
Quick-Start Guide for the De-Clicker
The De-Clicker is very simple and intuitive to use. It is generally wise to repair the larger and
more energetic events first.
1. If there are large displacement events in the programme material, enable the DePop
section and raise the sensitivity fader until the largest events are detected and repaired.
2. For clicks, enable that section and raise the sensitivity fader until they are detected and
repaired.
3. Finally if there is crackle left, enable that section and raise its fader to remove the crackle.
Tip: There is necessarily some degree of overlap in the detection circuits of clicks and
crackle. Decreasing the DeClick sensitivity might increase the apparent detection of crackle;
and increasing the DeClick sensitivity might indicate less crackle. Best results are likely if
the two controls are balanced.
WaveLab 7
328
Audio Plug-ins
Related topics
Sonnox DeBuzzer
Sonnox DeNoiser
Audio Plug-ins
Master Section
How do I add effects?
Presets
12.4
Sonnox DeNoiser
Sonnox DeNoiser is one of three plug-ins that form the Sonnox Restoration Toolkit. The tools
are not just for restoring old material, but also for removing the clicks, pops, buzzes and
background noise that can sometimes accidentally occur in new recordings.
A note on Touch Pad controls
Several controls in these plug-ins are Touch Pads. These controls give a clear display of the
numerical value of a control, and respond to the following actions:
Left-Click and drag up/down: Increase/decrease the value
Right-Click and drag up/down: Fine adjustment of value
Double Click: Directly edit value
Shift + Left-Click and drag up/down: Fine adjustment of value
Control + Left-Click (Windows) Cmd + Click (Mac): Set to default
For circular controls:
WaveLab 7
12.4 Sonnox DeNoiser
329
the default action is Circular mode, but if the Alt key is held, the action is Linear mode.
Additionally, for all controls (including faders and knobs, not just Touch Pads)
Control + Left-Click (Windows), Cmd + Click (Mac): Set to default
DeNoiser screen controls
Sonnox Menu Options Button
Clicking this button brings down a menu of options and preferences. It allows choice
of:
the input/output meter clip light hold duration (permanent, 2s, 5s), and
the splash screen to view the version number and build date.
Graphical Display
The graphical display shows the real-time frequency/gain curve of the programme material. It is graduated from 0 to 20kHz and from 0 to -144dB. The yellow line is the
calculated noise spectrum level, and in Auto mode will continually follow the noise in
real time. Everything below this contour is assumed to be noise, and everything above
the line is programme signal.
Input Level Meter
The Input Meter is designed to give exactly 1dB per LED for the top 18dB of dynamic
range, and 2dB per LED thereafter. This gives a clear and intuitive impression of the
working headroom.
Input Gain Trim Touch Pad (dB)
This allows you to adjust the input signal level by up to ±12dB.
Sensitivity Fader and Trim Touch Pad (dB)
The sensitivity fader defaults to 0.0dB, which is the midpoint of its travel. It will adjust
the sensitivity of the noise detection circuit, and the visible effect of this is to move
the yellow noise contour line up and down. The sensitivity level can be changed by
up to ±18dB. To reduce the sensitivity and make the De-Noiser less reactive to the
noise component, move the fader down. The noise contour will displace downwards,
showing less noise component in the detection circuit. If the sensitivity is set too low,
little noise reduction will occur. Conversely, to increase the sensitivity and make the DeNoiser more reactive to the noise component, move the fader up. The noise contour will
displace upwards, showing more noise component in the detection circuit. The default
setting is for the noise contour to lie just below the peaks of the signal. Making the
detection circuit more sensitive to noise will decrease the signal component, possibly
pushing the contour up towards the peaks of the signal. In this case, it is likely that
processing artifacts will be heard, as the noise removal circuit will be acting on the
signal component as well as the noise component.
Adapt Button
This button enables Adapt mode for the noise detection circuit. In this mode the noise
fingerprint is continually calculated and updated. This mode is useful for material with
a time-varying noise component.
WaveLab 7
330
Audio Plug-ins
Freeze Button
This button enables Freeze mode for the noise detection circuit. In this mode the noise
fingerprint is calculated once (when the Freeze button is pressed). This mode is useful
for material with a constant noise component, and would typically be sampled when
the signal is absent and only the noise component is present.
In Button
This button enables the noise removal processing. It allows glitch-less comparisons
with and without the noise reduction. It is important to note that with this button "off"
(i.e. the noise removal processing is disabled), the noise detection circuit is still enabled
and the graphical display will still show the real-time frequency display and the noise
contour line.
HF Limit Knob and Touch Pad (Hz)
This displays and controls the frequency beyond which the attenuation is applied nondynamically. Scrolling the frequency down from the default of 22kHz will show a red
region in the frequency display that has a fixed attenuation. To the left of the HF Limit
line the noise removal circuit behaves as normal. To the right the signal is attenuated
by a fixed amount set by the attenuation fader. This mode is useful for band-limited
programme material. A good example is a low bitrate encoded signal, which might be
band limited to 12kHz. Due to the sharp discontinuity, the noise removal circuit can
introduce audible artifacts around the band limit, and setting the HF Limit frequency
slightly lower than the band limit will remove those artifacts.
Attenuation Fader and Touch Pad (dB)
The attenuation fader and touch pad determine the level of attenuation that the noise
removal circuit will apply in the range 0 to -18 dB. Generally this should be set so that
the noise reduction is pleasing. Excessive use of attenuation can degrade the signal
unnecessarily.
Output Level Meter (dB)
The output meter is designed to give exactly 1dB per LED for the top 18dB of dynamic
range, and 2dB per LED thereafter. There is a peak-hold feature that holds the highest
peak, helping to give a better impression of the working dynamic range.
Output Gain Trim Touch Pad (dB)
This allows you to reduce the output level by up to 12dB. Dithering is applied after
output gain control, so it may be necessary to reduce this value by a small amount to
avoid clipping.
Quick-Start Guide for the De-Noiser
1. Start with Sensitivity and Attenuation controls at the default positions (0.0dB and 4.5dB respectively).
2. Select Auto mode if the noise varies in time; select freeze for a defined and static noise
fingerprint.
3. Adjust the Sensitivity to find the correct balance between being too low (not enough
noise is removed) and too high (too much signal is removed).
WaveLab 7
12.5 Sonnox DeBuzzer
331
4. Adjust the Attenuation to find the most pleasing audio; too much attenuation can impair
the audio, either by reducing brightness or by introducing low-level distortion.
Tip: You might be working with bandwidth-limited material, possibly as a result of samplerate
conversion or lossy compression (for example limited at around 10kHz). If you experience
distortion around the limit try reducing the HF Limit control. Adjust until it lies just to the
lower frequency side of the limit (around 9.5kHz in our example).
Related topics
Sonnox DeBuzzer
Sonnox DeClicker
Audio Plug-ins
Master Section
How do I add effects?
Presets
12.5
Sonnox DeBuzzer
Sonnox DeBuzzer is one of three plug-ins that form the Sonnox Restoration Toolkit. The
tools are not just for restoring old material, but also for removing the clicks, pops, buzzes and
background noise that can sometimes accidentally occur in new recordings.
A note on Touch Pad controls
Several controls in these plug-ins are Touch Pads. These controls give a clear display of the
numeric value of a control, and respond to the following actions:
Left-Click and drag up/down: Increase/decrease the value
WaveLab 7
332
Audio Plug-ins
Right-Click and drag up/down: Fine adjustment of value
Double Click: Directly edit value
Shift + Left-Click and drag up/down: Fine adjustment of value
Control + Left-Click (Windows), Cmd + Click (Mac): Set to default
For circular controls:
the default action is Circular mode, but if the Alt key is held, the action is Linear mode.
Additionally, for all controls (including faders and knobs, not just Touch Pads)
Control + Left-Click (Windows), Cmd + Click (Mac): Set to default
DeBuzzer screen controls
Sonnox Menu Options Button
Clicking this button brings down a menu of options and preferences. It allows choice
of:
the input/output meter clip light hold duration (permanent, 2s, 5s),
a default to 50Hz on start-up, and
the splash screen to view the version number and build date.
Input Level Meter
The Input Meter is designed to give exactly 1dB per LED for the top 18dB of dynamic
range, and 2dB per LED thereafter. This gives a clear and intuitive impression of the
working headroom.
Input Gain Trim Touch Pad (dB)
This allows you to adjust the input signal level by up to ±12dB.
Frequency Knob and Touch Pad (Hz)
The De-Buzzer has an active frequency range for the buzz fundamental of between
20Hz and 440Hz. In Auto mode, this knob sets the frequency from which the buzz
detection circuit will start to hunt for buzz components. In Freeze mode, this knob
sets the exact frequency of the buzz fundamental. The knob is graduated around the
circumference, and clicking on any labeled graduation will set the frequency to that
graduation. The frequency can be scrolled from the touch pad.
Fine Adjust Button
This button enables fine tuning of the buzz frequency control. The graduations around
the circumference of the frequency knob will re-draw to a finer scale, and scrolling
the touch pad will enable very quick fine tuning of a hunt frequency. Scrolling past an
end-stop will continue to scroll the frequency and the marked graduations will re-draw
appropriately. Fine Adjust Mode forces Freeze, so that the selected frequency can
be specified exactly, without the Auto circuitry hunting for a stronger fundamental. If
entering Fine Mode from Auto, the Freeze button will flash and the plug-in will revert to
Auto when Fine mode is exited.
WaveLab 7
12.5 Sonnox DeBuzzer
333
Tone On Button
This button enables an audible tone generator, which can be used to aid location of the
buzz fundamental. While the Tone button is on, a touch pad appears above the button
and becomes a Tone level control. It defaults to -18dB, and has a range of -6dB to
-96dB.
Sensitivity Knob and Touch Pad (%)
This controls the sensitivity of the buzz detection circuit. Fully sensitive might allow the
detection circuit to lock to inaudible and possibly undesirable frequencies. Stronger
buzzes, which typically would be removed first, will require a less sensitive setting.
Hum/Buzz Mode Button
This control switches between Hum mode and Buzz mode. In Hum mode the bandwidth limit for harmonic removal is 0 to 800Hz. In Buzz mode the bandwidth limit for
harmonic removal is 0 to 4000Hz. Hum mode is less damaging, and should be used
when possible.
Enable Button
This button enables the buzz removal processing. It allows glitch-less comparisons with
and without the buzz removal. It is important to note that with this button "off" (i.e. the
buzz removal processing is disabled), the buzz detection circuit is still enabled and the
Detect display will still show the degree of buzz detection.
Reduction Display
The Reduction display indicates the level of audio that is being removed from the signal.
Attenuation Knob and Touch Pad (dB)
The attenuation knob and touch pad determine the level of attenuation that the buzz
removal circuit will apply, up to a maximum of 96dB. Generally this should be set so
that the buzz is just inaudible. Excessive use of attenuation can degrade the signal
unnecessarily.
Auto Button
This button enables Auto mode for the buzz detection circuit. In this mode the buzz
detection is continually calculated and a slow drift in the buzz fundamental frequency
will be automatically followed. This mode is useful for material with a time-varying buzz
component. In this mode the removal filters follow the Detected frequency.
Freeze Button
This button enables Freeze mode for the buzz detection circuit. In this mode the buzz
fundamental is fixed to the frequency shown in the touch pad window. This mode is
useful for material with fluctuating buzz level, but with a constant buzz frequency. In
this instance, Auto mode would suffer when the buzz level drops and would typically
re-hunt for a different buzz fundamental. In this mode the removal filters follow the
Nominal frequency.
Detect Display
This display indicates the degree of detection that the buzz detection circuit has
achieved.
WaveLab 7
334
Audio Plug-ins
Output Level Meter (dB)
The output meter is designed to give exactly 1dB per LED for the top 18dB of dynamic
range, and 2dB per LED thereafter. There is a peak-hold feature that holds the highest
peak, helping to give a better impression of the working dynamic range.
Output Gain Trim Touch Pad (dB)
This allows you to reduce the output level by up to 12dB. Dithering is applied after
output gain control, so it may be necessary to reduce this value by a small amount to
avoid clipping.
Quick-Start Guide for the De-Buzzer
1. Find the nominal frequency. Start with Sensitivity and Attenuation controls at the default
positions (90% and -48dB respectively).
2. If you know the rough frequency of the nominal, select that frequency using either the
knob or by typing into the touch pad.
3. In Auto mode, allow the detector time to drift towards the actual fundamental. The
detect display will indicate confidence of hum detection. Auto mode should be used if
the fundamental drifts over time.
4. Freeze mode should be used to select a specific frequency that might be variable in
strength. Fine Adjust (which forces freeze mode) can be used to increase the resolution
of selecting the fundamental.
5. If you are still having difficulty finding the fundamental, try using the Tone control.
6. The Hum mode removes harmonics up to 800 Hz. If you can hear harmonics that
are higher in frequency, try selecting Buzz mode, which will remove harmonics up to
4000Hz. If there are no harmonics above 800Hz, be sure to use Hum mode to preserve
as much original audio as possible.
7. Also in order to cause as little damage to the audio as possible, back off the attenuation
until you can just hear the buzz, then increase it a little until the buzz is inaudible.
8. Now reduce the sensitivity until the buzz is just inaudible.
Tip: You can use the high resolution FFT in WaveLab to help identify the exact fundamental
frequency.
Related topics
Sonnox DeClicker
Sonnox DeNoiser
Audio Plug-ins
Master Section
How do I add effects?
Presets
WaveLab 7
12.6 Steinberg Autopan
12.6
335
Steinberg Autopan
This is a simple autopan effect. It can use different waveforms to modulate the left-right
stereo position (pan), using manual modulation speed settings.
The parameters are as follows:
Rate
Sets the auto-pan speed from 0.1 to 10, by rotating the knob by dragging, or using the
mouse wheel.
Width
This sets the depth of the Autopan effect, that is, how far out to the left/right speaker the
sound should move, from 0% to 100%.
Shape
Sets the modulation waveform. Sine produces a smooth sweep. Triangle creates a ramp (a
sweep from one speaker to the other and then a quick jump back).
Related topics
Audio Plug-ins
Master Section
How do I add effects?
Presets
12.7
WaveLab 7
Steinberg Chorus
336
Audio Plug-ins
This is a single stage chorus effect. It works by doubling whatever is sent into it with a slightly
detuned version.
The parameters are as follows:
Rate
The sweep rate can be set freely with the Rate knob, without sync to tempo.
Width
Determines the extent of the chorus effect. Higher settings produce a more pronounced
effect.
Spatial
This sets the stereo width of the effect. Turn clockwise for a wider stereo effect.
Mix
Sets the level balance between the dry signal and the effect. If Chorus is used as a
send effect, this should be set to maximum as you can control the dry/effect balance
with the send.
Shape
This switch changes the shape of the modulating waveform, altering the character of
the chorus sweep. Sine and triangle waveforms are available.
Delay
This parameter affects the frequency range of the modulation sweep, by adjusting the
initial delay time.
Filter Lo/Hi
These parameters allow you to roll off low and high frequencies of the effect signal,
respectively.
Related topics
Audio Plug-ins
Master Section
How do I add effects?
Presets
WaveLab 7
12.8 Steinberg Compressor
12.8
337
Steinberg Compressor
Compressor reduces the dynamic range of the audio, making softer sounds louder or louder
sounds softer, or both.
Compressor features separate controls for threshold, ratio, attack, hold, release and makeup gain parameters. Compressor features a separate display that graphically illustrates the
compressor curve shaped according to the Threshold and Ratio parameter settings. Compressor also features a Gain Reduction meter that shows the amount of gain reduction in
dB, Soft knee/Hard knee compression modes and a program-dependent Auto feature for
the Release parameter.
The following parameters are available:
Threshold (-60 to 0dB)
Determines the level where Compressor "kicks in". Signal levels above the set threshold
are affected, but signal levels below are not processed.
Ratio (1:1 to 8:1)
Sets the amount of gain reduction applied to signals over the set threshold. A ratio of
3:1 means that for every 3dB the input level increases, the output level will increase by
only 1dB.
Soft Knee button
If this button is off, signals above the threshold are compressed instantly according to
the set ratio (hard knee). When Soft Knee is activated, the onset of compression is
more gradual, producing a less drastic result.
Make-up (0 to 24dB or Auto mode)
This parameter is used to compensate for output gain loss, caused by compression.
If the Auto button is activated, the knob becomes dark and the output is automatically
adjusted for gain loss.
Attack (0.1 to 100ms)
Determines how fast Compressor will respond to signals above the set threshold. If
the attack time is long, more of the early part of the signal (attack) passes through
unprocessed.
WaveLab 7
338
Audio Plug-ins
Hold (0 to 5000ms)
Sets the time the applied compression will affect the signal after exceeding the threshold. Short hold times are useful for "DJ-style" ducking, while longer hold times are
required for music ducking, e.g. when working on a documentary film.
Release (10 to 1000ms or Auto mode)
Sets the amount of time it takes for the gain to return to its original level when the
signal drops below the threshold level. If the Auto button is activated, Compressor will
automatically find an optimal release setting that varies depending on the audio material.
Analysis (0 to 100) (Pure Peak to Pure RMS)
Determines whether the input signal is analyzed according to peak or RMS values (or
a mixture of both). A value of 0 is pure peak and 100 pure RMS. RMS mode operates
using the average power of the audio signal as a basis, whereas Peak mode operates
more on peak levels. As a general guideline, RMS mode works better on material with
few transients such as vocals, and Peak mode works better for percussive material with
a lot of transient peaks.
Live button
When this button is activated, the "look ahead" feature of Compressor is disengaged.
Look ahead produces more accurate processing, but adds a certain amount of latency
as a trade-off. When Live mode is activated, there is no latency, which might be better
for "live" processing.
Related topics
Audio Plug-ins
Master Section
How do I add effects?
Presets
12.9
Steinberg DeEsser
A de-esser is used to reduce excessive sibilance, primarily for vocal recordings. Basically,
it is a special type of compressor that is tuned to be sensitive to the frequencies produced
WaveLab 7
12.9 Steinberg DeEsser
339
by the "s" sound, hence the name de-esser. Close proximity microphone placement and
equalizing can lead to situations where the overall sound is just right, but there is a problem
with sibilant (hissing) sounds.
The following parameters are available:
Reduction
Controls the intensity of the de-essing effect.
Threshold
When the Auto Threshold option is deactivated, you can use this control to set a threshold for the incoming signal level, above which the plug-in starts to reduce the sibilants.
Auto
The Auto Threshold function automatically and continually chooses an optimum threshold setting independent of the input signal. The Auto Threshold function does not work
for low-level signals (< -30db peak level). To reduce the sibilants in such a file, set the
threshold manually.
Release
Sets the amount of time it takes for the de-essing effect to return to zero when the
signal drops below the threshold value.
Level meters
Indicate the dB values of the input (IN) and output (OUT) signals as well as the value
by which the level of the sibilant (or s-frequency) is reduced (GR). The gain reduction
meter shows values between 0dB (no reduction) and -20dB (the s-frequency level is
lowered by 20dB).
Positioning the DeEsser in the signal chain
When recording a voice, the de-esser’s position in the signal chain is usually located after
the microphone preamp and before a compressor/limiter. This keeps the compressor/limiter
from unnecessarily limiting the overall signal dynamics.
Related topics
Audio Plug-ins
Master Section
How do I add effects?
Presets
WaveLab 7
340
Audio Plug-ins
12.10 Steinberg Mono Delay
This is a mono delay effect using freely specified delay time settings.
The following parameters are available:
Delay
Sets the base note value for the delay from 0.1 to 5000 milliseconds.
Feedback
Sets the number of repeats for the delay.
Filter Lo
This filter affects the feedback loop of the effect signal and allows you to roll off low
frequencies from 10Hz up to 800Hz. The button below the knob activates/deactivates
the filter.
Filter Hi
This filter affects the feedback loop of the effect signal and allows you to roll off high
frequencies from 20kHz down to 1.2kHz. The button below the knob activates/deactivates the filter.
Mix
Sets the level balance between the dry signal and the effect. If MonoDelay is used as
a send effect, set this to the maximum value as you can control the dry/effect balance
with the send.
Note that the delay can also be controlled from another signal source via the side-chain input.
When the side-chain signal exceeds the threshold, the delay repeats are silenced. When the
signal drops below the threshold, the delay repeats reappear.
Related topics
Audio Plug-ins
Master Section
How do I add effects?
Presets
WaveLab 7
12.11 Steinberg Distortion
341
12.11 Steinberg Distortion
Distortion will add crunch to your tracks.
The following parameters are available:
Boost
Increases the distortion amount.
Feedback
Feeds part of the output signal back to the effect input, increasing the distortion effect.
Tone
Lets you select a frequency range to which to apply the distortion effect.
Spatial
Changes the distortion characteristics of the left and right channel, thus creating a
stereo effect.
Output
Raises or lowers the signal going out of the effect.
Related topics
Audio Plug-ins
Master Section
How do I add effects?
Presets
WaveLab 7
342
Audio Plug-ins
12.12 Steinberg Dual Filter
The DualFilter effect filters out certain frequencies while allowing others to pass through.
The following parameters are available:
Position
Sets the filter cutoff frequency. If you set this to a negative value, DualFilter will act as
a low-pass filter. Positive values cause DualFilter to act as a high-pass filter.
Resonance
Sets the sound characteristic of the filter. With higher values, a ringing sound is heard.
Related topics
Audio Plug-ins
Master Section
How do I add effects?
Presets
WaveLab 7
12.13 Steinberg Envelope Shaper
343
12.13 Steinberg Envelope Shaper
EnvelopeShaper can be used to cut or boost the gain of the Attack and Release phase of
audio material. You can either use the knobs or drag the breakpoints in the graphical display
to change parameter values. Be careful with levels when boosting the gain and if needed
reduce the Output level to avoid clipping.
The following parameters are available:
Attack
(-20 to 20dB) Changes the gain of the Attack phase of the signal.
Length
(5 to 200ms) Determines the length of the Attack phase.
Release (-20 to 20dB)
Changes the gain of the Release phase of the signal.
Output
(-24 to 12dB) Sets the output level.
Related topics
Audio Plug-ins
Master Section
How do I add effects?
Presets
WaveLab 7
344
Audio Plug-ins
12.14 Steinberg Expander
Expander reduces the output level in relation to the input level for signals below the set
threshold. This is useful when you want to enhance the dynamic range or reduce the noise
in quiet passages. You can either use the knobs or drag the breakpoints in the graphical
display to change the Threshold and the Ratio parameter values.
The following parameters are available:
Threshold (-60 to 0dB)
Determines the level where expansion "kicks in". Signal levels below the set threshold
are affected, but signal levels above are not processed.
Ratio (1:1 to 8:1)
Determines the amount of gain boost applied to signals below the set threshold.
Soft Knee button
If this button is off, signals below the threshold are expanded instantly according to the
set ratio ("hard knee"). When Soft Knee is activated, the onset of expansion is more
gradual, producing a less drastic result.
Attack (0.1 to 100ms)
Determines how fast Expander responds to signals below the set threshold. If the attack
time is long, more of the early part of the signal (attack) passes through unprocessed.
Hold (0 to 2000ms)
Sets the time the applied expansion will affect the signal below the Threshold.
Release (10 to 1000ms or Auto mode)
Sets the amount of time it takes for the gain to return to its original level when the signal
exceeds the threshold level. If the Auto button is activated, Expander will automatically
find an optimal release setting that varies depending on the audio material.
Analysis (0 to 100) (Pure Peak to Pure RMS)
This parameter determines whether the input signal is analyzed according to peak or
RMS values (or a mixture of both). A value of 0 is pure peak and 100 pure RMS. RMS
mode operates using the average power of the audio signal as a basis, whereas Peak
WaveLab 7
12.15 Steinberg Gate
345
mode operates more on peak levels. As a general guideline, RMS mode works better
on material with few transients such as vocals, and Peak mode better for percussive
material, with a lot of transient peaks.
Related topics
Audio Plug-ins
Master Section
How do I add effects?
Presets
12.15 Steinberg Gate
Gating, or noise gating, silences audio signals below a set threshold level. As soon as the
signal level exceeds the set threshold, the gate opens to let the signal through.
The following parameters are available:
Threshold (-60 to 0dB)
Determines the level where Gate is activated. Signal levels above the set threshold
trigger the gate to open, and signal levels below the set threshold will close the gate.
State LED
Indicates whether the gate is open (LED lights up in green), closed (LED lights up in
red) or something in between (LED lights up in yellow).
Filter buttons (LP, BP, and HP)
When the Side-Chain button (see below) is activated, you can use these buttons to set
the filter type to either low-pass, band-pass, or high-pass.
Side-Chain button
This button (below the Center knob) activates the sidechain filter. The input signal can
then be shaped according to set filter parameters. Internal side-chaining can be useful
for tailoring how the Gate operates.
WaveLab 7
346
Audio Plug-ins
Center (50Hz to 20000Hz)
When the Side-Chain button is activated, this sets the center frequency of the filter.
Q-Factor (0.01 to 10000)
When the Side-Chain button is activated, this sets the resonance of the filter.
Monitor button
Allows you to monitor the filtered signal.
Attack (0.1 to 1000ms)
Sets the time it takes for the gate to open after being triggered. If the Live button (see
below) is deactivated, it ensures that the gate will already be open when a signal above
the threshold level is played back. Gate manages this by "looking ahead" in the audio
material, checking for signals loud enough to pass the gate.
Hold (0 to 2000ms)
Determines how long the gate stays open after the signal drops below the threshold
level.
Release (10 to 1000ms or Auto mode)
Sets the amount of time it takes for the gate to close (after the set hold time). If the
Auto button is activated, Gate will find an optimal release setting, depending on the
audio material.
Analysis (0 to 100) (Pure Peak to Pure RMS)
Determines whether the input signal is analyzed according to Peak or RMS values (or
a mixture of both). A value of 0 is pure Peak and 100 pure RMS. RMS mode operates
using the average power of the audio signal as a basis, whereas Peak mode operates
more on peak levels. As a general guideline, RMS mode works better on material with
few transients such as vocals, and Peak mode better for percussive material, with a lot
of transient peaks.
Live button
When this button is activated, the "look ahead" feature of Gate is disengaged. Look
ahead produces more accurate processing, but adds a certain amount of latency as a
trade-off. When Live mode is activated, there is no latency, which might be better for
"live" processing.
Note that the gate can also be controlled from another signal source via the side-chain input.
When the side-chain signal exceeds the threshold, the gate opens.
Related topics
Audio Plug-ins
Master Section
How do I add effects?
Presets
WaveLab 7
12.16 Steinberg GEQ-10/GEQ-30
347
12.16 Steinberg GEQ-10/GEQ-30
(GEQ-10 pictured)
These two graphic equalizers are identical in every respect except for the number of available
frequency bands (10 and 30 respectively). Each band can be cut or boosted by up to 12dB,
allowing for fine control of the frequency response. In addition there are several preset modes
available which can add "color" to the sound of the GEQ-10/GEQ-30.
You can draw response curves in the main display by click-dragging with the mouse. Note
that you have to click on one of the sliders first before dragging across the display. You
can also point and click to change individual frequency bands, or enter values numerically by
clicking on a gain value at the top of the display.
At the bottom of the window the individual frequency bands are shown in Hz. At the top of
the display the amount of cut/boost is shown in dB.
Apart from the frequency bands, the following parameters are available:
Output
Controls the overall gain of the equalizer.
Flatten button
Resets all the frequency bands to 0dB.
Range
Allows you to relatively adjust how much a set curve cuts or boosts the signal. If the
Range parameter is turned fully clockwise, the range is +/-12dB.
Invert button
Inverts the current response curve.
Mode pop-up menu
The filter mode set here determines how the various frequency band controls interact
to create the response curve, see also below.
WaveLab 7
348
Audio Plug-ins
About the filter modes
On the pop-up menu in the lower right corner there are several different EQ modes available.
These modes can add color or character to the equalized output in various ways. Here follow
brief descriptions of the filter modes:
True Response – serial filters with accurate frequency response.
Digi Standard – resonance of last band depends on sample rate.
Variable Q – parallel filters where the resonance depends on the amount of gain. Mu-
sical sounding.
Constant Q u – parallel filters where the resonance of the first and last bands depends
on the sample rate (u=unsymmetrical).
Constant Q s – parallel filters where the resonance is raised when boosting the gain
and vice versa (s=symmetric).
Resonant – serial filters where a gain increase of one band will lower the gain in adjacent
bands.
Related topics
Audio Plug-ins
Master Section
How do I add effects?
Presets
12.17 Steinberg Limiter
Limiter is designed to ensure that the output level never exceeds a set output level, to avoid
clipping in following devices. Limiter can adjust and optimize the Release parameter automatically according to the audio material, or it can be set manually. Limiter also features
separate meters for the input, output and the amount of limiting (middle meters).
The following parameters are available:
WaveLab 7
12.18 Steinberg Maximizer
349
Input (-24 to +24dB)
Allows you to adjust the input gain.
Auto (-24 to +6dB)
Determines the maximum output level.
Release (0.1 to 1000ms or Auto mode)
Sets the amount of time it takes for the gain to return to its original level. If the Auto
button is activated, Limiter will automatically find an optimal release setting that varies
depending on the audio material.
Related topics
Audio Plug-ins
Master Section
How do I add effects?
Presets
12.18 Steinberg Maximizer
Maximizer is used to raise the loudness of audio material without the risk of clipping. Optionally, there is a soft clip function that removes short peaks in the input signal and introduces
a warm tube-like distortion to the signal.
The following parameters are available:
Output (-24 to +6dB)
Determines the maximum output level. Should normally be set to 0 (to avoid clipping).
Optimize (0 to 100)
Determines the loudness of the signal.
Soft Clip button
When this button is activated, Maximizer starts limiting (or clipping) the signal "softly",
at the same time generating harmonics which add a warm, tube-like characteristic to
the audio material.
WaveLab 7
350
Audio Plug-ins
Related topics
Audio Plug-ins
Master Section
How do I add effects?
Presets
12.19 Steinberg Mix 6 to 2
Mix6To2 lets you quickly mix down your surround mix format to stereo. You can control the
levels of up to six surround channels and decide for each channel up to which level it will be
included in the resulting mix.
Mix6To2 does not simulate a surround mix or add any psycho-acoustical artifacts to the
resulting output – it is simply a mixer. The plug-in should be placed in one of the post-fader
insert effect slots for the output bus.
For the Output bus the following parameters are available:
A Normalize button
If activated, the mixed output is normalized, i.e. the output level is automatically adjusted
so that the loudest signal is as loud as possible without clipping.
A Link button
that links the two Output faders.
Related topics
Audio Plug-ins
Master Section
How do I add effects?
Presets
WaveLab 7
12.20 Steinberg Mix 8 to 2
351
12.20 Steinberg Mix 8 to 2
Mix8To2 lets you quickly mix down your surround mix format to stereo. You can control the
levels of up to eight surround channels and decide for each channel up to which level it will
be included in the resulting mix.
Mix8To2 does not simulate a surround mix or add any psycho-acoustical artifacts to the
resulting output – it is simply a mixer. The plug-in should be placed in one of the post-fader
insert effect slots for the output bus.
For the Output bus the following parameters are available:
A Normalize button
If activated, the mixed output is normalized, i.e. the output level is automatically adjusted
so that the loudest signal is as loud as possible without clipping.
A Link button
that links the two Output faders.
Related topics
Audio Plug-ins
Master Section
How do I add effects?
Presets
WaveLab 7
352
Audio Plug-ins
12.21 Steinberg Mono to Stereo
This effect will turn a mono signal into a "pseudo-stereo" signal. The plug-in must be inserted
on a stereo track playing a mono file.
The following parameters are available:
Width
Controls the width or depth of the stereo enhancement. Turn clockwise to increase the
enhancement.
Delay
Increases the amount of differences between the left and right channels to further increase the stereo effect.
Color
Generates additional differences between the channels to increase the stereo effect.
Mono button
Switches the output to mono, to check for possible unwanted coloring of the sound
which sometimes can occur when creating an artificial stereo image.
Related topics
Audio Plug-ins
Master Section
How do I add effects?
Presets
WaveLab 7
12.22 Steinberg Multiband Compressor
353
12.22 Steinberg Multiband Compressor
The MultibandCompressor allows a signal to be split into a maximum of four frequency bands,
each with its own freely adjustable compressor characteristic. The signal is processed on the
basis of the settings that you have made in the Frequency Band and Compressor sections.
You can specify the level, bandwidth and compressor characteristics for each band by using
the various controls.
The Frequency Band editor
The Frequency Band editor in the upper half of the panel is where you set the width of the
frequency bands as well as their level after compression. Two value scales and a number of
handles are available. The vertical value scale to the left shows the input gain level of each
frequency band. The horizontal scale shows the available frequency range. The handles
provided in the Frequency Band editor can be dragged with the mouse. You use them to set
the corner frequency range and the input gain levels for each frequency bands.
The handles at the sides are used to define the frequency range of the different fre-
quency bands.
By using the handles on top of each frequency band, you can cut or boost the input
gain by +/- 15dB after compression, for that specific frequency band.
WaveLab 7
354
Audio Plug-ins
Bypassing frequency bands
Each frequency band can be by-passed using the "B" button in each compressor section.
Soloing frequency bands
A frequency band can be soloed using the "S" button in each compressor section. Only one
band can be soloed at a time.
Using the Compressor section
By moving breakpoints or using the corresponding knobs, you can specify the Threshold and
Ratio. The first breakpoint from which the line deviates from the straight diagonal will be the
threshold point.
For each of the four bands the following compressor parameters are available:
Threshold (-60 to 0dB)
Determines the level where Compressor "kicks in". Signal levels above the set threshold
are affected, but signal levels below are not processed.
Ratio (1000 to 8000) (1:1 to 8:1)
Determines the amount of gain reduction applied to signals over the set threshold. A
ratio of 3000 (3:1) means that for every 3dB the input level increases, the output level
increases by only 1dB.
Attack (0.1 to 100ms)
Determines how fast the compressor responds to signals above the set threshold. If
the attack time is long, more of the early part of the signal (attack) will pass through
unprocessed.
Release (10 to 1000ms or Auto mode)
Sets the amount of time it takes for the gain to return to its original level when the
signal drops below the threshold level. If the Auto button is activated, the compressor
will automatically find an optimal release setting that varies depending on the audio
material.
The Output Control
The Output knob controls the total output level that the MultibandCompressor passes on to
Wavelab. The range is from -24 to +24dB.
Related topics
Audio Plug-ins
Master Section
How do I add effects?
Presets
WaveLab 7
12.23 Steinberg Octaver
355
12.23 Steinberg Octaver
This plug-in can generate two additional voices that track the pitch of the input signal one
octave and two octaves below the original pitch, respectively. Octaver is best used with
monophonic signals.
The following parameters are available:
Direct
Adjusts the mix of the original signal and the generated voice(s). A value of 0 means
only the generated and transposed signal is heard. By raising this value, more of the
original signal is heard.
Octave 1
Adjusts the level of the generated signal one octave below the original pitch. Set to 0
means the voice is muted.
Octave 2
Adjusts the level of the generated signal two octaves below the original pitch. Set to 0
means the voice is muted.
Related topics
Audio Plug-ins
Master Section
How do I add effects?
Presets
12.24 Steinberg Pingpong Delay
This is a stereo delay effect that alternates each delay repeat between the left and right
channels.
WaveLab 7
356
Audio Plug-ins
The following parameters are available:
Delay
Sets the base note value for the delay from 0.1 to 5000 milliseconds.
Feedback
Sets the number of repeats for the delay.
Filter Lo
This filter affects the feedback loop and allows you to roll off low frequencies up to
800Hz. The button below the knob activates/deactivates the filter.
Filter Hi
This filter affects the feedback loop and allows you to roll off high frequencies from
20kHz down to 1.2kHz. The button below the knob activates/deactivates the filter.
Spatial
Sets the stereo width for the left/right repeats. Turn clockwise for a more pronounced
stereo "ping-pong" effect.
Mix
Sets the level balance between the dry signal and the effect. If PingPongDelay is used
as a send effect, set this to the maximum value as you can control the dry/effect balance
with the send.
Related topics
Audio Plug-ins
Master Section
How do I add effects?
Presets
WaveLab 7
12.25 Steinberg PostFilter
357
12.25 Steinberg PostFilter
The PostFilter is the filter plug-in to use if you are working on a post-production mix, but
of course you can use it in music production, too, as an alternative to complex EQ configurations. It allows quick and easy filtering of unwanted frequencies, creating room for the
important sounds in your mix.
The PostFilter plug-in combines a low-cut filter, a notch filter and a high-cut filter. You can
either make settings by dragging the handles in the graphical display, or by adjusting one
of the controls below the display section. Use the Preview buttons to compare the result of
your filtering and the filtered frequencies.
The following parameters are available:
Level meter
The meter to the right of the EQ display shows the output level, giving you an indication
of how the filtering affects the overall level of the edited event.
Low Cut Freq (20Hz to 1kHz, or Off)
Use this low-cut filter to eliminate low-frequency noise. The filter is off when the handle/knob is moved all the way to the left.
Low Cut Slope pop-up menu
Allows you to choose a slope value for the low-cut filter.
Low Cut Preview button
Use the Preview button (found between the Low Cut Freq button and the graphical
display) to switch the filter to a complementary high-cut filter. This deactivates any
other filters, allowing you to listen only to the frequencies you want to filter out.
WaveLab 7
358
Audio Plug-ins
Notch Freq
Sets the frequency of the notch filter.
Notch Gain
Allows you to adjust the gain of the selected frequency. Use positive values to identify
the frequencies that you want to filter out.
Notch Gain Invert button
Inverts the gain value of the notch filter. Use this button to filter out unwanted noise.
While looking for the frequency to omit, it sometimes helps to boost it in the first place
(set notch filter to positive gain). After you have found it, you can use the Invert button
to cancel it out.
Notch Q-Factor
Sets the width of the notch filter.
Notch Preview button
Use the Preview button (found between the notch filter buttons and the graphical display) to create a bandpass filter with the peak filter's frequency and Q. This deactivates
any other filters, allowing you to listen only to the frequencies you want to filter out.
Notches buttons (1, 2, 4, 8)
These buttons add additional notch filters to filter out harmonics.
High Cut Freq (3Hz to 20kHz, or Off)
Use this high-cut filter to eliminate high-frequency noise. Filter is Off when the handle/knob is moved all the way to the right.
High Cut Slope pop-up menu
Allows you to choose a slope value for the high-cut filter.
High Cut Preview button
Use the Preview button (found between the High Cut Freq button and the graphical
display) to switch the filter to a complementary low-cut filter. This deactivates any other
filters, allowing you to listen only to the frequencies you want to filter out.
Related topics
Audio Plug-ins
Master Section
How do I add effects?
Presets
WaveLab 7
12.26 Steinberg Roomworks
359
12.26 Steinberg Roomworks
RoomWorks is a highly adjustable reverb plug-in for creating realistic room ambiance and
reverb effects in stereo and surround formats. The CPU usage is adjustable to fit the needs
of any system. From short room reflections to cavern-sized reverb, this plug-in delivers high
quality reverberation.
The following parameters are available:
Input Filters
Lo Freq
Determines the frequency at which the low-shelving filter takes effect. Both the high
and low settings filter the input signal prior to reverb processing.
Hi Freq
Determines the frequency at which the high-shelving filter takes effect. Both the high
and low settings filter the input signal prior to reverb processing.
Lo Gain
Controls the amount of boost or cut for the low-shelving filter.
Hi Gain
Controls the amount of boost or cut for the high-shelving filter.
Reverb Character
Pre-Delay
Controls how much time passes before the reverb is applied. This allows you to simulate
larger spaces by increasing the time it takes for first reflections to reach the listener.
Reverb Time
Allows you to set the reverb time in seconds.
WaveLab 7
360
Audio Plug-ins
Size
Alters the delay times of early reflections to simulate larger or smaller spaces.
Diffusion
Affects the character of the reverb tail. Higher values lead to more diffusion and a
smoother sound, while lower values lead to a clearer sound.
Width
Controls the width of the stereo image. 100% gives you full stereo reverb. At 0%, the
reverb is all in mono.
Variation button
Pressing this button generates a new version of the same reverb program using altered
reflection patterns. This is helpful when certain sounds are causing odd ringing or
undesirable results. Creating a new variation will often solve these issues. There are
1000 possible variations.
Hold button
Pressing this button freezes the reverb buffer in an infinite loop (yellow circle around
button). You can create some interesting pad sounds using this feature.
Damping
Lo Freq
Determines the frequency below which low-frequency damping will occur.
High Freq
Determines the frequency above which high-frequency damping will occur.
Low Level
Affects the decay time of low frequencies. Normal room reverb decays quicker in the
high- and low-frequency range than in the mid-range. Lowering the level percentage
causes low frequencies to decay quicker. Values above 100% cause low frequencies
to decay more slowly than the mid-range frequencies.
High Level
Affects the decay time of high frequencies. Normal room reverb decays quicker in the
high- and low-frequency range than in the mid-range. Lowering the level percentage
causes high frequencies to decay quicker. Values above 100% cause high frequencies
to decay more slowly than the mid-range frequencies.
Envelope
Amount
Determines how much the envelope attack and release controls affect the reverb itself.
Lower values have a more subtle effect while higher values lead to a more drastic sound.
WaveLab 7
12.26 Steinberg Roomworks
361
Attack
The envelope settings in RoomWorks control how the reverb will follow the dynamics
of the input signal in a fashion similar to a noise gate or downward expander. Attack
determines how long it takes for the reverb to reach full volume after a signal peak (in
milliseconds). This is similar to a pre-delay but the reverb is ramping up instead of
starting all at once.
Release
Determines how long after a signal peak the reverb can be heard before being cut off,
similar to a gate's release time.
Output
Mix
Determines the balance of dry (unprocessed) and wet (processed) signal. When
RoomWorks is used as an insert for an FX channel, you will most likely want to set
this to 100% or use the Send button.
Wet only button
This button defeats the mix parameter, setting the effect to 100% wet or affected signal.
This button should normally be pressed when RoomWorks is being used as a send
effect for an FX or group channel.
Efficiency
Determines how much processing power is used for RoomWorks. The lower the value,
the more CPU resources will be used, and the higher the quality of the reverb. Interesting effects can be created with very high Efficiency settings (>90%). Experiment for
yourself.
Export button
Determines if during audio export RoomWorks will use the maximum CPU power for the
highest quality reverb. During export you may wish to keep a higher efficiency setting
to achieve a specific effect. If you want the highest quality reverb during export, make
sure this button is activated.
Output meter
Indicates the level of the output signal.
Related topics
Audio Plug-ins
Master Section
How do I add effects?
Presets
WaveLab 7
362
Audio Plug-ins
12.27 Steinberg Roomworks SE
RoomWorks SE is a "lite" version of the RoomWorks plug-in. This plug-in delivers high quality
reverberation, but has fewer parameters and is less demanding of CPU than the full version.
The following parameters are available:
Pre-Delay
Controls how much time passes before the reverb is applied. This allows you to simulate
larger spaces by increasing the time it takes for first reflections to reach the listener.
Reverb Time
Allows you to set the reverb time in seconds.
Diffusion
Affects the character of the reverb tail. Higher values lead to more diffusion and a
smoother sound, while lower values lead to a clearer sound.
Hi Level
Affects the decay time of high frequencies. Normal room reverb decays quicker in the
high- and low-frequency range than in the mid-range. Lowering the level percentage
causes high frequencies to decay quicker. Values above 100% cause high frequencies
to decay more slowly than the mid-range frequencies.
Lo Level
Affects the decay time of low frequencies. Normal room reverb decays quicker in the
high- and low-frequency range than in the mid-range. Lowering the level percentage
causes low frequencies to decay quicker. Values above 100% cause low frequencies
to decay more slowly than the mid-range frequencies.
Mix Determines
the blend of dry (unprocessed) signal to wet (processed) signal. When using RoomWorks SE inserted in an FX channel, you will most likely want to set this to 100% or
use the Send button.
Related topics
Audio Plug-ins
Master Section
How do I add effects?
Presets
WaveLab 7
12.28 Stereo Delay
363
12.28 Stereo Delay
StereoDelay has two independent delay lines with freely specified delay time settings.
The following parameters are available:
Delay 1 & 2
Using these controls you specify the base note value for the delay time in milliseconds.
Sync button
The buttons below the Delay knobs are used to turn tempo sync on or off for the respective delay.
Feedback 1 & 2
The Feedback controls set the number of repeats for each delay.
Filter Lo 1 & 2
These filters affect the feedback loop and allow you to roll off low frequencies up to
800Hz. The buttons below the knobs activate/deactivate the filter.
Filter Hi 1 & 2
These filters affect the feedback loop and allow you to roll off high frequencies from
20kHz down to 1.2kHz. The buttons below the knobs activate/deactivate the filter.
Pan 1 & 2
These controls are used to set the stereo position for each delay.
Mix 1 & 2
Use these controls to set the level balance between the dry signal and the effect. If
StereoDelay is used as a send effect, set them to the maximum value (100 %) as you
can control the dry/effect balance with the send.
Note that the delay can also be controlled from another signal source via the side-chain input.
When the side-chain signal exceeds the threshold, the delay repeats are silenced. When the
signal drops below the threshold, the delay repeats reappear.
Related topics
Audio Plug-ins
Master Section
How do I add effects?
Presets
WaveLab 7
364
Audio Plug-ins
12.29 Steinberg Stereo Enhancer
This plug-in will expand the stereo width of (stereo) audio material. It cannot be used with
mono files.
The following parameters are available:
Width
Controls the width of the stereo enhancement (i.e. the apparent stereo separation).
Turn clockwise to increase the enhancement.
Delay
Controls the delay differences between left and right channels to further increase the
stereo effect.
Color
Generates additional differences between the channels to increase the stereo enhancement.
Mono button
Switches the output to mono, to check for possible unwanted coloring of the sound
which sometimes can occur when enhancing the stereo image.
Related topics
Audio Plug-ins
Master Section
How do I add effects?
Presets
WaveLab 7
12.30 Steinberg Studio Chorus
365
12.30 Steinberg Studio Chorus
The StudioChorus plug-in is a two stage chorus effect which adds short delays to the signal
and pitch modulates the delayed signals to produce a "doubling" effect. The two separate
stages of chorus modulation are completely independent and are processed serially (cascaded).
For each stage the following parameters are available:
Rate
This is where you specify the base note value which may be set freely with the Rate
knob.
Width
Determines the extent of the chorus effect. Higher settings produce a more pronounced
effect.
Spatial
Sets the stereo width of the effect. Turn clockwise for a wider stereo effect.
Mix
Sets the level balance between the dry signal and the effect. If StudioChorus is used as
a send effect, set this to the maximum value as you can control the dry/effect balance
with the send.
Waveform Shape button
Allows you to select the modulation waveform, altering the character of the chorus
sweep. A sine and a triangle waveform are available.
Delay
Affects the frequency range of the modulation sweep by adjusting the initial delay time.
Filter Lo/Hi
Allow you to roll off low and high frequencies of the effect signal.
Note that the modulation can also be controlled from another signal source via the side-chain
input. When the sidechain signal exceeds the threshold, the modulation is controlled by the
side-chain signal's envelope.
WaveLab 7
366
Audio Plug-ins
Related topics
Audio Plug-ins
Master Section
How do I add effects?
Presets
12.31 Steinberg Studio EQ
This is a high-quality 4-band parametric stereo equalizer with two fully parametric mid-range
bands. The low and high bands can act as either shelving filters (three types), or Parameter
Description as a Peak (band-pass) or Cut (low-pass/high-pass) filter.
Making settings
1. Click the corresponding On button on the left of the plug-in panel to activate any or all
of the 4 equalizer bands (Low, Mid 1, Mid 2, and High). When a band is activated, the
corresponding EQ point appears in the EQ curve display.
2. Set the parameters for an activated EQ band. This can be done in several ways:
By using the knobs.
By clicking on the numeric values and typing in new values.
By using the mouse to drag points in the EQ curve display.
When using the mouse to change the parameter settings, you can use the following modifier
keys: - When no modifier key is pressed and you drag an EQ point in the display, the Gain
and Frequency parameters are adjusted simultaneously.
[Shift] Keep the [Shift] key pressed and drag the mouse to change the Q-factor of the
corresponding EQ band.
WaveLab 7
12.31 Steinberg Studio EQ
367
[Alt]/[Option] Keep the [Alt]/[Option] key pressed and drag the mouse to change the
frequency of the corresponding EQ band.
[Ctrl]/[Command] Keep the [Ctrl]/[Command] key pressed and drag the mouse to change
the gain value of the corresponding EQ band.
The following parameters are available:
Band 1 Gain (-20 to +24dB)
Sets the amount of cut/boost for the low band.
Band 1 Inv button
Inverts the gain value of the filter. Use this button to filter out unwanted noise. While looking
for the frequency to omit, it sometimes helps to boost it in the first place (set the filter to
positive gain). After you have found it, you can use the Inv button to cancel it out.
Band 1 Freq (20 to 2000Hz)
Sets the frequency of the low band.
Band 1 Q-Factor (0.5 to 10)
Controls the width or resonance of the low band.
Band 1 Filter mode
For the low band, you can select between three types of shelving filters, a Peak (band-pass),
and a Cut (lowpass/high-pass) filter. When Cut mode is selected, the Gain parameter is
fixed. -Shelf I adds resonance in the opposite gain direction slightly above the set frequency.
-Shelf II adds resonance in the gain direction at the set frequency. -Shelf III is a combination
of Shelf I and II.
Band 2 Gain (-20 to +24dB)
Sets the amount of cut/boost for the mid 1 band.
Band 2 Inv button
Inverts the gain value of the filter (see the description of the Invert button for Band 1).
Band 2 Freq (20 to 20000Hz)
Sets the center frequency of the mid 1 band.
Band 2 Q-Factor (0.5 to 10)
Sets the width of the mid 1 band: the higher this value, the "narrower" the bandwidth.
Band 3 Gain (-20 to +24dB)
Sets the amount of cut/boost for the mid 2 band.
Band 3 Inv button
Inverts the gain value of the filter (see the description of the Invert button for Band 1).
Band 3 Freq (20 to 20000Hz)
Sets the center frequency of the mid 2 band.
Band 3 Q-Factor (0.5 to 10)
Sets the width of the mid 2 band: the higher this value, the "narrower" the bandwidth.
Band 4 Inv button
Inverts the gain value of the filter (see the description of the Invert button for Band 1).
WaveLab 7
368
Audio Plug-ins
Band 4 Gain (-20 to +24dB)
Sets the amount of cut/boost for the high band.
Band 4 Freq (200 to 20000Hz)
Sets the frequency of the high band.
Band 4 Q-Factor (0.5 to 10)
Controls the width or resonance of the high band.
Band 4 Filter mode
For the high band, you can select between three types of shelving filters, a Peak, and a Cut
filter. When Cut mode is selected, the Gain parameter is fixed. -Shelf I adds resonance in
the opposite gain direction slightly below the set frequency. -Shelf II adds resonance in the
gain direction at the set frequency. -Shelf III is a combination of Shelf I and II.
Output (-24 to +24dB)
This knob on the top right of the plug-in panel allows you to adjust the overall output level.
Auto Gain button
When this button is activated, the gain is automatically adjusted, keeping the output level
constant regardless of the EQ settings.
Related topics
Audio Plug-ins
Master Section
How do I add effects?
Presets
12.32 Steinberg Test Generator
This utility plug-in allows you to generate an audio signal, which can be recorded as an Audio
File. The resulting file can then be used for a number of purposes:
For testing the specifications of audio equipment.
For measurements of various kinds, such as calibrating tape recorders.
WaveLab 7
12.33 UV22HR Dithering
369
For testing signal processing methods.
For educational purposes.
The TestGenerator is based on a waveform generator which can generate a number of basic
waveforms such as sine and saw as well as various types of noise. Furthermore, you can set
the frequency and amplitude of the generated signal. As soon as you add the TestGenerator
as an effect on an audio track and activate it, a signal is generated. You can then activate
recording as usual to record an Audio File according to the signal specifications:
Waveforms and noise section
Allows you to set the basis for the signal generated by the waveform generator. You can
select between four basic waveforms (sine, triangle, square, and sawtooth) and three types
of noise (white, pink, and brownian).
Frequency section
Allows you to set the frequency of the generated signal. You can select one of the preset
values (100, 440, 1000, or 10000Hz), or use the slider to set a value between 1Hz and
20000Hz.
Gain section
Allows you to set the amplitude of the signal. The higher the value (up to 0dB), the stronger
the signal. You can select one of the preset values (e.g. -20dB), or use the slider to set a
value between -81 and 0dB.
Related topics
Audio Plug-ins
Master Section
How do I add effects?
Presets
12.33 UV22HR Dithering
The UV22HR is a high quality dithering plug-in, based on an advanced algorithm developed
by Apogee. It allows extended information (from 32 bit floating point or 24 bit integer audio)
to be encoded into a standard medium such as CD, MP3 or AAC without loss of sonic
integrity. No pre-auditions or settings are necessary and audio detail is retained up to 30dB
into the noise floor.
For an introduction to the concept of dithering, see Dithering.
The following parameters are available:
WaveLab 7
370
Audio Plug-ins
Bit Resolution
The UV22HR supports dithering to multiple resolutions:
8, 16, 20 or 24 bits
You select the desired resolution by clicking the corresponding button.
Hi
Try this first, it is the most "all-round" setting.
Lo
This applies a lower level of dither noise.
Auto black
When this is activated, the dither noise is gated (muted) during silent passages in the
material.
Note that dithering should always be applied post-fader on an output bus.
Related topics
Audio Plug-ins
Master Section
How do I add effects?
Presets
Dithering
12.34 Steinberg Vintage Compressor
This is modeled after vintage type compressors. This compressor features separate controls
for input and output gain, attack, and release. In addition, there is a Punch mode which preserves the attack phase of the signal and a program-dependent Auto feature for the Release
parameter.
The available parameters work as follows:
Input (-24 to 48dB)
WaveLab 7
12.35 Steinberg VST Dynamics
371
In combination with the Output setting, this parameter determines the compression amount.
The higher the input gain setting and the lower the output gain setting, the more compression
is applied.
Output (-48 to 24dB)
Sets the output gain.
Attack (0.1 to 100ms)
Determines how fast the compressor responds. If the attack time is long, more of the early
part of the signal (attack) passes through unprocessed.
Punch button (On/Off)
When this is activated, the early attack phase of the signal is preserved, retaining the original
"punch" in the audio material, even with short Attack settings.
Release (10 to 1000ms or Auto mode)
Sets the amount of time it takes for the gain to return to its original level. If the Auto button
is activated, Vintage Compressor will automatically find an optimal release setting that varies
depending on the audio material.
Related topics
Audio Plug-ins
Master Section
How do I add effects?
Presets
12.35 Steinberg VST Dynamics
VSTDynamics is an advanced dynamics processor. It combines three separate processors:
Gate, Compressor and Limiter, covering a variety of dynamic processing functions. The
window is divided into three sections, containing controls and meters for each processor.
Activating the individual processors You activate the individual processors using the
buttons at the bottom of the plug-in panel.
WaveLab 7
372
Audio Plug-ins
The Gate section
Gating, or noise gating, is a method of dynamic processing that silences audio signals below
a set threshold level. As soon as the signal level exceeds the set threshold, the gate opens to
let the signal through. The Gate trigger input can also be filtered using an internal side-chain.
The following parameters are available:
Threshold (-60 to 0dB)
Determines the level where Gate is activated. Signal levels above the set threshold trigger
the gate to open, and signal levels below the set threshold close the gate.
State LED
Indicates whether the gate is open (LED lights up in green), closed (LED lights up in red) or
something in between (LED lights up in yellow).
Side-Chain button
This button activates the internal side-chain filter. You can use this to filter out parts of the signal that might otherwise trigger the gate in places you not want it to, or to boost frequencies
you wish to accentuate, allowing for more control over the gate function.
LP (low-pass), BP (band-pass), HP (high-pass)
These buttons set the basic filter mode.
Center (50 to 22000Hz)
Sets the center frequency of the filter.
Q-Factor (0.001 to 10000)
Sets the resonance or width of the filter.
Monitor (On/Off)
Allows you to monitor the filtered signal.
Attack (0.1 to 100ms)
Sets the time it takes for the gate to open after being triggered.
Hold (0 to 2000ms)
Determines how long the gate stays open after the signal drops below the threshold level.
Release (10 to 1000ms or Auto mode)
Sets the amount of time it takes for the gate to close (after the set hold time). If the Auto
button is activated, Gate will find an optimal release setting, depending on the audio material.
The Compressor section
The compressor reduces the dynamic range of the audio, making softer sounds louder or
louder sounds softer, or both. It works like a standard compressor with separate controls
for threshold, ratio, attack, release and make-up gain. The compressor features a separate
display that graphically illustrates the compressor curve shaped according to the Threshold,
Ratio and Make-Up Gain parameter settings. It also features Gain Reduction meters and a
program-dependent Auto feature for the Release parameter.
The available parameters work as follows:
WaveLab 7
12.35 Steinberg VST Dynamics
373
Threshold (-60 to 0dB)
Determines the level where the compressor "kicks in". Signal levels above the set threshold
are affected, but signal levels below are not processed.
Ratio (1:1 to 8:1)
Determines the amount of gain reduction applied to signals above the set threshold. A ratio
of 3:1 means that for every 3dB the input level increases, the output level increases by only
1dB.
Make-Up (0 to 24dB)
This parameter is used to compensate for output gain loss, caused by compression. When
the Auto button is activated, gain loss is being compensated automatically.
Attack (0.1 to 100ms)
Determines how fast the compressor responds to signals above the set threshold. If the
attack time is long, more of the early part of the signal (attack) passes through unprocessed.
Release (10 to 1000ms or Auto mode)
Sets the amount of time it takes for the gain to return to its original level when the signal drops
below the threshold level. If the Auto button is activated, the compressor will automatically
find an optimal release setting that varies depending on the audio material.
Graphical display
Use the graphical display to graphically set the Threshold and Ratio values. To the left and
right of the graphical display you will find two meters that show the amount of gain reduction
in dB.
The Limiter section
The limiter is designed to ensure that the output level never exceeds a set threshold, to avoid
clipping in following devices. Conventional limiters usually require very accurate setting up
of the attack and release parameters to prevent the output level from going beyond the set
threshold level. The limiter adjusts and optimizes these parameters automatically according
to the audio material. You can also adjust the Release parameter manually.
The following parameters are available:
Output (-24 to +6dB)
Determines the maximum output level. Signal levels above the set threshold are affected, but
signal levels below are left unaffected.
Soft Clip button
If this button is activated, the limiter acts differently. When the signal level exceeds -6dB,
Soft Clip starts limiting (or clipping) the signal "softly", at the same time generating harmonics
which add a warm, tube-like characteristic to the audio material.
Release (10 to 1000ms or Auto mode)
Sets the amount of time it takes for the gain to return to its original level when the signal
drops below the threshold level. If the Auto button is activated, the limiter will automatically
find an optimal release setting that varies depending on the audio material.
WaveLab 7
374
Audio Plug-ins
The Module Configuration button
Using the Module Configuration button in the bottom right corner of the plug-in panel, you
can set the signal flow order for the three processors. Changing the order of the processors
can produce different results, and the available options allow you to quickly compare what
works best for a given situation. Simply click the Module Configuration button to change to
a different configuration. There are three routing options:
C-G-L (Compressor-Gate-Limit)
G-C-L (Gate-Compressor-Limit)
C-L-G (Compressor-Limit-Gate).
Related topics
Audio Plug-ins
Master Section
How do I add effects?
Presets
12.36 Crystal Resampler
This plug-in offers high quality sample rate conversion of Audio Files. For example, if your
Audio File was recorded or saved at 96 or 48kHz and you wish to burn it to CD at 44.1kHz,
this plug-in will perform the conversion ready for burning.
The following parameters are available:
Sample rate
The rate can be set in 17 steps from 6kHz to 384kHz. It includes the common sampling
rates of 44.1, 48, 96 and 192kHz.
Quality
The quality requirements can be set in four steps - Preview (fast), Standard, High, or
Ultra (slow).
Related topics
Audio Plug-ins
WaveLab 7
12.37 Leveler
375
Master Section
How do I add effects?
Presets
12.37 Leveler
Leveler is useful for correcting an imbalance or adjusting levels between stereo channels, or
for mixing down to mono.
The parameters are as follows:
Volume Left, Right (-48dB to +12dB)
This governs how much of the signal is included in the left and/or right channel of the
output bus.
Stereo Link (OFF or LINKED)
When set to LINKED, Volume Right delivers the same gain as that set for Volume Left.
Mix to Mono (OFF or ON)
When set to ON, a mono mix of the stereo channels is delivered to the output bus.
Related topics
Audio Plug-ins
Master Section
How do I add effects?
Presets
12.38 Leveler Multi
WaveLab 7
376
Audio Plug-ins
Leveler Multi takes multi-channel input and applies a fader equally to all channels.
The parameter is as follows:
Volume (-48dB to 12dB)
This governs how much gain is applied to the signal before the output bus.
Related topics
Audio Plug-ins
Master Section
How do I add effects?
Presets
12.39 Peak Master
Peak master is a basic plug-in that minimizes peaks in your Audio File, allowing a louder mix
without clipping. It is particularly useful in helping to tame very dynamic instruments.
The parameters are as follows:
Input Gain
Values range from -12dB to 24dB.
Out Ceiling
Values range from -18dB to 0dB.
Softness
Values range from -5 to +5.
Related topics
Audio Plug-ins
Master Section
How do I add effects?
Presets
WaveLab 7
12.40 Silence
377
12.40 Silence
The Silence built-in plug-in provides a simple way of injecting a precise period of silence into
the start or end of an Audio File.
The parameters are as follows:
Start
Use the slider to add from 0 to 60,000ms of silence to the start of the file
End
Use the slider to add from 0 to 60,000ms of silence to the end of the file.
Related topics
Audio Plug-ins
Master Section
How do I add effects?
Presets
Silence Generator
12.41 Stereo Expander
This plug-in is a stereo width enhancer that takes a stereo input signal and makes it sound
"wider".
Stereo Expander gives better results from "real" stereo material (as opposed to mono channels panned to different positions in the stereo image).
Stereo Expander has the following parameter:
Width (0 to 100%)
Higher values result in a greater stereo width. Normally, you should set Width to values
between 0% and 20%; higher values can be used for special effects.
WaveLab 7
378
Audio Plug-ins
Related topics
Audio Plug-ins
Master Section
How do I add effects?
Presets
12.42 Internal Dithering
Internal Dithering is a built-in plug-in that provides a simple way of adding a small amount of
noise to the rendered signal to improve the apparent signal-to-noise ratio of the output.
For an introduction to the concept of dithering, see Dithering.
The following parameters are available:
Noise Type Two types are available, in addition to No Noise
Noise Shaping Three types are available, in addition to No Shaping
Bit resolution of the quantized output: 8, 16, 20 or 24 bits are available.
Note that dithering is applied post-fader on the output bus.
Related topics
Audio Plug-ins
Master Section
How do I add effects?
Presets
Dithering
WaveLab 7
Chapter 13
Utilities
WaveLab's Utilities menu contains a number of useful tools accessible from all Workspaces.
This page contains links to information about them.
CD/DVD utilities:
Import Audio CD
Burn Audio CD from DDP Image
Data CD/DVD
Batch utilities:
Batch Conversion
Batch Renaming
Utility windows:
Log window
Background task monitor
Timecode
13.1
Import Audio CD
This dialog allows you to import one or more tracks from an audio CD.
Once you have identified the source CD, you can select the track or tracks to import. You
must specify a folder location and file format before the file or files can be saved to disk.
Actions tab Specify the optical disk drive from the drop-down list, and the disk reading
speed. The title and track details are automatically completed. If no track names appear,
to refresh CD reading.
click
380
Utilities
From this list you can select the tracks (or define the start and end points of a single track).
The "Rename tracks" menu option automatically adds the track order number to the name in
a range of different styles. You can select a track name for text editing by double-clicking.
In "Output", accept the default Folder location or choose another. Clicking
Audio File Format dialog for changing details of the Audio File's format.
produces the
Options tab This accesses a list of tickable options to refine how the tracks are read and
output to file.
You can access this dialog via Utilities > Import Audio CD tracks....
For an explanation of each parameter and interface feature, click on , or the 'What's this?'
question mark icon. For more information see Getting Help
Related topics
Audio File Format Dialog
13.2
Burn Audio CD from DDP Image
This dialog allows you to burn an Audio CD from a DDP image. The dialog has controls for
refreshing the list of attached devices, opening the CD/DVD drive and erasing a CD-RW or
DVD-RW disk. You can choose to do a test burn of your CD, or write the CD from a range
of write speeds.
You can access this dialog by choosing Utilities > Burn Audio CD from DDP Image....
Alternatively you can import a DDP image in the Audio Montage Workspace via File > Import > Audio DDP Image... to convert it to a montage and then burn the montage.
For an explanation of each parameter and interface feature, click on , or the 'What's this?'
question mark icon. For more information see Getting Help
Related topics
DDP files
Authoring CDs and DVDs
13.3
Data CD/DVD
This dialog allows you to arrange files and folders into a structure that you can later write as
a "data" disk.
You can prepare a disk for a variety of media (CD-DA, DVD or Blu-ray Disk). The list of media
devices displays the amount of data that will fit on each type of disk. As you add files, an
indicator on the left (and a text display at the bottom) display how "full" your new disk is. You
can enter a name for your disk and change the disk file structure before writing your data to
an ISO image or writeable optical disk.
Note: Although you can prepare a disk in any format, the types of physical disk you can
burn will be limited by the optical drive connected to your computer. If you do not have a
WaveLab 7
13.3 Data CD/DVD
381
Blu-ray Disk writer connected, for example, you will not be able to write a Blu-ray Disk you
may have prepared. However, you can still save it as an ISO Disk image and transfer it for
remote burning.
To prepare a data disk, follow these steps:
Adding files
Add files and folders to the disk by:
dragging them directly from your computer's file browser.
dragging a file from any Workspace by either dragging it by its title bar tab or using the
document button
.
choosing File > Special > Add to Data CD/DVD from any of the editing Workspaces
to add the currently focused file.
Removing files
To remove files from the file structure:
select the files/folders you wish to remove and click on the red cross icon. To remove
a group of files, hold down [Shift] while selecting the files/folders to remove. Please
note that this does not delete the files from the computer, only a reference to them.
to remove all files/folders from the layout choose
Reset.
Editing the file structure
To edit the arrangement of the files in your disk:
drag files/folders to a different location in the file list pane. To move multiple files/folders
hold down [Shift] while selecting the files/folders you wish to move.
drag file/folders over a folder icon to move them into that directory.
to add a new folder click on the
folder icon.
to edit the name of a file/folder, double click on its title.
Burning your disk
Once you are happy with your disk layout you can write it to a disk or disk image:
select a media type from the list of media devices. This will determine the maximum
size and type of medium you will be writing to, whether it be CD, DVD, Blu-ray Disk or
an ISO image of any of these. You can change the media type at any stage.
WaveLab 7
382
Utilities
enter the name that you want your disk to display when it is mounted as a data volume.
to write your disk, click
write CD/DVD icon. This opens the write CD/DVD dialog
which enables you to burn your data disk to an ISO image or to an optical disk using a
connected CD/DVD/Blu-ray Disk writer.
For an explanation of each parameter and interface feature, click on , or the 'What's this?'
question mark icon. For more information see Getting Help
Related topics
Write Audio CD
Blu-ray Disk
ISO image
13.4
Batch Conversion
This dialog allows you to convert the file format of a group of Audio Files.
This could be useful for example, if you have a large number of Audio Files that you wish to
encode as MP3 files, or a group of stereo files that you need to downsample and convert
to mono. You can also take maximum advantage of your computer's architecture if you have
a multiple processor cores, by spreading the processing load across them. These settings
are selected in the Multitasking tab.
To use the Batch Converter tool:
1. Click on the
plus sign icon to add files, (or just drag the files directly into the pane)
2. Define an output file location and file format
3. Choose any options or performance settings from the Options and Multi-tasking tabs
4. Click Start to begin (you can also choose an option to start the process automatically
when dragging the file in).
You can access this dialog by choosing Utilities > Batch conversion of Audio Files...
For an explanation of each parameter and interface feature, click on , or the 'What's this?'
question mark icon. For more information see Getting Help
Related topics
Audio File Format Dialog
13.5
Batch Renaming
This dialog appears in various locations in WaveLab and allows you to rename a batch of
files, Clips or markers.
WaveLab 7
13.6 Log window
383
The Batch Renaming dialog offers a powerful set of facilities to convert, remove, format,
replace and insert text into existing names. You can use simple options to match text, or you
can build your own regular expressions, as required.
Batch renaming can be useful with large projects for example, so you can apply easily identifiable names to all referenced files, markers and Clips belonging to the project.
Batch renaming can be used for the following operations:
to rename files
to rename Clips in Audio Montages
to rename markers in Audio Files and Audio Montages.
These functions share most of the same features, with some minor differences. The Batch
Renaming dialog has three pages. The first page defines which files/clips/markers should
be renamed; the second dialog page defines how the renaming should be executed. The
third page shows you a preview of the names that will be produced, before you commit to
the changes.
You can access this dialog in various places throughout WaveLab:
from any Workspace: via Utilities > Batch file renaming...
from the Marker window: via Functions > Batch marker renaming...
from the Clips window in the Audio Montage Workspace: viaFunctions > Batch clip
renaming....
For an explanation of each parameter and interface feature, click on , or the 'What's this?'
question mark icon. For more information see Getting Help
Related topics
Batch Conversion
Marker Window
About Regular Expressions
Regular Expressions
13.6
Log window
This shared tool window allows you to view log messages that have been issued by WaveLab.
When using WaveLab's scripting language for example, the logWindow( ) function outputs
messages to this window. There are a number of toggle buttons and these allow you to filter
the types of messages displayed.
Note: When using the logWindow( ) method you need to have the
"Show informal notes"
button selected for the messages to be visible. If no log messages are displayed, make sure
.
all the toggle buttons are selected WaveLab 7
384
Utilities
You can access this window via Workspace > Shared tool windows > Log. It is available
in the Control Window, Audio File Workspace and Audio Montage Workspace. You can also
access this window in the Control Window via Utilities > Log.
For an explanation of each parameter and interface feature, click on , or the 'What's this?'
question mark icon. For more information see Getting Help
Related topics
Control Window
Specific tool windows
Scripting
13.7
Background task monitor
This specific tool window allows you to view all background rendering processes that are in
progress.
You can adjust the priority with which they are processed, pause or cancel them. It is useful
if you have a number of lengthy processes underway and want to free up some processing
power to focus on editing. You can either lower the priority of a task so it does not use as
much of the computer processor's capacity, or pause the task temporarily.
You can access this window by choosing Workspace > Shared tool windows > Background task monitor. It is available in the Control Window, Audio File Workspace and
Audio Montage Workspace. You can also access this window in the Control Window by
choosing Utilities > Background task monitor.
You can choose to automatically open the Background task monitor when a rendering process begins. To enable this option, select the checkbox via Options > Global Preferences
> Options > Make the Background Task Monitor visible when a task starts . Since
this window is a Shared tool window, the location where it opens may vary.
For an explanation of each parameter and interface feature, click on , or the 'What's this?'
question mark icon. For more information see Getting Help
Related topics
Specific tool windows
Control Window
Rendering
13.8
Timecode
This shared tool window displays the current time of the playback head (or the cursor position
if not playing back), in the timecode format currently selected in the Time Format dialog.
The current time can be in a range of standard SMPTE formats, CD or DVD specific formats,
or a custom one - see Time Format dialog.
WaveLab 7
13.8 Timecode
385
The most common use for this window is for working with video or film. You can use it to
display the playback head position of the current Audio File in a SMPTE format to frame level
resolution (i.e. hours:minutes:seconds:frames). You can also use it to display CD frames
(minutes:seconds:frames) when you are authoring CD or DVDs.
You can access this window by choosing Workspace > Shared tool windows > Timecode. It is available in the Control Window, Audio File Workspace and Audio Montage
Workspace.
For an explanation of each parameter and interface feature, click on , or the 'What's this?'
question mark icon. For more information see Getting Help
Related topics
Time Format dialog
CD Frame
SMPTE timecode
Authoring CDs and DVDs
WaveLab 7
386
Utilities
WaveLab 7
Chapter 14
How do I...
The following is a list of common tasks and brief instructions on how to achieve them using
WaveLab.
... import songs from an audio CD into WaveLab?
... use VST Plug-ins?
... edit an existing Audio File?
... compile and edit several Audio Files on multiple tracks?
... apply processing to an Audio File?
... convert an Audio File into another audio format?
... play back with real-time effects?
... record new Audio File?
... convert the sample rate of an Audio File?
... create a Podcast?
... open an aac, m4a or m4p Audio File from Apple iTunes?
14.1
... import songs from an audio CD into WaveLab?
From the Audio File Workspace, select Utilities > Import Audio CD tracks...
This opens the Import Audio CD dialog window where you can specify the tracks to import
or the specific time ranges to import for each track. You can also specify where the output
Audio Files are stored and the format in which to save them.
See Import Audio CD for more information.
14.2
... use VST Plug-ins?
You use the Master Section to apply effects to a file (or a selection), using the built in and/or
third party VST plug-ins.
See the Master Section for more details on using VST plug-ins.
388
How do I...
The VST plug-ins are described individually in Audio Plug-ins.
14.3
... edit an existing Audio File?
You can open Audio Files from within the Audio File Workspace by:
opening the file directly using the File > Open command
using WaveLab's File Browser to locate your file and open it (you may need to change
the file type filter so that the file type matches the Audio File)
dragging a file directly from the operating system's file browser
When you open the Audio File, it appears in a Wave edit window for you to begin editing. In
the Audio Montage Workspace you can only drag Audio Files into an existing montage; you
can't open an Audio File directly.
14.4
... compile and edit several Audio Files on multiple
tracks?
To accomplish this you need to create an Audio Montage.
First create a new Audio Montage file from File > New in the Audio Montage Workspace,
or if you are working within the Audio File Workspace from Edit > Create Audio Montage
from Audio File...
To add more Audio Files you can use drag them directly from:
the File Browser
the Operating System's file browser
the document button
in the status bar from within the Audio File Workspace. See
Status Bar for more information.
the document tab.
To add further tracks to your montage, right-click on the [1] button on the left side of the
window and choose "Add stereo track/Add mono track".
See Audio Montages for more information.
14.5
... apply processing to an Audio File?
The Audio File Workspace Process menu contains a number of options for manipulating
Audio Files, including fade-in, fade-out and normalize. Use these functions to process a
complete Audio File (or a selected region) that you have open in the main editing window.
WaveLab 7
14.6 ... convert an Audio File into another audio format?
389
You can also use the "Process in place" rendering function in the Master Section. This applies
effects to a file (or a selection) using the built in and/or third party VST plug-ins. You can use
the unlimited "Undo" function to reverse any bad editing decisions.
See Render Wave window for more information.
Power users may wish to use the facilities available in the Batch Processor Workspace. This
allows complex processing to be applied to a list of Audio Files. See Batch Processing for
more information.
14.6
... convert an Audio File into another audio format?
There are two ways:
From the Audio File Workspace you can either use the "Save as" or the "Save Special"
commands in the File menu. See Save Audio File dialog and Audio File Format Dialog
for more information.
You can also use the Render function within the Master Section. See Render Wave
window for more information.
Power users may wish to use the facilities available in the Batch Processor Workspace. This
allows complex processing to be applied to a list of Audio Files. See Batch Processing for
more information.
14.7
... play back with real-time effects?
You can play back Audio Files with real-time effects using the Master Section.
Plug-in effects (supplied with WaveLab or available from third parties) are inserted into the
audio signal path via the Master Section effects slots.
See Master Section and Audio Plug-ins for more information.
14.8
Use the
menu.
... record new Audio File?
Record button on the Transport toolbar, or select Record from the Transport
This opens the Record dialog where you can set up a new Audio File and begin to record.
Once recorded, the new file appears in a Wave window where you can edit it or add it to a
Montage using Edit > Create Montage from Audio File...
See Recording Dialog for more information.
14.9
... convert the sample rate of an Audio File?
There are two ways to do this.
WaveLab 7
390
How do I...
From within the Audio File Workspace choose Process > Convert Sample Rate...
You can also convert the sample rate in real-time using a resampler plug-in such as
Crystal Resampler, which is included in WaveLab. See Crystal Resampler.
See Render Wave window for more information on applying VST effects.
Power users may wish to use the facilities available in the Batch Processor Workspace. This
allows complex processing to be applied to a list of Audio Files. See Batch Processing for
more information.
14.10 ... create a Podcast?
To create a Podcast you use the Podcast Workspace.
First you need to create a new Podcast, there are several ways to do this.
From within the Podcast Workspace choose File > New, or
From the Audio File Workspace add Audio Files to a podcast by choosing File > Special > Add to Podcast..., or
Select Edit > Create Podcast from Audio File...
The Podcast Workspace is where you assemble, define and publish your Podcast to the
Internet.
See Podcasts for more information.
14.11 ... open an aac, m4a or m4p Audio File from Apple
iTunes?
Apple OS X and iTunes uses a number of proprietary audio codecs. These can be found
natively on Apple OS X but on Windows platforms you need to install QuickTime (this is
normally installed with iTunes on a PC).
QuickTime provides WaveLab with the necessary codecs to open these file formats.
Other file formats that are available using QuickTime include .caf, .m4v, .qt, .dv and others.
WaveLab 7
Chapter 15
Glossary
A
B
C
D
E
F
G
H
I
J
K
L
M
N
O
P
Q
R
S
T
U
V
W
X
Y
Z
A
ADPCM AES31 AIFF files Apple Lossless files ALAW files Aliasing Amplitude ASIO Attack
Audio montage
B
Bandwidth Bit depth Blu-ray Disk
C
CD Frame CD Pre-emphasis CD Text Chorus Clip Clipping Compression Cross fade
D
DAW DC Offset DDP files Decibel (dB) Dithering DVD-A
E
ECMAScript Ensoniq Paris files Equalization
392
Glossary
F
FFT Focused Clip Formant FTP Site
G
No entries available.
H
Headroom
I
ISO image ISRC
J
No entries available.
K
No entries available.
L
Loops Loudness
M
Markers Media Catalog Number MIDI MIDI Channels Mixing Mobile phone Audio Files MP2
files MP3 files
N
Non-destructive editing Normalize NTSC
WaveLab 7
393
O
Ogg Vorbis files OSQ files
P
PAL/SECAM Pan Peak level Plug-ins Pre-roll and Post-roll Preset system Processor cores
Q
Quantization
R
Raw PCM files Red Book CD-DA Regular Expressions RF64 files RMS
S
Sample rate SMPTE timecode Sound Designer II files Spectrogram Sun/Java files
T
Tempo Text/Excel files
U
ULAW files UPC/EAN
V
No entries available.
W
WAV files WAV64 files Waveform Wet/Dry WMA files
WaveLab 7
394
Glossary
X
No entries available.
Y
No entries available.
Z
Zero crossing
15.1
ADPCM
ADPCM – Microsoft/Dialogic is an audio file format commonly used for games and telephony applications that offers a lower bit rate than linear PCM and thus requires less storage
space/bandwidth.
The file extension is .vox or .adpcm
Glossary contents
15.2
AES31
The AES31 Standard is a non-proprietary audio file format developed by the Audio Engineering Society Standards Committee (AESSC). Its aim is to allow a project to be moved to
another audio editing system with a minimum of fuss, and to reproduce the project (including
Edit Decision Lists and other assets) as accurately as possible.
AES31 does not have a 2GB file-size limit and can be read by PC and Mac platforms. The
standard uses a form of universal resource locator for accessing files on any platform or network, together with a sample-accurate Audio Decision List: in/out points of the component
audio fies are defined in terms of hours:minutes:seconds:frames and sample count.
The file extension is .adl
Glossary contents
15.3
AIFF files
AIFF (Audio Interchange File Format) is the default uncompressed audio file format
used on the Macintosh.
AIFF was developed by Apple Inc. from IFF (Interchange File Format) which was in turn
developed by Electronic Arts. The audio data in AIFF is uncompressed PCM (Pulse Code
Modulation). A compressed variant, AIFF-C or AIFC, supports a number of compression
codecs. 8-, 16-, 20- or 24-bit resolutions are supported.
WaveLab 7
15.4 Apple Lossless files
395
Typical filename extensions are .aiff, .aif, .aifc, .snd.
Glossary contents
15.4
Apple Lossless files
ALAC (Apple Lossless Audio Codec) is an audio codec developed by Apple Inc. for lossless data compression of digital audio. Also known as Apple Lossless and Apple Lossless
Encoder (ALE), ALAC audio data is stored within the MP4 container and uses the mathematical technique of linear prediction to achieve a file size reduction between 60% to 40%,
depending on the audio content.
The Apple Lossless Encoder is part of Quicktime.
Typical filename extensions are .m4a and .alac.
Glossary contents
15.5
ALAW files
ALAW is an audio encoding and compression technique for telephony, using 8-bit resolution.
The EU telephone system uses A-law encoding for digitization.
Typical file extensions are .alaw, .vox
Glossary contents
15.6
Aliasing
Aliasing is a type of distortion caused during the analog-to-digital conversion process. If the
sampling rate is not at least double the frequency of the analog signal, spurious harmonics
and other artifacts may be created.
Careful filtering before the sampling stage can reduce this aliasing to a minimum.
Glossary contents
15.7
Amplitude
Amplitude is the height of a waveform above or below the zero line.
Glossary contents
15.8
ASIO
Audio Stream Input/Output (ASIO) is a computer device driver protocol for digital audio
specified by Steinberg, providing a low-latency and high fidelity interface between a software
application and a computer's soundcard.
WaveLab 7
396
Glossary
Glossary contents
15.9
Attack
Attack is the initial part of the sound. An attack is said to be fast when the maximum amplitude is reached very quickly (with percussive sounds from drums, guitar or piano, for example). Orchestral strings generally have slow attack, where the volume increases more
slowly.
Glossary contents
15.10 Audio montage
An Audio Montage is a compilation of audio Clips composited together. In WaveLab the
Audio Montage Workspace allows you to compile and edit multiple Clips (references to
Audio Files on disk) on one or more tracks.
The resulting Audio Montage can include both track and Clip-based effects, volume and pan
automation, wide-ranging fade and cross fade functions.
Multichannel support makes it possible to create surround mixes that can be burned to DVDAudio compatible disks.
Glossary contents
15.11 Bandwidth
Bandwidth is the group of frequencies (expressed in Hertz or in musical octaves) that pass
through a device with a loss of less than 3dB.
Glossary contents
15.12 Bit depth
Bit depth is the number of bits used to represent a single sample. 8-, 16- and 24-bits are
common bit depths. Larger bit depths represent the sample more accurately and are less
noisy, but take up more space on the disk.
Bit Meter
Glossary contents
15.13 Blu-ray Disk
Blu-ray Disk (BD or Blu-ray) is an optical disk storage medium designed to replace the
standard DVD format. The disk has the same physical dimensions as standard CDs and
DVDs, but the standard data storage capacity is 25GB (single layered), and 50GB (dual
layered disk).
WaveLab 7
15.14 CD Frame
397
The name "Blu-ray" derives from the 405 nanometer blue-violet laser used to read the disk
(standard DVDs use a 650nm red laser, CDs use 780nm). The shorter wavelength allows for
five or 10 times more data storage than a DVD although a recent development has pushed
the storage capacity to 500GB on a single disc by using 20 layers. In addition to optical
improvements, Blu-ray Disks feature improvements in data encoding that further increase
their capacity.
Data CD/DVD
Glossary contents
15.14 CD Frame
In a Red Book CD-DA, the time format is commonly measured in minutes, seconds and
frames (mm:ss:ff), where one "frame" corresponds to one sector, or 1/75th of a second of
stereo sound. In editing and audio extraction, the frame is the smallest addressable time
interval for an audio CD, so that track start and end positions can only be defined in steps of
1/75 second duration.
Red Book CD-DA
Glossary contents
15.15 CD Pre-emphasis
CD pre-emphasis refers to process designed to increase, within a band of frequencies, the
magnitude of some (usually higher) frequencies compared to the magnitude of other (usually
lower) frequencies in order to improve the overall signal-to-noise ratio. Pre-emphasis aims to
minimize the adverse effects of attenuation distortion or the saturation of recording media in
subsequent parts of the system. When carried out properly, pre-emphasis enables a received
signal to more closely resemble the original or desired signal and produces fewer bit errors.
Pre-emphasis is commonly used in telecommunications, digital audio recording, record cutting and in FM broadcasting transmissions. The presence of pre-emphasis on a track is
sometimes indicated by a tick in the
column on the Import Audio CD dialog.
Import Audio CD
Glossary contents
15.16 CD Text
CD Text is an extension of the Red Book Compact Disc specifications standard for audio
CDs. The standard allows disc and track information (album name, song name and artist, for
example) to be embedded on a standards-compliant audio CD.
CD-Text information is usually stored in the lead-in area of the CD (where there is roughly
5KB of space available). Support for CD-Text is common, but not all CD players can display
it.
Red Book CD-DA
Glossary contents
WaveLab 7
398
Glossary
15.17 Chorus
Chorus is an time-based effect produced by combining the original signal with a number of
moving delays and pitch shifted copies, often panned across a stereo field.
Steinberg Chorus
Glossary contents
15.18 Clip
Clip A Clip contains a reference to a source Audio File on your hard disk, as well as start and
end positions in the file (allowing Clips to play back smaller sections of their source Audio
Files). Any number of Clips can reference the same source file.
Note that a Clip is a reference to the original source file and does not contain audio data.
Focused Clip versus Select Clips
It is important to note that there is a difference between a "focused" Clip and a "selected"
Clip. Some editing functions can only be executed on an individual Clip or "Focused Clip",
while others can be executed on multiple Clips or "Selected Clips".
Focused Clip - there can only ever be one or no Focused Clip at a time. The Focused
Clip's name is displayed in red. It's necessary to identify the Clip as focused because
there are certain functions that can only be executed on a single Clip. You use the
Focused Clip window to perform these functions.
Selected Clip - there can be many selected Clips. This allows you to edit multiple Clips
at the same time using functions such as copy, delete, move, etc. Selected Clips have
a different background color.
Glossary contents
15.19 Clipping
Clipping is a form of audio distortion that occurs when a signal is truncated because it
exceeds the capabilities of the amplifier circuit. On an oscilloscope, the audio peaks appear
sliced off.
To avoid clipping, reduce the system gain in or before the gain stage in which the clipping
occurs.
Steinberg Limiter
Glossary contents
15.20 Compression
Compression This dynamic process is used to smooth out any large transient peaks in an
audio signal that would otherwise cause distortion through clipping or otherwise overloading
the system. Levels are progressively attenuated as they approach maximum levels.
WaveLab 7
15.21 Cross fade
399
Steinberg Compressor
Steinberg Multiband Compressor
Steinberg Vintage Compressor
Glossary contents
15.21 Cross fade
Cross fade is mixing two audio signals by fading one out at the same time as fading the
other in.
Glossary contents
15.22 DAW
DAW A Digital Audio Workstation is a software and hardware system dedicated to recording,
editing and playing back digital audio tracks on hard disk.
Because of the computational demands of audio editing and mastering, DAWs are often
based on very highly specified PC or Macintosh computers, equipped with high-quality
sound cards, large amounts of RAM, fast (multi-)processors and large capacity highperformance hard disks. In addition, they may also feature a noise suppressing enclosure
and a passive cooling system.
Glossary contents
15.23 DC Offset
DC offset occurs when hardware (such as a sound card) adds DC current to an audio
signal. The recorded waveform is not centered around the baseline (i.e. negative infinity).
WaveLab can correct a DC offset, which would otherwise artificially reduce the headroom
available during normalization processes.
DC Remover
Glossary contents
15.24 DDP files
DDP (Disk Description Protocol) is an industry format for submitting CD and DVDs to
replication facilities.
DVDs are usually submitted in DDP 2.0 format; this is also referred to as "Plant Direct"
(Sonic Solutions) and "DDPi" (Universal Music). A DDP file set for CD consists of: DDPID
(Mandatory), DDPMS (Mandatory), PQ DESCR (Optional) and one or more Image.dat file(s)
(Mandatory).
CD-RWs, formatted as "Audio CDs" are really only suitable for content distribution, not disk
replication or publishing. The DDP format offers the much more robust CIRC error correction
WaveLab 7
400
Glossary
and so protects both the audio data and its associated metadata.
The DDP image is a data file, and when burned to optical media, is a data disc. As such,
it has the full measure of CIRC error-correction to allow error-free copying of files on your
computer and across networks (including the internet). It’s also why you often need a DVD-R
to contain a DDP image of a CD, because the data redundancy is more robust in data form
than in streaming audio form.
Sending DDP files is "best practice" for disk replicators, who will upload the image file to
their network and burn a glass master directly from the image using specialist hardware/software. CIRC error-correction will assure that the data matches the original, or it will stop the
process.
WaveLab can read DDP files by choosing File > Import > Audio DDP Image.... Glossary
contents
15.25 Decibel (dB)
Decibel (dB) is a logarithmic unit of measurement that expresses the size of a physical
quantity (usually sound pressure level, power or intensity) relative to a reference level.
Decibels are often used in matters of sound because the ear perceives loudness on a logarithmic scale. The equation dB = 20 x log(V1/V2) is often used by sound engineers comparing two values. Applying a gain of 3dB doubles the amplitude of a sound, and a gain of
-3dB halves the amplitude, and this is confirmed perceptually.
The decibel does not have a unit, since it expresses a ratio of two quantities with the same
unit of measurement.
Glossary contents
15.26 Dithering
Dithering is the technique of adding small quantities of noise to a signal to reduce the
audibility of low level distortion in a digital recording. A small amount of random noise is
added to the analog signal before the sampling stage, reducing the effect of "quantization
errors".
Note that dithering should always be applied after the output bus fader stage.
UV22HR Dithering
Quantization
Glossary contents
15.27 DVD-A
DVD-Audio (DVD-A) is a digital format for delivering high-fidelity audio content on a DVD.
Audio on a DVD-A disk can be stored in many different bit-depth, sampling rate and channel combinations - from 16-, 20- or 24-bit depth, at 44.1 to 96kHz sampling rates, in mono,
stereo and various surround channel combinations, including 5.1 channel surround. The sampling rate may be as high as 192kHz for stereo channels, and different bit-depth/sampling
WaveLab 7
15.28 ECMAScript
401
rate and channel combinations can be used on a single disk.
DVD-Audio
Glossary contents
15.28 ECMAScript
WaveLab's scripting language is based on the ECMAScript scripting language, as defined
in "Standard ECMA-262 - ECMAScript Language Specification".
Microsoft's JScript, Netscape's JavaScript and Adobe's Actionscript are also based on the
freely-available ECMAScript standard.
ECMAScript Reference
Glossary contents
15.29 Ensoniq Paris files
Ensoniq Paris is an Audio File format used by the old Ensoniq Paris™ system. It has 16-bit
and 24-bit resolution.
The file extension is .paf.
Glossary contents
15.30 Equalization
Equalization (EQ) is a process by which certain frequency bands in an Audio File are
increased or lowered in level to compensate for recording or playback inadequacies.
Steinberg GEQ-10/GEQ-30
Glossary contents
15.31 FFT
FFT (Fast Fourier Transform) analysis is a mathematical method to convert a waveform
from the Time Domain to the Frequency Domain.
FFT uses various mathematical shortcuts to carry out a spectral analysis, trading computational speed for limitations in the number of samples and frequency bands used in the
analysis.
Glossary contents
15.32 Focused Clip
There can be no more than one Focused Clip. See Clip
WaveLab 7
402
Glossary
Glossary contents
15.33 Formant
Formants are the distinguishing frequency components of a sound.
Glossary contents
15.34 FTP Site
File Transfer Protocol (FTP) is a network protocol used to copy a file from one host to another
over a TCP/IP-based network such as the Internet. An FTP site may require user-based
password authentication or it may allow anonymous user access. Podcasts are published to
FTP sites.
Publish menu
FTP site
Glossary contents
15.35 Headroom
Headroom is the amount by which the signal-handling capabilities of an audio system exceeds a designated level - the Permitted Maximum Level (PML). Headroom can be thought
of as a safety zone allowing transient audio peaks to exceed the PML without exceeding the
signal capabilities of an audio system.
DC Remover
Glossary contents
15.36 ISO image
An ISO image is an archive file or "disk image" of an optical disk in a format defined by the
International Organization for Standardization (ISO).
"ISO image" derives from the ISO 9660 file system used with CD-ROM media. ISO image
files are supported by WaveLab and typically have a file extension of .iso.
Glossary contents
15.37 ISRC
ISRC - the "International Standard Recording Code" - is a code for identifying sound recordings (and music video recordings) on CDs intended for commercial distribution. WaveLab
allows you to specify an ISRC code for each audio track.
The code contains the following elements:
WaveLab 7
15.38 Loops
403
Country Code (2 ASCII characters)
Registrant Code (typically, a record label - 3 ASCII characters or digits)
Recording Year (2 digits or ASCII characters)
Serial Number (unique number identifying the recording - 5 digits or ASCII characters).
The groups of characters are often presented with hyphens to make them easier to read, but
hyphens are not part of the code.
Authoring CDs and DVDs
Burn Audio CD from DDP Image
UPC/EAN
Import Audio CD
Glossary contents
15.38 Loops
Loops are short audio Clips that create a repeating beat or pattern.
Loop Tone Uniformizer
Loop Tweaker
Glossary contents
15.39 Loudness
Loudness is a subjective measure, the perceptual correlate of amplitude of sound. There
are objective measures of sound strength, such as SPL (sound pressure level in dB), but
Loudness is affected by other factors, principally frequency (the sensitivity of the human ear
changes as a function of frequency) and duration.
The perception of Loudness varies from one person to another, so it cannot be measured
with a single metric.
Loudness distribution
Loudness normalizer
Glossary contents
15.40 Markers
Markers are symbols identifying a reference points in an Audio File, like tab markers in
word processing. There are several marker types in WaveLab, which may be used for quick
navigation or more specialist uses. Some markers must be used in pairs.
Markers
Marker types
WaveLab 7
404
Glossary
Glossary contents
15.41 Media Catalog Number
The MCN (Media Catalog Number) is a 13-digit code for an optical disk intended for
commercial distribution - there is one such code per disk. See UPC/EAN.
You can read the Media Catalog Number (EAN) from a CD by choosing Utilities > Import
Audio CD tracks... > Functions > CD Info....
Import Audio CD Glossary contents
15.42 MIDI
MIDI (Musical Instrument Digital Interface) is an industry standard that allows devices
such as synthesizers and computers to communicate with each other through a system of
channels and triggers.
Glossary contents
15.43 MIDI Channels
MIDI provides 16 channels for sending data. When processing MIDI triggers, WaveLab
needs to know which MIDI channel to monitor to receive a trigger.
Glossary contents
15.44 Mixing
Mixing is the process of blending multiple sound files into a single file, with control over the
relative levels of each incoming file,
Glossary contents
15.45 Mobile phone Audio Files
3GP and 3G2 file formats are multimedia container formats designed to minimize storage
and bandwidth requirements for use with mobile phones.
3GP (3GPP file format) is defined by the Third Generation Partnership Project (3GPP)
for GSM-based (UMTS) mobile phones.
3G2 (3GPP2 file format) is a multimedia container format defined by the 3GPP2 for
CDMA2000-based mobile phones.
Tyoical file extensions are .3gp, .3g2
Glossary contents
WaveLab 7
15.46 MP2 files
405
15.46 MP2 files
MP2 (MPEG-1, audio layer 2) is an audio encoding format defined by ISO/IEC 11172-3,
alongside MPEG-1 and MPEG-3, using lossy audio compression. The three audio "layers"
(MP1, MP2 and MP3) are different perceptual encoding techniques.
MP2 remains an important format for broadcast audio and is part of DAB digital radio and
DVB digital television standards. It is also the audio format used in HDV camcorders. MP2
files are sometimes referred to "Musicam files".
Typical filename extensions are .mp2, .mpa, .mpg, .mus, .m32, .m44 and .m48.
MP3 files
MP2 encoding
Glossary contents
15.47 MP3 files
MP3 (MPEG-1, audio layer 3) is a patented digital audio encoding format using lossy
audio compression, designed by the Moving Picture Experts Group as part of its MPEG-1
standard, and derived from MP2. MP3 is popular for PC and internet applications - data
compression ratios of 10:1 are typical.
Note that when you open an MPEG compressed file in WaveLab, the file is converted to a
temporary wave file that is much larger than the original compressed file, so make sure that
you have enough free space on your hard disk when opening MPEG compressed files. On
saving, the temporary wave file is converted back to MP3, so from a user perspective the file
handling is transparent apart from the size difference mentioned above.
The filename extension is .mp3
MP2 files
Audio File Format Dialog
Glossary contents
15.48 Non-destructive editing
Non-destructive editing When you delete or change a part of an Audio File in a nondestructive system, the audio is not deleted or permanently changed - instead a set of pointers keeps track of all the edits, so these can be readily reversed. WaveLab provides comprehensive facilities for Non-destructive editing.
Glossary contents
15.49 Normalize
To Normalize is to raise the volume so that the sample with the highest level is set to the
maximum user-defined level. This ensures that you are using all of the dynamic range available
to you.
WaveLab 7
406
Glossary
Steinberg Limiter
Steinberg Maximizer
Glossary contents
15.50 NTSC
NTSC (from the US "National Television System Committee") is the analog television system
used in North America, parts of South America, Japan and some Pacific territories.
NTSC has 29.97 interlaced frames of video per second - a field refresh frequency of 59.94Hz
(actually 60Hz/1.001). Each frame consists of a total of 525 scanlines, 486 of which are
visible.
The digital terrestrial television (DTT) replacement for NTSC is ATSC ("Advanced Television
Standards Committee").
PAL/SECAM
Glossary contents
15.51 Ogg Vorbis files
Ogg Vorbis is a lossy compressed audio format and codec that produces files about the
same size as MP3 files but with objectively higher fidelity and no patent restrictions.
Vorbis is intended for sample rates from 8kHz telephony to 192kHz digital masters and a
range of channel representations that includes monaural, stereo, surround 5.1, ambisonic,
or up to 255 discrete channels. Vorbis is open source (free) software maintained by the
Xiph.Org Foundation.
The file extension is .ogg.
Audio File Format Dialog
Glossary contents
15.52 OSQ files
Original Sound Quality (OSQ) is WaveLab's proprietary lossless compressed audio format. By saving files in this format, you can save considerable disk space without compromising audio quality.
The filename extension is .osq
Glossary contents
15.53 PAL/SECAM
PAL is short for "Phase Alternate Line"; SECAM is short for Séquentiel couleur à mémoire
("Sequential Color with Memory"). They are related analog television encoding systems used
WaveLab 7
15.54 Pan
407
in broadcast television systems in large parts of the world. NTSC is a another analog system
used in North America and parts of South America.
In digital applications PAL video mode is usually referred to as "576i" (i.e. a vertical resolution
of 576 scan lines, interlaced), in analogue contexts it is often quoted as "625 lines". SECAM
Digital video uses its own colour space, so (in the digital domain) the minor colour space
differences that used to exist between PAL and SECAM are no longer present.
In digital video applications such as DVDs and digital broadcasting, PAL/SECAM video is
based on 576 frame lines with two interlaced video fields per frame (i.e. 50 fields per second,
yielding 25 frames per second). Audio is pulse-code modulated.
NTSC
Glossary contents
15.54 Pan
Pan is short for panoramic. Pan is perceptually "placing" a mono or stereo sound source
between two or more speakers. We sense stereo position from a difference in loudness
when the sound strikes each ear, taking into account the time delay, spectrum, reverberation
and other cues.
Steinberg Autopan
Pan Normalizer
Glossary contents
15.55 Peak level
Peak level is a measure of maximum sound level. Peak Level Meters should go as high as
possible without ever reaching 0dB! The Peak Level meters display the peak levels of each
channel, graphically and numerically.
By default, the meter segments and numerical peak values are displayed in green for low
levels, yellow for levels between –6dB and –2dB, and red for levels above –2dB.
If the level is set too low, noise levels will be high relative to the recorded sound; if peak level
exceeds 0dB by a significant amount, clipping effects can occur.
Peak Master
Glossary contents
15.56 Plug-ins
A vast number of specialist audio software Plug-ins are available, ranging from freeware to
expensive high-end commercial products, and these can greatly extend the functionality of
WaveLab.
Steinberg created Virtual Studio Technology (VST) to allow effect plug-ins to be integrated
with audio editors (such as WaveLab). VST uses Digital Signal Processing (DSP) to emulate
in software the effects of familiar recording studio hardware.
WaveLab 7
408
Glossary
Audio Plug-ins
Glossary contents
15.57 Pre-roll and Post-roll
Pre-roll is the time elapsed before an event occurs; Post-roll is the time after an event.
Pre-roll can give a brief context if you are auditioning a Clip.
Glossary contents
15.58 Preset system
WaveLab provides a sophisticated Preset system, which allows you to store a range of
individual or bulk settings and recall them for later use.
Presets
Glossary contents
15.59 Processor cores
Processor cores Modern computers are often designed with a multi-core processor, with
two or more "cores" (i.e. independent processors) in a single physical package. A dual-core
processor contains two cores, and a quad-core processor contains four cores, with the aim
of improving computational performance.
The performance gains of multi-core processors depend on whether the software has been
implemented to take advantage of this architecture.In WaveLab, the multi-core approach
allows you to simultaneously encode as many files as there are CPU cores, for example,
leading to significant performance increases. Batch Conversion
Glossary contents
15.60 Quantization
Quantization is the process by which measurements are rounded to discrete values. In
digital audio, the continuously varying voltages of an analog signal are quantized to discrete
digital values, represented in binary numbers. In 8-bit audio, sample values range from -128
to 127; in 24-bit audio, sample values range from -8288608 to 8288607.
In analog-to-digital conversion and compression, differences between the actual analog
value and the quantized digital value is called "quantization error". This error is due either
to rounding or truncation and can give rise to "quantization noise" which may be reduced by
using "dithering" techniques.
Dithering
Glossary contents
WaveLab 7
15.61 Raw PCM files
409
15.61 Raw PCM files
Raw PCM files is an Audio File format that includes no information about bit resolution
or sample rate. If you open a file in this format, WaveLab prompts you to specify the bit
resolution and sample rate. If this is not done correctly, the file will not play back as intended.
Note that the "$$$" file type is WaveLab’s own temporary file format. If you experience a
computer crash you can try opening any stray "$$$" files on your hard disk(s) to restore them.
Tyical file extensions are .raw, .bin, .pcm, .$$$
Glossary contents
15.62 Red Book CD-DA
Red Book is the standard for audio CDs (Compact Disc Digital Audio, or CD-DA). Other
"Rainbow Books" in the series, known by the color of their covers, define the formats of
CD-ROMs, VCD, SACD and other compact disc formats. DVD and Blu-ray formats are not
defined in a Rainbow Book.
The first edition of the Red Book was released in 1980 by Philips and Sony and ratified as
IEC 60908. The standard is not freely circulated - from 2009 the IEC 60908 document
has been available as a PDF download for US$260. The Red Book specifies a compliant
CD-DA in great detail, including the physical properties of the CD, the digital audio encoding
(2-channel, signed 16-bit Linear Pulse Code Modulation, sampled at 44.1kHz), the modulation system, the CIRC error-correction scheme and subcode channels. Data are stored in
sectors of 2352 bytes ("frames"), read at 75 frames/s. The bit rate is 1411.2kbits/s. Other
considerations are that the maximum number of tracks is 99, the minimum duration of a track
is 4 seconds (including a 2-second pause), the maximum playing time is 79.8 minutes, and
the ISRC should be included.
WaveLab provides Red Book-compliant CD mastering.
CD Frame
ISRC
Glossary contents
15.63 Regular Expressions
A Regular Expression (regex for short) is a formula composed of characters that have a
special meaning (called "operators"). A simple example is in using "∗.doc" to search for all
text documents in a file manager. In this case, the asterisk (star) character is an operator that
matches any string before the ".doc" in a filename. In addition to WaveLab, many software
applications, text editors (like EditPad Pro) and programming languages support regular expressions.
The characters ". [ ] ( ) { } ? ∗ + - | ! / ∧ $" are operators in WaveLab's regular expression
engine. You can submit regular expressions in a WaveLab text box wherever you see the
icon. Clicking on the light bulb icon gives a fly-out menu listing special characters and
short cuts, to help you build a precise and well-formed expression.
There are many helpful web-based tutorials that explore the topic of regex.
WaveLab 7
410
Glossary
About Regular Expressions
Glossary contents
15.64 RF64 files
RF64 is an audio file format. You have an option (set in Options > Audio File editing
preferences > Files tab) to support the RF64 file format. If this is activated, the standard
Wave file format switches automatically to the RF64 file format as soon as the file size exceeds 2GB, without any performance loss or interruption. This is especially useful when
recording very long sessions as there is no need to worry about file size limit (apart from disk
space availability).
An RF64 file uses the ".wav" extension but it can only be opened with an application that
supports the RF64 standard.
WAV files
Glossary contents
15.65 RMS
RMS (Root Mean Square) can be used as a measurement of intensity of sound (or AC
voltage, etc.) over a period of time. The RMS measurement calculates a practical average
value of all the points on a waveform as a single number over a variable period that could be
1 ms, 20 ms, or 1 hour.
RMS is often a good basis for determining an "equal level" when equalizing Clip volumes,
producing more natural results than using Peak levels, since RMS offers a more realistic
measure of the perceived "loudness" of a sound.
Glossary contents
15.66 Sample rate
The Sample Rate, or sampling frequency, is the number of samples per second used to
store a sound. High sample rates are better able to approximate the original continuous
waveform, but require more storage space.
Glossary contents
15.67 SMPTE timecode
The Society of Motion Picture and Television Engineers devised a code to synchronize time between devices, the SMPTE time code. The time code is composed of
hours:minutes:seconds:frames.
Frames are fractions of a second based on the frame rate (which can take the values 24, 25,
29.97 and 30 frames per second).
Timecode
WaveLab 7
15.68 Sound Designer II files
411
Time Format dialog
Glossary contents
15.68 Sound Designer II files
Sound Designer II is an audio file format used by Digidesign applications (such as Pro
Tools). 8-, 16- or 24-bit resolutions are supported.
The filename extension is .sd2
Glossary contents
15.69 Spectrogram
A Spectrogram is an image that shows how the spectral density of a signal varies over time.
The Spectrum display
Glossary contents
15.70 Sun/Java files
Sun/Java is an Audio File format used on Sun and NeXT computers. Files in this format can
often be found on the Internet. 8-, 16- or 24-bit resolutions are supported.
Typical file extensions are .snd, .au
Glossary contents
15.71 Tempo
Tempo is the rhythmic rate of a musical piece, usually given in BPM (beats per minute).
Glossary contents
15.72 Text/Excel files
Text/Excel is a text representation of a waveform. By saving an Audio File as a text file and
then opening it in a spreadsheet application such as Excel, you can view it in textual, decimal
form and edit the sample values. When a text file representing a waveform is opened in
WaveLab it is decoded and opened as an Audio File.
Note that these files are not compressed in any way, so they can get very large! Therefore,
avoid creating and opening extremely large .txt files. Also note that when using 32 bit float
files, the .txt format is not entirely lossless because it is not possible to express a binary
floating point value in textual decimal form without some loss of precision.
The file extension is .txt
WaveLab 7
412
Glossary
Audio File Format Dialog
Glossary contents
15.73 ULAW files
ULAW is an audio encoding and compression technique supported by Windows and Web
phones, using 8-bit resolution. The U.S. telephone system uses U-law encoding for digitization.
Typical file extensions are .ulaw, .vox
Glossary contents
15.74 UPC/EAN
UPC/EAN code - the "Universal Product Code/European Article Number", a catalog number for an item (such as a CD) intended for commercial distribution. On a CD, the code is
also called the "Media Catalog Number" - there is one such code per disk.
UPC is a 12-digit barcode widely used in the United States and Canada; EAN-13 is a
13-digit barcoding standard (12 + a checksum digit) defined by the GS1 standards organization. "EAN" is now renamed as "International Article Number", but the abbreviation has
been retained.
You can read the Media Catalog Number (EAN) from a CD by choosing Utilities > Import
Audio CD tracks... > Functions > CD Info....
Authoring CDs and DVDs
Import Audio CD
Glossary contents
15.75 WAV files
WAV (Waveform Audio File Format) is an audio file format. Although a WAV file can
hold compressed audio, the most common WAV format contains uncompressed audio in
the linear pulse code modulation (LPCM) format.
Developed by Microsoft and IBM, WAV is closely related to AIFF and is compatible with
Windows, Macintosh and Linux operating systems. Uncompressed WAV files are quite bulky,
but they have a simple file structure which can be processed efficiently in audio editing and
produce archive files of high quality. 8-, 16-, 20-, 24-bit and 32-bit (float) resolutions are
supported.
The file extension is .wav
WAV64 files
Audio File Format Dialog
Glossary contents
WaveLab 7
15.76 WAV64 files
413
15.76 WAV64 files
Wave 64 is an audio file format developed by Sony that is very similar to the standard Wave
format, but with an important difference. Standard Wave files are limited in size to 2GB
(stereo), but Wave 64 allows virtually any length (actually the limit is 512GB).
The file extension is .w64.
WAV files
Glossary contents
15.77 Waveform
A Waveform is the visual representation of wave-like phenomena (such as sound or light).
The amplitude or sound pressure over time usually results in a smooth waveform.
In WaveLab, a waveform is generally represented with time on the horizontal (x-)axis, with
the start of the waveform being the leftmost point. The vertical (y-)axis is the amplitude of
the wave.
Glossary contents
15.78 Wet/Dry
Wet/Dry is a term that describes the balance between the effect sound (wet) and the original, unprocessed audio signal (dry). in a "dry" mix, the original signal is more pronounced;
with a "wet" mix, the effect sound is more dominant.
Glossary contents
15.79 WMA files
WMA (Windows Media Audio) is a proprietary audio data compression technology developed by Microsoft. WMA can refer to an Audio File format or a range of audio codecs. Like
AAC (Advanced Audio Coding) and Ogg Vorbis, WMA is intended to address perceived
deficiencies in the MP3 standard.
It is also possible to import/export audio in WMA surround format, provided that you have
Windows Media Player 9 (or later) installed on your system.
Typical file extensions are .wma, .asf
Audio File Format Dialog
Glossary contents
15.80 Zero crossing
A Zero crossing is a point where the wave crosses the zero level axis, the point where the
wave is considered to have "zero level".
WaveLab 7
414
Glossary
If you cut out a portion of a wave and paste it in somewhere else, chances are there will be
a discontinuity where the two waves are joined. This discontinuity will result in a transient in
the wave when it is played back, which is perceived as a "click" or "bump" in the sound. To
avoid this you need to make any editing splices at a zero crossing point.
Glossary contents
WaveLab 7


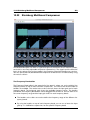
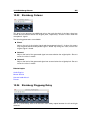
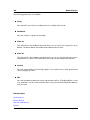


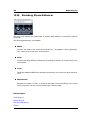
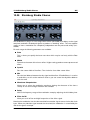

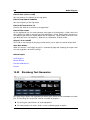
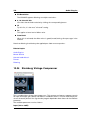
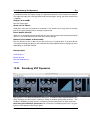


![Kenwood Z910DVD[R] User's Manual](http://vs1.manualzilla.com/store/data/007020200_1-b05420062acc26a5eda7b041010caf89-150x150.png)