Download Philips SBCSC490
Transcript
XP SBC SC 490 14-02-2003 16:43 Pagina 1
Instructions for use
English 4
Instructions pour l’utilisation
Français 20
Modo de empleo
Español 36
Bedienungsanleitung
Deutsch 52
Gebruiksaanwijzing
Nederlands 68
Istruzioni per l’uso
Italiano 84
Instruções de uso
Português 100
116
Bruksanvisning
Svenska 132
Vejledning
Dansk 148
Bruksanvisning
Norsk 164
Käyttöohje
Suomi 180
Baby Cam
SBC
SC490
XP SBC SC 490 14-02-2003 16:43 Pagina 2
2
☎
Helpline -
www.p4c.philips.com
België & Luxemburg/
Belgien & Luxemburg/
Belgique & Luxembourg
(Belgium & Luxembourg)
070 222 303
Nederland (Netherlands)
0900 8406
Danmark (Denmark)
808 82814
Österreich (Austria)
0810 001 203
Deutschland (Germany)
0180 535 6767
Portugal
35 11 416 3333
España (Spain)
902 113 384
Schweiz/ Suisse/ Svizzera
(Switzerland)
0844 800 544
France
0825 889789
(Greece)
0 0800 3122 1280
Ireland
0176 40292
Norge (Norway)
2274 8250
Suomi (Finland)
09 6158 0250
Sverige
08 5985 2250
UK (United Kingdom)
0870 900 9070
Italia (Italy)
199 11 88 99
SBC SC490/00/84
R&TTE Directive 1999/5/EC
BE ✔ DK ✔ GR ✔ ES
FR ✔
IRE
IT ✔ LU ✔ NL ✔ AT ✔
PT ✔ FI ✔ SE ✔ UK
NO✔
DE ✔ CH ✔
SBC SC490/16
R&TTE Directive 1999/5/EC
BE
DK
GR
ES ✔ FR
IRE
IT
LU
NL
AT
PT
FI
SE
UK
NO
DE
CH
SBC SC490/05
R&TTE Directive 1999/5/EC
BE
DK
GR
ES
FR
IRE ✔ IT
LU
NL
AT
PT
FI
SE
UK ✔ NO
DE
CH
XP SBC SC 490 14-02-2003 16:43 Pagina 3
3
1
POWER
8
2
3
SYSTEM
4
9
5
INPUT
CAMERA
DC12V
A
CHANNEL
B C D
6
10
7
A) Baby Unit
11
12
B) Camera Unit
13
15
16
CHANNEL
CHANNEL
B
C
D
B
C
D
SYSTEM
A
A
14
18
19
17
20
21
CHARGE
DC12V
22
OUTPUT
TV
23
24
C) Parent Unit
XP SBC SC 490 14-02-2003 16:43 Pagina 4
4
ENGLISH
Your Baby Cam
SBC SC 490
Philips is dedicated to producing caring, reliable products that new moms
and dads really need. Products whose reliability and operating quality bring
reassurance.Your wireless Baby Cam consists of a Baby Unit, a Parent Unit
with docking base and a Camera Unit. With all units properly connected,
the Philips Baby Cam provides round-the-clock support by ensuring you can
always see and hear your baby clearly. When the Baby Cam is used as a
regular baby monitor, it allows you to always hear your baby anywhere in
the house.
Philips Baby Care,Taking care together
Important information
Please read this guide carefully before using the wireless Baby Cam, and
keep it for future reference.This wireless Baby Cam is intended as an aid. It
is not a substitute for responsible and proper adult supervision and should
not be used as such.
• Make sure Baby Unit, Camera Unit and adapter cable are always out of
reach of the baby, at least 1 metre away.
• Never place Baby Unit or Camera Unit inside the baby ’s bed or playpen!
• Never cover the units (with a towel, blanket, etc.).
• Clean the units with a damp cloth.
• Never use the units near water.
• Radio equipment for wireless applications is not protected against
disturbance from other radio services.
Safety precautions
• Check if the voltage indicated on the type plate of the adapters
corresponds to the local mains voltage before connecting to the mains
power supply.
• Do not use the units in moist places or close to water.
• Do not expose the units to extreme heat or light.
XP SBC SC 490 14-02-2003 16:43 Pagina 5
ENGLISH
Packaging contents
Please confirm that the following items are packed in the Baby Cam box.
They are provided to help you set up and use your Baby Cam.
•
•
•
•
•
•
•
•
•
•
•
Baby Unit (transmitter unit)
Parent Unit (receiver unit)
Docking base for the Parent Unit
Camera Unit
Mounting gear for the Camera Unit
Audio/Video RCA connection cable for connection to a TV with RCA
connectors
Scart/RCA Audio/Video adapter for connection to a TV with Scart
connector
2 AC Power adapters
NiMH battery pack
Instructions for use
Babycare range overview leaflet
Contents
Help line 2
Important information 4
Functional overview 6
Getting the baby cam ready 7
Operating the baby cam 11
Technical specifications 15
Problem solving 16
General notes 19
5
XP SBC SC 490 14-02-2003 16:43 Pagina 6
6
ENGLISH
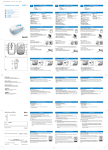
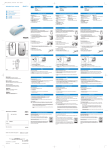
Functional overview Product illustrations on inside flap
A) Baby Unit
1 POWER button
switches the Baby Unit on and off
2 Battery check light (
)
blinks red when battery power is low
3 SYSTEM check light
lights green:
power on
lights orange:
transmitting sound (in baby monitor mode)
blinks/lights red: Baby Unit not OK
4 Microphone
5 SENSITIVITY control
adjusts the microphone sensitivity when the Baby Cam is used as a
regular Baby Monitor
6 INPUT CAMERA
camera connection
7 Battery compartment
8 CHANNEL selector
selects the required channel (A, B, C or D)*
9 DC 12V —<±
DC power supply socket for connection to the mains
10 AC power adapter
* Amount of available channels may vary per country due to local
regulations.
B) Camera Unit
11 Camera
12 Camera foot
XP SBC SC 490 14-02-2003 16:43 Pagina 7
ENGLISH
C) Parent Unit
13 Sound LEVEL lights
indicate the baby’s sound level
14 Battery check light (
)
blinks red when battery power is low
15 SYSTEM check light
lights green:
power on/connection OK
blinks red:
connection not OK
lights red:
connection not OK for more than 2 minutes
16 ON VOLUME OFF control
- switches the Parent Unit on and off
- adjusts the Parent Unit’s volume
17 Loudspeaker
to hear the baby
System check alarm
- beeps if the Baby Unit is out of range
- beeps in case of no connection for more than two minutes
18 CHANNEL selector
selects the required channel (A, B, C or D)*
19 Battery compartment
20 System check alarm switch (inside battery compatment)
switches the System Check alarm on or off
*) Amount of available channels may vary per country due to local
regulations.
Docking base
21 CHARGE light
- blinks red when charging
- lights red when fully charged
22 DC 12V —<±
DC power supply socket for connection to the mains
23 OUTPUT TV
to connect the docking base to the TV
24 AC power adapter
7
XP SBC SC 490 14-02-2003 16:43 Pagina 8
ENGLISH
8
Getting the Baby Cam ready
The wireless Baby Cam can be used in several ways:
- as a baby observation system enabling you to watch and hear your baby
on your TV. When the Parent Unit docking base is connected to the TV
via Scart connection you can even record the baby on VCR or DVD
recorder.
- as a regular baby monitor allowing you to hear your baby in and around
the house.
In both situations the units can be mains- as well as battery operated. With
the camera connected battery operation time is up to 4 hours for the Baby
Unit and up to 8 hours for the Parent Unit. When used as a baby monitor
(camera not connected) battery operation time is up to 16 hours for both
units.
Baby Unit (A)
Positioning the Baby Unit
• Position the Baby Unit at least 1 metre away from your baby.
• Never place the Baby Unit inside the baby ’s bed or playpen.
• Do not place the Baby Unit against the wall.
DC12V
A
Setting up for mains operated use
• Connect the AC power adapter (10) to a mains socket and the cord to
the DC 12V —<± socket (9) of the Baby Unit.
> The Baby Unit is now ready for mains operated use.
CHANNEL
B C D
Setting up for battery operated use
1 Remove the battery compartment cover (7) by turning the baby unit
bottom plate counter-clockwise (OPEN).
–
+
AA/R6
–
+
AA/R6
–
+
AA/R6
–
+
CLOSE
OPEN
AA/R6
–
+
AA/R6
+
+
2 Insert 6 1.5V (AA) Alkaline batteries noting the + and - configuration
inside the battery compartment.
(The batteries are not included; we recommend Philips Alkaline batteries).
–
+
AA/R6
+
–
+
AA/R6
+
–
+
AA/R6
–
+
+
AA/R6
+
+
–
+
AA/R6
+
+
–
+
AA/R6
–
+
OPEN
+
+
–
+
AA/R6
CLOSE
+
–
+
AA/R6
AA/R6
+
+
–
+
AA/R6
3 Put the battery compartment cover back in place and close by turning
the bottom plate clockwise (CLOSE).
> The Baby Unit is now ready for mains operated use.
> When the battery check light (2) flashes red, the battery power is low.
Install new batteries if this happens.
XP SBC SC 490 14-02-2003 16:43 Pagina 9
ENGLISH
9
Battery back-up
As soon as the batteries are inserted battery back-up will be activated. In
case of mains failure during mains operated use the unit will automatically
switch to battery operated use. As soon as the mains supply is back on the
unit switches to mains operated use again.
Disposal of batteries
Dispose of used batteries in an environmentally friendly manner.
Do not mix old and new batteries, or different types of batteries.
Remove Baby Unit batteries if the Baby Cam is not to be used for
long periods.
Camera Unit (B)
Mounting the camera
1 Remove the mounting plate from the camera foot (12).Turn the mounting
plate counter clockwise.
N
OPE
OP
EN
The camera can be mounted to the wall or placed on e.g. a cupboard.
Never place the Camera Unit inside the baby ’s bed or playpen.
Once connected to the Baby Unit it allows you to watch your baby, even in
the dark thanks to the built in ‘night vision’ feature.
OP
EN
E
OS
CL
2 Fix the mounting plate to the wall using the screws supplied.
Make sure the screw holes are placed in a vertical line.
CLOSE
UP
CL
OS
E
SE
CLO
3 Place the camera foot (12) back on the mounting plate and tighten by
turning it clockwise. Approximately 1/16 turn. Observe stripes on camera
foot.
CLOSE
UP
CL
OS
E
4 Place the camera (11) on the foot (12).
INPUT
CAMERA
DC12V
5 Connect the camera (11) to the Baby Unit’s INPUT CAMERA input (6).
Insert the plug with the flat side up.
6 Point the camera towards the baby.
XP SBC SC 490 14-02-2003 16:43 Pagina 10
ENGLISH
10
Parent Unit (C)
The Parent Unit comes with a high performance rechargeable battery pack.
The battery pack must be inserted and charged before the Parent Unit can
be used outside the docking base. When the battery pack is fully charged,
the Parent Unit can be taken out of the docking base and used cordlessly.
Connecting the docking base to the TV
If the camera is connected to the Baby Unit and the docking base to the TV,
you can watch and listen to your baby at any desired moment. For this
select External Input on your TV. If your TV is equipped with ‘Picture In
Picture’ (PIP) or Full Dual Screen, you can constantly view your baby while
watching TV.
DC12V
SCART connection
1 Plug the Audio/Video connection cable supplied into both the
SCART/RCA adapter supplied and the OUTPUT TV output (23) of the
docking base.
OUTPUT
TV
2 Connect the adapter to the SCART connector of the TV.
RCA connection
1 Connect the single end of the Audio/Video RCA connection cable
supplied to the OUTPUT TV output (23) of the docking base.
OUTPUT
TV
2 Connect the audio/video plugs at the other end of the cable to the
appropriate audio/video inputs on your TV. Make sure to insert the yellow
plug into the Video input and the white and red audio plugs into the
L(eft) and R(ight) Audio inputs.
CHANNEL
CHANNEL
B
C
D
B
C
D
A
A
CHANNEL
CHANNEL
B
C
D
B
C
D
Charging the battery pack/connecting to the mains
1 Remove the battery compartment cover (19) using a screwdriver.
A
A
DC12V
2 Insert the battery pack:
• Plug the connector of the cable into the connector on the right side of
the battery compartment.
• Place the side with the connection cable in the top of the battery
compartment.
XP SBC SC 490 14-02-2003 16:43 Pagina 11
ENGLISH
CHANNEL
CHANNEL
B
C
D
B
C
D
3 Put the battery compartment cover back in place and tighten the screw.
> If the rechargable battery pack begins to lose its effectiveness, replace it
with a new battery pack. Use rechargeable NiMH battery packs only!
A
A
DC12V
11
4 Connect the AC power adapter (24) to a mains socket and the cord to
the DC 12V —<± socket (22) of the docking base.
OUTPUT
TV
DC12V
OUTPUT
TV
5 Place the Parent Unit inside the docking base.
Do not place the docking base against the wall.
> The battery check light (14) blinks red.
> The Parent Unit can be operated now, but you should leave it in the
docking base until the battery pack is fully charged (at least 14-16 hours).
The battery check light (14) will then light red.
> When the battery check light (14) flashes red, the battery power is low.
Place the Parent Unit inside the docking base to recharge the battery
pack.
Operating the Baby Cam
Channel selection
CHANNEL
CHANNEL
B C
C D
D
B
CHANNEL
B C D
2 Use the CHANNEL selector (18) on the Parent Unit to set the
Parent Unit to the same channel as the Baby Unit.
A
A
A
1 Use the CHANNEL selector (8) on the Baby Unit to select the required
channel.
• If there is interference or if sound reception is poor, try repositioning the
units (Baby Unit first) or set both units to another channel.
Always make sure both units are set to the same channel.
XP SBC SC 490 14-02-2003 16:43 Pagina 12
12
ENGLISH
Switching on the units
1 Make sure the Parent Unit is connected to the TV and the Camera Unit
is connected to the Baby Unit.The Parent Unit should be placed in its
docking base.
POWER
SYSTEM
ON VOLUME OFF
2 Switch on the Baby Unit by pressing POWER (1).
> The SYSTEM check light (3) lights green.
3 Switch on the Parent Unit by turning the ON VOLUME OFF control (16)
to ON. Observe the clicking sound.
> The SYSTEM check light (15) lights green.
4 Switch on your TV and select the External Input (·).
Note:The Parent Unit must remain in the docking base otherwise the signal
from the Baby Unit is interrupted. In this case you will receive no picture
on the TV screen.
Adjusting loudspeaker volume of the Parent Unit
ON VOLUME OFF
• Adjust the volume level of the Parent Unit to the preferred level using
the ON VOLUME OFF control (16).
Checking that the units have contact
SYSTEM
• Check that the SYSTEM check light (15) on the Parent Unit lights
continuously green to confirm that both units have contact.
> The SYSTEM check light (15) lights/flashes red and the system check
alarm on the Parent Unit beeps when:
- the units are not in touch;
- out of range;
- there is interference.
XP SBC SC 490 14-02-2003 16:43 Pagina 13
ENGLISH
13
Switching the system check alarm on or off
The system check alarm on the Parent Unit beeps when the units are not
in touch.The alarm can be switched on or off.
A
A
CHANNEL
CHANNEL
B
C
D
B
C
D
A
A
CHANNEL
CHANNEL
B
C
D
B
C
D
1 Open the Parent unit ’s battery compartment cover.
2 Set the switch inside the compartment to the desired position
( - ON or
- OFF).
A
A
CHANNEL
CHANNEL
B
C
D
B
C
D
3 Close the battery compartment cover.
> The SYSTEM check light can still flash even if the system check alarm is
switched off.
Monitoring your baby
1 Make sure all connections have been properly made.
2 Switch on all units.
3 Switch on your TV.
4 Select External input on the TV.
> You can watch and listen to your baby at any desired moment.
Monitoring your baby silently
ON VOLUME OFF
• Adjust the volume on the Parent Unit to the lowest level using the
ON VOLUME OFF control (16) on the Parent Unit (do not switch off).
> The sound-LEVEL lights (13) visually alert you to baby’s sounds.
The more sound your baby makes, the more lights light.
XP SBC SC 490 14-02-2003 16:43 Pagina 14
ENGLISH
14
Recording your baby
You can make home videos without disturbing your playing child by
recording the Baby Cam images using your VCR or DVD Recorder. Because
your baby is completely unaware of being filmed, you get natural video of
the most special times.
1 Connect the babycam to your recording device using the RCA cable and
or RCA/Scart connector supplied. Also see the User Manual of the
recording device.
2 Select the Baby Cam input on the recording device.
Also see the User Manual of the recording device.
3 Prepare the recording device and insert a video tape or recordable DVD.
4 Press RECORD on the recording device to start recording.
Using the Baby Cam as a regular baby monitor
When used as a regular baby monitor, the Baby Cam allows you to hear
your baby in and around the house.
1 Disconnect the camera from the Baby Unit’s INPUT CAMERA input (6).
2 Switch on both units.
> You can now move anywhere in and around the house still hearing your
baby.
SYSTEM
– SENSITIVITY
+
Adjusting microphone sensitivity of the Baby Unit
• Adjust the microphone sensitivity of the Baby Unit to the preferred level
using the - SENSITIVITY + control.
You can use your own voice as a sound reference.
> The SYSTEM check light lights orange when the Baby Unit starts
transmitting.
XP SBC SC 490 14-02-2003 16:43 Pagina 15
ENGLISH
15
Operating range
When used cordlessly the Baby Cam operating range will be limited by
walls, ceilings, large objects and even glass. Depending on your local
circumstances the operating range can decrease down to approximately
30 metres.
The system check function (lights 3, 15 and beeping sound on the Parent
unit) will in principle indicate to you the reliability of the connection
between the Parent unit and Baby unit and whether you are out of range.
Technical specifications
Power supply:
Operating range:
– Battery pack; rechargeable NiMH for Parent
Unit (included)
– Optional batteries 6 x 1.5V; AA for
Baby Unit (not included)
– AC power adapter 230V AC, 50 Hz
Up to 100 metres in ideal open air
conditions.
Range will be affected by walls, doors, etc.
Indoors the range may decrease to
approximately 30 meters
Operating temperature: +5 °C to +45 °C
TV requirements:
PAL standard
Only use the AC/DC power adapter included.
XP SBC SC 490 14-02-2003 16:43 Pagina 16
16
ENGLISH
Problem solving
If a fault occurs, first check the points listed below. If you are unable to
remedy a problem by following these hints, contact the helpline
(see next paragraph) or consult your dealer.
Under no circumstances should you try to repair the set yourself as this will
invalidate the guarantee.
Problem
Possible cause
Solution
SYSTEM check light
does not light
Parent Unit
Unit is not switched on.
Power adapter is not plugged in or
batteries are empty.
Turn the ON VOLUME OFF control to ON.
Plug in power adapter or recharge
batteries
High pitched noise
No sound
Baby Unit
Unit is not switched on.
Power adapter is not plugged in or
batteries are empty.
Press POWER button.
Plug in power adapter or replace batteries.
Units are too close to each other.
Move Parent Unit away from Baby Unit.
Volume too high.
Decrease the Parent Units volume.
Volume on Parent Unit is set too low.
Increase Parent Unit volume.
Sensitivity setting on Baby Unit too low. Adjust sensitivity level of Baby Unit.
SYSTEM check light
blinks red and/or
system check alarm
on Parent Unit
beeps
Units are out of range.
Move Parent Unit closer to Baby Unit.
Baby Unit not switched on.
Press POWER button.
Power adapter of Baby Unit is not
plugged in or batteries are empty.
Plug in power adapter or replace batteries.
Contact between units is interrupted
Reposition the units. Baby Unit first.
Units too far away from each other.
Decrease distance between units.
Batteries are low.
Replace/recharge batteries.
Interference from another RF source.
Remove the other RF source.
XP SBC SC 490 14-02-2003 16:43 Pagina 17
ENGLISH
17
ENGLISH
ENGLISH
17
17
Problem
Possible cause
Solution
Battery check light
blinks red
Batteries are low or empty.
Parent Unit:
Baby Unit:
Recharge battery pack.
Replace or remove batterries.
No picture or
distorted picture
on TV screen/
disturbing sound
from TV
Camera Unit not (properly)
connected to the Baby Unit..
Make proper connection between units.
Parent Unit not (properly)
connected to the TV.
Make proper connection.
Parent Unit not in docking base.
Place Parent Unit in docking base.
Parent Unit too close to (active)
microwave oven.
Move Parent Unit away from microwave
oven.
Mobile or cordless phones too close
to (one of) the units.
Move phones away from the units.
Interference from microwave oven.
Move Parent Unit away from microwave
oven.
Interference or
poor reception
Pick-up from
another Baby Cam/
wireless TV link/
other 2.4 GHz
wireless device
Both systems are operating on the same Switch channels
frequency.
Parent Unit
batteries
do not charge
Battery life is at an end.
Replace rechargeable battery pack,
using only NiMH rechargeable battery
pack.
CHARGE light
does not light/blink
Battery pack not in place.
Place battery pack in Parent unit.
XP SBC SC 490 14-02-2003 16:43 Pagina 18
ENGLISH
A
A
CHANNEL
CHANNEL
B
C
D
B
C
D
Replacing the battery in the Parent Unit
1 Remove the battery compartment cover (19) using a screwdriver.
2 Remove the old battery pack.
CHANNEL
CHANNEL
B
C
D
B
C
D
A
A
CHANNEL
CHANNEL
B
C
D
B
C
D
3 Insert the battery pack:
• Plug the connector of the cable into the connector on the right side
of the battery compartment.
• Place the side with the connection cable in the top of the battery
compartment.
A
A
18
4 Put the battery compartment cover back in place and tighten the screws.
> The Parent Unit is now ready for use again.
XP SBC SC 490 14-02-2003 16:43 Pagina 19
ENGLISH
19
General notes
• Picture and sound quality is influenced by the use of microwave ovens.
Other wireless systems (Bluetooth, wireless LANs, etc.) can also adversely
influence the quality of picture and sound, and vice versa.
• The Baby Cam is a Radio Frequency (RF) based product. As such its
performance can suffer the same kinds of interference as GSMs, portable
radios and other RF-based products.
• The Baby Cam is not limited to just one room.You can use it anywhere in
the house. Consequently, anybody in the vicinity of your house (up to the
maximum operating range) who also owns a Baby Cam set to the same
channel, can watch and hear your baby.
• Radio wave safety: When switched on, the Philips Baby Cam transmits and
receives radio waves.The Philips Baby Cam complies with the standards that
are defined for it.
• The Philips Baby Cam has an operating range of up to 100 metres,
approximately in open air. Walls, ceilings and other large objects may limit
the useable operating range to about 30 metres in the house.
Need Help?
In case you have any questions about the SBC SC490, please contact our
helpline for assistance! You can find the number in the list on page 2.
Before you call, please read this manual carefully.
You will be able to solve most of your problems.
The model number of the Baby Cam is SBC SC490.
Date of purchase:
_____
day
/_____
/month
/______
/year
XP SBC SC 490 14-02-2003 14:27 Pagina 196
English
Français
Español
Deutsch
Nederlands
Italiano
Português
Ελληνικά
Svenska
Dansk
Norsk
Suomi
Hereby, Philips Consumer Electronics, B.U. Peripherals &
Accessories, declares that this SBC SC490 is in compliance
with the essential requirements and other relevant provisions of
Directive 1999/5/EC.
Par la présente, Philips Consumer Electronics, B.U.
Peripherals & Accessories, déclare que l'appareil SBC SC490
est conforme aux exigences essentielles et aux autres
dispositions pertinentes de la directive 1999/5/CE
Por medio de la presente, Philips Consumer Electronics, B.U.
Peripherals & Accessories, declara que el SBC SC490 cumple
con los requisitos esenciales y cualesquiera otras
disposiciones aplicables o exigibles de la Directiva 1999/5/CE
Hiermit erklärt Philips Consumer Electronics, B.U. Peripherals
& Accessories die Übereinstimmung des Gerätes SBC SC490
mit den grundlegenden Anforderungen und den anderen
relevanten Festlegungen der Richtlinie 1999/5/EG.
Hierbij verklaart, Philips Consumer Electronics, B.U.
Peripherals & Accessories dat het toestel SBC SC490 in
overeenstemming is met de essentiële eisen en de andere
relevante bepalingen van richtlijn 1999/5/EG.
Con la presente Philips Consumer Electronics, B.U.
Peripherals & Accessories dichiara che questo SBC SC490 è
conforme ai requisiti essenziali ed alle altre disposizioni
pertinenti stabilite dalla direttiva 1999/5/CE.
Philips Consumer Electronics, B.U. Peripherals & Accessories
declara que este SBC SC490 está conforme com os requisitos
essenciais e outras disposições da Directiva 1999/5/CE.
ΜΕ ΤΗΝ ΠΑΡΟΥΣΑ Philips Consumer Electronics, B.U.
Peripherals & Accessories ∆ΗΛΩΝΕΙ ΟΤΙ SBC SC490
ΣΥΜΜΟΡΦΩΝΕΤΑΙ ΠΡΟΣ ΤΙΣ ΟΥΣΙΩ∆ΕΙΣ ΑΠΑΙΤΗΣΕΙΣ ΚΑΙ
ΤΙΣ ΛΟΙΠΕΣ ΣΧΕΤΙΚΕΣ ∆ΙΑΤΑΞΕΙΣ ΤΗΣ Ο∆ΗΓΙΑΣ 1999/5/ΕΚ
Härmed intygar, Philips Consumer Electronics, B.U.
Peripherals & Accessories, att denna SBC SC490 står I
överensstämmelse med de väsentliga egenskapskrav och
övriga relevanta bestämmelser som framgår av direktiv
1999/5/EG.
Undertegnede Philips Consumer Electronics, B.U. Peripherals
& Accessories erklærer herved, at følgende udstyr SBC SC490
overholder de væsentlige krav og øvrige relevante krav i
direktiv 1999/5/EF
Philips Consumer Electronics, B.U. Peripherals & Accessories
erklærer at SBC SC490 apparatene tilfredsstiller de vesentligste kravene og andre relevante standarder i henhold til
direktivet 1995/5/EC.
Philips Consumer Electronics, B.U. Peripherals & Accessories
vakuuttaa täten että SBC SC490 tyyppinen laite on direktiivin
1999/5/EY oleellisten vaatimusten ja sitä koskevien direktiivin
muiden ehtojen mukainen.
XP SBC SC 490 14-02-2003 14:27 Pagina 197
Teknisiä tietoja
XP SBC SC 490 14-02-2003 14:27 Pagina 198
Guarantuee certificate
Garantiebewijs
Certificado de garantia
Garantibevis
Certificat de garantie
Certificado de garantia
$
Garantibevis
1
year warranty
année garantie
Jahr Garantie
jaar garantie
año garantia
anno garanzia
Type:
Garantieschein
Certificato di garanzia
Garanticertifikat
Takuutodistus
%
år garanti
år garanti
år garanti
vuosi takuu
año garantia
SBC SC490
Serial nr: ___________________________________________________________________
Date of purchase - Date de la vente - Verkaufsdatum - Aankoopdatum - Fecha de compra - Date d’acquisito Data da adquirição - G!
! - Inköpsdatum - Anskaffelsesdato - Kjøpedato - Oatopäivä -
Dealer’s name, address and signature
Nom, adresse et signature du revendeur
Name, Anschrift und Unterschrift des Händlers
Naam, adres en handtekening v.d. handelaar
Nombre, direccion y firma del distribudor
Nome, indirizzo e firma del fornitore
!b)!, % b
!b. b
!
Återförsäljarens namn, adress och signatur
Forhandlerens navn, adresse og unterskrift
Forhandlerens navn, adresse og unterskrift
Jälleenmyyjän nimi, osoite ja allekirjoitus
Nome, morada e assinature da loja
6 month guarantee on rechargeable batteries
6 mois de garantie sur les piles rechargeables
6 meses de garantía para las pilas recargables
6 Monate Garantie auf wiederaufladbare Batterien
6 maanden garantie op oplaadbare batterijen
Garanzia di 6 mesi sulle batterie ricaricabili
Pilhas recarregáveis com 6 meses de garantia
E% 6 !) b
! !b
6 månaders garanti på laddningsbara batterier
6 måneders garanti på genopladelige batterier
6 måneders garanti på de oppladbare batteriene
Ladattavilla akuilla on 6 kuukauden takuu
www.philips.com
This document is printed on chlorine free produced paper
Data subject to change without notice
Printed in China
0682


