1
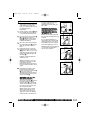
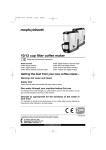
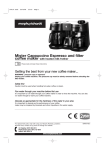
47060 rev2 25/6/07 12:37 Page 1 10/12 cup filter coffee maker Please read and keep these instructions Models Covered 47060- Manual Interface 47061- Digital Interface 47062- Manual Interface & Thermal carafe 47063- Digital Interface & Thermal carafe Getting the best from your new coffee maker... Warning: Hot water and steam Safety first Caution must be used when handling hot water, coffee or steam. Run water through your machine before first use It is important to run water through your coffee maker in order to rinse the machine. You can also run water through to warm your coffee machine. Descale as appropriate for the hardness of the water in your area It is important to descale as the performance of your coffee maker may be impaired by limescale and other impurities in the water supply. For replacement parts, help with using your Morphy Richards product, problems and lots more, contact us by phone or through our website. UK Helpline: 0870 060 2610 Replacement parts: 0870 167 6641 Ireland 1800 409119 CM47060 Rev2 47060 rev2 25/6/07 12:37 Page 2 Important safety instructions Other safety considerations The use of any electrical appliance requires the following common sense safety rules. • Disconnect the coffee maker from the mains supply when filling, cleaning or not in use. Primarily there is danger of injury or death and secondly the danger of damage to the appliance. These are indicated in the text by the following two conventions: • When unplugging, turn any control to ‘OFF’, then remove the plug from the wall socket. • WARNING: Danger to the person! Keep the outside of the coffee maker area clean and dry at all times. • IMPORTANT: Damage to the appliance! In addition we offer the following safety advice. Do not touch hot surfaces. Always use handles or knobs on the coffee maker. • Do not immerse the coffee maker itself in water and always ensure the electrical connections are kept dry. • Do not operate any appliance with a damaged cord or plug or after the appliance malfunctions or has been damaged in any manner. Ring the helpline number for advice on examination and repair. • The use of attachments or tools not recommended or sold by Morphy Richards may cause fire, electric shock or injury. • Do not use the coffee maker for anything other than its intended purpose. • If the supply cord is damaged, it must be replaced by the manufacturer, it’s service agent or similarly qualified persons in order to avoid a hazard. Location • Remove all the packaging and retain for future reference. • Ensure the coffee maker is used on a firm, flat surface. • Do not use the coffee maker outdoors or in a bathroom. • Do not place the coffee maker on a highly polished wooden surface as damage may occur to the surface. • Do not place the coffee maker on or near hot surfaces such as a hot plate, radiant rings or near a naked flame. • WARNING: Do not place the coffee maker onto a metal tray or metal surface whilst in use. Product safety UK Helpline 0870 060 2610 • Never use warm or hot water to fill the water reservoir. • Do not overfill the water reservoir. Replacement Parts 0870 167 6641 Ireland Helpline 1800 409119 47060 rev2 25/6/07 12:37 Page 3 Personal safety • Ensure the lid of the glass jug is securely in place before pouring. • Take care to pour hot coffee slowly and carefully without tipping the glass jug too fast. • Do not fill above the capacity mark of the water level gauge marked on the jug. • Do not use the glass jug in a microwave. • Milk should not be reheated, only heat it when required. • When heating milk, please use the stainless steel jug provided. • Do not fill the milk jug above the MAX mark. • Do not touch metal parts until the unit has cooled. • This appliance is not intended for use by persons (including children) with reduced physical, sensory or mental capabilities, or lack of experience and knowledge, unless they have been given supervision or instruction concerning use of the appliance by a person responsible for their safety. Children • • 3 UK Helpline 0870 060 2610 Children do not understand the dangers associated with operating electrical appliances. Never allow children to use this appliance. Children should be supervised to ensure that they do not play with the appliance. Treating scalds • Run cold water over the affected area immediately. Do not stop to remove clothing, get medical help quickly. Choice of coffee • Choose a finely ground espresso coffee to use with this machine. NOTE: Avoid blends that are very powdery. When the coffee is too finely ground it may block the filter. ELECTRICAL REQUIREMENTS Check that the voltage on the rating plate of your appliance corresponds with your house electricity supply which must be A.C. (Alternating Current). If the socket outlets in your home are not suitable for the plug supplied with this appliance the plug should be removed and the appropriate one fitted. WARNING: The plug removed from the mains lead, if severed, must be destroyed as a plug with a bared flexible cord is hazardous if engaged into a live socket outlet. Should the fuse in the 13 amp plug require changing, a 13 amp BS1362 fuse must be fitted. WARNING: This appliance must be earthed. Replacement Parts 0870 167 6641 Ireland Helpline 1800 409119 2 47060 rev2 25/6/07 12:37 Page 4 Product features Á ⁄ ¤ › Ë ‹ fi ‰ Â È Í Í ‚/ „ ‡/ · fl fl Ê Î Features ⁄ Measuring spoon storage area ¤ Water re-fill point Ë Plug storage ‚ Manual interface (see overleaf) Í Lid release ‹ Measuring spoon „ Digital interface (see overleaf) › Filter holder and permanent mesh filter ‰ Frother control fi Lid opening push button 3 · 8/10 cups steel thermal coffee jug È Anti drip Î Hot plates  Milk hot plate switch fl Milk frother steel jug Ê Illuminated water level indicator ‡ 12/15 cups glass coffee jug Á Coffee strength control 4 47060 rev2 25/6/07 12:37 Page 5 Ì Ó 1/ 2 1 Ï Ô ÚÒ ‚ Manual interface version Auto keep warm indicator Ï Function selector Ò Milk frother device ON indicator Ì 1/2 carafe indicator Ú Milk hot plate ON indicator Ó 1 carafe indicator Ô Brewing ON indicator Û ı Ù ˘ ˜ Ú Ò ˆ ¯ 35 ◊ 34 „ Digital interface version ˆ Hour function push button Auto keep warm indicator ˜ Minute function push button Ò Milk frother device ON indicator ¯ Cup selector push button Ú Milk hot plate ON indicator ˘ Quality and brew indicator Û Power ON/OFF selection push button ◊ Programming mode indicator 34 Automatic timer function indicator 35 Cup selection indicator 36 24 hour clock Ù Programme selection push button ı Auto function push button Milk hot plate ON pilot light Milk frother device ON pilot light 36 Milk frother device off pilot light Auto keep warm light 1/2 carafe light 1 carafe light auto 5 UK Helpline 0870 060 2610 Replacement Parts 0870 167 6641 Power ON/OFF Ireland Helpline 1800 409119 4 47060 rev2 25/6/07 12:37 Page 6 OPERATING THE APPLIANCE MANUAL INTERFACE VERSIONS ‚ BEFORE USE Making coffee Before using your coffee maker for the first time or if you have not used it for some time, rinse the machine by running water through. Follow the procedure for making coffee, without coffee in the filter holder. The product that you have purchased is available in four different versions: • Manual version - Glass carafe • Manual version - Thermal carafe • 24 hour automatic timer version - Glass carafe • 24 hour automatic timer version - Thermal carafe For the complete understanding of how to use your machine please refer to the specific section related to your version. Please note not all variants are available in all countries, please contact your retailer for more information. 5 1 Press the push button fi to open the hinged lid. The lid will automatically rise. 2 Using a jug, fill the water reservoir ¤ with the required amount of water using the level indicator Ê as a guide. Both the jug and water level indicator are marked in cups A. 3 Spoon ‹ the required amount of ground filter coffee into the mesh filter › spreading evenly. We suggest one level measuring spoon for every cup. Ensure the filter is sitting properly in the filter holder B. 4 Close the lid. Ensure the lid is closed and latched properly C, otherwise the machine will not function correctly. 5 Slide the jug ‡/· into the coffee maker ensuring it sits correctly on the hot plate D. The jug lid must be in place during the brewing process; otherwise the non drip valve will not open, causing the filter to flood. A B C D 6 47060 rev2 • 25/6/07 12:37 Page 7 Thermal Carafe Variant We suggest consuming your coffee within two hours, after this time we suggest brewing another jug of fresh coffee. Note: Thermal carafe versions have no hot plate. Please ensure the jug sits correctly on the base recess. • Ensure the jug · lid is fully closed by turning the lid clockwise, this ensures the maximum temperature is maintained in the jug. To ensure the coffee is kept as warm as possible we advise you rinse your thermal carafe in hot water before use. • Allow the unit to cool. • Remove the permanent filter and empty the used coffee grounds. Wash the filter immediately and dry thoroughly. • Thermal Carafe Variants • Plug the filter coffee maker in at the wall socket and switch on, the water gauge Ê will illuminate. Rotate the dial Ï to select one of the two on positions available: 1/2 carafe or a full carafe,F depending on the number of cups required. Refer to ‘Cup selection function’ page 11 for further information. When the brewing process is complete the product remains on, we recommend you switch off your coffee maker as soon as brewing is complete. • The thermal carafe · will keep the coffee warm in the jug for up to four hours. • The cup selection indicator Ì/Ó and the brewing on indicator Ô will light up. The hot water will start to flow through the coffee grounds and into the jug as coffee for you to enjoy. The anti drip valve È will prevent any remaining coffee dripping onto the base recess during serving. • We suggest consuming your coffee within two hours, after this time we suggest brewing another jug of fresh coffee. Glass Carafe Variant • WARNING: The coffee maker and hot plates are hot and remain hot for some time after switching off. 6 Select the required strength of coffee using the strength selector on the lid E. 8 • When the brewing process is complete the product will automatically switch to keep warm; the auto keep warm indicator will light up. The automatic keep warm function will keep the coffee warm in the carafe until the product is switched off. The anti-drip valve È will prevent any remaining coffee dripping onto the hot plate during serving. Ensure that the jug is replaced on the hot plate after serving. 7 NOTE: Remember to turn off the machine when you have finished. Please note the jug lid must be in place during the brewing process; otherwise the non-drip valve will not open, causing the filter to flood. 7 WARNING: The coffee maker and hot plates are hot and remain hot for some time after switching off. • • E F NOTE: • Remember to turn off the machine when you have finished. • Allow the unit to cool. • Remove the permanent filter and empty the used coffee grounds. Wash the filter immediately and dry thoroughly. UUKKHHeelplplilninee0088770000660022661104 RReepplalacceemmeennt tPPaartrsts0088770011657766664415 IrIerelalannddHHeelplplilninee11880000440099111199 6 47060 rev2 25/6/07 12:37 Page 8 DIGITAL INTERFACE VERSIONS „ • • When the machine is plugged in, the display will flash 12:00 dimly. • Ensure the jug · lid is fully closed by turning the lid clockwise, this ensures the maximum temperature is maintained in the jug. To ensure the coffee is kept as warm as possible we advise you rinse your thermal carafe in hot water before use. • Please note the jug lid must be in place during the brewing process; otherwise the non-drip valve will not open, causing the filter to flood. To set the time press the hour button ˆ and minute buttons ˜ to reach the desired time. NOTE: The clock is a 24 hour clock. The clock will be reset, each time the product is unplugged at the wall. Making coffee 1 Press the push button fi to open the hinged lid. The lid will automatically rise G. 6 Select the required strength of coffee using the strength selector on the lid L. 2 Using the jug, fill the water reservoir ¤ with the required amount of water using the level indicator Ê as a guide. Both the jug and water level indicator are marked in cups H. 7 Press the power ON/OFF selection button Û. The display lights up brightly and the cup selection indicator will flash 35 showing the previous selection. 3 Spoon ‹ the required amount of ground filter coffee into the mesh filter › spreading evenly. We suggest one level measuring spoon for every cup. Ensure the filter is sitting properly in the filter holder I. 4 5 7 NOTE: If the machine has been unplugged from the wall socket since the last operation the previous selection will be cleared, the default setting will be applied (1 full carafe). 8 Close the lid. Ensure the lid is closed and latched properly,J otherwise the machine will not function correctly. Slide the jug ‡/· into the coffee maker ensuring it sits correctly on the hot plate K. The jug lid must be in place during the brewing process; otherwise the non drip valve will not open, causing the filter to flood. G Note: Thermal carafe versions have no hot plate. Please ensure the jug sits correctly on the base recess. Set the clock • Thermal Carafe Variant 9 Press the cup selection button ¯ to select one of the available options, 1/2 carafe or full carafe M depending on the number of cups required. Refer to ‘Cup selection function’ page 11 for further information. The selection indicator will stop flashing, if no buttons are pressed for 2 seconds the machine will begin the brewing process. The brewing indicator ˘ will start to illuminate from left to right indicating that brewing is in progress, hot water will start to flow through the coffee grounds and into the jug as coffee ·. H I J K L M 47060 rev2 • 25/6/07 12:37 Page 9 Glass Carafe Variant • When the brewing process is complete the product will automatically switch to keep warm ; the brewing indicator ˘ will stop illuminating from left to right. All segments will remain solidly illuminated indicating the machine is in keep warm state. The indicator has now changed from a brewing indicator to a quality indicator. Refer to ‘Coffee Quality indicator’ page 11 for further information. When the brewing process is complete the product remains on, the brewing indicator ˘ will stop illuminating from left to right, all segments will remain solidly illuminated, the indicator has now changed from a brewing indicator to a quality indicator. Refer to ‘Coffee Quality indicator’ page 11 for further information. If the coffee is to be consumed immediately we recommend switching off your coffee maker as soon as brewing is complete. The automatic keep warm function will keep the coffee warm in the carafe until the product is switched off. NOTE: If you switch off your coffee maker the coffee quality indicator will turn off and reset. For safety reasons the coffee maker will automatically switch off after two hours. The thermal carafe will keep the coffee warm in the jug for up to four hours. The anti-drip valve È will prevent any remaining coffee dripping onto the hot plate during serving. Ensure that the jug is replaced on the hot plate after serving. For safety reasons the coffee maker will automatically switch off after two hours. The anti drip valve will prevent any remaining coffee dripping onto the base recess during serving. We suggest consuming your coffee within two hours, after this time we suggest brewing another jug of fresh coffee. We suggest consuming your coffee within two hours, after this time we suggest brewing another jug of fresh coffee. WARNING: The coffee maker and hot plates are hot and remain hot for some time after switching off. WARNING: The coffee maker and hot plates are hot and remain hot for some time after switching off. NOTE: • 9 Thermal Carafe Variant Remember to turn off the machine when you have finished. NOTE: • Allow the unit to cool. • • Remove the permanent filter and empty the used coffee grounds. Wash the filter immediately and dry thoroughly. Remember to turn off the machine when you have finished. • Allow the unit to cool. • Remove the permanent filter and empty the used coffee grounds. Wash the filter immediately and thoroughly. UK Helpline 0870 060 2610 Replaw cewmwe.nmtoPrpah rtysri0c8h7a0rd1s6.c7o6m641 Ireland Helpline 1800 409119 9 8 47060 rev2 25/6/07 12:37 Page 10 Set the automatic timer function NOTE: The timer function can be set when the coffee maker is brewing or when it is in standby. 1 2 3 Press the programme button Ù. The display will change to show the previous set time and cup selection flashing. If no previous setting has been made or the machine has been unplugged from the socket since the last setting the default setting will be shown; 12:00 and full carafe. Select ¯ the desired number of cups that want to be brewed, 1/2 or full carafe (see cup selection function on page 11). The cup selector indicator will stop flashing. 6 Press the AUTO button ı again to cancel the automatic function, the timer function indicator will disappear. The machine will keep in the memory the cup selection setting and the start time until it is unplugged from the mains socket. 7 To change the start time and the number of cups repeat steps 1-5. WARNING: Remember to fill the water tank with water and the filter with coffee before activating the auto function. Press the hour and minute ˜ buttons to set the desired time. The start time will stop flashing. NOTE: The clock is a 24 hour clock. NOTE: The programming mode indicator continues to flash to show the display is still in programming mode. If no buttons are pressed, the display will revert to the time display within 5 seconds. 4 If the programme button Ù is pressed again or if no buttons are pressed within 5 seconds the cup selection setting and the start time are memorised. 5 To activate the automatic timer function press AUTO button ı. • The display will change to show the programmed time and cup selection setting for 5 seconds. The display will then change to show the time, the automatic timer function indicator will illuminate to show the automatic timer function is set. • With the automatic function activated the coffee maker will turn on at the desired time and start to brew the coffee. NOTE: If the AUTO button ı is pressed during the brewing process the machine will switch off and the automatic timer function will be activated. 9 If setting the automatic timer function during the brewing process, wait until the process is complete before pressing the AUTO button. 47060 rev2 25/6/07 12:37 Page 11 Frothing milk It is advised to start heating your milk ready for frothing when you start making the coffee. This helps to ensure the milk reaches its optimum frothing temperature. 1 Fill the stainless steel jug fl with the required amount of milk. Do not exceed the maximum level. 2 Place the jug on the hot plate Î N and push the frother hot plate  ON/OFF switch to the ‘ON’ O position, the hot plate indicator will light up. 3 4 Once the coffee is brewed (and the auto keep warm indicator lights up) the milk is ready to froth. Engage the frother system by turning the frother control lever P ‰ to the right, the motor will start automatically and the milk frother device ON indicator will illuminate Ò. Pour the coffee into the cups and then gently pour or preferably spoon the milk onto the coffee. N WARNING: The stainless steel jug and the hotplate will remain hot for sometime after switching the machine off. NOTE: The milk frother jug and lid can be disassembled for easy cleaning. O It is recommended that you disassemble and clean the milk frother jug and its components immediately after use, as dried milk can be difficult to remove. NOTE: All milk jug and coffee jug components are dishwasher safe for easy cleaning. P Frothing should take between 30-60 seconds. NOTE: Frothing time can vary depending on the type of milk used and its starting temperature. We recommend to use semi skimmed milk from the fridge. 5 Q Disengage the frother system from the jug by turning the frother control lever to the left Q ‰, the motor will stop automatically. Push and release the milk hot plate switch to turn off the hot plate Â. WARNING: Take care the milk will be very hot. Remove the milk jug fl from the hot plate and press the lid release button Í to disengage the lid. The lid assembly can be removed for easy pouring and spooning off the milk. NOTE: The lid can be turned upside down and rest on the work surface. The inner lid is shaped to collect any dripping milk and froth for minimal mess. UK Helpline 0870 060 2610 Replacement Parts 0870 167 6641 Ireland Helpline 1800 409119 10 47060 rev2 1 25/6/07 12:37 Page 12 Cup selection function Coffee quality indicator This machine has a special selector that maintains the quality of coffee brewed in relation to the number of cups selected. The coffee quality indicator will show the quality of the coffee in the carafe in relation to the time since brewing was completed. Quality of the coffee is a personal choice. The quality indicator gives an indication of the quality and taste of coffee after the brewing process is complete. There are two options available: • 1/2 carafe (1-6 cups - Glass jug) (1-5 cups - Thermal jug) • 1 carafe (7-12 cups - Glass jug) (6-10 cups - Thermal jug) 11 2 The selection needs to be set in relation to the amount of water in the water tank and the amount of coffee powder in the filter. 3 The incorrect selection of this function will not affect the functionality of the machine however the quality and taste of the coffee brewed will be affected. 4 If you find the strength selector does not provide a weak or strong enough cup of coffee to suit your taste, the cup selection function can be used in conjunction to achieve a stronger or weaker cup of coffee. • The table below shows the settings to use in relation to the volume of water in the tank to help achieve a stronger or weaker coffee. Feel free to experiment with different settings until you achieve the desired strength of coffee to suit your own personal taste. 1-6 7-12 1-5 6-10 1/2 Standard Stronger 1 Weaker Standard It is not absolute and can differ due to personal taste, or type of coffee used. The graph shown below gives an indication of the relation between each segment of the display in relation to both quality and time. C D E B A 47060 rev2 25/6/07 12:37 Page 13 RECIPES Cappuccino Cafe Latte 1/2 espresso 1/3 espresso 1/3 hot milk 1/3 hot frothed milk Chocolate powder for sprinkling 1 2 3 4 5 1/2 hot frothed milk 1 2 Prepare coffee as per ‘making a coffee’ instructions (Page 5, 6 or 7). Fill the stainless steel milk jug with the required amount of milk, place on the hotplate and switch on. The milk will take approx. 7 minutes to reach the appropriate temperature. Froth milk by lifting the milk jug up to the milk frothing blade ensuring that the blade is just under the surface of the milk and press the milk frothing button. The milk will take approx. 30 seconds to froth. 3 4 Amaretto Coffee 250ml hot strong coffee Stir the coffee and alcohol together either with 2 tablespoons of doublecream, or top with a dollop of whipped cream. 2 Sprinkle with grated chocolate and serve. UK Helpline 0870 060 2610 Makes 2 servings Fill the stainless steel milk jug with the required amount of milk, place on the hotplate and switch on. The milk will take approx. 7 minutes to reach the appropriate temperature. 2 tsp sugar Froth milk by lifting the milk jug up to the milk frothing blade ensuring that the blade is just under the surface of the milk and press the milk frothing button. The milk will take approx. 30-60 seconds to froth. Pour the coffee into a tall glass and top with the frothed milk. 40ml of double cream 4 shot measurements of Irish whisky 350ml hot strong coffee 1 Whip double cream until thick then chill. 2 Warm 2 Irish coffee glasses with hot water and place in each a teaspoon of sugar and 2 shots of Irish whisky in glass. 3 Divide coffee among the glasses. 4 Slowly dribble the chilled cream over the back of the spoon onto the top of the coffee. 5 Do not stir. 1/3 hot frothed milk 1/3 hot chocolate 1 Prepare coffee as per ‘making a coffee’ instructions (5, 6 or 7). 2 Fill the stainless steel milk jug with the required amount of milk, place on the hotplate and switch on. The milk will take approx. 7 minutes to reach the appropriate temperature. 3 Froth milk by lifting the milk jug up to the milk frothing blade ensuring that the blade is just under the surface of the milk and press the milk frothing button. The milk will take approx. 30 seconds to froth. 4 Prepare the hot chocolate according to the manufacturer’s instructions. 2 shots of Amaretto 1 Prepare coffee as per ‘making a coffee’ instructions (5, 6 or 7). 1/3 espresso 2 tablespoons of double or whipped cream Sugar to taste Pour the coffee, hot milk and hot chocolate into a tall glass and serve. Irish Coffee Moccacino Pour the coffee in first and then the hot milk into a cappuccino cup, spoon over frothed milk. Sprinkle with chocolate powder to serve. 5 Replacement Parts 0870 167 6641 Ireland Helpline 1800 409119 12 47060 rev2 25/6/07 12:37 Page 14 CLEANING AND MAINTENANCE Refilling 1 Switch off the coffee maker, and allow 5 minutes to cool. 2 Lift the lid and refill with cold water. Descaling Unplug the coffee maker, and allow to cool. 2 Do not immerse the coffee maker in liquid. 3 Rinse the water tank occasionally with cold water. Do not use a cloth as any residue or lint left behind may clog the coffee maker. 4 Remove the permanent filter › and filter holder discard the used coffee and wash with warm soapy water. Extended soaking is recommended at the same time as descaling. Rinse and dry thoroughly. 5 Wash the coffee jug and milk jug including all frothing components, in warm soapy water. Rinse and dry all parts thoroughly. • If you live in a harder water area, we recommend that your coffee maker is descaled at regular intervals, eg. every 2 - 3 months. In areas of moderately hard water you should descale every 6 months. • If the water filters through more slowly than usual, it is a sign that descaling is necessary. • We recommend you to use proprietary liquid descaler which is especially made for coffee makers and plastic kettles. Follow the instructions on the bottle or sachet, and then operate the coffee maker with just water 3 times before making coffee. 6 Wipe all external surfaces with a damp cloth and dry thoroughly. • Do not use kettle descaler unless the packet specifically states it is suitable for coffee makers. Care must be taken to ensure the non drip valve situated on the bottom of the filter holder is not damaged during cleaning. • Never use harsh or abrasive cleaners. • NOTE: The permanent mesh filter should not be in place during descaling. 13 Cleaning care 1 NOTE: Coffee jug, milk jug and frother parts are all dishwasher safe. 47060 rev2 25/6/07 12:37 Page 15 Helpline If you have any difficulty with your appliance, do not hesitate to call. We are more likely to be able to help than the store from where you bought it. Please have the following information ready to enable our staff to deal with your enquiry quickly: • Name of the product. • Model number as shown on the underside of the appliance. • Serial number as shown on underside of the appliance. For electrical products sold within the European Community: • At the electrical products useful life it should not be disposed of with household waste. • Please recycle where facilities exist. • Check with your Local Authority or retailer for recycling advice in your country. UK Helpline 0870 060 2610 Replacement Parts 0870 167 6641 Ireland Helpline 1800 409119 UK Helpline 0870 060 2614 Replacement Parts 0870 157 6645 Ireland Helpline 1800 409119 14 47060 rev2 25/6/07 12:37 Page 16 YOUR TWO YEAR GUARANTEE It is important to retain the retailers receipt as proof of purchase. Staple your receipt to this back cover for future reference. EXCLUSIONS Morphy Richards shall not be liable to replace or repair the goods under the terms of the guarantee where: 1 The fault has been caused or is attributable to accidental use, misuse, negligent use or used contrary to the manufacturers recommendations or where the fault has been caused by power surges or damage caused in transit. 2 The appliance has been used on a voltage supply other than that stamped on the products. All Morphy Richards products are individually tested before leaving the factory. In the unlikely event of any appliance proving to be faulty within 28 days of purchase it should be returned to the place of purchase for it to be replaced. 3 Repairs have been attempted by persons other than our service staff (or authorised dealer). 4 Where the appliance has been used for hire purposes or non domestic use. If the fault develops after 28 days and within 24 months of original purchase, you should contact the Helpline number quoting Model number and Serial number on the product, or write to Morphy Richards at the address shown. 5 Morphy Richards are not liable to carry out any type of servicing work, under the guarantee. 6 Plastic filters for all Morphy Richards kettles and coffee makers are not covered by the guarantee. You may be asked to return a copy of proof of purchase • This guarantee does not confer any rights other than those expressly set out above and does not cover any claims for consequential loss or damage. This guarantee is offered as an additional benefit and does not affect your statutory rights as a consumer. • This guarantee is valid in the UK and Ireland only. Please quote the following information if the product develops a fault. These numbers can be found on the base of the product. Model no. Serial no. For electrical products sold within the European Community. At the end of the electrical products useful life it should not be disposed of with household waste. Please recycle where facilities exist. Check with your Local Authority or retailer for recycling advice in your country. Subject to the exclusions set out below (see Exclusions) the faulty appliance will then be repaired or replaced and dispatched usually within 7 working days of receipt.If for any reason this item is replaced during the 2 year guarantee period, the guarantee on the new item will be calculated from original purchase date. Therefore it is vital to retain your original till receipt or invoice to indicate the date of initial purchase. To qualify for the 2 year guarantee the appliance must have been used according to the manufacturers instructions. For example coffee makers should have been regularly descaled. The After Sales Division Morphy Richards Ltd Mexborough, South Yorkshire, England, S64 8AJ Morphy Richards products are intended for household use only. Registration 644702 Morphy Richards has a policy of continuous improvement in product quality and design. The company, therefore reserves the right to change the specification of its models at any time. Helpline (office hours) UK 0870 060 2610 Republic of Ireland 1800 409119 47060 MUK Rev2 06/07 For details of other products in the Morphy Richards range please see our website . . .