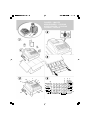
1
ECR 7700
USER'S GUIDE
ENGLISH
Cash Register
PUBLICATION ISSUED BY:
Olivetti S.p.A.
www.olivetti.com
Copyright © 2009, Olivetti
All rights reserved
Your attention is drawn to the following actions that could compromise
the characteristics of the product:
Het is belangrijk te weten dat de volgende acties nadelige gevolgen kunnen
hebben voor de goede werking van het product:
•
incorrect electrical supply;
•
het verkeerd aansluiten van een stroombron;
•
incorrect installation; incorrect or improper use, or, in any case, not in
accordance with the warnings given in the User Manual supplied with
the product;
•
onjuiste installatie; onjuist of oneigenlijk gebruik, of handelingen die
worden uitgevoerd zonder inachtneming van de waarschuwingen in
de handleiding bij het product;
•
replacement of original components or accessories with others of a
type not approved by the manufacturer, or carried out by unauthorized
personnel.
•
vervanging van originele onderdelen of accessoires door onderdelen
of accessoires van een type dat niet is goedgekeurd door de fabrikant,
of vervanging die wordt uitgevoerd door onbevoegd personeel.
Nous attirons votre attention sur les actions suivantes qui peuvent
compromettre la conformité attestée ci-dessus et les caractéristiques du
produit:
Chamamos a sua atenção para as seguintes acções que podem
comprometer o desempenho do produto:
•
abastecimento de corrente não adequado;
•
Alimentation électrique erronée;
•
•
Installation ou utilisation erronée ou non conforme aux indications
exposées dans le manuel d'utilisation fourni avec le produit;
instalação incorrecta, utilização incorrecta ou indevida, ou não
respeitando os avisos descritos no Manual do Utilizador que é fornecido
com o produto;
•
Replacement de composants ou d'accessoires originaux par des
pièces non approuvées par le constructeur, ou effectué par du personnel
non autorisé.
•
substituição de componentes originais ou acessórios por outros de
tipo não aprovado pelo fabricante, ou substituição realizada por
pessoal não autorizado.
Wir möchten Sie darauf hinweisen, daß folgende Aktionen die oben
bescheinigte Konformität und die Eigenschaften des Produkts
beeinträchtigen können:
Vær opmærksom på, at følgende handlinger kan beskadige
produktet:
•
Forkert strømforsyning.
•
Falsche Stromversorgung;
•
•
Installations- oder Bedienungsfehler bzw. Nichtbeachtung der Hinweise
in der Bedienungsanleitung, die mit dem Produkt geliefert wurde;
Forkert installation, ukorrekt eller forkert brug eller, som under alle
omstændigheder, ikke er i overensstemmelse med advarslerne i den
medfølgende Brugervejledning.
•
Das Auswechseln von Bauteilen oder Originalzubehör durch Unbefugte
oder das Ersetzen durch Teile, die nicht vom Hersteller anerkannt
werden.
•
Udskiftning af originale dele eller tilbehør med andre typer, som ikke
er godkendt af fabrikanten, eller foretaget af uautoriseret personer.
Prestar mucha atención a las siguientes acciones que pueden
comprometer la conformidad arriba certificada y, obviamente, las
características del producto:
Vi önskar fästa din uppmärksamhet på verksamheterna
som anges nedan, eftersom dessa kan kompromittera produktens
egenskaper:
•
Alimentación eléctrica errónea;
•
oriktig strömförsörjning;
•
Installación o uso erróneos, improprios o no conformes con las
advertencias detalladas en el manual de uso suministrado con el
producto;
•
oriktig installation; oriktig eller olämplig användning, eller som i alla
falli inte överensstämmer med de varningar som ges i
användarhandboken som levereras tillsammans med produkten;
•
Sustitución de componentes o accesorios originales con otros no
aprovados por el fabricante o bien efectuada por parte personal no
autorizado.
•
byte av originalkomponenter eller tillbehör mot annan typ
som ej godkänts av tillverkaren, eller som utförts av obehörig
personal.
FIGURES - IMAGES
ABBILDUNGEN - FIGURAS
AFBEELDINGEN - FIGURAS
FIGURER - BILDER
10
1
1
21
4
4
5
6
7
8
20
5
8
19
18
17
16
9
10
6
15
7
3
2
3
9
2
14
13
12
11
SAFETY INFORMATION
INFORMATIONS DE SECURITE
SICHERHEITSVORSCHRIFTEN
INFORMACIÓN DE SEGURIDAD
VEILIGHEIDSINFORMATIE
INFORMAÇÃO SOBRE SEGURANÇA
SIKKERHEDSFORANSTALTNINGER
SÄKERHETSINFORMATION
1. Connect the power cord to an electrical outlet that is near the product and easily accessible.
2. Install your cash register on a flat and stable surface, at a location where no one can step on
or trip over the power cord.
3. Do not use your cash register near water, or with wet hands.
4. Do not expose your cash register to rain or moisture.
5. Unplug your cash register from the electrical outlet before cleaning.
1. Brancher le cordon d’alimentation à la prise électrique qui se trouve près du produit et facilement
accessible.
2. Initialiser la caisse enregistreuse sur une surface plaine et stable, dans une place où il n’y pas le
risque de presser ou de heurter le cordon.
3. Ne pas utiliser la caisse enregistreuse près de l’eau, ou avec les mains mouillées.
4. Ne pas exposer la caisse enregistreuse à la pluie ou à l’humidité.
5. Débrancher la caisse enregistreuse de la prise électrique avant de la nettoyer.
1. Das Netzkabel an eine Steckdose anschließen, die in der Nähe der Maschine und leicht zugänglich ist.
2. Die Registrierkasse auf einer ebenen stabilen Fläche installieren. Darauf achten, dass keiner über
das Netzkabel stolpern oder auf es treten kann.
3. Die Kasse nicht in der Nähe von Wasser oder mit nassen Händen benutzen.
4. Die Kasse nicht Regen oder Feuchtigkeit aussetzen.
5. Vor Reinigungsarbeiten die Kasse vom Stromnetz trennen.
1. Conecte el cable de alimentación a una toma eléctrica que se encuentre cerca del producto y que
tenga un fácil acceso.
2. Instale su caja registradora en una superficie plana y estable, en un emplazamiento en el que nadie
pueda pisar el cable de alimentación o tropezar con él.
3. No utilice la caja registradora cerca del agua ni si tiene las manos húmedas.
4. No exponga la caja registradora a la lluvia o la humedad.
5. Desconecte la caja registradora de la toma eléctrica antes de la limpieza.
1. Sluit het netsnoer aan op een stopcontact dat zich in de buurt van het kasregister bevindt en vrij
toegankelijk is.
2. Installeer uw kasregister op een plat en stabiel oppervlak, op een plaats waar niemand op het
netsnoer kan trappen of erover struikelen.
3. Gebruik uw kasregister niet in de buurt van water, of met natte handen.
4. Stel uw kasregister niet bloot aan regen of vocht.
5. Trek de stekker uit het stopcontact voordat u het kasregister gaat schoonmaken.
1. Ligue o cabo de alimentação a uma tomada eléctrica que esteja perto da máquina e seja de fácil acesso.
2. Instale a caixa registadora sobre uma superfície plana e estável, num local onde ninguém possa chocar
com ela ou tropeçar no cabo de alimentação.
3. Não utilize a caixa registadora perto de água, nem a manuseie se tiver as mãos molhadas.
4. Não exponha a caixa registadora a chuva ou humidade.
5. Desligue a caixa registadora da tomada de corrente antes de a limpar.
1. Tilslut de elektriske kabel til elnettet, som er ved siden af produktet og nemt tilgængelig.
2. Placér Deres kasseapparat på en flad, sikker og stabil overflade, et sted hvor ingen kan gå eller trampe
over det elektrisk kabel.
3. Brug ikke Deres kasseapparat i nærheden af vand, eller med våde hænder.
4. Deres kasseapparat må ikke udsættes for regn eller fugtighed.
5. Slut Deres kasseapparat fra elnettet inden de går i gang med rengøring.
1. Stoppa in nätsladdens stickkontakt i ett lättåtkomligt vägguttag nära apparaten.
2. Installera kassaregistret på en jämn och stabil yta där ingen kan trampa på eller snubbla
över nätsladden.
3. Använd inte kassaregistret nära vatten eller med våta händer.
4. Utsätt inte kassaregistret för regn eller fukt.
5. Dra ut stickkontakten från vägguttaget före rengöringen.
HOW DO I PROCEED?
COMMENT JE DOIT PROCEDER?
VORGEHENSWEISE
¿QUÉ DEBO HACER A CONTINUACIÓN?
HOE GA IK TE WERK?
O QUE DEVO FAZER?
FREMGANGSMÅDE?
HUR GÅR JAG VIDARE?
START
START
START
START
UP
UP
UP
UP
-
START
START
START
START
UP
UP
UP
UP
1. Plug the cash register into a electrical outlet and insert the batteries.
2. Load the paper.
3. Proceed with Quick Start Programming.
4. Perform basic sales transactions.
5. Get to know your cash register in depth.
1.
2.
3.
4.
5.
Brancher la caisse enregistreuse à la prise électrique et insérer les batteries.
Charger le papier.
Procéder avec la fonction Vite Démarre de Programmation.
Exécuter les transactions de ventes basiques.
Prendre confiance avec la caisse enregistreuse.
1. Die Kasse an eine Netzsteckdose anschließen und die Batterien einsetzen.
2. Papier laden.
3. Die Quick Start Programmierung durchführen.
4. Einfache Verkaufsvorgänge ausführen.
5. Sich mit allen Funktionen der Kasse vertraut machen.
1. Enchufe la caja registradora en una toma eléctrica e inserte las baterías.
2. Cargue el papel.
3. Continúe con la programación de la puesta en servicio rápida.
4. Realice transacciones de venta básicas.
5. Conozca más en detalle la caja registradora.
1. Sluit het kasregister aan op een stopcontact en plaats de batterijen.
2. Plaats het papier.
3. Voer de snelstart-programmering uit.
4. Voer basis-verkooptransacties uit.
5. Leer uw kasregister grondig kennen.
1. Ligue a caixa registadora a uma tomada eléctrica e insira as pilhas.
2. Coloque o papel.
3. Continue com a Programação de Iniciação Rápida.
4. Realize transacções básicas de vendas.
5. Familiarize-se com a sua caixa registadora.
1.
2.
3.
4.
5.
Tilslut kasseapparatet til elnettet og sæt batterierne i.
Sæt papir i.
Gå frem med Hurtig Start Programmering.
Indret basis salgstransaktioner.
Lær Deres kasseapparat at kende.
1. Sätt in kassaregistersladden i ett vägguttag och sätt i batterierna.
2. Ladda pappret
3. Gå vidare med programmeringen för snabbstart.
4. Utför grundläggande försäljningstransaktioner.
5. Fördjupa kännedomen om kassaregistret.
INSERTING MEMORY BACKUP BATTERIES
INSÉRER LES BATTERIES TAMPONS DE LA MÉMOIRE
BATTERIEN ZUR SPEICHERSICHERUNG EINSETZEN
INSERCIÓN DE LAS BATERÍAS DE RESPALDO DE LA MEMORIA
INSTALLEREN VAN DE BATTERIJEN VOOR NOODVOEDING
INSERIR AS PILHAS DE BACKUP DA MEMÓRIA
INDSÆT HUKOMMELSE BACKUP BATTERIER
SÄTTA I BACK-UP BATTERIERNA
LOADING THERMAL PAPER
INSTALLATION DU PAPIER THERMIQUE
EINLEGEN VON THERMOPAPIER
CARGA DEL PAPEL TÉRMICO
THERMISCH PAPIER PLAATSEN
COLOCAR PAPEL TÉRMICO
ISÆTNING AF TERMOPAPIR
LADDA VÄRMEKÄNSLIGT PAPPER
DAILY JOB OPERATIONS
OPÉRATIONS QUOTIDIENNES
TÄGLICHE ARBEITEN
OPERACIONES COTIDIANAS DURANTE EL TRABAJO
DAGELIJKSE TAKEN
OPERAÇÕES DIÁRIAS
DAGLIGE ARBEJDSOPERATIONER
DAGLIGA ARBETSMOMENT
Morning startup
Démarre du matin
Einschalten zu
Geschäftsbeginn
Puesta en marcha al inicio
de la jornada
Morgens opstarten
Arranque da manhã
Morgens opstart
Sales transactions
Transactions de ventes
Verkaufsvorgänge
Transacciones de venta
Verkooptransacties
Transacções de vendas
Salgstransaktioner
Igångsättning på morgonen
End of day reports
Compte-rendu de fin journée
Berichte bei Geschäftsende
Informes de cierre de la
jornada
Einddaags-rapportages
Relatórios de fim de dia
Slut af dagens registreringer
Försäljingstransaktioner
Slut på dagen rapporter
Major Features
Cash Register Components
Removable Cash Drawer with Lock
Keypad Functions
The Control Lock and Key
Operator and Customer Displays
Error Conditions
Error Codes
Clearing an Error
Cash Register Reset Operations
Electronic Journal
Quick Start
Quick Start Programming
Cash Register Programming and
Features
Making Changes to Cash Register
Programming
Caption Programming using the
Alphanumeric Keypad and Character Table
Receipt Header and Footer
Department Names
PLU Item Names
Percent Discount (-%) or Add On (+%)
Foreign Currency Exchange Rates
Foreign Currency Descriptors
Rounding Option for Swiss, Danish and
Swedish Currencies
Fraction Rounding for VAT Calculation
Printing VAT Information on Customer
Receipts
Calculator Mode
Clerk System
Clerk Names
Manager Password
Using the Cash Register in a Password
Protected Mode
Training Mode
System Options
Consecutive Receipt Number
Z1 Counter Setting
Z2 Counter Setting
Grand Total Setting
Management Reports
X and Z Reports
PLU Sales Report
Clerk Report
PLU Stock Report
Department Programming Report
PLU Programming Report
Cash Register Programming Report
Training Report
Electronic Journal Reports
Sales Transactions
Major Features
1
1
1
2
2
3
3
3
3
3
4
5
5
•
6
•
•
•
6
6
7
8
8
8
9
9
9
10
10
10
11
12
12
12
12
13
15
15
15
15
15
15
16
16
17
17
17
17
18
18
19
•
•
•
•
•
•
•
•
•
•
•
•
•
•
•
•
•
•
14 departments and up to 400 Price Look-Up (PLU)
settings;
8 clerk numbers to monitor the sales of individual
employees;
Electronic journal with a maximum capacity of up to
3,000 transaction lines for storing all transaction data;
signalling of EJ memory full and nearly full conditions;
10-digit operator and client Vacuum Fluorescent
Displays (VFD);
Quantity entries using the decimal point;
Training mode facility with related password;
Stock counter for PLU items, that automatically
decrements to keep track of the remaining number of
items in stock;
Replaceable keycaps;
Receipt on/off, and duplicate receipt features;
Possibility of activating a Clerk Security System
consisting of a three-digit security code;
Possibility of assigning a name to each Clerk for rapid
identification;
Z management report mode password definition;
Customer sales receipt header personalization and
receipt footer definition;
Special rounding capabilities for Swiss, Danish and
Swedish currencies;
Customer receipt and management report printing in
English, French, German, Spanish, Dutch, Portoguese,
Danish or Swedish;
Department programming (positive and negative sales)
4 foreign currency exchange rates with related currency
descriptors;
Cash, check, charge and card tender media keys, with
change tendered on all payments;
4 different VAT rates;
Possibility of programming the cash register to print a
range of VAT totals on the sales receipt;
Time display at the press of a key;
Battery back-up protection for the records and programming data.
Cash Register Components
With reference to figure 2:
1. Customer Display
2. Operator Display
3. Control lock
4. Keypad
5. Cash Drawer
6. Cash Drawer Lock
7. Item deposit drawer
8. Power Cord
9. Customer Receipt Output Window
10. Printer Compartment Cover
Removable Cash Drawer with Lock
With reference to figure 4, the cash drawer has slots for
banknotes and for coins.
Open the drawer by pressing
or by sliding the hidden
emergency button underneath the register.
The cash drawer can be completely removed from the
register by lifting up on the open drawer and pulling
towards yourself.
1
ENGLISH
Contents
Keypad Functions
During caption programming,
With reference to figure 5:
between characters.
- Allows price entries for departments 8-14. Press
1.
this key before entering applicable department keys.
drawer that is not part of a sale. When pressed in the
REG mode, prints one or more copies of the last sales
transaction recorded (overrides the Receipt Off mode
set with the related key).
3.
15.
received on account that is not part of a sale; for
example, the start-up money put in the drawer at the
start of each business day can be registered as an RA.
As the Currency Conversion key, it is used to
automatically calculate and display the value in foreign
currency of the subtotal of a sale or of a particular
amount registered.
5.
- Opens the cash drawer without registering any
amount or when changing cash for a non-sales
transaction.
6.
7.
- Registers sales paid by check.
8.
- Subtotals a sale, and used for the programming of
VAT rates.
- Registers sales that are charged.
9.
- Totals exact cash transactions, computes
10.
change and totals transactions that are split tendered
with check or credit card and cash together. This key is
also used to enter into the calculator mode. In the
calculator mode, it is used as the "equal" (=) key.
11.
-
- Departments 1 through 7, to enter single
or multiple item sales to a particular department. When
pressed after
- Registers a preset price of an individual item to
the appropriate department.
17.
- Used to add or subtract a percentage rate from
an individual item or an entire sale. The rate can be a
pre-programmed percentage rate or any other manually
entered percentage rate.
18.
- Used to manually enter a price for a PLU article.
19.
- When used as the coupon key, subtracts an amount
from an item or the sales total, such as a coupon deduction.
When used as the Refund key, subtracts an item that is
returned for refund.
20.
- Advances the receipt or journal paper one line
feed; advances the paper continuously when held
down.
21.
- Deletes the last item entered, and used for
correcting a particular entry after it is processed and
printed. During caption programming, cancels from right to
left the characters that have been entered.
The Control Lock and Key
This control lock key must be properly positioned to operate
the cash register, to set the programs and to print or reset
the totals for the management report. With reference to
figure 3:
1. Turn the control key to the required position indicated
below.
PRG Used to set and change program settings.
- Enters a decimal point for defining quantities
with decimals during sales transactions. During caption
programming, confirms the entry of the selected
character when the same key is repeated.
-
/
- Input amounts, indicate how many
times a particular item repeats, add and subtract
percentage rates and input department code numbers.
Used to input the characters indicated on the related
key and indicated in the Character Table when defining
clerk names, receipt header, receipt footer, department
names, PLU product names and currency identifiers.
2
16.
, registers to Departments 8 through
14.
13.
before finalizing a transaction with a
Department or function key. Also used to clear error
conditions.
- Registers sales that are put on credit, such as a
debit card, or on a credit card that is alternative to the
one used for Charge tenders.
- Clears an entry made from the numeric keypad
or with
digit security code. In the REG mode, toggles the cash
register between printing and not printing the sales
receipt.
- When used as the RA key, registers any money
entries and
displays the current date, time and EJ information in the
REG and JRNL modes.
During caption programming, enters double-width
characters.
- Confirms an entered clerk number and three-
4.
- Multiplies [DEPARTMENT] or
14.
- Registers any money taken out of the cash
2.
12.
adds a space
OFF
The cash register is turned off and cannot be
used.
REG (On/Customer Receipt) - The cash register is set
for standard sales transactions. A customer
receipt is printed for each transaction.
JRNL (On/Journal Tape) - The cash register is set for
standard sales transactions. A journal record is
printed for each transaction. The key-activated
Receipt On/Off function does not work in this
mode (transaction always printed).
X1/X2 Prints the X management (mid-day) report.
Z1/Z2 Prints the Z management (end-of-day) report and
resets totals (except the grand total) to zero.
Your cash register is equipped with two 10-digit
alphanumeric Vacuum Fluorescent Displays (VFD). With
reference to figure 6, the display is read from left to right as
follows:
C1...C8
(1) - With the Clerk System active,
indicates the clerk number entered
before working in the REG or JRNL
mode, or when
is pressed.
Department
(2) - A set of digits indicating the
department key pressed for each
entry.
Repeat/Multiply
(3) - A number displayed when
repeating or multiplying items to
indicate the number of items entered
at one price.
Amount
(4) - Indicates entry amounts and
sales totals.
Error Conditions
Error Codes
The following error codes can be displayed:
E1
Operation error
E2
Sales amount exceeded
E3
Zero-price entry error
E4
Incorrect full-void entry
E5
Clerk number and password requested
E6
Manager password requested
ENGLISH
Operator and Customer Displays
Clearing an Error
Press
to clear an error. The tone ends, the displays
clear and the keypad unlocks, allowing you to continue
with the transaction or restart the program.
If an error condition cannot be cleared by pressing
,
Special Symbol Indicators
reset the cash register by performing one of the cash
register reset operations.
Special symbols appear at the far left-hand side of the
displays during cash register operation:
Cash Register Reset Operations
C (Change) Indicates that the displayed amount is the
change due to the customer.
If the cash register does not function, for example while
programming and the error signal cannot be stopped by
E (Error)
Indicates when an error is made during
operation or when programming the cash
register. An error tone sounds to alert the
operator.
ST (Sub-total)
Indicates that the amount shown is the
subtotal of a transaction, including sales tax
if applicable.
- (Minus)
Displays a negative entry. Also displays if
subtotal or cash tendered total is a negative
number due to a return or refund.
_ (Line)
Indicates, from left-to-right on the bottom of
the display, the calculator mode, receipt off
mode, training mode and an electronic
journal nearly full condition (less than 700
transaction lines available).
pressing
, reset the cash register.
There are four reset operations; be very careful when
choosing the one to perform since you could unnecessarily
cancel report data and cash register programming data.
Partial Reset
A Partial Reset operation just clears the cash register's
working memory.
1. Turn the control key to the OFF position.
2. Press
for about 2 seconds and then press
.
Displayed when
is pressed to indicate
that the amount is displayed in foreign
currency.
CA (Cash)
Indicates a sales transaction paid by cash.
Ch (Check)
Indicates a sales transaction paid by check.
Cr (Charge) Indicates a sales transaction paid by credit
card.
These symbols clear automatically when you start the next
entry or press
.
If the cash register still remains in an error condition,
proceed with the Full Reset - Reports operation.
Full Reset Reports
A Full Reset - Reports operation erases the cash register's
working memory, and all totals and counters (all report
data).
1. Turn the control key to the OFF position.
2. Press
for about 2 seconds and then press
.
If the cash register still remains in an error condition,
proceed with the Full Reset - New Language Entry Excluded
operation.
3
Full Reset - New Language Entry Excluded
A Full Reset - New Language Entry Excluded, erases the
cash register's working memory, all totals and counters
(all report data) and cancels all cash register
programming data with the exclusion of the languagespecific captions programmed. Be extremely careful
when using this reset operation.
1. Turn the control key to the OFF position.
When the electronic journal reaches a nearly full condition,
there are less than 700 lines remaining in journal memory.
A warning beep will sound at the beginning and end of
each transaction performed.
When the journal reaches a full condition, less than 300
lines are remaining in memory. A message is displayed
indicating that the journal memory is full along with a
warning beep at the beginning of a transaction; press
2. Press
for about 2 seconds and then press
.
3. Reprogram the cash register.
If the cash register still remains in an error condition,
proceed with the Full Reset - All Data operation.
Full Reset - All Data
A Full Reset - All Data operation erases the cash
register's working memory, all totals and counters (all
report data) and cancels all cash register programming
data. Be extremely careful when using this reset
operation. Use this method as last resort only.
t
o
continue with further transactions; remember, however,
that the transaction data will NOT be stored in memory and
the consecutive receipt counter will not increase. If
you
want to terminate the sales transaction, press
.
To know how many lines are remaining in the electronic
journal, press
in the REG mode
and outside of a sales transaction.
1. Turn the control key to the OFF position.
2. Press
for about 2 seconds and then press
Make sure that plenty of paper is loaded in the printer.
1. Control key position: Z1/Z2.
.
3. Reprogram the cash register.
Electronic Journal
The cash register is equipped with a dynamic Electronic
Journal (EJ) memory that by default contains up to 3,000
lines of sales data. During transactions, the sales data are
continuously recorded in this memory so that you are
constantly kept up-to-date with the latest 3,000 lines of
effective sales information.
You can, however, program the cash register for standard
electronic journal opertion. In this case you program the
memory to hold a maximum of 3,000 sales data lines before
being promped to clear the memory. The electronic journal
stores all the sales receipts recorded in the REG and JRNL
mode, thus allowing you to print this record at any time or
when memory reaches the nearly full or full condition.
To program the cash register for standard electronic journal
operation:
1. Control key position: PRG.
2. Press
.
NOTE: You can also personalize other electronic journal
features, by programming System Options 4, 5, 6 and 7.
See "System Options" for details.
4
Printing and Clearing the Contents of the Electronic Journal
2. Press
.
To interrupt report printing, press
press
. To resume printing,
again. To stop report printing, press
.
When the contents of the electronic journal are printed, a
message is displayed along with a beep to indicate that the
EJ memory capacity has been restored to its maximum
programmed line capacity.
NOTE: You can also print the contents of the electronic
journal with the control key in the X position; doing so,
however, will not clear the electronic memory.
Clearing Electronic Journal Memory Without
Printing the Contents
The electronic journal memory contents are cleared and
not printed:
1. Control key position: Z1/Z2.
2. Press
.
4. Set a Fixed VAT Rate
This section allows you to program basic cash register
features so that you can start to work right away with your
new product. Programs and transaction information for
management reports are stored in the memory of the cash
register which is protected by back-up batteries.
Before beginning to program the cash register or to
perform sales transactions, insert the batteries to save
this information if a power failure occurs or if the cash
register is unplugged from the electrical outlet.
Quick Start Programming
1. Control key position: PRG.
2. Type the [number] that represents the VAT (1 for VAT1,
2 for VAT2, 3 for VAT3 and 4 for VAT4).
.
3. Press
4. Type the VAT rate. Five digits can be used and you
MUST enter three digits after the desired decimal
place.
5. Press
.
Example: Set a VAT1 rate of 5.50%.
1. Set your Language
NOTE: After you set your language the cash register will
automatically perform a reset and cancel all the
programming and transaction data stored.
Type/Press:
VAT number
1. Control key position: PRG.
2. Press
.
5
3. Press your language identifier:
for French,
for Portuguese,
or
for Spanish,
for German,
for Dutch,
for Danish,
for Swedish,
NOTE: Before changing a VAT rate, print a Z Financial
report. See "X1 and Z1 Financial Reports".
See sections "Fraction Rounding for VAT Calculation" and
"Printing VAT Information on Receipt" for other VAT-related
features.
5. Link a multiple/single item sale, tax status
and Item Price to a Department
for English.
4. Press
50
.
Example: Program the cash register to print in French.
Type/Press:
A total of 14 departments are available on your cash
register. Programming a department consists of assigning
a multiple/single item positive or negative sale and a
previously programmed tax status to it. You can then
optionally assign a preset price to the department.
A 3-digit department status can be programmed by using
the following options:
Language identifier
2. Set the Date
Multiple/Single Item Sales
1. Control key position: PRG.
2. Type the current date in the DDMMYY format.
3. Press
.
Example: Set a date of May 25, 2009.
Type/Press:
Day
Month
Year
3. Set the Time
1. Control key position: PRG.
2. Type the current time in the HH:MM, 24-hour format.
3. Press
.
Example: Set the time at 3:30 PM.
0
1
2
3
=
=
=
=
Tax Status
Multiple, positive item sales 00 = Non taxable
Single, positive item sales
01 = Taxable with
Multiple, negative item sales
VAT 1
Single, negative item sales
02 = Taxable with
VAT 2
03 = Taxable with
VAT 3
04 = Taxable with
VAT 4
1. Control key position: PRG.
2. Type the [Multiple/Single Item Sales] and [Tax Status]
options by referring to the previous table. A 3-digit
status code must be entered.
3. Press
.
4. Type a [unit price] to assign to a specific item and then
assign it to a department by pressing the related
department
to
key. Use
for departments
from 8 to 14.
Type/Press:
Hour
Minutes
5
ENGLISH
Quick Start
Example: Program a multiple positive item sale, VAT 2
and a price of £2.50 to an item in Department 2.
Type/Press:
Programs and transaction information for management
reports are stored in the memory of the cash register which
is protected by back-up batteries.
Unit price
Tax status
Multiple positive
item sales
Department
After you have programmed your departments, you can
print a report that indicates the programmed values. See
section "Department Programming Report" for details.
6. Program a Fixed Price Look-Up (PLU)
Up to 400 PLUs can be programmed. You can also define
the number of items in stock for each individual PLU
programmed.
Every time an item is sold, the inventory number decrements
automatically so as to keep track of the remaining number
of items in stock.
, type the [PLU number (between 1 and
400)] and then press
.
3. Type the [number between 1 and 9999] of PLU items
in stock and then press
.
4. Type the [unit price] that you wish to assign to the PLU.
5. Press the related department
to
key
to assign the PLU to a Department from 1 to 14. If tax
is required for a particular PLU item, be sure to link the
PLU number related to the item to a department that is
programmed for tax. To program a department for tax,
refer to the section Link a Multiple/Single Item Sale, Tax
Status and Item Price to a Department.
6. Press
Before beginning to program the cash register or to
perform sales transactions, insert the batteries to save
this information if a power failure occurs or if you unplug
the cash register from the power outlet.
Making Changes to Cash Register
Programming
If you wish to make a change to your initial programming
(such as an update to VAT rates, PLUs or exchange rates):
•
•
•
Turn the control key to the PRG position.
Re-do the program in question and confirm as explained
in the next sections
Turn the control key to another operating mode.
A new program entry will automatically overwrite a previous
entry for the same program.
1. Control key position: PRG
2. Press
Cash Register Programming and
Features
.
Example: Create PLU 1 with a unit price of £2.69
assigned to Department 3. Define a total of 200 items in
stock.
Type/Press:
Caption Programming using the
Alphanumeric Keypad and Character
Table
To program customer receipt headers and courtesy
messages, PLU product names, department names, clerk
names and foreign currency descriptors you can use just
the alphanumeric part of the keypad to enter non-accented
capital letters and the Character Table to enter small
letters, accented capital and small letters, special characters
or symbols. The following captions can be programmed:
• Up to 400 PLU item names of a maximum 12 characters
each
• Up to 14 department names of a maximum 12 characters
each
• Up to 8 clerk names of a maximum 12 characters each
• Receipt headers of up to 6 lines of a maximum 24
characters each
• Receipt footers of up to 4 lines of a maximum 24 characters
each
• Up to 4 foreign currency identifiers of a maximum 10
characters each.
Using the Keypad
To use the alphanumeric keypad to enter capital caption
letters, locate the letter wanted and press its associated
alphanumeric key the number of times needed to display
it (the letter will be displayed on the far right-hand side of
the display).
• If the same alphanumeric key has to be used for
PLU number
PLU items in stock
successive
letters of a caption, press
between the two letters.
• Press
PLU price
Department
After you have programmed your PLU items, you can print
a report that indicates the programmed values. See section
"PLU Programming Report" for details.
if you want to add spaces.
• If you want to give a determined letter a double-width
attribute, press
before pressing the letter key.
• Any incorrect letter can be canceled by pressing
that provides the typcal backspace function available in
the PC environment.
6
• Confirm your final caption by pressing
4. Enter the letters or characters of the string you wish to
.
.
define and then press
Example: Enter the word BOOKS.
5. Repeat steps 3 and 4 if you wish to program the
remaining programmable header or footer lines.
O
O
B
6. Press
to exit.
ENGLISH
Type/Press:
Example: Change the third line of the default header to
PLEASE COME AGAIN using the Character Table.
Type/Press:
K
S
Receipt header line selection
Switch to Recipt header
definition mode
Using the Character Table
The Character Table provides all the letters and symbols
that your cash register is capable of printing.
P
To use this table, with reference to figure 7:
•
First look for the letter or symbol wanted and then
identify its corresponding alphanumeric key listed in
the first column on the left.
•
Press the alphanumeric key on the keypad the number
of times needed to select the character by reading the
number on the row on the top of the table.
•
Confirm your final caption by pressing
E
L
S
A
E
C
O
M
.
NOTE: Special accented national letters are not displayed.
A
E
G
A
Example: Select the letters L and Ü.
Type/Press:
Ü
L
I
N
Ü
Confirm entered
header
Exit
Receipt Header and Footer
By default your cash register prints a header and footer on
all customer receipts when the control key is in the REG
position.
The receipt header can consist of up to 6 lines of 24
characters each, the footer up to 4 lines of 24 characters
each. You can change the cash register's default header
or footer by using the numeric keypad and/or Character
Table to enter the characters.
1. Control key position: PRG.
2. Press
repeatedly until displaying the message
"HD1" indicating the first line of the receipt header, or
"FT1" indicating the first line of the receipt footer.
3. Press
repeatedly until displaying the line number
of the header or footer line you want to personalize, on
the left-hand side of the operator display.
7
Department Names
You can assign a name of up to 12 characters long to each
of the 14 departments available.
The department names that you define will be printed on
the customer receipts, journal reports and on all
management reports.
1. Control key position: PRG.
2. Press
Example: Name PLU 2 "COFFEE" by using the
alphanumeric keypad.
Switch to PLU Name
definition mode
PLU number selection
Type/Press:
repeatedly until displaying the message
"DP01" indicating the first customizable department.
3. Press
repeatedly until displaying the desired
department number on the left-hand side of the operator
display.
4. Enter the letters or characters of the string you wish to
define and then press
Confirm entered
PLU name
.
Exit
5. Repeat steps 3 and 4 for all desired department names.
Percent Discount (-%) or Add On (+%)
to exit
6. Press
Example: Name department 3 "BOOKS" by using the
alphanumeric keypad.
Switch to Department
name definition mode
Department number
selection
Setting this option automatically calculates the preset
discount or add on rate each time
key is pressed. The
percentage rate can be discounted from, or added on to,
an individual item or sales transaction total.
1. Control key position: PRG.
Type/Press:
2. Type the [numbers] representing the desired
percentage rate. Up to four digits ranging from 0 to
99.99 can be used. Two digits must be placed before
the decimal point and two must be placed after.
3. Define whether the percentage rate is a discount or an
add on by pressing the related code indicated below:
Confirm entered
department name
Exit
PLU Item Names
After associating a price to a PLU code, you can name the
PLU to identify the product that it represents. The name that
you can associate to the PLU code must be up to 12
characters long.
The PLU names that you define will be printed on the
customer receipts, journal reports and on the PLU
management reports.
1. Control key position: PRG.
2. Press
to display the message "PL001" indicating
the first PLU.
3. Press
repeatedly until displaying the desired PLU
number on the left-hand side of the operator display.
4. Enter the name to assign to the PLU and then press
.
5. Repeat steps 3 and 4 for all desired PLU names.
6. Press
8
to exit.
0 = Percent add on
1 = Percent discount
3. Press
to store the rate.
Example: Program a standard 5.50% discount rate.
Type/Press:
Units
Decimals
Sign
Foreign Currency Descriptors
You can program up to four different foreign currency
exchange rates. The foreign currency value is displayed
You can define a currency descriptor of up to 10 characters
long for each of the four exchange rates programmed. The
descriptor of the foreign currency used will be printed on
the customer receipt during sales transactions that are
finalized with payment in foreign currency, and on the
management reports.
whenever
is pressed during a sales transaction.
1. Control key position: PRG.
2. Type the identification number
to
corresponding to the foreign currency exchange rate
that you wish to define and then press
.
3. Type the [decimal point position] of the exchange rate
(0-8 digits after the decimal point).
4. Type the [decimal point position] of the converted
amount (0-3 digits after the decimal point).
5. Type the [exchange rate] using up to six digits without
specifying any decimal point.
6. Press
.
1. Control key position: PRG.
2. Press
until displaying the message "FC1"
indicating the first of the four possible foreign currency
exchange rates.
3. Press
repeatedly until displaying the desired
exchange rate identification number on the left-hand
side of the operator display.
4. Enter the descriptor to assign to the selected foreign
currency and then press
Example: Program the first exchange rate as:
1 GBP = 1.172 EURO.
.
5. Repeat steps 3 and 4 if you wish to assign a descriptor
to the remaining foreign currencies, if defined.
6. Press
to exit.
Type/Press:
Exchange rate
ID number
Example: Name foreign currency 1 "EURO" by using the
alphanumeric keypad.
Dec. point position of
exchange rate
Switch to foreign currency
definition mode
Dec. point position of
converted amount
Type/Press:
Exchange rate (1.172 Euro)
Confirm entered
foreign currency
descriptor
When the Foreign currency conversion calculation system option 15 is set to Divide, the converted amount is
calculated as follows:
Conversion Amount = Subt / FC rate
When the Foreign currency conversion calculation is set
to Multiply, the converted amount is calculated as
follows:
Conversion Amount = Subt x FC rate.
Exit
Rounding Option for Swiss, Danish and
Swedish Currencies
For the Swiss franc, Danish krone and Swedish krona
currencies, you can program the machine to so that the
amount of a transaction is automatically rounded
accordingly whenever the
,
or a [tender]
key is pressed. The rounded result will be displayed on the
operator and client displays, printed on the customer
receipt and journal report. The total adjustments are
indicated on the financial reports.
Setting the Rounding Option
With reference to the section "System Options", by setting
Machine Condition 14 to the related value (1, 2 or 3), you
can program the machine to round off the subtotal or tender
values of the related currency.
9
ENGLISH
Foreign Currency Exchange Rates
Fraction Rounding for VAT Calculation
Fraction rounding is used to round figures with decimals up
or down to the nearest whole numbers and is used for
percent tax calculations.
Choose from the following three options to select the
rounding as needed:
Status Number
0
2
VAT totals
per programmed
rate
Programmed
VAT rates
Fraction Rounding
a fraction of a pence is rounded down
one pence
a fraction under one-half pence is
rounded down one pence, a fraction
above one-half pence is rounded up
one pence (default setting)
a fraction of a pence is rounded up
one pence
1
Receipt With Taxed Sales Totals Split per Rate
(AMT VAT INCL) - Machine Condition 38
Taxed sales
totals per
rate
Receipt With Sum of the Taxed Sales Totals
(TOTAL INCL VAT) - Machine Condition 39
1. Control key position: PRG.
2. Type system option
followed by the status
Programmed
VAT rates
VAT totals
per programmed
rate
Sum of taxed
sales totals
number [0, 1 or 2] to select the desired fraction rounding.
3.
Press
to store the new setting.
Example: Program the rounding code so that a fraction
under one-half pence is rounded down one pence, a
fraction above one-half pence is rounded up one pence.
Receipt with Taxable Sales Totals without VAT per each
Rate (AMT VAT EXCL) - Machine Condition 40
Programmed
VAT rates
Type/Press:
VAT totals
per programmed
rate
Taxable
sales totals
without VAT
per each rate
Printing VAT Information on Customer
Receipts
You can program the cash register to print VAT information
on the customer receipt according to your business' or
country's requirements.
Receipt With the Sum of the Taxable Sales Totals without
VAT (TOT EXCL VAT) - Machine Condition 41
Programming the Cash Register to Print the
Required VAT Information
With reference to the section "System Options", by setting
machine conditions 37, 38, 39, 40 and 41 you program the
cash register to print the VAT information that you need.
1. Control key position: PRG.
2. Type the [machine condition number] followed by
status number
, then press
VAT totals per
programmed
rate
Programmed
VAT rates
Sum of the
taxable sales
totals without
VAT
.
3. Slide the control key to the OFF position.
Receipt With Sum of all VAT Amounts Calculated
(TOTAL VAT) - Machine Condition 37
Calculator Mode
The calculator mode is a non-print mode that can only be
accessed in the REG or JRNL position.
The following keys can be used in the calculator mode:
Key
Programmed
VAT rates
10
VAT totals
per programmed
rate
Sum of the
individual VAT
totals
to
Entering the Calculator Mode
Activating the Clerk System
1. Control key position: REG or JRNL.
1. Control key position: PRG.
2. Press
3. A line will appear on the far left-hand side of the display
indicating that the calculator mode is in operation.
Deactivating the Clerk System
1. Control key position: PRG.
Exiting the Calculator Mode
1. Control key position: REG or JRNL.
2. Press
.
ENGLISH
.
2. Type the [four-digit password] and press
2. Press
.
.
3. The line will disappear from the display indicating that
you are now back into the normal register mode.
Programming a Secret Code Linked to a Clerk
Number
With the Clerk System active:
Programming a Calculator Mode Password
1. Control key position: PRG.
1. Control key position: PRG.
2. Type a number from
2. Press
.
3. Type the [4-digit password] and press
.
NOTE: The 4-digit password cannot be 0000.
Example: Define calculator mode password 1962.
Switch to Calculator mode
password definition
to identify the clerk
which the secret code will be linked.
3. Press
.
4. Define if the clerk is a normal or training clerk by typing
the related code indicated below:
0 = Normal clerk
1 = Training clerk
5. Press
Type/Press:
to
.
6. Define a three-digit secret code by typing three [numeric
keys].
7. Press
.
Calculator password defined
Confirm
password
Clerk System
Example: Assign secret code 106 to a normal Clerk 1.
Type/Press:
The Clerk System is a security feature that enables you to
control access to the cash register and monitor the number
of transactions and the sales of up to 8 Clerks.
Your cash register is configured at the factory with the
Clerk System deactivated. You can activate the Clerk
System for a degree of protection and sales monitoring or
deactivate it again so that the cash register can be used
freely without restrictions.
NOTE: If the Clerk System is deactivated, the cash register
is used without needing to enter a Clerk number only or a
Clerk number and its related 3-digit security code.
You can also program other clerk-related features. See
"System Options", Machine conditions 9 and 10 for details.
Secret code
Clerk number
Entering a Clerk Number/Secret Code Before
Cash Register Operations
1. Control key position: REG or JRNL.
2. Type a Clerk number
to
and press
.
3. Type the corresponding three-digit code (if
programmed) and press
.
The clerk number is displayed (C1 .....C8) to identify the
clerk that is in use and that it is now possible to carry out
transactions. The clerk number is printed on the sales
receipt and on the management reports.
11
Example: Define manager password 9876 for the Z mode.
Clerk Names
You can program a clerk name or identifier of up to 12
characters long by using the alphanumeric keypad or the
Character Table. It will be automatically printed on all
receipts, journal records and management reports.
Switch to Z mode password definition
Type/Press:
1. Control key position: PRG.
2. Switch the cash register to the Clerk name definition
Manager password defined
repeatedly until displaying the
mode by pressing
message "CL1" indicating the first Clerk number.
Confirm entered
Manager password
Clearing the Z Mode Manager Password
3. Select the Clerk number corresponding to the Clerk
1. Control key position: PRG.
whose name you wish to define by pressing
2. Press
repeatedly until displaying the number on the right
hand side of the operator display.
3. Press
.
.
4. Using the alphanumeric keypad and Character Table,
enter the clerk name then press
. The name entered
will be automatically printed.
5. Press
If a manager password was defined to protect unauthorized
access to the Z mode, proceed as follows to enter the specific
password so that you can print the Z management report:
to exit.
Example: Program Alex as the name for Clerk number 2
using the Character Table.
Type/Press:
1. Control key position: Z1/Z2.
2. Type the specific 4-digit password.
3. Press
Clerk number selection
Switch to Clerk Name
definition mode
Using the Cash Register in a Password
Protected Mode
A
.
Training Mode
The training mode allows you to use the cash register to
perform true sales transactions for learning purposes. All
transactions performed in this mode are not recorded in the
management financial reports and the sales receipts are
not numbered consecutively.
When the cash register is switched to the training mode, all
training transactions are performed in the REG or JRNL
mode. You can also print a detailed training report to keep
track of the transactions performed in this mode. See
"Training Report" for details.
l
e
x
To switch the cash register to the training mode:
1. Control key postion: PRG.
Confirm entered Clerk name
Exit
Manager Password
You can define a manager password to prevent
unauthorized access to the machine's Z mode. Since the
management report taken in the Z mode resets transaction
totals to zero, a management password prevents the
accidental resetting of these totals by unauthorized
personnel.
A line appears on the display to indicate that the cash
register is in the Training Mode.
3. Turn the control key to REG or JRNL to perform training
sales transactions.
To exit the training mode:
1. Control key position: PRG.
2. Press
1. Control key position: PRG.
1. Control key position: REG or JRNL.
2. Press
2. Type your [4-digit password] and press
.
NOTE: If you define a manager password of 0000, the
password security protection feature will not work.
12
.
To switch the cash register to the training mode when a
training mode password has been defined:
Defining a Z Mode Manager Password
3. Type your 4-digit manager password and press
.
2. Press
.
A line appears on the display to indicate that the cash
register is in the Training Mode.
7
Sound warning beep for EJ memory nearly full
condition at the end of the transaction
0 = Do not sound
1 = Sound
8
Clerk System status
0 = Clerk system inactive
1 = Clerk system active
Programming a Training Mode Password
9
A training mode password prevents unauthorized access
to the training mode and allows training to be performed in
the REG or JRNL mode.
Clerk security code entry
0 = Clerk security code entry not required
1 = Clerk security code entry
10
Clerk number entry
0 = Clerk number entry not required at each
transaction
1 = Clerk number entry required at each
transaction
11
Zero price registration activity
0 = Active
1 = Inactive
12
VAT calculation
0 = Reserved
1 = Add-on TAX
2 = VAT calculation
13
Fraction Rounding Mode
0 = Round down
1 = Round off 5/4
2 = Round up
14
European rounding selection
0 = No European rounding
1 = European rounding selection - Swiss
0.01 – 0.02 = amount rounded to 0.00
0.03 – 0.07 = amount rounded to 0.05
0.08 – 0.09 = amount rounded to 0.10
2 = European rounding selection - Swedish
0.00 – 0.24 = amount rounded to 0.00
0.25 – 0.74 = amount rounded to 0.50
0.75 – 0.99 = amount rounded to 1.00
3 = European rounding selection - Danish
0.00 – 0.12 = amount rounded to 0.00
0.13 – 0.37 = amount rounded to 0.25
0.38 – 0.62 = amount rounded to 0.50
0.63 – 0.87 = amount rounded to 0.75
0.88 – 0.99 = amount rounded to 1.00
1. Control key position: REG or JRNL.
.
2. Type your [4-digit password] and press
1. Control key position: PRG.
.
2. Press
.
3. Type your [4-digit password] and press
NOTE: Do not assign a password 0000.
Example: Define training mode password 9876.
Type/Press:
Confirm entered
password
Switch to Training
Mode password
definition mode
Training Mode password
defined
System Options
Your cash register's system options programming feature
includes a number of options for the operation of the cash
register. Each of the functions described in this section is
already set upon delivery of the cash register to meet the
most frequent requirements.
The cash register's factory default settings, which you can
reprogram at any time, are indicated in bold print in the
table below. At any time you can print a report indicating
how your cash register is programmed. See " Cash Register
Programming Report" for details.
1
Date display/print format
0 = Date in “day - month - year” format
1 = Date in “month - day - year” format
15
Foreign currency conversion calculation
0 = Divide
1 = Multiply
2
Time indication
0 = 24Hour indication
1 = 12Hour indication
16
Multiple receipt issue
0 = Issue multiple receipts
1 = Do not issue multiple receipts
3
0 = Decimal point position – n
1 = Decimal point position – n.n
2 = Decimal point position – n.nn
3 = Decimal point position – n.nnn
17
Drawer open during NO SALE transaction enable/
disable
0 = Open
1 = Do not open
4
Electronic Journal
0 = Dynamic electronic journal operation
1 = Standard electronic journal operation
18
Update consecutive number on NO SALE
transaction receipt enable/disable
0 = Update consecutive number on receipt
1 = Do not update consecutive number on receipt
5
Electronic Journal storage selection
0 = Stores sales receipt only on electronic journal
1 = Full registration on electronic journal
19
Zero skip
0 = Zero skip on financial reports
1 = No zero skips on financial reports
6
Sound warning beep for EJ memory nearly full
condition at the start of the transaction
0 = Do not sound
1 = Sound
13
ENGLISH
To exit the training mode when a password has been
defined:
37
Total VAT amount printing enable/disable
0 = Print total VAT amount
1 = Do not print total VAT amount
38
Grand Total reset
0 = Do not reset Grand Total after Z1 report
1 = Reset Grand Total after Z1 report
Taxable amount split per rate printing enable/disable
0 = Print taxable amount split per rate
1 = Do not print taxable amount split per rate
39
22
Z1/Z2 counter reset
0 = Do not reset Z1 and Z2 counter after Z report
1 = Reset Z1 and Z2 counter after Z report
Total taxable amount printing enable/disable
0 = Print total taxable amount
1 = Do not print total taxable amount
40
23
Receipt line spacing selection
0 = 0.500mm
1 = 0.667mm
2 = 0.833mm
3 = 1.000mm
4 = 1.167mm
5 = 1.333mm
6 = 1.500mm
7 = 1.667mm
8 = 1.833mm
9 = 2.000mm
Taxable amount out of VAT split per rate printing
enable/disable
0 = Print taxable amount out of VAT split per rate
1 = Do not print taxable amount out of VAT split
per rate
41
Total taxable amount out of VAT printing
enable/disable
0 = Print total taxable amount out of VAT
1 = Do not print total taxable amount
out of VAT
42
NO SALE receipt printing enable/disable
0 = Print total NO SALE Receipt
1 = Do not print NO SALE Receipt
43
X/Z report header printing enable/disable
0 = Print header on X/Z report
1 = Do not print header on X/Z report
44
Z1/Z2 counter printing enable/disable
0 = Print Z1/Z2 counter
1 = Do not print Z1/Z2 counter
45
Grand Total printing enable/disable on Z1/Z2 report
0 = Print GT
1 = Do not print GT
46
PAYMENT MEDIA counter on Z1/Z2 report printing
enable/disable
0 = Print Payement Media counter
1 = Do not print Payement Media counter
47
NO SALE counter on Z1/Z2 report printing enable/
disable
0 = Print NO SALE counter
1 = Do not print NO SALE counter
48
VOID TOTAL counter on Z1/Z2 report
enable/disable
0 = Print VOID TOTAL counter
1 = Do not print VOID TOTAL counter
49
REFUND TOTAL counter on Z1/Z2 report printing
enable/disable
0 = Print REFUND TOTAL counter
1 = Do not print REFUND TOTAL counter
20
21
Consecutive receipt number reset
0 = Do not reset consecutive receipt number
after Z1 report
1 = Reset consecutive receipt number after Z1
report
24
Printing Font Size
0 = Normal Size
1 = Small Size
25
EJ report compressed printing enable/disable
0 = Disable compressed report printing
1 = Enable compressed report printing
26
Consecutive receipt number Update
0 = Update consecutive receipt number after Z1
report
1 = Do not update consecutive receipt number
after Z1 report
27-29 Reserved
30
Date printing enable/disable
0 = Enable date printing
1 = Disable date printing
31
Time printing enable/disable
0 = Enable time printing
1 = Disable time printing
32
Consecutive receipt number printing enable/disable
0 = Enable consecutive number printing
1 = Disable consecutive number printing
33
Subtotal printing enable/disable
0 = Print Subtotal when
1 = Do not print Subtotal when
34
is pressed
is pressed
Tax symbol at right hand side of amount printing
enable/disable
0 = Print tax symbol at right side of amount
1 = Do not print tax symbol at right side of amount
35
VAT details print position
0 = Print VAT details after tender amount (sales
receipt)
1 = Print VAT details before total amount (sales
receipt)
36
VAT amount split per rate printing enable/disable
0 = Print VAT amount split per rate
1 = Do not print VAT amount split per rate
printing
50-89 Reserved
90
Language selection
0 = Select English
1 = Select Spanish
2 = Select French
3 = Select German
4 = Select Dutch
5 = Select Portuguese
6 = Select Danish
7 = Select Swedish
NOTE: After you set your language the cash
register will automatically perform a reset and
cancel all the programming and transaction data
stored.
14
Changing the Cash Register's Standard Settings
Grand Total Setting
1. Control key position: PRG.
2. Type the [number] of the machine condition.
(1 to 90 as indicated in the table) that you wish to
change.
3. Type the [number] of the required setting.
You can program the transaction grand total value printed
on the management reports.
.
2. Type
and press
Example: Set the date to the Month/Day/Year format.
Setting
Consecutive Receipt Number
By default the cash register prints a consecutive receipt
number of up to 4 digits on each sales receipt and
management report. You can change this number according
your business needs. The newly entered receipt number
will be printed.
1. Control key position: PRG.
2. Type
.
3. Type your [4-digit consecutive receipt number] and
press
.
Z1 Counter Setting
You can set the Z1 counter according to your business
needs. The newly set Z1 counter will be printed.
1. Control key position: PRG.
2. Type
press
.
Management Reports
Confirm setting
and press
.
3. Type your [10-digit max Grand Total] and
press
Machine
condition
ENGLISH
4. Press
1. Control key position: PRG.
and your [4-digit Z1 counter] and
.
Z2 Counter Setting
You can set the set Z2 counter according to your business
needs. The newly set Z2 counter will not be printed.
Transaction data is maintained in the memory of the cash
register as long as the battery back-up system is in effect.
This data can be printed as a report for management
review.
The Management Report can be printed from either the
X1/X2 or Z1/Z2 position.
X and Z Reports
Turning the control key to the X1/X2 position prints the
accumulated transaction information and RETAINS ALL
TOTALS IN MEMORY. Take this report any time of the day
to print periodic reading of the transactions performed
(some users call the X report a mid-day report). X reports
include the PLU Report, Clerk Report, and the X1 and X2
Financial Reports.
Turning the control key to the Z1/Z2 position prints the same
information as the X report. The only difference is that after
a Z report printout ALL TRANSACTION TOTALS ARE
RESET TO ZERO, except for the grand total unless
programmed otherwise in the system options programming
mode. This report is usually taken at the end of the day so
that all the transaction totals are cleared to start from zero
the following day.
NOTE:To prevent the accidental printing of the Z report,
assign a Z mode manager password as explained in the
section entitled "Defining a Z Mode Manager Password".
An X2 report is called a period-to-date financial report
which is usually taken on a weekly basis. It accumulates all
the transaction totals. A Z2 report is the same as an X2
report with the exception that all the transaction totals are
reset to zero after it is taken. It is usually taken as a monthly
sales report to view end-of-month sales totals for each
department.
1. Control key position: PRG.
X1 and Z1 Financial Reports
2. Type
press
and your [4-digit Z2 counter] and
NOTE: Once a "Z" report is taken, it cannot be duplicated
so be sure to have plenty of paper in the cash register.
.
1. Control key position: X1/X2 or Z1/Z2 (bear in mind that
a Z2 printout resets all totals to zero).
2. If a Z-mode manager password was defined, type the
[4-digit password] and press
3. Type
.
.
15
X2 and Z2 Financial Reports
Clerk Report
1. Control key position: X1/X2 or Z1/Z2 (bear in mind that
a Z2 printout resets all totals to zero).
2. If a Z-mode manager password was defined, type the
1. Control key position: X1/X2 or Z1/Z2 (bear in mind that
a Z Clerk Report resets all totals).
[4-digit password] and press
and press
3. Type
Date
Z report identifier
Department number
or assigned name
2. Press
.
.
.
Clerk 1 number
or assigned
name
Consecutive
receipt number
Z counter
Department 1
activity counter
Department 1 sales
total
Time
X report
identifier
Activity counter
for Clerk 1
Sales
total of
clerk 1
Sales
total of
clerk 2
Activity counter
for Clerk 2
Sales total of all
clerks
PLU Sales Report
Sales total for all
departments
1. Turn the control key to the X1/X2 or Z1/Z2 position (bear
in mind that a Z PLU Report resets all PLU totals to
zero).
2. Press
.
Total amount VAT 1,
2, 3 and 4
Date
X report
identifier
Coupon amount
total
Net sales total in
local currency
Percent minus
total
PLU number
or assigned
name
PLU quantity
sold
PLU sales
total
Refund total
Void total
Gross sales total
Cash sales counter
Cash sales total
Check sales counter
Charge sales counter
Check sales total
Charge sales total
Card sales counter
Card sales total
Received on account
counter
Received on
account total
Paid out counter
Paid out total
Cash in drawer
total
Credit in drawer total
Check in drawer
total
Card in drawer total
Foreign currency
total
16
Grand total
All PLU
sales total
Department Programming Report
This report provides a printout showing the number of
items in stock for each individual PLU. It can only be issued
in the X1/X2 mode.
This report provides a printout showing how your
departments are programmed. It provides the status,
associated VAT and associated price for each department.
1. Control key position: X1/X2
1. Control key position: PRG
2. Press
.
ENGLISH
PLU Stock Report
.
2. Press
PLU Programming Report
Number of PLU
items in stock
PLU number
or assigned
name
This report provides a printout showing how the PLUs are
programmed. Their number, associated price, VAT rate (if
applicable), item descriptor and associated department
are reported on this receipt.
1. Control key position: PRG.
2. Press
You can also print a Minimum PLU Stock Report that
provides you with an inventory of all the PLU items under a
determined quantity that you define. Also this report can
only be issued in the X1/X2 mode.
1. Control key position: X1/X2
2. Type the [stock number] of up to 4 digits.
3. Press
.
Cash Register Programming Report
This report provides a printout showing how your cash
register is programmed. It lists the values that are
programmed for all system options, the VAT rates, foreign
currency exchange rates and percent minus value
programmed, the manager password and training mode
password assigned, and the three-digit security code
assigned to the clerk.
1. Control key position: PRG
2. Press
PLU number
or assigned
name
.
.
Number of PLU
items in stock
Example: Print a Stock Report of all PLU items with less
than 100 items in stock.
Type/Press:
17
Training Report
Complete Electronic Journal Report
This report provides an X or Z report of the transactions
performed in the training mode. Like the ordinary X and Z
financial reports, a Z report resets all transaction totals to
zero and provides the same information as an ordinary X
or Z financial report with the exception that the report
identifier is "X0" or "Z0".
This report is a complete listing of transaction receipts and
Z financial reports taken within the maximum line capacity
programmed.
1. Control key position: X1/X2 or Z1/Z2. Bear in mind that
in the Z position the training report contents are cleared.
2. Press
1. Control key position: X1/X2 or Z1/Z2. Bear in mind that
in the Z position the electronic journal memory contents
are cleared after you press
. Make sure there is
plenty of paper loaded in the printer.
2. If a manager password was defined type the
.
[4-digit password] and press
3. Press
.
.
When the contents of the electronic journal are printed, a
message is displayed along with a beep to indicate that the
EJ memory capacity has been restored to its programmed
line capacity.
Oldest Transaction Report
By entering the number of transactions you wish to view,
this report prints the selected number of oldest receipts and
Z financial reports performed and stored within the
programmed line capacity.
1. Control key position: X1/X2 or Z1/Z2. Bear in mind that
in the Z position the journal report contents are cleared.
Make sure there is plenty of paper loaded in the printer.
2. If a manager password was defined type the
[4-digit password] and press
.
3. Type a number between [001 and 999] indicating the
.
number of oldest reports wanted and press
Latest Transaction Report
By entering the number of transactions you wish to view,
this report prints the most recent receipts and Z financial
reports performed and stored within the programmed line
capacity.
1. Control key position: X1/X2 or Z1/Z2. Bear in mind that
in the Z position the journal report contents are cleared.
Make sure there is plenty of paper loaded in the printer.
2. If a manager password was defined type the
[4-digit password] and press
.
3. Type a number between [001 and 999] indicating the
number of latest reports wanted and press
Electronic Journal Reports
An electronic journal report executed with the control key
in the X1/X2 position does not clear the electronic journal
memory (and therefore all transaction data are retained)
while the report executed with the control key in the
Z1/Z2 position cancels electronic journal memory thus
restoring it to its maximum line capacity programmed.
To momentarily interrupt report printing, press
this key again to resume printing.
To cancel report printing, press
18
.
. Press
.
Daily Report
Sample Receipts
By entering the number of Z financial reports that you wish
to view, this report prints the receipts recorded before the
defined Z financial report along with the report itself.
The following receipt is a typical receipt issued by the cash
register. In this case the clerk system is active.
1. Control key position: X1/X2 or Z1/Z2. Bear in mind
that in the Z position the journal report contents are
cleared. Make sure there is plenty of paper loaded in
the printer.
[4-digit password] and press
.
3. Type a number between [01 and 99] indicating the
number of oldest end-of-day reports wanted and press
Time
Consecutive
receipt number
Clerk number
or assigned
name
Item price
with
department
VAT rate
identifier
Date
Departments
.
Item price in
non-taxable
department
Sales Transactions
Entering and Exiting the Register Mode
Total
balance due
Cash
tendered
Change due
1. Turn the control key to the REG or JRNL position.
Remember that the JRNL position registers all sales
transactions on the journal record while the REG position
provides customer receipts.
VAT amount
split per rate
2. If the Clerk System option was set to active and a clerk
code was programmed, enter the related Clerk number
assigned, press
, type the associated three-digit
secret code and then press
System option was set to active and a secret code was
not programmed, type any Clerk number
and then press
Customer receipt footer on 4 lines
with max. 24 characters per line
again. If the Clerk
to
The following example receipt containing the least
information possible. To obtain this receipt, program system
options 30, 31, 32, 34 and 36 accordingly. See "System
Options" for details.
.
Customer receipt header on 6 lines
with max. 24 characters per line
Date and Time Display
You can display the current date and time outside of a sales
transaction by pressing
to display the date and
to display the time with the cash register in either
Clerk number
or assigned
name
the REG or JRNL mode.
Electronic Journal Capacity Display
Item price
Departments
You can display the number of transaction data lines still
available in electronic journal memory outside of a
transaction by pressing
register in either the REG or JRNL mode.
with the cash
Cash
tendered
Total
balance due
Change due
Customer receipt footer on 4 lines
with max. 24 characters per line
19
ENGLISH
2. If a manager password was defined type the
Customer receipt header on 6 lines
with max. 24 characters per line
Receipt On/Off
Outside of a sales transaction, the cash register can be
switched to the non-print mode where the transactions
performed in the REG (Receipt) mode will not be printed.
In the non-print mode, the sales totals will be maintained
and the management reports will print.
Example: Register a £10.00 item to Department 1, a
£20.00 item to Department 2, with an exact tender in
foreign currency.
1. Press
1. Control key position: REG.
2. Press
Registering a Multiple Item Sale with
Exact Cash Tender in Foreign Currency
.
.
.
2. Press
NOTE: You can override this setting and print the receipt of
the last sales transaction performed by pressing
for
as many receipts wanted.
1. Control key position: REG.
to display and print the current balance due
in Local currency.
4. Press
Exiting the Non-Print Mode
2. Press
3. Press
for foreign currency number 1 programmed
to display the current balance due in the
and press
foreign currency.
.
.
5. Press
Registering a Single Item Sale with
Change Tender
Up to seven digits can be used for the amount of the entry.
Example: Register a £1.00 item in Department 1.
Compute change for £5.00.
1. Press
Registering a Sale of Multiple Items at
Same Cost
Up to two digits can be used for the quantity multiplied.
Example: Multiply two items costing £1.50 and register
the sale to Department 1. Compute change for £5.00.
.
2. Press
.
1. Press
The transaction is ended and the change due to the
customer is displayed.
2. Press
Registering a Multiple Item Sale with
Exact Cash Tender
3. Press
Example: Register a £2.50 item to Department 1, a
£0.50 item to Department 5 and a £1.65 item to Department 14, with an exact tender of £4.65.
4. Press
1. Press
.
.
. The change due to the
customer is displayed.
.
2. Press
Registering a Multiple Department Sale
with Payment in Foreign Currency and
Change Tender in Local Currency
.
3. Press
4. Press
.
.
Example: Register a £69.99 item to Department 1, a
£5.99 item to Department 4 and a £3.50 item to Department 9. Compute change for € 150.00.
.
1. Press
5. Press
.
.
.
2. Press
3. Press
4. Press
.
to display and print the current balance due
in Local currency.
20
for foreign currency number 1 programmed
to display the current balance due in
and press
foreign currency.
6. Type the amount tendered in foreign currency
and press
Card Tendering
Example: Register a £120.00 item to Department 2 and
a £50.00 item to Department 3. Complete the transaction
with payment using a credit or debit card.
1. Press
.
ENGLISH
5. Press
.
The change due to the customer is displayed.
.
2. Press
Registering a Charge Transaction
3. Press
Example: Register a £2.50 item to Department 1 and a
£3.00 item to Department 2 as a charge transaction.
Check Tender with Change
1. Press
3. Press
4. Press
Example: Register a £19.50 item to Department 4, a
£2.50 item to Department 5 and a £5.00 item to Department 13. Compute the change for a £30.00 check tender.
.
.
2. Press
.
1. Press
.
.
2. Press
.
3. Press
.
.
Split Cash/Charge Tendering
Example: Register a £10.00 item and a £15.00 item to
Department 2. Split the amount tendered between
£20.00 cash and £5.00 charge.
1. Press
3. Press
.
. The remaining
balance due (5.00) is displayed.
5. Press
. The change due to the
5. Press
Check Tender in Foreign Currency with
Change in Local Currency
.
4. Press
.
customer is displayed.
.
2. Press
4. Press
.
Example: Register a £19.50 item to Department 4, a
£2.50 item to Department 5 and a £5.00 item to Department 12. Compute the change in Local currency for a
€ 40.00 check tender.
1. Press
.
2. Press
.
Check Tendering
3. Press
.
Example: Register a £70.00 item paid by check to
Department 4.
4. Press
to display and print the current balance due
in Local currency.
1. Press
2. Press
.
.
5. Press
and press
for foreign currency number 1 programmed
to display the current balance due in
foreign currency.
6. Type the amount tendered by check in foreign currency
and press
. The change due in
local currency is displayed.
21
Split Check/Cash Tender
Example: Register a £24.00 item to Department 1, a
£36.00 item to Department 3 and a £4.00 item to Department 4. Split the tender between £60.00 check and £4.00
cash.
1. Press
.
2. Press
.
Discounting the Total Sale by Using a
Random Discount Rate
Example: Register a 20% discount to a sales transaction. Compute the change tender.
1. Press
.
2. Press
.
3. Press
3. Presss
4. Press
.
.
4. Press
.
. The amount discounted is
displayed.
. The remaining balance
5. Press
5. Press
.
due is displayed.
6. Press
.
6. Press
. The change due to the
customer is displayed.
Registering a (-) Reduction (Coupon)
Up to 7 digits can be used for the amount of the transaction.
Example: Register a £0.10 reduction (coupon) on a
£2.00 item to Department 2.
1. Press
.
2. Press
Discounting Individual Items using
Programmed and Random Discount
Rates
Example: Register a £2.50 item to Department 1, apply
the programmed discount to a £3.50 item to Department
14 and apply a discount rate of 3% to a £5.00 item to
Department 2. Compute change tender.
.
1. Type
3. Press
.
.
2. Type
.
Discounting the Total Sale
Example: Register a programmed 10% discount to an
entire sales transaction. Compute the change tender.
2. Press
to apply the programmed discount. The
amount discounted is displayed.
4. Press
.
1. Press
3. Press
.
5. Press
.
3. Press
.
6. Press
4. Press
. The amount discounted is displayed.
7. Press
5. Press
.
. The amount discounted is displayed.
.
the customer is displayed.
6. Press
customer is displayed.
22
. The change due to the
. The change due to
To use this feature, PLU codes must have been previously
set.
Example: Use preset PLU codes to register an entire
transaction: register PLU 1 and multiply 3 PLU 2. Compute change for a cash tender.
Refunding Multiple Items
Example: Refund a £4.99 item to Department 4 and three
£2.00 items to Department 5.
1. Press
.
. The amount to be refunded
2. Press
is displayed.
.
1. Press
3. Press
2. Press
. The amount of the
multiplication is displayed.
3. Press
5. Press
. The change due to the
4. Press
customer is displayed.
Overwriting a Preset PLU Price
Example: Register the sale of programmed PLU 1 and
then overwrite the preset PLU 1 with £ 3.50. Computer
change for a £ 10.00 tender.
.
.
2. Press
3. Press
. The amount to be
.
6. Press
.
Registering Multiple Void and Refund
Transactions
Example: Overwrite the preset PLU 6 with £3.00, register
the sale of a £2.50 item to Department 1, and of a £1.00
item to Department 2. Void the £3.00 sale to PLU 6 and
then register the sale of four £5.00 items to PLU 6. Void
the sale of the £2.50 item previously made to Department 1 and then refund 3 items costing £4.00 each.
Subtotal the sale and end the transaction with an exact
cash tender.
1. Press
.
4. Press
4. Press
refunded is displayed.
.
1. Press
.
.
.
2. Press
5. Press
. The change due to
.
.
3. Press
the customer is displayed.
Voiding the Previous Entry in the Middle
of a Sale
Example: Void a £2.50 entry erroneously made to
Department 2. Then register a £3.00 item to this same
Department. End the transaction with an exact change
tender.
4. Press
.
5. Press
.
.
6. Press
.
7. Press
1. Press
.
8. Press
9. Press
printed.
5. Press
.
.
3. Press
4. Press
.
. The amount voided is displayed and
2. Press
.
.
23
ENGLISH
Registering a Sales Transaction Using Preset
PLU Codes
Registering Money Received on Account
Up to 7 digits can be used for registering money received
on account.
Example: Register £200.00 received on account.
.
1. Press
The cash drawer opens and the transaction is recorded on
receipt.
Registering an Identification Number to a
Transaction
Up to 7 digits can be used for the identification number. This
entry can be made prior to any operation. The identification
number is not added to the management report or totals.
Example: Assign the identification number 3459 to a
£1.00 sale to Department 4. Enter an exact cash tender
sale.
1. Press
Registering Negative Department
Transactions
As prerequisite to negative department transactions,
program a normal department to a negative status as
explained in section "Link Multiple/Single Item Sale, Tax
Status and Item Price to a Department". These transactions
are useful when the clerk pays back money to the customer,
such as the refund of a deposit.
Example: With Department 11 activated for Single,
negative item sales, register a deposit refund of £1.00 for
the return of bottles.
.
2. Press
.
.
3. Press
Registering a No Sale
This operation opens the cash drawer and prints a no sale
receipt. The activity is registered to the activity counter in
the financial report.
If you do not want to print a no sale receipt, change Machine
Condition 42 to 1. See "System Options" for details.
1. Press
1. Press
2. Press
.
.
Issuing a Copy of the Last Sales Receipt
Registering Product Quantity Transactions
Example: Register the sale of 1.5 Kg of apples costing
£3.00 per kilogram to Department 3.
.
1. Press
2. Press
You can print a copy of the last receipt issued. For this
feature to be operational, Machine Condition 16 must be
set to its default value 0 (multiple receipts allowed). See
"System Options" for details.
NOTE: This feature will override the non-print mode, if
outside of a
previously activated, by pressing
.
transaction.
Paying Money Out
Up to 7 digits can be registered for money paid out.
Example: Register a £13.50 sale to Department 3 and
enter an exact cash tender sale. Print a copy of the sales
receipt.
Example: Pay out £150.00.
1. Press
1. Press
.
The cash drawer opens and the transaction is recorded on
receipt.
2. Press
3. Press
24
.
.
.
ENGLISH
DEUTSCH
Cash Register Specifications
Registrierkasse: Technische Eigenschaften
Listed below are the technical characteristics of this cash register
model.
Type:
Electronic cash register with clamshell
thermal printer, 14 departments, 8 clerks, up to
400 PLU settings and 3,000 line electronic
journal
Displays:
Two 10-digit operator and client alphanumeric
Vacuum Florescent Displays (VFD). Symbols
for error, change, subtotal, minus, total,
foreign currency value, electronic journal
memory nearly full or full, and item count
shown
Capacity:
7-digit input and readout
Printer:
24-column line thermal printer with drop-in
paper loading
Paper supply: 57.5 ± 0.5 mm thermal paper
Batteries:
Three standard "AA" size batteries which
safeguard memory contents in the event of
power failures
Technology:
CMOS RAM
Power cons.: Standby 8.5 W, Operating 30 W
Operating
Temperature: 32 – 104 °F (0 °C – 40 °C)
Dimensions: 340 mm (W) x 360 mm (D) x 230 mm (H)
Weight:
5.1 Kg (11.22 lbs)
Im folgenden sind technischen Eigenschaften dieses Registrierkassenmodells zusammengestellt.
Typ:
Elektronische Registrierkasse mit Thermodrucker,
14 Warengruppen, 8 Kassierern, bis zu 400
PLU-Einstellungen und Elektronischem Journal
mit 3.000 Zeilen
Displays:
Zwei 10-stellige Kassierer- und Kundendisplays
(fluoreszierende Vakuumdisplays - VFD),
Anzeige von Symbolen für Fehler, Rückgeld,
Zwischensumme, Minus, Gesamtsumme,
Fremdwährungswert, „Journalspeicher fast voll“
und Artikelanzahl
Kapazität:
7-stellige Eingabe und Ausgabe
Drucker:
Thermodrucker mit 24 Spalten und
Papierschnellladen
Papier:
57,5 ± 0.5 mm Thermopapier
Batterien:
drei Standard "AA" Batterien zur Speicherhaltung
bei Stromausfall
Technologie:
CMOS RAM
Stromverbrauch:
Bereitschaft 8,5 W, in Betrieb 30 W
Betriebstemperatur:
0 °C – 40 °C
Abmessungen: 340 mm (W) x 360 mm (T) x 230 mm (H)
Gewicht:
5,1 Kg
FRANÇAIS
ESPAÑOL
Spécifications techniques de la caisse
enregistreuse
Voici la liste des caractéristiques techniques de ce modèle de
caisse enregistreuse.
Type:
Caisse Enregistreuse Electronique avec
imprimante thermique à mécanisme “clamshell”,
14 rayons, 8 vendeurs, jusqu’à 400 paramètres
PLU et journal électronique à 3.000 lignes
Afficheurs:
Deux afficheurs VFD (Vacuum Florescent
Displays) alphanumériques à dix chiffres
opérateur et client. Symboles pourerreur,
change, sous-total, moins, total, valeur de la
devise étrangère, mémoire du journal
électronique presque pleine ou pleine, et
compteur articles
Capacité:
7 chiffres en entrée
Imprimante:
Imprimante thermique avec 24-colonnes
Rouleau de
papier:
57,5 ± 0,5 mm papier thermique
Piles:
Trois piles standard "AA" pour la
sauvegarde du contenu de la mémoire en
cas de coupure de courant
Technologie:
CMOS RAM
Consommation: Au repos 8,5 W, en fonction 30 W
Temperature de
fonctionnement: 0 °C – 40 °C
Dimensions:
340 mm (L) x 360 mm (P) x 230 mm (H)
Poids:
5,1 Kg
Descripciones de la Caja Registradora
Se han incluido a continuación las características técnicas de este
modelo de caja registradora.
Tipo:
Caja registradora electrónica con impresora
térmica pinza con 14 departamentos, 8
cajeros, hasta 400 entradas de PLU y diario
electrónico de 3.000 líneas
Pantallas:
Dos Pantallas Fluorescentes en Vacío (VFD)
cajero y cliente alfanumericás de 10
caracteres. Visualización de símbolos para
error, cambio, subtotal, menos, total, valor
divisa extranjera, memoria del diario
electrónico casi llena o llena, y recuento de
artículos
Capacidad:
Introducción y lectura de 7 dígitos
Impresora:
impresora térmica de 24 columnas por línea
con carga del rollo "drop-in"
Soporte papel:
Papel térmico de 57,5 ± 0,5 mm
Pilas:
Tres pilas estándar formato "AA" que
protegen el contenido de la memoria en
caso de fallos de corriente
Tecnología:
CMOS RAM
Cons. corriente:
Standby 8,5 W, Operando 30 W
Temp. operativa:
0 °C – 40 °C
Dimensiones:
340 mm (A) x 360 mm (P) x 230 mm (H)
Peso:
5,1 Kg
NEDERLANDS
DANSK
Specificaties
Kasseapparatets specifikationer
Hieronder vindt u de technische eigenschappen van dit model
kasregister.
Type:
Elektronisch kasregister met clamshell
thermische printer, 14 omzetgroepen,
8 medewerkers, maximaal 400 PLU-instellingen
en elektronische journaal met maximaal 3.000
regels
Displays:
Twee 10-cijferige VFD-displays (Vacuum
Florescent Display), voor medewerker en klant.
Symbolen voor fouten, wisselgeld, subtotaal,
korting, totaal, valuta-conversie, elektronisch
journaalgeheugen bijna vol of vol, en aantal
artikelen
Capaciteit:
7 cijfers invoer en uitlezen
Printer:
Thermisch, 24 tekens per regel met drop-in
papiertoevoer
Papier:
57,5 ± 0,5 mm rol thermisch papier
Batterijen:
Drie standaard "AA" batterijen die de inhoud
van het geheugen waarborgen bij stroom uitval
Technologie:
CMOS RAM
Stroomverbruik: Standby 8,5 W, bij gebruik 30 W
Bedrijfstemperatuur:
0 °C – 40 °C
Afmetingen:
340 mm (B) x 360 mm (D) x 230 mm (H)
Nedenfor finder de kasseapparatets tekniske specifikationer.
Type:
Den elektroniske kasseapparat med en
muslingeskalformet termoprinter, 14 Varegrupper,
8 ekspedienter, op til 400 PLU indstillinger og
3.000 linjer elektronisk journal
Displays:
To 10-cifrede alfanumeriske vakuum
fluorescerende ekspedient og kundedisplays
(VFD). Symboler for fejl, byttepenge, subtotal,
minus, total, beløb i udenlandsk valuta, elektronisk journal hukommelse næsten fuld eller fuld
og varetæller
Kapacitet:
7-cifret indtastning og aflæsning
Printer:
24 kolonne linier termoprinter med drop-in
papirfremføring
Papir:
57,5 ± 0,5 mm termopapir
Batterier:
Tre stk. standard AA batterier, der beskytter hukommelsen i tilfælde af strømsvigt
Teknik:
CMOS RAM
Forbrug:
Standby 8,5 W, i drift 30 W
Driftstemperatur: 0 °C til 40 °C
Mål:
340 mm (B) x 360 mm (L) x 230 mm (H)
Gewicht:
Vægt:
5,1 Kg
5,1 Kg
PORTUGUÊS
SWENSKA
Especificações da Caixa Registadora
Kassaregisterspecifikationer
Abaixo estão descritas as características técnicas deste modelo
de caixa registadora.
Nedan beskrivs de tekniska egenskaperna för den här
kassaregistermodellen.
Typ:
Elektroniskt kassaregister med termisk skrivare
av clamshell-typ, 14 varugrupper, 8 expediter,
upp till 400 PLU inställningar och en 3.000
raders elektronisk journal
Displayer:
Två alfanumeriska 10-siffriga Vakuum
Fluorescerande Displayer (VFD) för operatör
resp kund. Symboler för fel, bytepengar,
delsumma, minus, total, belopp i utländsk
valuta, elektronisk journal med minne nästan
fullt eller fullt, samt visning av antal artiklar
Kapacitet:
7-siffrig inknappning och avläsning
Skrivare:
24-teckens termisk skrivare med drop-in
pappersladdning
Papper:
57,5 ± 0,5 mm värmekänsligt papper
Batterier:
Tre standard AA batterier vilka skyddar
innehållet i minnet i fall av strömavbrott
Teknik:
CMOS RAM
Strömförbrukning:Standby 8,5 W, i drift 30 W
Driftstemperatur: 0 °C – 40 °C
Mått:
340 mm (B) x 360 mm (L) x 230 mm (H)
Vikt:
5,1 Kg
Tipo:
Visores:
Caixa registadora electrónica com impressora térmica, 14 departamentos,
8 funcionários, até 400 PLU programáveis e registo electrónico com 3.000 linhas
Dois visores (VFD) alfanuméricos de 10 dígitos,
um para o operador e outro para o cliente.
Símbolos para erro, troco, subtotal, menos, total,
valor em moeda estrangeira, memória de registo
electrónico quase cheia ou cheia e número de
itens
Entrada e leitura de 7 dígitos
Impressora térmica de linhas a 24 colunas
Capacidade:
Impressora:
Abastecimento
de papel:
Papel térmico de 57,5 ± 0,5 mm
Pilhas:
Três pilhas normais de formato “AA” que mantêm
o conteúdo da memória no caso de falhas de
corrente.
Tecnologia:
CMOS RAM
Consumo
de energia:
Em espera 8,5 W, Em Operação 30 W
Temperatura
de Operação: 0 °C – 40 °C
Dimensões:
340 mm (L) x 360 mm (P) x 230 mm (A)
Peso:
5,1 Kg
FIGURES - IMAGES
ABBILDUNGEN - FIGURAS
AFBEELDINGEN - FIGURAS
FIGURER - BILDER
2
3
1
Character Table
Tableau des Caractères
Zeichentabelle
Tabla de Caracteres
4
Tekencodetabel
Tabela de Caracteres
Karakterkode Tabel
Teckentabell
A
B
A =
Nombre defois que l’on doit presser la touche
N. mal drücken
Número de veces a pulsar
Aantal keren drukken
Nº de vezes que deve premir
Tryk antal gange
Antal gånger för nertryckning
B = Touches clavier
Tastenblock
Tecla del teclado
Toets toetsenblok
Tecla
Tastaturtast
Tangentbordsknapp
1. FOR COUNTRIES IN THE EUROPEAN UNION (EU)
The disposal of electric and electronic devices as solid urban waste is strictly prohibited: it must be
collected separately. The dumping of these devices at unequipped and unauthorized places may have
hazardous effects on health and the environment.
Offenders will be subjected to the penalties and measures laid down by the law.
TO DISPOSE OF OUR DEVICES CORRECTLY:
a) Contact the Local Authorities, who will give you the practical information you need and the instructions
for handling the waste correctly, for example: location and times of the waste collection centres, etc.
b) When you purchase a new device of ours, give a used device similar to the one purchased to our
dealer for disposal.
The crossed dustbin symbol on the device means that:
- When it to be disposed of, the device is to be taken to the equipped waste collection
centres and is to be handled separately from urban waste;
- Olivetti guarantees the activation of the treatment, collection, recycling and disposal procedures in accordance with Directive 2002/96/CE (and subsequent
amendments).
DIRECTIVA 2002/96/CE RELATIVA AO TRATAMENTO, RECOLHA, RECICLAGEM E
ELIMINAÇÃO DE RESÍDUOS DE EQUIPAMENTOS ELÉCTRICOS E ELECTRÓNICOS
E DE SEUS COMPONENTES
1. PARA OS PAÍSES DA UNIÃO EUROPEIA (UE)
É proibido eliminar qualquer resíduo de equipamentos eléctricos ou electrónicos como lixo sólido
urbano: é obrigatório efectuar uma recolha separada. O abandono de tais equipamentos em locais não
especificamente preparados e autorizados, pode ter efeitos perigosos sobre o ambiente e a saúde.
Os transgressores estão sujeitos às sanções e às disposições legais.
PARA ELIMINAR CORRECTAMENTE OS NOSSOS EQUIPAMENTOS, É POSSÍVEL:
a) Dirigir-se às Autoridades Locais que fornecerão indicações e informações práticas sobre a gestão
correcta dos resíduos, por exemplo: local e horário dos centros de entrega, etc.
b) Na compra de um nosso novo equipamento, devolver ao nosso Revendedor um equipamento usado,
semelhante ao comprado.
O símbolo do contentor riscado, indicado sobre o equipamento, significa que:
- O equipamento, quando chegar ao fim de sua vida útil, deve ser levado para
centros de recolha aparelhados e deve ser tratado separadamente dos resíduos
urbanos;
- A Olivetti garante a activação dos procedimentos no tocante ao
tratamento, recolha, reciclagem e eliminação do equipamento em conformidade
com a Directiva 2002/96/CE (e mod. post.).
2. FOR OTHER COUNTRIES (NOT IN THE EU)
The treatment, collection, recycling and disposal of electric and electronic devices will be carried out in
accordance with the laws in force in the country in question.
2. PARA OS OUTROS PAÍSES (FORA DA UE)
O tratamento, a recolha, a reciclagem e a eliminação de equipamentos eléctricos e electrónicos terão
de ser realizados em conformidade com as Leis em vigor em cada país.
DIRECTIVE 2002/96/CE SUR LE TRAITEMENT, LA COLLECTE, LE RECYCLAGE
ET LA MISE AU REBUT DES EQUIPEMENTS ELECTRIQUES ET ELECTRONIQUES
ET DE LEURS COMPOSANTS
1. POUR LES PAYS DE L'UNION EUROPEENNE (UE)
Il est interdit de mettre au rebut tout équipement électrique ou électronique avec les déchets municipaux
non triés : leur collecte séparée doit être effectuée. L'abandon de ces équipements dans des aires non
appropriées et non autorisées peut nuire gravement à l'environnement et à la santé.
Les transgresseurs s'exposent aux sanctions et aux dispositions prévues par la loi.
POUR METTRE CORRECTEMENT NOS EQUIPEMENTS AU REBUT, VOUS POUVEZ EFFECTUER L'UNE DES OPERATIONS
SUIVANTES :
a) Adressez-vous aux autorités locales, qui vous fourniront des indications et des informations
pratiques sur la gestion correcte des déchets (emplacement et horaire des déchetteries, etc.).
b) A l'achat d'un de nos équipements, remettez à notre revendeur un équipement usagé, analogue à
celui acheté.
Le symbole du conteneur barré, indiqué sur l'équipement, a la signification suivante :
- Au terme de sa durée de vie, l'équipement doit être remis à un centre de collecte
approprié, et doit être traité séparément des déchets municipaux non triés.
- Olivetti garantit l'activation des procédures de traitement, de collecte, de recyclage
et de mise au rebut de l'équipement, conformément à la Directive 2002/96/CE (et
modifications successives).
RICHTLIJN 2002/96/EG BETREFFENDE AFGEDANKTE ELEKTRISCHE
EN ELEKTRONISCHE APPARATUUR
1. VOOR DE LANDEN VAN DE EUROPESE UNIE (EU)
Het is verboden om elektrische en elektronische apparatuur als huishoudelijk afval te verwerken: het
is verplicht om een gescheiden inzameling uit te voeren. Het achterlaten van dergelijke apparatuur op
plekken die niet specifiek hiervoor erkend en ingericht zijn, kan gevaarlijke gevolgen voor het milieu en
de veiligheid met zich meebrengen. Overtreders zijn onderworpen aan sancties en maatregelen
krachtens de wet.
OM OP CORRECTE WIJZE ONZE APPARATUUR TE VERWERKEN KUNT U:
a) Zich wenden tot de plaatselijke instanties die u aanwijzingen en praktische informatie over de correcte
behandeling van het afval zullen verschaffen, zoals bijvoorbeeld: locatie en openingstijden van de
inzamelcentra, enz.
b) Bij aankoop van een nieuw apparaat van ons merk, het oude apparaat, dat gelijk moet zijn aan het
gekochte apparaat bij onze wederverkoper inleveren.
Het symbool van de doorgekruiste vuilnisbak, aangebracht op de apparatuur, betekent dat:
- Het apparaat aan het einde van zijn levensduur bij geoutilleerde inzamelcentra
moet worden ingeleverd en gescheiden van het huishoudelijk afval moet worden
verwerkt;
- Olivetti de activering garandeert van de procedures inzake behandeling, inzameling,
recycling en verwerking van de apparatuur conform de Richtlijn 2002/96/EG (en
latere wijzigingen).
2. POUR LES AUTRES PAYS (NON UE)
Le traitement, la collecte, le recyclage et la mise au rebut des équipements électriques et électroniques
doivent être effectués conformément à la loi en vigueur dans chaque pays.
2. VOOR DE OVERIGE LANDEN (NIET EU)
De behandeling, de inzameling, de recycling en de verwerking van elektrische en elektronische
apparatuur dienen overeenkomstig de wetten die in elk land van kracht zijn te gebeuren.
RICHTLINIE 2002/96/CE FÜR DIE BEHANDLUNG, SAMMLUNG, WIEDERVERWERTUNG
UND ENTSORGUNG VON ELEKTRO- UND ELEKTRONIK ALTGERÄTEN
UND DEREN BESTANDTEILE
EU-DIREKTIV 2002/96/EF (WEEE) OM OPSAMLING, GENBRUG OG
BORTSKAFFELSE AF ELEKTRISK OG ELEKTRONISK UDSTYR
DIRECTIVE 2002/96/CE ON THE TREATMENT, COLLECTION, RECYCLING AND DISPOSAL
OF ELECTRIC AND ELECTRONIC DEVICES AND THEIR COMPONENTS
1. FÜR DIE LÄNDER DER EUROPÄISCHEN UNION (EG)
Es ist verboten, jede Art von Elektro- und Elektronik-Altgeräten als unsortierten Siedlungsabfall zu entsorgen:
es ist Pflicht, diese separat zu sammeln. Das Abladen dieser Geräte an Orten, die nicht speziell dafür
vorgesehen und autorisiert sind, kann gefährliche Auswirkungen für Umwelt und Gesundheit haben. Widerrechtliche Vorgehensweisen unterliegen den Sanktionen und Maßnahmen laut Gesetz.
UM UNSERE GERÄTE ORDNUNGSGEMÄß ZU ENTSORGEN, KÖNNEN SIE:
a) Sich an die örtliche Behörde wenden, die Ihnen praktische Auskünfte und Informationen für die ordnungsgemäße Verwaltung der Abfälle liefert, beispielsweise: Ort und Zeit der Sammelstation etc.
b) Beim Neukauf eines unserer Geräte ein benutztes Gerät, das dem neu gekauften entspricht, an
unseren Wiederverkäufer zurückgeben.
Das durchkreuzte Symbol auf dem Gerät bedeutet, dass:
- Nach Ableben des Gerätes, dieses in ausgerüstete Sammelzentren
gebracht werden und separat von Siedlungsabfällen behandelt werden muss;
- Olivetti die Aktivierung der Behandlungs-, Sammel-, Wiederverwertungs- und
Entsorgungsprozedur der Geräte in Konformität mit der Richtlinie 2002/96/CE (u.
folg.mod.) garantiert.
2. FÜR DIE ANDEREN LÄNDER (NICHT-EG-STAATEN)
Das Behandeln, Sammeln, Wiederverwerten und Entsorgen von Elektro- und ElektronikAltgeräten muss nach den geltenden Vorschriften des jeweiligen Landes erfolgen.
DIRECTIVA 2002/96/CE SOBRE EL TRATAMIENTO, LA RECOGIDA, EL RECICLAJE Y LA
ELIMINACIÓN DE APARATOS ELÉCTRICOS Y ELECTRÓNICOS Y DE SUS OMPONENTES
1. PARA LOS PAÍSES DE LA UNIÓN EUROPEA (UE)
Está prohibido eliminar cualquier tipo de aparato eléctrico y electrónico como residuo urbano no
seleccionado: en el caso de estos equipos es obligatorio realizar su recogida selectiva. La eliminación
de estos aparatos en lugares que no estén específicamente preparados y autorizados puede tener
efectos peligrosos para el medio ambiente y la salud. Los transgresores están sujetos a las sanciones
y a las medidas que establece la Ley.
PARA ELIMINAR CORRECTAMENTE NUESTROS APARATOS EL USUARIO PUEDE:
a) Dirigirse a las Autoridades Locales, que le brindarán las indicaciones y las informaciones prácticas
necesarias para el correcto manejo de los desechos, por ejemplo: lugar y horario de las instalaciones
de tratamiento, etc.
b) En el momento de comprar uno de nuestros equipos nuevos, puede entregar a nuestro Revendedor un
aparato usado, similar al que ha adquirido.
El símbolo del contenedor con la cruz, que se encuentra en el aparato, significa que:
- Cuando el equipo haya llegado al final de su vida útil, deberá ser llevado a los
centros de recogida previstos, y que su tratamiento debe estar separado del de los
residuos urbanos;
- Olivetti garantiza la activación de los procedimientos en materia de tratamiento,
recogida, reciclaje y eliminación de los equipos, de conformidad con la Directiva
2002/96/CE (y suces. mod.).
2. PARA LOS OTROS PAÍSES (FUERA DE LA UE)
El tratamiento, la recogida, el reciclaje y la eliminación de equipos eléctricos y electrónicos se deberán
llevar a cabo de conformidad con las Leyes vigentes en cada País.
1. GÆLDENDE FOR EU-LANDE
Det er forbudt at bortskaffe elektrisk eller elektronisk udstyr som almindeligt husholdningsaffald: Det skal
opsamles separat. Hvis ikke elektrisk og elektronisk affald afleveres på særligt indrettede
opsamlingssteder, kan det få alvorlige konsekvenser for miljø og helbred.
Overtrædere kan straffes og retforfølges i henhold til gældende lovgivning.
FOR KORREKT BORTSKAFFELSE AF VORES UDSTYR KAN DU:
a) Henvende dig til de lokale myndigheder, som vil kunne give dig anvisninger og praktiske oplysninger
om en korrekt bortskaffelse af affaldet, f.eks.: Genbrugsstationers adresser og åbningstider osv.
b) Aflevere brugt udstyr ved køb af tilsvarende nyt udstyr hos vores Forhandler.
Det viste symbol, som findes på udstyret, betyder:
- At, brugt udstyr skal afleveres på særlige opsamlingssteder og bortskaffes separat;
- At, Olivetti garanterer at procedurerne for behandling, opsamling, genbrug og
bortskaffelse af udstyret i henhold til EU-direktiv 2002/96/EF (og efterfølgende
tilføjelser) efterleves.
2. GÆLDENDE FOR IKKE EU-LANDE
Behandling, opsamling, genanvendelse og bortskaffelse af elektrisk og elektronisk udstyr skal ske i
henhold til landets gældende lovgivning.
DIREKTIV 2002/96/EC AVSEENDE HANTERING, UPPSAMLING, ÅTERVINNING OCH
BORTSKAFFNING AV ELEKTRO- OCH ELEKTRONIKUTRUSTNINGAR SAMT DERAS
KOMPONENTER
1. AVSEENDE LÄNDERNA I DEN EUROPEISKA UNIONEN (EU)
Det är förbjudet att skaffa bort all slags elektro- och elektronikutrustning som fast stadsavfall: en separat
uppsamling måste obligatoriskt göras. Avlämning av sådan utrustning på ej specifikt förberedda platser
kan farligt påverka både miljön och hälsan. De som överträder dessa förordningar kommer att undergå
de straff och påföljder som förutsetts i lagstiftningen.
FÖR EN KORREKT BORTSKAFFNING AV VÅR UTRUSTNING KAN DU BETE DIG PÅ FÖLJANDE SÄTT:
a) Vänd dig till de lokala myndigheterna där du kan få praktisk anvisning och information om hur du ska gå
tillväga för att kunna hantera avfallen på korrekt sätt, t ex: plats och öppettider i avlämningsstationer, osv.
b) När du köper en ny utrustning från oss kan du lämna tillbaka en begagnad utrustning liknande den
nyköpta till återförsäljaren.
Symbolen med den korsade behållaren som visas på utrustningen anger att:
- När utrustningens livslängd gått ut, måste denna föras till organiserade
uppsamlingscentraler och behandlas separat från stadsavfallen;
- Olivetti garanterar aktivering av procedurer avseende hantering, uppsamling,
återvinning och bortskaffning i överensstämmelse med Direktivet 2002/96/CE
(och efterföljande ändringar).
2. AVSEENDE ÖVRIGA LÄNDER (EJ INOM EU)
Hantering, uppsamling, återvinning och bortskaffning av elektro- och elektronikutrustningar ska utföras
i överensstämmelse med lagstiftelsen i landet i frågan.
Code: 551403