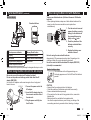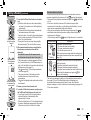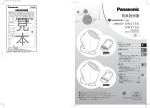
1
Instructions Upper Arm Blood Pressure Model For questions or assistance with your blood pressure monitor, call us at 1-800-338-0552. Panasonic Consumer Electronics Company Division of Panasonic Corporation of North America One Panasonic Way 1H-1 Secaucus, NJ 07094 No.1 EN, SP © 2008 Matsushita Electric Works, Ltd. All Rights Reserved. 35 EW3153 Before operating this device, please read these instructions completely and save this manual for future use. Printed in China Impreso en China 2008/01/15 1 14:54:31 2008/01/15 14:54:23 Panasonic Oscillometric Diagnostec™ Automatic Arm Blood Pressure Monitor Model EW3153 is a device intended to measure systolic and diastolic blood pressure and pulse rate of an adult individual by using a pressurized cuff on the arm. The device is not intended for use on infants and children. The device is designed for home use only, not for ambulatory measurement (measurement recorded continuously during the day). Specification of this device including pulse rate (30–160 pulse/min. +/– 5%) are listed in page 29. Blood pressure measurements determined with this device are equivalent to those obtained by a trained observer using the cuff/ stethoscope auscultation method, within the limits prescribed by the American National Standard, Manual, Electronic or automated sphygmomanometers. If you suffer from disorder of heart rhythm, known as arrhythmia only use this blood pressure monitor in consultation with your doctor. In certain cases oscillometric measurement method can produce incorrect readings. Table of Contents Introduction . .............................................................................................. 3 Basics of Blood Pressure .......................................................................... 3 Important Instructions Before Use . ........................................................... 4 Precautions to Ensure Safe, Reliable Operation ....................................... 6 Easily Check Your Blood Pressure Readings Against the JNC 7* Classification ........................................................................... 8 Preparations Prior to Taking Measurements ............................................. 9 Parts Identification ................................................................................... 10 When Using the Main Unit with the AC Adapter . .................................... 11 When Using the Main Unit with Batteries ................................................ 12 Inserting the Batteries into the Wireless Display ..................................... 13 Setting the Time and Date ....................................................................... 14 Taking a Reading . ................................................................................... 15 Storing and Calling up Blood Pressure Readings ................................... 24 Comparing AM and PM Average Systolic Blood Pressure ...................... 27 After Use ................................................................................................. 28 Specifications .......................................................................................... 29 Q & A ....................................................................................................... 30 Care and Maintenance ............................................................................ 32 Troubleshooting ....................................................................................... 33 Flashing System for hypertensive readings are based on blood pressure values classified in the paper: “JNC 7 Express; The Seventh Report of the Joint National Committee on Prevention, Detection, Evaluation and Treatment of High Blood Pressure; U.S. DEPARTMENT OF HEALTH AND HUMAN SERVICES; National Institute of Health; National Heart, Lung, and Blood Institute; National High Blood Pressure Education Program; NIH Publication No. 03-5233; May 2003.” The display values are generally known, but not proven, to be an indicator of your blood pressure. The EW3153 is not intended to be used as a diagnostic device. Contact your physician if prehypertensive or hypertensive values are indicated. 1-2 English English 2008/01/15 14:54:23 Panasonic Oscillometric Diagnostec™ Automatic Arm Blood Pressure Monitor Model EW3153 is a device intended to measure systolic and diastolic blood pressure and pulse rate of an adult individual by using a pressurized cuff on the arm. The device is not intended for use on infants and children. The device is designed for home use only, not for ambulatory measurement (measurement recorded continuously during the day). Specification of this device including pulse rate (30–160 pulse/min. +/– 5%) are listed in page 29. Blood pressure measurements determined with this device are equivalent to those obtained by a trained observer using the cuff/ stethoscope auscultation method, within the limits prescribed by the American National Standard, Manual, Electronic or automated sphygmomanometers. If you suffer from disorder of heart rhythm, known as arrhythmia only use this blood pressure monitor in consultation with your doctor. In certain cases oscillometric measurement method can produce incorrect readings. Table of Contents Introduction . .............................................................................................. 3 Basics of Blood Pressure .......................................................................... 3 Important Instructions Before Use . ........................................................... 4 Precautions to Ensure Safe, Reliable Operation ....................................... 6 Easily Check Your Blood Pressure Readings Against the JNC 7* Classification ........................................................................... 8 Preparations Prior to Taking Measurements ............................................. 9 Parts Identification ................................................................................... 10 When Using the Main Unit with the AC Adapter . .................................... 11 When Using the Main Unit with Batteries ................................................ 12 Inserting the Batteries into the Wireless Display ..................................... 13 Setting the Time and Date ....................................................................... 14 Taking a Reading . ................................................................................... 15 Storing and Calling up Blood Pressure Readings ................................... 24 Comparing AM and PM Average Systolic Blood Pressure ...................... 27 After Use ................................................................................................. 28 Specifications .......................................................................................... 29 Q & A ....................................................................................................... 30 Care and Maintenance ............................................................................ 32 Troubleshooting ....................................................................................... 33 Flashing System for hypertensive readings are based on blood pressure values classified in the paper: “JNC 7 Express; The Seventh Report of the Joint National Committee on Prevention, Detection, Evaluation and Treatment of High Blood Pressure; U.S. DEPARTMENT OF HEALTH AND HUMAN SERVICES; National Institute of Health; National Heart, Lung, and Blood Institute; National High Blood Pressure Education Program; NIH Publication No. 03-5233; May 2003.” The display values are generally known, but not proven, to be an indicator of your blood pressure. The EW3153 is not intended to be used as a diagnostic device. Contact your physician if prehypertensive or hypertensive values are indicated. 1-2 English English 2008/01/15 14:54:23 Introduction Thank you for purchasing the Panasonic Automatic Arm Blood Pressure Monitor EW3153. Measuring your own blood pressure is an important way of monitoring your health. High blood pressure (hypertension) is a major health problem which can be treated effectively once detected. Measuring your blood pressure between doctor visits on a regular basis in the comfort of your home, and keeping a record of the measurements, will help you monitor any significant changes in your blood pressure. Keeping an accurate record of your blood pressure will help your doctor diagnose and possibly prevent any health problems in the future. Basics of Blood Pressure Your heart acts like a pump, sending blood surging through your blood vessels each time it contracts. Blood pressure is the pressure exerted by blood pumped from the heart on the walls of blood vessels. Systolic pressure is the pressure exerted when the heart contracts and pumps blood into the arteries. Diastolic pressure is the pressure exerted when the heart expands, or relaxes. When you or your doctor take your blood pressure, both your systolic and diastolic pressures are measured. If your blood pressure measurement is 120 mmHg over 80 mmHg (120/80), for example, your systolic pressure is 120 mmHg while your diastolic pressure is 80 mmHg. Important Instructions Before Use 1. Do not confuse self-monitoring with self-diagnosis. Blood pressure measurements should only be interpreted by a health professional who is familiar with your medical history. 2. If you are taking medication, consult with your physician to determine the most appropriate time to measure your blood pressure. NEVER change a prescribed medication without first consulting with your physician. 3. Blood pressure can vary based on many factors, including age, gender, weight and physical condition. In general, a person’s blood pressure is lower during sleep and higher when he or she is active. Blood pressure can change easily in response to physiological changes. The setting in which a person’s blood pressure is measured can also affect the results. Having one’s blood pressure measured by a healthcare professional in a hospital or clinic can cause nervousness and may result in a temporarily elevated reading. Because blood pressure measurements taken in a clinical setting can vary considerably from those taken at home, a person’s blood pressure should be measured not only occasionally in the doctor’s office, but also on a regular basis at home. Also, if you find that your blood pressure is lower at home, this is not unusual. To accurately compare with your physician’s reading, take your Panasonic blood pressure monitor to your doctor’s office and compare readings in this setting. 4. People suffering from cardiac arrhythmia, vascular constriction, liver disorders or diabetes, people with cardiac pacemakers or a weak pulse, and women who are pregnant should consult their physician before measuring their blood pressure themselves. Different values may be obtained due to their condition. 5. Try to take your blood pressure measurements at the same time and under the same conditions every day. • The ideal time to measure your blood pressure (to obtain your socalled “base blood pressure”) is in the morning just after waking up, before having breakfast and before any major activity or exercise. If this is not possible, however, try to take measurements at a specified time prior to breakfast, and before you have become active. You should relax for about 5 minutes before taking the measurement. • The following situations may cause substantial variations in blood pressure readings and should therefore be avoided at least 3-4 English English 2008/01/15 14:54:23 Introduction Thank you for purchasing the Panasonic Automatic Arm Blood Pressure Monitor EW3153. Measuring your own blood pressure is an important way of monitoring your health. High blood pressure (hypertension) is a major health problem which can be treated effectively once detected. Measuring your blood pressure between doctor visits on a regular basis in the comfort of your home, and keeping a record of the measurements, will help you monitor any significant changes in your blood pressure. Keeping an accurate record of your blood pressure will help your doctor diagnose and possibly prevent any health problems in the future. Basics of Blood Pressure Your heart acts like a pump, sending blood surging through your blood vessels each time it contracts. Blood pressure is the pressure exerted by blood pumped from the heart on the walls of blood vessels. Systolic pressure is the pressure exerted when the heart contracts and pumps blood into the arteries. Diastolic pressure is the pressure exerted when the heart expands, or relaxes. When you or your doctor take your blood pressure, both your systolic and diastolic pressures are measured. If your blood pressure measurement is 120 mmHg over 80 mmHg (120/80), for example, your systolic pressure is 120 mmHg while your diastolic pressure is 80 mmHg. Important Instructions Before Use 1. Do not confuse self-monitoring with self-diagnosis. Blood pressure measurements should only be interpreted by a health professional who is familiar with your medical history. 2. If you are taking medication, consult with your physician to determine the most appropriate time to measure your blood pressure. NEVER change a prescribed medication without first consulting with your physician. 3. Blood pressure can vary based on many factors, including age, gender, weight and physical condition. In general, a person’s blood pressure is lower during sleep and higher when he or she is active. Blood pressure can change easily in response to physiological changes. The setting in which a person’s blood pressure is measured can also affect the results. Having one’s blood pressure measured by a healthcare professional in a hospital or clinic can cause nervousness and may result in a temporarily elevated reading. Because blood pressure measurements taken in a clinical setting can vary considerably from those taken at home, a person’s blood pressure should be measured not only occasionally in the doctor’s office, but also on a regular basis at home. Also, if you find that your blood pressure is lower at home, this is not unusual. To accurately compare with your physician’s reading, take your Panasonic blood pressure monitor to your doctor’s office and compare readings in this setting. 4. People suffering from cardiac arrhythmia, vascular constriction, liver disorders or diabetes, people with cardiac pacemakers or a weak pulse, and women who are pregnant should consult their physician before measuring their blood pressure themselves. Different values may be obtained due to their condition. 5. Try to take your blood pressure measurements at the same time and under the same conditions every day. • The ideal time to measure your blood pressure (to obtain your socalled “base blood pressure”) is in the morning just after waking up, before having breakfast and before any major activity or exercise. If this is not possible, however, try to take measurements at a specified time prior to breakfast, and before you have become active. You should relax for about 5 minutes before taking the measurement. • The following situations may cause substantial variations in blood pressure readings and should therefore be avoided at least 3-4 English English 2008/01/15 14:54:23 30 minutes prior to taking your blood pressure. Blood pressure will be higher than usual: - when you are excited or tense - when you are taking a bath - during exercising or soon after exercising - when it is cold - within one hour after eating - after drinking coffee, tea or other beverages containing caffeine - after smoking tobacco - when your bladder is full - when in a moving vehicle Blood pressure will be lower than usual: - after taking a bath - after drinking alcohol 6. Measurements may be impaired if this unit is used near a television, microwave oven, X-ray equipment or other devices with strong electrical fields. To prevent such interference, use the unit at a sufficient distance from such devices or turn the devices off. Precautions to Ensure Safe, Reliable Operation 1. Do not drop the unit. Protect it from sudden jars or shocks. 2. Do not insert foreign objects into any openings. 3. Do not attempt to disassemble the unit. 4. If the unit has been stored at temperatures below 0 °C (32 °F), leave it in a warm place for about 15 minutes before using it. Otherwise, the cuff may not inflate properly. 5. Do not store the unit in direct sunlight, high humidity or dust. 6. When cleaning, unplug the AC adapter from the AC outlet before cleaning. Also, do not plug in or unplug the AC adapter with wet hands. Doing so may result in electric shock or fire. 7. Do not spill water on the main unit, wireless display or AC adapter. Doing so may cause electric shock, short-circuiting, or product damage. 7. This unit is designed for use by adults. Consult with your physician before using this unit on a child. Do not use on infants or toddlers. 8. Do not use the AC adapter if it is damaged or if it plugs into the AC outlet loosely. Doing so may result in electric shock or short-circuiting. 8. This unit is not suitable for continuous monitoring during medical emergencies or operations. 9. If the product does not operate properly or seems strange, stop use and unplug the AC adapter immediately, and request inspection and service. Failure to do so could result in the risk of an accident, electric shock, or fire. 9. Do not use the unit for any purpose other than measuring blood pressure. Do not use the unit together with other devices. 10.Improper handling of batteries may result in battery rupture or in corrosion from battery leakage. Please observe the following to ensure proper use of batteries. a.Be sure to turn off the power after use. b.Do not mix different types or sizes of batteries. c.Change all batteries at the same time. Do not mix old and new batteries. d.Be sure to insert batteries with correct polarity, as instructed. e.Remove batteries when they are worn out, and dispose of them properly according to all applicable environmental regulations. f. Do not disassemble batteries or throw them into a fire. g.Do not short-circuit batteries. h.Do not attempt to recharge the batteries included with the unit. 5-6 English 10.When using the AC adapter, make sure it is fully inserted into the AC outlet. Failure to do so could result in electric shock or short-circuiting. 11.When the product is not in use, unplug the AC adapter from the AC outlet. Failure to do so could result in deterioration of the insulation due to dust or moisture, causing a leakage electricity fire. 12.When unplugging the AC adapter, do not pull on the cord. Always grasp the AC adapter body and unplug it. Failure to do so could result in the risk of electric shock, short-circuiting, or fire. 13.Do not insert any object in the AC adapter or allow debris to collect on it. Doing so could result in the risk of electric shock, short-circuiting, or fire. 14.Do not scratch, damage, modify, forcibly bend, pull, or twist the AC adapter cord. In addition, do not place heavy objects on top of the cord English 2008/01/15 14:54:23 30 minutes prior to taking your blood pressure. Blood pressure will be higher than usual: - when you are excited or tense - when you are taking a bath - during exercising or soon after exercising - when it is cold - within one hour after eating - after drinking coffee, tea or other beverages containing caffeine - after smoking tobacco - when your bladder is full - when in a moving vehicle Blood pressure will be lower than usual: - after taking a bath - after drinking alcohol 6. Measurements may be impaired if this unit is used near a television, microwave oven, X-ray equipment or other devices with strong electrical fields. To prevent such interference, use the unit at a sufficient distance from such devices or turn the devices off. Precautions to Ensure Safe, Reliable Operation 1. Do not drop the unit. Protect it from sudden jars or shocks. 2. Do not insert foreign objects into any openings. 3. Do not attempt to disassemble the unit. 4. If the unit has been stored at temperatures below 0 °C (32 °F), leave it in a warm place for about 15 minutes before using it. Otherwise, the cuff may not inflate properly. 5. Do not store the unit in direct sunlight, high humidity or dust. 6. When cleaning, unplug the AC adapter from the AC outlet before cleaning. Also, do not plug in or unplug the AC adapter with wet hands. Doing so may result in electric shock or fire. 7. Do not spill water on the main unit, wireless display or AC adapter. Doing so may cause electric shock, short-circuiting, or product damage. 7. This unit is designed for use by adults. Consult with your physician before using this unit on a child. Do not use on infants or toddlers. 8. Do not use the AC adapter if it is damaged or if it plugs into the AC outlet loosely. Doing so may result in electric shock or short-circuiting. 8. This unit is not suitable for continuous monitoring during medical emergencies or operations. 9. If the product does not operate properly or seems strange, stop use and unplug the AC adapter immediately, and request inspection and service. Failure to do so could result in the risk of an accident, electric shock, or fire. 9. Do not use the unit for any purpose other than measuring blood pressure. Do not use the unit together with other devices. 10.Improper handling of batteries may result in battery rupture or in corrosion from battery leakage. Please observe the following to ensure proper use of batteries. a.Be sure to turn off the power after use. b.Do not mix different types or sizes of batteries. c.Change all batteries at the same time. Do not mix old and new batteries. d.Be sure to insert batteries with correct polarity, as instructed. e.Remove batteries when they are worn out, and dispose of them properly according to all applicable environmental regulations. f. Do not disassemble batteries or throw them into a fire. g.Do not short-circuit batteries. h.Do not attempt to recharge the batteries included with the unit. 5-6 English 10.When using the AC adapter, make sure it is fully inserted into the AC outlet. Failure to do so could result in electric shock or short-circuiting. 11.When the product is not in use, unplug the AC adapter from the AC outlet. Failure to do so could result in deterioration of the insulation due to dust or moisture, causing a leakage electricity fire. 12.When unplugging the AC adapter, do not pull on the cord. Always grasp the AC adapter body and unplug it. Failure to do so could result in the risk of electric shock, short-circuiting, or fire. 13.Do not insert any object in the AC adapter or allow debris to collect on it. Doing so could result in the risk of electric shock, short-circuiting, or fire. 14.Do not scratch, damage, modify, forcibly bend, pull, or twist the AC adapter cord. In addition, do not place heavy objects on top of the cord English 2008/01/15 14:54:23 15.Do not step on the AC adapter. Doing so may cause an accident or injury. 16.Do not use a voltage converter. Doing so may cause fire or electric shock. 17.This AC adapter is designed for use only with Panasonic Blood Pressure Monitor, model EW3153. Use with other electrical devices may result in death or serious personal injury. 18.ALWAYS unplug the AC adapter from the power outlet before performing maintenance. 19.Do not let this product to be used by children. 20.Do not let this product to be used by people who cannot express their feelings, or who cannot operate the product by themselves. Do not use the unit on an arm where a catheter has been inserted. Such use may result in an accident or injury. 21.Use AC adapter only with electrical outlet of voltages marked on name plate. For use in the U.S.A., use AC adapter only with AC 120 V electrical outlet. Use with electrical outlets at other voltages may results in the risk of fire, electric shock, or burns. 22.Do not allow any material to drape over the AC adapter. Doing so could result in the risk of fire. 23.Do not modify or attempt to repair the product or AC adapter by yourself. Doing so could result in the risk of fire, electric shock, or personal injury. 7-8 English Easily Check Your Blood Pressure Readings Against the JNC 7* Classification Blood Pressure Categories Diastolic Blood Pressure (DBP) or pinch it with objects. Do not wrap the cord around the main unit and the AC adapter. Doing any of these things may result in the risk of fire or electric shock. 100 90 80 Stage 2 Hypertension e.g.: SBP 165 DBP 105 Stage 1 Hypertension e.g.: SBP 150 DBP 95 Prehypertension e.g.: SBP 130 DBP 85 Normal e.g.: SBP 115 DBP 75 120 140 160 Systolic Blood Pressure (SBP) If the two blood pressure measurements (systolic, diastolic) fall into separate categories, your level is classified in the higher of the two categories. For example, a Stage 2 systolic reading, but a diastolic pressure reading in the normal range. *JNC 7: The Seventh Report of the Joint National Committee on Prevention, Detection, Evaluation and Treatment of High Blood Pressure National Institute of Health (NIH) Publication; No. 03-5233, May 2003 IMPORTANT: • Do not be alarmed by temporarily high or low readings because fluctuations in a person’s blood pressure are not uncommon. If possible, measure and record your blood pressure at the same time every day, and consult your physician if you have questions or concerns. • If abnormal variations in blood pressure are observed in measurement, please consult your physician. English 2008/01/15 14:54:23 15.Do not step on the AC adapter. Doing so may cause an accident or injury. 16.Do not use a voltage converter. Doing so may cause fire or electric shock. 17.This AC adapter is designed for use only with Panasonic Blood Pressure Monitor, model EW3153. Use with other electrical devices may result in death or serious personal injury. 18.ALWAYS unplug the AC adapter from the power outlet before performing maintenance. 19.Do not let this product to be used by children. 20.Do not let this product to be used by people who cannot express their feelings, or who cannot operate the product by themselves. Do not use the unit on an arm where a catheter has been inserted. Such use may result in an accident or injury. 21.Use AC adapter only with electrical outlet of voltages marked on name plate. For use in the U.S.A., use AC adapter only with AC 120 V electrical outlet. Use with electrical outlets at other voltages may results in the risk of fire, electric shock, or burns. 22.Do not allow any material to drape over the AC adapter. Doing so could result in the risk of fire. 23.Do not modify or attempt to repair the product or AC adapter by yourself. Doing so could result in the risk of fire, electric shock, or personal injury. 7-8 English Easily Check Your Blood Pressure Readings Against the JNC 7* Classification Blood Pressure Categories Diastolic Blood Pressure (DBP) or pinch it with objects. Do not wrap the cord around the main unit and the AC adapter. Doing any of these things may result in the risk of fire or electric shock. 100 90 80 Stage 2 Hypertension e.g.: SBP 165 DBP 105 Stage 1 Hypertension e.g.: SBP 150 DBP 95 Prehypertension e.g.: SBP 130 DBP 85 Normal e.g.: SBP 115 DBP 75 120 140 160 Systolic Blood Pressure (SBP) If the two blood pressure measurements (systolic, diastolic) fall into separate categories, your level is classified in the higher of the two categories. For example, a Stage 2 systolic reading, but a diastolic pressure reading in the normal range. *JNC 7: The Seventh Report of the Joint National Committee on Prevention, Detection, Evaluation and Treatment of High Blood Pressure National Institute of Health (NIH) Publication; No. 03-5233, May 2003 IMPORTANT: • Do not be alarmed by temporarily high or low readings because fluctuations in a person’s blood pressure are not uncommon. If possible, measure and record your blood pressure at the same time every day, and consult your physician if you have questions or concerns. • If abnormal variations in blood pressure are observed in measurement, please consult your physician. English 2008/01/15 14:54:23 Preparations Prior to Taking Measurements To use this product, the power supplies are required for both the main unit and the wireless display. Main unit Wireless display Parts Identification Main unit 1 Measuring section Pressure cuff 2 Battery cover for main unit Battery cover for main unit Power supply Power supply • Exclusive AC adapter (EW31555) • 2 AA-size LR6 batteries Approximately 2000 (included) or • 4 AA-size Panasonic LR6 batteries measurements can be taken. Approximately 150 measurements can be taken. Depending on the conditions, battery life may be dramatically shorter. Bottom of main unit 3 IR transmitter (on both sides) 4 Connector 5 Arm support The angle of this product can be adjusted so that measurements can be taken without having to be in a forced posture. View from Top Use of the main unit with the dedicated AC adapter (EW31555) (included) is recommended. Elbow rest Main unit and wireless display are not sold separately and cannot be purchased as replacement parts. For Batteries • Unit with batteries can be used up to 6 times a day when using Panasonic Alkaline batteries (AA-sized LR6 batteries) under the following conditions: Room temperature: 73 °F (23 °C) Pressurized to 170 mmHg Circumference of the arm: 11-51/64 (30 cm) • If batteries other than alkaline batteries are used or batteries are used in a room colder than 73 °F (23 °C), and when measuring a person with thin arms or high blood pressure, battery life may be dramatically shortened. *Use alkaline batteries. (Panasonic Oxyride batteries can also be used.) 9-10 English 6 Quick air release button 7 Handle 8 On/Off and Start button Power cord AC adaptor AC Adapter (EW31555) (included) Plug English 2008/01/15 10 14:54:24 Preparations Prior to Taking Measurements To use this product, the power supplies are required for both the main unit and the wireless display. Main unit Wireless display Parts Identification Main unit 1 Measuring section Pressure cuff 2 Battery cover for main unit Battery cover for main unit Power supply Power supply • Exclusive AC adapter (EW31555) • 2 AA-size LR6 batteries Approximately 2000 (included) or • 4 AA-size Panasonic LR6 batteries measurements can be taken. Approximately 150 measurements can be taken. Depending on the conditions, battery life may be dramatically shorter. Bottom of main unit 3 IR transmitter (on both sides) 4 Connector 5 Arm support The angle of this product can be adjusted so that measurements can be taken without having to be in a forced posture. View from Top Use of the main unit with the dedicated AC adapter (EW31555) (included) is recommended. Elbow rest Main unit and wireless display are not sold separately and cannot be purchased as replacement parts. For Batteries • Unit with batteries can be used up to 6 times a day when using Panasonic Alkaline batteries (AA-sized LR6 batteries) under the following conditions: Room temperature: 73 °F (23 °C) Pressurized to 170 mmHg Circumference of the arm: 11-51/64 (30 cm) • If batteries other than alkaline batteries are used or batteries are used in a room colder than 73 °F (23 °C), and when measuring a person with thin arms or high blood pressure, battery life may be dramatically shortened. *Use alkaline batteries. (Panasonic Oxyride batteries can also be used.) 9-10 English 6 Quick air release button 7 Handle 8 On/Off and Start button Power cord AC adaptor AC Adapter (EW31555) (included) Plug English 2008/01/15 10 14:54:24 Parts Identification (continued) Wireless display View from Bottom When Using the Main Unit with Batteries *Always use alkaline batteries. (4 AA-size Panasonic LR6 alkaline batteries) • When replacing batteries, always use 4 fresh alkaline batteries of the same type from the same manufacturer, and replace them simultaneously. 1. Turn the main unit over and remove the battery cover by sliding it in the direction of the arrow while pressing lightly on the mark. 2. Check the polarities of the batteries and install them correctly. 1 Blood pressure indicator 6 Memory/Recall button 2 Display 7 User selection button 3 Set button 8 Battery cover for wireless display 4 Adjust button (Display off) 9 IR receiver 5 AM/PM comparison button *Specifications of the product or parts may be changed without prior notice. When Using the Main Unit with the AC Adapter Be sure to use only the exclusive AC adapter (included). Do not use the power cord with any product other than this AC adaptor (EW31555). Use of other AC adapters could cause damage to the unit or physical harm to the user. AC 120 V 1. Connect the power cord to the AC adaptor. 2. Insert the AC adapter plug into the connector on either side of the main unit. 3. Plug the power cord fully into the AC outlet. 11 11-12 English 3. Replace the battery cover and slide it closed. Notes for using the main unit with batteries Approximately 150 measurements can be taken. Depending on the conditions, battery life may be dramatically shortened. Use of the main unit with the dedicated AC adapter (EW31555) (included) is recommended. Replace batteries when: • The mark shown to the left appears during use. • No display appears even if the On/Off and Start button is pressed. CAUTION: • Always follow the cautions printed on the batteries. • Check the polarities of the batteries and install them correctly. • Remove exhausted batteries promptly. • If the product will not be used for long periods of time, remove the batteries first. • Batteries should be used before their expiration date. Use after the expiration date may result in injury or staining of the surrounding area due to generation of heat, bursting, or leakage. English 2008/01/15 12 14:54:25 Parts Identification (continued) Wireless display View from Bottom When Using the Main Unit with Batteries *Always use alkaline batteries. (4 AA-size Panasonic LR6 alkaline batteries) • When replacing batteries, always use 4 fresh alkaline batteries of the same type from the same manufacturer, and replace them simultaneously. 1. Turn the main unit over and remove the battery cover by sliding it in the direction of the arrow while pressing lightly on the mark. 2. Check the polarities of the batteries and install them correctly. 1 Blood pressure indicator 6 Memory/Recall button 2 Display 7 User selection button 3 Set button 8 Battery cover for wireless display 4 Adjust button (Display off) 9 IR receiver 5 AM/PM comparison button *Specifications of the product or parts may be changed without prior notice. When Using the Main Unit with the AC Adapter Be sure to use only the exclusive AC adapter (included). Do not use the power cord with any product other than this AC adaptor (EW31555). Use of other AC adapters could cause damage to the unit or physical harm to the user. AC 120 V 1. Connect the power cord to the AC adaptor. 2. Insert the AC adapter plug into the connector on either side of the main unit. 3. Plug the power cord fully into the AC outlet. 11 11-12 English 3. Replace the battery cover and slide it closed. Notes for using the main unit with batteries Approximately 150 measurements can be taken. Depending on the conditions, battery life may be dramatically shortened. Use of the main unit with the dedicated AC adapter (EW31555) (included) is recommended. Replace batteries when: • The mark shown to the left appears during use. • No display appears even if the On/Off and Start button is pressed. CAUTION: • Always follow the cautions printed on the batteries. • Check the polarities of the batteries and install them correctly. • Remove exhausted batteries promptly. • If the product will not be used for long periods of time, remove the batteries first. • Batteries should be used before their expiration date. Use after the expiration date may result in injury or staining of the surrounding area due to generation of heat, bursting, or leakage. English 2008/01/15 12 14:54:25 Inserting the Batteries into the Wireless Display *Always use alkaline batteries. (2 AA-size LR6 alkaline batteries) • When replacing batteries, always use 2 fresh alkaline batteries of the same type from the same manufacturer, and replace them simultaneously. 1. Turn the wireless display over and remove the battery cover by sliding it in the direction of the arrow while pressing lightly on the mark. 2. Check the polarities of the batteries and install them correctly. 3. Replace the battery cover and slide it closed. Replace batteries when: • The mark shown at left appears during use. In this case, press the On/Off and the Start button on the main unit to interrupt the measurement. If both batteries for the main unit and the wireless display must be (main unit) and (wireless display) replaced at the same time, are alternately displayed. Setting the time and date *Please be sure to set the date and time before taking the first measurement after purchasing the blood pressure monitor, or after replacing the batteries. (If you attempt to take measurements without first setting the time and date then “–” will be displayed.) 1. Press the Set button “1” on the wireless display for at least 3 seconds. 2. Adjust the month. Press the Adjust button “2” to adjust the number of the month. 3. Adjust the date. (1) Press the Set button “1” and the number for the date will flash. (2) Press the Adjust button “2” to adjust the number of the date. 4. Adjust the hour. (1) Press the Set button “1” and the time will flash on and off. (2) Press the Adjust button “2” to adjust the number of the hour. 5. Adjust the minutes. (1) Press the Set button “1” and the number for minutes will flash. (2) Press the Adjust button “2” to adjust the number of minutes. 6. Finally, synchronizing with a time signal, press the Set button “1” to complete the procedure. • The date and time are alternately displayed in approximately 2 seconds. 7. Press the Adjust button “2” to turn off the unit. During leap years, 3/1 will be displayed when it is February 29th. Please manually reset the date to 2/29. 13 13-14 English English 2008/01/15 14 14:54:25 Inserting the Batteries into the Wireless Display *Always use alkaline batteries. (2 AA-size LR6 alkaline batteries) • When replacing batteries, always use 2 fresh alkaline batteries of the same type from the same manufacturer, and replace them simultaneously. 1. Turn the wireless display over and remove the battery cover by sliding it in the direction of the arrow while pressing lightly on the mark. 2. Check the polarities of the batteries and install them correctly. 3. Replace the battery cover and slide it closed. Replace batteries when: • The mark shown at left appears during use. In this case, press the On/Off and the Start button on the main unit to interrupt the measurement. If both batteries for the main unit and the wireless display must be (main unit) and (wireless display) replaced at the same time, are alternately displayed. Setting the time and date *Please be sure to set the date and time before taking the first measurement after purchasing the blood pressure monitor, or after replacing the batteries. (If you attempt to take measurements without first setting the time and date then “–” will be displayed.) 1. Press the Set button “1” on the wireless display for at least 3 seconds. 2. Adjust the month. Press the Adjust button “2” to adjust the number of the month. 3. Adjust the date. (1) Press the Set button “1” and the number for the date will flash. (2) Press the Adjust button “2” to adjust the number of the date. 4. Adjust the hour. (1) Press the Set button “1” and the time will flash on and off. (2) Press the Adjust button “2” to adjust the number of the hour. 5. Adjust the minutes. (1) Press the Set button “1” and the number for minutes will flash. (2) Press the Adjust button “2” to adjust the number of minutes. 6. Finally, synchronizing with a time signal, press the Set button “1” to complete the procedure. • The date and time are alternately displayed in approximately 2 seconds. 7. Press the Adjust button “2” to turn off the unit. During leap years, 3/1 will be displayed when it is February 29th. Please manually reset the date to 2/29. 13 13-14 English English 2008/01/15 14 14:54:25 Taking a Reading 3 Place the wireless display in front of your body where you can see it easily. • The main unit and the wireless display transmit/receive the measured values through infrared rays. (See page 18.) • Do not put your hand or any other objects in front of the wireless display. Advice: In general, blood pressure measurements are lower on the second attempt because you are calmer. For people who easily get tense, measuring twice each time is advised. When two measurements are taken, normally the smaller measurement is stored. When taking two measurements, always stay quiet for 4 to 5 minutes after the first measurement before taking the second measurement. Differences in blood pressure values between the left and right arms may be around 10 mmHg. The blood pressure can be measured in either the left or right arm, but all measurements should be taken using the same arm for comparative consistency. Getting into the proper position for taking a measurement Place the main unit on a table so that it is flat and the center of the unit is at heart height. *Differences in height will cause differences in blood pressure values. If the heights of the chair and table are not suitable, you may have to lean forward. In this case, form a stable stack of books or similar objects under the main unit to adjust the height of the main unit. *You cannot use the unit while lying down. Use only in a sitting position. 1 Put the main unit on a table in front of you and slide your arm through the measurement section of the unit. • Remove your shirt or roll up your sleeve so that the measuring section will be on your bare skin. • If rolling up your sleeve causes pressure on your arm or underarm, remove your shirt for measurements. Be sure that the rolled-up sleeve is not inside the cuff area when taking measurements. Elbow rest 15 15-16 English 2 Place your elbow on the elbow rest with your palm up and relax. Posture to obtain accurate measurements Measure on bare skin. Put your elbow on the elbow rest. Stretch your back. Place the main unit in front of you on a table at heart height. Put your palm up and relax. Place the wireless display where you can see it easily. Do not put your hand or any other objects in front of the wireless display. Cautions to obtain accurate measurements Sit quietly and relax while taking measurements. Do not lean forward Do not let your rolled- Do not take with your body at an up sleeve be inside the measurements at the angle during measuring section. elbow. Place your elbow measurements. Roll your sleeve far up in the elbow rest. Take measurements in your arm. the proper posture. English 2008/01/15 16 14:54:26 Taking a Reading 3 Place the wireless display in front of your body where you can see it easily. • The main unit and the wireless display transmit/receive the measured values through infrared rays. (See page 18.) • Do not put your hand or any other objects in front of the wireless display. Advice: In general, blood pressure measurements are lower on the second attempt because you are calmer. For people who easily get tense, measuring twice each time is advised. When two measurements are taken, normally the smaller measurement is stored. When taking two measurements, always stay quiet for 4 to 5 minutes after the first measurement before taking the second measurement. Differences in blood pressure values between the left and right arms may be around 10 mmHg. The blood pressure can be measured in either the left or right arm, but all measurements should be taken using the same arm for comparative consistency. Getting into the proper position for taking a measurement Place the main unit on a table so that it is flat and the center of the unit is at heart height. *Differences in height will cause differences in blood pressure values. If the heights of the chair and table are not suitable, you may have to lean forward. In this case, form a stable stack of books or similar objects under the main unit to adjust the height of the main unit. *You cannot use the unit while lying down. Use only in a sitting position. 1 Put the main unit on a table in front of you and slide your arm through the measurement section of the unit. • Remove your shirt or roll up your sleeve so that the measuring section will be on your bare skin. • If rolling up your sleeve causes pressure on your arm or underarm, remove your shirt for measurements. Be sure that the rolled-up sleeve is not inside the cuff area when taking measurements. Elbow rest 15 15-16 English 2 Place your elbow on the elbow rest with your palm up and relax. Posture to obtain accurate measurements Measure on bare skin. Put your elbow on the elbow rest. Stretch your back. Place the main unit in front of you on a table at heart height. Put your palm up and relax. Place the wireless display where you can see it easily. Do not put your hand or any other objects in front of the wireless display. Cautions to obtain accurate measurements Sit quietly and relax while taking measurements. Do not lean forward Do not let your rolled- Do not take with your body at an up sleeve be inside the measurements at the angle during measuring section. elbow. Place your elbow measurements. Roll your sleeve far up in the elbow rest. Take measurements in your arm. the proper posture. English 2008/01/15 16 14:54:26 Taking a Reading (continued) Do not take measurements. • Within 1 hour of eating or drinking alcohol • Immediately after drinking coffee or tea, or smoking • In a moving vehicle • Immediately after exercising or taking a bath (Wait at least 20 minutes and take a measurement while staying quiet.) • In cold places [Take measurements at room temperatures around 20 °C (68 °F).] • When you need to urinate (Wait several minutes after urinating before taking measurements.) Be sure to obey the following points for accurate measurements: • Do not move your body, arm, or fingertips. • Do not touch the main unit. • Do not talk. • Do not use a cellular phone near the main unit. Positions of the main unit and the wireless display Your body reflects infrared rays. For the measurement on your left arm The same range (restrictions) as the measurement on your left arm is applied. For the measurement on your right arm • Face the wireless display towards you into position within reach of your hand [within approx. 23⅝ (60 cm)]. *Do not put your hand or any other objects in front of the wireless display. The main unit and the wireless display communicate with each other using infrared rays. Infrared rays are transmitted from the transmitter on the side panel of the main unit, and reflected on your body and then received on the bottom of the front panel of the wireless display. The units may not communicate due to improper positioning of the wireless display or other environmental conditions (lighting, sunlight, etc.) In those cases, place the wireless display closer to your body. *If you place the wireless display where it cannot receive signals from the main unit, and then press the On/Off and the Start button, the main unit starts a measurement but nothing appears on the wireless display. *If the wireless display is placed where it can receive signals from the main unit while the measurement is executed, results are displayed. If the wireless display cannot receive signals from the main unit, the mark flashes on the wireless display (on the display panel) as shown in the figure on the left. In this case, set the wireless display in the proper position. 17 17-18 English English 2008/01/15 18 14:54:26 Taking a Reading (continued) Do not take measurements. • Within 1 hour of eating or drinking alcohol • Immediately after drinking coffee or tea, or smoking • In a moving vehicle • Immediately after exercising or taking a bath (Wait at least 20 minutes and take a measurement while staying quiet.) • In cold places [Take measurements at room temperatures around 20 °C (68 °F).] • When you need to urinate (Wait several minutes after urinating before taking measurements.) Be sure to obey the following points for accurate measurements: • Do not move your body, arm, or fingertips. • Do not touch the main unit. • Do not talk. • Do not use a cellular phone near the main unit. Positions of the main unit and the wireless display Your body reflects infrared rays. For the measurement on your left arm The same range (restrictions) as the measurement on your left arm is applied. For the measurement on your right arm • Face the wireless display towards you into position within reach of your hand [within approx. 23⅝ (60 cm)]. *Do not put your hand or any other objects in front of the wireless display. The main unit and the wireless display communicate with each other using infrared rays. Infrared rays are transmitted from the transmitter on the side panel of the main unit, and reflected on your body and then received on the bottom of the front panel of the wireless display. The units may not communicate due to improper positioning of the wireless display or other environmental conditions (lighting, sunlight, etc.) In those cases, place the wireless display closer to your body. *If you place the wireless display where it cannot receive signals from the main unit, and then press the On/Off and the Start button, the main unit starts a measurement but nothing appears on the wireless display. *If the wireless display is placed where it can receive signals from the main unit while the measurement is executed, results are displayed. If the wireless display cannot receive signals from the main unit, the mark flashes on the wireless display (on the display panel) as shown in the figure on the left. In this case, set the wireless display in the proper position. 17 17-18 English English 2008/01/15 18 14:54:26 Taking a Reading (continued) Measurement 1 Press the On/Off and Start button on the main unit. (1) After the entire display on the wireless display has been lit, the pressure cuff will be tightened automatically. (2) Pressurization will be performed automatically and measurements will be taken. *It may take about 1 second for the wireless display to turn on after pressing the On/Off and the Start button. This is not abnormal. The entire display will light for approx. *The angle of the main unit may change slightly 1 second. while pressurizing. This will not affect accuracy. 2 When measurement has been completed, the blood pressure and pulse values will be displayed. The cuff will loosen after the measurement result has been shown for about 5 seconds. The pressure cuff will be tightened automatically. • The blood pressure indication ( mark) will flash for 6 seconds then stay lit. If the measurement is high, it will also flash for 6 seconds to indicate high blood pressure. (See page 22.) • The mark will light. (For storing measurement values, see page 24.) • The pulse rate value is the beats per minute calculated based on the pulse rate during measurement. • The mark is displayed when pulse rate could not be measured. The heart mark will blink when pulse is detected during pressurization. 3 Remove your arm from the main unit. Movement detection function If movement is detected while measurement is being taken and more pressure is applied by the pressure cuff, the mark will be displayed. • Please redo blood pressure measurement again if the mark flashes or is lit. • If the arm to which the pressure cuff is attached is moved while measurement is being taken (e.g. the elbow is bent suddenly), in some cases correct measurements may not be obtained. • When movement has been detected during measurement, the mark flashes when the blood pressure reading obtained during that measurement is displayed. (If this reading is saved, the mark will light whenever it is recalled.) Movement Mark Flashing Explanation Movement has been detected. · The elbow has been bent suddenly. · The upper arm has been tensed. · The arm has been moved, etc. With correct posture, please take the measurement again after measurement has been completed (see page 16). Lit Movement has been detected that will significantly affect the reading. · Significant movement has been detected. · Movement has been detected repeatedly. · Significant arm movement has been detected, etc. Please take the measurement again (a will appear on the display). *This function is designed to help you to take measurements accurately (see page 33). Even if the Movement mark is not displayed, we recommend that measurements be taken 2 times, with 5 minutes between readings, in order to obtain an accurate reading (see pages 15– 18 for correct position). 4 To switch off the blood pressure monitor, press the On/Off and Start button on the main unit. • If you forget to switch it off, the blood pressure monitor will switch off automatically after approximately 2 minutes. • When the Adjust button “2” on the wireless display is pressed, indications disappears but the power of the main unit is still on for about 2 minutes. 19 19-20 English English 2008/01/15 20 14:54:27 Taking a Reading (continued) Measurement 1 Press the On/Off and Start button on the main unit. (1) After the entire display on the wireless display has been lit, the pressure cuff will be tightened automatically. (2) Pressurization will be performed automatically and measurements will be taken. *It may take about 1 second for the wireless display to turn on after pressing the On/Off and the Start button. This is not abnormal. The entire display will light for approx. *The angle of the main unit may change slightly 1 second. while pressurizing. This will not affect accuracy. 2 When measurement has been completed, the blood pressure and pulse values will be displayed. The cuff will loosen after the measurement result has been shown for about 5 seconds. The pressure cuff will be tightened automatically. • The blood pressure indication ( mark) will flash for 6 seconds then stay lit. If the measurement is high, it will also flash for 6 seconds to indicate high blood pressure. (See page 22.) • The mark will light. (For storing measurement values, see page 24.) • The pulse rate value is the beats per minute calculated based on the pulse rate during measurement. • The mark is displayed when pulse rate could not be measured. The heart mark will blink when pulse is detected during pressurization. 3 Remove your arm from the main unit. Movement detection function If movement is detected while measurement is being taken and more pressure is applied by the pressure cuff, the mark will be displayed. • Please redo blood pressure measurement again if the mark flashes or is lit. • If the arm to which the pressure cuff is attached is moved while measurement is being taken (e.g. the elbow is bent suddenly), in some cases correct measurements may not be obtained. • When movement has been detected during measurement, the mark flashes when the blood pressure reading obtained during that measurement is displayed. (If this reading is saved, the mark will light whenever it is recalled.) Movement Mark Flashing Explanation Movement has been detected. · The elbow has been bent suddenly. · The upper arm has been tensed. · The arm has been moved, etc. With correct posture, please take the measurement again after measurement has been completed (see page 16). Lit Movement has been detected that will significantly affect the reading. · Significant movement has been detected. · Movement has been detected repeatedly. · Significant arm movement has been detected, etc. Please take the measurement again (a will appear on the display). *This function is designed to help you to take measurements accurately (see page 33). Even if the Movement mark is not displayed, we recommend that measurements be taken 2 times, with 5 minutes between readings, in order to obtain an accurate reading (see pages 15– 18 for correct position). 4 To switch off the blood pressure monitor, press the On/Off and Start button on the main unit. • If you forget to switch it off, the blood pressure monitor will switch off automatically after approximately 2 minutes. • When the Adjust button “2” on the wireless display is pressed, indications disappears but the power of the main unit is still on for about 2 minutes. 19 19-20 English English 2008/01/15 20 14:54:27 Taking a Reading (continued) Irregular pulse function If the pulse rate varies by more than ±25% from the average while a measurement is being taken, when measurement is completed the mark will be displayed. mark will be lit after approx. 6 seconds of blinking when • The the measurement is completed. mark is lit, please take the measurement again. • If the • In some cases, if the pulse rate fluctuates greatly while a measurement is being taken, it may be impossible to obtain an accurate reading. (Flashes.) (Is lit.) Alarm function signals high blood pressure Blood pressure values for both systolic and diastolic readings are determined and indicated via mark in the display as being within normal or hypertensive ranges based on definitions and classification of blood pressure levels by the JNC 7. Moreover, when blood pressure is in the high range, the reading displayed on screen flashes on and off to alert user. According to JNC 7 Classification, values consistently in excess of 140 mmHg (Sys.) and/or 90 mmHg (Dia.) are considered to constitute high blood pressure. Blood pressure sign mark positions (mmHg) Diastolic Hypertension (Stage 1, Stage 2) Orange Yellow • If you save a reading where an irregular pulse was recorded, the mark will be displayed when you recall that reading. If the mark is displayed an irregular pulse rate is detected, not necessarily due to atrial fibrillation. However, if this mark continues to be displayed in subsequent readings, please consult with your physician. *This function is designed to act as a guide to help you to obtain accurate readings (Please see pages 15–18). *If the mark is frequently displayed, please consult a health professional for your health condition. Don’t try to interpret readings or attempt to treat any condition yourself. Always follow the guidance of a health professional. 21 21-22 English Green 90 80 Prehypertension Normal 120 140 (mmHg) Systolic • Blood pressure readings will flash for approx. 6 seconds when in the high blood pressure range. Systolic blood pressure: 140 mmHg and over Diastolic blood pressure: 90 mmHg and over (Only when measurement is complete) When an Error Occurs During Measurement A will appear on the display to indicate that measurement was unsuccessful and should be performed again. Before performing another measurement, always press the On/Off and Start button to turn off the unit and make sure to allow a rest period of 4 to 5 minutes before starting again. Please consult your doctor without delay if the blood pressure indicator repeatedly displays to elevated blood pressure values. English 2008/01/15 22 14:54:28 Taking a Reading (continued) Irregular pulse function If the pulse rate varies by more than ±25% from the average while a measurement is being taken, when measurement is completed the mark will be displayed. mark will be lit after approx. 6 seconds of blinking when • The the measurement is completed. mark is lit, please take the measurement again. • If the • In some cases, if the pulse rate fluctuates greatly while a measurement is being taken, it may be impossible to obtain an accurate reading. (Flashes.) (Is lit.) Alarm function signals high blood pressure Blood pressure values for both systolic and diastolic readings are determined and indicated via mark in the display as being within normal or hypertensive ranges based on definitions and classification of blood pressure levels by the JNC 7. Moreover, when blood pressure is in the high range, the reading displayed on screen flashes on and off to alert user. According to JNC 7 Classification, values consistently in excess of 140 mmHg (Sys.) and/or 90 mmHg (Dia.) are considered to constitute high blood pressure. Blood pressure sign mark positions (mmHg) Diastolic Hypertension (Stage 1, Stage 2) Orange Yellow • If you save a reading where an irregular pulse was recorded, the mark will be displayed when you recall that reading. If the mark is displayed an irregular pulse rate is detected, not necessarily due to atrial fibrillation. However, if this mark continues to be displayed in subsequent readings, please consult with your physician. *This function is designed to act as a guide to help you to obtain accurate readings (Please see pages 15–18). *If the mark is frequently displayed, please consult a health professional for your health condition. Don’t try to interpret readings or attempt to treat any condition yourself. Always follow the guidance of a health professional. 21 21-22 English Green 90 80 Prehypertension Normal 120 140 (mmHg) Systolic • Blood pressure readings will flash for approx. 6 seconds when in the high blood pressure range. Systolic blood pressure: 140 mmHg and over Diastolic blood pressure: 90 mmHg and over (Only when measurement is complete) When an Error Occurs During Measurement A will appear on the display to indicate that measurement was unsuccessful and should be performed again. Before performing another measurement, always press the On/Off and Start button to turn off the unit and make sure to allow a rest period of 4 to 5 minutes before starting again. Please consult your doctor without delay if the blood pressure indicator repeatedly displays to elevated blood pressure values. English 2008/01/15 22 14:54:28 Taking a Reading (continued) Storing and Calling up Blood Pressure Readings To interrupt measurements quickly Press the Quick air release button. If pressure cuff will not deflate quickly enough even if the On/Off and Start button is pressed, press and hold the quick air release button on top of the unit. The air will be released in approximately 4 seconds. If the pressure cuff comes off: 2 Press the pressure cuff into 1 With the belt and seam the groove of the main unit. downwards, slide the pressure Either the front or the back can cuff into the main unit. be attached first. Up to 90 readings each can be stored in the memory for two people. Storing blood pressure readings • All data is retained even when the batteries go flat or are changed. • When measurements are taken and no date has been set, the date and ” on the wireless display. time will be displayed as “ 1. After measurement has been completed, the mark will be lit up. Press the user selection button on the wireless display to select the desired user. To select User … To Step 2. To select User … Press the user selection button. 2. Press the Memory/Recall button. Pressure cuff Seam Belt With the belt and seam downwards, slide the pressure cuff into the main unit. Groove Check that the pressure cuff is inserted in the groove on the main unit. *When re-attaching, be sure not to touch the inside of the main unit where the pressure cuff has been removed. Doing so may result in an accident or injury. (After approx. 2 seconds.) (After approx. 2 seconds.) 3. Memory storage is completed. • A total for and of 90 readings can be stored in memory. Readings over the memory capacity will be recorded over the oldest measurement in memory. • Readings cannot be saved when a measurement has been unsuccessful (display of the error mark for blood pressure readings). Readings can be saved, however, when the mark is displayed for the pulse rate. • The memory number, measurement date, and time are alternately displayed in approximately 2 seconds. (After approx. 2 seconds.) 23 23-24 English English 2008/01/15 24 14:54:29 Taking a Reading (continued) Storing and Calling up Blood Pressure Readings To interrupt measurements quickly Press the Quick air release button. If pressure cuff will not deflate quickly enough even if the On/Off and Start button is pressed, press and hold the quick air release button on top of the unit. The air will be released in approximately 4 seconds. If the pressure cuff comes off: 2 Press the pressure cuff into 1 With the belt and seam the groove of the main unit. downwards, slide the pressure Either the front or the back can cuff into the main unit. be attached first. Up to 90 readings each can be stored in the memory for two people. Storing blood pressure readings • All data is retained even when the batteries go flat or are changed. • When measurements are taken and no date has been set, the date and ” on the wireless display. time will be displayed as “ 1. After measurement has been completed, the mark will be lit up. Press the user selection button on the wireless display to select the desired user. To select User … To Step 2. To select User … Press the user selection button. 2. Press the Memory/Recall button. Pressure cuff Seam Belt With the belt and seam downwards, slide the pressure cuff into the main unit. Groove Check that the pressure cuff is inserted in the groove on the main unit. *When re-attaching, be sure not to touch the inside of the main unit where the pressure cuff has been removed. Doing so may result in an accident or injury. (After approx. 2 seconds.) (After approx. 2 seconds.) 3. Memory storage is completed. • A total for and of 90 readings can be stored in memory. Readings over the memory capacity will be recorded over the oldest measurement in memory. • Readings cannot be saved when a measurement has been unsuccessful (display of the error mark for blood pressure readings). Readings can be saved, however, when the mark is displayed for the pulse rate. • The memory number, measurement date, and time are alternately displayed in approximately 2 seconds. (After approx. 2 seconds.) 23 23-24 English English 2008/01/15 24 14:54:29 Storing and Calling up Blood Pressure Readings (continued) Calling up readings from memory Readings can be recalled after being saved without having to switch the unit on. 1. Press the user selection button on the wireless display to select the desired user. To select User … To Step 2. To select User … Press the user selection button. 2. Press the Memory/Recall button. • The average readings of all recorded measurements are displayed. • When readings from 90 measurements have been saved the average of the readings from all 90 measurements will be displayed. (If there is only 1 measurement recorded, mark will not be displayed.) will be displayed. • The mark • Blood pressure indicator will be lit up for approximately 6 seconds. 3. Press the Memory/Recall button to display (After approx. readings starting with from the most recent 2 seconds.) measurement. • Each time the Memory/Recall button is pressed readings are displayed in order of the most recent measurement. • The memory number, measurement date, and (After approx. 2 seconds.) time are alternately displayed in approximately 2 seconds. 4. Press the Adjust button “2” on the wireless display to switch off the unit. If you forget to switch off the unit it will do so • (After approx. automatically after approx. 30 seconds. 2 seconds.) 25 25-26 English Deleting all data stored in memory (1) Recall the user whom you want to delete using the user selection button. (2) Recall stored data using the Memory/Recall button. (3) Press the Memory/Recall button again and hold it (for approx. 3 seconds) until all readings are deleted. NOTE: Readings from individual measurements cannot be deleted. (4) If everything has been deleted, the selected or mark and will be displayed. English 2008/01/15 26 14:54:30 Storing and Calling up Blood Pressure Readings (continued) Calling up readings from memory Readings can be recalled after being saved without having to switch the unit on. 1. Press the user selection button on the wireless display to select the desired user. To select User … To Step 2. To select User … Press the user selection button. 2. Press the Memory/Recall button. • The average readings of all recorded measurements are displayed. • When readings from 90 measurements have been saved the average of the readings from all 90 measurements will be displayed. (If there is only 1 measurement recorded, mark will not be displayed.) will be displayed. • The mark • Blood pressure indicator will be lit up for approximately 6 seconds. 3. Press the Memory/Recall button to display (After approx. readings starting with from the most recent 2 seconds.) measurement. • Each time the Memory/Recall button is pressed readings are displayed in order of the most recent measurement. • The memory number, measurement date, and (After approx. 2 seconds.) time are alternately displayed in approximately 2 seconds. 4. Press the Adjust button “2” on the wireless display to switch off the unit. If you forget to switch off the unit it will do so • (After approx. automatically after approx. 30 seconds. 2 seconds.) 25 25-26 English Deleting all data stored in memory (1) Recall the user whom you want to delete using the user selection button. (2) Recall stored data using the Memory/Recall button. (3) Press the Memory/Recall button again and hold it (for approx. 3 seconds) until all readings are deleted. NOTE: Readings from individual measurements cannot be deleted. (4) If everything has been deleted, the selected or mark and will be displayed. English 2008/01/15 26 14:54:30 Comparing AM and PM Average Systolic Blood Pressure Average AM and PM systolic blood pressure is displayed in order to allow you to compare readings from both time periods. Use of the AM and PM average systolic blood pressure comparison function can aid in the detection of a blood pressure pattern known as “early morning surge” in which blood pressure rises rapidly in the morning. AM/PM comparison can only be done when the date and time have been set up. These can be compared after readings have been saved, and even when the unit is turned off. 1. Press the user selection button to select the user for a comparison of average AM and PM systolic blood pressures. • Each time the button is pressed the user switches from one to the other. 2. Press the button. After Use 1 Tilt the main unit (using the handle) in the direction of the arrow until the unit is locked. 2 Place the wireless display on top of the unit securely. To transport the unit • Carry the main unit and the wireless display separately. Since the wireless display cannot be secured in place, be careful to avoid dropping the unit. • The average AM and PM systolic blood pressure for the selected user will be displayed. AM… 3:00 AM to 11:00 AM PM… 6:00 PM to 2:59 AM • The average systolic blood pressure recorded during the time periods shown above will be displayed. • When the time has not been recorded or a single reading has been recorded, “ ” will be displayed. 3. Press the Adjust button “2” to switch off the unit. • If you forget to switch off the unit it will do so automatically after approx. 30 seconds. 27 27-28 English English 2008/01/15 28 14:54:30 Comparing AM and PM Average Systolic Blood Pressure Average AM and PM systolic blood pressure is displayed in order to allow you to compare readings from both time periods. Use of the AM and PM average systolic blood pressure comparison function can aid in the detection of a blood pressure pattern known as “early morning surge” in which blood pressure rises rapidly in the morning. AM/PM comparison can only be done when the date and time have been set up. These can be compared after readings have been saved, and even when the unit is turned off. 1. Press the user selection button to select the user for a comparison of average AM and PM systolic blood pressures. • Each time the button is pressed the user switches from one to the other. 2. Press the button. After Use 1 Tilt the main unit (using the handle) in the direction of the arrow until the unit is locked. 2 Place the wireless display on top of the unit securely. To transport the unit • Carry the main unit and the wireless display separately. Since the wireless display cannot be secured in place, be careful to avoid dropping the unit. • The average AM and PM systolic blood pressure for the selected user will be displayed. AM… 3:00 AM to 11:00 AM PM… 6:00 PM to 2:59 AM • The average systolic blood pressure recorded during the time periods shown above will be displayed. • When the time has not been recorded or a single reading has been recorded, “ ” will be displayed. 3. Press the Adjust button “2” to switch off the unit. • If you forget to switch off the unit it will do so automatically after approx. 30 seconds. 27 27-28 English English 2008/01/15 28 14:54:30 Specifications Q & A Power source DC 6 V (Main unit: Four AA/LR6 size alkaline batteries) AC 120 V 60 Hz (when using AC adapter) DC 3 V (Wireless display: Two AA/LR6 size alkaline batteries) Display Digital LCD Method of measurement Oscillometric system Measurement range Blood pressure: 0 mmHg to 280 mmHg Pulse rate: 30 to 160 beats per minute Accuracy Blood pressure: Within ±3 mmHg Pulse rate: Within ±5% Operation temperature/ 10 °C to 40 °C (50 °F to 104 °F), 15% to 90% RH humidity range Storage temperature/ –20 °C to 60 °C (–4 °F to 140 °F), 10% to 95% RH humidity range Measurable arm Approx. 7¾ to 13⅜ (20 cm to 34 cm) circumference Weight Main unit: Approx. 1550 g (54.7 oz.) (not including batteries) Wireless display: Approx. 160 g (5.6 oz.) (not including batteries) Dimensions Main unit: 11⅛ × 6⅝ × 11⅛ (28.3 cm × 16.9 cm × 28.1 cm) Wireless display: 5¾ × 3¼ × 2⅝ (14.6 cm × 8.4 cm × 6.8 cm) Protection against Internally powered equipment, Type BF electric shock applied part AC adapter Input Output 29 29-30 English AC 120 V 60 Hz DC 6 V 2.0 A Q Why are the blood pressure values measured at home different from those measured at the doctor’s office? A Blood pressure varies in a 24-hour period. In addition, it can vary greatly depending on the weather, your mental state, amount of exercise, etc. In particular, there is the phenomenon of “White uniform hypertension” at doctor’s offices, where the blood pressure measured in a doctor’s office is higher because of stress or anxiety. In addition, if the blood pressure measured at home is sometimes higher and sometimes lower than the blood pressure measured at the doctor’s office, the following can be considered. Please pay attention to these points when taking measurements. 1 Measuring posture was poor. Did you take measurements while leaning forward with your body at an angle? 2 Measurements were not taken at the upper arm. Please take measurements with your elbow in the arm support of the main unit. (See pages 15–17.) 3 Were you anxious or upset during measurements? Before taking measurements, take 2 or 3 deep breaths and relax, so that your blood pressure stabilizes. Q Why do the main unit and the wireless display operate together even when they are separated? A The main unit and the wireless display communicate using infrared rays. Infrared rays are transmitted from the transmitter on the side panel of the main unit, and reflected on your body and then received on the bottom of the front panel of the wireless display. Q The mark does not light when an arm is moved. The mark is a function to notify you that your arm is bent or to indicate extra loads on the pressure cuff. Therefore, it may not indicate motion (bending an arm slightly, etc.). If you are concerned about the result, retry the measurement. A English 2008/01/15 30 14:54:30 Specifications Q & A Power source DC 6 V (Main unit: Four AA/LR6 size alkaline batteries) AC 120 V 60 Hz (when using AC adapter) DC 3 V (Wireless display: Two AA/LR6 size alkaline batteries) Display Digital LCD Method of measurement Oscillometric system Measurement range Blood pressure: 0 mmHg to 280 mmHg Pulse rate: 30 to 160 beats per minute Accuracy Blood pressure: Within ±3 mmHg Pulse rate: Within ±5% Operation temperature/ 10 °C to 40 °C (50 °F to 104 °F), 15% to 90% RH humidity range Storage temperature/ –20 °C to 60 °C (–4 °F to 140 °F), 10% to 95% RH humidity range Measurable arm Approx. 7¾ to 13⅜ (20 cm to 34 cm) circumference Weight Main unit: Approx. 1550 g (54.7 oz.) (not including batteries) Wireless display: Approx. 160 g (5.6 oz.) (not including batteries) Dimensions Main unit: 11⅛ × 6⅝ × 11⅛ (28.3 cm × 16.9 cm × 28.1 cm) Wireless display: 5¾ × 3¼ × 2⅝ (14.6 cm × 8.4 cm × 6.8 cm) Protection against Internally powered equipment, Type BF electric shock applied part AC adapter Input Output 29 29-30 English AC 120 V 60 Hz DC 6 V 2.0 A Q Why are the blood pressure values measured at home different from those measured at the doctor’s office? A Blood pressure varies in a 24-hour period. In addition, it can vary greatly depending on the weather, your mental state, amount of exercise, etc. In particular, there is the phenomenon of “White uniform hypertension” at doctor’s offices, where the blood pressure measured in a doctor’s office is higher because of stress or anxiety. In addition, if the blood pressure measured at home is sometimes higher and sometimes lower than the blood pressure measured at the doctor’s office, the following can be considered. Please pay attention to these points when taking measurements. 1 Measuring posture was poor. Did you take measurements while leaning forward with your body at an angle? 2 Measurements were not taken at the upper arm. Please take measurements with your elbow in the arm support of the main unit. (See pages 15–17.) 3 Were you anxious or upset during measurements? Before taking measurements, take 2 or 3 deep breaths and relax, so that your blood pressure stabilizes. Q Why do the main unit and the wireless display operate together even when they are separated? A The main unit and the wireless display communicate using infrared rays. Infrared rays are transmitted from the transmitter on the side panel of the main unit, and reflected on your body and then received on the bottom of the front panel of the wireless display. Q The mark does not light when an arm is moved. The mark is a function to notify you that your arm is bent or to indicate extra loads on the pressure cuff. Therefore, it may not indicate motion (bending an arm slightly, etc.). If you are concerned about the result, retry the measurement. A English 2008/01/15 30 14:54:30 Q & A (continued) Q Since the mark was displayed, I retried the measurement by setting my arm on the unit properly. But the indicated value is still higher than usual. A The mark is just a guide for the proper measurement method. (See page 20.) If you correct your posture when the mark is displayed but the measured value is still higher or lower than usual, retry the measurement. The following causes are suspected. • Did you measure properly (in proper posture)? Measure as indicated on pages 15–17. • Measured immediately after smoking. • Measured when irritated or emotional. • Measured in cold environments • For persons who have a physical constitution with less fluctuation in the pulse rate. • If you are concerned about the results, retry the measurement after staying quiet for 4 to 5 minutes. Q When should I measure my blood pressure? A We recommend three measurements a day. First ........ Upon Waking (Because, with almost no influence from body movement, it’s the blood pressure is closest to that at night.) Second.... Before Lunch (Because it provides blood pressure values close to the highest of the day.) Third........ At Bedtime (So as to obtain data close to your average blood pressure values during the day.) This way, by taking measurements morning, noon and night, you can use the unit to learn the patterns of and monitor your blood pressure. • Use of the AM and PM average systolic blood pressure comparison function can aid in the detection of a blood pressure pattern known as “early morning surge” in which blood pressure rises rapidly in the morning. (See page 27.) 31 31-32 English Care and Maintenance Do not attempt to disassemble, repair or modify the unit. • Doing so may cause fire or cause the unit to malfunction. It may also lead to injury. Do not apply excessive force to the unit or drop the unit. • Doing so may cause damage. Do not insert dust or foreign objects into the unit. • Doing so may result in damage. If the unit is stored at temperatures below the freezing point, do not use it immediately. Leave it in a warm place for at least an hour before use. • If the unit is not allowed to warm up, it may not pressurize. Do not touch the unit when measurement is in progress. • Doing so may cause incorrect readings. If the unit becomes dirty, clean it with a soft cloth moistened with warm water or soapy water. (Do not use alcohol, benzine, or paint thinner.) • Use of such chemicals may result in cracking or discoloration. When the unit will not be used for a long time (30 days or more), be sure to remove the batteries. • Otherwise, the batteries may leak and damage the unit. The pressure cuff cannot be washed. For storage, avoid high temperatures, high humidity, and direct sunlight. • Shortage under such conditions may result in damage. English 2008/01/15 32 14:54:31 Q & A (continued) Q Since the mark was displayed, I retried the measurement by setting my arm on the unit properly. But the indicated value is still higher than usual. A The mark is just a guide for the proper measurement method. (See page 20.) If you correct your posture when the mark is displayed but the measured value is still higher or lower than usual, retry the measurement. The following causes are suspected. • Did you measure properly (in proper posture)? Measure as indicated on pages 15–17. • Measured immediately after smoking. • Measured when irritated or emotional. • Measured in cold environments • For persons who have a physical constitution with less fluctuation in the pulse rate. • If you are concerned about the results, retry the measurement after staying quiet for 4 to 5 minutes. Q When should I measure my blood pressure? A We recommend three measurements a day. First ........ Upon Waking (Because, with almost no influence from body movement, it’s the blood pressure is closest to that at night.) Second.... Before Lunch (Because it provides blood pressure values close to the highest of the day.) Third........ At Bedtime (So as to obtain data close to your average blood pressure values during the day.) This way, by taking measurements morning, noon and night, you can use the unit to learn the patterns of and monitor your blood pressure. • Use of the AM and PM average systolic blood pressure comparison function can aid in the detection of a blood pressure pattern known as “early morning surge” in which blood pressure rises rapidly in the morning. (See page 27.) 31 31-32 English Care and Maintenance Do not attempt to disassemble, repair or modify the unit. • Doing so may cause fire or cause the unit to malfunction. It may also lead to injury. Do not apply excessive force to the unit or drop the unit. • Doing so may cause damage. Do not insert dust or foreign objects into the unit. • Doing so may result in damage. If the unit is stored at temperatures below the freezing point, do not use it immediately. Leave it in a warm place for at least an hour before use. • If the unit is not allowed to warm up, it may not pressurize. Do not touch the unit when measurement is in progress. • Doing so may cause incorrect readings. If the unit becomes dirty, clean it with a soft cloth moistened with warm water or soapy water. (Do not use alcohol, benzine, or paint thinner.) • Use of such chemicals may result in cracking or discoloration. When the unit will not be used for a long time (30 days or more), be sure to remove the batteries. • Otherwise, the batteries may leak and damage the unit. The pressure cuff cannot be washed. For storage, avoid high temperatures, high humidity, and direct sunlight. • Shortage under such conditions may result in damage. English 2008/01/15 32 14:54:31 Troubleshooting Display Status before error The indication disappears in the middle of the operation. or mark is is displayed. (the displayed.) Pressurization to more than 280 mmHg was performed. The mark flashes for 2 minutes or longer. Pressure decreased suddenly. Symptom Cause and solution Batteries are exhausted. (See pages 11–13.) Were measurements taken according to the proper procedure and in the correct posture? (See pages 15–18.) Be sure your arm is is displayed. The heart mark blinked properly inserted into the only a few times or not at all. main unit. (See pages 15–18.) Cuff does not inflate. Your arm or body moved. is displayed. Failure of the main unit Has the unit detected movement? (See page 20.) Take it to the store where it was purchased for testing and repairs. Symptom Possible cause • The position of the main unit is higher or lower than your heart when measuring. Systolic or diastolic blood • Your arm was not inserted properly into the pressure value is high or main unit. low. • You moved or talked during measurements. (See pages 15–18.) Value is different from that measured by the doctor. • Blood pressure varies in response to minute changes in your mental state, such as your reaction to a doctor’s presence. • Sit quietly for 4 to 5 minutes and then take Measurement values are another measurement. (See pages 15–18, different with each 30–31.) measurement. 33 33-34 English Possible cause • Press the ring portion on the outside of the Pressure cuff comes off. pressure cuff into the main unit. (See page 23.) • The wireless display is improperly Indications on the wireless display do not positioned. change during operation. • Your hand or another object is in front of the wireless display. (See page 18.) No display appears even • Batteries are installed with the polarities wrong. (See pages 11–13.) when the On/Off and Start button is pressed. • Batteries are exhausted. (See pages 11–13.) The mark flashes when readings are being taken. mark flashes The when readings are being taken. mark flashes The even though I did not move my arm or body. Varying sounds and pressurization speeds occur during inflation of the cuff. The wireless display is lost. Instrument is broken. • There was a significant fluctuation in pulse when readings were being taken. (See page 21.) • Your arm or body moved. (See page 20.) • In some cases this will be displayed when you have tensed the muscles in your hand. Relax the muscles in your hand and take the reading again. (See pages 15–17, 20.) • Changes in operating sounds and pressurization speeds are normal and occur due to the fact that measurements are being made as the cuff is being inflated. Take it to the store where it was purchased for testing and repairs. If the unit still appears to provide unusual or erroneous readings, consult your physician. If the unit does not appear to be functioning properly, contact Panasonic at 1-800-338-0552. English 2008/01/15 34 14:54:31 Troubleshooting Display Status before error The indication disappears in the middle of the operation. or mark is is displayed. (the displayed.) Pressurization to more than 280 mmHg was performed. The mark flashes for 2 minutes or longer. Pressure decreased suddenly. Symptom Cause and solution Batteries are exhausted. (See pages 11–13.) Were measurements taken according to the proper procedure and in the correct posture? (See pages 15–18.) Be sure your arm is is displayed. The heart mark blinked properly inserted into the only a few times or not at all. main unit. (See pages 15–18.) Cuff does not inflate. Your arm or body moved. is displayed. Failure of the main unit Has the unit detected movement? (See page 20.) Take it to the store where it was purchased for testing and repairs. Symptom Possible cause • The position of the main unit is higher or lower than your heart when measuring. Systolic or diastolic blood • Your arm was not inserted properly into the pressure value is high or main unit. low. • You moved or talked during measurements. (See pages 15–18.) Value is different from that measured by the doctor. • Blood pressure varies in response to minute changes in your mental state, such as your reaction to a doctor’s presence. • Sit quietly for 4 to 5 minutes and then take Measurement values are another measurement. (See pages 15–18, different with each 30–31.) measurement. 33 33-34 English Possible cause • Press the ring portion on the outside of the Pressure cuff comes off. pressure cuff into the main unit. (See page 23.) • The wireless display is improperly Indications on the wireless display do not positioned. change during operation. • Your hand or another object is in front of the wireless display. (See page 18.) No display appears even • Batteries are installed with the polarities wrong. (See pages 11–13.) when the On/Off and Start button is pressed. • Batteries are exhausted. (See pages 11–13.) The mark flashes when readings are being taken. mark flashes The when readings are being taken. mark flashes The even though I did not move my arm or body. Varying sounds and pressurization speeds occur during inflation of the cuff. The wireless display is lost. Instrument is broken. • There was a significant fluctuation in pulse when readings were being taken. (See page 21.) • Your arm or body moved. (See page 20.) • In some cases this will be displayed when you have tensed the muscles in your hand. Relax the muscles in your hand and take the reading again. (See pages 15–17, 20.) • Changes in operating sounds and pressurization speeds are normal and occur due to the fact that measurements are being made as the cuff is being inflated. Take it to the store where it was purchased for testing and repairs. If the unit still appears to provide unusual or erroneous readings, consult your physician. If the unit does not appear to be functioning properly, contact Panasonic at 1-800-338-0552. English 2008/01/15 34 14:54:31 Operating Instructions Instrucciones de Uso Upper Arm Blood Pressure Monitor Monitor de presión arterial de brazo Model No./Nº de Modelo For questions or assistance with your blood pressure monitor, call us at 1-800-338-0552. Panasonic Consumer Electronics Company Division of Panasonic Corporation of North America One Panasonic Way 1H-1 Secaucus, NJ 07094 No.1 EN, SP © 2008 Matsushita Electric Works, Ltd. All Rights Reserved. 35 Printed in China Impreso en China 2008/01/15 1 English 1 Español S1 EW3153 Before operating this device, please read these instructions completely and save this manual for future use. Antes de utilizar este dispositivo, lea completamente estas instrucciones y conserve este manual para futura referencia. 14:54:31 2008/01/15 14:54:23