1
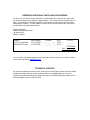
Portable Light Studio Item Number PS-102-dum Thank you for purchasing the PS-102-dum portable light studio. This studio will offer you an easy and portable way to take high quality photos. Inside this box you will find the following contents: CONTENTS OF BOX ONE LIGHT BOX: The included light box has two colored backgrounds for varying contrasts. It is designed for easy set up, as it can be placed either on a table top, or even on your floor. The light box is made of a specially woven, heat resistant, nylon fiber-mesh diffuser, which helps deliver uniform illumination while eliminating unwanted glare and harsh shadows. Its dual sided background is made up of non-reflective polyester fabric. The blue and gray backgrounds provide for contrast when photographing either dark or light objects. TWO HIGH OUTPUT LIGHTS: The Portable Lighting Studio comes with two high power lamps. Each 20 watt lamp provides even color temperature and clarity, using GU10-C light bulbs. Each lamp is supported by retractable legs which allow for hand held use. ONE MINI TRIPOD: This box contains a mini tripod which can be attached to your digital camera. By using the tripod’s extension legs and tilt head, you will be able to take photos from many different angles. Furthermore, the tripod’s durable, sturdy legs will offer you increased stability when taking photos. ONE BUILT IN CARRYING CASE: The built in carrying case has the perfect compact size that will enable you to carry your Portable Lighting Studio with you when you are on the go. Its durable nylon material case comes with pockets to hold the lights and tripod, and a sturdy handle to make it convenient for traveling. WARNING: PLEASE READ BEFORE USING Please use caution when using your Portable Lighting Studio to avoid accidents, fire, or personal injury. Follow the recommendations below in order to use this product safely and to have the best possible photo taking experience. DO NOT direct the lamps at people or materials that are less than 4 inches away. DO NOT touch any part of the video light housing or safety glass if the light has recently been in use. Wait until the light has been cooled. DO NOT touch the light bulbs with your bare fingers. Oil from your skin can cause the bulbs to burnout. Use cloth or plastic between the bulb and your fingers when inserting and removing bulbs. CHANGING BULBS The Portable Lighting Studio comes with GU10-C light bulbs. These bulbs can be purchased at many hardware or lighting stores. To change bulbs follow the steps below: 1. Detach the front cover from its housing by unscrewing it in a counter-clockwise motion and then pulling it off. 2. Remove the old bulb and insert the fresh bulb into the lamp’s socket, matching pins to socket holes. 3. Replace the front cover by screwing it on using a clockwise motion. OPERATING THE LAMPS In order to get the best results when using the included lamps, please follow the below steps: 1. Pull out the lamp’s retractable legs, they will automatically spread out so that they can be used to support the lamp. 2. Place the lamp on a solid, stable surface and proceed to adjust the angle of the lamp’s head. 3. Insert the lamp’s plug into an available AC outlet. A 110 volt outlet is required in order to use your lamps safely. 4. To turn on your lamp, rotate the on/off switch on the lamp’s wire. OPERATING THE LIGHT BOX The light box that is included with your package comes folded in its portable carrying case. In order to assemble the light box and begin using your portable lighting studio, please follow the steps below: 1. Open the Velcro latch on the portable carrying case, and now open the carrying case. 2. The unit has three semi-opaque, fiber-mesh square pieces. Two of these, which are attached to the unit’s carrying case, will form the left and right walls of your lighting studio. The third, which is not connected to your unit, can be Velcroed to the top to form a roof for your studio. 3. The dual sided background can be unrolled to provide contrast when taking photos of light or dark objects. SETTING UP YOUR LIGHTING STUDIO TO TAKE PHOTOS There are many, many ways for a photographer to arrange lamps when taking photos. There are numerous books on photography which discuss this topic in great detail. One of the basic concepts of lighting techniques involves three point lighting. Three-point lighting is a very common lighting technique used when taking photos with digital and 35mm film cameras. By using three separate light sources, the photographer can illuminate the shot's subject however desired, while also controlling (or eliminating entirely) the shading and shadows produced by direct lighting. The key light, as the name suggests, shines directly upon the subject and serves as its principal illuminator; more than anything else, the strength, color and angle of the key determines the shot's overall lighting design. In indoor shots, the key is commonly a specialized lamp, or a camera's flash. In outdoor daytime shots, the Sun itself often serves as the key light. In this case, of course, the photographer cannot set the light in the exact position he or she wants, so instead arranges the subjects to best capture the sunlight, perhaps after waiting for the sun to position itself just right. The fill light also shines on the subject, but from a side angle relative to the key. It balances the key by illuminating shaded surfaces, and lessening or eliminating chiaroscuro* effects, such as the shadow cast by a person's nose upon the rest of the face. It is usually softer and less bright than the key light (up to half), and more to a flood. Not using a fill at all can result in stark contrasts (due to shadows) across the subject's surface, depending upon the key light's harshness. Sometimes, as in low-key lighting, this is a deliberate effect, but shots intended to look more natural and less stylistic require a fill. In some situations a photographer can use a reflector (such as the colored backgrounds of your light box) as a fill light instead of an actual lamp. Reflecting and redirecting the key light's rays back upon the subject from a different angle can cause a softer, subtler effect than using another lamp. The back light (a.k.a. the rim, hair or shoulder light') shines on the subject from behind, often (but not necessarily) to one side or the other. It gives the subject a rim of light, serving to separate the subject from the background and highlighting contours. Back light or rim light is different from a kick in that a kick (or kicker) contributes to a portion of the shading on the visible surface of the subject, while a rim light only creates a thin outline around the subject without necessarily hitting the front (visible) surface of the subject at all. *An element in art, chiaroscuro (Italian for lightdark) is defined as a bold contrast between light and dark. Chiaroscuro is also used in cinematography to indicate extreme low-key lighting to create distinct areas of light and darkness in films, especially in black and white films. NOTES 1. Always store this unit in dry places. 2. To minimize shadows, point light down at your subject. This will cause shadows to fall beneath rather than behind the subject. 3. For a softer effect, point the video light up, letting illumination bounce back into the subject. ORDERING ADDITIONAL PARTS AND ACCESSORIES If at any point you need to replace the GU10-C light bulbs that come with this unit, these bulbs can be purchased at many hardware or lighting stores. You can also order these bulbs from us. Also, if you would like an extra background for your light box, a double sided, black and white background is available. To order, please fill out the order form below and send it, along with a check endorsed to Sakar International to: Sakar International Portable Lighting Studio Offer 195 Carter Drive Edison, NJ 08817 Product Item Number Quantity GU10-C Light Bulb ….. PS-101-Bulb…….. _______ x Black/White Screen …..PS-102-BW…..…..._______ x Price $9.95 = $9.95 = TOTAL _______ _______ + $3.00 (s&h) Total____________ You can expect your power adapter to arrive within two weeks of receipt of your order. Email all of your order inquiries to [email protected]. TECHNICAL SUPPORT For questions regarding customer service issues such as missing parts, where and how to obtain warranty service and general questions please email us at [email protected]. If you are experiencing problems installing your product and require immediate assistance, please call our technical support hot line at (877)397-8200.