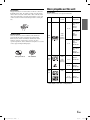
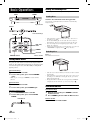
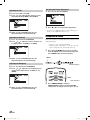
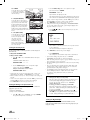
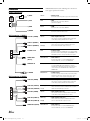
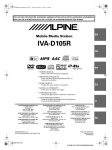
1
R
EN
DVD Entertainment System
PKG-2000P
FR
ES
DIGITAL VIDEO
•
OWNER’S MANUAL
Please read before using this equipment.
•
BEDIENUNGSANLEITUNG
Bitte vor Gebrauch des Gerätes lesen.
•
MODE D’EMPLOI
Veuillez lire avant d’utiliser cet appareil.
•
MANUALE DI ISTRUZIONI
Si prega di leggere il manuale prima di
usare il sistema.
•
MANUAL DE OPERACIÓN
Léalo antes de utilizar este equipo.
•
HANDBOK
Läs denna handbok innan du använder
utrustningen.
DE
IT
ALPINE ELECTRONICS MARKETING, INC.
ALPINE ELECTRONICS OF AUSTRALIA PTY, LTD.
ALPINE ELECTRONICS FRANCE S.A.R.L.
1-1-8 Nishi Gotanda
Shinagawa-ku
Tokyo 141-0031, Japan
Phone 03-5496-8231
161-165 Princess Highway, Hallam
Victoria 3803, Australia
Phone 03-8787-1200
(RCS PONTOISE B 338 101 280)
98, Rue de la Belle Etoile, Z.I. paris Nord II,
B.P. 50016, 95945 Roissy Charles de Gaulle
Cedex, France
Phone 01-48638989
ALPINE ELECTRONICS OF AMERICA, INC.
Frankfurter Ring 117, 80807 München, Germany
Phone 089-32 42 640
ALPINE ELECTRONICS GmbH
19145 Gramercy Place
Torrance, California 90501 U.S.A.
Phone 1-800-ALPINE-1 (1-800-257-4631)
ALPINE ELECTRONICS OF CANADA, INC.
777 Supertest Road
Toronto, Ontario M3J 2M9 Canada
Phone 1-800-ALPINE-1 (1-800-257-4631)
ALPINE ELECTRONICS OF U.K., LTD.
ALPINE House
Fletchamstead Highway, Coventry CCV4 9TW, U.K.
Phone 0870-33 33 763
ALPINE ELECTRONICS (BENELUX) GmbH
Leuvensesteenweg 510-B6,
1930 Zaventem, Belgium
Tel.: 02-725 1315
SV
ALPINE ITALIA S.p.A.
Viale C. Colombo 8, 20090 Trezzano
Sul Naviglio (MI), Italy
Phone 02-484781
ALPINE ELECTRONICS DE ESPAÑA, S.A.
Portal de Gamarra 36, Pabellón, 32
01013 Vitoria (Alava)-APDO 133, Spain
Phone 945-283588
Designed by Alpine Electronics of America, Inc.
Printed In China
00 Cover2000P.indd 1
4/10/2006 4:49:50 PM
ENGLISH
Contents
Operating Instructions
WARNING
WARNING .................................................. 3
CAUTION ................................................... 3
PRECAUTIONS ......................................... 4
Discs playable on this unit ...................... 5
Getting Started
When Using the Remote Control ...................... 7
Remote Control Battery Replacement .............. 7
Overhead Monitor ............................................. 8
Remote Control ................................................. 8
Key Map of Remote Control Function .............. 9
Basic Operations
Turning Power On and Off .............................. 10
Loading and Unloading Discs ......................... 10
Audio Mute function ....................................... 10
Adjusting the Volume ...................................... 11
Switching the Source....................................... 11
Selecting the Backlight Brightness ................. 11
Instant Change of Visual EQ ........................... 11
Device Control
Memorizing Device Control............................ 11
Selecting Source Name from Remote Control...... 11
DVD
Playing DVD/Video CD .................................. 12
Stopping Playback (PRE-STOP) ..................... 12
Stopping Playback ........................................... 12
Fast-forwarding/Fast-reversing ....................... 13
Finding the Beginning of Chapters or Tracks.. 13
Playing Still Frames (pausing) ........................ 13
Frame-by-frame Playback .............................. 13
Slow Motion Playback .................................... 13
Searching by Title Number (DVD only).......... 13
Searching Directly by Chapter or Track Number...... 13
Chapter/Track/Title Repeat Playback ............. 14
Switching the Audio Tracks ............................ 14
Switching the Angle (DVD only) .................... 14
Switching the Subtitles (subtitle language)
(DVD only) ................................................ 14
Displaying the Disc Status (DVD only) .......... 15
Displaying the Disc Status (Video CD only)... 15
TV Tuner Control
Selecting Preset Channel ................................. 15
Selecting and Seeking Channel Manually ....... 15
Memorizing Channel ....................................... 15
DVB-T Control .........................................16
ISDB-T Control .......................................16
Monitor Setup
Adjusting Picture ............................................. 17
Visual EQ Operation .................................... 17
Adjusting the Brightness .............................. 17
Adjusting the Color Density ........................ 17
Adjusting the Tint ........................................ 18
Adjusting the Contrast ................................. 18
Adjusting the Sharpness ............................... 18
Resetting the Picture Adjustment ................. 18
Setting Audio & Screen ................................... 18
Setting the Source Name .............................. 19
Setting the Auto Level Control ..................... 19
Setting the Screen Modes ............................. 19
Setting the TV System .................................. 19
Setting the Video Signal ............................... 19
Setting System Control ................................... 20
Setting the IR Transmitter ............................ 20
Setting the FM Modulator ............................ 20
Setting the FM Frequency ............................ 20
Setting the Dimmer ...................................... 20
Setting the Dimmer Low Level .................... 20
Setting the Beep............................................ 20
Setting the DVD Auto Play ........................... 20
Resetting to the Factory Default ................... 20
1-EN
Book_PKG-2000P.indb
1
4/8/06
2:54:37 AM
DVD Setup
DVD Setup Operation ..................................... 21
Setting the Language .................................... 21
Setting the TV Screen ................................... 21
Setting the Country Code ............................. 22
Setting the Rating Level (Parental Lock) ..... 22
Setting the Digital Output............................. 22
Custom Setup Operation
Custom Setup Operation .............................. 23
Setting the CD Play Mode ............................ 23
Setting the Video CD Play Mode ................. 23
Setting the Pause Mode ................................ 23
Setting the Downmix Mode.......................... 23
Wireless Headphone
Headphone Receivers ...................................... 24
Operation ......................................................... 24
Battery Installation .......................................... 24
Installation and Connections
WARNING
WARNING ................................................ 25
CAUTION ................................................. 25
PRECAUTIONS ....................................... 25
Connections ..................................................... 26
Mount Side ...................................................... 27
Dome Light Wire ............................................. 27
System Connections ........................................ 28
Information
List of Language Codes .................................. 29
List of Country Codes ..................................... 30
In Case of Difficulty ........................................ 32
System Indication ............................................ 33
Accessories ...................................................... 34
Specifications .................................................. 34
2-EN
Book_PKG-2000P.indb
2
4/8/06
2:54:38 AM
Operating Instructions
WARNING
WARNING
This symbol means important instructions.
Failure to heed them can result in serious
injury or death.
DO NOT WATCH VIDEO WHILE DRIVING.
Watching the video may distract the driver from looking ahead of the
vehicle and cause an accident.
DO NOT OPERATE ANY FUNCTION THAT TAKES YOUR
ATTENTION AWAY FROM SAFELY DRIVING YOUR VEHICLE.
INSTALL THE PRODUCT CORRECTLY SO THAT THE DRIVER
CANNOT WATCH TV/VIDEO UNLESS THE VEHICLE IS STOPPED
AND THE EMERGENCY BRAKE IS APPLIED.
It is dangerous (and illegal in many states) for the driver to
watch the TV/Video while driving the vehicle. The driver may be
distracted from looking ahead and an accident could occur. If the
product is not installed correctly, the driver will be able to watch
the TV/Video while driving the vehicle and may be distracted from
looking ahead causing an accident. The driver or other people
could be severely injured.
CAUTION
This symbol means important instructions.
Failure to heed them can result in injury or
material property damage.
Any function that requires your prolonged attention should only
be performed after coming to a complete stop. Always stop the
vehicle in a safe location before performing these functions.
Failure to do so may result in an accident.
HALT USE IMMEDIATELY IF A PROBLEM APPEARS.
KEEP THE VOLUME AT A LEVEL WHERE YOU CAN STILL
HEAR OUTSIDE NOISE WHILE DRIVING.
Failure to do so may cause personal injury or damage to the
product. Return it to your authorized Alpine dealer or the nearest
Alpine Service Center for repairing.
Failure to do so may result in an accident.
MINIMIZE DISPLAY VIEWING WHILE DRIVING.
Viewing the display may distract the driver from looking ahead
of the vehicle and cause an accident.
DO NOT MIX NEW BATTERIES WITH OLD BATTERIES. INSERT
WITH THE CORRECT BATTERY POLARITY.
When inserting the batteries, be sure to observe proper polarity (+
and –) as instructed. Rupture or chemical leakage from the
battery may cause fire or personal injury.
DO NOT DISASSEMBLE OR ALTER.
Doing so may result in an accident, fire or electric shock.
USE ONLY IN CARS WITH A 12 VOLT NEGATIVE GROUND.
(Check with your dealer if you are not sure.) Failure to do so may
result in fire, etc.
KEEP SMALL OBJECTS SUCH AS BATTERIES OUT OF THE
REACH OF CHILDREN.
Swallowing them may result in serious injury. If swallowed,
consult a physician immediately.
KEEP FINGERS AWAY WHILE THE MOTORIZED FRONT PANEL
OR MOVING MONITOR IS IN MOTION.
Failure to do so may result in personal injury or damage to the
product.
CAUTION
CAUTION-Laser radiation when open, DO NOT STARE INTO BEAM
(Bottom side of player)
USE THE CORRECT AMPERE RATING WHEN REPLACING
FUSES.
Failure to do so may result in fire or electric shock.
DO NOT BLOCK VENTS OR RADIATOR PANELS.
Doing so may cause heat to build up inside and may result in fire.
USE THIS PRODUCT FOR MOBILE 12V APPLICATIONS.
Use for other than its designed application may result in fire,
electric shock or other injury.
DO NOT PLACE HANDS, FINGERS OR FOREIGN OBJECTS IN
INSERTION SLOTS OR GAPS.
Doing so may result in personal injury or damage to the product.
3-EN
Book_PKG-2000P.indb
3
4/8/06
2:54:38 AM
PRECAUTIONS
Product Cleaning
Use a soft dry cloth for periodic cleaning of the product. For
more severe stains, please dampen the cloth with water only.
Anything else has the chance of dissolving the paint or damaging
the plastic.
Inserting Discs
Your player accepts only one disc at a time for playback. Do not
attempt to load more than one disc.
Make sure the label side is facing up when you insert the disc.
Press to eject any disc that is inserted incorrectly.
Playing a disc while driving on a very bumpy road may result in
skips, but this will not scratch the disc or damage the player.
New Discs
Temperature
Do not operate your unit in ambient temperature above +70°C
(+158°F) or below -20°C (-4°F).
Moisture Condensation
You may notice the disc playback sound wavering due to
condensation. If this happens, remove the disc from the player
and wait about an hour for the moisture to evaporate.
Fuse Replacement
As a protective measure to prevent the disc from jamming, press
to eject any disc with irregular surface or inserted incorrectly.
When a new disc is inserted into the player and ejected after
initial loading, using your finger, feel around the inside of the
center hole and outside edge of the disc. If you feel any small
bumps or irregularities, this could inhibit proper loading of
the disc. To remove the bumps, rub the inside edge of the hole
and outside edge of the disc with a ball-point pen or other such
instrument, then insert the disc again.
When replacing the fuse(s), the replacement must be of the same
amperage as shown on the fuse holder. If the fuse(s) blows more
than once, carefully check all electrical connections for shorted
circuitry. Also have your vehicle’s voltage regulator checked.
Center Hole
Center Hole
New
Disc
Bumps
Outside
(Bumps)
Damaged Disc
Do not attempt to play cracked, warped, or damaged discs.
Playing a bad disc could severely damage the playback
mechanism.
Maintenance
If you have problems, do not attempt to repair the unit yourself.
Return it to your Alpine dealer or the nearest Alpine Service
Station for servicing.
Irregular Shaped Discs
Be sure to use round shaped discs only for this unit and never use
any special shaped discs.
Use of special shaped discs may cause damage to the mechanism.
Characteristics of LCD Panel
• After turning the system off, a slight ghost of the image
will remain temporarily. This is an effect peculiar to LCD
technology and is normal.
• Under cold temperature conditions, the screen may lose
contrast temporarily. After a short warm-up period, it will
return to normal.
• The LCD panel is manufactured using an extremely high
precision manufacturing technology. Its effective pixel ratio
is over 99.99%. This means that 0.01% of the pixels could be
either always ON or OFF.
Installation Location
Make sure the PKG-2000P will not be installed in a location
subjected to:
•
•
•
•
Direct sun and heat
High humidity and water
Excessive dust
Excessive vibrations
Correct Handling
Using Wireless Headphones
If ACC or the monitor's power source is turned off, a loud noise is
produced through the headphones. Be sure to remove the wireless
headphones from your ears before you turn the monitor off.
Do not drop the disc while handling. Hold the disc so you will
not leave fingerprints on the surface. Do not affix tape, paper, or
gummed labels to the disc. Do not write on the disc.
CORRECT
Never Attempt the Following
Do not grip or pull out the disc while it is being pulled back into
the player by the automatic reloading mechanism.
Do not attempt to insert a disc into the unit when the unit power
is off.
INCORRECT
CORRECT
4-EN
Book_PKG-2000P.indb
4
4/8/06
2:54:39 AM
Discs playable on this unit
Disc Cleaning
Fingerprints, dust, or soil on the surface of the disc could cause
the DVD player to skip. For routine cleaning, wipe the playing
surface with a clean, soft cloth from the center of the disc to the
outer edge. If the surface is heavily soiled, dampen a clean, soft
cloth in a solution of mild neutral detergent before cleaning the
disc.
Playable Discs
The discs listed below can be played on this unit.
Mark (logo)
Recorded
content
Disc size
12 cm*
Disc Accessories
There are various accessories available on the market for
protecting the disc surface and improving sound quality.
However, most of them will influence the thickness and/or
diameter of the disc. Using such accessories can cause
operational problems. We recommend not using these accessories
on discs played in Alpine DVD players.
DVD
Video
Max.
playing time
One-sided
disc
Approx.
4 hours
Two-sided
disc
Approx.
8 hours
Audio
+
Video
(Moving
pictures)
8 cm
One-sided
disc
Approx.
80 Minutes
Two-sided
disc
Approx.
160 Minutes
Transparent Sheet
Disc Stabilizer
Video
CD
Music
CD
Audio
+
Video
(Moving
pictures)
12 cm
Approx.
74 Minutes
8 cm
Approx.
20 Minutes
12 cm
Approx.
74 Minutes
8 cm
(CD single)
Approx.
20 Minutes
Audio
* Two-layer DVD disc compatible
5-EN
Book_PKG-2000P.indb
5
4/8/06
2:54:41 AM
Discs that cannot be played
DVD-ROMs, DVD-RAMs, DVD + Rs, DVD + RWs, CD-ROMs,
photo CDs, etc.
DVD region number (playable region number)
All discs have a region number. This DVD player will play back
discs fit with each region. Check your region number listed below.
Region
Countries
All Regions
United States of America,
Canada
Europe, including France,
Greece, Turkey, Egypt, Arabia, Japan and South Africa
Korea, Thailand, Vietnam,
Borneo and Indonesia
Australia and New Zealand,
Mexico, the Caribbean and
South America
India, Africa, Russia and
former USSR countries
Peoples Republic of China
Video CDs
This DVD unit is compatible with playback control (PBC)
compatible video CDs (version 2.0).
“PBC” is a function by which you can use menu screens recorded
on the disc to find the scene you want to watch and view various
types of information in dialog style.
Using compact discs (CD/CD-R/CD-RW)
On handling compact discs (CD/CD-R/CD-RW)
• Do not touch the surface.
• Do not expose the disc to direct sunlight.
• Do not affix stickers or labels.
• Clean the disc when it is dusty.
• Make sure that the disc is smooth and flat.
• Do not use commercially available disc accessories.
Do not leave the disc in the car or the unit for a long time.
Never expose the disc to direct sunlight.
Heat and humidity may damage the disc and you may not be
able to play it again.
Using DVD-Rs/DVD-RWs
• This unit is compatible only with discs recorded in the DVDVideo mode. Discs recorded in the DVD-VR mode cannot be
played back.
• Note that discs not finalized (processed to enable to play on
playback-only DVD players) cannot be played on this DVD
player.
• Some discs may not play back, depending on the recording
device. (This unit has a copy protection function. Discs copied
illegally will not be played back. Some files recorded by a
software using an improper recording system may be
recognized as illegally copied.)
• In the following cases, the disc may not play on this unit:
discs recorded by certain DVD recorders, certain irregular
discs, flawed discs, dirty discs, when the pickup lens of this
DVD player is dirty, or when moisture condensation has
occurred inside the unit.
• Be sure to follow all cautions included with your DVD-Rs/
DVD-RWs discs.
• Do not put stickers, seals, or tape on the label side of DVD- Rs/
DVD-RWs.
• Compared to the regular discs, DVD-Rs/DVD-RWs are more
affected by heat, moisture, and direct sunlight. If left in a car,
etc., damage may occur and it might not play on this unit.
Disc terminology
Title
If titles are programmed for the DVD, these are the largest units
of division of the information recorded on the disc.
If you use unspecified compact discs, correct performance cannot
be guaranteed.
You can play CD-Rs (CD-Recordable)/CD-RWs (CDReWritable) which have been recorded only on audio devices.
Chapter
Each Title may also be divided into smaller divisions, called
chapters. These can be specific scenes or musical selections.
• Some of the following discs may not play on this unit:
Flawed discs, discs with fingerprints, discs exposed to extreme
temperatures or sunlight (e.g., left in the car or this unit), discs
recorded under unstable conditions, discs on which a recording
failed or a re-recording was attempted, copy-protected CDs
which do not conform to the audio CD industry standard.
• This product incorporates copyright protection technology that is
protected by method claims of certain U.S. patents and other
intellectual property rights owned by Macrovision Corporation
and other rights owners. Use of this copyright protection
technology must be authorized by Macrovision Corporation, and
is intended for home and other limited viewing uses only unless
otherwise authorized by Macrovision Corporation. Reverse
engineering or disassembly is prohibited.
To customers using CD-R/CD-RW
• If a CD-R/CD-RW cannot be played back, make sure the last
recording session was closed (finalized).
• Finalize the CD-R/CD-RW if necessary, and attempt playback
again.
• Manufactured under license from Dolby Laboratories. “Dolby,”
“Pro Logic” and the double-D symbol are trademarks of Dolby
Laboratories.
• “DTS” and “DTS2.0” are trademarks of Digital Theater Systems,
inc.
6-EN
Book_PKG-2000P.indb
6
4/8/06
2:54:42 AM
Getting Started
3
Closing the cover
Slide the cover as illustrated until a click is heard.
When Using the Remote Control
• Point the remote control at the remote sensor within
about 2 meters.
• It may not be possible to operate the remote control
if the remote control sensor is exposed to direct
sunlight.
• The remote control is a small, lightweight precision
device. To avoid damage, short battery life,
operational errors and poor response, observe the
following.
- Do not subject the remote control to excessive
shock.
- Do not put in a trouser pocket.
- Keep away from food, moisture and dirt.
- Do not place in direct sunshine.
When you use Remote Control for the first time, pull the plastic tape
before using the remote control.
Warning
DO NOT OPERATE ANY FUNCTION THAT TAKES
YOUR ATTENTION AWAY FROM SAFELY DRIVING
YOUR VEHICLE.
Any function that requires your prolonged attention should
only be performed after coming to a complete stop. Always
stop the vehicle in a safe location before performing these
functions. Failure to do so may result in an accident.
Remote Control Battery Replacement
Battery type: AAA battery or equivalent.
1
Opening the battery case
Pull up the battery cover while pressing in the direction of
the arrow.
2
Replacing the battery
Put the battery in the case with the (+) indication upward as
shown in the illustration.
• Placing a battery in backwards way may cause a
malfunction.
7-EN
Book_PKG-2000P.indb
7
4/8/06
2:54:44 AM
IR Transmitter and Receiver
Overhead Monitor
IR transmitter sends the sound to the Headphone. IR receiver receives
the signal from the remote control.
Eject Button
Eject Button
Power
Disc-In Slot
Pressing Eject button unloads Disc. If the ignition key is set to ACC
or ON, a disc can be removed even when the power is OFF.
Disc-In LED
While a disc is in DVD player and the power is on, Disc-In LED light
turns on.
Disc-In LED
IR Transmitter
and Receiver
LCD Monitor Panel
Remote Control
RUE-4159 is a universal remote control which works for Built-in
DVD, Overhead monitor and other 5 devices. Refer the key map for
the function buttons of each device. (page 9)
Front Passenger
Access Switch
Game Port
Luminance Sensor
7
White LED Dome Light
1
6
Panel Open Switch
Dome Light Switch
Front Control Keys
I
B
A
0
LCD Monitor Panel
This is a 10.2 inch, Wide VGA, Active Matrix LCD. In addition, an
Infrared Wireless Headphone Transmitter is located on top of the
LCD panel.
Monitor Open Button
Press Monitor Open Button to release the Monitor Panel. The Panel
will drop down slightly allowing you to fully open to its 90 degree or
greater position. To close, firmly press the LCD Monitor Panel back
up into the housing until a click is heard.
K
N
J
V
R
Q
White LED Dome Light
White LED Dome Light connection has polarity. Be cautious when
installing the monitor. Refer to Dome Light Connection (Page 27).
Dome Light Switch
Dome light switch turns on/off the dome light. When the switch is set
to Door, the dome light turns on when the door is open.
Front Control Keys
W
X
E
F
3
2
8
5
4
C
D
9
M
L
O
U
P
S
T
Y
G
H
Blue, back-lit button illuminates when the overhead monitor main
power is on. DVD overhead monitor and other devices can be
controlled by using these buttons.
Front Passenger Control Buttons
:
FM modulator ON/OFF switch
The monitor’s DVD sound is transmitted to the radio’s FM Tuner,
when FM button is on. The radio must be tuned to the proper
frequency. The FM transmitter function in the System menu must be
ON to use the FM modulator.
: Play/pause and power switch
The front passenger can play/pause the DVD. It also allows turning
on the unit. The unit can be turned off by pressing and holding this
switch.
8-EN
Book_PKG-2000P.indb
8
4/8/06
2:54:45 AM
Key Map of Remote Control Function
RUE-4159 Remote Control Key Assignment
KEY FUNCTION
1
2
3
4
5
6
7
8
9
10
11
12
13
MONITOR POWER
DEVICE POWER
MUTE
DIMMER
VISUAL EQ
DVD
AUX1
AUX2
DEVICE MODE: EXT-DVD
DEVICE MODE: DVD-HU
DEVICE MODE: TV TUNER
DEVICE MODE: DVB-T
DEVICE MODE: ISDB-T
14
MEMORY FOR DEVICE MODE: MEM
15
NUMERIC KEY: 1
NUMERIC KEY: 2
NUMERIC KEY: 3
NUMERIC KEY: 4
NUMERIC KEY: 5
NUMERIC KEY: 6
NUMERIC KEY: 7
NUMERIC KEY: 8
NUMERIC KEY: 9
NUMERIC KEY: 0/10
DVD / DVD-HU / DVB-T / TV= 0,
ISDBT=10
NUMERIC KEY: 11 (+10)
DVD / DVD-HU = +10
NUMERIC KEY: 12 (CLR)
DVD= CLR
SETUP
DISP (INFO)
DVB-T= INFO
TOP.M (EPG)
ISDB / DVB-T= EPG
ENTER
MENU (DVD SETUP)
UP: ▲
DN: ▼
LT:
RT:
RETURN (EXIT)
ISDB-T=RETURN DVB-T= EXIT
16
17
18
19
20
21
22
23
24
25
26
27
28
29
30
31
32
33
34
35
Skip or Fast FW:
Skip or Fast BW:
CHANNEL UP: CH ▲
CHANNEL DOWN: CH ▼
PLAY/PAUSE:
STOP: ■ (BACK)
DVB-T= BACK
SCAN
REPEAT
AUDIO
SUB.T (DATA) (TXT)
ISDB-T= DATA DVB-T= TXT
ANGLE (1SEG)
ISDB-T= 1/13 Seg
OHM
DVD/
EXE-DVD
DVD-HU
ISDB-T
(Japan only)
DVB-T
(Europe only)
TV Tuner
✔
✔
✔
✔
✔
✔
✔
✔
✔
✔
✔
✔
✔
✔
✔
✔
✔
✔
✔
✔
✔
✔
✔
✔
✔
✔
✔
✔
✔
✔
✔
✔
✔
✔
10
✔
✔
✔
✔
✔
✔
✔
✔
✔
✔
✔
✔
✔
✔
✔
✔
✔
✔
✔
✔
+10
+10
11
✔
✔
✔
✔
✔
✔
✔
✔
✔
✔
✔
✔
✔
CLR
✔
✔
✔
✔
✔
✔
12
MENU (P&H) *
MENU (P&H) *
✔
✔
✔
INFO
✔
✔
EPG
EPG
✔
✔
✔
✔
✔
✔
✔
✔
✔
✔
✔
✔
✔
✔
✔
✔
✔
✔
✔
✔
✔
✔
✔
✔
✔
✔
✔
✔
✔
Preset UP
Favorite UP
Preset UP
✔
✔
Preset DN
Favorite DN
Preset DN
✔
✔
✔
✔
✔
✔
✔
✔
✔
✔
✔
✔
✔
✔
✔
✔
DATA
✔
✔
1/13 Seg
EXIT
BACK
✔
✔
✔
TXT
NOTE *: (P&H) Press & Hold
9-EN
Book_PKG-2000P.indb
9
4/8/06
2:54:47 AM
Basic Operations
EJECT
Loading and Unloading Discs
Turn on the power before loading and unloading discs.
POWER
Loading discs
Insert the disc with the label side facing upwards.
Once the disc is partially inserted, it is drawn in automatically.
Playback starts.
Top Front Side
SELECT
Front Control Keys
POWER
MUTE
DVD, AUX1,
AUX2
• If the ignition key is on ACC or ON, a disc can be inserted even
when the power is OFF.
• For two-sided DVDs, play one side of the disc to the end, then
unload the disc, turn it over and reload it to play the other side.
• Never insert map discs for navigation purposes as they could
damage the equipment.
• If wrong disc, upside-down discs or dirty discs have been inserted,
“DISC ERROR” is displayed. Press and eject the disc.
DIMMER
Unloading discs
Visual EQ
MONITOR SETUP
Press
Remote Control
.
Be sure to remove the disc.
Turning Power ON/OFF
The power state of the monitor is memorized when Ignition/ACC is
turned off. When Ignition/ACC is turned back on, the monitor returns
to the memorized power state (either ON or OFF), including DVD
playback position. .
Front Control Keys
1
2
Press POWER to turn ON.
To turn off the power, press and hold POWER
again.
• While the power is ON, press POWER to activate the Mute
function.
• If the disc is not removed within a few moments, it will be reloaded
automatically.
• If the ignition key is set to ACC or ON, a disc can be removed even
when the power is OFF. After removing the disc, the power turns
OFF again automatically.
• During ACC OFF or while the disc is being loaded (“LOADING”
is displayed), the disc will not be ejected even if you press .
Remote Control
1
2
Press POWER to turn ON.
To turn off the power, press POWER again
Front Passenger Controls
1
2
Audio Mute Function
Front Control Keys
Press PLAY/PAUSE button to turn ON.
1
To turn off the power, press and hold PLAY/
PAUSE.
2
PLAY/PAUSE
While the power is ON, press POWER to activate
the Mute function.
Press POWER again turn it OFF the Mute function.
Remote Control
Press MUTE to turn it ON and OFF.
10-EN
Book_PKG-2000P.indb
10
4/8/06
2:54:50 AM
Device Control
Adjusting the Volume
Volume can be controlled from the headphone or your own radio
volume function.
1
2
Device modes (TV, DVB-T, ISDB-T, DVD-HU and EXT-DVD) are
available on the remote control by pressing the device control.
Turn on POWER on the headphone.
Adjust the volume level by turning clockwise for
louder and counter-clockwise for lower on the
headphone.
AUX1
Refer to Wireless Headphone (Page 24)
AUX2
Switching the Source
DEVICE BUTTON
(TV, DVB-T, ISDB-T,
DVD-HU and EXT-DVD)
Front Control Keys
1
2
Press SELECT to cycle through the different
sources.
Remote Control
Press DVD, AUX1 or AUX2 to change each source
directly.
• OSD (On Screen Display) will be turned off automatically, when
not operating more than 6 seconds.
• To connect the device to AUX1 and AUX2, see page 28.
• When the source is changed, the device remembers the scene where
playback stopped.
• The device mode of the remote control is automatically shifted to
the assigned device, when AUX1 or AUX2 is pressed.
Selecting the Backlight Brightness
The brightness of the LCD panel’s backlighting is adjustable to more
closely match the vehicle’s interior lighting. This makes the screen
easier to view.
1
2
MEMORY
Press SELECT to change each source.
Memorizing Device Control
You can map the device function on AUX1 and AUX2. Once the
device is memorized in the source (AUX1 or AUX2), the remote
control will be automatically switched to the memorized device mode
at the next time AUX1 or AUX2 is pressed.
1
2
3
Press AUX1 or AUX2.
Select one of following devices you want to assign,
TV/DVB-T/ISDB-T/DVD-HU/EXT-DVD.
Press MEMORY key to store the device on the
source.
• Each step should be made within 6 seconds, otherwise OSD (On
Screen Display) will be automatically turned off.
Selecting Source Name from Remote Control
When you proceed the above step with the remote control pointed
toward the monitor, the device source name on OSD can be
automatically shifted without entering Setup menu.
Press DIMMER.
Press DIMMER to cycle through the OSD as AUTO,
LOW and HIGH. (Default: HIGH)
SOURCE NAME
For setting Dimmer level, refer to page 15.
Instant Change of Visual EQ
1
2
Press V EQ. on the remote control.
Press V EQ. to switch to the different mode.
11-EN
Book_PKG-2000P.indb
11
4/8/06
2:54:53 AM
DVD Auto Play
DVD
The instruction includes Built-In DVD, EXT-DVD,
DVD-HD. DVD player can be also used for CD/CDR/CD-RW.
SELECT MENU
■
The main movie will play automatically without pressing Play or
Enter button, when DVD is inserted, if AUTO or SKIP mode is
selected on DVD Auto Play under System menu. See page 20 for
detail.
If a menu screen appears
ENT
On DVDs and video CDs, menu screens may appear automatically,
when DVD Auto Play is set to NORMAL. Perform the operation
described below to start playback.
Front Control Keys
• For many discs, the menu screen can also be displayed by pressing
MENU.
DVD menu
Press ▲, ▼, or
press ENTER.
DVD
to select the desired item, then
• For some discs it is possible to select items directly from the menu
screen using the number keys (“0” to “9”).
EXT-DVD
DVD-HU
MENU
TOP.M
▲▼
DISPLAY
REPEAT
ENTER
Video CD menu
RETURN
Use the number keys (“0” to “9”) to select the desired
number, then press ENTER.
■
number
keys
(0 to 9)
CLEAR*2
+10*1
Remote Control
*1
+10 is available for Built-in DVD, EXT-DVD and DVD-HU.
*2
CLEAR is available only for Built-in DVD and EXT-DVD.
Playing DVD/Video CD
• The menu screen does not appear when the PBC function is
turned off. In this case, set VCD PLAY MODE to turn on the PBC
function. For details, Refer to “Setting the Video CD Play Mode”
(page 23).
Stopping Playback (PRE-STOP)
Press ■ during playback to stop playback. That position is stored in
memory.
1
Press ■ during playback.
“PRE-STOP” is displayed.
2
Press
in the PRE-STOP mode.
Playback starts from the position at which it was stopped.
• For some discs, the position at which playback was stopped may
not be accurate.
Caution
• Not all functions will operate for every DVD. See the individual
DVD’s instructions for details on the features supported.
• Fingerprints on a disc may adversely affect playback. If a
problem occurs, remove the disc and check for fingerprints on
the playback side. Clean the disc if necessary.
• When using the remote control, be careful to press one button
at time. Pressing multiple buttons at the same time may cause
erroneous operation.
• If you switch the power or ignition key OFF during playback,
playback will continue where you left off when you resume
playback.
• If you try to perform an invalid operation (based on the type
of disc being played), the following mark is displayed on the
monitor screen:
• A disc type must match the setting of TV System under Audio
& Screen menu. If a wrong type disc is inserted, the message
"VIDEO SIGNAL SYSTEM IS NOT CORRECT" is displayed,
and playback is not available.
Stopping Playback
Press ■ twice during playback.
“STOP” is displayed, and playback stops.
• Playback starts from the beginning when
playback is stopped.
is pressed while
Insert a disc with the label side facing up.
To load discs, see “Loading and Unloading Discs” on page 10.
Playback starts.
• The reverse side of a double-sided DVD will not be played
automatically. Remove the disc, turn it over, and reinsert it.
• It may take some time before playback starts after loading a disc.
12-EN
Book_PKG-2000P.indb
12
4/8/06
2:54:55 AM
Fast-forwarding/Fast-reversing
1
During playback, press and hold
or
(fast-forward).
Slow Motion Playback
(fast-reverse)
When pressed for more than 1 second, the disc is
forwarded/reversed at double speed.
When held in 5 more seconds, the disc is forwarded/
reversed at 8 times the normal speed.
2
Release
or
to return to normal playback.
• No sound appears during fast-forward/fast-reverse.
• Fast-forwarding/fast-reversing of a Video CD is only functional if
the disc incorporates PBC (playback control).
• For DVDs and video CDs with playback control (PBC), the menu
screen may reappear during fast-forwarding/fast-reversing.
Finding the Beginning of Chapters or Tracks
During playback, press
or
: Press this to start playback from the beginning of
the following chapter or track.
: Press this to start playback from the beginning of
the current chapter or track.
repeatedly to start playback from the
Press
beginning of a previous chapter or track.
• Some DVDs do not have chapters.
• The beginning of a track may not be found on the Video CD
equipped with PBC (playback control). Set VCD PLAY MODE
to turn the PBC function off. Refer to “Setting the video CD Play
Mode” (page 23).
Supplementary explanation
“Chapters” are divisions of movies or musical selections
on DVDs.
“Tracks” are divisions of movies or musical selections on
video and music CDs.
Playing Still Frames (pausing)
During playback, press
Press
Frame-by-frame Playback
or
.
The picture advances or reverses by one frame each time
the button is pressed.
2
Press
or
to pause, and press
to
• No sound is played during slow motion playback/reverse slow
motion playback.
• Slow playback/reverse slow playback is not available when playing
back a slide show.
• 1/2, 1/8 are approximate speeds. The actual speed differs from disc
to disc.
• For video CD, reverse slow motion playback is not available.
Use this function to easily find positions on the DVD using the
DVD’s title.
1
2
When playback stops, input the number of the title
you want to play using the number keys (“0” to
“9”).
Press ENTER.
Playback starts from the selected title number.
• This function cannot be used on discs on which no title numbers
are recorded.
• Press CLR to delete the last digit in the title number. Press and
hold CLR for at least 2 seconds to clear all title numbers.
• Press RETURN to cancel the title search mode and resume normal
playback.
• The playback starts automatically for two digit title numbers even
if ENTER in procedure 2 is not pressed.
• Playback starts from the beginning of the chapter/track number in
the state of PRE-STOP.
Searching Directly by Chapter or Track
Number
1
to resume playback.
In the pause mode, press
Release
playback.
Use this function to easily move to the beginning of the chapters or
tracks on the disc.
.
• No sound is played during the still mode.
• The image or sound may stop temporarily when playback starts
from the pause mode, This is not a malfunction.
• When
on Front Passenger Control is pressed, blue screen
appears temporarily.
1
2
Press and hold
or
while in the pause
mode to set 1/8 normal speed slow motion
playback mode/reverse slow motion playback
mode. Hold for a further 5 seconds to set half
speed.
Searching by Title Number (DVD only)
.
The chapter/track switches each time the button is pressed, and
playback of the selected chapter/track starts.
1
2
1
to resume normal playback.
• No sound is played during frame-by-frame playback.
• For video CD, reverse frame-by-frame playback is not available.
2
During playback or pre-stop, input the number of
chapter or track you desire by using the number
keys (“0” to “9”).
Press ENTER.
Playback starts from the selected chapter or track.
• This function cannot be used on discs on which no chapter
numbers are recorded.
• The beginning of a track number cannot be directly found on the
Video CD equipped with PBC (playback control). Set VCD PLAY
MODE to turn the PBC function off. Refer to “Setting the video
CD Play Mode” (page 23).
• Depending on the number of digits input, playback may start
automatically even if ENTER is not pressed in step 2.
• Press CLR to delete the last digit in the chapter/track number.
Press and hold CLR for at least 2 seconds to clear "Chapter" and
"Track" numbers.
• Press RETURN to cancel the chapter/track search mode and
resume normal playback.
13-EN
Book_PKG-2000P.indb
13
4/8/06
2:54:57 AM
Chapter/Track/Title Repeat Playback
Switching the Angle (DVD only)
Use this function to play the disc’s titles, chapters or tracks repeatedly.
On DVDs in which scenes have been filmed from multiple angles, the
angle can be switched during playback.
During playback, press REPEAT.
The repeat mode switches each time the button is pressed.
During playback, press ANGLE.
DVD
The angle switches between the angles recorded on the disc,
each time the button is pressed.
The chapter is played repeatedly.
REPEAT CHAPTER
REPEAT TITLE
The title is played repeatedly.
REPEAT OFF
The mode returns to normal
playback. (Factory default)
• Some time may be required for the angle to change.
• Depending on the disc, the angle may switch in one of two ways.
- Seamless: The angle switches smoothly.
- Non-seamless: When the angle is switched, a still picture is
displayed first, after which the angle switches.
Switching the Subtitles (subtitle language)
(DVD only)
VIDEO CD
The track is played repeatedly.
REPEAT TRACK
The entire disc is played repeatedly.
(Factory default)
REPEAT DISC
• The track/disc repeat modes cannot be used on video CDs with
playback control (PBC). Set VCD PLAY MODE to turn the PBC
function off. Refer to “Setting the video CD Play Mode” (page 23).
• For some discs it is not possible to switch the repeat mode.
Switching the Audio Tracks
DVDs can have up to 8 different audio tracks. These alternate tracks
can be switched during playback.
During playback, press AUDIO.
The sound switches between the alternate audio tracks recorded
on the disc each time the button is pressed.
• The selected alternate track becomes the default setting every time
the power is turned on or the disc is replaced. If the disc does not
include that track, the disc's default language is selected instead.
• Not all discs will allow changing the alternate audio tracks during
playback. In these cases, select audio tracks from the DVDs menu.
• There may be a delay before the selected alternate track begins to
play.
With multiple subtitle language DVDs, the subtitle language can be
switched during playback, or subtitles can be hidden.
During playback, press SUBTITLE.
The subtitle switches between the languages recorded on the
disc and OFF each time the button is pressed.
• There may be a delay before the selected subtitle appears.
• No all discs will allow changing the subtitles during playback. In
these cases, select subtitles from the DVD's menu.
• The selected subtitle language becomes the default setting every
time the power is turned on or the disc is replaced. If the disc does
not include that language, the disc's default language is selected
instead.
• For some discs, the subtitles will be displayed even when this is set
to off.
Tips
Switching from the disc menu.
For some discs, the audio language, angle and subtitles can
be switched from the disc menu.
1 Press MENU, select the item, then press ENT.
2 Press ▲, ▼,
or
to select the language or angle,
the press ENTER.
(For some discs, they can be selected using the
number keys "0" to "9" while the language or the
angle menu is displayed.)
Video CDs with multiplex audio
During playback, press AUDIO.
The left and right channels will be output as shown in the figure
below, each time the button is pressed.
LR
LL
RR
LR
14-EN
Book_PKG-2000P.indb
14
4/8/06
2:55:01 AM
Displaying the Disc Status (DVD only)
Use the procedure described below to display the status (title number,
chapter number, etc.) of the currently playing DVD on the monitor
screen.
During playback, press DISPLAY.
The playback status is displayed.
TV Tuner Control
To control TV tuner from the Front Controls Keys or the remote
control, set source name to TV in the System Setup. Or refer to
Device Control. (page 11)
• Refer to ALPINE TV Tuner Operation Manual for details.
SCAN
The playback status display closes when DISPLAY is pressed
again.
Playback disk
PRESET ▲
TV system
(NTSC or PAL)
Front Control Keys
Current chapter
number
Current title
number
Playback status
Chapter
playback time
Current audio
number
Repeat setting
(Default setting
- repeat off)
TV
Audio recording
system
Current subtitle
language
PRESET ▼
Current angle
number
Current subtitle
number
CH▼
PRESET ▼
CH▲
SCAN
PRESET ▲
Displaying the Disc Status (Video CD only)
Use the procedure described below to obtain an on-screen display of
the status (track number, etc.) of the currently playing video CD on
the monitor screen.
number
keys
(0 to 9)
During playback, press DISPLAY.
Remote Control
The playback status is displayed.
The playback status display closes when DISPLAY is pressed
again.
Selecting Preset Channel
Front Control Keys
Playback disk
Press
or
to select preset channel memorized by ■ on
the Front Control Keys.
TV system
(NTSC or PAL)
Remote Control
Current track
number
Playback status
Track playback
time
Press
or
to select preset channel memorized by
SCAN on the remote control.
Repeat setting
(Default setting
- repeat disc)
Playback control
(PBC)
• When PBC is set to ON, the current track number and track
playback time is not displayed.
Selecting and Seeking Channel Manually
Front Control Keys
Press or
to select one channel at a time on the Front
Control Keys. Press and hold or to seek the next available
channel.
Remote Control
Press CH ▲ or CH ▼ to select one channel at a time on the
remote control. Press and hold CH ▲ or CH ▼ to seek the next
available channel.
Memorizing Channel
Press SCAN on the remote control or ■ on the Front Control
Keys to memorize the receivable channels in the entire TV
broadcast band.
15-EN
Book_PKG-2000P.indb
15
4/8/06
2:55:02 AM
DVB-T Control
ISDB-T Control
This function is available only for Europe. To control DVB-T from
the Front Control Keys, set source name to DVB-T in the System
Setup. To set up DVB-T on the remote control, refer to Device
Control. (page 11)
This function is available only for Japan. To control ISDB-T from the
Front Control Keys, set source name to ISDB-T in the System Setup.
To set up ISDB-T on the remote control, refer to Device Control.
(page 11)
• Refer to TUE-T200DVB, DVB-T Operation Manual for details.
• Refer to TUE-T300, ISDB-T Operation Manual for details.
MENU
EXIT ▼▲ENT
EPG FAVORITE ▼ FAVORITE ▲
MENU RETURN ▼▲ ENT
Front Control Keys
Front Control Keys
DVB-T
MENU
EPG
ENTER
▲▼
INFO
EXIT
CH▼
SCAN
FAVORITE ▼
AUDIO
TXT
number
keys (0 to 9)
CH▲
FAVORITE ▲
BACK
Remote Control
EPG PRESET ▼ PRESET ▲
ISDB-T
ENTER
EPG
MENU
▲▼
DISP
CH▼
PRESET ▼
DATA
RETURN
CH▲
PRESET▲
1/13 SEG
number
keys (1 to 12)
Remote Control
16-EN
Book_PKG-2000P.indb
16
4/8/06
2:55:05 AM
Monitor Setup
• “OFF” will change to “CUSTOM”, when any of the picture
mode (Brightness, Color, Tint, Contrast and Sharpness) has been
adjusted
Adjusting Picture
Visual EQ, Brightness, color, tint, contrast and sharpness are
adjustable.
• Each source is independently adjustable.
• Make adjustments within 6 seconds, otherwise the OSD (On Screen
Display) will turn off automatically.
• After adjusting, the “OFF” setting in Visual EQ changes to
“CUSTOM”. After resetting the unit, “CUSTOM” changes back to
“OFF”
1
Press SETUP button on the remote control.
Or press and hold the SELECT button on the Front
Control Keys for at least 2 seconds to open SETUP
screen. The PICTURE setting menu is highlighted.
• NIGHT MOVIE, SOFT, SHARP and HIGH CONT. are fixed values.
They cannot be set manually. If the picture mode is changed, they
automatically change to CUSTOM mode.
• To return OFF mode, press RESET on the picture mode, or change
values of BRIGHT, COLOR, TINT, CONTRAST and SHARPNESS
to 0 manually.
3
Wait 6 seconds until OSD disappears; the
adjustment will be saved automatically.
Adjusting the Brightness
2
3
Press ▲ or ▼ and select BRIGHT.
Press or to adjust the brightness. Brightness
can be adjusted from –15 (MIN) to +15 (MAX).
SELECT
Front Control Keys
4
Wait 6 seconds until OSD disappears; the
adjustment will be saved automatically.
SETUP
Remote Control
VISUAL EQ Operation
Adjusting the Color Density
2
3
Press ▲ or ▼ and select COLOR.
Press or to adjust the color density. Change
depth can be adjusted from –15 (MIN) to +15 (MAX).
You can select a mode suitable for the subject image.
2
To change VISUAL EQ, press or to cycle
through the OSD as OFF, NIGHT MOVIE, SOFT,
SHARP and HIGH CONT. (Default: OFF)
4
Wait 6 seconds until OSD disappears; the
adjustment will be saved automatically.
VISUAL EQ mode (manufacturer’s settings) selection
(VISUAL EQ MODE)
OFF:
Normal Setting (Visual EQ OFF)
NIGHT MOVIE: Suitable for movies in which dark
scenes frequently appear.
SOFT:
Suitable for CGs and animated
films.
SHARP:
Suitable for old movies where
images are not clearly shown.
HIGH CONT.: Suitable for recent movies.
17-EN
Book_PKG-2000P.indb
17
4/8/06
2:55:07 AM
Adjusting the Tint
2
3
4
Press ▲ or ▼ and select TINT.
2
Press ▲ or ▼ and select RESET.
3
Press
Press or to adjust the tint. Tint tone can be
adjusted from G15 (G MAX) to R15 (R MAX).
Wait 6 seconds until OSD disappears; the
adjustment will be saved automatically.
Adjusting the Contrast
2
3
Resetting the Picture Adjustment
Press ▲ or ▼ and select CONTRAST.
Press or to adjust the contrast. Contrast can
be adjusted from –15 (LOW) to +15 (HIGH).
Setting Audio & Screen
Each source has different menu. Depending on the selection of source,
setting menu changes.
• Each source can be adjustable individually.
• Adjusting should be made within 6 seconds, otherwise OSD
(On Screen Display) will be automatically turned off.
Press and hold SELECT for at least 2 seconds to
show the SETUP menu on Front Control Keys. Or
Press SETUP button on Remote Control.
SELECT
Wait 6 seconds until OSD disappears; the
adjustment will be saved automatically.
Adjusting the Sharpness
2
3
to reset the picture adjustments.
• If you do not press
or
within 6 seconds, OSD disappears
and the previous adjustments will not be reset.
1
4
or
Front Control Keys
Press ▲ or ▼ and select SHARPNESS.
Press or to adjust the screen quality. Screen
quality can be adjusted from -15 (SOFT) to +15
(HARD).
SETUP
Remote Control
2
4
Wait 6 seconds until OSD disappears; the
adjustment will be saved automatically.
Press SELECT/SETUP to switch to
AUDIO&SCREEN setting menu from PICTURE
setting menu. To change each item, press ▲ or ▼.
18-EN
Book_PKG-2000P.indb
18
4/8/06
2:55:09 AM
Setting the Source Name
3
Setting the Screen Modes
Press ▲ or ▼ and select SOURCE NAME.
The currently selected
source name
Display mode on the screen can be adjusted to Wide,
Cinema and Normal. (Default: WIDE)
The currently selected
source displays on
Source Name menu
Video Signal menu is
for AUX1 only
DVD:
Source name of DVD can not be changed to other names.
3
Press
or
to select WIDE/CINEMA/NORMAL
AUX 1:
Press
or to select AUX1/EX-DVD/DVD-HU/DVB-T/
ISDB-T/TV/GAME/USER* (Default: AUX1)
AUX 2:
Press
or to select AUX2/EX-DVD/DVD-HU/DVB-T/
ISDB-T/TV/GAME/USER* (Default: AUX2)
WIDE
Normal images are expanded uniformly in the
horizontal direction and are displayed over the entire
screen.
Customizing Source Name
Your desired OSD source name can be defined up to 6 characters.
4
5
6
Press
or
Press ▲, ▼, or and ENTER key to select the
character “A-Z”, “0-9”, “-“, space and “.”.
“DEL”:
“CLR”:
“OK”:
•
to select USER.
Press ENTER key. Character setting menu
appears.
Delete one character at a time.
Clear entire characters.
Confirm source name and exit
from character setting menu.
CINEMA
Normal images are expanded in the horizontal and
vertical directions. The top and bottom of the image
are cut off. This mode is suited for 16:9 cinema size
images.
If no key is pressed within 6 seconds, OSD disappears and the
source name will not be changed.
NORMAL
Normal image (4:3)
4
Wait 6 seconds until OSD disappears; the
adjustment will be saved automatically.
Setting the TV System
Broadcast TV System can be manually switched.
Setting the Auto Level Control
Auto Level Control adjusts the sound volume
automatically. This function balances sound volume for
all sources.
3
Press or to turn ON/OFF Auto Level Control.
(Default: ON)
3
Press
AUTO)
or
to select AUTO/NTSC/PAL. (Default:
Setting the Video Signal
3
Press
or to select Composite/S-Video.
(Default: Composite)
Video Signal selection menu is only available in AUX1
source.
AUX1 must be connected with either Composite cable
or S-Video cable. You can not connect both cables at
the same time. It may cause noise on the screen.
Refer to System Connection (Page 28)
19-EN
Book_PKG-2000P.indb
19
4/8/06
2:55:12 AM
Setting System Control
Setting the Dimmer
IR transmitter, FM transmitter, FM frequency, dimmer and beep can
be adjusted for all available sources.
4
or
to select AUTO/LOW/HIGH. (Default:
AUTO adjusts the LCD backlight brightness automatically by
sensing the ambient light from the luminance sensor.
• Once this adjustment is made, all sources are affected.
SELECT
Press
AUTO)
Setting the Dimmer Low Level
ENT
4
Front Control Keys
Press or to select low level of Dimmer
between 0 (min.) to 15 (max.). 15 (max.) is the same
brightness level with HIGH on Dimmer menu.
Setting the Beep
4
Press
ON)
or
to turn on/off beep sound. (Default:
Setting the DVD Auto Play
4
NORMAL:
AUTO:
SKIP:
SETUP
Remote Control
1
2
Press
or
to select NORMAL/AUTO/SKIP.
Stay on the menu until the user input.
Play movie after 6 seconds on the menu.
Play movie Immediately. It will skip
previews and the menu.
• This setting is only available before inserting a disc, or
when in stop mode.
• To activate SKIP mode, a disc must be ejected and reloaded
after setting. (Note: SKIP mode can not be activated, when
a disc is inserted or reloaded while Alpine logo is shown on
the screen monitor.)
• This function is not available on some discs.
Press and hold SELECT for at least 2 seconds to
show the SETUP menu on Front Control Keys. Or
Press SETUP button on Remote Control.
Press SELECT/SETUP to switch to SYSTEM
setting menu from AUDIO&SCREEN setting menu.
Resetting to the Factory Default
4
3
Press ENTER Key, the system changes to Factory
Default System Setting. Entire settings include
Picture, Visual EQ, Display Mode are also reset.
DVD Setup values will not be affected.
Press ▲ or ▼ to change each item.
Setting the IR Transmitter
4
Press
or
to select A/B/OFF. (Default: A)
Setting the FM Modulator
4
Press or to select FM Radio region (OFF/USA/
EUR/JPN). (Default: OFF)
Setting the FM Frequency
4
Press or to select desired FM Radio
Frequencies between 88.1 MHz to 92.1 MHz for
USA and Europe, and 88.1 MHz to 90.0 MHz for
Japan. (Default: 89.1 MHz)
• USA frequency step is 0.2MHz and Europe and Japan is
0.1MHz.
20-EN
Book_PKG-2000P.indb
20
4/8/06
2:55:16 AM
DVD Setup
Setting the language
The audio language, subtitle language and menu language can be set
according to your preferences.
Once set, this becomes the default language. This function is
convenient when you always want to listen in English. (Not all discs
allow changing the default language. If not, the factory default
language applies.)
DVD SETUP
ENTER
▲▼
RETURN
■
number
keys
(0 to 9)
MENU and DVD SETUP are the same button.
DVD Setup Operation
The following steps 1 to 4 are common to each of
the DVD settings described here. Refer to each
section for details.
1
Press and hold DVD SETUP before inserting a
disc, or when in stop mode.
The setup menu appears on the monitor.
2
3
4
AUDIO:
Set the audio track language.
SUBTITLE:
Set the language of the subtitles
displayed on the screen.
MENU:
Set the language used for the
menus (title menu, etc.).
Setting contents:
AUTO *1 / ENGLISH / JAPANESE / GERMAN / SPANISH
/ FRENCH / ITALIAN / PORTUGUESE / RUSSIAN /
CHINESE / OTHERS *2
Press ,
ENTER.
,
or
to select the desired language, then press
1 AUTO:
The disc is played with the audio language or subtitle
language set as the priority language for the disc.
2 OTHERS:
Set this to play the disc with a language other than one
of the languages displayed. Press ENTER then use the
number keys “0” to “9” to input the 4-digit language
code. Then press ENTER again. For the language codes,
refer to “List of Language Codes” (page 23).
Further items will be displayed.
• If you change the language setting when the disc is inside, the
setting is decided with one of the following operations.
-Disc eject
-Turn OFF the main unit
• To temporarily change the language of the current disc, either do
so from the DVD menu or using the operation described in the
section "Switching the audio tracks" (page 14).
• If the disc does not include the selected language, the disc’s default
language is set.
• Languages set upon shipment from the factory:
Audio language : AUTO
Subtitle language : AUTO
Menu language : AUTO
• Press RETURN to return to the previous display.
Setting items:
Setting the TV Screen
Press ▲ or ▼ to select the desired setting item,
then press ENTER.
LANGUAGES / TV SCREEN / COUNTRY CODE / PARENTAL /
DIGITAL OUT / CUSTOM SETUP*1
*1
Setting item: Language
Further setting items: AUDIO /
SUBTITLE / MENU
Refer to “Custom Setup” on page 23.
Press ▲ or ▼ to change the setting item, then
press ENTER.
Press and hold DVD SETUP.
Use the procedure described below to set the output screen according
to the type of TV monitor being used.
Setting item: TV SCREEN
Setting contents: 16:9 (WIDE) / 4:3 (LB) / 4:3 (PS)
• For some discs, the picture may not be set to the selected screen
size. (For details, refer to the explanation on the disc’s jacket.)
• Press RETURN to return to the previous screen.
The settings are stored and the setup mode is deactivated.
• When settings are changed, old settings are overwritten. Make a
note of the current settings before making changes. If the vehicle’s
battery is disconnected, the settings will be cleared and will return
to the factory settings.
Continued
21-EN
Book_PKG-2000P.indb
21
4/8/06
2:55:17 AM
16 : 9 WIDE
Select this when connected
to a wide screen TV. This
is selected upon shipment
from the factory.
4 : 3 LB (LETTER BOX)
Select this when connected to a
conventional 4 : 3 size (normal TV
aspect ratio) monitor. There may
be black bands visible at the top
and bottom of the screen (when
playing a 16 : 9 size movie). The
width of these stripes will depend
upon the original aspect ratio of the theatre release of the
movie.
2 Use the number keys “0” to “9” to input the 4-digit
password, then press ENTER.
PASSWORD ✽ ✽ ✽ ✽
Input numbers are displayed as “✽.“
The default password is 1111 upon shipment from the factory.
The restriction level (PARENTAL LEVEL) input display appears.
• Can be erased one digit at a time each time CLR is pressed. Press
and hold CLR for at least 2 seconds to delete all digits.
• Press RETURN to return to the previous screen.
• If the password is wrong, the unit displays “PASSWORD ERROR”
for 5 seconds. It then returns to the password input display where
the password may be reentered.
3 Press , ,
or
press ENTER.
to select the rating level (1 to 8), then
4 : 3 PS (PAN- SCAN)
Select this when connected
to a conventional 4 : 3 size
monitor. The picture will fill
the entire TV screen.
However, due to the
mismatch in aspect ratio,
parts of the movie at the
extreme left and right sides will not be visible (when playing a
16 : 9 size movie).
Select “OFF” to cancel the parental lock or if you do not want
to set a rating level.
The lower the number, the higher the rating level.
Setting the Country Code
Set the country number of which you want to set the rating level
(Parental lock).
Setting item: COUNTRY CODE
Setting contents: CODE
1 Press ▲ or ▼ to select “COUNTRY CODE,” then press
ENTER.
“COUNTRY CODE” will be reset.
COUNTRY CODE - - - 2 Use the number keys “0” to “9” to input the 4-digit
country code, then press ENTER.
Example: United States “8583” is input
COUNTRY CODE 8 5 8 3
• If the input code is wrong, the unit returns to the country code
input display, after display “CODE ERROR” for 5 seconds.
• For the country codes, refer to “List of Country Codes” (Pages 30
and 31).
• Can be erased one digit at a time each time CLR is pressed. Press
and hold CLR for at least 2 seconds to delete all digits.
• Press RETURN to return to the previous screen.
Setting the Rating Level (Parental Lock)
Use this function to restrict the viewing of movies to children of
appropriate age levels only.
Setting item: PARENTAL
Setting contents: PASSWORD
1 Press ▲ or ▼ to select “PARENTAL,” then press ENTER.
The password input mode is activated.
• Press RETURN to return to the previous display.
4 Press DVD SETUP.
The settings are stored and the setup mode is deactivated.
• If you want to change the password, select “CHANGE
PASSWORD,” then input the new password (4 digits).
• Write down the password on a piece of paper and store the piece of
paper somewhere in case you forget it.
• On unrated DVDs, playback will not be restricted even if the rating
level is set.
• Once set, this rating level remains in memory until changed. To
enable the play of discs of higher rating levels or to cancel the
parental lock, the setting must be changed.
• Not all DVDs provide a Parental Lock feature. If you are unsure
about a DVD, play it first to confirm. Do not leave DVDs
accessible to young children for whom you deem them
inappropriate.
Tips
• Changing the rating level temporarily
Some discs may request that you change the rating level set
in the default settings during playback. In this case, the
message appears on the monitor screen “PARENTAL
LEVEL CHANGE OK?”
• To change parental level and play, press ENTER.
The password input mode is displayed. Input the 4-digit
password in “Setting the Rating Level (Parental Lock)” you
set, then press ENTER.
• To play without changing the parental level, press ■.
(When ■ is pressed, playback will be at the parental level
set with “Setting the Rating Level (Parental Lock).”)
Setting the Digital Output
Digital output is not available on this Built-in DVD 10.2 inch
overhead monitor, PKG-2000P. It will not affect the playback, if you
change the setting.
22-EN
Book_PKG-2000P.indb
22
4/8/06
2:55:19 AM
Custom Setup
Operation
Custom Setup Operation
The following steps (1 through 5) are common to each of the
mode settings. Once the mode is selected under the CUSTOM
SETUP menu, refer to the section for that mode for details.
1
Press DVD SETUP before inserting a disc, or when
in stop mode.
The setup menu appears on the monitor.
Setting the Video CD Play Mode
When playing a Playback Control (PBC) enabled video CD, you can
choose to set PBC ON or OFF.
Setting item: VCD PLAY MODE
Setting contents: PBC ON / PBC OFF
PBC ON: The PBC menu is displayed.
PBC OFF: The PBC menu is not displayed.
The initial setting at the factory is PBC ON.
Setting the Pause Mode
In pause mode, screen blurring may occur. To overcome this, set
AUTO/FIELD/FRAME accordingly.
Setting item: PAUSE MODE
Setting contents: AUTO / FIELD / FRAME
If you experience blurring during pause mode, set to FIELD or
FRAME.
The initial setting at the factory is AUTO.
Setting the Downmix Mode
This function applies to Dolby Digital, DTS stream sound.
Setting item: DOWNMIX MODE
Setting contents: STEREO / SURROUND ENCODED
2
3
Press ▲ or ▼ to select “CUSTOM SETUP,” then
press ENTER.
STEREO:
Stereo Downmix
SURROUND ENCODED: Surround compatible Downmix
The initial setting at the factory is
SURROUND ENCODED.
Press ▲ or ▼ to select your desired setting item,
then press ENTER.
CUSTOM SETUP items:
CD PLAY MODE / VCD PLAY MODE / PAUSE MODE /
DOWNMIX MODE
4
5
Press ▲ or ▼ to change the setting item, then
press ENTER.
Press DVD SETUP.
The settings are stored and the setup mode is deactivated.
• Press RETURN to return to the previous display.
• When settings are changed, old settings are overwritten. Make a
note of the current settings before making changes. If the vehicle’s
battery is disconnected, the settings will be cleared and will return
to the factory settings.
Setting the CD Play Mode
The unit can be set to play only the audio data on discs containing
music data.
Setting item: CD PLAY MODE
Setting contents: CD-DA / COMPRESSED AUDIO
CD-DA:
Only CD data can be played back.
The initial setting at the factory is
CD DA.
• Compressed audio is not supported on this Built-in DVD 10.2 inch
overhead monitor, PKG-2000P. Please do not change this setting.
23-EN
Book_PKG-2000P.indb
23
4/8/06
2:55:21 AM
Wireless Headphone
Headphone Receivers
1) Infrared Sensors; Receive signal from the
transmitter.
2) Battery Cover
3) Volume Control
4) Power Switch
5) Power Indicator LED
Operation
Read carefully to prevent damage to the headphone or
your ears:
WARNING: Before turning on the power, remove headphones and turn
the volume down as low as possible.
1) Be sure the batteries are properly installed in the
headphones.
2) Turn the headphones volume completely down
before placing it on your ears and turning on the
power.
3) Turn on the headphone power and adjust the
headphone volume to a comfortable level (You can
increase the audio source volume if needed).
Battery Installation
Place two AAA batteries into the battery compartment of the
headphone(s), making sure that the battery polarity is correct.
24-EN
Book_PKG-2000P.indb
24
4/8/06
2:55:22 AM
Installation and Connections
Before installing or connecting the unit, please read the
following and pages 3 and 4 of this manual thoroughly
for proper use.
Caution
HAVE THE WIRING AND INSTALLATION DONE BY
EXPERTS.
MAKE THE CORRECT CONNECTIONS.
The wiring and installation of this unit requires special technical
skill and experience. To ensure safety, always contact the dealer
where you purchased this product to have the work done.
Failure to make the proper connections may result in fire or
product damage.
USE SPECIFIED ACCESSORY PARTS AND INSTALL THEM
SECURELY.
USE ONLY IN CARS WITH A 12 VOLT NEGATIVE GROUND.
Be sure to use only the specified accessory parts. Use of other
than designated parts may damage this unit internally or may not
securely install the unit in place. This may cause parts to become
loose resulting in hazards or product failure.
Warning
(Check with your dealer if you are not sure.) Failure to do so may
result in fire, etc.
BEFORE WIRING, DISCONNECT THE CABLE FROM THE
NEGATIVE BATTERY TERMINAL.
Failure to do so may result in electric shock or injury due to
electrical shorts.
DO NOT ALLOW CABLES TO BECOME ENTANGLED IN
SURROUNDING OBJECTS.
Arrange wiring and cables in compliance with the manual to
prevent obstructions when driving. Cables or wiring that obstruct
or hang up on places such as the steering wheel, gear lever, brake
pedals, etc., can be extremely hazardous.
DO NOT SPLICE INTO ELECTRICAL CABLES.
Never cut away cable insulation to supply power to other
equipment. Doing so will exceed the current carrying capacity of
the wire and result in fire or electric shock.
DO NOT DAMAGE PIPE OR WIRING WHEN DRILLING
HOLES.
When drilling holes in the chassis for installation, take
precautions so as not to contact, damage or obstruct pipes, fuel
lines, tanks or electrical wiring. Failure to take such precautions
may result in fire.
DO NOT USE BOLTS OR NUTS IN THE BRAKE OR
STEERING SYSTEMS TO MAKE GROUND CONNECTIONS.
Bolts or nuts used for the brake or steering systems (or any
other safety-related system), or tanks should NEVER be used
for installations or ground connections. Using such parts could
disable control of the vehicle and cause fire, etc.
KEEP SMALL OBJECTS SUCH AS BATTERIES OUT OF THE
REACH OF CHILDREN.
Swallowing them may result in serious injury. If swallowed,
consult a physician immediately.
DO NOT INSTALL IN LOCATIONS WHICH MIGHT HINDER
VEHICLE OPERATION, SUCH AS THE STEERING WHEEL
OR SHIFT LEVER.
Doing so may obstruct forward vision or hamper movement, etc.,
and result in a serious accident.
ARRANGE THE WIRING SO IT IS NOT CRIMPED OR
PINCHED BY A SHARP METAL EDGE.
Route the cables and wiring away from moving parts (like the seat
rails) or sharp or pointed edges. This will prevent crimping and
damage to the wiring. If wiring passes through a hole in metal,
use a rubber grommet to prevent the wires insulation from being
cut by the metal edge of the hole.
DO NOT INSTALL IN LOCATIONS WITH HIGH MOISTURE
OR DUST.
Avoid installing the unit in locations with high incidence of
moisture or dust. Moisture or dust that penetrates into this unit
may result in product failure.
Precautions
• Be sure to disconnect the cable from the (–) battery post before
installing your PKG-2000P. This will reduce any chance of
damage to the unit in case of a short-circuit.
• Be sure to connect the color coded leads according to
the diagram. Incorrect connections may cause the unit to
malfunction or damage to the vehicle's electrical system.
• When making connections to the vehicle's electrical system,
be aware of the factory installed components (e.g. on-board
computer). Do not tap into these leads to provide power for this
unit. When connecting the PKG-2000P to the fuse box, make
sure the fuse for the intended circuit of the PKG-2000P has the
appropriate amperage. Failure to do so may result in damage
to the unit and/or the vehicle. When in doubt, consult your
ALPINE dealer.
• The PKG-2000P uses female RCA-type jacks for connection
to other units (e.g. amplifier) having RCA connectors. You may
need an adaptor to connect other units. If so, please contact
your authorized ALPINE dealer for assistance.
IMPORTANT
Please record the serial number of your unit in the space
provided below and keep it as a permanent record. The serial
number plate is located on the bottom of the unit.
SERIAL NUMBER:
INSTALLATION DATE:
INSTALLATION TECHNICIAN:
PLACE OF PURCHASE:
25-EN
Book_PKG-2000P.indb
25
4/8/06
2:55:23 AM
Connections
ALPINE's PKG-2000P needs the following power connections to
assure proper operation of the monitor.
Power Connector
1) BATT
Yellow
• Battery Lead
Connect this lead to the positive (+) post of the vehicle’s battery.
2) ACC
Red
• ACC
Connect this line to the vehicle’s ACC line.
(Switched 12V, ignition)
3) GND
Black
• GND
Connect this line to the vehicle’s GND line.
4) DOOR
Green
• Door
Connect this lead to the vehicle’s door
AV Connector 1 (AUX1)
AUX IN 1 (VIDEO)
Yellow
• Video Input Connector
This connector is used in combination with the video inputs
of other video products (AV head unit or TV Tuner)
AUX IN 1 (AUDIO L)
White (L)
AUX IN 1 (AUDIO R)
Red (R)
POWER +12V
Red
• Audio Input Connectors
These connectors are used in combination with a head
unit or TV Tuner with audio output connectors.
• Power Control
Connect this lead to any ALPINE video source product's ACC
line, which is red. It controls turning the power ON/OFF for the
ALPINE video products correspond to PKG-2000P power.
REMO OUT
(AUX 1)
White/Brown
REMOTE IN
White/Brown
• Remote Out 1
Corresponds to AUX 1. To control ALPINE DVD player,
TV tuner or DVD-HU, connect to each REMOTE IN.
• Remote In
To control ALPINE PKG-2000P, DVD player or TV tuner
from DVD-HU or LCD monitor in the front area of the vehicle,
connect this line to the ALPINE DVD-HU or LCD monitor
REMOTE OUT.
S-VIDEO
Blue/Brown
• S-Video Input
You can not use Composite Video Input and S-Video
input at the same time. It may cause noise on the
screen. Refer to Video Signal setting (page 19)
AV Connector 2 (AUX2)
AUX OUT (VIDEO)
Yellow
• Video Output Connector
This connector is used in combination with the video inputs
of other video products (AV head unit or LCD monitor)
AUX OUT (AUDIO L) White (L)
AUX OUT (AUDIO R) Red (R)
AUX IN 2 (VIDEO)
Yellow
• Audio Output Connectors
These connectors are used in combination with a head unit or
LCD monitor with audio input connectors.
• Video Input Connector
This connector is used in combination with the video inputs
of other video products (AV head unit or TV Tuner)
AUX IN 2 (AUDIO L)
White (L)
AUX IN 2 (AUDIO R) Red (R)
REMO OUT (AUX 2)
White/Brown
• Audio Input Connectors
These connectors are used in combination with a head
unit or TV Tuner with audio output connectors.
• Remote Out 2
Corresponds to AUX 2. To control ALPINE DVD player,
TV tuner or DVD-HU, connect to each REMOTE IN.
26-EN
EN03 GettingStarted_r4.indd
26
5/16/06
6:39:45 PM
Mount Side
AV Connector 2
The direction of AV
connector ports
Power Connector
AV Connector 1
FM Switching Box
Connector
Dome Light Polarity
The detail of dome light polarity switch
Dome Light Wire
Dome light wire connects the built-in Dome Light to the cable from
the vehicle’s Dome Light Switch.
Polarity change switch is located on the top surface that
mounts into the headliner.
Vehicle Door polarity depends on the vehicle type. The
polarity can be changed by the “Door SW polarity”
switch. (Default: Negative Switched System)
Polarity +: When door open, door signal is 12V
Polarity -: When door open, door signal is GND
PKG-2000P
PKG-2000P
27-EN
Book_PKG-2000P.indb
27
4/8/06
2:55:30 AM
System Connections
PKG-2000P DVD Built-In
Overhead Monitor
When the game port and
AUX2 are connected at the
same time, the game port has
a priority.
28-EN
Book_PKG-2000P.indb
28
4/8/06
2:55:33 AM
Information
List of Language Codes
(For details, see page 21.)
Abbreviation
AA
AB
AF
AM
AR
AS
AY
AZ
BA
BE
BG
BH
BI
BN
BO
BR
CA
CO
CS
CY
DA
DE
DZ
EL
EN
EO
ES
ET
EU
FA
FI
FJ
FO
FR
FY
GA
GD
GL
GN
GU
HA
HI
HR
HU
HY
IA
Code
6565
6566
6570
6577
6582
6583
6589
6590
6665
6669
6671
6672
6673
6678
6679
6682
6765
6779
6783
6789
6865
6869
6890
6976
6978
6979
6983
6984
6985
7065
7073
7074
7079
7082
7089
7165
7168
7176
7178
7185
7265
7273
7282
7285
7289
7365
Language
Afar
Abkhazian
Afrikaans
Amharic
Arabic
Assamese
Aymara
Azerbaijani
Bashkir
Byelorussian
Bulgarian
Bihari
Bislama
Bengali, Bangla
Tibetan
Breton
Catalan
Corsican
Czech
Welsh
Danish
German
Bhutani
Greek
English
Esperanto
Spanish
Estonian
Basque
Persian
Finnish
Fiji
Faroese
French
Frisian
Irish
Scots Gaelic
Galician
Guarani
Gujarati
Hausa
Hindi
Croatian
Hungarian
Armenian
Interlingua
Abbreviation
IE
IK
IN
IS
IT
IW
JA
JI
JW
KA
KK
KL
KM
KN
KO
KS
KU
KY
LA
LN
LO
LT
LV
MG
MI
MK
ML
MN
MO
MR
MS
MT
MY
NA
NE
NL
NO
OC
OM
OR
PA
PL
PS
PT
QU
RM
Code
7369
7375
7378
7383
7384
7387
7465
7473
7487
7565
7575
7576
7577
7578
7579
7583
7585
7589
7665
7678
7679
7684
7686
7771
7773
7775
7776
7778
7779
7782
7783
7784
7789
7865
7869
7876
7879
7967
7977
7982
8065
8076
8083
8084
8185
8277
Language
Interlingue
Inupiak
Indonesian
Icelandic
Italian
Hebrew
Japanese
Yiddish
Javanese
Georgian
Kazakh
Greenlandic
Cambodian
Kannada
Korean
98145.451
Kurdish
Kirghiz
Latin
Lingala
Laothian
Lithuanian
Latvian, Lettish
Malagasy
Maori
Macedonian
Malayalam
Mongolian
Moldavian
Marathi
Malay
Maltese
Burmese
Nauru
Nepali
Dutch
Norwegian
Occitan
(Afan) Oromo
Oriya
Punjabi
Polish
Pashto, Pushto
Portuguese
Quechua
Rhaeto-Romance
Abbreviation
RN
RO
RU
RW
SA
SD
SG
SH
SI
SK
SL
SM
SN
SO
SQ
SR
SS
ST
SU
SV
SW
TA
TE
TG
TH
TI
TK
TL
TN
TO
TR
TS
TT
TW
UK
UR
UZ
VI
VO
WO
XH
YO
ZH
ZU
Code
8278
8279
8285
8287
8365
8368
8371
8372
8373
8375
8376
8377
8378
8379
8381
8382
8383
8384
8385
8386
8387
8465
8469
8471
8472
8473
8475
8476
8478
8479
8482
8483
8484
8487
8575
8582
8590
8673
8679
8779
8872
8979
9072
9085
Language
Kirundi
Romanian
Russian
Kinyarwanda
Sanskrit
Sindhi
Sangho
Serbo-Croatian
Singhalese
Slovak
Slovenian
Samoan
Shona
Somali
Albanian
Serbian
Siswati
Sesotho
Sundanese
Swedish
Swahili
Tamil
Telugu
Tajik
Thai
Tigrinya
Turkmen
Tagalog
Setswana
Tonga
Turkish
Tsonga
Tatar
Twi
Ukrainian
Urdu
Uzbek
Vietnamese
Volapuk
Wolof
Xhosa
Yoruba
Chinese
Zulu
29-EN
Book_PKG-2000P.indb
29
4/8/06
2:55:34 AM
List of Country Codes
(For details, see page 22.)
Abbreviation
AD
AE
AF
AG
AI
AL
AM
AN
AO
AQ
AR
AS
AT
AU
AW
AZ
BA
BB
BD
BE
BF
BG
BH
BI
BJ
BM
BN
BO
BR
BS
BT
BV
BW
BY
BZ
CA
CC
CD
Code
6568
6569
6570
6571
6573
6576
6577
6578
6579
6581
6582
6583
6584
6585
6587
6590
6665
6666
6668
6669
6670
6671
6672
6673
6674
6677
6678
6679
6682
6683
6684
6686
6687
6689
6690
6765
6767
6768
CF
CG
CH
CI
CK
CL
CM
CN
CO
CR
CU
CV
CX
CY
CZ
DE
DJ
DK
6770
6771
6772
6773
6775
6776
6777
6778
6779
6782
6785
6786
6788
6789
6790
6869
6874
6875
Country
Abbreviation
Andorra
DM
United Arab Emirates
DO
Afghanistan
DZ
Antigua and Barbuda
EC
Anguilla
EE
Albania
EG
Armenia
EH
Netherlands Antilles
ER
Angola
ES
Antarctica
ET
Argentina
FI
American Samoa
FJ
FK
Austria
Australia
FM
FO
Aruba
FR
Azerbaijan
Bosnia and Herzegovina
GA
Barbados
GB
Bangladesh
GD
Belgium
GE
Burkina Faso
GF
Bulgaria
GH
Bahrain
GI
Burundi
GL
Benin
GM
Bermuda
GN
Brunei Darussalam
GP
Bolivia
GQ
Brazil
GR
Bahamas
GS
Bhutan
GT
Bouvet Island
GU
Botswana
GW
Belarus
GY
Belize
HK
Canada
Cocos (Keeling) Islands
HM
Congo, the Democratic Republic of the
HN
Central African Republic
HR
Congo
HT
Switzerland
HU
Cote dílvoire
ID
Cook Islands
IE
Chile
IL
Cameroon
IN
China
IO
IQ
Colombia
IR
Costa Rica
IS
Cuba
IT
Cape Verde
JM
Christmas Island
JO
Cyprus
JP
Czech Republic
KE
Germany
KG
Djibouti
KH
Denmark
Code
6877
6879
6890
6967
6969
6971
6972
6982
6983
6984
7073
7074
7075
7077
7079
7082
7165
7166
7168
7169
7170
7172
7173
7176
7177
7178
7180
7181
7182
7183
7184
7185
7187
7189
7275
7277
7278
7282
7284
7285
7368
7369
7376
7378
7379
7381
7382
7383
7384
7477
7479
7480
7569
7571
7572
Country
Dominica
Dominican Republic
Algeria
Ecuador
Estonia
Egypt
Western Sahara
Eritrea
Spain
Ethiopia
Finland
Fiji
Falkland Islands
Micronesia, Federated States of
Faroe Islands
France
Gabon
United Kingdom
Grenada
Georgia
French Guiana
Ghana
Gibraltar
Greenland
Gambia
Guinea
Guadeloupe
Equatorial Guinea
Greece
South Georgia and the
South Sandwich Islands
Guatemala
Guam
Guinea-Bissau
Guyana
Hong Kong
Heard Island and
McDonald Islands
Honduras
Croatia
Haiti
Hungary
Indonesia
Ireland
Israel
India
British Indian Ocean Territory
Iraq
Iran, Islamic Republic of
Iceland
Italy
Jamaica
Jordan
Japan
Kenya
Kyrgyzstan
Cambodia
Abbreviation
KI
KM
KN
KP
Code
7573
7577
7578
7580
KR
KW
KY
KZ
LA
7582
7587
7589
7590
7665
LB
LC
LI
LK
LR
LS
LT
LU
LV
LY
MA
MC
MD
MG
MH
MK
7666
7667
7673
7675
7682
7683
7684
7685
7686
7689
7765
7767
7768
7771
7772
7775
ML
MM
MN
MO
MP
MQ
MR
MS
MT
MU
MV
MW
MX
MY
MZ
NA
NC
NE
NF
NG
NI
NL
NO
NP
NR
NU
NZ
OM
PA
7776
7777
7778
7779
7780
7781
7782
7783
7784
7785
7786
7787
7788
7789
7790
7865
7867
7869
7870
7871
7873
7876
7879
7880
7882
7885
7890
7977
8065
Country
Kiribati
Comoros
Saint Kitts and Nevis
Korea, Democratic
People’s Republic of
Korea, Republic of
Kuwait
Cayman Islands
Kazakstan
Lao Peopleís Democratic
Republic
Lebanon
Saint Lucia
Liechtenstein
Sri Lanka
Liberia
Lesotho
Lithuania
Luxembourg
Latvia
Libyan Arab Jamahiriya
Morocco
Monaco
Moldova, Republic of
Madagascar
Marshall Islands
Macedonia, The former
Yugoslav Republic of
Mali
Myanmar
Mongolia
Macau
Northern Mariana Islands
Martinique
Mauritania
Montserrat
Malta
Mauritius
Maldives
Malawi
Mexico
Malaysia
Mozambique
Namibia
New Caledonia
Niger
Norfolk Island
Nigeria
Nicaragua
Netherlands
Norway
Nepal
Nauru
Niue
New Zealand
Oman
Panama
30-EN
Book_PKG-2000P.indb
30
4/8/06
2:55:36 AM
Abbreviation
PE
PF
PG
PH
PK
PL
PM
PN
PR
PT
PW
PY
QA
RE
RO
RU
RW
SA
SB
SC
SD
SE
SG
SH
SI
Code
8069
8070
8071
8072
8075
8076
8077
8078
8082
8084
8087
8089
8165
8269
8279
8285
8287
8365
8366
8367
8368
8369
8371
8372
8373
Country
Peru
French Polynesia
Papua New Guinea
Philippines
Pakistan
Poland
Saint Pierre and Miquelon
Pitcairn
Puerto Rico
Portugal
Palau
Paraguay
Qatar
Reunion
Romania
Russian Federation
Rwanda
Saudi Arabia
Solomon Islands
Seychelles
Sudan
Sweden
Singapore
Saint Helena
Slovenia
Abbreviation
SJ
SK
SL
SM
SN
SO
SR
ST
SV
SY
SZ
TC
TD
TF
TG
TH
TJ
TK
TM
TN
TO
TP
TR
TT
TV
Code
8374
8375
8376
8377
8378
8379
8382
8384
8386
8389
8390
8467
8468
8470
8471
8472
8474
8475
8477
8478
8479
8480
8482
8484
8486
Country
Abbreviation
Svalbard and Jan Mayen
TW
Slovakia
TZ
Sierra Leone
UA
San Marino
UG
Senegal
UM
Somalia
US
Suriname
UY
Sao Tome and Principe
UZ
El Salvador
VA
Syrian Arab Republic
VC
Swaziland
VE
Turks and Caicos Islands
VG
Chad
VI
French Southern Territories
VN
Togo
VU
Thailand
WF
Tajikistan
WS
Tokelau
YE
Turkmenistan
YT
Tunisia
YU
Tonga
ZA
East Timor
ZM
Turkey
ZW
Trinidad and Tobago
Tuvalu
Code
8487
8490
8565
8571
8577
8583
8589
8590
8665
8667
8669
8671
8673
8678
8685
8770
8783
8969
8984
8985
9065
9077
9087
Country
Taiwan, Province of China
Tanzania, United Republic of
Ukraine
Uganda
United States Minor
Outlying Islands
United States
Uruguay
Uzbekistan
Holy See (Vatican City State)
Saint Vincent and the
Grenadines
Venezuela
Virgin Island, British
Virgin Islands, U.S
Viet Nam
Vanuatu
Wallis and Futuna
Samoa
Yemen
Mayotte
Yugoslavia
South Africa
Zambia
Zimbabwe
31-EN
Book_PKG-2000P.indb
31
4/8/06
2:55:37 AM
In Case of Difficulty
If you encounter a problem, please turn the power off, then on
again. If the unit is still not functioning normally, please review the
items in the following checklist. This guide will help you isolate the
problem if the unit is at fault. Otherwise, make sure the rest of your
system is properly connected or consult your authorized Alpine
dealer.
No function or display.
• Vehicle's ignition is off.
- If connected following the instructions, the unit will not
operate with the vehicles ignition off.
• Improper power lead connections.
- Check power lead connections.
• No fuse or blown fuse.
- Replace the fuse on the battery lead of the unit with the
proper value.
• Vehicle’s battery is weak.
- Check the voltage of vehicle’s battery.
Disc playback sound is wavering.
• Moisture condensation in the disc unit.
- Allow enough time for the condensation to evaporate (about 1
hour).
Disc insertion not possible.
• A disc is already in the DVD player.
- Eject the disc and remove it.
• The disc is being improperly inserted.
- Re-insert the disc following the instructions in the "Loading
and Unloading Discs" section.
Unable to fast forward or reverse the disc.
• The disc has been damaged.
- Eject the disc and discard it; using a damaged disc in your
unit can cause damage to the mechanism.
Disc playback sound skips due to vibration.
• Improper mounting of the unit.
- Securely re-mount the unit.
• The disc is very dirty.
- Clean the disc.
• The disc has scratches.
- Change the disc.
• The pick-up lens is dirty.
- Do not use a commercial available lens cleaner disc.
Consult your nearest ALPINE dealer.
Disc playback sound skips without vibration.
• Dirty or scratched disc.
- Clean the disc; damaged disc should be replaced.
CD-R/CD-RW playback not possible.
• Close session (finalization) has not been performed.
- Perform finalization and attempt playback again.
Error displays
• Mechanical error
- Press . After the error indication disappears, insert the disc
again. If the above-mentioned solution does not solve the
problem, consult your nearest ALPINE dealer.
Unit does not operate.
• Monitor's power is not turned on.
- Turn on the monitor's power.
• Condensation
- Wait a while (about 1 hour) for the condensation to dry.
No picture is produced.
• Monitor's mode is not switched to the mode you want to see.
- Switch to the mode you want to see.
• Monitor's parking brake cord is not connected.
- Connect the monitor's parking brake cord and set the parking
brake. (For details, refer to the monitor's instructions.)
• Monitor's parking brake is not set.
- Connect the monitor's parking brake cord and set the parking
brake. (For details, refer to the monitor's instructions.)
Playback does not start.
• Disc is loaded upside-down.
- Check the disc and load it with the labeled side facing
upward.
• The disc is dirty.
- Clean the disc.
• A disc not able to playback with this unit is loaded.
- Check if the disc is able to be played back.
• Parental lock is set.
- Cancel the parental lock or change the rating level.
• Setup menu is displayed.
- Press SETUP to turn the menu off.
Picture is unclear or noisy.
• Disc is being fast-forwarded or fast-reversed.
- The picture may be unclear, but this is normal.
• Vehicle's battery power is weak.
- Check the battery power and wiring.
(The unit may malfunction if the battery power is under 11
volts with a load applied.)
• Monitor's fluorescent tube is worn out.
- Replace the monitor's fluorescent tube.
Image stops sometimes.
• Disc is scratched.
- Replace with a non-scratched disc.
No picture display.
• Brightness control is set for minimum brightness control.
- Adjust the brightness.
• Incorrect setting of the mode.
- Switch to the correct mode.
- Check the connection to the source unit.
- Check the power of the source unit.
• Incorrect or open connection with the Monitor, AV interface
unit.
- Check the connection and remedy.
Picture color is poor.
• Brightness/Color/Tint/Contrast/Sharpness control are not set to
the proper positions.
- Check each control.
Spots or dotted lines/stripes appear.
• Caused by neon signs, high-voltage power lines, CB
transmitter, other vehicle’s ignition plugs, etc.
- Change the location of your vehicle.
Unit does not operate.
• Monitor’s power is not turned on.
- Turn on the monitor’s power.
Due to continuous product improvement, specifications and
design are subject to change without notice.
32-EN
Book_PKG-2000P.indb
32
4/8/06
2:55:38 AM
System Indication
LOADING ERROR
DISC ERROR
• Mechanism error.
1) Press and eject the disc.
If the disc does not eject, press and hold for at least 3
seconds and eject the disc.
If the disc still does not eject, consult your Alpine dealer.
2) When the error indication remains after ejecting, press
again.
If the error indication still does not turn off after pressing
a few times, consult your Alpine dealer.
• The temperature in the car is too low.
- Raise the temperature in the car to normal temperature.
EJECT ERROR
• Mechanism error.
1) Press and eject the disc.
If the disc does not eject, press and hold for at least 3
seconds and eject the disc.
If the disc still does not eject, consult your Alpine dealer.
2) When the error indication remains after ejecting, press
again.
If the error indication still does not turn off after pressing
a few times, consult your Alpine dealer.
NO DISC
VIDEO SIGNAL SYSTEM IS
NOT CORRECT
• No disc is inserted.
- Insert a disc.
• Although a disc is inserted, "NO DISC" is displayed and the
unit does not start to play or eject the disc.
- To remove the disc, press and hold for at least 3 seconds.
• PAL disc is loaded.
- Load an NTSC disc.
• Remote control operation is not possible.
- For some discs or playing modes, certain operations are not
possible. This is not a malfunction.
REGIONAL CODE
VIOLATION
• Disc does not match regional code number.
- Load a disc that matches the regional code number.
HI-TEMP
• Protective circuit is activated at high temperature.
- The indicator will disappear when the temperature returns to
within operation range.
- Leave the power OFF until the temperature decreases and
then turn the power ON again.
33-EN
Book_PKG-2000P.indb
33
4/8/06
2:55:39 AM
Accessories
Specifications
Check accessory parts.
Video Display System NTSC/PAL Compatibility
AV Connector 1
AV Connector 2
Power Connector
DISPLAY SCREEN
Size
Width
Height
Aspect Ratio
Type
X1
RUE-4159 Universal
Remote Control
X1
SHS-N100 Single
Source Wireless IR
Headphone
X1
Installation Bracket*1
System
Number of Elements
Effective Number of
Elements
Back Light
10.2”
221mm (8.70”)
132mm (5.20”)
16:9
Transparent type TN
Liquid Crystal Display
TFT-LCD, Active Matrix
800(W) x 480(H) x 3
1.152M pixels (VGA)
99.9% or more
Cold Cathode Fluorescent
Lamp
GENERAL
Operating Voltage
X1
X1
Screws (for
Installation Bracket)
Trim Ring*2
X1
Power Consumption
Screws (for Trim Ring)
Video Input
Audio Input
IR Transmitter
FM Modulator
X1
X4
FM Switching Box
AAA Battery
X6
Document
Operating Temperature
10 – 16 V DC
(Typical: 12V)
2.35A (MAX)
1.60A (TYP)
140mA (Stand by)
1.0V p-p 75ohm
2.0V rms (max)
CH A: 2.3MHz / 2.8MHz
CH B: 3.2 MHz / 3.8MHz
8.1MHz - 92.1MHz
PLL Frequency
Synthesizer
-4 ˚F to +158 ˚F (-20 ˚C
to + 70 ˚C)
MONITOR
X4
X1
X1
Width
Depth
Height
Weight
305 mm (12.01”)
305 mm (12.01”)
52 mm (2.05”)
2.27Kg (5.0lbs)
Built-in DVD Overhead Monitor
ACCESSORIES
Weight
1.22Kg (2.7lbs)
CAUTION
CAUTION-Laser radiation when open, DO NOT STARE INTO BEAM
(Bottom side of player)
X1
Installation of Bracket and Trim Ring
x4
*1 Installation Bracket is used to stabilize the monitor at the time
of installing the monitor. Ask ALPINE dealer for detail.
*2 Trim Ring is used to make the monitor suitable to your vehicles
x6
ceiling shape at the time of installing the monitor. Ask ALPINE
dealer for detail.
34-EN
Book_PKG-2000P.indb
34
4/8/06
2:55:41 AM