1
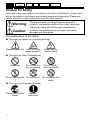
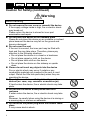
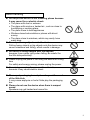
Digital Signage Monitor Sign Show 7POP Operation Manual Thank you for your purchase Before using this device, please make sure the instructions has been read and understood especially the “Safety” chapter. Please keep this manual in a good condition for future reference. Device number is very important for quality management. Please check the device number when you buy this device. Preface Getting start Set-up Install Adjustment Getting Help Preface Table of contents Preface…………………………..2 Table of contents...........................2 Caution for Safety........... ..............4 Caution for correct usage ...........12 Terminology.................................14 The process of using the device.16 Getting start……………………17 Step 1: Accessories and tools ....17 Step 2: Insert the SD memory car ......................................... ...18 Step 3: Connect device with AC adapter........................................19 Step 4: Format the SD memory card.............................................20 Step 5: To update the configure file and content files..........................23 Set-up…………………………..26 Before the set-up............ ............26 Step9: Set the replay time .......... 43 To replay the contents at the same time (timer setting)............ 43 To replay on the due day of every week ........................................... 47 To replay on the due day of every month ......................................... 51 To replay on the due period ....... 55 Install…………………………...59 Step 10: To install the device onto the site............................ ............ 59 To install the device.................... 59 To paste the sticker of “ replay from start” to the device .............60 Adjustment……………………..61 To adjust the brightness and volume............................ ............ 61 To adjust the brightness............. 61 To adjust the volume .................. 62 Buttons used for set-up ..............26 The outlook of selecting item......26 To make sure the setting content of all content files ........................27 To use the button of “replay from start”................................ ........... 63 To turn on/ off the power by manual........................................ 64 Setting contents and items .........29 Constitution of setting screen.....31 Step 6: Set up the network and online access.................. ............32 To turn on the power by manual 64 To turn off the power by manual 64 To access the device via a web page............................................35 To upload contents using auto download ....................................38 Step 7: Set the present time and date.............................................39 Step 8: Select the replaying contents (set to replay contents)41 2 To edit the content files............... 65 To change batteries for clock button.......................................... 66 Packaging................................... 67 Getting Help……………………68 Troubleshooting.............. ............ 68 Outlook of the operational manual Outlook of symbols in the manual. Caution: watch out for the operation. Memo: limits of function and usage are written as reference. About the contents of this manual. z This is a copyrighted material. Any use of this copy without proper permission is forbidden. z The devices from other companies mentioned in the manual are trademark or logo of other companies. The marks such as TM, ®, © are omitted in the manual. z Windows and Windows Media are trademarks registered for Microsoft Corporation and in America. z Any change on design, condition and other contents may be made without public announcement. Show the reference page or reference item 3 Preface Getting start Set-up Install Adjustment Getting Help Caution for Safety There are many signs written in the manual or shown in the device. These signs are for the safety of customers, surrounding people and properties. Please pay careful attention to these signs before you read this manual. Warning: This signs means: should this sign be ignored or mistaken, the possible death or injury may take place. Caution: This signs means: should this sign be ignored or mistaken, the possible injury to people or property damages may take place. The explanation of the signs: z The signs for watch-out (including warning): General watch-out Caution for the hands caught-in Watch out the electric shock z The signs for “don’t”(forbiddance) Watch-out Do not use it at the wet places Do not touch it with wet hands Do not decompose it Do not touch it Do not soak it into water z The signs for compulsory (forced) Please plug off the power 4 General instruction Warning When abnormality takes place If the following situations occur, please do not use the device because fire or electric shock may take place. • When smoke or strange smell occurs. • When videos or the sounds can’t be played. • When water or objects are get inside the device. • When the cabinet is dropped and damaged. • When the power cord is damaged, such as cord line exposure or disconnection. As the above situations take place, please immediately turn off the power and unplug the plug. If the smoke occurs, please stop all actions and take the device back to the stores. Please do not repair the device by yourself, as it might be dangerous. About the power Please do not plug into the DC power on ships or boats because it may cause fire and electric shock. Please do not plug into the DC24V power at truck or bus because it may cause fire and electric shock. The total voltage can’t exceed the capacity that is displayed at AC outlet because it may cause fire and electric shock. The voltage provided by AC outlet of this device is limited. 5 Preface Getting start Set-up Install Adjustment Getting Help Caution for Safety (continued) Warning About handling Do not remove the rear cover or remodel the device If the supply voltage inside is high, fire or electric shock may break out. Please return the device to stores for inner part examination and repair. Do not place this device on an unstable place Please do not place this device on an unstable or inclined place because the device may fall on the ground and become damaged. Do not cover the vent If the vent is covered, the inner part may be filled with heat and fire may take place. Therefore, please pay attention to the following situations. • Do not place the device in a closet or a bookcase • Do not place carpet or cloth on the device • Do not place table cloth on the device • Do not place the device on the sideway or upside down. Please do not insert any objects into the device Fire or electric shock may occur if metals or any combustible materials are inserted in the vent or card output. Watch the little kids particularly when they are operating the device. Do not place container with liquid inside near the devices (ex: vase, cup, cosmetic or medicine jar) If liquid enters the device, fire or electric shock may take place. Do not use the device at wet places such as a restroom If water enters the device, fire or electric shock may take place. Moreover, be careful when using the device at a raining or a snowing day or at shore or waterside. Do not touch the power plug when the thunder takes place It may cause electric shock. 6 About power cord Do not use the power cord with devices other than Sign Show 7POP Do not use the power cord with devices other than Sign Show 7POP, because it may cause fire or electric shock. Do not damage the electric cord Do not damage the power cord, because it may cause fire or electric shock. • Do not modify the power cord. • Do not twist, distort or pull the power cord. • Do not put the device or heavy objects over the power cord. • Do not put the power cord close to thermal objects. Do not let dust or metals get into the power plug or outlet plug. Fire or electric shock may take place because of heat or short circuit. Please unplug the outlet plug and dry it with cloth every half-year. About button battery Please put the button battery at the place beyond the reach of little kids. Do not allow kids to take out battery from devices (or battery charger) when the devices are used. If kids mistakenly eat the button battery, please see a doctor immediately. 7 Preface Getting start Set-up Install Adjustment Getting Help Caution for Safety (continued) Caution! About power cord, power plug and AC adapter Please use the exclusive AC adapter, or fire or electric shock may break out. Please disconnect all links with machines and then connect the power plug, or fire or electric shock may break out. Moreover, please connect AC adapter to the device with DC plug, and then plug into outlet of wall. Please do not pull the cord of the power plug If the power cord is dragged or pulled, the cord may be damaged and cause fire and electric shock. Please hold the plug and pull it. Please do not plug power into outlet which has slack, because heat may take place and then the fire occurs. Go to selling stores or hardware stores to exchange the outlet. When pulling out the power cord, please pull it from the outlet of the wall, or it may cause electric shock. Please pull the power cord from the outlet of the wall. When intended to pull out the power cord, please pull the plug. Please pull the DC plug after pulling out the power plug. Make sure to pull out the power plug before pulling out the DC plug. 8 About handling Do not put the device in the following places because it may cause fire or electric shock. • The place with dust or wetness • The place with smoke or heated air , such as close to humidifying or cooking place. • The place close to heat appliances • Window-closed automobiles or places with direct sunray. • The place close to windows, which may easily have water drop. Do not put heavy objects onto the device Putting heavy objects or big objects onto the device may cause unbalance and falling, which results in damage. Do not sit or being hanged over the devices, because it can cause injury when falling. Be careful for the little kids particularly. Please unplug the power if not using the device for a long time For safety and energy saving, please unplug the power. Do not plug or unplug the power with wet hands, because it may cause electric shock Please put packaging box at places beyond the reach of the little kids It may cause asphyxia or hurts if kids play the packaging box Please do not use the device when there is warped sound Speakers may get heated and cause fire. 9 Preface Getting start Set-up Install Adjustment Getting Help Caution for Safety (continued) Caution! About moving Do not move this device when there are objects onto it. If the objects fall down, people may get hurt. When moving the device, please unplug the power or connecting cord. If moving the device without unplug, fire or electric shock may take place. About maintenance Please take the device to stores for inner part cleaning once for every 2 to3 years If the device is used without cleaning the dust, the fire may take place. In particular, great effects can be seen when cleaning out the dust before plum rain period. When maintaining the device, please unplug the power, or it may cause electric shock. 10 About falling-proofing In order to prevent falling, please take the following measures People may get hurt because of falling caused by earthquake. Please make use of the stand hole at back side and fix the device to the wall or pillar firmly. Make sure to choose the firm place. * Please make good use of marketing devices, such as wire or screws. About volume Please turn on the power after turn down the volume (a case of mechanized volume) If the volume keeps high, it may cause sudden sound, which can lead to listening injury. Before turn off the power, please turn down the volume (a case of digital volume) If the volume keeps high, turning on the power may cause sudden sound, which can lead to listening injury. About button battery Please do not dump the used batteries If the battery is dumped without insulation or dumped together with other metal with electric conductivity, fire or fracture may take place. When dumping the battery, please paste tape of insulation to two terminals or one terminal, and then dump it as incombustible trash. 11 Preface Getting start Set-up Install Adjustment Getting Help Caution for correct usage Places for safekeeping or use of device Please do not put the device at the following places Because it may cause malfunction • Place beyond the permission operating temperature (0℃~40℃) • Place beyond the permission operating humidity (10%~80%) • Place with high magnetic force such as transformer or motor • Place close to transceiver or cell phones with high electromagnetic wave. • Place with a lot of dust • Place with violent shaking • Place close to windows which easily have water drop • Place with radioactive rays, X rays or lethal gas About security function The security function can set up for the purpose of mistake-proof. For more detailed, please ask the stores or the contact windows which are written on back cover. This function is based on the standard of class A of VCCI. The function may cause electromagnetic wave when using at home. In this case, It is demanded so that users take appropriate measures 12 About installing Please install the device close to the outlet Please install the device close to the outlet so that it is easier to plug or unplug the power. If the power is plugged, the power becomes “on” or “standby.” The power can not be completely turned off only by button. Please leave some space from wall or other machinery when installing the device. The inner part will be filled with heat , which may cause the fire. Please take notice for the following situations. • Please leave more than 5cm from the wall. • Please leave some space between the device and other machinery. • When installing the device in the shelter, please leave 5 cm from upper and rear side respectively. About handling Do not excessively use the device The reciprocal heat or sounds can cause malfunction or damages, which can lead to fire. Do not put any containers with water, such as vase or cup because it may cause fire or electric shock Do not insert any object inside because it may cause fire or electric shock. Please use the devices at place with proper light in order to protect the eyes. If looking at the screen for a long time in a place with improper light, it may cause eye tiredness. Do not use the device as the screen shakes due to the surrounding or installment situation because it may cause falling of eyesight. Please turn off the power when inserting the memory card. Please make sure to turn off the power when inserting SD memory card into the device The warranty doesn’t cover the malfunction caused by memory card and contents. Moreover, any copyright about contents is not the responsibility of out company. Do not paste any label or sheet onto the memory card because it may cause damage to the devices About energy saving Please unplug the power for safety and energy saving if not using the device for a while. About maintenance Please turn off the power and wipe the dirt with soft cloth. When the device gets serious dirt, please use dry cloth with neural and diluted cleanser to wipe it. About moving Please unplug the electric cord when moving the device Please make sure to turn off the power and unplug the power from electric out when moving the device. If the cord is damaged, fire or electric shock may occur. About power cord, AC adapter The accessory’s AC adapter can not be used for the device other than SIGN SHOW 7POP. Do not put heavy object over electric cord. Do not put the cord under the device. If the cord is damaged, it may cause fire and electric shock. Use only the provided AC adapter attachment to the device. If the voltage is abnormal, it may cause fire or electric shock. About MP3 file The device can not be used for DRM files (with download license). Once using DRM file in the device, un expectation malfunction may take place. 13 Preface Getting start Set-up Install Adjustment Getting Help Terminology <Front View> 3 4 2 1 <Base View with cover removed> 5 6 7 8 <Rear View> 9 10 11 12 13 14 Remove the base cover for access. 14 Speakers The sound can be played from SD memory card Power light/ timer light The light will be on for the following situation: Power on Green light Timer set on for Orange light operation Timer set on for stand by Red light Set button/ “replay from start” button Press this button to confirm settings. Press this button to replay contents in SD memory card. ( to see page 55) 7-type TFT LCD panel For displaying the menu and image files, which are saved at SD memory card. LAN Port For connecting to networks. SD card slot To insert the SD memory card. ( to see page 19) USB terminal To connect with USB. DC input terminal To connect with attached AC adapter. ( to see page 20) Attention light To light up the rear piece of the device. The battery cover Remove battery cover at the following situation: To alter the set-up by button To change the batteries UButton To set up the menu, it is used moving the cursor up ( to see page 25) To show the picture again, it is used to make it brighter. ( to see page 60) VButton To set up the menu, it is used for moving the cursor below ( to see page 25) To show the picture again, it is used to make it darker. ( to see page 60) YButton To set up the menu, it is used to moving the cursor right. ( to see page 25) To show the picture again, it is used to make the volume louder. ( to see page 60) ZButton To set up the menu, it is used for moving of the cursor left ( to see page 25) To show the picture again, it is used to make the volume lower. ( to see page 60) 15 Preface Getting start Set-up Install Adjustment Getting Help The process of using the device Step 1 Please prepare the accessories and tools you need --------------------------------------------------- page 17 T Preparing Step 2 Please insert the SD memory card into the device ----------------------------------------------------- page 18 T Step 3 Please connect the AC adapter with the device - page 19 T Step 4 Please format the SD memory card----------------- page 20 T Step 5 Please place content files in the USB drive ------- page 23 T Step 6 Please set up the network and online access ---- page 31 T Step 7 Setting up T Step 8 Please select the content files to be displayed --- page 40 T Step 9 T Installing Step 10 Completion 16 Please set up the present time ----------------------- page 38 Please set up the replaying time • • • • Replay at the same time of every day------- page 42 Replay at the same day of every week ----- page 46 Replay at the same day of every month ---- page 50 Replay for the fixed period --------------------- page 54 Please install the device ------------------------------- page 58 Getting start Step 1: Accessories and tools Accessories included with the device Necessaries for Must read it Quick Start Guide Quick Start Guide * 1 AC Adapter and power cord * 1 Necessaries for installing sticker of “replay from start” Simple stand*1 screws packaged with stand(M3)*2 Things to prepare Content files SD memory card CD-R ( UM, Layout editor ) sticker of “replay from start”*1 Tool USB memory with content files Screwdriver Memo: • USB memory has to save the contents which are made by CD-R. If there isn’t any file, it can’t be transmitted into SD memory card. • If the accessory is not enough, please ask the selling stores and sorry for the inconvenience. 17 Preface Set-up Getting start Install Adjustment Getting Help Step 2: Insert the SD memory card • Please insert the SD memory card into the device • Please make sure to unplug the power before insert the SD memory ( 56 page) 1. Take off the rear cover: remove the screws by using the screwdriver Screwdriver Screws attached on Memo: • When taking out the SD memory card, please make sure to unplug the power and push the memory card to the depth. SD memory card Back cover * When taking out the SD memory card, please must turn off the power * When the power is off, the power light will become red or off. Power light upside Memo: • The screws have a function of missing-proof, please do not take them off the rear cover 2. Insert the SD memory card into the device Please put the label side of SD memory card as down side Please insert into SD card slot SD card slot SD memory card 18 Step 3: Connect device with AC adapter • When connecting device with AC adapter, the power will be on • When plugging the DC plug into the DC terminals, please turn the DC plug sideways as the following picture. Please insert into AC outlet DC terminal DC plug 19 Preface Getting start Set-up Install Adjustment Getting Help Step 4: Format the SD memory card Before using your SD card for the first time, a format may be required. Notice: • Formatting an used SD memory card will erase all the saved files. • The SD memory card will be unusable by computers if formatting is done on this device. 1. To show the menu screen Turn on the power, and then press the right button and left button simultaneously for 2 seconds. Buttons used for formatting • Up, down, left, right button • Button for “replay from start”( use “set button” for the following mention) Up button Down button Right button Left button <Menu screen> 2. To display the system screen Select the “system” by using the up or down button, and then press the set button. <state of taking off the battery cell Set button < System screen> <The front of the device > 20 Format the SD memory card (continued) 3. To display the capacity of 5. To practice the formatting memory Select “memory capacity” by up or down button, and then press the set button. Select the “yes” by up or down button, and then press the set button. ⇒ Start to format the SD memory card. <The beginning of the format screen> <Memory capacity screen> T 4. To display the formatting screen Select the “initialization” by up or down button, and then press the set button. <The end of the formatting screen> < Format screen> Memo: • The time of formatting depends on the type of memory cards. (capacity or speed) 21 Preface Set-up Getting start Install Adjustment 6. Return to the menu screen Please select “ return” after completing formatting and then press the set button. ⇒ In the screen of memory card capacity, the capacity of formatted SD memory card will display. Getting Help Memo: • When taking out the SD memory card, please make sure to turn off the power and then push the SD memory card to the depth. SD memory card SD memory card * When taking out the SD memory card, please make sure to plug off the power adapter of the device. <Memory card capacity screen> T ⇒ Select the “back” and then press the set button. ⇒Return to the menu. 22 power light Step 5: To update the configure file and content files To transmit the content file that is saved in USB memory to SD memory card. <To speculate the transmitting time from USB memory> Content files Transmitted time 10 MB About 10 seconds 50 MB About 50 seconds 100 MB About 1 minute and 40 seconds 250 MB About 4 minutes and 10 seconds 500 MB About 8 minutes and 20 seconds * This is the speculation for transmitting time. The time depends on the type of USB memory and SB memory card. Set button Notice: • If the content files in USB memory are transmitted, the content file saved in SD memory card will be erased. Button for file replacement 23 Preface Getting start Set-up Install Adjustment 1. To turn on the power Please make sure that the power light is green or orange color. Power light 2. To insert the USB memory into the USB terminal Please take off the base cover of terminal, and insert the USB memory into USB terminal. * Please leave the OSD menu first. USB terminal USB memory 24 Getting Help The message will show “A CONFIGURATION FILE IS FOUND!” Use the same steps as you would in updating content files to update the configuration files. ⇒ The message will be shown as the following picture. replayed, the content files can still be replaced. • If the replaying time has been set beforehand for the transmitted contents , please replay it following the instruction of replaying time setting. Memo: • The message shown as the picture below means the failure of transmission. <File replacement screen> Memo: • If the message of “must format the SD card” displays, please format the SD. memory card. ( page 21) 3. To transmit the content files of USB memory After pressing the set button for 3 seconds, the saved content files in SD memory card will be erased and then USB memory’s content files will be transmitted. ⇒ “Upload complete” means the completion of transmission. After the transmission, the content files in SD memory will be replayed automatically. Notice: • During transmission, do not take out the USB memory from the device. Memo: • To cancel the transmission, please press the set button for fewer seconds. • Even though the contents are <Screen1 of file replacement error> ⇒ Please press set button and practice the process from second step again. <Screen2 of file replacement error> ⇒ Please press set button and then change the SD memory card with enough capacity. 4. Take off the USB memory Please take out the USB memory from USB terminal and then put back the terminal cover. 25 Preface Getting start Set-up Install Adjustment Getting Help Before the set-up Set-up Buttons used for set-up The outlook of selecting item Please use the 4 buttons inside the cover of rear operation button. To select the menu The selected item displays in the word of white color. Up button Down button Right button Left button <state of taking off the battery cell cover> Set button <example: the state of selecting the day /time> The detail setting of menu [To select the item] When the selected items are shown in the word of white color, please press the button of up, down, left or right. Shown in the word of white color <The front of the device > < The state of selecting the item> [To change the setting value] When the selected items are shown in the word of blue color, please press the button of up or down. Shown in the word of blue color <The state of changing the setting value> 26 To make sure the setting content of all content files Make sure the setting content of replaying day or time of content files and then write the contents in the following table. Timer set-up Schedule set-up Timer set-up (Set [mode] as “loop replay” (Set [timer set-up] as “on”) Finishing Replaying Stopping time Starting time Name of content files time selection Schedule Set-up Schedule Set-up Replaying set-up Replay day Repetition (day of week/ Starting Finishing Name of content Replaying Volume Set-up day of month/ time time files selection period) * Please make copy of these tables to use them. 27 Preface Getting start Setting screen of OSD System Day/time setting ( to see page 38) Set-up Install Adjustment Getting Help Setting contents Assure the The model, operation time, firmware version system can be assured * setting can't be practiced Memory Make sure the space of SD memory card, capacity capacity, range, or to initialize the SD card Renew *Practice only by service man firmware Back to the Back to the original setting original setting Day Set the present day, year, month, day) Setting value (default) year: 2007~2032 month: 01~12 day: 01~31 Time Set the present time (hour: minutes: seconds) hour: 00~23 minute: 00~59 second: 00~59 NTP GMT NTP: on/off (For time adjustments) GMT: -12~+14 Network Network Set the Network mode (passive, CMS, active) Mode Set Static IP/ DHCP Set IP address Set Mask Set Gateway Set DNS1 Set DNS2 Set Mac Address Web Page Web page Set web site address. Web IP address setup Set Login Login: off Set User name Username: admin Auto Download Set auto download Periodically check Download setup Daily check Timer setting Timer Select to reply at the same time (setting by On, Off ( to see setting timer) page 42) Starting Set the replay time when the timer setting is hour: 00~23 time "on" minute: 00~59 Finishing Set the finishing time when the timer setting second: 00~59 start: (00:00:00) time is" on" finish:(23:59:59) Stopping Set the stopping day when the timer is " on" Mon. Tue. Wed. day Thu. Fri. Sat. Sun, None 28 Setting contents and items Mode Schedule setting ( to see page 42) Loop replay Schedule replay Replaying Replay selection Don't replay Replay Volume time Repetition setting of setting all content files (select the name of content files The replayable content ( to be set loop replay, [replay] at replaying selection)can schedule replay be repeatedly replayed at the setting time of [timer setting] The replayable content ( to be set [replay] at replaying selection) can be replayed at the setting time. Replay the content Enable, Disable Don't replay the content setting the volume when replay Mute, 01~10 Every week: Weekly, Monthly repetition takes place at the weekday with replaying on ( with symbol “*”at [replaying due day]) Every month: repetition takes place at the day with replaying on ( with symbol “*”at [replaying due day]) off: Set up the replaying period (starting day and finishing day) 29 Preface Getting start Set-up Install Adjustment Setting screen Setting contents Schedule setting Starting time Finishing time Starting day Finishing day Replaying due day Setting the replay time of content files( to select the name of content files) Getting Help Setting the replay time Setting the finishing time Set up when the repetition setting year: 2007~2032 is on month: 01~12 day: 01~31 To set [repetition setting] as “Weekly”: Repetition occurs at the setting day with “on” (* symbol) To set [repetition setting] as “Monthly”: Repetition occurs at the setting day with “on” (* symbol) LED On/Off LED light On The LED turns on setting Off The LED turns off Blinking The LED flashes Other setting Button for To set the function of button of “RETURN SW” “replay from start” Japanese The screen displays in Japanese Setting language language of menu English The screen displays in English language Simplified The screen displays in Simplified Chinese Chinese language Traditional The screen displays in Traditional Chinese Chinese language Completion Finish the setting 30 Setting value (default) hour: 00~23 minute: 00~59 second: 00~59 Monday ~ Sunday 01~31 on, off, blinking on, off(off) Simplified Chinese, Traditional Chinese, Japanese, English Constitution of setting screen System setting screen Date/time setting screen of d t /ti Network setting screen Menu screen Auto download screen (Network Mode: Active) Web page setting screen (Network Mode: Passive) Timer setting screen Schedule setting screen LED On/Off setting screen Others setting screen Exit 31 Preface Getting start Set-up Install Adjustment Getting Help Step 6: Set up the network and online access • Set up the network • Set up the web page • Set up the auto download Buttons used in network settings 1. To display the menu screen Please press the left and right button simultaneously for 2 seconds. Up button Down button Right button Left button <state of taking off the battery cell cover> Set button < Menu screen> 2. To display the network setting <The front of the device > screen Select “Network” using the up or down button and press the set button. ⇒ The following screen displays. [The screen of setting network] Setting item Example Network Mode Passive, Active IP 10.1.3.101 Mask 255.255.255.0 Gateway 10.1.3.254 DNS1 192.168.1.168 DNS2 192.168.1.167 <Screen of setting network> 32 3. To set the network mode Select “Network Mode” and press the set button. ⇒ The selected item turns from white to blue. Press the left or right button to toggle “Active” or “Passive”. • Selecting “Active” will allow you to use the “Auto Download” function and upload contents to your device. • Selecting “Passive” will allow you to use the “Web page” function and have access to the device via a web page. 5. To set the IP, mask, gateway, dns1, dns2 Select the item by left or right button and then press the set button. ⇒ The selected item turns from white to blue. T Change the setting value by using up or down button and then press the set button. ⇒ The selected item turns from blue to white. T After completing the network setting, please press the down button to select “Save”. 4. To set the IP assignment Select “IP assignment” and press the set button. ⇒ The selected item turns from white to blue. Press the left or right button to toggle “Static IP” and “DHCP”. 33 Preface Getting start Set-up Install Adjustment Getting Help 6. To set the web page Web page settings become available if “Passive” Network Mode is selected in Network settings. Select “Web page” using the up or down button and press the set button. ⇒ The following screen displays. 7. To set the auto download Auto download settings become available if “Active” Network Mode is selected in the Network settings OSD menu. Select “Auto download” using the up or down button and press the set button. ⇒ The following screen displays. <Web page settings screen> <Auto download settings screen> Select the item by left or right button and then press the set button. ⇒ The selected item turns from white to blue. Change the setting value by using up or down button and then press the set button. • • • Selecting “On” in “Login” will turn on the web page login feature. Settings values in “Web site” and “UserName” can not be changed. The default password is “8475” and the Username must be “admin”. After completing the web page setting, please press the down button to select “Save”. Select the item by left or right button and then press the set button. ⇒ The selected item turns from white to blue. To display the “*” symbol for enabling the setting, use the up or down button and then press the set button. Change the setting value by using up or down button and then press the set button. After completing the web page setting, please press the down button to select “Save”. Auto download function needs the “I207LN.cfg” file to set its “URL”, “User Name” and other necessary parameters. Use the “CFE” Tool to create the file 34 Set up the network and online access (continued) To access the device via a web page Connect your PC and networks to your device to use this function. and transfer the file to the device using a USB drive. File will be found after you restart the device. 1. To display the menu screen on the web Web access becomes available if “Passive” Network Mode is selected in Network settings. Open a web browser on your PC and enter the IP address. IP address information can be viewed from the Web page settings screen. If prompted for username and password, use the username “admin” to login. 2. To set up the system menu Select the “System” tab on top to view the system menu. Select “Firmware update” to update the device firmware. Select “SD Card Format” to format the SD card in your device. Select “Load Default” to load factory settings and reset all settings in your device. ⇒ The following screen displays. • You can change the display language by selecting the “Language” drop down menu from the upper right corner. 35 Preface Getting start Set-up Install Adjustment Getting Help 3. To set up the play menu 4. To set the other menu Play menu allows you to view your schedule edit, take snap shot of your contents, and upload files to the device. Other menu allows you to enable or disable time setting, LED, return switch, and login authentication. Select the “Play” tab on top to open the drop down menu. ⇒ The following screen displays. Select the “Other” tab on top to view the other menu. ⇒ The following screen displays. Select “Schedule Edit” to view your scheduled programs. Select “Snapshot” to take a snapshot of the content currently displaying. Select “Content Upload” to upload files from your PC to the SD card inside the device. • • 36 To upload a file, select “Browse” to locate your file and select “Upload” to upload the file. Files must be in .zip format, which is compressed by the “Content Packer” tool, in order to be uploaded. File name must not include any space character. Select the “Timer”, “LED Enable”, “Return Switch”, and “Login Authentication” to open the drop down menu and select “On” to enable or “Off” to disable. Select “Holiday” to open the drop down menu and select “Sun.”, “Mon.”, “Tue.”, “Wed.”, “Thu.”, “Fri.”, “Sat.”, or “None” as the holiday. 5. To set up the network menu 6. To view the system log Network menu allows you to set up your network settings. System log allows you to view information on OSD, Play, System, and Other. Select the “Network” tab on top to view the network menu. ⇒ The following screen displays. Select the “Log” tab on top to view the system log. ⇒ The following screen displays. To set up the address setting, select “Static” or “DHCP” from the “Network Type” drop down menu and enter the values in “IP Address”, “Network Mask” or “Gateway”. Select “Save” when the set up is complete. 37 Preface Getting start Set-up Install Adjustment Getting Help Set up the network and online access (continued) To upload contents using auto download Connect your PC and networks to your device to use this function. An ftp site must be set up first before using this function. Auto download settings become available if “Active” Network Mode is selected in Network settings. To upload contents to your device from ftp, use a content packer to create a zip file, such as “content.zip” (please make sure that the name of zip file must not include any space character.) and place it in the ftp subfolder, such as “Demo”. Set up the time in “Periodically check” or “Daily check” and the device will download the file from the ftp site at your selected time. Note: When downloading contents using Auto download or Web page, the files are not moved to the device until the download is complete. Please leave enough disk space for your new contents to prevent downloads from failing. 38 Step 7: Set the present time and date • Set the present time and day • Must set the present time and day before setting replaying time • Button for setting Button for setting 1. To display the menu screen Please press the left and right button simultaneously for 2 seconds. Up button Down button Right button Left button <state of taking off the battery cell cover> Set button < Menu screen> 2. To display the setting screen for <The front of the device > [The screen of setting day and time] Setting item Example Day (year/month/day) 2008/3/20 Time (hour: minute: 10:00:00 second) day and time Select the “date/time” by up or down button and then press the set button. ⇒ When the screen of setting day/time displays, the item of year will be shown in the word of white color. year month day <Screen of setting date/time> hour second minute 39 Preface Getting start Set-up Install Adjustment Getting Help 3. To set the date (year/month/ day) 4. To set the time ( hour: minute: Select the item by using the left or right button, and then press the set button. ⇒ Setting items display in the word of blue color. second) Select the item by left or right button and then press the set button. ⇒ Setting items display in the word of blue color. T Change the setting value by using up or down button and then press the set button. ⇒ Setting value display in the word of white color. T After complete the time setting, please press the down button to saving. ⇒ “Save” displays in the word of white color. 5. To save the setting “save” is used to confirm the selecting items and then press the button. ⇒ Back to menu screen. Shown in the word of blue color T Change the setting value by using up or down button and then press the set button. ⇒ Setting value displays in the word of white color. Shown in the word of white color T After completing the date setting, please press the down button to the time setting. ⇒ Time items display in the word of white color. Memo: • If you don’t want to save and back to menu, please select the “back” and press set button. 40 Step 8: Select the replaying contents (set to replay contents) To replay or not to replay the saved contents in SD memory card Memo: • At original setting, it is set up as “replay.” Button for setting Up button Down button Right button Left button <state of taking off the battery cell cover> Set button Example To replay contents: Program 1, Program 2, Program 3 [Schedule setting screen] Setting item Content files (the name of content files in the SD memory card is shown) Replaying selection “replay”: replaying contents “not replay” : not replaying contents Setting example Program 1 Program 2 Program 3 Program 4 Program 5 Program 1: replay Program 2: replay Program 3: not replay Program 4: replay Program 5: not replay Contents file Replaying selection <The front of the device > < Schedule setting screen> 41 Preface Getting start Set-up Install Adjustment Getting Help 1. To display the menu Please press the left and right button simultaneously for 2 seconds. T Select the “ don’t replay” by using up or down button, and then press set button. ⇒ Replaying selection displays in the word of white color. <Menu scre1en> 2. To display schedule setting screen Select “schedule setting” by up or down button and then press set button. Select the “schedule setting” by up or down button and then press the set button. ⇒ When the screen of schedule setting display, the item of “mode” will display in the word of white color. <Screen of schedule setting> 3. To select to replay or no replay the content files Select the “replay” item of content file (Program 3) by using up, down or right button and then press the set button. ⇒ The replaying selection of content file (Program 3) displays in the word of blue color. T Select the replaying selection of content file (Program 5) by pressing the down button. ⇒ The replaying selection of content files (Program 5) displays in the words of blue color. T Select the “don’t replay” by using up or down button, and then press set button. ⇒ The replaying selection displays in the word of white color. Memo: • If there are more than 9 content files, please use “forward” or “back” to choose. The hidden content files display after pressing the set button. 4. Back to menu screen After complete the setting, please select “back” item by down button and press set button. 42 Step9: Set the replay time To replay the contents at the same time (timer setting) To replay the contents which are set to replay at “contents replaying setting”. Buttons for setting Selecting replay “replay”: replayed contents “not replay” : not replayed contents Up button Down button Right button Program 5 Program 1: replay Program 2: replay Program 3: not replay Program 4: replay Program 5: not replay Left button <state of taking off the battery cell cover> Set button < Timer setting screen> Content file <The front of the device > Example The repetition of replay the contents Program 1, Program 2, Program 4 in the order everyday (Monday to Friday) from 10 AM to 8 PM. [Timer setting screen] Setting item Timer setting Starting time Finishing time Stop day Replaying selection <Schedule setting screen> Example On ( forced) 10 AM 8 PM Saturday [schedule setting screen] Setting item mode Content files(content files saved in the SD memory card) Example Loop replay (forced) Program 1 Program 2 Program 3 Program 4 43 Preface Getting start Set-up Install Adjustment Getting Help 1. To display the menu screen 3. To set timer setting “on” Please press the left and right button simultaneously for 2 seconds. Make sure the selected setting values of [timer setting] and then press the set button. ⇒ To display in the word of blue color. Shown in the word of blue color < Menu screen> 2. To display the timer setting screen Select the [timer setting] by up or down button and then press the set button. ⇒ When the timer setting screen display, the setting value of “timer setting” displays in the word of white color. Select “on” by using up or down button and then press the set button. ⇒ To display in the word of white color. Shown in the word of white color (Next page to continue) < Timer setting screen > 44 Set the replay time (continued) To replay the contents at the same time (Timer setting) (continued) 4. To set the starting time( hour: 5. To set finishing time ( hour: minute: second) Make sure that the setting value of [timer setting] displays in the word of white color and then press down button. ⇒ Starting time displays in the word of white color. T Select the setting item (hour: minute: second) by using left or right button, and then press set button. ⇒ Selecting items display in the word of blue color. T Change the setting value by using the up or down button and then press set button. ⇒ To display in the word of white color. minute: second) Make sure that the starting time displays in the word of white color and then press down button. ⇒ Finishing time displays in the word of white color. T Select the setting item (hour: minute: second) by using left or right button, and then press set button. ⇒ Selecting items display in the word of blue color. T Change the setting value by using the up or down button and then press set button. ⇒ To display in the word of white color. 45 Preface Getting start Set-up Install Adjustment Getting Help 6. To set “ Saturday” as stopping 7. To set “ loop replay” [mode] day Make sure that the finishing time displays in the word of white color and then press down button. ⇒ The setting value of [stopping day] displays in the word of white color. T Please press the set button. ⇒ The setting value displays in the word of blue color. Select [schedule setting] and then press the set button. ⇒ Schedule setting screen displays. T Make sure to select [mode] and then press the set button. ⇒ To display in the word of blue color. T Select “loop replay” by using up or down button, and then press the set button. ⇒ To display in the word of white color. T Select [back] and then press the set button. ⇒ Complete the setting and back to menu screen. T Select “Saturday” by using the up or down button and then press set button. ⇒ The setting value displays in the word of white color. T Select “back” and then press the set button ⇒ Back to menu screen. 46 Set the replay time (continued) To replay on the due day of every week Set up the replaying day and time of content files. Example Replay the Program 1 from 11:30AM~1:00PM every Monday and Friday. [Schedule setting screen] Setting item [mode] Example Schedule replay(forced) Program 1 Program 2 Content files (content files saved in the SD memory card) Selecting replay Program 1: replay “replay”: replayed Program 2: not replay contents “not replay” : not replayed contents Content files Replaying selection < Schedule setting screen> [Content replay setting screen] Program 1 Volume Repetition setting Starting time Finishing time Replaying due day 10 Every week (forced) 11:30:00 13:00:00 Monday, Friday <Content replay setting screen> 47 Preface Getting start Set-up Install Adjustment Getting Help 1. To display the menu screen 4. To display the content replay Please press the left and right button simultaneously for 2 seconds. setting screen Select to content file (Program 1) which is set to replay by using down button and then press the set button. ⇒ Content replay setting screen displays and the setting values of [volume] display in the word of white color. < Menu screen> 2. To display the schedule setting screen Select the “schedule setting” by up or down button and then press the set button. ⇒ Schedule setting screen displays, and the setting value of [mode] displays in the word of white color. < Schedule setting screen> T <Content replay setting screen> < Schedule setting screen > 3. To set “schedule replay” [mode] Make sure that the selected setting values of [mode] display in the word of white color and then press the set button. ⇒ Setting value displays in the word of blue color. T Select “schedule replay” by using up or down button and then press the set button. ⇒ Setting value displays in the word of white color. 48 5. To set up [volume] Make sure that the setting value of [volume] displays in the word of white color and then press the set button. ⇒ Setting value displays in the word of blue color. T Set up the volume (example is “10”) by using up or down button and then press the set button. ⇒ Setting value displays in the word of white color. (Next page to continue on) Set the replay time (continued) To replay on the due day of every week 6. To set [repetition setting] as “ every week” Make sure that the setting value of [volume] displays in the word of white color and then press down button. ⇒ Select [repetition setting] and then the setting value displays in the word of white color. T Press the set button and the setting value can be changed. ⇒ Setting value displays in the word of blue color. T Select “every week” by using up or down button and then press the set button. ⇒ Setting value displays in the word of white color. ⇒ [ Replaying due day] displays on the screen 7. To set [starting time] ( hour: minute: second) Make sure that the setting value of [repetition setting] displays in the word of white color and then press down button. ⇒ Select starting time (hour) and the setting value displays in the word of white color. T Select the setting item (hour: minute: second) by using left or right button, and then press set button. ⇒ The setting value of selecting items displays in the word of blue color. T Change the setting value by using the up or down button and then press set button. ⇒ The setting value displays in the word of white color 8. To set finishing time (hour: minute: second) Make sure that the starting time displays in the word of white color and then press down button. ⇒ Finishing time displays in the word of white color. T Select the setting item (hour: minute: second) by using left or right button, and then press set button. ⇒ Setting value of selecting items displays in the word of blue color. T Change the setting value by using the up or down button and then press set button. ⇒ Setting value displays in the word of white color. 49 Preface Getting start Set-up Install Adjustment Getting Help 9. To set up [replay due day] 10. To complete the content replay Make sure that the finishing time displays in the word of white color and the press the set button. ⇒ The “( ) Monday” of [replay due day] displays in the word of white color. T Select the day of week by using left or right button, and then press set button. ⇒ The selected day displays in the word of blue color. T To display “*” symbol or not by using up or down button and then press the set button. (In example, Monday and Friday display “*”) ⇒ Selected day displays in the word of white color. setting Press the down button and select [back] ⇒ Selected [back] item displays in the word of white color. T Make sure to select [back] and then press the set button. ⇒ Back to screen of schedule setting. ⇒ Selected [back] item displays in the word of white color. Memo: • After completing the content replay setting, please select [back] at schedule screen and back to menu screen. 50 Set the replay time (continued) To replay on the due day of every month Example Replay the Program 5 from 10:00AM~5:30PM on 5th and 25th of every month. [Schedule setting screen] Setting item mode Content files(content files saved in the SD memory card) Example Loop replay (forced) Program 1 Program 2 Program 3 Program 4 Program 5 Selecting replay Program 1: replay “replay”: replayed Program 2: replay Program 3: not replay contents Program 4: replay “not replay” : not replayed contents Program 5: not replay content files replaying selection < Schedule setting screen> [ content replay setting screen] Program 1 Volume Repetition setting 10 Every month (forced) Starting time 10:00:00 Finishing time 17:30:00 Replaying due 05, 25 day <Screen replay setting screen> 51 Preface Getting start Set-up Install Adjustment Getting Help 1. To display the menu screen 4. To display the content replay Please press the left and right button simultaneously for 2 seconds. setting screen Select to replay content file (Program 5) by down button and then press the set button. ⇒ Content replay setting screen displays and the setting values of [volume] display in the word of white color. < Menu screen> 2. To display the schedule setting screen Select the “schedule setting” by up or down button and then press the set button. ⇒ Schedule setting screen displays, and the setting value of [mode] displays in the word of white color. < Schedule setting screen> T < Schedule setting screen > 3. To set mode as “schedule replay” Make sure that the setting values of [mode] display in the word of white color and then press the set button. ⇒ Setting value displays in the word of blue color. T Select “schedule replay” by using up or down button and then press the set button. ⇒ Setting value displays in the word of white color. <Content replay setting screen> 5. To set up [volume] Make sure that the setting value of [volume] displays in the word of white color and then press the set button. ⇒ Setting value displays in the word of blue color. T Set up the volume (example: 10) by using up or down button and then press the set button. ⇒ Setting value displays in the word of white color. (Next page to continue on) 52 Set the replay time (continued) To replay on the due day of every month (continued) 6. To set [repetition setting] as 7. To set “Starting time” ( hour: “ every month” Make sure that the setting value of [volume] displays in the word of white color and then press down button. ⇒ Select [repetition setting] and then the setting value displays in the word of white color. T Press the set button and the setting value can be changed. ⇒ Setting value displays in the word of blue color. T Select “every month” by using up or down button and then press the set button. ⇒ Setting value displays in the word of white color. ⇒ [ Replaying due day] displays on the screen. minute: second) Make sure that the setting value of [repetition setting] displays in the word of white color and then press down button. ⇒ Select starting time (hour) and the setting value displays in the word of white color. T Select the setting item (hour: minute: second) by using left or right button, and then press set button. ⇒ Setting value of selecting items display in the word of blue color. T Change the setting value by using the up or down button and then press set button. ⇒ Setting value displays in the word of white color. 53 Preface Getting start Set-up Install Adjustment 8. To set finishing time ( hour: minute: second) Make sure that the starting time displays in the word of white color and then press down button. ⇒ Finishing time (hour) displays in the word of white color. T Select the setting item ( hour: minute: second) by using left or right button, and then press set button. ⇒ Setting value of selecting items displays in the word of blue color. T Change the setting value by using the up or down button and then press set button. ⇒ Setting value displays in the word of white color. 9. To set up [replaying due day] Make sure that the finishing time displays in the word of white color and the pres the set button ⇒ The “( ) 01” of [replaying due day] displays in the word of white color T Select the setting day by using left or right button, and then press set button. ⇒ Selected day displays in the word of blue color. T 54 Getting Help To display “*” symbol or not by using up or down button and then press the set button. (In example, 5th and 25th displays “*”) ⇒ Selected day displays in the word of white color. 10. To complete the screen replay setting Press the down button and select [back]. ⇒ Selected [back] item displays in the word of white color. T Make sure to select [back] and then press the set button. ⇒ Back to screen of schedule setting. ⇒ Selected [back] item displays in the word of white color. Memo: • After completing the content replay. setting, please select [back] at schedule screen and back to menu screen. Set the replay time (continued) To replay on the due period To replay the content at the same due period. Example Replay the Program 1 Program 2 Program 3 Program 4 by order from 10:00AM~8:30PM during 2008/3/1~2008/3/14. [Schedule setting screen] [Content replay setting screen] Setting item mode Program 1 Program 2 Example Schedule replay (forced) Content files(Content Program 1 files saved in the SD Program 2 memory card) Program 3 Program 4 Selecting replay Program 1: replay Program 2: replay “replay”: replayed Program 3: replay contents Program 4: replay “not replay” : not replayed contents content file replaying selection Program 3 Program 4 Volume Repetition setting Starting time Finishing time Starting day Finishing day Volume Repetition setting Starting time Finishing time Starting day Finishing day 10 Off( forced) 10:00:00 20:30:00 2008/3/1 200/3/14 10 Off( forced) 10:00:00 20:30:00 2008/3/15 200/3/31 <Schedule setting screen> <example: content replay setting screen for Program 1> 55 Preface Getting start Set-up Install Adjustment Getting Help 1. To display the menu screen 4. To display the content replay Please press the left and right button simultaneously for 2 seconds. setting screen for Program 1 Select content file (Program 1) which has been set replayed by down button and then press the set button. ⇒ Content display setting screen displays and the setting values of [volume] display in the word of white color. < Menu screen> 2. To display the schedule setting < Schedule setting screen> T screen Select the “schedule setting” by up or down button and then press the set button. ⇒ Schedule setting screen displays, and the setting value of [mode] displays in the word of white color. <Content replay setting screen> 5. To set up [volume] < Schedule setting screen > 3. To set [mode] as “schedule replay” Make sure that the setting values of [mode] display in the word of white color and then press the set button. ⇒ Setting value displays in the word of blue color. T Select “Enable” by using up or down button and then press the set button. ⇒ Setting value displays in the word of white color. 56 Make sure that the setting value of [volume] displays in the word of white color and then press the set button. ⇒ Setting value displays in the word of blue color. T Set up the volume (example: 10) by using up or down button and then press the set button. ⇒ Setting value displays in the word of white color. (Next page to continue) Set the replay time (continued) To replay on the predetermined period 6. To set [Repeat setting] as “ off” Make sure that the setting value of [volume] displays in the word of white color and then press down button. ⇒ Select [Repeat setting] and then the setting value displays in the word of white color. T Press the set button and the setting value can be changed. ⇒ Setting value displays in the word of blue color. T Select “off” by using up or down button and then press the set button. ⇒ Setting value displays in the word of white color. 7. To set [Starting time] ( hour: minute: second) Make sure that the setting value of [repetition setting] displays in the word of white color and then press down button. ⇒ Select starting time (hour) and the setting value displays in the word of white color. T Select the setting item (hour: minute: second) by using left or right button, and then press set button. ⇒ Setting value of selecting items displays in the word of blue color. T Change the setting value by using the up or down button and then press set button. ⇒ Setting value displays in the word of white color. 8. To set finishing time (hour: minute: second) Make sure that the starting time displays in the word of white color and then press down button. ⇒ Finishing time displays in the word of white color. T Select the setting item (hour: minute: second) by using left or right button, and then press set button. ⇒ Setting value of selecting items display in the word of blue color. T Change the setting value by using the up or down button and then press set button. ⇒ Setting value displays in the word of white color. 57 Preface Getting start Set-up Install Adjustment 9. To set up [Starting day](year/month/day) Make sure that the finishing time displays in the word of white color and the press the set button. ⇒ [Starting day] (year)displays in the word of blue color. T Select the setting item (year/month/day) by using left or right button, and then press set button. ⇒ Setting value of selecting item displays in the word of blue color. T Change the setting value by using the up or down button and then press set button. ⇒ Setting value displays in the word of white color. 10. To set up [finishing day] (year/month/day) Make sure that the starting day (year/month/day) displays in the word of white color and the pres the set button ⇒ [Finishing day] (year)displays in the word of white color. T Select the setting item (year/month/day) by using left or right button, and then press set button. ⇒ Setting value of selecting item displays in the word of blue color. T 58 Getting Help Change the setting value by using the up or down button and then press set button. ⇒ Setting value displays in the word of white color. 11. To complete the content replay setting for Program 1 Press down button and then select [back]. ⇒ The selected [back] displays in the word of white color. T Make sure to select [back] and then press set button. Back to schedule setting screen. ⇒ The selected [back] displays in the word of white color. 12. To set the content replaying for Program 2, Program 3, Program 4 Repeat the procedure from number 4 to number 11. Memo: • After completing the content replay setting, please select [back] at schedule setting screen and back to menu screen. Step 10: To install the device onto the site Install To install the device Please install the device on the flat site by using the simple stand and foot packaged together with the device. Installing hole 1. To install the simple stand Screw M3 screws (accessory) into the installing hole of the device as following picture. Memo: • There are 3 stages in the installing hole of the stand. Please adjust the position of holes. 2. To install falling-proofing wire to M3 screw (accessory) simple stand Like left picture, please install the falling-proof wire to one of simple stands. Notice: • Please watch out the length, strength and materials of the falling-proof wire. 3. To install foot Simple stand Install 2 foots into the base side of the device as the left picture. 4. To install the device onto flat site 5. To install the falling-proofing wire to the site In procedure 2, please install the falling-proofing wire to sites. Memo: • Please follow the instruction of metal materials of other devices when using them. 59 Preface Getting start Set-up Install Adjustment Getting Help To paste the sticker of “ replay from start” to the device Please paste the sticker of “replay from start” to the device as the following picture. sticker of “replay from start” button Memo: • When pressing the button of “replay from start” during contents replaying, the content files will be replayed from start. Please use it as occasion demands. ( page 62) 60 To adjust the brightness and volume To adjust the brightness and volume, please use the 4 buttons inside the rear battery cell cover. Adjustment The button for adjustment of brightness and volume Up button Down button darken brighten Right button Left button <state of taking off the battery cell Set button <The front of the device > To adjust the brightness To adjust the brightness by up or down button during the content replaying. Brighten the screen Press the up button to brighten the screen. Darken the screen Press the down button to darken the screen. 61 Preface Getting start Set-up Install Adjustment To adjust the volume About adjusting the volume, please go to the section of schedule setting ( page 40). However, the volume can be changed during contents replaying by using left or right button. To louder the volume Press the left button and the volume louder. To lower the volume Press the right button and the volume lower. lower louder Memo: • The volume which is set in the schedule setting displays as “01.” * On the mute mode, there aren’t any sounds even if you set the volume louder. 62 Getting Help To use the button of “replay from start” Once pressing the button of “replay from start” during contents replaying, the content files will be replayed from start. Please paste the sticker of “replay from start” for button to the device. ( page 60) “replay from start” button Memo: • Please set [replaying from start button] “on” if the button of “replay from start” malfunctions. 63 Preface Getting start Set-up Install Adjustment Getting Help To turn on/ off the power by manual The power can be turn on/ off by manual without setting replay time. It can be used to replay the contents without timer setting or to turn off the power by force during replaying. Example: ( as timer is set from 8:00 to 20:00) As the timer is on and intended to turn on/ off the power, the procedure is shown as following: manual manual ON OFF timer ON manual OFF timer OFF timer ON Power Setting timer <The procedure for turning on/ off the power as timer is set> Button for turn on/ off the power up button down button To turn on the power by manual Under the condition of “off” (the screen is black), please press the up and down button simultaneously for 2 seconds. Setting mode Screen shown Timer setting: To replay content files on as power is on ⇒ Turn power off when finishing time of timer begins Timer setting: To replay content files off as power is off Schedule Within setting time: replay To replay content files as power is on. Beyond setting time: Not replay content files To turn off the power by manual Press the up and down button simultaneously for 2 seconds during replaying the contents. ⇒ Turn off the power by force. 64 To edit the content files • With the accessory’s CD-R (General Layout Editor), the animation or static state of contents can be edited and the captions can also be set up. • With this CD-R, the setting of replay schedule can be simply operated. ( page 38) Memo: • Please take a look on the instruction of CD-R for the use of CD-R • To produce the content file, please authorize the photo-shop to make it. < Completion of content files> Using General Layout Editor to Completion of file layout Exchange file Replay files for SignShow 7POP Transmit file USB memory Transmit file (SD memory card) <PC environment for CD-R (General Layout Editor)> OS Microsoft Windows XP 32 bit English version (service pack 2) * Including Microsoft. Net Framework2.0 Hardware • CPU: above Intel Pentium 1.0 • Memory: above 256MB • Disc capacity: about 17 MB Corresponding format Type Corresponding format Video MPEG 1/2 Audio MP3 Static screen JPG. BMP background Select background color Or JPG. BMP Caption Text (added from dialect ) 65 Preface Getting start Set-up Install Adjustment Getting Help To change batteries for clock button For changing the batteries of buttons ( call “button” for the following mention) as clock delays. Please change the new batteries. Memo: • Please use type-CR2032 batteries. • Please adjust the date/ time again after changing the batteries. * Timer setting can be kept when changing batteries and keeping the power on. Battery protecting sheet Talon Battery for button Standard screwdriver 1. To turn off the power of device Please unplug the AC adapter. Memo: • Do not turn off the power if you want to keep the timer setting. 2. To take off the battery cell cover Slide the battery cell cover to left and take it off. 3. To take off the battery Strip the battery protecting sheet and then use the standard screwdriver with insulation as the left picture. Caution: • Watch out for the thermal batteries after turning off the power. 4. To install the battery Put plus side of battery upside and then push the battery into the device. Caution: • Risk of explosion if battery is replaced by an incorrect type. Dispose of used batteries according to instructions. 5. To install the battery cover Cover the battery protecting sheet and then install the battery cover. 66 Packaging When carrying the device, please pack it as the following picture. 67 Preface Getting start Set-up Install Adjustment Getting Help Getting Help Troubleshooting Before getting maintenance from professionals, take a look at the following points. Condition reason corresponding measure There is no power The power plug has Make sure to plug the power or the screen is been slacked black. and been removed. The timer has been Press the up button and down button turn off simultaneously( to see page 56) (red timer light) There is no sound The volume has been Adjust the volume by using button at minimized back The files can not be The file selection has Set the file selection as "replay" at replayed been set as "not section of schedule setting replay" The schedule loop replay Set schedule replay as "schedule replay can not be replay" operated. to see page 38 The button of replay "replay from start" Set button of replay from start as "on" from start button has been set ( to see page 29, 30) malfunctions as " off" The files can not be The capacity label of Change capacity label as transmitted from USB memory isn't [I207LHN]( A half size alphanumeric USB memory consistent character) I207LHN (E) capacity label The used SD memory card in SIGN SHOW 7POP can not be read in computers. 68 Exclusively for SIGN SHOW 7POP format,the files can’t be read in the computer Please format the card in the computer. However, the data in SD memory card will be erased. About warranty and after sales service About warranty Please contact your local regional sales office for warranty information as each region may offer local or other warranty’s. Your can take your device for maintenance to selling stores or the supporting units which are written on the inner sheet. We do not support the maintenance which is beyond the warranty. About maintenance after warranty period About maintenance after warranty period, please ask providing stores. We will provide maintenance according to customers’ expectation with money charging. Request of maintenance Please inform providing store or service windows of the following information. • Device: memory card player • Type: SIGN SHOW 7POP • Purchase day: • Problem: • Address: • Name: • Telephone: Discarding the devices Please obey the law or regulation as discarding the devices. Reference of after sales service For confusion about after sales service, please ask providing stores or service windows written on the back sheep of device. About warranty range Warranty range and after sales service are restricted within you purchasing location. 69 Preface Getting start Set-up Install Adjustment Getting Help Specifaction Network port LCD LCD panel Valid range Screen constitution Contrast: View angle: The brightness of white surface Back light: type-7 TFT color LCD 154.08*86.58 800*RGB*400 pixel 500:1 left/right 65 degree, up 40 degree, down 65 degree 280cd/m ( panel center, 25℃) LED Output Sound Stereo speaker Volume adjustment 1.0 W+ 1.0W within the operation button at the rear of the device Memory card slot SD memory card MPEG4 SP 2.5 Mbps ADPCM * The file-making at layout and editor is necessary. Clock 24 hour-type 00:00~23:59 set present time set starting time and finishing time of replay Consumption electric current AC 0.4A (MAX) 70 Voltage/ frequency Output AC 100V ~240V 50Hz/60Hz DC5V 3A Outlook Device Appearanc e Size Weight mold cabinet about 229mm (W)*115mm (D)*38mm (H) (including sticking out part) about 600g (including SD memory car, batteries) Packaging File which can be replayed Real-time clock Clock setting Timer setting 10/100M Ethernet network connector, RJ45. *Notice: It does not support Wake-on-LAN. Power (AC adapter) Card slot *1 * Maximum 2GB * not including SD memory card Video format Sound format Interface Appearanc e Weight 229mm (W)*38mm (D)*116mm (H) about 870g Environment for operate the device Temperature Humidity 0℃~40℃ under 80% (exclude frosting) Environment for preserve the device Temperature Humidity -5℃~50℃ under 80% (Exclude frosting) Battery The battery for timer (CR2032) is attached with device * The specification and outlook may be changed without announcement. Accessory AC adapter Power code Quick Start Guide Sticker for button of “replay from start” Stand & Screw CD-R(UM & Driver) WIRE SADDLES *1 *1 *1 *1 *1 *1 *1 Appearance and size Unit: mm * the depth of using screws is under 4 mm 71