Transcript
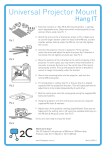
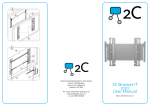
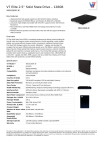
projector mount
extension
www.2cdisplays.com.au
This product has been specifically
designed for use with the Hang IT
projector mount, also from 2C.
The Extend IT has been
innovatively designed as a modular
unit. In this box are sufficient parts
for either a projector mount
500mm below the ceiling or
1000mm below the ceiling. With a
couple of simple modifications you
can also customise the Extend IT to
your own specific length anywhere
between 125mm and 1000mm.
ExtendIT mounting instructions
500mm
1
Attach the ceiling plate to the ceiling
with appropriate fasteners.
2
M6 bolt
1
Attach the ceiling plate to the ceiling
with appropriate fasteners.
Screw the pole with the joiner bolt
onto the ceiling plate.
2
Screw the poles together using the
supplied joiner.
3
Attach the base plate to the extender
pole using the M6 bolt supplied.
3
Screw the 1000mm pole to the
ceiling plate.
4
Attach the Hang IT to the base of the
Extend IT using the M8 bolts supplied.
4
Attach the base plate to the extender
pole using the M6 bolt supplied.
M8 bolt
See Pic A.
5
Handy Hints
1000mm
M6 bolt
Pic A
5
Attach the Hang IT to the base of the
Extend IT using the M8 bolts supplied.
6
Follow the rest of the instructions
on the Hang IT box.
You may adjust the total height of
the post by cutting it with a hacksaw.
Make sure that you only cut off the end
with the 6.5mm hole. Then redrill the
6.5mm hole 60mm from the end. Do
not cut the threaded end of the post.
¿ 6.5
60mm
See Pic C
M8 bolt
See Pic B.
Follow the rest of the instructions
on the Hang IT box.
1
Pic B
2
The Extend IT uses Lock-Tite to secure
the threaded ends of the poles. For the
best result, screw each connection
once, and once only.
If you unscrew and re-screw a joint,
you will reduce the effectiveness of the
Lock-Tite. If you need to undo a joint, we
recommend that you reapply Lock-Tite
to the joint before reconnecting.
Pic C