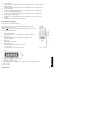
1
CONNECT 236
CONNECT
236
™
Scart
switcher
Scart switcher
USER MANUAL
3
GEBRAUCHSANLEITUNG 17
GUIDE UTILISATEUR
31
MODO DE EMPLEO
55
MANUALE D’ISTRUZIONE 69
GEBRUIKSAANWIJZING
83
20245/20080129 • CONNECT 236™ + Scart switcher
ALL RIGHTS RESERVED MARMITEK ©
2
© MARMITEK
SAFETY WARNINGS
ENGLISH
• To prevent short circuits, this product should only be used inside and only in dry spaces.
Do not expose the components to rain or moisture. Do not use the product close to a
bath, swimming pool etc.
• Do not expose the components of your systems to extremely high temperatures or bright
light sources.
• In case of improper usage or if you have altered and repaired the product yourself, all
guarantees expire. Marmitek does not accept responsibility in the case of improper usage
of the product or when the product is used for purposes other than specified. Marmitek
does not accept responsibility for additional damage other than covered by the legal
product responsibility.
• This product is not a toy. Keep out of reach of children.
• Do not open the product (battery panel excepted): the device may contain live parts. The
product should only be repaired or serviced by a qualified expert.
• Keep batteries out of the reach of children. Dispose of batteries as chemical waste. Never
use old and new batteries or different types of batteries together. Remove the batteries
when you are not using the system for a longer period of time. Check the polarity (+/-)
of the batteries when inserting them in the product. Wrong positioning can cause an
explosion.
• Only connect the adapter to the mains after checking whether the mains voltage is
the same as the values on the identification tags. Never connect an adapter when it is
damaged. In that case, contact your supplier.
Introduction
Thank you for buying this Marmitek Connect 236. Marmitek products are made with care and
are of a high quality. Please read this user manual carefully and follow all the instructions.
Accessories
After unpacking the carton, make sure that, next to the Scart switcher, all of the following
accessories are supplied.
CONNECT 236™
3
Front View and Back View
The Connect 236 has a total of six Input Channels. Input 6 is located on the front panel and
input 1 to 5 are located on the back panel.
1.
2.
3.
4.
5.
6.
7.
8.
9.
10.
11.
12.
13.
4
Power switch button
To turn the Scart switcher on and off;
Remote Control Sensor
To receive the wireless remote control signals;
REC button
To change the RECORD function;
SET button
To confirm when changing your settings;
LCD Display
To display the Scart switcher status;
</> button
To change the input 1-6 (or program your settings)
Input 6 (External video input jacks)
To connect the device’s Video and Audio jack to the Scart switcher;
Scart Input 1
To connect the device’s Scart jack to the Scart switcher;
Scart Input/Output 2
To connect the device’s Scart jack to the Scart switcher;
Scart Input/Output 3
To connect the device’s Scart jack to the Scart switcher;
Scart Input 4
To connect the device’s Scart jack to the Scart switcher;
Scart Input 5
To connect the device’s Scart jack to the Scart switcher;
Scart Output
To connect the device’s Scart jack to the Scart switcher;
© MARMITEK
ENGLISH
14. Video Output
To connect the device’s Video jacks to the Scart switcher;
15. Audio Output 1
To connect the device’s Audio jack to the Scart switcher.
16. Audio Output 2
To connect the device’s Audio jack to the Scart switcher.
17. Coaxial 1,3,4 Input (Digital Audio)
To connect the device’s Coaxial jack to the Scart switcher;
18. Coaxial Output(Digital Audio)
To connect the device’s Coaxial jack to the Scart switcher;
19. Power
To connect the AC Power adapter to the Scart switcher.
Name and Functions
LCD display and Remote Control
You can select each Input Channel by using the numerical button
on the Remote Control.
The ” ” button is located on the Remote Control, which allows
the Connect 236 to be switched on and off.
1.
2.
3.
4.
5.
1.
2.
3.
4.
Power switch button
To turn the Scart switcher on and off.
SET button
To confirm when using the NAME and REC function
REC button
To change the REC function;
CH1-CH6 button
To select the CH1-CH6 directly
< / > buttons
To change between Input 1 to 6
CH1-CH6 input indicator
Multi display, showing you the name of the device selected
REC 1 status
REC 2 status
CONNECT 236™
5
Channel 1
Device name is DVD Player
REC 1 (Ch2) Locking with Ch5
REC 2 (Ch3) Locking with Ch4
Currently watching the Channel 1
Setup Instructions
Connecting the AC Power adapter
Make connections as shown in the diagram below.
Connecting the AC Power adapter
1. Connect the AC Power adapter plug to the AC9V IN located on the rear panel of the
Connect 236.
2. Connect the AC Power adapter into a suitable wall outlet.
IMPORTANT: The AC Power adapter must be the correct type. Do not use an AC Power
adapter other than the type indicated.
6
© MARMITEK
ENGLISH
Battery installation
1.
2.
3.
Open the battery cover
Push and slide the battery cover open.
Insert the battery
Insert two AAA size batteries, observe the correct polarity.
Closing the cover
Close the battery cover until a click is heard.
System connections
Note:
1. To prevent any possible problems, always disconnect the power plug or switch Off the
POWER button of the Connect 236 before connecting or disconnecting the cables.
2. When connecting the cables, always insert the pin plugs correctly into the connecting
jacks. Insufficient insertion may result in no-sound problems or generation of noise.
Connecting through a Scart, Composite video and Audio
Make connections as the diagram shown below. When connecting the related devices, refer
to the related instruction manual.
CONNECT 236™
7
Connecting directly to a TV
1. Plug the Scart cable into the corresponding input on your TV.
2. Plug the other end of Scart cable into the Connect 236 Scart output.
3. Plug your DVD Player, VCR, Satellite Receiver and Game Console, etc. into any of 5 Scart
inputs on the back of the scart switcher.
OUTPUT
SCART
SCART (COMPOSITE VIDEO)
(RGB)
INPUT
COMPOSITE
VIDEO
SCART (RGB)
YES
YES
YES
SCART (COMPOSITE VIDEO)
NO
YES
YES
COMPOSITE VIDEO (Ch6)
NO
YES
YES
QUICK START
Example of a typical setup
The Connect 236 has been designed to connect up to six separate AV devices and output
their Audio/Video signal on the TV / Hi-Fi. Each device can be selected independently of each
other. Once a device has been connected, there is no need to remove any of the cables when
selecting an input.
1. Press the Power button to On
The back light of the LCD will fade in and the Connect 236 Scart switcher enters the
operation mode.
Press the button again and the back light of the LCD will fade out and the Connect 236
Scart switcher will switch off.
2. Press the < or > button to select a Channel
The LCD shows CH1, CH2, CH3, CH4, CH5 or CH6.
8
© MARMITEK
ENGLISH
Power button standby
A small amount of the power is retained to support the memory and remote control sensor
function when the POWER is switched off. This is known as the standby mode. POWER may
be switched On/Off by the Remote Control.
Note: The above device connections are for reference only. Any suitable devices may be
connected to the Input Channels.
Programming the input channel
For easy identification of the AV device connected to the Connect 236, it is possible to name
each of the six inputs on the Input Channel Display.
Press and hold the “SET” button for 2 seconds, the “CH1” on the LCD will begin to flash.
Press the “<” or “>” button to select the desired Input channel (1-6).
Press the “SET” button, the “------”will be flashing.
Press the “<” or “>” button, the LCD will show the first available name: “DVD_1”.
Press “<” or “>” button to cycle through all the available names. When the desired name is
displayed press the “SET” button. The name will be stored.
Available names:
CONNECT 236™
9
Note:
1. Repeat the procedure above each time you wish to rename.
2. During the setting, the mode will return to the previous stage if there is no input for 10 sec.
3. If you want to clear the names on the Connect 236, press and hold “<” and “>” on the
Connect 236 for 5 seconds, and all the programmed names will be cleared.
4. You can also use the Remote Control for renaming.
Before setting the record function
Multi-function A/V switching is possible with 5 input terminals and 2 input/output terminals
enabling:
- locking function prevents switching over the device erroneously during recording.
- the recording of one signal on two different recorders at the same time.
- the recording of two different signals on two different recorders at the same time.
Recording Set Up.
1. Channel 2 and Channel 3 are assigned for RECORD. Connect your record device to
Channel 2/3.
2. You can define the name of your RECORD Device, refer to “Programming the input
channel” for how to assign the device name.
10
© MARMITEK
ENGLISH
Setting the record function
Set the REC function as below:
Press and hold the “REC” button 2 sec, and the “REC 1” symbol will flash, the record device
name is shown in the LCD if you have assigned one: example: CH2=VCR_1
Press the “<” or “>” button to select the channel for the input source signal, the device name
is shown in the LCD if you have assigned one; example: CH1= DVD_1
Press the “REC” button to confirm the source channel and finish the setting for “REC1”.
The “REC 2” symbol will flash, the record device name is shown in the LCD if you assigned
one; example: CH3 = DVD_R
Press the “<” or “>” button to select the channel for the input source signal, the device name
is shown in the LCD if you assigned one; example: CH4=SAT_1
Pressing the “REC” button will confirm the source channel and finish setting up for “REC 2”
CONNECT 236™
11
Note:
1. During the setting, the mode will return to the previous stage if there is no input for 10 sec.
2. Unplugging the AC Power adapter, will clear all of the REC settings.
3. In REC mode, the “<”/ “>” buttons still will change the channel.
4. You can also use the Remote Control for changing the channel.
5. You can’t select channel 2 for REC 1
6. You can’t select channel 3 for REC 2
How to clear the record function
Clear the REC function as below:
Press and hold the “REC” button 2 sec, the “REC 1” symbol will flash, the record device name
is shown in the LCD if you assigned one example: CH2=VCR_1
Press the “<” or “>” button to select channel “CH2” for “REC 1”.
Press the “REC” button. The “REC 2” symbol will flash, the record device name is shown in
the LCD if you assigned one. Example: CH3=DVD_R
Press the “<” or “>” button to select channel “CH3” for “REC 2”.
12
© MARMITEK
ENGLISH
Press the “REC” button, the Control 236 will return to the operation mode.
Note:
1. During the setting, the mode will return to the previous stage if there is no input for 10 sec.
2. Unplugging the AC Power adapter will clear the REC settings.
3. In REC mode, the “<”/ “>” buttons still will change the channel.
4. You can also use the Remote Control for changing the channel.
FREQUENTLY ASKED QUESTIONS
No picture
Check to verify that;
- your Scart Cable is properly connected to your system and the Connect 236.
- your Scart Cable is properly plugged into your TV from the Connect 236 Output.
- you have selected the correct input channel.
- your TV is on the appropriate video input.
- your TV and Connect 236 are turned on.
No sound
- Check the connecting cables.
- Check the volume setting of the TV.
- Check whether the audio signal is transmitted by the cable used (S-VIDEO cables or
partially pinned Scart cables do not transmit audio).
- Check to verify that your TV and system are turned on.
The image is very grainy/there is background interference
- Switch off equipment which is not being used. Sometimes equipment transmits a very
strong signal, which can cause interference.
- Check the quality of the cables used.
CONNECT 236™
13
TECHNICAL DATA
General
Power requirements:
Power consumption:
Dimensions:
Mass:
Inputs/Outputs
Inputs on the front:
Inputs on the back:
Outputs on the back:
AC 9V 500mA
2W
285mm X 260 mm X 55 mm
2Kg
Ch6= 1 x RCA Video, 2 x RCA Audio (L+R)
CH1-5 = 5 x Scart, 3 x Coaxial RCA audio
OUTPUT, CH2, CH3 = 3 x Scart, 1 x RCA Video, 4 x RCA
Audio (2 x L+R), 1 x RCA Coaxial audio
Product modifications may take place without prior notice
ALSO AVAILABLE
1. Wireless audio and video
You can connect a product from the Marmitek GigaVideo
series to the OUTPUT or REC1/REC2 connection of the
Connect 236 to transmit the audio and video signal wirelessly
throughout the entire house. This means you can also
transmit the signal to a TV in another room and watch the
signals from every device connected to the Connect 236.
The built-in infrared return channel of the GigaVideo series
also means you can control the equipment and the Connect 236 remotely, even through
walls and ceilings!
2. Control your Connect 236 and A/V equipment that
is out of sight.
Marmitek offers a range of products to control your equipment
in a closed cabinet or from a different room, both wired and
wireless.
For these so called infrared extensions, more information can
be found at: www.marmitek.com.
3. Audio and video via the coax
The Marmitek MegaVideo products give you the possibility to
add the OUTPUT or REC1/REC2 signal of your Connect 236 as
an extra channel to your coax cable. You can watch the signal of
every device connected everywhere in the house where there is
a coax connection. The built-in infrared return channel of model
14
© MARMITEK
4. No extra remote control
When wanting to control your devices from multiple places or wanting to use
only one remote control for all devices, you can use the Marmitek EasyControl
6, 8 or the Marmitek EasyTouch 35 to learn the commands of your Connect
236 remote control. These remote controls replace almost all the controls you
now use.
5. S-video to composite video adapter
If the Out connections of devices connected (e.g. a laptop) do
not correspond with the In connections of your Connect 236, in
many cases the Marmitek S-video to Composite Video Adapter
can be used.
For the SCART INPUT/OUTPUT connectors, many different
SCART converters can be obtained.
More information can be found on our web site: www.marmitek.com
Environmental Information for Customers in the European Union
European Directive 2002/96/EC requires that the equipment bearing this symbol on the product and/or its
packaging must not be disposed of with unsorted municipal waste. The symbol indicates that this product
should be disposed of separately from regular household waste streams. It is your responsibility to dispose
of this and other electric and electronic equipment via designated collection facilities appointed by the government or
local authorities. Correct disposal and recycling will help prevent potential negative consequences to the environment
and human health. For more detailed information about the disposal of your old equipment, please contact your local
authorities, waste disposal service, or the shop where you purchased the product.
CONNECT 236™
15
ENGLISH
Megavideo55 also means you can control the equipment and the Connect 236 remotely,
even through walls and ceilings!
16
© MARMITEK
• Um Kurzschluss vorzubeugen, dieses Produkt bitte ausschließlich innerhalb des Hauses
und nur in trockenen Räumen nutzen. Setzen Sie die Komponenten nicht Regen oder
Feuchtigkeit aus. Nicht neben oder nahe eines Bades, Schwimmbades usw. verwenden.
• Setzen Sie die Komponente Ihres Systems nicht extrem hohen Temperaturen oder starken
Lichtquellen aus.
• Bei einer zweckwidrigen Verwendung, selbst angebrachten Veränderungen oder selbst
ausgeführten Reparaturen verfallen alle Garantiebestimmungen. Marmitek übernimmt
bei einer falschen Verwendung des Produkts oder bei einer anderen Verwendung des
Produktes als für den vorgesehenen Zweck keinerlei Produkthaftung. Marmitek übernimmt
für Folgeschäden keine andere Haftung als die gesetzliche Produkthaftung.
• Dieses Produkt ist kein Spielzeug. Außer Reichweite von Kindern halten.
• Das Produkt niemals öffnen (ausgen. des Batteriefachs): Das Gerät kann Teile enthalten,
worauf lebensgefährliche Stromspannung steht. Überlassen Sie Reparaturen oder
Wartung nur Fachleuten.
• Halten Sie die Batterien außerhalb der Reichweite von Kindern. Liefern Sie die Batterien als
chemischen Kleinabfall ein. Verwenden Sie niemals alte und neue oder unterschiedliche
Typen von Batterien durcheinander. Wenn Sie das System längere Zeit nicht benutzen,
entfernen Sie die Batterien. Achten Sie beim Einlegen der Batterien auf die Polarität (+ / -):
Ein falsches Einlegen kann zu Explosionsgefahr führen.
• Schließen Sie den Netzadapter erst dann an das Stromnetz an, nachdem Sie überprüft
haben, ob die Netzspannung mit dem auf dem Typenschild angegeben Wert übereinstimmt.
Schließen Sie niemals einen Netzadapter an, wenn diese beschädigt sind. In diesem Fall
nehmen Sie Kontakt mit Ihrem Lieferanten auf.
Einführung
Herzlichen Dank, dass Sie sich für diesen Marmitek Connect 236 entschieden haben.
Marmitek Produkte werden mit großer Sorgfalt hergestellt und sind von hoher Qualität. Bitte
lesen Sie diese Gebrauchsanleitung sorgfältig durch und befolgen Sie alle Anweisungen.
Zubehör
Prüfen Sie den Verpackungsinhalt neben dem Scart Switcher auch auf alle nachfolgenden
Zubehörteile.
CONNECT 236™
17
DEUTSCH
SICHERHEITSHINWEISE
Vorder- und Rückansicht
Der Connect 236 besitzt sechs Eingabekanäle. Eingang 6 befindet sich an der Frontseite und
Eingang 1 bis 5 an der Rückseite.
1.
2.
3.
4.
5.
6.
7.
8.
9.
10.
11.
12.
13.
18
Netzschaltertaste
Hiermit schalten Sie die Einheit aus oder ein;
Fernbedienungssensor
Mit diesem Sensor empfängt die Fernbedienung drahtlos Signale;
REC Taste
Um zur RECORD (Aufzeigen) Funktion zu wechseln;
SET Taste
Bestätigungstaste, nachdem Sie Ihre Einstellung verändert haben;
LCD Display
Gibt den Status der Einheit wieder;
</> Taste
Um die Eingabe 1-6 zu verändern (oder Ihre Einstellungen zu programmieren)
Eingang 6 (Externe Videoeingangbuchsen)
Verbinden der Videoanschlüsse der Video- und Audioanlage mit der Einheit;
Scart-Eingang 1
Verbinden der Videoanschlüsse des Geräts mit der Einheit;
Scart-Ein-/Ausgang 2
Verbinden der Videoanschlüsse des Geräts mit der Einheit;
Scart-Ein-/Ausgang 3
Verbinden der Videoanschlüsse des Geräts mit der Einheit;
Scart-Eingang 4
Verbinden der Videoanschlüsse des Geräts mit der Einheit;
Scart-Eingang 5
Verbinden der Videoanschlüsse des Geräts mit der Einheit;
Scart-Ausgang
Verbinden der Videoanschlüsse des Geräts mit der Einheit;
© MARMITEK
DEUTSCH
14. Video-Ausgang
Verbinden der Videoanschlüsse des Geräts mit der Einheit;
15. Audio-Ausgang 1
Verbinden der Audio-Anschlüsse des Geräts mit der Einheit;
16. Audio-Ausgang 2
Verbinden der Videoanschlüsse des Geräts mit der Einheit;
17. Koaxial 1,3,4 Eingang (Digital Audio)
Verbinden der Koaxialanschlusse des Geräts mit der Einheit;
18. Koaxial Ausgang (Digital Audio)
Verbinden der Koaxialanschlusse des Geräts mit der Einheit;
19. Stromversorgung
Verbinden der Netzteiladapter mit der Einheit.
Bezeichnungen und Funktionen
LCD Display und Fernbedienungseinheit
Sie können jeden Eingangskanal mithilfe der Nummerntasten der
Fernbedienung wählen.
Die “ ” Taste befindet sich auf der Fernbedienung und schaltet
den Connect 236 Ein oder Aus.
1.
2.
3.
4.
5.
1.
2.
3.
4.
Netzschaltertaste
Drücken Sie die Taste um die Einheit aus- und einzuschalten;
SET Taste
Zur Bestätigung der NAME und REC Funktion.
REC Taste
Um zur RECORD (Aufzeigen) Funktion zu wechseln;
CH1-CH6 Taste
Direktwahl CH1-CH6
< / > Tasten
Um zwischen Eingang 1 bis 6 zu schalten
CH1-CH6 Eingangsanzeige
Multifunktionsdisplay, gibt den Namen und die gewählte Einrichtung wieder.
REC 1 Status
REC 2 Status
CONNECT 236™
19
Kanal 1
Name des Geräts ist DVD Player.
REC 1 (Ch2) Einschalten mit Ch5
REC 2 (Ch3) Einschalten mit Ch4
Gegenwärtig ist Kanal 1 angewählt
Aufbauanleitung
Anschluss des AC Netzteiladapters
Schließen Sie die Einheit gemäß der Darstellung im nachstehenden Diagramm an.
Anschließen des AC Netzteiladapters
1. Verbinden Sie den AC Netzteiladapter mit dem AC9V IN Anschluss an der Rückseite des
Connect 236.
2. Verbinden Sie den AC Netzteiladapter mit einer geeigneten Steckdose.
ACHTUNG: Nur ein geeigneter Netzteiladapter darf verwendet werden. Verwenden Sie
keinen anderen Netzteiladapter als auf dem Typenschild angegeben.
20
© MARMITEK
Batterien einlegen
DEUTSCH
1. Öffnen des Batteriefachs
Drücken und schieben Sie das Batteriefach auf.
2. Einlegen der Batterie
Legen Sie zwei AAA Batterien ein und achten Sie dabei auf die korrekte Polarität.
3. Das Batteriefach schließen
Schließen Sie das Fach und lassen Sie den Deckel einrasten.
Systemanforderungen
Hinweis:
1. Lösen Sie, um möglichen Problemen vorzubeugen, vor dem Anschließen oder Lösen von
Kabeln immer erst den Netzteiladapter oder drücken Sie auf die Ein/Austaste des Connect
236. .
2. Achten Sie bei dem Anschluss der Kabel immer darauf, dass die Stecker ordnungsgemäß
eingesteckt sind.
Ein inkorrekter Anschluss kann zu Tonausfall oder Lärmentwicklung führen.
Verbindung mit Scart, Composite-Video und Audio
Verbinden Sie die Einheit gemäß der Darstellung im nachstehenden Diagramm. Beachten Sie
zum Anschließen der entsprechenden Geräte die betreffende Gebrauchsanleitung.
CONNECT 236™
21
Direktanschluss an einen TV
1. Verbinden Sie das SCART-Kabel mit dem entsprechenden Eingang Ihres Fernsehers.
2. Verbinden sie das andere Ende des SCART-Kabels mit dem Connect 236 SCART
Ausgang.
3. Schließen Sie Ihren DVD Player, VCR, Satellitenempfänger, Spielgerät usw. an einen der 5
SCART Eingänge an der Rückseite der Einheit an.
AUSGANG
SCART
SCART (COMPOSITE VIDEO)
COMPOSITE
(RGB)
EINGANG
VIDEO
SCART (RGB)
JA
JA
JA
SCART (COMPOSITE VIDEO)
NEIN
JA
JA
COMPOSITE VIDEO (K6)
NEIN
JA
JA
SCHNELLSTART
Vorbild einer typischen Installation
Der Connect 236 wurde für den Anschluss von bis zu sechs verschiedenen AV Geräten
entwickelt, wobei das Audio/Video Signal zum TV / zur Stereoanlage weitergeleitet wird. Jedes
Gerät kann unabhängig voneinander bedient werden. Ist ein Gerät einmal angeschlossen,
müssen für die Empfangswahl des Geräts keine Kabel mehr umgesteckt werden.
1. Schalten Sie die Einheit ein
Die LCD-Anzeige wird leuchten und die Connect 236 Einheit wird aktiviert.
Drücken Sie nochmals die Taste, so wird die Leuchtanzeige erlöschen und die Connect
236 abschalten.
2. Drücken Sie die < oder > Taste um einen Kanal anzuwählen
Im Display erscheint CH1, CH2, CH3, CH4, CH5 oder CH6.
22
© MARMITEK
Standby Taste
Wenn die Einheit ausgeschaltet ist, wird ein kleiner Reststrom für die Speichereinheit und den
Fernbedienungssensor benutzt. Somit befindet sich das Gerät im so genannten StandbyModus. Sie können den Strom mit der Ein-Ausschalttaste der Fernbedienung ein- oder
ausschalten
Programmieren des Eingangskanals
Zur leichten Erkennung eines an den Connect 236 angeschlossenen Geräts können Sie jedes
der sechs Geräte im Eingangskanal Display benennen.
Drücken und halten Sie die „SET“ Taste 2 Sekunden lang fest, der „CH1“ im Display leuchtet
auf.
Drücken Sie die „<“ oder „>“ Taste, um den gewünschten Kanal (1-6) zu wählen.
Drücken Sie die „SET“ Taste, „------“ wird aufleuchten.
Drücken sie die „<“ oder „>“ Taste, das Display wird den ersten, verfügbaren Namen
wiedergeben: „DVD_1“.
Drücken Sie die „<“ oder „> Taste um alle verfügbaren Namen zu durchlaufen. Wird der
richtige Name wiedergegeben, drücken Sie dann die „SET” Taste. Der Name wird nun
gespeichert.
CONNECT 236™
23
DEUTSCH
Hinweis: Oben erwähnte Geräteverbindungen sind nur Beispiele. Sie können jedes
gewünschte Gerät mit den Eingangskanälen verbinden.
Verfügbare Namen:
Hinweis:
1. Wiederholen Sie oben stehendes Verfahren, wenn Sie Geräte umbenennen möchten.
2. Nach 10 Sekunden Pause geht der Modus automatisch in das Hauptmenü zurück.
3. Wenn Sie die Namen im Connect 236 löschen möchten, drücken und halten Sie dann die
„<“ und „>“ Taste fünf Sekunden fest. Alle programmierten Namen sind nun gelöscht.
4. Sie können zur Neubenennung auch Ihre Fernbedienung nutzen.
Vor der Aufzeichnungseinstellung
Zur Multifunktion A/V Umschaltung verfügt die Einheit über 5 Eingangsanschlüsse und 2
Eingang-/Ausgangsanschlüsse:
- Sperrfunktion verhindert versehentliche Umschaltung des Geräts während der
Aufzeichnung.
- Ein Signal wird auf zwei verschiedenen Aufnahmegeräten gleichzeitig aufgenommen.
- Zwei verschiedene Signale werden auf zwei verschiedenen Aufnahmegeräten gleichzeitig
aufgenommen.
Das Aufzeichnen.
1. Kanal 2 und Kanal 3 sind für die Aufzeichnung “RECORD“ vorgesehen. Verbinden Sie Ihr
Aufnahmegerät mit dem Eingang 2 oder 3.
2. Sie können den Namen Ihres Aufnahmegeräts definieren. Unter “Programmieren des
Eingangskanals” finden Sie, wie der Gerätename bestimmt wird.
24
© MARMITEK
Drücken und halten Sie die „REC“ Taste 2 Sek. lang fest. Das „REC 1“ Symbol leuchtet auf,
im Display erscheint, wenn bestimmt, der Name des Aufzeichnungsgeräts: Beispielsweise:
CH2=VCR_1
Drücken Sie die „<“ oder „>“ Taste, um den Kanal für das Eingangssignal zu bestimmen. Im
Display erscheint, wenn bestimmt, der Gerätename; beispielsweise: CH1= DVD_1
Drücken Sie die „REC“ Taste zur Bestätigung des Eingangskanals und für die Gerätewahl
von „REC1“.
Das „REC 2“ Symbol leuchtet auf, im Display erscheint, wenn bestimmt, der Name des
Aufzeichnungsgerät; beispielsweise: CH3 = DVD_R
Drücken Sie die „<“ oder „>“ Taste, um den Kanal für das Eingangssignal zu bestimmen. Im
Display erscheint, wenn bestimmt, der Gerätename; beispielsweise: CH4=SAT_1
Drücken Sie die „REC“ Taste zur Bestätigung des Eingangskanals und
von „REC2“.
CONNECT 236™
für die Gerätewahl
25
DEUTSCH
Einstellen der Aufzeichnungsfunktion
Stellen Sie die REC Funktion wie folgt ein:
Hinweis:
1. Nach 10 Sekunden Nichtbetätigung geht der Modus automatisch in das Hauptmenü
zurück.
2. Wenn Sie das Netzteil lösen, werden alle REC Einstellung gelöscht werden.
3. Im REC Modus können mit den „<“/ „>“ Tasten weiterhin die Kanäle gewechselt
werden.
4. Sie können zur Kanalumschaltung auch Ihre Fernbedienung nutzen.
5. Sie können Kanal 2 nicht für REC 1 selektieren
6. Sie können Kanal 3 nicht für REC 2 selektieren
Löschen der Aufzeichnung
Löschen Sie die REC Einstellung wie folgt:
Drücken und halten Sie die „REC“ Taste 2 Sek. lang fest. Das „REC 1“ Symbol leuchtet auf,
im Display erscheint, wenn bestimmt, der Name des Aufzeichnungsgeräts. Beispielsweise:
CH2=VCR_1
Drücken Sie die „<“ oder „>“ Taste um Kanal „CH2“ für „REC 1“ zu wählen.
Drücken Sie die „REC“ Taste. Das „REC 2“ Symbol leuchtet auf, im Display erscheint, wenn
bestimmt, der Name des Aufzeichnungsgeräts. Beispielsweise: CH3=DVD_R
Drücken Sie die „<“ oder „>“ Taste um Kanal „CH3“ für „REC 2“ zu wählen.
26
© MARMITEK
Hinweis:
1. Nach 10 Sekunden Nichtbetätigung geht der Modus automatisch in das Hauptmenü
zurück.
2. Wenn Sie das Netzteil lösen, werden alle REC Einstellungen gelöscht werden.
3. Im REC Modus können mit den „<“/ „>“ Tasten weiterhin die Kanäle gewechselt
werden.
4. Sie können zur Kanalumschaltung auch Ihre Fernbedienung nutzen.
HÄUFIG GESTELLTE FRAGEN
Kein Bild
- Prüfen Sie, ob das Scart Kabel ordnungsgemäß an Ihr System und den Connect 236
angeschlossen ist.
- Prüfen Sie, ob das Scart Kabel vom Connect 236 Ausgang ordnungsgemäß an Ihren
Fernseher angeschlossen ist.
- Prüfen Sie, ob Sie den richtigen Eingangskanal gewählt haben.
- Prüfen Sie, ob Ihr Fernseher an den entsprechenden Videoeingang angeschlossen ist.
- Überprüfen Sie, ob Ihr Fernseher und der Connect 236 eingeschaltet sind.
Kein Ton
- Prüfen Sie die Verbindungskabel.
- Prüfen Sie die Toneinstellung Ihres Fernsehers.
- Prüfen Sie, ob das Audiosignal mit dem verwendeten Kabel versendet wird (S-VIDEO
Kabel oder teilweise verstiftete Scart Kabel übersenden kein Audio).
- Überprüfen Sie, ob Ihr Fernseher und System eingeschaltet sind.
Das Bild ist sehr körnig/stört im Hintergrund
- Schalten Sie nicht verwendete Anlagen aus. Manche Anlagen geben ein sehr starkes
Signal ab und können somit Interferenz verursachen.
- Überprüfen Sie den ordnungsgemäßen Zustand der verwendeten Kabel.
CONNECT 236™
27
DEUTSCH
Drücken Sie die „REC“ Taste, der Control 236 wird in das Hauptmenü zurückgehen.
TECHNISCHE DATEN
Allgemeines
Stromversorgung:
Stromverbrauch:
Maße :
Gewicht:
AC 9V 500mA
2W
285mm X 260 mm X 55 mm
2Kg
Eingänge/Ausgänge
Eingänge Frontseite: Ch6= 1 x RCA Video, 2 x RCA Audio (L+R)
Eingänge Rückseite: CH1-5 = 5 x Scart, 3 x Koaxial RCA Audio
Ausgänge Rückseite: OUTPUT, CH2, CH3 = 3 x Scart, 1 x RCA Video, 4 x RCA Audio (2 x
L+R), 1 x RCA Koaxial Audio
Änderungen von Produkten können ohne vorherige Ankündigung vorgenommen werden.
ZUSÄTZLICHE MÖGLICHKEITEN
1. Drahtloses Audio und Video
Sie können ein Produkt aus der Marmitek GigaVideo Serie mit
dem OUTPUT oder dem REC1/REC2 Anschluss des Connect
236 verbinden, um Audio- und Videosignale drahtlos durch
das ganze Haus zu versenden. Somit können Sie auch das
Signal zu einem Fernseher in einem anderen Raum versenden
und Programme jedes an den Connect 236 angeschlossenen
Geräts empfangen.
Mit dem eingebauten Infrarotsender der GigaVideo Serien
können Sie zudem Geräte und den Connect 236 durch
Wände und Decken hindurch fernbedienen!
2. Bedienen Ihrer Connect 236 und A/V Geräte, die sich
außer Sicht befinden.
Marmitek verfügt über eine große Produktpalette, die Ihnen
ermöglicht, Ihre sich in einem verschlossenen Schrank oder
anderen Raum befindende Geräte drahtlos oder verdrahtet zu
bedienen.
Weitere
Infos
zu
diesen
so
genannten
Infrarot
Verlängerungsmöglichkeiten finden Sie unter: www.marmitek.
com.
28
© MARMITEK
DEUTSCH
3. Audio und Video über Koax
Die Marmitek MegaVideo Produkte ermöglichen Ihnen, das
OUTPUT oder REC1/REC2 Signal Ihres Connect 236 als einen
zusätzlichen Kanal an Ihr Koaxkabel hinzuzufügen. Sie können
das Signal an jedem mit koaxkabel verbundenen Gerät überall
im Haus empfangen. Mit dem eingebauten Infrarotsender des
MegaVideo55 können Sie zudem Geräte und den Connect 236
durch Wände und Decken hindurch fernbedienen!
4. Keine zusätzliche Fernbedienung
Wenn Sie Ihre Geräte von verschiedenen Orten aus bedienen möchten oder
nur eine Fernbedienung für all Ihre Geräte verwenden möchten, so können
Sie dazu die Marmitek EasyControl 6, 8 oder die Marmitek EasyTouch 35
verwenden, um die Befehle Ihrer Connect 236 Fernbedienung einzulernen.
Diese Fernbedienungen können nahezu all Ihre genutzten Fernbedienungen
ersetzen.
5. S-Video zum Composite Videoadapter
Sollten die Ausgänge von angeschlossenen Geräten (z.B.
einem Laptop) nicht mit den Eingängen Ihres Connect 236
korrespondieren, so können Sie in vielen Fällen den Marmitek
S-Video zum Composite Video Adapter verwenden.
Für die SCART EIN-/AUSGÄNGE sind viele verschiedene SCART
Umwandler erhältlich.
Weitere Infos finden Sie auf unserer Webseite: www.marmitek.com.
Umweltinformation für Kunden innerhalb der Europäischen Union
Die Europäische Richtlinie 2002/96/EC verlangt, dass technische Ausrüstung, die direkt am Gerät und/oder an
der Verpackung mit diesem Symbol versehen ist nicht zusammen mit unsortiertem Gemeindeabfall entsorgt
werden darf. Das Symbol weist darauf hin, dass das Produkt von regulärem Haushaltmüll getrennt entsorgt
werden sollte. Es liegt in Ihrer Verantwortung, dieses Gerät und andere elektrische und elektronische Geräte über die
dafür zuständigen und von der Regierung oder örtlichen Behörden dazu bestimmten Sammelstellen zu entsorgen.
Ordnungsgemäßes Entsorgen und Recyceln trägt dazu bei, potentielle negative Folgen für Umwelt und die menschliche
Gesundheit zu vermeiden. Wenn Sie weitere Informationen zur Entsorgung Ihrer Altgeräte benötigen, wenden Sie sich
bitte an die örtlichen Behörden oder städtischen Entsorgungsdienste oder an den Händler, bei dem Sie das Produkt
erworben haben.
CONNECT 236™
29
30
© MARMITEK
• Afin d’éviter un court-circuit, ce produit ne doit être utilisé qu’à l’intérieur, et uniquement
dans des endroits secs. Ne pas exposer les composants à la pluie ou à l’humidité. Ne pas
utiliser à côté de ou près d’une baignoire, une piscine, etc.
• Ne pas exposer les composants de votre système à des températures extrêmement élevées
ou à des sources de lumières trop fortes.
• Toute utilisation impropre, toute modification ou réparation effectuée vous-même
annule la garantie. Marmitek n’accepte aucune responsabilité dans le cas d’une utilisation
impropre du produit ou d’une utilisation autre que celle pour laquelle le produit est
destiné. Marmitek n’accepte aucune responsabilité pour dommage conséquent, autre que
la responsabilité civile du fait des produits.
• Ce produit n’est pas un jouet et doit être rangé hors de la portée des enfants.
• Ne jamais ouvrir le produit (excepté le compartiment des piles) : Les appareils peuvent
comprendre des composants dont la tension est mortelles. Les réparations ou l’entretien
ne doivent être effectués que par des personnes compétentes.
• Tenir les piles hors de portée des enfants. Traiter les piles usagées comme des petits
déchets chimiques. Ne jamais utiliser simultanément des vieilles piles et des piles neuves,
ou des piles de types différents. Enlever les piles lorsque le système sera mis longtemps
hors de service. Respecter la polarité en insérant les piles (+/-) : une insertion incorrecte
peut engendrer un danger d’explosion.
• Brancher l’adaptateur secteur sur le réseau électrique seulement après avoir vérifié que
la tension d’alimentation correspond à la valeur indiquée sur les plaques d’identification.
Ne jamais brancher un adaptateur secteur lorsque celui-ci est endommagé. Dans ce cas,
veuillez contacter votre fournisseur.
Introduction
Merci d’avoir acheté ce Marmitek Connect 236. Les produits de Marmitek ont été faits avec
attention et sont de haute qualité. Lisez attentivement ce mode d’emploi et suivez toutes les
instructions.
Accessoires
Après avoir déballé la boîte, assurez-vous qu’outre le commutateur Scart, tous les accessoires
suivants soient livrés.
CONNECT 236™
31
FRANÇAIS
AVERTISSEMENTS DE SECURITE
Vue de face et vue d’arrière
Connect 236 a 6 canaux d’entrée au total. L’entrée 6 se trouve sur le panneau de devant et
les entrées 1 à 5 se trouvent sur le panneau arrière.
1.
2.
3.
4.
5.
6.
7.
8.
9.
10.
11.
12.
13.
32
Bouton interrupteur
Appuyez sur le bouton afin d’allumer et éteindre le commutateur Scart
Détecteur de télécommande
C’est le détecteur pour les signaux de télécommande sans fil
Bouton REC
Pour changer la fonction REC (enregistrement)
Bouton SET
Pour confirmer quand vous changez le réglage
Affichage ACL
Pour afficher l’état de l’unité
Bouton </>
Pour changer l’entrée 1-6 (ou programmer vos réglages)
Entrée 6 (jacks extérieurs d’entrée vidéo)
Raccordez les jacks vidéo et audio des appareils au commutateur Scart
Entrée scart 1
Raccordez les jacks scart de l’appareil au commutateur Scart
Entrée/sortie scart 2
Raccordez les jacks scart de l’appareil au commutateur Scart
Entrée/sortie scart 3
Raccordez les jacks scart de l’appareil au commutateur Scart
Entrée scart 4
Raccordez les jacks scart de l’appareil au commutateur Scart
Entrée scart 5
Raccordez les jacks scart de l’appareil au commutateur Scart
Sortie scart
Raccordez les jacks scart de l’appareil au commutateur Scart
© MARMITEK
14. Sortie vidéo
Raccordez les jacks vidéo de l’appareil au commutateur Scart
15. Sortie audio 1
Raccordez les jacks audio de l’appareil au commutateur Scart
16. Sortie audio 2
Raccordez le jack audio de l’appareil au commutateur Scart
17. Entrée coaxiale 1,3,4 (audio digital)
Raccordez le jack coaxial de l’appareil au commutateur Scart
18. Sortie coaxiale (audio digital)
Raccordez le jack coaxial de l’appareil au commutateur Scart
19. Électricité
Raccordez la distribution d’électricité au commutateur Scart
Nom et fonctions
Écran ACL et unité de télécommande
1.
2.
3.
4.
5.
1.
2.
3.
4.
FRANÇAIS
Vous pouvez choisir le canal d’entrée de votre choix en utilisant le
bouton numérique sur l’unité de télécommande.
Le bouton “ ” est placé sur l’unité de télécommande, ce qui
permet d’allumer ou d’éteindre Connect 236.
Bouton interrupteur
Appuyez sur le bouton afin d’allumer et éteindre l’appareil
Bouton SET
Pour confirmer quand vous utilisez la fonction NAME et REC
Bouton REC
Pour changer la fonction REC
Bouton CH1-CH6
Pour choisir directement CH1-CH6
Boutons </>
Pour changer entre entrée 1 à 6
indicateur d’entrée CH1-CH6
Affichage multiple, montrant le nom ou l’appareil choisi
état REC 1
état REC 2
CONNECT 236™
33
Canal 1
Le nom de l’appareil est lecteur DVD
REC 1 (Ch2) fermant avec Ch5
REC 2 (Ch3) fermant avec Ch4
Regardant actuellement le canal 1
Instructions d’installation
Raccorder le commutateur Scart de distribution d’électricité AC
Faites le raccordement comme indiqué dans le schéma ci-dessous.
Raccorder l’unité de distribution d’électricité AC
1. Raccordez la prise de l’unité de distribution d’électricité AC au AC9V IN se trouvant dans le
panneau arrière de Connect 236.
2. Raccordez l’unité de distribution d’électricité AC dans une sortie murale adéquate.
IMPORTANT: L’unité de distribution d’électricité doit être correcte. N’utilisez pas une autre
unité que celle du type indiqué.
34
© MARMITEK
Installation de la pile
Raccordements du système
Note:
1. Afin d’éviter tout problème, débranchez toujours la prise d’électricité ou coupez le bouton
POWER de Connect 236 avant de raccorder ou de débrancher les câbles.
2. Quand vous raccordez les câbles, placez toujours correctement les fiches des prises dans
les jacks de raccordement.
Si les fiches des prises sont mal placées, cela peut causer des problèmes de non bruit ou
produire du bruit.
Raccorder par Scart, Vidéo composé et Audio
Faites le raccordement ainsi qu’indiqué dans le schéma ci-dessous. Quand vous raccordez les
appareils relatifs, consultez le mode d’emploi relatif.
CONNECT 236™
35
FRANÇAIS
1. Ouvrez le couvercle de la pile
Poussez et ouvrez le couvercle de la pile.
2. Placez la pile
Placez deux piles AAA, vérifiez la polarité adéquate.
3. Fermez le couvercle
Fermez le couvercle de la pile jusqu’à ce que vous entendiez un clic.
Raccorder directement à un téléviseur
1. Branchez le câble Scart dans les entrées correspondantes de votre téléviseur.
2. Branchez l’autre bout du câble Scart dans la sortie Scart Connect 236.
3. Branchez votre lecteur DVD, magnétoscope, antenne de réception satellite et console de
jeux, etc. dans une des 5 entrées Scart à l’arrière de l’appareil.
SORTIE
SCART
SCART (VIDEO COMPOSITE)
VIDEO COMPOSITE
(RGB)
INPUT
SCART (RGB)
OUI
OUI
OUI
SCART (VIDEO COMPOSITE)
NON
OUI
OUI
VIDEO COMPOSITE (Ch6)
NON
OUI
OUI
DÉMARRAGE RAPIDE
Exemple d’une installation typique
Connect 236 a été conçu de façon à raccorder jusqu’à six différents appareils AV et à sortir leur
signal Audio/Vidéo sur télévision et hi-fi. Chaque appareil peut être choisi indépendamment
l’un de l’autre. Lorsqu’un appareil est raccordé, il ne faut pas enlever l’un des câbles quand
vous choisissez une entrée.
1. Appuyez sur le bouton Power sur On
La lampe arrière du LCD apparaît et Connect 236 entre en mode opérationnel.
Appuyez de nouveau sur le bouton et la lampe arrière du LCD disparaît et Connect 236
est éteint.
2. Appuyez sur le bouton < ou > pour choisir un canal
Le LCD indique CH1, CH2, CH3, CH4, CH5 ou CH6.
36
© MARMITEK
Bouton Power en stand-by
Une petite quantité de courant est retenue pour supporter la mémoire et la fonction de
télécommande quand le courant est éteint. C’est le mode stand-by. POWER peut être allumé/
éteint avec l’unité de télécommande.
Note: Les raccordements d’appareils ci-dessus sont uniquement utilisés en tant que référence.
Tout appareil adéquat peut être raccordé aux canaux d’entrée.
Appuyez et retenez le bouton «SET» pendant 2 secondes, «CH1» sur le LCD va se mettre à
clignoter.
Appuyez sur le bouton «<» ou «>» pour choisir le canal d’entrée (1-6) désiré.
Appuyez sur le bouton «SET», «------» clignotera.
Appuyez sur le bouton «<» ou «>», le LCD montrera le premier nom disponible : «DVD_1».
Appuyez sur le bouton «<» ou «>» pour voir tous les noms disponibles. Quand le nom désiré
est affiché, appuyez sur le bouton «SET». Ce nom sera enregistré.
Noms disponibles :
CONNECT 236™
37
FRANÇAIS
Programmer le canal d’entrée
Pour une identification facile de l’appareil AV raccordé à Connect 236, il est possible de
nommer chacune des six entrées sur l’affichage du canal d’entrée.
Note:
1. Répétez la procédure ci-dessus chaque fois que vous désirez renommer les canaux.
2. Pendant l’installation, le mode revient à la phase précédente s’il n’y a pas d’entrée pendant
10 secondes.
3. Si vous voulez effacer les noms sur Connect 236, appuyez et retenez «<» et «>» sur
Connect 236 pendant 5 secondes, et tous les noms programmés seront effacés.
4. Vous pouvez également utiliser l’unité de télécommande pour renommer.
Avant d’installer la fonction d’enregistrement
Il est possible de changer la fonction multiple A/V avec 5 bornes d’entrée et 2 bornes d’entrée
ou de sortie permettant :
- La fonction de blocage prévient le changement par erreur de l’appareil pendant
l’enregistrement.
- Enregistre un signal sur deux appareils en même temps.
- Enregistre deux signaux différents sur deux appareils différents en même temps.
Installation de l’enregistrement
1. Canal 2 et canal 3 sont destinés pour enregistrer. Raccordez votre appareil d’enregistrement
aux canaux 2/3.
2. Vous pouvez définir votre appareil d’enregistrement, consultez “Programmer le canal
d’entrée” pour nommer l’appareil.
38
© MARMITEK
Installer la fonction d’enregistrement
Installez la fonction REC comme suit:
Appuyez sur le bouton «<» ou «>» pour choisir le canal pour le signal d’entrée d’origine,
le nom de l’appareil est visible sur le LCD si vous en avez donné un, par exemple : CH1=
DVD_1
Appuyez sur le bouton «REC» pour confirmer le canal d’origine et terminez l’installation pour
«REC1».
Le symbole «REC 2» clignote, le nom de l’appareil d’enregistrement est visible sur le LCD si
vous en avez donné un, par exemple : CH3 = DVD_R
Appuyez sur le bouton «<» ou «>» pour choisir le canal pour le signal d’entrée d’origine, le
nom de l’appareil est visible sur le LCD si vous en avez donné un, par exemple : CH4=SAT_1
En appuyant sur le bouton «REC» vous confirmez le canal d’origine et terminez l’installation
de «REC 2»
CONNECT 236™
39
FRANÇAIS
Appuyez sur et retenez le bouton «REC» pendant 2 secondes, et le symbole «REC 1» clignote,
le nom de l’appareil d’enregistrement est indiqué sur le LCD si vous en avez donné un, par
exemple : CH2=VCR_1
Note:
1. Pendant l’installation, le mode revient à la phase précédente s’il n’y a pas d’entrée pendant
10 secondes.
2. Si vous débranchez la distribution d’électricité, toutes les données REC seront effacées.
3. Dans le mode REC, les boutons «<»/ «>» changeront le canal.
4. Vous pouvez également utiliser l’unité de télécommande pour changer le canal.
5. Vous ne pouvez pas choisir le canal 2 pour REC 1
6. Vous ne pouvez pas choisir le canal 3 pour REC 2
Comment effacer la fonction d’enregistrement
Effacez la fonction d’enregistrement comme suit :
Appuyez sur le bouton «REC» et retenez-le pendant 2 secondes, le symbole «REC 1»
clignotera, le nom de l’appareil d’enregistrement sera affiché sur le LCD si vous en avez donné
un, par exemple : CH2=VCR_1
Appuyez sur le bouton «<» ou «>» pour choisir le canal «CH2» pour «REC 1».
Appuyez sur le bouton «REC». Le symbole «REC 2» clignotera, le nom de l’appareil
d’enregistrement sera affiché sur le LCD si vous en avez donné un, par exemple : CH3=DVD_R
Appuyez sur le bouton «<» ou «>» pour choisir le canal «CH3» pour «REC 2».
40
© MARMITEK
Appuyez sur le bouton «REC», Control 236 retournera à l’état de marche.
Note:
1. Pendant l’installation, le mode retournera à la phase précédente s’il n’y a pas d’entrée
pendant 10 secondes.
2. Si vous débranchez la distribution d’électricité, toutes les données REC seront effacées.
3. Dans le mode REC, les boutons «<»/ «>» changeront le canal.
4. Vous pouvez également utiliser l’unité de télécommande pour changer le canal.
Pas d’image
Vérifiez que
- votre câble scart soit bien raccordé à votre système et à Connect 236.
- votre câble scart soit bien branché dans votre téléviseur depuis la sortie de Connect 236.
- vous ayez choisi le canal d’entrée adéquat.
- votre téléviseur soit sur l’entrée vidéo adéquate.
- votre téléviseur et Connect 236 soient allumés.
Pas de son
- Contrôlez les câbles de raccordement.
- Contrôlez le volume de votre téléviseur.
- Contrôlez si le signal audio est transmis par le câble utilisé (des câbles S-VIDEO ou des
câbles attachés en partie ne transmettent pas en audio).
- Vérifiez que votre téléviseur et le système soient allumés.
L’image est très floue / il y a une perturbation au second plan
- Éteignez les appareils qui ne sont pas utilisés. Certains appareils ont un signal très puissant
qui peut causer une perturbation.
- Contrôlez la qualité des câbles utilisés.
CONNECT 236™
41
FRANÇAIS
FOIRE AUX QUESTIONS
CARACTÉRISTIQUES TECHNIQUES
Général
Exigences de la puissance :
Consommation de puissance :
Dimensions:
Masse:
Entrées / sorties
Entrées à l’avant :
Entrées à l arrière :
Sorties à l’arrière :
AC 9V 500mA
2W
285mm X 260 mm X 55 mm
2 Kg
CH6= 1 x RCA Vidéo, 2 x RCA Audio (L+R)
CH1-5 = 5 x Scart, 3 x Coaxial RCA audio
SORTIE, CH2, CH3 = 3 x Scart, 1 x RCA Vidéo, 4 x RCA
Audio (2 x L+R), 1 x RCA Coaxial audio
Des modifications de produit peuvent avoir lieu sans avis préalable
OPTIONS ADDITIONNELLES
1. Audio et vidéo sans fil
Vous pouvez raccorder un produit de la série GigaVideo
de Marmitek au raccordement OUTPUT ou REC1/REC2 de
Connect 236 afin de transmettre le signal sans fil audio
ou vidéo à travers toute la maison. Cela signifie que vous
pouvez également transmettre le signal vers une télévision
dans une autre pièce et regarder les signaux depuis chaque
appareil raccordé à Connect 236.
Le canal inséré infrarouge de retour de la série GigaVideo
signifie également que vous pouvez contrôler les appareils
et Connect 236 de loin, même à travers parois et plafonds !
2. Contrôlez vos appareils Connect 236 et A/V qui se
trouvent hors de vue
Marmitek offre une variété de produits pour contrôler vos
appareils dans un placard fermé ou depuis une autre pièce,
aussi bien avec que sans fil.
Pour ces rallonges infrarouges, vous trouverez d’autres
informations sur notre site : www.marmitek.com.
42
© MARMITEK
3. Audio et vidéo par câble coax
Les produits MegaVideo de Marmitek vous donnent la possibilité
d’ajouter le signal OUTPUT ou REC1/REC2 de votre Connect 236
comme un canal additionnel vers votre câble coax. Vous pouvez
regarder le signal de chaque appareil raccordé partout dans la
maison où se trouve une rallonge coax. Le canal de retour inséré
infrarouge du modèle Megavideo55 signifie également que vous
pouvez contrôler les appareils et Connect 236 de loin, même à
travers parois et plafonds !
FRANÇAIS
4. Pas de télécommande additionnelle
Si vous voulez contrôler vos appareils depuis divers endroits ou utiliser une
seule télécommande pour tous les appareils, vous pouvez utiliser Marmitek
EasyControl 6, 8 ou Marmitek EasyTouch 35 pour apprendre les commandes
de votre télécommande Connect 236. Ces télécommandes remplacent
presque toutes les télécommandes que vous utilisez maintenant.
5. S-video vers adaptateur de composite video
Si les rallonges de sortie des appareils raccordés (par exemple
un ordinateur portable) ne correspondent pas avec les rallonges
d’entrée de votre Connect 236, dans beaucoup de cas Marmitek
S-video vers l’adaptateur video composite peut être utilisé.
Pour les rallonges scart entrée/sortie, beaucoup d’adaptateurs
scart sont en vente.
Adapter
Vous trouverez d’autres informations sur notre site : www.marmitek.com
Informations environnementales pour les clients de l’Union européenne
La directive européenne 2002/96/CE exige que l’équipement sur lequel est apposé ce symbole sur le produit
et/ou son emballage ne soit pas jeté avec les autres ordures ménagères. Ce symbole indique que le produit
doit être éliminé dans un circuit distinct de celui pour les déchets des ménages. Il est de votre responsabilité
de jeter ce matériel ainsi que tout autre matériel électrique ou électronique par les moyens de collecte indiqués par le
gouvernement et les pouvoirs publics des collectivités territoriales. L’élimination et le recyclage en bonne et due forme
ont pour but de lutter contre l’impact néfaste potentiel de ce type de produits sur l’environnement et la santé publique.
Pour plus d’informations sur le mode d’élimination de votre ancien équipement, veuillez prendre contact avec les pouvoirs
publics locaux, le service de traitement des déchets, ou l’endroit où vous avez acheté le produit.
CONNECT 236™
43
44
© MARMITEK
AVISOS DE SEGURIDAD
Introducción
Gracias por la compra del Marmitek Connect 236. Los productos de alta calidad de Marmitek
se producen con gran exactitud. Por favor lea este manual cuidadosamente y sigua las
instrucciones.
Accesorios
Controle si el embalaje contiene el interruptor SCART y todas otras partes y accesorios.
CONNECT 236™
45
ESPAÑOL
• Para evitar un cortocircuito, este producto solamente se usa en casa y en habitaciones
secas. No exponga los componentes del sistema a la lluvia o a la humedad. No se use
cerca de una bañera, una piscina, etc.
• No exponga los componentes del sistema a temperaturas extremamente altas o a focos
de luz fuertes.
• En caso de uso indebido o modificaciones y reparaciones montados por su mismo, la
garantía se caducará. En caso de uso indebido o impropio, Marmitek no asume ninguna
responsabilidad para el producto. Marmitek no asume ninguna responsabilidad para
daños que resultan del uso impropio, excepto según la responsabilidad para el producto
que es determinada por la ley.
• Este producto no es un juguete. Asegúrese de que está fuera del alcance de los niños.
• Nunca abra el producto (a excepción de compartimiento de pilas): Puede contener piezas
que se encuentren bajo una tensión mortal. Deja las reparaciones o servicios a personal
experto.
• Ten cuidado que las pilas se encuentran fuera del alcance de niños. Entrega las pilas
como residuos químicos. Nunca use pilas nuevas y viejas o pilas de tipos distintos a la vez.
Quita las pilas si no usa el sistema durante mucho tiempo. Cuando pone las pilas, presta
atención a la polaridad (+ / -): si no son puestas de manera justa, puede causar peligro de
explosión.
• No conecte el adaptador de red a la red de alumbrado antes de que haya controlado si la
tensión de red corresponde con el valor indicado en la estampa de tipo. Nunca conecte
un adaptador de si ése está dañado. En este caso, por favor entre en contacto con su
proveedor.
Parte delantera y parte trasera
El Connect 236 dispone de seis canales de entrada. Entrada no. 6 se encuentra en la parte
delantera y las entradas 1 - 5 están en la parte trasera del Connect 236.
1.
2.
3.
4.
5.
6.
7.
8.
9.
10.
11.
12.
13.
46
Interruptor de energía
Pulse el botón para encender o apagar la unidad;
Sensor de mando a distancia
Sensor para las señales del mando a distancia inalámbrico;
Botón REC
Para cambiar la función RECORD (grabar);
Botón SET
Botón para confirmar los ajustes;
Pantalla LCD
Muestra el estado de la unidad;
Botones </>
Para cambiar entre las entradas 1-6 (o para la programación de los ajustes);
Entrada 6 (entrada de video externa)
Conecta las conexiones de video e audio del dispositivo a la unidad;
Entrada SCART 1
Conecta la conexión SCART del dispositivo a la unidad;
Entrada/Salida SCART 2
Conecta la conexión SCART del dispositivo a la unidad;
Entrada/Salida SCART 3
Conecta la conexión SCART del dispositivo a la unidad;
Entrada SCART 4
Conecta la conexión SCART del dispositivo a la unidad;
EntradaSCART 5
Conecta la conexión SCART del dispositivo a la unidad;
Salida SCART
Conecta la conexión SCART del dispositivo a la unidad;
© MARMITEK
14. Salida video
Conecta las conexiones video del dispositivo a la unidad;
15. Salida audio 1
Conecta la conexión audio del dispositivo a la unidad.
16. Salida audio 2
Conecta la conexión audio del dispositivo a la unidad.
17. Entrada Coax 1,3,4 (audio digital)
Conecta la conexión coax del dispositivo a la unidad;
18. Salida Coax (audio digital)
Conecta la conexión coax del dispositivo a la unidad
19. Alimentación
Conecta la unidad de alimentación a la unidad.
Denominaciones y funciones
Pantalla LCD y unidad de mando a distancia
Con las teclas numéricas en el mando a distancia selecciona los
canales de entrada.
Con el botón “ ” en el mando a distancia se enciende o se apaga
el Connect 236.
2.
3.
4.
5.
1.
2.
3.
4.
Interruptor de energía
Pulsar el botón para encender o apagar la unidad;
Botón SET
Para confirmar cuando se utilicen las funciones NAME y REC;
Botón REC
Para cambiar la función REC;
Botones CH1-CH6
Para seleccionar CH1-CH6 (canales 1-6) directamente;
Botones < / >
Para cambiar entre las entradas 1 - 6.
ESPAÑOL
1.
Indicador de entrada CH1-CH6
La pantalla multifuncional muestra el nombre del dispositivo seleccionado.
Estado REC 1
Estado REC 2
CONNECT 236™
47
Canal 1
El nombre del dispositivo es ‘DVD Player’
REC 1 (Ch2) Cerrar con Ch5
REC 2 (Ch3) Cerrar con Ch4
Actualmente está viendo canal 1
Instrucciones de ajustes
Conexión de la unidad de alimentación AC.
Conecte los dispositivos como mostrado en el diagrama abajo.
Conexión de la unidad de alimentación AC.
1. Conecte la clavija de la unidad de alimentación AC a la entrada AC9V IN en la parte
trasera del Connect 236.
2. Enchufe la unidad de alimentación AC.
IMPORTANTE: La unidad de alimentación debe ser del tipo correcto. No utilice unidades de
alimentación otras que las indicadas.
48
© MARMITEK
Colocación de las pilas
1. Abra la tapa de las pilas
Presione en la tapa de las baterías y deslízela.
2. Coloque las pilas
Coloque dos pilas AAA y fíjese en la polaridad correcta.
3. Cierre la tapa de las pilas
Cierre la tapa de las pilas. Está cerrada cuando se escuche un ‘klik’.
Conexiones del sistema
Nota:
- Siempre corte la electricidad o apague el Connect 236 antes de conectar o desconectar
los cables.
- Cuando conecte los cables, controle si las clavijas estén bien enchufadas en las conexiones.
Si la conexión no está completa puede resultar en una ausencia de sónido o en ruido.
Conecte los dispositivos como mostrado en el diagrama abajo. Lea el manual del dispositivo
en cuestión antes de conectarlo.
CONNECT 236™
49
ESPAÑOL
Conexión SCART, video & audio compuesto
Conectar directamente al TV
1. Conecte el cable SCART a la entrada correspondiente del TV.
2. Conecte el otro lado del cable SCART a la salida SCART del Connect 236.
3. Conecte el lector de DVD, el VCR, el receptor de satélite, la videoconsola etc. a una de las
5 entradas SCART en la parte trasera de la unidad.
SALIDA
SCART
SCART (VIDEO COMPUESTO)
VIDEO COMPUESTO
(RGB)
ENTRADA
SCART (RGB)
SI
SI
SI
SCART (VIDEO)
NO
SI
SI
VIDEO COMPUESTO(Ch6)
NO
SI
SI
EMPEZAR DIRECATAMENTE
Ejemplo de un ajuste típico
Se pueden conectar hasta seis dispositivos A/V al Connect 236. Las señales audio/video de
estos dispositivos se transmiten al equipo TV/Hi-Fi. Todos los dispositivos pueden selectarse
independientemente. No es necesario quitar los cables de los dispositivos conectados antes
de seleccionar una entrada.
1. Ponga el interruptor de energía en posición ‘Encendido’
La lámpara en la parte trasera de la pantalla LCD se enciende lentamente y la unidad
Connect 236 entra en el modo de operación. Si pulse el botón otra vez, la lámpara se
apaga lentamente y el Connect 236 deja el modo de operación.
2. Pulse el botón < o el botón > para seleccionar un canal
La pantalla LCD muestra CH1, CH2, CH3, CH4, CH5 o CH6.
50
© MARMITEK
Interruptor de energía en modo ‘Standby’
Se utiliza una pequeña cantidad de energía para alimentar la memoria y la función sensor del
mando a distancia cuando el interruptor de energía está puesto en posición Apagado. Esto se
llama el modo standby. La alimentación se enciende/apaga con el mando a distancia.
Nota: Las conexiones que se muestran arriba son un ejemplo. Se pueden conectar todos los
dispositivos adecuados a los canales de entrada.
Programación del canal de entrada
Para poder identificar los dispositivos A/V conectados al Connect 236, cada de las seis
entradas puede ser nombrada en la pantalla de canales de entrada.
Pulse y mantenga pulsado el botón ‘SET’ para 2 segundos. Parpadea ‘CH1’ en la pantalla
LCD.
Pulse ‘<’ o ‘>’ para seleccionar el canal de entrada deseado (1-6).
ESPAÑOL
Pulse ‘SET’, en la pantalla aparece ‘------‘ parpadeando.
Pulse ‘<’ o ‘>’, la pantalla LCD muestra el primer nombre disponible: ‘DVD_1’.
Pulse ‘<’ o ‘>’ para mostrar todos los nombres disponibles. Cuando aparece el nombre
deseado , pulse ‘SET’ y el nombre se guarda.
Nombres disponibles:
CONNECT 236™
51
Nota:
1. Repite el procedimiento descrito arriba cada vez que quiere cambiar un nombre.
2. Si no se insierte nada durante el ajuste para 10 segundos, el aparato vuelve al paso
anterior.
3. Si quiere borrar los nombres en el Connect 236, pulse ‘< ‘ y ‘>’ y manténgalos pulsados
para 5 segundos. Todos los nombres guardados se borren.
4. Los nombres pueden cambiarse con el mando a distancia.
Para ajustar la funcion grabar (record)
Una conexión multifuncional A/V es posible con 5 consoles de entrada y 2 consoles de
entrada/salida para activar las siguientes funciones:
- La función cerrar para evitar que el dispositivo pase la conexión durante el proceso de
grabar.
- Graba una señal en dos aparatos de grabación distintos al mismo tiempo.
- Graba dos señales en dos aparatos de grabación distintos al mismo tiempo.
Ajuste función grabar
1. Canal 2 y canal 3 están adjudicados a la función de grabar (RECORD). Conecte el aparato
de grabar a canal 2/3.
2. Es posible definir el nombre del aparato de grabación. Consulte el capítulo ‘Programar el
canal de entrada’ para informaciones sobre la adjudicación de un nombre.
52
© MARMITEK
Ajustar la función grabar
Ajuste la función grabar (REC) de la manera siguiente:
Pulse el botón ‘REC’ y manténgalo pulsado para 2 segundos. El símbolo ‘REC 1’ parpadéa y el
nombre del aparato de grabación aparace en la pantalla. Ejemplo: CH2=VCR_1
Pulse ‘REC’ para confirmar el canal fuente y para terminar el ajuste de ‘REC 1’.
El símbolo ‘REC 2’ parpadea y el nombre del aparato de grabación aparace en la pantalla.
Ejemplo: CH3 = DVD_R
Pulse ‘<’ o ‘>’ para seleccionar el canal para la señal fuente que entra. El nombre del aparato
aparece en la pantalla LCD. Ejemplo: CH4=SAT_1
Pulse ‘REC’ para confirmar el canal fuente y para terminar el ajuste de ‘REC 2’.
CONNECT 236™
53
ESPAÑOL
Pulse ‘<’ o ‘>’ para seleccionar el canal para la señal fuente que entra. El nombre del aparato
aparece en la pantalla LCD. Ejemplo: CH1= DVD_1
Nota:
1. Si no se insierte nada durante el ajuste para 10 segundos, el aparato vuelve al paso
anterior.
2. Si se interrumpe la alimentación de energía, todos los ajustes REC se borran.
3. En el modo REC puede cambiar los canales con los botones ‘<’/’>’.
4. Puede cambiar los canales con el mando a distancia.
5. Canal 2 no puede seleccionarse para REC 1.
6. Canal 3 no puede seleccionarse para REC 2.
Borrar la función de grabar
Borre la función grabar (REC) de la manera siguiente:
Pulse ‘REC’ y manténgalo pulsado para 2 segundos. El símbolo ‘REC 1’ parpadea y el nombre
del aparato de grabación aparace en la pantalla. Ejemplo: CH2=VCR_1
Pulse ‘<’ o ‘>’ para seleccionar canal ‘CH2’ para ‘REC 1’.
Pulse ‘REC’. El símbolo ‘REC 2’ parpadea y el nombre del aparato de grabación aparace en la
pantalla. Ejemplo: CH3=DVD_R.
Pulse ‘<’ o ‘>’ para seleccionar canal ‘CH3’ para ‘REC 2’.
54
© MARMITEK
Pulse ‘REC’ y el Control 236 vuelve al modo de operación.
Nota:
1. Si no se insierte nada durante el ajuste para 10 segundos, el aparato vuelve al paso
anterior.
2. Si se interrumpe la alimentación de energía, todos los ajustes REC se borran.
3. En el modo REC puede cambiar los canales con los botones ‘<’/’>’.
4. Puede cambiar los canales con el mando a distancia.
No imagen
1. Controle si el cable SCART está correctamente conectado a su sistema y al Connect
236.
2. Controle si el cable SCART de la salida del Connect 236 está correctamente conectado al
TV.
3. Controle si ha seleccionado el canal de entrada justo.
4. Controle si el TV está conectado a la entrada de video correcta.
5. Controle si el TV y el Connect 236 están encendidos.
No sonido
Controle los cables de conexión.
Controle los ajustes de volumen del TV.
Controle si la señal audio se transmite a través del cable utilizado (cables S-VIDEO o cables
SCART no transmiten señales audio).
Controle si el TV y el Connect 236 están encendidos.
Imagen granosa/interferencia en el fondo
Apague aparatos que no se utilicen. Algunos aparatos emiten una señal tan fuerte que puede
causar interferencias.
Controle la calidad de los cables utilizados.
CONNECT 236™
55
ESPAÑOL
PREGUNTAS FRECUENTES
DATOS TÉCHNICOS
Genaral
Exigencias de energía:
Consumo:
Dimensiones:
Peso:
Entradas/Salidas
Entradas parte delantera:
Entradas parte trasera:
Salidas parte trasear:
AC 9V 500mA
2W
285mm X 260 mm X 55 mm
2Kg
Ch6= 1 x RCA video, 2 x RCA audio (L+R)
CH1-5 = 5 x SCART, 3 x coax RCA audio
OUTPUT, CH2, CH3 = 3 x SCART, 1 x RCA video, 4 x RCA audio
(2 x L+R), 1 x RCA coax audio
Se pueden realizar modificaciones del producto sin aviso anterior.
OPCIONES ADICIONALES
1. Audio y video inalámbricos
Los productos de la serie GigaVideo de Marmitek pueden
conectarse al OUTPUT o a la conexión REC1/REC2 del Connect
236, para transmitir inalámbricamente la señal video/audio.
De esta manera la señal puede también transmitirse a un TV
que está colocado en otra habitación y puede verla en cada
aparato conectado al Connect 236.
Con el canal de vuelta infrarrojo incorporado de la serie
GigaVideo puede además manejar los aparatos y el Connect
236 a distanciá, ¡aún a través de muros y techos!
2. Manejar el Connect 236 y su equipo A/V también si se
encuentran fuera de la vista.
Marmitek le ofrece una variedad de productos para manejar su
equipo aún si se encuentra dentro de un armario cerrado u en
otrda habitación. Es posible con o sin cables.
Información más detallada sobre estas extensiones infrarrojas
en: www.marmitek.com.
56
© MARMITEK
3. Audio y video a traves de coax
Los productos MegaVideo de Marmitek ofrecen la posibilidad de
añadir la señal OUTPUT o la señal REC1/REC2 del Connect 236
como canal adicional al cable coax. De esta manera puede ver la
señal en cada aparato conectado, en todos lugares en casa que
disponen de una conexión coax. Con el canal de vuelta infrarrojo
incorporado de la serie GigaVideo puede además manejar los
aparatos y el Connect 236 a distanciá, ¡aún a través de muros y techos!
4. Sin mando a distancia adicional
Si quiere manejar su equipo desde varias habitaciones o si solamente dispone de
un solo mando a distancia para todos sus aparatos, puede utilizar el Marmitek
EasyControl 6, 8 o el Marmitek EasyTouch 35 para aprender los mandos del
mando a distancia del Connect 236. Estos mandos a distancia sustituyen casi
todos los demás mandos que utilice ahora.
5. Adaptador S-video a video compuesto
Si las conexiones salientes del equipo conectado (p.e. laptop) no
corresponden con los conectores del Connect 236, puede en
la mayoría des los casos utilizar el adaptador S-video a viedeo
compuesto de Marmitek para resolver este problema.
Para las conectores de Entrada/Salida SCART existen una
variedad de convertores SCART.
ESPAÑOL
Para más informatie vea: www.marmitek.com
Información medioambiental para clientes de la Unión Europea
La Directiva 2002/96/CE de la UE exige que los equipos que lleven este símbolo en el propio aparato y/o en
su embalaje no deben eliminarse junto con otros residuos urbanos no seleccionados. El símbolo indica que el
producto en cuestión debe separarse de los residuos domésticos convencionales con vistas a su eliminación.
Es responsabilidad suya desechar este y cualesquiera otros aparatos eléctricos y electrónicos a través de los puntos de
recogida que ponen a su disposición el gobierno y las autoridades locales. Al desechar y reciclar correctamente estos
aparatos estará contribuyendo a evitar posibles consecuencias negativas para el medio ambiente y la salud de las personas.
Si desea obtener información más detallada sobre la eliminación segura de su aparato usado, consulte a las autoridades
locales, al servicio de recogida y eliminación de residuos de su zona o pregunte en la tienda donde adquirió el producto.
CONNECT 236™
57
58
© MARMITEK
PRECAUZIONI DI SICUREZZA
• Per evitare il pericolo di cortocircuito utilizzare questo prodotto esclusivamente al coperto
e in luoghi asciutti. Non esporre i componenti di questo prodotto a pioggia o umidità.
Non utilizzare vicino alla vasca da bagno, piscina, ecc.
• Non esporre i componenti del sistema a temperature eccessivamente alte o a fonti intense
di luce.
• In caso di utilizzo scorretto, di riparazioni o modifiche apportate personalmente decade
qualsiasi garanzia. Marmitek declina ogni responsabilità per i danni derivanti da un utilizzo
non appropriato del prodotto o da utilizzo diverso da quello per cui il prodotto è stato
creato. Marmitek declina ogni responsabilità per danni consequenziali ad eccezione della
responsabilità civile sui prodotti.
• Questo prodotto non è un giocattolo: tenerlo lontano dalla portata dei bambini.
• Non aprire mai il prodotto (vano batteria escluso): L’apparecchio può contenere
componenti la cui tensione è estremamente pericolosa. Lasciare fare riparazioni o
modifiche esclusivamente a personale esperto.
• Batterie: conservare le batterie fuori dalla portata dei bambini. Consegnare le batterie agli
appositi centri per lo smaltimento. Non utilizzare mai in combinazione batterie nuove e
vecchie o di tipo diverso. Togliere le batterie quando l’apparecchio non viene utilizzato per
un lungo periodo di tempo. Inserire correttamente le batterie prestando attenzione alla
polarità (+ / -): un errato posizionamento delle batterie può provocare una esplosione.
• Collegare l’alimentatore alla presa di corrente solamente dopo avere controllato che la
tensione della rete elettrica corrisponda alle indicazioni riportate sulla targhetta. Non
utilizzare mai un alimentatore danneggiato. In tal caso rivolgersi al proprio rivenditore.
Accessori
Dopo il disimballaggio assicurarsi che, accanto al commuttore scart, tutti gli accessori seguenti
siano forniti.
CONNECT 236™
59
ITALIANO
Introduzione
Vi ringraziamo per aver comprato il Marmitek Connect 236. I prodotti Marmitek sono stati
fatti con la massima attenzione e sono di alta qualità. Vi preghiamo di leggere attentamente
questo manuale e di seguire tutte le istruzioni.
Vista frontale e vista dal retro
L’unità Connect 236 dispone di sei canali di ingresso. Ingresso 6 si trova sul pannello anteriore
e gli ingressi 1 – 5 si trovano sul pannello posteriore.
1.
2.
3.
4.
5.
6.
7.
8.
9.
10.
11.
12.
13.
60
Interruttore di alimentazione
Premere l’interruttore per accendere o spegnere l’unità;
Sensore per telecomando
Questo è il sensore per i segnali del telecomando senza fili;
Tasto REC
Per cambiare la funzione di registrazione;
Tasto SET
Per confermare le impostazioni modificate;
Display LCD
Per visualizzare lo stato del dispositivo;
Tasto </>
Per cambiare l’ingresso 1-6 (o programmare le vostre impostazioni)
Ingresso 6 (connettori jack ingresso video esterno)
Per collegare i connettori jack dell’apparecchio video e audio all’unità;
Ingresso scart 1
Per collegare il connettore scart jack del dispositivo all’unità;
Ingresso/uscita scart 2
Per collegare il connettore scart jack del dispositivo all’unità;
Ingresso/uscita scart 3
Per collegare il connettore scart jack del dispositivo all’unità;
Ingresso scart 4
Per collegare il connettore scart jack del dispositivo all’unità;
Ingresso scart 5
Per collegare il connettore scart jack del dispositivo all’unità;
Uscita scart
Per collegare il connettore jack scart del dispositivo all’unità;
© MARMITEK
14. Uscita video
Per collegare i connettori jack video del dispositivo all’unità;
15. Uscita audio 1
Per collegare il connettore jack audio del dispositivo all’unità;
16. Uscita audio 2
Per collegare il connettore jack audio del dispositivo all’unità;
17. Ingresso coassiale 1,3,4 (audio digitale)
Per collegare il connettore jack coassiale del dispositivo all’unità;
18. Uscita coassiale (audio digitale)
Per collegare il connettore jack coassiale del dispositivo all’unità;
19. Alimentazione
Per collegare l’alimentatore all’unità.
Nome e funzioni
Display LCD e telecomando
Si può scegliere ogni canale di ingresso usando il tasto numerico
sul telecomando.
Il tasto“ ” si trova sul telecomando con cui si può accendere e
spegnere il 236.
1.
2.
3.
4.
ITALIANO
5.
Interruttore di alimentazione
Premere l’interruttore per accendere o spegnere l’unità.
Tasto SET
Per confermare durante l’uso delle funzioni NAME e REC.
Tasto REC
Per cambiare la funzione di registrazione.
Tasto CH1-CH6
Per selezionare direttamente i canali CH1-CH6.
Tasti < / >
Per cambiare tra gli ingressi 1 – 6.
1.
2.
3.
4.
Indicatore ingresso CH1 - CH6.
Multidisplay, visualizzando il nome del dispositivo scelto.
Stato REC 1.
Stato REC 2.
CONNECT 236™
61
Canale 1
Nome del dispositivo è lettore DVD.
REC 1 (Ch2) Bloccando con Ch5
REC 2 (Ch3) Bloccando con Ch4
Attualmente guardando il canale 1
Istruzioni per l’installazione
Collegare l’alimentatore CA
Collegare come indicato nel schema qui sotto.
Collegare l’alimentatore CA
1. Collegare il connettore dell’alimentatore CA al CA9V IN che si trova sul pannello posteriore
del Connect 236.
2. Collegare l’alimentatore CA ad un’appropriata presa a muro.
IMPORTANTE: l’alimentatore deve essere del tipo corretto. Non usare un altro tipo di
alimentatore di quello indicato.
62
© MARMITEK
Installazione della batteria
1. Aprire il coperchio della batteria
Spingere e aprire il coperchio della batteria.
2. Inserire la batteria
Inserire due batterie formato AAA, osservare la polarità corretta.
3. Chiudere il coperchio
Chiudere il coperchio della batteria finché si sentirà un rumore simile ad un clic.
Collegamenti sistema
Nota:
1. Per prevenire qualsiasi problema, sempre scollegare il connettore di alimentazione o
disattivare l’interruttore di alimentazione del Connect 236 prima del collegamento o
scollegamento dei cavi.
2. Sempre inserire correttamente i connettori a poli nei connettori jack durante il collegamento
dei cavi.
Un inserimento insufficiente potrebbe provocare problemi di mancanza di suono o generare
rumori.
Collegamento tramite Scart, Composite video e Audio
ITALIANO
Collegare come indicato nel schema seguente. Per il collegamento dei relativi dispositivi,
vedere il relativo manuale di istruzioni.
CONNECT 236™
63
Collegamento diretto a un TV
1. Inserire il cavo scart nel corrispondente ingresso sul vostro TV.
2. Inserire l’altro lato del cavo scart nell’uscita scart del Connect 236.
3. Inserire il vostro lettore DVD, VCR, ricevitore satellitare e console videogiochi, ecc. in uno
dei 5 ingressi scart sul lato posteriore dell’unità.
USCITA
SCART (RGB)
SCART (RGB)
INGRESSO
SCART (COMPOSITE VIDEO)
COMPOSITE VIDEO
SI
SI
SI
SCART (COMPOSITE VIDEO)
NO
SI
SI
COMPOSITE VIDEO (Ch6)
NO
SI
SI
AVVIO RAPIDO
Esempio di una configurazione tipica
Il Connect 236 è stato sviluppato per collegare fino a sei separati apparecchi AV e per inviare il
loro segnale audio/video al TV/HiFi. Ogni apparecchio può essere selezionato separatamente
l’uno dall’altro. Dopo il collegamento di un apparecchio, non è necessario rimuovere i cavi
quando si seleziona un ingresso.
1. Premere l’interruttore di alimentazione (On)
La luce di fondo dell’LCD comparirà lentamente e l’unità Connect 236 entra nel modo di
funzionamento.
Premere di nuovo il tasto e la luce di fondo dell‘LCD scomparirà lentamente e l’unità 236
si spegnerà.
2. Premere il tasto < o > per selezionare un canale
L’LCD visualizza CH1,CH2,CH3,CH4,CH5 o CH6.
64
© MARMITEK
Interruttore di alimentazione standby
Una piccola quantità dell’alimentazione è usata per sostenere la memoria e la funzione
sensore del telecomando quando l’alimentazione è stata scollegata. Questo è il modo di
standby. L’alimentazione può essere collegata/scollegata tramite il telecomando.
Nota: I collegamenti dei dispositivi summenzionati valgono solo da riferimento. Qualsiasi
dispositivo adatto può essere collegato ai canali di ingresso.
Programmazione del canale di ingresso
Per un’identificazione facile dell’apparecchio AV collegato al Connect 236, è possibile dare un
nome a ogni dei sei ingressi sul display del canale di ingresso.
Premere e mantenere premuto durante 2 secondi il tasto “SET”, ora “CH1” sull’LCD comincerà
a lampeggiare.
Premere il tasto “<” o “>” per selezionare il canale di ingresso desiderato (1-6).
Premere il tasto “SET”, ora lampeggerà “------”.
Premere il tasto “<” o “>”, l’LCD visualizzerà il primo nome disponibile: “DVD_1”.
ITALIANO
Premere il tasto “<” o “> per scorrere tutti i nomi disponibili. Quando il nome desiderato è
visualizzato, premere il tasto “SET”. Il nome sarà memorizzato.
Nomi disponibili:
CONNECT 236™
65
Nota:
1. Ripetere la procedura di sopra ogni volta quando si vuole dare un nome nuovo.
2. Durante l’impostazione, il modo ritornerà alla fase precedente quando non sono introdotti
dei dati durante 10 secondi.
3. Se si vuole eliminare i nomi sul Connect 236, premere e mantenere premuto durante
5 secondi i tasti “<” e “>” sul Connect 236, ora tutti i nomi programmati saranno
eliminati.
4. Si può anche usare il telecomando per dare un nome nuovo.
Prima di impostare la funzione di registrazione
Lo scambio multifunzionale tra apparecchi AV è possibile grazie ai 5 terminali di ingresso ed
ai 2 terminali di ingresso/uscita, che abilitano:
- La funzione di bloccaggio che previene lo scambio erroneo del dispositivo durante la
registrazione.
- La registrazione contemporanea di un segnale su due registratori diversi.
- La registrazione contemporanea di due segnali differenti su due registratori diversi.
Impostazione della registrazione
1. Canale 2 e canale 3 sono destinati alla registrazione (RECORD). Collegare il vostro
dispositivo di registrazione al canale 2/3.
2. Vedere la parte “Programmazione del canale di ingresso” per definire il nome del vostro
dispositivo di registrazione.
66
© MARMITEK
Impostazione della funzione di registrazione
Impostare la funzione di registrazione come segue:
Premere e mantenere premuto il tasto “REC” durante 2 secondi e il simbolo “REC 1”
lampeggerà, poi il nome del dispositivo di registrazione (se assegnato) sarà visualizzato
nell’LCD. Esempio: CH2=VCR_1.
Premere il tasto “<” o “>” per selezionare il canale per il segnale di ingresso della fonte, poi
il nome del dispositivo di registrazione (se assegnato) sarà visualizzato nell’LCD. Esempio:
CH1= DVD_1.
Premere il tasto “<” o “>” per selezionare il canale per il segnale di ingresso della fonte, poi
il nome del dispositivo di registrazione (se assegnato) sarà visualizzato nell’LCD. Esempio:
CH4=SAT_1.
Premere il tasto “REC” per confermare il canale di fonte e per finire l’impostazione per “REC
2”.
CONNECT 236™
67
ITALIANO
Premere il tasto “REC” per confermare il canale di fonte e per finire l’impostazione per
“REC1”.
Il simbolo “REC 2” lampeggerà, poi il nome del dispositivo di registrazione (se assegnato)
sarà visualizzato nell’LCD. Esempio: CH3 = DVD_R.
Nota:
1. Durante l’impostazione, il modo ritornerà alla fase precedente quando non sono introdotti
dei dati durante 10 secondi.
2. Lo scollegamento dell’alimentatore eliminerà tutte le impostazioni di registrazione.
3. Nel modo di registrazione i tasti “<”/ “>” cambieranno il canale.
4. Si può anche usare il telecomando per cambiare il canale.
5. Non è possibile selezionare il canale 2 per REC 1.
6. Non è possibile selezionare il canale 3 per REC 2.
Come eliminare la funzione di registrazione
Eliminare la funzione di registrazione come segue:
Premere e mantenere premuto il tasto “REC” durante 2 secondi e il simbolo “REC 1”
lampeggerà, poi il nome del dispositivo di registrazione (se assegnato) sarà visualizzato
nell’LCD. Esempio: CH2=VCR_1.
Premere il tasto “<” o “>” per selezionare il canale “CH2” per “REC 1”.
Premere il tasto “REC”. Il simbolo “REC 2” lampeggerà, poi il nome del dispositivo di
registrazione (se assegnato) sarà visualizzato nell’LCD. Esempio: CH3=DVD_R.
Premere il tasto “<” o “>” per selezionare il canale “CH3” per “REC 2”.
68
© MARMITEK
Premere il tasto “REC” e il Control 236 ritornerà al modo di funzionamento.
Nota:
1. Durante l’impostazione, il modo ritornerà alla fase precedente quando non sono introdotti
dei dati durante 10 secondi.
2. Lo scollegamento dell’alimentatore eliminerà le impostazioni di registrazione.
3. Nel modo di registrazione i tasti “<”/ “>” cambieranno il canale.
4. Si può anche usare il telecomando per cambiare il canale.
DOMANDE FREQUENTI
Manca il suono
- Controllare i cavi di collegamento.
- Controllare l’impostazione di volume del TV.
- Controllare se il segnale audio è trasmesso tramite il cavo usato (cavi S-VIDEO o cavi scart
parzialmente a poli non trasmettono audio).
- Controllare se il vostro TV e il sistema sono accesi.
L’immagine è molto granulosa/c’è dell’interferenza di fondo
- Spegnere gli apparecchi che non sono usati. Talvolta gli apparecchi trasmettono un
segnale molto forte che può causare l’interferenza.
- Controllare la qualità del cavo usato.
CONNECT 236™
69
ITALIANO
Manca un’immagine
- Controllare se il cavo scart è stato correttamente collegato al vostro sistema e al Connect
236.
- Controllare se il cavo scart è stato correttamente collegato al vostro TV dall’uscita del
Connect 236.
- Controllare se è stato scelto il canale di ingresso appropriato.
- Controllare se il vostro TV è stato collegato all’appropriato ingresso video.
- Controllare se il vostro TV e il Connect 236 sono accesi.
SPECIFICAZIONI TECNICHE
Generali
Richieste per l’alimentazione:
Consumo di alimentazione:
Dimensioni:
Massa:
CA 9V 500mA
2W
285mm X 260 mm X 55 mm
2Kg
Ingressi/Uscite
Ingressi sulla parte anteriore: Ch6= 1 x RCA Video, 2 x RCA Audio (L+R)
Ingressi sulla parte posteriore: CH1-5 = 5 x Scart, 3 x Coassiale RCA audio
Uscite sulla parte posteriore: USCITA, CH2, CH3 = 3 x Scart, 1 x RCA Video, 4 x RCA Audio
(2 x L+R), 1 x RCA Coassiale Audio
I prodotti possono subire modificazioni senza preavviso.
OPZIONI ADDIZIONALI
1. Audio e video senza fili
Si può collegare un prodotto della serie Marmitek GigaVideo
all’uscita o al collegamento REC1/REC2 del Connect 236
per trasmettere il segnale audio e video senza fili attraverso
tutta la casa. Questo significa che si può anche trasmettere
il segnale a un TV in un’altra stanza e guardare i segnali da
ogni dispositivo collegato al Connect 236.
Il canale di ritorno a infrarosso incorporato della serie
GigaVideo significa anche che si può controllare a distanza
gli apparecchi e il Connect 236, perfino attraverso pareti e
soffitti!
2. Controllare il vostro Connect 236 e gli apparecchi AV
fuori la vista.
Marmitek offre una gamma di prodotti per controllare i vostri
apparecchi in un armadio chiuso o da un’altra stanza, sia con
che senza fili.
Per ulteriori informazioni su queste cosiddette estensioni a
infrarosso, visitare: www.marmitek.com.
70
© MARMITEK
3. Audio e video via cavo coassiale
I prodotti Marmitek MegaVideo danno la possibilità di aggiungere
il segnale di uscita o REC1/REC2 del vostro Connect 236 come un
canale extra al vostro cavo coassiale. Si può guardare il segnale
da ogni dispositivo collegato, dappertutto nella casa dove c’è un
collegamento coassiale. Il canale di ritorno a infrarosso incorporato
del modello MegaVideo 55 significa anche che si può controllare a
distanza gli apparecchi e il Connect 236, perfino attraverso pareti
e soffitti!
4. Senza telecomando addizionale
Quando si vuole controllare i vostri dispositivi da vari luoghi o usare un solo
telecomando per tutti i dispositivi, si può usare il Marmitek EasyControl 6, 8 o
il Marmitek EasyTouch 35 per venire a sapere i comandi del telecomando del
vostro Connect 236. Questi telecomandi possono sostituire quasi tutti i comandi
che si usano ora.
5. Adattatore S-video a composite video
Se i collegamenti di uscita dei dispositivi collegati (p.e. un
portatile) non corrispondono ai collegamenti di ingresso del
vostro Connect 236, in molti casi è possibile usare l’adattatore
S-video a Composite Video di Marmitek.
Per i connettori scart ingresso/uscita, sono disponibili vari
convertitori scart.
Per ulteriori informazioni si può visitare il nostro sito:
www.marmitek.com
Informazioni relative all’ambiente per i clienti residenti nell’Unione Europea
questo prodotto non deve essere smaltito insieme ai normali rifi uti domestici. È responsabilità del proprietario
smaltire sia questi prodotti sia le altre apparecchiature elettriche ed elettroniche mediante le specifi che strutture di
raccolta indicate dal governo o dagli enti pubblici locali. Il corretto smaltimento ed il riciclaggio aiuteranno a prevenire
conseguenze potenzialmente negative per l’ambiente e per la salute dell’essere umano. Per ricevere informazioni più
dettagliate circa lo smaltimento delle vecchie apparecchiature in Vostro possesso, Vi invitiamo a contattare gli enti pubblici
di competenza, il servizio di smaltimento rifi uti o il negozio nel quale avete acquistato il prodotto.
CONNECT 236™
71
ITALIANO
La direttiva europea 2002/96/EC richiede che le apparecchiature contrassegnate con questo simbolo sul
prodotto e/o sull’imballaggio non siano smaltite insieme ai rifi uti urbani non differenziati. Il simbolo indica che
72
© MARMITEK
VEILIGHEIDSWAARSCHUWINGEN
• Om kortsluiting te voorkomen, dient dit product uitsluitend binnenshuis gebruikt te
worden, en alleen in droge ruimten. Stel de componenten niet bloot aan regen of vocht.
Niet naast of vlakbij een bad, zwembad, etc. gebruiken.
• Stel de componenten van uw systeem niet bloot aan extreem hoge temperaturen of
sterke lichtbronnen.
• Bij oneigenlijk gebruik, zelf aangebrachte veranderingen of reparaties, komen alle
garantiebepalingen te vervallen. Marmitek aanvaardt geen productaansprakelijkheid bij
onjuist gebruik van het product of door gebruik anders dan waarvoor het product is
bestemd. Marmitek aanvaardt geen aansprakelijkheid voor volgschade anders dan de
wettelijke productaansprakelijkheid.
• Dit product is geen speelgoed. Buiten bereik van kinderen houden.
• Het product nooit openmaken (m.u.v. het batterijvakje): de apparatuur kan onderdelen
bevatten waarop levensgevaarlijke spanning staat. Laat reparatie of service alleen over
aan deskundig personeel.
• Houd batterijen buiten bereik van kinderen. Lever batterijen in als klein chemisch afval.
Gebruik nooit oude en nieuwe batterijen of verschillende typen batterijen door elkaar.
Verwijder de batterijen wanneer u het systeem langere tijd niet gebruikt. Let bij het
inleggen van de batterijen op de polariteit (+ / -): verkeerd inleggen kan explosiegevaar
opleveren.
• Sluit de voedingsadapter pas op het lichtnet aan nadat u hebt gecontroleerd of de
netspanning overeenkomt met de waarde die op de typeplaatjes is aangegeven. Sluit een
voedingsadapter nooit aan wanneer deze beschadigd is. Neem in dat geval contact op
met uw leverancier.
Introductie
Bedankt voor de aankoop van deze Marmitek Connect 236. De producten van Marmitek
worden met grote zorgvuldigheid gemaakt en zijn van hoge kwaliteit. Leest u a.u.b. deze
handleiding nauwlettend door en volg de instructies.
NEDERLANDS
Toebehoren
Controleer na het uitpakken van de doos of (naast de SCART switcher) de volgende
onderdelen en toebehoren aanwezig zijn:
CONNECT 236™
73
Voorkant en achterkant
De Connect 236 beschikt in totaal over zes ingangen. Ingang 6 zit aan de voorkant en de
ingangen 1 t/m 5 zitten aan de achterkant van de Connect 236.
1.
2.
3.
4.
5.
6.
7.
8.
9.
10.
11.
12.
13.
74
Voedingschakelaar
Knop indrukken om de scartswitcher aan en uit te zetten;
Sensor afstandsbediening
Sensor voor de signalen van de draadloze afstandsbediening;
REC knop
Knop om de RECORD functie te wisselen;
SET knop
Knop ter bevestiging van veranderingen in de instellingen;
LCD scherm
Geeft de status van de unit weer;
</> knop
Om tussen de ingangen 1-6 te wisselen (of om de instellingen te programmeren)
Ingang 6 (externe video ingang).
Verbind de video en audio aansluiting van het A/V apparaat met de scartswitcher;
SCART ingang 1
Verbind de SCART aansluiting van het A/V apparaat met de scartswitcher;
SCART ingang/uitgang 2
Verbind de SCART aansluiting van het A/V apparaat met de scartswitcher;
SCART ingang/uitgang 3
Verbind de SCART aansluiting van het A/V apparaat met de scartswitcher;
SCART ingang 4
Verbind de SCART aansluiting van het A/V apparaat met de scartswitcher;
SCART ingang 5
Verbind de SCART aansluiting van het A/V apparaat met de scartswitcher;
SCART uitgang
Verbind de SCART aansluiting van het A/V apparaat met de scartswitcher;
© MARMITEK
14. Video uitgang
Verbind de video aansluitingen van het A/V apparaat met de scartswitcher;
15. Audio uitgang 1
Verbind de audio aansluiting van het A/V apparaat met de scartswitcher.
16. Audio uitgang 2
Verbind de audio aansluiting van het A/V apparaat met de scartswitcher.
17. Coax 1,3,4 ingang (digitale audio)
Verbind de coax aansluiting van het A/V apparaat met de scartswitcher;
18. Coax uitgang (digitale audio)
Verbind de coax aansluiting van het A/V apparaat met de scartswitcher;
19. Voeding
Verbind de voeding met de scartswitcher.
Benoemingen en functies
LCD scherm en afstandsbediening
Met de numerieke knop op de afstandsbediening kunt u elk
ingangskanaal selecteren.
Met de “ ” knop op de afstandsbediening kan de Connect 236
in- en uitgeschakeld worden.
2.
3.
4.
5.
1.
2.
3.
4.
Voedingschakelaar
Druk de knop om de scartswitcher in- en uit te schakelen;
SET knop
Ter bevestiging wanneer de NAME en de REC functie
gebruikt worden;
REC knop
Wisselt de REC functie;
CH1-CH6 knop
CH1-CH6 (kanalen 1-6) direct selecteren;
< / > knoppen
Wisselen tussen de ingangen 1 t/m 6.
NEDERLANDS
1.
CH1-CH6 ingangsindicator
Multidisplay geeft de naam van het geselecteerde A/V apparaat weer
REC 1 status
REC 2 status
CONNECT 236™
75
Kanaal 1
De A/V apparaat-naam is DVD Player
REC 1 (Ch2) Vastgezet op Ch5
REC 2 (Ch3) Vastgezet op Ch4
Momenteel kijkt u naar kanaal 1
Instructies voor het instellen
Aansluiting van de AC voedingsadapter.
Sluit de componenten op elkaar aan als getoond in het volgende schema.
Aansluiting van de AC voedingsadapter
1. Sluit de plug van de AC voedingsadapter aan op de AC9V IN aan de achterzijde van de
Connect 236.
2. Plug de AC voedingsadapter in een passend stopcontact.
BELANGRIJK: De voedingsadapter moet van het correcte type zijn. Gebruik geen andere
voedingsadapter dan het aangegeven type.
76
© MARMITEK
Plaatsen van de batterij
1. Open de batterijklep
Druk op de batterijklep en schuif deze open.
2. Plaats de batterijen
Plaats twee AAA batterijen, let op de correcte polariteit.
3. Sluit de batterijklep
Sluit de batterijklep. Deze is dicht wanneer er een ‘klik’ te horen is.
Systeemaansluitingen
Opmerking:
1. Haal, om mogelijke problemen te voorkomen, de voedingsadapter uit het stopcontact of
zet de voedingschakelaar van de Connect 236 op Uit, vóór het aansluiten of ontkoppelen
van de kabels.
2. Let er bij het aansluiten van de kabels altijd op dat de pluggen correct aangesloten zijn.
Wanneer de verbinding niet goed is, kan dat resulteren in de afwezigheid van geluid of in
ruis.
Aansluiting via SCART, composite video & audio
NEDERLANDS
Sluit de componenten op elkaar aan, zoals getoond in het volgende schema. Raadpleeg de
handleiding van de betreffende A/V apparaten voor de aansluiting.
CONNECT 236™
77
Direct op een TV aansluiten
1. Sluit de SCART kabel aan op de betreffende ingang van de TV.
2. Sluit de andere kant van de SCART kabel aan op de SCART uitgang van de Connect 236.
3. Sluit de DVD speler, VCR, satellietontvanger, spelconsole, etc. aan op een van de 5 SCART
ingangen aan de achterkant van de scartswitcher.
UITGANG
SCART
SCART (COMPOSITE VIDEO)
COMPOSITE
(RGB)
INGANG
VIDEO
SCART (RGB)
JA
JA
JA
SCART (COMPOSITE VIDEO)
NEE
JA
JA
COMPOSITE VIDEO (Ch6)
NEE
JA
JA
SNELSTART
Voorbeeld van een typische instelling
U kunt tot zes verschillende A/V apparaten op de Connect 236 aansluiten en hun audio/
video signalen worden aan uw TV / Hifi apparatuur doorgegeven. Alle A/V apparaten
kunnen onafhankelijk van elkaar geselecteerd worden. Het is niet nodig om de kabels van de
aangesloten A/V apparaten te verwijderen voor het selecteren van een ingang.
1. Zet de voedingschakelaar op Aan
De achtergrondverlichting van het LCD-scherm gaat langzaam aan en de Connect 236
scartswitcher is klaar voor gebruik
Wanneer u de knop nogmaals indrukt, gaat het lampje aan de achterkant van het LCD
scherm langzaam uit en de Connect 236 scartswitcher wordt uitgeschakeld.
2. Druk de < of de > knop om een kanaal te selecteren
Het LCD scherm toont CH1, CH2, CH3, CH4, CH5 of CH6.
78
© MARMITEK
Voedingschakelaar knop in stand-by
Een kleine hoeveelheid stroom wordt gebruikt om het geheugen en de afstandsbediening
sensor functie te voeden wanneer de voedingsschakelaar op Uit staat. Dit is de stand-by
modus. De Connect 236 kan met behulp van de afstandsbediening Aan/Uit geschakeld
worden.
Opmerking: Boven getoonde aansluitingen zijn slechts een voorbeeld. U kunt alle geschikte
A/V apparaten op de ingangskanalen aansluiten.
Programmeren van het ingangskanaal
Om de A/V apparaten, die op de Connect 236 zijn aangesloten, makkelijk te kunnen
identificeren, is het mogelijk om elk van de zes ingangen op het LCD scherm te benoemen.
Druk de “SET” knop in en houd deze 2 seconden ingedrukt, op het LCD scherm begint
“CH1” te knipperen.
Druk de “<” of de “>” knop in om het gewenste ingangskanaal te selecteren (1-6).
Druk de “SET” knop in en “------” verschijnt op het scherm en knippert.
Druk de “<” of de “>” knop in, het LCD scherm toont de eerst beschikbare naam: “DVD_1”.
Druk de “<” of de “> knop in om alle beschikbare namen te doorlopen. Druk de “SET” knop
in wanneer de gewenste naam wordt getoond, en de naam wordt opgeslagen.
NEDERLANDS
Beschikbare namen:
CONNECT 236™
79
Opmerking:
1. Herhaal hierboven omschreven procedure elke keer dat u een naam wilt wijzigen.
2. Wanneer er tijdens de instelling 10 seconden lang niets wordt ingegeven, keert het
apparaat terug naar de vorige stap.
3. Wanneer u de namen op de Connect 236 wilt wissen, druk de “<” en de “>” knop in en
houd deze 5 seconden lang ingedrukt. Alle geprogrammeerde namen zijn nu gewist.
4. Voor de wijziging van namen kunt u ook gebruik maken van de afstandsbediening.
Voor het instellen van de opnamefunctie (record)
Multi functie A/V schakeling is mogelijk met 5 ingangsconsoles en 2 ingangs-/uitgangsconsoles
om de volgende functies te activeren:
- Vastzetfunctie voorkomt dat het A/V apparaat tijdens de opname per ongeluk
overschakelt.
- Neemt tegelijkertijd één signaal op twee verschillende recorders op.
- Neemt tegelijkertijd twee verschillende signalen op twee verschillende recorders op.
Instelling opnamefunctie
1. Kanaal 2 en kanaal 3 zijn toegewezen aan de opnamefunctie (RECORD). Sluit het
opnameapparaat aan op kanaal 2/3.
2. U kunt de naam van het opnameapparaat definiëren. Raadpleeg het hoofdstuk
“Ingangskanaal programmeren” voor informatie over het toewijzen van een naam.
80
© MARMITEK
Instellen van de opnamefunctie
Stel de opnamefunctie (REC) als volgt in:
Druk de “REC” knop in en houd deze 2 seconden lang ingedrukt. Het “REC 1” symbool
knippert en de naam van het opnameapparaat wordt op het scherm getoond mits
toegewezen. Voorbeeld: CH2=VCR_1
Druk de “<” of de “>” knop in om het kanaal voor het inkomende bronsignaal te selecteren.
De naam van het apparaat wordt op het LCD scherm getoond mits toegewezen. Voorbeeld:
CH1= DVD_1
Door de “REC” knop in te drukken wordt het bronkanaal bevestigd en de instelling van “REC
1” afgesloten.
Het “REC 2” symbool knippert en de naam van de opnameapparaat wordt op het scherm
getoond mits toegewezen. Voorbeeld: CH3 = DVD_R
Door de “REC” knop in te drukken wordt het bronkanaal bevestigd en de instelling van “REC
2” afgesloten.
CONNECT 236™
81
NEDERLANDS
Druk de “<” of de “>” knop in om het kanaal voor het inkomende bronsignaal te selecteren.
De naam van het apparaat wordt op het LCD scherm getoond mits toegewezen. Voorbeeld:
CH4=SAT_1
Opmerking:
1. Wanneer er tijdens het instellen 10 seconden lang niets wordt ingegeven, keert het
apparaat terug naar de vorige stap.
2. Door de stekker uit het stopcontact te halen, worden alle REC instellingen gewist.
3. In de REC modus kunt u tussen de kanalen wisselen met de “<”/ “>” knoppen.
4. U kunt ook de afstandsbediening gebruiken om tussen de kanalen te wisselen.
5. Kanaal 2 kan niet voor REC 1 geselecteerd worden.
6. Kanaal 3 kan niet voor REC 2 geselecteerd worden.
Wissen van de opnamefunctie
Wis de opnamefunctie (REC) als volgt:
Druk de “REC” knop in en houd deze 2 seconden ingedrukt. Het “REC 1” symbool knippert
en de naam van het opnameapparaat wordt op het scherm getoond mits toegewezen.
Voorbeeld: CH2=VCR_1
Druk de “<” of de “>” knop in om kanaal “CH2” voor “REC 1” te selecteren.
Druk de “REC” knop in. Het “REC 2” symbool knippert en de naam van het opnameapparaat
wordt op het scherm getoond mits toegewezen. Voorbeeld: CH3=DVD_R
Druk de “<” of de “>” knop in om kanaal “CH3” voor “REC 2” te selecteren.
82
© MARMITEK
Druk de “REC” knop in en de Control 236 gaat terug naar de operatiemodus.
Opmerking:
1. Wanneer er tijdens het instellen 10 seconden lang niets wordt ingegeven, keert het
apparaat terug naar de vorige stap.
2. Door de stekker uit het stopcontact te halen, worden alle REC instellingen gewist.
3. In de REC modus kunt u tussen de kanalen wisselen met de “<”/ “>” knoppen.
4. U kunt ook de afstandsbediening gebruiken om tussen de kanalen te wisselen.
FAQ
Geen beeld
Controleer of
- de SCART kabel correct aangesloten is op uw systeem en de Connect 236.
- de SCART kabel vanuit de Connect 236 uitgang correct is aangesloten op de TV.
- u het juiste ingangskanaal heeft geselecteerd.
- de TV op de juiste video ingang is aangesloten.
- de TV en de Connect 236 aangezet zijn.
Geen geluid
- Controleer de verbindingskabels.
- Controleer de volume-instellingen van de TV.
- Controleer of het audio signaal door de gebruikte kabel verzonden wordt (S-VIDEO kabels
of niet volledig bezette SCART kabels verzenden geen audio signalen).
- Controleer of de TV en het systeem aangezet zijn.
NEDERLANDS
Het beeld is korrelig/er is storing op de achtergrond
- Zet apparatuur die niet gebruikt wordt uit. Sommige apparaten geven een zeer sterk
signaal af, wat storingen kan veroorzaken.
- Controleer de kwaliteit van de gebruikte kabels.
CONNECT 236™
83
TECHNISCHE GEGEVENS
Algemeen
Voeding:
Verbruik:
Afmetingen:
Gewicht:
AC 9V 500mA
2W
285mm X 260 mm X 55 mm
2Kg
Ingangen/Uitgangen
Ingangen voorkant:
Ch6= 1 x RCA video, 2 x RCA audio (L+R)
Ingangen achterkant: CH1-5 = 5 x SCART, 3 x coax RCA audio
Uitgangen achterkant: OUTPUT, CH2, CH3 = 3 x SCART, 1 x RCA video, 4 x RCA audio (2 x
L+R), 1 x RCA coax audio
Product aanpassingen kunnen zonder voorafgaande bekendmaking plaats vinden.
EXTRA OPTIES
1. Draadloos audio en video
Producten uit de Marmitek GigaVideo serie kunnen op de
OUTPUT of op de REC1/REC2 connectie van de Connect
236 aangesloten worden om het audio en het video signaal
draadloos door het hele huis te verzenden. Het signaal kan
dus ook naar een TV die in een andere kamer staat verzonden
worden, en u kunt het op elk apparaat dat op de Connect
236 aangesloten is bekijken.
Met het ingebouwde infrarood retourkanaal van de GigaVideo
serie kunt u bovendien de apparatuur en de Connect 236 op
afstand bedienen, zelfs door muren en plafonds!
2. De Connect 236 en uw A/V apparatuur bedienen, ook
wanneer deze uit het zicht staan.
Marmitek biedt een verscheidenheid aan producten aan die
het u mogelijk maken uw apparatuur ook te bedienen wanneer
deze zich in een gesloten kast of zelfs in een andere kamer
bevindt. Dit kan met of zonder kabels.
Meer informatie over deze zogenoemde infrarood verlengers
kunt u vinden op: www.marmitek.com.
84
© MARMITEK
3. Audio en video via de coax
De Marmitek MegaVideo producten maken het mogelijk om
het OUTPUT of het REC1/REC2 signaal van de Connect 236 als
extra kanaal aan uw coax kabel toe te voegen. U kunt het signaal
dan op elk aangesloten apparaat overal in huis waar een coax
connectie beschikbaar is, bekijken. Met het ingebouwde infrarood
retourkanaal van het model Megavideo55 kunt u uw apparatuur
en de Connect 236 op afstand bedienen, zelfs door muren en
plafonds!
4. Geen extra afstandsbediening
Wanneer u uw apparatuur graag vanuit verschillende plekken in huis wilt
bedienen, of wanneer u slechts een enkele afstandsbediening voor alle
apparaten wilt gebruiken, kunt u met behulp van de Marmitek EasyControl 6, 8
of de Marmitek EasyTouch 35 de bevelen op uw Connect 236 afstandsbediening
leren. Deze afstandsbedieningen kunnen bijna alle afstandsbedieningen
vervangen die u nu gebruikt.
5. S-video naar composite video adapter
Wanneer de uitgaande connecties van de aangesloten
apparatuur (b.v. laptop) niet met de connecties van de Connect
236 corresponderen, kan in vele gevallen de Marmitek S-video
to composite video adapter een oplossing bieden.
Voor de SCART INGANG/UITGANG connectoren zijn een aantal
verschillende SCART convertoren verkrijgbaar.
Meer informatie vindt u op onze website: www.marmitek.com
Milieu-informatie voor klanten in de Europese Unie
De Europese Richtlijn 2002/96/EC schrijft voor dat apparatuur die is voorzien van dit symbool op het product
of de verpakking, niet mag worden ingezameld met niet-gescheiden huishoudelijk afval. Dit symbool geeft aan
dat het product apart moet worden ingezameld. U bent zelf verantwoordelijk voor de vernietiging van deze en
andere elektrische en elektronische apparatuur via de daarvoor door de landelijke of plaatselijke overheid aangewezen
inzamelingskanalen. De juiste vernietiging en recycling van deze apparatuur voorkomt mogelijke negatieve gevolgen voor
het milieu en de gezondheid. Voor meer informatie over het vernietigen van uw oude apparatuur neemt u contact op met
NEDERLANDS
de plaatselijke autoriteiten of afvalverwerkingsdienst, of met de winkel waar u het product hebt aangeschaft.
CONNECT 236™
85
DECLARATION OF CONFORMITY
Hereby, Marmitek BV, declares that this Connect236 is in compliance with the essential requirements and other relevant
provisions of the following Directives:
DIRECTIVE 2004/108/EC OF THE EUROPEAN PARLIAMENT AND OF THE COUNCIL of 15 December 2004 on the
approximation of the laws of the Member States relating to electromagnetic compatibility
Council Directive 73/23/EEC of 19 February 1973 on the harmonization of the laws of Member States relating
to electrical equipment designed for use within certain voltage limits
Hiermit erklärt Marmitek BV die Übereinstimmung des Gerätes Connect236 den grundlegenden Anforderungen und
den anderen relevanten Festlegungen der Richtliniën:
RICHTLINIE 2004/108/EG DES EUROPÄISCHEN PARLAMENTS UND DES RATES vom 15. Dezember 2004 zur
Angleichung der Rechtsvorschriften der Mitgliedstaaten über die elektromagnetische Verträglichkeit
Richtlinie 73/23/EWG des Rates vom 19. Februar 1973 zur Angleichung der Rechtsvorschriften der
Mitgliedstaaten betreffend elektrische Betriebsmittel zur Verwendung innerhalb bestimmter
Spannungsgrenzen
Par la présente Marmitek BV déclare que l’appareil Connect236 est conforme aux exigences essentielles et aux autres
dispositions pertinentes de la directives:
DIRECTIVE 2004/108/CE DU PARLEMENT EUROPÉEN ET DU CONSEIL du 15 décembre 2004 relative au
approchement des législations des États membres concernant la compatibilité électromagnétique
Directive 73/23/CEE du Conseil, du 19 février 1973, concernant le rapprochement des législations des États
membres relatives au matériel électrique destiné à être employé dans certaines limites de tension
86
© MARMITEK
DECLARATION OF CONFORMITY
Marmitek BV declara que este Connect236 cumple con las exigencias esenciales y con las demás reglas relevantes de
la directriz:
DIRECTIVA 2004/108/CE DEL PARLAMENTO EUROPEO Y DEL CONSEJO de 15 de diciembre de 2004 relativa a la
aproximación de las legislaciones de los Estados miembros en materia de compatibilidad electromagnética
Directiva 73/23/CEE del Consejo, de 19 de febrero de 1973, relativa a la aproximación de las legislaciones de
los Estados Miembros sobre el material eléctrico destinado a utilizarse con determinados límites de tensión
Con ciò, Marmitek BV, dichiara che il Connect236 è conforme ai requisiti essenziali ed altre disposizioni relative alla
Direttiva :
DIRETTIVA 2004/108/CE DEL PARLAMENTO EUROPEO E DEL CONSIGLIO del 15 dicembre 2004 concernente il
ravvicinamento delle legislazioni degli Stati membri relative alla compatibilità elettromagnetica
Direttiva 73/23/CEE del Consiglio, del 19 febbraio 1973, concernente il ravvicinamento delle legislazioni degli
Stati Membri relative al materiale elettrico destinato ad essere adoperato entro taluni limiti di tensione
Bij deze verklaart Marmitek BV, dat deze Connect236 voldoet aan de essentiële eisen en aan de overige relevante
bepalingen van Richtlijnen:
RICHTLIJN 2004/108/EG VAN HET EUROPEES PARLEMENT EN DE RAAD van 15 december 2004 betreffende de
onderlinge aanpassing van de wetgevingen van de lidstaten inzake elektromagnetische compatibiliteit
Richtlijn 73/23/EEG van de Raad van 19 februari 1973 betreffende de onderlinge aanpassing van de
wettelijke voorschriften der Lid-Staten inzake elektrisch materiaal bestemd voor gebruik binnen bepaalde
spanningsgrenzen
MARMITEK BV - P.O. BOX 4257 - 5604 EG EINDHOVEN – NETHERLANDS
Copyrights
Marmitek is a trademark of Marmidenko B.V.
Connect236 is a trademark of Marmitek B.V.
All rights reserved.
Copyright and all other proprietary rights in the content (including but not limited to model numbers, software, audio, video,
text and photographs) rests with Marmitek B.V. Any use of the Content, but without limitation, distribution, reproduction,
modification, display or transmission without the prior written consent of Marmitek is strictly prohibited. All copyright and
other proprietary notices shall be retained on all reproductions.
CONNECT 236™
87