Transcript
Package Contents:
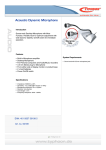
Wireless Sensor
1 - Wireless Sensor
1 - Goose Neck Suction Cup Mount
WIRELESS SENSOR SET UP:
1. Open the battery door and insert 4 AAA batteries.
2. Power ON the Wireless Sensor.
3. When powered ON, the red LED next to the power
button will illuminate.
USING WIRELESS SENSOR WITH SUCTION CUP
MOUNT:
1. To unlock the Suction Cup
Mount, gently slide the two
locking tabs out and pull
upward.
2. Find a smooth, flat surface
to place the Wireless Sensor.
3. With the Suction Cup Mount
tabs in the up position,
press firmly down on the
suction base until secure.
4. Push the lock down until it
clicks 2 to 5 times, depending
on desired suction level.
5. Angle the neck of the Goose Neck Suction Cup Mount
until the Wireless Sensor is directly facing the playing
area.
6. Enter the “Wii Settings” menu. Under “Sensor Bar”
select “Position” and confirm that the current setting
matches the position of the Wireless Sensor. If
necessary, change the “Position” setting.
USING WIRELESS SENSOR WITHOUT SUCTION
CUP MOUNT:
1. Carefully remove Wireless Sensor from the Goose Neck
Suction Cup Mount.
2. Place the Wireless Sensor on a stable surface centered
with the television, making sure that the front of the
device is facing the playing area with no obstructions.
6. Enter the “Wii Settings” menu. Under “Sensor Bar”
select “Position” and confirm that the current setting
matches the position of the Wireless Sensor. If
necessary, change the “Position” setting.
SAFETY NOTICE:
• To avoid injury or damage, make sure other people,
animals, or objects are not within your range of motion.


