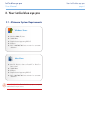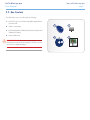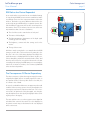
1
LaCie blue eye pro
User Manual
Table of Contents
page 1
Table of Contents
1.Introduction to LaCie blue eye pro............................................................................. 5
2.Your LaCie blue eye pro............................................................................................ 6
2.1.Minimum System Requirements...................................................................................................... 6
2.2.Box Content................................................................................................................................. 7
3.Color Management................................................................................................... 8
3.1.Basic Issues With Monitor Color Rendering...................................................................................... 8
3.2.Monitor Calibration And Device Profiles........................................................................................ 10
4.Installing Your LaCie blue eye pro........................................................................... 13
4.1.Installing the Software.................................................................................................................. 13
4.2.Connecting the LaCie blue eye Colorimeter.................................................................................. 14
4.3.Using Another Colorimeter.......................................................................................................... 15
5.Calibrating LaCie 300/500/700 Series Monitors...................................................... 16
5.1.Starting the Application................................................................................................................ 16
5.2.Calibrating your LaCie 300/500/700 Series Monitor..................................................................... 17
5.2.1. Setting Calibration Values for your LaCie 300/500/700 Series Monitor................................ 17
5.2.2. Calibration and Profiling................................................................................................... 18
5.2.3. Saving the Profile.............................................................................................................. 19
5.3.Controlling the Calibration of Your LaCie 300/500/700 Series Monitor.......................................... 20
5.3.1. Classic Test and Report..................................................................................................... 21
5.3.2. UGRA Display Analysis & Certification Tool Report.............................................................. 22
5.3.3. Saving the Calibration Report............................................................................................ 23
5.3.4. The Calibration Report...................................................................................................... 23
5.4.Advanced Options...................................................................................................................... 25
5.4.1. Optimize for Accuracy or for Speed.................................................................................... 25
5.4.2. Blackpoint Adjustment Setting............................................................................................ 25
5.4.3. Chromatic Adaptation Setting............................................................................................ 25
5.4.4. Profile type....................................................................................................................... 25
5.4.5. Profile Version.................................................................................................................. 26
5.4.6. OSD lock......................................................................................................................... 26
5.4.7. ColorKeeper.................................................................................................................... 26
5.5.Switching Colorimetric Environments............................................................................................. 27
5.6.Using a Reference Profile for Easy Setup or Monitor Matching......................................................... 28
5.7.Analyzing Your Ambient Lighting Conditions.................................................................................. 29
5.8.Fine Tuning your LaCie 300/500/700 Series Monitor.................................................................... 30
5.9.Accessing Key Monitor and System Information.............................................................................. 31
6.Calibrating Other Monitors with the LaCie blue eye pro.......................................... 32
6.1.Starting the Application................................................................................................................ 33
6.2.Calibrating your Monitor............................................................................................................. 33
6.2.1. Setting Calibration Values for your Monitor......................................................................... 34
6.2.2. Brightness Adjustment....................................................................................................... 35
6.2.3. Contrast Adjustment.......................................................................................................... 36
6.2.4. White Point Adjustment..................................................................................................... 37
6.2.5. Creating A Profile with “Calibration”.................................................................................. 38
6.2.6. Saving The Profile............................................................................................................. 38
LaCie blue eye pro
User Manual
Table of Contents
page 2
6.3.Controlling the Calibration of Your Monitor.................................................................................. 39
6.3.1. Calibration Report............................................................................................................ 39
6.3.2. Test And Report................................................................................................................ 39
7.Using Your LaCie blue eye pro with Windows......................................................... 40
8.Troubleshooting...................................................................................................... 41
9.Contacting Customer Support.................................................................................. 43
9.1.LaCie Technical Support Contacts................................................................................................ 44
10.Warranty Information............................................................................................ 45
LaCie blue eye pro
User Manual
Copyrights
Copyright © 2008 LaCie. All rights reserved. No part of this publication may
be reproduced, stored in a retrieval system, or transmitted in any form or by any
means, electronic, mechanical, photocopying, recording or otherwise, without
the prior written consent of LaCie.
Trademarks
Apple, Mac, and Macintosh are registered trademarks of Apple Computer,
Inc. Microsoft, Windows NT, Windows
98, Windows 98 SE, Windows 2000,
Windows Millennium Edition and Windows XP are registered trademarks of
Microsoft Corporation. PhotoShop, Illustrator and InDesign are registered
trademarks of Adobe Inc. Sony and iLink
are registered trademarks of Sony Electronics. Other trademarks mentioned in
this manual are the property of their respective owners.
Changes
The material in this document is for information only and subject to change
without notice. While reasonable efforts
have been made in the preparation of
this document to assure its accuracy,
LaCie assumes no liability resulting from
errors or omissions in this document,
or from the use of the information contained herein. LaCie reserves the right to
make changes or revisions in the product design or the product manual without reservation and without obligation to
notify any person of such revisions and
changes.
Forward
page 3
FCC Information
LaCie blue eye pro
Tested to comply with
FCC standards for home
or office use
Information for Users: Any changes or
modifications made to this device which
are not expressly approved by LaCie are
prohibited and may void the user’s authority to operate this equipment.
General Information Statement: This device complies with Part 15 of the FCC
Rules. Operation of this device is subject
to the following two conditions:
This device may not cause harmful interference, and 2) This device must accept any interference received, including
interference that may cause undesired
operation.
This equipment has been tested and
found to comply with the limits for a
Class A digital device pursuant to part
15 of the FCC Rules. These limits are
designed to provide reasonable protection against harmful interference in a
commercial installation. This equipment
causes, uses, and can radiate radio frequency energy and, if not installed and
used in accordance with the instructions,
may cause harmful interference to radio
communications. There is no guarantee,
however, that interference will not occur
in a particular installation. If this equipment does cause harmful interference to
radio or television reception, which can
be determined by turning the equipment
off and then on, the user is encouraged
to try to correct the interference by one
or more of the following measures:
1. Reorient or relocate the receiving
antenna
2. Increase the separation between the
equipment and the antenna
3. Connect the equipment into an outlet on a circuit different from that to
which the receiver is connected
4. Consult the dealer or an experienced
TV/radio technician for help
FCC Compliance Statement For US Users: This equipment has been tested and
found to comply with the limits for a
Class B digital device pursuant to Part
15 of the FCC rules. These limits are
designed to provide reasonable protection against harmful interference in a
residential installation. This equipment
generates, uses, and can radiate radio
frequency energy and if not installed and
used in accordance with the instructions
may cause harmful interference to radio
communications. However, there is no
guarantee that interference will not occur
in a particular installation. If this equipment does cause harmful interference to
radio or television reception, which can
be determined by turning the equipment
off and on, the user is encouraged to
try to correct the interference by one or
more of the following measures:
1. Reorient or relocate the receiving
antenna.
2. Increase the separation between the
equipment and receiver.
3. Connect the equipment into an outlet on a circuit different from that to
which the receiver is connected.
4. Consult dealer or an experienced radio/ TV technician for help.
Changes or modifications not expressly
approved by the manufacturer could
void the authority of the user to operate
this equipment.
This device complies with Part 15 of the
FCC Rules. Operation is subject to the
following two conditions:
LaCie blue eye pro
User Manual
1. This device may not cause harmful
interference and,
2. This device must accept any interference received, including interference
that may cause undesired operation.
For European Users: This product conforms to the requirements of EC Directives 73/23/EEC and 89/336/EEC.
Declaration of Conformity /
Déclaration de Conformité /
Erklarung zur einhaltung von
Produktnormen:
Sequel Imaging, Inc. 25 Nashua Road
Londonderry, NH 03053, USA
Forward
page 4
Product Name/Designation/Produktname:
Sequel Imaging
Model Number / Numéro de modèle /
Modelnummer:
Digital Control
Conforms to the following Product
Specifications / Satisfait aux spécificatons produit suivantes / Den folgenden
Produktspezifi-kationen enspricht:
EMC: EN 60950 / EN 55022:1994
Class B / EN 61000-4-4:1995 /
EN 55024:1998 / EN 61000-45:1995 EN 61000-4-2:1995 / EN
61000-4-6:1996 / EN 61000-4-3:1996
/ EN 61000-4-11:199
For Japanese Users: This product conforms to the requirements of the Japanese Regulation VCCI V-3/99.05 Class
B for Conducted and Radiated Disturbance.
Brand Name:
Sequel Imaging
Part Number: 36.88.32
Type:
Eye One Display
Power Requirements: DC via Host PC
This symbol on the product or on its packaging
indicates that this product
must not be disposed of
with your other household
waste. Instead, it is your responsibility to
dispose of your waste equipment by
handing it over to a designated collection point for the recycling of electrical
waste and electronic equipment. The
separate collection and recycling of your
waste equipment at the time of disposal
will help to conserve natural resources
and ensure that it is recycled in a manner that protects human health and the
environment. For more information
about where you can drop off your waste
equipment for recycling, please contact
your local city office, your household
waste disposal service or the shop where
you purchased the product.
CAUTION: The LaCie blue eye pro’s
warranty may be void as a result of the
failure to respect the precautions listed
above.
LaCie blue eye pro
User Manual
Introduction
page 5
1.Introduction to LaCie blue eye pro
Thank you for purchasing LaCie blue eye pro, LaCie’s professional color management solution. The LaCie blue eye pro colorimeter and LaCie blue eye pro software are a fast, precise, and
easy-to-use color management tool that will automatically calibrate your monitor and build the corresponding ICC profile.
This profile provides a description of the monitor’s individual
color characteristics, which helps imaging and page design software such as Adobe Photoshop, Lightroom, Indesign, Illustrator,
Apple Aperture, and QuarkXPress, to display accurate colors.
Thanks to LaCie blue eye pro, Graphics Pros working in colormanaged environments are able to adjust every monitor in their
workflow, allowing them to perform image softproofing and editing in total confidence.
Throughout this User Manual, several references are made to UGRA, the Swiss Center of Competence for Media and Printing
Technology. Well known for its Mediawedge®, a standardised
control strip that is used for contract proofing control, UGRA has
extended this test to Monitor evaluation. For the first time, the
Proof Edition of LaCie blue eye pro embeds UGRA’s test approach and criteria, and makes it possible to certify a workstation for softproofing. To take advantage of this certification, select “UDACT” when using LaCie blue eye pro’s Test and Report
feature (please refer to section 5.3. for detailed instructions).
Quick Links
Click a topic:
✦✦ Install your LaCie blue eye pro
✦✦ Calibrate your LaCie 300/500/700 Series Monitor
✦✦ Calibrate other monitors
Features
✦✦ Automatic hardware calibration on all LaCie
300/500/700 series monitors with user-specified white
point temperature, gamma, and brightness settings
✦✦ Advanced calibration options: reference profile matching, blackpoint adjustment, and white point fine-tuning
✦✦ Monitor calibration and profile accuracy testing through
Test and Report function
✦✦ Dynamic calibration switching through Select Profile
function
✦✦ Ambient light measurement
✦✦ Compatible with leading measurement devices
✦✦ Integrate into Apple ColorSync and ICC-compatible
environments, such as Adobe Photoshop, Lightroom,
Indesign, and Illustrator, Apple Aperture, and QuarkXPress.
LaCie blue eye pro
User Manual
2.Your LaCie blue eye pro
2.1. Minimum System Requirements
Windows Users
✦✦
✦✦
✦✦
✦✦
✦✦
Windows 2000, XP, Vista
128MB RAM
Graphics board supporting DDC-CI
USB port
LaCie 300/500/700 Series monitor for automatic
calibration
Mac Users
✦✦ Mac OS 10.3.9 or later on PowerPC or 10.4.5 or
later on Intel
✦✦ 128MB RAM
✦✦ USB port
✦✦ Graphics board supporting DDC-CI
✦✦ LaCie 300/500/700 Series Monitor for automatic
calibration
Important Info: The LaCie blue eye pro is compatible
with the Intel Core processors.
Your LaCie blue eye pro
page 6
LaCie blue eye pro
User Manual
Your LaCie blue eye pro
page 7
2.2. Box Content
Your LaCie blue eye pro should include the following:
1. LaCie blue eye pro Colorimeter with Ambient light diffuser/
protective shell
2. Cable counterweight
1
2
blue
eye
3. LaCie Display Utilities CD-ROM (includes User Manual and
Calibration Software)
4. Quick Install Guide
3
4
LaCie Color Utilities
Important Info: Please save your packaging. In the event
that the drive should need to be repaired or serviced, it must be
returned in its original packaging.
blue eye pro
LaCie User Manual
LaCie blue eye
Quick Install Guide
©C
opy
right
2006
, A ll rights reser ved. 1 2
###
2804
###
0
v1 .
LaCie blue eye pro
User Manual
Color Management
page 8
3.Color Management
The digital age has brought about many important gains for
color-conscious professionals, whether they work in fields such
as graphic design, pre-press, video or digital photography. With
these improvements, however, new challenges arose.
One of those issues confronting professionals is the variability of
the reproduction of color from one monitor to another.
Every monitor has its own color characteristics. In order to effectively deal with this variability in monitor “personalities,” it’s
important to have a means of controlling, or managing, this
difference. The most effective color management solution for
monitors involves using a piece of hardware (the LaCie blue eye
Colorimeter) and software (LaCie blue eye pro PE) to adjust and
control the color among different monitors.
The Three Primaries – Red, Green And Blue
The intensity of the light emitted by the red, green and blue dot
in each pixel is set as a function of three values commonly called
R,G and B. The R, G and B of a given pixel can be set as any
integer value from 0 to 255.
✦✦ A pixel set to R=255, G=255, B=0 has its red and green
dots emitting at maximum intensity and the blue dot not
emitting at all. The result is an intense yellow.
✦✦ A pixel set to R=128, G=128, B=128 has its three dots
emitting red, green and blue lights at a medium intensity.
To implement color management, it is essential to properly calibrate and create custom, individual profiles for all your monitors.
Once a monitor has been calibrated and a profile has been created, the profile then communicates with the operating system
and the application software to ensure that images are displayed
accurately.
This section will help to explain how color is created and how
LaCie blue eye pro utilizes calibration and profiles to help you
implement your color management solution.
3.1. Basic Issues With Monitor
Color Rendering
Human perception of color is the result of the addition by our
brain of the stimuli received from three types of nerve cells located in our eyes that are sensitive to the red, green and blue areas
of the color spectrum. This is why the method used in a computer
monitor to reproduce color is for each pixel to be composed of
three dots that respectively emit red, green and blue light.
321
1 pixel = 1 red dot + 1 green dot + 1 blue dot
LaCie blue eye pro
User Manual
Color Management
page 9
RGB Values Are Device-Dependent
As we noted earlier, every monitor has its own individual settings
for reproducing the RGB, because monitor manufacturers make
very different choices as to the components that are used in their
monitors. This leads to very strong differences between the color
produced by any given RGB settings on separate monitors. Besides the different components, there are also several reasons for
this variation. On a TFT, for instance, here are some of the most
important factors that come into consideration:
128 128 128
0
255 255 0
✦✦ The color filters used to create the dots of each pixel
✦✦ The nature of the backlights
✦✦ The light transmittance characteristics of the liquid crystal
technology used in the display
✦✦ The brightness, contrast and other settings used on the
monitor
✦✦ The age of the monitor
With this in mind, moving back to our example about the RGB
setting to produce blue. We know that we’re getting the color
blue, but is the color of blue being displayed accurately? One
particular monitor could display the blue as akin to sky blue, another as Navy Blue, and another as another shade of blue. And
this is the case for all colors, not just blue. Because the color that
is actually produced by a given RGB setting is not necessarily the
same from one monitor to another, color scientists say that RGB
values are device-dependent.
The Consequences Of Device Dependency
The direct consequence of this is that a given image (for instance
a digital photograph) will not necessarily appear the same on
two separate monitors. One may often observe color shifts, loss
of contrast or loss of detail.
As a result, considerable inefficiencies can appear in professional
workflows. When receiving a picture from its photographer, the
news agency may have the impression that some color correction needs to be performed on the photograph, even though it
may already have been done by the photographer before sending the picture to the agency.
The same problem can occur when a printer receives digital art
included in their customer’s document. The colors displayed on
the printer’s monitor may not be identical to the ones displayed
at the customer site.
321
0 255
LaCie blue eye pro
User Manual
Color Management
page 10
3.2. Monitor Calibration And
Device Profiles
The LaCie blue eye pro implements a convenient solution to
these problems. It entails two steps:
Step 1: The monitor is set to a calibrated state that is described
in terms of its Brightness, Gamma and White Point Temperature. This allows the color-conscious professional to knowingly
choose the range of colors that will be displayed on the monitor;
and in particular to be certain that the colors displayed on the
monitor correspond to a standard environment.
Step 2: An ICC (International Color Consortium) monitor profile
is created and systematically embedded in the artwork produced
from the professional’s workstation. The ICC profile acts as a
translator between RGB values and absolute colorimetric measurements that are expressed in a scientific color model such as
CIELAB or Yxy.
By taking into account the translation mechanisms contained in
the ICC profile, another computer monitor (or any other device,
such as a printer, for example) can reproduce the exact same
absolute colors even though its components, settings and aging
may be significantly different. The benefit is that both professionals see the same colors, and that there is no color shift across
the workflow.
MONITOR 1
R G B
MONITOR 1
ICC Profil e
y
x
R G B
PROFILE
CONNECTION
SPAC E
MONITOR 2
ICC Profile
y
x
MONITOR 2
ICC Profiles form the links
in your image chain between device-dependent
monitors and the deviceindependent PCS.
LaCie blue eye pro
User Manual
Color Management
page 11
Monitor Calibration
The calibration process allows the professional to influence the
range of colors displayed. The main settings that influence the
range of colors displayed are the following:
The Gamma Curve (a) determines the characteristics of the absolute colors associated with all the RGB values between the
white point and the black point. It expresses the intensity of the
light emitted by each of the RGB dots for each of the intermediary values between 0 and 255. The shape of the gamma curve
in particular determines the level of detail and contrast that are
displayed on the monitor. A practical way of describing this curve
is through the use of a numerical value that describes its slope.
The White Point (b), i.e. the characteristics of the color displayed by the RGB value: R=255, G=255, B=255. These
characteristics are often summarized with the term White Point
Temperature, because scientists have developed a model where
a given body brought to a certain temperature emits light of
a given color. This temperature is expressed in degrees Kelvin
(°K). Common White Point Temperature settings in the pre-press
workflow are 5000 K and 6500 K. To influence White Point
Temperature, it is necessary to adjust the respective intensities
(also called gains) of red, green and blue light that are emitted
by the RGB value of (255, 255,255).
The Luminance (c) controls the overall brightness of the monitor.
With the LaCie blue eye pro, you can fine-tune all of these factors and target the Brightness, Gamma and White Point Temperature settings of your choice. The sensor that is included is an
advanced device that measures the light emitted by your monitor
and expresses it in absolute colorimetric terms.
a
b
c
LaCie blue eye pro
User Manual
Device Profiles
Device profiles are the most important part of the color management puzzle, because without an ICC profile within your image
chain, you can’t implement color management. Profiles serve
three very important functions:
✦✦ They describe what color the RGB pixel values actually represent.
✦✦ They relate device-dependent RGB values to device independent CIELAB/Yxy values.
✦✦ They contain data to convert between the RGB value that
each device produces, and the CIELAB/Yxy number value.
Technical note: CIELAB refers to the Commission Internationale de l’Eclairage, and L= the “lightness”; A= the position of a color on a red-green axis; and B= the position of a
color on a yellow-blue axis. Yxy refers to a specification where
a color is specified by its x and y coordinates on a chromaticity
diagram graph.
Color Management
page 12
LaCie blue eye pro
User Manual
Installing Your LaCie blue eye pro
page 13
4.Installing Your LaCie blue eye pro
4.1. Installing the Software
Mac Users
Insert the LaCie Color Utilities CD-ROM into your computer’s CD
or DVD drive. Once the disc appears on your desktop, double
click the disc icon to open the LaCie Color Utilities CD-ROM. A
pop up window will appear. Follow the on-screen instructions to
drag LaCie blue eye pro into your applications folder or other
location.
ie
LaC
Windows Users
Insert the LaCie Color Utilities CD-ROM into your computer’s
CD or DVD drive. Follow the on-screen instructions to install the
software. Once installation is complete, go into Programs and
launch the LaCie blue eye pro software.
Co l
o
ilit
r Ut
ies
LaCie blue eye pro
User Manual
Installing Your LaCie blue eye pro
page 14
4.2. Connecting the LaCie blue eye
Colorimeter
e
blu
Important Info: Before connecting the LaCie blue eye
to your monitor:
✦✦ Clean the monitor to remove fingerprints and dust.
✦✦ Install the LaCie blue eye software (see section 4.1. Installing the Software for more information)
1. Remove the LaCie blue eye colorimeter from the protective
shell by applying downward pressure on the protective shell,
while holding the LaCie blue eye colorimeter with your other
hand. You should hear a “click” noise whenever the LaCie
blue eye colorimeter is removed or placed in its protective
shell (figure A).
Fig. A
10°
2. Incline the monitor by 10° (figure B).
3. With EasyHood installed, simply unfold the hook to attach
your calibrator. If no hood is installed, position the LaCie
blue eye colorimeter and cable counterweight. The LaCie
blue eye colorimeter should be flush against the monitor’s
screen (figure B).
4. Connect the LaCie blue eye colorimeter’s USB cable to an
available USB port on your computer (figure C).
Technical note: You may attach the LaCie blue eye colorimeter to powered USB hubs.
Fig. B
321
Fig. C
e
ey
LaCie blue eye pro
User Manual
4.3. Using Another Colorimeter
LaCie blue eye pro supports a variety of colorimeters, including
the following:
✦✦ LaCie blue eye
✦✦ Monaco Xrite DTP94
✦✦ GretagMacBeth (now XRite) eyeOneDisplay v1 & v2, eyeOne Pro
✦✦ ColorVision Spyder 2 & 3
The default device expected by LaCie blue eye pro is the LaCie blue eye colorimeter. If you are using another colorimeter,
please select the appropriate device from the Device drop-down
menu to enable the application to detect it. If you are using a
GretagMacBeth eyeOne Display colorimeter please select the
blue eye device.
Installing Your LaCie blue eye pro
page 15
LaCie blue eye pro
User Manual
Calibrating LaCie 300/500/700 Series Monitors
page 16
5.Calibrating LaCie 300/500/700 Series Monitors
CAUTION: BEFORE BEGINNING
✦✦ Make sure that your monitor has been powered on for
at least one hour. This ensures that the monitor has had
enough time to warm up and stabilize.
✦✦ Disable any screen savers.
✦✦ Delete or disable any competing profile programs you may
have installed. These programs could compete for control
of the display, and it is important that only one program is
running at a time.
✦✦ If another profile program is installed and it has a startup
utility that is used at your computer’s boot time, this program will need to be deleted.
✦✦ Set up your work area as you will use it after calibrating and
profiling. Room lighting has an affect on the appearance of
screen images.
✦✦ Tilt the monitor upwards 10° (with the axis measuring from
the horizontal length of the bottom of the monitor). This
helps to prevent unwanted light from affecting the results.
5.1. Starting the Application
Double-click on the LaCie Blue eye pro icon from your applications folder. The LaCie blue eye pro Main Menu will appear.
Button
Description
Settings
Click this option to set up your calibration
settings. See Chapter 5.2.1. for details.
Calibration
Click this option to calibrate your monitor. See Chapter 5.2.2. for details.
Test Report
Click this option to evaluate the Calibration state of your monitor. See Chapter
5.3. for details.
Select Profile
Click this option to switch from one
colorimetric environment to another (to
choose your colorimetric environment).
See Chapter 5.5. for details.
In this window you will find four buttons, each dedicated to a
specific use.
LaCie blue eye pro
User Manual
Calibrating LaCie 300/500/700 Series Monitors
page 17
5.2. Calibrating your LaCie
300/500/700 Series Monitor
If you are using LaCie Blue eye pro for the first time or if you want
to enter new calibration settings, you will first need to specify the
target values you want to adopt before calibrating your monitor.
From the Main Menu window, click on the Settings button to
open the Settings window.
General recommendations regarding settings
If you are not yet familiar with color management methods or with your workflow’s specifics, you may adopt the
following settings as general settings:
✦✦ White point: 6500 Kelvin
5.2.1. Setting Calibration Values for your
LaCie 300/500/700 Series Monitor
The Settings window of the LaCie blue eye pro application invites you to provide your target values for your monitor’s settings
of Gamma, White Point Temperature, and Luminance.
✦✦ Gamma can be set at any value between 1 and 3 in 0.1
increments. Please choose the gamma value that corresponds to your working environment.
✦✦ White Point Temperature can be set either through a preset
value (From 5000 Kelvin to 9500 Kelvin in 500 K increments), or manually.
✦✦ Luminance can be targeted as an absolute value in cd/m2
(candelas/meter2), or a predefined value expressed as a
portion of the maximum luminance offered by the monitor. If you are not familiar with calibration and do not have
known pre-set values, you may simply use the settings contained in the box at right.
This is close to the native white point of most LCD panels and is a relatively neutral white (values below 5000K
tend to appear yellowish).
✦✦ Brightness: 120 cd/m2
Under common office lighting conditions, a setting of
120 cd/m2 is sufficient. However, if you work in a dim
environment a lower luminance may be sufficient, and
if your office is very bright, or if you are using a lightbox
for critical color comparisons, a higher luminance may
be preferable.
✦✦ Gamma: 2.2
This is also a good starting point for gamma. You may
want to compare the aspect of the same document with
gamma values of 1.8 and 2.2 to determine which is
preferable.
If your workflow relies on soft proofing
If your workflow relies on soft proofing, you may consider following UGRA’s recommendation for calibration:
white point between 5600 and 6000K, gamma of 1.8
and luminance of at least 120 cd/m2. Also, make sure
that the type of profile selected in the Advanced Settings
window is “Matrix” (refer to section 5.4.4. Profile Type
for details).
If you use such settings, you will be able to evaluate your
monitor’s calibration against UGRA’s criteria by selecting the UGRA methodology in the “Test and Report”
feature of blue eye pro (see section 5.3.).
LaCie blue eye pro
User Manual
Once you have selected the appropriate Calibration settings
you can immediately proceed to calibration by clicking the Calibration button: for further instructions go directly to section 5.2
Calibrating your LaCie 300/500/700 Series Monitor. If you wish
to navigate to other options, click on the corresponding button.
Reference Profile: this is an alternative to the above Calibration Settings that can be used in situations where you want to
calibrate two monitors so they closely match.
In this situation, calibrate the first monitor and save its profile
normally. Then, calibrate the second monitor by using the first
profile as a reference. First, select the Reference Profile checkbox and click on the Select button. A popup window will appear,
allowing you to navigate to the appropriate folder where you can
select the profile to use as reference. Then, click the Calibration
button. For further information on this feature please refer to
section 5.6. of this manual.
If necessary you can access the Advanced options menu by
clicking on the advanced options button (refer to section 5.4.
Advanced Options for further information).
For further information on menus and options available in this
software refer to the table of content to find the related chapter.
5.2.2. Calibration and Profiling
The LaCie blue eye pro software creates a custom ICC Profile of
your monitor based on measures performed by the Lacie blue
eye colorimeter during the calibration process.
Position the LaCie blue eye application screen so that the white
disc is placed underneath the LaCie blue eye colorimeter, then
press the Start button to begin the calibration and profiling process.
Your selected Target settings are displayed on the calibration
window during calibration process to remind you of the selected values. You can stop the calibration process at any time by
pressing the Stop button. You can also go back to the Settings
or Main menu window by clicking the corresponding button. At
the end of the calibration process the Save Profile window will
appear.
Calibrating LaCie 300/500/700 Series Monitors
page 18
LaCie blue eye pro
User Manual
5.2.3. Saving the Profile
The Save Profile window will automatically appear at the end of
the Calibration process. In this window, you can simply choose
the default filename, or enter a custom filename for your profile
to be saved under.
The default profile filename contains the date of calibration, color temperature, gamma and luminance settings. With this practical format you can easily remember, at a future date, when your
last calibration took place, and what the settings were.
Once you have chosen the profile’s filename, click on the Save
Profile button. This file is stored in the Home > Library >ColorSync profile folder.
In Windows 2000 and XP the file is stored in: C:/WINNT/System32/spool/DRIVERS/COLOR/
In VIsta the file is stored in the following path : C:/WINDOWS/
System32/spool/DRIVERS/COLOR/
Your new profile automatically becomes the current profile for
your monitor settings. After saving the profile you just created,
you can exit the application by clicking on the Quit button. You
also have the option of obtaining a detailed report regarding
your monitor’s calibration by clicking on the Test and Report
button (see 5.3.4. Calibration Report) or to go back to the main
menu by clicking on the Main menu button.
Calibrating LaCie 300/500/700 Series Monitors
page 19
LaCie blue eye pro
User Manual
5.3. Controlling the Calibration
of Your LaCie 300/500/700
Series Monitor
The Test and Report tool gives you the opportunity to verify the
accuracy of your monitor’s current profile settings for Gamma,
White Point, and Luminance by measuring and comparing them
to the actual monitor settings. Depending on the options that
you select, Test and Report will display a Monitor Report window
that contains:
✦✦ Classic: A chromaticity diagram of your monitor’s current
Gamut as well as a diagram and numerical values representing the color discrepancies measured by the tool.
✦✦ UDACT1 Test & Uniformity: A certificate of conformity to
UGRA recommendations regarding soft proofing (“UGRA
certified” or “UGRA not certified”) In both cases a detailed
report can be saved for future reference. Clicking on the
Test and Report button opens a window. Place the calibrator on the target and click on the Start button to launch the
test process: the colorimeter measures color patches of a
series of different colors: Shades of gray, Red, Green, Blue,
Cyan, Magenta, Yellow, and Pastel values to evaluate the
quality of the calibration by comparing measured values
with expected ones.
In case you selected the UDACT test, the UGRA/FOGRA MediaWedge® colors are included in the test.
1
UDACT stands for “UGRA Display Analysis and Certi cation Tool”
Calibrating LaCie 300/500/700 Series Monitors
page 20
LaCie blue eye pro
User Manual
5.3.1. Classic Test and Report
The Calibration Report shows:
✦✦ The Chromaticity Diagram (color gamut) of the monitor
compared to the sRGB, AdobeRGB and ISO-coated gamut.
✦✦ The average and maximum Delta-Es of the measured color
patches
These Delta-E values are calculated with the CIE94 method and
therefore express perceptive color differences. The lower these
Delta-E values, the better. If these Delta-Es are below 2, the
values will be displayed in Green.
✦✦ The difference between the measured and targeted Gamma, White Point Temperature and Luminance and their deviation in percentage.
The combination of these three elements allows you to have an
overall appreciation of the quality of the calibration: if the deviation between target values and current values is below 5%
it will be displayed in green. Differences exceeding 5% will be
highlighted in orange.
Calibrating LaCie 300/500/700 Series Monitors
page 21
LaCie blue eye pro
User Manual
5.3.2. UGRA Display Analysis &
Certification Tool Report
If you selected the UDACT test when running Test and Report,
the report will show how well the monitor’s calibration and profiling state matches UGRA’s recommendations for softproofing
with the following workflows and gamuts:
✦✦ ISO coated / Gravure (offset printing with coated paper)
✦✦ ISO uncoated (offset - uncoated paper)
✦✦ ISO newspaper (for newsprint)
✦✦ Multicolor/Highbody (future workflows).
UGRA’s recommendations are the following:1
✦✦ White Point : max 2DeltaE*
✦✦ Gray Balance: max 1 DeltaC* average and max 2 DeltaC*
range with 95% tonal range
✦✦ Profile Quality: max 3 DeltaE* average and 6 DeltaE* peak
value
✦✦ Gamut (MK): max 4 Delta E* average and 90% volume
(98% in the case of HighColor)
Passing the test requires respecting all four criteria simultaneously. Please note that a failed test can simply mean the display’s
calibration settings are not in line with those recommended by
UGRA (please refer to the Settings section of this manual for
further information). Also it may be required to recalibrate the
display to exceed the above thresholds and obtain certification.
1
The following delta-values are calculated with the
DeltaE*ab (76) method.
Calibrating LaCie 300/500/700 Series Monitors
page 22
LaCie blue eye pro
User Manual
Calibrating LaCie 300/500/700 Series Monitors
page 23
5.3.3. Saving the Calibration Report
The Calibration Report can be saved by clicking on the Save
button. The Save As window then appears. After choosing a
name, location and format (PDF- , Html-, Text-,) to save the file,
click on the Save button and the software will create and display
a document containing a detailed Monitor Calibration Report.
5.3.4. The Calibration Report
These first lines (a) indicate the date on which the calibration
took place, the path of your saved profile on the system and its
name (in this case 23.05.06-5000K- 22-100cd).
These two diagrams (b) show the Chromaticity diagram and the
delta-E differences between measured color patches and targeted values.
These lines (c) represent your calibration settings targets versus
the results obtained. Differences in percentage are also displayed This value represents the luminance of the black color
displayed by the monitor.
a
This table (d) summarizes the measurements taken of the greyscale displayed by your monitor. For each line, you will find:
b
✦✦ Color – the shade of gray measured
✦✦ Kelvin – the temperature of the measured color
✦✦ Chroma – the chromaticity difference between the measured color and target color
✦✦ Gamma – the Gamma value of the curve on which the
point belongs
c
Average Gamma (e) – the average of the values given in the
Gamma table: This is the average of the values given in the
gamma column.
d
e
LaCie blue eye pro
User Manual
Calibrating LaCie 300/500/700 Series Monitors
page 24
This table (a in figure C) summarizes the L*a*b values of the
measured color patches and their measured delta-E and Delta-E
(CIE94) values.
This table (b in figure C) summarizes the XYZ values of the measured color patches for the Black, White and 50% Gray color
patches, and their measured Color Temperature.
If you performed the UGRA Display Analysis and Certification
version of test, the Report (figure D) is more detailed and contains the UGRA Certification level of the monitor as well as all
relative measurements, including Gray Balance and UGRA/
FOGRA Mediawedge color patches, as well as Monitor Uniformity results.
a
b
Fig. C
UGRA
Display Analysis & Certification Tool
Report
Basics
Date:
Report-Version:
Monitor-Name:
EDID-Name:
EDID-Serial:
Profile:
Created:
Measurement device:
2008-7-16 9:25:59
v1.3.1
LaCie 724
LaCie 724
H1AK500000
/Library/ColorSync/Profiles/16.07.08-5000K-18-120cd.icc
2008-7-16 9:19
eye-one display 2
Summary
The monitor has passed the certification according to the UGRA DACT specifications.
Calibration
White Point
Gray balance
Profile quality
yes
yes
yes
MultiColor, HighBody
Offset/Gravure Paper Type 1/2
Offset on uncoated paper
Newspaper Printing
sRGB
AdobeRGB
ECI-RGB
yes
yes
yes
yes
yes
yes
yes
Softproofing
Diagram
WhitePoint
Gray Balance
Profile Quality
Softproof Quality
Fig. D
LaCie blue eye pro
User Manual
Calibrating LaCie 300/500/700 Series Monitors
page 25
5.4. Advanced Options
This menu allows you to set up advanced calibration options
used for special purposes (Fig. A.).
5.4.1. Optimize for Accuracy or for Speed
Blue eye pro offers you the possibility to adjust the calibration
process according to your preference for Accuracy or Speed. By
default, Accuracy is selected. This ensures the most precise color
matching. Checking the Speed option will reduce the number of
color patches measured and the number of optimization rounds
the software performs, and will shorten the calibration process
by approximately 30%.
Fig. A
5.4.2. Blackpoint Adjustment Setting
You may elect to increase the luminance of the color black. This
can be useful to obtain a realistic rendering of your document
in situations where you know that the paper and inks used when
ultimately printing it may not allow a full black. To increase the
luminance of black, adjust the blackpoint slider to your desired
value. This setting will be automatically taken into consideration
when calibrating your monitor.
5.4.3. Chromatic Adaptation Setting
Some constraints in your color chain may force you to use a
monitor White Point other than D50 (5000° Kelvin) while still
targeting D50 paper prints. In this situation, you may perceive a
difference between displayed colors and printed colors, due to
the Chromatic Adaptation behavior of the human brain. Color
scientists have devised methods to correct this impression. Two
of these methods are Bradford and von Kries. When one of these
methods is selected, the profiling process of LaCie blue eye pro
will minimize this impression by slightly adjusting the chromaticity
of your monitor. To activate this feature, please select your chosen chromatic adaptation method by clicking on the corresponding radio button of the Advanced Options settings window.
5.4.4. Profile type
With LaCie blue eye pro you can choose the type of profile you
want to create. By default, profiles created are matrix profiles.
Select the required Profile type by clicking on the related but-
LaCie blue eye pro
User Manual
ton.
✦✦ Matrix profiles are created using algorithms based on matrices and linearization curves.
✦✦ LUT-Profiles (or Table Profiles) are created using lookup
tables.
LUT-Profiles are a perfect match for devices that don’t respond
in a linear way such as printers or some older monitors. Though
LUT-Profiles are more precise and may give better results, especially for nonlinear displays, they are not recommended in
workflows using Adobe Software (especially Photoshop) as they
are not fully compatible with it. Matrix profiles on the other hand
are the best choice for high quality monitors such as Series
300/500/700 due to their linear response even if they may not
be as accurate as LUT profiles. Matrix profiles give smoother
results with Adobe Photoshop.
Though both profiles types rely on different calculation techniques, they generally don’t provide significantly different results
on Series 300/500/700 monitors. We therefore recommend the
use of LUT or Matrix depending on your workflow and the software used.
5.4.5. Profile Version
By default, profiles created with Blue eye pro are ICC 2 profiles. If required you can choose version 4 profiles by marking
the ICC 4 button. Though ICC2 profiles have been widely used
and proved their reliability, improvements needed to be added
in ICC4 profiles to increase predictability and performance and
to reduce eventual differences of interpretation. ICC4 profiles
provide:
✦✦ A more precise definition of rendering intents to reduce ambiguities.
✦✦ Embedded chromatic adaptation information.
✦✦ Improved look up table (LUT) specifications.
✦✦ Improved translation from PCS XYZ to PCS L*a*b*.
Both profiles versions will provide excellent results in your workflow. Though ICC4 profiles are newer and integrate several improvements, they might not be supported by every CMM.. We
therefore recommend the use of ICC4 or ICC2 profiles depending on your workflow and the software used.
Calibrating LaCie 300/500/700 Series Monitors
page 26
5.4.6. OSD lock
Use this option to prevent accidental changes to your monitor’s
settings that may invalidate your calibration. Mark the Locked
button to lock the on-screen display (OSD), Mark the Unlocked
button to allow changes. Once your advanced options are modified, you can:
✦✦ Go back to the main menu by clicking on the Main menu
button
✦✦ Go to the Settings window by clicking on Settings
✦✦ Click the Calibration button in order to calibrate your
monitor.
5.4.7. ColorKeeper
ColorKeeper is LaCie’s hardware backlight stabilizer technology,
present in some (but not all) LaCie displays. Selecting or deselecting the checkbox respectively activates or deactivates the
backlight stabilizer. When used on a display that doesn’t embed
ColorKeeper, this option is grayed. On the LaCie 700 Series, to
ensure maximum color precision and stability, ColorKeeper is on
by default and cannot be turned off.
LaCie blue eye pro
User Manual
5.5. Switching Colorimetric
Environments
From the Main Menu window, the Select Profile button offers the possibility of easily switching from one colorimetric environment to another, for instance from D65 to D50, without
re-calibrating the monitor or even manipulating the colorimeter.
To take advantage of this possibility, two profiles corresponding
to both of these environments must have already been created
through the standard calibration process described in section
5.2. Calibrating Your LaCie 300/500/700 Series Monitor.
When you click on the Select Profile button, the window to the
right appears. To switch from your current colorimetric environment to another, select a new profile from the pull-down menu.
Simply highlight the profile and click on the Activate button. The
new monitor profile is activated and its associated settings are
loaded in the monitor.
If you use several different displays on your computer, make sure
to select the Show only profiles for this monitor type checkbutton, so only profiles built for the active monitor appear.
Calibrating LaCie 300/500/700 Series Monitors
page 27
LaCie blue eye pro
User Manual
Calibrating LaCie 300/500/700 Series Monitors
page 28
5.6. Using a Reference Profile for Easy Setup or Monitor Matching
The Reference Profile Setting allows you to calibrate your
monitor to closely match another monitor. This allows you to
ensure colors are closely matched between two monitors connected to the same computer or on two different computers. All
related calibration settings, including advanced settings, such as
specific Black Point or Chromatic adaptation, are memorized,
included in the calibration without the need for further setup, and
locked, thus preventing any accidental change.
This feature can also be used as an easy and safe way to setup
your calibration even if you only have a single monitor. Instead
of specifying all settings, which may be complicated and unsafe, a single file is used as a reference profile to define the
“standard”. Once the reference profile is selected, its settings
will be used for any future calibration. All calibration settings are
locked, making accidental wrong calibration impossible. To use
this feature, you must:
1. Create a profile with LaCie Blue eye pro using your favorite
settings on any Mac or PC. Follow the standard Calibration
process including Advanced Settings if necessary; see Chapters 5.2. to 5.4.5. for details.
2. If you wish to export the profile on several monitors and computers, simply copy it in the profile folder of every computer
on which you want to apply the reference profile.
3. If this profile is to be used for one or two monitors on a single
computer, go directly to step 5.
4. The files are located as indicated below according to your
Operating System:
In Mac OS X: Home > Library >ColorSync profile folder.
In Windows 2000: C:/WINNT/System32/spool/ DRIVERS/
COLOR directory
In Windows XP: C:/WINNT/System32/spool/ DRIVERS/
COLOR directory
5. Copy the Profile on any Media and paste it on your Target
computer(s) in the following folder:
In Mac Os X: Home > Library >ColorSync profile folder.
In Windows 2000: C:/WINNT/System32/spool/ DRIVERS/COLOR directory
In Windows XP: C:/WINNT/System32/spool/ DRIVERS/
COLOR directory
6. Double click on the LaCie Blue eye pro icon from your applications folder. The LaCie blue eye pro Main Menu will
appear.
7. Click the Settings button from the Main Window to access
the Settings window.
8. Mark the Reference profile button and select from your profiles list the required profile. The selected profile will be used
as a reference for any further calibration. All calibration settings are now locked.
LaCie blue eye pro
User Manual
Calibrating LaCie 300/500/700 Series Monitors
page 29
5.7. Analyzing Your Ambient Lighting Conditions
Your ambient lighting conditions can influence the way you perceive your monitor’s colors. If your ambient lighting is too intense
(for instance if your office’s windows are not shaded) the contrast
offered by your monitor may seem insufficient. If the ambient
light has a dominant chroma (for instance if your light bulbs have
a yellowish shade or if the walls of your office are painted with a
saturated color), you may have the impression that your monitor
also has a cast of the same color.
This is why ISO standard 6334 recommends that for color-critical work you make sure that your working environment’s Ambient Light is neutral (no color cast) and subdued (less than 64 lux
according to the standard). LaCie blue eye pro offers you an
easy way to analyze your Ambient Lighting conditions.
To perform this analysis, please select the Ambient Light Analysis
feature. On Apple Macintosh click on the Tools menu bar and
select the corresponding menu option. On Microsoft Windows
please right click the application bar and select the corresponding menu option. This window, figure A, appears on your display.
Please adjust the Ambient Light Diffuser on the LaCie blue eye
sensor and turn the sensor towards your office (back to the display), then click on the Start button.
The software will start analyzing the ambient lighting and will
display Illuminance and Color Temperature values. The ISO
3664 standard recommends an Ambient Light that offers less
than 64 lux Illuminance and has a neutral chroma. If you are
working with a D50 (5000°Kelvin) White Point Temperature setting, for instance, it is recommended that your Ambient Light
have a Color Temperature near 5000 degrees Kelvin. If you
notice that either your Ambient light offers a higher Illuminance
or a non-neutral Color Temperature, it may be useful to adjust
your lighting until more standard values are attained. This can
be achieved by changing your light bulbs, turning off your office
lamps or reducing their intensity, shading any windows, and so
on.
When you are satisfied with your Ambient Light Analysis, please
click on the Stop and Done buttons. This will bring you back to
the main application window of LaCie blue eye pro.
LaCie blue eye pro
User Manual
Calibrating LaCie 300/500/700 Series Monitors
page 30
5.8. Fine Tuning your LaCie 300/500/700 Series Monitor
LaCie blue eye pro offers you an easy way to fine tune your LaCie
300/500/700 Series Monitor’s White point and brightness.
To use this tool on your Mac, please click on the Tools menu
bar and select the corresponding menu option. On Microsoft
Windows please right click the application bar and select the
corresponding menu option. The window to the right appears
on your display. To adjust the chromaticity and brightness of the
White point, move the 4 available sliders. The first three sliders
adjust your display’s White Point Chromaticity.
✦✦ Cyan to red: this slider will slightly increase (± 10 %) the
Red or Cyan component
✦✦ Magenta to Green: this slider will slightly increase (± 10 %)
the Magenta or Green component
✦✦ Yellow to Blue: this slider will slightly increase (± 10 %) the
Yellow or Blue component
With the fourth slider you can adjust the brightness by ± 20%.
Once you are visually satisfied with the modifications you performed, you can measure the influence of the changes in your
monitor’s White Point and Luminance by placing the LaCie blue
eye calibrator on the measuring target and clicking on the Measure button. The software will measure the new White Point and
Brightness and display them on the Finetuning window.
Once the new White Point is satisfactory to you and has been
Measured, click on Calibrate to implement the changes in your
calibration. The calibration step will be performed as usual: see
Sections 5.2.1. and 5.2.2. for details.
LaCie blue eye pro
User Manual
Calibrating LaCie 300/500/700 Series Monitors
page 31
5.9. Accessing Key Monitor and System Information
LaCie blue eye pro offers you easy access to some key system
and monitor information fields. To display this data, please click
on About in the blue eye pro menu and the following window
will appear, displaying the following information:
✦✦ Display model (Serial number of your display)
✦✦ DDC Detect (Connection mode: VGA or DVI)
✦✦ Resolution
✦✦ Current Profile (Date of Creation of the profile)
LaCie blue eye pro
User Manual
Calibrating Other Monitors
page 32
6.Calibrating Other Monitors with the LaCie blue eye pro
LaCie blue eye pro also offers the possibility of calibrating other
monitors than the LaCie 300/500/700 Series, such as the LaCie
119 and 120. When the application is run on such a monitor,
the calibration process is manual. The software will guide you
through several steps that allow you to adjust Luminosity, Contrast, and individual RGB controls to set White Point Temperature and Gamma to your desired settings. The next chapter will
guide you through this process.
When you run LaCie blue eye pro on a dual-monitor system, the
software will automatically detect on which monitor the window
is located and will run the appropriate calibration process (automatic or manual).
CAUTION: BEFORE BEGINNING Before you begin to calibrate, ensure that the following conditions are met:
✦✦ Ensure that you have a copy of your monitor’s User Manual
for OSD (On-Screen Display) reference, and to help determine factory presets and configuration.
✦✦ Make sure that your monitor has been powered on for
at least one hour. This ensures that the monitor has had
enough time to warm up and stabilize.
✦✦ Disable any screen savers. Delete or disable any competing
profile programs you may have installed. These programs
could compete for control of the display, and it is important
that only one program is running at a time.
✦✦ If another profile program is installed and it has a startup
utility that is used at your computer’s boot time, this program will need to be deleted.
✦✦ Setup your work area in the way that you will use it after
calibrating and profiling. Room lighting has an effect on the
appearance of screen images.
✦✦ Tilt the monitor upwards 10° (with the axis measuring from
the horizontal length of the bottom of the monitor). This
helps to prevent unwanted light from affecting the results.
✦✦ If your monitor’s OSD offers color adjustment mechanisms,
set them as close to your targeted workflow settings as possible before launching the LaCie blue eye software.
LaCie blue eye pro
User Manual
6.1. Starting the Application
Double click on the LaCie Blue eye pro icon from your applications folder. The LaCie blue eye pro Main Menu will appear.
In this window you will find four buttons, each dedicated to a
specific use:
Button
Description
Settings
Click this option to setup your calibration
settings. See Chapter 5.2.1. for details.
Calibration
Click this option to calibrate your monitor. See Chapter 5.2.2. for details.
Test Report
Click this option to evaluate the Calibration state of your monitor. See Chapter
5.3. for details.
Select Profile
Click this option to switch from one
colorimetric environment to another (to
choose your colorimetric environment).
See Chapter 5.5. for details.
6.2. Calibrating your Monitor
If you are using LaCie Blue eye pro for the first time or if you want
to enter new calibration settings, you will first need to specify the
target values you want to adopt before calibrating your monitor.
From the Main Menu window, click on the Settings button to
open the Settings window.
Calibrating Other Monitors
page 33
LaCie blue eye pro
User Manual
Calibrating Other Monitors
page 34
6.2.1. Setting Calibration Values for your
Monitor
The Settings window of the LaCie blue eye pro application allows you to provide your target values for your monitor’s settings
of Gamma, White Point Temperature, and Luminance.
✦✦ Gamma can be set at any value between 1 and 3 in 0.1
increments. Please choose the gamma value that corresponds to your working environment.
✦✦ White Point Temperature can be set either through a preset
value (From 5000 Kelvin to 9500 Kelvin in 500 K increments), or manually.
✦✦ Luminance can be targeted as an absolute value in cd/m2
(candelas/meter2), or a predefined value expressed as a
portion of the maximum luminance offered by the monitor.
If you are not familiar with calibration and do not have known
pre-set values, you may start by using the following settings as
guidelines. With experience you will be able to more specifically
determine which settings are the best for your workflow.
✦✦ Gamma: 2.2
✦✦ White Point: 6500 K
✦✦ Luminance: 120 cd/m2
These settings are a good starting point for calibration due to
their relatively neutral values:
✦✦ A 2.2 gamma corresponds to the native performance characteristics of most professional monitors and may therefore
result in smoother continuity of tone.
✦✦ A 6500 K White point is also close to most native TFT monitors settings and is commonly used in prepress workflow
especially by users who consider that 5000K calibrated
monitors tend to look too yellow.
✦✦ 120 cd/m2 may be considered a reasonable Luminance
value under “normal” lightning conditions. If you work in
a dim environment a lower luminance may be sufficient. If
your office is very bright, or if you are using a lightbox for
document proofing, a higher luminance could be preferable. Once these settings are selected you can immediately
proceed to calibration by clicking the Calibration button:
for further instructions go directly to section 6.2. Calibrating
your Monitor.
If you wish to navigate to other options, click on the corresponding button.
Important Info: These settings are only indicated as
guidelines. We advise you to contact your monitor documentation for further information on calibration.
✦✦ Reference Profile: This option is not available in Manual
calibration mode. If necessary you can access the Advanced
options menu by clicking on the Advanced options button
(Go to section 5.4. Advanced Options for further information).
For further information on menus and options available in this
software refer to the table of contents to find the related chapter.
LaCie blue eye pro
User Manual
6.2.2. Brightness Adjustment
The Brightness Adjustment window will assist you in placing
your monitor in the optimal range of brightness. When in this
range, two conditions are met:
✦✦ Full black and the darkest gray can be distinguished one
from the other. This insures there is no loss of detail in the
dark zones of your artwork.
✦✦ The darkest black remains black. This prevents any potential
loss of contrast.
1. In your monitor’s OSD, please choose the lowest possible
value for Brightness.
2. Place the colorimeter over the (dark) measurement area and
click Start.
3. You will now slowly increase the Brightness control in your
monitor’s OSD a few increments at a time.
While you do this, the colorimeter constantly measures the actual luminosity of the monitor and displays it with the slider. As
you increase the brightness of your monitor, the slider will move
to the right towards the green area. When it reaches the green
zone, a message will inform you the monitor is bright enough.
You may then click on the Next button to go to the Contrast
Adjustment window.
Technical note: If you cannot reach the green zone after
adjusting your monitor to its maximum brightness, move to the
next step, 6.2.3. Contrast Adjustment, by clicking on the Next
button.
CAUTION: Do not modify your monitor’s brightness setting
after this stage. Doing so will force you to restart the calibration
and profiling process.
Calibrating Other Monitors
page 35
LaCie blue eye pro
User Manual
6.2.3. Contrast Adjustment
The Contrast Adjustment window will assist you in placing your
monitor in its optimal dynamic for your colors. The right contrast
setting produces brighter colors through continuous tones, detailed shadows and highlights.
1. Using your monitor’s OSD, set your monitor to its highest
contrast value.
2. Press Start.
3. Using the OSD, decrease your monitor’s contrast value a few
increments at a time. As you decrease the contrast of your
monitor, the slider will move to the left towards the green
area. When it reaches this green area, a message will inform
you the monitor is correctly set. You may then click on the
Next button to go to the White Point Adjustment window.
Important Info: If your monitor does not have an OSD
control for contrast, move on to the next step, 6.2.4. White
Point Adjustment, by clicking on the Next button.
CAUTION: Do not modify your monitor’s brightness setting
after this stage. Doing so will force you to start the calibration
and profiling process over.
Calibrating Other Monitors
page 36
LaCie blue eye pro
User Manual
6.2.4. White Point Adjustment
The value of the White Point Temperature determines the actual
color of white.
Important Info: Some monitors do not offer individual
R, G, B settings. If your monitor does not offer these settings,
check to see if your monitor’s OSD settings let you choose a
color temperature.
During this phase of the calibration process, the LaCie blue eye
colorimeter constantly measures the colorimetric characteristics of white as displayed by your monitor. To reach your target
White Point Temperature, you will adjust the relative quantities
of Red, Green and Blue used by the monitor to create white. To
do this, you will sequentially increase or decrease the R, G, and
B gain settings of your monitor, using the OSD.
1. Press the Start button.
2. Identify which of the settings need to be decreased by looking at the three sliders. The slider that needs to be will be the
setting whose slider is furthest away from the center. Reduce
or increase this setting’s gain by decreasing gain using your
monitor’s OSD. The corresponding slider should move to the
center towards the green area. When it reaches this green
area, this setting is correct.
3. Repeat the above steps on the next two sliders until all of the
R, G, and B sliders have reached the green area. Monitor’s
RGB gains are now set according to your target White Point
Temperature.
Once the White Point Temperature has been set, click on the
Next button to continue onto the last step.
Calibrating Other Monitors
page 37
LaCie blue eye pro
User Manual
6.2.5. Creating A Profile with
“Calibration”
After completing steps 6.2.1. through 6.2.4., LaCie blue eye will
finish calibration by creating a custom ICC profile of your monitor based on the information provided to the program by measuring color patches with the LaCie blue eye colorimeter. Press
the Start button to begin the profiling process.
6.2.6. Saving The Profile
Once all steps are complete, the Save Profile window will automatically appear. In this window, you can simply choose the
default filename, or enter a custom filename for your profile to
be saved under. The default profile filename contains the date of
calibration, color temperature, gamma and luminance settings.
With this practical format you can easily remember, at a future
date, when your last calibration took place, and what the settings
were. Once you have chosen the profile’s filename, click on the
Save Profile button. Your new profile automatically becomes
the current profile for your monitor settings.
During this process, ensure that nothing disrupts the measurement: the LaCie blue eye colorimeter should remain aligned on
the measurement area at all times and no other window should
appear on the monitor.
CAUTION: Do not modify your monitor’s OSD settings, or you
will have to restart the entire calibration process.
Important Info: The correctness of the ICC profile depends on your monitor’s OSD settings. If at any time you need
to change them, you will need to rebuild a profile. Likewise, if
you want to change your monitor’s settings (to move to a different White Point, for instance) you will need to rebuild a profile.
Calibrating Other Monitors
page 38
LaCie blue eye pro
User Manual
6.3. Controlling the Calibration of
Your Monitor
6.3.1. Calibration Report
Now that your monitor has been calibrated, you can run a test to
verify the quality of the calibration. The LaCie blue eye pro software will measure the quality of the color correction performed
by the ICC profile you have built. The process is the same as
described in section 5.3. Controlling Calibration of Your LaCie
300/500/700 Series Monitor.
6.3.2. Test And Report
In the main window of your application you also have the opportunity to test your monitor’s current settings for Gamma, White
Point and Luminance. To do this, simply click on the Test & Report button and the following window will prompt you to place
the LaCie blue eye colorimeter onto your monitor. The application will display a sampling of colors to determine the current
values of your monitor’s Gamma, White Point and Luminance.
At the end of the process, the blue eye software will display a
chromaticity diagram of your monitor and lists your monitor’s
current settings for Gamma, White Point and Luminance. Based
on this information you can easily decide if it is necessary to
recalibrate your monitor or, if the current monitor state is satisfactory, simply continue working with the monitor as is. To go
into the calibration process, press the Calibration button. If you
are satisfied with the current monitor state, you can exit the application by clicking the Quit button.
Calibrating Other Monitors
page 39
LaCie blue eye pro
User Manual
Using Your LaCie blue eye pro with Windows
page 40
7.Using Your LaCie blue eye pro with Windows
The calibration and profiling process of LaCie blue eye pro is
identical on Microsoft Windows systems and on Macintosh systems. Apart from the following two user-interface differences,
please refer to the corresponding Macintosh chapters of this
manual.
Choosing your calibration device
The main application window, to the right, allows you to choose
the calibration device to be used. The default choice is the LaCie
blue eye. When using an alternate device, please select the appropriate device in the drop-down menu. When using a GretagMacBeth eyeOne device please select the ‘LaCie blue eye’ option as the LaCie blue eye colorimeter uses the same driver.
Accessing Finetuning, Ambient Light Analysis and
Advanced Calibration settings
These three features of blue eye pro can be accessed by rightclicking on the application bar of the LaCie blue eye application.
Please select the appropriate feature from the dropdown menu
and the corresponding window will appear on your screen.
Please refer to the corresponding chapters of the Mac section of
this manual for detailed instructions on using these features.
LaCie blue eye pro
User Manual
Troubleshooting
page 41
8.Troubleshooting
In the event that your LaCie blue eye pro software or hardware
is not working correctly, please refer to the following checklist to
find out the source of the problem. If you have gone through all
of the points on the checklist and your product is still not working correctly, please have a look at the FAQs that are regularly
published on our Web site – www.lacie.com. One of these FAQs
may provide an answer to your specific question. You can also
visit the drivers page, where the most recent software updates
will be available. If you need further assistance, please contact
your LaCie reseller or LaCie Technical Support (see section 9.
Contacting Customer Service for details).
Manual Updates
LaCie is constantly striving to give you the most up-to-date,
comprehensive User’s Manuals available on the market. It is
our goal to provide you with a friendly, easy to-use format that
will help you quickly install and utilize the many functions of
your new device. If your manual does not reflect the configurations of the product that you purchased, please check our Web
site for the most current version available.
Problem
Question
Solution
Issues with the LaCie
blue eye colorimeter.
Is the LaCie blue eye colorimeter being recognized?
Verify that the LaCie blue eye colorimeter is connected to your
computer through a USB port; also verify that the proper device
has been selected in the Device menu of the blue eye pro software.
Can the LaCie blue eye colorimeter
be connected to the USB port on
Apple keyboards?
Yes, the Apple keyboard provides a sufficient amount of power for
the colorimeter.
Can the LaCie blue eye vision calibrator be used with the LaCie blue
eye pro software?
The LaCie blue eye vision calibrator can be used with the LaCie
blue eye pro software in Windows only. Under Mac OS X, this calibrator is unfortunately not supported. Please refer to section 4.3.
Using Another Colorimeter for more information.
Is the process for calibrating a monitor
other than the LaCie 300/500/700
Series Monitor the same?
No, the calibration process is different. Please refer to section 6.
Calibrating Other Monitors with the LaCie blue eye pro for full
instructions and additional information.
Issues regarding
the calibration of
monitors other than
the LaCie 300/500
/700Series Monitor.
LaCie blue eye pro
User Manual
Troubleshooting
page 42
Issues regarding
the calibration of
monitors other than
the LaCie 300/500
/700Series Monitor.
Can LaCie photon monitors be calibrated in DVI or VGA mode with the
LaCie blue eye pro software?
Yes, but the calibration process will be manual. Please refer to section 6. for full instructions and additional information.
Issues regarding
the Select Profile
Module.
Why don’t all of the saved ICC profiles appear in the dropdown menu
of the Select Profile module?
The drop-down menu displays the last 49 profiles created using
the LaCie blue eye pro. If you have created more than 49 profiles,
you will need to erase or move the older and/or unused profiles
to a folder other than the ColorSync folder (Library > Colorsync
> Profiles).
Issues regarding
the Select Profile
Module.
Can the Select Profile module be
used without the colorimeter connected?
Yes, a saved profile can be loaded without having the colorimeter
connected.
Compatibility issues.
Is the LaCie blue eye pro software
compatible with Mac OS 9?
No, the LaCie blue eye pro software is only compatible with Mac
OS 10.1 and later.
Various Issues
Does the monitor need to be recalibrated if the OSD settings were altered?
No, simply select your previous profile from the Select Profile module. Please see section 5.5. Switching Colorimetric Environments
for more information.
Can the LaCie 300/500/700 Series
Monitor be calibrated while connected through an ADC port?
Yes, but you will need to use an ADC to DVI converter cable.
LaCie blue eye pro
User Manual
9.Contacting Customer Support
Before You Contact Technical Support
Read the User Manual and review the Troubleshooting section.
Try to isolate the problem. If possible, make the drive the only
external device on the CPU, and make sure that all of the cables
are correctly and firmly attached.
If your question is related to monitor calibration, launch the LaCie blue eye pro application and in the “About” section verify that
your monitor is plugged in via the DVI connection. Then perform
a monitor Calibration Report and send it via email to Tech Support along with your question.
If you still can’t get your LaCie device to work properly, contact
us via the provided Web link. Before contacting us, make sure
that you are in front of your computer and that you have the following information on hand:
✦✦ Your LaCie device’s serial number
✦✦ Monitor brand and model
✦✦ Video card brand and model
✦✦ Operating system (Mac OS) and version
✦✦ Computer brand and model
✦✦ Names of CD or DVD drives installed on your computer
✦✦ Amount of memory installed
✦✦ Names of any other devices installed on your computer
Contacting Customer Support
page 43
LaCie blue eye pro
User Manual
Contacting Customer Support
page 44
9.1. LaCie Technical Support Contacts
LaCie Asia, Singapore, and Hong Kong
Contact us at:
http://www.lacie.com/asia/contact/
LaCie Australia
Contact us at:
http://www.lacie.com/au/contact/
LaCie Belgium
Contact us at:
http://www.lacie.com/be/contact/ (Français)
LaCie Canada
Contact us at:
http://www.lacie.com/caen/contact/ (English)
LaCie Denmark
Contact us at:
http://www.lacie.com/dk/contact
LaCie Finland
Contact us at:
http://www.lacie.com/fi/contact/
LaCie France
Contact us at:
http://www.lacie.com/fr/contact/
LaCie Germany
Contact us at:
http://www.lacie.com/de/contact/
LaCie Italy
Contact us at:
http://www.lacie.com/it/contact/
LaCie Japan
Contact us at:
http://www.lacie.com/jp/contact/
LaCie Netherlands
Contact us at:
http://www.lacie.com/nl/contact/
LaCie Norway
Contact us at:
http://www.lacie.com/no/contact/
LaCie Spain
Contact us at:
http://www.lacie.com/es/contact/
LaCie Sweden
Contact us at:
http://www.lacie.com/se/contact
LaCie Switzerland
Contact us at:
http://www.lacie.com/chfr/contact/ (Français)
LaCie United Kingdom
Contact us at:
http://www.lacie.com/uk/contact/
LaCie Ireland
Contact us at:
http://www.lacie.com/ie/contact/
LaCie USA
Contact us at:
http://www.lacie.com/contact/
LaCie International
Contact us at:
http://www.lacie.com/intl/contact/
LaCie blue eye pro
User Manual
Warranty Information
page 45
10. Warranty Information
LaCie warrants your drive against any defect in material and
workmanship, under normal use, for the period designated on
your warranty certificate. In the event this product is found to be
defective within the warranty period, LaCie will, at its option,
repair or replace the defective drive. This warranty is void if:
LaCie will not, under any circumstances, be liable for direct, special or consequential damages such as, but not limited to, damage or loss of property or equipment, loss of profits or revenues,
cost of replacement goods, or expense or inconvenience caused
by service interruptions.
✦✦ The drive was operated/stored in abnormal use or maintenance conditions;
Any loss, corruption or destruction of data while using a LaCie
drive is the sole responsibility of the user, and under no circumstances will LaCie be held liable for the recovery or restoration
of this data.
✦✦ The drive is repaired, modified or altered, unless such repair, modification or alteration is expressly authorized in
writing by LaCie;
✦✦ The drive was subjected to abuse, neglect, lightning strike,
electrical fault, excessive tampering, improper packaging
or accident;
✦✦ The drive was installed improperly;
✦✦ The serial number of the drive is defaced or missing;
✦✦ The broken part is a replacement part such as a pickup
tray, etc.
✦✦ The tamper seal on the drive casing is broken.
LaCie and its suppliers accept no liability for any loss of data
during the use of this device, or for any of the problems caused
as a result.
Under no circumstances will any person be entitled to any sum
greater than the purchase price paid for the drive.
To obtain warranty service, call LaCie Technical Support. You
will be asked to provide your LaCie product’s serial number, and
you may be asked to furnish proof of purchase to confirm that
the drive is still under warranty.
All drives returned to LaCie must be securely packaged in their
original box and shipped with postage prepaid.
Important Info: Register online for free technical support:
www.lacie.com/register