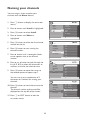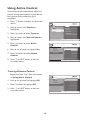
1
FLAT TV 42PFL7932D 52PFL7932D User Manual philips IMPORTANT! Return your Warranty Registration card today to ensure you receive all the benefits you’re entitled to Registering your model with PHILIPS makes you eligible for all of the valuable benefits listed below, so don’t miss out. Complete and return your Product Registration Card at once to ensure: * Proof of Purchase Returning the enclosed card guarantees that your date of purchase will be on file, so no additional paperwork will be required from you to obtain warranty service. * Product Safety Notification * Additional Benefits of Product Ownership By registering your product you’ll receive notification - directly from the manufacturer - in the rare case of a product recall or safety defect. Registering your product guarantees that you’ll receive all of the privileges to which you’re entitled, including special moneysaving offers. Know these safety symbols Congratulations on your purchase, and welcome to the “family!” Dear PHILIPS product owner: Thank you for your confidence in PHILIPS.You’ve selected one of the best-built, best-backed products available today.We’ll do everything in our power to keep you happy with your purchase for many years to come. As a member of the PHILIPS “family,” you’re entitled to protection by one of the most comprehensive warranties and outstanding service networks in the industry. What’s more, your purchase guarantees you’ll receive all the information and special offers for which you qualify, plus easy access to accessories from our convenient home shopping network. Most importantly, you can count on our uncompromising commitment to your total satisfaction. All of this is our way of saying welcome - and thanks for investing in a PHILIPS product. P.S. To get the most from your PHILIPS purchase, be sure to complete and return your Product Registration Card at once. This “bolt of lightning” indicates uninsulated material within your unit may cause an electrical shock. For the safety of everyone in your household, please do not remove product covering. The “exclamation point” calls attention to features for which you should read the enclosed literature closely to prevent operating and maintenance problems. WARNING:To reduce the risk of fire or electric shock, this apparatus should not be exposed to rain or moisture and objects filled with liquids, such as vases, should not be placed on this apparatus. CAUTION: To prevent electric shock, match wide blade of plug to wide slot, fully insert. ATTENTION : Pour éviter les chocs électriques, introduire la lame la plus large de la fiche dans la borne correspondante de la prise et pousser jusqu’au fond. For Customer Use Enter below the Serial No., which is located on the rear of the cabinet. Retain this information for future reference. Model No. __________________________ Serial No. __________________________ Visit our World Wide Web Site at http://www.philips.com CONTENTS Overview of television controls and connectors.......................................................................6 Side controls..................................................6 Overview of remote control buttons and functions..............................................................7 Restricting access to digital channels...........21 Changing your PIN code.............................21 Restricting access to digital channels...........22 Restricting access to TV channels............22 Guide to Digital TV..........................................9 Restricting access to programs with Maturity rating...............................................22 Getting Started..............................................9 Setting up your favorite channel list.............23 Switching on the TV for the first time.........10 Changing the Favorite List name...............23 Understanding the information banner.......11 Selecting the TV channels and radio stations............................................................23 Viewing or listening to digital TV and radio ..............................................................................12 Setting up your favorite channel list.............24 Changing the order of stored channels...12 Setting up the TV and radio channels..........13 Checking for new TV channels or radio stations............................................................13 Adding all services to the favorite list......24 Removing all services to the favorite list ..........................................................................24 Updating software automatically (For Service use only)......................................25 Setting up the TV and radio channels..........14 Viewing the current software version.....25 Adding new channels or stations to your list.....................................................................14 Installing new software................................25 Setting up the TV and radio channels..........15 Reinstalling all channels...............................15 Setting up the TV and radio channels..........16 Installing digital channels manually............16 Setting up the TV and radio channels..........17 Testing your TV reception.........................17 Updating software automatically (For Service Use)..............................................26 Getting program listings..................................27 Using the on-screen menus............................28 Searching and storing your channels automatically......................................................29 Manual installation............................................30 Selecting your preferences.............................18 Changing the Tuner Mode..........................30 Setting your language...................................18 Changing the TV System.............................31 Submenu options for language...................18 Fine Tuning your channels..........................32 Selecting your preferences.............................19 Naming your channels.....................................33 Setting your time zone................................19 Time Zones....................................................19 Selecting your preferences.............................20 Storing your favorite channels.......................34 Adjusting your picture settings......................35 Setting your digital audio output...............20 Adjusting your sound settings........................36 Digital Audio Output...................................20 Using the timer..................................................37 Setting your closed caption options.........20 Setting the TV time......................................38 CONTENTS Setting the wake-up clock..........................39 Using Mode Selection (Applicable to 480p and 720p only).........58 Child-locking the TV . .....................................41 Using Native 1080 mode (For 1080p TV models only)......................58 Displaying the TV time................................38 Enabling Child Lock......................................41 Disabling Child Lock....................................41 Controlling access to TV channels...............42 Accessing Parental Lock..............................42 Changing Access Code................................43 Locking channels...........................................44 Controlling access to TV programs.............45 Using the movie rating lock (for certain regions only)............................45 Using the TV Rating lock (For certain regions only)...........................47 Turning off Blocking.....................................49 Blocking other programs............................49 Using Active Control.......................................50 Turning off Active Control.........................50 Turning on Closed Captions..........................51 Changing your picture format........................52 Using the Auto Sound and Auto Picture features................................................................53 Using the Surf feature......................................54 Adding channels to your Surf list..............54 Removing channels from Surf list..............54 Using the Source List.......................................55 Using your TV as a computer monitor........56 Picture settings (VGA mode).....................56 Feature settings (VGA mode)....................56 Using your TV in High Definition (HD) mode....................................................................57 Connecting the HD equipment.................57 Controlling the TV settings in HD mode................................................................57 Troubleshooting................................................60 Specifications......................................................62 Overview of television controls and connectors Side controls The side controls are on the left side or top of the TV set. 1. VOLUME + / To increase volume level, press VOLUME +, to decrease level, press VOLUME -. 1 2. MENU To display the on-screen menus or to exit from the on-screen menus. The CHANNEL + /- buttons can be used to navigate the menu items. The VOLUME + / - buttons can be used to select the menu items. - CHANNEL + 2 3 4 3. CHANNEL + / To select the TV channel numbers upwards or downwards. 4. POWER . To turn off or turn on the TV set. 6 Overview of remote control buttons and functions 1. Standby button . To switch the TV to standby mode if it is already turned on. Or to turn on TV when it is in standby mode. 1 2 3 4 5 6 7 8 9 2. DEMO button To turn on or turn off Pixel Plus Demo. When turned on, a split-screen display shows Pixel Plus active on one half and Pixel Plus inactive on the other half. 3. SAP button To select SAP, Stereo and forced Mono in analog mode and to change audio language in digital mode. 4. SURF button (Analog mode only) To channel surf up to 8 channels. 5. Incredible Surround button To enable Incredible Surround in stereo mode and Spatial in mono mode. 10 6. A/D button To toggle between analog and digital modes. 11 7. Cursor buttons To navigate and select menu items and adjust indiividual settings. 12 13 8. OK button To select menu items or confirm selection. 9. ANALOG MENU button To use the analog menus. 10. Volume buttons To turn up or turn down the sound level. 11. Mute button To turn off the volume. 12. Numeric (0-9) buttons To enter channel number or set time. 13. Exit / Status button To exit on-screen menus. Or to display information on the current channel or information banner for Digital mode. 7 Overview of remote control buttons and functions 14. Picture Format button To cycle through list of available picture formats. 14 15. AV button To display AV source list or to cycle through list of AV sources by repeatedly pressing button. 15 16 17 16. Closed Captions button To display current Closed Caption setting or cycle through list by repeatedly pressing button. 18 19 17. Active Control button To turn on or turn off Active Control. 18. Color buttons (Digital mode only) To use preset functions on the on-screen display. 20 19. EPG (Digital mode only) Electronic Program Guide button To get program listings and information. 21 20. DIGITAL MENU button To use the menu in digital mode. 21. Channel buttons To select the channel number upwards or downwards. 22 23 22. Dot button (Digital mode only) To enter values for minor channels (example: 36.5) 24 25 23. SMART PICTURE button To select factory-preset picture settings. 26 24. SMART SOUND button To select factory-preset sound settings. NOTE: The u button is used to select menu items or confirm your selection. You can also press the Æ button instead of the u button. Either buttons will work in the same context. The Í button is used to return to the previous menu screen. 25. A/CH (Alternate Channel) button To display the last viewed channel and the current channel. 26. Sleeptimer button To set sleeptimer in increments of 15, 30...240 mins. 8 Guide to Digital TV What is Digital Television (DTV)? Digital Television (DTV) is a relatively new type of broadcasting that promises to transform television viewing into a whole new experience. Digital technology is used to capture images and sound to deliver better picture quality. There are different types of digital television quality. The most common are: • Standard Definition TV (SDTV) SDTV is the basic level of quality display and resolution for both analog and digital. Transmission of SDTV can be in the traditional (4:3) or widescreen (16:9) format. • High Definition TV (HDTV) HDTV has the highest quality for digital broadcast formats. Its resolution can be up to 1080p. Combined with digitally enhanced sound technology, HDTV sets new standards for sound and picture quality in television. Difference between Digital and Analog ? Digital Television is a more flexible and efficient technology than the analog broadcast system. Analog broadcasts can only provide one program at a time. Digital television can broadcast a high definition program or several standard definition programs simultaneously. You can receive information about programs through the Information Banner and Electronic Program Guide. This information is provided by the broadcaster. Getting Started • When the TV is powered-on for the first time you will be prompted to run auto install to receive the channels that are broadcasted locally. • Auto installation may take 20 to 40 minutes depending on the number of channels that are transmitted by the cable provider or broadcaster. • When the TV is not receiving any signal from the antenna or cable, NO SIGNAL will appear on the TV screen. This can be caused by the antenna or cable not being plugged in correctly or when the wrong tuner mode is selected. • When no transmission is received from the broadcaster, NO PROGRAM will appear on the TV screen. • You will not be able to receive pay channels when using direct antenna / cable connection to the television. • When the set-top box is connected to the television using coaxial cable, it is necessary to auto-program the television for the set-top box source channel and change the channels at the set-top box to view the program. • When the set-top box is connected to the television using AV connection, select the television input source for the set-top box to view the program and change the channels at the set-top box to view the program. 9 Switching on the TV for the first time Setup When you turn the TV on for the first time, the TV is in digital mode and the following menu appears on screen. Language Language English Time Zone Add new services Português Selecting your language and time zone 1. Press the Æ button to enter Language, and press the Î or ï button to select your preferred language. Close Select system menu language. Setup 2. Press the u button to confirm your selection. Time Zone 3. Press the ï button to highlight Time Zone and press the Æ button. 4. Press the Î or ï button to select your preferred Time Zone. Language (GMT-03:00) Brasilia Time Zone Add new services (GMT-04:00) Manaus Select time zone in your location. 5. Press the u button to confirm your selection. Setup Add new services Language Add new services Time Zone Add new services 6. Press the ï button to select Add new services. 7. Press the u button to start the installation. The TV searches for the available analog and digital channels. Enter to scan new channel. When scanning has completed, a pop-up window will display information on the number of analog and digital services found. Auto Program Channel TV 8. If no digital channels are detected, press the v button to switch to analog mode. 32 579 MHz Setup | Installation Total 1 Channels Found Current Scanning Scan percentage Information Analog TV services: Analog Radio services: Digital TV services: Digital Radion services: 69/69 1 1 1 0 Yes Close A service scan is in progress, please press OK to stop. 10 Understanding the information banner When you select a digital program, an information banner is displayed at the top of the screen. The banner disappears after a few seconds. You can also press the button on the remote control to display the information banner. When you press the button again in succession, the TV will display the description of the program. For example, synopsis, cast, duration and genre). The information banner provides useful information of the current program on the screen such as channel name, program title, start time of program, and so on. 1080p 1. Resolution Indicates resolution type, for example: 1080p 1 2. Favorite list indication Indicated by a tick if you have added this program to your favorite list setting. 3. Channel number In the format: 000:0000 4. Channel name 5. Program title 6. Program start time 7. Program time progress bar Displays time left indicator bar. 8. Program end time 9. Closed Caption icon Displays Closed Caption (CC) if you have enabled CC. 10. Clock Current time. 11 000.0000 2 3 TV GloboHD 4 The Fairly Odd Parents 5 16:35 6 16:50 CC 7 8 9 16:48 10 Viewing or listening to digital TV and radio Changing the order of stored channels Setup You can change the order of the digital channels and radio stations that you have stored. Favorites Service List Preferences Information Service Setup Installation button on the remote 1. Press the control and use the Î or ï button to select Digital TV from the source list. Close Setup | Installation Installation 2. Press the Setup menu. Test Reception Access restrictions button to display the Service List Service List Rearrange Services Service Setup Test Reception Listen to new Radio Stations View new TV Channels 3. Press the ï button to select Installation, and press the Æ button twice to select the Service List menu. Close 4. Press the Î or ï button to select Rearrange Services, and press the Æ button. Setup | Installation 5. Press the Æ button to select Uninstall services. Rearrange Uninstall Services Uninstall services GloboHD Move services GLOBO M 6. Press the Æ button and use the Î or ï button to select the program you want to uninstall. Close 7. Press the Æ button to return to the previous menu and press the ï button to select Move services. Setup | Installation 8. Use the Î or ï button to highlight the program and the u button to select. 9. Use the Î or ï button move the program to the order you want and press the u button to confirm. Move Services Uninstall services GloboHD Move services GLOBO M Close 10. Repeat steps 8 and 9 to move other channels. 11. Press the Rearrange TIP: Press the button on the remote control to switch between the digital and analog modes. button to exit the menu. 12 Setting up the TV and radio channels Checking for new TV channels or radio stations You can check for the availability of TV channels or radio stations that have been launched by the broadcaster after you have installed the TV. Setup button on the remote 1. Press the control and use the Î or ï button to select Digital TV from the source list. 2. Press the Setup menu. Favorites Service List Preferences Information Service Setup Test Reception Access restrictions Installation button to display the Close 3. Press the ï button to select Installation, and press the Æ button twice to select the Service List menu. Setup | Installation Installation 4. Press the Î or ï button to select View new TV Channels or Listen to new Radio Stations. Service List Service List Rearrange Services Service Setup Test Reception Listen to new Radio Stations View new TV Channels 5. If new services are available, press the Æ button to enter into the list of services, and press the Î or ï button to move through the list. Close Setup | Installation | Service List For information on how to add new services to your list of favorite channels, see topic on Adding new channels or stations to your list. New TV Channels 05.1 - TV GloboHD 05.3 - TV GLOBO M Test Reception 6. Press the Í button to return to the previous menu. 7. Press the 7_ 8_ Close Select the service(s) to change channel. button to exit the menu. TIP: Press the button on the remote control to switch between the digital and analog modes. 13 Setting up the TV and radio channels Adding new channels or stations to your list You can search for new TV channels or radio stations that have been launched by the broadcaster after the initial installation. button on the remote 1. Press the control and use the Î or ï button to select Digital TV from the source list. 2. Press the Setup menu. Setup Favorites Service List Preferences Information Service Setup button to display the Installation 3. Press the ï button to select Installation, and press the Æ button. Close Setup | Installation 4. Select Service Setup, and press the Æ button. Installation 5. Press Æ to Add new services, and press the u button to activate the installation. A search begins. Any new channels are added to the channel list menu. The percentage of the installation that has been completed and the number of channels found is displayed. Service Setup Service List Add new services Service Setup Reinstall services Test Reception Manual install services Close TIP: Press the button on the remote control to switch between the digital and analog modes. 6. When the search is complete, press the u button to accept the new services. 7. Press the Í button to return to the previous menu. 8. Press the Test Reception Access restrictions button to exit the menu. 14 Setting up the TV and radio channels Reinstalling all channels This menu allows you to reinstall all the digital TV channels and radio stations. Setup button on the remote 1. Press the control and use the Î or ï button to select Digital TV from the source list. Favorites Service List Preferences Information Service Setup Test Reception Access restrictions Installation 2. Press the Setup menu. button to display the Close 3. Use the ï button to select Installation, and press the Æ button. Setup | Installation Installation 4. Select Service Setup, and press the Æ button. Service Setup Service List Add new services Service Setup Reinstall services Test Reception Manual install services 5. Select Reinstall services, and press the Æ button. Close CAUTION: Reinstalling services will overwrite all your previously stored channels. Auto Scan 8/68 7_ 8_ Close A service scan is in progress, please press OK to stop. Auto Scan Scanning Channel 9 ... Scan status Scan percentage 7. Press the u button to store the services. 8. Press the Í button to return to the previous menu. 9. Press the Scanning Channel 9 ... Scan status Scan percentage 6. Press the u button to start the installation. A search is for digital services is started. The services are stored automatically. When the search is complete, the menu indicates the number of digital services found. Once searching is complete, you should see a list of stored channels on the left panel. 68/68 7_ 8_ Close A service scan is in progress, please press OK to stop. button to exit the menu. TIP: Press the button on the remote control to switch between the digital and analog modes. 15 Setting up the TV and radio channels Installing digital channels manually You can manually scan services by buttoning in the frequency of your target channel. Setup button on the remote 1. Press the control and use the Î or ï button to select Digital TV from the source list. Press the setup menu. Favorites Service List Preferences Information Service Setup Test Reception Access restrictions Installation button to display the Close 2. Select Service Setup, and press the Æ button. Setup | Installation Installation 3. Select Manual install services, and press the Æ button. Service Setup Service List Add new services Service Setup Reinstall services Test Reception Manual install services 4. Use the Í and Æ buttons to select the channel number. 5. Press ï button and press u button to start the search. Close 6. When the search is complete, press the u button to accept the new service. Setup | Installation | Service Setup Manual Scan Channel No. 2 05 3 TV GLOBO M Frequency 57143 Test Reception 7. Press the Í button to return to the previous menu. 8. Press the Access restrictions Start Scan Installation Signal Strength: button to exit the menu. Signal Quality: 7_ 8_ Close TIP: Press the button on the remote control to switch between the digital and analog modes. Manual Scan Scanning Channel 9 ... Scan status Scan percentage 68/68 7_ 8_ Close A service scan is in progress, please press OK to stop. 16 Setting up the TV and radio channels Testing your TV reception Setup | Installation This option lets you check the strength of the signal that is being transmitted via your aerial connection. Service List Frequency Service Setup Test Reception Network name Installation Test Reception Signal quality Signal strength button on the remote 1. Press the control and use the Î or ï button to select Digital TV from the source list. Close Setup | Installation 2. Use the numeric buttons (0-9) or the CH +/- buttons to switch to the digital channel you would to test the signal. Test reception Frequency Frequency 569143 Khz Network name Signal quality Signal strength 3. Press the Setup menu. button to display the 4. Press the ï button to select Installation, and press the Æ button. Setup | Installation Test reception 5. Press the ï button to select Test Reception, and press the Æ button. Frequency Network name Signal quality Signal strength 6. Press the Æ button to select the Frequency option. The frequency of the current channel is displayed. 7. Press the ï button to select Network name. The name of the broadcast channel is displayed. Setup | Installation Test reception Signal quality Frequency Network name 8. Press the ï button to select Signal quality. An indicator bar is displayed showing you the quality level of the TV signal. Signal quality Signal strength 9. Press the ï button to select Signal strength. An indicator bar is displayed showing you the strength level of the TV signal. Setup | Installation Test reception Frequency Network name Signal quality 10. Press the Network name BAND-HD Signal strength button to exit the menu. TIP: If the signal strength is poor, consider adjusting or changing your aerial. Contact a professional aerial installer for best results. 17 Signal strength Selecting your preferences This option lets you select your preferred language, time zone, and digital audio output. Setting your language 1. Press the button on the remote control and use the Î or ï button to select Digital TV from the source list. 2. Press the setup menu. Setup Favorites Language Preferences Information Time Zone Digital Audio Output Access restrictions Closed Caption Installation button to display the Close 3. Press the ï button to select the Preferences menu. Setup | Preferences 4. Press the Æ button to select Language and press the Æ button. Preferences 5. Press the ï button to select Audio, Closed Caption or System and press the Æ button. Language Language Audio Time Zone Digital Audio Output Closed Captio System Closed Caption 6. Press the Æ button to select the option and Î or ï to select the language. You can select English or Portuguese. Close Setup | Preferences 7. Select your language and press the u to confirm. Language 8. To return to the previous menu, press the Í button. 9. Press the Press the display the setup menu. button to • Closed Caption: To select the Closed Caption option. • System: To select the menu language. Closed Caption System Português Close TIP: Press the button on the remote control to switch between the digital and analog modes. Submenu options for language Audio: To select the audio sound language. English Select audio preference language. 10. button to exit the menu. • Audio Audio 18 Selecting your preferences Setting your time zone 1. Press the button on the remote control and use the Î or ï button to select Digital TV from the source list. 2. Press the setup menu. Setup button to display the Favorites Language Preferences Information Time Zone Digital Audio Output Access restrictions Closed Caption Installation 3. Press the ï button to select the Preferences menu. Close 4. Press the Æ button and ï button to select Time Zone. Press the Æ button. Setup | Preferences Preferences 5. Press the Æ button to select the one of the three time zones available. • GMT-04:00: Manaus Time Zone Digital Audio Output (GMT-04:00) Manaus Close Time Zones GMT-03:00: Brasilia (GMT-03:00) Brasilia Closed Caption 6. Press the DIGITAL MENU button to exit the menu. • Time zone Language button on the remote TIP: Press the control to switch between the digital and analog modes. 19 Selecting your preferences Setting your digital audio output 1. Press the button on the remote control and use the Î or ï button to select Digital TV from the source list. Setup | Preferences Preferences Digital Audio Output Language AAC Time Zone Digital Audio Output PCM Closed Caption 2. Press the setup menu. button to display the 3. Press the ï button to select the Preferences menu. Close Select AAC for 5.1 system. 4. Press the Æ button and ï button until Digital Audio Output is selected. Press the Æ button. Setup | Preferences Preferences 5. Press the Æ button to select the AAC or PCM output. Digital Audio Output Language AAC Time Zone Digital Audio Output PCM Closed Caption 6. Press the DIGITAL MENU button to exit the menu. Select PCM for stereo system. Close Digital Audio Output • • AAC: Advanced Audio Coding (AAC) is a very high quality audio encoding and noise reduction system. It is the audio system you hear in High Definition Television (HDTV) and digital broadcast TV (DTV). Setup | Preferences Closed Caption PCM: Pulse Code Modulation (PCM) is a way of transmitting uncompressed digital audio. PCM is used by Audio CDs. Closed Caption Closed Caption On Digital caption service Off Set to display digital closed caption. Setting your closed caption options Close Setup | Preferences Closed Caption The Digital caption service option is for turning on or turning off your digital captioning. The Closed Caption option is for setting your closed caption to CC, CC1 or CC2 button on the remote TIP: Press the control to switch between the digital and analog modes. Digital caption service Closed Caption CC1 Digital caption service CC2 Select digital closed caption service. 20 Close Restricting access to digital channels You can restrict access to the digital channels by blocking them with an access PIN code. Favorites Set PIN Proctection Turning on PIN code protection Preferences Information Maturity Rating Access restrictions Radio Stations Installation Change pin code Setup 1. Press the button on the remote control and use the Î or ï button to select Digital TV from the source list. TV Channels Close 2. Press the setup menu. button to display the Setup | Access restrictions Access restrictions 3. Press the ï button to select Access restrictions, and press the Æ button. Set Pin Protection Set Pin Protection On Maturity Rating TV Channels Off Radio Stations Change pin code 4. Press the Æ button to select Set PIN Protection. Close 5. Press the Î or ï button to select On, and press the u button to confirm. Setup | Access restrictions Change pin code Enter your system PIN _ __ _ New system PIN Changing your PIN code Reenter new system PIN 1. Repeat steps 1 to 3 from the section, Turning on PIN code protection. 2. Press the ï button until Change pin code is selected and press the Æ button. Enter your system PIN code. Close Setup | Access restrictions 3. Press the Æ button to select Enter your system pin and press the u button. Change pin code Enter your system PIN _ __ _ New system PIN Reenter new system PIN 4. Enter your PIN code using the numeric buttons (0-9) on the remote control. 5. You will be prompted to enter your new PIN code. Enter a new code. Close New system PIN. 6. You will be prompted to reenter the new code. Enter the code as above. Setup | Access restrictions Change pin code Enter your system PIN _ __ _ New system PIN 7. Press the Reenter new system PIN button to exit the menu. TIP: If you have forgotten your PIN code, reset the code by pressing “0711” followed by “0711” to enter a new code. Reenter new system PIN. 21 Close Restricting access to digital channels Restricting access to TV channels Setup | Access restrictions 1. Repeat steps 1 to 3 from the section, Turning on PIN code protection. Access restrictions 2. Press the ï button until TV Channels is selected. TV Channels Set Pin Protection TV GloboHD Maturity Rating TV Channels TV GLOBO M Radio Stations Change pin code 3. Press the u button and the Æ button to see the list of TV channels. Close 4. Use the Î and ï buttons to select the TV channel to be blocked from access. 5. Press the u button to confirm blocking the TV channel. Restricting access to programs with Maturity rating Setup | Access restrictions Access restrictions You can restrict access to the digital programs using the Maturity rating provided the broadcast programs are rated. Maturity Rating Set Pin Protection No Block Maturity Rating TV Channels Block All Block age 10 and below Radio Stations Block age 12 and below Block age 14 and below Change pin code Block age 16 and below Block age 18 and below 1. Repeat steps 1 to 3 from the section, Turning on PIN code protection. Close 2. Press the ï button until Maturity Rating is selected. Please enter your pin code Blocking active. Enter PIN code to temporarily unlock. 3. Press the u button and the Æ button to see the list of ratings. _ __ _ 4. Use the Î and ï buttons to select the rating to use for blocking TV programs that match the rating. 5. Press the u button to confirm the rating you want. NOTE: You will not be able to view channels or programs that have been blocked using the TV Channels restriction or Maturity Rating filter. A pop-up window will prompt you to enter the PIN code to temporarily unlock the channel or program. 22 Setting up your favorite channel list You can create a list of up to four of your favorite TV channels and radio stations. Setup button on the remote 1. Press the control and use the Î or ï button to select Digital TV from the source list. 2. Press the setup menu. Favorites List 1 Preferences Information List 2 Select favorite list Access restrictions Installation button to display the Close Setup | Favorites List 1 3. Press the Æ button to enter the Favorites menu. Favorite List 1 Favorite List 1 Name Select TV channels Select Radio stations 4. Press the Î or ï button to select List 1, List 2, List 3, or List 4, and press the Æ button. Add all services Remove all services 5. Press the Æ button to enter the Favorites setting options. Close Enter the name for the list. Setup | Favorites List 1 Changing the Favorite List name Favorite List 1 Favorite List 1 Name Select TV channels Select Radio stations Rename list Add Do all services you really want to change name for list? 1. Use the Í or Æ buttons to move the cursor over the character of the name list and press the Î or ï buttons to scroll through the character list. Remove all services Yes 2. Press the u button to confirm. No Close Enter the name for the list 3. A pop-up window will prompt you to confirm changing the favorite list name. Use the Í or Æ buttons to select Yes or No and press the u button. Setup | Favorites List 1 Name Select TV channels Select Radio stations Favorite List 1 GloboHD GLOBO M Add all services Selecting the TV channels and radio stations Remove all services 1. Use the Î or ï buttons to navigate the list of channels or stations to select. Select TV channels for the list. 2. Press the u button to select. An ‘X’ marks the checkbox to indicate the channel or station has been selected. 23 Close Setting up your favorite channel list Adding all services to the favorite list Setup | Favorites List 1 1. Press the u button to add all the services to the favorite list. Favorite List 1 Add all services Name Select TV channels Select Radio stations Add all services 2. A pop-up window will prompt you to confirm adding all the services to the favorite list. Use the Í or Æ buttons to select Yes or No and press the u button. Remove all services Close Press [[OK]] to add all services to the favorites list Setup | Favorites 3. Press the List 1 button to exit the menu. Favorite List 1 Add all services Name Select TV channels Select Radio stations Addall allservices services Add Removing all services to the favorite list Do you really want to add all services? Remove all services 1. Press the u button to remove all the services from the favorite list. Yes No Close Press [OK] to add all services to the favorites list. 2. A pop-up window will prompt you to confirm removing all the services from the favorite list. Use the Í or Æ buttons to select Yes or No and press the u button. Setup | Favorites List 1 Favorite List 1 Remove all services Name Select TV channels Select Radio stations Add all services Remove all services 3. Press the button to exit the menu. Close Press [[OK]] to add all services to the favorites list button on the remote TIP: Press the control to switch between the digital and analog modes. Setup | Favorites List 1 Favorite List 1 Remove all services Name Select TV channels Select Radio stations Addall allservices services Add Do you really want to remove all services? Remove all services Yes No Close Press [OK] to remove all services to the favorites. 24 Updating software automatically (For Service use only) Setup | Information You can view information on the current version of the TV software and install new versions if they are available. Information System Software System Software Current Software Version New Software Restore Default Viewing the current software version 1. Press the button on the remote control and use the Î or ï button to select Digital TV from the source list. Enter to view current software version. Close System Information 2. Press the setup menu. H/W Version: ZDT620 ISDTV V0.1 button to display the S/W Version: LC07B-DTM V0.13+ Release Time: Aug-27-2007 02:10PM 3. Press the ï button until Information is highlighted, then press the Æ button to select it. The software version is displayed. Note: Screen information may differ depending on your software version. Installing new software Setup | Information 1. Switch off the TV set from the wall socket mains. Insert your USB device to the USB port at the rear panel of the TV set and switch on the set. Information System Software System Software Current Software Version New Software Restore Default 2. If you are in analog mode, switch to digital mode by pressing the v button on the remote control. 3. Press the setup menu. Close button to display the Setup | Information | New Software New Software Select USB disk Select USB disk USB disk1 4. Press the ï button until Information is highlighted, then press the Æ button to select it. 5. Press the u button to enter the System Software menu. Press the Æ button followed by the ï button to highlight New Software. Select USB disk to read file. 6. Press the u button to select New Software. 25 Close Updating software automatically (For Service Use) 7. You will be prompted to select the USB disk. Setup | Information | New Software Select file upgrade.zim Select USB disk USB disk1 8. Press the u button to select the USB disk. The filename will be displayed. 9. Press the u button to select the filename. 10. You will be prompted to confirm performing the update. Use the Í or Æ buttons to select Yes and press the u button. Close Select file to upgrade. Setup | Information | New Software A pop-up window will display an indicator bar while the update is in progress. Select file upgrade.zim Select USB disk USB disk1 Confirmation When the update has completed, the screen will go blank momentarily. Do you really want to update? Yes 11. Switch off the TV set from the wall socket mains for one to two seconds. No Close Select file to upgrade. 12. Switch on the TV set again. The new software is now installed. Setup | Information | New Software Select USB disk USB disk1 Select file upgrade.zim Updating Programming flash Select file to upgrade. 26 Close Getting program listings You can access an Electronic Program Guide which provides you with a quick and easy way to view a list of digital programs. You can navigate through the guide and obtain detailed information about the programs. button on the remote 1. Press the control and use the Î or ï button to select Digital TV from the source list. Television | TV guide 16:24 Now Next 00.1 BBC One 16:35 The fairly odd... 16:50 The fairly odd... 00.1 BBC Two 16:30 Ready Steady 17:15 The weakest lin 00.1 BBC Three 12:50 This is BBC Thr 2. Press the Œ button to display the Electronic Program Guide (EPG). Thu 19 Jul 18:58 Welcome to BB 00.1 BBC Four 12:50 This is BBC Fou 18:58 This is BBC Fou 00.1 France 16:10 Newsround sho 16:45 Tracy Beaker 00.1 CBeebles 16:20 Step inside 16:30 Koala Brothers 00.1 BBC 7 19:00 BBC News 19:30 Tales from the 00.1 BBC 8 18:45 Rock from the 19:45 Dark Angel Record Prev day Next day More info 16:35 The fairly odd parents 15 miins A list of digital programs in the currently selected favourites list is displayed. Television | TV guide 3. Press the Æ button to access the Now list and the Î or ï buttons to select a program. 16:24 Now Thu 19 Jul Next 00.1 BBC One 16:35 The fairly odd... Mon The 31-10 16:50 fairly odd... 00.1 BBC Two 16:30 Ready Steady Tue 01-11 17:15 The weakest lin 00.1 BBC Three 12:50 This is BBC Thr 4. Press the Í button to return to the previous screen and the Æ button to access the Next list. 00.1 BBC Four 18:58 WedWelcome 02-11 to BB ThurThis 03-11 12:50 This is BBC Fou 18:58 is BBC Fou 00.1 France 16:10 Newsround sho 16:45 Tracy Beaker Fri 04-11 00.1 CBeebles 16:20 Step inside 00.1 BBC 7 19:00 BBC News 16:30 Koala Brothers Sat 05-11 Sun Tales 06-11 from the 19:30 Today 00.1 BBC 8 18:45 Rock from the 19:45 Dark Angel Record Prev day Next day More Jumpinfo to 16:35 The fairly odd parents 15 miins Press OK to view this channel 5. Use the Î or ï buttons select the date and press the u button. Television | TV guide 6. Press the colour buttons to activate the TV guide. The TV guide features are displayed at the bottom of the screen. 16:24 Now Next 00.1 BBC One 16:35 The fairly odd... 16:50 The fairly odd... 00.1 BBC Two 16:30 Ready Steady 17:15 The weakest lin 00.1 BBC Three 12:50 This is BBC Thr 00.1 BBC Four 7. When you have finished, press the Œ button to exit the menu. Thu 19 Jul 18:58 Welcome to BB 12:50 This is BBC Fou 18:58 This is BBC Fou 00.1 France Tracy Record 16:10 Prev Newsround day Nextsho day 16:45 More infoBeaker 16:35 The fairly parents 15Koala miinsBrothers 00.1 CBeebles 16:20odd Step inside 16:30 Genre name - Sub genre name BBCthat News 19:30 Talestreasures from the into cash 00.1 BBC 7 Welcome to19:00 the show literally turns hidden 00.1 BBC Rock from theAmerica’s 19:45latest DarkU.S. Angelpremiere and8dreams18:45 into realities, BBC addition channel’s successful living Record to thePrev day hugely Next day More infoline-up.Function 16:35 The fairly odd parents 15 miins Sample screens only. The Electronic Program Guide may differ from your TV set. 27 Using the on-screen menus Before using the on-screen menus, select your menu language. 1. Press h button to display the on-screen menus. Main Picture Installation Installation Brightness Sound Features Color Install Sharpness E it Exit Color Temp Contrast Contrast + NR 2. Press ï button untill Install is highlighted. Main Picture Installation Installation Language Sound Features Tuner Mode Install Manual E it Exit Name Auto Program Fav. Program 3. Press u button to select Language. Install The available languages for your TV will be displayed on the right panel. 4. Press u button to highlight the first language or ï to select the other available languages. 5. Press u button to select the language. 6. Press h or EXIT button to exit the on-screen menus. 28 Language Installation Installation English Tuner Mode Spanish Auto Program Portuguese Manual Name E it Exit Manual M anuall Fav. Program Fav F av. Program P Name N ame Install IInstallation nstallation Language English Tuner Mode Auto Program Spanish Manual Name E it Exit Manual M anuall Fav. Program Fav F av. Program P Portuguese Name N ame Searching and storing your channels automatically When you are using the TV for the first time, you will need to run the automatic or manual searching of channels. 1. Press h button to display the on-screen menus. Main Installation Installation Language Picture 2. Press ï button until Install is highlighted. 3. Press u button to select Install. Sound Features Tuner Mode Install Manual E it Exit Name Auto Program Fav. Program 4. Press ï button until Auto Program is highlighted. Install Language Tuner Mode IInstallation Press OK to continue Auto Program Manual Name Exit E it Fav. Program 5. Press u to start Auto Program. Auto Program Auto Program will start scanning for channels automatically. When scanning has completed, the progress bar display will exit from the screen. The first channel found will be displayed on the screen. 6. Press h or EXIT button to exit the on-screen menus. TIP: To cancel or interrupt auto searching, press the h or EXIT button. Only channels that were found before interruption will be stored. 29 Installation Channel 14 TV 471 MHz Manual installation You can manually set the TV tuner and system as well as fine tune the channels. Changing the Tuner Mode If you have problems using Auto Program to search for channels, you can manually set the tuner system. Main Picture 1. Press h button to display the on-screen menus. Installation Installation Language Sound Features Tuner Mode Install Manual E it Exit Name Auto Program Fav. Program 2. Press ï button until Install is highlighted. 3. Press u button to select Install. 4. Press ï button until Tuner Mode is highlighted. Install Language 5. Press u button to select Tuner Mode. 6. Press ï or Î button to select Auto, Antenna or Cable. 7. Press u button to select the option. 8. Press h or EXIT button to exit the on-screen menus. Tuner Modes: • Automatic: The TV will automatically detect whether or not cable signal input is present. • Antenna: The TV will detect antenna signals and will search for all antenna TV channels available in your local area. • Cable: The TV will detect cable signals and will search for all cable TV channels available in your local area. 30 IInstallation nstallation Auto Tuner Mode Antenna Auto Program Cable Manual PAL-N P AL N Name E it Exit Fine F i Tune ine T Fav. Program Store S t tore Manual installation Changing the TV System 1. Press h button to display the on-screen menus. Main Picture 2. Press ï button until Install is highlighted. 3. Press u button to select Install. Installation Installation Language Sound Features Tuner Mode Install Manual E it Exit Name Auto Program Fav. Program 4. Press ï button until Manual is highlighted. 5. Press u button to select Manual. 6. Press u button to select System. 7. Press ï or Î button to select Auto, NTSC, PAL-M or PAL-N. 8. Press u button to select the option. 9. Press h or EXIT button to exit the on-screen menus. TV Systems: • Automatic: The TV will automatically detect the tuner system. • NTSC: Used mainly in North America and some South American countries. • PAL-M: Used in Brazil. • PAL-N: Used in Argentina, Uruguay and Paraguay. 31 Install Language Installation Installation System Tuner Mode Fine Tune Auto Program Store S tore t Manual Channel C h hannel l Name E it Exit Fine F i Tune ine T Fav. Program Store S t tore Manual System Installation Installation Auto Fine Tune NTSC St Store PAL-M Ch Channel l PAL-N Fixitite T Tune Exit E Fine F i Tune ine T St Store Store S t tore Manual installation Fine Tuning your channels You can fine tune the channels after you have searched them automatically by using the Fine Tune feature. Switch to the channel number that you want to fine tune. Main Installation Installation Language 1. Press h button to display the on-screen menus. Picture Sound Features Tuner Mode 2. Press ï button until Install is highlighted. Install Manual E it Exit Name Auto Program Fav. Program 3. Press u button to select Install. 4. Press ï button until Manual is highlighted. 5. Press u button to select Manual. 6. Press ï button until Fine Tune is highlighted. Install IInstallation nstallation Language System Tuner Mode Fine Tune Auto Program Store S tore t Manual Channel C h hannel l Name E it Exit Fine F i Tune ine T Fav. Program Store S t tore Manual IInstallation System Fine Tune Store St 7. Press u button to select Fine Tune. 10 Sh Sharpness 2 C l Temp Color T The Fine Tune level bar will be displayed. C t t+ Contrast NR 8. Press ï or Î button to manually fine tune the channel reception. 9. Press h or EXIT button to exit the on-screen menus. 32 -10 Naming your channels You can assign a short name for your channels with the Name feature. 1. Press h button to display the on-screen menus. Main Picture 2. Press ï button until Install is highlighted. 3. Press u button to select Install. Installation Installation Language Sound Features Tuner Mode Install Manual E it Exit Name Auto Program Fav. Program 4. Press ï button until Name is highlighted. 5. Press u button to select the first channel number on the list. Install 6. Press u button to start naming the channel number. 7. Press Æ button until a rectangular block cursor appears next to the channel number. Language Installation Installation 002 Tuner Mode 003 Auto Program 004 Manual 005 Name E it Exit 006 Fav. Program 007 008 009 8. Press ï or Î button to cycle through the list (A-Z, 0-9) to select the characters or numbers to use for the channel name. Install 9. Press u button to move the cursor to the second space and repeat step 7. Language Installation Installation 002 Auto Store 003 Manual Store 004 Sort 005 Name E it Exit 006 Fav. Program 007 008 009 You can use up to a combination of 5 characters or numbers for naming your channels. Install 10. Press u button to store the name to the channel. The channel number and name will be displayed on the top left of the screen. Language Installation Installation 002 D O C U Tuner Mode 003 NEWS Auto Program 004 MOVIE Manual 005 SPOR Name E it Exit 006 Fav. Program 007 008 11. Press h or EXIT button to exit the on-screen menus. 009 33 Storing your favorite channels The Favorite Program feature lets you store only the channels you want on your favorite list which you can access using the remote control channel buttons. 1. Press h button to display the on-screen menus. Picture Sound Features Tuner Mode 2. Press ï button until Install is highlighted. Install Manual E it Exit Name Main 3. Press u button to select Install. Installation Installation Language Auto Program Fav. Program 4. Press ï button until Fav. Program is highlighted. The list of channel numbers are displayed on the right panel. All channel numbers will have a tick () beside them to indicate as favorite channel by default. Install Language Installation Installation 002 Tuner Mode 003 Auto Program 004 Manual 005 Name E it Exit 006 Fav. Program 007 5. Press u button to select the first channel number on the list or ï button to move down the list. 008 009 6. Press u button to remove the tick or add the tick to the corresponding number. Only channel numbers with the tick will be added to your favorite list. When you use the Channel + / - buttons, you will only have your favorite channels. Install IInstallation nstallation Language 002 Tuner Mode 003 Auto Program 004 Manual 005 Name E it Exit 006 Fav. Program 007 008 009 7. Press h or EXIT button to exit the on-screen menus. TIP: To access channels not in the favorite list, use the numeric (0-9) buttons. 34 Adjusting your picture settings The Picture sub-menu features let you adjust the various picture settings. Main Picture 1. Press h button to display the on-screen menus. 2. Press u button to select the Picture sub-menu. Installation Installation Brightness Sound Features Color Install Sharpness E it Exit Color Temp Contrast Contrast + NR 3. Press ï or Î button to highlight the sub-menu items. 4. Press u button to select the Picture sub-menu item. Picture IInstallation Brightness 100 Color Contrast 5. Press ï or Î button to adjust the settings of the sub-menu items. Sharpness 53 Color Temp Contrast + 0 NR 6. Press u button to select the Picture sub-menu item. 7. Press ï or Î button to adjust the settings of the sub-menu items. Depending on which Picture item you are adjusting, some items will have the level indicator bar, some with discreet settings such as Cool, Warm and Normal, or On and Off. Picture Brightness Installation Installation Cool Color Contrast Normal Sharpness IIncr. ncr Surround S d Color Temp SAP S AP Contrast + Sound S oundd Warm NR 8. Press h or EXIT button to exit the on-screen menus. Picture Picture settings: • Brightness Brightness: Adjust how bright the picture should be. Installation Installation Off Color Contrast On Sharpness IIncr. ncr Surround S d Color Temp SAP S AP Contrast + Sound S oundd Warm W arm • Color: Adjust the intensity of the colors. • Contrast: Adjust how light or dark the tones should be. • Sharpness: Adjust the detail level of the picture. • Contrast +: Enhances the contrast of the picture. • Color Temp: Set the color to Cool (moreblue), Normal (balanced) or Warm (more red). • NR: Noise Reduction. Reduces picture noise (random dots). NR 35 Adjusting your sound settings The Sound sub-menu features let you adjust the various sound settings. Main Picture 1. Press h button to display the on-screen menus. 2. Press ï button to highlight the Sound sub-menu. Installation Installation Equalizer Sound Features Balance Install Incr. Surround E it Exit SAP AVL Forced Mono 3. Press u button to select the Sound sub-menu. Equalizer 4. Press ï or Î button to highlight the sub-menu items. IInstallation 120 HZ 200 HZ 50 500 HZ 1200 HZ 5. Press u button to select the Sound sub-menu item. 0 3 KHZ 7500 HZ 12 KHZ 6. Press ï or Î button to adjust the settings of the sub-menu items. Depending on which Sound item you are adjusting, some items will have the level indicator bar, some with discreet settings such as Mono, Spatial, or On and Off. Sound Equalizer 7. Press h or EXIT button to exit the on-screen menus. -50 Installation Installation Off Balance AVL On Incr. Surround 11200 200 HZ SAP 3 KHZ Forced Mono 77500 500 HZ NR 1122 KHZ 5500 00 HZ Sound settings: • • • Equalizer: Adjust each individual frequency (tone). Balance: Adjust the left and right speaker sound level. AVL (Automatic Volume Leveler): Control the sudden sound level increase when changing channels or during advertisement slots • Incr. Surround: Enhanced stereo effect. Select Incredible Surround or Stereo (when in stereo mode) or Mono or Spatial (when in mono mode). • SAP (Secondary Audio Programming): Activate to allow alternative languages or commentary. • Sound IInstallation nstallation Equalizer Mono Balance Spatial AVL 5500 00 HZ Incr. Surround 11200 200 HZ SAP 3 KHZ Forced Mono 77500 500 HZ NR 1122 KHZ Forced Mono: Select Off to leave broadcast signal as is. Or select On to force the signal to mono. NOTE: Stereo and Incredible Surround modes can only be selected when the TV broadcast is in stereo. You can also press the f button to toggle the sound modes. 36 Using the timer The Timer sub-menu features let you set the time and program the TV set to switch on or off automatically. Setting the sleeptimer 1. Press h button to display the on-screen menus. Main Picture 2. Press ï button until Features is highlighted. Installation Installation Timer Sound Features Child Lock Install Active Control E it Exit Parental Lock Closed Caption Volume V olume l Limiter Li it 3. Press u button to select the Features. N NR 4. Press u button to select Timer. 5. Press u button to select Sleep. The right panel will display the sleep timer settings: Off, 15, 30, 45, 60, 90, 120, 180 and 240 minutes. Features Timer 6. Press ï or Î button to select the number of minutes remaining before the TV set automatically switches to standby mode. 7. Press u button to confirm the setting. 8. Press h or EXIT button to exit the on-screen menus. TIP: Installation Installation Sleep Child Lock Parental Lock Time Active Control Stop Time Closed Caption Channel Start Time V l Volume Limiter Li it Activate NR 122isplay 1D KHZ Timer Sleep Installation Installation Off Time 15 Start Time 30 Stop Time 45 Channel 60 Activate 90 Display 2 KHZ 112 20 180 You can check if the sleeptimer is enabled or how much more time remaining by pressing the STATUS button on the remote control. The status will be displayed on the bottom center of the screen. To cancel sleeptimer, select Off in the Sleep sub-menu. 37 Using the timer Setting the TV time Main Follow steps 1 to 4 from the section on Setting the sleeptimer to access the Timer sub-menu. Picture Sound Features Child Lock Install Active Control E it Exit 1. Press u button to select the Timer sub-menu. Installation Installation Timer Parental Lock Closed Caption Volume V olume l Limiter Li it N NR 2. Press ï button to highlight Time. 3. Press u button to select the Time sub-menu. Features Timer The entry fields --:-- will be displayed for you to enter the time in HH:MM format. 4. Use the numeric buttons (0-9) to enter the time. Example: 10:45 5. Press h or EXIT button to exit the on-screen menus. Displaying the TV time You can display the TV time (which you have set up) by pressing the STATUS button or display it at all times by turning on Display. Installation Installation Sleep Child Lock Parental Lock Time Active Control Stop Time Closed Caption Channel Start Time V l Volume Limiter Li it Activate NR 122isplay 1D KHZ Timer Sleep Installation Installation 11 44 :: 22 55 Time 15 Start Time 3300 Stop Time 4455 Channel 6600 Activate 9900 Display 112220K KHZ 1 180 Follow steps 1 to 4 from the section on Setting the sleeptimer to access the Timer sub-menu. Timer 1. Press ï button to highlight the Display sub-menu. 2. Press u button to select Display. 3. Press ï or Î button to highlight On. Sleep Installation Installation 1Off 5 Time Start Time 3300 Stop Time 4455 Channel 6600 Activate 9900 Display 112220K KHZ On 1 180 4. Press u button to select On. 5. Press h or EXIT button to exit the on-screen menus. 38 Using the timer Setting the wake-up clock You can use the Timer feature to program the TV set to switch on and off at a specified time and channel. Follow steps 1 to 4 from the section on Setting the sleeptimer to access the Timer sub-menu. Features Installation Installation Sleep 1. Press ï button to highlight Start Time is highlighted. Timer Child Lock Parental Lock Time 2. Press u button to select Start Time. Active Control Stop Time Closed Caption Channel The entry fields --:-- will be displayed for you to enter the time in HH:MM format. 3. Use the numeric buttons (0-9) to enter the time. Example: 20:00 V l Volume Limiter Li it Activate NR 122isplay 1D KHZ Timer Installation Installation 12 40 :: 20 50 Sleep 4. Press h or EXIT button to exit the on-screen menus. 5. Press Í button to return to the Timer sub-menu. Start Time Time Start Time 15 Stop Time 4455 Channel 6600 Activate 9900 Display 112220K KHZ 3300 1 180 6. Press ï button until Stop Time is highlighted. Timer Sleep 7. Press u button to select Stop Time. 8. Use the numeric buttons (0-9) to enter the time. Example: 21:40 Installation Installation 12 41 :: 24 50 Time Start Time 15 Stop Time 4455 Channel 6600 Activate 9900 Display 112220K KHZ 3300 1 180 9. Press Í button to return to the Timer sub-menu. 10. Press ï button until Channel is highlighted. Timer IInstallation nstallation Sleep 12 4 : 2 5 15 Time Start Time 11. Press h or EXIT button to exit the on-screen menus. 3300 Stop Time 4455 Channel 6600 Activate 9900 Display 112220K KHZ 1 180 39 Using the timer 12. Press ï or Î button to select the channel number to be activated at the specified time. 13. Press Í button to return to the Timer sub-menu. Timer 14. Press ï button to highlight Activate. 15. Press u button to select Activate. 17. Press u button to select the option. 18. Press h or EXIT button to exit the on-screen menus. 19. Press . button on the remote control to switch the TV to standby mode. Activate settings: Off: To cancel wake-up clock. • Once: To set wake-up clock to activate once only. • Daily: To set wake-up clock to activate everyday at this time. Installation Installation 1Off 5 Time Start Time Daily Stop Time 4455 Channel 6600 Activate 9900 Display 112220K KHZ Once 1 180 16. Press ï or Î button to select Off, Once or Daily. • Sleep NOTE: If the TV is still switched on after you have set the wake-up clock, the channel will switch to the specified number at Start Time. Once the TV has been switched off via the POWER button of the TV controls, the wake-up clock settings will be lost. 40 Child-locking the TV If you need to prevent children from accessing the TV without adult supervision, you can use the Child Lock feature. Enabling Child Lock Main 1. Press h button to display the on-screen menus. Picture 2. Press ï button until Features is highlighted. Installation Installation Timer Sound Features Child Lock Install Active Control E it Exit Parental Lock Closed Caption Volume V olume l Limiter Li it N NR 3. Press u button to select Features. 4. Press ï button until Child Lock is highlighted. Features Installation Installation 1Off 5 5. Press u button to select Child Lock. Timer On 6. Press ï or Î button to highlight On. Child Lock Parental Lock Active Control 4455 Closed Caption 6600 V l Volume Limiter Li it 9900 Di l Display 112220K KHZ 7. Press u button to enable Child Lock. Daily D aily il 1 180 8. Switch off the TV or put it on standby mode. NOTE: Once Child Lock has been enabled, you will not be able to access any TV channels with the CHANNEL + / - buttons on the TV panel or operate any of its buttons. The TV will only display “Locked” on the bottom center of the screen. Keep the remote control away from children to prevent them from using it to by-pass Child Lock. Features Disabling Child Lock Timer Repeat steps 1 to 5 from the sction on Enabling Child Lock 1. Press ï or Î button to highlight Off. Installation Installation 1Off 4:25 Child Lock Parental Lock On Active Control 4455 Closed Caption 6600 V l Volume Limiter Li it 9900 Di l Display 112220K KHZ Daily il 1 180 2. Press u button to disable Child Lock. 41 Controlling access to TV channels The Parental Lock feature lets you control the type of TV programs that can be accessed with built-in program ratings based on age and content. Accessing Parental Lock Before you can use the Parental Lock features, you need to access it by entering your Access Code. Main Picture 1. Press h button to display the on-screen menus. Installation Installation Timer Sound Features Child Lock Install Active Control E it Exit Parental Lock Closed Caption Volume V olume l Limiter Li it N NR 2. Press ï button until Features is highlighted. Features 3. Press u button to select Features. 4. Press ï button until Parental Lock is highlighted. 5. Press u button to select Parental Lock. If you are using Parental Lock for the first time, you must enter the factory default code 0711. Timer Installation Installation 1 4- : -2 5- - Child Lock Parental Lock Daily il Active Control 4455 Closed Caption 6600 V l Volume Limiter Li it 9900 Di l Display 112220K KHZ Access Code 1 180 Features Timer Child Lock 6. Enter 0711 using the numeric (0-9) buttons. The system will display Incorrect. 7. Enter 0711 again. You should see Correct displayed after entering the code. Installation Installation 1 4* : *2 5* * Correct Parental Lock Daily il Active Control 4455 Closed Caption 6600 V l Volume Limiter Li it 9900 Di l Display 112220K KHZ 1 180 Parental Lock NOTE: You may be prompted to change the access code. Otherwise, you can continue to access the Parental Lock features. Lock Channel Installation Installation 1 5 002 Change Code Clear All 004 003 Lock All 005 Movie Rating 006 TV Rating 007 Block Options 101208 2 KHZ 009 42 Controlling access to TV channels Changing Access Code Parental Lock Use your current access code to gain entry to the Parental Lock sub-menu. Lock Channel 1. Press ï button highlight Change Code. Lock All IInstallation nstallation 1 41 :42: 52 5 Change Code Clear All Movie Rating TV Rating 2. Press u button to select Change Code. Block Options 12 KHZ Parental Lock Lock Channel Installation Installation 14:25 Change Code Clear All New Code Daily il Lock All 4455 Movie Rating 6600 TV Rating 9900 Block Options 112220K KHZ You will be prompted to enter your new access code. 3. Enter your new four-digit access code with the numeric (0-9) buttons. You will be prompted to confirm the new access code. 1 180 4. Re-enter your new access code. Once the system verifies your new code, Confirmed will be displayed for a few seconds. Lock Channel Parental Lock Installation Installation 1 4* : *2 5* * Change Code Clear All Confirm code Daily il Lock All 4455 Resetting the Access Code Movie Rating 6600 TV Rating 9900 If you have forgotten the access code that you had set before, you can reset the code back to the factory default access code. Block Options 112220K KHZ 1 180 Perform steps 1 to 7 from the section on Accessing Parental Lock as if you were accessing it for the first time. Your access code will be reset to 0711. Lock Channel Parental Lock Installation Installation 1 4* : *2 5* * Change Code Clear All Confirmed Daily il Lock All 4455 Movie Rating 6600 TV Rating 9900 Display 112220K KHZ 1 180 43 Controlling access to TV channels Locking channels Use your current access code to gain entry to the Parental Lock sub-menu. 1. Press u button to select Lock Channel. The list of all the available channels will be displayed on the right panel. Parental Lock 2. Press ï button until Parental Lock is highlighted. 3. Press u button to select Parental Lock. If you are using Parental Lock for the first time, you must enter the factory default code 0711. Lock Channel Installation Installation 1 5 002 Change Code Clear All 004 003 Lock All 005 Movie Rating 006 TV Rating 007 Block Options 101208 2 KHZ 009 Channel 2 Blocked By Channel Blocking Access Code : ---- Lock Channel Parental Lock Installation Installation 1Yes 4:25 Change Code Clear All 004 Lock All 0005 05 Movie Rating 0006 06 TV Rating 0007 07 Block Options 1012208K KHZ Locked 0 009 Lock Channel Parental Lock Installation Installation 1Yes 4:25 Change Code Clear All 004 Lock All 0005 05 Movie Rating 0006 06 TV Rating 0007 07 Block Options 1012208K KHZ Cleared 0 009 44 Controlling access to TV programs Using the movie rating lock (for certain regions only) Movie Rating: • G: Suitable for all ages. You can control access to movies based on their content as defined by the Motion Picture Association of America (MPAA). • PG: Some material may not be suitable for children. • PG-13: Some material may not be suitable for children under 13 years of age. • R: Material not suitable for children under 17 years of age. Requires parental guidance. • NC-17: Not auitable for children under 17 years of age. Has excessive violence, sex or offensive language. • X: Not suitable for children under 17 years of age. Content is pornographic. Your TV is equipped with a computer chip (V-chip) which can block program content based on their rating. All the settings apply to the AV inputs except the HDMI inputs. Repeat the steps from the section on Accessing Parental Lock to get into the Parental Lock sub-menu. 1. Press ï button until Movie Rating is highlighted. 2. Press u button to select Movie Rating. The list of movie rating labels will be displayed on the right panel. Main Picture 3. Press ï or Î button to highlight your choice of movie rating label. Installation Installation Timer Sound Features Child Lock Install Active Control E it Exit Parental Lock Closed Caption Volume V olume l Limiter Li it 4. Press u button to enable the rating. A tick () will appear beside the rating label to indicate the rating lock has been enabled. The rating labels below the one you select will also be enabled. N NR Parental Lock 5. Press Í button to return to the Parental Lock sub-menu. 45 Lock Channel Installation Installation G Change Code Clear All PG - 13 Lock All R Movie Rating NC - 17 TV Rating X NR Blo Options Block 122isplay 1D KHZ Parental Lock Lock Channel Installation Installation G Change Code Clear All PG - 13 PG PG Lock All R Movie Rating NC - 17 TV Rating X NR Blo Options Block 122isplay 1D KHZ Controlling access to TV programs 6. Press ï button until Movie Rating is highlighted. Block Options 7. Press u button to select Block Options. 8. Press ï or Î button to highlight On. IInstallation nstallation Unrated Off No Rating Blocking On Daily il A ti C Active Control t l 4455 Cl d Caption Closed C ti 6600 V l Volume Limiter Li it 9900 Di l Display 112220K KHZ 9. Press u button to enable Block Options. 1 180 10. Press h or EXIT button to exit the on-screen menus. NOTE: Your movies will be blocked if they fall under the movie rating category that you enabled. The screen will display a message to inform you the program has been blocked by the movie rating. Programs remain locked even after the TV has been switched off. You can choose to enter the Parental Lock access code which will allow you to view the program. Subsequently, all other locked programs will be viewable. Channel 2 Blocked By PG - 13 Access Code : ---- TIP: You can check which movie or TV rating you enabled while viewing your programs by pressing the STATUS button twice on the remote control. Movie Rating G Ins TV Rating TV - Y PG PG - 13 TV - G R TV - PG NC - 17 X TV - 14 TV - Y7 TV - MA Unrated No Rating 46 Controlling access to TV programs Using the TV Rating lock (For certain regions only) TV-Y: Suitable for all children. Programs are not expected to frighten children. You can control access to TV programs based on their content as defined by your broadcaster or program provider. Your TV is equipped with a computer chip (V-chip) which can block program content based on their rating. TV-Y7: For children 7 years or olderwho can tell make-believe from reality. Some mild fantasy violence or comedic violence. Programs may frighten younger children under 7 years of age. TV-Y7 FV: Fantasy violence more intense or combative than those in TV-Y7 category. The TV ratings are based on age with content-based sub ratings so you can decide which category and content to apply for the rating lock. Age-based rating Content-based rating • TV-Y None • TV-Y7 FV (Fantasy violence) • TV-G None • TV-PG V (Violence) S (Sex) L (Strong Language) D (Sexual dialog) • TV-14 V (Violence) S (Sex) L (Strong Language) D (Sexual dialog) • TV-MA V (Violence) S (Sex) L (Strong Language) TV-G: Suitable for all children but not designed specifically for children. TV-PG: Parental guidance needed. Some violence, strong language, sexual situations or suggestive dialog. Parents should watch these programs with their children. TV-14: Not suitable for children under 14 years of age. Content has violence, strong language, sexual situations or suggestive dialog. TV-MA: For adult viewing. Not suitable for chiildren under 17 years of age. Main Repeat the steps from the section on Accessing Parental Lock to get into the Parental Lock sub-menu. Picture Installation Installation Timer Sound Child Lock Features Parental Lock Install Active Control E it Exit 1. Press ï button until TV Rating is highlighted. Closed Caption Volume V olume l Limiter Li it N NR 2. Press u button to select TV Rating. The list of TV rating labels will be displayed on the right panel. These ratings are based on age groups. Parental Lock 3. Press ï or Î button to highlight your choice of TV rating label. Some of the age-based ratings have content-based sub ratings. Refer to the table listing the age and content-based ratings. 47 Lock Channel Installation Installation TV-Y Change Code Clear All TV-G TV-Y7 Lock All TV-PG Movie Rating TV-14 TV Rating TV-MA NR Blo Options Block 122isplay 1D KHZ Controlling access to TV programs 4. Press u button to select to select the age-based rating. TV Rating TV-Y 5. Press ï or Î button to highlight Lock All. 6. Press u button to enable Lock All. A tick () will appear beside the rating label to indicate the rating lock has been enabled. If content-based rating labels are present, they will also be enabled (with a tick beside them). To enable one or more ontent-based ratings, highlight only those and press the u button. Installation Installation Lock All TV-Y7 TV-G V TV-PG L S TV-14 D TV-MA TV-MA T V MA NR Block Options Blo 122isplay 1D KHZ TV Rating Installation Installation Lock All TV-Y TV-Y7 TV-G V TV-PG L S TV-14 D TV-MA TV-MA T V MA NR Block Options Blo 122isplay 1D KHZ Block Options IInstallation nstallation 7. Press Í button to return to the Parental Lock sub-menu. 8. Press ï button until Block Options is highlighted. 9. Press u button to select Block Options. 10. Press ï or Î button to highlight On. Unrated Off No Rating Blocking On Daily il A ti C Active Control t l 4455 Cl d Caption Closed C ti 6600 V l Volume Limiter Li it 9900 Di l Display 112220K KHZ 1 180 11. Press u button to enable Block Options. 12. Press h or EXIT button to exit the on-screen menus. NOTE: Your programs will be blocked if they fall under the TV rating category that you enabled. The screen will display a message to inform you that the program has been blocked by the TV rating. Programs remain locked even after the TV has been switched off. You can choose to enter the Parental Lock access code which will allow you to view the program. Subsequently, all other locked programs will be viewable. Channel 5 Blocked By TV - 14 Access Code : ---- 48 Controlling access to TV programs Turning off Blocking You can temporarily disable Blocking even after you have set the movie or TV rating options. Select Off from the Block Options sub-menu. 1. Press u button to select to select Block Options. Block Options 2. Press ï or Î button to highlight Off. 3. Press u button to enable Block Options. Blocking other programs IInstallation nstallation Unrated Off No Rating Blocking On Daily il A ti C Active Control t l 4455 Cl d Caption Closed C ti 6600 V l Volume Limiter Li it 9900 Di l Display 112220K KHZ 1 180 You can also block programs that are unrated, such as documentaries, “director’s cut” edition or programs that have no advisory data (No Rating). Block Options Unrated No Rating Repeat the steps from the section on Accessing Parental Lock to get into the Parental Lock sub-menu. 1. Press ï button until Block Options is highlighted. IInstallation nstallation Off On Blocking Daily il A ti C Active Control t l 4455 Cl d Caption Closed C ti 6600 V l Volume Limiter Li it 9900 Di l Display 112220K KHZ 1 180 2. Press u button to select Block Options. Block Options Unrated No Rating 3. Press ï or Î button to highlight Unrated or No Rating. 4. Press u button to select Unrated or No Rating. IInstallation nstallation Off On Blocking Daily il A ti C Active Control t l 4455 Cl d Caption Closed C ti 6600 V l Volume Limiter Li it 9900 Di l Display 112220K KHZ 1 180 5. Press u button to highlight On. 6. Press u button to enable Unrated or No Rating. Channel 5 Blocked By No rating Access Code : ---- NOTE: Programs with no rating or unrated will be blocked and the screen will display a message to inform youthe program has been blocked by the TV rating. 49 Using Active Control Active Control will automatically adjust the picture settings continuously to provide the best picture quality under any signal conditions. 1. Press h button to display the on-screen menus. 2. Press ï button until Features is highlighted. 3. Press u button to select Features. Main IInstallation nstallation Picture Timer Sound Features Child Lock Install Active Control E it Exit Parental Lock Closed Caption Volume V olume l Limiter Li it N NR 4. Press ï button until Active Control is highlighted. 5. Press u button to select Active Control. Features IInstallation nstallation Timer Off 6. Press ï or Î button to highlight On. Child Lock On Parental Lock Parental P arental t l LLockk 7. Press u button to enable Active Control. Active Control Active A ctive ti C Control t l Closed Exit E it Caption Closed C llosedd Caption C ti V l Volume Limiter Li it Volume V olume l Limiter Li it N NR 8. Press h or EXIT button to exit the on-screen menus. Turning off Active Control Repeat the steps 1 to 5 from the section on Using Active Control. 1. Press ï or Î button to highlight Off. 2. Press u button to highlight Off. 3. Press h or EXIT button to exit the on-screen menus. 50 Features IInstallation nstallation Timer Off Child Lock Parental Lock On Active Control Stop S t Time top Ti Closed Caption Channel C hhannell V l Volume Li Limiter it Activate A ctivate ti t NR 122isplay 1D KHZ Start S tart t t Time Ti Turning on Closed Captions You can enable closed captions for your programs if your broadcasting station provides caption service. Closed captions (CC) are subtitles hidden in the video signals which you can turn on or off unlike the normal subtitles you see in movies which cannot be turned off. CC are subtitles for dialog and descriptions (useful for the hearing-impaired). 1. Press h button to display the on-screen menus. Main Picture 2. Press ï button until Features is highlighted. Sound Features Child Lock Install Active Control E it Exit 3. Press u button to select Features. 6. Press ï or Î button to highlight CC, Off, CC1, CC2 or CC Mute. 7. Press u button to select Closed Caption option. 8. Press h or EXIT button to exit the on-screen menus. Closed Caption choices: • CC1: Most channels transmit closed captions in CC1 mode. Closed captions can be in Spanish, Portuguese or English. • CC2: Broadcasters may transmit closed captions in CC2 mode. CC2 is rarely used. • CC Mute: Closed captions in CC1 mode will be displayed only when the sound is turned off via the Mute button. Closed Caption N NR 5. Press u button to select Closed Caption. CC Off: Turn off Closed captioning. Parental Lock Volume V olume l Limiter Li it 4. Press ï button until Closed Caption is highlighted. • Installation Installation Timer 51 Features Timer Installation Installation CC Off Child Lock CC1 Parental Lock CC2 Active Control CC Mute Closed Exit E it Caption Closed C llosedd Caption C ti V l Volume Limiter Li it Volume V olume l Limiter Li it Changing your picture format The pictures you get on your TV may be in the widescreen (16:9) or standard (4:3) format depending on your broadcast stations. You can select various screen formats to suit the type of programs you watch. 4:3 1. Press the ë button repeatedly to cycle through the available picture formats. 16 : 9 (Widescreen) Picture Formats: • 4:3: Entire picture is reproduced on the screen with black bands on the left and right of the screen. • 16:9: The picture is displayed in its original proportions as transmitted. • Superzoom: Removes black bands on the sides of the screen of 4:3 format programs with minimal distortion. • Subtitle Zoom: The 4:3 format program is displayed on the entire screen leaving the subtitles area visible. Some of the top of the picture is cropped off. • Movie Expand 14:9: The picture is enlarged to fit horizontally with black bands visible at the sides of the screen. • Movie Expand 16:9: The picture is enlarged to fill up the screen and eliminate the top and bottom black bands. Some of the top and bottom of the picture is cropped off. Superzoom Subtitle Zoom Movie Expand 14 : 9 Movie Expand 16 : 9 52 Using the Auto Sound and Auto Picture features Your TV comes with pre-set Auto Sound and Auto Picture settings to match different listening environment. 1. Press the Ú button repeatedly to cycle through the available sound settings. MOVIES The sound setting type will be displayed at the bottom center of the screen. MUSIC Auto Sound settings: • Movies: Gives you the sensation of being in the middle of the action. • Music: Low tones to emphasize music. • Voice: High tones to emphasize dialog. • Personal: Your own sound settings can be stored here. you can only change the settings for Personal. VOICE PERSONAL 1. Press the ≈ button repeatedly to cycle through the available sound settings. The picture setting type will be displayed at the bottom center of the screen. RICH Auto Picture settings: • Rich: Brilliant and sharp pictures for bright environment. • Natural: Suitable for living room conditions. • Soft: Suitable for poor signals and living room conditions. • Multimedia: Optimal settings for graphical media. • Personal: Your own picture settings can be stored here. You can only change the settings for Personal. NATURAL SOFT MULTIMEDIA PERSONAL NOTE: If you change any picture settings in the Picture or Sound sub-menus, your previous Personal setting will be overwritten with the current changes you made. 53 Using the Surf feature You can store up to 8 of your favorite channels in the Surf list. You will be able to surf your channels by displaying the Surf list at the press of a button and using the cursor button to scroll the list of programs. Surf Adding channels to your Surf list 002 003 012 1. Press the numeric (0-9) buttons or Channel + / - buttons to switch to your favorite channel. 015 020 024 037 050 2. Press the SURF button to display the Surf list. You should only see one channel number on the list. This is the same channel number you are on. Surf 002 003 3. Press u button to select to add the channel to the Surf list. You should see a tick () beside the channel number to indicate that it has been stored in the Surf list. 012 015 020 024 037 050 Repeat steps 1 to 3 to add more channels to the Surf list. Surf 002 003 Removing channels from Surf list 012 015 1. Press the SURF button to display the Surf list. 020 024 037 050 2. Press ï or Î button to highlight the channel number you want to remove. 3. Press u button to remove the channel from the Surf list. The channel number will be deleted from the list. Repeat steps 2 to 3 to remov more channels while the Surf list is still displayed. 54 Using the Source List Your TV is equipped with several audio and video connection jacks for you to connect to devices such as DVD players and recorders, Home Theater systems, High-Definition devices and many more. The Source List lets you select the audio and video source that your device is connected to. Source List TV AV SIDE 1. Press the AV button to display the audio and video source list. CVI 1 CVI 2 VGA HDMI 1 2. Press ï or Î button to highlight your AV source. HDMI 2 3. Press u button to select your AV source. You should see the channel corresponding to the AV source where your device is connected to. Audio / Video sources: • TV: Normal TV broadcast via the 75 ohm antenna connector. • AV: Composite video and audio output. • SIDE: Headphone jack, Composite video and audio, and S-Video input. • CVI 1: Component video (Y Pb Pr) with Component audio input. • CVI 2: Component video (Y Pb Pr) with Component audio input. • VGA: Video Graphics Array with audio input. • HDMI 1: High Definition Multimedia Interface input. • HDMI 2: High Definition Multimedia Interface input. Refer to Quick Start Guide for connection instructions. 55 Using your TV as a computer monitor Your TV is equipped with a VGA port for you to use as a computer monitor. NOTE: Refer to the Quick Start Guide for connecting the computer to your TV. Connect your computer to the TV via the VGA cable (not supplied). Source List TV 1. Press the AV button to display the audio and video source list. AV SIDE CVI 1 CVI 2 VGA 2. Press ï or Î button until VGA is highlighted. HDMI 1 HDMI 2 3. Press u button to select VGA. You should see your computer display on the TV screen. Most of the Picture and Sound settings are the same as those in the TV mode. Picture settings (VGA mode) • • Horizontal: To adjust the picture to the left or right. Main Picture Vertical: To adjust the picture upwards or downwards. Installation Installation Brightness Sound Features Color Install Sharpness E it Exit Horizontal Contrast Vertical Color Temp Feature settings (VGA mode) • Phase / Clock: To fine tune so that your TV and computer’s display settings match. • Auto Adjust: To synchronize the TV and computer’s Phase/Clock rate automatically. • Contrast + Main Picture Reset: To override with the factory default settings. Installation Installation Timer Sound Features Child Lock Install Closed Caption E it Exit Phase Parental Lock Clock Auto Adjust Reset 56 Using your TV in High Definition (HD) mode The High Definition (HD) mode lets you enjoy clearer and sharper pictures if you are using HD equipment that can produce high definition video signals. Source List TV AV SIDE CVI 1 CVI 2 VGA Connecting the HD equipment HDMI 1 HDMI 2 1. Connect the HDMI or DVI output from your HD equipment to the HDMI 1 or HDMI 2 socket of the TV. Use a DVI-to-HDMI cable if DVI output is connected. Picture sub-menu 2. Connect the audio cable to the L / R audio jacks (AV) of the TV if you are using DVI output from your HD equipment to connect to the TV. • The Picture sub-menu options are: Brightness, Color, Contrast, Sharpness, Color Temp., Contrast+, Horizontal Shift and Vertical Shift. • All the options work the same way as the ones in the TV Picture sub-menu except for Horizontal Shift and Vertical Shift. • Horizontal Shift option lets you adjust the horizontal position of the image. • Vertical Shift option lets you adjust the vertical position of the image. 3. Press the AV button to display the Source List and the Î or ï button to select HDMI 1 or HDMI 2. 4. Press the u button to switch to the selected source. Controlling the TV settings in HD mode Sound sub-menu 1. Press the h button to display the onscreen menus. • 2. Press the Î or ï button to select Picture, Sound or Features and press u to select the items in the sub-menu. 3. Press the Î or ï button to highlight the settings and the Í or Æ button to adjust the settings. The Sound sub-menu options are Equalizer, Balance, AVL and Incr. Surround. All the options work the same way as the ones in the TV Sound sub-menu. Features sub-menu • 4. Press the Í button to return to the previous menu. 5. Press h or EXIT button to exit the on-screen menus. 57 The Features sub-menu options are Timer, Child Lock, Parental Lock and Active Control. All the options work the same way as the ones in the TV Features sub-menu except for Mode Selection. Using your TV in High Definition (HD) mode Using Mode Selection (Applicable to 480p and 720p only) Features When you connect HD equipment via HDMI supporting resolutions of 480p or 720p, the Mode Selection options will be available in the Features sub-menu. You can select PC or HD mode. Timer 1. Press the h button to display the onscreen menus. Installation Installation PC Child Lock Parental Lock HD Mode Selection Stop S t Time top Ti Active Control Channel C hhannell Closed Caption NR Volume V ollume LLimiter imiiter Activate A ctivate ti t Features Installation Installation native 1080 Start S tart t t Time Ti 122isplay 1D KHZ 2. Press ï button until Features is highlighted. 3. Press u button to select Features. 4. Press ï button until Mode Selection is highlighted. 5. Press u button to select Mode Selection. 6. Press ï or Î button to select PC or HD modes. 7. Press h or EXIT button to exit the on-screen menus. Using Native 1080 mode (For 1080p TV models only) When you connect HD equipment via HDMI or Y Pb Pr supporting resolution of 1080p, the Native 1080 option in the Display submenu will be available. You can watch the original HD format which is the true resolution from the input signals. 1. Press the h button to display the onscreen menus. Timer 2. Press ï button until Features is highlighted. 3. Press u button to select Features. 4. Press ï button until Display is highlighted. 58 Child Lock Parental Lock O Active Control Stop S t Time top Ti Closed Caption Channel C hhannell Display NR Volume V ollume LLimiter imiiter Activate A ctivate ti t Start S tart t t Time Ti 122isplay 1D KHZ Using your TV in High Definition (HD) mode 5. Press u button to select Display. 6. Press ï or Î button to select Off or On. Select On to watch your programs in the original HD format (1080p). 7. Press h or EXIT button to exit the on-screen menus. Display IInstallation nstallation native 1080 Off Child Lock P Parental t l LLockk On A ti C Active Control t l Stop S t Time top Ti Cl d Caption Closed C ti Channel C hhannell Di l Display NR Volume V ollume LLimiter imiiter Activate A ctivate ti t Note: Start S tart t t Time Ti 122isplay 1D KHZ Non 1080p models Your Philips TV is HDMI compliant. If you do not get a good picture, it is not a defect of your TV set. Please change the video format on your device (DVD player, cable set top box, etc) to a standard format. For example, you should select 480p, 576p, 720p, 1080i or 1080p for DVD players. HD format 480p SD format 576p 480i 720p 1080i 576i 1080p models HD format SD format 59 480p 576p 480i 720p 1080p 576i 1080i Troubleshooting NOTE: Before calling Service, refer to the troubleshooting topic for a list of symptoms and solutions which may address your problem. Symptoms Possible solutions No display on screen • Check whether power cord is properly connected into the mains socket and to your TV. If there is still no power, disconnect plug and wait for 60 seconds and re-insert plug. Switch on TV again. • Press the . on the remote control. Poor reception • (“snowy” picture) • Try manually adjusting your picture. Check antenna connection to the TV and to the wall antenna socket. • Check that you have chosen the correct TV system. • Press the STATUS button to check the signal strength. • Verify that the supplied cables are connected properly (Example: Aerial cable to TV, power cables to mains plug). • Verify that you have selected the correct AV source. • Verify that Child Lock has been disabled. No sound on certain channels • Check whether the correct TV system is selected. No sound • Verify that the volume is not set at minimum. • Check that the Mute is not enabled. • Check the connections between the optional equipment and the TV are correctly connected. Sound interference • Try switching off any electrical appliances to prevent interference. Examples: hairdryer, vacuum cleaner Picture interference • Try switching off any electrical appliances to prevent interference. • Move any operating electrical appliances such as haridryers, vacuum cleaner away from the TV set. TV not responding to remote control • Move closer to the receiver at the front of the TV. • Check that batteries are correctly installed on the remote control. • Replace batteries if necessary Tiny spots on the screen that do not change color • This symptom is not a problem. The liquid crystal panel is built with very high precision technology giving you the fine picture details. Occasionally, a few non-active pixels may appear on the screen as a fixed point of red, blue, green or black. Note : this does not affect the performance of the set. No picture 60 Troubleshooting Symptoms Possible solutions No sound or picture but front panel red light is lit • Press the . on the remote control. VGA mode does not work • Check VGA cable is connected securely. Verify that the correct AV source is selected. • Press the button to display the source list and select the correct one. • Check whether you have configured the computer to a compatible display resolution. • Check the graphics card setting of the computer. In S-Video mode, the colour becomes faint • Check whether S-Video cable is connected securely. Black bar on top and bottom of screen in VGA mode • Change PC refresh rate to 60 Hz. 61 Specifications 42PFL7932D TV System 52PFL7932D Auto, PAL-M, PAL-N; NTSC / PAL (Playback) Standby consumption <1W TV type LCD WXGA Active matrix TFT Screen size 42” (107 cm) 52” (132 cm) (Diagonal Visual aprox.) Resolution Supported resolution 1920 x 1080p Computer formats: 640 x 480, 60, 72, 75Hz, 800 x 600, 60, 72, 75Hz, 1024 x 768, 60, 70, 75Hz, 1280 x 768, 60Hz Video formats: 640 x 480i, 640 x 480p, 720 x 576i, 720 x 576p, 1280 x 720p, 1920 x 1080i Sound Output power 2 x 10 W Connectivity AV CVBS In, Audio L/R In, S-Video In) CVI 1 Y Pb Pr, Audio L/R In) CVI 2 Y Pb Pr, Audio L/R In) HDMI 1 • HDMI 2 • PC PC VGA In, PC Audio In AV Out CVBS Out, Audio L/R Out Side CVBS In, Audio L/R In, S-Video In, Headphone Out Antenna 75 Ohm, F-type Accessories Power cord, Quick Start Guide, User Manual, Table-top stand, Remote control, AAA batteries x2 Dimensions Set weight Set weight with stand 26.5 kg 40 kg 33.5 kg 50 kg Set dimensions (W x H x D) mm 1046 x 686 x 116 1289 x 835 x 124 Set dimensions with stand (W x H x D) mm 1046 x 749 x 265 1289 x 835 x 901 Specifications subject to change without notice. 62