1
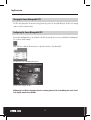
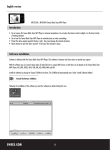
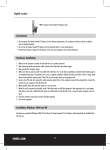
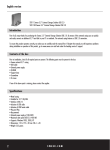
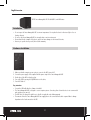
English version
PP121 Sweex Manageable UPS 1200VA USB 2.0 with LED status
Introduction
• Do not expose the Sweex Manageable UPS to extreme temperatures. Do not place the device in direct sun light or close to
heating elements.
• Do not use the Sweex Manageable UPS in extremely dusty or moist environments.
• Prevent hard shocks or impacts of the device, as this can cause damage to the internal electronics.
• Never try to open the device yourself, this voids the warranty.
Hardware Installation
1.
2.
3.
4.
5.
Make sure that the computer you are going to connect to the UPS is turned off.
Connect the power supply of the computer with the power output of the Sweex Manageable UPS
Put the plug of the UPS in the plug socket
Turn on the UPS by pressing the On/Off button on the device.
Turn the PC back on.
Pay attention:
• Connect the USB cable after the software is installed.
• The Sweex Manageable UPS is designed to secure computer systems. Connecting other electronic devices is not recommended
and entirely at your own risk.
• The UPS has to be charged for eight hours to be able to supply the entire back-up capacity.
• The amount of time the Sweex Manageable UPS can supply power to the connected devices after a power failure is always
dependant on the load connected to the UPS.
2
English version
LED's and Buttons
There are 3 LED's on the front side of the Sweex Manageable UPS and one button.
1. Blue LED indicates that the mains voltage is OK.
2. Orange LED indicates that the UPS is charging.
3. Red LED indicates that there is a power failure. The UPS will now supply power to all connected devices.
4. On/Off button.
Software installation
1. Place the Sweex CD-ROM in the CD-ROM tray. A menu will appear automatically. Click “Drivers and Software”.
The installation procedure will be started.
2. In the first window click “Next”.
3. Enter your details:
4. Enter your name or computer name. At “Company Name” enter any name. You must not leave this empty.
5. At “Serial Number” enter the code found on the case of the Sweex CD-ROM. Use capitals and stripes when needed as
indicated.
6. Click “Next” and follow the steps to complete the installation.
7. After installing the software connect the USB from the computer to the Sweex Manageable UPS. Windows will automatically
install the UPS.
3
English version
Charging the Sweex Manageable UPS
The UPS is being charged from the moment it is plugged in the plug socket. The orange LED will light up. The UPS is also charging
up when it is turned on with the button.
Configuring the Sweex Manageable UPS
By using the PowerManagerLite you can configure the UPS. At the bottom right of your screen you will find the PowerManagerLite
icon, use this to start the manager.
Double click the icon with your left mouse button or right click it and choose “Start Monitor(W)..”.
The main screen of the PowerManagerLite appears.
Click the icons to configure the UPS.
Additional tips and further information about the remaining functions of the PowerManagerLite can be found
in the English manual on the CD-ROM.
4
English version
Warranty
For most Sweex products a warranty period of 3 years applies. On Graphics Cards and Consumer Electronics Sweex offers 2 years
of warranty. We do not give support or warranty on supplied software, rechargeable batteries and batteries. Transaction of
warranty only takes place at the sales point where the product is bought.
All brand names and associated rights mentioned in this manual are and stay property of the rightful owner.
5