1
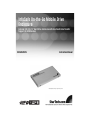
InfoSafe On-the-Go Mobile Drive
Enclosure
External USB 2.0 2.5” Hard Drive Enclosure with One-Touch Data Transfer
Support for USB Devices
IDECASE25OTG
Instruction Manual
Actual product may vary from photo
FCC Compliance Statement
This equipment has been tested and found to comply with the limits for a Class B digital
device, pursuant to part 15 of the FCC Rules. These limits are designed to provide
reasonable protection against harmful interference in a residential installation. This
equipment generates, uses and can radiate radio frequency energy and, if not installed
and used in accordance with the instructions, may cause harmful interference to radio
communications. However, there is no guarantee that interference will not occur in a
particular installation. If this equipment does cause harmful interference to radio or
television reception, which can be determined by turning the equipment off and on, the
user is encouraged to try to correct the interference by one or more of the following
measures:
• Reorient or relocate the receiving antenna.
• Increase the separation between the equipment and receiver.
• Connect the equipment into an outlet on a circuit different from that to which the
receiver is connected.
• Consult the dealer or an experienced radio/TV technician for help.
Use of Trademarks, Registered Trademarks, and
other Protected Names and Symbols
This manual may make reference to trademarks, registered trademarks, and other
protected names and/or symbols of third-party companies not related in any way to
StarTech.com. Where they occur these references are for illustrative purposes only and
do not represent an endorsement of a product or service by StarTech.com, or an
endorsement of the product(s) to which this manual applies by the third-party company in
question. Regardless of any direct acknowledgement elsewhere in the body of this
document, StarTech.com hereby acknowledges that all trademarks, registered
trademarks, service marks, and other protected names and/or symbols contained in this
manual and related documents are the property of their respective holders.
Instruction Manual
Table of Contents
Introduction . . . . . . . . . . . . . . . . . . . . . . . . . . . . . . . . . . . . . . . . . . . . . . . . . . . . .1
Before You Begin . . . . . . . . . . . . . . . . . . . . . . . . . . . . . . . . . . . . . . . . . . . . . . . . .1
System Requirements . . . . . . . . . . . . . . . . . . . . . . . . . . . . . . . . . . . . . . . . . . .1
Contents . . . . . . . . . . . . . . . . . . . . . . . . . . . . . . . . . . . . . . . . . . . . . . . . . . . . .1
Installation . . . . . . . . . . . . . . . . . . . . . . . . . . . . . . . . . . . . . . . . . . . . . . . . . . . . . .2
Installing a Hard Drive in the Enclosure . . . . . . . . . . . . . . . . . . . . . . . . . . . . .2
Connecting the Enclosure to a USB Device . . . . . . . . . . . . . . . . . . . . . . . . . .3
Installing Drivers (Windows 98SE) . . . . . . . . . . . . . . . . . . . . . . . . . . . . . . . . .4
Connecting the Enclosure to a Computer . . . . . . . . . . . . . . . . . . . . . . . . . . . .4
Disconnecting the Enclosure from a Computer . . . . . . . . . . . . . . . . . . . . . . .5
Specifications . . . . . . . . . . . . . . . . . . . . . . . . . . . . . . . . . . . . . . . . . . . . . . . . . . .5
Accessory Products from StarTech.com . . . . . . . . . . . . . . . . . . . . . . . . . . . . .5
Technical Support . . . . . . . . . . . . . . . . . . . . . . . . . . . . . . . . . . . . . . . . . . . . . . . .7
Warranty Information . . . . . . . . . . . . . . . . . . . . . . . . . . . . . . . . . . . . . . . . . . . . .7
i
Instruction Manual
Introduction
Thank you for purchasing a StarTech.com InfoSafe external USB On-the-Go hard drive
enclosure. This product allows you to turn virtually any standard 2.5” notebook computer
hard drive into a portable storage solution. The enclosure allows you to copy files
(including images, audio, and multimedia) directly from a digital camera, MP3 player, card
reader, or other USB devices to the hard drive without a computer. For ultimate
portability, the enclosure includes a battery pack that uses standard AA batteries.
Features
• Supports almost any 2.5” form factor IDE hard drive
• Pocket-sized enclosure in a lightweight, durable brushed aluminum finish
• Compact battery pack keeps you running on the road
• Unique one-touch transfer button copies files from your device to the hard drive
automatically
• Unique USB cable allows you to power the drive without the battery pack or a power
adapter when transferring files to a computer
• Backwards compatible with the USB 1.1 standard (USB 2.0 device interface
required to achieve maximum data transfer speeds)
Before You Begin
System Requirements
• A computer with an available USB 2.0 port
• An operating system that supports removable hard drives: Windows
98SE/ME/2000/XP/2003 Server, Mac OS X or higher (other operating systems may
also support this product; consult your documentation for specific details)
• A 2.5” IDE hard drive (must be formatted using the FAT32 file system to use the Onthe-Go computerless file transfer feature)
Contents
This package should contain:
• 1 x IDECASE25OTG
• 1 x USB 2.0 cable with extra power connector and adapter
• 1 x External battery pack (4 AA batteries not included)
• 1 x Installation CD
• 1 x Instruction Manual
1
Instruction Manual
Installation
NOTE: Before you use the drive enclosure with a USB product, the hard drive must be
formatted using the FAT32 file system. The option to format a drive using this file system
is available in Windows 98 and later versions. Other operating systems, such as Mac OS
and Linux, may also offer the option to format the drive using this file system. If the
drive is formatted using something other than FAT32 (including NTFS), you will not
be able to directly connect the drive to a USB device and transfer files. You could
continue to connect the drive to a computer as a typical portable hard drive.
These instructions assume that this drive has already been partitioned and formatted
prior to connecting the enclosure to a USB device or a computer. If you are unsure on
how to format a drive with FAT32 on your computer, consult your documentation or an
experienced computer user for assistance.
Installing a Hard Drive in the Enclosure
Use caution when installing a hard drive in the enclosure. Excessive shock or force
could damage the drive and/or the enclosure, resulting in data loss.
CAUTION: Always ensure that you are properly grounded when handling a hard drive or
the enclosure tray, since electronic components can be damaged by static electricity. If
an anti-static mat or similar product is not available, ground yourself by touching a
computer case or other metal surface for several seconds before handling any
components.
X
X
e
Slid
n
ctio
dire
his
ut t
o
tray
Adhesive strip
1. Using a pen or small screwdriver, press in the tabs holding the tray in the
enclosure, marked with an “x” in the picture above.
2. Gently slide the tray out of the enclosure in the direction noted above.
3. Carefully remove the white protective strip from the end of the tray. This will expose
an adhesive surface that will hold the hard drive in place. Keep the protective strip in
a safe location to re-cover the adhesive when the enclosure is not in use, if desired.
4. Line up the connectors on the hard drive with the connector on the tray. Gently slide
the hard drive into place until there is a snug fit between the tray and the hard drive.
Do not use excessive force to avoid damaging the drive and the the enclosure.
5. Gently turn the tray over. Carefully apply slight pressure to the adhesive strip to
2
Instruction Manual
ensure that the bottom of the tray is affixed to the hard drive. This will help prevent
the hard drive from moving during transport and will make the tray easier to re-insert
into the enclosure.
6. Gently insert the tray into the enclosure, ensuring that the top of the tray matches the
top of the enclosure and that the rear panel of the tray is flush with the outer edge of
the enclosure. The tabs on the tray will snap back into the enclosure to keep the tray
in place.
Connecting the Enclosure to a USB Device
You can connect the enclosure directly to virtually any USB storage device and use the
one-button transfer feature to copy files from the device to the hard drive in the
enclosure.
1. Connect the provided USB adapter to
the back of the enclosure. Connect the
data cable provided with the device to
the connector on the adapter, and the
opposite end to your device (camera,
card reader, MP3
player, memory stick, etc.).
Sample connection to a USB
device using the provided adapter
Using the Battery Pack
When not connected to a computer, you can use the
included battery pack to power the enclosure. To install
batteries in the battery pack, press the button on the side of
the housing to open the battery compartment. The battery
pack uses 4 standard AA size batteries.
Install each of the four batteries according to the orientation
printed on the bottom of the compartment. For the best
performance, we strongly recommend using batteries
designed for “high draw” or “electronic devices” that will
extend battery performance life.
2. Connect the battery pack to the
enclosure and power it on (see the
sidebar for more information).
3. Press the Backup button on the back
of the enclosure. The enclosure will
copy the data from the USB device to
the disk automatically.
To power the enclosure with the battery pack, turn the
switch to the ON position. Be sure to turn the battery pack
off after use to avoid draining the batteries.
3
Instruction Manual
Installing Drivers (Windows 98SE)
Windows ME/2000/XP/2003 Server and supported versions of Mac OS all support
removable hard drives without additional software. Ensure you have the most current
updates installed. Computers running Windows 98SE need to install support for USB
removable mass storage devices before using the enclosure:
1. Insert the installation CD into your computer’s CD-ROM or other compatible optical
drive.
2. Double click the My Computer icon on the desktop. Double click the icon for the
computer’s CD-ROM drive.
3. Double click folders and files in the following order: USB Storage Ser. > OTG >
WIN98 driver > Setup.exe.
4. The setup program will start. Follow the on-screen prompts to complete the
installation.
Connecting the Enclosure to a Computer
This product has been tested with Windows 98/98SE, ME, 2000, XP, 2003 Server, and
Mac OS 9.0.x, 9.2.x, and X. Other operating systems may also support this device;
consult your documentation or a computer service professional for details on whether this
product will work with your operating system and configuration.
When used with the Windows operating systems noted above, the drive enclosure is
“hot-swappable” which means the drive can be connected and disconnected while the
computer is running and will be immediately accessible to the user like any other hard
drive.
1. Place the enclosure near the computer you wish to use.
2. Using the provided USB 2.0 “Y” data cable, it to the USB connector
on the rear panel of the enclosure. Connect the opposite ends of the cable to two
available USB ports on the back of the computer or a powered USB hub. The Access
LED indicator on the rear panel of the enclosure should light red to indicate power.
(Both connectors must be connected to the USB source to provide sufficient power for
reliable operation.)
3. Alternatively, you may also use an external power adapter (not provided) with the
device. For most configurations, you will not need more power than what can be
provided using the included USB “Y” cable. If you wish to use an external power
adapter with the drive enclosure, a universal adapter rated for 5V DC output at 1.6A
and a tip with a positive center will work with the enclosure. Most electronics stores
should be able to provide a generic adapter that meets these requirements. Be sure
to follow any precautions and usage instructions provided with the power adapter to
avoid any damage to the drive enclosure.
4. The drive should be ready to use and will be visible under My Computer (Windows)
or on the desktop (Mac OS).
4
Instruction Manual
Disconnecting the Enclosure from a Computer
1. Ensure that any programs that have accessed the drive are closed.
2. Ensure that the Access LED on the back of the enclosure is not flashing, which
indicates the drive is being accessed.
3. You may wish to use your operating system’s “safe removal”
feature to be absolutely sure that no data is being written to or
read from the hard drive in the enclosure when you disconnect it from the computer.
In Windows, you can click the Safe Remove icon (see above) and choose the
enclosure from the menu. In Mac OS, you can drag the icon for the drive to the trash
to “eject” it and stop it safely.
4. You can now safely remove the USB 2.0 data cable from the enclosure.
Specifications
Hard Drive Compatibility
External Interface/Data Transfer Rate
Interface Connections
EIDE: ATA/33/66/100/133/166 drives supported
(ATA/100/133/166 drives interface at ATA/66 speeds)
USB 2.0 (backwards compatible with USB 1.1/1.0)
Maximum data transfer rate: 480 Mbits/sec.
(A USB 2.0 interface is required for maximum data transfer
rates. Actual data transfer speeds will vary by configuration.)
Internal:
1 x 44-pin 2.5” IDE hard drive interface
External:
1 x USB type mini-B female
1 x Power adapter connector
1 x One-Touch data transfer button
Dimensions (L x W x H)
5.35 x 2.95 x 0.51 in. (13.6 x 7.5 x 1.3 cm)
Optional Power Adapter Requirements Output: 5V DC, 1.6A, positive center
Regulatory Certifications
FCC Class B, CE
5
Instruction Manual
Accessory Products from StarTech.com
Contact your local StarTech.com dealer or visit www.startech.com for cables or other
accessories that will help you get the best performance out of your new product.
CBUSB220
2 Port USB 2.0 CardBus Adapter
PCI225USB
Value 2 Port USB 2.0 PCI Card
PCI225USB_LP
Low Profile 2 Port USB 2.0 PCI Card
PCI420USB
4 Port USB 2.0 PCI Card
PCI425USB
Value 4 Port USB 2.0 PCI Card
PCI625USB2I
Value 6 Port USB 2.0 PCI Card
CB2U2F
2 Port USB 2.0 and 2 Port IEEE-1394 FireWire CardBus Slot Saver Adapter
PCI3UV22F
3 Port USB 2.0 and 2 Port IEEE-1394 FireWire Slot Saver PCI Card
PCISATA2U5
2 Port Serial ATA and 5 Port USB 2.0 Slot Saver PCI Card
PCISAT2F3U4
2 Port Serial ATA, 3 Port IEEE-1394 FireWire and 4 Port USB 2.0 Slot Saver PCI Card
USB2HAB6T
6 ft. Transparent USB 2.0 Cable A-B M/M
USB2HAB10T
10 ft. Transparent USB 2.0 Cable A-B M/M
USB2HAB15T
15 ft. Transparent USB 2.0 Cable A-B M/M
USB2HAB6
6 ft High Speed Certified USB 2.0 Cable
USB2HAB10
10 ft High Speed Certified USB 2.0 Cable
6
Instruction Manual
Technical Support
StarTech.com’s lifetime technical support is an integral part of our commitment to provide
industry-leading solutions. If you ever need help with your product, visit
www.startech.com/support and access our comprehensive selection of online tools,
documentation, and downloads.
Warranty Information
This product is backed by a one-year warranty. In addition, StarTech.com warrants its
products against defects in materials and workmanship for the periods noted, following
the initial date of purchase. During this period, the products may be returned for repair, or
replacement with equivalent products at our discretion. The warranty covers parts and
labor costs only. StarTech.com does not warrant its products from defects or damages
arising from misuse, abuse, alteration, or normal wear and tear.
Limitation of Liability
In no event shall the liability of StarTech.com Ltd. and StarTech.com USA LLP (or their
officers, directors, employees or agents) for any damages (whether direct or indirect,
special, punitive, incidental, consequential, or otherwise), loss of profits, loss of business,
or any pecuniary loss, arising out of or related to the use of the product exceed the
actual price paid for the product.
Some states do not allow the exclusion or limitation of incidental or consequential
damages. If such laws apply, the limitations or exclusions contained in this statement
may not apply to you.
7
About StarTech.com
StarTech.com is “The Professionals’ Source for Hard-to-Find Computer Parts”.
Since 1985, we have been providing IT professionals with the quality products
they need to complete their solutions. We offer an unmatched selection of
computer parts, cables, server management solutions and A/V products and
serve a worldwide market through our locations in the United States, Canada,
the United Kingdom and Taiwan.
Visit www.startech.com for complete information about all our products and
to access exclusive interactive tools such as the Parts Finder and the KVM
Reference Guide. StarTech.com makes it easy to complete almost any IT
solution. Find out for yourself why our products lead the industry in
performance, support, and value.
Revised: 15 December 2005 (Rev. A)