1
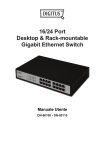
16/24 Port
Desktop & Rack-mountable
Gigabit Ethernet Switch
User Manual
DN-80100 • DN-80110
Package Contents
The following items should be found in your package:
• 16/24 Port Desktop & Rack-mountable Gigabit Ethernet Switch
• Power Adapter
• Quick Installation Guide
• Rack-mount Bracket
• Screw
Make sure that the packets contains above items. If any of
the above items is missing or damaged, please contact your
distributor.
Content
1. INTRODUCTION .................................................................. 1
1.1. PRODUCT OVERVIEW................................................. 1
1.2. MAIN FEATURES......................................................... 1
1.3. STANDARDS................................................................ 1
1.4. WORKING ENVIRONMENT ......................................... 2
2. HARDWARE INSTALLATION............................................. 2
2.1. BEFORE INSTALLATION ............................................ 2
2.2. INSTALLATION ............................................................ 2
2.3. CONNECTING THE 16/24 PORT DESKTOP &
RACK-MOUNLABLE GIGABIT ETHERNET SWITCH
TO YOUR NETWORK .................................................. 3
2.4. LED INDICATORS........................................................ 4
3. TROUBLESHOOTING ......................................................... 5
1. lntroduction
Thank you for choosing the 16/24 Port Desktop & Rackmountable Gigabit Ethernet Switch.
1.1. Product Overview
The 16/24 Port Desktop& Rack-mountable Gigabit Ethernet
Switch provides non-blocking, wire speed switching for your 10,
100, and 1000 megabit network clients. Drop this switch in
place of your current work group hub or switch, and you can
upgrade your high requirement workstations to full Gigabit
speeds as necessary, while continuing to service other clients
at their current speeds, or build your network from the ground
up, with appropriate link speeds for each user's requirements.
Either way, it's perfect for graphics projects, multimedia, and
other applications that need to move large files across the
network quickly. With the 16/24 Port Desktop & Rackmountable Gigabit Ethernet Switch, you can connect your
existing 10/100 Ethernet network to a Gigabit server backbone
without any additional equipment. All ports have automatic
MDI/MDIX detection, so installation is worry free. Each port
independently and automatically negotiates for best speed and
whether to run in half or full-duplex mode.
1
1.2. Main Features
•
•
•
•
•
•
•
•
•
•
Compliant with the IEEE802.3 10Base-T Ethernet, IEEE802.3u
100Base-TX, IEEE802.3ab 1000Base-T specifications
32/48Gbps switching fabric capacity
16/24 port 10/100/1000Mbps TX Auto-Negotiation Ethernet
Switch
Full/Half-Duplex capability on each TX port (only support full
duplex in 1000M)
IEEE802.3x standard flow control for Full-duplex, optional
Back Pressure function for Half-duplex operation
Supports TP interface Auto MDIX function for auto TX/RX swap
Supports TP interface Auto MDIX function for auto TX/RX swap
Support BK MAC address table
LED indicators for simple diagnostics and management
Plug and Play
1.3. Standards
•
•
•
•
IEEE 802.3 10Base-T
IEEE 802.3u 100Base-TX
IEEE 802.3ab 1000Base-T
IEEE 802.3x Flow Control
1.4. Working Environment
Temperature
• 0° to 40° C (operating)
• -20° to 70° C (storage)
Humidity
• 10% to 85% non-condensing (operating)
• 5% to 90% non-condensing (storage)
Power
• 100 - 240VAC, 50 - 60Hz
2
2.lnstallation
2.1. Before Installation
The setup of the Switch can be performed using the following steps:
• Install the 16/24 Port Desktop & Rack-mountable Gigabit
Ethernet Switch in a fairly cool and dry place.
See working environment for the acceptable operation
temperature and humidity ranges
• Install the Switch in a site free from strong electromagnetic
source, vibration, dust, and direct sunlight
• Leave at least 10cm of space at the left and right hand side
of the Switch for ventilation.
• Visually inspect the AC power jack and make sure that it is
fully secured to the power adapter
• Do not stack any device upon the Swltch
2.2. Installation
•
Desktop or Shelf Installation
When installlng the Switch on a desktop or shelf, the rubber
feet included with the device must be first attached. Attach
these cushioning feet on the bottom at each corner of the
device. Allow enough ventilation space between the device
and the objects around it.
•
Rack Installation
The Switch can be mounted in an EIA standard size, which
can be placed in a wiring closet with ether equipment. To
instalI, attach the mounting brackets on the switch's front
panel (one on each side) and secure them with the screws
provided. Then, use the screws provided with the equipment
rack to mount the Switch in the rack.
3
2.3. Connecting the 16/24 Port Desktop & Rackmountable Gigabit Ethernet Switch to Your Network
Description
Function
Connect to Power adapter, please don't use the
PWR
unknown power adapter, otherwise your device
may be damaged.
These ports support network speeds of 10Mbps,
100Mbps or 1000Mbps, and can operate in half
and full duplex transfer modes. These ports also
support automatic MDI/MDIX crossover
detection, which gives the Switch true 'plug and
1X-16X/24X
play' capabilities. Just connect any network
cable between the Switch and the device, and
the Switch will automatically detect the settings
of the device and adjust itself accordingly.
2.4. LED Indicators
The LED Indicators will allow you to monitor, diagnose
and troubleshoot any potential problem with the switch,
connection or attached devices.
LED
PWR
LINK/ACT
1000M
Function
On
Power on
Off
Power off
On
Corresponding port data transmitting
Flash
Corresponding port connection normal
Off
Corresponding port connection abnormal
On
Corresponding port works at 1000Mbps
Off
Corresponding port works at 10/100Mbps
4
3.Troubleshooting
1. The Power LED is not lit
• Check if the AC power cord is well connected. Try to
unplug and plug back in the power cord to the switch or try
another power outlet.
2. The Link LED is not lit
• Make sure the network configuration of connecting device is
correct, and network card and drivers are installed correctly.
• Check the cable connections.
• Make sure the cable distance between the switch and
other IEEE 802.3 compatible network device does not
exceed 100 meters.
3. Performance is bad
• Check the status of Ethemet switching. If Ethernet
switching is set to full-duplex on one device but a partner is
set to halfduplex, then performance will be poor.
• Make sure the cable between the switch and other IEEE 802.3
compatible network device is Category 5 UTP or better.
4. Same devices can't talk to other devices on the network
• Check status of the Link LEDs to make sure devices are linked
• Make sure that the devices' network configurations are correct.
• Reset the switch if needed.
5