1
BA_U1_86_02.fm Seite 0 Montag, 17. Dezember 2007 10:21 10
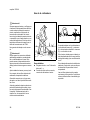
STIH)
STIHL BF, BK
Instruction Manual
Manual de instrucciones
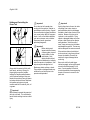
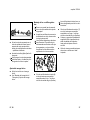
Warning!
Read and follow all safety precautions in
Instruction Manual – improper use can cause
serious or fatal injury.
Advertencia!
Lea y siga todas las precauciones de
seguridad dadas en el manual de
instrucciones – el uso incorrecto puede
causar lesiones graves o mortales.
English / USA
© ANDREAS STIHL AG & Co. KG, 2007
0458 504 8621 A. M0,5. M7. PM. Printed in USA
Printed on chlorine-free paper.
Printing inks contain vegetable oils; paper can be recycled.
BA_SE_158_003_01_06.fm
Contents
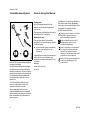
CombiAttachmentSystem ................. 2
Guide to Using this Manual .............. 2
Safety instructions and
working techniques ........................... 3
Using the Cultivator ........................ 10
Approved Basic Power Tools .......... 12
Mounting the Attachment ................ 13
Fitting Carrying Eye (Clamp) .......... 16
Mounting the Loop Handle ............. 16
Fitting the Harness ......................... 18
Starting / Stopping
the Engine ...................................... 18
Storing the Machine ........................ 19
Main Parts ...................................... 20
Specifications ................................. 21
Special Accessories ....................... 22
Maintenance and Repairs ............... 22
Allow only persons who understand this
manual to operate your soil cultivator
attachment.
To receive maximum performance and
satisfaction from your STIHL soil
cultivator attachment, it is important that
you read and understand the
maintenance and safety precautions,
starting on page 3, before using your soil
cultivator attachment.
Contact your STIHL dealer or the STIHL
distributor for your area if you do not
understand any of the instructions in this
Manual.
!Warning!
Because a cultivator is a relatively fast
turning cutting tool some special safety
precautions must be observed to reduce
the risk of personal injury. Careless or
improper use may cause serious or even
fatal injury.
STIHL's philosophy is to continually
improve all of its products. As a result,
engineering changes and improvements are made from time to time. If the
operating characteristics or the
appearance of your attachment differs
from those described in this Manual,
please contact your STIHL dealer for
information and assistance.
STIHl
BF, BK
1
English / USA
CombiAttachmentSystem
Guide to Using this Manual
Pictograms
All the pictograms attached to the
machine are shown and explained in
this manual.
The operating and handling instructions
are supported by illustrations.
..
..
In the STIHL CombiAttachmentSystem
a number of different
CombiAttachmentEngines and power
tool attachments can be combined to
produce a power tool. In this instruction
manual the functional unit formed by the
CombiAttachmentEngine and power
tool attachment is referred to as the
power tool.
In addition to the operating instructions,
this manual may contain paragraphs
that require your special attention. Such
paragraphs are marked with the
symbols described below:
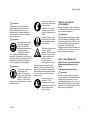
Symbols in text
Warning where there is a risk of an
accident or personal injury or
serious damage to property.
The individual steps or procedures
described in the manual may be marked
in different ways:
Caution where there is a risk of
damaging the machine or its
individual components.
:
Note or hint which is not essential
for using the machine, but may
improve the operator’s understanding of the situation and result
in better use of the machine.
A bullet marks a step or procedure
without direct reference to an
illustration.
A description of a step or procedure that
refers directly to an illustration may
contain item numbers that appear in the
illustration.
Example:
Note or hint on correct procedure in
order to avoid damage to the
environment.
Loosen the screw (1)
Lever (2) ...
The CombiAttachmentEngine and
power tool attachment come with
separate instruction manuals.
Always read and make sure you
understand both instruction manuals
before starting and using your machine.
Keep the manuals in a safe place for
later reference.
2
BF, BK
English / USA
Safety instructions and
working techniques
Equipment and features
Important!
This instruction manual may refer to
several models with different
features. Components that are not
installed on all models and related
applications are marked with an
asterisk (*). Such components may
be available as special accessories
from your STIHL dealer.
Since the combination of
STIHL Basic Power Tool
and Soil Cultivator
Attachment is a machine
with high-speed
implement, a number of
special safety precautions must be
observed in order to reduce the risk of
injury.
Engineering improvements
STIHL’s philosophy is to continually
improve all of its products. As a result,
engineering changes and improvements
are made from time to time. If the
operating characteristics or the
appearance of your machine differ from
those described in this manual, please
contact your STIHL dealer for
assistance.
Therefore some changes, modifications
and improvements may not be covered
in this manual.
These safety instructions
must be read through
attentively and observed.
Read through the owner's
manual and safety
instructions for the basic
power tool and soil cultivator attachment
from time to time. Negligence or
incorrect use of the power tool may lead
to severe or even fatal injuries.
Let your STIHL dealer show you to
operate the power tool safely. Note the
accident prevention regulations issued
by the employers' liability insurance
associations.
! Important!
Use of a power tool may be dangerous.
Contact with the rotating implement will
cause serious cuts. Solid objects such
as stones or pieces of metal may be
catapulted aside and injure the operator
or bystanders.
Such objects may also damage the
implement. Blades may shatter, splinter
or break.
STIHL does not recommend the use of
non-elastic blades when working on
stony ground. Catapulted objects or
damaged blades may cause serious or
even fatal injuries to the operator or
bystanders.
! Important!
Minors should never be allowed to use
this power tool. Bystanders, especially
children and animals should not be
allowed in the area where a power tool is
in use!
Never let the power tool run unattended.
! Important!
Never lend or rent the power tool to
other people without its owner's manual.
The instructions contained in this
manual must be observed by every
operator of this power tool.
BF, BK
3
English / USA
Most of these safety instructions apply
for all STIHL soil cultivators. The
components and controls may differ in
different models. The main components
and functions of this power tool model
are described in the appropriate chapter
of the manual.
Safe use of a power tool involves:
1.
the operator,
2.
the power tool,
3.
use of the power tool.
THE OPERATOR!
Physical condition
You must be in good physical condition
and mental health and not under the
influence of any substance (drugs,
alcohol, etc.) which might impair vision,
dexterity or judgement. Do not operate
the power tool when you are fatigued.
Be alert - if you get tired while operating
your power tool, take a break. Tiredness
may result in loss of control. Working
with a power tool can be strenuous. If
you have any condition that might be
aggravated by strenuous work, check
with your doctor before operating a
power tool.
4
! Important!
–
Wear gloves and keep your hands
warm.
Prolonged use of a power tool exposing
the operator to vibrations may produce
whitefinger disease (Raynaud's
phenomenon) or carpal tunnel
syndrome.
–
Always keep a firm grip on the
machine, but do not constantly hold
the handles with great pressure.
Take a break frequently.
–
Keep the AV system well
maintained. A cultivator with loose
components or with damaged or
worn AV buffers will tend to have
higher vibration levels.
–
Maintain a firm grip at all times, but
do not squeeze the handles with
constant, excessive pressures, take
frequent breaks.
These conditions reduce the hand's
ability to feel and regulate temperature,
produce numbness and burning
sensations and may cause nerve and
circulation damage and tissue necrosis.
The factors contributing to whitefinger
disease are not yet fully known, but cold
weather, smoking and illnesses or
physical conditions influencing the blood
vessels and flow of blood in the body, as
well as long-term exposure to vibrations
are known to cause whitefinger disease.
The following points should be observed
in order to reduce the risk of suffering
whitefinger disease or carpal tunnel
syndrome:
–
Most STIHL power tools are
available with an anti-vibration
("AV") system designed to reduce
the transmission of vibrations
created by the engine to the
operator's hands. An AV system is
recommended for those persons
using power tools on a regular or
sustained basis.
All the safety instructions given above
cannot guarantee that you will not suffer
whitefinger disease or carpal tunnel
syndrome. Therefore, continual and
regular users should closely monitor the
condition of their hands and fingers. If
any of the above symptoms appear,
seek medical advice immediately.
Proper clothing
! Important!
Always wear appropriate protective
equipment to reduce the risk of injury.
BF, BK
English / USA
! Important!
The deflector on the soil cultivator
cannot protect the operator from all
objects (stones, glass, wires, etc.)
catapulted by the rotating implement.
Thrown objects may also ricochet and
strike the operator.
! Important!
Never operate the power
tool without goggles or
properly fitted safety
glasses with adequate top
and side protection
complying with ANSI Z
87.1 or national applicable safety
standards. To reduce the risk of injury to
your face, STIHL recommends that you
also wear a face shield or face screen
over your goggles or safety glasses.
! Important!
The noise of a power tool
may damage your
hearing. Wear sound
barriers (ear plugs or ear
mufflers) to protect your
hearing. Continual and
regular users should have their hearing
checked regularly.
BF, BK
Protect your hands with
gloves when handling the
power tool and
implement. Heavy-duty,
non-slip gloves improve
your grip and protect your
hands.
THE SOIL CULTIVATOR
ATTACHMENTS
Clothing must be sturdy
and snug-fitting, but also
allow complete freedom
of movement.
Never modify a soil cultivator in any way.
Only soil cultivators supplied by STIHL
or explicitly approved by STIHL for use
with the specific power tool models are
authorized. Although certain
unauthorized tools may be useable with
the STIHL power tool, their use may in
fact be extremely dangerous.
Avoid loose-fitting jackets,
scarves, neckties,
jewellery, flared or cuffed
trousers, long loose hair
or anything that could
become caught on
branches, brush or
moving parts of the unit.
Wear long trousers made of heavy
material to protect your legs. Do not
wear shorts or operate the power tool
when barefoot or wearing open sandals.
Tuck your hair up so that it is above
shoulder level.
Good footing is very
important. STIHL
recommends the use of
safety boots with non-slip
soles, preferably with
steel toe caps.
Refer to the chapter "Main components"
for illustrations of the various parts of the
soil cultivator attachments.
! Important!
USE OF THE POWER TOOL
(Basic Power Tool with Cultivator
Attachment pick tines or bolo
tines)
Transporting the power tool
! Important!
Always turn off the engine and make
sure the implement has stopped before
putting the power tool down. When
transporting the power tool in a vehicle,
ensure that it is properly secure so that it
cannot tip over, fuel cannot spill and the
power tool is not damaged.
5
English / USA
Preparing to use the power tool
Adjust carrying harness and hand grip to
suit your size before starting work. The
machine should be properly balanced as
specified on your owner’s manual for
proper control and less fatigue in
operation.
Before starting, always check that your
power tool is in good condition,
especially the throttle trigger, throttle
trigger interlock, stop switch, implement,
deflector and harness.
Fueling
The power tool is operated with a
mixture of petrol and oil. For further
information, refer to the safety
instructions and the chapter "Fuel" in the
owner's manual for the basic power tool.
! Important!
Petrol is an extremely
flammable fuel. If spilled
or ignited by a spark or
other ignition source, it
can cause fire and serious
burn injury or property
damage. Use extreme caution when
handling petrol or fuel mix.
6
Do not smoke and keep well away from
fire or flame.
Operating notes
The power tool may only be used for the
jobs described in the owner's manual.
! Important!
Your power tool is a one-person
machine. Once started, it may hurl
objects over a great distance.
5m (16ft)
Before Starting
Always check your power tool for proper
condition and operation before starting –
refer to appropriate sections in the
instruction manuals.
Check the owner´s manual for the
attachment to ensure you are using the
appropriate deflector for that
attachment.
Starting the engine
Details on starting the engine can be
found in the appropriate chapter of the
owner’s manual for the basic power tool.
Place the unit on firm ground in an open
area. The implements must be clear of
the ground and all other obstructions.
To reduce the risk of eye and other
injury, ensure that bystanders are at
least 16 feet (5 m) away. They should
also wear goggles. Stop the engine
immediately if anyone approaches.
Start and operate the machine without
assistance.
!Warning!
When starting, make sure you have a
firm footing. Always stand to one side of
the machine to avoid risk of injury from
contact with rotating tool.
BF, BK
English / USA
! Important!
! Important!
To reduce the risk of injury
from loss of control, make
absolutely sure that the
implement can rotate
freely when started.
Shortly after the engine
starts in START position, its speed will
be fast enough for the clutch to engage
and turn the implement.
The machine produces
toxic exhaust fumes as
soon as the engine is
running. These gases
(e.g. carbon monoxide)
may be colourless and
odourless. To reduce the risk of serious
or fatal injury from inhaling toxic fumes,
never run the power tool indoors or in
poorly ventilated locations.
When the engine running only at idle,
attach the power tool to the spring hook
of your harness (see appropriate
chapter of this manual).
Working conditions
The power tool may only be operated
and started outdoors in a well ventilated
area.
It may only be operated in daylight and
good visibility. Work with care.
BF, BK
! Important!
Use of this product may cause dust or
vapours containing chemical
substances which are known to cause
respiratory disease, cancer, congenital
defects or other reproductive disorders.
If you are unaware of the risks
associated with certain dust or vapours,
ask your employer or state authorities,
such as OSHA and NIOSH, or other
sources about hazardous substances.
California and various other States have
published lists of substances which are
known to cause cancer or reproductive
disorders, etc.
Dust and vapours should be avoided at
the point of origin. Follow the work
instructions and recommendations
issued by OSHA/NIOSH, employers'
liability insurance associations and trade
unions. If the inhalation of toxic dust and
vapours cannot be avoided, the operator
and all bystanders should always wear
respiratory protection approved by
NIOSH/MSHA for the substance
concerned.
Danger!
The power tool is not
insulated. Before starting
work, ensure that there
are no power cables near
the surface. Damaging such cables with
the tool can cause electric shocks with
serious or fatal consequences.
! Important!
Information on the routing of cables can
be obtained from public utilities and such
service providers as "Miss Utility" or
"One Call".
7
English / USA
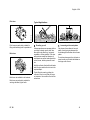
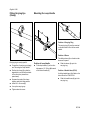
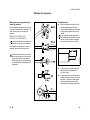
002BA055 KN
Holding and Controlling the
Power Tool
! Important!
! Important!
Do not lean too far forwards when
working with the machine. Maintain a
good balance and firm footing. Special
care must be taken in slippery conditions
(rain, snow) and on difficult, overgrown
terrain. Look out for hidden obstacles,
such as tree stumps, roots or ditches.
Slopes and uneven ground are
particularly dangerous.
Avoid cutting close to fences, the sides
of buildings, tree trunks, stones or
similar obstacles which could damage
the blade or lead to loss of control of the
machine. Beware of a higher risk of
ricochets in such conditions. Flying
objects or damaged blades may cause
serious or fatal injuries to the operator
and bystanders. Avoid the roots of
trees! Large roots may jam the blades
and damage the machine. The tree may
also be damaged if its roots are severed.
002BA054 KN
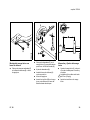
! Important!
Always hold the power tool firmly with
both hands - as shown. Wrap your
fingers tightly around the handles,
keeping the handles cradled between
your thumb and forefinger. Keep your
hands in this position to have your power
tool under control at all times. Make sure
the handles and grips are in good
condition and free of moisture, pitch, oil
or grease.
Before starting work,
inspect and clear the area
of stones, glass, pieces of
metal, rubbish or other
solid objects. Such
objects could be hurled
aside by the tool and directly or indirectly
strike the operator or bystanders. Such
objects may also damage the tool.
Blades may shatter, splinter or break.
Flying objects or damaged blades may
cause serious or fatal injuries to the
operator and bystanders.
If the machine strikes a buried object
(such as a stone), stop the engine and
remove the obstacle. Examine the
machine for signs of damage before
continuing.
Never work with the throttle trigger
interlock engaged, as the engine speed
cannot be controlled properly in this
case. Correct operation of the slide
control is described in the corresponding
chapter of the owner's manual for the
power tool.
! Important!
Never attempt to operate the power tool
with only one hand. This could lead to
loss of control resulting in serious or fatal
injury.
8
BF, BK
English / USA
If the implement or deflector is blocked
or covered, always switch off the engine
and ensure that the tool has come to a
standstill before starting to clean it.
Grass, weeds, etc. should be cleaned off
the tool at regular intervals.
! Important!
Check the tightness and condition of the
tool at regular intervals during cutting. If
the behaviour of the tool changes, stop
the engine immediately and examine the
tool. Cracked, bent, warped, damaged
or dull tools must be replaced
immediately. Such tools may shatter at
high speeds and cause injuries.
! Important!
Keep your hands and feet
well clear of the tool.
Never touch a rotating
tool. The tool continues to
run for a short time after
releasing the throttle
trigger (coasting effect).
BF, BK
Major settings
! Important!
To reduce the risk of injury due to loss of
control or contact with a moving tool,
never operate the machine with
incorrectly set idle speed. The tool
should not move if the idle speed has
been set correctly. Instructions for
adjusting the idle speed can be found in
the appropriate chapter of the owner's
manual for the power tool.
If the correct idle speed cannot be set,
have the machine checked and correctly
set or repaired by your STIHL service
dealer.
MAINTENANCE, REPAIR AND
STORING
STIHL may refuse to acknowledge a
warranty claim if the component has
not been handled or serviced
correctly or if unauthorized spare
parts have been used.
!Warning!
Use only identical STIHL replacement
parts for maintenance and repair. Use of
non-STIHL parts may cause serious or
fatal injury.
Follow the maintenance and repair
instructions in the appropriate section of
your owner's manual. Please refer to the
maintenance chart on the last pages of
this manual.
Additionally, the daily maintenance
schedule for your power tool set forth in
your STIHL Owner's Manual should be
strictly followed.
9
English / USA
Using the Cultivator
!Warning!
Always stop the engine and make sure
that the tool is stopped before doing any
maintenance or repair work or cleaning
the power tool. Do not attempt any
maintenance or repair work not
described in your owner's manual. Have
such work performed at your STIHL
dealer only.
Wear gloves when working on the
attachment.
!Warning!
Tighten all nuts, bolts and screws,
except the carburetor adjustment
screws, after each use.
Store the attachment in a dry and high or
locked location out of reach of children.
Before storing for longer than a few
days, always empty the fuel tank. See
chapter “Storing the machine” in the
basic power tool manual.
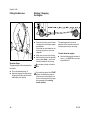
10
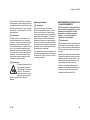
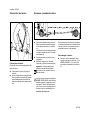
381BA003 KN
Never repair damaged tools by welding,
straightening or modifying the shape.
This may cause parts of the tool to come
off and result in serious or fatal injuries.
General
:
:
Put on the harness – see "Fitting the
Harness" – and then
With the engine running, attach the
cultivator to the harness.
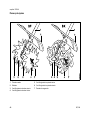
You can work with your cultivator in the
forward (1) and backward (2) directions,
from left to right or vice versa (3) or in a
circular motion.
Choose the best method to suit your
purposes, i.e. this depends on the shape
and size of the area and soil conditions.
Working in an alternating backwards
and forwards motion is particularly
suitable for loosening packed soil.
The rotor blades may only be operated
in one position. Arrows on the blades
show the required direction of rotation.
BF, BK
English / USA
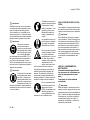
Typical Applications
469BA017 KN
Pick tines
Pick tines are particularly suitable for
tilling and loosening hard or packed soil.
469BA018 KN
Bolo tines
Bolo tines not available in all markets.
Bolo tines are particularly suitable for
working cultivated, lighter soils.
BF, BK
:
Breaking up soil
A few preparations are necessary before
you begin to break up soil which has
been previously tilled (e.g. last year's
vegetable or flower garden). First clear
away surface weeds and remains of
other plants as well as hard objects like
rocks, stones, bottles, pieces of wood
etc.
:
Loosening soil around plants
Only loosen the surface soil around
plants. Avoid going too deep as this
could damage the shallow roots of some
plants.
To avoid any damage to the cultivator or
trees, be wary not to catch the blades on
the large roots of trees.
Hold the cultivator firmly with both hands
and till only a small area at a time to the
required depth.
Finish tilling the area by guiding the
cultivator in such a way that you leave
no footprints. Use a rake to level off the
entire area.
11
English / USA
Approved Basic Power
Tools
:
Working in soil improvers
The cultivator can be used for mulching
with loam, compost, leaves, other
organic material or fertilizers.
Prepare the area by removing all old
roots, the remains of large plants and
hard objects (stones etc.). Spread the
mulch evenly on the ground.
Work in the mulch with a circular or back
and forth motion.
Finish off by leveling the area with a
rake.
:
Cleaning the rotor blades
Parts of plants, e.g. roots, can become
tightly wrapped around or between the
rotor blades during operation.
To clean the rotor blades:
Operation of the cultivator attachment is
permitted only with the following basic
power tools:
–
Wear gloves.
Bike-handled machines or
loop-handled machines with
barrier bar
–
Pull the hitch pins out of the shaft.
Schrittbegrenzer)
–
Pull the rotor blades off the shaft.
–
Remove roots, plants and soil.
STIHL FS 83, STIHL FS 851),
STIHL FS 1101), STIHL FS 120,
STIHL FS 130, STIHL FS 200,
STIHL FS 250, STIHL FH 75,
STIHL HL 751), STIHL HL 1001)
This attachment is only approved for
use with a basic power tool
equipped with either a loop handle
with barrier bar or a bike handle
Trenching or furrowing
Walk slowly backward and pull the
cultivator to create the furrow required.
Repeat as necessary to obtain deeper
furrows.
Machines with handle hose
The following machines must be
retrofitted with a loop handle with barrier
bar:
STIHL HL 731), STIHL HL 751) and
STIHL HL 1001) in versions with 0°
gearbox.
To retrofit the loop handle see chapter
on "Mounting the Loop Handle".
1)
12
Attachment is not approved for
models FS 85 RX, FS 110 RX,
HL 73 K, HL 75 K or HL 100 K
BF, BK
English / USA
Mounting the Attachment
Loop-handled machines without
barrier bar
Preparations
:
On the following machines the standard
loop handle must be removed and
replaced by a loop handle with barrier
bar:
The drive shaft may slip out of the
tube in this process. If this happens,
push the drive shaft back into the
tube.
STIHL FC 83, STIHL FC 85,
STIHL FC 110, STIHL KW 85
The barrier bar cannot be mounted
to the standard loop handle.
To retrofit the loop handle see chapter
on "Mounting the Loop Handle".
L
381BA015 KN
Other combinations of the
attachment and non-approved basic
power tools are not permitted since
they may result in accidents or
serious personal injury.
BF, BK
Loosen the clamp screws on the
basic power tool’s gearbox housing
and pull the gearbox off the drive
tube.
:
The drive shaft must not project
from the tube more than distance L
(25mm/1in).
:
If this dimension is not correct, apply
slight pressure to the drive shaft and
rotate it slowly at the same time until
it can be pushed in to the required
length.
13
A
:
Apply a mark to the drive tube at
distance A of 50 mm (2 in)
(e.g. with a pencil or felt tip pen).
413BA015 KN
English / USA
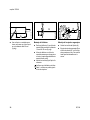
Mounting the Deflector
Mounting the Gearbox
:
:
Loosen the clamp screws (4).
:
Push the gearbox (5) onto the drive
tube (2) – turn the gearbox back and
forth as necessary until the housing
is approximately in line with the
mark.
Slide the deflector (1) onto the drive
tube (2) until distance "a" is 100 mm
(4 in).
:
Line up the deflector on the drive
tube so that the machine support on
the powerhead and the longer part
of the deflector point up.
:
Tighten down the clamp screws (3)
firmly.
Check that the deflector is secure –
it must not be possible to rotate it on
the drive tube.
14
BF, BK
English / USA
Mounting the Rotor Blades
Take care not to lose the two
washers on the gearbox output
shaft.
:
:
Line up the gearbox on the drive
tube so that the machine support on
the powerhead points down and the
rotor blades are vertical – parallel to
the deflector.
:
Tighten down the clamp screws (4)
firmly.
Arrange the blades in the order they
will be fitted on the shaft, noting the
following points:
Left-hand and right-hand blades are
different. The direction of rotation is
marked with arrows on the gearbox
and blades. Make sure the arrows
point in the same direction.
The hub of the inner blade is larger
than that of the outer blade.
:
Rotate the outer right-hand blade
(7) on the shaft until it can be
pushed into position – check the
direction of rotation again (arrows).
:
Insert and engage the hitch pin (8)
in the hole in the shaft – fold the
hitch pin flat against the blade.
:
Use the same procedure to mount
the blades on the left-hand side.
Check that the gearbox is secure –
it must not be possible to rotate it on
the drive tube.
Adjusting the Loop Handle
:
Loosen the screws on the loop
handle.
:
See "Mounting the Loop Handle" –
"Aligning and Securing the Loop
Handle"
BF, BK
:
Rotate the inner right-hand blade (6)
on the shaft until it can be pushed
into position – check the direction of
rotation again (arrows).
15
English / USA
Fitting Carrying Eye
(Clamp)
Mounting the Loop Handle
3
1
2
504BA017 KN
4
A
1
Position of Carrying Ring
The carrying ring (3) must be mounted
on the drive tube in front of the control
handle.
002BA142 KN
2
504BA016 KN
1
Carrying ring is country-specific.
Position of Loop Handle
:
For position of carrying eye (clamp)
see "Mounting the Loop Handle".
:
:
Position the clamp (1) so that the
tapped hole is on the left-hand side
of the drive tube (viewed from
powerhead).
:
Squeeze the ends of the clamp
together and hold it that position.
:
Insert M 6 x 14 screw (2).
:
Line up the carrying eye.
:
Tighten down the screw.
16
Fit the loop handle (1) on the drive
tube approx. 10“ / 25 cm (A) forward
of the control handle (2).
Position of Sleeve
The sliding sleeve (4) on the drive tube
serves as a spacer.
:
Slide the sleeve (4) up to the
carrying ring.
Position of Handle Hose (SP 81)
A sliding handle hose (4) is fitted on the
drive tube of the STIHL SP 81.
:
Slide the handle hose (4) up to the
carrying ring.
BF, BK
English / USA
Mounting the Loop Handle with
Barrier Bar
:
Insert the square nuts (5) in the
barrier bar (6) – line up the holes.
BF, BK
:
Fit the clamp (7) in the loop handle
(1) and position it with the handle on
the drive tube (8).
:
Fit the clamp (9).
:
Fit the barrier bar (6) – check its
position.
:
Line up the holes.
:
Fit the screws (10) in the holes and
screw them into the barrier bar as
far as stop.
Aligning and Securing the Loop
Handle
:
Adjust the loop handle (1) to the
most comfortable position for the
user and application.
Distance A must not be more than
22“ (55 cm).
:
Tighten down the screws on the
loop handle firmly.
17
English / USA
Fitting the Harness
Shoulder Strap
The type and style of harness depend on
the market.
:
Put on the shoulder strap (1).
:
Adjust the length of the strap so that
the spring hook (2) is about a hand’s
width below your right hip.
18
Starting / Stopping
the Engine
:
Place the unit on the ground: It must
rest securely on the engine support
and deflector.
Check that the rotor blades are not
touching the ground or any other
obstacles.
:
Make sure you have a firm footing.
:
Hold the unit with your left hand and
press it down firmly – your thumb
should be under the fan housing.
The starting procedure is now as
described in the instruction manual of
the basic power tool you are using.
To shut down the engine:
:
Move the slide control in direction of
arrow ( h ) to STOP-O or move the
stop switch to O
Do not stand or kneel on the drive
tube!
If you start the engine in the START
positon, the blades may begin to
rotate as soon as the engine runs.
Do not run the engine for any longer
than necessary in the starting
throttle position.
BF, BK
English / USA
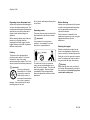
Storing the Machine
For periods of about 3 months or longer:
:
Remove, clean and inspect the rotor
blades.
:
Store the machine in a dry, high or
locked location – out of the reach of
children and other unauthorized
persons.
BF, BK
19
English / USA
Main Parts
1
Drive tube
5
Inner left-hand rotor blade
2
Deflector
6
Outer left-hand rotor blade
3
Outer right-hand rotor blade
7
Hitch pin
4
Inner right-hand rotor blade
20
BF, BK
English / USA
Specifications
Engine
Definitions
1.
Drive tube
Encloses and protects drive shaft
between engine and gearbox.
2.
Deflector
The deflector is designed to help
reduce the risk of injury from objects
thrown back towards the operator
by the blades and from contact with
the blades.
3.
4.
Outer right-hand rotor blade
Metal blade, star-shaped with
pointed or curved tines. Mounts to
the outer right-hand side.
Inner right-hand rotor blade
Metal blade, star-shaped with
pointed or curved tines. Mounts to
the inner right-hand side.
5.
Inner left-hand rotor blade
Metal blade, star-shaped with
pointed or curved tines. Mounts to
the inner left-hand side.
6.
Outer left-hand rotor blade
Metal blade, star-shaped with
pointed or curved tines. Mounts to
the outer left-hand side.
7.
Hitch pin
Secures the rotor blade to the shaft
for easy removal and installation of
parts.
See instruction manual of basic power
tool you are using.
Gearbox
Type:
Reduction ratio:
Single-stage worm
gear
44:1
Rotor blades
Four rotor blades, double-edged,
rotate in same direction
Diameter:
9 in (230 mm)
Working width:
8.9 in (220 mm)
Weight
Attachment complete
with deflector
7.9 lbs (3.6 kg)
BF, BK
21
English / USA
Special Accessories
Maintenance and Repairs
Contact your STIHL dealer for
information regarding special
accessories that may be available for
your product.
Users of this unit should carry out only
the maintenance operations described
in this manual. Other repair work may be
performed only by authorized STIHL
service shops.
Warranty claims following repairs can be
accepted only if the repair has been
performed by an authorized STIHL
servicing dealer using original STIHL
replacement parts.
Original STlHL parts can be identified by
the STlHL part number, the STIHl
logo and, in some cases, by the STlHL
parts symbol (. This symbol may
appear alone on small parts.
22
BF, BK
español / EE.UU
© ANDREAS STIHL AG & Co. KG, 2007
0458 504 8621 A. M0,5. M7. PM. Printed in USA
Impreso en papel sin cloro.
Las tintas contienen aceites vegetales,el papel es reciclable.
BA_SE_158_003_31_06.fm
Contenido
Sistema de accesorios Combi ........
Guía para el uso de este manual ...
Instrucciones de seguridad y
técnicas de manejo ........................
Uso de la cultivadora ......................
Herramientas motorizadas
básicas aprobadas .........................
Montaje del accesorio .....................
Instalación de la argolla
de transporte (abrazadera) .............
Montaje del mango tórico ...............
Colocación del arnés ......................
Arranque / parada del motor ...........
Almacenamiento de la máquina .....
Piezas principales ...........................
Especificaciones .............................
Accesorios especiales ....................
Mantenimiento y reparaciones .......
24
24
25
32
34
35
38
38
40
40
41
42
43
44
44
Permita que solamente las personas
que comprenden la materia tratada en
este manual manejen su accesorio de
cultivo.
Para obtener el rendimiento y satisfacción máximos del accesorio de cultivo
STIHL, es importante leer y comprender
las instrucciones de mantenimiento y las
precauciones de seguridad, que empiezan en la página 25, antes de usarla.
Comuníquese con el concesionario o
distribuidor de STIHL si no entiende
alguna de las instrucciones dadas en el
presente manual.
!Advertencia
Dado que una cultivadora es una herramienta de corte motorizada de gran
velocidad, es necesario tomar medidas
especiales de seguridad para reducir el
riesgo de lesiones. El uso descuidado o
inadecuado puede causar lesiones graves e incluso mortales.
La filosofía de STIHL es mejorar continuamente todos su productos. Como
resultado de ello, periódicamente se
introducen cambios de diseño y mejoras. Si las características de funcionamiento o la apariencia de su accesorio
difieren de las descritas en este manual,
comuníquese con el concesionario
STIHL para obtener la información y
ayuda que requiera.
STIHl
BF, BK
23
español / EE.UU
Sistema de accesorios
Combi
Guía para el uso de este
manual
Pictogramas
Todos los pictogramas que se
encuentran en la máquina se muestran
y explican en este manual.
Las instrucciones de uso y manipulación
vienen acompañadas de ilustraciones.
Símbolos en el texto
..
..
Con el sistema de accesorios Combi de
STIHL se puede combinar varios motores y accesorios para formar una herramienta motorizada. En este manual de
instrucciones la unidad formada por el
motor del sistema de accesorios Combi
y el accesorio se identifica como la
herramienta motorizada.
Los pasos individuales o procedimientos
descritos en el manual pueden estar
señalados en diferentes maneras:
:
Un punto identifica un paso o
procedimiento sin referencia directa
a una ilustración.
Una descripción de un paso o
procedimiento que se refiere
directamente a una ilustración puede
tener números de referencia que
aparecen en la ilustración.
Ejemplo:
Suelte el tornillo (1)
Además de las instrucciones de uso, en
este manual pueden encontrarse
párrafos a los que usted debe prestar
atención especial. Tales párrafos están
marcados con los símbolos que se
describen a continuación.
Advertencia donde existe el riesgo
de un accidente o lesiones
personales o daños graves a la
propiedad.
Precaución donde existe el riesgo
de dañar la máquina o los
componentes individuales.
Nota o sugerencia que no es
esencial para el uso de la máquina,
pero puede ayudar al operador a
comprender mejor la situación y
mejorar su manera de manejar la
máquina.
Nota o sugerencia sobre el
procedimiento correcto con el fin de
evitar dañar el medio ambiente.
Palanca (2) ...
El motor del sistema de de accesorios
Combi y el accesorio tienen distintos
manuales de instrucciones.
Siempre lea y asegúrese que comprenda bien ambos manuales de instrucciones antes de arrancar y usar la
máquina. Guarde los manuales en un
lugar seguro para referencia futura.
24
BF, BK
español / EE.UU
Instrucciones de seguridad
y técnicas de manejo
Equipo y características
Importante
Este manual de instrucciones
puede describir varios modelos con
diferentes características. Los
componentes que no se encuentran
instalados en todos los modelos y
las aplicaciones correspondientes
están marcados con un asterisco
(*). Esos componentes pueden ser
ofrecidos como accesorios
especiales por el concesionario
STIHL.
Ya que la herramienta
motorizada básica y el
accesorio de cultivadora
de STIHL forman una
máquina con una velocidad alta de funcionamiento, es necesario observar varias
precauciones de seguridad especiales
para reducir la posibilidad de lesiones.
Mejoramientos técnicos
La filosofía de STIHL es mejorar
continuamente todos su productos.
Como resultado de ello, periódicamente
se introducen cambios de diseño y
mejoras. Si las características de
funcionamiento o la apariencia de su
máquina difieren de las descritas en
este manual, comuníquese con el
concesionario STIHL para obtener la
ayuda que requiera.
Por lo tanto, es posible que algunos
cambios, modificaciones y
mejoramientos no hayan sido descritos
en este manual.
Es necesario leer detenidamente y respetar estas
instrucciones de seguridad. Lea periódicamente
el manual del propietario
y las instrucciones de
seguridad de la herramienta motorizada
básica y del accesorio de cultivadora. El
uso descuidado o inadecuado de la
herramienta motorizada puede causar
lesiones graves e incluso mortales.
Pida a su concesionario STIHL que le
enseñe el manejo de la herramienta
motorizada. Observe los reglamentos
de prevención de accidentes emitidos
por las asociaciones de seguro contra
responsibilidad civil de empleadores.
! Importante
! Importante
El uso de cualquier herramienta motorizada puede ser peligroso. El contacto
con el accesorio giratorio resultará en
cortaduras graves. Los objetos sólidos,
tales como piedras o pedazos de metal
podrían salir lanzados al aire y lesionar
al operador o personas en la cercanía.
Estos objetos también pueden dañar el
accesorio. Las cuchillas pueden astillarse o romperse.
STIHL no recomienda el uso de cuchillas rígidas en zonas pedregosas. Los
objetos lanzados o las cuchillas dañadas pueden causar lesiones graves o la
muerte del operador o de las personas
en la cercanía.
! Importante
Nunca se debe permitir a los niños que
usen esta herramienta motorizada. ¡No
se debe permitir la proximidad de otros,
especialmente niños y animales, donde
se esté utilizando la herramienta motorizada!
Nunca deje la herramienta motorizada
funcionando sin vigilancia.
No preste ni alquile nunca su herramienta motorizada sin entregar el
manual del propietario. Cada operador
de esta herramienta motorizada debe
observar las instrucciones incluidas en
este manual.
BF, BK
25
español / EE.UU
La mayoría de estas instrucciones de
seguridad se aplican a todas las cultivadoras de STIHL. Los componentes y
controles pueden diferir en los distintos
modelos. Los componentes principales
y las funciones de este modelo de herramienta motorizada se describen en el
capítulo apropiado del manual.
El uso seguro de una herramienta motorizada atañe a:
1.
el operador
2.
la herramienta motorizada
3.
el uso de la herramienta motorizada.
EL OPERADOR
Condición física
Usted debe estar en buenas condiciones físicas y psíquicas y no encontrarse
bajo la influencia de ninguna sustancia
(drogas, alcohol, etc.) que le pueda restar visibilidad, destreza o juicio. No
maneje la herramienta motorizada
cuando está fatigado.
Esté alerta. Si se cansa durante el
manejo de la herramienta motorizada,
tómese un descanso. El cansancio
puede provocar una pérdida del control.
El uso de cualquier herramienta motorizada es fatigoso. Si usted padece de
alguna dolencia que pueda ser agravada por la fatiga, consulte a su médico
antes de utilizar la herramienta motorizada.
26
! Importante
–
Use guantes y mantenga las manos
abrigadas.
El uso prolongado de una herramienta
motorizada expone al operador a vibraciones que pueden provocar el fenómeno de Raynaud (dedos blancos) o el
síndrome del túnel del carpio.
–
Agarre firmemente la máquina en
todo momento, pero no apriete los
mangos con fuerza constante y
excesiva. Tómese descansos frecuentes.
Estas condiciones reducen la capacidad
de las manos de sentir y regular la temperatura, producen entumecimiento y
ardor y pueden provocar trastornos nerviosos y circulatorios, así como necrosis
de los tejidos.
–
Mantenga el sistema AV en buen
estado. Una cultivadora con los
componentes flojos o con amortiguadores AV dañados o desgastados también tendrá tendencia a
tener niveles más altos de vibración.
–
Agarre firmemente los mangos en
todo momento, pero no los apriete
con fuerza constante y excesiva;
tómese descansos frecuentes.
No se conocen todos los factores que
contribuyen a la enfermedad de Raynaud, pero el clima frío, el fumar y las
enfermedades o condiciones físicas que
afectan los vasos sanguíneos y la circulación de la sangre, como asimismo
períodos prolongados de exposición a la
vibración son factores en el desarrollo
de la enfermedad de Raynaud. Se
deben observar los siguientes puntos
para reducir el riesgo de la enfermedad
de Raynaud o el síndrome del túnel del
carpio.
–
La mayor parte de las herramientas
motorizadas de STIHL se ofrecen
con un sistema antivibración ("AV")
cuyo propósito es reducir la transmisión de las vibraciones creadas por
el motor a las manos del operador.
Se recomienda el uso del sistema
AV a aquellas personas que utilizan
herramientas motorizadas en forma
constante y regular.
Todas las instrucciones de seguridad
antes mencionadas no le garantizan
que va a estar totalmente protegido contra la enfermedad de Raynaud o el síndrome del túnel del carpio. Por lo tanto,
los operadores constantes y regulares
deben revisar con frecuencia el estado
de sus manos y dedos. Si aparece
alguno de los síntomas arriba mencionados, consulte inmediatamente al
médico.
Vestimenta adecuada
! Importante
Siempre use el equipo protector apropiado para reducir la posibilidad de
lesiones.
BF, BK
español / EE.UU
! Importante
El deflector provisto con la cultivadora
no siempre protege al operador contra
todos los objetos extraños (gravilla,
vidrio, alambre, etc.) arrojados por el
accesorio giratorio. Los objetos arrojados o lanzados por el accesorio también
pueden rebotar y golpear al operador.
! Importante
Nunca use una herramienta motorizada a
menos que se usen gafas
de seguridad bien colocadas con protección superior y lateral adecuada,
que satisfagan la norma ANSI Z 87.1 ó
las normas nacionales correspondientes. Para evitar lesionarse el rostro,
STIHL recomienda también usar un protector de rostro o rejilla sobre las gafas o
anteojos de seguridad.
! Importante
El ruido de la herramienta
motorizada puede dañar
los oídos. Siempre use
amortiguadores del ruido
(tapones u orejeras) para
protegerse los oídos. Los
usuarios constantes y regulares deben
someterse con frecuencia a un examen
o control auditivo.
BF, BK
Protéjase las manos con
guantes cuando manipule
la herramienta motorizada y el accesorio. Los
guantes gruesos y antideslizantes mejoran el
manejo y protegen las
manos.
La ropa debe ser de confección fuerte y ajustada
sin impedir la completa
libertad de movimiento.
Evite el uso de chaquetas
sueltas, bufandas, corbatas, joyas, pantalones
acampanados o con vueltas, pelo largo suelto o
cualquier cosa que pueda
engancharse en las
ramas, matorrales o piezas en movimiento de la máquina.
Use pantalones largos hechos de un
material grueso para protegerse las
piernas. No maneje la herramienta
motorizada mientras está descalzo o
usando sandalias. Sujétese el pelo de
modo que quede sobre los hombros.
Es muy importante tener
una buena superficie de
apoyo para los pies.
STIHL recomienda el uso
de botas gruesas con
suela antideslizante, de
preferencia con puntas de acero.
LOS ACCESORIOS DE CULTIVADORA
Vea el capítulo "Componentes principales" para las ilustraciones de los componentes de los accesorios de cultivadora.
! Importante
Nunca modifique, de ninguna manera,
una cultivadora. Utilice únicamente las
cultivadoras suministradas por STIHL o
expresamente autorizadas por STIHL
para usarse con los modelos específicos de herramientas motorizadas. Si
bien es posible conectar ciertos accesorios no autorizados a la herramienta
motorizada de STIHL, su uso puede ser,
en la práctica, extremadamente peligroso.
USO DE LA HERRAMIENTA
MOTORIZADA
(Herramienta motorizada básica
con accesorio de cultivadora provista de púas ganzúas o púas
bolo)
Transporte de la herramienta
motorizada
! Importante
Antes de apoyar la herramienta motorizada en el suelo, apague el motor y asegúrese de que el accesorio ha dejado de
girar. Cuando transporte la herramienta
motorizada en un vehículo, sujétela firmemente para impedir su vuelco, el
derrame de combustible y el daño a la
herramienta motorizada.
27
español / EE.UU
Preparación para el uso de la
herramienta motorizada
Ajuste el arnés y la empuñadura de
modo correspondiente a su estatura
antes de empezar a trabajar. La
máquina debe estar correctamente
equilibrada de la forma especificada en
el manual del propietario para un control
correcto y menos fatiga de trabajo.
Siempre revise la condición y funcionamiento de su herramienta motorizada
antes de ponerla en marcha, especialmente el gatillo de aceleración, el bloqueo del gatillo de aceleración, el interruptor de parada, el accesorio, el
deflector y el arnés.
No fume y aléjese del fuego o las llamas.
Notas de manejo
La herramienta motorizada puede
usarse solamente para las operaciones
descritas en el manual del propietario.
! Importante
Su herramienta motorizada es una
máquina que debe ser manejada por
solamente una persona. Una vez que
está funcionando, puede arrojar objetos
a gran distancia.
5m (16ft)
! Importante
La gasolina es un combustible muy inflamable.
Si se derrama y arde a
causa de una chispa u
otra fuente de ignición,
puede provocar un incendio y quemaduras graves o daños a la
propiedad. Tenga sumo cuidado
cuando manipule gasolina o la mezcla
de combustible.
28
Siempre revise la condición y funcionamiento de su herramienta motorizada
antes de ponerla en marcha – consulte
las secciones apropiadas de los manuales de instrucciones.
Revise el manual del propietario para el
accesorio para asegurarse que se esté
usando el deflector apropiado para el
accesorio.
Arranque del motor
Los detalles del procedimiento de arranque del motor están en el capítulo apropiado del manual del propietario de la
herramienta motorizada básica.
Coloque la máquina sobre suelo firme
en un lugar abierto. Los accesorios
deben estar alejados del suelo y de las
demás obstrucciones.
Llenado de combustible
La herramienta motorizada funciona
mezcla de gasolina y aceite. Para más
información, consulte las instrucciones
de seguridad y el capítulo "Combustible"
del manual del propietario de la herramienta motorizada básica.
Antes de arrancar
Para reducir el riesgo de ocasionar
lesiones a los ojos u otras partes del
cuerpo, asegúrese que las personas
estén a por lo menos 5 m (16 pies) de
distancia de la máquina. También
deben usar gafas. Apague el motor
inmediatamente si se le aproxima
alguna persona. Ponga en marcha y
maneje su máquina sin ayuda de nadie.
!Advertencia !
Durante el arranque, asegúrese de
tener los pies bien apoyados. Siempre
párese a un lado de la máquina para evitar la posibilidad de lesiones debido
al contacto con el accesorio giratorio.
BF, BK
español / EE.UU
! Importante
! Importante
Para reducir el riesgo de
lesiones debido a la pérdida de control de la
máquina, esté absolutamente seguro que el
accesorio pueda girar
libremente cuando se arranca el motor.
Cuando se arranca el motor en posición
de ARRANQUE, la velocidad del motor
será suficientemente alta para que el
motor se embrague y gire el accesorio.
La máquina emite gases
de escape tóxicos apenas
el motor empieza a funcionar. Estos gases (por
ej., monóxido de carbono)
pueden ser incoloros e
inodoros. Para reducir el riesgo de sufrir
lesiones graves o mortales por respirar
gases tóxicos, nunca haga funcionar la
herramienta motorizada puertas adentro
o en lugares mal ventilados.
Con el motor funcionando a velocidad
de ralentí solamente, enganche la herramienta motorizada al gancho de resorte
de su arnés (vea el capítulo correspondiente en este manual).
Condiciones de trabajo
Maneje y arranque su herramienta
motorizada exclusivamente al aire libre
y en un lugar bien ventilado.
Maneje la máquina solamente cuando
tenga buena visibilidad y a la luz del día.
Trabaje con cuidado.
BF, BK
! Importante
El uso de este producto puede generar
polvo o vapores que contienen productos químicos considerados como causantes de enfermedades respiratorias,
cáncer, defectos de nacimiento u otra
toxicidad reproductora. Si usted desconoce los riesgos asociados con el polvo
o vapor en cuestión, consulte con su
empleador, autoridades gubernamentales tales como OSHA y NIOSH y otras
fuentes de información sobre materiales
peligrosos. El estado de California y
algunos otros estados han publicado
varias listas de sustancias carcinógenas, de toxicidad reproductora, etc.
El polvo y los vapores deben eliminarse
en el punto de origen. Observe las instrucciones y recomendaciones emitidas
por OSHA/NIOSH, las asociaciones de
seguro contra responsibilidad civil de
empleadores y los sindicatos. En los
casos en que no se puede evitar la inhalación del polvo y los vapores, el operador y cualquier persona que se encuentre cerca siempre deben usar un
respirador aprobado por NIOSH/MSHA
para el material en uso.
Peligro
La herramienta motorizada no está eléctricamente aislada. Antes de
empezar a trabajar, asegúrese que no hayan cables eléctricos
cerca de la superficie. El cortar tales
cables con la herramienta puede resultar en choques eléctricos y la posibilidad
de lesiones graves o la muerte.
! Importante
La información acerca de la ubicación
de cables eléctricos puede obtenerse de
las empresas de servicio eléctrico locales o de un servicio de localización de
líneas eléctricas, tal como "Miss Utility"
o "One Call".
29
español / EE.UU
002BA054 KN
002BA055 KN
Sujeción y control de la herramienta motorizada
Siempre sujete la herramienta motorizada firmemente con ambas manos - tal
como se muestra. Envuelva los dedos
firmemente en los mangos, manteniéndolos sujetos entre los dedos índice y
pulgar. Mantenga las manos en esta
posición, para que siempre tenga la
herramienta motorizada bien controlada. Asegúrese que los mangos y
empuñaduras estén en buenas condiciones y sin humedad, resina, aceite o
grasa.
30
! Importante
! Importante
Nunca intente manejar la herramienta
motorizada con una sola mano. Esto
puede resultar en la pérdida de control y
lesiones graves o mortales.
Evite cortar cerca de vallas, edificios,
tocones, piedras u otros objetos de ese
tipo que puedan dañar la cuchilla o
resultar en la pérdida de control de la
máquina. Esté alerta a la posibilidad de
rebote de los objetos lanzados en estas
condiciones. Los objetos lanzados o las
cuchillas dañadas pueden causar lesiones graves o la muerte del operador o
de las personas en la cercanía. ¡Evite
las raíces de los árboles! Las raíces
grandes pueden aprisionar las cuchillas
y dañar la máquina. También es posible
dañar el árbol al cortar las raíces.
! Importante
No se incline demasiado hacia adelante
al trabajar con la máquina. Mantenga
buen equilibrio con los pies bien apoyados. Se debe tener cuidado especial
cuando las condiciones del suelo son
resbaladizas (lluvia, nieve) y en terreno
difícil y con mucha vegetación. Esté
atento a los obstáculos ocultos tales
como tocones, raíces y zanjas. Las
pendientes y el terreno accidentado son
especialmente peligrosos.
! Importante
Antes de empezar a trabajar, inspeccione el área
en busca de piedras,
vidrio, pedazos de metal,
basura u otros objetos
sólidos y retírelos. Estos
objetos pueden salir lanzados por el
accesorio directamente o por rebote
hacia personas que se encuentren en la
cercanía o hacia el operador. Estos
objetos también pueden dañar el accesorio. Las cuchillas pueden astillarse o
romperse. Los objetos lanzados o las
cuchillas dañadas pueden causar lesiones graves o la muerte del operador o
de las personas en la cercanía.
Si la máquina choca contra un objeto
enterrado (tal como una piedra), apague
el motor y quite el obstáculo. Examine
la máquina en busca de señales de
daños antes de proceder.
Nunca trabaje con el bloqueo del gatillo
de aceleración aplicado, ya que sea
imposible regular adecuadamente la
velocidad del motor. El uso correcto del
control deslizante se describe en el
capítulo correspondiente del manual del
propietario de la herramienta motorizada.
BF, BK
español / EE.UU
Si el accesorio o el deflector se atasca o
queda pegado, siempre apague el motor
y asegúrese que el accesorio está detenido antes de limpiarlo. Limpie el pasto,
las malezas, etc. del accesorio en intervalos regulares.
! Importante
Durante el corte, revise el apriete y la
condición del accesorio en intervalos
regulares. Si nota un cambio en el comportamiento del accesorio, apague el
motor inmediatamente, y revise el accesorio. Los accesorios que presenten
grietas, torceduras, combadura, daños o
que no tengan filo deben sustituirse de
inmediato. Las herramientas en esas
condiciones pueden romperse a alta
velocidad y causar lesiones.
! Importante
Mantenga las manos y los
pies lejos del accesorio.
Nunca toque un accesorio
giratorio. El accesorio
sigue girando por un rato
después que se suelta el
gatillo de aceleración (efecto de
volante).
BF, BK
Ajustes principales
! Importante
Para reducir el riesgo de lesiones
debido a la pérdida de control o al contacto con el accesorio en movimiento,
no use una máquina cuya velocidad de
ralentí está mal regulada. Si la velocidad de ralentí ha sido correctamente
ajustada, el accesorio no debe desplazarse. Las instrucciones de ajuste de la
velocidad de ralentí están en el capítulo
apropiado del manual del propietario de
la herramienta motorizada.
Si es imposible regular correctamente la
velocidad de ralentí, pida al concesionario de servicio STIHL que revise, ajuste
o repare la máquina.
MANTENIMIENTO, REPARACION
Y ALMACENAMIENTO
STIHL se reserva el derecho de denegar un reclamo en garantía si el componente en cuestión no ha sido
manejado o mantenido correctamente, o si se le han instalado
repuestos no autorizados.
!Advertencia!
Utilice solamente piezas de repuesto de
STIHL para el mantenimiento y reparación. El uso de piezas no fabricadas por
STIHL puede causar lesiones graves o
mortales.
Siga las instrucciones de mantenimiento
y reparación dadas en la sección correspondiente del manual del usuario. Consulte la tabla de mantenimiento en las
últimas páginas de este manual.
Además, es imprescindible seguir el
programa de mantenimiento diario indicado en el manual del usuario de la
herramienta motorizada STIHL.
31
español / EE.UU
Uso de la cultivadora
!Advertencia!
Siempre apague el motor y verifique que
el accesorio está parado antes de llevar
a cabo cualquier trabajo de mantenimiento, reparación o limpieza de la
herramienta motorizada. No intente
hacer ningún trabajo de mantenimiento
o reparación que no esté descrito en su
manual del propietario. Este tipo de trabajo debe realizarse únicamente en el
taller del concesionario de STIHL.
Use guantes al trabajar con el accesorio.
Apriete todas las tuercas, pernos y tornillos, excepto los tornillos de ajuste del
carburador, después de cada uso.
Guarde el accesorio en un lugar seco,
elevado o con llave lejos del alcance de
los niños.
381BA003 KN
!Advertencia!
Nunca repare los accesorios dañados
aplicándoles soldadura, enderezándolos o modificándoles su forma. Esto
puede causar el desprendimiento de
alguna pieza de la herramienta motorizada y producir lesiones graves o mortales.
Generalidades
:
:
Póngase el arnés – vea "Colocación
del arnés" – y
Cuando el motor está en marcha,
conecte la cultivadora al arnés.
Se puede trabajar con la cultivadora en
los sentidos de avance (1) y retroceso
(2), de izquierda a derecha o viceversa
(3), o en sentido circular.
Elija el mejor método para su trabajo, es
decir dependiendo de la forma y tamaño
del lugar de trabajo y las condiciones del
suelo.
Si se trabaja alternando el sentido hacia
adelante y hacia atrás, esto resulta particularmente útil para soltar la tierra
compactada.
Las cuchillas giratorias sólo pueden
accionarse en una posición. Las flechas
en las cuchillas indican el sentido de giro
requerido.
Antes de guardar la máquina durante un
período de más de algunos días, siempre vacíe el tanque de combustible. Vea
el capítulo "Almacenamiento de la
máquina" en el manual de la herramienta motorizada básica.
32
BF, BK
español / EE.UU
Usos típicos
469BA017 KN
Púas ganzúas
Las púas ganzúas son particularmente
útiles para labrar y soltar suelos duros,
compactados y con materiales incrustados.
469BA018 KN
Púas bolo
Las púas bolo no están disponibles en
todos los mercados.
:
Rotura del suelo
Hay que hacer unos pocos trabajos preparativos antes de empezar a romper el
suelo previamente cultivado (por ejemplo, en el jardín del año pasado). Primero quite las malezas de la superficie
y los restos de los demás cultivos, así
como los objetos duros, tales como
rocas, piedras, botellas, pedazos de
madera, etc.
Agarre la cultivadora firmemente con
ambas manos y cultive a la profundidad
deseada solamente una zona pequeña
a la vez.
:
Aflojado del suelo alrededor de
los cultivos
Afloje únicamente la tierra superficial
alrededor de las plantas. No trabaje
demasiado profundo, ya que esto puede
dañar las raíces poca profundas de
algunos cultivos.
Para evitar dañar la cultivadora o los
árboles, procure no enganchar las
cuchillas en las raíces grandes de los
árboles.
Termine el cultivo guiando la cultivadora
para evitar dejar huellas. Use un rastrillo
para nivelar la zona de trabajo.
Las púas bolo son particularmente útiles
para labrar suelos cultivados y más
blandos.
BF, BK
33
español / EE.UU
Herramientas motorizadas
básicas aprobadas
:
Incorporación de mejoradores
del suelo
La cultivadora puede usarse para la
incorporación de marga, tierra de jardinero, hojas u otros materiales orgánicos
o fertilizantes.
Prepare la zona quitando las raíces viejas, los restos de plantas grandes y
objetos duros (rocas, etc.). Esparza el
mullido uniformemente sobre el suelo.
Incorpore el mullido con un movimiento
giratorio o hacia adelante y atrás.
Limpieza de las cuchillas giratorias
Las piezas de plantas, tales como las
raíces, pueden enrollarse alrededor de
las cuchillas giratorias o entre las mismas durante el trabajo.
Para limpiar las cuchillas giratorias:
–
Use guantes.
–
Saque los pasadores de enganche
del eje.
–
Extraiga las cuchillas del eje.
–
Quite las raíces, plantas y tierra.
Se permite el uso del accesorio de cultivadora solamente con las siguientes
herramientas motorizadas básicas:
Máquinas con manillar tipo bicicleta o máquinas con mango
tórico y barra de defensa
STIHL FS 83, STIHL FS 851),
STIHL FS 1101), STIHL FS 120,
STIHL FS 130, STIHL FS 200,
STIHL FS 250, STIHL FH 75,
STIHL HL 751), STIHL HL 1001)
Este accesorio está aprobado para
uso solamente con una herramienta
motorizada básica equipada con un
mango tórico con barra de defensa
o un manillar tipo bicicleta.
Termine el trabajo nivelando la zona con
un rastrillo.
:
Zanjeo o apertura de surcos
Camine lentamente hacia atrás y tire de
la cultivadora para formar el surco
requerido. Repita según sea necesario
para formar surcos más profundos.
Máquinas con mango de manguera
En las siguientes máquinas es necesario instalar un mango tórico con barra de
defensa:
STIHL HL 731), STIHL HL 751) y
STIHL HL 1001) en las versiones con
caja de engranajes de 0°.
Para instalar el mango tórico, vea el
capítulo "Montaje del mango tórico".
1)
34
El accesorio no ha sido aprobado
para uso con los modelos FS 85 RX,
FS 110 RX, HL 73 K, HL 75 K, o
HL 100 K
BF, BK
español / EE.UU
Montaje del accesorio
Máquinas con mango tórico sin
barra de defensa
Preparaciones
:
En las siguientes máquinas es necesario quitar el mango tórico estándar e instalar un mano tórico con barra de
defensa:
Afloje los tornillos de fijación de la
caja de engranajes de la herramienta motorizada básica y extraiga
la caja de engranajes del tubo de
mando.
El eje impulsor puede deslizarse
fuera del tubo durante este procedimiento. Si esto sucede, empuje el
eje impulsor de vuelta en el tubo.
STIHL FC 83, STIHL FC 85,
STIHL FC 110, STIHL KW 85
La barra de defensa no puede instalarse en el mango tórico estándar.
Para instalar el mango tórico, vea el
capítulo "Montaje del mango tórico".
L
BF, BK
381BA015 KN
No se permite ninguna otra combinación de accesorio y herramienta
motorizada básica no aprobada
debido al riesgo de que pueda causar accidentes o lesiones personales graves.
:
El eje impulsor no debe sobresalir
del tubo más de la distancia L
(25 mm/1 pulg).
:
Si esta dimensión no es la correcta,
aplique una ligera presión en el eje
impulsor y al mismo tiempo gírelo
lentamente hasta que se pueda
empujarlo hasta el largo requerido.
35
A
:
413BA015 KN
español / EE.UU
Use un lápiz o un rotulador para
hacer una marca en el tubo impulsor a la distancia A de 50 mm
(2 pulg).
Montaje del deflector
Montaje de la caja de engranajes
:
:
Suelte los tornillos de fijación (4).
:
Empuje la caja de engranajes (5) en
el tubo de mando (2) – gire la caja
de engranajes en uno y otro sentido
hasta que esté alineada con la
marca.
Deslice el deflector (1) en el tubo de
mando (2) de modo que la distancia
"a" sea de 100 mm (4 pulg).
:
Alinee el deflector en el tubo de
mando de manera que el soporte en
el motor y la parte larga del deflector
apunten hacia arriba.
:
Apriete los tornillos (3) de fijación firmemente.
Verifique que el deflector esté bien
fijado – no debe ser posible girarlo
en el tubo impulsor.
36
BF, BK
español / EE.UU
Montaje de las cuchillas giratorias
Procure no perder las dos arandelas en el eje de salida de la caja de
engranajes.
:
:
:
Alinee la caja de engranajes en el
tubo de mando de manera que el
soporte del motor apunte hacia
abajo y las cuchillas estén verticales
– paralelas al deflector.
Arregle las cuchillas en la secuencia
de instalación en el eje, observando
los siguientes puntos:
Las cuchillas izquierdas y derechas
son diferentes. El sentido de giro
está marcado con flechas en la caja
de engranajes y en las cuchillas.
Asegúrese que las flechas están
apuntando en el mismo sentido.
Apriete los tornillos (4) de fijación firmemente.
La cuchilla giratoria interior tiene un
cubo más grande que el de la cuchilla exterior.
:
Gire la cuchilla derecha exterior (7)
en el eje hasta que sea posible
empujarla en su lugar – verifique
otra vez el sentido de giro (flechas).
:
Coloque y enganche el pasador de
enganche (8) en el agujero del eje –
doble el pasador de enganche
hasta que esté plano contra la
cuchilla.
:
Utilice el mismo procedimiento para
colocar las cuchillas en el lado
izquierdo.
Verifique que la caja de engranajes
esté bien fijada – no debe ser posible girarla en el tubo impulsor.
Ajuste del mango tórico
:
Afloje los tornillos en el mango
tórico.
:
Vea "Montaje del mango tórico" –
"Alineación y fijación del mango
tórico"
BF, BK
:
Gire la cuchilla derecha interior (6)
en el eje hasta que sea posible
empujarla sobre el eje – Verifique
otra vez el sentido de giro (flechas).
37
español / EE.UU
Instalación de la argolla de
transporte (abrazadera)
Montaje del mango tórico
3
1
2
504BA017 KN
4
A
1
Posición de la argolla de transporte
La argolla de transporte (3) debe colocarse en el tubo de mando, delante del
mango de control.
002BA142 KN
2
La argolla para transporte se usa para
ciertos países.
:
Para la posición de la argolla de
transporte (abrazadera), consulte la
sección "Montaje del mango tórico".
:
Coloque la abrazadera (1) para que
el agujero roscado esté en el lado
izquierdo del tubo de mando (visto
de la unidad motriz).
:
Comprima juntos los extremos de la
abrazadera y sosténgalos en esa
posición.
:
Inserte el tornillo M6 x 14 (2).
:
Alinee la argolla de transporte.
:
Apriete el tornillo.
38
504BA016 KN
1
Posición del mango tórico
:
Fije el mango tórico (1) en el tubo de
mando, a aproximadamente 25 cm
(10 pulg) (A) delante del mango de
control (2).
Posición del manguito
El manguito deslizante (4) en el tubo de
mando sirve como un espaciador.
:
Deslice el manguito (4) hasta la
argolla de transporte.
Posición de la manguera de mango
(SP 81)
En el tubo de mando de la STIHL SP 81
se colocar una manguera de mango (4)
deslizable.
:
Deslice la manguera de mango (4)
hasta la argolla de transporte.
BF, BK
español / EE.UU
Montaje del mango tórico con
barra de defensa
:
Coloque las tuercas cuadradas (5)
en la barra de defensa (6) - alinee
los agujeros.
BF, BK
:
Coloque la abrazadera (7) en el
mango tórico (1) y ponga los dos en
posición en el tubo de mando (8).
:
Ajuste la abrazadera (9).
:
Instale la barra de defensa (6) revise su posición.
:
Alinee los agujeros.
:
Inserte los tornillos (10) en los agujeros y atorníllelos en la barra de
defensa hasta donde topen.
Alineación y fijación del mango
tórico
:
Ajuste el mango tórico (1) a la posición más cómoda para el usuario y
el trabajo.
La distancia A no debe medir más
de 55 cm (22 pulg).
:
Apriete los tornillos en el mango
tórico.
39
español / EE.UU
Colocación del arnés
Correa para hombro
El tipo y el estilo del arnés dependen del
lugar de venta.
:
Colóquese la correa (1) sobre el
hombro.
:
Ajuste el largo de la correa de modo
que el gancho con resorte (2) quede
aproximadamente el ancho de la
mano por debajo de su cadera derecha.
40
Arranque / parada del motor
:
Coloque la máquina sobre el suelo.
Debe quedar firmemente apoyada
en el soporte del motor y el deflector.
Verifique que las cuchillas giratorias
no estén tocando el suelo ni ningún
otro obstáculo.
:
Asegúrese de tener los pies bien
apoyados.
:
Sujete la máquina con la mano
izquierda y empuje hacia abajo firmemente - el pulgar debe estar
debajo de la caja del ventilador.
El procedimiento de arranque siguiente
corresponde al descrito en el manual de
instrucciones de la herramienta motorizada básica que se está usando.
Para apagar el motor:
:
Mueva el control deslizante en el
sentido indicado por la flecha (h) a
STOP (PARADA) – O o mueva el
interruptor de parada a la posición
O.
No se pare ni se arrodille sobre el
tubo de mando.
Si se arranca el motor en la posición
START (ARRANQUE), las cuchillas
pueden empezar a girar tan pronto
arranque el motor. No haga funcionar el motor por más tiempo que el
necesario con el acelerador en la
posición de arranque.
BF, BK
español / EE.UU
Almacenamiento de la
máquina
Para intervalos de 3 meses o más:
:
Retire, limpie e inspeccione las
cuchillas del rotor.
:
Guarde la máquina en un lugar seco
y elevado, o bajo llave – fuera del
alcance de los niños y de otras personas no autorizadas.
BF, BK
41
español / EE.UU
Piezas principales
1
Tubo de mando
5
Cuchilla giratoria izquierda interior
2
Deflector
6
Cuchilla giratoria izquierda exterior
3
Cuchilla giratoria derecha exterior
7
Pasador de enganche
4
Cuchilla giratoria derecha interior
42
BF, BK
español / EE.UU
Especificaciones
Motor
Definiciones
5.
1.
Tubo de mando
Encierra y protege el eje impulsor
entre el motor y la caja de engranajes.
2.
Deflector
El deflector está diseñado para ayudar a reducir el riesgo de lesiones
causadas por objetos arrojados
contra el operador por las cuchillas
y por el contacto con las cuchillas.
6.
Cuchilla giratoria derecha exterior
Cuchilla metálica, forma de estrella
con púas apuntadas o curvadas.
Para colocar en el exterior del lado
derecho.
7.
3.
4.
Cuchilla giratoria derecha interior
Cuchilla metálica, forma de estrella
con púas apuntadas o curvadas.
Para colocar en el interior del lado
derecho.
BF, BK
Cuchilla giratoria izquierda interior
Cuchilla metálica, forma de estrella
con púas apuntadas o curvadas.
Para colocar en el interior del lado
izquierdo.
Vea el manual de instrucciones de la
herramienta motorizada básica que está
usando.
Cuchilla giratoria izquierda exterior
Cuchilla metálica, forma de estrella
con púas apuntadas o curvadas.
Para colocar en el exterior del lado
izquierdo.
Tipo:
Pasador de enganche
Fija la cuchilla giratoria en el eje
para facilitar el retiro y la instalación
de componentes.
Cuchillas giratorias
Caja de engranajes
Engranaje sinfín
de etapa sencilla
Relación de reducción:
44:1
Cuatro cuchillas con filo doble, giran
en un mismo sentido
Diámetro:
230 mm (9 pulg)
Ancho de trabajo: 220 mm (8,9 pulg)
Peso
Accesorio completo
con deflector:
3,6 kg (7,9 lb)
43
español / EE.UU
Accesorios especiales
Mantenimiento y
reparaciones
Comuníquese con su concesionario
STIHL para información acerca de los
accesorios especiales que pueden estar
disponibles para su producto.
Los usuarios de esta máquina deben
efectuar únicamente los trabajos de
mantenimiento descritos en este
manual. Solamente los talleres autorizados por STIHL deben llevar a cabo los
demás trabajos de reparación.
Los reclamos de garantía presentados
después de realizadas las reparaciones
serán aceptados únicamente si las mismas fueron ejecutadas por un concesionario de servicio autorizado STIHL utilizando piezas de repuesto originales de
STIHL.
Es posible identificar las piezas originales de STIHL por el número de pieza
STIHl, el logotipo de STIHL y, en
algunos casos, el símbolo ( de piezas
STIHL. En las piezas pequeñas el símbolo puede aparecer solo.
44
BF, BK
BA_U4_86_01.fm Seite 1 Montag, 17. Dezember 2007 10:22 10
0458 504 8621 A
englisch / English USA / spanisch / español EE.UU