1
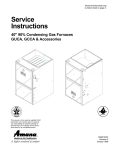
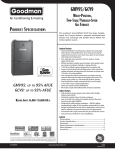
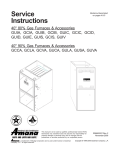
20219203
Installation
Instructions
Description
With the improvements in the product design of the new
40” 90% model furnaces, the Primary and Secondary
Heat Exchangers can now be replaced as a single unit
thus eliminating the need to replace the entire furnace
due to either a sooted or leaking heat exchanger or
recuperator coil. The following installation instructions
are for the Heat Exchanger Replacement Kit which
contains the complete heat exchanger assembly along
with the three pieces of gasket that are used between the
heat exchanger assembly and inside partition rails.
WARNING
To avoid death, personal injury or property damage due to electrical shock,
disconnect the electrical power supply
before servicing this unit.
R Kit #
20317301
20317302
20317303
20317304
20317305
20317306
20317307
20317308
20317309
20317310
20317311
20317312
20317313
20317314
20317315
20317316
Models Used On
GUCA045**30
GUCA070**30
GUSA070**35
GUCA070**40
GUCA090**40
GUSA090**40
GUCA090**50
GUSA090**50
GUCA115**50
GUSA115**50
GCCA045**30
GCCA070**30
GCCA070**40
GCVA070**40
GCCA090**40
GCCA090**50
GCVA090**50
GCCA115**50
GUVA045**30
GUVA070**40
GUVA090**50
GUVA115**50
Heat Exchanger
Replacement Kits
WARNING
Disconnect electrical power and shut off
gas supply.
I. Removal Procedures
Note: Save all components and screws removed in the
following procedures for reassembly.
1. After electrical power and gas supply have been
turned off to the unit, remove burner compartment
door.
Note: On Counterflow model furnaces, the blower compartment door will also need to be removed to gain
access to the incoming power lines to the furnace. The
incoming power lines will need to be removed from the
Counterflow model furnace since the furnace must be
removed from the installation to gain access to the five
Phillipshead screws located on bottom of the furnace
that attach the top cover assembly to the furnace.
2. Next, disconnect and remove the gas supply piping to
the furnace. In order to have enough clearance for
removal of the heat exchanger assembly from the
unit, all gas piping needs to be removed from the
inner cabinet of the furnace.
3. Remove the attached ductwork and combustion air
intake pipe (Direct Vent Only) and vent/flue pipe to
gain access for removal of the top cover assembly on
Upflow/Horizontal models. Units installed in the Counterflow position do not have the combustion air intake
pipe or vent/flue pipe attached to the top panel
assembly but require them to be removed because
the entire furnace must be removed to gain access to
the screws that secure the top panel assembly to the
furnace.
RECOGNIZE THIS SYMBOL AS A SAFETY PRECAUTION
ATTENTION SERVICE PERSONNEL
As a professional servicer you have an obligation to
know the product better than the customer. This includes all safety precautions and related items.
Remember, it is your responsibility to install the
product safely and to know it well enough to be able to
instruct a customer in its safe use.
Prior to actual installation, thoroughly familiarize yourself with these instructions. Pay special attention to all
safety warnings. Often during installation or repair it is
possible to place yourself in a position which is more
hazardous than when the unit is in operation.
Safety is a matter of common sense...a matter of
thinking before acting. Most dealers have a list of
specific good safety practices...follow them.
December 2001
The precautions listed in these instructions should not
supersede existing practices but should be considered
as supplemental information.
20219203 Rev. 1
4. Remove the rubber elbow that attaches the vent/flue
pipe to the induced draft blower by loosening the two
inner worm gear hose clamps along with removing the
condensate drain line that is attached to the rubber
elbow by a single hose clamp. After removing the
rubber elbow, remove the top panel assembly by
removing the screws that secure the it to the furnace.
7. Remove the manifold assembly by removing the four
screws that secure it and the two pressure switches to
the front of the heat exchanger on Upflow/Horizontal
models only. The Counterflow/Horizontal models will
also have four screws that secure the manifold assembly to the front of the heat exchanger but the two
pressure switches are mounted on the blower deck,
requiring the removal of two screws per switch for
removal.
Note: The top cover assembly has to be removed to gain
enough clearance for removal of the heat exchanger
assembly. The heat exchanger will need to be raised
approximately 2" for removal from the furnace.
Note: The pressure switch hoses do not have to be
disconnected from the pressure switches since they are
long enough for the pressure switches to be placed out of
the way without their removal. If the hoses are removed,
make sure they are reconnected to the correct pressure
switch to ensure proper furnace operation.
Note: Upflow/Counterflow Alternate Vent/Flue Location.
To remove the inner vent/flue piping, loosen the two inner
worm gear hose clamps that attach the rubber coupling to
the vent/flue coupling and induced draft blower. Next,
loosen the external worm gear hose clamp that attaches
the short piece of PVC pipe to the externally mounted
rubber elbow and the vent flue coupling. Remove the four
screws from the vent/flue coupling and then remove it
from side panel of the unit.
8. After removing the manifold assembly and pressure
switches, the orifice shield can be removed by removing the two screws that secure it to the front of heat
exchanger.
9. Next, the primary limit can be removed by removing
the two screws that also secure it to front of the heat
exchanger. After removing the manifold, pressure
switches, primary limit and inducer motor, make sure
that these components are placed out of the way to
prevent them from being damaged upon removal of
the heat exchanger assembly.
Note: Horizontal Alternate Vent/Flue Location. To remove the inner vent/flue piping, loosen the two inner worm
gear hose clamps that attach the rubber coupling to the
induced draft blower and vent/flue coupling. Next, remove
the four screws that attach the vent/flue coupling to
cabinet. The rubber elbow in this installation is outside the
cabinet and does not have to be removed.
10. The final step in getting the heat exchanger assembly
ready for removal is to remove the screws that secure
it to the inside partition panel rails of the furnace. Also
the permagum that is located at the top corners
(between the side panel, top cover and partition panel
rails) and the bottom corners (between the side panel,
blower deck and partition panel rails) must be removed.
5. Next, remove the condensate drain lines from the
recouperator cover or induced draft blower (attached
to ID Blower only in Horizontal Leftside Down Position). The PVC drain trap will also need to be removed
from Counterflow models.
6. Next, remove the induced draft blower by removing
the four screws that secure it to the front of recuperator cover. Disconnect the power leads, white (WH)
and black (BL) wires, from the induced draft blower
along with removing the green ground wire.
11. The heat exchanger assembly can now be removed
by lifting the assembly approximately 2" and sliding it
out of the unit. After removing the heat exchanger
assembly from the furnace, inspect the gasket along
the partition panel rails for any damage. If any of the
gaskets are damaged, replace them with the new
gaskets supplied in this kit.
2
Note: Upflow/Counterflow Alternate Vent/Flue Location.
Secure the vent/flue coupling to side panel with the four
screws removed in Step 4 of the removal procedures.
Next, reconnect the rubber coupling to the induced draft
blower and tighten the two inner worm gear hose clamps
and then tighten the external worm gear hose clamp that
attaches the externally mounted rubber elbow to the vent/
flue coupling.
II. Reinstallation Procedures:
The new heat exchanger assembly can now be installed
in the furnace.
1. Slide the new heat exchanger assembly into the
furnace and secure it to partition panel rails with the
screws that were removed in Step 10 of the removal
procedures.
Note: Horizontal Alternate Vent/Flue Location. To install
the inner vent/flue piping, reconnect the rubber coupling
to the induced draft blower and gray vent/flue coupling
and then tighten the two worm gear hose clamps. Reattach the gray vent/flue coupling to cabinet with the four
screws also removed in Step 4 of the removal procedures.
2. Install the top cover assembly with screws that were
removed in Step 4 of the removal procedures and then
reinstall the permagum into the top corners between
the side panel, top cover and partition panel rails and
bottom corners between the side panel, blower deck
and partition panel rails of the furnace.
3. Next, install the orifice shield onto the front of the new
heat exchanger assembly with the two screws that
were removed in Step 8 of the removal procedures.
9. Reconnect the ductwork, flue pipes and gas piping to
the unit.
NOTE: The incoming power lines will need to be reconnected on the Counterflow/Horizontal model furnaces
installed in the counterflow position since the furnace had
to be removed from the installation to gain access to the
seven screws that attached the top cover assembly to the
furnace.
4. After installing the orifice shield, install the manifold
assembly along with the two pressure switches
(Upflow/Horizontal Models Only) onto the front of the
heat exchanger using the four screws removed in
Step 7 of the removal procedures. On Counterflow/
Horizontal models, the pressure switches are not
installed with the manifold assembly but are installed
onto the blower deck using two screws per switch.
NOTE: Before placing the unit in operation, leak test the
unit and gas connections. Check for leaks using an
approved chloride-free soap and water solution, an electronic combustible gas detector, or other approved testing method.
Note: If the pressure switches are not installed correctly,
it may be possible for switches along with the hoses to
become filled with condensate causing the unit to cycle on
either pressure switch and eventually lockout requiring.
WARNING
5. Install the primary limit onto the front of the heat
exchanger assembly using the two screws removed
in Step 9 of the removal procedures.
To avoid the possibility of explosion or
fire, never use a match or open flame to
test for leaks.
6. After installing the primary limit, install the induced
draft blower onto the recouperator cover with the four
screws removed in Step 6 of the removal procedures
and then reconnect the two power leads (white (WH)
and black (BL) wires) to the induced draft blower and
secure the green ground wire back to the unit.
WARNING
Upon completion of the heat exchanger
replacement, carefully inspect the entire
flue system both inside and outside the
furnace to assure it is properly sealed.
Leaks in the flue system can result in
serious personal injury or death due to
exposure to flue products, including carbon monoxide.
7. Next, install the rubber elbow onto the induced draft
blower and internal vent/flue pipe with the worm gear
hose clamps that were removed in Step 4 of the
removal procedures. Also reconnect the condensate
drain line to the rubber elbow with the hose clamp also
removed in Step 4 of the removal procedures.
8. Reconnect the condensate drain lines to the induced
draft blower (attached to ID Blower only in Horizontal
Leftside Down Position) and recouperator coil front
cover with the hose clamps that were removed in Step
5 of the removal procedures. The PVC drain trap will
also need to be reinstalled if removed.
10. Install burner compartment door and blower compartment door.
11. Restore power to the unit and check for proper operation. Verify proper gas pressures, static pressures
and temperature rise on the unit.
NOTE: If the gas pressures, static pressures and temperature rise are not within the ranges specified, this will
result in premature unit failure.
3